As of December 2020, this guide to download PUBG Mobile KR for PC is still valid and working.
PUBG Mobile Korean for PC is here. The Korean PUBG fans can download and install PUBG Korean for PC right now. PUBG KR for PC can be installed on Desktop PCs and Mac. You can install PUBG Korean for PC on Windows 7, 8, 10, macOS, and OS X. Let us take a look at the features of this version of PUBG Mobile before installing it on the computer.
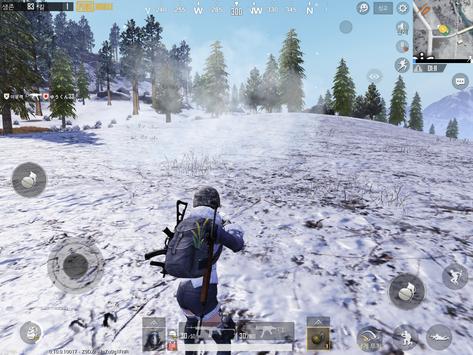
Image of PUBG Mobile Korean for PC
PUBG Mobile Korean
PUBG is famous because of its huge audience coverage. This game has multiple variants. For example, we have the PUBG Mobile for the global audience. The global version of PUBG is in the English language. After this, we have a PUBG Mobile Lite version. This version is designed to run on devices with less-powerful hardware. We also have the PUBG Chinese version. The Chinese version obviously is in the Chinese language. And it turns out that we have the PUBG Mobile Korean version too.
PUBG Mobile has a great fan following in the Korean region. The developers PUBG wanted to surprise their Korean players so they developed this dedicated version. Just as the name suggests, the PUBG Mobile Korean has the Korean language. This game has a few features that are exclusively designed for the Korean citizens.
The gameplay, aesthetics, elements, and everything else is similar to the normal PUBG Mobile. The Korean consumers like using their mother language on all of their gadgets and applications, which makes the PUBG Mobile Korean worthy for them. If you are here on this page, I am assuming that you are from Korea too and this guide is what you need to install PUBG Korean for PC now. We will just take a look at a flashback of PUBG Mobile before installing it.
PUBG Mobile
Those who have no idea of PUBG Mobile prior to reading this, here is everything you need to know.
PUBG Mobile is a battle royale game. This game is a pure trendsetter. Before PUBG Mobile, we did not have any game of this kind. The day the news of PUBG Mobile broke out, game development companies went crazy and came up with a lot of rip-offs of this game. If you have played games like Rules of Survival, Last Hope, Survivor Royale etc, it will be easy for you to understand the concept of this game.
As the game starts off, 100 different players join each other in a C130 plane. The plane takes the players to an Island. Players have to decide a spot within the map to jump off. After jumping off, players can either open their parachute to control their landing, or they can let the parachute open itself when they are closing to the ground.
As the players hit the ground, they have to start looking for cloths, weapons, and supplies first of all. As soon as the players complete their gear, they have to start looking for the opponents. Everyone is everyone’s opponent on the field. No other player is going to spare anyone. The moment you hear someone approaching you, take a safe position, aim, and shoot the opponent. The goal in this game is to kill all other 99 players to become the last man standing.
The game presents a lot of challenges. Players have to keep their inventory filled with the useful items. They have to keep upgrading their gear throughout the game. Players also have to keep an eye on the band-aids. The band-aids will boost the recovery process in case you are shot.
This is not it about PUBG Mobile. This was just a basic idea of what this game is all about. To learn more about it, you must play it, and in fact, spend days playing it to master it. We will now take a look at the steps to download PUBG Mobile Korean for PC.
PUBG Mobile KR for PC
PUBG’s mobile version is a lot better than its desktop counterpart. That’s why many players prefer playing the mobile version on PCs via Emulators. The same thing can be done with PUBG Mobile Korean too. By the way, PUBG Mobile Korean can be found in the Google Play Store. Korean players can follow the easy steps given below to start playing PUBG Mobile Koren for PC right now.
These are the steps to play PUBG Mobile KR on a computer powered by Windows or Mac.
Download and install an Android emulator.
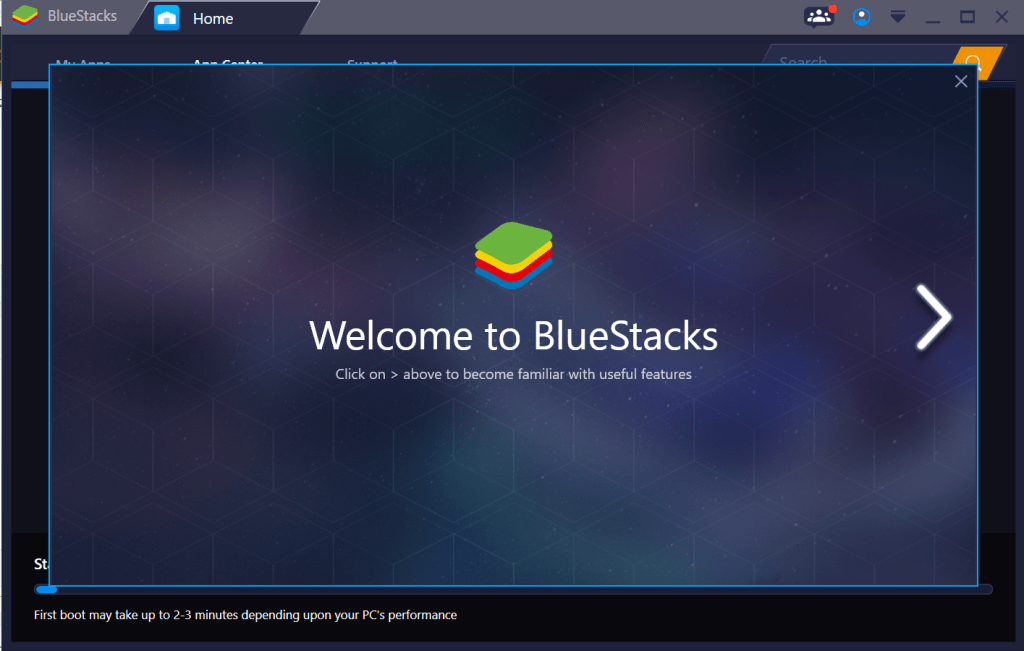
First of all, you need an Android emulator or App Player. Best choice for Windows users is the BlueStacks 4. Mac users can download and install the Nox App Player.
Open the Emulator and set up Google Account.
Open the emulator that you just installed. It will ask you to add your Google Account. Add the account and finish the initial setup.
After setting up Google Account, open Play Store in Emulator.
Open the Play Store in emulator now. In Play Store, search for “PUBG Mobile”. Install the game now. Make sure that you are inside Korea. If you are outside Korea, you will not find the Korean version.
Open Home Screen or App Drawer and launch PUBG Mobile Korean.
The game will now appear in App Drawer or on Home Page. Open the game now and set up the Keys. You can map the keys the way you like them.
Play the game. Become the last survivor. That’s all.
All done. It’s time to play the game. Happy Chicken Dinner!final
Alternatively, you can download PUBG Mobile Korean APK and install it manually.
If the method above fails to work, download PUBG Mobile Korean APK and install it manually. Manual installation is easier. You just have to open the APK file on your computer and all done.
Final Words
I am assuming that by this time, you are successfully playing the PUBG Korean on your computer. If you have any questions regarding this game or regarding BlueStacks 4/Nox App Player, feel free to drop them below in the comments section. I will try my best to get back to you as soon as possible.
This is the guide to fix Call of Duty Mobile Stuck on Loading Screen in Gameloop. Follow this small tutorial to get the game running in Gameloop once again.
Call of Duty Mobile Stuck on Loading Screen in Gameloop
Call of Duty Mobile is the hottest smartphone game right now. The Call of Duty Mobile gamers on Android and iOS are joined by Windows players with the help of Gameloop. The Gameloop is the official Call of Duty Mobile emulator. It keeps the COD Mobile experience on your computer as close as possible to the phone gameplay.
Gameloop players have a huge advantage over mobile players. At first, they can use the mouse and the keyboard. The Gameloop also has controller support. Playing Call of Duty Mobile on a PC is much easier than the phone, you can easily win every single battle, but the issues that the Gameloop has been going through, they quite spoil the gameplay.
One of the most common problems that a huge number of COD Mobile Players have been facing is the game getting stuck on the Loading Screen in Gameloop.
As soon as the players launch the game, the game doesn’t go ahead of the loading screen. The players end up quitting the game. This was reported by a few gamers in a thread on Reddit. The issue was quickly resolved with the help of another Redditor’s response, however, there are so many players who are unaware of the fix. Keeping in view the nature of this problem, I decided to write this guide.
Follow the few simple and easy steps given below to fix Call of Duty Mobile Stuck on Loading Screen in Gameloop.
Fix Call of Duty Mobile Stuck on Loading Screen in Gameloop
1. Update Gameloop Emulator
Open Gameloop Emulator on your computer.
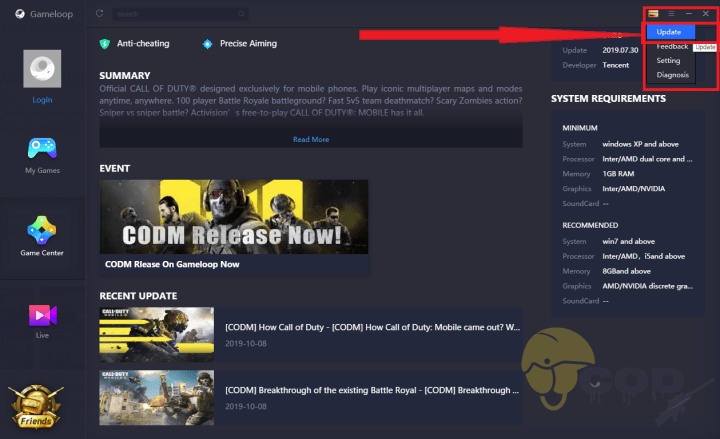
On the top-right side, click on the Menu button.
Now click on Update.
Close Gameloop after updating.
Open Gameloop again and launch Call of Duty Mobile now.
2. Update Call of Duty Mobile in Gameloop
In Gameloop Emulator, go to My Games.
Click on Call of Duty Mobile.
If there is an update available, update the game by clicking on the install button.
Close Gameloop and open it again.
Run COD Mobile now. See if it works or not.
3. Uninstall and Reinstall Gameloop
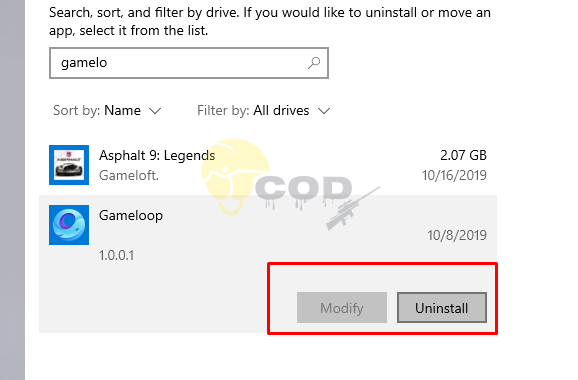
If the two solutions given above fail to work, uninstall Gameloop from the computer.
Now download Gameloop once again and install it.
Open Gameloop and install the Call of Duty Mobile.
Login using the account you were using previously.
All your previous data will come back and the game will work now. That’s all.
Conclusion
That’s all. By now, you have hopefully fixed the Call of Duty Mobile stuck on the loading screen. This guide will also fix many other COD Mobile problems on Gameloop. If you have anything to add to this guide, make sure to leave it in the comments below. Also, feel free to ask any questions. I will try my best to get back to you as soon as possible.
CamScanner changed the way we save documents on our phones. The future is portable and CamScanner is just a great step in that direction. This phone-only application has no official PC version. But you can run the phone version on your computer using a neat trick. We are here to show you that. As you move forward in this guide, you will find the tutorial to download CamScanner for PC. The CamScanner for PCwill run smoothly on Windows 10 and macOS. Before you download this document scanning application for Windows or macOS, let me tell give you its brief overview.
Scan on the go with CamScanner
Reducing the use of paper is one of the ways to save the environment. The fewer trees we cut, the better it gets for our climate. One way of saving papers is to shift the work from papers to our digital devices. Every day, billions of documents are scanned which increases the demand for paper. Imagine if we had a simple solution that requires no paper to scan the documents? Well, CamScanner is the solution we are talking about.
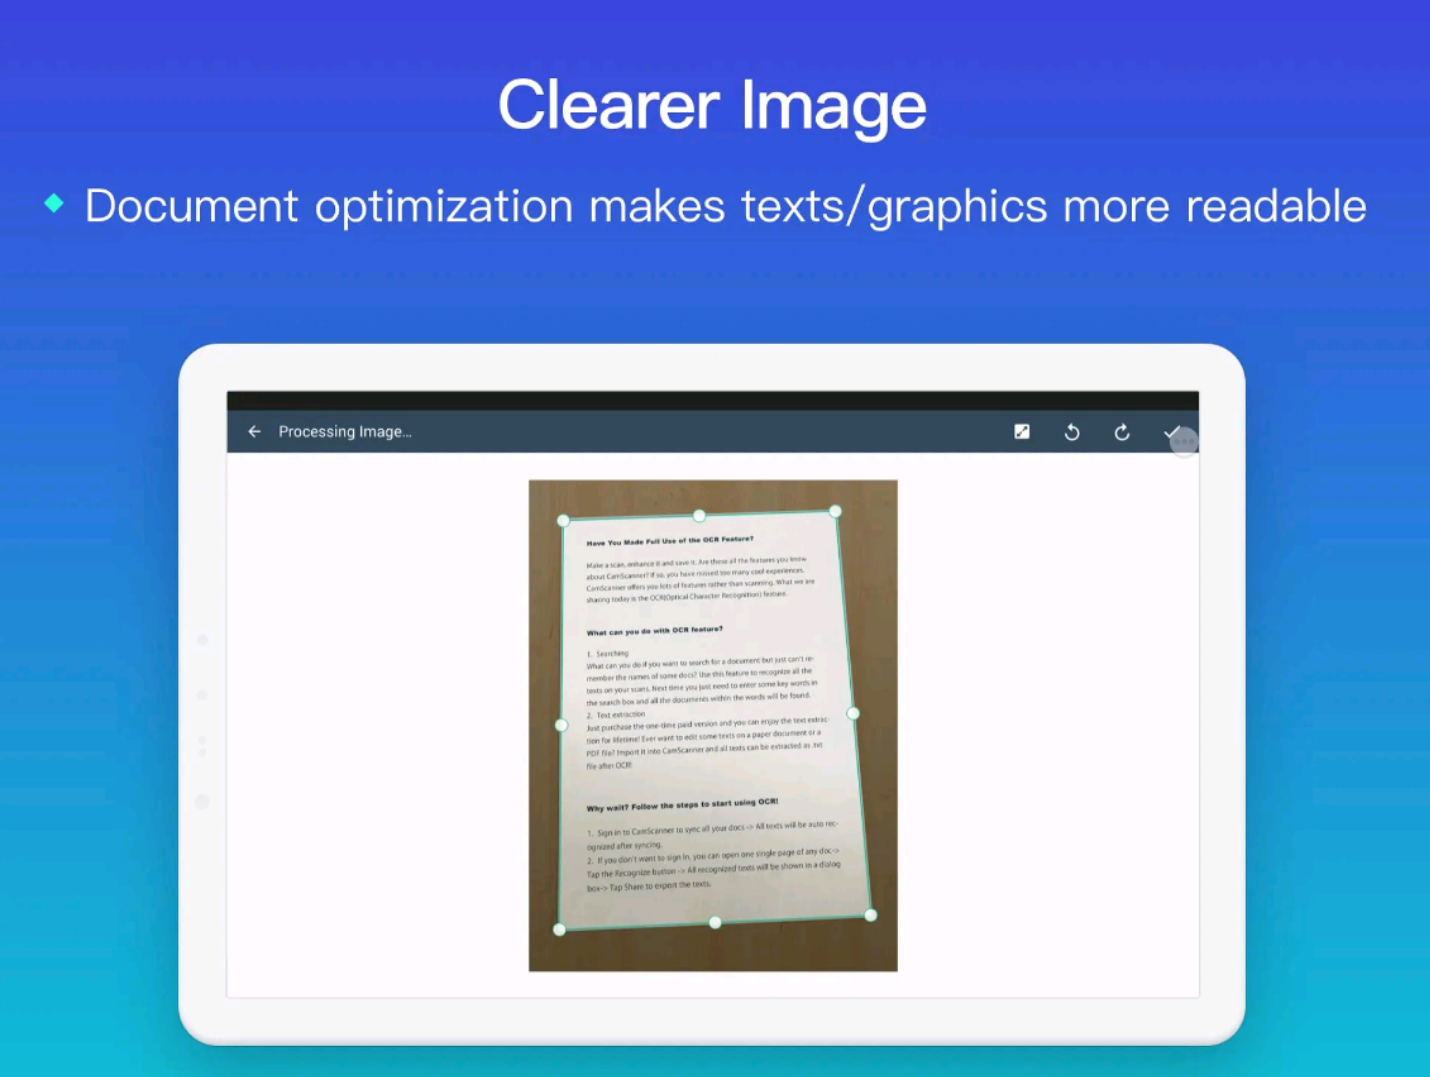
You don’t need to carry the documents in the form of papers now. Just scan them on the go with your smartphone or computer and save them either on your local storage or in the cloud drive. That’s how smart CamScanner is. It uses your device’s camera to scan a document. If you are thinking that this is as same as capturing a picture of the document, then let me tell you that it’s not. CamScanner changes the look and feels of the scanned document to imitate that of a real document. It applies the necessary treatment to a document to make the text better and clear. The app offers a handful of effects by default. Users can choose the scan-effect that looks the best to them.
CamScanner has the ability to scan multiple documents and combine them into one PDF. It also offers a collage feature. If you want to scan multiple pages of a passport, you can put them together with the help of the PDF option. By default, CamScanner will save all of your scanned documents the device’s storage. If you wish, you can connect your Google Drive or DropBox account with CamScanner and it will automatically upload your scanned copies to the cloud drive.
Scanning papers, passport, ID, pictures, or anything else is not difficult at all. The only thing this app requires is for the users to hold the camera straight and stable over a document. CamScanner automatically detects documents, fixes the edges, and outputs the result.
CamScanner is more than a Document Scanner
This is not just a digitizer, CamScanner has a lot of other cool features. It comes with an OCR feature which can detect and pull text from the images/docs. This text can be copied for different purposes later on. CamScanner also brings a full set of editing tools. You can make annotations or any other kind of modifications to the documents within the app. The app will also let you lock the confidential documents.
Top Features of CamScanner
Digitize content quickly on the go.
AirPrint and quickly Fax the documents.
Convert to PDF, JPG, and PNG format.
Extract text from images with OCR.
A quick search feature to find documents.
Editing tools to enhance documents.
Auto-sync across different platforms using the CamScanner account.
CamScanner App Details
Developer
INTSIG Information Co., Ltd
Current Version
5.18.8.20200419
Last Updated
May 9, 2020
Rating
4.7 with 2.6M Votes
Total Downloads
100,000,000+
Why was CamScanner removed from the Play Store?
CamScanner was once removed from the Google Play Store. This makes the users a bit skeptical about this application, but before you make a judgment, let me tell you why it was removed. According to the Play Store team, the CamScanner app had some kind of malware and it was removed temporarily. However, after fixing the app and assuring the Play Store team about its safety, CamScanner was back into the Play Store. As of today, it’s widely available across all regions for both the Android and iOS platforms in their official stores.
CamScanner for Windows 10 | CamScanner for macOS
By now, you all should have a clear idea that CamScanner has no PC version, then how exactly are you going to run CamScanner PC? Since we have its Android version, we will be emulating that with the help of an Android emulator. Yes, you heard that right. Using an Emulator like the BlueStacks or the NoxPlayer, you can easily run CamScanner Windows or the CamScanner macOS. This is not limited to one version of these ecosystems. It will be compatible with Windows 7, Windows 8, Windows 8.1, Windows 10, and all versions of macOS. Just take a look at the requirements and then the steps.
Requirements to download PC Version of CamScanner
Desktop or Laptop with Windows/macOS.
Webcam with Desktop or Front cam with Laptop.
Internet Connection.
Google Account. If you don’t have one, create it for free.
Download the emulator, install it, and set it ups using the Google Account.
Follow the remaining part of this tutorial.
Steps to download CamScanner for PC
On your PC, open the emulator.
In the emulator, launch the Google Play Store.
Using the search bar of the Play Store, find “CamScanner”.
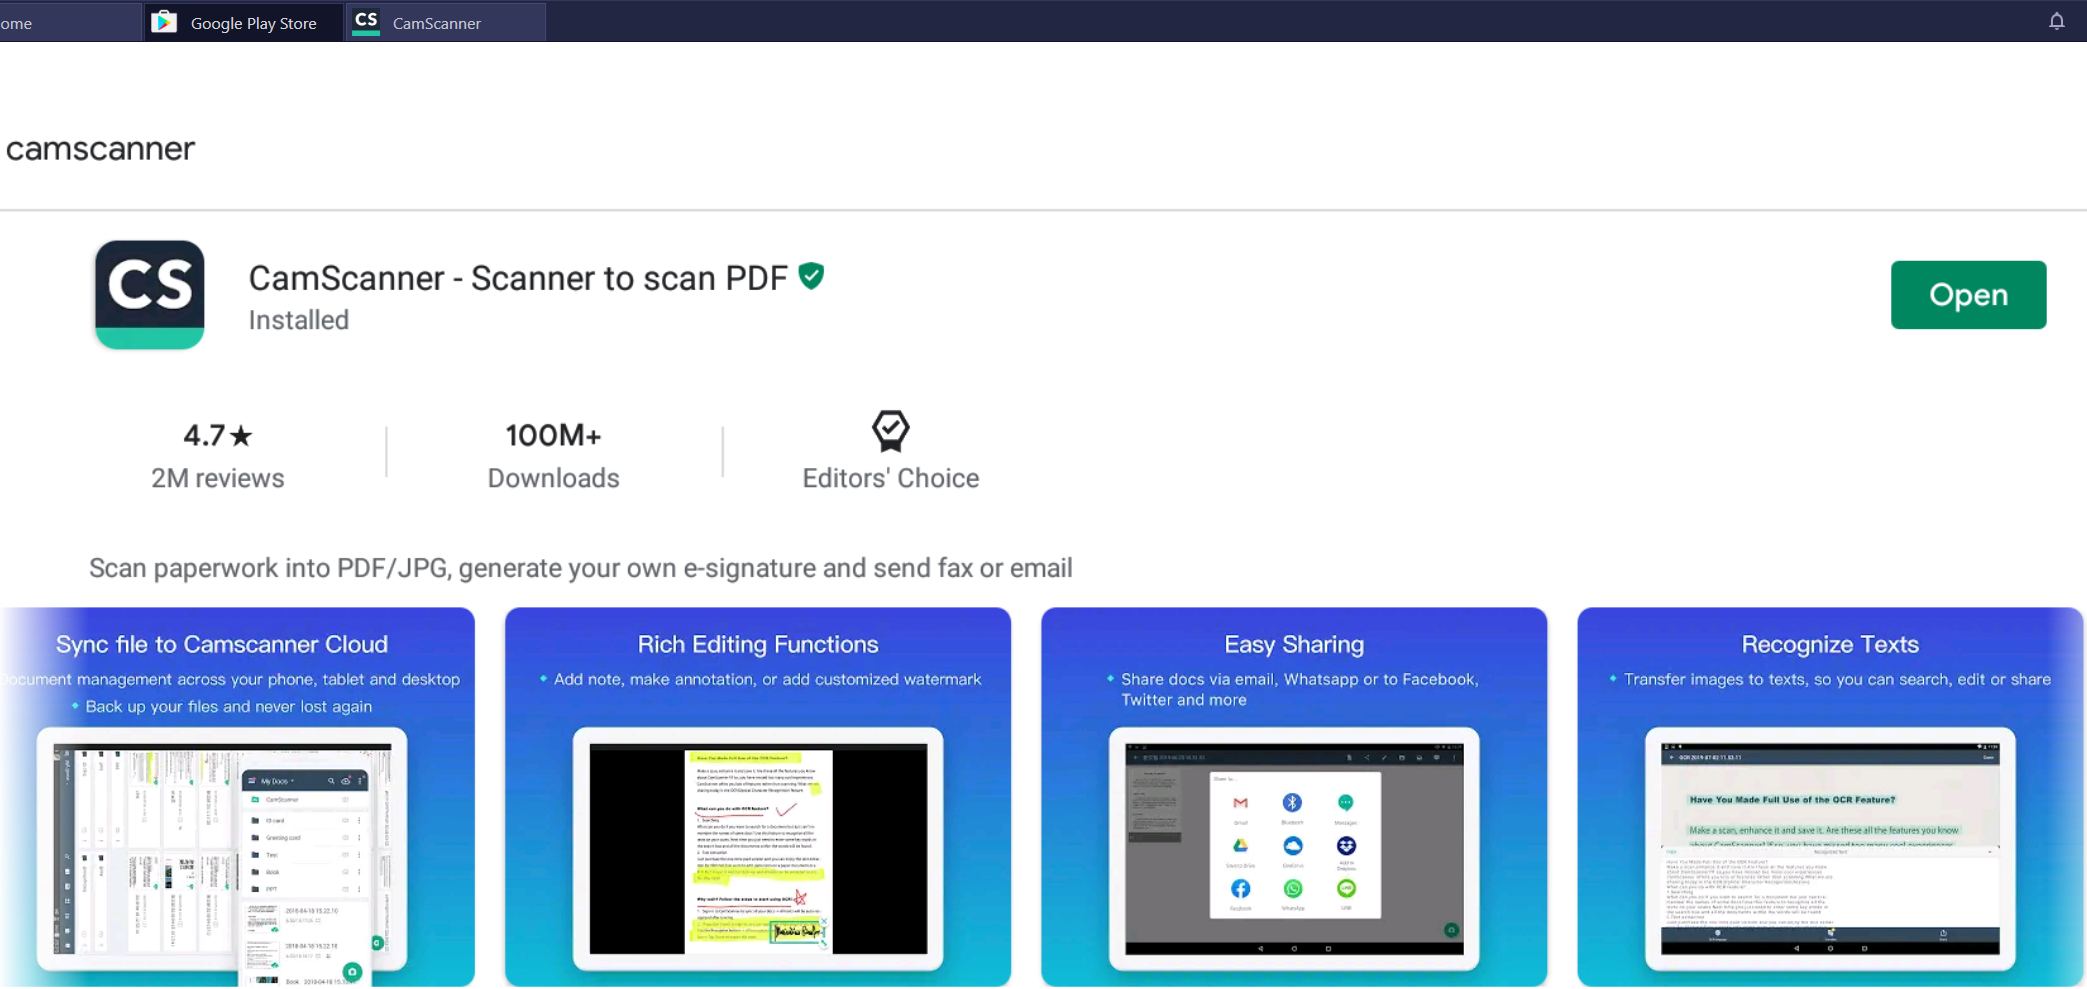
As you find CamScanner, install it.
Installing CamScanner from Google Play
Open CamScanner now and set it up by following on-screen instructions.
Now using your WebCam or Laptop’s Camera, scan the documents.
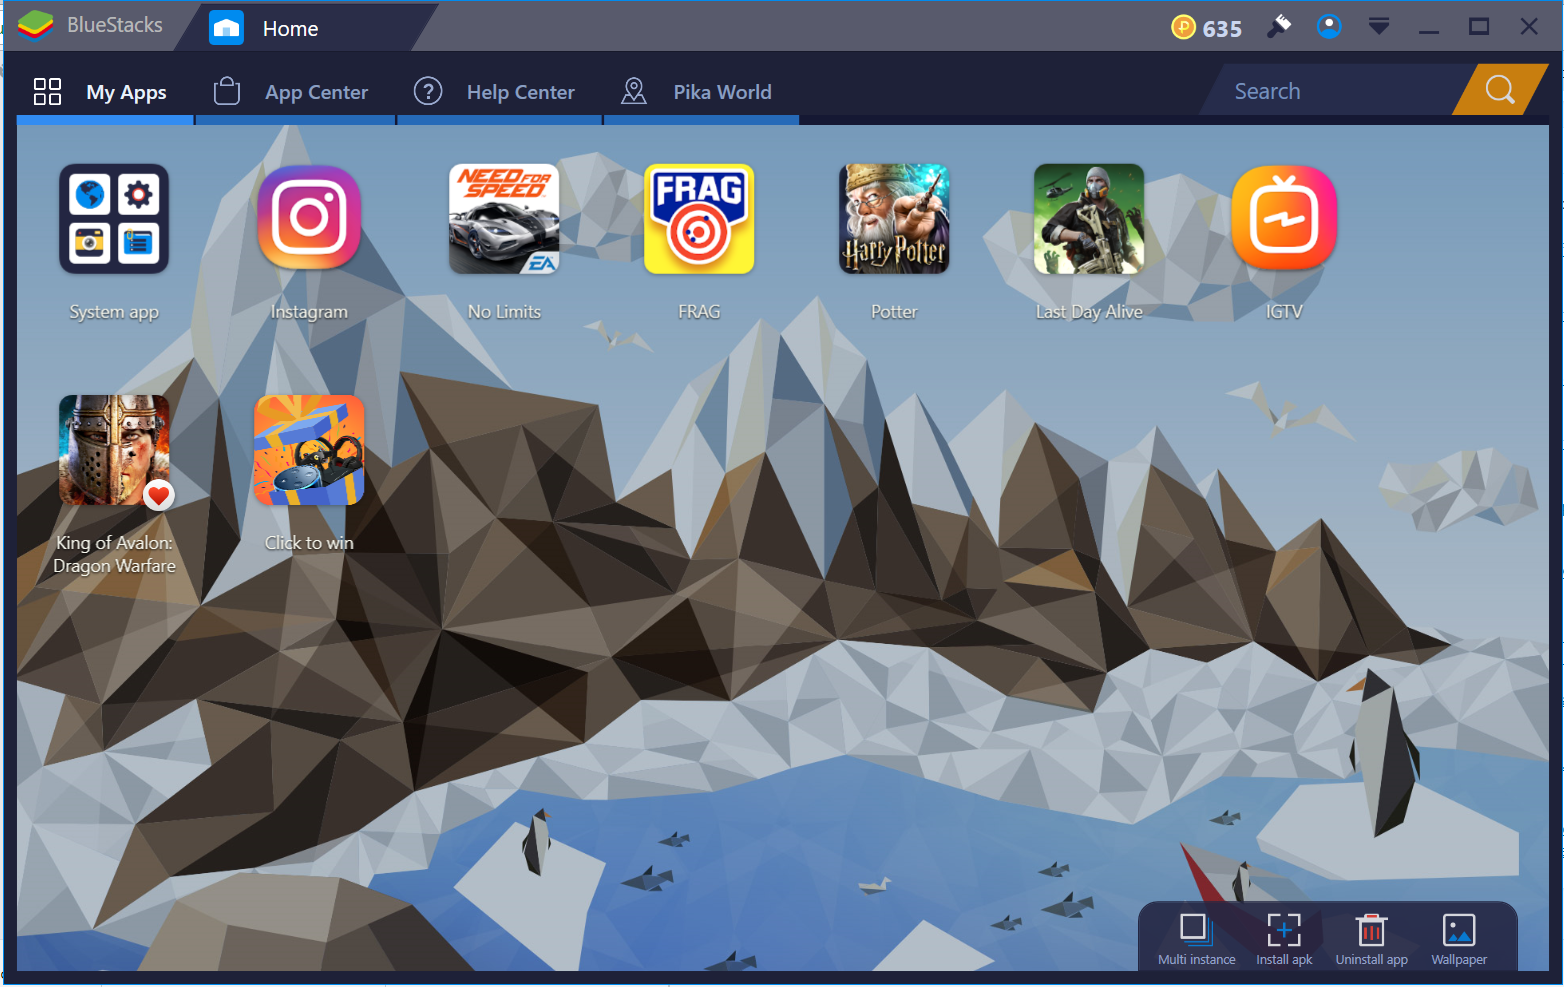
Running CamScanner on Windows 10 via BlueStacks 4.2
PRO TIP
Use a webcam with a wire to scan documents when using CamScanner for PC. Using such a camera will make it a lot easier to scan as it has a wire and you can hold it in your hands.
Video on how to download CamScanner PC
What’s next?
CamScanner for PC is now installed. Since we are using a tricky method, scanning documents on your PC is not going to be a piece of cake. Use the camera accurately to scan the documents in the best possible form. Rest assured, CamScanner PC will run without any hiccups and it will be a worthy experience. Just in case you run into any kind of problems while installing CamScanner on PC or setting up those Android emulators, feel free to reach out to us. The best way to contact us regarding this guide would be through the comments section below.
FAQs
Does CamScanner work on Windows?
Yes, CamScanner runs on Windows with the help of an Android Emulator.
Can I get CamScanner for macOS Catalina?
Yes, using the BlueStacks 4.1, you can easily run CamScanner on macOS.
Can CamScanner PC scan documents use a webcam?
Yes, if your computer has a webcam or in-built camera, you can easily scan documents.
Is CamScanner for PC safe?
It is absolutely safe. We are not using any unverified sources or means to download the app. You can completely trust the process.
Where does CamScanner for PC save the scanned documents?
It saves all your scanned documents and files in the emulator. You can export the scanned files to Windows afterward.
Is the Gameloop emulator failing to load at your end? If you are getting the Gameloop Failed to start the emulator error, or failed to start the engine, error code :3, it’s time to fix it. Take a look at this guide to fix Gameloop Failed to start the emulator. Failed to start the engine, error code :3.
Before you fix the error, let me give you a flashback of the Gameloop and also when and why this error pops up.
Gameloop Loading Stuck at 15% – Failed to Sart the emulator – Failed to start the engine, error code :3
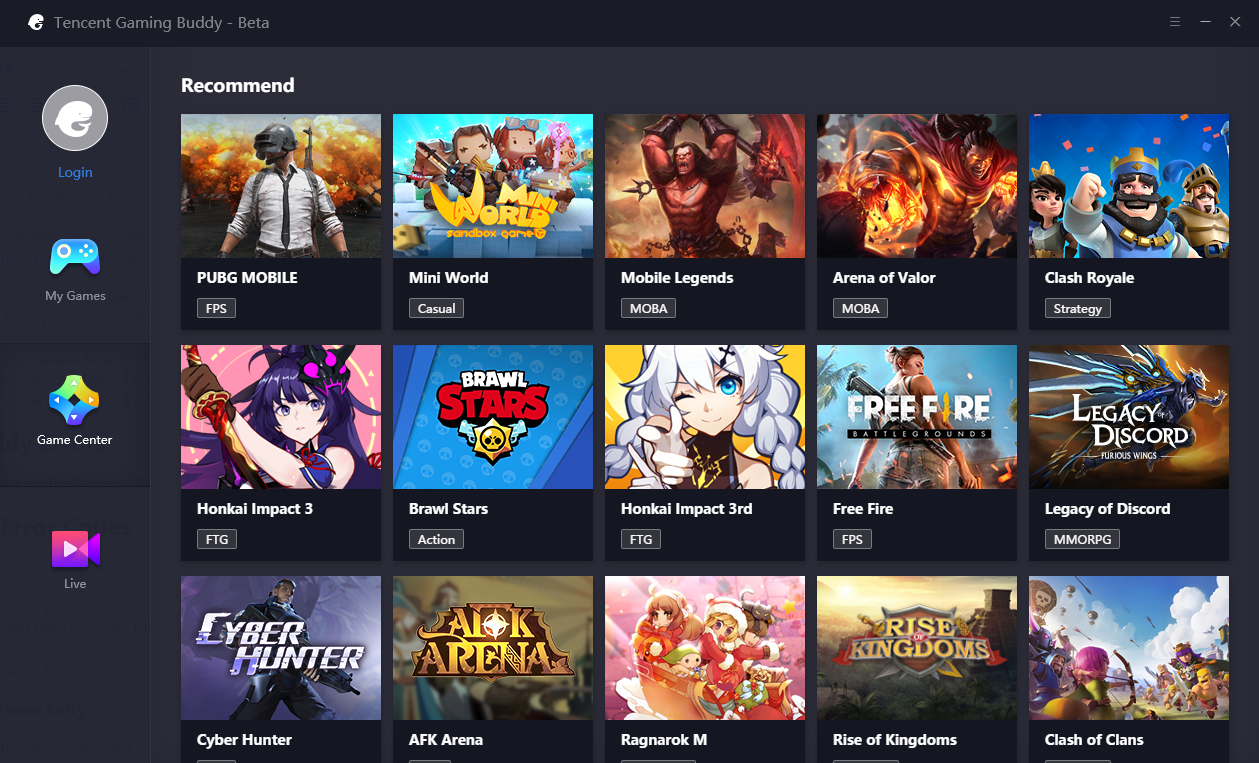
Gameloop is the official emulator for COD Mobile and PUBG Mobile. This emulator was formerly known as Tencent Gaming Buddy. The developers improved a few aspects of the emulator and rebranded it as Gameloop. Apart from being the official emulator for COD Mobile and PUBG Mobile, it also runs dozens of other games. Gameloop can be used as a complete Android emulator as you can also install the Play Store and APK files in it.
The Gameloop came out as a much-improved emulator as compared to the Tencent Gaming Buddy, but it looks like it reciprocates some of the issues of Tencent Gaming Buddy. One of those errors is the Gameloop being unable to load at 15%. The emulator sometimes fails to start and the engine fails at times too. Users end up getting the error code :3.
There is no way to bypass this error without restarting the emulator. Even restarting doesn’t help every time. To fix this problem permanently, you have to take another route. Fortunately, we have found the fix and you are going to find it below.
Take a look at the steps to fully fix Gameloop Failed to start the emulator. Failed to start the engine, error code :3.
Gameloop Failed to start the emulator. Failed to start the engine, error code :3
Close the Gameloop emulator if it is running.
Open the Process Hacker tool on the computer.
In the search box of Process Hacker, type “aow”.
As you find aow processes, click on aow_xxxx.exe.
Terminate the aow process completely.
Open the Gameloop emulator. It will load this time.
Play COD Mobile now. That’s all.
Final Words
That’s all. You have successfully fixed the error on Gameloop now. If you have any other questions/queries, feel free to use the comment box below. I will try my best to get back to you as soon as possible.
Updated: 12/11/2020 | As of early 2020, these are still the best lightweight Android Emulators for PC. Take a look to pick the best Android Emulatorfor yourself.
Android Emulators give you a hang of the Android OS on your computer. The invention of Android Emulators dates back to 2010. Since then, the Android Emulators have been making it extremely easy for users to enjoy the Android OS on their personal computers. As of writing this post, there are over 15 different that exist. All the Emulators have something different to offer.
The Emulator you pick for your PC depends totally on what features you need. The problem that most users face while using an Android Emulator is heavy resource utilization. These tools consume too much of your PC’s power in order to function normally. So, for the best results and flawless performance, users need a lightweight Android Emulator. I have compiled a list of 10 best lightweight Android Emulators for PC. The lightweight Android Emulators that I have picked will run on Windows and Mac OS. The list is sorted with the best lightweight emulator being on the top and the order goes downwards.
Before we take a look at the lightweight Android emulators, let’s get a good understanding of such software and why do you need one.
How Android Emulators work?
Android is open-source software. The open-source nature of Android gives opportunities to the developers to mold this ecosystem the way they want. The Android Emulators are typically the Virtual Android Devices that can run on any Windows or Mac-powered computer.
Google itself provides the Android SDK Tools which have the Android Emulator inside. The basic purpose of emulating Android on a computer was to allow the app developers to test their applications. Android Virtual Device environment allows the developers to select the hardware and software environment to make suitable devices for their applications. The Android Emulators give a real-Android device experience to the developers. They can emulate incoming calls, text messages and almost every single operation that they would carry out on a real Android device.
This concept was taken up by different companies that later on came up with the emulators that required the users to do the least. One such example is the BlueStacks App Player which was released back in 2011. BlueStacks happened to be a complete package for those who just wanted a straightforward Android instance on their PCs without going through any complexity.
Now that you have understood the purpose of the existence of Android Emulators, you must be wondering why an average user needs an Android Emulator? Well, the answer lies in the evolution of the tools. Over the past decade, the Android Emulators have evolved in such a way that users now prefer to run most of their Android apps on the computer instead, and of course, they should be doing it because it’s way cool. Let’s understand how these tools can help you.
Why do you need an Android Emulator?
Here are the reasons why you would want to need an Android Emulator.
You don’t have an Android phone and you want to enjoy the Android OS on your computer.
There is a cool game that you want to enjoy on a bigger screen. The emulator will let you run it.
Use your computer’s mouse and keyboard to play games. Especially, FPS games are more enjoyable this way.
An application that is available for Android and not for PC, you want to run it on your computer.
The sound effects of a game are good enough to run it on a computer.
The Android phone you’re using has weak hardware that cannot run heavy games, on the other hand, the emulator will let you run the same game.
Your Android phone is running out of storage. Use the emulator to enjoy the available space on your computer.
An application or game that is worth using on a computer, can be downloaded on with the help of an emulator too.
You happen to be an application developer, simulating your applications on the emulator is definitely a good idea.
No device compatibility or OS compatibility issues because of the flexibility of emulators.
The most popular Android Emulator, BlueStacks has been updated to version 4.1. This latest version is compatible with both the Windows and macOS. The BlueStacks 4.1 fixes several issues that existed in the emulator for years. It brings a smoother UI. The BlueStacks 4.1 isn’t resource hungry either. The previous versions of BlueStacks are obsolete now.
The BlueStacks is the oldest and the best in business. The BlueStacks has been discontinued for Windows, however, it still runs on the Mac OS. It is the best emulator for Mac. The BlueStacks is like an all-in-one package for those who simply want to enjoy an Android tablet running inside their computer.
BlueStacks has a very nice UI. The moment you run BlueStacks on your Mac, you find a screen showing you the application suggestions, application tabs, and a notification bar. Users can log in using their Google Account which gives them access to the Google Play Store. The BlueStacks supports all the applications that exist in the Google Play Store. Since the BlueStacks is pretty old, it did not have so many options like Keyboard mapping, multi-instances etc. It tops our list because it is still active for Mac and still the best in business.
BlueStacks 2 brought great improvements over the original BlueStacks. The new version of BlueStacks was released only for Windows. After the BlueStacks 2, the company launched the BlueStacks 3. While the BlueStacks 2’s focus was on the UI improvements and some new features, the BlueStacks 3 focused completely on the performance and usability. There were a few new features in this release as well, however, most of the enhancements were in the performance department.
The BlueStacks 3 introduced the multi-instance feature. This feature allowed the users to run multiple BlueStacks windows on their computers. This means you can run a number of applications in one instance of BlueStacks and a totally different number of applications in another instance of the player.
BlueStacks 3 also has the APK installation button to install the APKs directly on it. It comes with the Google Play Store preloaded. The BlueStacks 3 is way lighter than its predecessors. It is the best option if you want to play games or run communication applications like WhatsApp for PC.
Following are the BlueStacks 3 system requirements.
BlueStacks N – Obsolete
BlueStacks further improved the performance of the Player in the BlueStacks N release. This new version is specifically named as BlueStacks 3N. The N is added to the name because of the software upgrade. BlueStacks 3N is based on the Android Nougat. The previous BlueStacks 3 was based on the Android Marshmallow and the original BlueStacks was based on the Android KitKat. So those of you who want to run Android Nougat on their computers can go with the BlueStacks N.
The system requirements for the BlueStacks N are similar to those for the BlueStacks 3.
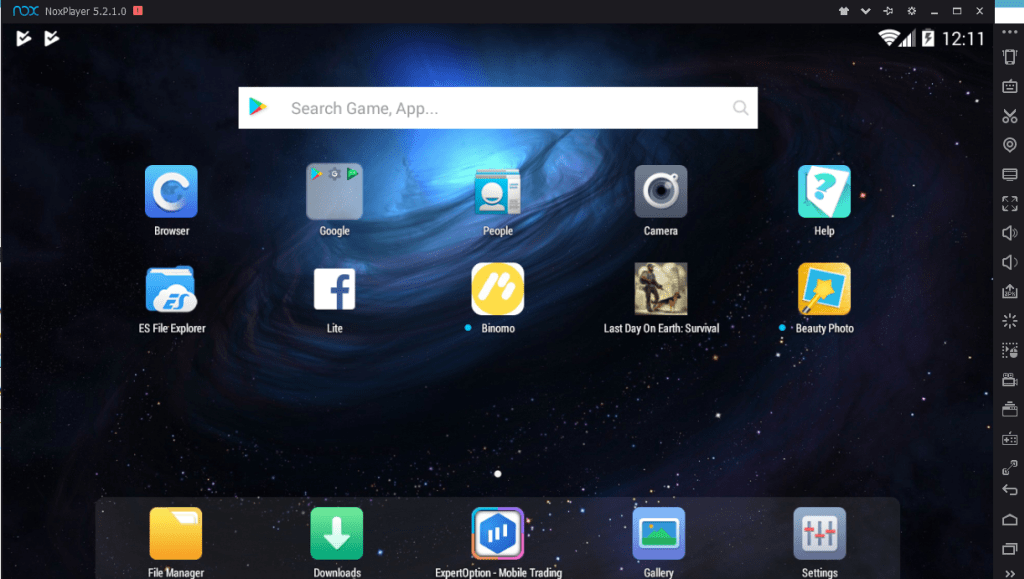
Nox App Player by BigNox is among one of the best and lightweight tools. If you are worried about your PC hanging again and again because of the emulator, you can give a try to the Nox Player in order to get rid of such an issue. The Nox Player is based on the Android 7.1.2 Nougat. It works on both the Windows and Mac ecosystems.
Nox Player focuses on gaming. The company has optimized this player to run all the resource-heavy games. It is the best choice for FPS lovers as well. The tool allows the players to map the keys according to their liking. Nox Player allows using an external controller as well. It has the multi-instance feature if you want to operate it in several tabs.
Nox comes with the Google Play Store and all other basic Google applications pre-installed. I particularly like the Nox Player because of its Vanilla Android-like UI. It completely looks like a real Android tablet running inside your computer.
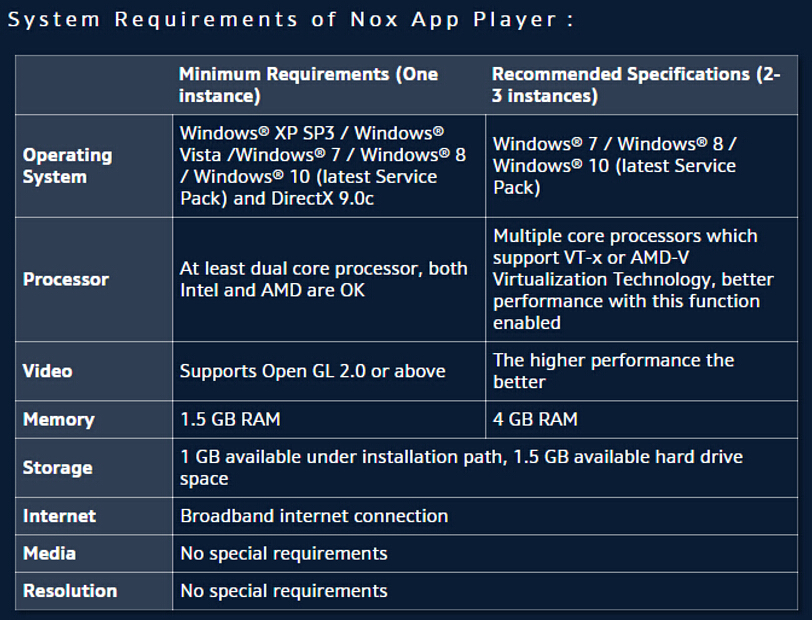
Following are the system requirements for NoxPlayer.
Genymotion
The Genymotion is the best choice for App Developers. Genymotion gives the freedom to select the Android device during the setup. The application developers can emulate any Android device with the help of the Genymotion emulator. It runs Android as a service either in the cloud or right on your desktop PC.
Users can run the games on this emulator as well, but the extensive options of this emulator are best suited to the application developers.
Genymotion is free for pesonal use. The tool is premium for developers.
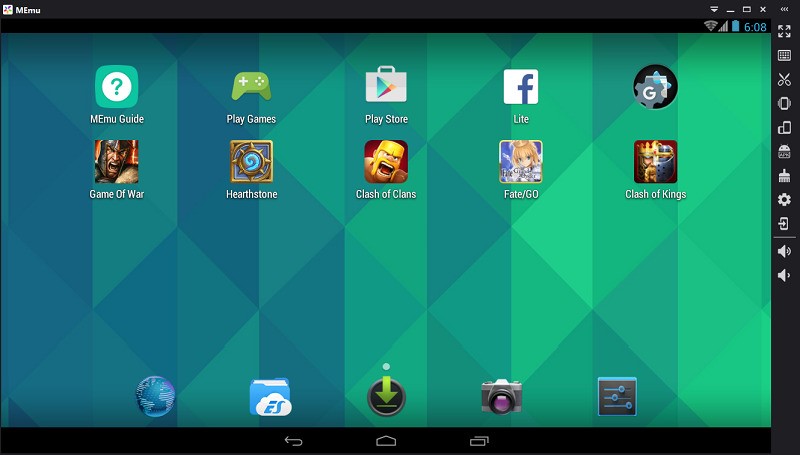
MEmu, as the name pretty much suggests it, is an emulator for gaming geeks. Whether you want to enjoy the HD graphics of a game, experience its sound effects on bigger speakers, or simply want to run games because you don’t have an Android phone, the MEmu is not going to disappoint you. It is a lightweight Android emulator. It is also based on the Android 7.1 Nougat.
MEmu performs up to the mark for almost all the resource-hungry games. The games like Asphalt 9, PUBG Mobile, Fortnite for Android, and Rules of Survival have been found running smoothly on this emulator.
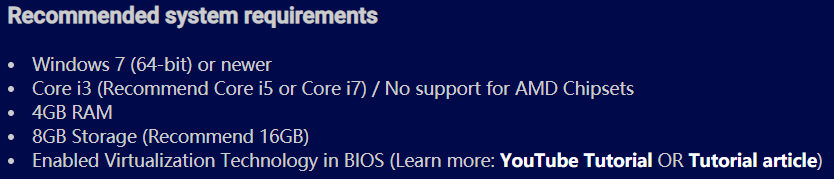
MEmu is not available for Mac. It only works on the Windows OS. These are the official system requirements for MEmu.
Although Remix OS Player has been discontinued, it still runs well on the systems that it supported at the time of its release. The Remix OS Player by Jide was released as a stand-alone application to emulate the Remix OS on computers. The Remix OS Player was also released for the Windows only. It is also inspired by the UI of the Vanilla Android.
Remix OS Player was optimized for gaming. Jide designed it as a native application to run on a computer. The Remix OS Player was released running on Android Marshmallow. There was no further update for this player.
These are the Remix OS Player system requirements.
Just like Nox Player, MEmu, and Remix OS Player, Andy’s focus is also on gaming. Andy’s mission is to give the users the best possible gaming experience on a computer. Andy utilizes the graphics of a computer to produce the best output for any game running on it. For a few years, Andy ran on one version of Android which happened to be its downside. Just in April 2018, the company updated Andy to Android Nougat.
The features that most of the Android App Players lack or they charge for them, Andy provides all of them for free. For example, take a look at this chart.
These are the system requirements to run Andy on a computer.
Dual-core AMD or Intel CPU with Virtualization support
3Gb of RAM; Andy uses less than 1Gb while running apps
At least 10Gb of free disk space
GPU with OpenGL 2.1 support
Windows 7 SP1 / Windows 8.1 / Ubuntu 14.04+ / OSX 10.8+
This is yet another player for gamers. The KOPlayer runs on the Windows operating system only. It lays out a smooth platform for all the Android games to run on your computer. The KOPlayer is built on the Android x86 Architecture. It supports OpenGL & hardware acceleration as well. The KOPlayer also runs multiple instances. It allows the users to run multiple accounts. The video recording feature in KOPlayer is one of a kind. It allows keyboard mapping and also supports a remote controller. Almost all the applications available in the Play Store run in this player.
KOPlayer system requirements:
Windows XP SP3 (32 or 64 bits)
It supports Windows Vista (32 or 64 bits)
Also, Windows 7 (32 or 64 bits)
The graphics card supports OpenGL 2.0.
CPU supports VT-x or AMD-V virtualization,which can be opened in BIOS.
At least 512MB memory.
At least providing 3GB hard disk space to install KOPLAYER, and sometimes may need 8GB or more. This depends on applications you installed in the virtual machine. And a working Internet connection for installation and update.
The resolution of the system should not be lower than 1024×768.
Bliss is not a typical Android emulator. It’s basically a completely different OS born out of a custom ROM for Android. Bliss for computers is based on the x86 architecture. It can run on any PC, Laptop or Tablet that uses the UEFI boot. The Bliss supports the devices powered by the CPUs from AMD, Nvidia, Qualcomm, and Intel. The best part of this player is that it is based on the latest Android 8.0 Oreo firmware. Bliss, in fact, is the only player to be based on the Android Oreo.
So, that’s all with the list of lightweight Android Emulators. The emulators mentioned above will give you the best possible performance. Another thing to keep in mind is how much trustworthy an emulator is. All the emulators mentioned in this post are hand-tested and found completely safe and sound. Enjoy the games in stunning resolution and run all of your desired applications on the computer now.
If you have any other option in mind, feel free to drop it in the comments section below. In case of queries, feel free to reach out to me.
Move to iOS is Apple’s official application move data from an Android phone to the iPhone. This application often encounters an error “Move to iOS could not communicate with the device”. This is a common error. It comes up the moment you try to connect your Android phone to the iPhone. The error exactly shows the Move to iOS could not communicate with the device error. In this guide, you will learn how to fix Move to iOS could not communicate with the device error. Before taking a look at the solution, let us understand the background of this problem.
Move to iOS – The only application to switch data from Android to iPhone
Every day, we see a new smartphone in the market. It has become a habit of the consumers to switch to a new smartphone as soon as they find a better option. To make the smartphone switch easy for the consumers, different smartphone companies have developed different applications that move all the data in one go. Companies like Huawei, Samsung, OnePlus, Oppo, Xiaomi, and all others have their own applications for their specific purpose. Furthermore, the Google Play Store has hundreds of such applications that work on all the Android phones. This was about Android. Now when it comes to iOS, there is only one application called “Move to iOS”, and thanks to Apple, that one application does not work fine either.
Switching from Android to Android is a piece of cake. Switching from iPhone to iPhone is a piece of cake. Moving from Android to iOS is when the pain starts. To further elaborate, I will explain what exactly happened to me.
The decision of switching from OnePlus 6 to iPhone XS Max
For over last 5 months, I was using the OnePlus 6. My OnePlus 6 had over 50,000 images, 400 videos, thousands of WhatsApp images, chats, messages, contacts, call logs, documents, etc. My experience with the OnePlus 6 was quite wonderful. In September, Apple released the iPhone XS Max, and just for the sake of experiencing the iOS, I decided to move from OnePlus 6 to iPhone XS Max. I got the iPhone XS Max and it was the time to shift the data.
When I turned on the iPhone XS Max, it asked me whether I want to transfer data from my Android phone or another iPhone. I chose the Android option and it showed me a code. I had to download the Move to the iOS application on my OnePlus 6 and enter the code shown on the iPhone. This code was supposed to help the OnePlus 6 establish a connection with the iPhone XS Max. After this, I was supposed to get the option to transfer my contacts, call logs, messages, and photos. You see, no WhatsApp data here either. I was fine with the data that I was able to move, so I followed the procedure.
Move to iOS – The real pain starts
The moment I entered the code in the Move to iOS application on the OnePlus 6, it started giving me the “Move to iOS could not communicate with the device” error. I looked up the internet to no solution. It turned out that this was widespread error and Apple did not have any official solution listed on any of their support pages. I looked through hundreds of forums, and after trying a handful of solutions given by different users, I was finally able to get through.
So, after going through all that misery, I decided to write this guide in order to help all the future Android to iPhone shifters. It is time to take a look at the solution to Move to iOS could not communicate with the device error.
*8/2/2019 – Post updated with an authentic/working method.
Move to iOS could not communicate with the device – How to avoid this error
First of all, ensure that your iPhone is not already set up and you have the option to transfer data from Android. If your iPhone is already set up, consider performing a factory data reset in order to get the data transfer option.
Pick up your Android phone now and install “Move to iOS” application from the Play Store.
Now on your Android phone, forget the current WiFi network.
If there is an application that you think can interrupt with the network, uninstall it.
Turn on Airplane Mode or Flight Mode on your Android phone.
Having the Airplane Mode on, restart your Android phone.
Plug the charger in both the Android Phone and the iPhone now. The charger must be turned on.
Now on your Android phone, open Move to iOS application.
Now on the Apps & Data screen on iPhone, click on “Move Data from Android”.
You will see a code on your iPhone Now.
At this point, your iPhone has generated a WiFi connection too.
On the Android phone, open the WiFi and connect to the WiFi hotspot created by the iPhone. For example, it would be something like iOS fb466 or iOSfb466 – It can differ according to your phone.
Connect to this WiFi on your Android now. The password would be the name of your WiFi connection. For example, if the hotspot name is iOS fb466, the password would be iOS fb466. If it is iOS fb466, the password would be iOS fb466. Be careful about the spaces.
Open Move to iOS app now and enter the code again. It will work. That’s all.
Update: I have made a video regarding the fix. You can watch the video below if that is more convenient to you.
Thanks to our respected member Michael W Scott for letting us know about this solution in the comments section.
Conclusion
By this point, you should have all of your data moved from Android to iPhone. You must be wonder what was not letting you transfer the data previously. Well, the problem lies within two factors. The first thing is that most of the users do not plug in the charger before transferring the data, the charger needs to be plugged into both the devices. The second problem is that if any kind of communication/connectivity takes place on the Android device during the connection to iPhone, it interrupts the entire process. So, you must avoid any connectivity on the Android phone and for that, we enable the Airplane Mode. This is the solution that you will not find on any official Apple support forum. I hope that you have resolved this issue by following the steps given here. If you have anything to add to this guide or you are facing any problems, feel free to reach out to us.
From here you can download Gameloop Emulator for Call of Duty Mobile. Gameloop is the official COD Mobile Emulator by Tencent. It works on Windows 7, 8, and 10.
Gameloop – Tencent Gaming Buddy Revamped!
Tencent Gaming Buddy was the official Android Emulator for PUBG Mobile. The emulator came from none other than the developers of PUBG Mobile. Tencent itself allowed gamers to play the mobile version of PUBG on their computers. Where this move was highly disliked by mobile gamers, it was equally liked by those who always wanted to play PUBG on their computer for free. The official desktop version of PUBG was not free to play, however, Tencent made the mobile version free for everyone. Desktop gamers had a huge edge over mobile gamers. They easily stayed ahead of PUBG Mobile’s Mobile players.
Come October 2019 and there’s another game coming out from Tencent’s camp. This time we have the Call of Duty Mobile, a game that may end up diverting all the audience from PUBG Mobile. In fact, a huge number of users have already switched from PUBG Mobile to COD Mobile because of its amazing gameplay. Following its own trend, Tencent once again did what it did with PUBG Mobile. The company updated its Tencent Gaming Buddy with support for Call of Duty Mobile.
Not only that, but Tencent has also changed the name of its emulator. The Tencent Gaming Buddy with native support for COD Mobile is now called Gameloop. Tencent might have changed the name to make the emulator look more prominent for a new game. That said, the emulator once again gives the desktop players an edge over mobile players.
With the Gameloop, players can use the Mouse and Keyboard, or a Gamepad to dominate over the game. There was Gamepad support in the mobile version of COD Mobile earlier, but Tencent removed the support and right now, there are only touch controls for the phone users. But if you are a desktop gamer or if you are using your laptop to play COD Mobile, you can get that advantage via Keyboard and Mouse.
The controls are highly customizable in Gameloop. You can change the configuration for each and every single key. There are separate controls for Multiplayer and Battle Royale Mode. Furthermore, Tencent has introduced different controls to handle the Helicopter.
On top of these controls, you can also change the graphics settings in Gameloop. To cut it short, you can transform the COD Mobile into a full-fledge desktop game. If you have been a player of Call of Duty in the past, you are absolutely going to love this game on the computer.
Gameloop supports Windows 7, Windows 8, and Windows 10 at the moment. It doesn’t run on macOS. If you want to play COD Mobile on Mac, you can get an Android emulator from our list of Best Emulators for COD Mobile on PC.
Go ahead to download Gameloop Emulator for Call of Duty Mobile now. The instructions to install it and run COD on it are given in the video attached below.
Download Gameloop Emulator
Gameloop Emulator for Call of Duty Mobile – Download
Open the emulator’s setup on your computer and install it.
After installation, open the emulator and click on the “Download” button appearing next to COD Mobile.
Wait for the game to be downloaded/installed. Once done, launch the game. That’s all.
Video on Gameloop Emulator for COD Mobile
That’s all. You can find more guides for COD Mobile below:
Find out the best Call of Duty Mobile PC key mapping for Gameloop. COD Mobile experience on PC will be better with the following controls and key mapping.
Call of Duty Mobile on PC
The official COD Mobile emulator came out right after its launch. Tencent, the guys behind COD Mobile and PUBG Mobile revamped their Tencent Gaming Buddy and released it as Gameloop. It’s the simplest, lightest, and easiest-to-use emulator for Call of Duty Mobile at the moment.
Gameloop is very flexible. At first, it allows gamers to configure the graphics according to your computer’s hardware. If you have a low-end PC, you can go with the minimum graphics and if you have a high-end PC, you have options like consuming all 8 cores, setting the RAM to 4GB, and using QHD resolution. In fact, we have already made a guide on the best COD Mobile Gameloop Graphics settings.
Just like the graphics, Gameloop also allows gamers to change the controls. The game can be played with the help of a Gamepad, or you can set up your keyboard. The customizable key mapping is what makes this my favorite emulator to play COD Mobile on PC.
Gameloop has the keys mapped out specifically for Call of Duty Mobile beforehand. This emulator was specifically revamped for Call of Duty Mobile, so the COD players don’t have much to do there.
The pre-defined key mapping and controls on COD Mobile in Gameloop are the standard keys that you usually get with every other FPS or Battle Royale game on a computer.
Below in this post, I am going to list down the Gameloop COD Mobile default controls and after that, I’m going to show you how you can change the key mapping and how to switch to the gamepad.
Before you take a look at the guide, here are some other useful COD Mobile for PC guides for all of you.
Best Call of Duty Mobile PC Key Mapping & Controls for Gameloop
The following are the default Call of Duty Mobile Key Mapping and Controls in Gameloop.
COD Mobile Gameloop Key Mapping Multi-Player Mode
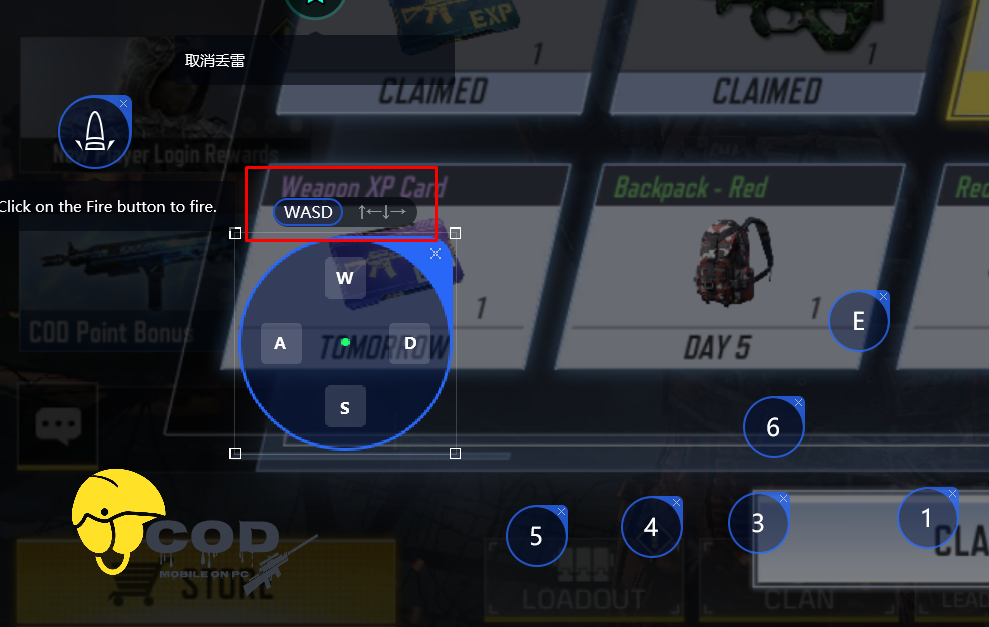
Move: WASD [W – A – S – D keys on the left side of Keyboard]
Jump/Surface: Space button
Crouch/Go Prone/Slide: Press C to Couch. Hold C to Go Prone.
Reload: R
Free: Alt
Sprint: Shift + W
Stun Grenade: 3
Cluster Grenade: 4
Air Strike, Nova Gas or Smoke Grenade: 5
Multi-bang: 6
Hemostatic or First Aid Kit: 7/8/9
Pick Up Items, Open Doors, Parachute etc: F
Change loadout: F
Ragdoll: F4
Game Stats/Match Stats: Tab
Mic On/Off: Y
Run: =
Volume On/Off: T
Settings: ESC
Map: M
Chat/Player Statis: F2
Slide while running: Shift + W + Hold C
COD Mobile Gameloop Mouse Controls Multi-Player Mode
Free Look/Mouse-Look: Simply move your mouse around. [Make sure that your game is being operated by keyboard/mouse controls. If it’s not, press Control on the keyboard to enable Mouse/Keyboard control]
Aim: Right-Click
Fire: Left-Click
Switch Weapon: Scroll
COD Mobile Gameloop Key Mapping Battle Royale Mode
Move: WASD [W – A – S – D keys on the left side of Keyboard]
Jump/Surface: Space button
Slide while running: Shift + W + Hold C
Enter Vehicle/Helicopter/Pick up items/Open Box/Backpack/Change Class: F
Open your own bag: Tab
Crouch/Go Prone/Slide: Press C to Couch. Hold C to Go Prone.
Reload: R
Free: Alt
Sprint: Shift + W
Stun Grenade: 3
Cluster Grenade: 4
Air Strike, Nova Gas or Smoke Grenade: 5
Multi-bang: 6
Hemostatic or First Aid Kit: 7/8/9
Pick Up Items, Open Doors, Parachute etc: F
Change loadout: F
Ragdoll: F4
Game Stats/Match Stats: Tab
Mic On/Off: Y
Run: =
Volume On/Off: T
Settings: ESC
Map: M
Chat/Player Statis: F2
Use Skill Class/First Aid: E
Enemy/Attack/Retreat: Press X & Move the Mouse
Vehicle Controls:
WASD – Accelerate/Left/Right/Slow
Brake: Space
Speed Up: Hold Shift while driving
Horn: G
COD Mobile Mouse Control Battle Royale Mode
Free Look/Mouse-Look: Simply move your mouse around. [Make sure that your game is being operated by keyboard/mouse controls. If it’s not, press Control on the keyboard to enable Mouse/Keyboard control]
Aim: Right-Click
Fire: Left-Click
Switch Weapon: Scroll
How to customize or change Key Mapping in COD Mobile for PC – Gameloop
Open Gameloop and run Call of Duty Mobile.
On the right side, you will find a Keyboard button. Click on it.
This will open the Keyboard controls.
Select the Multi-Player or Battle Royale Mode in Key Mapping settings.
On the game’s screen, you will find all controls cluttering the screen.
Click on any control/button, it will ask you for the replacement key.
Press the button you want to set for that specific action.
The button will be saved.
On the right-most side, you will be able to find default controllers. You can enable/disable some controls from here.
For example, you want to replace the Y button of Mic with another button, click on Y. It will ask you to input the key. You can press any key to replace “Y”.
Similarly, if you want to replace WASD keys with Arrow keys, you will find the Arrow keys right next to the WASD pad. Click on the Arrow keys and these buttons will be switched.
Playing COD Mobile on PC with Gamepad
Call of Duty Mobile initially had the gamepad/controller support on the phone. As the controller players dominated the game, the developers pulled back the support. At the moment, Call of Duty Mobile doesn’t have the controller support, but the Gameloop still supports the gamepad.
You heard that right. You can play this game on your computer with a gamepad. For this, you need to connect a gamepad first of all. After that, you can open the game, click on Keyboard on the right side and click on Gamepad. You can customize the gamepad controls according to your own choice now.
Conclusion
That’s all. With the settings explained above, it’s going to be extremely easy for all the COD Mobile players to play this game on a computer. Playing this game on your computer is all about making it easy and simple. This way, you will dominate the game and mobile players will not get a chance to stand against the ones using emulators.
I hope you guys enjoyed this guide. If you have any suggestions, questions, or queries, feel free to reach out to us. I will try my best to get back to you as soon as possible.
This a list of WhatsApp Video Call issues and their probable solutions. Take a look to fix WhatsApp Video Call issues right away!
WhatsApp Video Calls have been released worldwide now. The video calls being offered through WhatsApp are far better than other video calling services available to date. Another advantage of the WhatsApp Video Calling feature is that all of your calls are end-to-end encrypted, so there is no chance of losing your privacy or getting trapped into being spied. WhatsApp has efficiently implemented the Video Calling feature keeping the quality of the chat application intact. We saw a similar implementation of the voice calling feature. WhatsApp didn’t let the overall experience of the chat messenger get disturbed and that’s how it kept on growing its user base.
Your buddies are now just a tap away. Simply pressing the call button > video call will bring up your friends or family in the screen within a few seconds. That’s how easy things have become now. WhatsApp Video Calls are in a very early stage at the moment. Although the videos have been rolled out to the users world-wide, there still are chances that many are not aware of the feature and many haven’t updated their WhatsApp Messenger yet.
Video calls on WhatsApp have got several issues that you might not be able to solve in the first go. It will take time to master this new feature of WhatsApp and get used to it. To help you with any upcoming problem, we have compiled a list of the issues occurring every now and then also covered a guide on how to fix WhatsApp Video Call issues.
How to fix WhatsApp Video Call issues:
WhatsApp Video Call Couldn’t Place Call Issue
There are several reasons for this issue to come up. The very first reason can be the unavailability of the new video calling feature in the region of your friend. If WhatsApp Video Call feature hasn’t made its way to that country or region, you will not be able to use this feature.
The second reason adding to this issue can be that your friend is either using a phone that doesn’t support video/voice calling or that simply doesn’t have a front camera on it.
If the issue is coming up because of the 2nd reason, then your friend has to get a compatible phone.
The third reason can be that your friend is not using the latest version of WhatsApp with this feature enabled.
WhatsApp Video Call Poor Connection Video Paused Issue
This issue comes up because of a poor internet connection. If you have a data connection and you are currently using WiFi, try switching to the data connection and vice versa.
Furthermore, you can try closing all the background applications to lay off some load on your smartphone which will eventually result in improving the video quality.
You can also try restarting your phone and call your friend afterward.
WhatsApp Video Call Video Paused
Whenever you get the Video Paused error on screen, that means your friend or partner is doing some other activity on his/her smartphone at the moment. For instance, you are on a video call and all of a sudden you get a text message on your smartphone. You open the messaging application while the video call is going on in the background, your friend will see the “Video Paused” message on the screen. If you were just wondering why do you see this error again and again, there you have got the reason for it. To get rid of this error, stay on the WhatsApp Video Call screen.
WhatsApp Video Call Voice Issue
To improve the voice quality during a WhatsApp Video Call, simply try switching your internet connection and shut down all unnecessary applications on your phone. Also, try refreshing your phone by restarting it and going into a video call again.
That’s all for now. If you are currently facing any issues with WhatsApp Video Calling feature, let us know through the comment box below and we will try looking into a solution for you.
Update: In October 2019, Tencent Gaming Buddy was rebranded as Gameloop. The guide that you are going to take a look at works for Gameloop or Tencent Gaming Buddy.
Got a problem with your Gameloop or Tencent Gaming Buddy? It’s time to fix it. This is the guide to Fix Gameloop/Tencent Gaming Buddy Errors like the Error Codes, Lag Issues, FPS Drop, Performance, Installation, and Lag Issues.
Tencent Gaming Buddy is the Android emulator tailor-made to run PUBG Mobile on computers. It was developed by Tencent to not to let the PUBG Mobile gamers use any other emulator. The Tencent Gaming Buddy perfectly met the needs of the players of the most popular Battle Royale game. The PUBG Mobile runs smoothly on the TGB emulator. The optimization offered by TGB makes PUBG Mobile look super awesome on a computer.
Tencent Gaming Buddy offers advanced control to the gamers. They adjust each and every single preference of the emulator according to their computer’s hardware power. TGB can run on a computer having a RAM as low as 512MB. No other emulator is capable of running on this low memory. It is also compatible with the least powerful graphics cards out there.
Since Tencent Gaming Buddy is a very flexible emulator, it is very common for errors to occur on such a program. The Tencent Gaming Buddy can sometimes show you a frame drop. It can also show you Error Codes like Error Code 2, 3, 5. The Mic doesn’t work sometimes, which is really important for playing a game like PUBG Mobile. The emulator’s loading gets stuck at 98% some times. There are many other random errors that can hamper your smooth TGB experience. Fortunately, all these Tencent Gaming Buddy Errors can be fixed with the help of easy solutions. As you go ahead, you will find the solutions to all of your TGB problems.
Fix Gameloop and Tencent Gaming Buddy Errors
The following are all the problems that occur on Tencent Gaming Buddy. The solution to each problem is listed next to it.
Gameloop/Tencent Gaming Buddy Error Codes
Error Code 2, 3, 5
Uninstall Tencent Gaming Buddy from your computer.
Now go to C:\Program Files and find the “Tencent” folder.
Delete the Tencent folder.
Re-install the emulator. It should work fine.
Error Code 31 or Download Failed, Please Retry
Open Start menu on your computer and type “cmd”.
Open cmd now and enter this command: netsh winsock reset
After the command is executed, close cmd and restart your computer.
Try running TGB emulator now.
Another method to fix Error Code 31
First of all, remove temporary files. To do so, go to Start menu and type “Run”.
Open the Run window and type “TEMP” and hit enter.
Now delete all temporary files.
Also, type %TEMP% in run and delete the files that you see then.
Now go to Control Panel > User Accounts > Change your account name > Change the name.
Also, change the account type from Admin to Standard and vice versa.
Restart your computer now.
Re-install the Tencent Gaming Buddy now.
Tencent Gaming Buddy 100% CPU Usage
Close all the programs on your computer.
Open Tencent Gaming Buddy and close it.
Repeat the 2nd step again.
Open the TGB emulator now. It should be working fine.
Fix Gameloop/Tencent Gaming Buddy PUBG Mobile Lag & FPS Drop
As I mentioned above, TGB gives the gamers extended control over its settings. By default, the emulator is set to consume the maximum resources of your computer. If you do not adjust the emulator according to your computer’s power, you may face the Lag issue and also the frame drop issue while playing games like PUBG Mobile. Especially, if you try playing an FPS game on Tencent Gaming Buddy, you are likely to face the FPS Drop issue. You can fix all such issues by optimizing the performance of Tencent Gaming Buddy. Following are the best TGB optimization tips that will make it smooth.
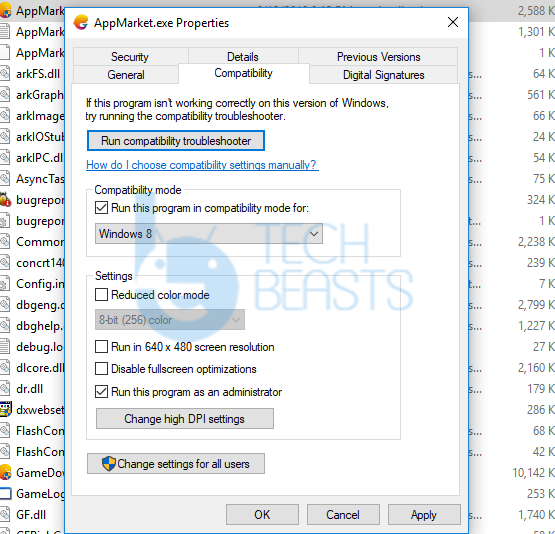
First of all, go to C:\program files\txgameassistant\appmarket.
Right click on AppMarket.exe > Properties.
Click on Compatibility and select a lower version of Windows i.e. Windows 8 or Windows 7.
Also, click on “Run this program as administrator”.
In case you are using Windows 7, install the latest version of DirectX. If you are on Windows 8/10, skip this step.
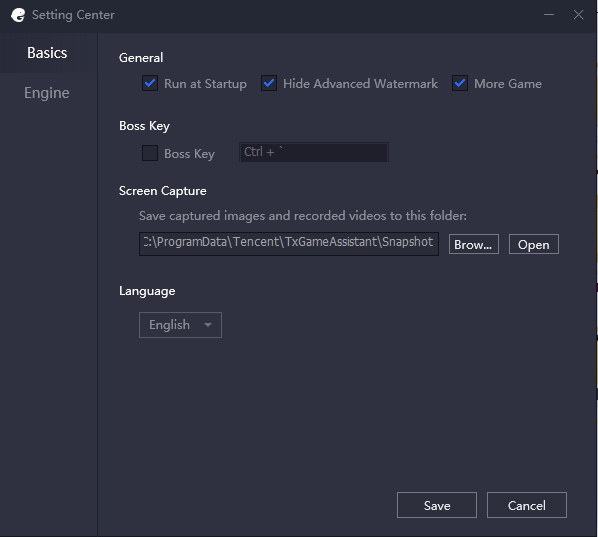
Now open Tencent Gaming Buddy and go to its settings.
Go to Engine now.
If you have a good GPU, select OpenGL+. If your GPU is average, select OpenGL.
In case you have a good CPU, click on DirectX+. For an average CPU, click on DirectX.
Now check all the boxes. Check Prioritize Dedicated GPU only if you have a dedicated Graphics Card.
Keep the Anti-aliasing closed.
Set the Memory and Processor values as you wish. Do not set the highest value here.
Save the settings now and play the game.
Gameloop or TGB Loading Stuck on 98%
The TGB emulator often gets stuck on 98% while loading. When this starts happening, it keeps happening for at least 5 times out of 10. Luckily, this is also a common issue, which means that it can be easily fixed too. Follow the solutions given below one by one to find out the one that works for you.
Change TGB Emulator Engine
Since TGB Emulator uses DirectX or OpenGL to run its engine, it can create problems. The OpenGL relies on the GPU of your computer and the DirectX relies on the CPU. If you are using OpenGL and the GPU of your computer is not meeting the requirements, it can make create loading issues for the emulator. To fix this, you can switch from OpenGL to DirectX and vice versa. For one of these options, the TGB will continue to work fine.
Delete Temp Folder
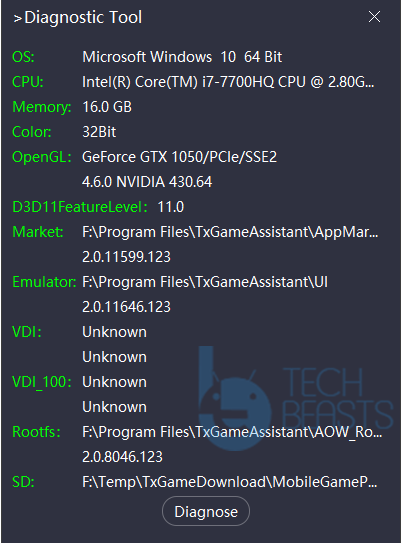
Deleting the Temp Folder can refresh the entire TGB emulator. Before you apply a more complex method to fix loading issues, you should try deleting the Temp folder. The Temp folder resides in the TGB emulator’s installation directory. For example, if you installed the emulator in your C drive, the Temp folder is there in the C drive. If you are not sure where to find this folder, you can find its location by going into the options of TGB Emulator > Diagnostics > you will find the Temp folder’s location at the bottom. Open this folder and delete the temporary files. Open the TGB after this and it should be working fine.
Disable Windows Defender & Uninstall Antivirus
The Tencent Gaming Buddy has a lot of files that need to run without any hindrance. The Windows Defender and Antivirus often blacklist the files of many programs. The files are not harmful, but even then, the Defender and Antivirus can block them. This will not let the TGB load all of its resources. To fix this, uninstall the TGB Emulator first of all. Now open Windows Defender and disable all of its activities. Similarly, uninstall the Antivirus from your computer if you have any. After this, restart your computer. Install the Tencent Gaming Buddy again now. It should be loading fine.
PUBG Mobile Voice Chat Not Working | Mic Not Working
First of all, run Tencent Gaming Buddy in the background. Make sure that your Mic is connected to the computer via USB. Follow the steps given below now.
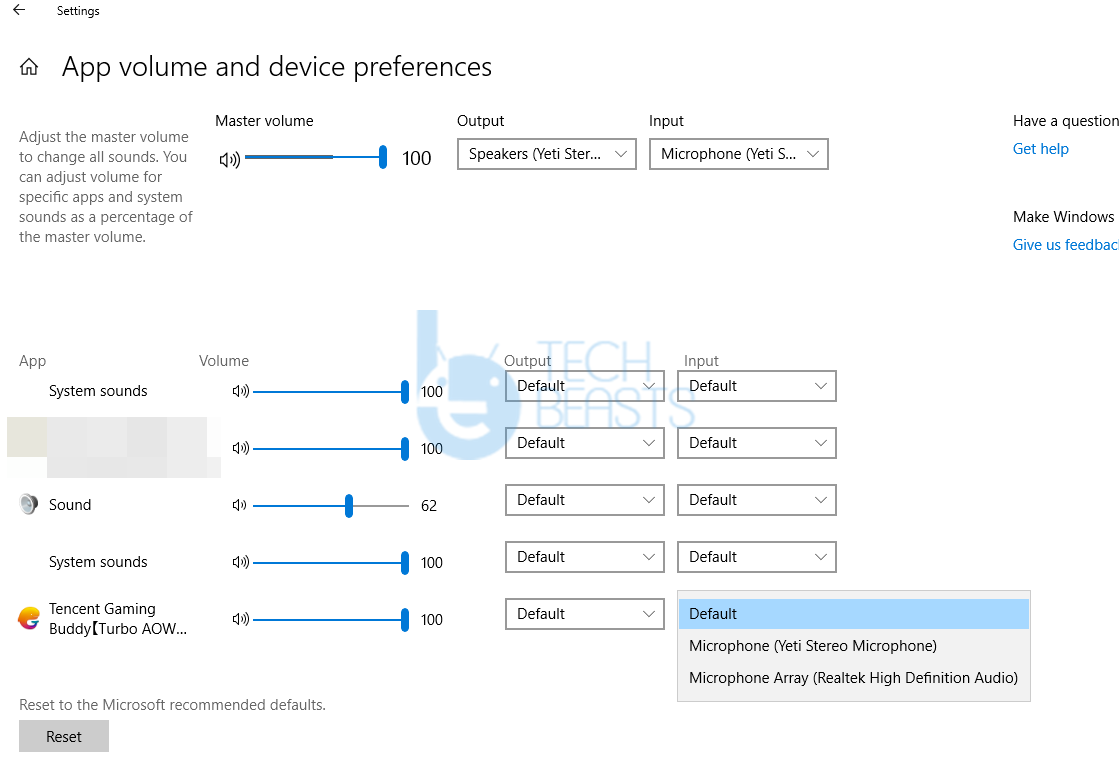
Open the Start Up menu on the computer.
Type “Sound mixer options” and open it.
You will see a list of apps that are playing sound right now.
In front of Tencent Gaming Buddy, change the Output and Input values to USB.
Now go to Start Up menu again and type Sound and open Sound settings.
Click on Recording > Right click on your Mic > Properties > Advanced > Uncheck all options > Apply.
Close Tencent Gaming Buddy and open it again. The audio issue should be resolved.
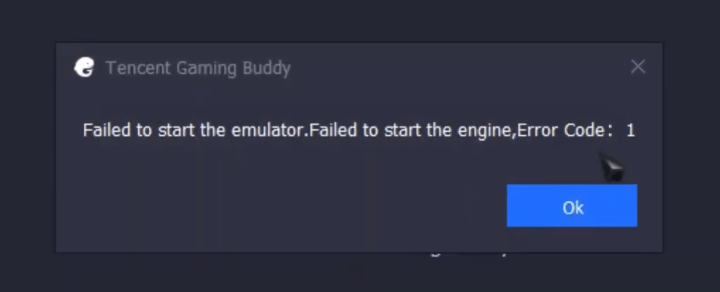
Gameloop Failed to Start the Engine | Failed to Start the Emulator
Method#1
Download and install Process Hacker on your computer.
Open Process Hacker.
In the Search Box, search for “aow”.
As you find aow_xxxx.exe, kill it or terminate the process.
Try running COD Mobile or PUBG Mobile or any other game in the Gameloop or TGB emulator now.
Method#2 – Manual
Open TGB on the computer and go to its Settings> Basic.
Now uncheck the “Run at startup” option.
Restart the computer now.
Now go to C:\program files and locate the folder “TxGameAssistant”.
Rename this folder to anything else, for example, TxGameAssitantX.
Restart the Tencent Gaming Buddy emulator now.
The emulator will show you some errors like Can’t start AOW engine or it will be stuck on the download at 1%.
Close the emulator and restart the computer now.
Now rename the TxGameAssistantX to TxGameAssistant again and re-launch TGB. That’s all.
Keys not working on Gameloop/Tencent Gaming Buddy | Keyboard Mapping not working | No controls
Open the settings of the game you are playing.
Click on Controls and then click on customize.
Now click on Reset and then Save.
Now open Tencent Gaming Buddy keymap Settings from the right side.
The KeyMapping and Gaming Resolution should be the same now.
Click on Reset and Save again.
Restart the TGB Emulator now.
Update your Graphics Card Driver
If you are getting this error, it simply means that you need to update the drivers. You can download the official driver downloader for your laptop or Desktop PC, or you can also download a program like Driver Booster. Look for all the outdated drivers and update them. After updating the drivers, restart your computer and launch the TGB emulator again. It should get rid of this error now.
COD Mobile or PUBG Mobile not working on Tencent Gaming Buddy | PUBG Mobile Alternative Emulators
In case the Tencent Gaming Buddy is not running PUBG Mobile for you, or you are not liking the look and feel of this game in the TGB, you can opt for the alternatives. There is a number of TGB Alternatives to play PUBG Mobile. You can either get the BlueStacks 4 or the Nox Player for this purpose. Here are the exact steps.
Open the emulator and then log in using your Google Account.
Now open the Play Store and find PUBG Mobile.
Install the game and launch it from the app drawer / all apps.
You can set up the keys and controls now.
Enjoy PUBG Mobile on another emulator now.
Banned from PUBG Mobile
The developers of PUBG Mobile have a very strict check on the players. If anyone caught cheating, deception, or using any malicious techniques, he/she may get banned immediately. If you don’t want to lose your valuable PUBG Mobile profile, make sure that you do not cross the boundaries set by the developers. A game is good as long as the Fairplay is being implemented. Follow the rules, test your mettle, and prove how good of a player you are. Once banned, there is no way to get your PUBG Mobile account back. Always be careful.
Final Words
That’s all. I hope you have fixed all of your Tencent Gaming Buddy Errors. If you have any problem that should be listed in this post, feel free to drop it in the comments section below. I will try my best to get back to you as soon as possible. Stay connected :).
Update 11/12/2019: The Tencent Gaming Buddy is now called Gameloop. The rebranding of TGB took place with the release of COD Mobile. This guide to play any Android game on TGB will work for Gameloop as well now.
Do you know that Tencent Gaming Buddy Android emulator is not limited to those few games its lists? Yes, you heard that right. You can play any Android game or run Android App on Tencent Gaming Buddy. Installing other Android games or apps on this emulator is a little bit tricky. We are here to share the entire method with you. In this guide, you will learn how you can play any Android Game on Tencent Gaming Buddy.
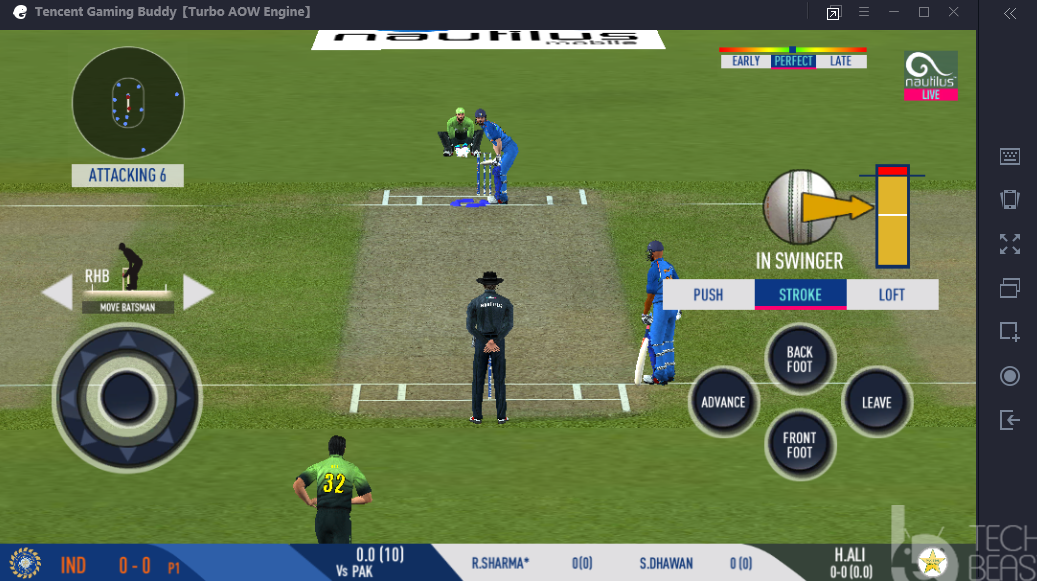
Playing Real Cricket 19 on Tencent Gaming Buddy
Gameloop [Former Tencent Gaming Buddy]
Android Emulators have served the purpose of running Android games and apps on computers for over a decade. We have seen options like the BlueStacks, Nox Player, KO Player, MEmu Player, Genymotion,and many others. There are games that users prefer playing on their computers rather than a smartphone. This is where these Android Emulators happen to be handy. Recently, something similar happened when PUBG Mobile came out. The mobile version of the game was liked more by the users than its desktop counterpart. PUBG Players opted for different Android emulators to play the most popular battle royale game. It was a wake-up call for Tencent, the PUBG Mobile developer. The company was quick to launch its own emulator named Tencent Gaming Buddy.
Tencent added support for almost all of its games in the Tencent Gaming Buddy. It also incorporated Google Installer to allow Google Play Games. The emulator gave users extended control over its engines. Users can select what number of CPU cores they want the emulator to use. They can also define the RAM they want to allow this emulator to occupy. The best part of the Tencent Gaming Buddy was that it could run on computers having a RAM as minimum as 512MB. If you have ever used a mainstream emulator like the BlueStacks or Nox, you must have seen that those emulators put the maximum load on your computer consuming all possible resources.
Tencent Gaming Buddy quickly became the go-to choice for the PUBG Mobile Players. The emulator was so good that gamers wanted to run other games and apps on the emulator too. Tencent Gaming Buddy users kept experimenting unless they found ways to install APKs of other games. They also managed to install the Google Play Store, which means they go access to over a Million applications through the Tencent Gaming Buddy.
Having discovered the methods to run any Android Game on Tencent Gaming Buddy, the gamers literally killed the need for any other emulator. If you have a low-spec computer which is unable to run a resource-hungry emulator, you can opt for Tencent Gaming Buddy.
It’s time to take a look at the steps to install any Android game on TGB Android Emulator. Follow the steps below to get it done without any further ado.
Guide on how to play any Android Game on Gameloop/Tencent Gaming Buddy
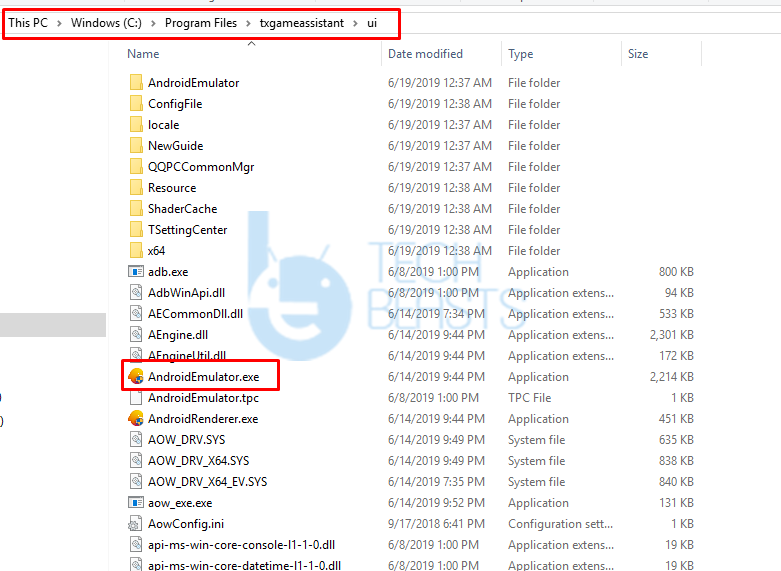
Now go to C:\program files\txgameassistant\ui > open AndoridEmulator.exe.
Once the emulator loads, press F9.
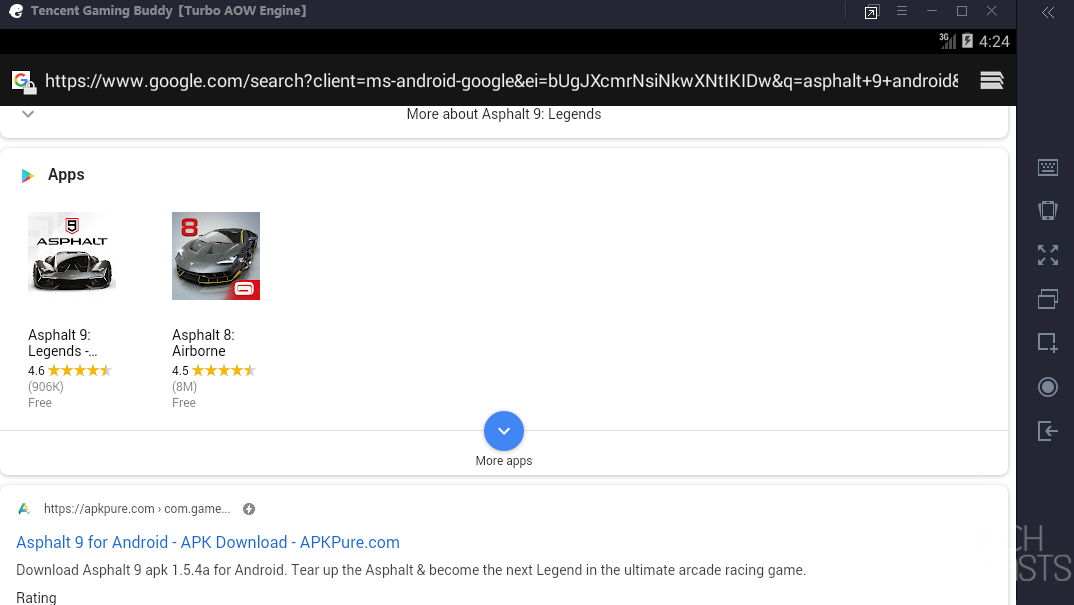
Now open Browser in the emulator.
Search for your favorite game or app now. For example, Asphalt 9 or Real Cricket 19.
As you find the Play Store link of the game, open it via Play Store.
You will now enter the Google Play Store.
Install any game or application you want now.
You can launch the games from the app drawer.
If the Play Store method is something you don’t like, you can download the APK of any game and install it using the ES File Explorer. This method is explained in the method to install APKs on the TGB emulator. To play the games, you can configure your computer’s mouse and keyboard. Tencent Gaming Buddy works best with the FPS and Battle Royale games. If you want to play games like Call of Duty Mobile for PC, or PUBG Mobile Lite for PC, or the Frostborn for PC, you may find TGB emulator the best tool to go with.
Final Words
That’s all. By now, you should be able to run any Android game of your choice on the computers. Tencent Gaming Buddy will put the least amount of stress on your computer’s hardware, which is why I personally recommend using this over the famous emulators. Tencent Gaming Buddy is specifically designed to run games only. It will give you the best possible experience on a bigger screen with better sound effects. Should you have any questions related to this emulator, feel free to ask them through the comments section below. I will try my best to get back to you as soon as possible.
Update 11/12/2019: The Tencent Gaming Buddy is now called Gameloop. The rebranding of TGB took place with the release of COD Mobile. This guide to install APK on TGB will work for Gameloop as well now.
Tencent Gaming Buddy was originally built to run the PUBG Mobile on PCs. The emulator was so good that users wanted to run all other Android apps and games on this emulator too. A method surfaced on the web which allowed the installation of all APKs on Tencent Gaming Buddy. This means that the Tencent Gaming Buddy is not limited to PUBG Mobile only. If you also want to install any APK on Tencent Gaming Buddy or Gameloop, you can follow the instructions given here.
Tencent Gaming Buddy [Gameloop Now]
PUBG Mobile is undoubtedly the #1 battle royale game. When the mobile version of this game was released, gamers found it much better than its desktop version. For this reason, all of them wanted to play the mobile version of PUBG Mobile on the PC. Most of the gamers turned their heads towards the BlueStacks and NoxPlayer Emulator, but Tencent didn’t really like that. The PUBG Mobile developers released their own Android emulator called Tencent Gaming Buddy. Where emulators like BlueStacks, NoxPlayer, KO Player are highly resource-hungry, Tencent built its emulator to be resource efficient. Tencent Gaming Buddy could run the PUBG Mobile on the laptops with RAM as low as 4GB too. The customization tailored for PUBG Mobile specifically made this the best choice.
The developers added support for a handful of other games in Tencent Gaming Buddy, but they didn’t officially allow the installation of APKs or any other apps in it. Users found the ways to install APKs on Tencent Gaming Buddy on their own and shared it on several forums. Tencent Gaming Buddy, because of being light, makes the Android-on-pc experience much better. Yes, it does have its limitations, it is not like a whole eco-system inside a window like the BlueStacks, but its good enough to run the apps on the go.
APK on Tencent Gaming Buddy or Gameloop
For those who don’t know, APK of an Android app is just like the Setup.exe of a Windows Software. If you have the APK of the game or app you want, you can install it manually on any Android device. In our case, we are going to be installing the APK on Tencent Gaming Buddy, which will basically install any Android App or Game on a Desktop PC or a Laptop.
The Gameloop/Tencent Gaming Buddy doesn’t have the Google Play Store. You can install the Play Store manually using the appropriate APK file. After installing the Play Store, you can download the apps from the Play Store directly. This, in my opinion, is the biggest advantage of being able to install APK files in the TGB.
Take a look at the steps below now.
Guide to install any APK on Tencent Gaming Buddy/Gameloop
Download and install Gameloop/Tencent Gaming Buddy on your computer.
Now go to the installation folder of TGB i.e. C:\Program Files\txgameassistant\ui
In the UI folder, you will find AndroidEmulator.exe. Open this file.
It will install itself over the TGB now. After this installation, close it.
Now open the AndroidEmulator.exe again.
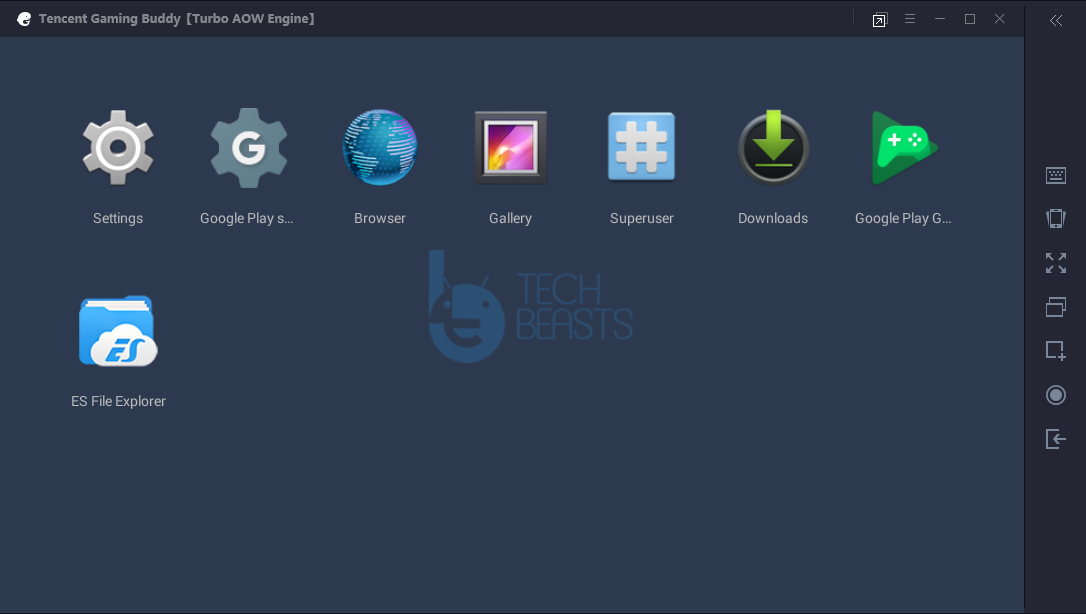
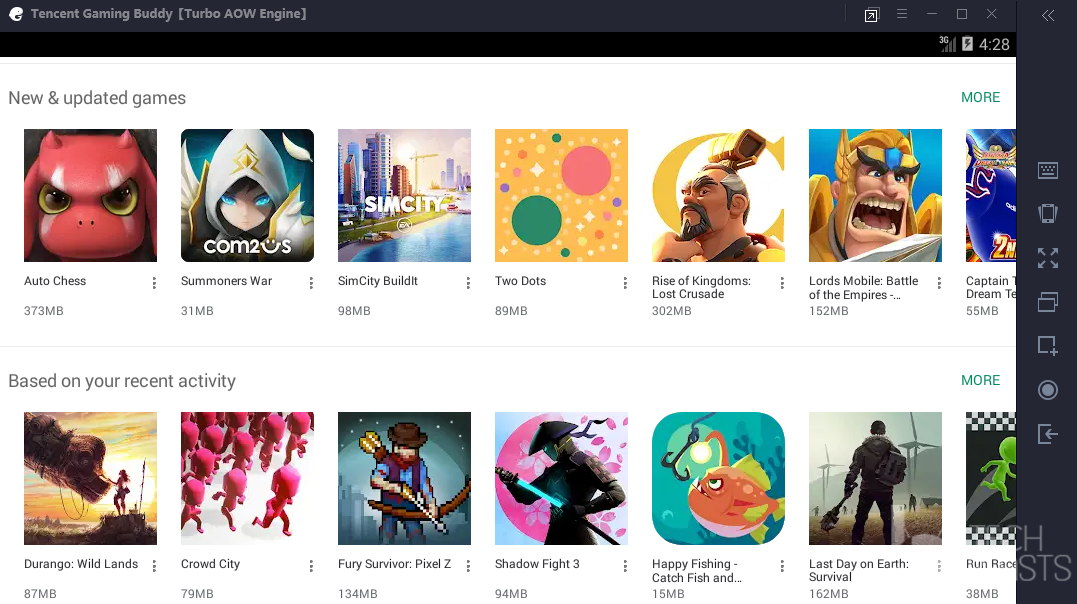
You will see an empty window now. Press F9 now.
You will see a list of a few apps now, open “Browser” from here.
In the Browser, find any APK i.e. ES File Explorer.
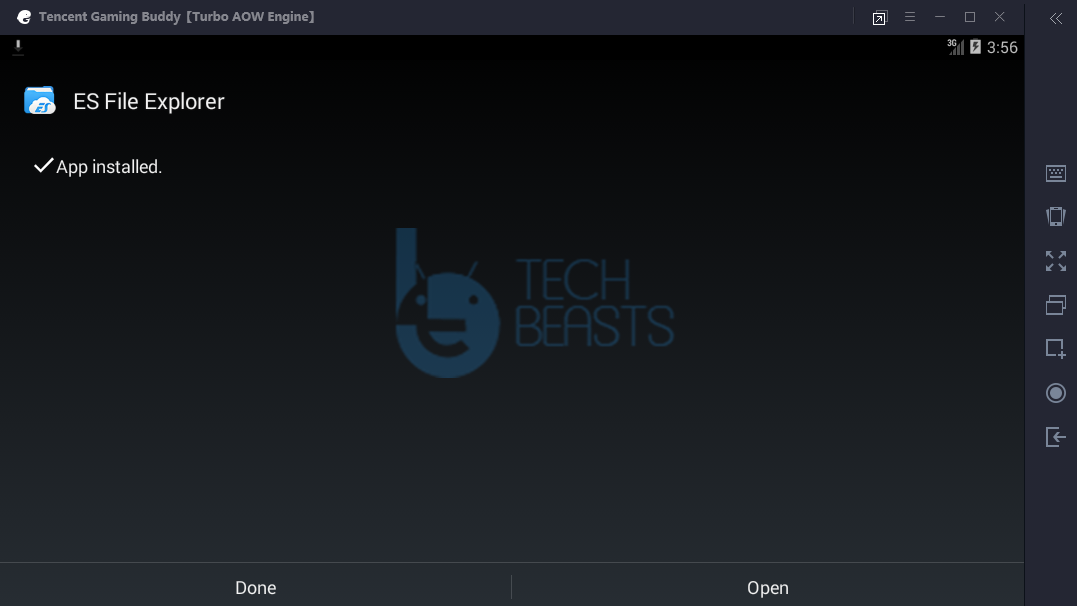
Download the APK and install it.
Now you can copy APKs from your computer to TGB via ES File Explorer. You can also keep downloading the APKs directly via Browser.
Copy APK, XAPK, and OBB Files to TGB
Download any APK, XAPK, and OBB Files to your computer.
Copy the file now.
Now open the drive where you installed the Tencent Gaming Buddy.
Go to Temp > TxGameDownload > MobileGamePCShared.
Paste your files now.
Open TGB Emulator now.
Open the ES File Explorer now.
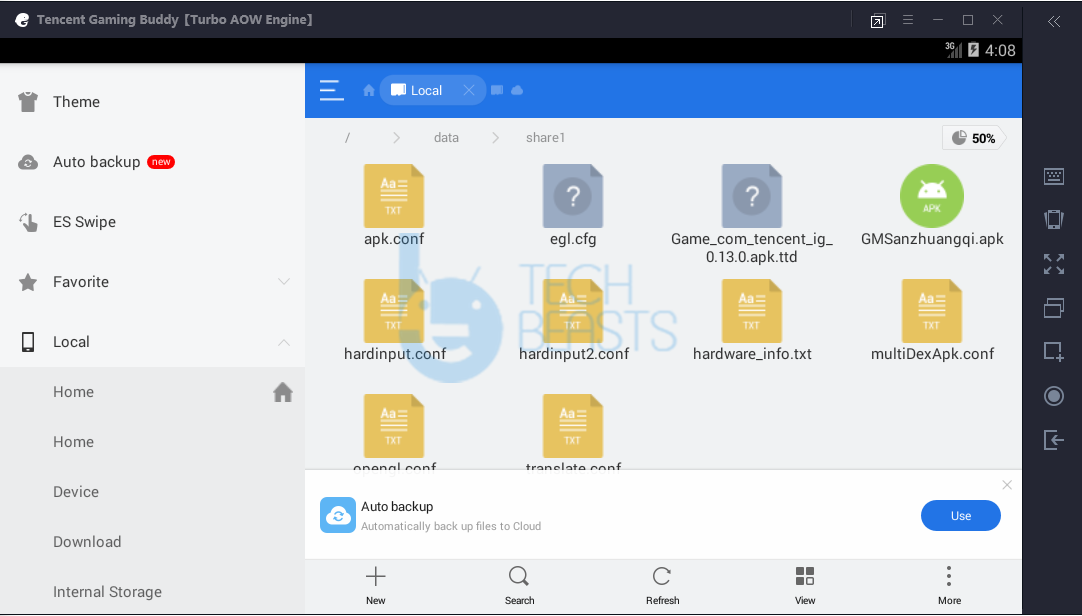
On the left side, click on Device > Data > Share1.
You will have all the copied files there.
Final Words
That’s all. You have learned how to install APK files and also how to copy files from Windows to Tencent Gaming Buddy. Remember that using any file manager like the ES File Explorer, you can move the files freely inside the Tencent Emulator. Having followed this tutorial, you should now be able to unleash the real potential of this nice emulator. If you have any queries or questions, feel free to reach out to us. I will try my best to get back to you as soon as possible.






























![How to install any APK on Gameloop [Tencent Gaming Buddy]](https://techbeasts.com/wp-content/uploads/2019/06/Screenshot_5-1.png "How to install any APK on Gameloop [Tencent Gaming Buddy]")