Home Blog Page 18

Download BlueStacks 4.2 for Windows 10 & Windows 8

0
Download BlueStacks 4.2 for Windows 10 & Windows 8

The newest version of BlueStacks is out now. The new BlueStacks 4.2 is available here for download. All the Windows 10 and Windows 8 users can download BlueStacks 4.2 from here.BlueStacks 4.1 for Windows 10 & Windows 8
Before you download the BlueStacks version 4.2, let me give you a brief overview of the most popular Android emulator.

Update May 2020

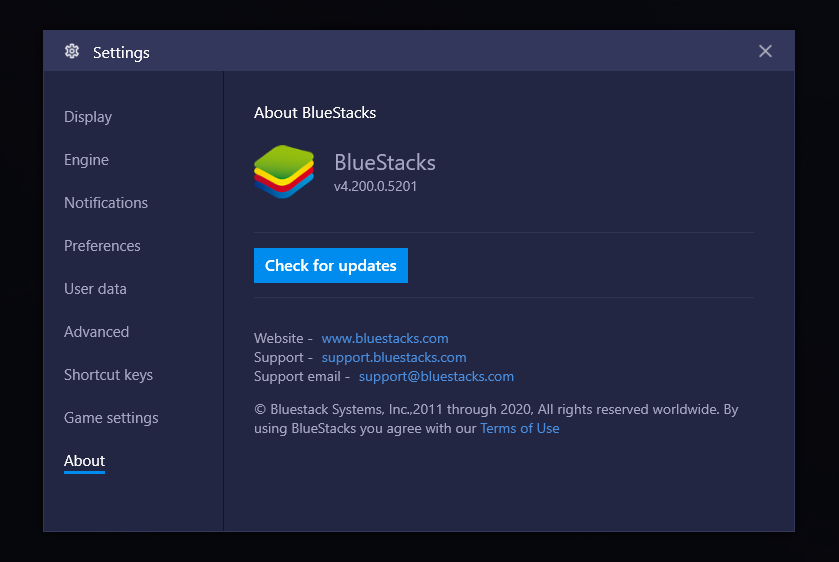
BlueStacks 4.2 is now out with a lot of performance enhancements and bug fixes. If you are still using the old BlueStacks version, you may update it right now. The new update is much better. The latest version is 4.200.0.5201.BlueStacks 4.2
BlueStacks 4.1 [Superceded by BlueStacks 4.2]

Until 2011, the only way to enjoy Android apps was through an Android phone. The entry of BlueStacks emulator changed this. BlueStacks helped users experience Android apps and games on their computers. The emulator runs like a virtual device inside your computer. It looks and works more like a virtual Android tablet on your PC. You can run pretty much every Android application or game that is there in the Google Play Store. BlueStacks lets you play the games on a bigger screen, enjoy the sound effects on your speakers, utilize the phone-only apps on the computer and many other things. Time-by-time, the BlueStacks Android emulator has been getting updates. At the time of writing this post, the latest version of BlueStacks is 4.1.130.10.1003.

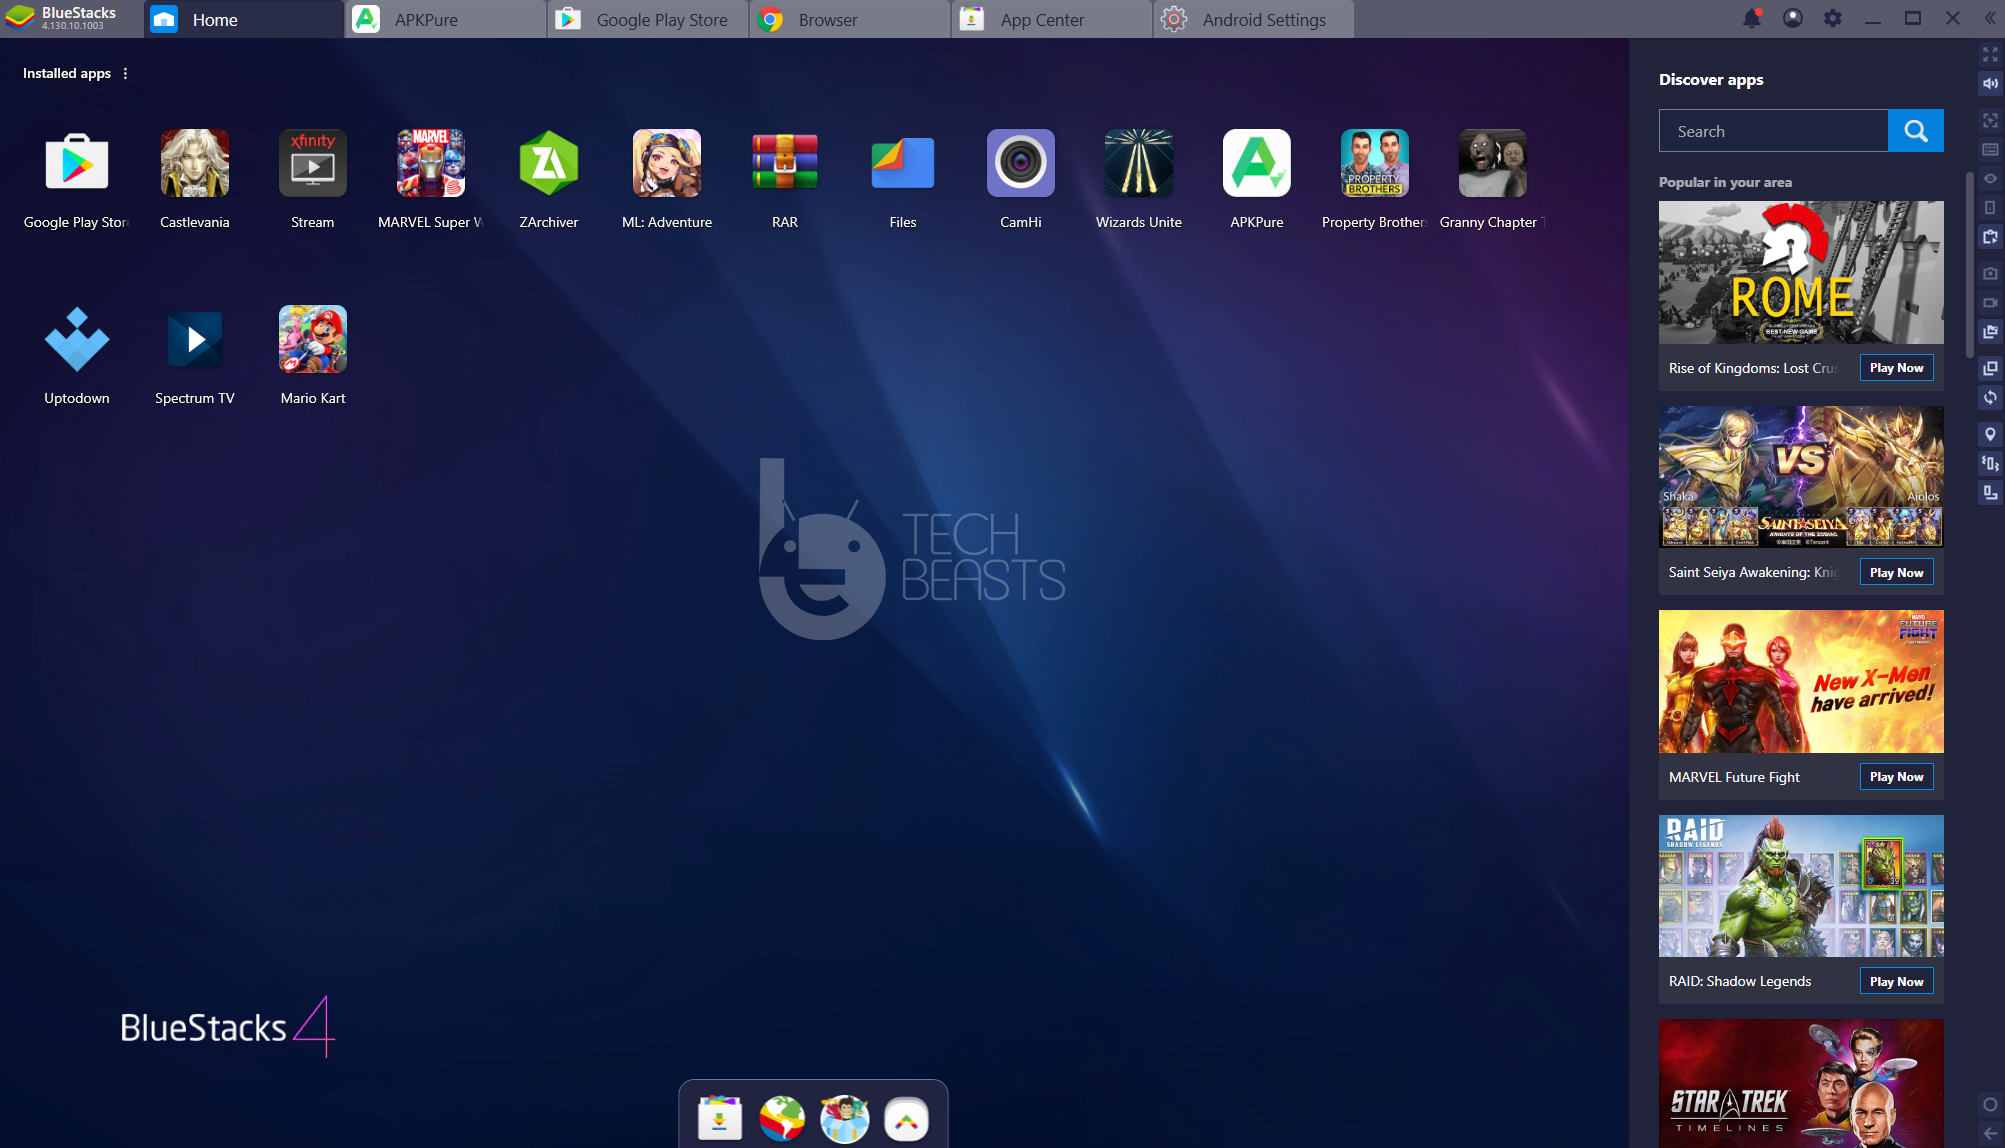
Over the past decade, the UI of BlueStacks has improved a lot. BlueStacks right now has the best possible UI for an Android emulator. With BlueStacks 4, the company improved a bunch of things in the new UI. Now the new version improves things further. At first, it adds a couple of new things in the UI. For example, it brings the Discover Apps menu on the right side of the home screen. It has an in-built screen recorder aka macro recorder. BlueStacks 4.1 also has an exclusive App Center where BlueStacks will give you the app recommendations on its own. Yes, the emulator still runs on the Android Nougat, but the latest version supports more applications than ever before.BlueStacks 4.1 for Windows 10 & Windows 8

BlueStacks 4.1 also focuses on performance stability. It’s designed and developed to put the least amount of load on the resources of your PC. Android emulators need a powerful computer generally, but the BlueStacks 4.1 will run on a mediocre PC as well. Of course, you do need to meet the minimum requirements of the emulator.

Also, check out: Download BitLife for PC and Laptop

My very own purpose for trying out the newest version of this emulator was to play the Mario Kart Tour on Windows 10. The previous BlueStacks 4 doesn’t support Mario Kart Tour. BlueStacks maker has specified this new version to be compatible with the new games like the Mario Kart Tour.

Mario Kart on Windows 10
Picture Courtesy: BlueStacks.com

So, if you want to play any game that’s not appearing in the Play Store on older BlueStacks, you should get your hands on the BlueStacks 4.1. Go ahead to download BlueStacks 4.1 for Windows 10 & Windows 8 now.

Download BlueStacks 4.2

  1. Open the Installer on your computer.
  2. Now install or update BlueStacks.
  3. Follow on-screen instructions to finish the installation.
  4. Once done, open the emulator and log in using your Google Account.
  5. You are all set to play the latest games now. That’s all.

Requirements:

Minimum system requirements

  • OS: Microsoft Windows 7 and above.
  • Processor:  Intel or AMD Processor.
  • RAM: Your PC must have at least 2GB of RAM.
  • HDD: 5GB Free Disk Space.

Recommended system requirements

  • OS: Microsoft Windows 10
  • Processor: Intel or AMD Multi-Core Processor with Single Thread
  • Graphics: Intel/Nvidia/ATI, Onboard or Discrete controller
  • RAM: 8GB or higher
  • HDD: SSD (or Fusion/Hybrid Drives)

That’s all. If you have any questions or queries, feel free to reach out to us. We will try our best to help you out.

FAQs

Can I trust BlueStacks?

BlueStacks is a completely safe and sound application. It gets updated regularly to fix bugs and issues. You can trust it as it comes from well-reputed developers.

Which version of BlueStacks is the best?

The latest version of BlueStacks is always the best. At the moment, its newest version of BlueStacks 4.200.05201 and it is the best.

What BlueStacks 4?

BlueStacks 4 comes with a major overhaul. It is the biggest update in the history of BlueStacks. It happens to be lighter, faster, and better than previous versions of BlueStacks.

What is the newest version of BlueStacks?

The newest version of BlueStacks is the 4.200.05201.

Is using BlueStacks illegal?

No. It is not illegal. BlueStacks is completely legit and it is legal to use it.

Will BlueStacks get you banned?

NO! BlueStacks is not doing anything the wrong way. It is 100% legit and it will not get you banned in any game.

Which version of BlueStacks is best for low-end PC?

The newest version of BlueStacks, BlueStacks 4.2 is the lightest and fastest for low-end PC.

Which version of BlueStacks is best for Windows 10?

For Windows 10, it is recommended to use the latest version i.e. BlueStacks 4.2.

How can I use WhatsApp on PC with BlueStacks?

To run WhatsApp on your PC with BlueStacks, take a look at this guide.

Make sure to check out: Download PUBG Mobile KR for PC and Laptop

Best Bitmoji Alternatives for Android and iPhone

0
Best Bitmoji Alternatives for Android and iPhone

Take a look at the best Bitmoji Alternatives for Android and iPhone. These are the best Bitmoji Alternative apps as of January 2020.

With all the options available, chatting is still the most dominating method of communication. It is physible, convenient and more expressive somehow. Emojis (formerly known as smiley faces) have been around since the days of Yahoo and Hotmail chat rooms. For past couple of years, Bitmoji has taken over the competition and more so since integration with Snapchat. In this post, we will go through the list of best Bitmoji Alternatives on the market. It covers aspects like the Keyboard option, the quality and how much of a variety it provides.bitmoji alternatives android iphone

Since the messaging is so deeply rooted in today’s society, people look for more ways to express themselves through this medium. Of course, it is not as direct as video calling or voice calling, but it has its own flavor. When using apps to create custom avatars (like Bitmoji) we add a bit of a comical touch into conversations. People are no longer limited to overused emojis available on every keyboard out there. In fact, personalized emojis make the conversations look and feel more personal.

Why look for Bitmoji Alternatives?

Before heading further, we must learn why is Bitmoji so popular? The plain reason is its integration with Snapchat. It provides little cartoon faces on the contacts list and you can send customized stickers to friends without using a dedicated keyboard. All of these seem pretty good but still, there are some issues.

While Bitmoji is pretty good, other apps like Bitmoji actually provide better quality and more variety. Not so long ago, Google showcased a machine learning-based system that could produce better emojis compared to the current market leader.

Another important reason for downloading similar apps to Bitmoji is availability. It is possible that the official app is not available in some regions of the world. It is either due to geo-restrictions or just government’s restrictions. Either way, if someone wants a cartoon/emoji version for themselves, they must get it!

The most common use of Bitmoji is through its dedicated keyboard. It is not activated by default though. The second dominant use is via Snapchat. Its deep integration with it makes the overall experience quite good. However, when using other apps like the Bitmoji keyboard, users can easily send those emojis in these chats too.

Mirror AI – Android & iOS (iPhone / iPad)

bitmoji alternatives mirror ai

From realistic avatars to having a dedicated keyboard, Mirror AI has it all. The Mirror Emoji Keyboard works well with apps like WhatsApp, Facebook, Messenger, etc. Moreover, it is super easy to set up. In order to create a new personal emoji in Mirror AI, just take a selfie and let the magic happen. Once processed, either use it as it is or perform some customizations. Once your personal avatar is set, use from a wide range of stickers and emojis to use in chats.

Another cool feature in Mirror AI is the option to create a friend’s avatar from the picture only. Do that and put both of yourselves inside the same emoji. How cool is that! Switch between regular typing keyboard and Mirror AI Keyboard from the notification menu. This process works fastest on Android OS though. iOS is a bit more restrictive in its settings still.

Also, check out: Download BitLife for PC and Laptop

The only downside to this app could be the lack of the option to download avatar stickers as images. This would be cool but still, it is not a deal-breaker for us. The purpose of this app is to send fun and personalized emoji avatars in chats, and it does that! To be honest, it is one of the best competitors of the Bitmoji Keyboard.

Download – Android | iOS

Kouji – AR Avatar Creator – Android | iOS (iPhone / iPad)

apps like bitmoji kouji

Kouji might just be the biggest competitor of the Bitmoji keyboard. The AR Emoji technology throws 2D stickers out of the water. Experience your personal avatars in 3D form and make them appear in real-world! To make it even more awesome, these emojis are not just limited to their appearance, users can actually do voice-overs and these avatars try to lip-sync it.

The personal emoji game is taken to a whole new level. Either record personal clips or record these with your friends. Save them on the phone or share it on social media. It is up to you. The intelligent character customization system has practically countless possibilities. Therefore, if someone spends enough time on it, they can make pretty much the perfect AR avatar of themselves.

The only downside to Kouji is probably that it requires more effort than its competitors. However, to be fair, it is not really a downside. Once set up, you can make awesome short clips using it. The best part is that these characters show up in the real-world with the help of AR technology.

Download – Android | iOS

Genies – Android & iOS (iPhone / iPad)

While most avatar/emoji apps focus on cartoonish outlook, Genies app is focused on creating 3D avatars. These look pretty realistic. Moreover, these virtual characters can actually mimic the emotions from real-life. For example, you want to send someone an emoji of yourself as angry, happy, crying or whatever, it perfectly captures that emotion.

One of the downsides to Genies’ app is that it forces people to invite their friends to join. Moreover, the customization process of these faces can be pretty cumbersome and long. Therefore, make sure you have a lot of time at hand before you start meddling with it.

Download – Android | iOS

Chudo – Android | iOS (iPhone / iPad)

apps like bitmoji chudo

Create real-time emojis with characters like Santa, Snowman, Reindeer, Giraffe, Avocado and many more. Chudo Messenger uses AI technology to fix special characters’ faces on users in real-time. This is a fun idea when you don’t exactly want a lookalike Bitmoji but a more fun and fictional character. However, the AI will make the character customizations to make these faces resemble your personality.

Do you wear glasses? Scan your face in the Chudo app with glasses on. This way, each of these characters will don a pair of glasses similar in shape to the ones you use. These customizable and fun looking characters are not limited to images only. Make videos, record sounds and these AI masks will record lip movement too. All the avatars are created in real-time. These are not regular stickers. But record fun clips using different skins and share with friends.

Download – Android | iOS

Moji Edit – iOS (iPhone / iPad)

bitmoji alternatives moji edit

While most avatar creating apps focus on stickers and life-like characters, Moji Edit makes more usable and mini emojis of your personal avatar. Unlike Bitmoji, you get emojis with various moods and expressions (over 1500 attributes). Use these emojis the same way as someone would use the smiling and laughter emoji on WhatsApp. The cool thing is that its dedicated keyboard makes the whole process a lot easier and convenient.

The biggest downside of Moji Edit is that it is only available for iOS (iPhone and iPad) right now. We hope that its Android counterpart gets released pretty soon. Apart from this, users get limitless options for customizing their avatars, creating profile picture-worthy images and more. Use this in more than one way possible!

Download – iOS

Emojily – Android | iOS (iPhone / iPad)

bitmoji alternatives emojily

Not everyone wants a personalized avatar and use it as their emoji. Emojily is a brilliant emoji keyboard like Bitmoji that offers non-lookalike creations and customization of characters. There are thousands of accessories and options to choose from. Customize your personal emoji character with different kinds of hats, face types, unique characters and creatures, accessories, colors and more.

Once a character is one, generate countless emojis in the keyboard and thousand of attributes. Want to send a sad or happy emoji? Why not send the ones from the stack of self-generated ones. This is better than using the regular ones but it is not as personal as using AI and machine learning to create a replica of your face.

Download – Android | iOS

Try out other apps like Bitmoji!

We can all agree that Bitmoji has penetrated the social media and especially Snapchat, thanks to its massive integration. However, it does not mean that one doesn’t give a go to other apps like Bitmoji Keyboard. We have created a list of various apps above. These range from regular 2D avatars to 3D avatars to AR emoting characters to non-lookalike-yet-self-generated emojis. Make sure you give these options a go. Since all of these apps offer something unique and new, it would be a great way to explore new ways of expressing yourself in chats.

How to install Good Lock 2020 on any Samsung Galaxy Android 10

3
How to install Good Lock 2020 on any Samsung Galaxy Android 10

Take a look at this guide to install Good Lock 2020 on any Samsung Galaxy Android 10 phone. You can download Samsung Good Lock 2020 on all Galaxy phones regardless of your region.

install Good Lock 2020 on any Samsung Galaxy
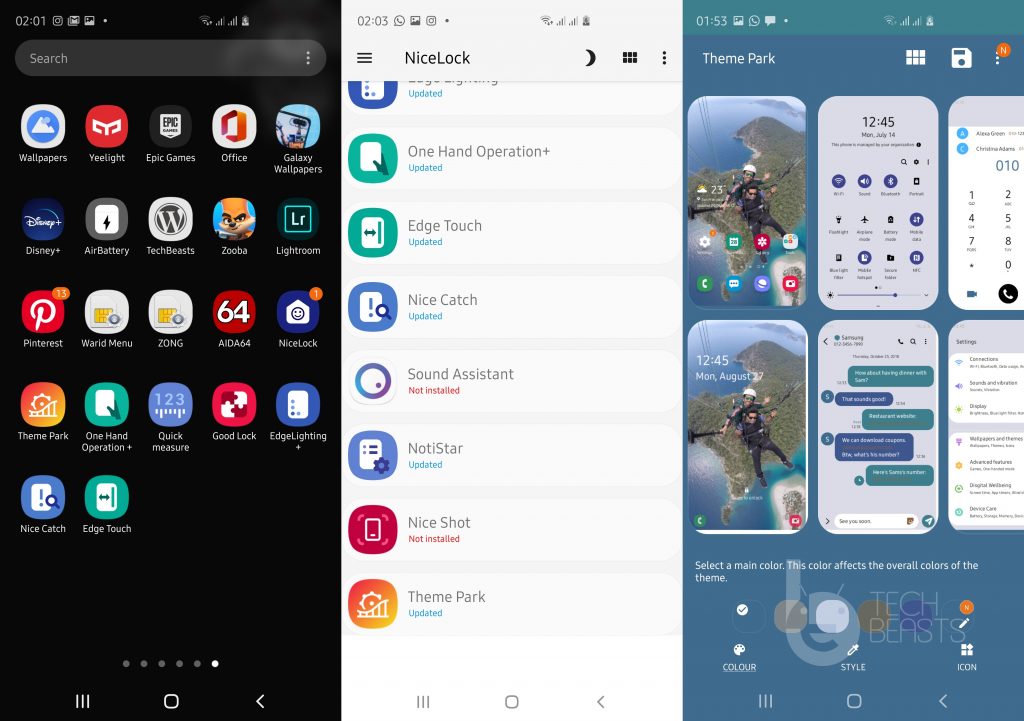
The app with its modules.

Before you install the Good Lock 2020 app, let me give you its brief overview.

Good Lock 2020

Good Lock is Samsung’s UI customization app. Samsung first launched this app back in 2016. Since then, Samsung has been refreshing this app every year with new UI features. The purpose of this app is to test the features that the company wants to introduce in future versions of its UI. At the moment, Samsung’s latest UI is the One UI 2. Some of the One UI 2 features were a part of the Good Lock 2019 application. Samsung closely listens to the feedback provided by the users and introduces the most wanted features in its upcoming UI.

The purpose of Good Lock 2020 will be to find out the best features that the company can introduce in its future UI updates. These features will likely be a part of Samsung’s One UI 3 or whatever UI it launches with the Android 11 update.

Now the Good Lock app itself is like a control center. It’s a dashboard that lists all the plugins. You can control each plugin after its installation through the Good Lock app.

Some of the most popular plugins/addons of the Good Lock app include the Nice Shot, QuickStar, Lock Star, Task Changer, MultiStar, EdgeLighting, and Sound Assistant. With the new Good Lock 2020, Samsung has introduced a new module named Theme Park. The purpose of Theme Park is to give the users full control over the theme modification of the phone.

To learn everything about the Good Lock 2020 and also see its Changelog, check this out. 

Good Lock 2020 Installation Problem

Good Lock 2020 is not easy to install and that is exactly why you need this guide. The problem with Good Lock is that it’s available in 5 countries only out of which 2 countries are the USA and Canada. If you want to install the Good Lock app outside those 5 countries, you will have to opt for a manual installation method which is what you are about to see here.

install Good Lock 2020 on any Samsung Galaxy
Good Lock app with error.

If you try to look for the Good Lock 2020 app in the Galaxy Store, you will find nothing. Even if you try to open it via its direct link, you will get the error about the app not being available in your region. Now that you are on this page, you have probably made your mind to install it manually, so let’s take a look at the steps without any further ado.

Nicelock – Good Lock’s alternative

So basically, we will be installing another application named Nice Lock. It’s a replacement for the Good Lock app built by Blue Horizon Apps. Nice Lock is as good as the Good Lock app. With the Nice Lock, you will not really be able to feel the difference. Above all, it’s a completely safe and sound application to use and it’s already got over 100K downloads. 

The day the Good Lock 2020 app came out, NiceLock was updated at the same time to work with the Android 10 powered devices. Once you install the Nice Lock 2020 app, we can begin installing the Good Lock 2020 plugins/add-ons manually.

Install Good Lock 2020 [NiceLock]

  1. On your Samsung Galaxy phone, open the Play Store.
  2. Look for the NiceLock app in the store now.
  3. As you find the application, install it.
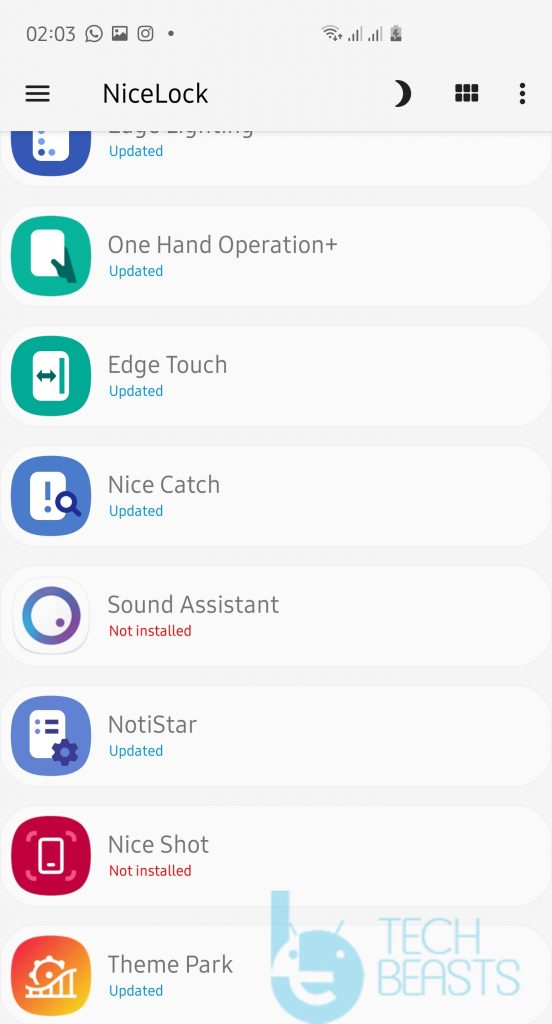
  4. After installation, open the app, you will find a list of modules to be installed.
install Good Lock 2020 on any Samsung Galaxy
NiceLock running as good as Good Lock.

Alternatively, you can download the NiceLock 2020 APK and install it manually. This is for the users who cannot find the NiceLock app in the Play Store.

Download Good Lock 2020 Modules: Theme Park, NotiStar, Nice Shot, Task Changer & More

Install Samsung Good Lock 2020 Modules/Addons/Plugins

  1. Copy the downloaded module to your phone’s internal storage.
  2. Now open the File Manager and go to the location where you copied the modules.
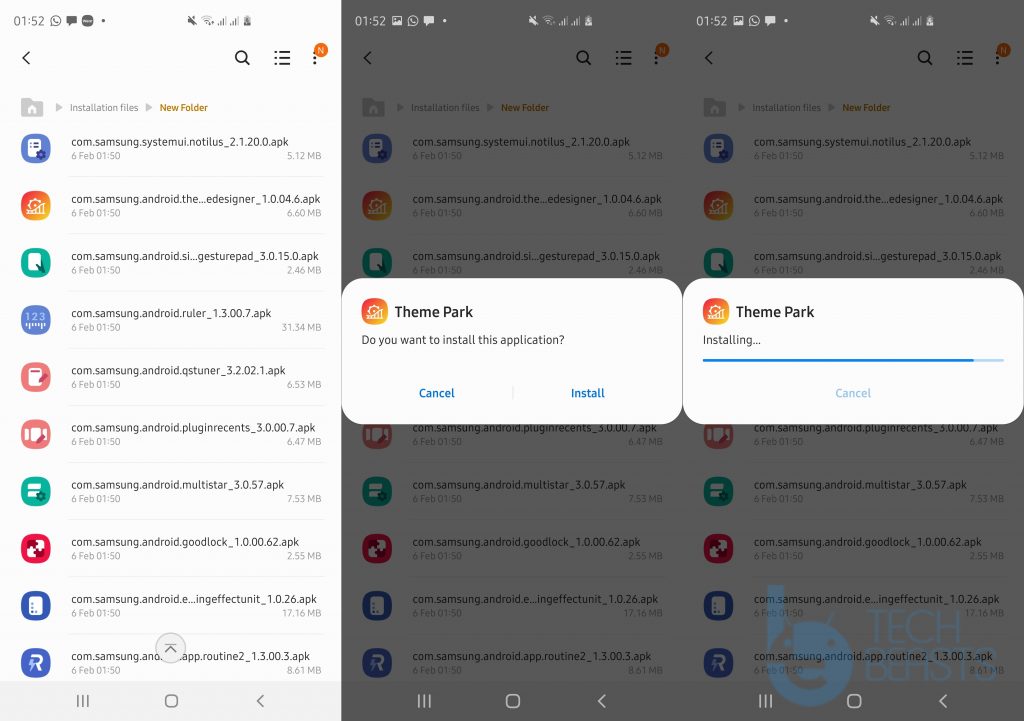
  3. Install the modules you want, just like a normal APK file.
  4. Now open the NiceLock application from the app drawer.
  5. Open the module that you just installed and set it up. That’s all.
install Good Lock 2020 on any Samsung Galaxy
installing Good Lock apps.

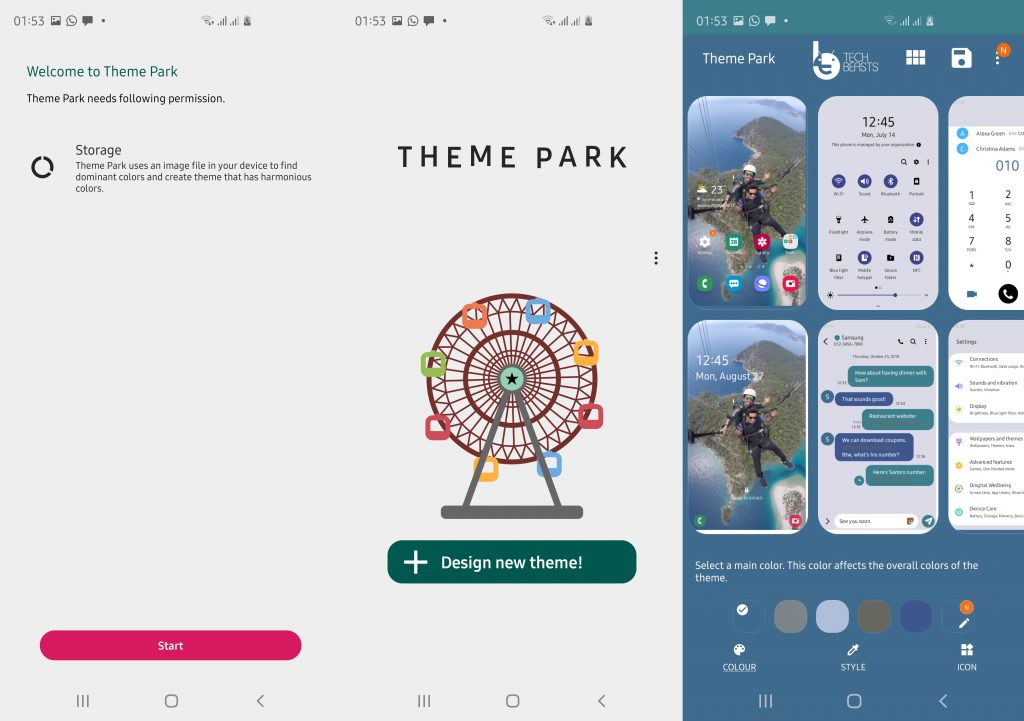
On my Galaxy S10 Plus, I installed some of the available Good Lock 2020 modules. You can take a look at the Theme Park app first.

install Good Lock 2020 on any Samsung Galaxy
The new Samsung Theme Park.

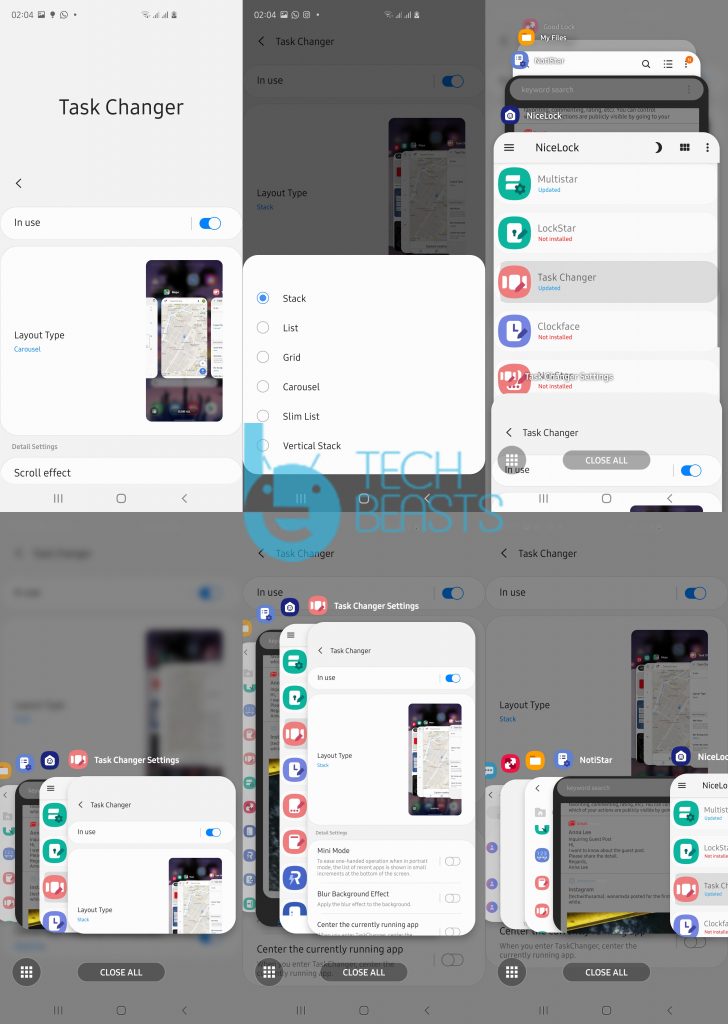
Also, I installed Task Changer. Here is how the Task Changer works.

install Good Lock 2020 on any Samsung Galaxy
Task Changer with a few samples.

Conclusion

Depending on your personal preference, you can install/uninstall the Good Lock 2020 modules. Some of the modules are absolutely worth it. For example, you must give the Theme Park, NiceShot, Task Changer, and Sound Assistant a try. If you have any questions related to the Good Lock app or any of its plugins, feel free to drop them in the comment section down below. I will try my best to get back to you as soon as possible.

Download BitLife for PC and Laptop
0
Download BitLife for PC and Laptop
This guide is about installing BitLife Life Simulator for PC. Users can download BitLife for PC on their Desktop PC and Laptop now. Before you get your hands on BitLife Life Simulator for PC, let us learn more about this game.

If you are bored with your real life, it’s time to play BitLife. This new game has attracted thousands of gamers within a very short time span. BitLife Life Simulator is about living an imaginary life. Players are assigned a character who’s life starts as an infant. Players have to raise this character, make the decisions for its life, and take it as far as they can.

BitLife for PC
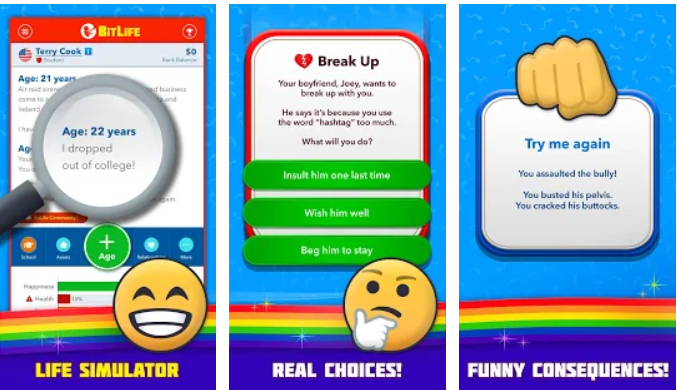
BitLife Images

What is BitLife Life Simulator?

The moment this game starts off, players are presented with a “New Life” button on the screen. Pressing this button takes the players to a timeline. This timeline displays all the updates regarding your character. The timeline starts with the name, gender, and country of your character. Players can also start a custom life.

BitLife for PC
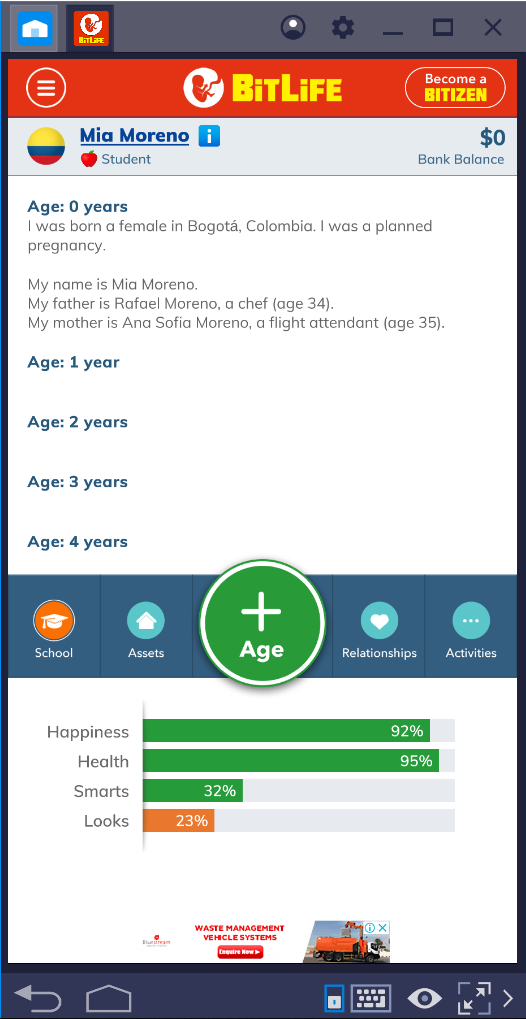
Running Bitlife for PC via BlueStacks 4.1

In the custom life, they will be able to set the basic details of their character. Anyways, once you have selected the character, you go ahead and press the “+” button. This plus button increases the age of your character and that’s when the fun begins.

Education, Nurturing, and more

First of all, your character goes to the primary school. After basic education, it goes to the secondary school. During this time, your character will form relationships. It will be doing a lot of activities that will be controlled by you. All this will be happening in a sequence as you press the plus button.

BitLife for PC
BitLife Life Simulator for PC via BlueStacks

Players will train their character to drive. They will earn a driving license so that they can roam around whenever they want. When the character is old enough, you will be asked to chose the university and field of study.

The admission application will be sent to the university. It totally depends on the past record of the character whether he/she will get the admission or not. If the university accepts the application, you can drive your character towards a great career.

BitLife for PC
Another image of Bitlife for PC

Try not to die…

The menu in this game gives the players a complete control over their character. For example, the players can decide when to see a doctor, when to play, when to watch TV, or when to travel.

During this journey, your character can catch some diseases too. If your character is exposed to a harmful disease, it can die as well. If your character dies, your game will come to an end.

BitLife for PC
Image – Bitlife for PC

The goal in this game is to come up with the best possible decision making. The longer you live, the higher your score will be. Do you have what it takes to live a long life? Play BitLife Life Simulator and figure it out right now.

Steps to Download BitLife Life for PC

Originally, this game is built for Android smartphones. Since its a very good game to kill time, you should download it on your computer too. The Android version can be installed on computers via an Android emulator. Follow the steps coming up next to download BitLife Life Simulator for PC.

Here is how you can play BitLife for PC.

Install BlueStacks 4 or Nox App Player on your computer.

First of all, download BlueStacks 4 if you are running Windows. If you are running Mac, download and install Nox App Player. Open the emulator after installation.

Add your Google Account and Open Play Store.

As you open the emulator, it will ask you to set up your Google Account. You can add your existing account or create a new account. Once done, open the Play Store in the emulator.

Install BitLife Life Simulator.

In the Play Store, search for BitLife Life Simulator. As you find the game, install it. It will now appear under the Home Screen or under the App Drawer of your emulator.

Open BitLife and play it!

Now open BitLife Life Simulator on your computer. Click on “NewLife” in order to start playing this game. Have fun!

Conclusion

That’s all with the installation of Bitlife for PC. You should be able to enjoy this game on a bigger screen now. BitLife for PC should be running smoothly on all Windows 7,8,10, and Mac-powered computers. If you have any questions regarding this game or the emulators, feel free to ask them below.

YouTube Vanced for PC – Download on Windows and Mac

YouTube Vanced for PC – Download on Windows and Mac

Looking for a method to download YouTube Vanced for PC? You will find it here. You can install YouTube Vanced on a computer running Windows or Mac. This step-by-step guide uses BlueStacks and Nox Player to run YouTube Vanced for PC.

YouTube Vanced for PC

YouTube Vanced is the most popular modified version of YouTube. This version of YouTube can play YouTube in the background. If you just want to listen to songs on YouTube, the YouTube Vanced may be the most appropriate solution. In this guide, I will show you the steps to download YouTube Vanced for PC. Before you install YouTube Vanced for PC, let’s learn a little more about this application.

YouTube Vanced

As its name suggests, this is an advanced YouTube app. The official YouTube application does not allow background play. When you minimize the app, the video stops playing too. YouTube has millions of songs. When you just want to listen to songs without wasting data, you do not prefer watching the video. Only listening to audio is not possible on the official YouTube application. YouTube does have a picture-in-picture mode, but even that mode is limited to a few countries only.

With the help of YouTube Vanced, the video will still keep playing in the background, but it will play in the lowest possible resolution. On the front, you can keep listening to the audio and this will save your internet data.

The UI of YouTube Vanced is exactly as same as the YouTube app. It offers the dark mode as well. You can find your playlists, library, and history options in it. If you log in using your main account, you will have all of your data in the YouTube Vanced too.

Head towards the steps below to get the YouTube Vanced on a Desktop PC or Laptop now.

YouTube Vanced for PC

  1. Windows users can use the BlueStacks 4 and Mac users can use the Nox Player for this purpose. Pick your desired emulator from here.
  2. Install the emulator and open it on your computer. Log into the emulator using your Google Account.
  3. Now download the YouTube Vanced APK.
  4. Open the APK on your computer. It will be automatically installed via emulator.
  5. Open BlueStacks or Nox Player now.
  6. Launch the YouTube Vanced in it now. That’s all. Enjoy!
YouTube Vanced
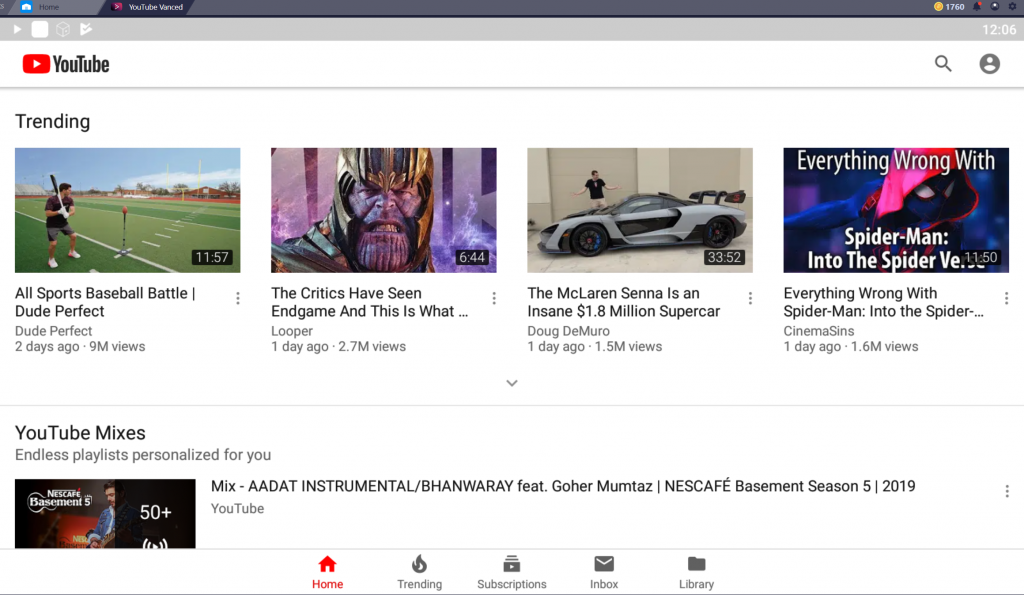
YouTube Vanced in BlueStacks 4 – Image@UsamaM

More: Best Modified YouTube Apps for Android – [Audio & Background Playback]

Download PUBG Mobile Lite for PC and Laptop in 2020

0
Download PUBG Mobile Lite for PC and Laptop in 2020

PUGB Mobile Lite has been released today. The game is for the devices that couldn’t handle the original PUBG Mobile. There is no difference between the PUBG Mobile Lite and the PUBG Mobile. The Lite version is just optimized to run on devices with less powerful resources. PUBG Mobile Lite can also run on the computers that have a lite Android emulator. So, if you have been willing to play PUBG Mobile on your computer but you couldn’t run it because of its hardware requirements, you can run it now with the help of its Lite version. This guide is about downloading and installing PUBG Mobile Lite for PC. Before we go through the steps, let’s shed some light on what PUBG Mobile is all about.PUBG Mobile Lite for PC

PUBG Mobile is a battle royale game. In PUBG Mobile, over 40 players are sent off from a plane. These players have to land on an area which is of 2 x 2 KM. After players have landed safely, they have to start looking for weapons. These weapons will be used for their protection as they have landed in a totally unknown place. All the 40 players are scattered through this area of 2 x 2 KM. Now they have to go after other players and take them down one by one. During this process, players have to find safe places where they can hide when the enemies come after them. There are vacant houses that the players can break into. These houses will have loads of weaponry and other useful items. Players can befriend other players in order to form a team. Having an alliance with other players will make you one powerful participant in the game. PUBG Mobile comes with epic graphics. The game is popular for all the right reasons.

PUBG Mobile Lite for PC in 2020

So far, PUBG Mobile ran on high-end devices pretty well. It’s time to install PUBG Mobile Lite on a device that couldn’t run this game earlier. You can download, install and play PUBG Mobile Lite on a PC powered by Windows or Mac. In order to do this, you will need BlueStacks or NoxPlayer. Follow the easy and simple steps given below to get PUBG Mobile Lite for PC without any further ado.

PUBG Mobile Lite for PC – How to install on Windows

  1. Download, install and setup BlueStacks N on your computer. Mac users can download and install BlueStacks instead.
  2. Now open BlueStacks 3 and then open My Apps tab.
  3. Go to System Apps and open Google Play Store.
  4. Now in the Play Store, search for PUBG Mobile Lite for PC.
  5. As soon as you find the game, install and launch it from My Apps. Follow on-screen instructions to play it using your Mouse and Keyboard now.

PUBG Mobile Lite for PC – How to install on Mac

  1. Download and setup BlueStacks on your computer.
  2. Open BlueStacks now and launch Google Play Store in it.
  3. In the Play Store, search for PUBG Mobile Lite for PC.
  4. Install the game and follow on-screen instructions to play PUBG Mobile Lite for PC using Mouse and Keyboard.

That’s all for now. Got any questions? Feel free to ask them in the comments box below. Have a good day!

Download PUBG Mobile for PC and Laptop in 2020

Download PUBG Mobile for PC and Laptop in 2020

This is the step-by-step to download PUBG Mobile for PC and Laptop. You can play PUBG Mobile on a computer powered by Windows or macOS.

The most awaited battle royale game is nearing its full launch. We are talking about PUBG Mobile, which is the mobile version of PLAYERUNKNONWN’S BATTLEGROUNDS. A few months ago, the rumors about PUBG making its way for smartphones surfaced. The rumors turned into reality soon after Tencent announced its plans for bringing the most famous battle royale game to the Android and iOS platforms.PUBG Mobile for PC

PUBG Mobile – Overview

PUBG Mobile is still in its early stages, but the game is now available in some countries which means PUBG fans can grab it now. The game is in its soft-launch phase at the moment. It will be rolling out to all the regions in a matter of a few days. If you are wondering why PUBG Mobile is such a hot game, then let’s look into the answer.

PLAYERUNKNOWN’S BATTLEGROUNDS is about a battle which is taking place on remote Island, which has been cut off from the world. There are about 100 different players who have landed on this Island with the help of a parachute. These players were either thrown off from the planes or they jumped willingly. Now that they have hit the ground, the quest for their survival starts.PUBG Mobile for PC

On the Island, everyone wants to ensure that only they become the last person to survive. They will start fighting with each other which will lead them to killings on the Island. All the players will start looking for weapons that will be used for their defense or to let them kill others. No one’s your buddy here. The moment someone spots you, you will become a goner. To get rid of the fear of someone spotting you easily, you must find a place to hide. The time’s running out. You must find a place to hide before all the hide-spots come to an end.

Since you are playing the role of a human being in the game, you are definitely going to need food and other basic necessities to survive. There are obviously no shops or markets around. You must find the items that you can use to craft items or the items that you can use to cook a meal. There are vehicles that you can pull out to boost up your gameplay. You can break into all the buildings in this game. Check out all the boxes lying around for the collectibles. You are completely on your own here. Take the responsibility for your survival and prove that you are the best person in the entire area of 8×8 KM.PUBG Mobile for PC

Players can also form teams in this game to fight with a team of opponents. PUBG Mobile is a huge game. This game is capable of keeping gamers engaged for hours. Another reason for this game to attract a lot of attention and love is the way it’s crafted. Tencent has done a tremendous job on the graphics of this game. This game looks gorgeous. The gameplay is lucrative. And now that we have the authentic PUBG, it’s time to get rid of all those low-quality knock-offs as well.

PUBG’s desktop version is quite big. It’s going to take a lot of time for you to download and install the desktop version. However, if you want to save your time, you can download the PUBG Mobile version on your computer. Yes, you heard it right. You can download and install the PUBG Mobile on your computers powered by Windows or Mac OS.PUBG Mobile for PC

PLAYER UNKNOWN’S BATTLEGROUNDS for PC can be easily downloaded using an Android App Player. You can play PUBG Mobile for PC on a desktop PC or Laptop. PUBG Mobile for PC can be installed with the help of BlueStacks 3 on Windows and NoxPlayer will work on both Windows and Mac. Have a look at the steps given below to get this game now.

Download PLAYERUNKNOWN’S BATTLEGROUNDS MOBILE for PC on Windows and Mac [Desktop PC and Laptop] in 2020

  1. Download and install BlueStacks 4.1 on your computer.
  2. Open BlueStacks, sign in using your old or new Google Account.
  3. Now open the Play Store in the BlueStacks and look for PUBG Mobile.
  4. As you find PUBG Mobile, install it.
  5. Let the game install and open it once the installation ends.
  6. Go through the game setup and play it. That’s it!

You can download the Korean, Chinese, Vietnamese, and the Lite version of PUBG Mobile in a similar manner. This guide, as of December 2019 and January 2020 is fully working. If you are experiencing any problems while trying to use the emulator or installing the PUBG Mobile on the computer, feel free to use the comment box below. I will try my best to get back to you as soon as possible.

More guides:

Forza Street for PC FREE DOWNLOAD

Forza Street for PC FREE DOWNLOAD

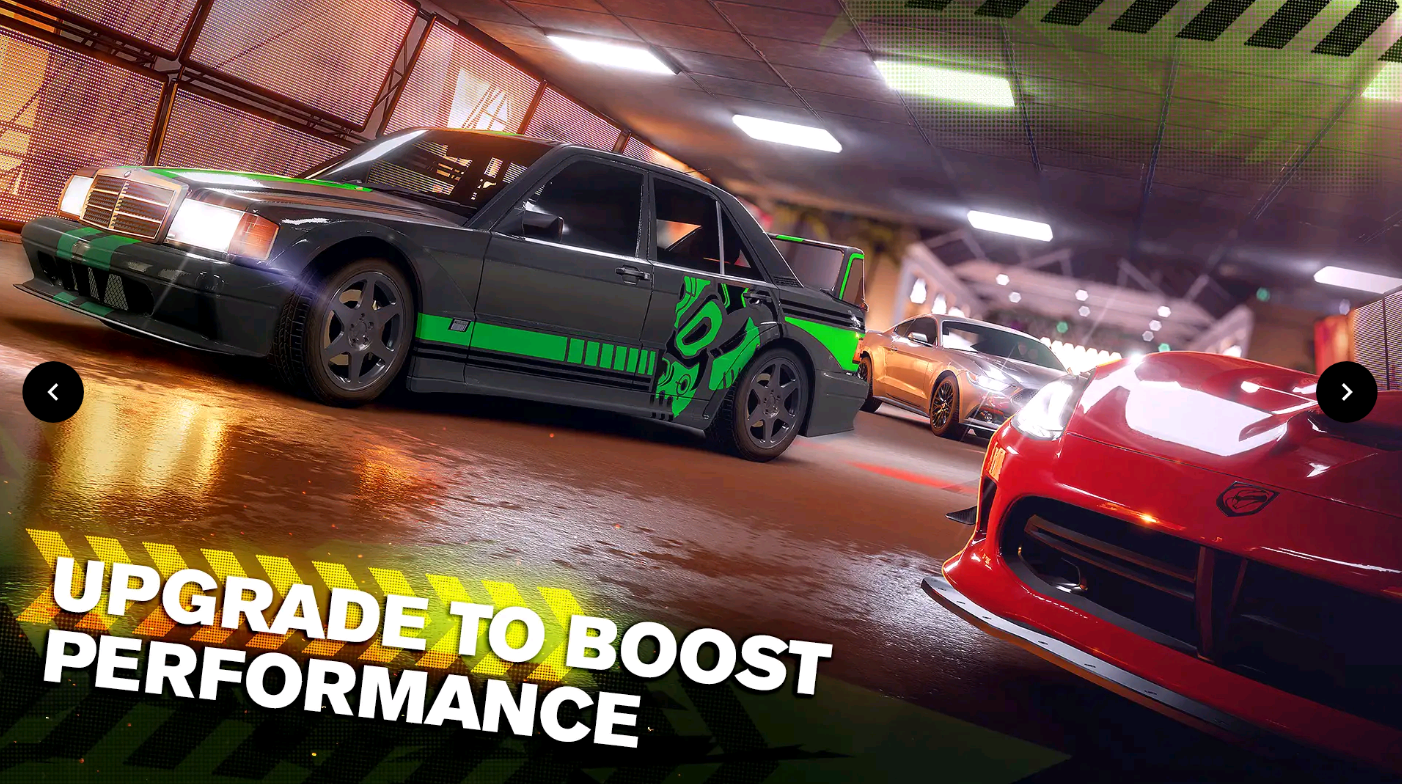
Forza Street, Microsoft’s free racing game is out for Android. The same Forza Street can be played on a PC too. In this guide, you will take a look at the steps to download Forza Street for PC. You can run Forza Street for PC on Windows 10 and macOS.

Forza Street – The FREE RACING GAME

This is undoubtedly the most popular and top-notch racing game. Forza Street is famous for many reasons. The game has high-quality graphics, superb gameplay in an open world, a never-ending list of realistic cars, and everything else that makes a game worth it. Forza has a handful of variants. At this time, the mainstream version of Forza Horizon 4. This one is a premium version and it’s only available for PC. Forza Street is a free version that is officially available for Windows and now it’s out for Android too.forza street for pc

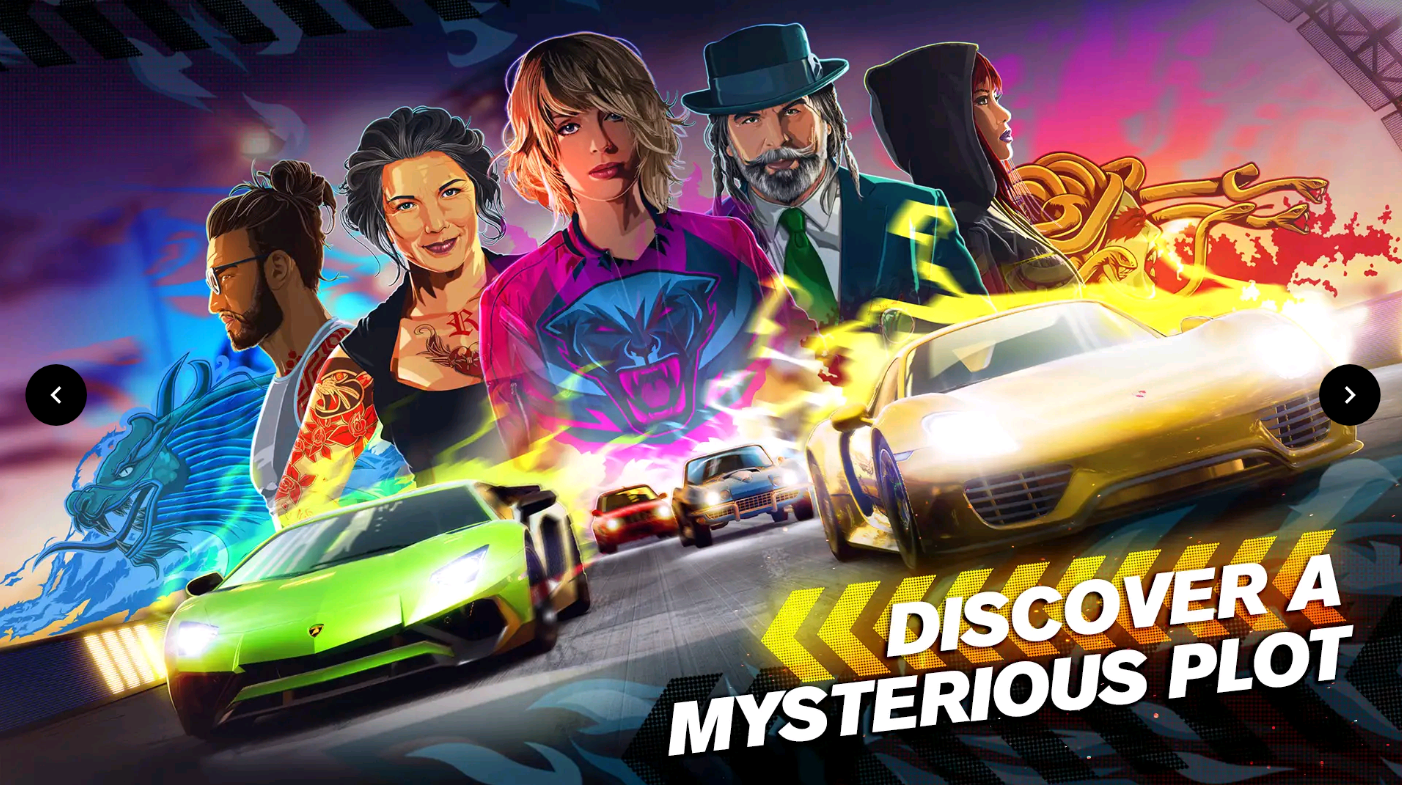
Forza Street puts you right in the middle of the ultimate racing scene. Drivers have to compete with each other through an open world that follows no rules. The game starts off by giving players a choice to pick up an event. This a story-driven game. Each race will have an interesting story behind it. Like the Forza Horizon, the locations in Forza Street are also realistic. You will drive through the hills, forests, you will enjoy offroading and whatnot.forza street for pc

Available rides include Classic, Retro, and modern. Initially, players are given the Ford Mustang GT 20165. 1991 BMW M3, 1959 Nissan Fairlady Z 432 is also available. Color choices vary car-to-car. After selecting your car, you will get to know about the racing location. The first race takes place at Miami South Beach.

The game is going to be really easy at the start. You will win most of the races, but as you level up, it’s going to get difficult. The controls matter the most in this game. You have to be really accurate with the accelerator. There come the Yellow & Red patches in the game. Players have to release the accelerator while entering the Yellow patch and press the accelerator while leaving through the Red Patch. The timing of releasing Gas is also the crucial most part of the game.

Forza Street on PC

Forza Street for Android is as good as the PC version, if not better. You can run the Android version on your computer via an Android emulator like the BlueStacks or the NoxPlayer. If you want to enjoy this version of Forza Street for PC, you have landed at the right place. I am going to show you the step-by-step guide to download Forza Street for PC.forza street for pc

Requirements

  • Windows 10, Windows 8, Windows 7, and macOS.
  • Desktop PC or Laptop.
  • Keyboard & Mouse.
  • Internet Connection.
  • Google Account. If you don’t have one, create it for free.
  • Android Emulator – Download BlueStacks or NoxPlayer.
  • Install the Emulator and set it up using your Google Account.
  • The remaining part of this guide.

Note: If you want to run the original Forza Street for PC, you can download it on Windows for free using this Microsoft Store link. Otherwise, follow the steps below.

Download Forza Street for PC

  1. On your computer, launch BlueStacks or NoxPlayer.
  2. In the Emulator, open the Google Play Store.
  3. Using the search bar of the Play Store, find Forza Street.
  4. As you find the game, download/install it.
  5. Once installed, launch Forza Street.
  6. The emulator will show you basic controls, you can change if you want.
  7. Start playing Forza Street for PC using the Keyboard.

Conclusion

By now, you should have the game running well on your computer. If you are getting the device compatibility error in the Play Store, try upgrading your Emulator or just try using another Android Emulator. Forza Street for PC will run only inside the emulator,  but if you have downloaded it from the Microsoft Store, it will run system-wide (only on Windows). If you have got any kind of questions regarding this game or the Emulators mentioned above, please feel free to reach out to us.


Fix Instagram Story Failed To Upload

0
Fix Instagram Story Failed To Upload

With the help of my guide, you will be able to easily Fix Instagram Story Failed To Upload on your Android and iOS devices.

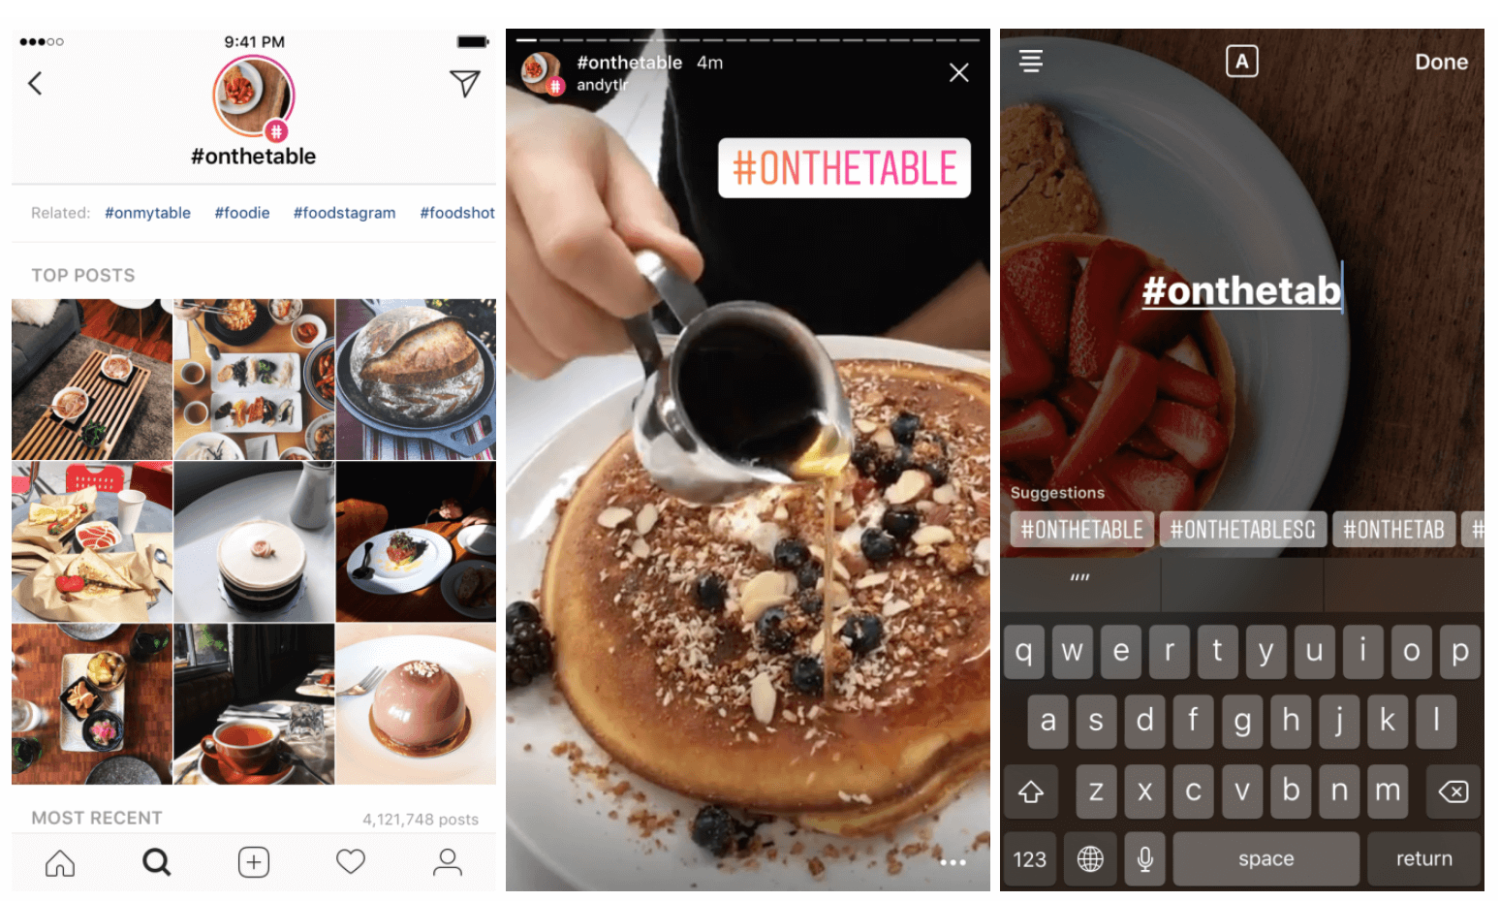
Stories had given Instagram a new and renewing look since it was propelled in 2017. With more than 500 million make at least one Story consistently, the site’s traffic volume develops hugely every day. In addition to the fact that it is helpful for individual use, however, Instagram Stories is additionally an in vogue path for brands and entrepreneurs to associate with clients.

Instagram Story Failed To Upload

Read more:

It’s said that nowadays, Stories presently represent 33% of Instagram’s content. In this way, on the off chance that you need to get more reach and commitment, possibly it’s the ideal opportunity for you to investigate utilizing Instagram Stories.

In spite of the fact that the Stories feature was introduced by Snapchat, Instagram has effectively coordinated it into its foundation. The manner in which it works is straightforward: you take a video or picture (or arrangement of recordings or pictures), include a caption, incorporate a few channels, and distribute it. Your Stories will be live for 24 hours, and afterward, it naturally vanishes and spared in your document.

Most clients have a consistent encounter utilizing Instagram Stories; a great deal has even been so imaginative with it! In any case, a few users have reported a problem with Stories – explicitly, its inability to upload the recordings or pictures, with a never-ending ‘Posting’ or ‘Upload Failed’ message.

So in this post, I will guide you and provide you the best workarounds you can use to Fix Instagram Story Failed To Upload.

How to Fix Instagram Story Failed To Upload:

Before we jump on to any solutions, let me first tell you why an Instagram story has failed to upload. Once you get a clear picture it will be very easy to fix it.

Backend Problems:

Instagram is refreshed persistently, with new fixes and hotfixes applied on for all intents and purposes an everyday schedule. For the most part, such hotfixes are basically tried on a lot of equal equipment running a sort of fake Instagram. On the off chance that a software change doesn’t break the imagine site, at that point, it’s presumably safe to apply it to the fundamental site.

As a rule, this is a safe wagered, yet there are times when the safe wager doesn’t pay off, and a tried bit of software hits the production servers, and the entire product comes to a standstill.

May be Instagram is buggy:

What users consider as “Instagram” is the application that they run on their cell phone or tablet. That application, albeit a basic piece of the Instagram design, performs just a little bit of crafted by the entire framework. It’s a lot easier bit of software than the code that holds the servers together and keeps the applications chugging along.

The software that sudden spikes in demand for your telephone, called the “client,” is more agreeable to test than the modern software on the server-side. It has one imperfection, however: it is utilized by a huge number of individuals, which implies that a great deal of the potential ways that these arbitrary people may attempt to do things basically won’t be spoken to in the testing procedure.

A little glitch in the client could create a circumstance where Stories would neglect to transfer, especially as a result of some unordinary client activity.

Fix Instagram Story Failed To Upload:

Now you know what can cause such type of issue. The following are the best workarounds you can use to Fix Instagram Story Failed To Upload.

Take a Break, Try again in a While:

Yea, Please take a break if you were trying to upload a story and it is not. It will be very wise and it really works every time. Give it a break, do other stuff, and after a while try uploading your story again.

Make Sure Instagram Server is not down:

Recently Instagram was down all over the world and I was looking for a way to check if it’s still down or not. While doing that I found a website that lets you check if a website is down or not.

This Website is called, downdetector.com, open this website and see for yourself.

Turn OFF WiFi and Switch to Mobile data:

It worked for me a number of times and believe me it is worth trying. Sometimes our WiFi seems to be working but because of a glitch, software issue, reception problems, we are unable to use it.

So, If you were trying to upload a story on Instagram over your WiFi and it failed. Switch to mobile data and give it a try. I have read that 80% of users reported that after switching to mobile data, the Instagram Story Failed To Upload problem was fixed.

Restart App:

Restarting apps on either Android or iOS revives the transitory documents and memory utilization of that app. That can be sufficient to make it work once more. Most apps will self-manage memory or cache, however once in a while they stall out.

A restart can make them work once more. For Androids, open the app drawer, discover the Instagram app, and hit the X in the upper right corner to close the app down. For the iPhone, open ongoing apps in iOS and swipe up to close Instagram.

Update your App:

This is very important, we don’t pay attention to such things. You should always use the updated version of all the apps. 

Like most of the apps, Instagram, also rollout update frequently. Sometimes a bug or an issue pops up and right after that, you see an update. Refreshing it through the App Store or Google Play Store is a consistent following stage. Open your separate app store and take a gander at accessible updates.

Unistall & Re-install Instagram:

If you are still facing Instagram Story Failed To Upload error after all these workarounds. The only thing that you can do now is to Uninstall the Instagram app from your iOS and Android devices. After that re-install the latest version.

That is all. This is how you can Fix Instagram Story Failed To Upload on Android & iOS.

Fix Incorrect Location Settings On Life360 [ Guide ]

0
Fix Incorrect Location Settings On Life360 [ Guide ]

With the help of my guide, you will be able to Fix Incorrect Location Settings On Life360. I have made a simple yet 100% working guide to Fix Incorrect Location Settings On Life360.

Incorrect Location Settings On Life360

As one of the most mainstream location-sharing services, Life360 has made some amazing progress since its 2008 beginning. It currently gives a huge number of families their friends and family’s whereabouts. In this regard, GPS location assumes an indispensable job inside this app.

Not at all like different apps, once you start getting location errors on Life360, believe me, this is not a small issue. The essential purpose of Life360 is to keep you refreshed with others’ whereabouts. Before falling back on uninstalling Life360 from your devices or smartphones, here are a couple of things that you can do to attempt to Fix Incorrect Location Settings On Life360.

Read more: Fix Play Store This app is not compatible with your device error

How To Fix Incorrect Location Settings On Life360:

The following are all the workarounds that you can use one by one to fix the location setting problems on Life360. Please make sure you go with step by step, that will help fix and also determine what the issue is and where.

Check GPS Is Turned ON?

This appears to be easy, yet you’d be astonished at how frequently individuals disregard the most evident things. Life360 is an app that is about location – it depends on GPS or Global Positioning System to pinpoint a gadget’s/device/smartphone’s precise whereabouts.

Each advanced cell phone is furnished with GPS innovation. In any case, in spite of the fact that the app itself will approach your phone’s GPS (after you affirm it, obviously), it won’t have the option to turn it on or off however it sees fit.

This implies the GPS include on a cell phone should be turned on in the event that you need your location to appear inside the app.

Turning on GPS is basic and clear, paying little heed to what device you have. It’s imaginable situated in the settings on your telephone or tablet.

GPS requires a strong measure of battery to run, yet there are approaches to change the settings to safeguard your battery life.

Turn on the WiFi:

It might appear to be somewhat unusual, yet turning on your Wi-Fi can really improve your location precision, in any event, when you aren’t associated with a wireless switch.

The clarification behind this? All things considered, in any event, when not associated with a switch, your gadget’s Wi-Fi will consequently quantify the quality of the indication of all neighborhood Wi-Fi Networks. This data doesn’t simply disappear – it’s utilized for triangulation. By deciding your gadget’s vicinity from wireless access gadgets, Life360 can get a much more clear picture with regards to where you’re found.

Truth be told, in certain occurrences, GPS is less solid than Wi-Fi regarding deciding your whereabouts. This is on the grounds that the entire rationale behind GPS depends on satellites. Indeed, the innovative wonders that circle our planet are those that make GPS conceivable. In any case, when you’re inside a structure, particularly a structure with various floors, this may meddle with your gadget’s GPS. So as to work flawlessly, it needs clear sky over your head.

Read more: Pokemon Go Failed to Detect Location/GPS Not Found

Then again, Wi-Fi has exactly the intended effect inside. It will attempt to contact the switches in the gadget’s vicinity. Thusly, it will gracefully the installed apps with this data. In correlation, GPS can be off by as much as a whole mile if there’s an overhead block.

VPN Makes Things Fuzzy:

VPN does help us in many ways but it also impacts the location accuracy. Not only with Life360 but with other apps too. I know VPN helps you unblock apps, ensure your safety, and more but when you are using Life360 I suggest you should turn off your VPN app.

HotSpot is no Good while using Life360:

One thing that you have to remember here is that the hotspot Wi-Fi signal did not depend on a real fixed physical location. It works dependent on triangulation and approximation, much like the satellites that decide your GPS location.

Thus, you’re likely happier abstaining from utilizing a hotspot. It won’t meddle with your location assurance, however, it will suck your battery dry. Join this with your telephone’s GPS and Wi-Fi, and your telephone’s battery life won’t be a long one.

Data:

IF you are using Data, keep that in mind. You will only get strong signals when you are in a good reception area. Otherwise, your signals will drop, and using Life360 on laggy internet won’t do any good.

So there were the best workarounds to Fix Incorrect Location Settings On Life360 on Android, iOS, etc.

Do The Ripple Effect In TikTok [ How To ]

0
Do The Ripple Effect In TikTok [ How To ]

Let me tell you how you can do the Ripple Effect In TikTok on iOS and Android. Nowadays, everyone is sitting at home and they have nothing to do except to use their smartphones and what is better then TikTok to spend time in this pandemic.

Ripple Effect In TikTok

If you are among them then you are well aware of the TikTok effects and among them, there is one which is getting popular nowadays. I am talking about the Ripple Effect In TikTok and today I will tell you in my post how to do Ripple Effect In TikTok.

Without uncertainty, the ripple effect is probably the most ideal approaches to add a wow factor to your recordings. The smooth water-like waves even give a pinch of romance to the clips. In any case, there’s still no local alternative to do it.

There’s no motivation to stress, however. On the off chance that you need to realize how to do this effectively, we have you secured. How about we ripple directly into the methods and requirements.

Read more: Download TikTok Videos on Any Platform

You need to know:

This article expects that you’ve just downloaded and introduced TikTok. Similarly as significantly, ensure the application’s refreshed on your Android or iOS gadget.

Besides, you should refresh the cell phone’s product too and have over half a charge on your battery. This is on the grounds that the effect requires some figuring power that is generally battery serious. All things considered, you’re effectively shooting a video by means of a web-based application.

With this as a primary concern, you ought to likewise have a consistent Wi-Fi connection. Otherwise, the ripple probably won’t be as smooth as you anticipate it.

It’s likewise conceivable to do the TikTok ripple effect on your tablet. Be that as it may, the procedure is a lot trickier, so it’s ideal to adhere to smartphones.

That off the beaten path, it’s a great opportunity to get serious.

How to Do The Ripple Effect In TikTok:

The following are the two methods that you can use to add the Ripple Effect in TikTok. I have tried both and they work perfectly.

It doesn’t matter what method you should choose, what matters is that you should shoot video in slow motion at about 0.5 speed. That is the main task.

Method 1:

  • Launch the TikTok application on your smartphone. For instance purposes, in this article, I am using TikTok for iOS. However, the means are the equivalent on Android devices.
  • Hit the + symbol to include another video and afterward select the speed symbol to begin recording in slow motion. The speed bar springs up at the base of the screen and you have to tap on “0.5x”
  • Press the record to fasten and pick the recording term. The 60s alternative may work better, however, you can get snappy ripples at 15s.
  • While recording, you ought to rapidly move/shake your telephone towards and away from the item, you’re attempting to record. What’s more, presto, your video with the gradually expanding influence ought to be prepared to post.

Method 2:

  1. Open TikTok, hit the + symbol, and record a video in slow motion. As stated, you don’t have to move or shake by any means, simply shoot and spare the recording in your Gallery or Camera Roll.
  2. Access Video Star, select the video, and hit Edit for more activities. Above all, you have to tap “Make Video” for the application to create an editable recording.
  3. Presently, select “Quick Split Scene” and pick where you need the split. At that point tap “New” and pick “Re-Effect”. Select the amplifying focal point symbol to start the effect search, and type squirm into the inquiry bar.

There you go, that is it for adding the Ripple Effect In TikTok. Please give it a try and let me know how did it go for you.

Download iPhone SE 2020 Stock Wallpapers

Download iPhone SE 2020 Stock Wallpapers

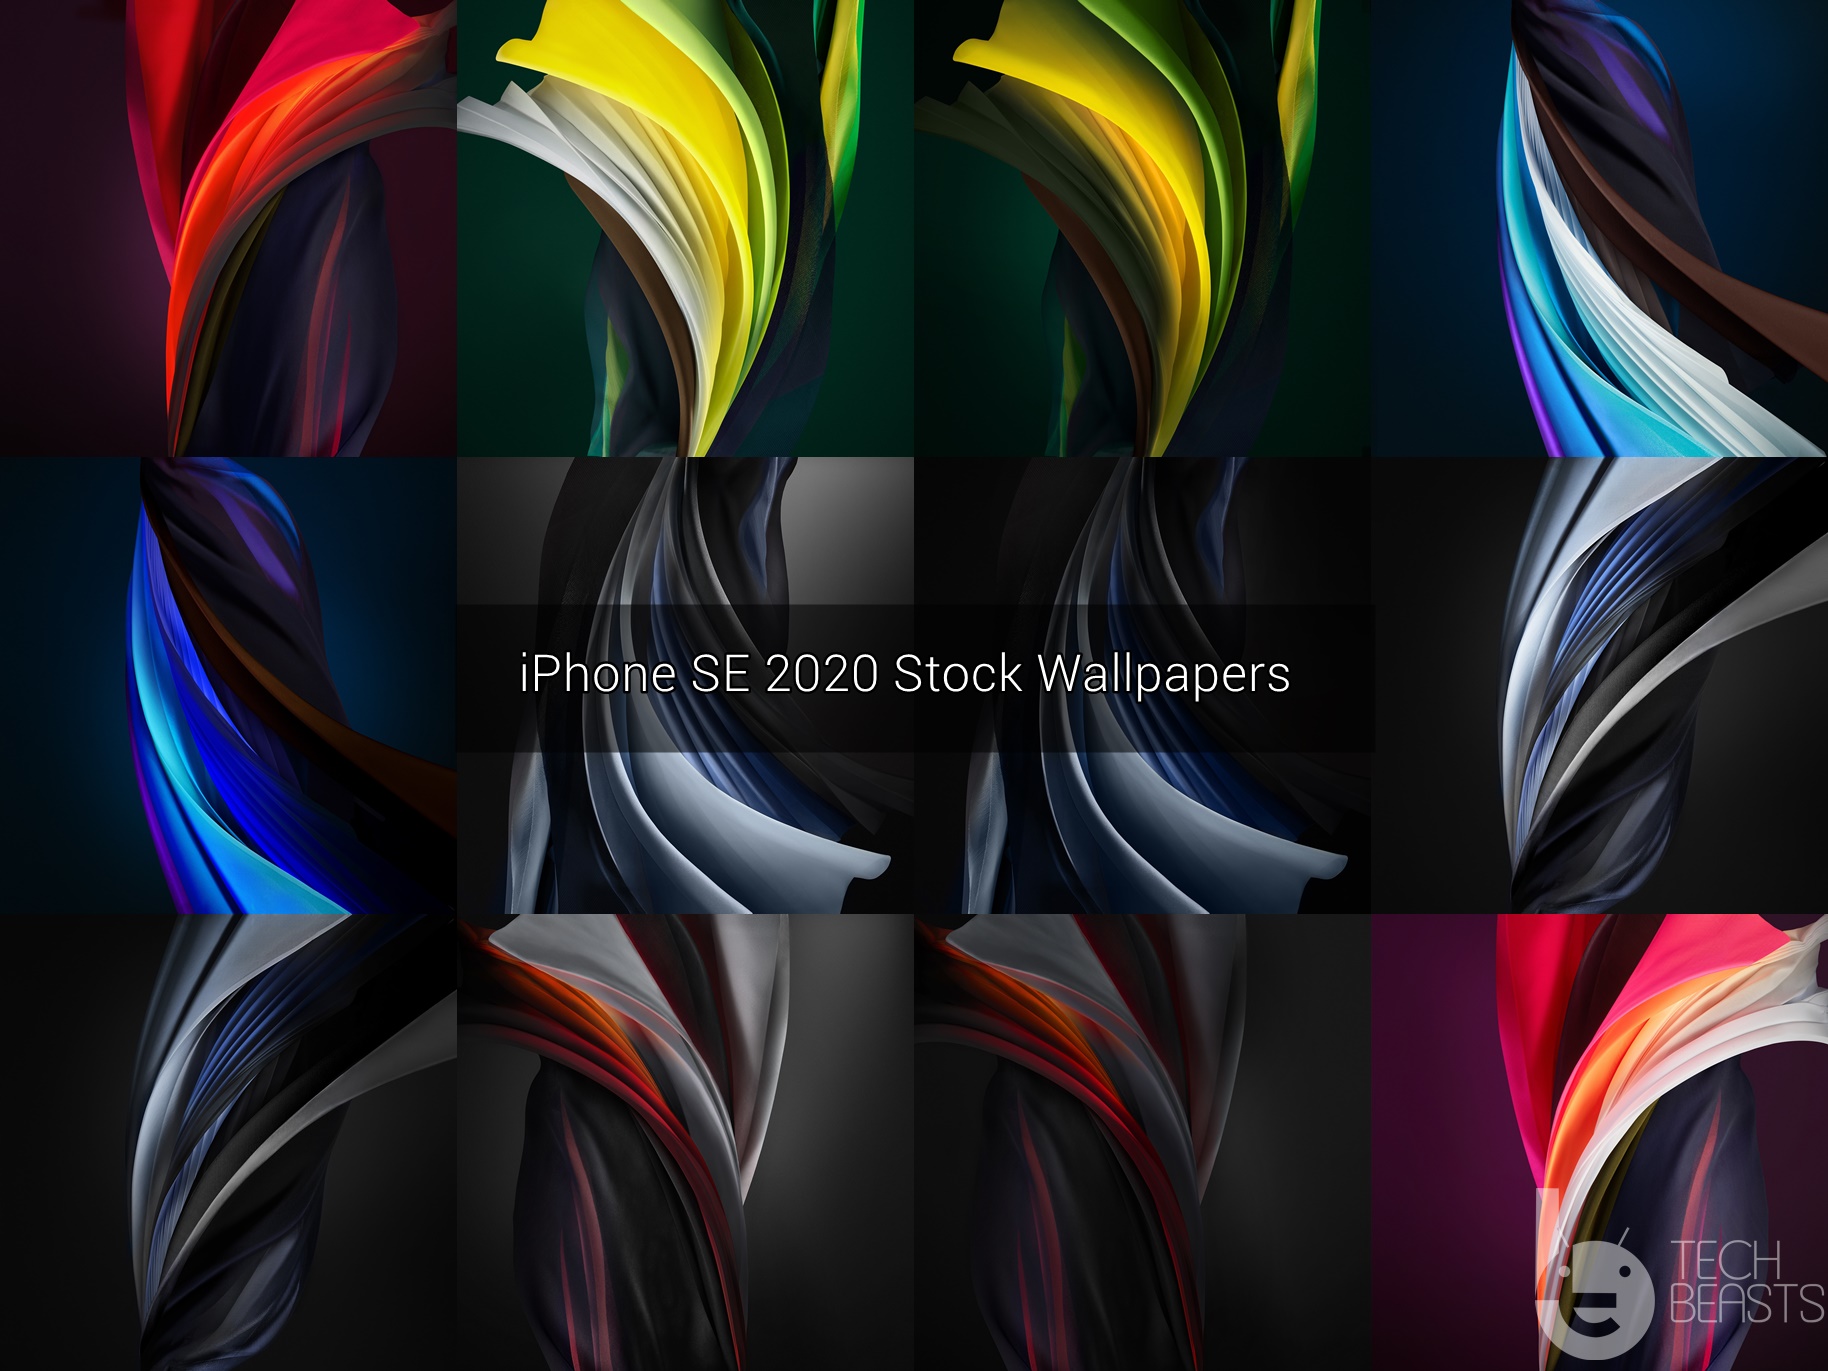
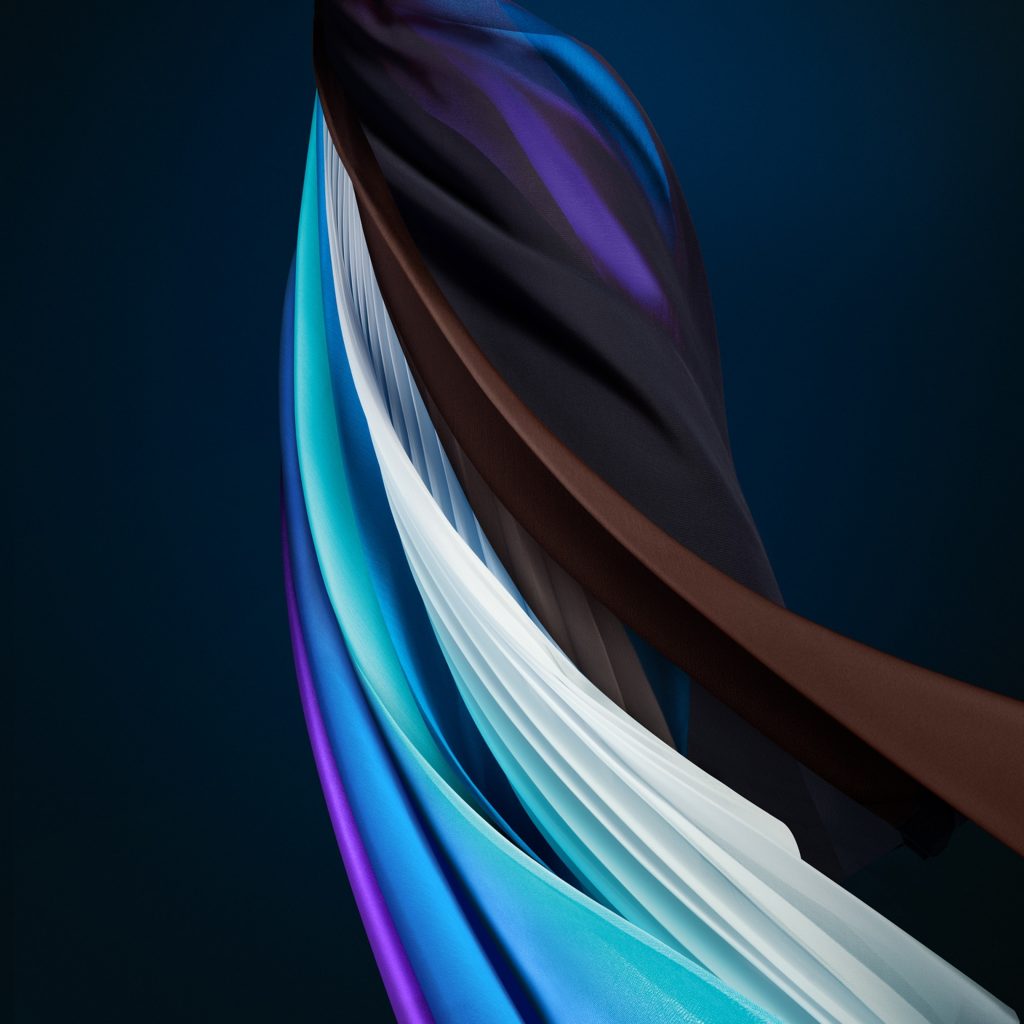
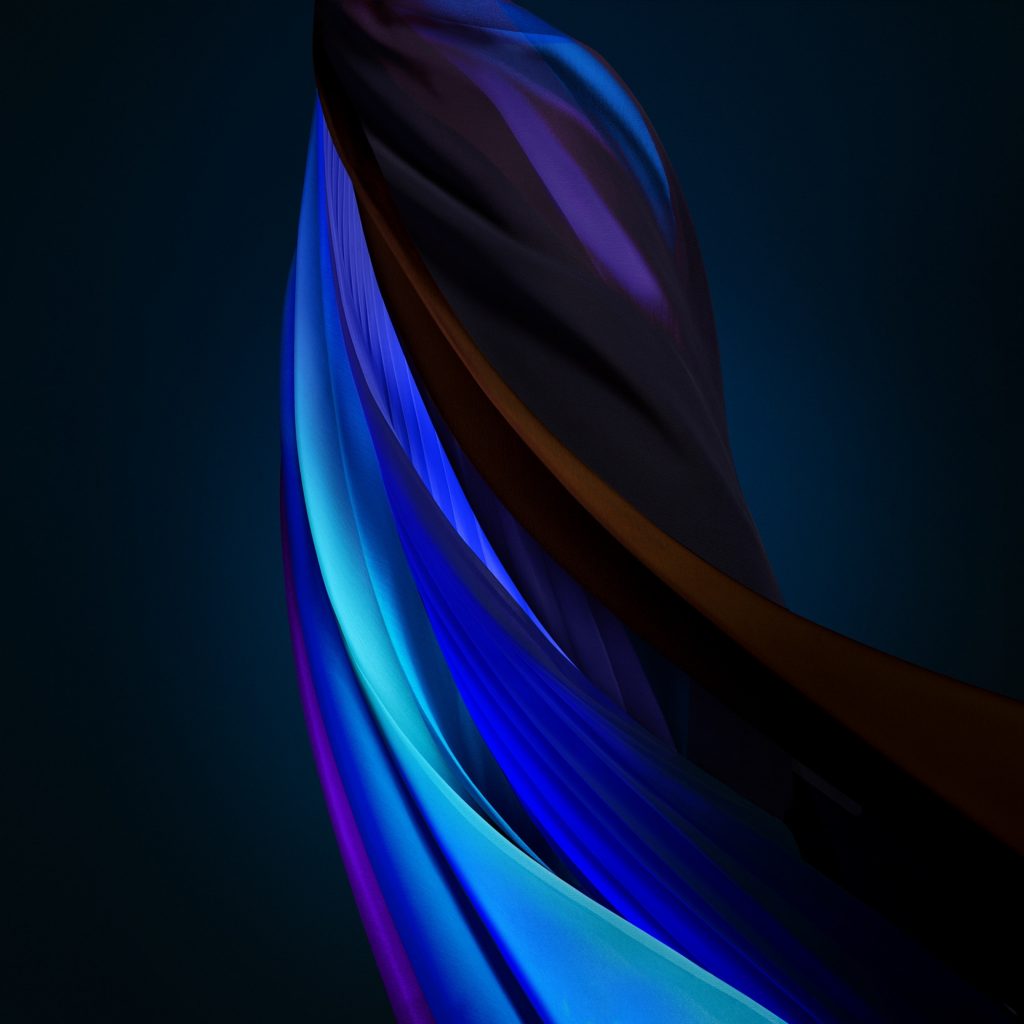
Apple announced the iPhone SE 2020 a day ago only and its stock wallpapers are available now. The iPhone SE brings a handful of new wallpapers to the table. Apple has designed 12 new wallpapers for its new mid-range iPhone. You can download iPhone SE 2020 Stock Wallpapers from here now. These iPhone SE stock wallpapers can be applied to the screen of any phone.

iphone se 2020 stock wallpapers

iPhone SE 2020 Stock Wallpapers

All 12 official iPhone SE 2020 wallpapers carry a resolution of 2688 x 2688 pixels. These are basically the 6 original wallpaper while the additional 6 wallpaper is just the minute variations of the original 6. If your iPhone or Android phone has an HD, FHD, or even a QHD resolution, you will find these iPhone SE official wallpapers a perfect fit on the screen. You can either download all iPhone SE 2020 stock wallpapers using the all-in-one button or download them one-by-one.

iPhone SE Stock Wallpapers – Download one-by-one

To download these wallpapers separately, right-click on your desired image and then click on “save image as…”. If you are downloading on your phone, you will long-press the image and tap on the Download image option.

Apple iPhone SE 2020

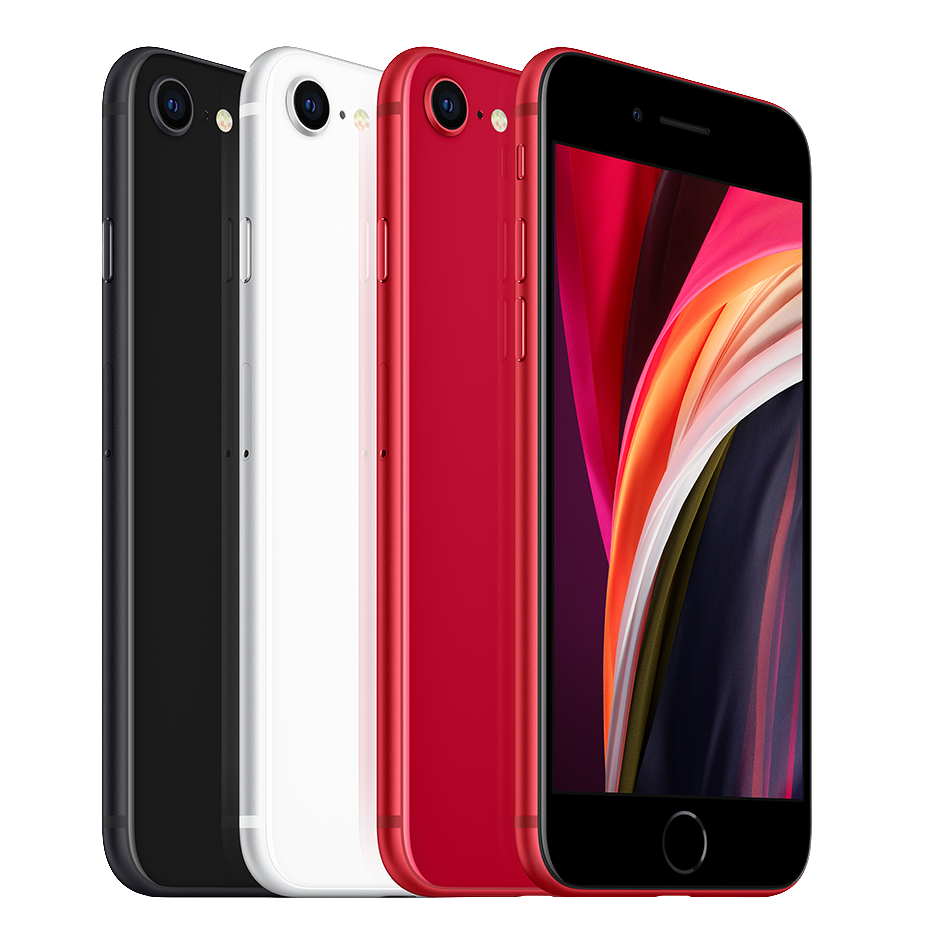
The iPhone SE 2020 is the successor of the original iPhone SE that was launched a few years back. For the most part, it looks as if Apple has just re-introduced the iPhone 8, but with a new chipset. The design, display, form factor, and most of the phone’s specs are identical to the iPhone 8.

Apple iPhone SE 2020

To start off, the iPhone SE touts a 4.7-inches 750 x 1334 pixels screen with a screen-to-body ratio of 16:9. The PPI is 326. This is a water and dust resistant iPhone and it weighs at 148 grams. iPhone SE is powered by Apple’s A13 Bionic chipset. It has a RAM of 3GB and internal storage options are 64GB, 128GB, and 256GB. There is only one camera at the back, it’s the same old 12 megapixels shooter. Thius camera can shoot 4K videos at 60FPS, and also has the OIS support. On the front, iPhone SE 2020 has a single 7 megapixels camera. iPhone SE 2020’s battery is 1821 mAh. It supports 18W charging and there’s no wireless charging. The phone is being offered in the Black, White, and Red colors. It starts at EUR 480.

Also, check out: Download OnePlus 8 Pro Stock Wallpapers 4K

That’s all you get with the iPhone SE 2020. Let us know about your thoughts on this new Apple smartphone. If you run into problems while downloading the wallpapers, reach out to us using the comments below.