Home Blog Page 8

Download Google Play Store on Gameloop [Tencent Gaming Buddy]

3
Download Google Play Store on Gameloop [Tencent Gaming Buddy]

Update: The Tencent Gaming Buddy is now called Gameloop. This guide to install Google Play Store on TGB will work for Gameloop as well now. The rebranding of TGB took place with the release of COD Mobile.

Tencent Gaming Buddy now called Gameloop can do much more than its primarily supposed to do. Apparently, it supports 14 games with PUBG being the main game. A number of technology enthusiasts tried to unleash the full potential of Tencent Gaming Buddy emulator. Upon doing so, they found that it is actually one of the best emulators to run any Android games or apps. As a matter of fact, the Google Play Store can be installed on the Tencent Gaming Buddy too. In this guide, I will show you the steps to download Google Play Store on Tencent Gaming Buddy. With the help of the Play Store in TGB, you will be able to install any Android game or application straight away from the market.Google Play Store on Gameloop

Gameloop/Tencent Gaming Buddy and Google Play Store

Tencent Gaming Buddy is built by Tencent, the developers of PUBG Mobile. The PUBG Mobile attracted more audience on Desktop PCs and Laptops than the smartphone devices. This was because the mobile version of PUBG Mobile was way better than its desktop counterpart. Gamers used emulators like BlueStacks and Nox Player to play PUBG Mobile on computers. Tencent didn’t really want its users to slip away so it built its own emulator, the Tencent Gaming Buddy. At first, it supported PUBG Mobile only. Later on, Tencent added support for 14 more games.

The Tencent Gaming Buddy also offered Google Play Services. This was done in order to run Google Play Games in the emulator. With the Google Play Games, users could bring the data of those 14 games from their smartphone to their computer. At this point, it was pretty much evident that the TGB emulator can run other Android games and apps too. In fact, TGB lovers found ways to install APKs on it too. The only missing thing was the Google Play Store.

With the Google Play Store, the need for search APKs of Apps from the not-so-credible sources will come to an end. Gamers will be able to install their desired games and apps from millions of apps in the Play Store.

Luckily, a method to install the Google Play Store in the TGB Emulator was discovered too. I am going to show you that very method in this guide here.

Without any further ado, take a look at the steps to install Google Play Store on Tencent Gaming Buddy emulator.

Guide on how to Download Google Play Store on Gameloop/Tencent Gaming Buddy

  1. First, learn how to install APK files in TGB Emulator and then install ES File Explorer on it.
  2. Now get the Google Installer file for TGB – Download.
  3. Copy the Google Installer file to your emulator’s Temp folder i.e. C:\Temp\TxGameDownload\APK
  4. Now open AndroidEmulator.exe from the Tencent Gaming Buddy folder and press F9.
  5. In the emulator, open ES File Explorer and locate the Google Installer APK that you just copied in Temp.
  6. Open the APK and install it.Google Play Store on Gameloop
  7. Now go to the main menu and open the Google Installer.Google Play Store on Gameloop
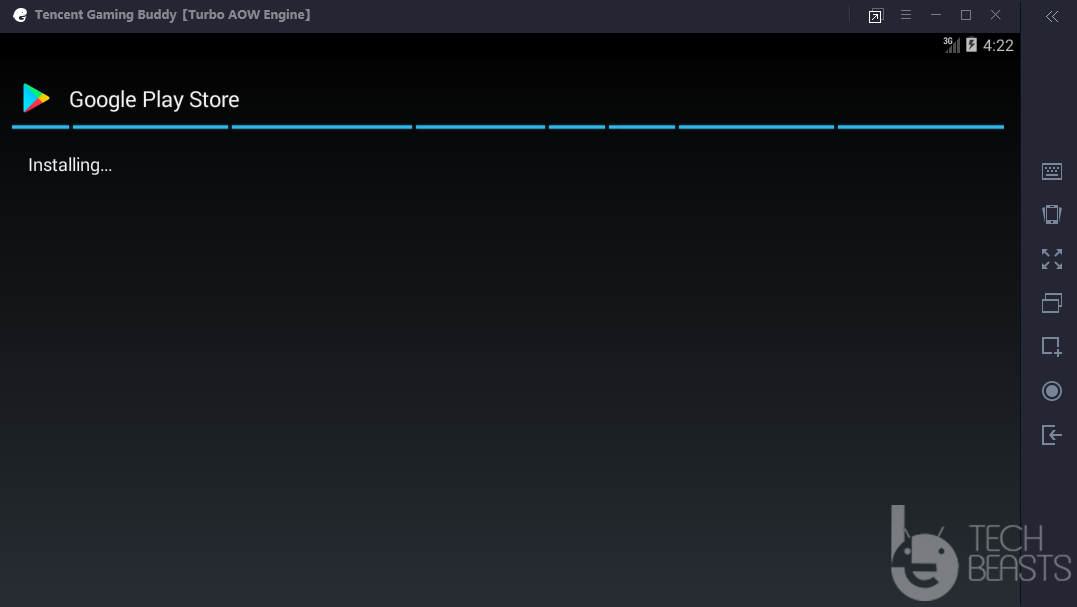
  8. It will begin installing the Play Services and Play Store.Google Play Store on GameloopGoogle Play Store on Gameloop
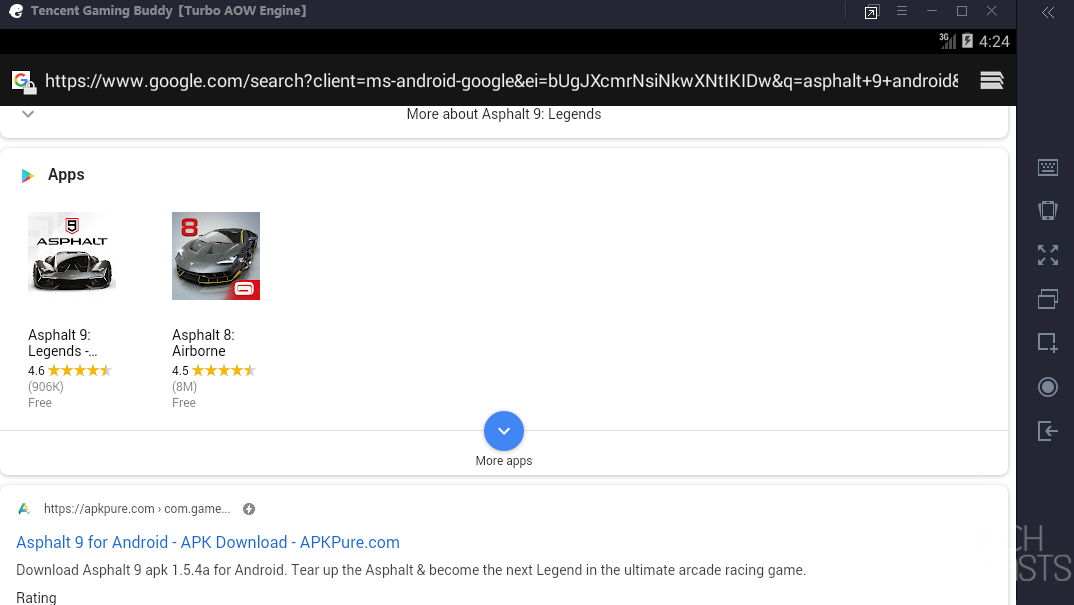
  9. After installing, go to Browser > Search for any Android App or Game.
  10. You will find the Google Play Store link in search, open the link and then click on Google Play Store.
  11. That app or game will open via the Play Store now. Log in and you can install it. That’s all.Google Play Store on GameloopGoogle Play Store on Gameloop

Google Play Store on Gameloop

Final Words

You must have noted that the Google Play Store doesn’t appear among all the apps in the app drawer of the TGB. At the moment, there is no clue why it is not appearing there, but the Play Store is definitely there in the emulator. The only way to access it is by searching for an application in the Browser and then opening it via Play Store. I did try running multiple games and applications on it. Fortunately, the result was impressive. Games in the TGB emulator run smoothly as compared to the BlueStacks and other emulators. The best part of the TGB is that you can change its configuration to run it on a PC with less powerful hardware. The extended control in the settings of TGB is what makes it the best Android emulator out there.

Best Call of Duty Mobile PC Gameloop Settings [Graphics & Sensitivity]

Best Call of Duty Mobile PC Gameloop Settings [Graphics & Sensitivity]

Here are the best Call of Duty Mobile PC Gameloop Settings for Graphics and Sensitivity. You can apply these settings on Windows 7/8/10-powered computers.

Call of Duty Mobile PC Gameloop Settings

Call of Duty Mobile has successfully become the most popular action game at the moment. The game is receiving all the love and appreciation from millennials all around the world. COD Mobile’s affiliation with Tencent made one thing evident that this game will definitely be playable on a computer. Following the official release of the game, Tencent released an emulator tailor-made to run Call of Duty Mobile on PC.

The Tencent Gaming Buddy has been renamed as Gameloop and it now runs COD Mobile. If you get your hands on Gameloop right now, you will find the Call of Duty Mobile with a Download button on its home screen.

Gameloop makes the Call of Duty Mobile gameplay on a computer buttery smooth. Yes, the emulator players are annoying mobile players as they have better control over the game. When you play this game using a mouse and keyboard, you have a much better grip on the game. Especially in the battle royale mode, it’s very easy to be the last man standing every single time.

Not only better controls, but it also gives you better graphics quality. Call of Duty Mobile is much more enjoyable on a bigger screen. Especially if you have a gaming monitor, playing COD Mobile on PC is going to be a whole lot of fun. If you listen to the game’s sound on your high-quality speakers, it’s just going to add up to your already amazing experience.

Like your phone, you can completely modify the graphics and sensitivity for Call of Duty Mobile PC as well. It’s fairly simple to enhance the Call of Duty Mobile PC Gameloop Settings for Graphics and Sensitivity.

In the guide below, I am going to show you the best Call of Duty Mobile PC Gameloop Settings for both the Graphics and Sensitivity. With these COD Mobile PC Graphics settings, you will be able to get a much better and crispier resolution output with smooth gameplay.

Before applying these settings, you must have an idea about the specifications of your computer. If you don’t know what RAM, Graphics Card, and Processor your computer has, you can check it by going into the properties of your PC.

Best Call of Duty Mobile PC Gameloop Settings – Graphics

First of all, open Gameloop on your computer. If you don’t have it, you can install it using the guide on our site.

  • In Gameloop, click on the Menu button on the top-right corner and click on Settings.
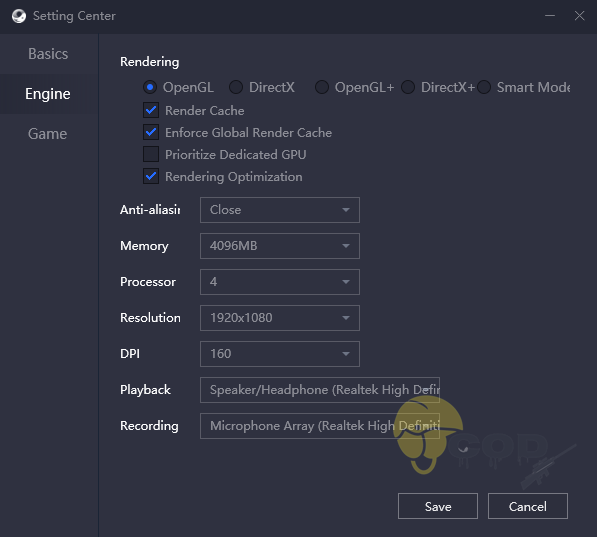
  • In Settings, click on Engine.
Call of Duty Mobile PC Gameloop Settings
  • Under the Rendering option, turn on “OpenGL, Render Cache, Enforce Global Render Cache, and Rendering Optimization.
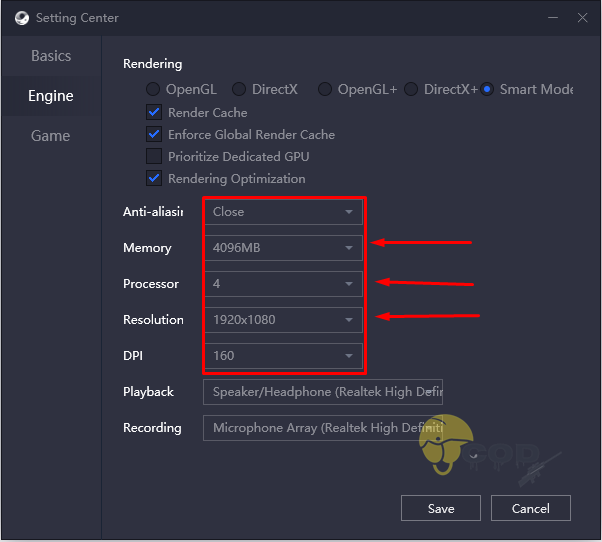
  • Now click on Anti-aliasing and set it to close.
  • Click on Memory and set it to 1/3rd or half of what your computer’s actual memory is. For example, if you have a RAM of 2GB, set it to 512MB or 1024MB. If you have a RAM of 8GB, you can set it to 2048 or 4096MB. Set it depending on the amount of RAM you have.
Call of Duty Mobile PC Gameloop Graphics Settings
  • Now click on Processor and set it to half the number of cores that you have on your PC. For example, if you have 2 cores, set it to 1, if you have 4, set it to 2, and if you have 8, set it to 8. If you have 8 and set it to 8, it will consume the entire CPU, that’s why set it to half.
  • Next is the resolution, you should leave it as it is since its a mobile game, but if you have a good GPU in your computer, you may set it to 1920 x 1080 pixels.
  • Set DPI to anywhere between 120 – 160. You can change these settings later if you need them.

Call of Duty Mobile In-Game Graphics Settings

We have set the Gameloop settings. It’s time to set the settings in the game now.

  • Open Call of Duty Mobile in Gameloop.
  • Click on the Settings icon in the game.
  • Now go to Audio & Graphics.
  • You will find Graphic Quality and Frame Rate Settings now.
  • If you have a low-end PC, set both these to Low or Medium. If you have a high-end PC, set both these to High or Very High. If you have a very powerful computer, set both to MAX.
  • Turn off Depth of Field, RagDoll, Anti Aliasing, BLOOM. You may or may not keep the Real-Time Shadow on.
  • Select the Realistic Graphics mode for BR mode.
  • Save the settings. You are all done.

Best Call of Duty Mobile PC Gameloop Settings – Sensitivity

Sensitivity is something that’s a personal preference of a gamer. The general rule of thumb is that you should be using a high-sensitivity in short-range battles. This allows you to move your weapons and maintain your character’s movement while approaching an enemy at a shorter distance. But if you are in long-range battles, keeping the sensitivity low would a better idea. That’s because in long-range battles, your target accuracy needs to be high and unwanted movement can hamper the gameplay. Especially when you are using a sniper, you need an extreme level of stability.

So, if you are playing the DeathMatch or Frontline mode in COD Mobile, I’d prefer using high-sensitivity settings. If you are playing the Battle Royale mode, I’d prefer keeping the sensitivity low.

After you have identified what sensitivity settings you want, follow these steps to change it.

  • Open Call of Duty Mobile PC in Gameloop.
  • In the game, go to Settings.
  • Now go to Sensitivity Settings.
  • Click on BR Mode.
Call of Duty Mobile PC Gameloop Sensitivity Settings
  • Now set the Camera & Firing Sensitivity to Low, High, or Very High depending on your need.
  • Launch the game and check your sensitivity settings. You can change these settings at any point. That’s all.

Conclusion

That’s all. You should be having a great experience playing COD Mobile on your desktop PC or laptop now. If you have anything to add to this guide or if you have discovered better settings, make sure to drop them in the comments section below to help other COD Mobile players. I will try my best to get back to you as soon as possible.

How to play COD Mobile Free For All on Gameloop or BlueStacks

How to play COD Mobile Free For All on Gameloop or BlueStacks

Follow the steps in this guide to play COD Mobile Free For All on Gameloop or BlueStacks emulator.

COD Mobile Free For All on Gameloop or BlueStacks

Call of Duty Mobile received an update 2 days back. This was the first community update for this game. Where this game focused on fixing the most common bugs, it also introduced a couple of new features. Call of Duty Mobile has got a new playing mode named “Free for All”. This mode is as good as it sounds. Free for All will appear in Call of Duty Mobile on all platforms on its own. Accessing this mode can be a little bit tricky as the game doesn’t notify you that it’s there. I’m going to show you how you can access the COD Mobile Free for All and how you can run it in the Gameloop and BlueStacks emulator. Before I show you the method, let me tell you a little more about this mode.

Free For All – Call of Duty Mobile

Free For All is a limited edition mode. It will go away in about 4 more days which is why you must give it a try before you miss it.

The Free For All mode diverts you from the typical match modes on Call of Duty Mobile. At first, this mode is solely for individual players. There are no teams involved here like the Frontline, Team Deathmatch, Domination, Hardpoint, and the Battle Royale mode. You are all by yourself in this mode.

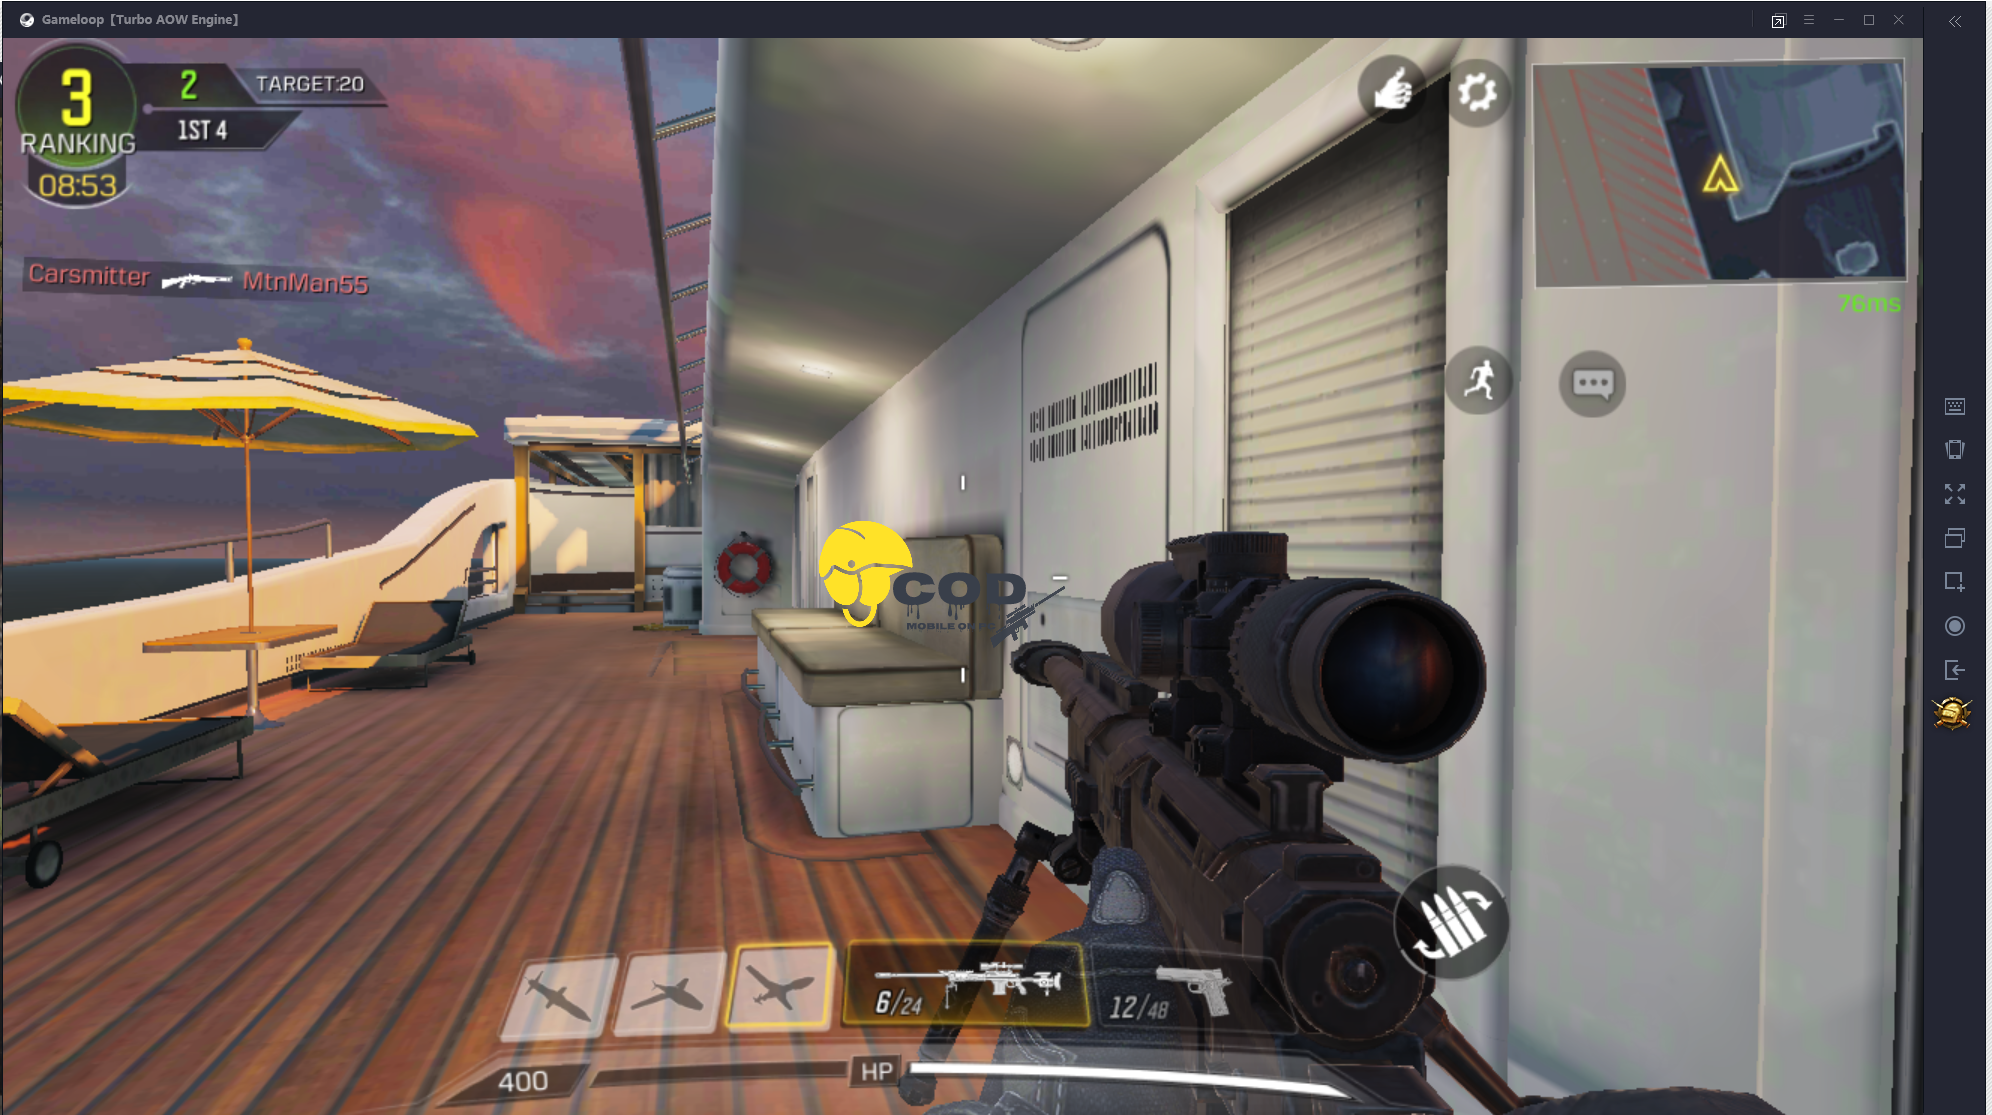
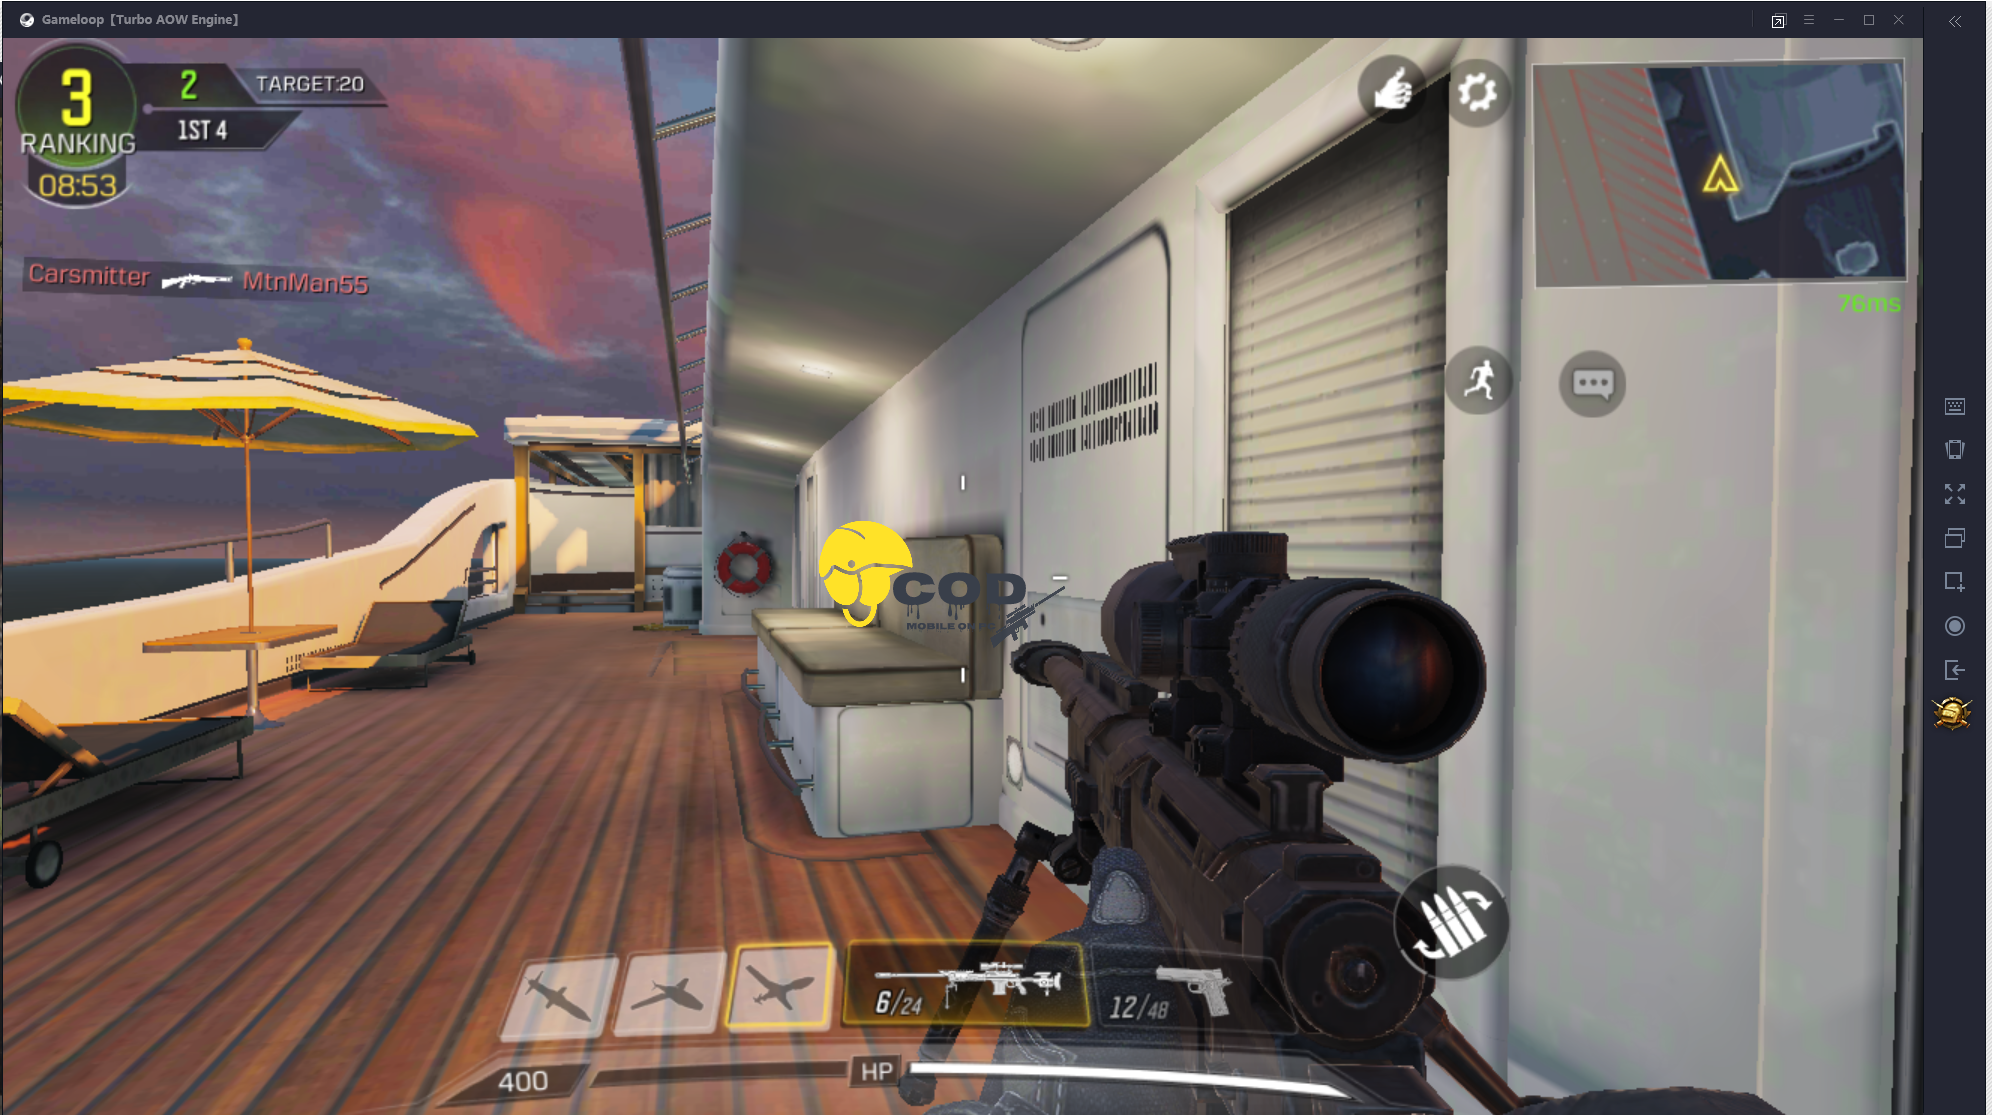
There is a target of 20 Kills in each match. The player who obtains that number of kills first of all wins the game. The Free For All mode is massively filled with players. You will find more players than you find in the team matches.

Players do get a chance to choose their loadout when the match starts off. You also revive every time you get shot. If you manage to unlock the streaks, you can get an edge over all other players. The sooner you achieve 20 Kills, the higher will be your score.

Free For All mode is one of the quickest ways to level up in COD Mobile. Apart from the advantages, this is a really good and addictive mode. Once you start playing, you won’t be able to get off from the screen anytime soon.

Now here is how you can access Free For All in Call of Duty Mobile on Gameloop or BlueStacks.

Play COD Mobile Free For All on Gameloop or BlueStacks

  • Open Gameloop or BlueStacks on your PC.
  • Now open Call of Duty Mobile.
  • If the game asks for an update, update it.
  • From the game’s home screen, select Multiplayer mode.
  • In the Multiplayer mode, click the Frontline or whatever mode is there.
COD Mobile Free For All on Gameloop or BlueStacks
  • Now go to FEATURED.
COD Mobile Free For All on Gameloop or BlueStacks
  • Select Free For All and confirm.
  • Go back and play the game in Multiplayer mode.
COD Mobile Free For All on Gameloop or BlueStacks

Conclusion

That’s all. You can now enjoy free-style shooting in COD Mobile. The Free For All mode is here till the 17th of October. Let me know your thoughts on this new game mode. Are you liking it or not? If you have any questions to ask or any suggestions to share, use the comments box below.

More COD Mobile for PC Guides:

Call of Duty Mobile Problems and Fixes: COD Mobile Crashes, Freezes, Restarts & Stutters

Call of Duty Mobile Problems and Fixes: COD Mobile Crashes, Freezes, Restarts & Stutters

Here are all the common Call of Duty Mobile Problems and their fixes. You can find the most annoying COD Mobile errors and their solutions in this guide.

Call of Duty Mobile Problems and Fixes
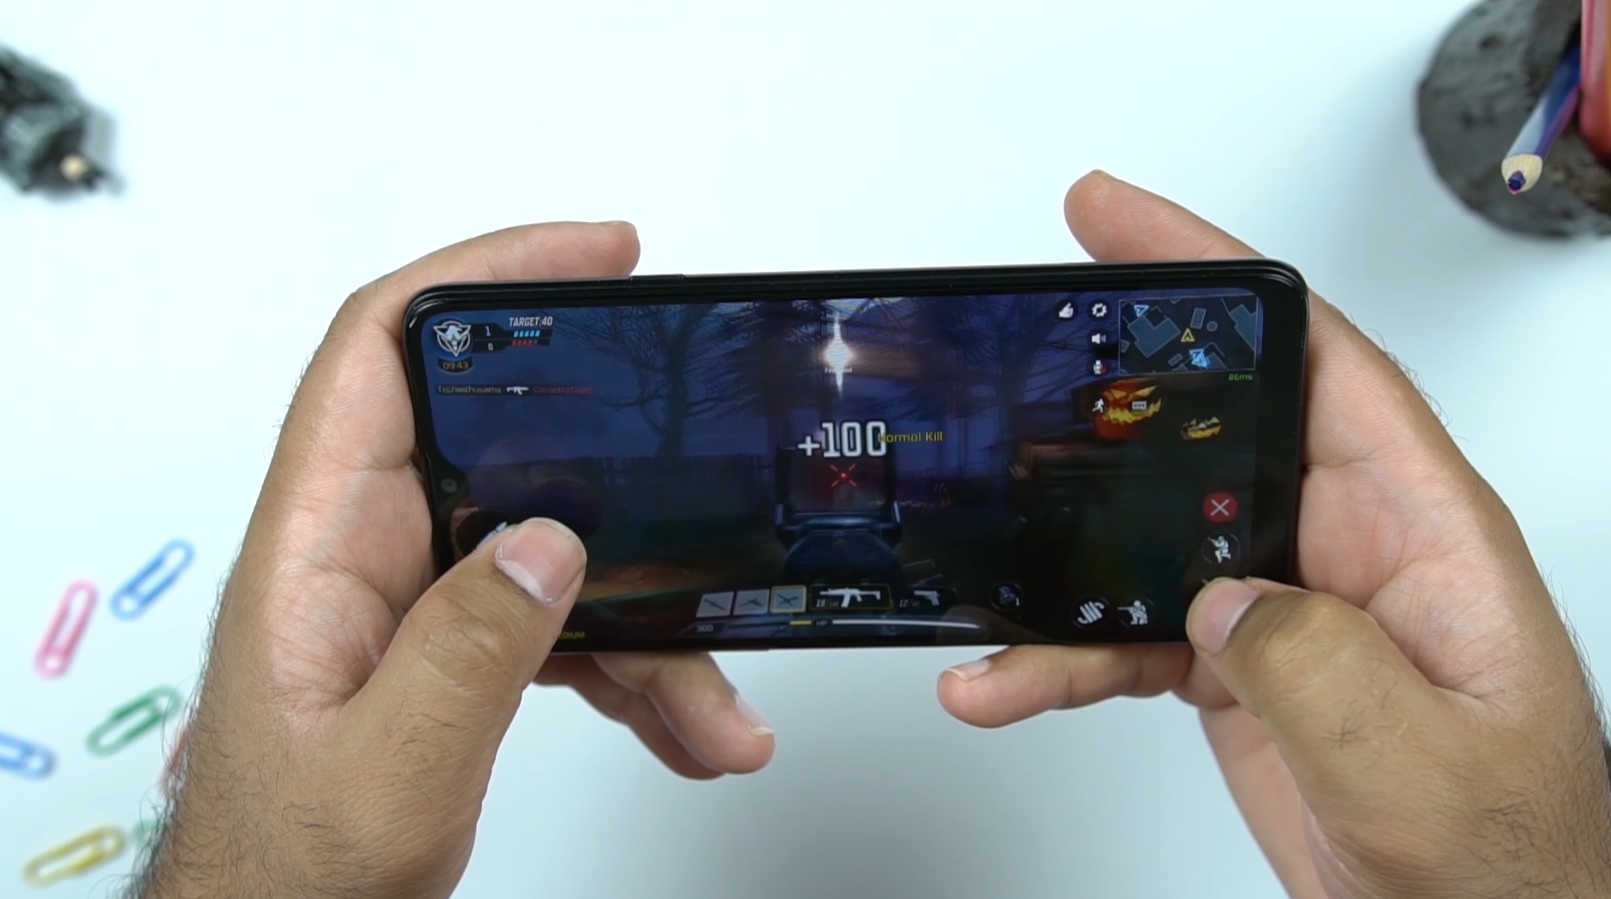
Playing COD Mobile on my Galaxy A20s – Image @ CODMobileonPC

Call of Duty Mobile has successfully become the most popular smartphone game. The game recently surpassed all records set by PUBG Mobile. The FPS game has got the gamers glued to the screens of their smartphones. On the day of its release, a major chunk of users moved from PUBG Mobile to Call of Duty Mobile.

Being the most famous smartphone game doesn’t mean that this game is free of issues. Call of Duty Mobile has been suffering from several issues since the day of its release. On its first day, the game gave Network Error to the users. After that, the users started facing connection timeout errors or server errors. The developers have been doing their best to fix all the issues on time, but a new issue keeps popping every now and then. Call of Duty Mobile is a multiplayer game and its smooth behaviour spends on the servers used by Activision. When the servers are involved, troubles are not something uncommon. Online games extraordinary maintenance.

When the issues are happening on the server-side, you can do nothing about the, but if they’re happening on your device, you can definitely fix them. Call of Duty Mobile players has been reporting the problems that have nothing to do with the game’s network but are related to the player’s gaming platform or device.

Some of the most common Call of Duty Mobile problems include the COD Mobile crashing, the COD Mobile freezes randomly, COD Mobile also restarts on its own, or the game fails to download.

I have personally encountered the COD Mobile freezing problem and let me tell you that it’s the worst. Suppose that you are in the middle of the Frontline battle, Team Deathmatch, or Standoff, and you are just a few kills away from your target, and the game freezes; what would happen? Well, you will end up turning your victory into a defeat.

Call of Duty Mobile Problems and Fixes

I can understand your pain and that’s why I’m writing this post. I am going to list down all the problems and also going to list their solutions below. Some of these solutions are recommended by Activision on their official site and some are my own recommendations. Let us take a look and fix the Call of Duty Mobile Problems one by one.

Call of Duty Mobile Problems and Fixes

Following are the common COD Mobile Problems occurring on the Android, iOS, and Gameloop.

Unable to download Call of Duty Mobile

  • Check the Network on your phone. If you are connected to the WiFi and it’s not working, switch to mobile data and vice versa. Also, make sure that you have completed the initial setup of your Android device. New Android devices with unfinished setup do not download Apps from the Play Store.
  • Turn on Flight Mode on your phone and then turn it off. Try to download the game now.
  • Clear the Cache and Data of the Play Store. To do so, go to Settings > Apps > Google Play Store > Storage > Clear Data and Cache. You may have to re-enter your Google ID after this.
  • Restart your Android or iOS device and try again. To do this, press and hold the power button and click on Power Off or Slide Power Off.

These solutions will let you download the COD Mobile easily on your Android or iOS powered the smartphone.

Call of Duty Mobile Freezes halfway through

This problem has several fixes. Apply these solutions one by one to see which one works for you.

  • Restart your Android or iOS handset. To do this, press and hold the power button and then press the Power Off or swipe on the Power Off slider. Let your phone restart and run the game then.
  • Clear the Cache of your Android phone. To do this, boot your Android phone into the Recovery mode and wipe the cache partition.
  • Clear the Cache and Data of Call of Duty Mobile. I have made a guide on this. Follow the instructions in this guide to clear COD Mobile Cache and Data.
  • Check the iOS App Store or Play Store for updates. If there is a new COD Mobile update, perform the update immediately.

Call of Duty Mobile Crashes again and again

  1. First of all, make sure that your Android or iOS phone is compatible. COD Mobile works on Android 5.0 and higher with 2GB of RAM and iOS 9.0 or higher with 2GB of RAM as well. If your phone is not compatible, the game might never work.
  2. Check your network connection. If you are getting a server connection problem, it may be your internet causing all the trouble. To play Call of Duty Mobile without any crashes, you must have smooth connectivity.
  3. Update COD Mobile. If there is a new update available, update the game immediately.
  4. Clear the cache and data of COD Mobile and try again.

COD Mobile Stutters while playing

  • Check COD Mobile Graphics Settings: If the COD Mobile stutters during gameplay, it might be that you are using the graphics settings that your phone is unable to handle. Press the Settings gear icon in COD Mobile and go to Audio/Graphics. Set the medium graphics or low graphics settings. If the game works smoothly this time, it means that your phone doesn’t support high graphics and max frame rates.
  • Cooldown your phone: If your Android or iOS device has heated up too much while playing COD Mobile, it’s time to give it a break. Let your phone cool down and play after a while. It will run smoothly afterward.
  • Close the Background Apps: If you have too many apps running in the background, close them all and let the phone’s RAM focus on Call of Duty Mobile.

Call of Duty Mobile Restarts – Closes and Opens Back / Loses Match Progress

To fix this problem, apply these solutions one by one.

  • Clear the cache of your Android phone: Boot your Android handset into the recovery mode and wipe its cache partition.
  • Clear the cache and data of Call of Duty Mobile: You can clear the game’s data to fix this. Make sure that you sync your game progress with another account before clearing its cache and data.

Call of Duty Mobile stuck on Getting Version Info screen

Call of Duty Mobile Problems and Fixes

This is a very old and common problem on COD Mobile. Thankfully, it has a number of fixes too. Try the following.

  • Check your Internet connection: If your Internet is having problems, switch your connection and try again.
  • Change the server in the game. It might be that there is a lot of load on the server you are playing this game on. Try switching to the Southeast Asian or the Korean server to see if the game works fine or not.
  • Try using a VPN to play Call of Duty Mobile. Countries have specific Call of Duty Mobile servers. This has been done to layoff the load from individual servers. You can switch your region and see if the game gets past the getting version info or not.
  • Update the game: Call of Duty Mobile has had several updates since the day of its official release. Check the Play Store. If there’s a new update, perform the update now to run the game. That’s all.

I can’t use Controller to play Call of Duty Mobile

At the moment, Call of Duty Mobile doesn’t have controller support. The game did have controller support initially, but the developers pulled it back. According to Activision, it’s working on bringing back the controller support but they have no ETA. If you want to play the game using the controller, you may play it on the Gameloop Emulator.

Call of Duty Mobile Network Connection Unstable Error

Call of Duty Mobile Problems and Fixes

This is one of the most annoying errors too. I have already done a dedicated guide on this issue. Take a look at these instructions to fix the COD Mobile Network error right now.

FIX COD MOBILE Network Error (4,28)(4,50)(4,51)(4,35)

I have done a detailed guide on fixing all the COD Mobile Network Errors including Network Error Code (4,28)(4,50)(4,51)(4,35). Take a look at this guide to fix them right now.

Also, take a look: How to fix COD Mobile Reloading Bug – Cancels Reload

Conclusion

By now, you must have the Call of Duty Mobile up and running on your device without the problems listed above. If you are having a problem that is not listed above, drop it in the comments section below so that I can take a look at it. Also, if you have a different solution to one of the problems mentioned in this guide, drop that in the comments too. Stay connected for more COD Mobile guides.

How to delete Call of Duty Mobile Cache without losing Data

How to delete Call of Duty Mobile Cache without losing Data

Follow the instructions to clear or delete Call of Duty Mobile cache without losing data. This guide will explain how can you clear COD Mobile cache on both the PC and the phone.

delete Call of Duty Mobile Cache without losing Data

Call of Duty Mobile Cache – Why you should clear it?

Call of Duty Mobile is the hottest Android and iOS game right now. The game is running successfully all across the world. The game was having a lot of issues on the day of its release, especially the server issues. The developers fixed the initial problems but there are some issues that are still annoying the COD Mobile players. Fortunately, a large number of Call of Duty Mobile problems can be fixed by just clearing its cache.

If you are facing COD Mobile Network Status Error, Server taking too long to connect, Server trying to connect again and again while you are playing the game, deleting the cache might help with all this. Furthermore, if your game is getting stuck on the getting version info screen or somewhere else, you can try clearing its cache and it might just work wonders.

Deleting Call of Duty Mobile Cache will also help if the game is stuttering at your end. Basically, we just want to give this game a fresh start to see how it performs afterward.

Now, if you are a little bit skeptical as to what might happen after clearing the cache, then let me clear all your doubts. If you follow the proper instructions to get rid of the cache, nothing will go wrong. You will not lose any data. The data and your stats will remain completely safe and secure.

Now that you have landed on this page, I will assume that you want to take a look at the method. So without any further ado, take a look at the steps to delete COD Mobile cache on PC and phone.

Delete Call of Duty Mobile Cache without losing Data – Phone

  • On your phone, go to Settings.
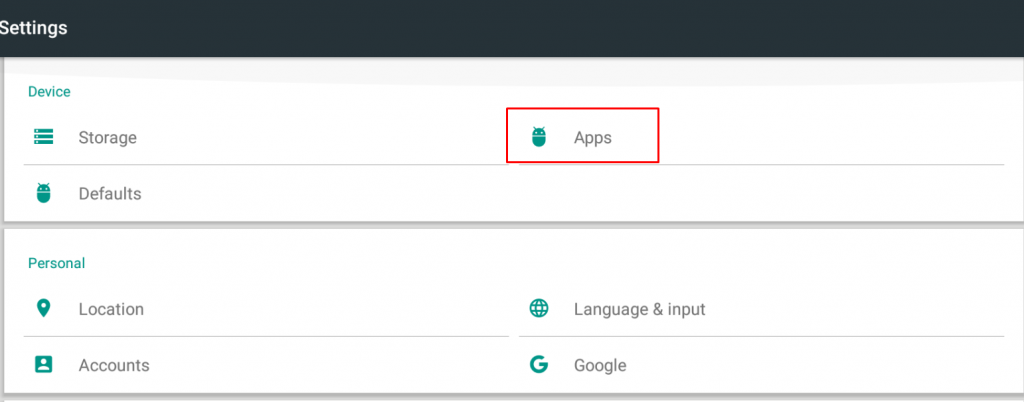
  • In Settings, go to Apps or Application Manager.
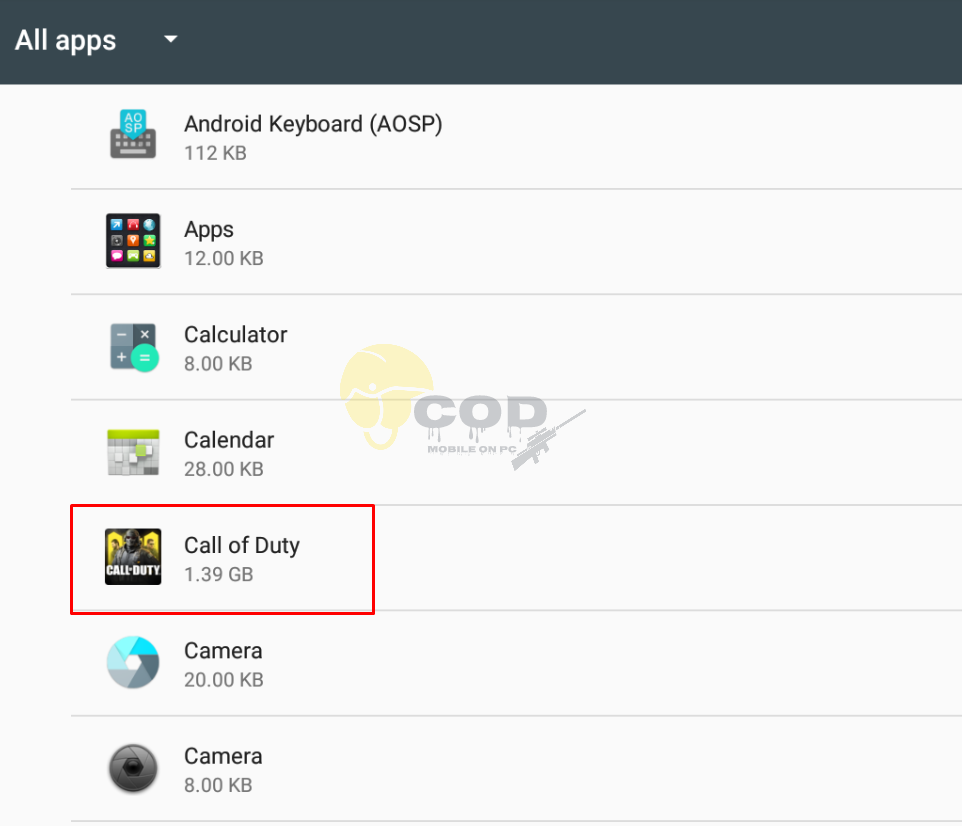
  • Find Call of Duty Mobile in the list apps.
  • Click on Call of Duty Mobile.
  • Now click on Storage.
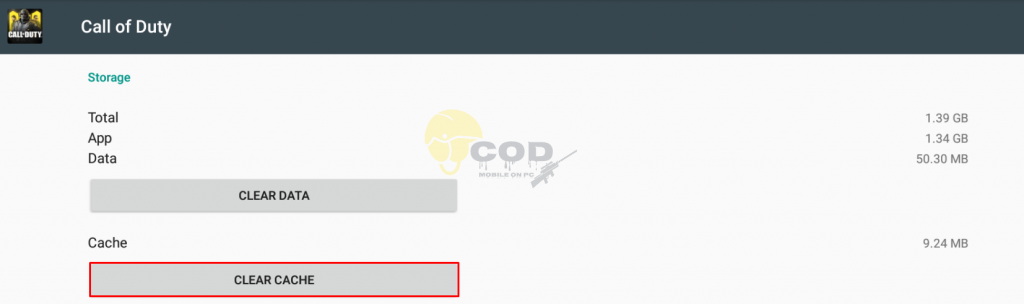
  • Click on “Clear cache”.
  • Restart your phone.
  • Launch Call of Duty Mobile now.

Delete Call of Duty Mobile Cache without losing Data – PC

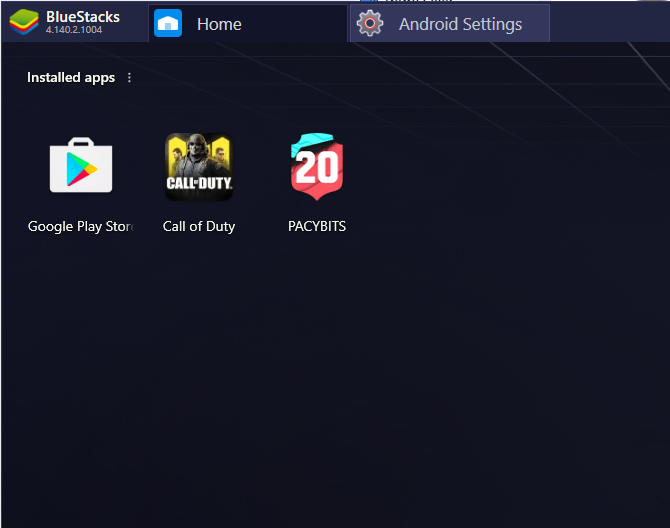
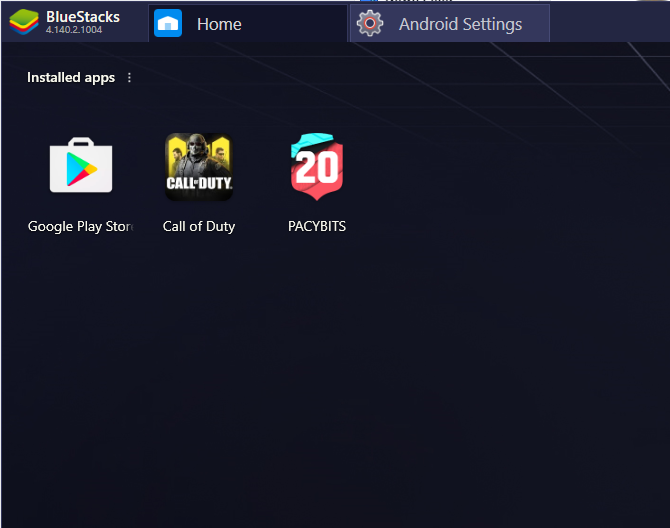
For this tutorial, I’m assuming that you are running Call of Duty Mobile PC on BlueStacks. Clearing its cache is not possible on Gameloop which is why you will find BlueStacks-only instructions below.

  • Open BlueStacks on the computer.
  • Hover over the “More Apps” button at the bottom and click on “Android Settings”.
  • In the Settings, click on Apps.
  • Find Call of Duty Mobile and open it.
  • Now click on Storage.
  • In the end, click on “Clear cache”.
delete Call of Duty Mobile Cache without losing Data
  • Restart BlueStacks now and launch COD Mobile.

Conclusion

That’s all. You have successfully cleared the cache of Call of Duty Mobile. Usually, it isn’t needed to delete cache every now and then. You should only clear it when you are facing problems with your gameplay. Also, you should perform a cache clearing process whenever your game receives an update. If you have any questions or queries, feel free to reach out to us. I will try my best to get back to you as soon as possible.

More COD Mobile guides:

Download Call of Duty Mobile Season 2 for PC

Download Call of Duty Mobile Season 2 for PC

Call of Duty Mobile Season 2 is live now. This is the tutorial to download Call of Duty Mobile Season 2 for PC. First, take a look at what’s new.

Call of Duty Mobile Season 2 for PC
Gameloop – Call of Duty Mobile Season 2 for PC

Call of Duty Mobile Season 2

The season 2 is the biggest Call of Duty Mobile Update since its release. It is big in terms of size, and also big in terms of new features and changes. Call of Duty Mobile Season 2 update, pretty much fulfils all the wishes and demands of the players.

Controller Support

The first and foremost update of this season is the controller support. COD Mobile players can once again use the controllers. The controller update was pulled back in October right after the game’s launch. After fixing the controller compatibility issues, Activision has released the controller support again. You can use controllers like Xbox One S, and the PS4 Dual Shock to play the game.

Zombies Mode

Season 2 brings the zombies mode. The zombie’s mode is divided further into two more modes. There is a Raid mode in which players just have to roam in the area, jump over the walls, break into the doors, find the incoming zombies and take them to the task right there. The normal mode in Raid mode has an 8-level limit and difficult mode has a 12-level limit. When the players reach the final level, they have to face off the Boss Zombie. The 2nd mode is the survival mode. In this mode, players have to keep fighting the zombies for as long as they can.

cod mobile season 2 for pc

New Map & Modes in Multiplayer and Battle Royale

For the multiplayer mode, the COD Mobile gets a new map called Summit. It is available as a part of the Raid mode for now. The other new modes making their way to the game soon are One Shot, One Kill, Sticks & Stones, and Prop Hunt.

cod mobile season 2 for pc

Apart from getting a new theme for the multiplayer mode, it is also getting a new winter theme and map for the battle royale mode. It also gets the new circus-themed areas. A lot of new characters and animals have been introduced to the game in this update.

cod mobile season 2 for pc

The biggest change in COD Mobile for me was its music. I was too tired of listening to the same old music in the game. The new music theme is soothing.

There are many other new features introduced in this update. You can check them all out once you update the game and start playing it.

Call of Duty Mobile Season 2 for PC

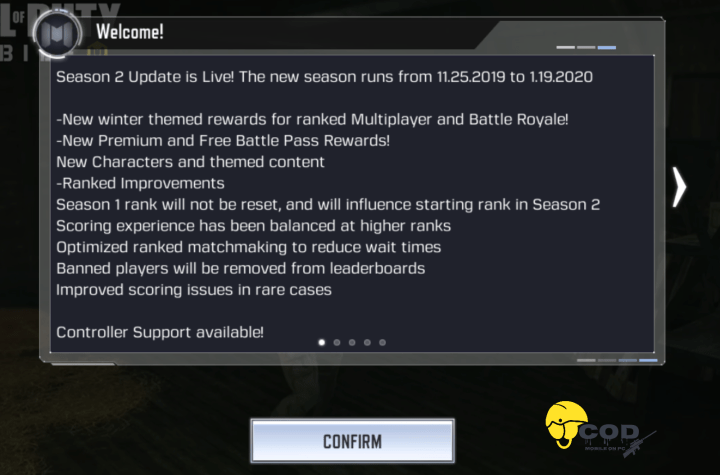
If you are playing COD Mobile via Gameloop, BlueStacks, NoxPlayer, MEmu, or any other Android emulator, getting the Season 2 update is not going to be as smooth. You will get the update notification as soon as you open the game, but clicking on the confirm button will do nothing. That is why you need this guide. In a bit, you will find the steps to download Call of Duty Mobile Season 2 for PC.

Call of Duty Mobile Season 2 for PC
Stuck on Season 2 update in Gameloop Emulator

Download Call of Duty Mobile Season 2 for PC – Gameloop

  1. Open the Gameloop emulator on your computer.
  2. Don’t open Call of Duty Mobile. If you opened it, close it now.
  3. In Gameloop, go to Game Center.
  4. Click on Call of Duty Mobile.
  5. On the game screen’s right side, you will find the “Install” button. Click on it.
  6. The game will update its configuration and start downloading the update.
  7. Open the game after installation completes. You will have the Season 2.
Call of Duty Mobile Season 2 for PC

Download Call of Duty Mobile Season 2 for PC – BlueStacks, Nox Player, MEmu and others

  1. Close the Call of Duty Mobile game in the emulator.
  2. Open the Play Store inside the emulator and find Call of Duty Mobile.
  3. You will find the Update button next to the game.
  4. Click on the Update button to update.
  5. Open the game after the update finishes.
  6. You will have the season 2 now. That’s all.

Final Words

That is how simple it was to download COD Mobile Season 2 for PC. Not being able to update the game from the in-game notification can be a little frustrating, but with the trick given above, you can do it within no time. By now, you should be able to play COD Mobile Season 2. If you have any further questions regarding the game or this guide, feel free to drop your feedback below. I will try my best to get back to you as soon as possible.

More COD Mobile Guides:

Android USB Drivers For Windows – Download Google Nexus Samsung, HTC, Huawei, Motorola, LG USB Drivers [ADB / Fastboot]

6
Android USB Drivers For Windows – Download Google Nexus Samsung, HTC, Huawei, Motorola, LG USB Drivers [ADB / Fastboot]

As of late 2019, the Android USB Drivers for Windows in this post are the latest. You can download Android USB Drivers for all Android phones.

Android is an extremely fast-growing operating system of the present time and many of the companies are using it in their new devices. The USB drivers for an Android device are always important for development purposes and transferring media content to the phone’s storage. Using the device for Android Development purposes requires Android SDK, ADB & Fastboot Drivers.

Android1

Having the drivers’ pre-installed on the computer is a precautionary measure to prevent any mishap and save time at a later time.  Most of the Android USB Drivers are available on the official sites of the device manufactures, but for your ease, we’ve compiled all the USB drivers/ PC Suites download links from all the major/popular Android Device Manufacturers below.

Android USB Drivers For Windows – Download Google Nexus Samsung, HTC, Huawei, Motorola, LG USB Drivers [ADB / Fastboot]

Download Google, Samsung, HTC, Huawei, Motorola, LG USB Drivers [ADB / Fastboot]

Also Check: How to Install ADB & Fastboot drivers on Windows 8/8.1 with USB 3.0

Feel free to Contact Us if we are missing any drivers.

 Updated: 11/24/2019 

How to change Call of Duty Mobile server in Gameloop

How to change Call of Duty Mobile server in Gameloop

Not liking your current Call of Duty Mobile server on PC? It’s time to change it. Here is how you can change Call of Duty Mobile server in Gameloop.

Call of Duty Mobile – Mulitple Servers

Call of Duty Mobile is the game that everyone is talking about right now. It took only 3 days for this game to become the most popular smartphone game in the world. The game is not limited to smartphones only. Its developers have also built an emulator to let users run it on the PC. Gameloop happens to be the official Call of Duty Mobile emulator.

On the first day of its release, the game ran into server issues. A lot of players were unable to connect to the server and somewhere not able to get past the loading screen or getting version info. Those issues seemed to be server-specific. Although the developers fixed all those issues, some users opted for other available servers of Call of Duty Mobile.

change Call of Duty Mobile server

When you install this game, it asks you what server you want to play it on. There are three servers in total. We have the International Servers, Asian Servers, and the Korean servers.

All these servers have their own elements in the game. When you will play on the international servers, your matches will be made with the players all across the globe. Asian and Korean servers will definitely keep you limited to the players of their respected regions. There is a high chance that these servers will also have a specific language. For example, the Korean server may or may not have a game in the Korean language.

So, those of you who are facing the server connection problems, they can try switching to another server. Also, if you want to play with an entirely different group of players, you may try changing the server in that case too. It’s incredibly easy to change server on Call of Duty Mobile when playing on Android or iOS smartphone. However, it’s a bit tricky to change the server in the Gameloop emulator.

Take a look at the steps below to change Call of Duty Mobile server in Gameloop.

Change Call of Duty Mobile server in Gameloop

  • Open the Gameloop emulator on your computer.
  • On the left side in the emulator, click on “My Games”.
change Call of Duty Mobile server
  • You will see Call of Duty Mobile there now.
  • Below Call of Duty Mobile’s Play button, you will find “Change Server”.
change Call of Duty Mobile server
  • Click on it and you will see three options i.e. Southeast Asia, Korea, and your selected server, probably International.
  • Now you can download the server you want and you can also remove a downloaded server from the list of your servers.

Keep in mind that these servers have different data. Your game will not remain the same after changing the server which is why you need to sure of what you are going to do. It’s very easy to switch your server back. You will not lose your game progress by changing the server.

Conclusion

By this time, you should be playing COD Mobile on your desired server. Let us know if you have discovered something new on another server. Also, feel free to list down the differences between the servers. If you have anything to ask or share, use the comments box below. I will try my best to get back to you as soon as possible.

More Call of Duty Mobile Guides:

GCam for Xiaomi Mi 10T and 10T pro, Install free

0
GCam for Xiaomi Mi 10T and 10T pro, Install free

You can now use GCam for Xiaomi Mi 10T and 10T pro. I have compiled a method for you to download the app on your Smartphones.

These are all mods of the original Google Camera and there is no guarantee that the files will give you a full GCam experience. But the new versions are being updated regularly by the Moders to give you an enhanced Google Camera experience.

The Xiaomi Mi Note 10t and Mi 10T pro

The Snapdragon 865 processor used here provides snappy speeds, useful for editing those super-high-res photos you just took or playing games. It would work well with the high-refresh-rate screen, as 144Hz is usually great for gaming, though few mobile games are actually optimized for that just yet.

In terms of performance, the Mi 10T clearly plays in the first division. Just as in the Mi 10T Pro, it has a Snapdragon 865 under its hood, one of the fastest smartphone SoCs, which is also used in the Mi 10 and Mi 10 Pro.

We’ve got a few other good things to say about the phone. its fingerprint sensor easy to use, the battery life is great, and there seemed to be fewer pre-installed third-party apps

Camera and Display

Firstly, as with many Xiaomi phones, the Mi 10T Pro has a pretty impressive main camera, with the same 108MP snapper we’ve seen in a few of the company’s other phones. This is certainly a ‘brute force’ tactic to getting on our best phones list, with sheer resolution prioritized above nuanced AI software or huge-pixel-size sensors, but it gets the job done. The auxiliary cameras don’t add much though.

The Mi 10T Pro’s 144Hz display is one of the quickest around. It feels super responsive to use, and gamers will enjoy the fast refresh rate. Xiaomi has included AdaptiveSync technology. This dynamically switches between refresh rates depending on the application that you’re running. You can manually switch in the settings menu too.

The Mi 10T pro camera features

  • Rear:
    • 108MP, f/1.7, 26mm, 1/1.33-inch sensor
    • 13MP ultrawide, f/2.4, 123-degree FOV
    • 5MP macro, f/2.4
  • Video:
    • 8K 30fps, 4K 60fps, FHD 120fps
  • Front:
    • 20MP, f/2.2, 27mm, 1/3.4-inch sensor
    • FHD 30fps

Mi 10T camera Features

  • 64 MP, f/1.9, 26mm (wide), 1/1.73″, 0.8µm, PDAF
  • 13 MP, f/2.4, 123˚ (ultrawide), 1.12µm
  • 5 MP, f/2.4, (macro), AF
  • While the front camera is 20 MP, f/2.2, 27mm (wide), 1/3.4″, 0.8µm.
Install GCam for Xiaomi Mi 10T
From TechTablets

Why the People want GCam on their Mi 10T and Mi 10T pro Smartphones

GCAm brings almost every feature of cameras on pixel devices to any device. Not to forget some of them may not be available depending upon the hardware. You can search for GCam modded version for your device but your device must support Camera2api else you won’t be able to install GCam on your device.

  • Automatic DND mode while using video-recording.
  • Quick-Toggle for Video resolution changes
  • New settings UI.
  • 24FPS video recording.
  • 4K@60fps Video recording
  • Exposure controls to adjust brightness and HDR of your photo.
  • Received Frequent Faces to help you capture Top Shot photos.
  • Touch and Hold shortcut in the shutter button to capture Top Shot photos.
  • AI adjustments.

Download Google Camera for Xiaomi Mi 10T and 10T pro

Download one of the following Google Camera APKs depending on your preference, you can also try all these builds one by one if you wish.

Google Camera GCam for Xiaomi Mi 10T
From TechTablets

How to Install GCam on Xiaomi Mi 10T and Mi 10T pro

  • First, download the APK from the given Download links provided above.
  • Then, Simply enable the unknown app install and then install the application just like any third-party application.
  • After that allow with all it is the permission it requires.
  • Now, Simply open the Google Camera and start using the extra-ordinary photos.

Steps to Enable Astrophotography Mode on GCam (Mi 10T Series)

  • Launch Google Camera > Go to Settings.
  • Scroll down a bit and tap on Advanced.
  • Scroll down at the bottom of the page and turn on the ‘Use Astrophotography Mode’ toggle.

How to Configure GCam for Xiaomi Mi 10T and 10T pro

  • Probably, this can fix using the configure XML Config file on your device. Where simply move the file of GCAm to Configs7 Folder.
  • In case there is not any folder the simply create the “Config7” inside the “GCam” folder, Now move the Config file there.
  • Now, Simply open the Google Camera and double tab the shutter button, and then the dropdown menu appears.

Final Thoughts

Hopefully, This helps you a lot, and you have been installed the GCam successfully on your Xiaomi Mi 10T / 10T Pro. I would like to know your valuable opinion and feedback if there is any query share with us in the comment section down below.

Note: These Gcam builds come from different developers/modders. These are not guaranteed to work on your device, but one of these will definitely work. Some of these builds have their configs files. However, you can configure the application on your own after installation.

You can check out the Google Camera for Poco X3 as well from this LINK

Google Camera GCam for Poco X3 – Install Free

0
Google Camera GCam for Poco X3 – Install Free

If you are looking for a way to install the Google Camera for Poco X3 you have come to the right place. You will just have to follow some simple steps.

Pcoco X3 Google Camera will work fine on the device. Poco X3 has a snapdragon 732 G chipset, which will support the GCam app on you Poco X3 NFC.

 GCam for Poco X3

The Poco X3 Phone

The new Poco X3 is a great budget-friendly device that punches above its weight, delivering great performance and an incredible 120Hz display at just 200 Euro.

The right side of the frame has the fingerprint sensor embedded in the power button. Just above that, you’ll find the volume controls. The top of the frame has the IR blaster and the left side is the dual hybrid SIM tray. At the bottom, you’ll find a speaker grille, a Type-C port, and a 3.5m headphone jack. The earpiece also doubles up as a speaker to offer stereo sound support.

POCO X3 sports a 6.67-inch FHD+ IPS LCD display with Gorilla Glass 5 protection on top and a center-aligned punch-hole cutout. The display supports a high 120Hz refresh rate to offer a smooth scrolling experience. The 1080p resolution is sharp and we were able to stream movies on platforms like Netflix in crisp high resolution. Overall, the POCO X3 offers a good display, but it’s not the best in this segment.

The Camera

The phone gets a quad-camera setup housed in a module that is center-aligned. The module does stick out quite a bit and tends to gather a lot of dust around it. The rear panel has a striped pattern strip down the middle with large POCO branding on it.

The POCO X3 offers a similar quad-camera setup as its predecessor, but instead of the 64MP Sony IMX686, the company has opted for the Sony IMX682 sensor. The primary camera is accompanied by a 13MP ultra-wide-angle lens, a 2MP macro lens, and a 2MP depth sensor. At the front, the phone sports a 20MP camera for selfies. The POCO X3’s cameras are backed by features like AI Skyscaping 3.0 mode, Kaleidoscope mode, Pro mode, Pro colour, and filters like Gold Vibes and Cyberpunk.

Why Would you need Google Camera on your smartphone

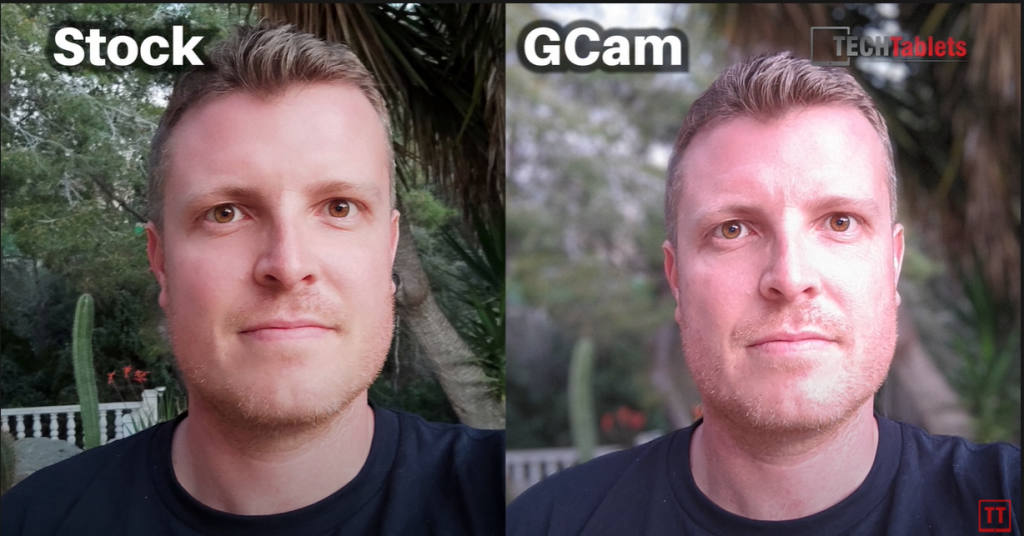
Where it’s most noticeable is with the front-facing camera on the Poco X3 NFC. As many Chinese manufacturers typically do, Poco does add quite a bit of facial smoothing to selfies, something that the Google Camera app doesn’t do at all. If you like seeing all the pores on your face, the GCam will certainly deliver.

The results you get from the GCam on the Poco X3 are noticeably better than what the stock camera app is able to deliver. While there isn’t a significant shift in white balance, the GCam does seem to tone down saturation a little while increasing sharpness and contrast. Taking a close look at the details in the images you’ll notice that GCam preserves a lot more detail in the fine textures.

Google Camera for Poco X3

What is GCam

GCam stands for Google Camera, and it generally refers to a modded camera app you can download in order to get some camera features (HDR+, Portrait Mode-ish) from Google’s Pixel phones.

It’s not necessary at all, but I think the photos it takes are oftentimes better than the stock camera. One of the most popular ones is cstark27’s version, which offers two separate apps: one for the regular rear camera, and one for the wide-angle camera

Download LINKS for Google Camera on Poco X3

Download one of the following Google Camera APKs depending on your preference, you can also try all these builds one by one if you wish.

Note: These Gcam builds come from different developers/modders. These are not guaranteed to work on your device, but one of these will definitely work. Some of these builds have their configs files, but unfortunately, there is no configs file available for the Poco X3 NFC right now. However, you can configure the application on your own after installation.

How to Download the Google Camera app on your Poco X3 Smartphone

To dwonload the GCam on Poco X3 you will not need anything else then the download links provided for you above.

  1. First, you will download the GCam on Poco X3 from the links whichever you like.
  2. Before the download of the file, you should allow your app to download from external sources.
  3. In order to this, go to the device Settings menu > Security/Privacy > enable it.
  4. It will launch the package installer and tap on the Install button.
  5. Once the installation is done, open, and use it.

How to Configure your Google Camera on your Poco X3

If you have a configs file for the Poco X3 nfc, here is how to install it. or f you do not have one just use the one provided below.

  • Download the XML file from the Link.
  • Save the XML file to GCam Folder, You need to create the folder.
  • After you have created the Gcam folder in that folder create New Folder- Configs7
  • Now under that folder Copy and Paste the XML file you just downloaded from the above link
  • Open GCam and double-tap the empty space from the left side of the shutter button » restore config (switching between configs does not require a reboot)

Final Thoughts

I personally have not used the GCam on Poco X3 but the results that are being shown are clearly better than the stock camera app. There might be some issues with the mod but its developers are constantly updating new versions to make sure you get all the good features of the Google Camera on your device.

You can also check out the GCam for Mi Note 10 Lite HERE

AndroVid for PC – How to use for Free – Windows 10, Mac

0
AndroVid for PC – How to use for Free – Windows 10, Mac

AndroVid on PC is an easy to use, full-featured video maker. Just download now and easily make amazing videos with music, text, effects, stickers, and many more features.

AndroVid for Mac

Why the AndroVid PC app?

Maybe you’re not a professional and have no ambitions to become one, but just want to edit some videos for fun, such as family footage or your own not-too-serious YouTube channel. Or maybe you have thoughts of being a professional one day, but want some easy to use video editing software to get you started? For such purposes, AndroVid for PC app is the right option for you.

It isn’t as complex as other editing apps, so the interface will look less scary to a novice, and your learning curve will be a lot more straightforward. But it’s still packed with powerful features, such as face detection, audio effects and bundled soundtracks. 

You get all the video effects you’d expect in a consumer video editor: transitions, chroma-keying, opacity, and so on. The approach to video editing is very simple and visual. Plus smart search functionality, video stabilization options, and automated functions, such as motion tracking and smart toning, all help speed up your workflow.

AndroVid on PC

Features- AndroVid for Windows

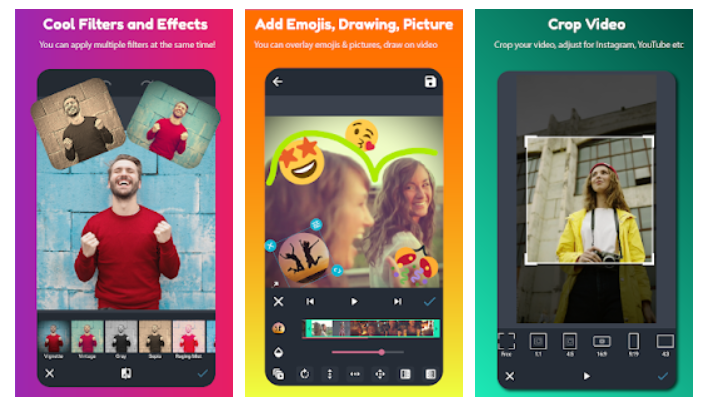
  • Trim and cut video to remove unnecessary parts.
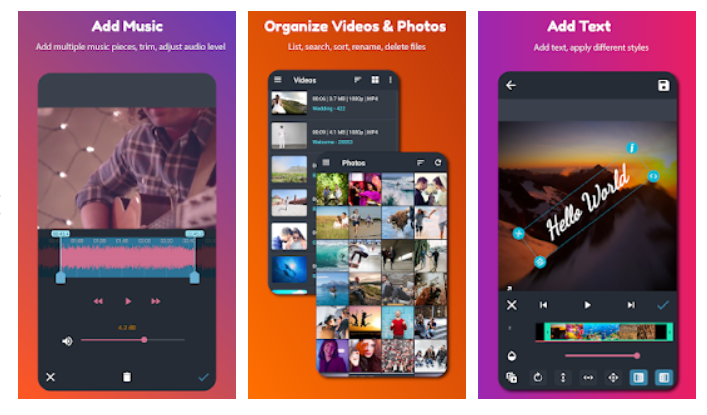
  • Free video joiner with music.
  • Video Maker with song, free Tik Tok editor. Mute video sound
  • Add text on video with font, color, and style
  • Apply stunning color filters to make your video stand out: Vintage, Sepia,
  • Fit video in any Aspect Ratio without cropping.
  • Extract music from video, fast convert video to MP3 music
  • Combine up to 9 photos into a beautiful photo collage.
    Background change, border size, roundness
  • Make slideshow video from pictures
  • Fast rotate video by 90 degrees or 180 degree
  • Enhance your video for better quality. Adjust brightness, contrast, saturation, temperature.
  • Free Video transcoder app to convert videos to other formats, change the resolution to make your videos smaller. Supports conversion to GIF, 3GP, AVI, FLV, MP4, MPG, MOV, WMV, and VOB formats.
  • Zip your video to make video size smaller for easy sharing
AndroVid app PC download

How to Install AndroVid app on Windows and Mac

  1. Install the BlueStacks emulator on your PC
  2. You will need to co complete the installation process of the emulator, just follow the on-screen instructions
  3. Open the emulator, it might take some time to start depending on your Internet connection.
  4. Look for the PlayStore app on the home screen and click on it to open
  5. You will be asked to give your Google ID.
  6. Search for the AndroVid app and click on the install button to complete the process.

If you want to use this app on your Smartphone just follow this PlayStore app LINK.

Movavi Clips for PC Install Free – Windows and Mac

0
Movavi Clips for PC Install Free – Windows and Mac

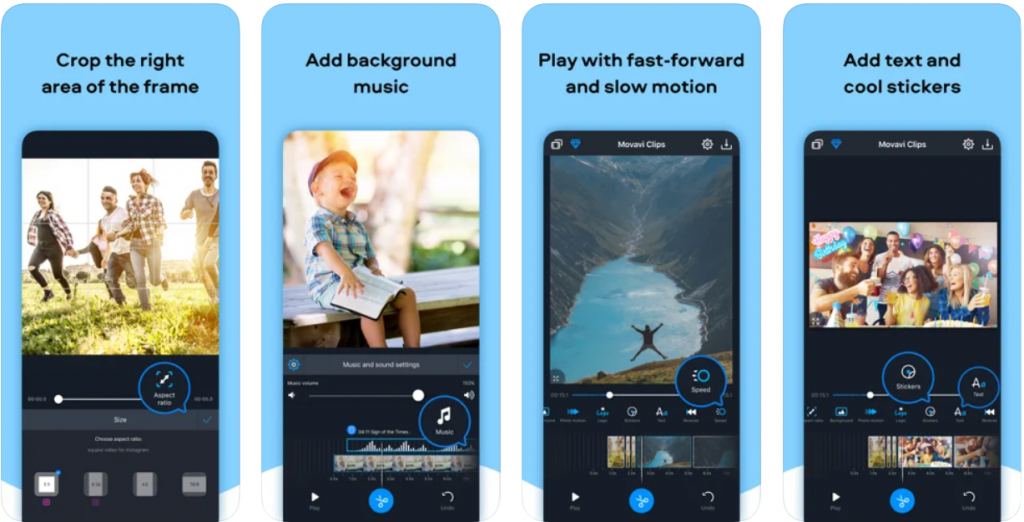
Movavi Clips app on PC is an advanced video editor for your device! It has everything you need to create an epic video or engaging Stories.

Movavi Clips for PC

What is Movavi Clips for PC app

Movavi Video Editor is designed for anyone who wants to easily share their ideas through videos. You can Create heart-warming wedding videos, engaging travel clips, memorable birthday films and home movies. With Movavi’s free-download video software, you become the director of your own story.

The UI of the app is very appealing. In the Movavi Clips PC app, every tool is where you expect it to be. So even if you’ve never tried to edit videos on a PC before, it will take you no more than 20 minutes to master the movie editor and be able to edit like a pro.

When you’re ready to begin, you will find editing tools generally reserved for professional video editing software. Some of the tools available in the app include precise clip cutting, the ability to slow down or fast forward video clips, add transitions, and much more.

Once you have the basic video assembled, you can then use Movavi for Windows to color correct your footage using color filters. You can also manually adjust the brightness and saturation of each clip.

Before you export the movie, you can add titles, stickers, and voice-overs to give it a personalized feel. Additionally, you can choose to add music from Movavi’s built-in music and sounds library. This takes away the difficulty of having to find copyright-free music.

Movavi Clips editor on PC

Features of Movavi Clip app

Add Photos and Videos

  • Choose the clips and photos you want to use for your movie
  • Order them the way you want

Add Music

  • Pick a song from your device’s memory or use one of the built-in tracks
  • Adjust music volume
  • Mute original video sound if necessary

Edit Your Movie

  • Cut out the sections you don’t want to keep in your movie
  • Add smooth transitions
  • Overlay stickers and captions
  • Copy video fragments

Save the Result

  • Set the aspect ratio for your output video
  • Save the movie on your phone or tablet
  • Share it on social networks
Movavi Clips app PC download

How to Download Movavi app on Windows and Mac

  1. Install the BlueStacks emulator on your PC.
  2. You will need to complete the installation of the emulator by following the on-screen instructions.
  3. It may take some time depending on your Internet connection
  4. Open the emulator on your PC, and look for the PlayStore app on the home screen
  5. Search for the Movavi app
  6. Click on the install button to complete the download
Movavi Clips on Windows

PC version

There is an official version of the app available for PC users ( Windows and Mac). You can access it from this LINK.

There are two version of it one is completely free but you will get a limited access to the features of the software. The Plus version is going to cost you $39.95 and it will have all the best features of the software.

System requirement for PC version

  • Operating system Microsoft Windows, XP/Vista/7/8/10 with up-to-date patches.
  • Processor Intel, AMD, or compatible dual-core processor, 1.5 GHz
  • Graphics card
  • RAM 512 MB RAM for Windows XP and Windows Vista, 2 GB for Windows 7, Windows 8, and Windows 10
  • Hard drive space 800 MB available hard disk space for installation, 500 MB for ongoing operations