Home Blog Page 28

Download Galaxy S10/S10 Plus Android 10 Firmware Update
Download Galaxy S10/S10 Plus Android 10 Firmware Update
Download Android 10 for my Galaxy S10 Plus via SamFirm

Samsung has officially released the Android 10 for the Galaxy S10 series. You can now download Galaxy S10/S10 Plus Android 10 firmware update from here. Remember that this is the final Android 10 update.
Samsung Galaxy S10/S10 Plus Android 10
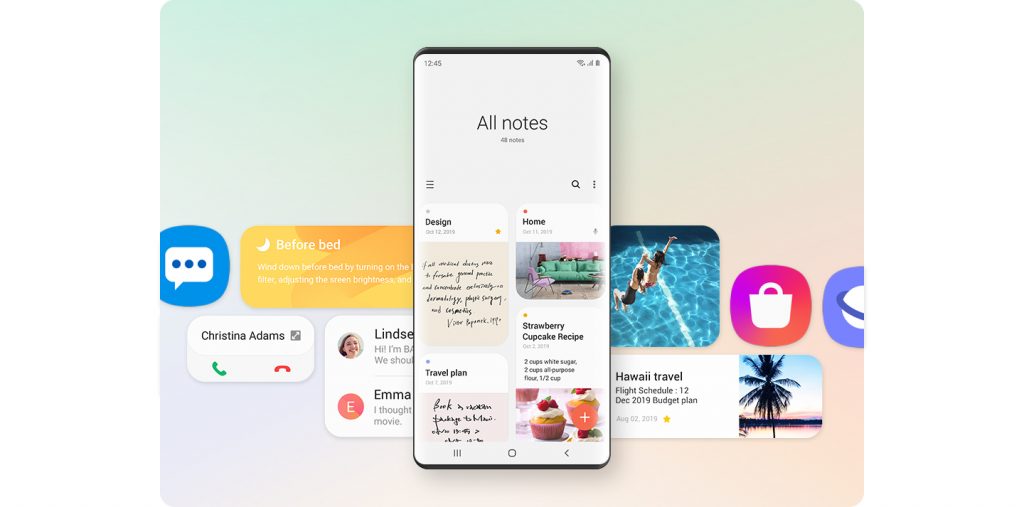
Android 10 One UI 2 – Image CC: Samsung

Android 10 for Galaxy S10 – What’s new?

After months of beta testing, the Android 10 has finally been released for the Galaxy S10 lineup. The much-awaited update brings massive changes to Samsung’s UI. The update boasts a number of new features too.

The Android 10 update, to start off, brings the all-new One UI 2.0. It overhauls almost every UI element of its predecessor, the One UI 1.1/1.5. 

The One UI 2.0 changes the way the lock screen used to look like. If you have ever used the Samsung Good Lock app, you will find that the inspiration for most of the Android 10’s UI elements comes from the apps you saw in the Good Lock app. 
Galaxy S10 Plus Android 10 Firmware update
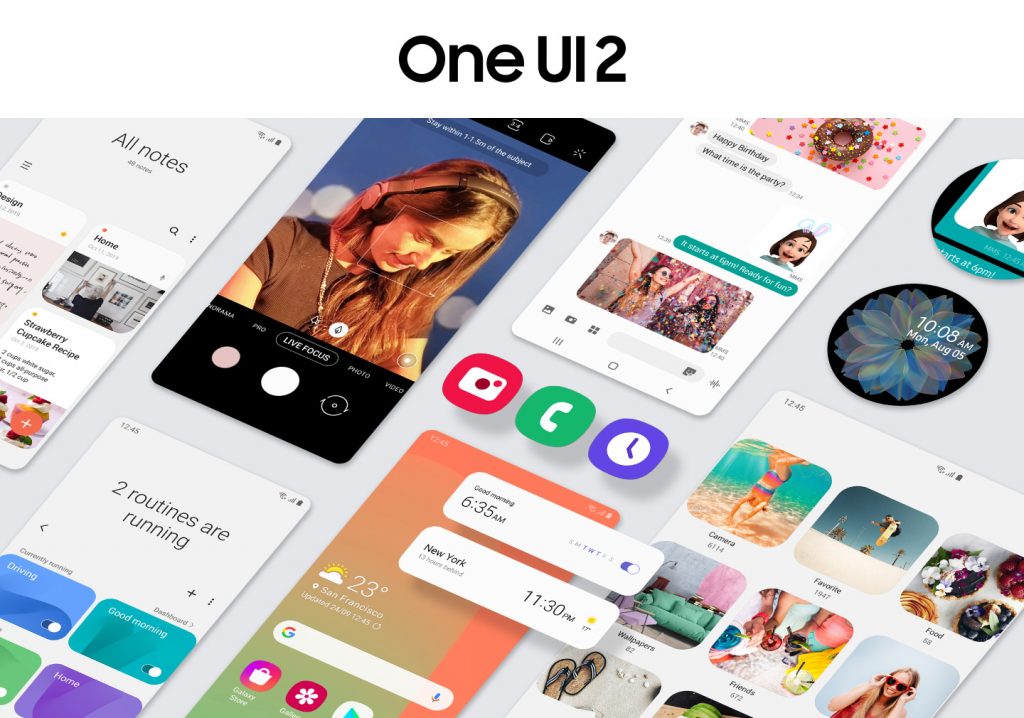
One UI 2 – Image CC: Samsung

Samsung has completely changed the UI of the camera app. Apart from changing the icons of the camera options, Samsung has added a “More” section where more camera options reside.

The settings application has also received massive updates. Samsung is trying to fit in more content on one visible screen now. The title cards have got a bit smaller with this update. One UI 2.0 also brings a native screen recorder. This is a useful feature for those willing to make a tutorial out of their phone’s screen. 

The Dark Mode aka the Night Mode of the Samsung phones has got better. The Dark Mode can now darken the wallpaper too. Samsung has made more apps compatible with the Night Mode.

In terms of the new features, this is not a huge update. Keeping in view Samsung’s track record, it will be safe to say that Samsung might end up adding new features slowly through new smaller software updates.

Galaxy S10 Android 10 update rollout

At the time of writing this, the Android 10 update of Galaxy S10 has rolled out in Germany. If you are living outside Germany, you will not find this update through OTA.

Right now, the only way to download the Android 10 is through a manual procedure. You can install the German Android 10 update on any Galaxy S10 or S10 Plus as long as you have the same model number. For example, the update is out for G970F and G975F. You can find the language options in the firmware which means you don’t have to worry about losing English or your native language. It’s just the region of the firmware which will be German, other than that it does not make any difference at all.

Down below, I am going to link the download for the latest Android 10 update of Galaxy S10 and S10 Plus. Also, I’m going to show the download method via SamFirm tool.

Download Samsung Galaxy S10/S10 Plus Android 10

  • Galaxy S10 G973F FXXU3BSKO – Download
  • Samsung Galaxy S10 Plus G975F FXXU3BSKO – Download
  • Galaxy S10E – G970F FXXU3BSKO – Download

How to download Galaxy S10 Android 10 via SamFirm

  1. Download and extract SamFirm Tool on Windows PC.
  2. Open SamFirm.exe.
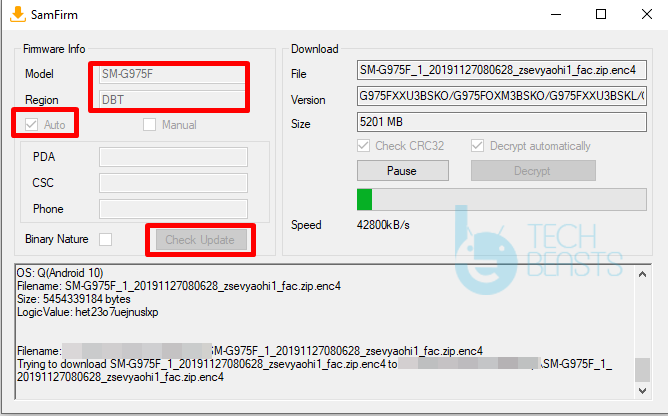
  3. In SamFirm, enter the model number i.e. SM-G973F or G970F or G975F in the Model Number tab.
  4. Enter the region “DBT” in the region tab.
  5. Click on “Auto” and then click on “Check Update”.
  6. Click on the “Download” button in SamFirm now.
  7. SamFirm will find the Android 10 update and start downloading it. That’s all.
download galaxy s10 android 10
Download Android 10 for my Galaxy S10 Plus via SamFirm

Confused about your device’s model number? Find the list of Galaxy S10 Model Numbers here.

Now how to install the firmware that you just downloaded? Well, I have written a guide for that too. Take a look at this guide to install it now.

Final Words

That’s all. You can download the Android 10 using this guide for any model of the Galaxy S10/S10E/S10 Plus given that the Android 10 has rolled out for your model. If you have any further questions, feel free to use the comment section below. I will try my best to get back to you in time.
COD Mobile Perks Explained – Best Perks & How to Unlock

COD Mobile Perks Explained – Best Perks & How to Unlock

Perks are the chief constituent of Call of Duty series. Call of Duty Mobile is no different. It has all the perks too. If you haven’t discovered perks yet, you will do so once you go through this guide. All of the COD Mobile Perks are explained here. You will also learn about the Best Perks and also how to unlock COD Mobile perks.

COD Mobile Perks
Perks work in Multipalyer Mode only.

COD Mobile Perks

For the unbeknownst, perks in COD Mobile are like powerups in any other game. Perks give your soldiers special abilities on the battlefield. These special abilities and enormously improve your gameplay. The game-changing perks can transform your defeat into a win. For example, you will find features like improving the recovery speed of your soldiers, you will be able to hide your soldiers from the enemy UAVs, or they can improve the sprint speed of your character. There are dozens of perks in COD Mobile to benefit from.

To ensure maximum benefit from a perk, you must learn about the best ones. Choosing the wrong perks is not going to do any good for your game. A lot of choices in the perks section can also leave you confused which is also why you need to know about the best COD Mobile perks. Before you learn about the best perks, let me show you a few prerequisites to use perks.

COD Mobile Perks Requirements

  • COD Mobile Perks work only in the Multiplayer Mode.
  • Perks will not work in the Battle Royale mode.
  • COD Mobile has 3 Perks: Red, Green, and Blue.
  • At max, you can use only 3 Perks.
  • You can use only 1 Perk from each Perk category.
  • To use at least one perk from each category, you must surpass level 12.

If you are meeting all these prerequisites, you are all good to go ahead and learn more about perks.

Red Perks

COD Mobile Perks
Red Perks of COD Mobile

This is the very first set of Perks that you will unlock in Call of Duty Mobile. The Red Perks open up at level 4. The following are all the perks of Red Perks.

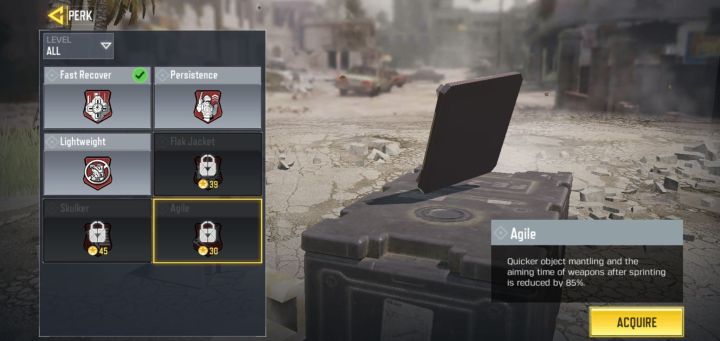
Fast Recover: It increases the HP recovery rate of your soldier by 35%.

Persistence: With this perk, the scorestreak progression will not reset upon your player’s death, but it doubles the scorestreaks costs.

Lightweight: It increases the sprinting speed of your soldier by 10%. The fail damage is enormously reduced with this Perk.

Flak Jacket: It reduces the damage from explosions by about 35%. This can prove to be a life saviour in many situations.

Skuller: It helps your player move 12% faster when walking or crouching in the game.

Agile: The object mantling becomes quicker. The aiming time of weapons of you stops sprinting is reduced by 85%.

Green Perks

COD Mobile Perks
Green Perks of COD Mobile

The Green Perks will unlock at level 6. These perks are aimed at making your player prone to enemy attacks. The following are the perks of the Green Perks.

Tracker: The enemy footprints are visible for 4 seconds when they are approaching you. You can easily aim at your enemies with this perk.

Vulture: This perk picks up the ammo from kills equal to the magazine capacity of your current weapon.

Toughness: When your player is shot, it reduces the flinch by 60%.

Ghost: It makes your player undetectable for enemy UAVs. The Enemy UAVs cannot reveal your position.

Cold-Blooded: The enemy AI-controlled Scorestreaks cannot target you when this perk is activated. However, it doesn’t affect the manually-controlled Scorestreaks.

Hard Wired: Your player becomes immune to Counter-UAVs and EMP Grenades. It doesn’t let you trigger Trip Mines either. It reduces the effectiveness of enemy tracker perks too.

Blue Perks

Best COD Mobile Perks
Blue Perks of COD Mobile

This is the last set of Perks in COD Mobile. The first Blue Perk unlocks at level 12. Take a look at the perks of Blue Perks category.

Hardline: It increases the points earned by killing enemies by 25%.

Demo Expert: It will increase the damage of your explosives by 25%.

Tactical Mask: It reduces the duration of tactical equipment effects on you by 40%.

Alert: It shows a general location of enemies on the mini-map when the enemies approach you.

Engineer: It shows enemy equipment and scorestreaks. It also re-rolls friendly care packages and booby trap enemy care packages.

Dead Silence: It will make your movement silent. The enemies will not know when you approach them.

COD Mobile Best Perks

  1. Fast Recover
  2. Agile
  3. Vulture
  4. Toughness
  5. Ghost
  6. Dead Silence
  7. Alert

If you keep getting shot again and again in the game, use the Fast Recover from Red Perks. It will speed up the HP Recovery of your player by 35%. For quicker object mantling, you may go with the Agile Perk, but it’s totally your own choice. My personal choice from the Red Perks is the Fast Recover.

From the Green Perks, pick the Vulture Perk if you don’t want to run out of bullets. It will keep your magazine loaded for the most time. If you want to hide from the enemy UAVs, going with the Ghost Perk is the best choice. If you want to reduce flinch by 60% after being shot, go with the toughness perk. Other green perks are pretty much useless.

From the Blue Perks, the Dead Silence will make your movement completely silent and this is going to help you target enemies without having them turn their heads towards you. The Alert Perk will give you a better idea of where your enemies are.

Remember that you can use only 1 perk from each perk category at one time. The best perks are listed to help you avoid a lot of confusion.

How to activate Perks in COD Mobile

  1. Open Call of Duty Mobile on your phone or in Gameloop.
  2. Click on Multiplayer Mode.
  3. Now click on Loadout on the left side of the screen.
  4. On the lower-right side, you will find Red, Green, and Blue Badges.
  5. Click on each badge and choose your perk one by one. That’s all.
Activating Perks from Loadout menu

Conclusion

After applying perks to your COD Mobile gameplay, you will note a lot of improvement. This will improve your winning streak in the game. If you have any questions related to these perks or this guide, feel free to use the comment section below. I will ensure to get back to you as soon as possible.

More COD Mobile Guides:

How to get COD Mobile Season 2 in Gameloop

0
How to get COD Mobile Season 2 in Gameloop

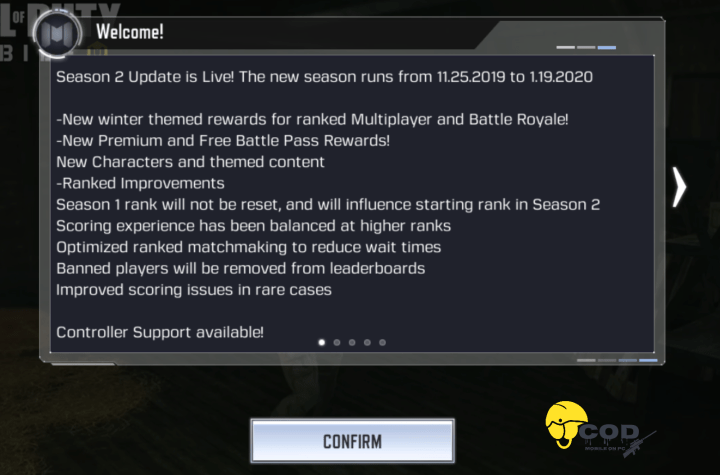
Are you unable to update COD Mobile to Season 2 in Gameloop? Worry not, because you are not alone! Here is how to get COD Mobile Season 2 in Gameloop. In this guide, I will show you how to get past that confirm button for Season 2 update.

Season 2 Update Details

COD Mobile Season 2 in Gameloop

Call of Duty Mobile Season 2 has fully rolled out. This is the biggest update since the release of Call of Duty Mobile. It brings a ton of exciting features and modes. The Season 2 update highlights include the controller support. It brings a new zombies mode divided into two more modes i.e. Raid Mode and Survival Mode. The Multiplayer Mode gets a handful of new modes including the One Shot, One Kill, Sticks & Stones, and Prop Hunt. The Multiplayer Mode and Battle Royale Mode get a new winter theme and a circus theme too. COD Mobile has just become a whole lot interesting with this latest update.

On an Android or iOS phone, you can update to the Season 2 via the Play Store or App Store. Furthermore, you can click on the Confirm button to update as you open the game. When it comes to getting the Season 2 of COD Mobile on Gameloop, things get a bit tricky.

As you open COD Mobile in Gameloop, you will get the Season 2 details and the “Confirm” button to start the update. The season 2 update is of about 1427 MBs. When you click on the Confirm button, nothing happens. Clicking on the Cancel button will take you to the game and it will be the same old season 1. So, how are you supposed to get COD Mobile Season 2 in Gameloop? Well, that’s what you are going to learn here. Take a look at the steps below to update COD Mobile Season 2 in Gameloop Emulator.

get COD Mobile Season 2 in Gameloop
COD Mobile Gameloop Season 2 Can’t Update – Confirm Button Doesn’t Work

Get COD Mobile Season 2 in Gameloop

  1. Open Gameloop Emulator on your computer.
  2. Do not open COD Mobile, if you opened it, close it now.
  3. In the Gameloop, click on Game Center.
  4. Click on Call of Duty Mobile in Game Center.
  5. Now on the right side, click on the Install button. It will not re-install the game, it will only update.
  6. As soon as you click on the Install button, it will start “update configuration”.
  7. After the update ends, launch Call of Duty Mobile from “My Games”.
  8. It will be running the Season 2 now. That’s all.
Updating to Season 2
get COD Mobile Season 2 in Gameloop

Final Words

That’s all. You will now play Season 2 of your favorite game. If you want to get the Season 2 on other emulators, take a look at this guide. In case you have got any questions, feel free to use the comment box below. I will ensure to get back to you as soon as possible.

Enable Dark Mode on the Chrome Browser [ Guide ]

0
Enable Dark Mode on the Chrome Browser [ Guide ]

Nowadays, Dark Mode is every where, we haves seen dark mode adopted by Samsung, Apple, Google and more. It seems Dark mode will soon necessary and it should be, Dark mode provides more battery life on devices and it won’t hurt eyes. Today, I will tell you how to enable dark mode on Chrome Browser.

As you may all know, the dark mode provided on a computer turns Chrome browser dark. However, not everything picks the dark mode, some websites still left as they were. So rather than settling with some draw backs. I think you should follow my guide and enable dark mode on Chrome browser system wide. What ever you will open in Google Chrome, will adopt the dark mode.

Read more: How to turn on Dark Mode on iOS 13

I’ll be using two methods to enable the Dark Mode on Google Chrome. One is using the Google Chrome extension and the other is using Chrome Flags. Both methods work perfectly and after testing both, I made this post.

Enable Dark Mode on Chrome Browser:

In my first method, I’ll be using Google Flags. heed the instructions below to enable the Dark mode.

Chorme Flags:

Total Time: 5 minutes

Open Chrome Flags:

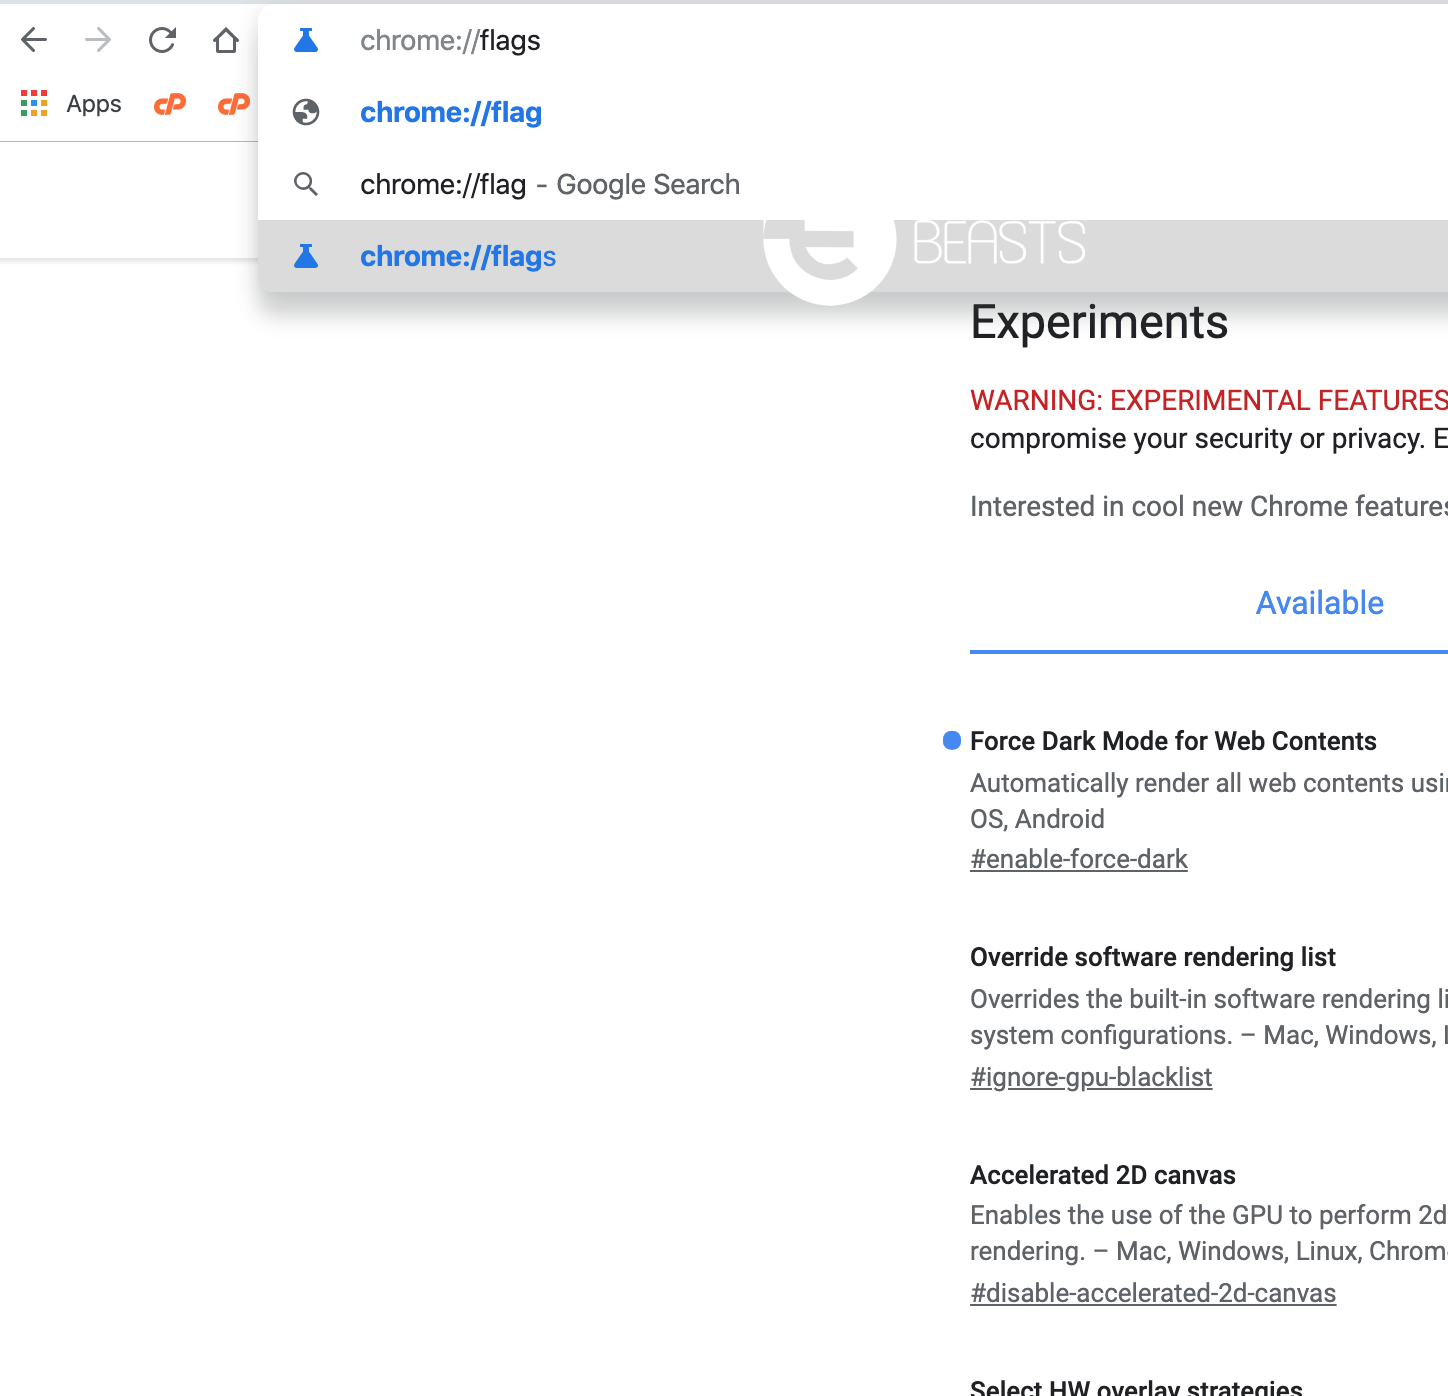
Launch Chrome Browser on your Window or Mac. Type in [ chrome://flags ] hit enter.

Search for Dark Mode:

Upon loading, you will see all the experimental features that you can use to get more functionality on Chrome Browser.

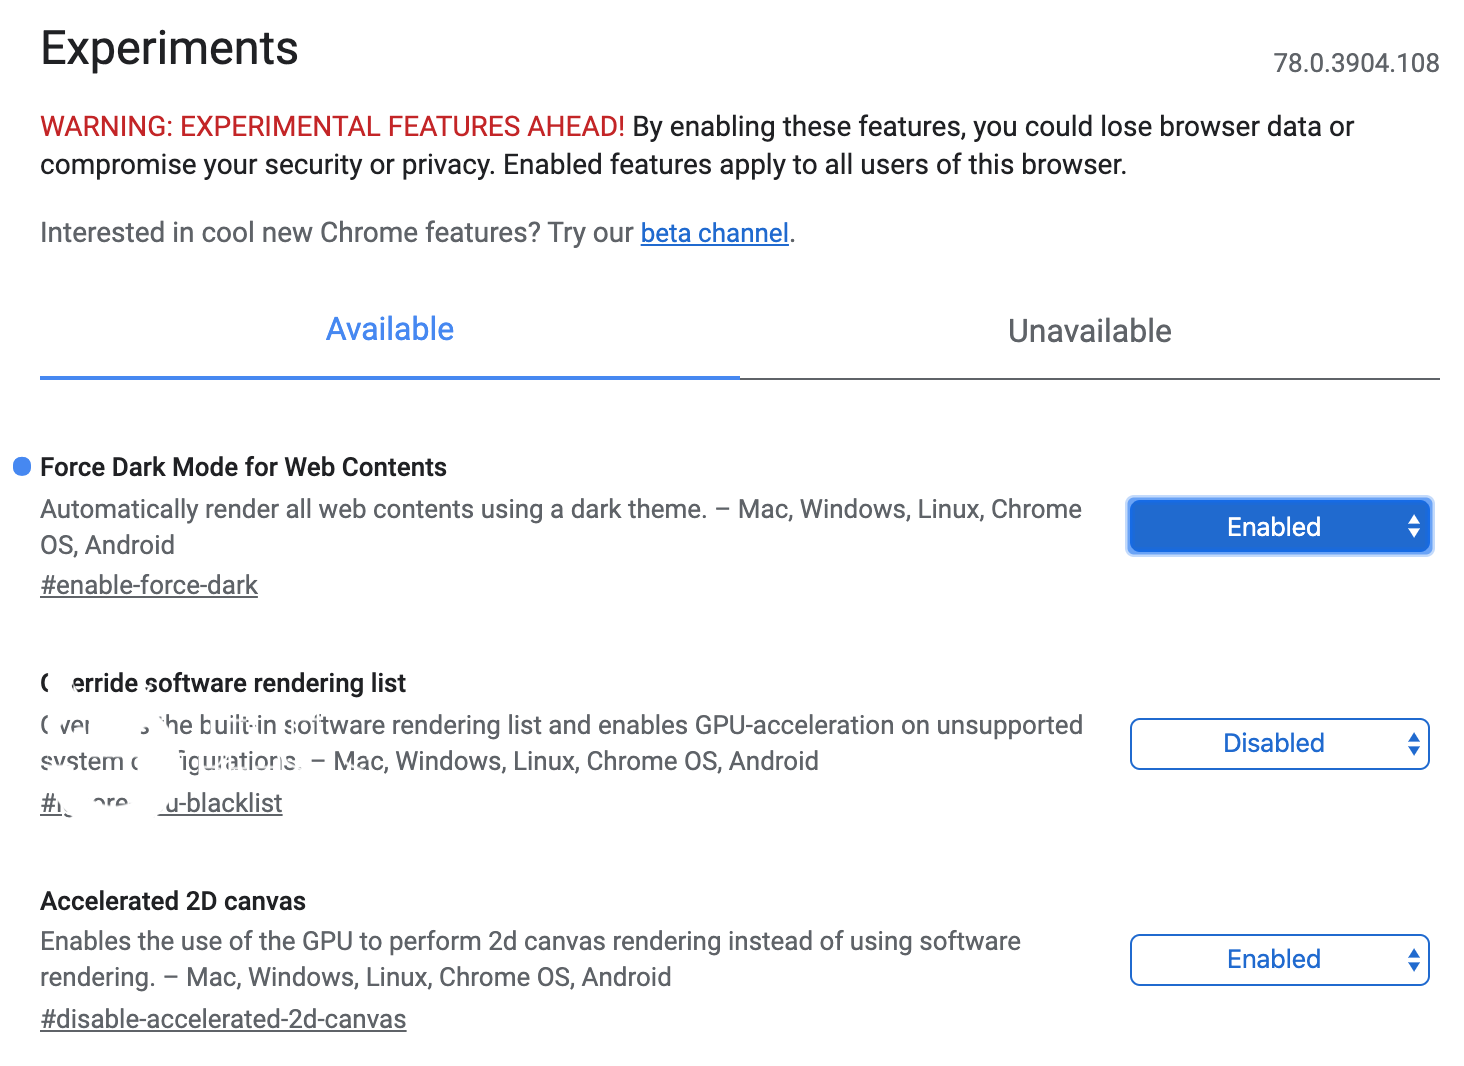
Click on the search bar and type in [ Dark ]. You will be provided with a number of results. The one we will use is ‘force dark mode for web content’.

Now click on default and a drop down list will show up, select Enable. Relaunch your Chrome browser.

Open Different Websites:

After Chrome is relaunched. Try opening different Websites and you will see Dark Mode is working with all of them. I have taken a number of screenshots to show you the results.

How to fix Galaxy Note 10 Speaker Distortion

1
How to fix Galaxy Note 10 Speaker Distortion
Galaxy Note 10 Plus Speaker - Picture @ Usama M

Does your Galaxy Note 10 or Note 10 Plus have a distortion in its speaker? Take a look at this guide to fix Galaxy Note 10 Speaker Distortion. You can apply multiple solutions to get rid of that distortion.

fix Galaxy Note 10 Speaker Distortion
Galaxy Note 10 Plus Speaker – Picture @ Usama M

Galaxy Note 10 Speaker Distortion

Both the Galaxy Note 10 and Note 10 Plus are two of the most expensive Samsung smartphones. Any minor issue occurring out of nowhere can get the Note 10 owners scratching their heads. Recently, a number of Galaxy Note 10 owners started reporting the speaker distortion problem in a Reddit thread.

Galaxy Note 10 comes with two speakers. The stereo speakers setup has 1 speaker at the bottom and one speaker is at the top of the screen. Both speakers work together to produce a stereo sound. Galaxy Note 10 is also equipped with features like Dolby Atmos. The sound enhancement options of this phone can take the sound experience to a whole new level.

The distortion faced by the Galaxy Note 10 owners includes an eery sound when they are listening to a podcast. The issue also happens when someone in a video speaks a little louder. Note 10’s back around its camera vibrates, which is pretty normal. The rear of phones like Galaxy S10, S10 5G, and S10 Plus also vibrates. So, Note 10’s rear vibrating with sound effects is normal, but if it’s sound is being distorted, it definitely has an issue. 

Furthermore, a user reported that the distortion happens only when you are listening at full volume. Note 10’s speakers are designed to output any level of sound smoothly, the distortion should not happen in the first place regardless of the volume level.

Fortunately, the solution to this problem was also presented by a couple of users. If you have been facing this problem, take a look at the steps below to fix it right away.

Fix Galaxy Note 10 Speaker Distortion

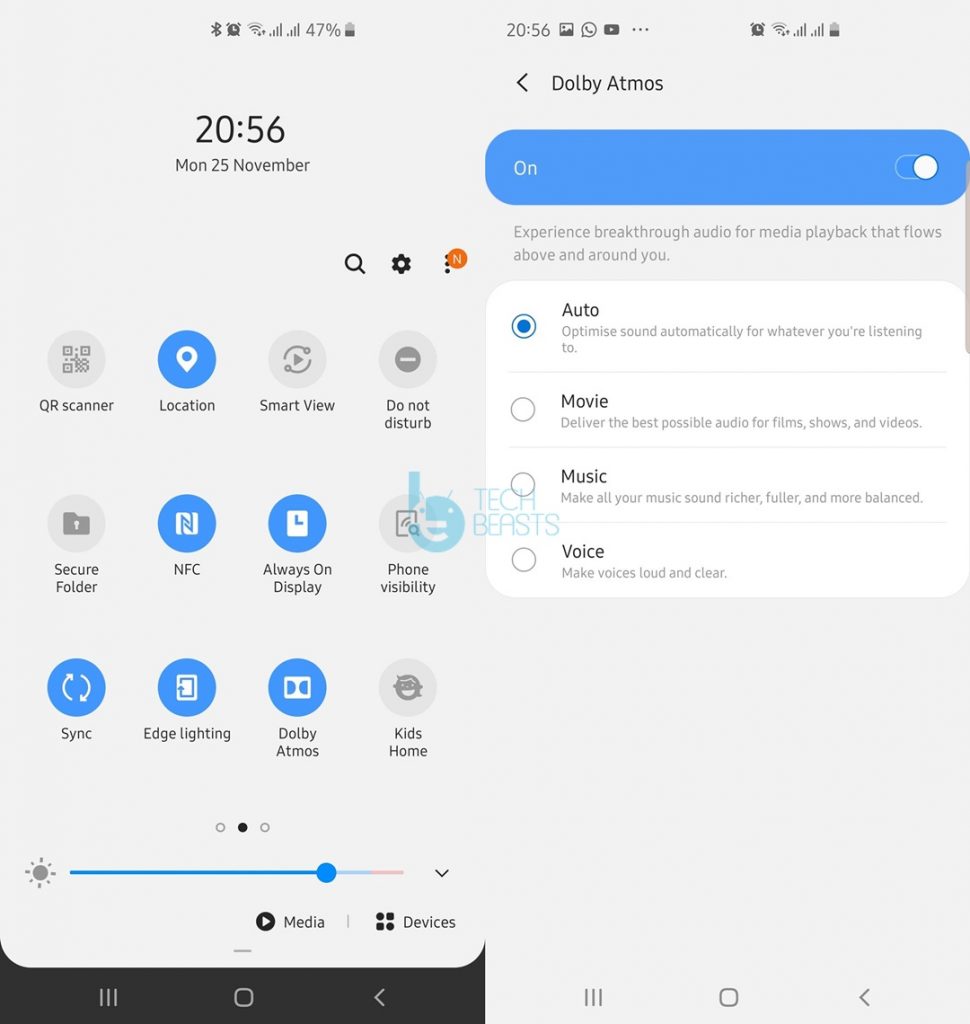
  1. On your phone, pull down the notifications panel to access toggles and turn on “Dolby Atmos”.
  2. Long-press the Dolby Atmos button to access its settings. Set it to Auto for automatic sound optimization. If you are listening to podcasts, set it to Voice.
  3. On your phone, go to settings > sounds and vibration > advanced sound settings > sound quality and effects > equalizer> if it set to custom, set it to a pre-defined equalizer.
  4. Play something on your phone and check the sound now. The distortion will be gone.
fix Galaxy Note 10 Speaker Distortion
Turning on Dolby Atmos on Note 10
fix Galaxy Note 10 Speaker Distortion
Resetting the equalizer

Conclusion

That’s how easy it was to fix the Galaxy Note 10 speaker distortion. The Dolby Atmos on a new phone is turned off by default. Also, if you had it turned on previously, a new update can turn it off. Dolby Atmos can significantly enhance the sound output of the Galaxy phones that support it. By now, you have hopefully fixed this problem. If you have anything to add to this guide or any questions to ask, use the comment box below.

Download Five Nights at Freddy’s AR Special Delivery for PC

0
Download Five Nights at Freddy’s AR Special Delivery for PC
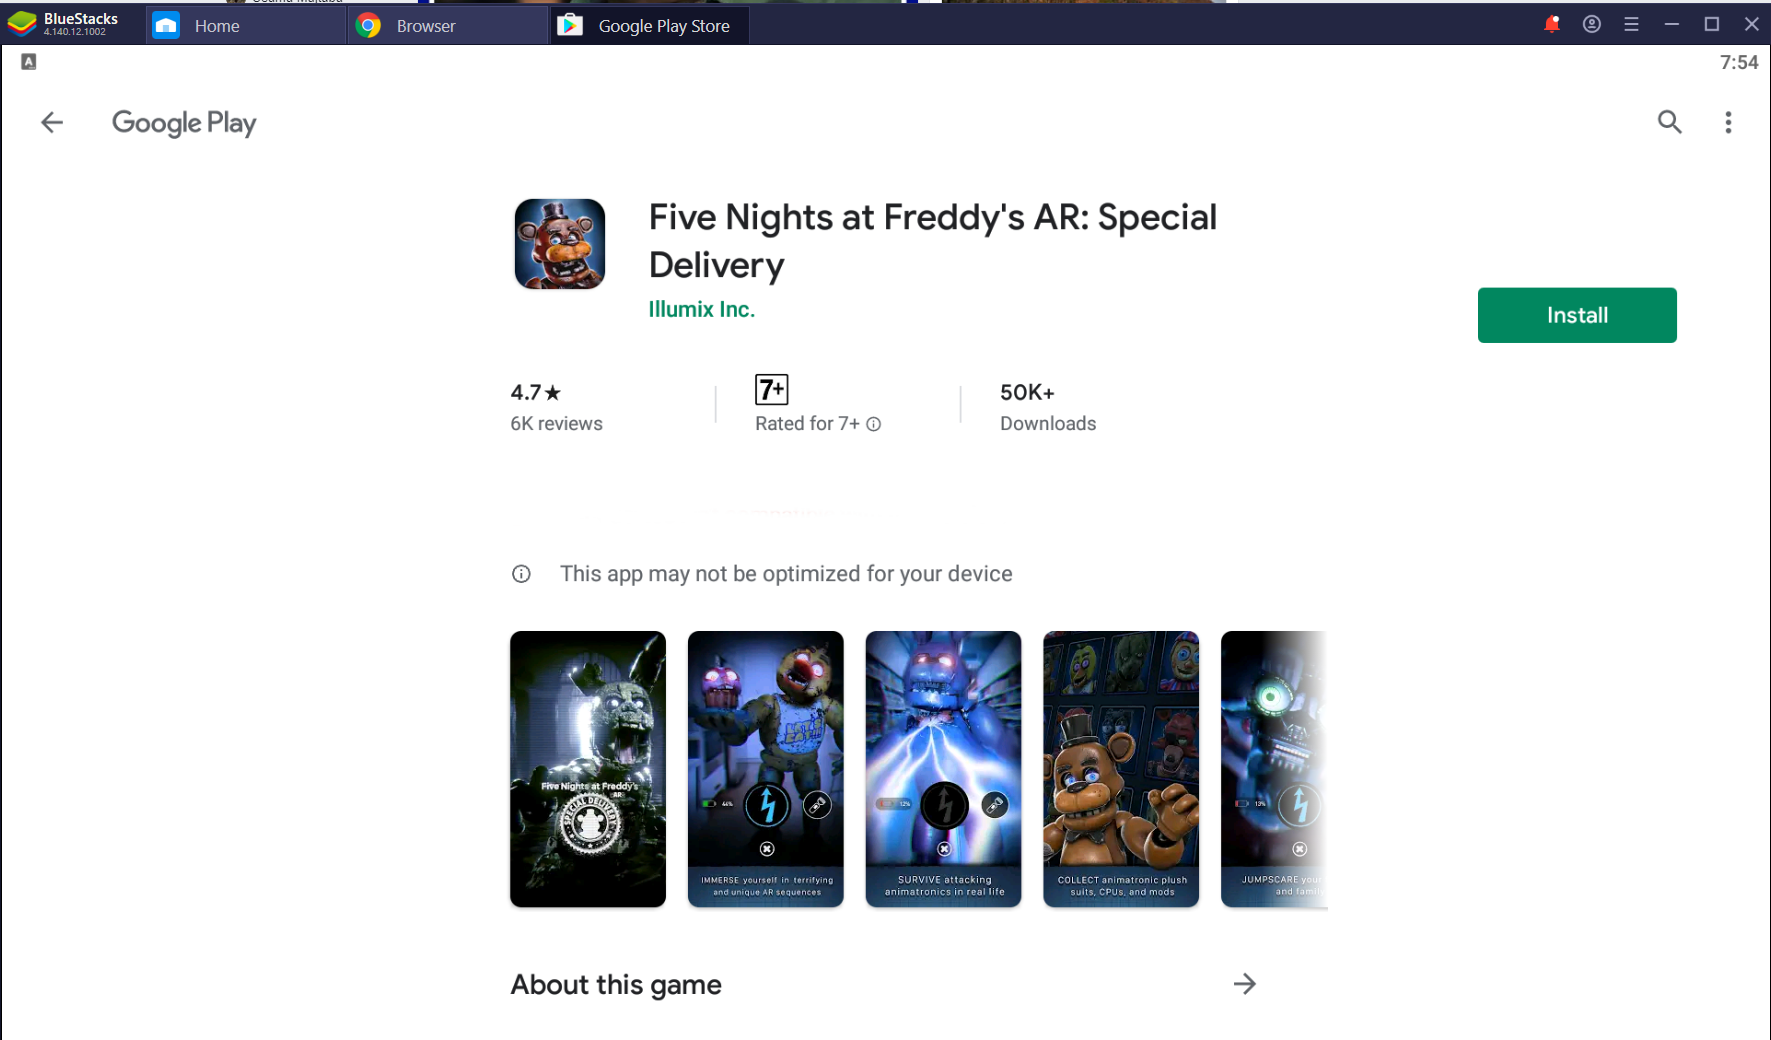
Installing Five Nights at Freddy's AR Special Delivery for PC on Windows 10 via BlueStacks

This is the tutorial to download and play Five Nights at Freddy’s AR Special Delivery for PC. You can get this game on Windows 10/8/7 and macOS. It will run on all Laptops and Notebooks.

Five Nights at Freddy's AR Special Delivery for PC
Installing Five Nights at Freddy’s AR Special Delivery for PC on Windows 10 via BlueStacks

Five Nights at Freddy’s AR Special Delivery

The Five Nights at Freddy’s AR Special Delivery is the latest installment in the Five Nights series. This is the first free game of this series. The game was released a couple of days back and since then, it has glued the phone gamers to the screens of their phones. 

If you are not already familiar with the Five Nights series, these games revolve around the horrifying character named Freddy. In the first 3 parts of this series, players acted as nighttime security guards who had to use several tools such as security cameras and scanners to secure the place from hostile animatronics. The 4th installment of this series took place in the house of a child where he must defend against the same hostile animatronics and flee the house on feet.

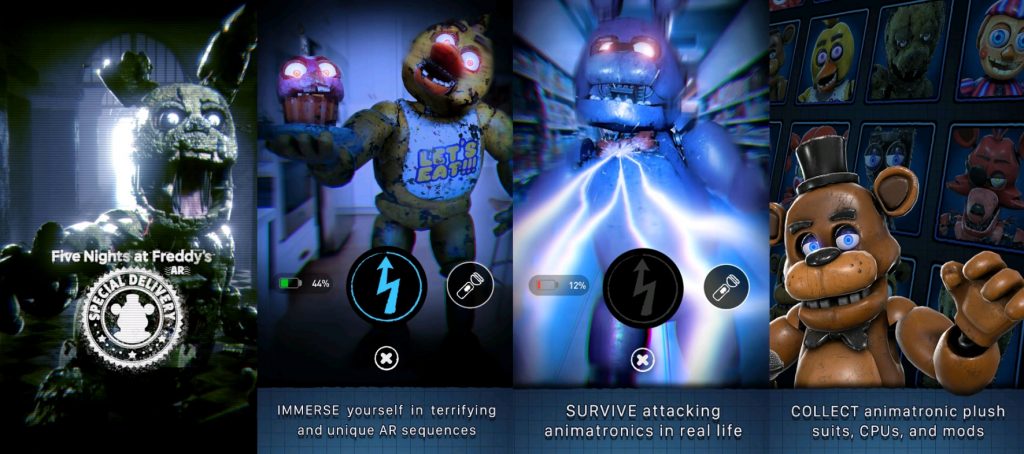
The latest version, Five Nights at Freddy’s AR Special Delivery takes a whole new approach. At first, this is an AR game, which means it involves a lot of movement. The game uses the camera of your device. Players have to turn on the camera and start moving in the surrounding areas. They have to spot the animatronics and as soon as they find them, they have to use the tools to seize them. The way the characters appear on the screen, they can definitely give the players a chilling experience. If you have a weak heart, you better stay away from this game. But if you are love sudden appearances of nightmarish characters, you should definitely give this game a try.

To survive the animatronics attacks, you have a scanner, a flashlight, and a battery. Players can collect parts and assemble them to deploy their own hotwired animatronics. You can send these animatronics against others playing this game.

Five Nights at Freddy’s AR Special Delivery for PC

So, are you ready to face the abnormal creatures of FNAF? The game is out for Android and iOS in the Google Play Store and App Store respectively. You can also play this game on your laptop and notebook. For that, you need to follow this guide. In a bit, you will find steps to download and play Five Nights at Freddy’s AR Special Delivery for PC.

Download Five Nights at Freddy’s AR Special Delivery for PC

  1. Download and install the BlueStacks emulator on your computer. Open BlueStacks and log in using your old or new Google Account.
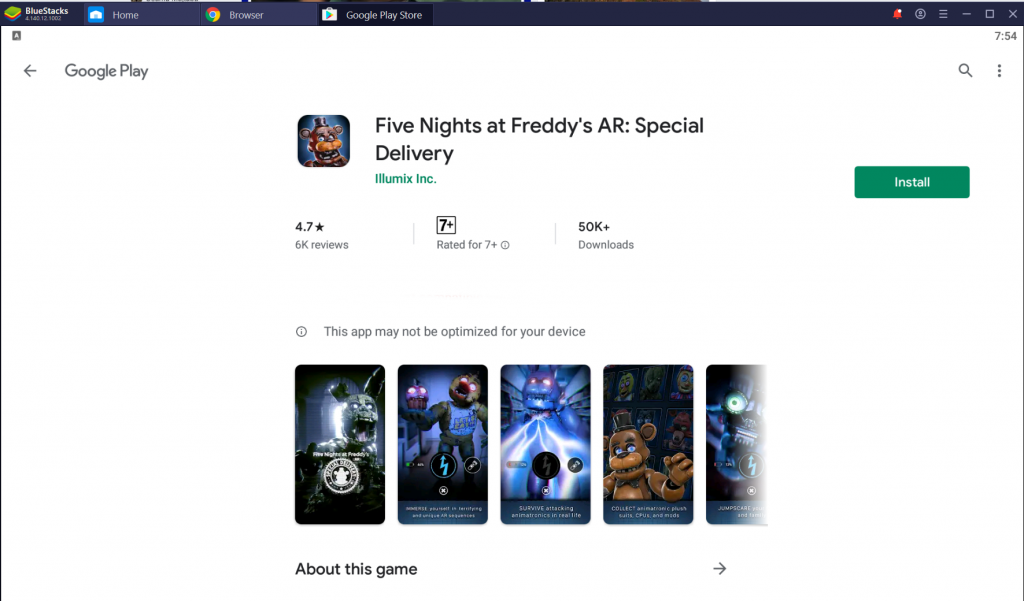
  2. Launch Google Play Store in the emulator, find Five Nights at Freddy’s AR Special Delivery and install it.
  3. Launch the game, turn on the laptop/notebook’s camera, start moving around to find the animatronics. That’s all.

Note: If you see the error “This game is not compatible with your device”, try using an emulator other than BlueStacks.

Final Words

AR games like FNAF require the players to physically move. The game is suitable for Laptops and Notebook PCs as you can easily move those. You cannot play this game on a desktop PC because you can’t move it. This game will use your laptop/notebooks camera to help you detect the scary characters of the game. If you have any questions regarding this game or the guide given above, feel free to use the comment section below. I will try my best to get back to you as soon as possible.

Download Ink Inc Tattoo Drawing for PC and Laptop

0
Download Ink Inc Tattoo Drawing for PC and Laptop
Playing Ink Inc Tattoo Drawing for PC via BlueStacks

This is the guide to download Ink Inc Tattoo Drawing for PC. You can download the Ink Inc Tattoo Drawing Game for PC on Windows and macOS. This will work for all Desktop computers and Laptops.

Ink Inc Tattoo Drawing for PC
Installing Ink Inc Tattoo Drawing for PC on Windows 10

Ink Inc Tattoo Drawing

Have you ever dreamt of becoming a Tattoo artist but couldn’t become one? It’s time to fulfill your dream. No, you don’t have to become a Tattoo artist for real. You can become a virtual tattoo artist with the help of the Ink Inc Tattoo Drawing game.

This new game making its way to the top-charts of smartphone games is interesting. In the Ink Inc Tattoo Drawing game, players are the Tattoo Artists. They run a Tattoo shop. Customers come in, ask for Tattoos and you draw their desired tattoos.

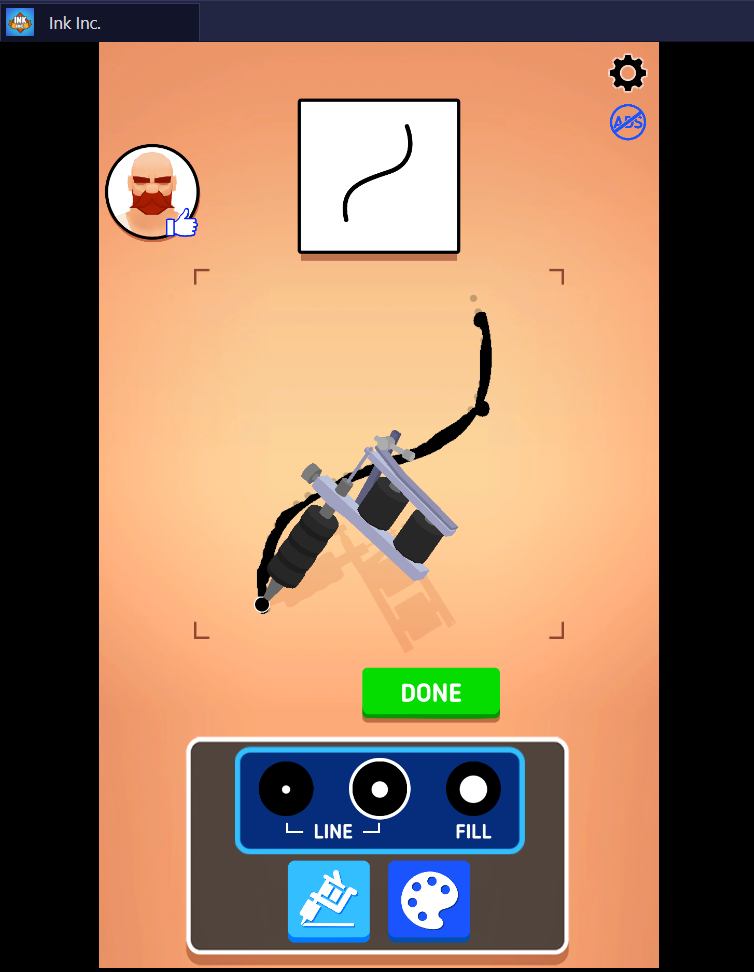
The game starts off with a tutorial showing how you can draw a tattoo using the given tools. A sketch of the tattoo is shown on the screen. Players have to move the tool on the sketch to draw the tattoo. When you start using the tattoo machine, the customer gives you feedback in the form of an emoji. If you move away from the sketch, you get a sad/angry reaction. When you draw the tattoo properly, you get a heart or happy emoji.

Initially, players are given the idea of what pen they will use. Once you master the first two levels, you will not get the pen idea anymore. You will have to pick up the tool based on the kind of tattoo the customer needs. Using a wrong pen can result in negative feedback which will bring down the ratings of your shop.

As you level up, you will get complex tattoos. You have to be really efficient to stay on the lines. Going off the lines is not an option.

Ink Inc Tattoo Drawing is a free game. At the moment, it is available in the Play Store for Android and App Store for iOS. If you wish to play this game on the computer, you are going to need this guide. As you scroll down, you will learn how you can download Ink Inc Tattoo Drawing for PC.

Download Ink Inc Tattoo Drawing for PC

  1. Install an Android Emulator i.e. BlueStacks on your computer. Open the BlueStacks and log in using your existing or new Google Account.
  2. Launch the Play Store in the BlueStacks, find Ink Inc Tattoo Drawing and install it.
  3. Lastly, launch Ink Inc Tattoo Drawing for PC in BlueStacks and start playing it.
Ink Inc Tattoo Drawing for PC
Playing Ink Inc Tattoo Drawing for PC via BlueStacks

Final Words

To draw the tattoos in this game on the computer, the only thing you need is the mouse. Use the mouses’ right-click to draw the lines and also to fill in the tattoos. The game will run smoothly on any Windows 10/8/7 and macOS computer. If you have any questions regarding this game or this guide, feel free to use the comment section below. I will try my best to respond back as soon as possible.

Download Idle Construction 3D on Windows 10 and macOS

0
Download Idle Construction 3D on Windows 10 and macOS
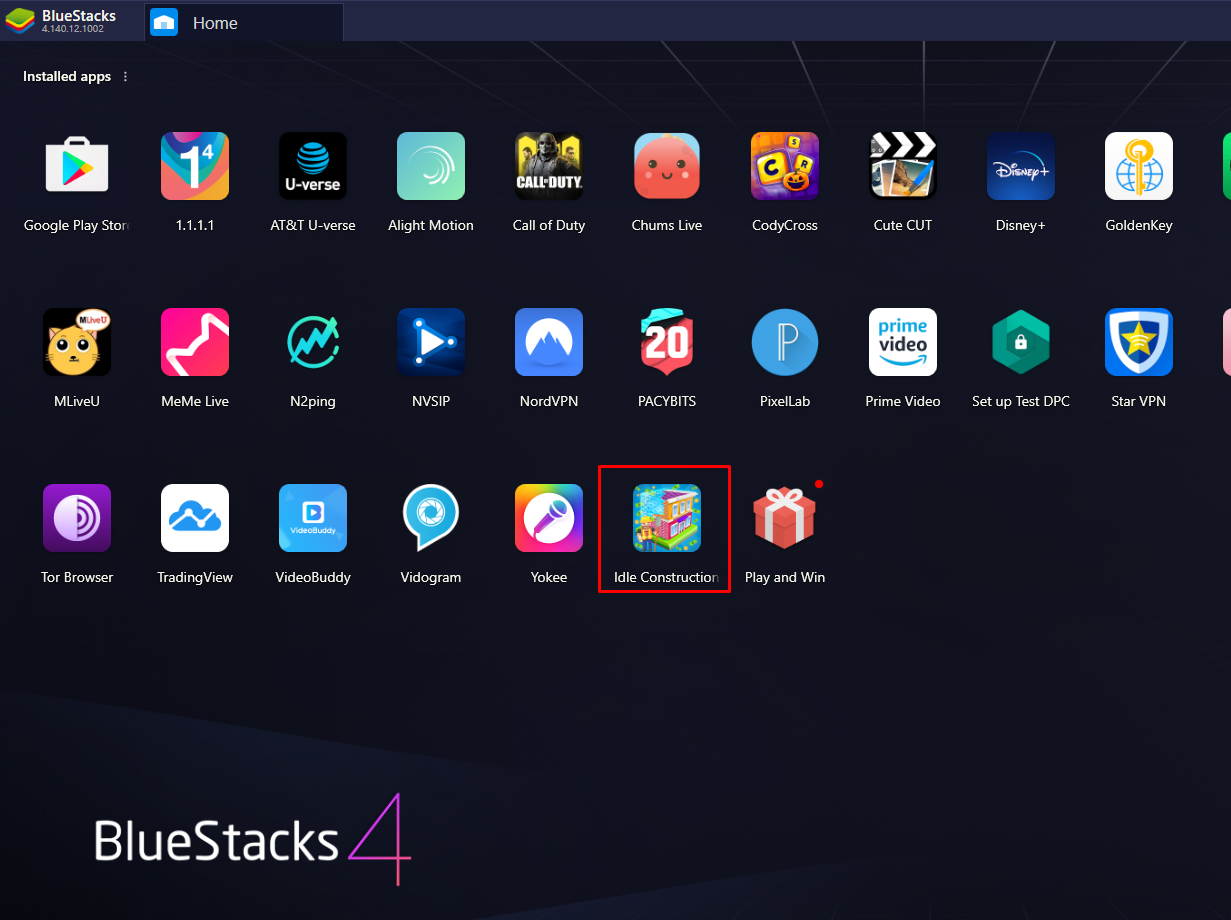
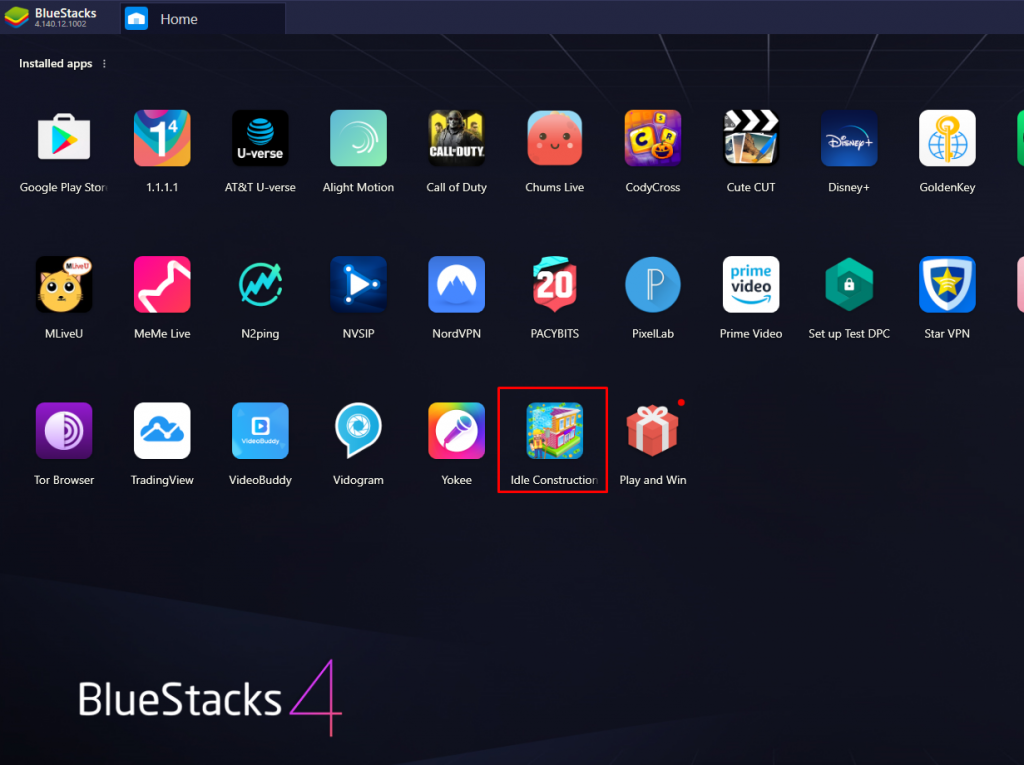
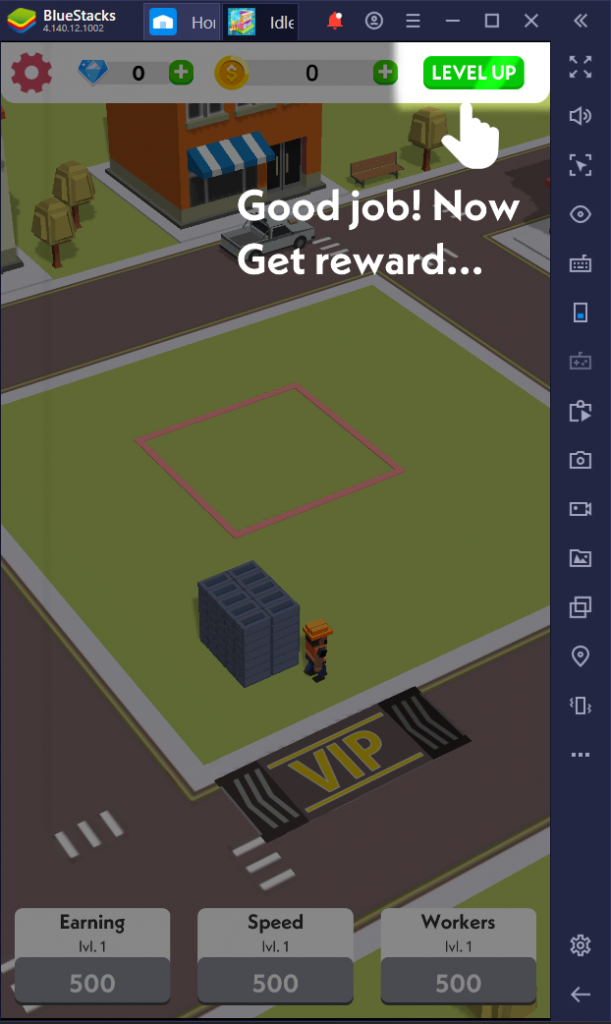
Running Idle Construction 3D on BlueStacks 4.1

This is the tutorial to download Idle Construction 3D on Windows 10 and macOS. You can get Idle Construction 3D for PC on Desktop PCs and Laptops.

Download Idle Construction 3D on Windows 10 and macOS
Running Idle Construction 3D on BlueStacks 4.1

Idle Construction 3D

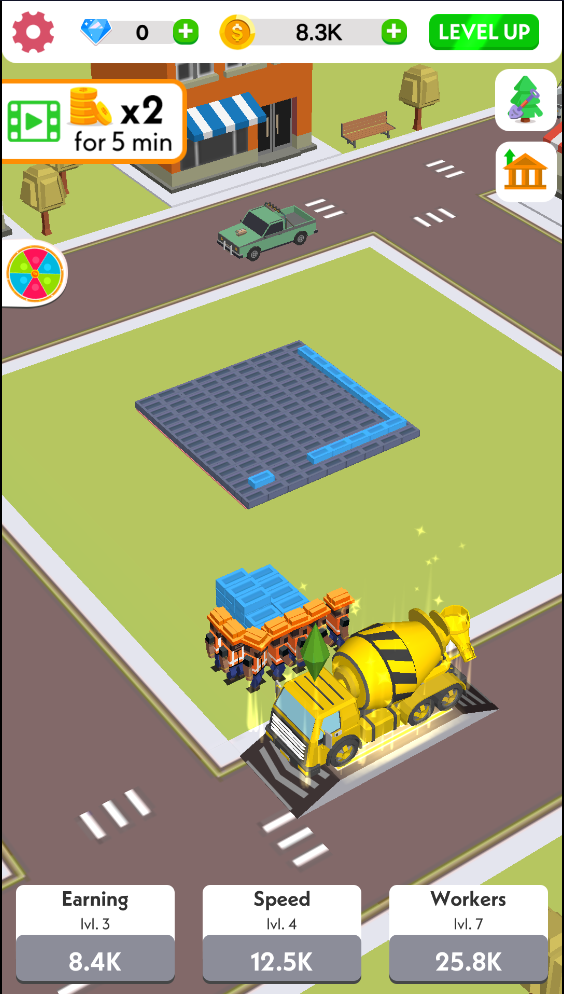
The Idle Construction 3D is a relatively new game for aimed at smartphone gamers. The is a small, light, and simple game built to kill boredom. As its name suggests, the game prompts the players to construct beautiful, high rise buildings. The goal given to players in this game is to become the biggest Construction Tycoon by building more and more buildings.

Download Idle Construction 3D on Windows 10 and macOS

The game starts off by giving a few tips to the players. The gamers have to build a basic building first of all. This is where the journey starts. The quicker you finish the construction of a building, the more money you will rake in.

Initially, players get a couple of workers only. The game starts off really snow with almost zero money in your pocket. As you perform a few tasks, you get the opportunity to add more workers and speed up the construction. 

Players are being given contracts by various contractors in the game. The contractors pay you for completing the constructions within the given time frame. Adding more manpower will boost up your credibility among all the contractors.

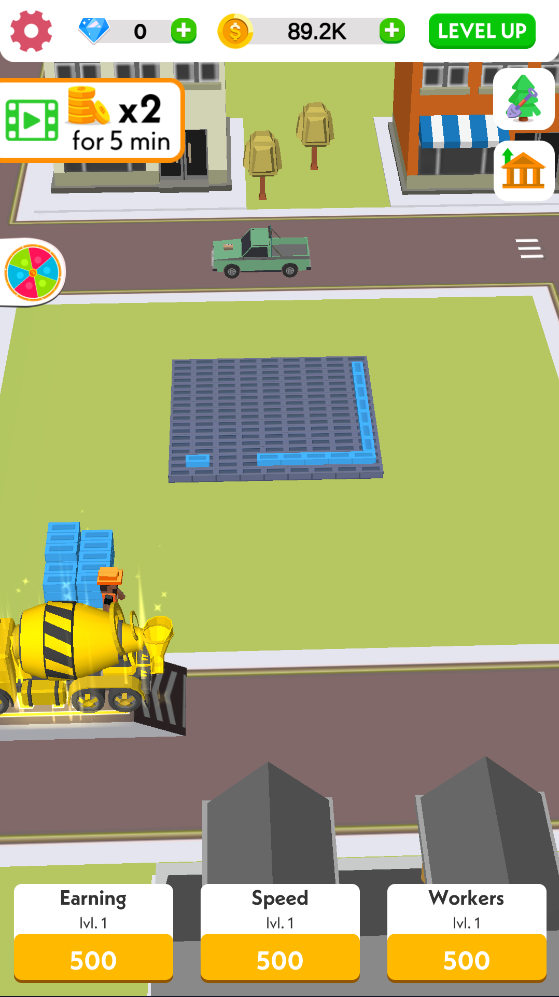
This a colorful game. The graphics are very basic, but they will not kill your interest in the game. Idle Construction 3D is not a very complex game. If you are looking for a game just to kill time, this is not going to be a bad choice.

Idle Construction 3D comes for free. It’s already out in the Play Store for Android. The game isn’t available for Windows natively, but you can run its Android version on both the Windows and macOS. Follow the steps in this guide to get Idle Construction 3D for PC.

Download Idle Construction 3D on Windows 10 and macOS

  • First of all, install the BlueStacks emulator on the computer. Open the BlueStacks and login with your old or new Google Account.
  • Open the Play Store in the BlueStacks emulator, find Idle Construction 3D and install it.
  • Launch the game, follow the on-screen tutorial and start playing it.
Playing Idle Construction 3D for PC on Windows 10

Final Words

Idle Construction 3D for Windows 10 and macOS requires the use of the mouse. You can keep tapping the game using your mouse to play it. There’s nothing else to do here. The game runs smoothly as far as I have tested it. If you have any further questions regarding this game or this guide, feel free to use the comment section below. I will make sure to respond back as soon as possible.

Untethered vs semi-untethered vs tethered vs semi-tethered Jailbreak Differences

0
Untethered vs semi-untethered vs tethered vs semi-tethered Jailbreak Differences
Cydia Icon

Jailbreaking your iPhone can sometimes be overwhelming. Especially, when you’re new to Jailbreak, and you have no idea what a Jailbreak process means. The terms untethered, semi-untethered, tethered, and semi-tethered can confuse the new Jailbreakers. If you are caught in such a situation, this is the guide you need to know. Here are the untethered vs semi-untethered vs tethered vs semi-tethered Jailbreak differences. Before you learn about these terms, let me give you an idea of what Jailbreak is.

Untethered vs semi-untethered vs tethered vs semi-tethered Jailbreak
Cydia Icon

Jailbreak

The first iPhone was released in 2007. This was a new beginning towards a whole new era of technological advancements in the phone industry. Since 2007, we have seen an enormous amount of innovation when it comes to phones.

The world’s very first smartphone did not appear smart enough to some users and they wanted a little more. As a result, the famous hacker GeoHot ended up Jailbreaking the iPhone in 2009. It was the iPhone 3GS and the iPhone OS 3.0 which was Jailbroken first of all. After that, a world of new possibilities opened up and more iPhone users started joining the Jailbreak brigade.

The idea of Jailbreaking was to install custom scripts, custom apps, to modify the UI, and behaviors or the iPhone OS which is called iOS nowadays.

iOS is known for its security. As soon as a Jailbreak solution came out, Apple was quick enough to patch it. But the Jailbreakers were equally efficient. Every time Apple patched a Jailbreak, a new Jailbreak popped up.

Back in the day, Jailbreak processes were smooth. With security advancements, Jailbreaking an iPhone became difficult. The terms untethered, tethered, semi-untethered, and semi-tethered came in to define the nature of a Jailbreak. 

Take a look at differences between untethered vs semi-untethered vs tethered vs semi-tethered Jailbreak now.

Untethered Jailbreak

Untethered Jailbreak is like gold dust among all Jailbreaks. When an iPhone or iPad is pwnd via an untethered jailbreak, it can complete a boot cycle without interrupting the Jailbreak script and processes. This is suitable for an iPhone/iPad used as a daily driver.

In simple words, when your iPhone is untethered jailbroken, it will not lose the Jailbreak upon restarting the iPhone. You can restart as many times as you want and the Jailbreak will keep working without having the need to run the Jailbreak tool again.

While the untethered jailbreak is the most-liked Jailbreak, it is also the most difficult to achieve. That is also one reason to not have the untethered jailbreak so often. Finding the exploits to untethered jailbreak an iPhone can be as challenging as climbing up Mount Everest. The amount of hard work and development required to make a fully functional untethered jailbreak requires a lot of dedication.

The last time we had an untethered jailbreak was on the iOS 9.1 The pangu jailbreak tool allowed pwning the iOS 9.1 through a computer. 

semi-untethered Jailbreak

Semi-untethered is not as smooth as the Untethered Jailbreak, but it can be kept on a daily driver iPhone/iPad. The Semi-untethered Jailbreak allows the iOS device to complete a boot cycle, stops working upon rebooting your iPhone. It requires deploying a side-loaded Jailbreak to fully load after rebooting. Thankfully, no computer is needed for this. You can use the side-loaded app to once again deploy the payload.

The Unc0ver and Chimera Jailbreaks are the two biggest and most recent examples of semi-untethered Jailbreak. Unc0ver and Chimera both allowed Jailbreaking the iOS 12.4 and below on all iPhones/iPads powered by A7 – A12 chipsets. 

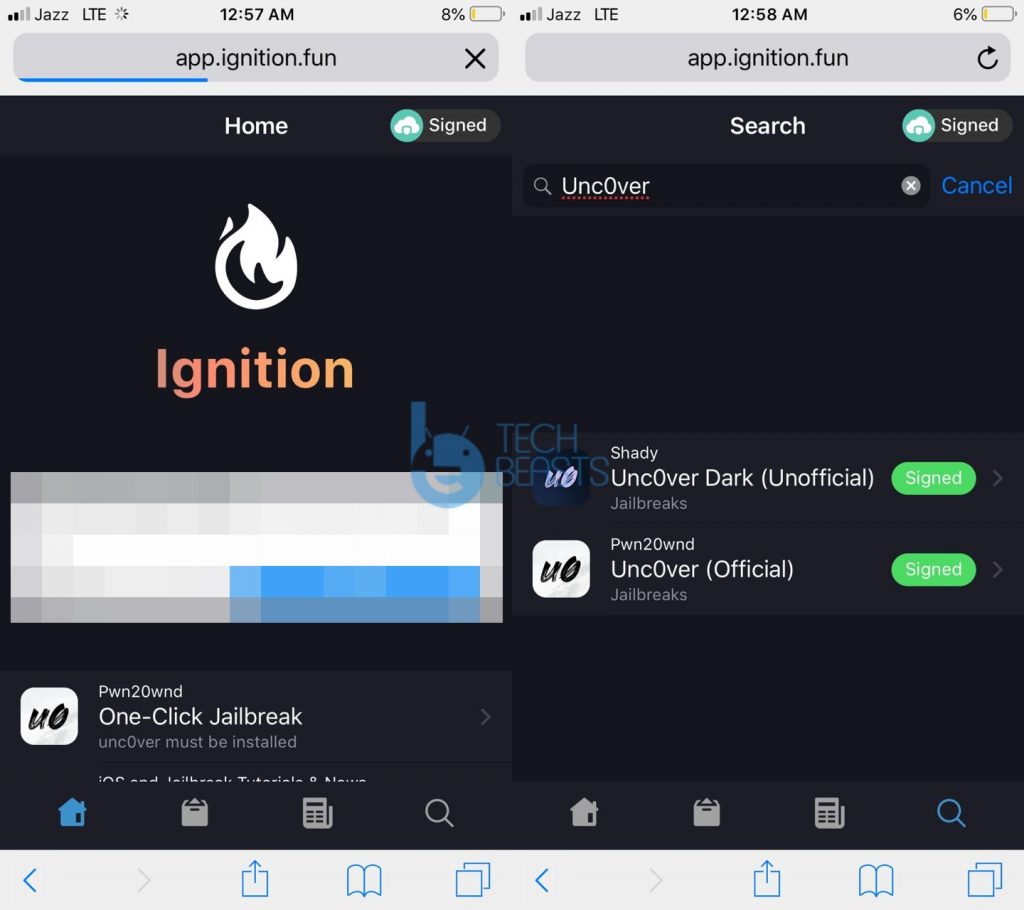
As far as the sideloading of the Jailbreak apps is concerned, you have multiple methods for that. You can either sideload an app/tool via Cydia Impactor, or you can use a service like Ignition, or the Unc0ver’s official site to directly download such apps on your iPhone.

Tethered Jailbreak

Tethered Jailbreak is for Jailbreak Enthusiasts since it temporarily pwns a device. The Tethered Jailbreak works with the help of a computer. You use a tool on the computer to Jailbreak an iPhone/iOS. After Jailbreaking, if your phone’s battery drops to zero, or you accidentally restart it, it will be unable to complete a boot cycle without the help of a computer.

To complete the boot cycle, you will connect the pwnd iPhone to the computer and run the Jailbreak tool all over again. Furthermore, you will have to enter the DFU mode too.

This can be time-consuming and troublesome as well. Especially, someone who’s very new to Jailbreak is not going to quite adjust to it. Also, this is not the kind of Jailbreak you would want on your daily driver. Yes, you can avoid restarting the device, but there’s no way you can avoid a dying battery until and unless you have the charger or power bank all the time. 

redsn0w, a tool that jailbroke A4-powered devices back in the day, is a great example of Tethered Jailbreak. This tool was available for both the Windows and macOS.

semi-tethered Jailbreak

Unlike the Tethered Jailbreak, the Semi-tethered Jailbreak will allow a pwnd iPhone to complete a boot cycle. However, the Jailbreak Extensions will fail to work after the phone reboots. To make the Jailbreak functional again, you will connect it to the computer using a data cable, and run the Jailbreak tool again. This will also require booting into the DFU mode.

The semi-tethered jailbreak is not a troublemaker as big as the tethered jailbreak because, here, your iPhone will continue to work as a normal device after rebooting. In the tethered jailbreak, you cannot even complete a boot cycle without re-jailbreaking the iPhone. 

The most recent example of semi-tethered jailbreak is the Checkra1n tool which is based on axi0m’s checkm8 exploit. It drops the payload before the iPhone boots up which makes this compatible with all versions of iOS running on A7 – A12 devices.

Final Words

Hopefully, you have a clear understanding of Untethered vs semi-untethered vs tethered vs semi-tethered jailbreaks. The untethered jailbreak is definitely the most wanted type of jailbreak, but it is a very hard nut to crack. If you have anything to add to this guide or any questions, use the comment section below. I will try my best to get back to you as soon as possible.

Best Apps to Make Video Call from Android to iPhone

0
Best Apps to Make Video Call from Android to iPhone

In this post, I will provide you the best Apps to Make Video Call Android to iPhone. Both Android & iOS users have dedicated apps to make video calls, for instance, iPhone & iPad users can use FaceTime to make video calls from iPhone to iPhone. On the other hand, Andorid users can use Google Duo to make video calls.

But sometimes end-user, whom you are trying to make a video call, don’t have an iPhone or an Android device. So what to do? When you have an iPhone and the other user has an Android device or the opposite of that. How to make a video call then? Hmmm, Well I can help you with that.

The following are the best Apps to Make Video Call Android to iPhone. Let’s Jump in.

Best Apps to Make Video Call Android to iPhone:

Viber:

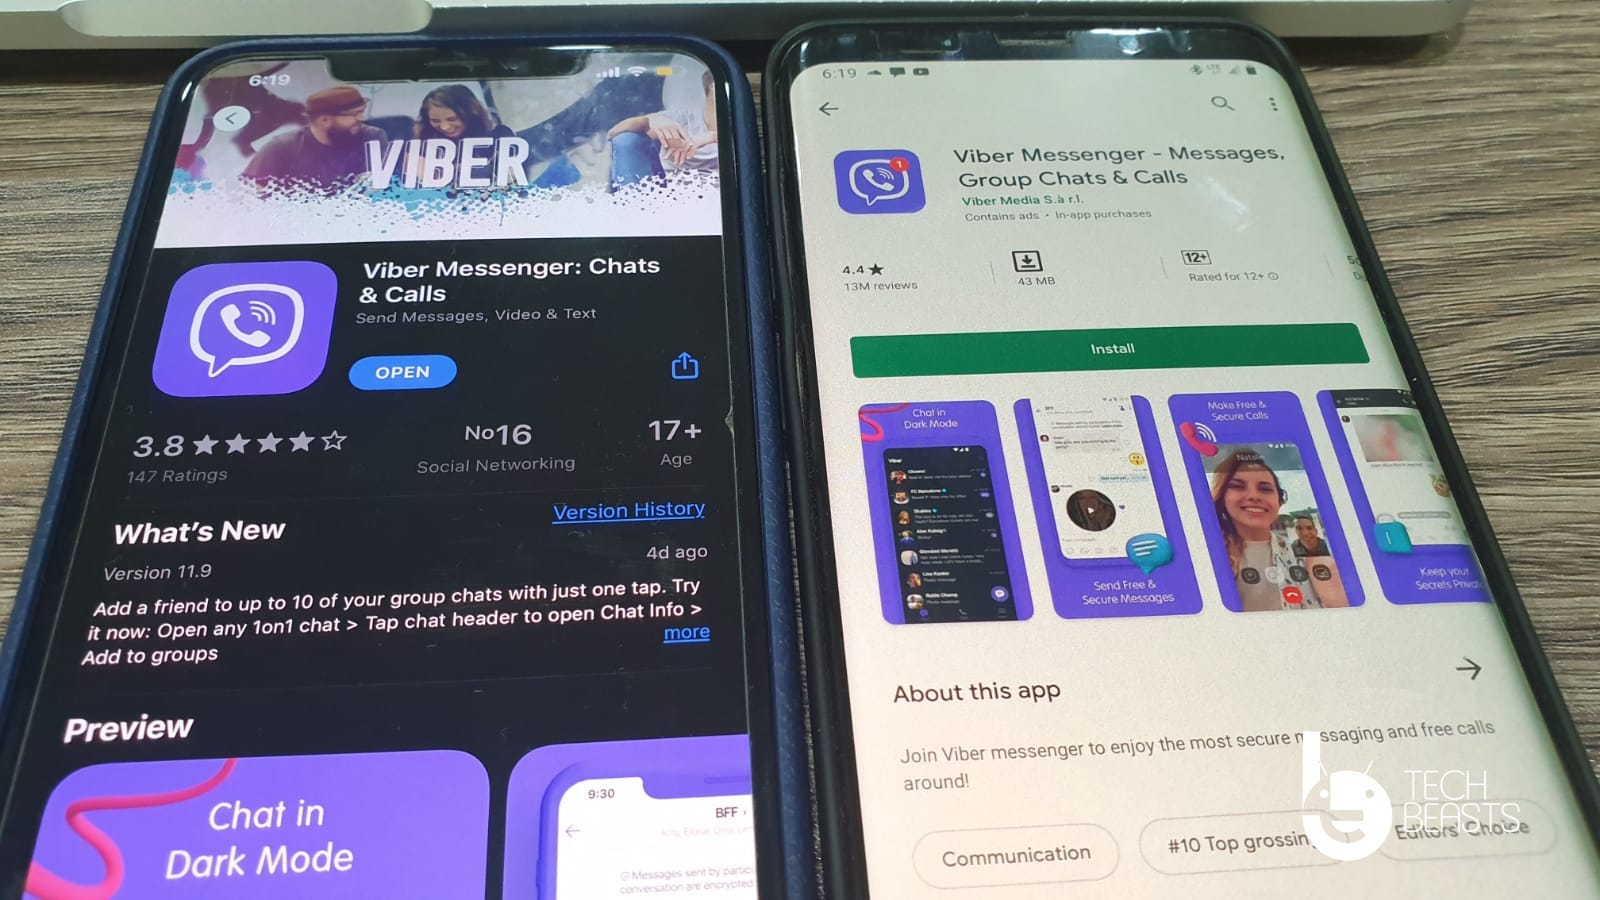
The first app that will allow you to make a video call from Android to iPhone is Viber. Moreover, Viber is considered as a FaceTime alternative. It’s a free app and lets you make video calls for free.

Make Video Call from Android to iPhone

The interface is simple, a layman can easily use Viber and make video & voice calls. Not only it provides VOIP & Video calls. It has tons of other features, you can chat with other users, send them stickers, emoticons and more.

Moreover, If you haven’t user Viber, you will be glad to know that. There are a number of Brands who have their public profiles on Viber. You can easily contact them and get quick assistance. In their latest update, they added a new feature that allows you to send short 30-second videos.

WhatsApp vs Viber: Choose the best

I have used Viber and the only downside I noticed is, Viber is bloated with a lot of applications and features so it looks cluttered and makes it complicated for the user.

Download Viber Android | iOS

Google Duo:

For years there was no one to compete FaceTime but then Google released Google Duo. A perfect app for Android & iOS users to make video calls. But there is no group video call option. As the name says all, at a time only two people call video chat. However, Google Duo has a few exciting features. The one I & most of the Google Duo users like is the Knock Knock feature. When someone is calling, use the Knock Knock feature, you will a video preview and that way you will know who is calling you.

Make Video Call from Android to iPhone

I use Google Duo and it works pretty fast, no connectivity issue. Even in bad internet reception Google Duo works pretty well. The interface is user-friendly and you will get End-to-end encryption.

If you want to know about the downsides of Duo. Well, there are few such as no Group Vidoe call, No emoticons or GIFs and along with that, you cannot share files.

Download Google Duo Android | iOS

WhatsApp:

WhatsApp is the best choice when it comes to Make a Video call from Android to iPhone. This app doesn’t need any introduction, every smartphone users use WhatsApp on a daily basis.

Make Video Call from Android to iPhone

You can make Vidoe calls, Voice Call, Send Voice Message, Chat with your friends and families. Moreover, you can share documents, files, photos, videos, and you can share your live location.

WhatsApp is the smoothest communication application available for platforms like Android and iOS. But there is a downside to it while using the video call feature of WhatsApp you can only a total of 4 participants.

Read more: Best WhatsApp Spying Apps for you

Download WhatsApp Android | iOS

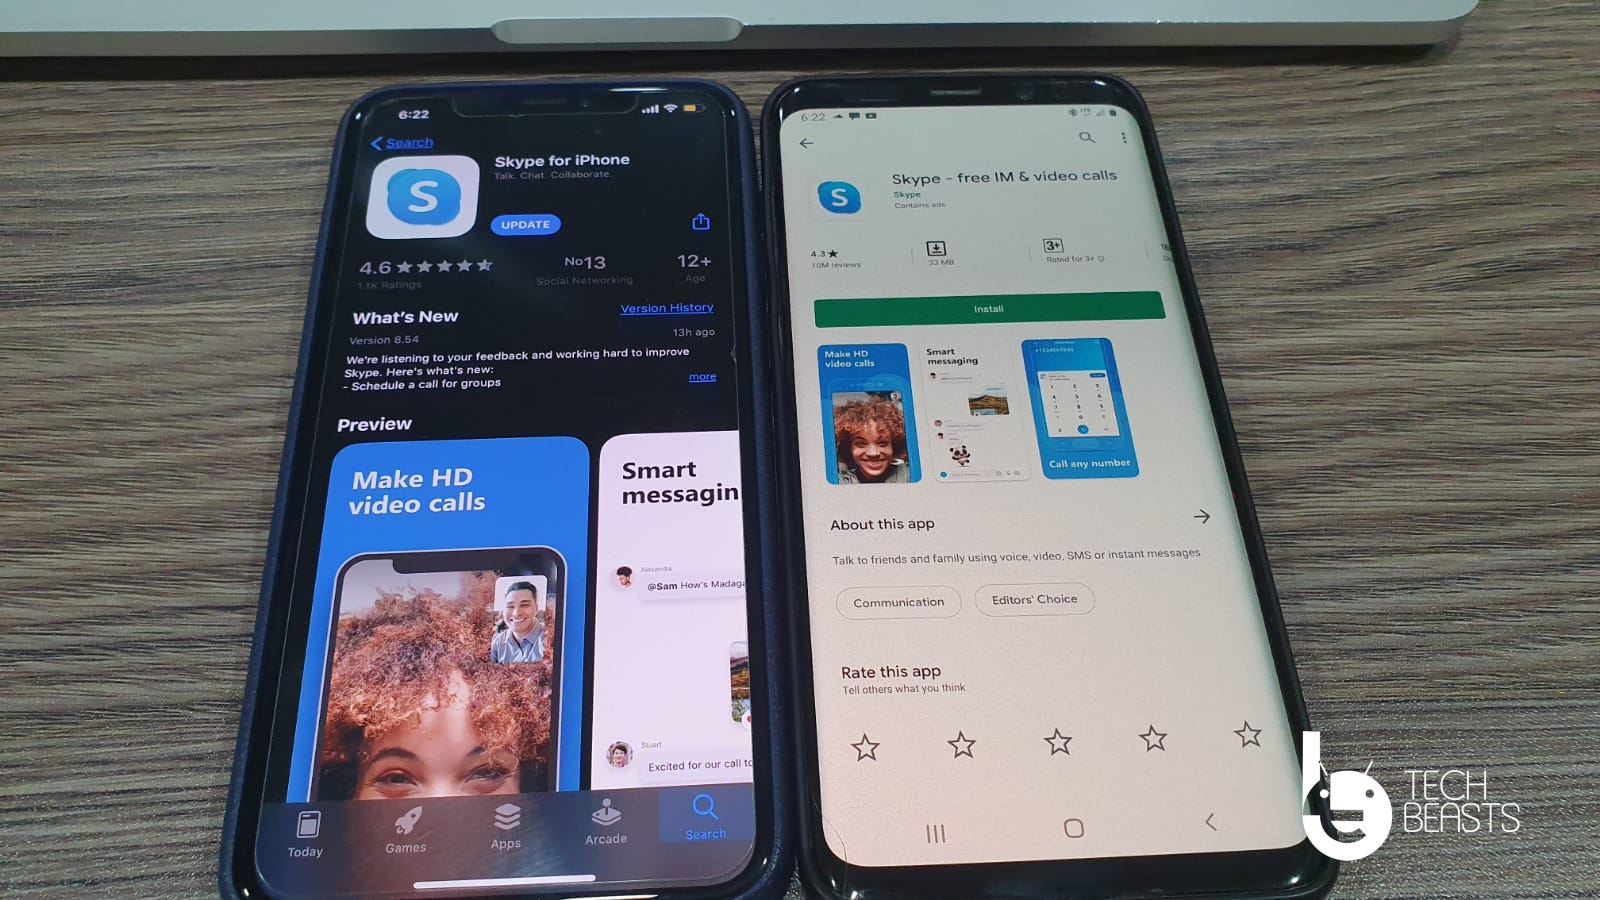
Skype:

Skype is a very good alternative to WhatsApp, as it has some additional features like voice calls and video calls. Skype can be used to communicate with friends and family across the borders or within.

Make Video Call from Android to iPhone

It can also be used for business purposes, for example, to conduct meeting with the client through video call or making a conference call. It also supports chat conversations with amazing emoticons.

This is only Vidoe calling app which has no downside. It has everything one can ask for. Skype will make things easy when you are trying to make a video call from Android to iPhone.

Read more: Free Video Calling Apps for Windows PC

Download Skype Android | iOS

Facebook Messenger:

Facebook Messenger allows you to make video calls between Android & iOS devices. Since Facebook has the biggest user database of all time. It’s not possible that whom you are calling won’t have Messenger.

Make Video Call from Android to iPhone

The UI of Facebook Messenger is neat and clean. But if you think it’s easy to use, I beg to differ, it’s not. There are tons of options and sometimes it looks messy to me. However, the good news is, you can all up to 50 participants at a time.

Other than that, you can share files, photos, documents, locations, and more. Moreover, there a number of live filters that you can use during the Video call.

When it comes to the downside, there is only one. The UI and trust me, Facebook need to work on that.

Read more: Facebook vs Facebook Lite: Which is better?

Download Facebook Messenger Android | iOS

Zoom:

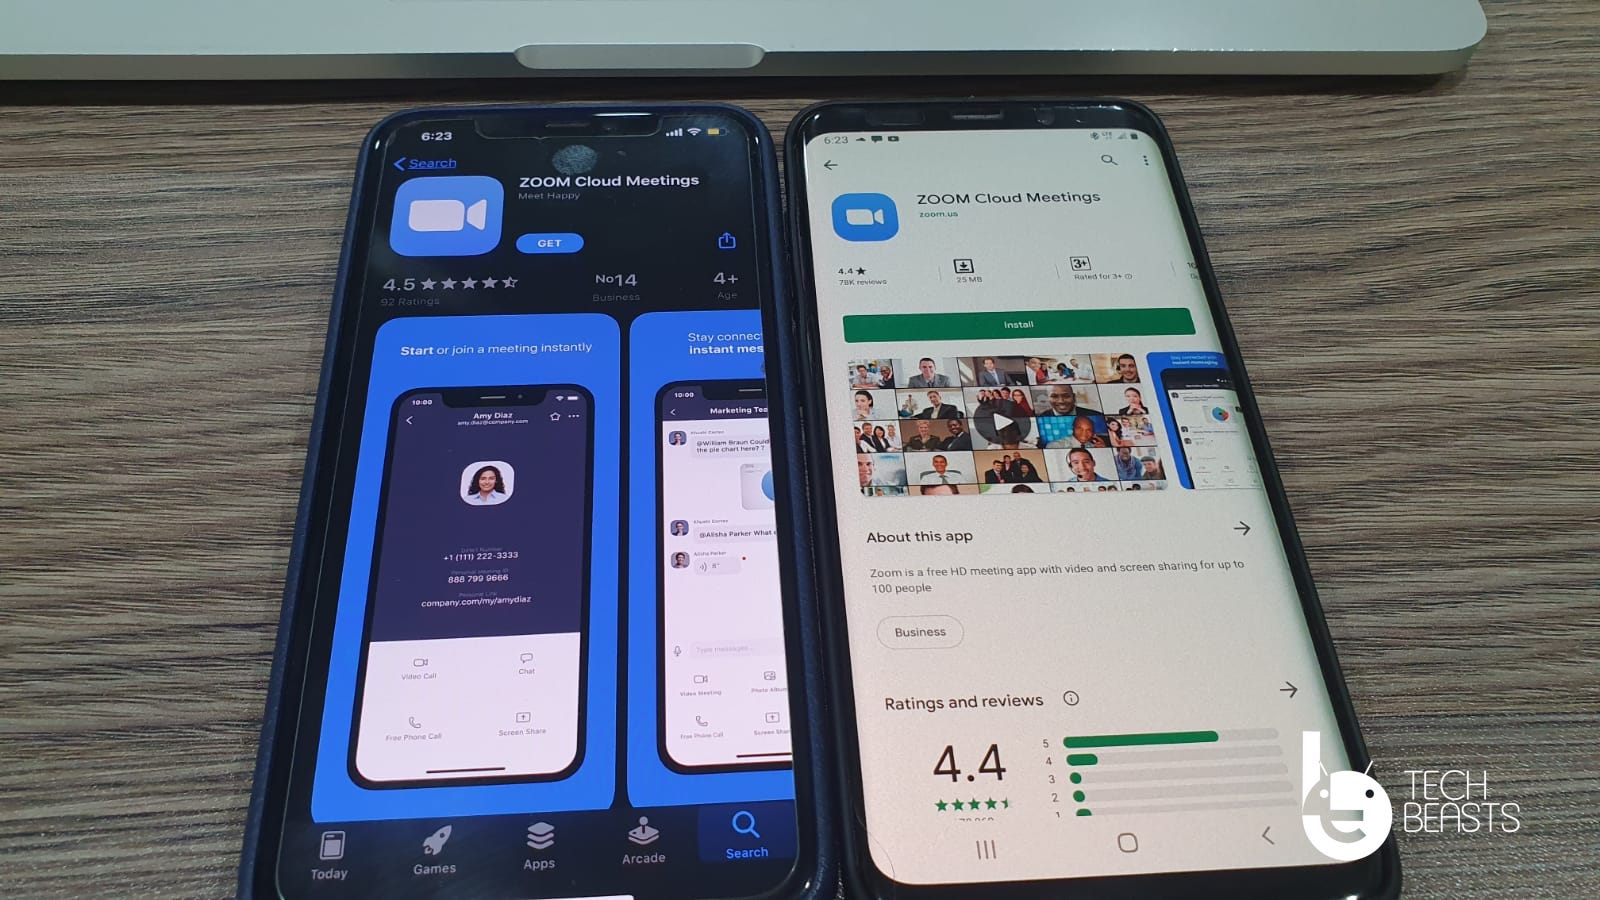
Zoom is specifically designed for the business community. You can add up to 500 participants in a single call. Not only that, but you can also add up to 1000 participants which can only view.

Make Video Call from Android to iPhone


So if you run a business and want to get connected with all of your employees at once Zoom is the app you go for. Since not all of your employees are iPhone users or Android.

So it would be the best you use Zoom and make a video call from Android to iPhone. The interface of Zoom is user-friendly. You are allowed to share documents, files, photos, videos and more.

The only downside I notice is, not all main features are for free. You have to pay up a little sum to avail all the features.

Read more: Download WhatsApp on WiFi Tablet without SIM

Download Zoom Android | iOS

Wire:

If you are among those who don’t want to share their personal data with any third-party video calling apps. Then you should use Wire and believe me they are good. Wire follows EU privacy laws. Also, it is free and you don’t even have to sign up to use Wire.

All you have to do is download the Wire app on your iPhone or Android. Start calling your friends and colleagues, share files, add up to 10 people at a time.

Wire is the best free and most secure video calling app for Android & iOS. Like Skype, Wire has no downside or cons.

Download Wire Android | iOS

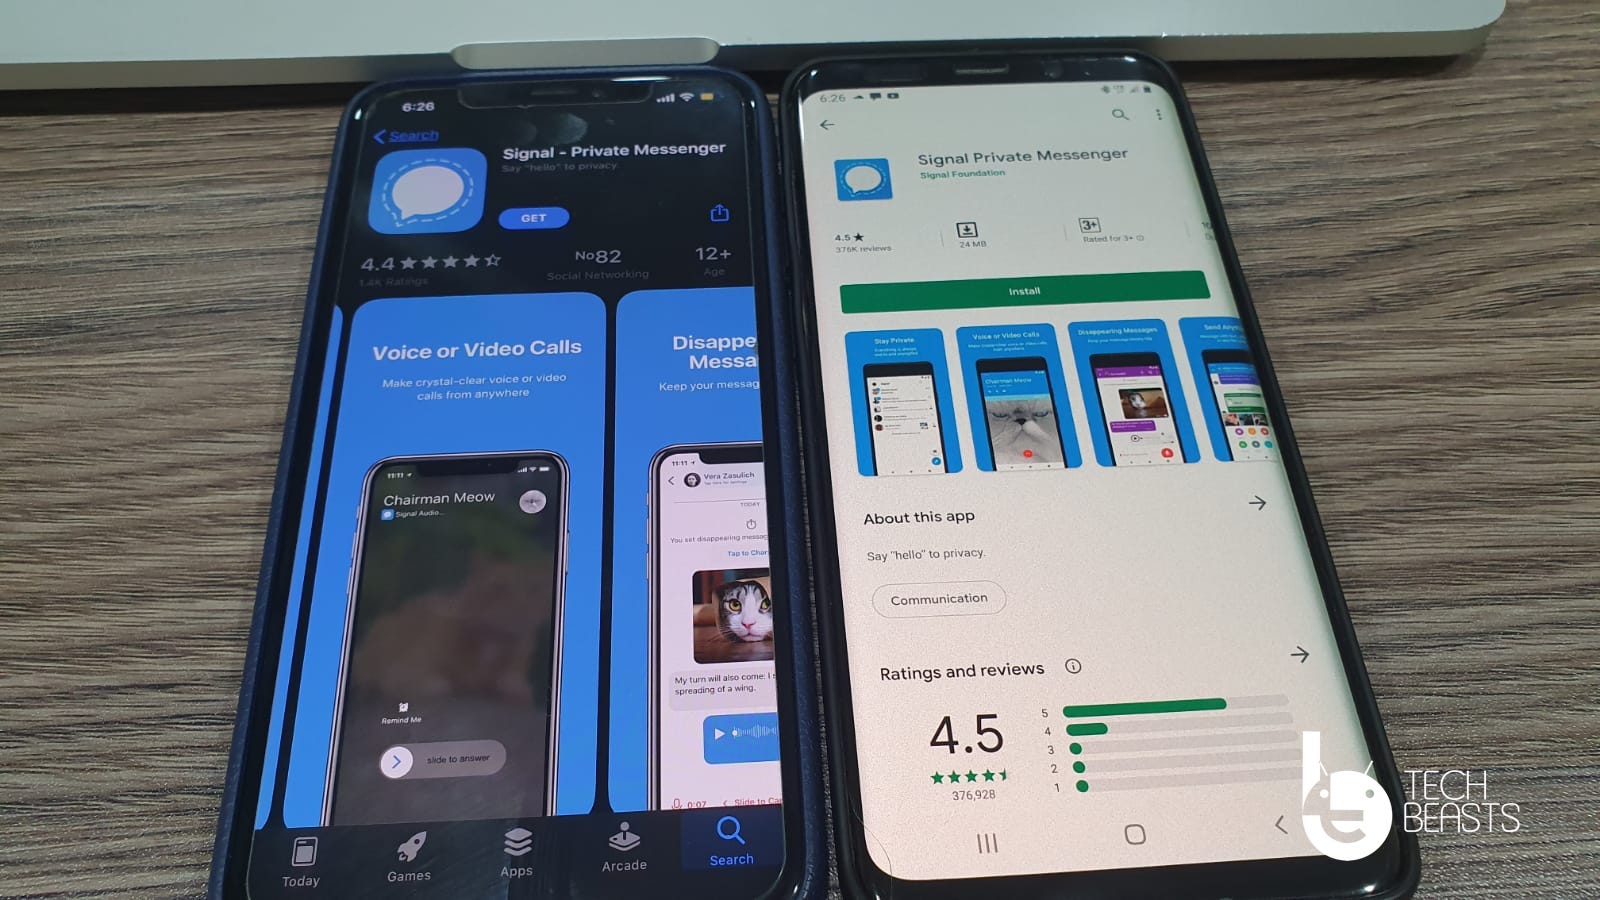
Signal:

The signal is the same as Wire and it is available for both Android and iOS devices. When it comes to security and piracy Signal held his name. It provides end-to-end encryption for users.

You can share files and make free video calls from iPhone to Android. Signal has one additional feature that Wire doesn’t seem to have. You can send a self-destructing message to any user on your Signal contact list. After a specific time, you have set, the message will be auto-deleted.

Signal works in the same way WhatsApp does. It uses your phone number to activate your account and then use your contact list to connect with others.

I am using Signal for very long and still, I haven’t found any downside to it. Use the link below to download Signal on your Android & iOS devices.

Download Signal Android | iOS

These were the Best Apps to Make Video Call from Android to iPhone. Try them and let me know how was your experience.

10 Ways to Fix App Store Not Downloading Apps Issue

0
10 Ways to Fix App Store Not Downloading Apps Issue

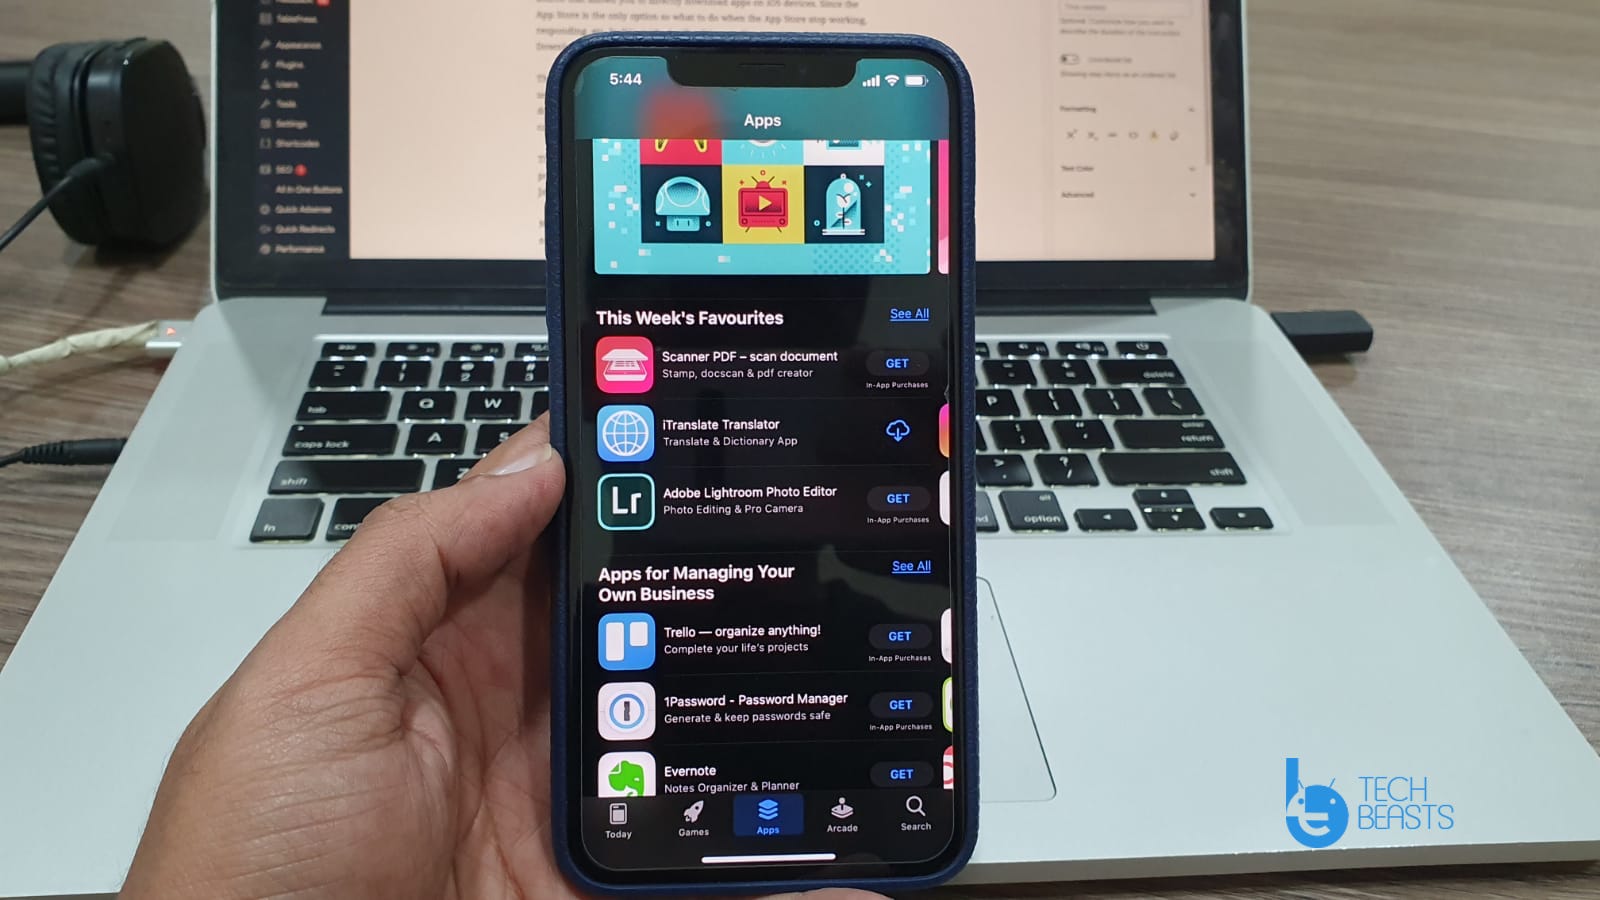
If you are an iOS user then you are well aware of the fact that you can only download apps on iPhone & iPad using App Store. There is no third-party source that allows you to directly download apps on iOS devices. Since the App Store is the only option so what to do when the App Store stop working, responding, etc. In this guide, I will tell how to Fix App Store Not Downloading Apps.

App Store Not Downloading Apps

The biggest difference between iOS & Android devices is freedom. Android users can easily sideload apps and they can also use third-party sources to download apps. But iOS users are stuck with the App Store. However, they can use other sources but for that, they have to Jailbreak their device first.

This year we have seen a number of Jailbreak Tools but none of them provide an untethered jailbreak. That’s why I will not suggest any of you, to Jailbreak your device. It is better to stick with the App Store.

Now let’s begin and Fix App Store Not Downloading Apps. I have found a number of Workarounds to help you.

Fix App Store Not Downloading Apps Issue:

Heed the instructions below and you will be able to fix App Store no downloading apps issue. Make sure after trying a method you should try downloading an app. If one didn’t work for you then proceed to the next one.

Total Time: 10 minutes

Update OS

This is the first and foremost workaround you should try if one of your stock apps is not working. Head over to the Settings -> General -> Software Update.
If a new update is available, Tap on Download & Install.

Hard Reboot

When it comes to Android there a number of methods that can be used to hard reset or reboot a device. But when it comes to the iPhone & iPad, there is only one.
Press & release the Volume Up button -> Press & release the Volume down Button -> At the end press & hold the Volume Down and Power Button. Until you see the Slide to Turn off slider on the screen.

Wait for a few hours

If the App Store is not downloading apps. Close the App Store and wait for a few hours and then restart your device. After that, open the App Store and try downloading an app.

Pause, Restart

This trick still works most of the time. Start downloading an app and when the downloading is started. Pause it and then wait for a few seconds. Start the downloading again, this works.

Clear App Store Cache

I am sure not all of you know, you can also clear App Store cache. Not like you do on Android devices but this trick will help you clear App Store Cache.
Open the App Store, at the bottom you will see 5 buttons. Tap 10 times on one of them. By tapping a button 10 times will clear the cache of the Apps store.

Check Network Settings

It’s also a basic workaround that you should always try. Make sure you are connected to an active WiFi connection. Moreover, turn off WiFi and connect your device to mobile data.
After that try downloading an app. If still there is no success for you. Connect to another WiFi connection. Make sure all the connections are enabled.
If you are using a proxy or a VPN, disconnect it and then try downloading an app.

Date & Time Settings

I have faced this problem a number of times. My date & time settings were messed up and because of that, I was unable to download any app from the App Store.

Head over to the Settings -> General -> Date & Time. Set your date & time according to your geo-location.

Free Space

After trying all the workarounds given above, you still are facing the App Store Not Downloading Apps issue. I think you should check the available space on your device.
Sometimes we forget to check how much storage space is left on our iPhone or iPad. That may be the reason you are unable to download apps from the App store.
Head over to the Settings > General > About > iPhone Storage > Check your Storage. If you don’t have enough storage to download an app or game. You need to free up space.

Sign out and Back In

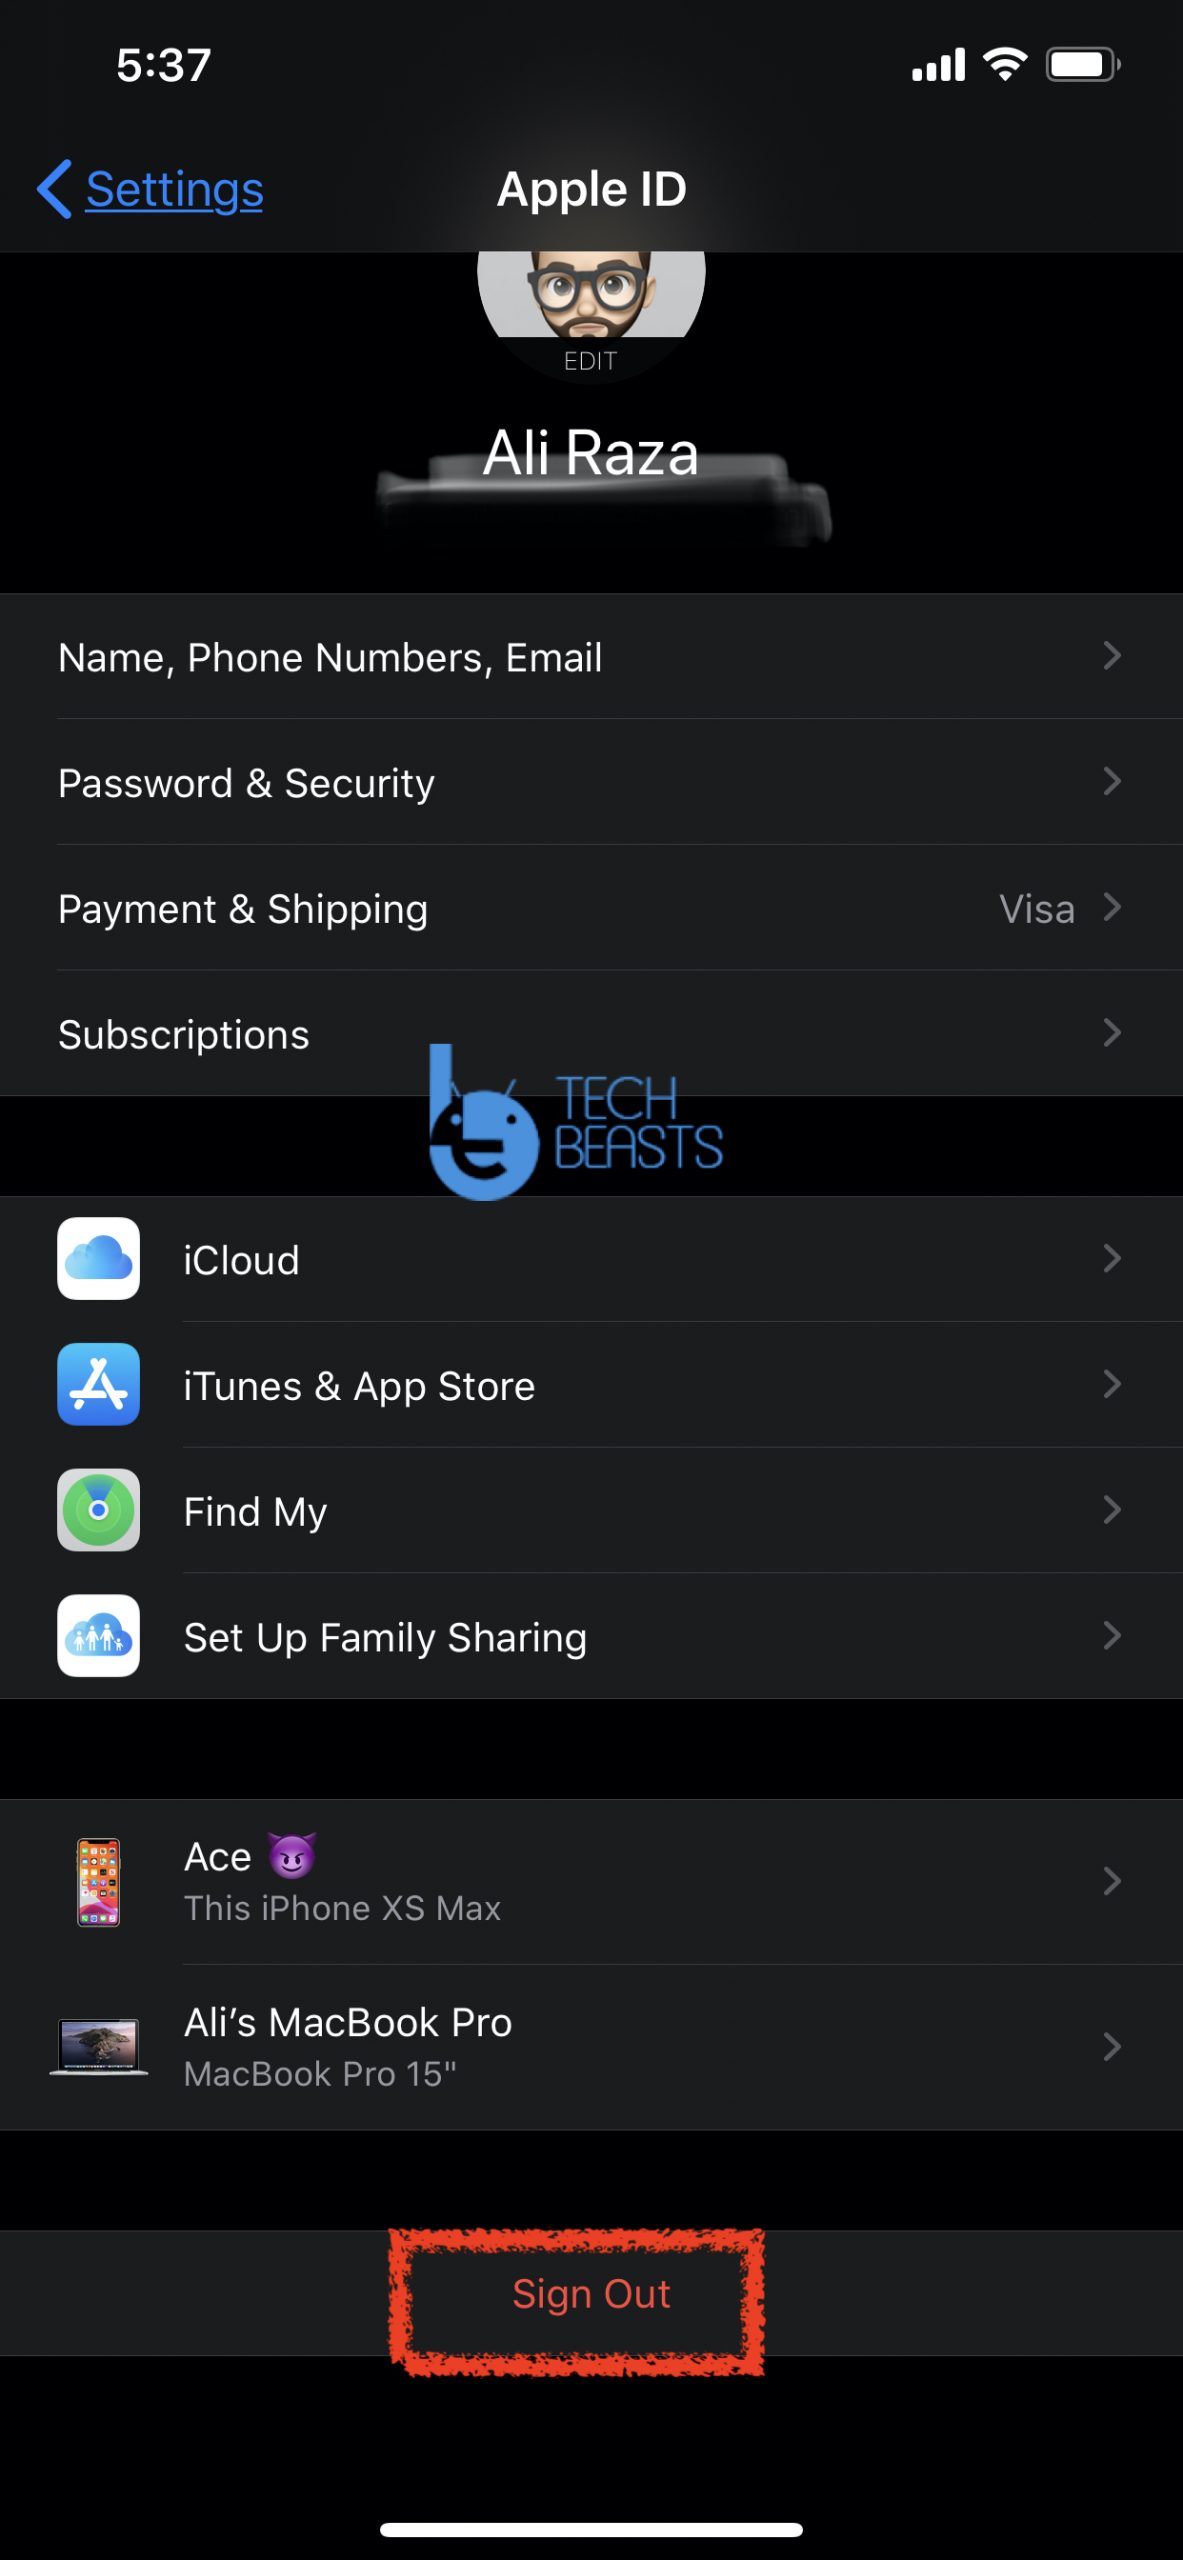
This trick does work, all you have to do head over to Settings -> Tap on Apple ID, iCloud Settings. Scroll down and at the bottom of the page, you will see ” Sign out”. Tap on it and Enter your Apple ID password to proceed.

Reset Options

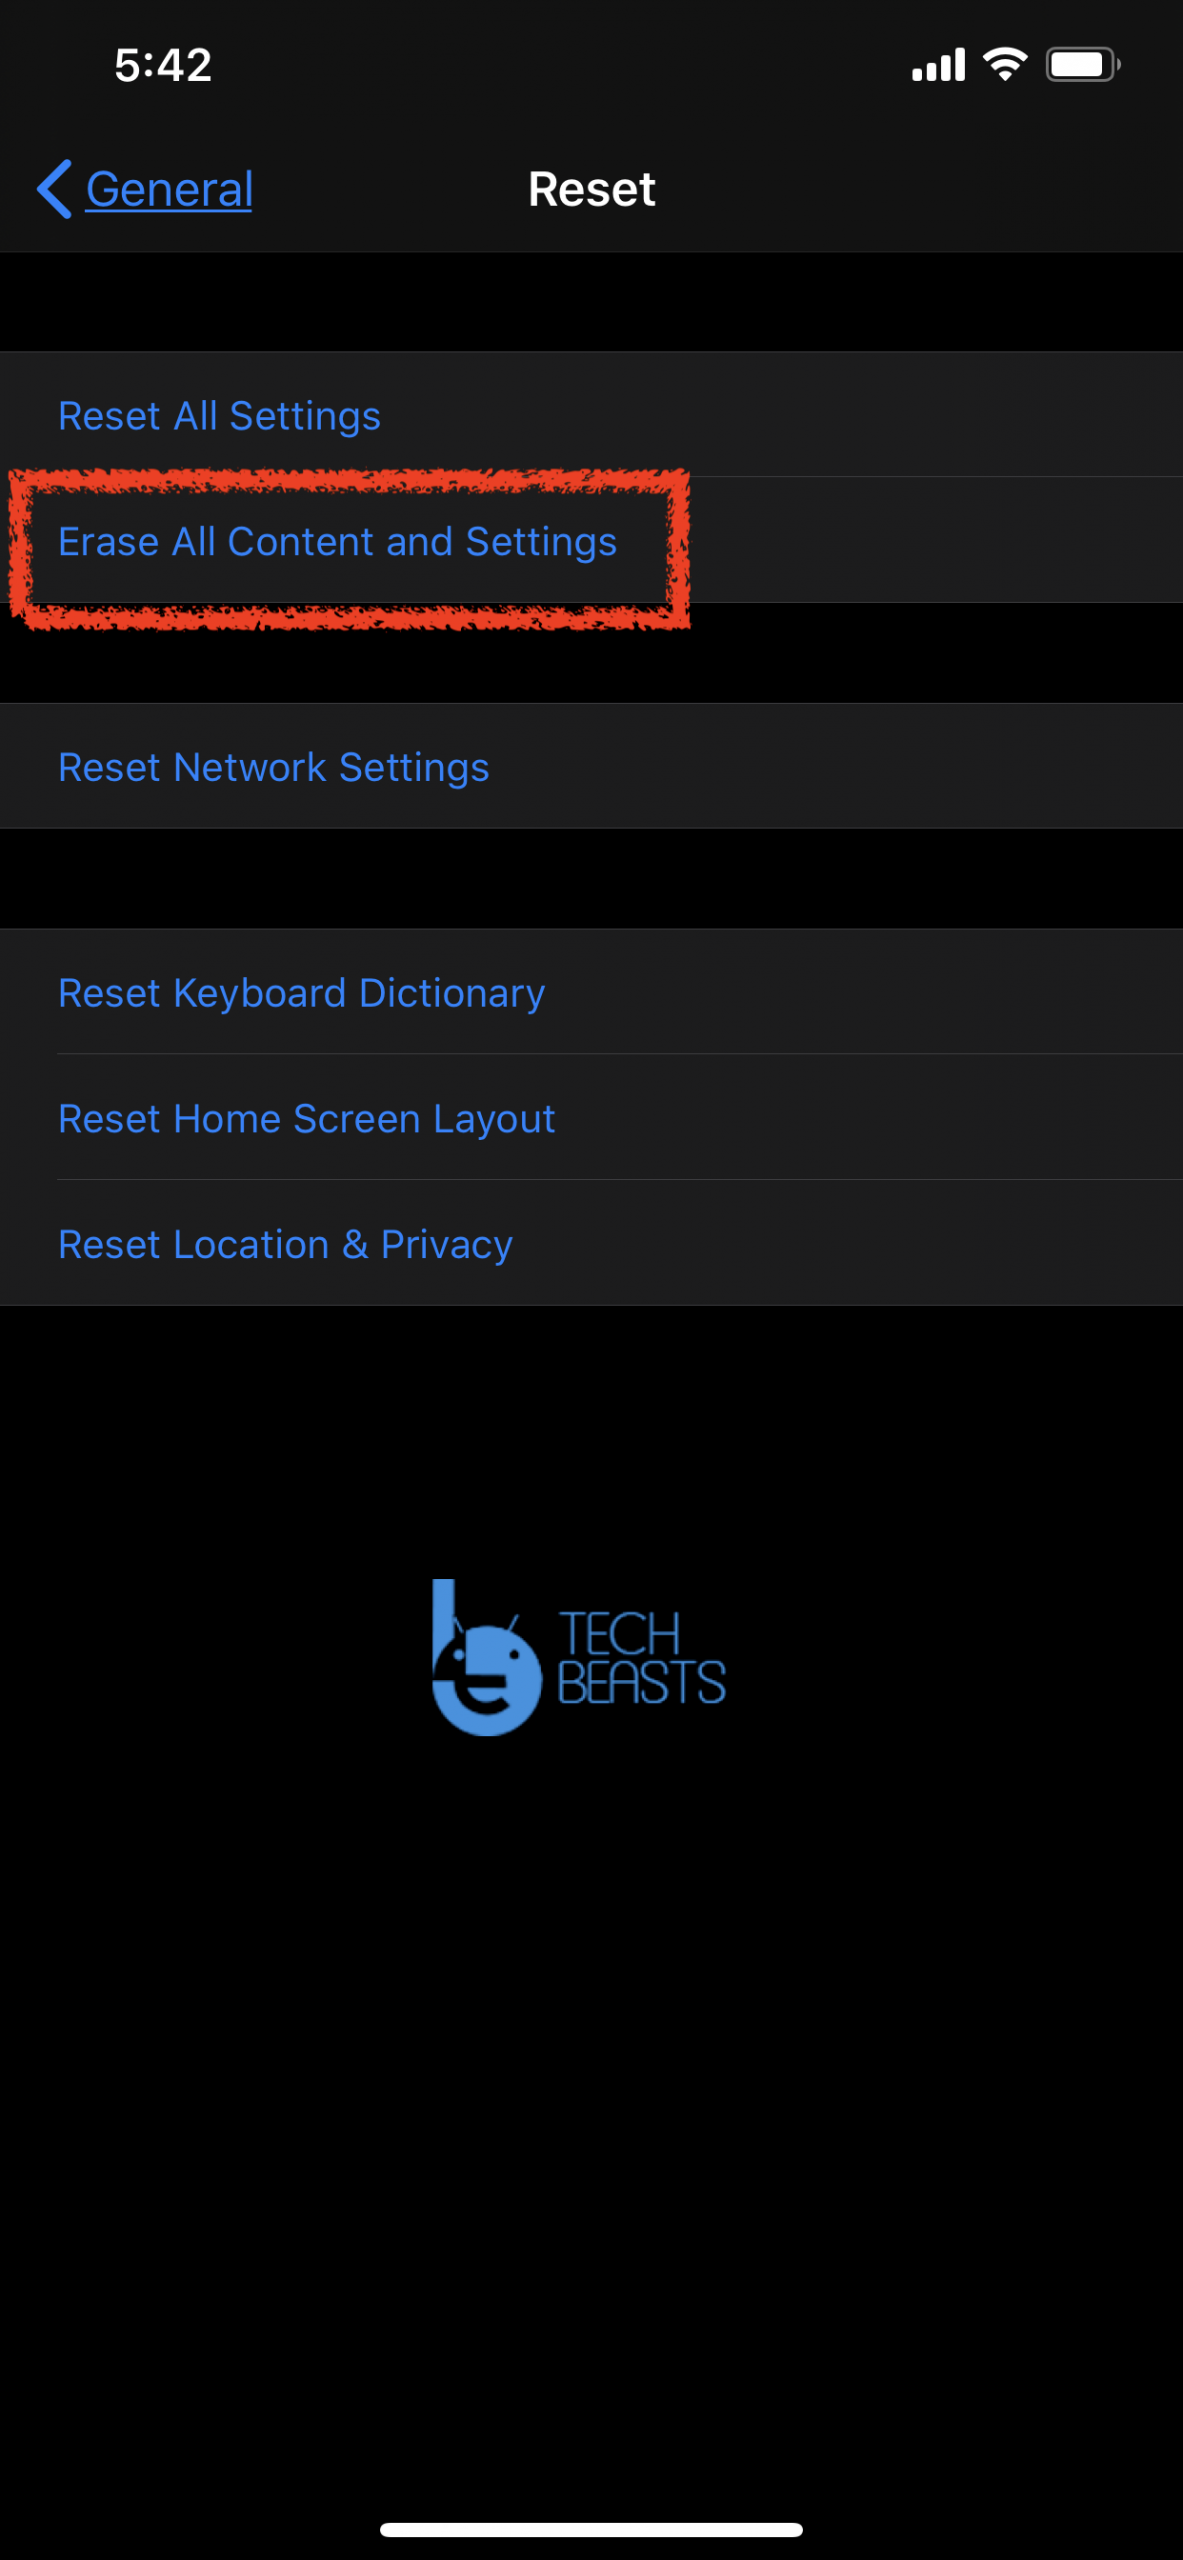
If everything else fails, you need to factory reset your Apple device. Head over to the Settings > General > Reset > Erase All Content & Settings.

That will be all. This is how you can Fix App Store Not Downloading Apps Issue on iPhone & iPad.

How to enable Virtualization Technology (VT) for BlueStacks
0
How to enable Virtualization Technology (VT) for BlueStacks

In this guide, we will take a look at the method to enable Virtualization Technology (VT) for BlueStacks on Windows. The method will explain how to enable VT for BlueStacks on Windows 8, Windows 8.1, and Windows 10.enable Virtualization Technology (VT) for BlueStacks 3

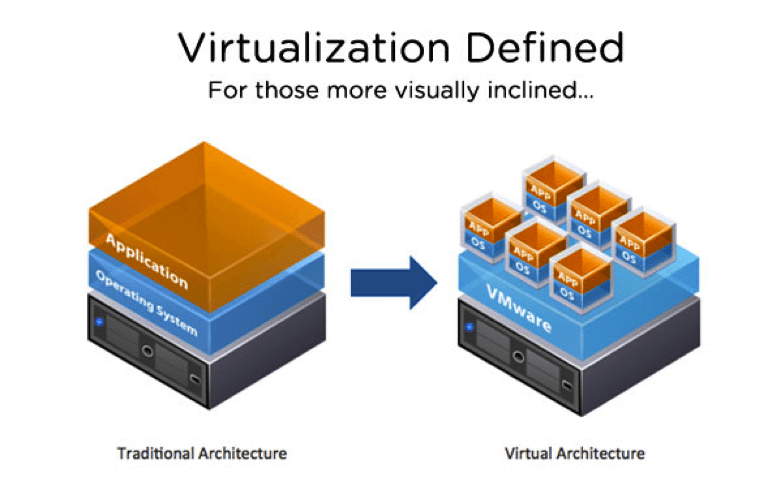
Intel Virtualization Technology, formerly known as Vanderpool, is a feature that enables a CPU to act as several independent computers. The same technology by ADM is known as AMD-V. The purpose of VT and AMD-V is exactly the same. Virtualization Technology is basically used for running several operating systems on a computer at the same time. You must have heard of virtualization software like VMWare. Such software triggers virtualization in a computer to run another OS without any hiccups. Virtualization Technology is useful for running Android Emulators on a computer as well. If you have ever wanted to run Android OS on your computer and you came across BlueStacks, you will definitely need VT enabled on the computer.

The latest version of BlueStacks, the BlueStacks 4.1 runs well on the Windows-powered computers. However, the emulator gets stuck at times and sometimes it just becomes too much slow. You can boost up the performance of BlueStacks 4.1 on your computer simply by enabling the virtualization technology. BlueStacks 4.1 is a huge software and it can potentially slow down the performance of your computer as well. You need a powerful computer in order to run software like BlueStacks 4.1. It’s very important to have VT enabled if you want to put the least amount of load on your CPU. Having VT enabled will make your CPU believe that there is another operating system that needs another computer to run. If you run BlueStacks 4.1 without VT, it will put all the load on the part of the CPU which is already handling your current operating system.

Let’s proceed with the guide to enable Virtualization Technology (VT) for BlueStacks 4.1 now.

How to check if your computer supports Virtualization Technology or not?

Intel Users

  1. First of all, you need to check whether your computer supports VT or not. Here’s how you can do so.
  2. Intel users can download the Intel Processor Identification Utility tool.
  3. Install and launch your installed tool now.
  4. If you have installed the Intel tool, open it and click on “CPU Technologies”.
  5. Under the CPU Technologies page, you will find the Intel Virtualization Technology with Yes written next to it.
  6. If it’s exactly the same as shown below, it means you can enable VT on your computer.

AMD Users

  1. AMD users can download the AMD-V Detection Utility tool.
  2. Launch the newly installed tool on your computer.
  3. The AMD tool will show you the message “This system is compatible with Hyper-V”. If it shows you this message, it means you can enable VT on your computer.

How to enable Virtualization Technology (VT) for BlueStacks

Now that you know your computer supports VT, it’s time to enable it.

Windows 10 Users:

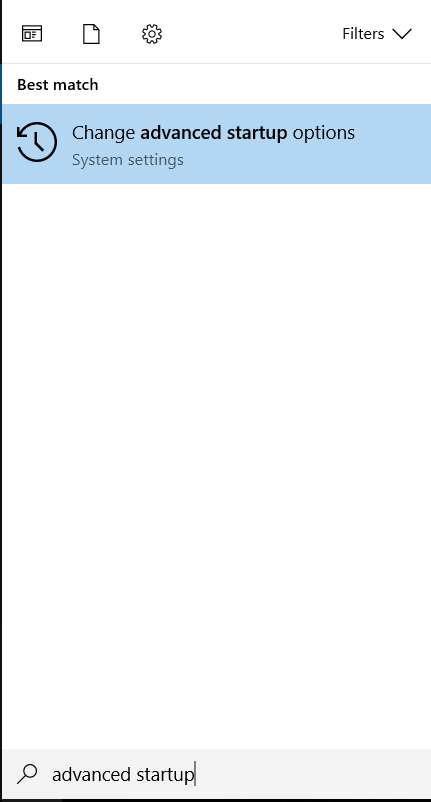
    1. On your computer, click on the search button appearing the taskbar and type “Advanced startup”.
    2. As soon as “Change advanced startup options” appears, click on it.enable Virtualization Technology (VT) for BlueStacks 3
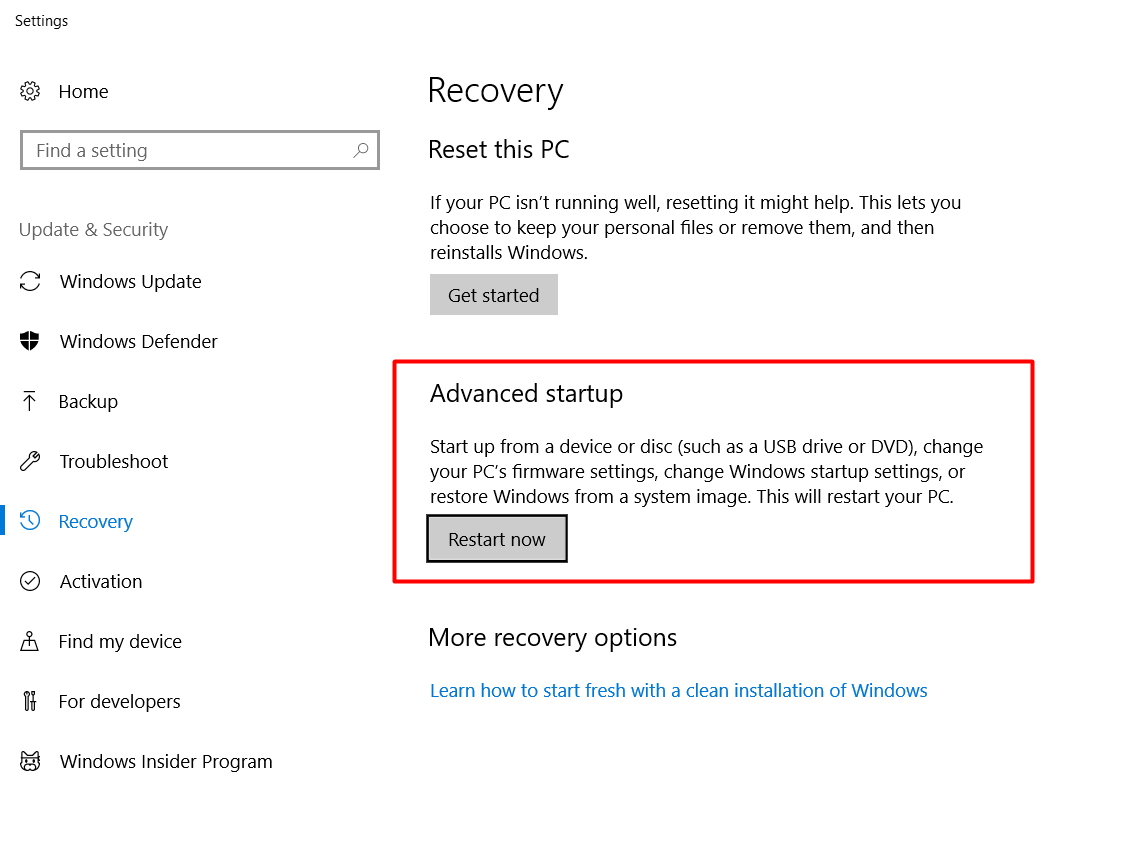
    3. Now click on Restart now.enable Virtualization Technology (VT) for BlueStacks 3
    4. Click on Troubleshoot > Advanced options.enable Virtualization Technology (VT) for BlueStacks 3enable Virtualization Technology (VT) for BlueStacks 3
    5. Now under Advanced options > UEFI firmware settings > Restart to enter BIOS.
    6. Your computer will reboot and enter the BIOS now.
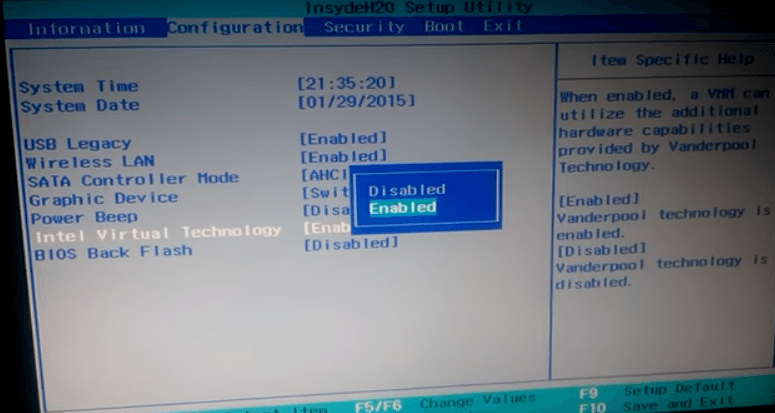
    7. In BIOS, use the arrow key to move to Configuration or System Configuration.
    8. Now use the arrow down key to select “Intel Virtualization Technology”.
    9. Press Enter and then use the arrow down key to select “Enabled”.
    10. Save the settings and restart your computer now.enable Virtualization Technology (VT) for BlueStacks 3

enable Virtualization Technology (VT) for BlueStacks 3enable Virtualization Technology (VT) for BlueStacks 3

Windows 8.1 & Windows 8 users:

  1. On your Windows 8.1 or Windows 8 computer, press the Windows key + I.
  2. It will open the PC settings.
  3. From the right side, click on “General”.
  4. Now in General, you will find Advanced startup.
  5. Under Advanced startup, click on Restart.
  6. Now under Restart > Troubleshoot > Advanced options.
  7. Under Advanced Options > UEFI Firmware Settings > Restart.
  8. Your computer will reboot and enter the BIOS now.
  9. In BIOS, use the arrow key to move to Configuration or System Configuration.
  10. Now use the arrow down key to select “Intel Virtualization Technology”.
  11. Press Enter and then use the arrow down key to select “Enabled”.
  12. Save the settings and restart your computer now.

Now launch BlueStacks after having the VT enabled. You will find it running smoothly this time. That’s all.