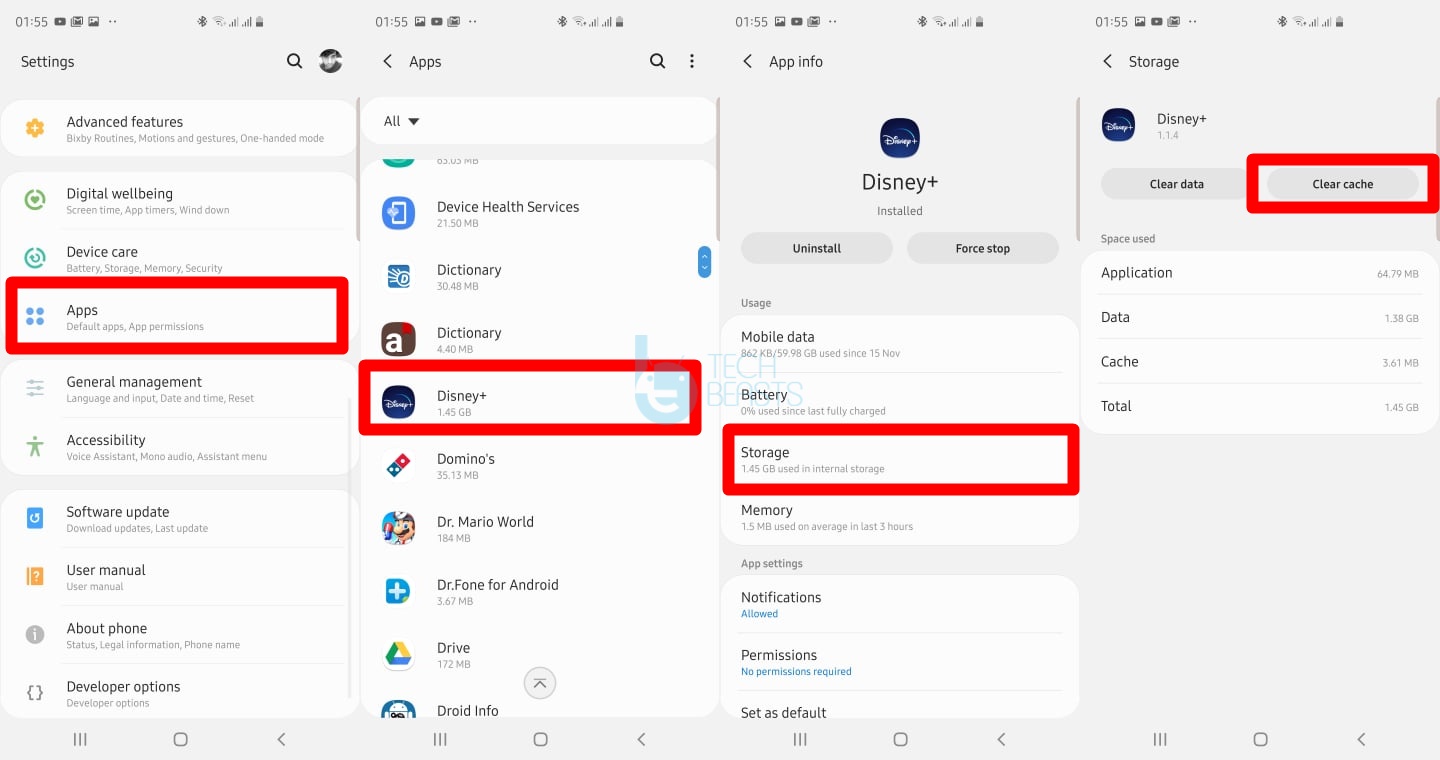
Follow the steps given in this guide to clear Disney+ Cache and Data on Android phones. Clearing the Disney+ cache and data can fix potential problems that you are currently facing on this app.
Clear Disney+ Cache and Data
These are the simple steps to delete Disney+ cache and data.
Total Time:2 minutes
On the Android phone, open Settings.
First of all, open the Settings application on your Android phone or tablet.
From the Settings, open Apps or App Manager.
Scroll down in the settings and open the Apps or Application Manager inside the settings.
Now open Disney+ settings.
You will now see a list of all the installed apps, scroll down, find, and open Disney+ settings.
Click on Storage in the Disney+ settings.
In the Disney+ settings, you will see the “Storage” option. Click on it to open it.
Clear Disney+ Data and Cache!
You will now see the Clear Data and Clear Cache buttons. Click on the buttons one by one to clear it. That’s all.
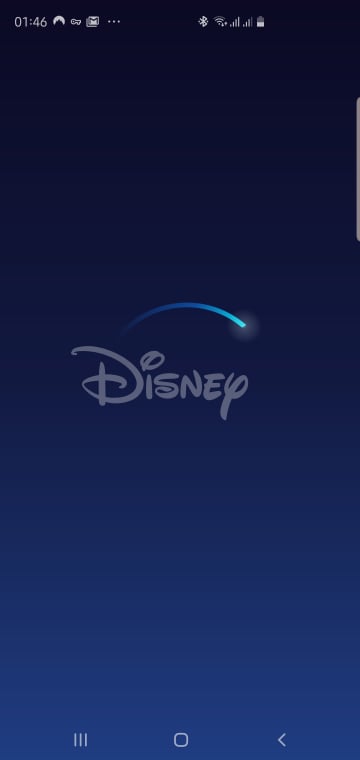
Clearing the Disney+ cache and data will not delete the application. If you only clear the cache, it will only refresh the Disney+’s processes. If you clear the Data, it will log you out of the Disney+ app removing all the background processes and refreshing everything linked with the Disney+. After clearing data and cache, you can log back in. The app will work better and will fix problems like Disney+ being stuck on the loading screen.
That’s all. If you have any further questions/queries related to the Disney+ application, feel free to drop it in the comment section below.
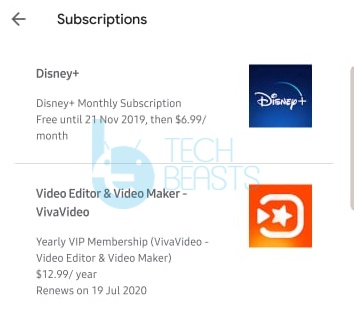
In this Disney+ tutorial, you will take a look at the steps to cancel Disney+ subscription via Play Store. If you are unable to cancel your subscription in the Disney+ app, you can use this guide to easily cancel subscription via the Google Play Store.
Cancel Disney+ subscription via Play Store
Follow these steps to cancel Disney+ subscription right away.
Total Time:2 minutes
Open Google Play Store on your Android phone.
On the Android smartphone, open the Google Play Store. Stay on the home screen.
In the Play Store, go to Subscriptions.
Click on the menu bars on the top-left in the search bar and click on Subscriptions.
Click on Disney+ in the subscriptions.
You will find a list of all the apps that you have purchased/subscribed to. Click on Disney+ in the app.
Click on Cancel Subscription.
At the bottom of the Disney+ subscription page in the Play Store, you will find “Cancel Subscription”, you need to click on it.
Your subscription has been canceled. All done!
In a second or so, your subscription will be cancelled and Disney+ will be removed from your Play Store subscriptions.
That’s all. After this, you will not be charged for Disney+ subscription.
Reasons to cancel Disney+ subscription
It is more important to know why you should cancel Disney+ subscription rather than knowing why I’m making this guide.
Disney+ is having a topsy-turvy ride at the moment. The apps’ Android version is full of bugs. There is a huge list of Disney+ error codes that appear most of the times on the Android phones only.
Disney+ also gets stuck on the loading screen randomly. The application also doesn’t have a lot of content that can impress the masses.
Most of the users are of the view to give this application a little bit of time before the developers improve it. There is a huge room for improvement in terms of the apps’ stability and its content as well.
If you recently signed up for the Disney+ trial, you have a good chance to cancel your subscription before the 7th day of trial.
If you have any other questions regarding the Disney+ application or you are having any difficulties unsubscribing, feel free to use the comment box below. I will try my best to get back to you as soon as possible.
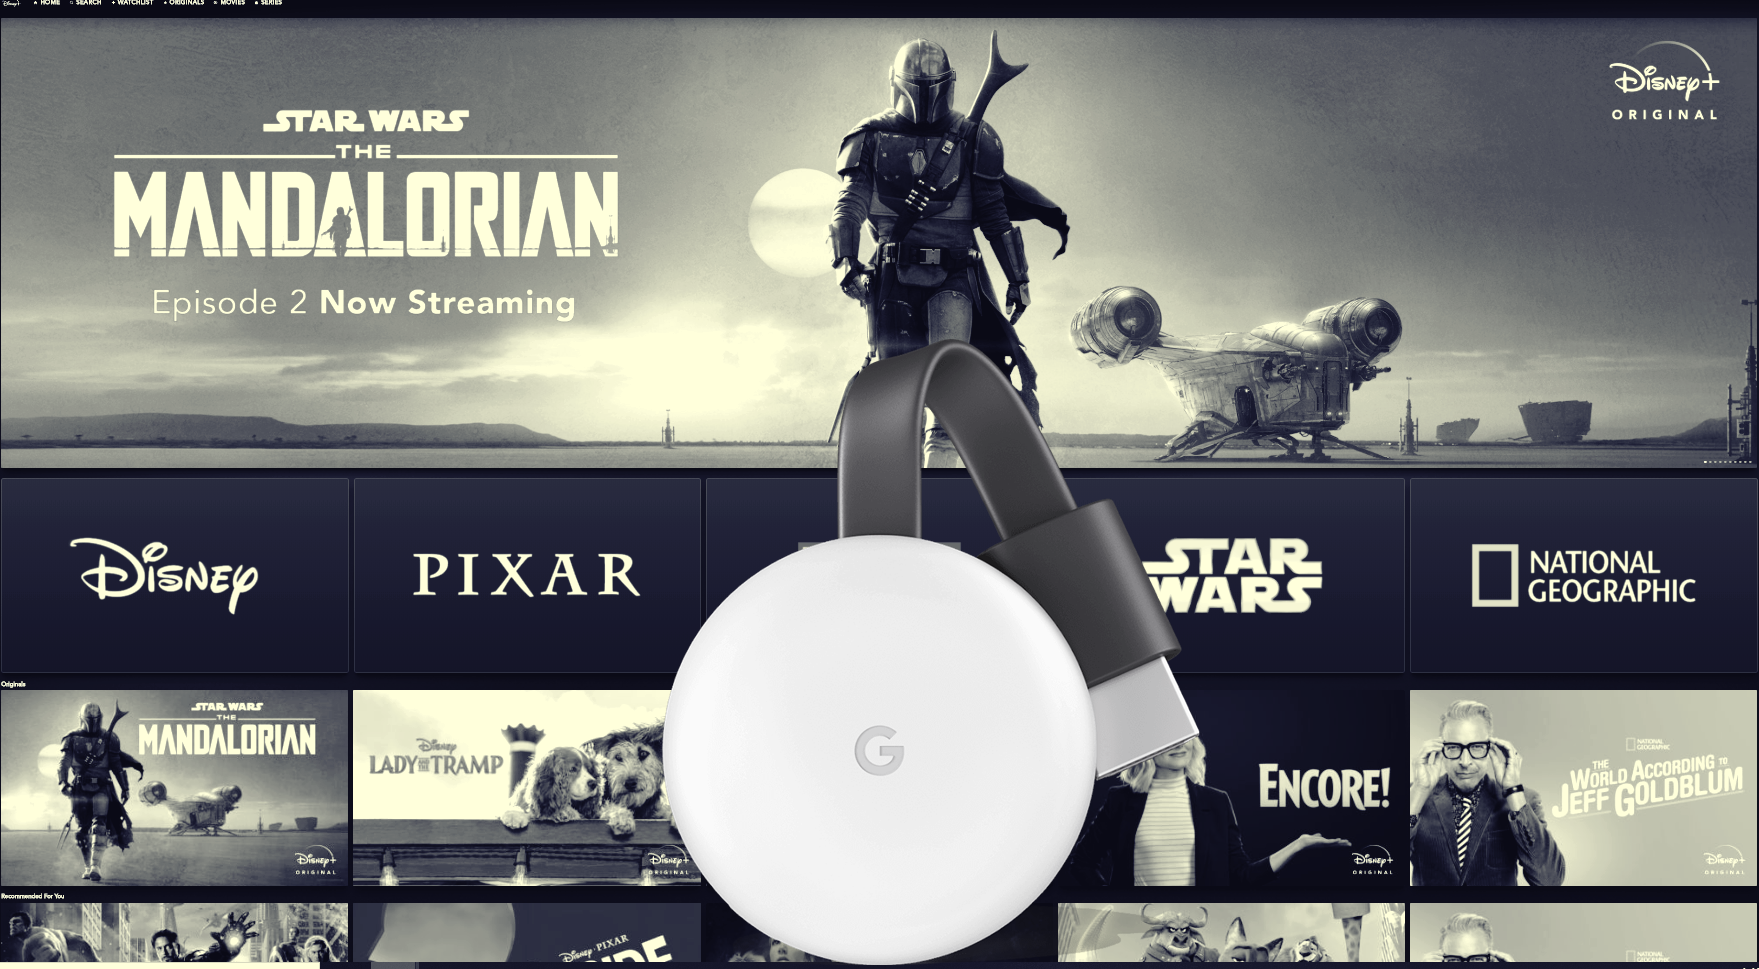
It is incredibly easy to cast Disney+ with Google Chromecast. The Disney+ app is officially compatible with Chromecast. Take a look at the steps below to cast Disney+ with Google Chromecast and watch Disney+ on your TV!
Disney+ with Google Chromecast
Disney+ is compatible with a load of Smart TVs, it supports AirPlay and Samsung SmartView, and it’s officially supporting the Chromecast as well. If you happen to have a Chromecast connected to your TV, you can cast Disney+ on it right away. These are the few requirements for this.
Chromecast and Android phone must be using the same WiFi.
Cast Disney+ with Google Chromecast
These are the simple and easy steps to cast Disney+ with Google Chromecast.
Turn on your TV with the Chromecast connected.
Turn on your TV and bring the Chromecast screen on the front.
Open Disney+ on your Android phone.
On the Android phone, open the Disney+ application and find the movie/tv show you want to watch.
Play your desired movie/TV show in the Disney+ app.
Now play the movie you want to cast with Chromecast.
Press the Screen Cast button in the Disney+ app.
As the movie plays, you will find a cast button on the top-right corner of the screen. Press this button.
The screen will be cast to your TV via Chromecast. That’s all!
The Chromecast will appear in the list of available devices. Click on it and cast the screen. That’s all.
Remember that if you have no Chromecast available around, the screen mirroring/cast button will not appear in the Disney+ app. The button only appears when there is a compatible screen-casting device available for connectivity.
If you are living outside the US and Canada but still want to access Disney+, grab the best Disney+ VPN and you are good to go.
In case you own a Vizio TV, the in-built Chromecast is not going to work. Disney+ isn’t available for the Smartcast either. You can follow this guide to cast Disney+ on Vizio Smartcast HDTV via AirPlay 2.
Final Words
You are hopefully watching Disney+ on a bigger screen now. Chromecast is a really great solution to convert ordinary LED TVs into Smart TVs. If you are facing any issues with the connectivity, feel free to use the comment section below to reach out to us. I will try my best to get back to you as soon as possible.
Disney+ stuck on loading screen - Disney+ won't load
Follow the steps given in this tutorial to fix Disney+ stuck on loading screen. If Disney+ won’t load or it has become unresponsive, you can fix it now. This guide is for Android only.
Disney+ and its problems
Disney+ is the most awaited application of the year 2019. The app was officially announced on November 12. Disney+’s launch didn’t go as smooth as everyone expected. The app encountered a number of errors and bugs on its very first day. Most of the Disney+ issues have happened on the Android operating systems. Android users are not having the best of Disney+’s experience. The app keeps returning a new error code every now and then. At times, Disney+ becomes fully non-responsive. The app sometimes refused to play your desired title.
Disney+ stuck on loading screen – Disney+ won’t load
I have personally experienced all these issues on the Disney+ app. Before I officially gave up on this application, I tried a few fixes and some of them fixed the application for a while.
If you are facing all those problems, let me tell you that it’s not your fault. All those bugs and problems are in the Disney+ application and we will be getting a number of updates fixing all these problems.
Disney has already released a couple of updates fixing a few issues. Those of you who are still facing some problems, they can try the solutions given below. These solutions will not permanently fix the Disney+ loading problem, but these will definitely let you watch the desired title for now.
Fix Disney+ stuck on loading screen
Open the Play Store and check if there is a new Disney+ update, if there is, update the app right now.
Now open Settings on the Android handset.
In Settings, go to Apps or App Manager.
Find Disney+ and open its settings.
Now click on Storage > Clear the Cache.
Restart the Android phone, open Disney+ and it will load. That’s all.
Clearing Disney+ cache on Android
Also, keep in mind that if you are trying to access Disney+ using a VPN, it may not work at its best. Disney+ does not work all the time when connected through a VPN. You can try switching to different servers in the VPN app to see if it fixes the Disney+ stuck on the loading screen.
Final Words
That’s all with this fix. Hopefully, you will be able to fix the problem this way. If you have any further questions or queries related to the Disney+ app or this guide, feel free to use the comment box below. I will try my best to get back to you as soon as possible.
This is the tutorial to cast and watch Disney+ on Vizio Smart TV with AirPlay 2. This tutorial is only for Apple iPhone, iPad, and iPod. Before you take a look at the steps, let me tell you about Disney+ and its compatibility with Vizio Smart TV.
Disney+
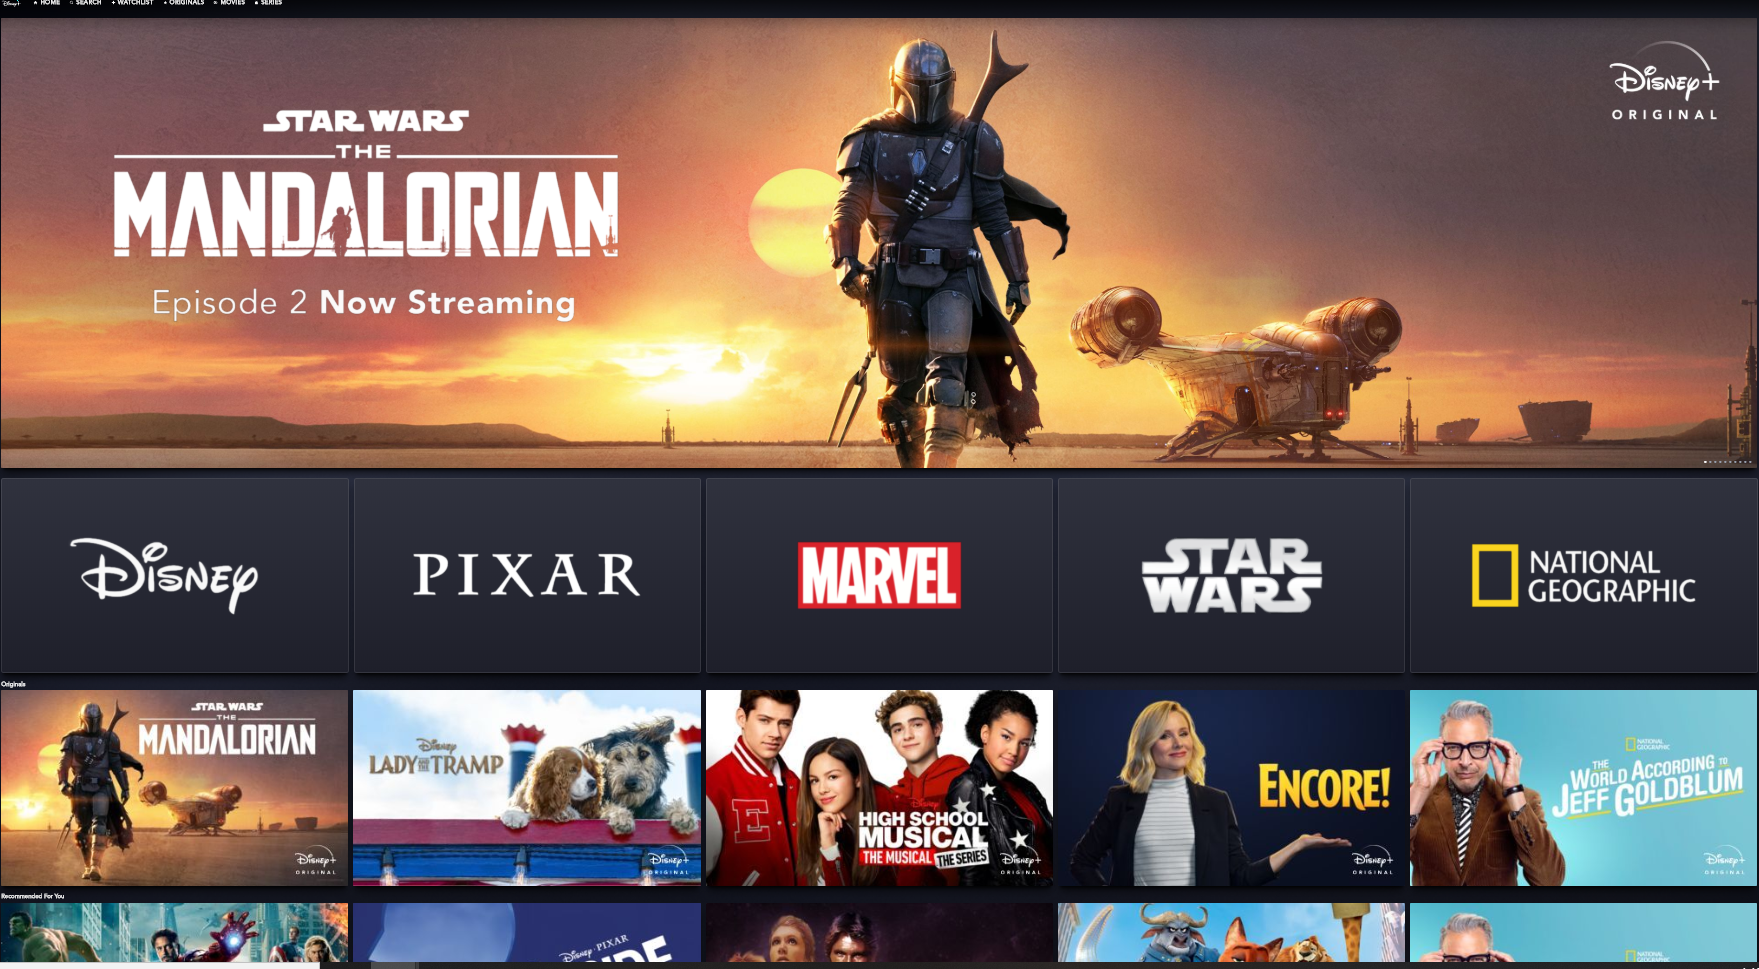
The most awaited streaming application of the year is finally out. Disney+ is the official Disney Streaming application. The app has content from Disney, Pixar, Star Wars, and Marvel.
Disney+ was officially launched on November 12. The journey of Disney+ hasn’t been as smooth as the users expected. Disney+ users encountered a huge number of errors on the app. Some of the Disney+ problem has already been fixed while some are still there. Apart from the topsy turvy takeoff, the content on the app was also massively criticized by the users. Despite all those problems and criticism, the Disney+ has raked in over 10M subscriptions so far.
Disney+ works on a number of devices and platforms. You will find this app working on Android, iOS, it works on Windows and macOS too. Disney+ is available for Android Smart TVs, Apple TV, Chromecast, and many other such devices. It is very unfortunate that a huge list of Disney+ compatible devices do not include Vizio, the 2nd most Smart TV seller in the US. So, if you own a Vizio Smart TV, you are out of luck to run the Disney+ on the TV.
Disney+ on Vizio
Disney+ cannot be installed on the Vizio Smartcast TVs. The app does not support the OS of the Vizio TV. However, that’s one of the two ways to get Disney+ on Vizio TV. For the most part, Vizio TVs rely on their in-built Chromecast, and it’s really disappointing to see that Disney+ doesn’t work with the in-built Chromecast of Vizio TVs either. So, both the methods to get Disney+ on Vizio will are non-functional.
Here is Vizio’s official tweet about Disney+ on its Smart TVs.
Hi Nick, Disney+ is not currently available on VIZIO TV’s as a built in app or available to cast. If you have an AirPlay 2 compatible SmartCast TV, you may be able to AirPlay Disney+ content to the TV.https://t.co/VmPce5PjKA— VIZIO (@VIZIO) 12 November 2019
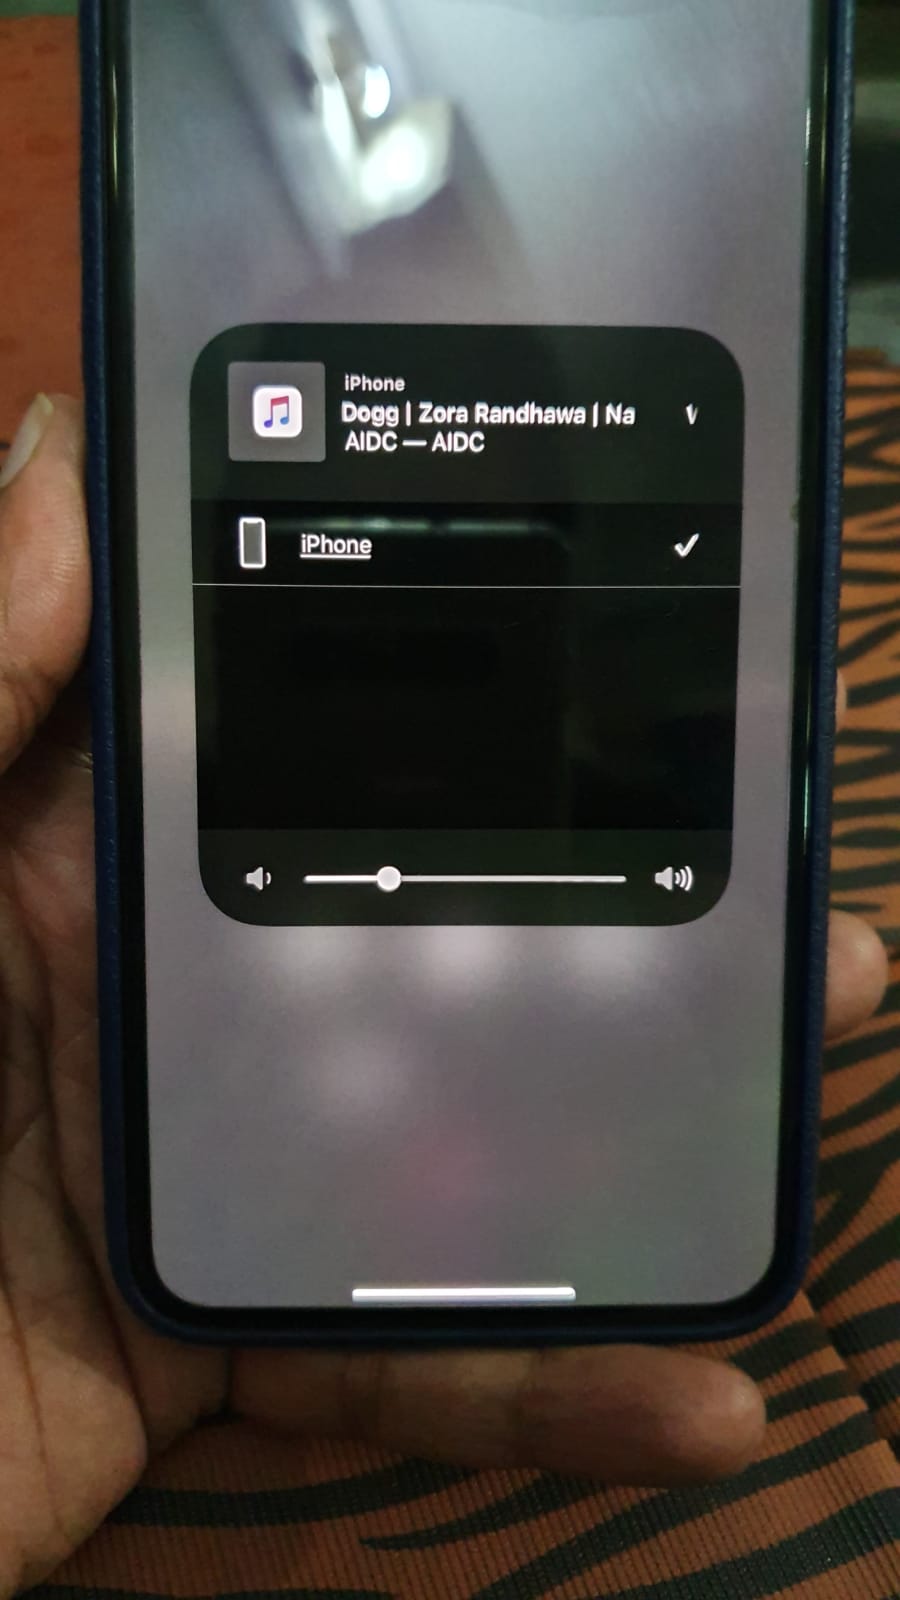
The only way to cast Disney+ on a Vizio TV right now is through Apple AirPlay 2. At first, you have to have an iPhone, iPad, or iPod. Your device must have the AirPlay 2. You can find a list of the Vizio Smart TVs with AirPlay 2.
So, if your device matches the above scenario, you can find the steps given below to watch Disney+ on Vizio Smart TV with AirPlay 2.
Here is a quick look at the requirements once again
Apple iPhone, iPod, iPad with AirPlay 2
Vizio Smartcast HDTV
Disney+ installed on the iPhone/iPad/iPod [ Disney+ on App Store]
Active Disney+ Subscription.
Vizio Smart TV and Apple Device must be connected to the same WiFi network
Watch Disney+ on Vizio Smart TV with AirPlay 2
These are the simple steps to cast and watch Disney+ on Vizio Smartcast HDTV with AirPlay 2.
Total Time:2 minutes
Step 1
Open the Disney+ app on your Apple device and sign in.
Step 2
If the app shows a cast button on its home screen, do not cast as it will not work right now. If you are not seeing the button, that’s alright.
Step 3
Play a movie or TV show in the Disney+ app. As soon as the movie starts, you will see a cast and AirPlay button on the top-right corner.
Step 4
Press the button and you will see a list of devices available for AirPlay. Select your Vizio Smart TV.
Step 5
Vizio Smart TV will be connected and you will see the Disney+ app being cast to the TV now. Resume the movie and enjoy on a bigger screen!
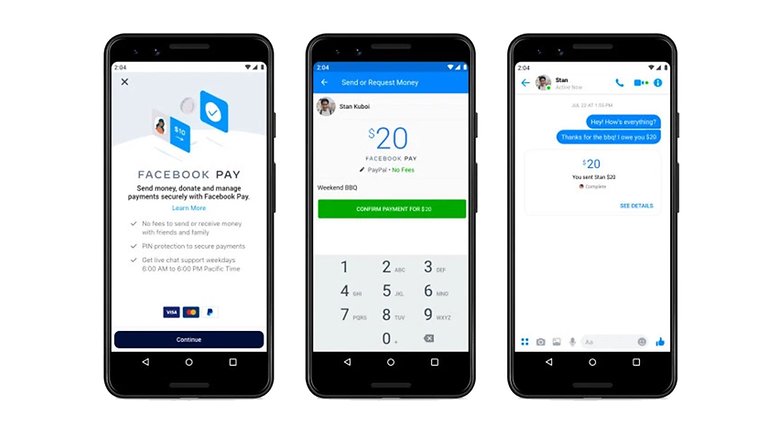
Facebook has introduced his own payment app named as Facebook Pay. In this post, I will tell you all about Facebook Pay. How toUse Facebook Pay, send and receive money via the Facebook App, Messenger, WhatsApp & Instagram.
Seems like Facebook is also setting in his foots in the world of digital payment apps. All the big manufacture have their own payment portals. Apple has it Apple Pay, Samsung has Samsung Pay, Google has Google Pay, and there are a number of other services that allow users to send & receive payments with ease.
The best thing about Facebook pay is that it allows users to send & receive money using Facebook and the Messenger app. Nowadays, everyone uses Facebook, WhatsApp & Instagram and Facebook Pay will work with both. Giving that, WhatsApp and Instagram are under the umbrella of Facebook. So, it is obvious that Facebook Pay will work with WhatsApp & Instagram.
This will give an edge to Facebook Pay over Google Pay and Apple Pay. Facebook has the largest user database and allowing them to use this feature will give a head start. You will be allowed to make In-App purchases, send and receive normal external payments. Moreover, soon you will able to use Facebook Pay just as you use Google & Apple Pay on stores.
Make Payment using Facebook Pay:
Now that Facebook has introduced its own payment gateway. They will start with their own networks, you will be able to pay for services, purchase items, send money to other users.
At first, they connected Facebook and Messenger apps. But in no time you will see WhatsApp and Instagram will be connected with Facebook Pay.
Payment, security and data protection:
This is the main concern nowadays, security and data protection. Everyone wants to know about all the working and then they can proceed with the payments.
We’ve heard that at the start, Facebook Pay will use your credit cards and PayPal accounts as payment methods. That means in order to use Facebook Pay you need to Add your Credit Cards and also you need to attach your PayPal account.
As far as security, Facebook is collaborating with PayPal and Stripe to provide the best security infrastructures. To protect the Payment one will need to create a PIN before he/she makes a payment.
Moreover, the Facebook Pay app will provide you all the details of your transactions. That way you can easily track the record of your Payments made using Facebook Pay.
That is all you need to know about Facebook Pay now it’s time to tell you how to Use Facebook Pay.
How To Use Facebook Pay, Add a Payment Method, Send & Receive Money:
Before I move on, Let me tell you one more thing. Facebook Pay is only available to US users. So if you are in the US then you will able to Use Facebook Pay.
Open the Facebook App or Facebook Website. Head over to the Settings -> Facebook Pay.
Now add your credit card or PayPal account.
That will be all. Next time when you are trying to make a payment. Use Facebook Pay on Facebook app or Messenger.
Payments in Messenger:
Open a message with the person you want to send money to.
Tap on the “$” sign, located above your Keyboard.
Enter the amount you want to send.
Tap on Pay, you have sent the money.
There you go. This is How you can Use Facebook Pay, Send & Receive Money Via Facebook App, Messenger, WhatsApp & Instagram.
We all know that we share our mobile data over WiFi Hotspot. But did you know that using a third-party app you can share Android’s VPN connection over WiFi Hotspot? Yes, you can, in this post, I will explain how you can.
But before we proceed, you need to know one thing, sharing Android’s VPN connection over WiFi Hotspot is possible. However, in order to do that you need to root your Android device.
I’ll be using an app called VPN Hotspot – tethering/Wi-Fi repeater. This app is available on Google Play and it’s free. The basic purpose of this app is to allow you to share a VPN connection over WiFi-Hotspot.
You won’t be a needing dedicated VPN app or any other software for your Windows PC. All you have to do is install VPN Hotspot – tethering/Wi-Fi repeater on your Android device. Connect a VPN and share it over WiFi Hotspot.
Let’s get started now and it’s time to learn how to Share Android’s VPN connection over WiFi Hotspot.
Share Android’s VPN connection over WiFi Hotspot:
Heed the instruction below and you will be able to share your Android VPN connection through WiFi Hotspot. But first, you need to root your Android device.
You can use the link provided above to download the WiFi Hotspot app or you can head over to Google Play. Type in the Download VPN Hotspot – tethering/Wi-Fi repeater and install it.
Grant Root Access:
Once the App is installed. Launch it, upon its first launch, the app will ask for root permissions. Tap on allow to grant the app required permissions.
Turn on your VPN Connection:
Turn on your Mobile Data or connect to a WiFi connection. Now launch the VPN app and connect it. After that Enable HotSpot on your device.
Turn on Wi-Fi hotspot on the App:
Once everything is in order, head over to the VPN Hotspot – tethering/Wi-Fi repeater. Now here you will see a new Lan connection, scroll down and enable WiFi-Hotspot.
That will be all. It’s time to check our Android VPN connection is live over WiFi Hotspot or not? Head over to your PC Windows or Mac. Open WiFi settings and look for your newly created WiFi Hotspot connection.
You will see your Mobile Hotspot name on the list and you don’t have to enter new credentials. Just connect it and start using an Android VPN connection on your PC, Mac, Roku, Chromecast and more.
That’s all. This is how you can easily share your Android’s VPN connection over WiFi Hotspot. The only downside to this method is that you have to root your device. Please do try it and let me know if you need any help.
Here is a complete Disney+ Error Code List. The solutions of some of the Disney+ Errors are also given here.
Disney+ launched just a couple of days back. The application was massively welcomed by users, especially Disney fans. Things didn’t quite go as expected as the Disney+ started crashing for the users. Disney+ was unable to play the titles for many users in the US and Canada.
Disney+ on my Galaxy S10 Plus
Disney+ users reported a different error every minute on the launch day of Disney+. There are over dozens of error codes popping up in this app at the moment. If you are experiencing the errors, I’d like to tell you that it’s not your fault. The load on Disney+ is what’s making the application a little bit sluggish right now. I have collected the list of all Disney+ error codes and listed them below. The possible fixes of some of these errors are also given below.
Disney+ Error Code List
Error Code 4
This Disney Error Code 4 occurs when the application is unable to complete the transaction. This happens when you are trying to get the Disney+ subscription. In this case, you need to make sure of the following.
Your card details entered in Disney+ are the same as they are on the card.
The billing address must be accurate. Check your billing postal code, ZIP, etc.
Enter the right security code of your card. Entering a wrong security code will not let the transaction go through.
Make sure that you are entering a correct expiration date.
Disney+ will not accept any official or government-issued card. Make sure to use your personal card for this.
If you have the US or Canadian card, try that. Although I have personally signed up for Disney+ using a non-US card, if a non-US card isn’t working for you, you can try a US one.
Error Code 5
When Disney+ is unable to save your account information, it pops up the Error Code 5. To fix this problem, you have to check the entered information. The information must be accurate.
Error Code 7
If your password doesn’t meet Disney’s criteria, or you have entered an email address that doesn’t exist, you will get the Error Code 7.
Error Code 8
Adding an invalid email to sign up for Disney+ will cause the Error Code 8. After signing up, always check your mail inbox for Disney+ subscription confirmation.
Error Code 9
When Disney+ logs you out, it will start giving the Error Code 9. The main reason for Disney+ to log you out is the failure of payment. If your Disney+’s payment gateway declines your card because of some information conflict, it will sign you out resulting in Error Code 9. To fix the error, make sure of the following things.
Your card details entered in Disney+ are the same as they are on the card.
The billing address must be accurate. Check your billing postal code, ZIP, etc.
Enter the right security code of your card. Entering a wrong security code will not let the transaction go through.
Make sure that you are entering a correct expiration date.
Disney+ will not accept any official or government-issued card. Make sure to use your personal card for this.
If you have the US or Canadian card, try that. Although I have personally signed up for Disney+ using a non-US card, if a non-US card isn’t working for you, you can try a US one.
Error Code 11
Error code 11 means the content you are trying to watch is not available for your location. You can use a Disney+ VPN to unlockthe US or Canadian content outside these countries.
Error Code 13
Disney+ allows 10 accounts at a time. If you try to add an 11thcprofile/account to Disney+, you will get the Error Code 13. To be able to add a new account, you will have to delete one previously added account or profile.
Error Code 22
Disney+ can sometimes have content that wouldn’t play because of rights or rating restrictions. In such a case, you will get the Error Code 22. You can try accessing the same content later and it might just work.
Error Code 24
When Disney+ is unable to connect to your account, you will get the Error Code 24. To fix this, make sure that your internet connection is working. A slow internet connection can also cause trouble. Since Disney+ is an HD streaming service, you need to ensure smooth connectivity.
Error Code 25
Disney+ can experience internal errors as well. You can try performing the same action again to get rid of the Disney+ error code 25.
Error Code 27
When there is a problem with a video’s rights availability, Disney+ will give you the error code 27. Check back later for the same video.
Error Code 28
When Disney+ is unable to find your desired video in its directory, it gives you the error code 28. You can try finding the same video later.
Error Code 29
Due to the internal connectivity issues, Disney+ can give you the error code 29.
Error Code 30
The Disney+ error code 30 pops up when there is a problem adding a new device to the application. You need to check the following.
The device is not already added. If it’s added, Disney+ will result in an error.
You have no room for new devices. After reaching the 10-device limit, you can’t add the 11th device. Remove one device to add a new device.
Disney+ encountered an undefined error to link your new device. Trying adding the device later.
Error Code 31
When Disney+ is unable to verify your location, you will get the Error Code 31.
Make sure that the location services on your iOS or Android phone are turned on. You can go to the Settings and check the location services.
If you are outside the US, but you have the Disney+ subscription, you can use a VPN to watch it. Here is our list of best Disney+ VPN.
Error Code 32
This happens when Disney+ is unable to log into your account. In this case, either check your login details or the internet connection. If both are fine, check your account after some time again.
Error Code 34
In each Disney+ account, you can create 7 profiles at max. If you have reached the 7 profiles limit, you will not be able to add the 8th and you will get the error code 34.
To get rid of the error code 34, you need to delete an existing profile.
To delete the profile on your TV, Mobile, or Web browser, click on the profile icon in Disney+ and Edit Profile > Delete.
Editing Disney+ Profile on Android phone
Error Code 35
When the video you are trying to watch is not temporarily available, you will get error code 35. This can happen because of the rights issue or internal server problem of Disney+.
Error Code 36
The Disney+ error code 36 also occurs when the video you are trying to watch is temporarily unavailable. Again, this can be due to the rights issue, location problem, or the Disney+ internal error.
Error Code 38
The error code 38 means Disney+ is unable to sync with the time and date of your smartphone, TV, or the computer. To fix this, check your date and time. They should be up to date.
Error Code 40
This error also means that the video you are trying to access is currently unavailable. This could be due to the rights or location problem.
Error Code 42
The error code 42 is similar to the error code 40. It occurs when your desired video is unavailable. Check back for the video later.
Error Code 44
The error code 44 can happen when you Disney+ is unable to load your desired video because of rights availability or the internal failure. Try checking for the video at a later time.
Error Code 72
This error means Disney+ encountered some problems with your account. To fix this, log out of Disney+ and log back in.
Error Code 73
The error code 73 appears when Disney+ is not available in your region. At the moment, Disney+ is available in the US and Canada only. Remember that using free VPNs will not let your watch Disney+ either. If you want to watch Disney+ while being out of the compatible regions, you can take a look at our hand-tested list of best Disney+ VPN.
Error Code 75
When the concurrent devices limit has reached, the error code 75 appears. You need to make sure of these 3 things.
Disney+ allows 4 simultaneous devices to stream at a time. Reaching this limit will essentially result in error code 75. The number of concurrent devices should not go above 4.
A total of 10 devices is allowed to be linked with Disney+.
You can add 7 profiles in the Disney+ app at a time.
Error Code 76
When your internet connection is too slow or isn’t working at all, you will get the Error Code 76.
Error Code 81
Disney+ experienced a problem while you were trying to reset your password. Try resetting the password again to fix error code 81.
Error Code 83
Disney+ is compatible with specific devices and requires a specific speed of the internet to stream. Furthermore, Disney+ is available in a few select regions at the moment. When Disney+ cannot find the device, account, or region compatibility, it gives you the error code 81. To check your device/region availability, check this page.
Error Code 86
If your Disney+ profile has been terminated, you will get the Error Code 86. It can happen because of a violation of Disney’s TOS or if you are under the age of 18, you will not be allowed on Disney+.
Error Code 87
When Disney+ is unable to locate your profile, it gives you the error code 87. This can be Disney’s internal problem too. If you are unable to bypass this, log out of Disney+, log in again and create a new profile.
Final Words
That’s all. If you are unable to resolve the Disney+ errors, you can contact their customer support as well. If you have any questions/queries regarding this post, feel free to use the comment box below. I will try my best to get back to you as soon as possible.
This is the tutorial to pair AirPods Pro with Android phones. AirPods Pro and all of its features are compatible with Android handsets.
AirPods Pro
Apple released the AirPods Pro on October 30. The new AirPods Pro is not a gimmicky upgrade like AirPods 2. AirPods Pro offers massive changes and new features over its predecessors.
AirPods Pro with AirPods and Mi Earbuds
The AirPods Pro, at first, comes with an all-new design. In fact, the internet was quite busy making fun of the new AirPods Pro looked like something from the popular game Plants vs Zombies. However, the AirPods Pro were massively liked by everyone who got them and I am one of those users too.
AirPods Pro earbuds have silicone ear tips. The old plastic design is gone. These are much more comfortable and super light. Apple has added pressure valves on the front and rear of each earbud. The pressure valves will remove that sensation of pressure from the ears. Furthermore, the AirPods now offer Active Noise Cancellation. There are basically three modes in the new AirPods Pro.
Either you can completely turn off the noise cancellation, you can activate transparency mode, or you can keep the noise cancellation on. In the transparency mode, the AirPods Pro filter the important sounds from the surroundings and let them in.
On Apple devices, users can conduct and ear tip fit test to check the fitness of the silicon tips in their ears.
Both earbuds of the AirPods Pro have a battery life of 5 hours each. The wireless charging case of the AirPods Pro can last for 24 hours. It means that you can recharge your AirPods Pro for about 5 times in the wireless charging case.
AirPods Pro with Android – My Experience
I have been using the original AirPods for almost a year. As soon as the AirPods Pro came out, I got them quickly. I’m not an Apple fanboy, I use the AirPods Pro with my Android phones. The AirPods were quite smooth with all the Android phones I them with. For the AirPods Pro, I was a bit skeptical, not about the pods, but the new features actually.
After pairing the AirPods Pro with my phone, I found that the noise cancellation mode worked perfectly fine. You can switch between other modes too. So, at the time of writing this post, the AirPods Pro is my primary truly wireless pair of earbuds.
Now take a look at the steps given below to pair AirPods Pro with Android.
How to Pair AirPods Pro with Android
These are the few steps to pair AirPods Pro with an Android phone.
Total Time:2 minutes
Step 1
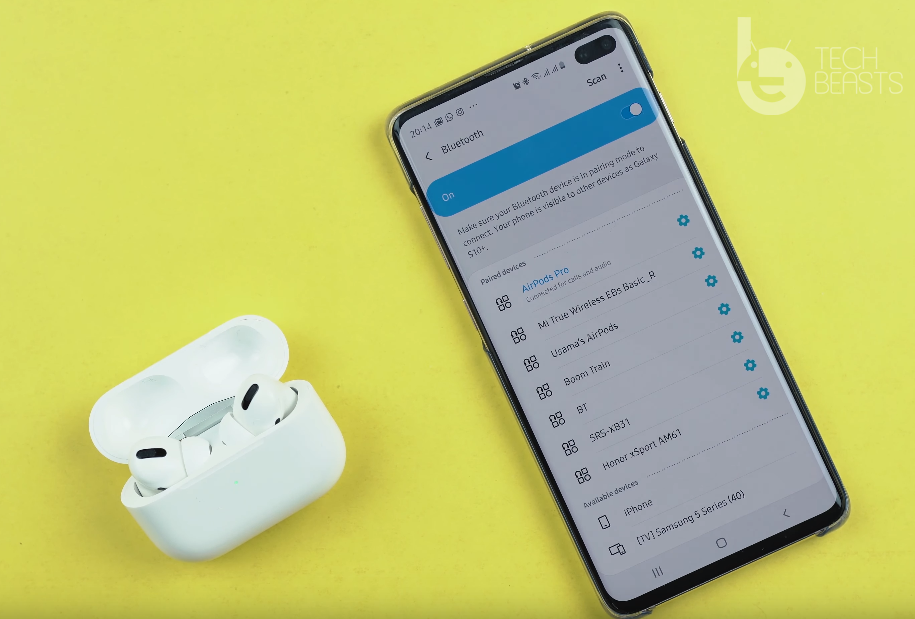
On the Android phone, turn on Bluetooth and scan for a new device.
Step 2
Press and hold the small button at the back of the AirPods Pro case.
Step 3
Keeping the button pressed, check scanned devices on Android phone and click on AirPods Pro.
Step 4
AirPods Pro will be paired and appear in the list of Paired devices.
Step 5
To connect for the first time, open the AirPods Pro case and click on AirPods Pro in the list of connected devices. That’s all.
After the first connection, the AirPods Pro will be automatically connected whenever you open the case.
AirPods Pro Noise Cancellation & Transparency Mode & other controls on Android
As mentioned earlier, there are buttons on the stems of both the earbuds of AirPods Pro. Here how these buttons work.
Pressing and holding the button switches between noise cancellation and transparency mode.
Press the once pauses/plays a song or picks up the call.
You can press the button twice forwards a track.
Press the button thrice goes backk to the previous track.
How to check AirPods Pro battery on Android?
Get the AirBattery application from the Google Play Store.
Open the AirBattery app and go through it.
The app will configure itself with your AirPods.
You will see the battery life of earbuds and case everytime you connect the AirPods Pro now.
Final Words
That’s all. I hope this guide is all what you needed for the AirPods Pro compatibility with an Android phone. If you have any questions/queries, feel free to use the comment box below. I will try my best to get back to you as soon as possible.
AirPods Pro vs AirPods vs Mi Earbuds vs Huawei AM61 vs Bose QuietControl 30 Comparison
WonderFox HD Video Converter Factory Pro is a multi-functional program packed online video downloader, video converter, basic video editor, screen recorder is equal to one. With advanced hardware acceleration technology and clear interface, it has been committed to providing users with strong support to convert video to almost all compatible formats, download online video for any time and anywhere to enjoy, and edit video based on their own preferences over the past decade.
In the latest version, it has not only been added some powerful new features such as make GIF, record screen, etc. but also greatly enhanced the editing function, which is friendly to the beginners and advanced users of video editing and makes itself more popular in the software market.
Interface
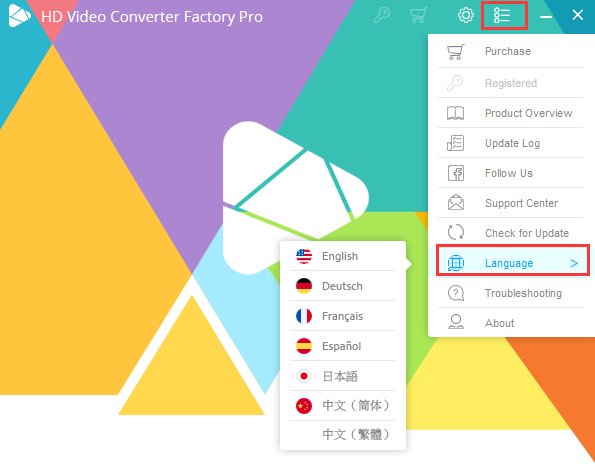
WonderFox HD Video Converter Factory Pro is designed with a clear interface, and even for novice users who don’t have much practical experience and expertise in video conversion can get familiar with it in a short time. Not only that, but it also has built-in multi-language options such as English, Japanese, Chinese, French, Spanish, etc. you can choose the preferred software interface according to your usual habits.
Installation
WonderFox HD Video Converter Factory Pro is a conversion tool suitable for Windows PC and works well with Windows10/8.1/8/7 and lower. You can free download the pro version and the free version from the official website.
Key features of WonderFox HD Video Converter Factory Pro
Download online videos from video sharing sites
With a fast video downloader, the software enables you to download popular videos from more than 300 video sites around the world in 3 simple steps, including YouTube, Twitter, Liveleak, Vimeo, Facebook, Hulu and more. In addition, you are allowed to choose the resolution, output folder as you like.
Support various output formats and devices
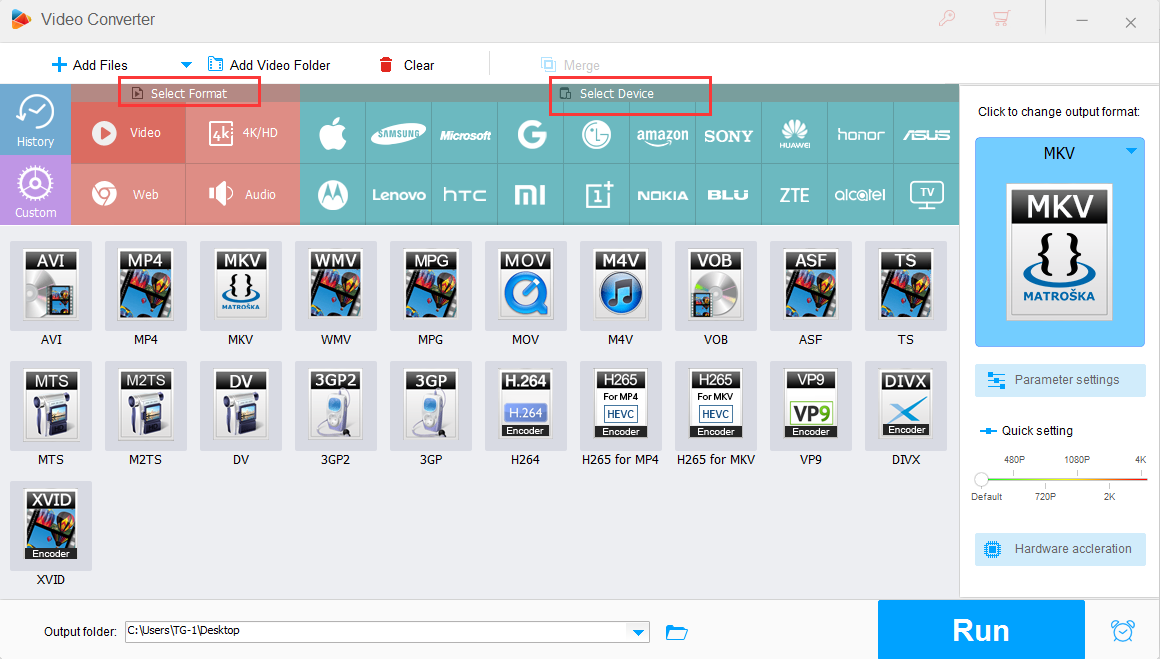
WonderFox HD Video Converter Factory Pro provides over 300 output formats and devices to help you convert video to multiple compatible formats and digital devices.
Output devices – tablets, smartphones, laptops, PC, full HD TVs, etc.
Video – VOB, M4V, MOV, MPG, WMV, MKV, MP4, AVI, etc.
4K/HD – 4K MKV, 4K MP4, HD AVI, HD MOV, HD MPG, HD WMV, etc.
Audio – DTS, AAC, MP3, ALAC, WAV, AC3, MKA, etc.
What’s more gratifying is that with the support of Nvidia NVENC, CUDA, Intel QSV, Multi-CPU, Hyper-Threading, and Hardware encoding technology, it can convert videos at a speed of 50X faster, which can save you a lot of time.
A basic video editor
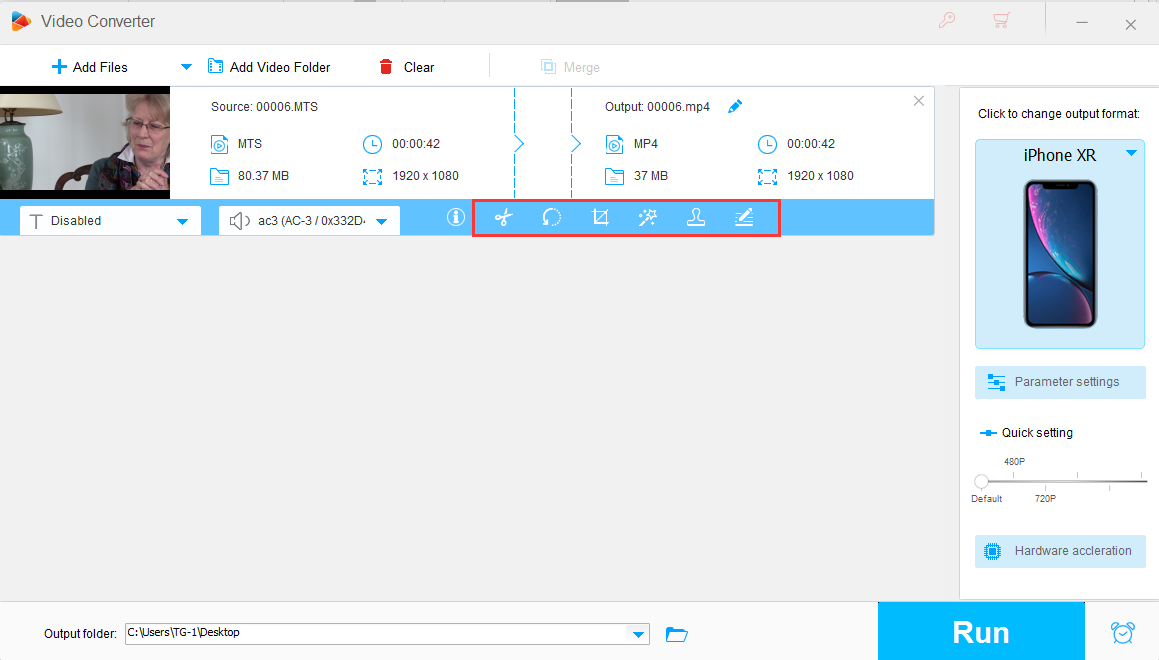
WonderFox HD Video Converter Factory Pro is an all-in-one software that also comes with useful video editing features in addition to the above two highlights, such as cutting, cropping, trimming, rotating, adding special effects, merging videos, adjusting video resolution and so on.
More features ofWonderFox HD Video Converter Factory Pro
Convert SD videos to HD videos.
Make GIF with ease.
Change video subtitles.
Remove audio from the video.
Record screen with sound.
Batch compressed video.
Pros:
Convert a video at a fast speed without quality loss.
Easy to use.
Meet the needs of users in different regions.
Cons:
It can only be used on a Windows PC.
Bottom Line
WonderFox HD Video Converter Factory Pro is a user-friendly conversion program that you can use to download videos, upload videos, convert video formats, edit videos and more in a few simple clicks. Moreover, its perfect compression ratio and conversion speed make it a safe choice for users.
Final Words
WonderFox HD Video Converter Factory Pro is a one-stop tool with high stability and thoughtful customization to empower you to solve video-related problems quickly and easily. If you still don’t have a suitable HD video converter, you can list it as your next choice.
If you happen to own a Redmi Note 8 Pro. I got good news for you, the best camera app which is called GCam or Google Camera is available for Redmi Note 8 Pro. In this post, I’ll explain to you how to download Google Camera for Redmi Note 8 Pro & Install it.
It may seem came as a surprise to you that I am saying I’ll tell you how to install Google Camera on Redmi Note 8 Pro. Well, it looks easy but it’s not, most of the time we install GCam APK, change few settings and we are good to go. But not in this case, you have to do a bit more than usual.
So before I begin let me tell a bit about Google Camera Port APK. Well, all know that all the manufacturers are working hard to improve their cameras. Moreover, we have seen a number of devices came out with the best smartphone camera you can have. However, when it comes to Googe this is not the case. Google is going in another direction and they are working their best to provide the best software for Cameras. Google Camera is the best example you can get. It works on other devices and we have seen in the past, using Google Camera we took some mind-blowing shots.
That is the very reason why all the Android device users want Google Camera Port for their device. Google Camera Port is based on the original Pixel Stock camera app. Along with all the features that you see in Pixel devices. Since Google Pixel devices have Snapdragon chipset, that means we can easily use Google Camera Port on any other Snapdragon devices.
Now you all be wondering Redmi Note 8 Pro is running the MTK chipset and how is it possible to install GCam port on Redmi Note 8 Pro. I thought the same but thanks to XDA senior member, Wyroczen, he found a way to Install Google Camera on Redmi Note 8 Pro.
You will get the idea of how Wyroczen was able to port the Google Camera Port for Redmi Note 8 Pro. Keep on reading and you will see for your self.
You will get the download links below. But let me shed some light on the main features of GCam Port for Redmi Note 8 Pro.
After installing Google Camera Port you will get features like HDR+, Lens Blur, Panorama, Portrait, Night Sight, Photo-Sphere, Photo Booth, Slow Motion and more.
Excited, let’s move on and provide you the download links to all the files that are required to install GCam on Redmi Note 8 Pro.
Downloads GCam for Redmi Note 8 Pro:
This time you will require two files to make GCam work for you. One is GCam Port APK and the other one is XML File, this one will do the magic for you.
Heed the instructions below in the same manner. That way you will have no problems on the way.
Total Time:5 minutes
Create GCam Directory.
First head over to My Files on your Redmi Note 8 Pro. Here you need to create a GCam folder or Directory -> Inside it Create another directory ( Configs ).
Place XML File in Configs Directory:
Download the wyroczen_rn8pro_3.xml file from the links given above. Once it is downloaded, place it in the Configs directory.
Install the GCam Port APK file.
Now Install the APK as you used to do. You need to create the GCam directory and place the XML configuration file in it otherwise Google Camera Port won’t work properly on your device.
Launch the GCam Port.
Now that everything is in order. Launch the Google Camera on your Redmi Note 8 Pro. Tap on the dark space, a new dialogue box will show up. Tap on restore.
This is the tutorial to download, install, and use NVISP for PC. The NVSIP for PC can be downloaded on all Desktop PCs and Laptops. The NVSIP for PCsupports Windows 10, Windows 8, Windows 7, and macOS operating systems.
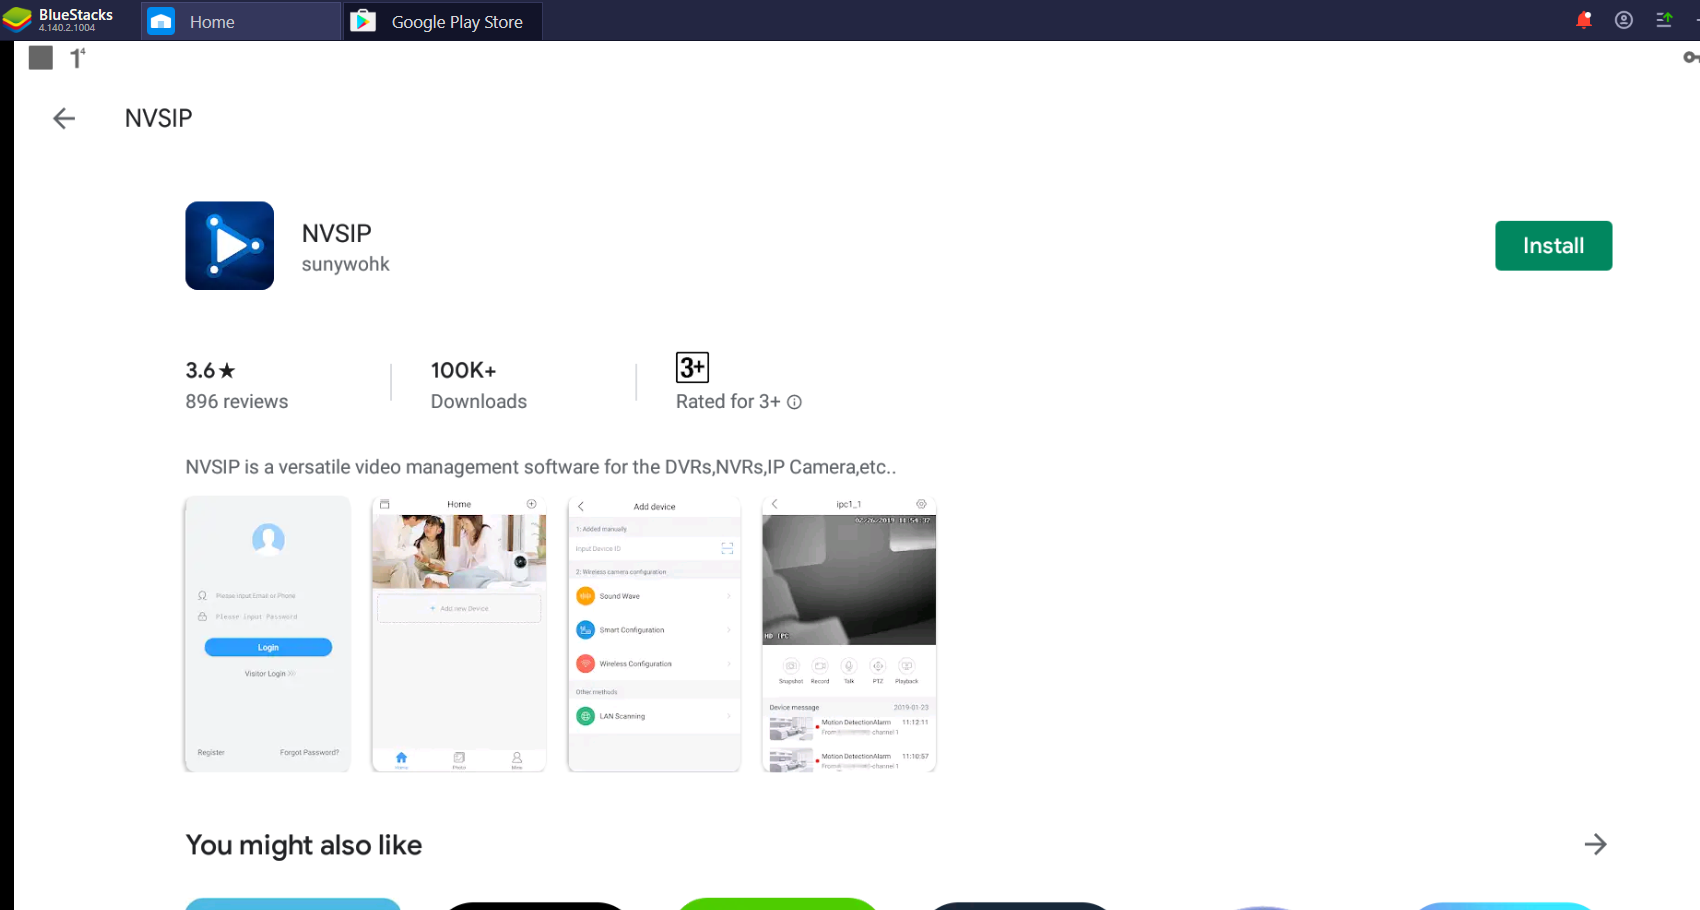
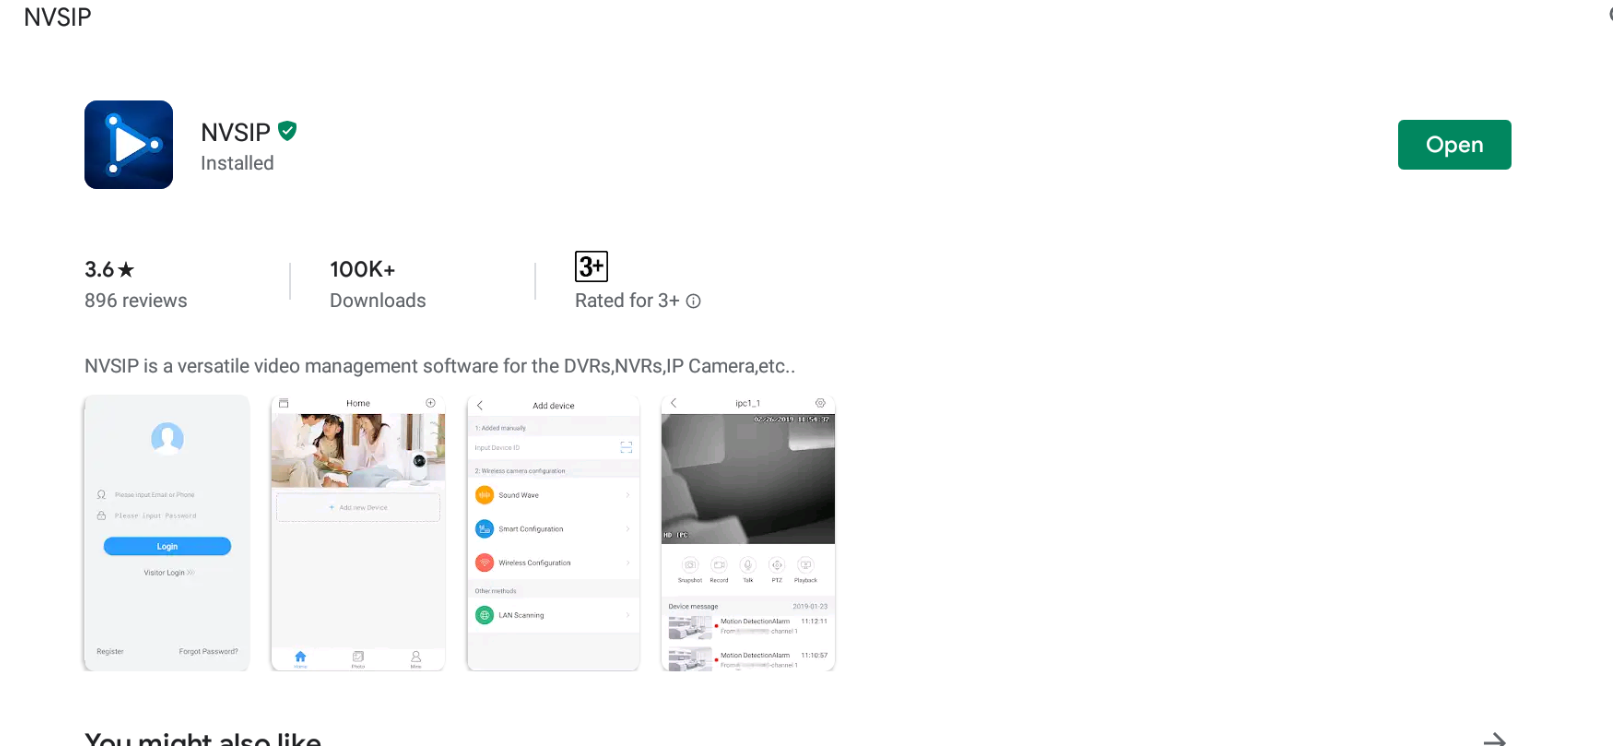
Image of NVSIP in Play Store on BlueStacks 4.1
NVSIP – What is it for?
NVSIP is an application built for the people who care about security. This is a management tool for DVRs, NVRs, and IP cameras. If you have any of these installed at your home or office, you can connect the cameras to the NVSIP application and keep an eye on it all the time.
A user can add multiple cameras to NVSIP at once. The application shows a tiled view of all the connected cameras. This way, you can keep an eye on multiple cameras simultaneously. Over the top of that, the NVSIP application informs the users if any unusual activity happens in front of any of the cameras. NVSIP also has the record option. It can capture pictures as well. The recorded videos and pictures are saved in the internal or external storage of the device.
There are three methods to configure cameras with this application. There is a sound-wave method which detects the nearby camera with the help of a sound wave. The other two methods include the smart configuration and the Wireless configuration. For the most part, NVSIP is a self-explanatory application. Even if you have never set up an IP camera or a DVR with such an application in the past, you are going to do that easily with NVSIP.
NVSIP is originally built for smartphones, but I personally think that such a nice tool should not be kept limited to a phone only. You can actually use NVSIP on a computer as well. The guide coming your way will show you the method to download NVSIP for PC now.
Download NVSIP for PC Windows using BlueStacks:
First, Download and install BlueSacks on your Windows or Mac.
Open BlueStacks and log in using the Google Account.
Now open the Play Store in BlueStacks.
In the Play Store, type “NVSIP” and search it.
As you find NVSIP, install it.
Now open NVSIP in BlueStacks.
Follow on-screen instructions to set this application up.
Final Words
That’s all. You have the NVSIP installed on a computer now. Feel free to use this application remotely while you are away from your workplace or home. NVSIP will work flawlessly but just in case the application acts up, you can quickly remove a camera and re-configure it. Remember that to configure a camera, the camera, and your computer must be connected to the same WiFi network or they must be close to each other. Once the connection has been established, you may move the devices away from each other. If you have any questions or queries, feel free to use the comment box below. I will try my best to get back to you as soon as possible.