Home Blog Page 30

How to change iTunes Backup Folder Location on Windows 10
2
How to change iTunes Backup Folder Location on Windows 10
iTunes on Windows 10

This is a tutorial to change iTunes Backup Folder location on Windows 10 and below. By default, iTunes has a specific location to save your backups. If you don’t want to save the backup in the iTunes-defined location, you can easily change it.
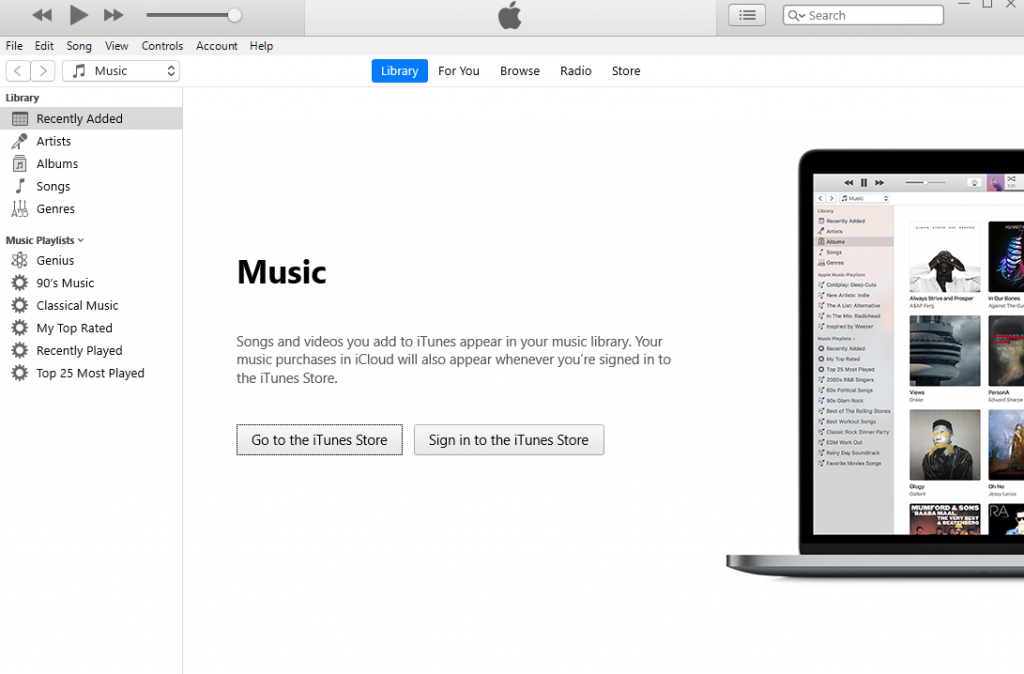
change iTunes Backup Folder Location on Windows 10
iTunes on Windows 10

iTunes Backup

Apple’s official iPhone assistant for computers is capable of creating a backup image of the iOS-powered devices. With iTunes, you can backup everything including images, videos, songs, messages, call logs, and pretty much everything else including the system of the device. iTunes makes it extremely easy to restore the data to an iPhone or iPad.

When you create a backup using iTunes, it is saved in the directory of the currently active user on Windows. This folder can be a little bit tricky to find at times. For ease-of-access, you can move the backup folder location to a more easy-to-access location.

Changing the iTunes Backup Folder Location

Changing the location of iTunes backup is not simple copy-paste work. This is a little bit of a technical task and that’s why there are a handful of companies offering tools to change the folder location. The moment you get your hands on one of those tools and find out that those are not free, you end up being a little bit disappointed. But don’t worry. The solution that you are going to find here is absolutely free. By following the upcoming instructions, you will be able to change the folder location without any hassle.

Requirements

  • Windows computer
  • iTunes on the computer – Download
  • A mouse and keyboard

Change iTunes Backup Folder Location on Windows

These are the simple and easy steps to change iTunes backup location for free.

Total Time: 5 minutes

Create a folder named “Backup” anywhere on your computer.

First of all, create a new folder and name it as “Backup”. This folder can be at any location of your choice. For example, in my case, I have created the Backup folder in the drive “G” and the folder location is G:\Backup
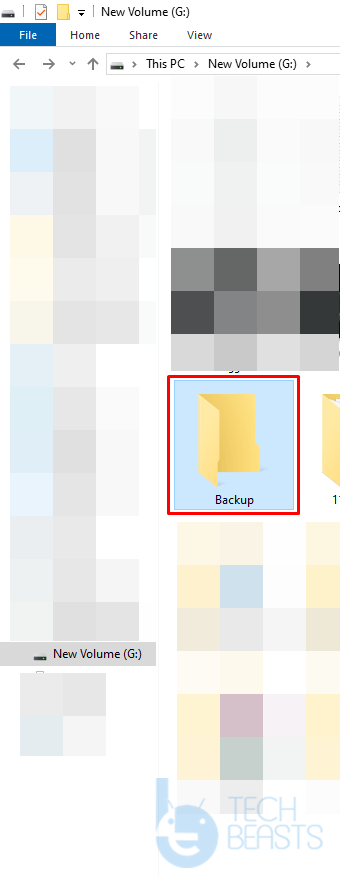
Making new iTunes Backup Folder

Locate the current iTunes Backup folder.

Click on the Start button of Windows and open the “RUN” menu. Copy and paste the following: C:\Users\YourUserName\AppData\Roaming\Apple Computer\Mobile Sync
If you have installed the iTunes in a drive other than C, replace that. Default iTunes folder location
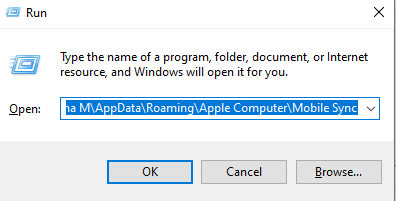
You can also access this path by simply copying it to the search bar of Windows 10’s taskbar.

Delete or rename the Backup folder inside Mobile Sync.

Inside the Mobile Sync folder, you will find a Backup folder. Either rename this folder as old.Backup or delete it.old backup
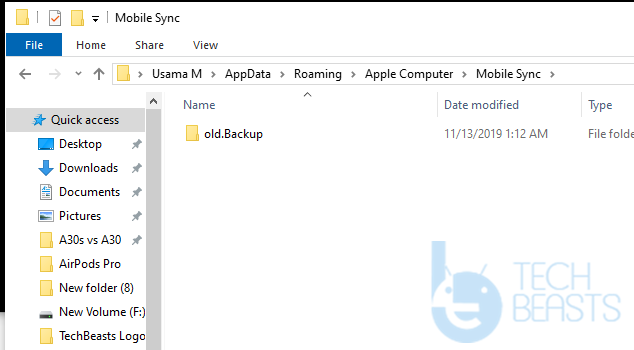
Open Command Window inside the Mobile Sync folder now.

Now inside the Mobile Sync folder, press and hold Shift Key + Right Click and then click on “open command window here”. In case you don’t have the command window here already, go to start > command window and enter the following command path: C:\Users\YourUserName\AppData\Roaming\Apple Computer\Mobile Sync

Enter this command and you are done!

In the command window, enter this command:
> For Microsoft Store iTunes:
mklink /J “%USERPROFILE%\Apple\MobileSync\Backup” “E:\Backup”
> For Classic iTunes:
mklink /J “%APPDATA%\Apple Computer\MobileSync\Backup” “E:\Backup” changing iTunes Backup Folder Location

As soon as you enter the last mklink command, you will get a message that a junction has been created for your desired iTunes backup folder location. The junction basically creates a shortcut backup folder in the default iTunes backup location and links it with the backup folder that you just created. All the backups that you create from this point on, they will be saved in your newly created folder.

Final Words

Congrats! You have successfully changed the iTunes Backup folder location for free. If you are facing any difficulties regarding this guide or you have any other questions related to the iTunes, feel free to drop them in the comments section down below. I will try my best to get back to you as soon as possible.
Jailbreak iOS 13.2.2 using Checkra1n

0
Jailbreak iOS 13.2.2 using Checkra1n
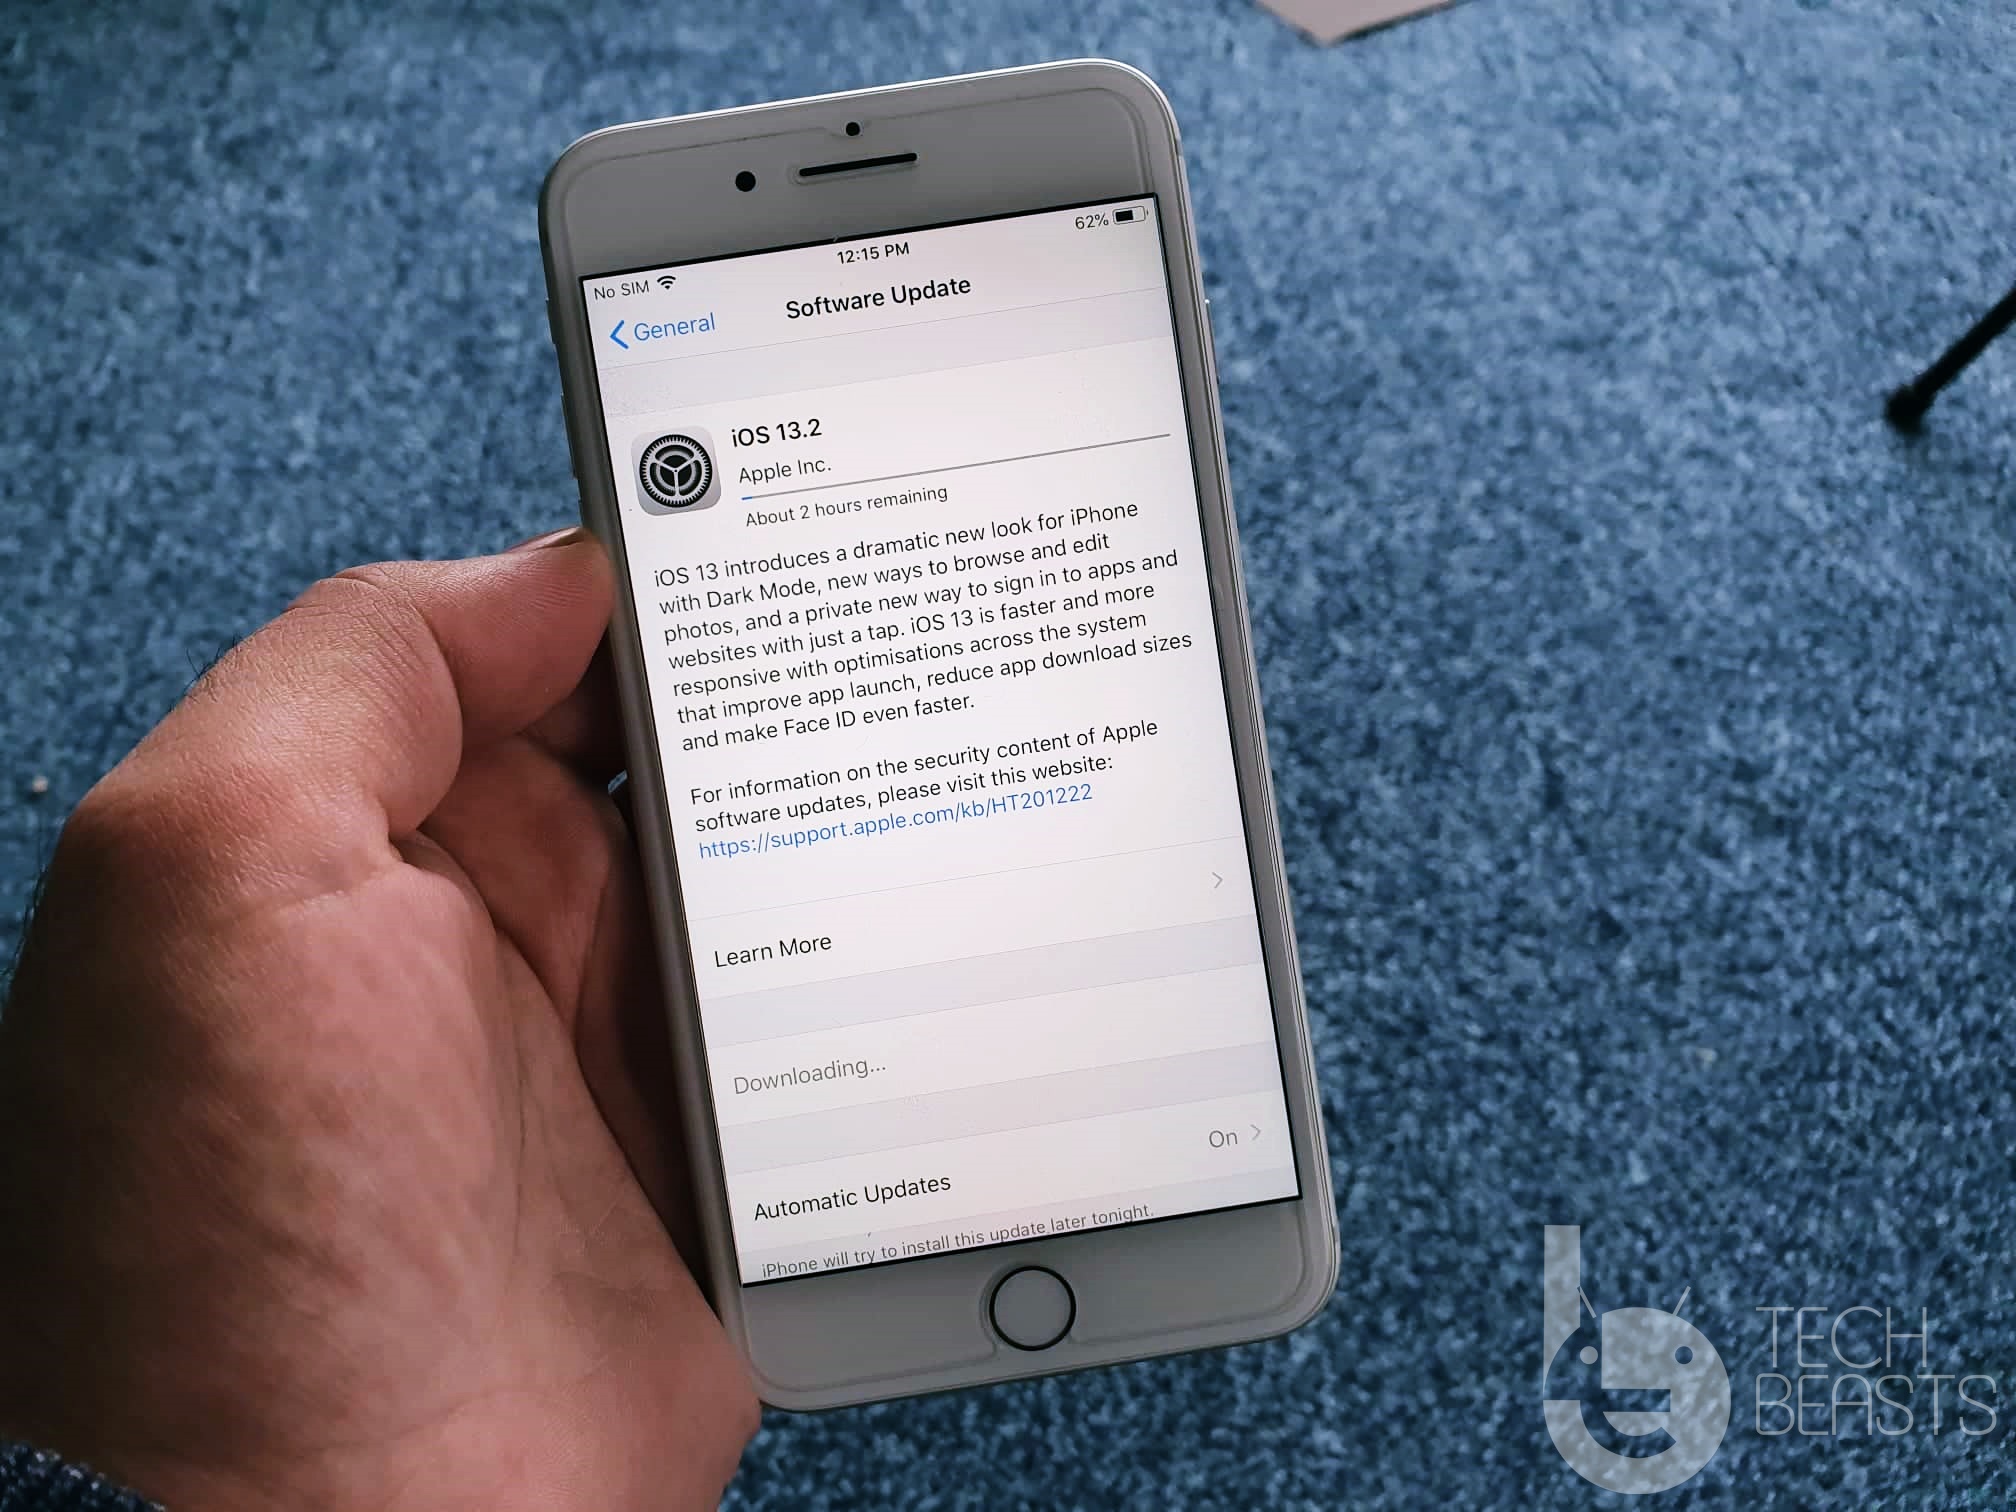
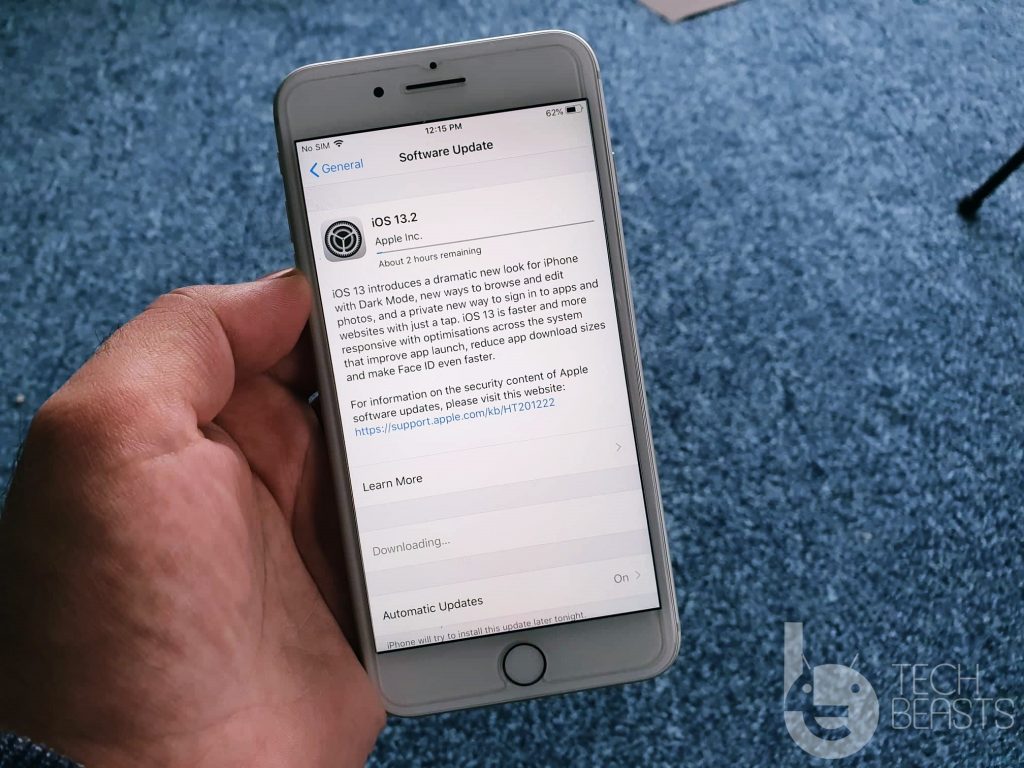
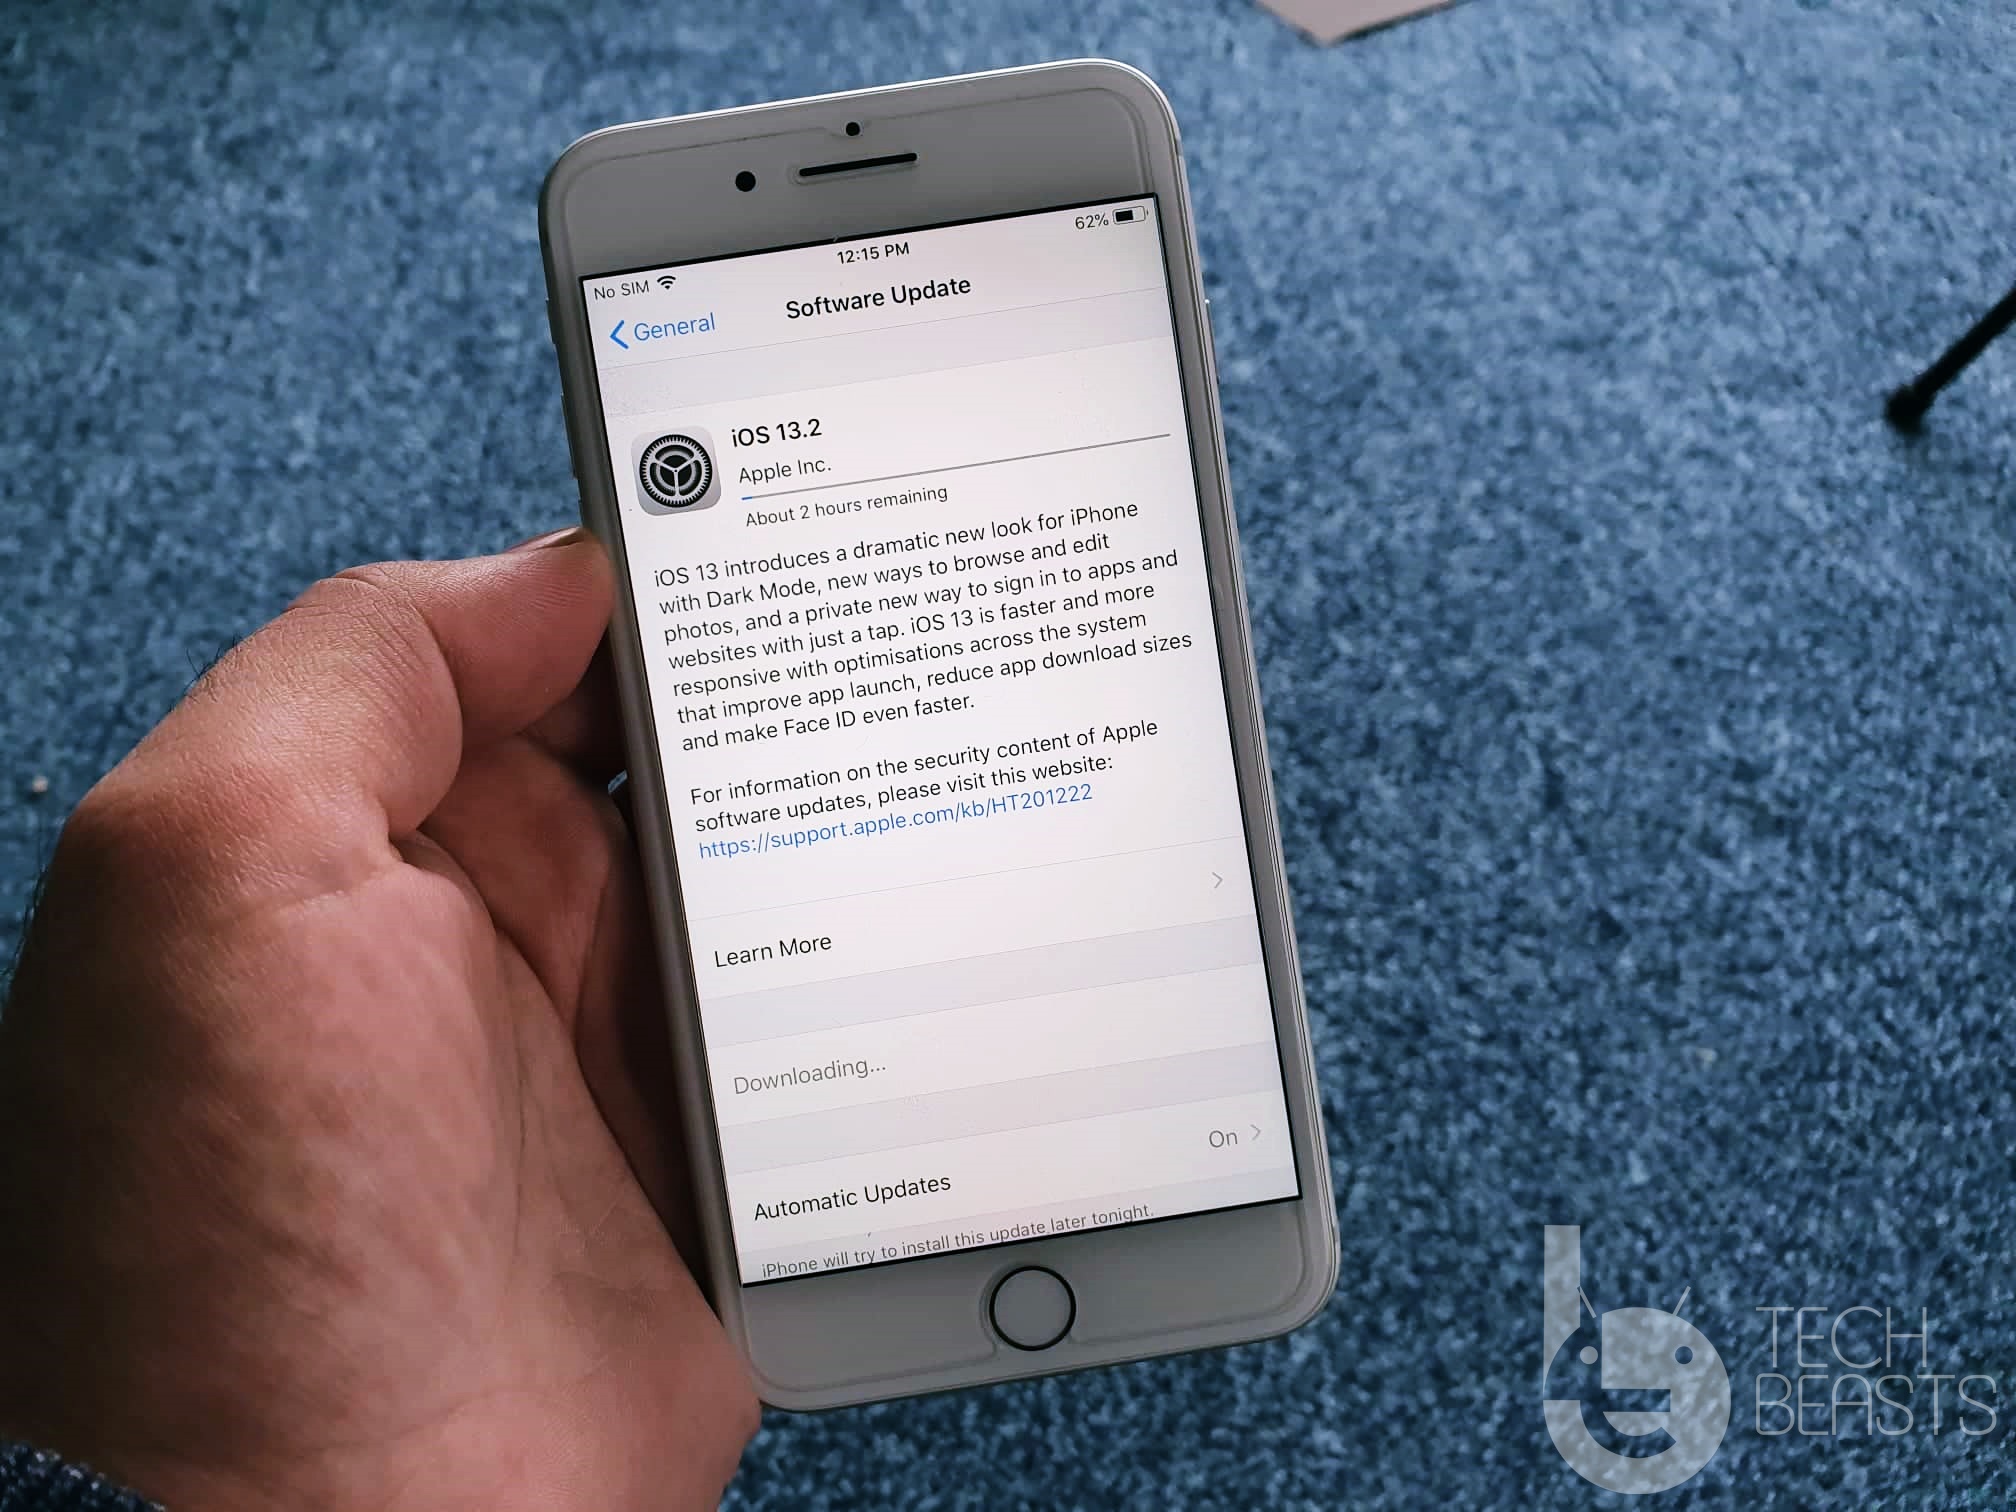
iOS 13 on iPhone 8 Plus - ready to be Jailbroken.

iOS users! rejoice, the iOS 13 Jailbreak is here. The biggest breakthrough has happened in iOS’s history. iOS 13.2.2 and below can be Jailbroken with the help of Checkra1n tool. This is the tutorial to Jailbreak iOS 13.2.2 using Checkra1n. This guide will work for all iPhones and iPads powered by A5 – A11 chipsets.

Jailbreak iOS 13
iOS 13 on iPhone 8 Plus – ready to be Jailbroken.

Checkra1n Jailbreak

Checkra1n is the first official Jailbreak tool for iOS 13. This tool came out as a result of the checkm8 bootrom exploit found the Axi0m. For the past couple of months, developers were working hard on this tool and it finally came out 2 days back. The Checkra1n can Jailbreak any version of iOS on any iPhone or iPad having a chipset between A5 – A11.

Checkra1n drops its payload in the iOS system right before the operating system itself boots on the device. This is how it manages to Jailbreak all versions of iOS. Checkm8 bootrom is a hardware exploit, which makes this unpatchable as well. Checkra1n can smoothly Jailbreak the iPhones from iPhone 5S to iPhone X, and some iPad devices as well. However, there is one downside and that may be a dealbreaker for many users.

Checkra1n

Checkra1n is a semi-tethered Jailbreak. It means that every time you restart or reset your iPhone, you will have to re-jailbreak the device all over again. Restarting the iPhone doesn’t mean it will be unjailbroken, the system files still remain modified. Users only have to run the process once again to make the Cydia and tweaks work.

Checkra1n is in very early stages at the moment. At the time of writing this guide, the latest version of Checkra1n is 0.9.2 and its in the beta stage. Furthermore, there is no IPA file of this tool. It’s available for macOS only. Sorry Windows users, you will either have to get Hackintosh or you will have to borrow a friend’s Mac to Jailbreak your iPhone. Another thing to keep in mind is that the tool does not fully support some devices. Before you take a look at the steps to Jailbreak iOS 13, learn about the compatibility of the iPhones and iPads.

Checkra1n iOS 13 Device Compatibility List

Supported

  • iPhone 6 & 6 Plus
  • iPhone 6s & 6s Plus
  • The iPhone 7 & 7 Plus
  • iPhone 8 & 8 Plus
  • iPhone X

Partial/Experimental Support:

  • iPhone 5s
  • iPad Mini 2
  • The iPad Mini 3
  • iPad Air

Not supported:

  • iPad Air 2
  • The iPad 5th Gen
  • iPad Pro 1st Gen

Requirements

  • Apple iPhone or iPad with A5 – A11 chipset
  • MacBook, iMac, or Mac PC
  • Create a backup of your iPhone or iPad
  • Download and install Checkra1n tool on your Mac.

Jailbreak iOS 13.2.2 using Checkra1n

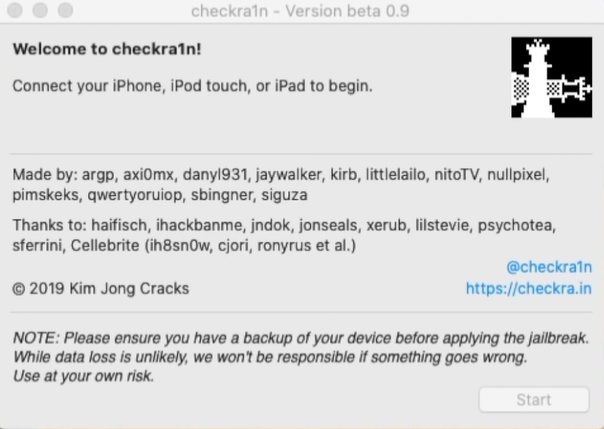
  1. Open Checkra1n tool on your computer.
  2. Connect the iPhone or iPad to the computer.
  3. Click on the Start button in Checkra1n.
  4. Checkra1n will do its thing and start the process.
  5. Checkra1n will tell you to reboot the iPhone in DFU mode. Follow the on-screen steps to do so.
  6. Once in DFU Mode, the Jailbreak process will start and end in a bit.
  7. You will see logs on the screen of your iPhone.
  8. Once the iPhone boots up, open the Checkra1n application.
  9. Click on Cydia in Checkra1n and install it.
  10. Now open Cydia and install the available tweaks. That’s all.

Conclusion

That’s all. Remember that you will have to perform the Jailbreak process from start if you restart or reset your iPhone. If you want to unjailbreak the phone, you can take a look at this guide to unjailbreak iOS 13. Feel free to drop your questions and queries in the comment section down below. I will try my best to get back to you as soon as possible.
How to Unjailbreak iOS 13.2.2 – Remove Checkra1n & Cydia

1
How to Unjailbreak iOS 13.2.2 – Remove Checkra1n & Cydia
iOS 13 on iPhone 8 Plus - Image by: Usama M

Unjailbreak iOS 13.2.2 and Remove Checkra1n & Cydia: Just a day ago, we had the first-ever Jailbreak for iOS 13.2.2 and below. It looks like the Checkra1n Jailbreak hasn’t been going smooth for many users. A large number of iOS users are planning to Unjailbreak the iPhone and go back to stock. In that case, this is the guide you are going to need. Here is the complete tutorial to Unjailbreak iOS 13.2.2. You will learn how you can remove Checkra1n & Cydia.

Unjailbreak iOS 13
iOS 13 on iPhone 8 Plus – Image by: Usama M

Before you Unjailbreak your Jailbroken iOS 13-powered iPhone or iPad, let me tell you a little bit about this Jailbreak and why you would want to Unjailbreak your iPhone/iPad.

iOS 13 Jailbreak to Unjailbreak

A couple of months ago, a new checkm8 exploit was discovered in the Apple hardware by the Jailbreak developer Axi0m. The bootrom-based exploit allowed Jailbreaking of all iPhones and iPads powered by the chipsets between A5 – A11. This includes the iPhone starting from the iPhone 5S going all the way up to iPhone X. Such a Jailbreak happened after almost a decade. The last bootrom-based Jailbreak was released by Geohot in his tool Limera1n.

The bootrom-based checkm8 exploit runs a script just before the iPhone or iPad loads the iOS. This means that the new tool Checkra1n can Jailbreak pretty much any iOS version running on the devices with compatible hardware.

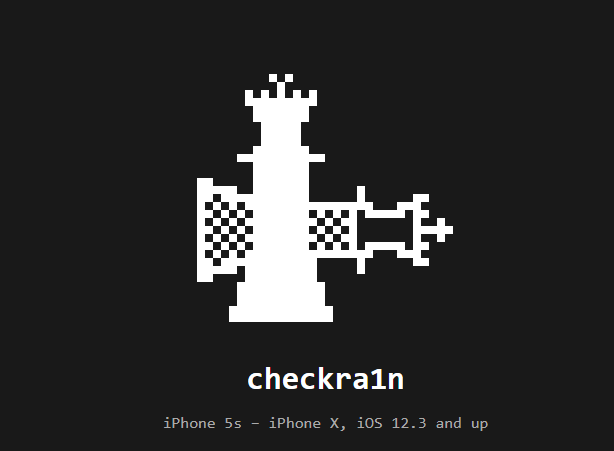
Checkra1n is in very early stages at the moment. The Jailbreak is not very smooth. In fact, the tool is still in the beta stages and has bugs too. The tool is released for macOS only. There is no IPA. Users with an iPhone are going to need a macOS device to Jailbreak the iPhone/iPad.

Furthermore, Checkra1n Jailbreak is semi-tethered. This means that every time you restart your phone, you will have to Jailbreak the phone all over again. Now, this doesn’t mean that restarting the phone will unjailbreak it. Once you have Jailbroken the device, Checkra1n’s files will remain in the system of your iPhone.

So, if you want to completely restore your iPhone or iPad to the stock state, you will have to uninstall Checkra1n. By uninstalling Checkra1n, I mean that you have to remove all of its remains from the iOS system. Furthermore, you also have to completely delete Cydia and its files from the iPhone.

Down below in this guide, you will find the steps needed to Unjailbreak iOS 13.2.2 and Remove Checkra1n & Cydia right away.

Unjailbreak iOS 13.2.2 – Remove Checkra1n

  1. Open Checkra1n on your iPhone/iPad.
  2. In the Checkra1n application, click on “Restore System”.
  3. Checkra1n will remove the system now.
  4. Restart the iPhone.
  5. All done!

That’s it. You are UNJailbroken now. When you Jailbreak the iPhone using Checkra1n, it creates a snapshot of your original iOS 13 filesystem. Restoring the system restores the original snapshot. Henceforth, the iPhone is unjailbroken with all the unmodified system files back in place.

However, you will still find Cydia in the app drawer. Cydia is still there because restoring the System does not refresh the UICACHE. Even though you should not care about that Cydia icon hanging in there, but just in case you want to remove it, go ahead. Take a look at the steps below to remove Cydia from iOS 13 now.

Uninstall Cydia from iOS 13

  • First of all, you have to Jailbreak iOS 13 on your iPhone once again. This needs to be done to enable SSH.
  • After Jailbreaking, do not install or re-install Cydia from the Checkra1n application.
  • Connect your mobile to the macOS-powered computer.
  • Launch terminal on the macOS and enter the following commands.
  • Install Brew by entering the following command.
/usr/bin/ruby -e "$(curl -fsSL https://raw.githubusercontent.com/Homebrew/install/master/install)"
  • If it asks for your macOS password, you need to enter to use SSH.
  • Now enter the following command:
brew install libimobiledevice
  • This command will install the dependency we need to SSH over USB.
  • Open a new terminal window and enter this command now:
iproxy 2222 44

This command will forward the traffic from your computer’s local 2222 port to usb 44 port.

  • Press CMD+T while the terminal is still open and then enter this command:
ssh root@localhost -p 2222
  • This command will SSH into your iPhone now. If it asks for a password, enter this password:
alpine
  • Type “Yes” and press the return button on the keyboard.
  • Enter the following command in the terminal window now:
uicache --all
  • Once the command has fully executed, enter the following command:
killall SpringBoard
  • This will reflect the icon cache refresh on the iPhone.
  • Restart the iPhone/iPad and remove the Checkra1n app now. That’s all. You are fully Jailbroken with Checkra1n and Cydia removed.

Final Words

That’s all with the unjailbreaking process. If you find the above mentioned method complex, you can also install a new stock firmware using the IPSW file, however that will require the installation of all your previous apps all-over again. If you have any questions or queries regarding this Jailbreak or the Unjailbreak guide, feel free to use the comments section below. I will try my best to get back to you as soon as possible.
Stop People from Adding You to WhatsApp Groups

0
Stop People from Adding You to WhatsApp Groups

Let me tell you how you can Stop People From Adding You to WhatsApp Groups. I know sometimes it becomes a pain in the back with all the notifications popping up. Media files are auto downloading on your Android or iOS device. And yet you don’t even want to be a part of that particular WhatsApp Group.

Stop People from Adding You to WhatsApp Groups

WhatsApp is the biggest cross messaging platform and nowadays every smartphone user uses WhatsApp daily. However, where it is helpful, it is also annoying in many sorts. First and foremost is WhatsApp groups. They are good and most of the time they can be really helpful in many aspects. But there is a time when you are added to a WhatsApp group without your permission and after that non-stop messages and notifications.

It can be painful and irritating, annoying. Well, today I will tell you how to Stop People From Adding You to WhatsApp Groups. Moreover, you will be glad to know that, it can be done using WhatsApp privacy settings. Let’s get going now.

Read more: WhatsApp vs WhatsApp Business: A better version?

Stop People From Adding You to WhatsApp Groups:

I am not sure you have seen the new WhatsApp privacy settings for groups. Because they have added a number of new options and recently they added one more which made things easier. Previously when it comes to who can add you in a Group there were three options and the one we used was ” My contacts except “. Now it is updated to ” No Body “. That makes more sense, rather than selecting all of our contacts one by one.

Use the following instructions and you will be able to stop your friends, family members, colleagues, etc from adding you to WhatsApp groups.

Total Time: 2 minutes

Launch WhatsApp:

Open WhatsApp on your Android device. [ You can use these same instructions on iOS devices ].

Head over to the Settings

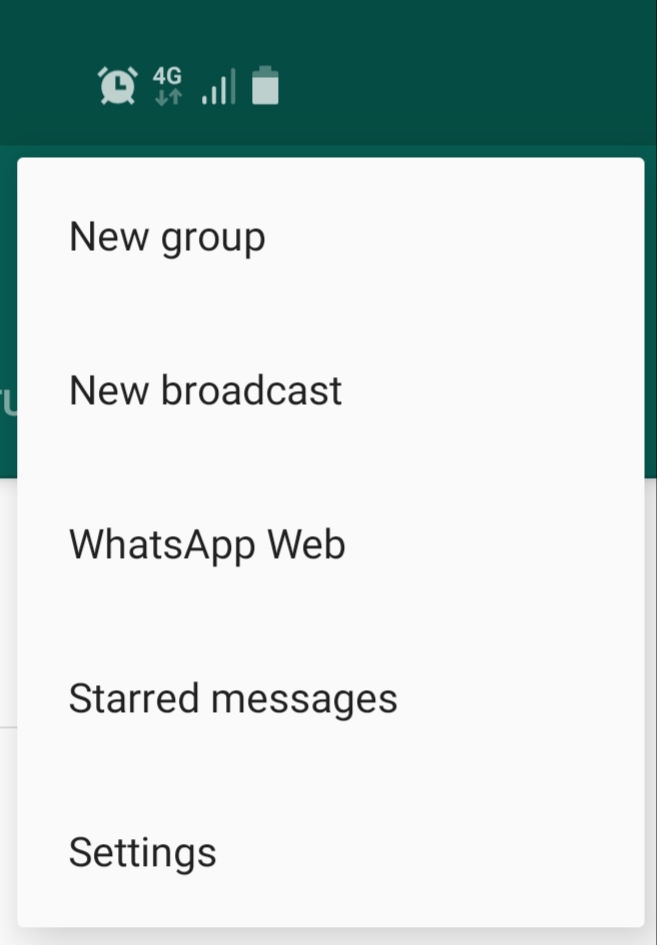
Now tap on the 3 dots icon located at the top right corner of the screen. Tap on Settings.

Open Account Settings

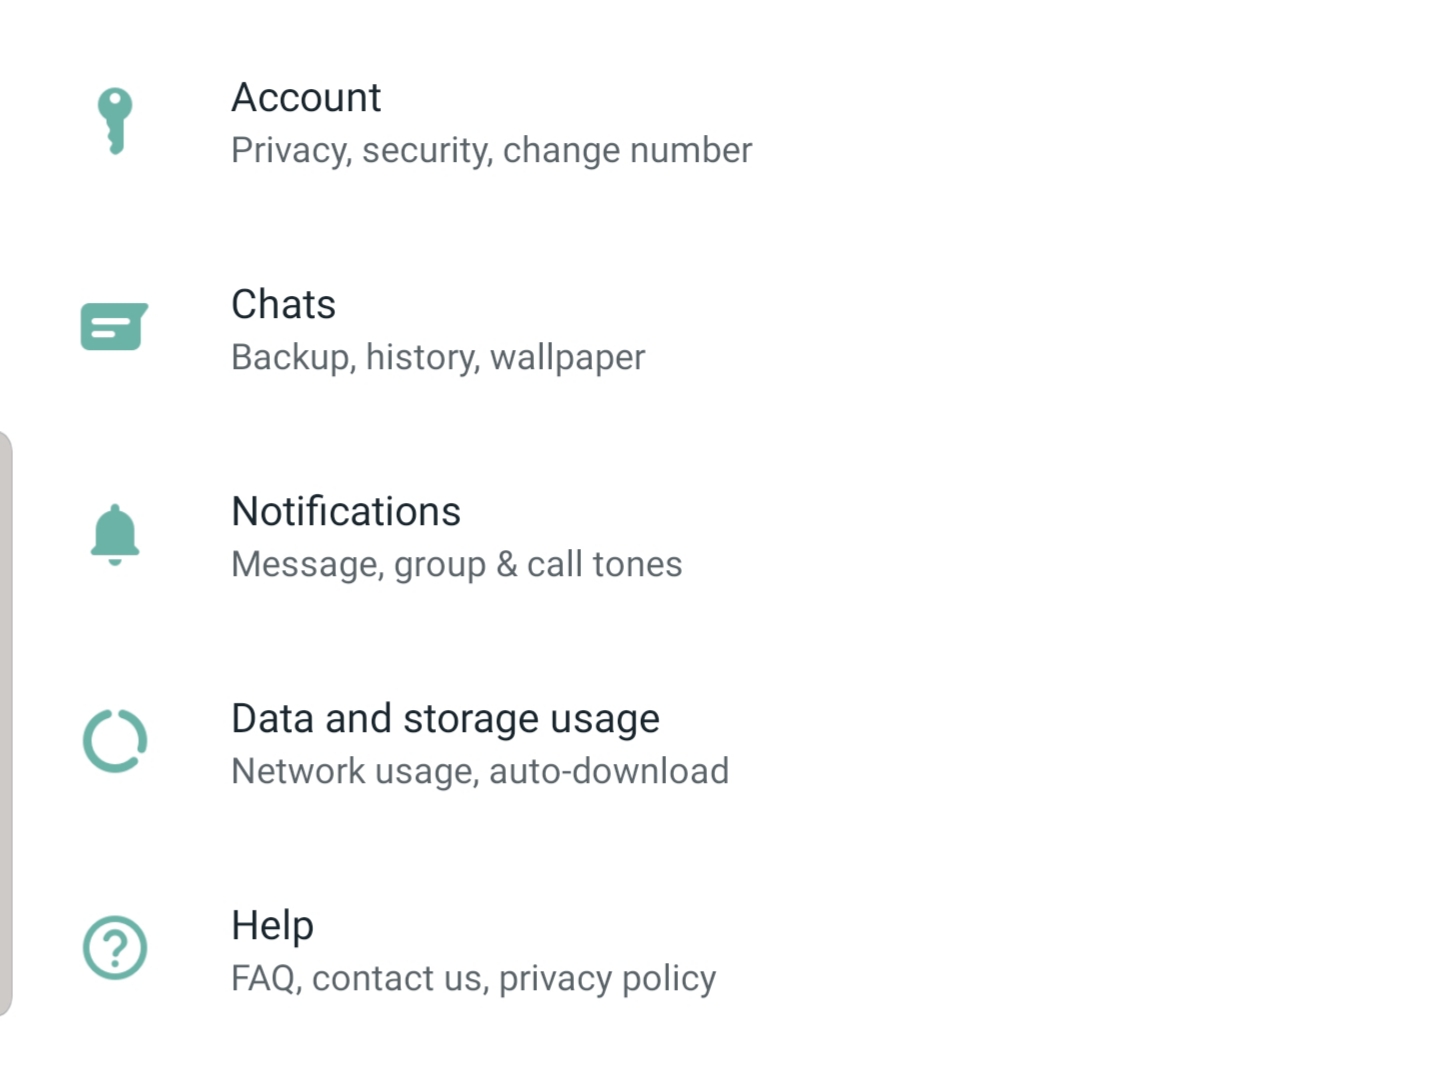
When you are in General Settings of WhatsApp. Tap on Account and it will lead you to your Account Settings.

Access Privacy Settings

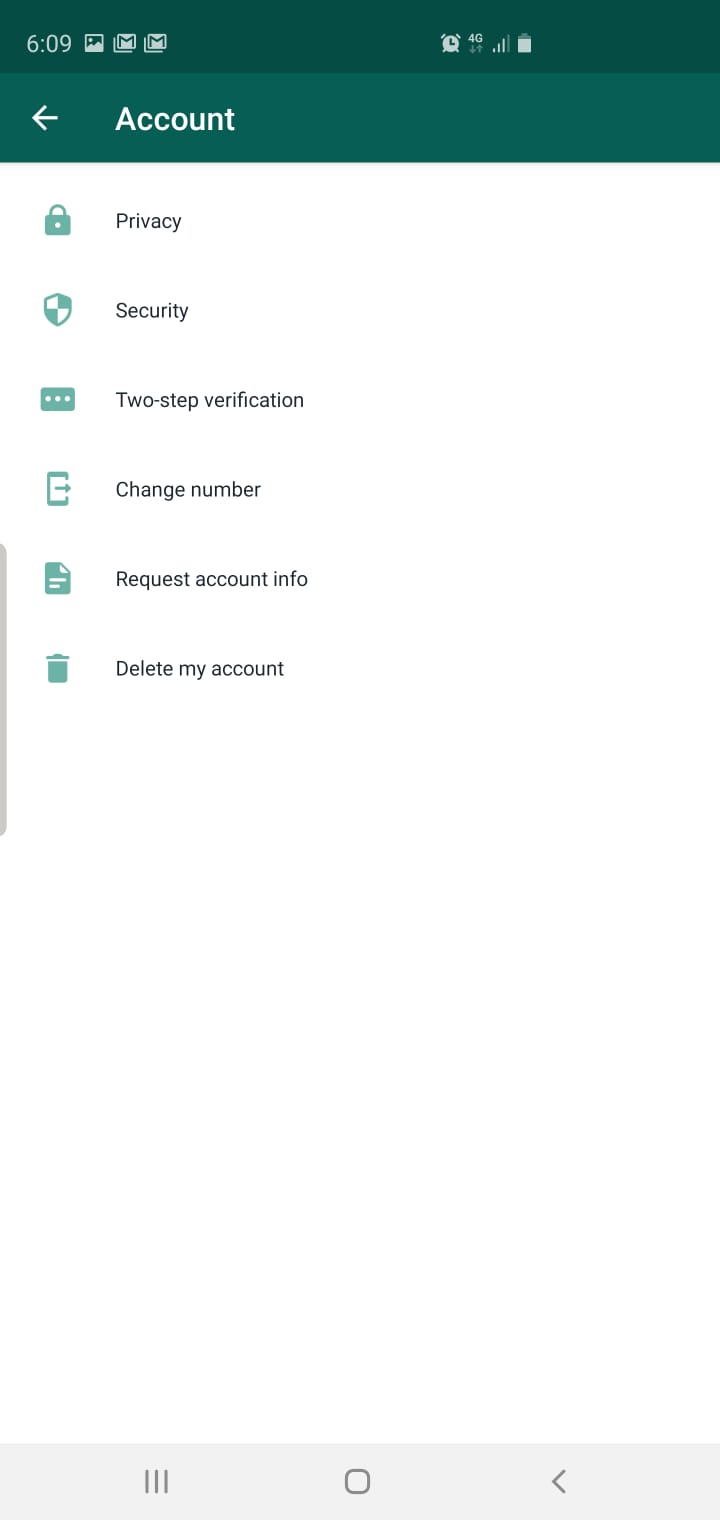
In your account settings, you will be presented with a number of options. Tap on Pricay because here you can find WhatsApp group settings.

Look for Groups

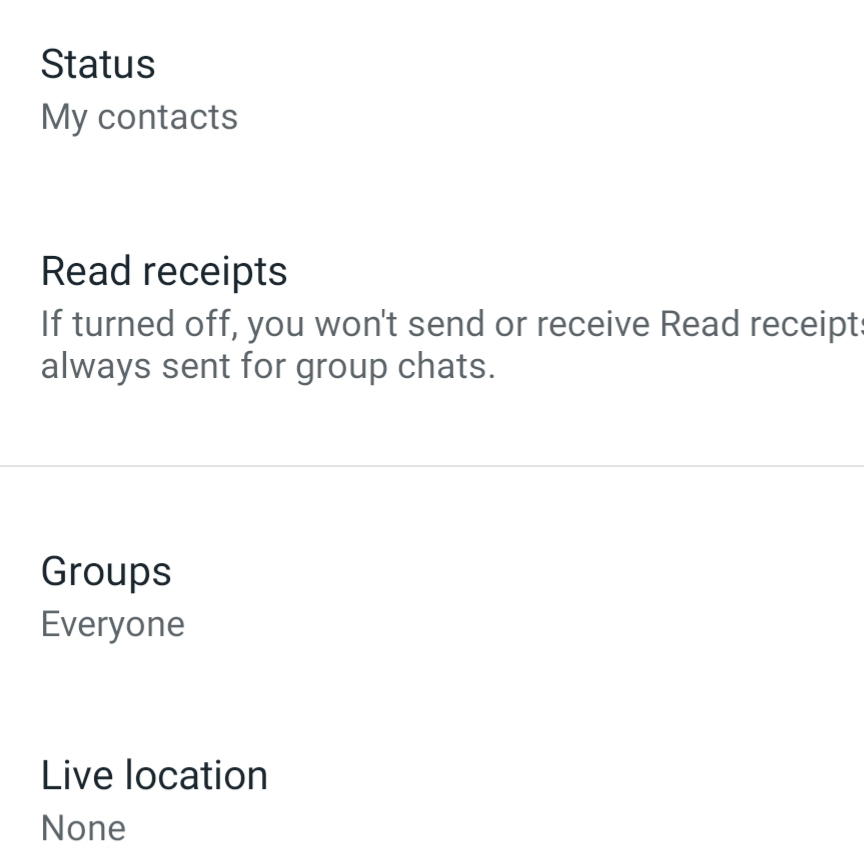
You will see a number of Privacy Settings, scroll down and Tap on Groups.

Select My Contacts Except

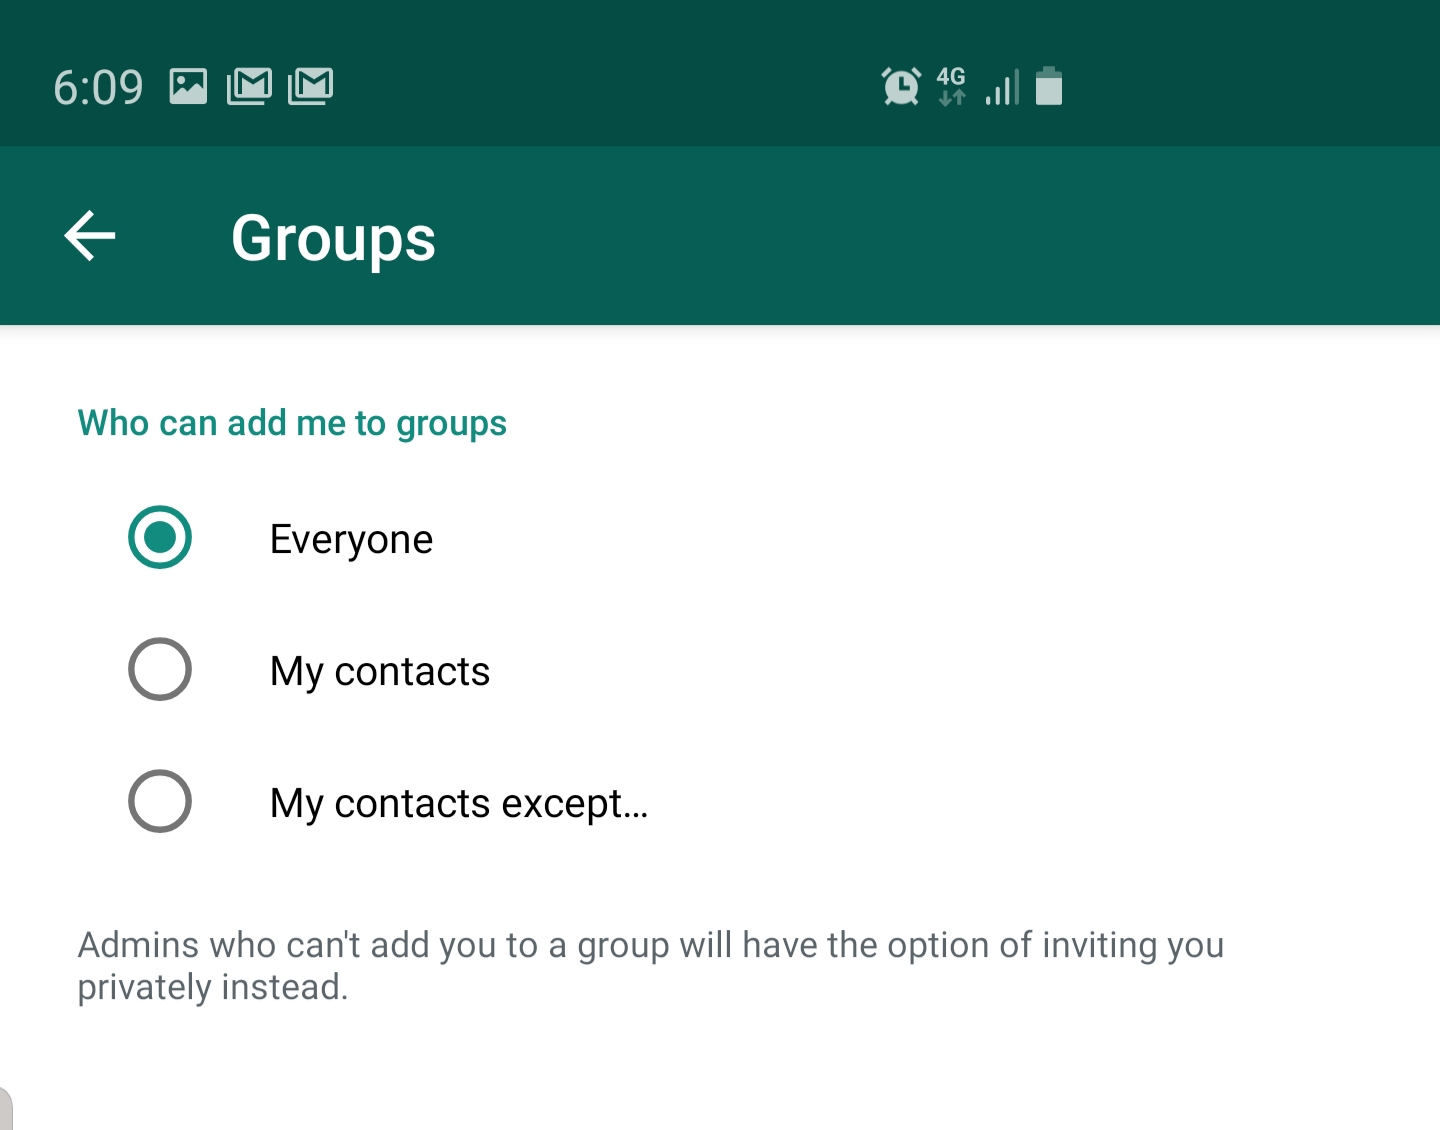
There you will see three options to choose from, by default Everyone is selected. Now you know why you can easily add to any group. Select My Contacts Expect.

Choose the ones you want to stop

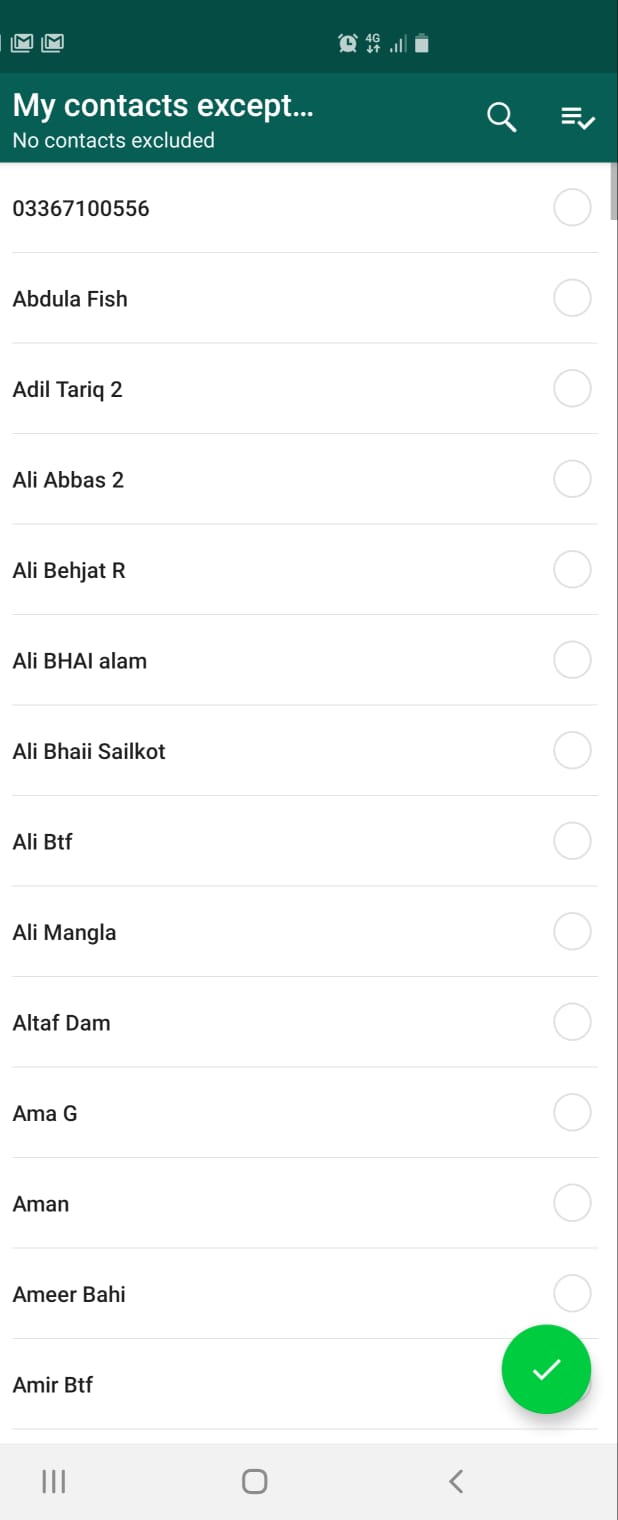
When you select My Contacts Expect, you will be taken to your contact list. Select the contact whom you want to stop by adding you to a WhatsApp group.

There you go now, select all the contacts or you can with some whom you don’t want to allow to add you in a WhatsApp Group. This will ensure two things. One if someone is not in your contact list, he/she won’t be able to add you in to a WhatsApp Group. The second one is, the contact which you have select from the list won’t be able to add in you in any WhatsApp Group.

Read more: Best WhatsApp Spying Apps for you [2019]

However, if someone tries to add you to a group, they have to send you an invitation. It totally up to you whether you accept it or not. 

That will be all. This is how you can Stop People From Adding You to WhatsApp Groups.

Download Checkra1n 0.9.x – Jailbreak iOS 13.2.2

1
Download Checkra1n 0.9.x – Jailbreak iOS 13.2.2

Checkra1n Jailbreak for iOS 13.2.2 and below is out now. iOS users can download the Checkra1n 0.9.3.5 from here. The method to Jailbreak iOS 13.2.2 using Checra1n can be found below as well.

Checkra1n Jailbreak

After months of rumors and anticipations, the Checkra1n Jailbreak has finally made it to the users. The Jailbreak was in works for the past couple of months. The Checkra1n uses the bootrom-based Checkm8 exploit to Jailbreak all iPhones and iPads powered by the A5 – A11 chipsets. Such a Jailbreak has happened almost after a decade. Last time we had the Limera1n by Geohot using the same kind of exploit.

Checkra1n 0.9.1

Since this is an exploit in the hardware, it’s nearly impossible for Apple to patch this Jailbreak. Checkra1n runs its script before the iOS loads on the iPhone. This means that you can Jailbreak pretty much all versions of the iOS running on the A5 – A11 devices.

Here are the Checkra1n compatible devices:

  • iPhone 6 & 6 Plus
  • iPhone 6s & 6s Plus
  • The iPhone 7 & 7 Plus
  • iPhone 8 & 8 Plus
  • iPhone X

Partial/Experimental Support:

  • iPhone 5s
  • iPad Mini 2
  • The iPad Mini 3
  • iPad Air

Not supported:

  • iPad Air 2
  • The iPad 5th Gen
  • iPad Pro 1st Gen

The above compatibility list is for the current release of the Checkra1n. The tool is in its very early stages and contains a lot of bugs. As the development moves on, we will hopefully see support for all the iPhones and iPads between A5 – A11 chipsets.

Checkra1n has its macOS tool that Jailbreaks your iPhone with the help of a Macbook or iMac. The Checkra1n IPA is not available at the moment. From below, you can download the Checkra1n app for macOS and run the application to Jailbreak the compatible iPhone or iPad running iOS 13.2.2 or below.

Download Checkra1n 0.9.3.5

How to Jailbreak iOS 13.2.2 using Checkra1n

  1. Install the Checkra1n on your macOS.
  2. Connect the iPhone or iPad to the computer.
  3. Launch Checkra1n on the computer.
  4. As Checkra1n detects your iPhone, click on the Start button.
  5. Checkra1n will ask you to boot your iPhone in DFU mode. Follow on-screen instructions to get into the DFU mode.
  6. As soon as you enter the DFU mode, checkra1n will start the Jailbreak process. You will see the logs running on the screen of the iPhone.
  7. Once done, your iPhone will boot up and you will get the Checkra1n app.
  8. Open Checkra1n and install Cydia.
  9. Install your favorite tweaks using Cydia. That’s all.

Final Words

Checkra1n is a semi-tethered Jailbreak. This means that you will have to re-Jailbreak your iPhone every time you plan of restarting it. Yes, it is one huge downside and this may leave you unconvinced to Jailbreak right now, but it is what it is. If you are on iOS 12.4 or below, I recommend using the Unc0ver 3.7 to Jailbreak your iPhone as that’s a more stable method for the older versions of iOS. If you have any questions or queries, feel free to use the comment box below. I will try my best to get back to you as soon as possible.
More:

Get Airdrop on Android & Windows [ Tutorial ]

0
Get Airdrop on Android & Windows [ Tutorial ]

If you want to use Airdrop on Android & Windows 10 PC. Heed the instructions below to learn how you can achieve this by just following simple steps.

Apple ecosystem is the reason why Apple users don’t switch to other manufacturers. Believe it or not, you like Apple or not but what they offer in their boxed ecosystem is the very reason people pay steep prices to buy Apple products.

Airdrop on Android

The core features provided by the Apple inc are not allowed to work outside of the Apple OS environment. But nowadays, if something is not compatible with one, you can always find an alternative to it. Just like this post, I am telling you how to get Airdrop on Android & Windows. Yes, you have read it right, Airdrop a core feature of the Apple ecosystem. Moreover, it’s not available for any other devices or OS.

But there are many other options you can choose to get the same functionality as AirDrop on Android & Windows. However, you will not be able to get all features of Airdrop but you can get the universal clipboard, just like on Apple devices.

How To Transfer Large Files Between Android Devices Quickly

Since there is no direct option to download or install Airdrop on Android & Windows. We’ll be using a third-party app on Windows & Android. Let’s get going then.

Get Airdrop on Android & Windows:

Before we proceed, you should keep that in mind. In order to make it work, your Windows PC & your Android device must be on the same WiFi network. Otherwise, you cannot make it work.

Requirements:

This is what you have to do:

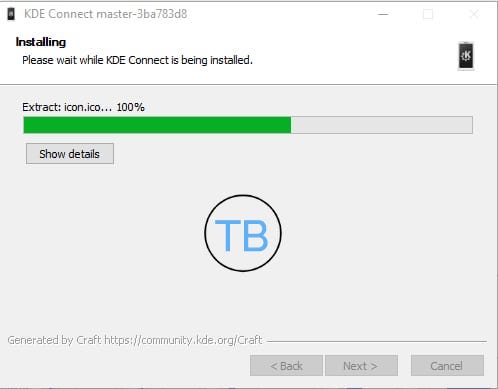
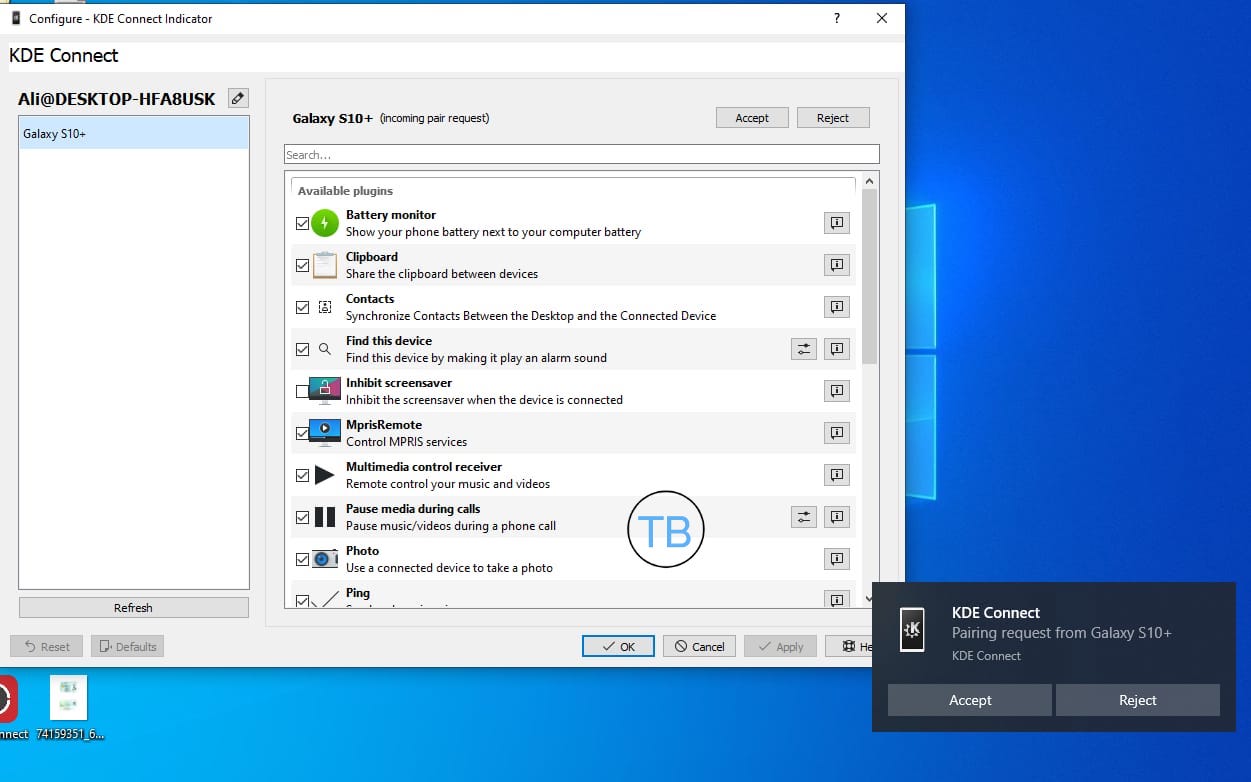
  1. Download the KDE Connect Nightly Build For Windows 10 (64-bit) from the link given above and Install it.

get Airdrop on Android

  • Now once the installation process is completed. Launch the KDE Connect and don’t worry if no windows show up. KDE Connect is running in the background.
  • Click on the system tray and there you will find the KDE Connect icon. Right-click on the KDE icon and click configure.
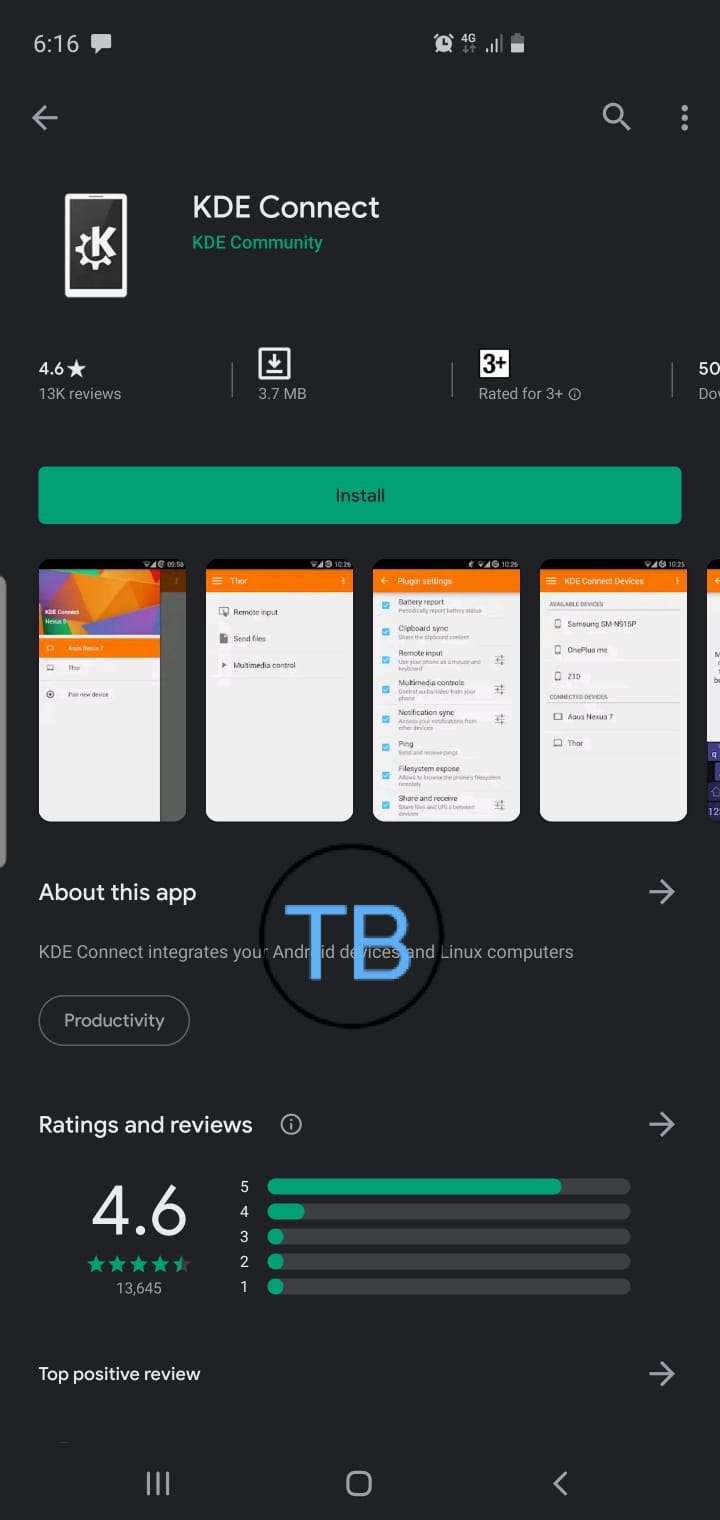
  • Grab your Android device and install the KDE Connect Android app from Google Play.

get Airdrop on Android

  • Once installed, Launch the App and make sure your PC and Android device is on the same WiFi Network.
  • When you open the KDE app on Android, you will see your PC name on the list.

get Airdrop on Android

  • Tap on your device and on the next screen you will see ” Request Pairing Button “. Tap on it to start the pairing process.
  • Head over to your PC now and you will see a notification pop-up of Pairing request, click on Accept.

  • There you go, now your Android device and Windows PC are paired. Every time your Android device and Windows PC are on the same network they will be automatically be paired.

Just to make sure you have the universal clipboard. Copy anything on your Android device and it will be synced to the clipboard on your PC. So now you can say that it is possible to get Airdrop on Android & Windows, in some ways.

Now you can say that you have the same environment as Apple users have when it comes to sharing between devices. Using KDE Connect on your Windows & Android, not only you can enjoy Clipboard sharing, but you can also send & receive all sorts of files.

However, you must be using the same WiFi network on both devices. KDE connect will be running in the background on your PC. So in some ways, you are getting Airdrop like functionality.

That’s it. Please try this and let me what do you think.

5 Best & Free HEIC/HEIF to JPEG Converters for Android

0
5 Best & Free HEIC/HEIF to JPEG Converters for Android
Total Image Converter in action

Looking for the best HEIC or HEIF to JPEG Converter for Android? You will find a few here. Take a look at the 5 best and free HEIC/HEIF to JPEG Converters for Android. These converters will convert the images with minimum loss of quality.

Before you go through the HEIF to JPEG converts for Android, let me tell you what this format is and how it works.

HEIC/HEIF – What does it mean?

First of all, the HEIC and HEIF formats are the same. It means High-Efficiency Image Coding or High-Efficiency Image Format. It’s driven from the HEVC video format. This format was introduced by Moving Picture Experts Group (MPEG).

The idea behind the introduction of this new format for images was to consume the least amount of storage. When you capture the images in RAW and JPEG formats, the size of the picture is huge. To save the pictures on a phone or computer, you need a lot of space too. Especially nowadays when the cameras of phones are coming with 108 megapixels sensors, you would need loads of storage to save the pictures. A picture taken through a 108 megapixels camera can have a size of up to 30 MBs. This is when the image will be saved in the JPEG format.

The size of the same picture can be cut down by saving it in the HEIF format. When we talk about reducing the size, the question that quickly runs through everyone’s mind is that what will be the impact on the quality of the picture. With the HEIF format, there is a minimum to 0 loss of quality in a picture. The details, colors, sharpness remain the same as a JPEG image. The HEIF uses a different compression approach which makes the image less heavy.

So, to sum it up, the HEIC or HEIF formats can be used to save high-quality images by consuming a very small amount of storage on your phone.

In some cases, the HEIC format images are only 5-10% smaller than the JPEG counterpart and sometimes, the images are 40-50% smaller in size.

To understand it better, take a look at the following images and their sizes in the JPEG vs HEIC formats.

JPEG Image
HEIC Image
JPEG vs HEIC Size Comparison
JPEG vs HEIC Size Comparison for another picture

Assuming that you have an understanding of the HEIC/HEIF format, we can now proceed further.

HEIC and HEIF Images can be problematic on some devices. There are operating systems and platforms that still do not support these formats. For example, viewing the HEIC images on a computer can be troublesome. If you upload these pictures to cloud storage, there can be issues with viewing the pictures online.

If you have been taking pictures in the aforementioned format and you want to convert them to JPEG, you can do that easily. There are HEIC to JPEG converters specifically built for the devices that use this format.

For Android, you will find many such converters in the Play Store. I have picked up 5 best converters after thorough testing. Take a look at the converters and install the one that appeals the most to you.

HEIC/HEIF to JPEG Converters for Android

Total Media Converter

Total Media Converter is the nicest among all the converters. It has an easy-to-use UI that attracted me the most. It can convert images into almost all the formats from into other relevant formats. When a user presses the button to add an image to the converter, it asks you about the image’s original format and the format you want to convert it to. In the list, you can find HEIC, JPG, JPEG, WEBP, PNG, MP4, FLV, WMV, and many other formats.

HEIC/HEIF to JPEG Converters for Android
Total Image Converter in action

The HEIC images can be converted to JPG, JPEG, PNG, and WEBP formats only. Once you choose the HEIC To JPEG, it will ask you to add the picture. The file manager will let you navigate through the pictures. When you will select the folder that has the HEIC image, it will show the HEIC images only which will make the selection easy.

After you have added the image, you have to press the convert button on the top-right corner. It will take a few seconds and the converted image appears in the result.

Image Converter by Rectfy

Image Converter can convert images to JPG, PNG, wEBP, GIF, and PDF formats. The for this converter’s presence in this list is the selection of image output quality. The converter welcomes you with a nice UI showing all the formats that it converts too. There is a transparency tool in this converter. If a part or parts of the image are transparent, you can fill the transparency with the color of your choice. You can choose the output quality from 0 to 100.

HEIC/HEIF to JPEG Converters for Android
Converting HEIC to JPEG using this Converter

To add the images, you simply tap the gallery icon in the center. Another great feature of Image Converter is that it doesn’t make you go through the file manager. It shows you the gallery straight away. You can open the album where your HEIC images are residing and select the image. Converted images appear in the gallery of your phone.

Image Converter

This is yet another converter built to get the task done quickly. Not a very impressive UI, but it’s still a bit easy to choose your desired image in this converter. It supports a ton of formats other than the HEIC.

Image Converter in use.

The downside is that it’s not going to filter the HEIC images for you. You will have to go through your gallery and choose the HEIC image manually. It also has the option to change the output quality of the image.

HEIC to JPG Free

As simple as its name suggests. A very straight forward converter with no additional options at all. It filters the HEIC images in a folder. The reason for this converter to be at the 4th spot is that it doesn’t show you the thumbnails of the HEIC images.

The HEIC to jPG Converter

You cannot view what image you are selecting. To be accurate with your selection, you must know the name of the image or select it based on the time and image’s number on the list. Other than that it can do its job without any hassle.

Luma HEIC to JPG Converter

Luma is popular, but the last in our list. There are a few reasons why I’d want it to be your 5th choice. Luma is built for HEIC to JPEG only, but when it comes to selecting the HEIC images, the real pain starts. After clicking on the “+” button in Luma, it takes you the root of your phone’s storage.

Luma converting the images

Once you have finally entered the folder where the HEIC image is saved, you find that the images are sorted in ascending order on the basis of the date. You heard that right. If you have 2 thousand images in that folder, you will have to scroll all the way down to find the HEIC image. Luma could have used a HEIC filter like the converters mentioned above, but I guess it is what it is. Luma should be your choice if one of the converters mentioned above does not work.

Conclusion

That’s all. Hopefully, have picked up the right HEIC to HEIF converter for yourself. If you have any questions or queries, use the comment box below. I will try my best to get back to you as soon as possible.
More from our Best Picks:

Remap Netflix Buttons on NVIDIA Shield TV 2019

0
Remap Netflix Buttons on NVIDIA Shield TV 2019

If you happen to own NVIDIA Shield TV 2019 then you are well aware of their new remote. They have redesigned their remoter and added a number of new features along with a dedicated button for Netflix. Press that button and NVIDIA Shield TV will load up the Netflix app. So, it isn’t obvious that we want to remap it, this is what we do, even on smartphones. So, In this guide, I will tell you how to Remap Netflix Buttons on NVIDIA Shield TV 2019.

Remap Netflix Buttons on NVIDIA Shield TV

Before we proceed, let me clear one thing. There is no direct option to Remap Netflix Buttons on NVIDIA Shield TV. So, in order to do so, we will require a third-party app. Moreover, I am not sure you noticed or not, NVIDIA Shield TV has already given you a customizable button. The one with the quick settings, you can easily remap using settings.

Now after that you still want to remap the Netflix button, follow the instructions below.

Remap Quick Settings Buttons:

1: Head over to the Settings page. You can access Settings by click on the gear icon located on the top right corner.

2: Scroll down and click on the Remote & Accessories option.

3: On the next screen click on Customize Settings button.

4: You will be presented with a number of options on the next screen. Choose carefully what you to want to do with the quick settings button.

5: I want to open an app using the quick settings button. So I selected Open an App -> Next I choose the app from the list.

That’s it. Now every time I press the quick settings button, the app I selected in the settings will open up. Now you know how you can remap the Quick Settings button, it’s time tell you how to Remap Netflix Buttons.

Read more: Remap Galaxy Note 9 S Pen button

Remap Netflix Buttons on NVIDIA Shield TV 2019:

In this method, I will be using a third-party app to remap Netflix Buttons on NVIDIA Shield TV. Moreover, using the same app you can remap any button you want.

  1. First, you need to install the Button mapper app from Google Play. Don’t need to do anything, just tell the assistant to install the Button mapper app.
  2. Once installed, launch the app on your NVIDIA Shield TV. Now before we start doing anything, you need to do one more thing.
  3. Head over to the Settings -> Device Preferences -> Accessibility -> Button Mapper -> Turn it on.
  4. Now head back to the Button Mapper app. There you will see a number of actions that you can assign to the NVIDIA Shield TV 2019 remoter buttons.
  5. Click on Add Buttons. Now the app will ask you to press the button you want to remap. In our case press Netflix Button.
  6. Upon pressing the button, a new button is added. On the next screen enable Customize toggle switch -> assign an action.

That’s it. But before you all fired up that you did remap Netflix Buttons on NVIDIA Shield TV. There is one drawback using the Button Mapper, it does remap buttons but it cannot override the original function. for e.g, You have remapped the Netflix button and added the YouTube app as an action. Now when you press that button, it will open the Netflix first and then after that, it will also open the YouTube app.

So, now you know everything. Let me know what you think and how well did it go for you?

Download Xiaomi Mi CC9 Pro Stock Wallpapers

0
Download Xiaomi Mi CC9 Pro Stock Wallpapers
All Xiaomi Mi CC9 Pro Stock Wallpapers

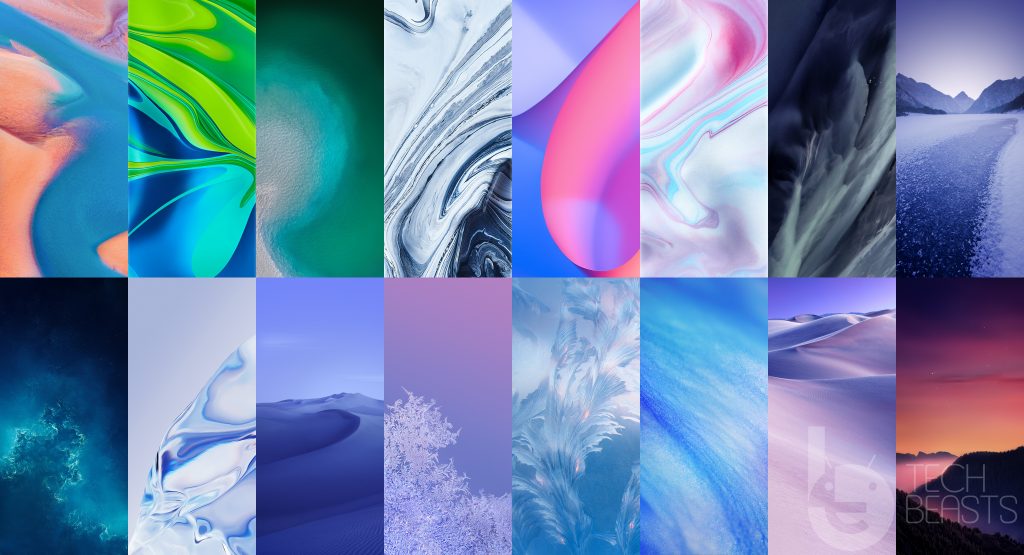
The world’s first 108 megapixels smartphone, the Xiaomi Mi CC9 Pro is out now. Stock Wallpapers of the Mi CC9 Pro are also out. From here, you can download the Xiaomi Mi CC9 Pro Stock Wallpapers. This phone comes with 16 in-built wallpapers. 

All Xiaomi Mi CC9 Pro Stock Wallpapers

Xiaomi Mi CC9 Pro

The Mi CC9 Pro was in rumors for quite a while. The highlight of this phone was its long-rumored 108 megapixels camera. A few months back, Xiaomi made this camera sensor in collaboration with Samsung. The Mi CC9 Pro is the world’s first phone to come with the said camera. This is the highest camera resolution for any smartphone to date.

The Xiaomi Mi CC9 Pro comes in with a 6.47-inches Super AMOLED screen. This screen has a resolution of 1080 x 2340 pixels. The front and back of this phone are protected by Gorilla Glass 5. It produces 600 nits max brightness. This screen supports HDR10. On the power end, the Xiaomi Mi CC9 Pro is powered by The Qualcomm Snapdragon 730G 8nm chipset. It’s coupled with the Adreno 618 GPU. The phone comes with a RAM of 6GG or 8GB with an internal storage of 128GB or 256GB. There is no microSD card slot on this phone.

Mi CC9 Pro
Mi CC9 Pro – Image Source: Xiaomi

Mi CC9 Pro has 5 cameras at the back. It has the main 108MP camera. 5MP depth camera is there. There is a 12MP telephoto camera. It has a 20MP ultrawide camera, a 2MP dedicated macro camera is there as well. On the front, it has a single 32MP camera. There is a battery of 5260 mAh on this phone. Mi CC9 Pro comes with a 30W fast charger. This phone is being offered in the Aurora Green, Glacier White, and Midnight Black colors.

The screen of the CC9 Pro has a ratio of 19:9. It comes with a dot-drop notch in the middle. To maximize the beauty of this phone’s display, Xiaomi has added 16 brand new wallpapers. You can find the Mi CC9 Pro Stock Wallpapers below now.

Xiaomi Mi CC9 Pro Stock Wallpapers

All stock wallpapers of the Mi CC9 Pro have a full HD resolution i.e. 1080 x 2340 pixels. You can apply these wallpapers to the screen of any Android smartphone and also to an iPhone’s display. You can download these wallpapers one-by-one or download them altogether from below.

All Mi CC9 Pro Stock Wallpapers: Download

Xiaomi Mi CC9 Pro Stock Wallpapers

Check out our Stock Wallpapers section to download more stock wallpapers.

Install Custom Fonts on iOS 13 and iPadOS 13

0
Install Custom Fonts on iOS 13 and iPadOS 13

Those who want to use custom fonts on iOS devices. Use our guide below and you will learn how to Install Custom Fonts on iOS 13 and iPadOS 13.

Custom Fonts on iOS

When it comes to custom fonts on iOS we have very limited options or the first thing comes to our mind is Jailbreak. But not anymore, you will be glad to know that, iOS 13 and iPadOS 13 now support custom fonts. However, before you start getting any ideas, iOS 13 does support custom fonts but they can only work on certain apps.

First, I thought once I installed custom fonts in iOS 13. They will be available system-wide just like Android devices. But after installing custom fonts on my iPhone. I realized that they only work with a number of apps. It would be better if they allowed system-wide font settings, just like Android devices.

Well, I am sure in future we may get changing fonts option in Settings. Till then you can use my guide and learn how to custom fonts on iOS device systemwide. Those who want to do creative writing, this is the guide you should follow and use tons of customs fonts to make creative things.

Read more: Install Custom Fonts on your Android Device

Install Custom Fonts in iOS 13 and iPadOS 13:

I have breakdown my post into three steps, to make things easier for you. Follow all the instructions given below and you will be able to Install Custom Fonts on iOS 13 and iPadOS 13.

How to Change Fonts in Any Android Phone – Without Root

1: Apps with Fonts Manager:

There are a number of stock apps that come with the built-in font manager. That means you can use different fonts while using such apps without installing any third-party app. Yet, again there is no systemwide option available but you can use custom fonts inside the app.

So if you want to use custom fonts on iOS devices, you have to do a bit of hard work. Let me make things more clear, you have to check all the apps individually, to confirm that they have Fonts Manager.

A number of stock Apple apps have Fonts Manager. Just to show you how you can access the Fonts Manager on an app, I have created a step by step tutorial.

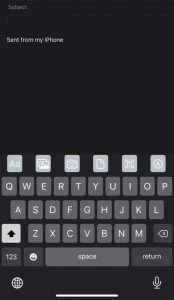
  • I am using Stock Mail app on iPhone XS Max running iOS 13. Launch the Mail app on your iPhone or iPad.
  • Now Tap anywhere in the blank space, it will launch the Apple Keyboard. You can try this same method on Gboard.
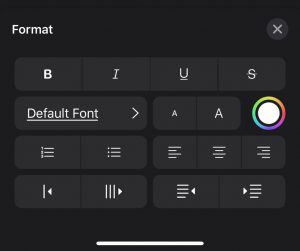
  • You will [ A ] icon the toolbar of your keyboard. Tap on it and it will take you to the font settings page.
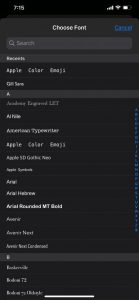
  • Tap on default font. Next, you will see the list of a number of fonts.
  • Choose the one you want and in order to activate it. Tap on it.
  • Now start writing and you will see the font you have selected is not activated and working.

The following are the screenshots to let you understand how easy it is to use fonts Manager on stock apps.

2: Install Custom Fonts on iOS 13 and iPadOS 13:

Now in the first part, you have learned how you can use different fonts on specific apps using fonts manager. In this part, I will tell you how to install Custom Fonts on iOS 13 and iPadOS 13 without Jailbreak. 

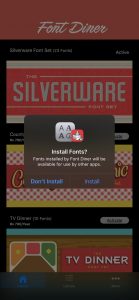
Now since Apple was kind enough to add support of customs fonts in iOS 13. There are a number of apps that can help you get tons of custom fonts. I used an app called Font Diner. It’s a free app and comes with 23 different fonts for free.

If you want to access more, you can purchase the pro pack and add tons of new fonts. Using Font Diner is pretty simple, install it using the App Store. Once installed, launch it and tap on activate to install all the free fonts.

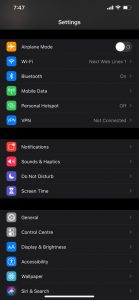
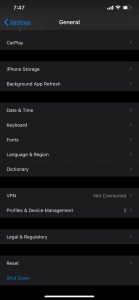
Now that you have installed and activated Font Diner. All you have to do is head over to the Settings -> General -> Fonts, Choose the font you like. Tap on it and see the trophy case for example.

See the following screenshots, it will make things easier for you. You will get a clear idea of what you have to do is Install Custom Fonts on iOS 13 and iPadOS 13.

3: Using Custom Fonts Anywhere on iOS and iPadOS 13

There is no such option to use customs fonts on iOS 13 anywhere. Either you can use Jailbreak tweaks for that you have to Jailbreak your device or you can use third-party keyboard apps. There are a plethora of Font Keyboard apps which let you use custom fonts on all the apps.

However, every time you want to use custom fonts anywhere on iOS 13, you have to activate the font keyboard. Now you will be wondering which app you should use?

I am using CoolFonts, it’s a free and popular app. First, you need to install the Cool Fonts app from the App Store. After that, you have to enable the Keyboard.

Head over to the Settings -> Cool Fonts -> Keyboards -> Enable Cool Fonts.

After that, you need to add Cool Fonts as your keyboard. Otherwise, you won’t be able to switch and select Cool Fonts Keyboard.

Now go to Settings -> Keyboards -> Keyboards -> Add New Keyboard -> Select Cool Fonts.

That will be all. Now you can use Custom Fonts on iOS 13 and iPadOS 13 anywhere. All you need to do is switch to the Cool Fonts Keyboard. Let me know if you have any questions.

Download Cloudflare WARP 1.1.1.1 VPN for PC

0
Download Cloudflare WARP 1.1.1.1 VPN for PC
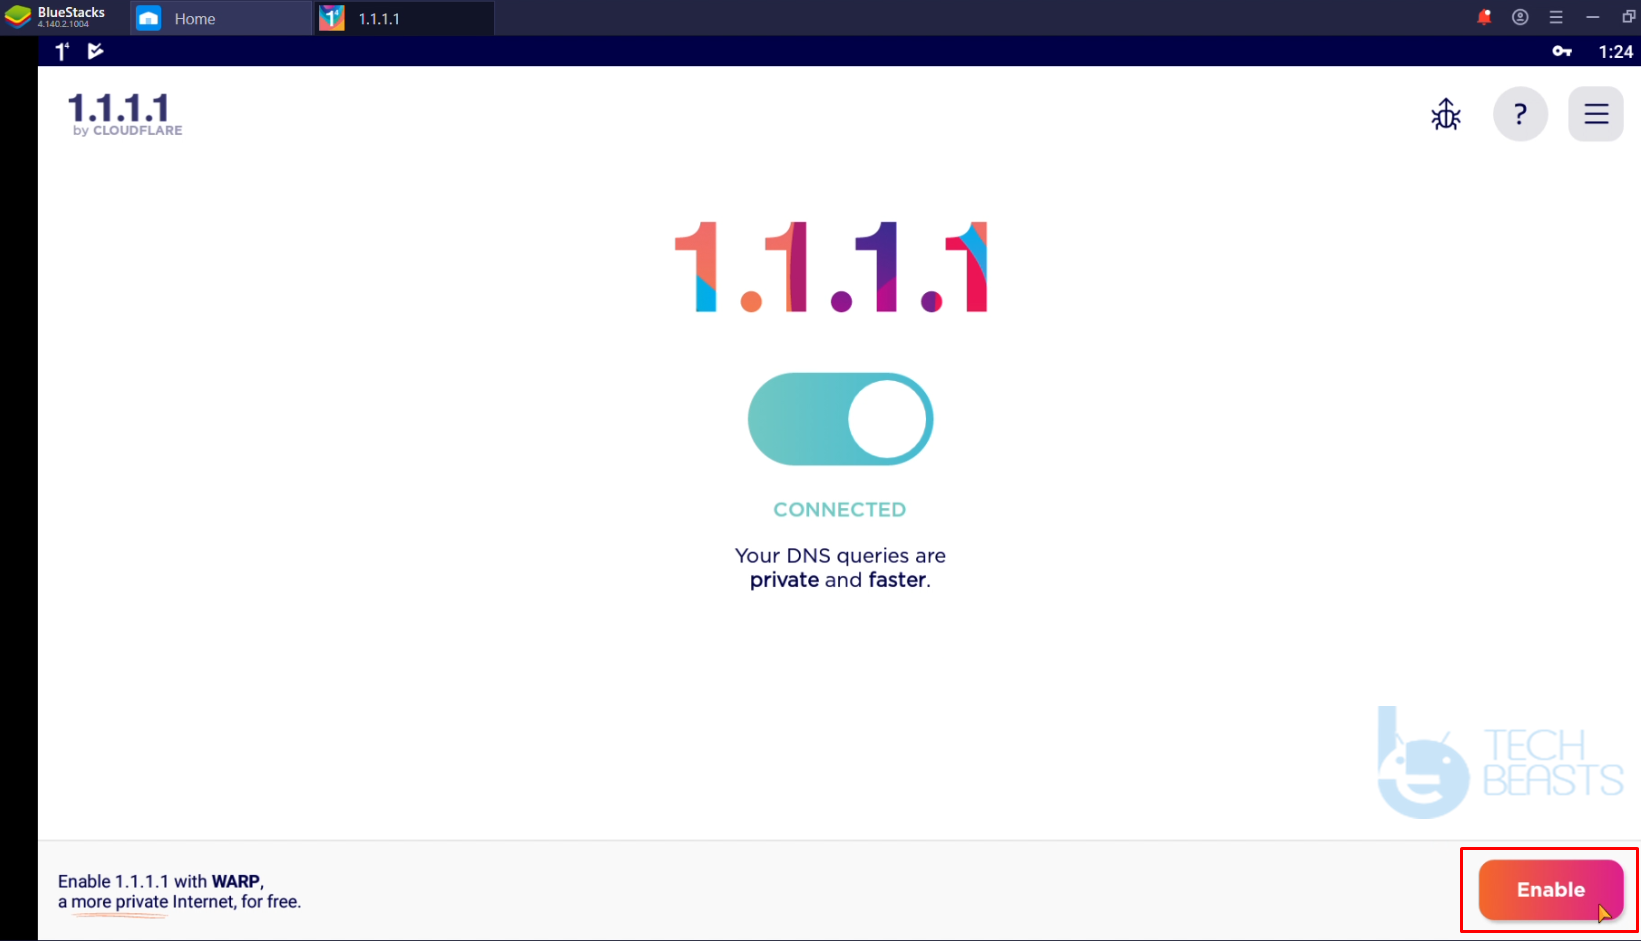
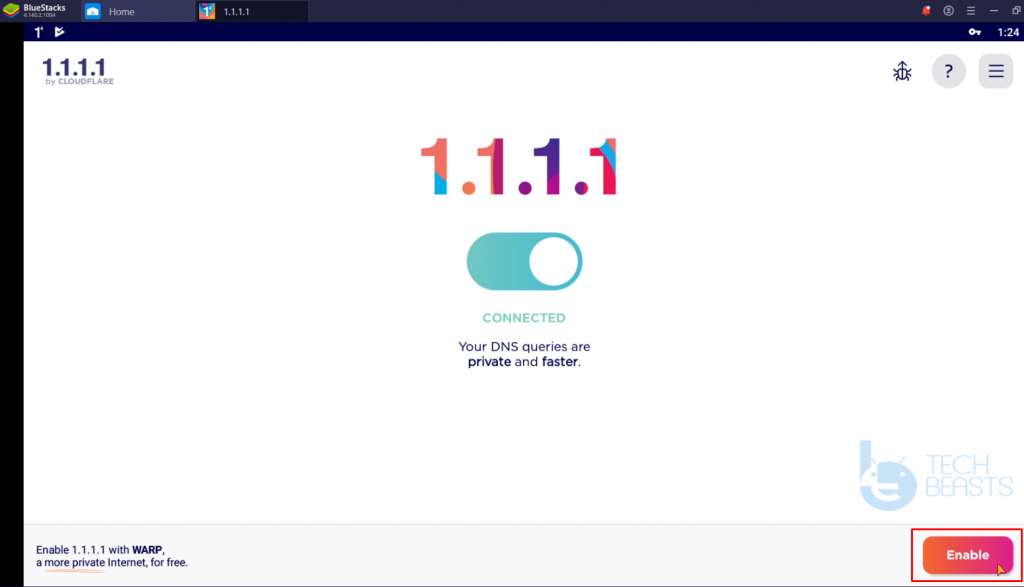
Using 1.1.1.1 WARP VPN for PC on Windows 10

Following are the few simple and easy steps to download Cloudflare WARP 1.1.1.1 VPN for PC. This app can be installed on Windows and macOS.

Cloudflare’s WARP 1.1.1.1 VPN

1.1.1.1 is Cloudflare’s DNS service. This is one of the fastest privacy-first consumer services and it comes for free. Cloudflare launched this service back in 2018.

A couple of months back, Cloudflare added the WARP VPN to its 1.1.1.1 App for Android. The new app is named as Warp 1.1.1.1.

The 1.1.1.1 app does not only make your online communication fast and secure, it also encrypts it with the help of the new VPN. This VPN makes your online identity unknown. Any online parties with wrong intentions cannot snoop into your activity. No one can know your location or your computer’s real IP address.

1.1.1.1 WARP VPN for PC
Using 1.1.1.1 WARP VPN for PC on Windows 10

1.1.1.1 with WARP uses modern protocols to replace your existing connection between your device and the internet. This way, the medium becomes untouchable giving the user an edge.

Not only it helps you improve your security and privacy, but it also speeds up your internet connection. 1.1.1.1 DNS has been in use for long by internet users to boost up their internet speed.

On top of all these features, the 1.1.1.1 with WARP also allows users to bypass the geographical restrictions. If an app or site is not loading in your region because of the restrictions set by your ISP, you can bypass them with Cloudflare 1.1.1.1 WARP VPN. 

If you want to access a website that works in a specific region only, that too can be accessed via this VPN.

The Cloudflare WARP VPN provides a limited amount of bandwidth at first. If you run out of the free bandwidth, you can go with one of their premium plans. Based on my own experience, I don’t think so that you will run out of the free data any time soon. It is highly unlikely that you will need an upgrade for normal internet use.

Cloudflare WARP 1.1.1.1 VPN for PC

Originally, this app was built for Android and iOS. Cloudflare did not roll out the same for Windows and macOS. If you are on this page, I assume that you are here to download the WARP 1.1.1.1 VPN for PC on Windows 7, 8, 10 and macOS-powered Desktop PC and Laptop. First off, I would like to tell you that you have landed at the right place. Take a look at the steps coming up next to download the WARP 1.1.1.1 VPN for PC.

Requirements:

  • Internet Connection
  • Android Emulator – Download and install – We recommend BlueStacks.
  • Windows 10, 8, 7 or macOS
  • Desktop PC or Laptop

Download Cloudflare WARP 1.1.1.1 VPN for PC

Video Tutorial:

Conclusion

WARP VPN is now installed inside the BlueStacks or any other Android emulator that you used. Remember that you cannot make the use of WARP VPN system-wide. Everytime you want to use the 1.1.1.1 DNS or WARP, you will open the emulator, enable the VPN, and then launch the website inside that emulator. This is a downside, but this is the only way to use it on your computer. For any suggestions or questions, use the comment box below.

How to convert HEIC, HEIF Images to JPEG on Android

0
How to convert HEIC, HEIF Images to JPEG on Android

Following are the instructions to convert HEIC, HEIF Images to JPEG on Android phones. This guide will work for all Android smartphones of all companies.

Before you take a look at the steps, let me tell you what is HEIC, HEIF and how it affects your pictures.

What is HEIC or HEIF Image Format?

First things first. The HEIC and the HEIF are the same things. HEIF stands for High-Efficiency Image Format. When Apple started using this format for pictures on iPhones and iPads, it changed the format to HEIC. It’s just a different name, otherwise, it is the same HEIF format.

Now, what does this format do? To understand this, you have to understand why this came into being at first.

Smartphones these days are coming with large camera sensors. The phones have camera sensors starting from 8 megapixels going all the way up to 108 megapixels. When you capture a picture through a high-resolution camera, the picture’s size is equally big. For example, a 64-megapixel camera takes a picture of 10 – 20MBs. This is when the pictures are saved in the JPEG format. The JPEG is also the default format of pictures on Android. JPEG is also known as JPG format.

If you keep taking a lot of pictures through a high-res camera, you will run out of storage very soon. No matter how big is your storage chip, you will fill it entirely at one point.

To save the storage by bringing down the image size, the MPEG (Motion Pictures Expert Group) introduced the new HEIF format. This is based on the HEVC format. This format brings down the image size significantly without disturbing the image quality.

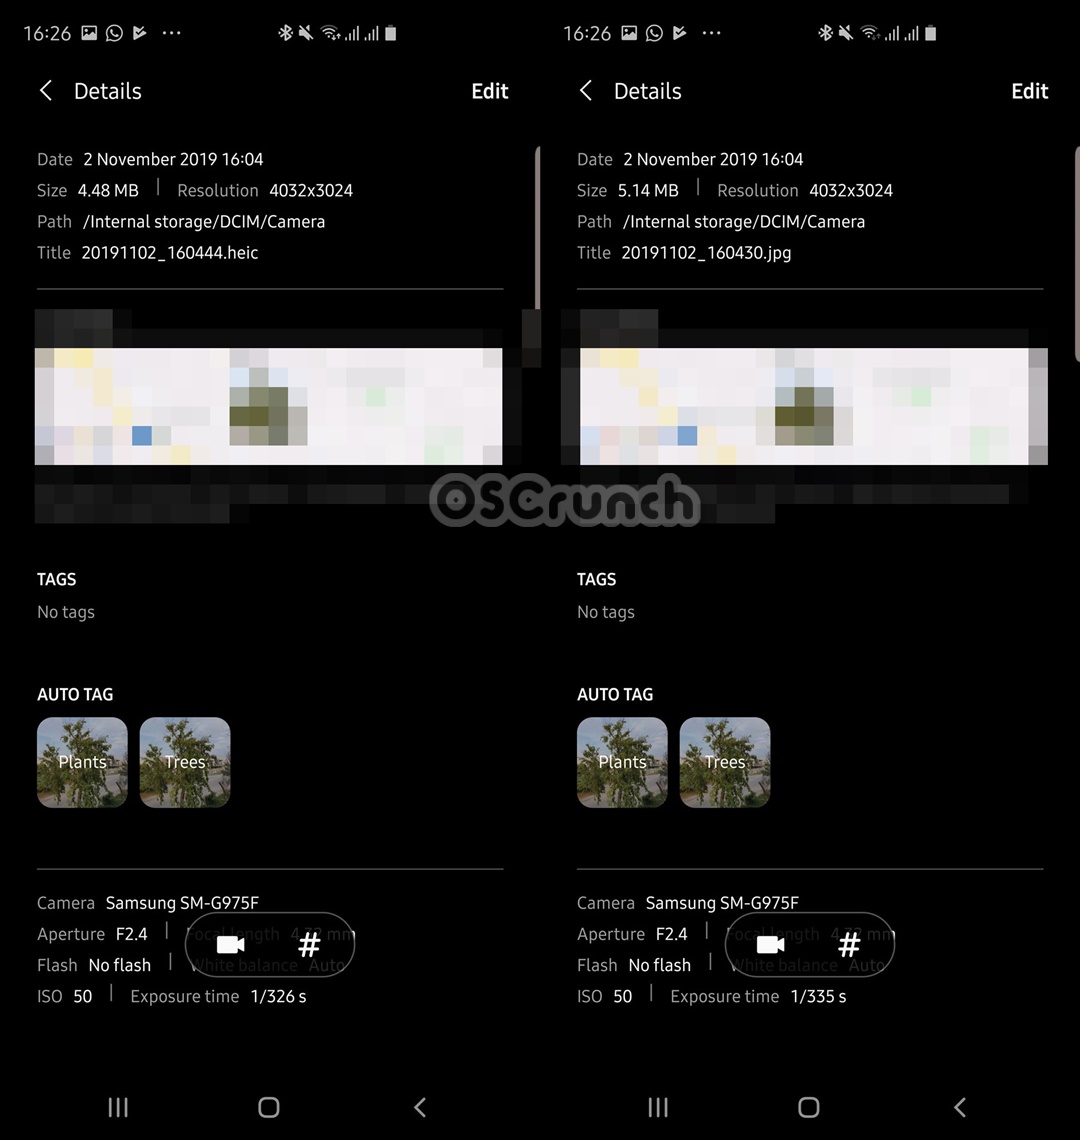
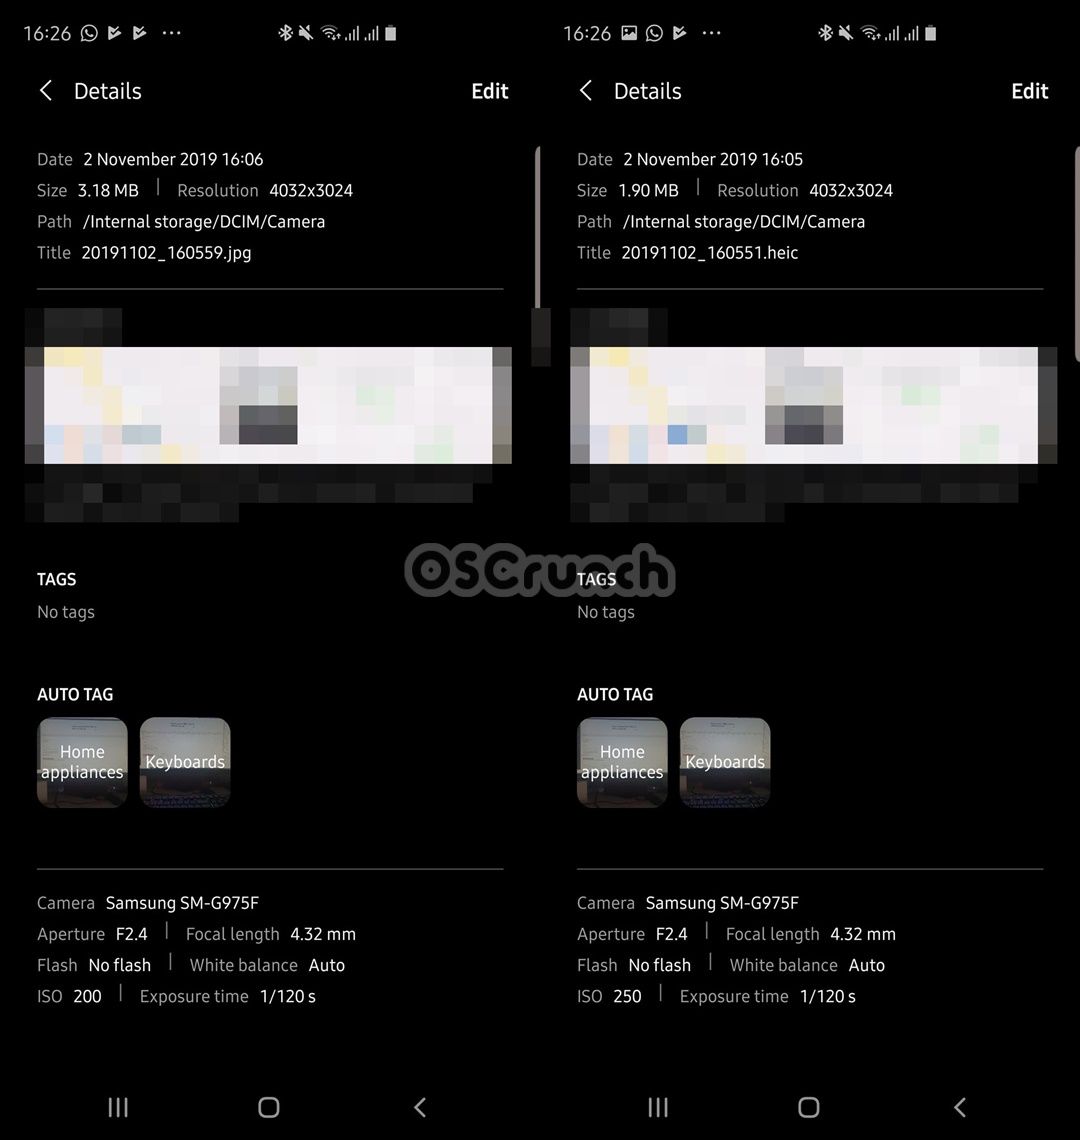
You heard that right. The HEIF/HEIC images have the same quality as the JPG images, but with a reduced size. For example, the same image may have a size of 3.90 MBs in JPG and 1.9 MBs in HEIC. If you capture pictures with a lot of details and colors, the difference between the HEIC and JPG size will not be huge, but the HEIC size will still be less than the JPG. To explain it further I have added some images below.

Image captured in JPEG Format
Image captured in HEIC Format
HEIC, HEIF Images to JPEG on Android
HEIC vs JPEG Size Comparison
Captured in JPEG
Captured in JPEG
Captured in HEIC/HEIF
JPG vs HEIC Size Comparison

Now that you have understood the basic difference between HEIC/HEIF and JPEG, you must have learned that HEIC is a better format to save storage space.

If you have made your mind to set the HEIC format as default on the Android phone, there is more that you need to learn.

The HEIC images, when uploaded to cloud storage, or shared over WhatsApp, Messanger, or shared through Email, are automatically converted to JPEG. The same doesn’t happen when you copy HEIC pictures to a computer.

If you want to access HEIC pictures on a computer, you will have to manually convert those images to JPEG. Furthermore, the HEIC images may not be compatible with many photo editors, which is also why you need to convert them beforehand.

Take a look at the steps to convert HEIC, HEIF Images to JPEG on Android now.

Requirements

Download and install one of the following Converters on your Android phone.

  1. Luma: heic to jpg converter: Download
  2. Heic to JPG Converter Free: Download
  3. Total Media Converter (HEIC to JPG – JPG to HEIC) : Download
  4. Free Image Converter: Download

Convert HEIC, HEIF Images to JPEG on Android

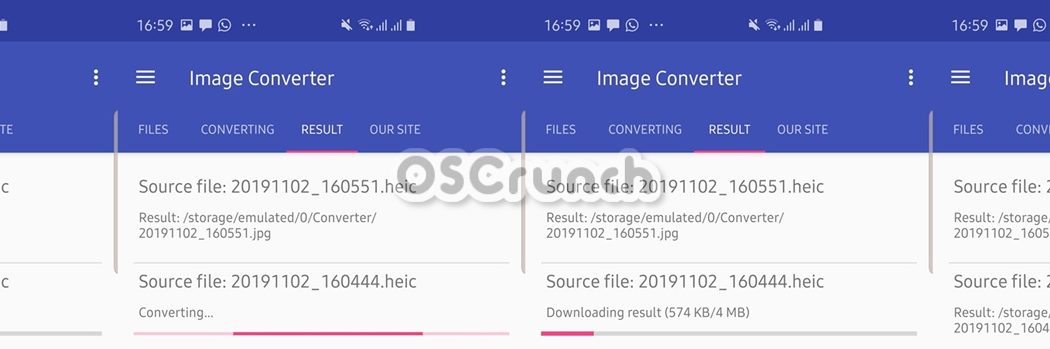
Take a look at these steps demonstrated with the help of Image Converter. The steps remain the same for other converters as well.

Total Time: 2 minutes

Open the Image Converter or any other Converter on the phone.

Open the converter that you have installed on the computer. It can be any converter from the ones listed above.

Add your HEIC image to the Converter.

Click on the “+” button in the converter and add the HEIC image to the converter.

Set the Output Quality and Format of the image.

Go to the Convert Tab in the converter and set the output quality, and the output format which is JPG or JPEG in our case.

Conver the image and get it in the Gallery.

Click on the “Convert” button to start the conversion. The JPG image will be saved in your phone’s gallery. That’s all.

HEIC, HEIF Images to JPEG on Android
Result of the converted image

Final Words

By now, you have successfully learned how to convert HEIC or HEIF images to JPEG on the Android phone. If have any suggestions, questions/queries, feel free to use the comments box below. I will try my best to get back to you as soon as possible.
More: