Home Blog Page 31

How to restore missing Microsoft Store and Apps on Windows 10 1903

0
How to restore missing Microsoft Store and Apps on Windows 10 1903

Has the Microsoft Store and other Windows Store Apps suddenly vanished from your computer after updating to Windows 10 1903? If so, you are not alone! Here is the detailed guide on how you can restore missing Microsoft Store and Apps on Windows 10 1903. This includes bringing back Microsoft Store, Microsoft Photos, Calculator, Groove Music, Windows Media Player, and many other apps.
restore missing Microsoft Store and Apps

Before I show you the procedures, let me tell you what exactly I went through after updating to Update 1903.

Windows 10 Update 1903 – The not-so-smooth experience

In May 2019, Microsoft released the Windows 10 Update 1903. Just after a few days, Microsoft announced that it will discontinue support for previous versions of Windows 10 forcing all the users to update to the 1903 version.

I got the notification to update my computer. For the first few days, I ignored the notification and when its pop-up frequency increased, I decided to finally upgrade my Windows from version 1809 to 1903.

I started updating my computer without reading about the bugs in version 1903. This is the only thing that went wrong on my end, but even If I had read about the bugs, I was still going to upgrade because Microsoft was all set to discontinue support for version 1809. Also, it’s always recommended to have the latest piece of software installed to prevent hackers and malware from infecting your computer. With my fingers crossed, I performed the update.

After a day of updating my computer, I tried opening a picture but the Photos application didn’t open up. Nothing happened at all. I used a third-party photo viewer at first and ignored this issue. Soon after that, I had to use the calculator. The calculator didn’t open up either. I realized that something was wrong.

I started searching on the internet about what was wrong and I got to know that many users were facing similar problems. Microsoft didn’t have any single word on this issue. All the queries on the Microsoft forums either have wrong answers leading the users nowhere, or no responses at all.

A few solutions that I found on various websites included resetting the applications that were having the problems or to update those apps using the Microsoft Store.

In the settings, I looked for the applications having issues and they did not appear there either. When I tried opening the Microsoft Store, that didn’t open either.

I did more research and found some methods to reinstall the application package of missing apps using PowerShell. This worked only for the Photos app. I was able to open and view the pictures in the Microsoft Photos app once again, but all other Microsoft apps failed again. I even tried downgrading to the update 1809 to no use.

All of this leads me to factory reset my computer and right now, I have all the Microsoft apps working once again.

Throughout this process, I wanted to avoid factory resetting my computer at any cost, but in the end, I had to opt for this option. I had to reinstall all the software & apps on my computer from scratch. Thankfully, the factory resetting the computer does not delete your files or data. It only uninstalls the third-party software.

Knowing the kind of pain a user can go through because of this bug in the 1903 update, I decided to make this guide. Down below, I’m going to list down all the possible solutions with the factory reset method in the end. You can apply the solutions one by one to see which one works for you. The whole idea of making this guide is to give you all the solutions in one place. Take a look and missing Microsoft Store and other Windows Store Apps on Windows 10 1903.

Restore missing Microsoft Store and other Windows Store Apps on Windows 10 1903

Our primary goal here would be to fix the Microsoft Store first of all. Because once you have the Microsoft Store working, all other apps can be downloaded from the store and they will start working too.

Solution# 1: Reset the missing Apps e.g. Reset Microsoft Store, Microsoft Photos and other apps

  1. In the search bar, type “Add or remove programs”.
  2. In the Add or remove programs, find “Microsoft Store”.
  3. Click on Microsoft Store and then click on “Advanced Options”.
    advanced options microsoft store
  4. Scroll down and find “RESET”.
  5. RESET the Microsoft Store now.
    Reset Microsoft Store
  6. Restart the computer and launch the Microsoft Store. See if it works or not.

You can use this procedure for all missing apps. Find them in the Add or remove programs and reset them one by one. If you cannot find the missing apps there either, it means that the apps are not on your computer anymore. In such a case, re-install the apps by following the procedure below.

Solution# 2: Reset the Windows Store Cache

  1. Go to Start Menu’s search bar.
  2. Type “WSReset.exe”.
  3. As you find the command, right-click on it and “Run as administrator”.
    wsreset to reset Windows Store cache
  4. The command will open a command window, run and close on its own.

If the command window doesn’t open up, it would mean that the Microsoft Store is not on your computer. You will have to install the Microsoft Store package manually in this case as well.

Solution# 3: Re-install your version of Microsoft Store

  • On your computer, go to Add or remove programs.
  • In the list, find the Microsoft Store.
  • Go to Advanced Settings of Microsoft Store.
  • Note down the Microsoft Store version.
Microsoft Store Version
Picture for reference only
  • Now add your MS Store version number to this command:
    • add-appxpackage -register -disabledevelopmentmode "C:\Program Files\WindowsApps\Microsoft.WindowsStore_11712.1001.20.0_x64__8wekyb3d8bbwe\AppxManifest.xml"
  • After replacing the version number, the command should ook like this:
    • add-appxpackage -register -disabledevelopmentmode "C:\Program Files\WindowsApps\Microsoft.WindowsStore_11910.1001.5.0_x64__8wekyb3d8bbwe\AppxManifest.xml"
  • Note: Replace this with your own version of MS Store. I have just demonstrated this for my version of MS Store.
  • Run PowerShell as administrator on your computer.
    Windows PowerShell
  • Execute the command in the PowerShell.
  • Restart the computer now.
    • Run the WSReset.exe once again.
  • Launch the Microsoft Store and it should be working.
  • Solution# 4: Re-install missing Microsoft Store and Apps

    • First of all, download the Windows Apps reinstall-preinstalledapps.zip package. Mirror is here.
    • Extract this zip to get its content.
    • Note down the location of the extracted content. If you haven’t changed the location, it should appear in:
      • C:\Users\yourusernamehere\Downloads
    • Now go to Start and find “PowerShell”, right-click and “Run as administrator”.
    • In the power shell, enter this command:
      • Set-ExecutionPolicy Unrestricted
    • This will ask you to change the execution policy. Type “Y” and press Enter.
    • Now enter the following command in PowerShell:
      • cd C:\Users\YourUserName\Downloads
    • Replace yourusernamehere with the username on your computer.
    • In the PowerShell, enter the following command to re-install the Windows Store: 
      • .\reinstall-preinstalledApps.ps1 *Microsoft.WindowsStore*
    • Now run the WSReset.exe as administrator from the Start Menu.
    • In the PowerShell, enter the following command in the end:
      • Set-ExecutionPolicy AllSigned
    • Restart your computer now.
    • Launch Microsoft Store or any other missing app.

    Solution# 5: Re-installing Microsoft Store

    • In the PowerShell, enter the following command:
      • Get-AppXPackage *WindowsStore* -AllUsers | Foreach {Add-AppxPackage -DisableDevelopmentMode -Register "$($_.InstallLocation)\AppXManifest.xml"}
    • After the logs run through, restart your computer.
    • Launch the Microsoft Store and see if it works now or not.

    Solution# 6: Reset your computer – the only way guaranteed to restore missing Microsoft Store and Apps

    Before applying this solution, backup all of your tools. Make sure that you are choosing the right settings while factory resetting. Again, you will lose all the software installation, nothing will happen to your files. The files on the desktop will stay on the desktop. The files in drives will stay in the drives.

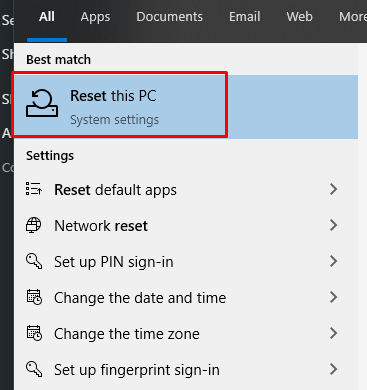
    1. In the search menu in the Task Bar, type Reset.
    2. Open “Reset This PC”.
    3. reset this pc
    4. Click on Get Started.
      get started to reset this pc
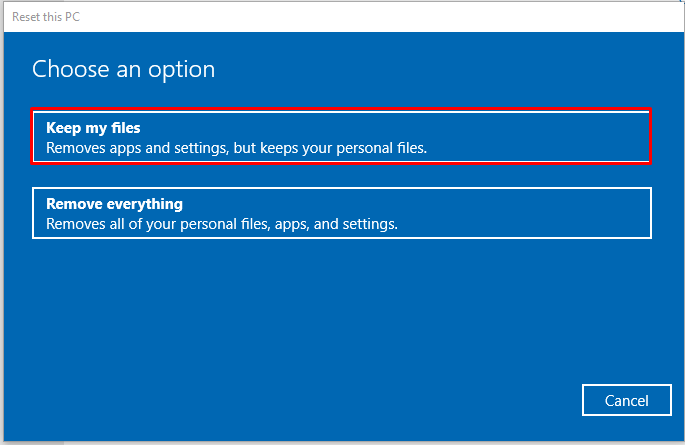
    5. Now select “Keep my files”.
      Keep my files
    6. Follow the on-screen instructions and let it reset it everything.
    7. Your computer will be reset in 20-30 minutes.
    8. Set it up once again and check the Microsoft Store and all other missing apps. They will be working.

    You can now install all of your previously installed tools again. This is the solution that worked for me to get the Microsoft Photos, Calculator, Groove Music, Cortana, and other such apps working.

    Final Words

    That’s all. You would be really lucky if any solution from solution 1 – 5 restores missing Microsoft Store and Apps on your Windows 10 1903. It’s really unfortunate that factory resetting is the only guaranteed solution. It’s not that the first 5 solutions will not work at all. Those solutions have been tested by a number of users and many of them successfully restored the MS Store. Especially, the solution to re-install your own version of MS Store is what worked for me as well, but that couldn’t bring back other missing apps which is why I had to factory reset.

    Let me know if you have any questions or queries regarding this guide. I will try my best to get back to you as soon as possible. 
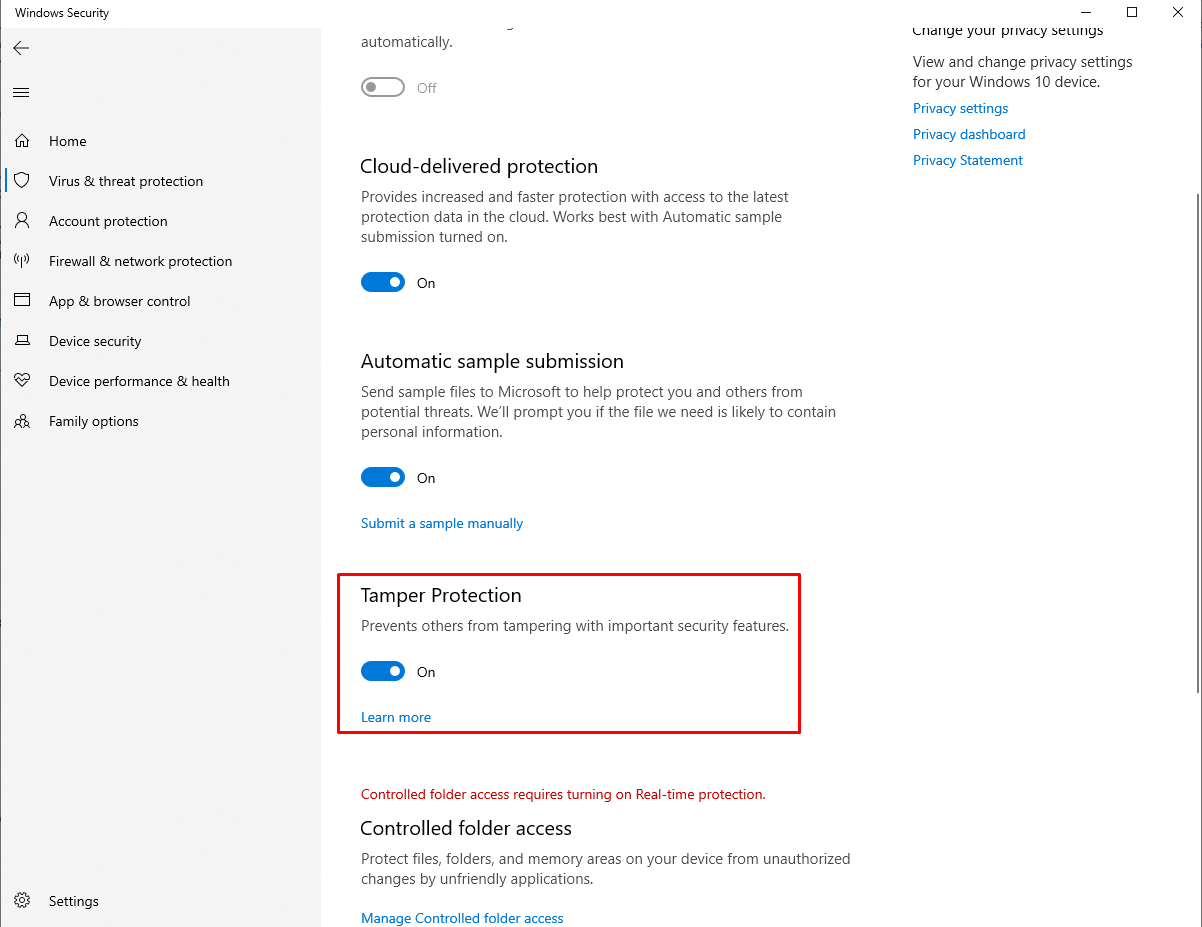
    More: How to enable Windows 10 Tamper Protection

    How to enable Windows 10 Tamper Protection

    0
    How to enable Windows 10 Tamper Protection
    Tamper Protection enabled on a Windows 10 1903-powered computer

    These are the few simple and easy steps to enable Windows 10 Tamper Protection. Tamper Protection mode will make your Windows 10 computer safer.

    enable Windows 10 Tamper Protection
    Tamper Protection enabled on a Windows 10 1903-powered computer

    What is Tamper Protection?

    Microsoft is working hard to improve the security features of Windows 10. In May 2019, Microsoft rolled out the new Windows 10 1903 update. This update brought significant changes and some new features. In the security department, Microsoft introduced a new Tamper Protection mode which aims at protecting the settings of Windows Defender.

    With the increased security measures in Microsoft Defender, malware is becoming stronger as well. Malware usually harms a computer by changing how the Windows Defender works. To change the Windows Defender’s functionality, the malware uses PowerShell commands, registry modifications, or group policies. In the recent past, malware like TrickBot, Nodersok, and GootKit have made efforts to bypass and change the Windows Defender settings to access the system.

    With the Tamper Protection enabled on a computer, you can prevent all such parties from harming the Windows Defender and hence your computer.

    On the computers having Windows 10 1903 as the out-of-the-box OS, the Tamper Protection is already enabled. Microsoft is also making efforts to enable it in the updates. If you don’t know about the Tamper Protection or you have not activated it yet, you can manually activate it. Furthermore, if you use a third-party Antivirus, you will have to turn on the Tamper Protection in that case as well. Tamper Protection does not work with third-party Antivirus programs on its own.

    Enable Windows 10 Tamper Protection

    There are two methods to enable Tamper Protection on Windows 10. In the first method, I’m going to show you how to enable it to work with Windows Defender. The 2nd method will demonstrate how to enable Windows 10 Tamper Protection with an Antivirus.

    Follow these few steps to activate Tamper Protection in Windows Defender.

    Total Time: 2 minutes

    Step 1

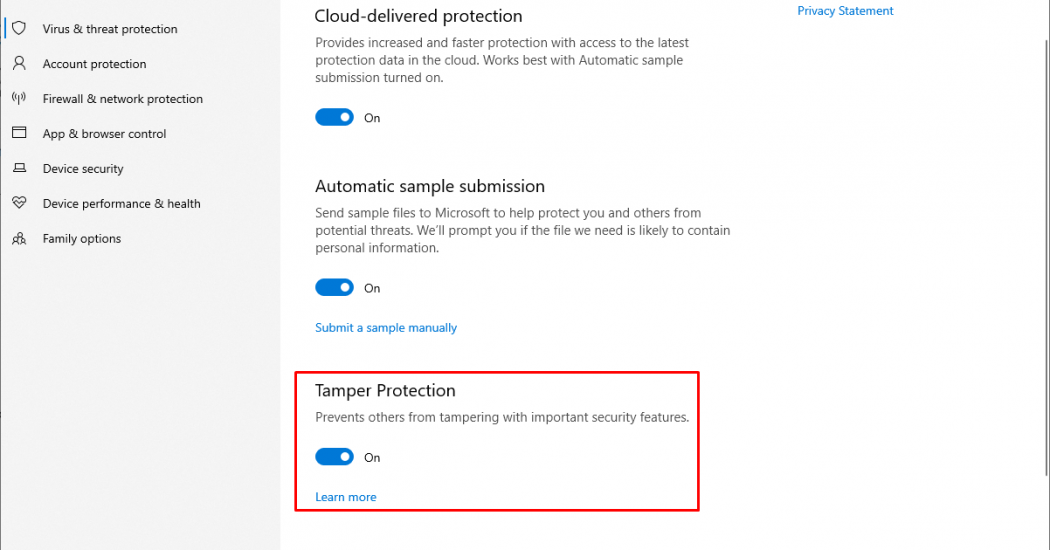
    Type “Windows Security” in the search of Task Bar and open Windows Security.
    Windows Security

    Step 2

    In Windows Security, click on “Virus & threat protection”.Virus & threat protection

    Step 3

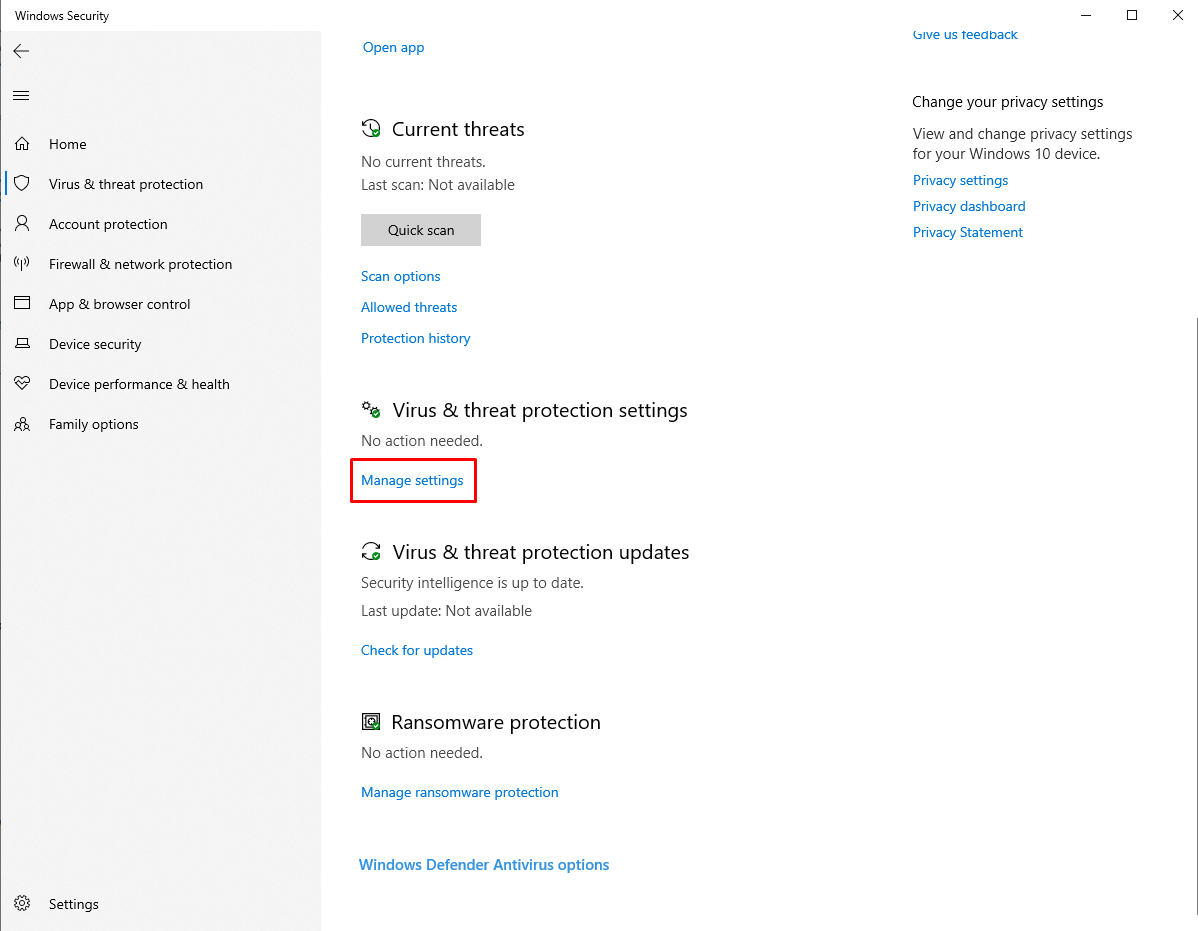
    Scroll down and click on “Manage Settings” under “Virus & threat protection settings”.Virus & threat protection settings

    Step 4

    Scroll down and click on the toggle to turn on Tamper Protection.Enable Tamper Protection Windows 10

    Step 5

    Tamper Protection is turned on. Continue using your computer without worrying. That’s all.Enable Tamper Protection Windows 10

    Enable Windows 10 Tamper Protection with Antivirus

    1. Open Windows Security settings on your computer.
    2. Click on Virus & threat protection.
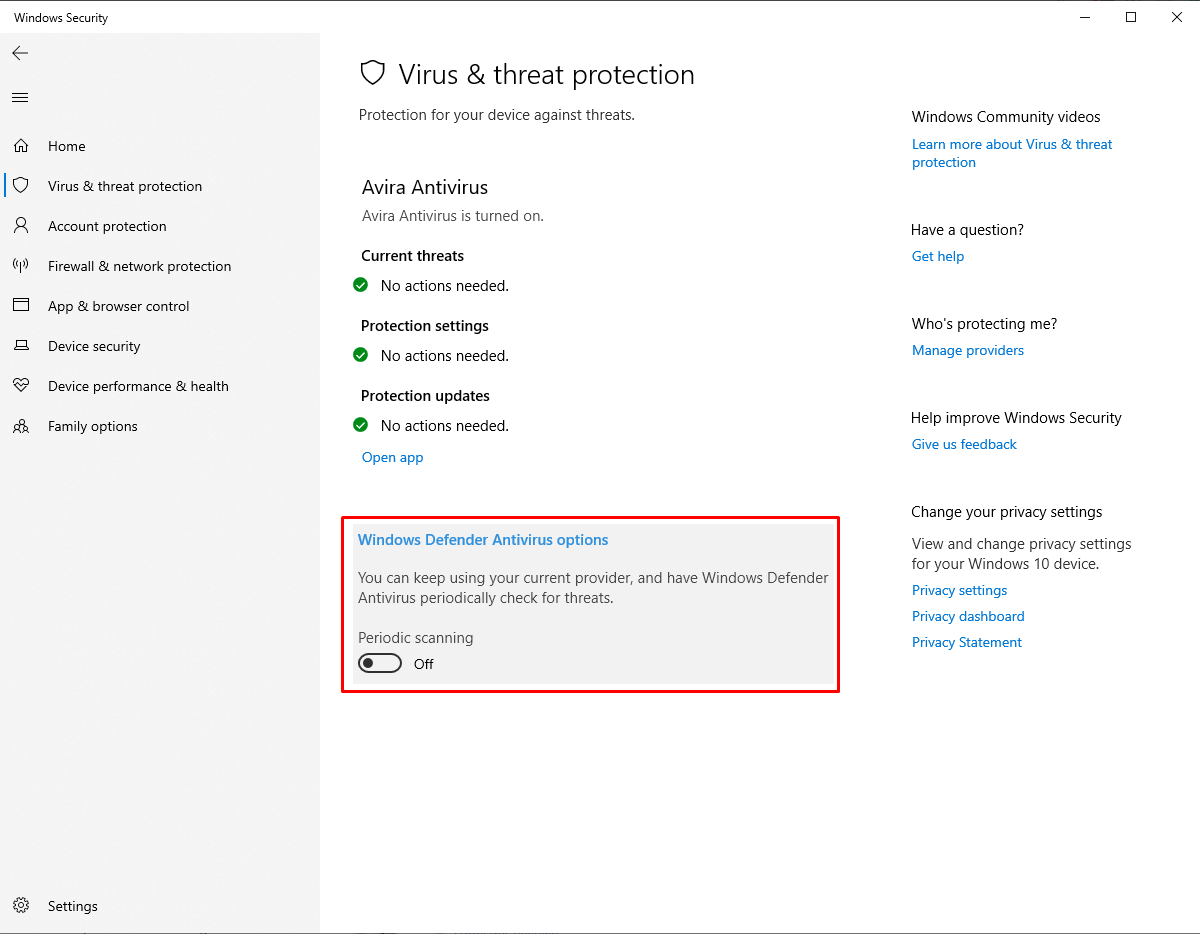
    3. Now click on “Windows Defender antivirus options”.Windows defender antivirus options
    4. Click on the toggle to turn on “Periodic Maintenance”.Periodic Maintenance Windows 10
    5. You will see more settings now. Click on Manage Settings under “Virus & threat protection settings”.Activating TTamper Protection on Windows 10
    6. Find Tamper Protection and click on the toggle to turn it on.Tamper Protection


    Pro Tip: Turn on the Ransomware Protection as well.

    Final Words

    That’s all. You have added one more layer of security to your Windows 10 PC. It’s always important to have the security features turned on. Even if you are not using a third-party Antivirus, you must have the Windows Defender turned on with all of its settings configured. If you have any questions or queries, feel free to drop them in the comments section below. I will try my best to get back to you in time.

    Download cstark27’s GCam APK – Google Camera Port for Pixel 1/2/3/3a/4

    0

    From here you can download cstart27’s GCam APK Google Camera Port for Pixel 1, Pixel 2, 3, 3a, and Pixel 4. Furthermore, you will learn how you can install the cstart27’s GCam port on the phone.

    cstark27's GCam APK

    cstark27’s GCam Port – What’s so special?

    Before the release of the Google Pixel 4, the camera of Pixel phones was the only feature that was keeping them at the top. That, however, changed with the Pixel 4 because the Pixel 4’s camera failed to deliver. The Pixel 2 and Pixel 3 consistently remained the top camera smartphones throughout their release year. These phones were declared the best camera smartphones by DxOMark.

    Google Pixel 2 and Pixel 3 had only 1 camera sensor at the back, and that was better than 2 and 3 cameras of flagships of other phone makers. It wasn’t the hardware, but Google’s software optimization that helped the Pixel phones to take those stunning pictures.

    The Portrait and Night Sight mode of the Pixel smartphones are still the best. It will take some time for the competitors to beat that.

    Google’s stock camera application has all the features that an average user needs in a phone’s camera. But the Pixel phones are not limited to those few features only. There’s a whole lot of features that you don’t have in the stock Pixel camera app, but you can add them. That’s what cstark27 has been doing for years. 

    cstark27’s GCam unlocks all the camera features of the Pixel phones. You can add a plethora of new features in your Pixel phone. Some of the top features of the cstark27’s GCam port include the Pixel phone’s ability to record a 4K timelapse, setting the Portrait, Night Sight, or Camera mode as the default, ability choose the zoom level in portrait mode, and changing the shutter speed and ISO of the phones.

    There are some features of specifically added for the Google Pixel 1 and Pixel 2. These features include the HEVC format, Motion Photos, Photobooth, and many others. You can take a look at all the features listed below.

    Features of cstark27’s GCam

    Courtesy of cstark 27’s XDA thread.

    All Pixels:

    • Ability to choose Camera, Portrait, or Night Sight as the default mod.

    • Custom Lib options to reduce black crush, improve details, and/or increase clarity

    • Ability to choose 4K Time Lapse quality

    • Ability to choose zoom level in Portrait Mode of 1.2x or 2.0x (for the rear camera)

    • Ability to choose to enable HDR+ Enhanced for Portrait Mode

    • Option to have quicker access to Night Sight by “permanently” adding the little message at the bottom regardless of measured light (admittedly it disappears if you capture a photo in regular mode)

    • Option to increase shutter speed and frames in Night Sight for potentially “better” Night Sight photos

    • Option to disable the “Learning AWB” in HDR+ Enhanced/Night Sight

    • Option for manual shutter speed & ISO

    • Face warping is completely disabled

    • In addition to the above, these are the added features for specific devices (when compared to the stock app):

    Pixel 1 and Pixel 2

    • Portrait Mode (only when a “human face” is detected, does not work on objects/animals like Pixel 2, 3, 3a)

    • “Learned Depth” for Portrait Mode which provides, usually, a more accurate depth detection and more pleasing bokehRemoves the HDR+ mode reset on launch or when leaving settings (Pixel 2 only)

    • Synthetic Fill Flash (brightens faces when there is a strong backlight)

    • Motion Photos & Top Shot (if you have the correct Google Photos APK installed)

    • HEVC option

    • Photobooth

    • Adds focus button in Night Sight (Auto/Near/Far)

    • Tracking Autofocus in Photo mode

    • Super Res Zoom sharpening algorithm


    Pixel 3:

    • -Adds 60ps option to top bar in Video mode

    Pixel 3a:

    • Synthetic Fill Flash (brightens faces when there is a strong backlight)

    Download cstark27’s GCam APK

    cstark27’s GCam APK – Google Camera Port: Latest: PXv3.2_GoogleCamera_7.2.010.apk

    How to install GCam Port on Pixel 1/2/3/4

    1. Copy the APK to your phone.
    2. Using a File Manager on the phone, open the APK and install it.
    3. Lauch the GCam from the app drawer.
    4. Start using the application. No extra settings are required. That’s all.

    More:

    How to legally activate MS Office 2019 using Volume License [No tool needed]

    1
    How to legally activate MS Office 2019 using Volume License [No tool needed]

    This is the guide on how to legally activate MS Office 2019 using Volume License. No script or tool is needed to activate MS Office. Before you activate the MS Office on your computer, let me give you a brief overview of this method.

    activate MS Office 2019

    Activating MS Office 2019 legally – No Tools

    Microsoft Office 2019 was released back in September 2018. It took a number of iterations for the Microsoft Office 2019 to see the final release. At the time of writing this guide, the MS Office 2019 is the latest version.

    As usual, the Microsoft Office 2019 came with a subscription price heavy on the user’s pocket. Not everyone is capable of affording the MS Office. Especially, the students who need to make their assignments and presentations using the MS Word and MS Powerpoint, it’s really hard for them to get the MS Office. Universities and institutions often partner up with Microsoft to provide free tools to their students, but that’s not the case everywhere. There are only a few institutions that have joined Microsoft’s program.

    A large number of users looking for tips and tricks to activate their trial version of MS Office. In doing so, they often end up damaging their devices. Having a method to freely and legally activate the MS Office 2019 is not less than a blessing in a disguise.

    This method that we are going to use, it uses the Volume License to legally activate MS Office 2019. Not only that, but it will also activate the MS Office 2016.

    The best part of this method is that you are not going to use any third-party scripts and third-party tools. You can fully trust this method. It will not harm your computer in any way. The only thing you have to do is to enter a few commands in the command line/shell of your computer.

    Preparations

    • To use this method, you must have the Microsoft Office 2019 or MS Office 2016 installed on your Windows 10 computer. If you don’t have Office at the moment, you should first install it.
    • After installation, open the MS Office on your computer and go through the basic setup.
    • You must agree to the terms and conditions of the MS Office before following this procedure.
    • Once you have the Office on your PC, you can follow the instructions below to activate it.

    Legally activate MS Office 2019 using Volume License

    Follow these simple and easy steps to activate MS Office 2019 LEGALLY via Volume License.

    Total Time: 5 minutes

    Open Command Prompt on your Windows 10 PC.

    Click on the Windows button on the lower-left corner of the screen > type “Command Prompt”. As you find it, right-click > Run as administrator.

    In the Command Prompt, open the MS Office 2016 or 2019 Installation Directory

    Depending on your system, enter the following command in the Command Prompt:
    cd /d %ProgramFiles%\Microsoft Office\Office16
    cd /d %ProgramFiles(x86)%\Microsoft Office\Office16

    Now enter this command to convert your Retail License into Volume


    for /f %x in (‘dir /b ..\root\Licenses16\ProPlus2019VL*.xrm-ms’) do cscript ospp.vbs /inslic:”..\root\Licenses16\%x”

    Remember that you will enter this command only if you have installed the MS Office 2019 officially from Microsoft Store. If you used an ISO file, skip this step.

    Enter these commands to activate MS Office via KMS Client

    Enter all these commands one by one. Let each command return its response and enter the next one.
    cscript ospp.vbs /setprt:1688
    cscript ospp.vbs /unpkey:6MWKP >nul
    cscript ospp.vbs /inpkey:NMMKJ-6RK4F-KMJVX-8D9MJ-6MWKP
    cscript ospp.vbs /sethst:kms8.msguides.com
    cscript ospp.vbs /act

    After entering the last command, you will get an “Activation Successful” message.

    Open Microsoft Office 2019 and enjoy!

    Now open any MS Office application and it will not ask you for activation. That’s all.

    Output of the Above Commands

    Here is the output of all the commands that are listed above. I entered these commands to activate my MS Office 2016 on Windows 10 PC. It worked smoothly.

    C:\WINDOWS\system32>cd /d %ProgramFiles(x86)%\Microsoft Office\Office16 C:\Program Files (x86)\Microsoft Office\Office16>for /f %x in ('dir /b ..\root\Licenses16\ProPlus2019VL*.xrm-ms') do cscript ospp.vbs /inslic:"..\root\Licenses16\%x" C:\Program Files (x86)\Microsoft Office\Office16>cscript ospp.vbs /inslic:"..\root\Licenses16\ProPlus2019VL_KMS_Client_AE-ppd.xrm-ms" Microsoft (R) Windows Script Host Version 5.812 Copyright (C) Microsoft Corporation. All rights reserved.

    ---Processing--------------------------

    --------------------------------------- Installing Office license: ..\root\licenses16\proplus2019vl_kms_client_ae-ppd.xrm-ms Office license installed successfully.

    --------------------------------------- ---Exiting-----------------------------

    C:\Program Files (x86)\Microsoft Office\Office16>cscript ospp.vbs /inslic:"..\root\Licenses16\ProPlus2019VL_KMS_Client_AE-ul-oob.xrm-ms" Microsoft (R) Windows Script Host Version 5.812 Copyright (C) Microsoft Corporation. All rights reserved.

    ---Processing-------------------------- ---------------------------------------

    Installing Office license: ..\root\licenses16\proplus2019vl_kms_client_ae-ul-oob.xrm-ms Office license installed successfully.

    --------------------------------------- ---Exiting-----------------------------

    C:\Program Files (x86)\Microsoft Office\Office16>cscript ospp.vbs /inslic:"..\root\Licenses16\ProPlus2019VL_KMS_Client_AE-ul.xrm-ms" Microsoft (R) Windows Script Host Version 5.812 Copyright (C) Microsoft Corporation. All rights reserved.

    ---Processing-----------------------------------------------------------------

    Installing Office license: ..\root\licenses16\proplus2019vl_kms_client_ae-ul.xrm-ms Office license installed successfully.

    ------------------------------------------Exiting-----------------------------

    C:\Program Files (x86)\Microsoft Office\Office16>cscript ospp.vbs /inslic:"..\root\Licenses16\ProPlus2019VL_MAK_AE-pl.xrm-ms" Microsoft (R) Windows Script Host Version 5.812 Copyright (C) Microsoft Corporation. All rights reserved

    . ---Processing--------------------------

    --------------------------------------- Installing Office license: ..\root\licenses16\proplus2019vl_mak_ae-pl.xrm-ms Office license installed successfully.

    ------------------------------------------Exiting-----------------------------

    C:\Program Files (x86)\Microsoft Office\Office16>cscript ospp.vbs /inslic:"..\root\Licenses16\ProPlus2019VL_MAK_AE-ppd.xrm-ms" Microsoft (R) Windows Script Host Version 5.812 Copyright (C) Microsoft Corporation. All rights reserved.

    ---Processing-------------------------- ---------------------------------------

    Installing Office license: ..\root\licenses16\proplus2019vl_mak_ae-ppd.xrm-ms Office license installed successfully.

    ------------------------------------------Exiting-----------------------------

    C:\Program Files (x86)\Microsoft Office\Office16>cscript ospp.vbs /inslic:"..\root\Licenses16\ProPlus2019VL_MAK_AE-ul-oob.xrm-ms" Microsoft (R) Windows Script Host Version 5.812 Copyright (C) Microsoft Corporation. All rights reserved.

    ---Processing-----------------------------------------------------------------

    Installing Office license: ..\root\licenses16\proplus2019vl_mak_ae-ul-oob.xrm-ms Office license installed successfully. ---------------------------------------

    ---Exiting-----------------------------

    C:\Program Files (x86)\Microsoft Office\Office16>cscript ospp.vbs /inslic:"..\root\Licenses16\ProPlus2019VL_MAK_AE-ul-phn.xrm-ms" Microsoft (R) Windows Script Host Version 5.812 Copyright (C) Microsoft Corporation. All rights reserved.

    ---Processing-------------------------- ---------------------------------------

    Installing Office license: ..\root\licenses16\proplus2019vl_mak_ae-ul-phn.xrm-ms Office license installed successfully. --------------------------------------- ---Exiting----------------------------- C:\Program Files (x86)\Microsoft Office\Office16>cscript ospp.vbs /setprt:1688 Microsoft (R) Windows Script Host Version 5.812 Copyright (C) Microsoft Corporation. All rights reserved.

    ---Processing--------------------------

    --------------------------------------- Successfully applied setting. ---------------------------------------

    ---Exiting-----------------------------

    C:\Program Files (x86)\Microsoft Office\Office16>cscript ospp.vbs /unpkey:6MWKP >nul C:\Program Files (x86)\Microsoft Office\Office16>cscript ospp.vbs /inpkey:NMMKJ-6RK4F-KMJVX-8D9MJ-6MWKP Microsoft (R) Windows Script Host Version 5.812 Copyright (C) Microsoft Corporation. All rights reserved.

    ---Processing-------------------------- --------------------------------------- -

    -------------------------------------- ---Exiting-----------------------------

    C:\Program Files (x86)\Microsoft Office\Office16>cscript ospp.vbs /sethst:kms8.msguides.com Microsoft (R) Windows Script Host Version 5.812 Copyright (C) Microsoft Corporation. All rights reserved

    . ---Processing--------------------------

    --------------------------------------- Successfully applied setting. ---------------------------------------

    ---Exiting-----------------------------

    C:\Program Files (x86)\Microsoft Office\Office16>cscript ospp.vbs /act Microsoft (R) Windows Script Host Version 5.812 Copyright (C) Microsoft Corporation. All rights reserved.

    ---Processing--------------------------

    --------------------------------------- Installed product key detected - attempting to activate the following product: SKU ID: 1ecbf9c7-7c43-483e-b2ad-06ef5c5744c4 LICENSE NAME: Office 16, Office16HomeStudentR_Grace edition LICENSE DESCRIPTION: Office 16, RETAIL(Grace) channel Last 5 characters of installed product key: DJ3QD ERROR CODE: 0xC004F017 ERROR DESCRIPTION: The Software Licensing Service reported that the license is not installed.

    ---------------------------------------

    Installed product key detected - attempting to activate the following product: SKU ID: 4f414197-0fc2-4c01-b68a-86cbb9ac254c LICENSE NAME: Office 16, Office16ProjectProVL_KMS_Client edition LICENSE DESCRIPTION: Office 16, VOLUME_KMSCLIENT channel Last 5 characters of installed product key: G83KT

    ---------------------------------------

    Installed product key detected - attempting to activate the following product: SKU ID: 6bf301c1-b94a-43e9-ba31-d494598c47fb LICENSE NAME: Office 16, Office16VisioProVL_KMS_Client edition LICENSE DESCRIPTION: Office 16, VOLUME_KMSCLIENT channel Last 5 characters of installed product key: RJRJK --------------------------------------- Installed product key detected - attempting to activate the following product: SKU ID: 85dd8b5f-eaa4-4af3-a628-cce9e77c9a03 LICENSE NAME: Office 19, Office19ProPlus2019VL_KMS_Client_AE edition LICENSE DESCRIPTION: Office 19, VOLUME_KMSCLIENT channel Last 5 characters of installed product key: 6MWKP

    ---------------------------------------

    Installed product key detected - attempting to activate the following product: SKU ID: d450596f-894d-49e0-966a-fd39ed4c4c64 LICENSE NAME: Office 16, Office16ProPlusVL_KMS_Client edition LICENSE DESCRIPTION: Office 16, VOLUME_KMSCLIENT channel Last 5 characters of installed product key: WFG99 ---------------------------------------

    --------------------------------------- ---Exiting-----------------------------

    Final Words

    That’s all. By now, you have successfully activated your trial version of MS Office 2019 or 2016. If you are facing any difficulties, feel free to drop your comments below. I will try my best to get back to you as soon as possible.
    SamFirm Tool – Download Latest Samsung Firmware [How to]

    SamFirm Tool – Download Latest Samsung Firmware [How to]
    SamFirm in action

    Samsung Galaxy owners can easily download firmware for their phones using SamFirm Tool. In this guide, I will show you the steps to download and install SamFirm tool and also the steps to download the latest Samsung Firmware via SamFirm. Furthermore, you will find the steps to install the downloaded Firmware via Odin3.

    Download Samsung Firmware via SamFirm
    SamFirm in action

    Previous Download Sources vs SamFirm

    To start off, I’d like to say that SamFirm is a blessing in a disguise. I will explain why.

    Samsung is the smartphone leader in the world for a few reasons. One of them is the customer support, and one part of the customer support is the permission of manually installing the firmware. Not only that, Samsung provides all the firmware for its Galaxy devices through its servers. 

    There is a handful of websites that download the firmware files from Samsung’s servers and then provide it to the users. These websites spend a lot of money on their servers to maintain those firmware files, and also to handle a heavy load of traffic. To pay for the servers, such websites and platforms offer two different solutions for downloading the firmware.

    They either let you download the firmware for free, but with restricted download speed. The download speed, in this case, is usually below 100 or 500 kbps. The 2nd solution is that they sell you their premium account which lets you download the firmware at a blazing fast speed. Most of the premium accounts are available on a monthly basis, which is another bottleneck and many customers simply refuse to pay for that. That’s also because many users have to download a firmware once in a blue moon and to them, it doesn’t make sense to buy the account for a whole month.

    SamFirm – Making things easy

    This was a big gap that the SamFirm tool filled. No. SamFirm doesn’t have any premium account service. It doesn’t have any kind of registration involved. Want to know the best part? It doesn’t even have a website involved which means you don’t have to go through a complex UI to finding your desired firmware.

    SamFirm is a simple, good-looking, and easy-to-use tool. The only thing a user has to do is to enter his desired firmware’s CSC, and the phone’s model number and then click on Check Update. The tool finds the latest firmware on Samsung’s servers and gives you the download link.

    There are no download limits placed here. SamFirm will download the firmware as fast as possible. In my case, I had an internet connection of 30 Mbps and I got a consistent download speed of  3 to 3.5 Mbps. It took about 10 minutes to download a 5GB firmware file for my Galaxy S10 Plus. That’s how good the SamFirm tool is.

    The only downside of SamFirm is that you cannot download an older firmware file. It does not have any database linked from where it can retrieve the old firmware files and that’s where those firmware websites take the lead. However, keeping in view the dying trend of rooting and tweaking a Samsung Galaxy Phone, the chances are very meager that you would need an old version of your software. SamFirm always finds and fetches the most up-to-date software with the latest security patch.

    The credit for this great tool goes to zxz0O0 who’s a senior member at XDA-Developers. 

    Down below, you will find the SamFirm download link and also the guide to download the firmware.

    Download SamFirmLatest Version

    • SamFirm 0.3.6Download
      • Remember that SamFirm works only on Windows.
      • Extract the downloaded Package to get the SamFirm.exe file.

    How to download Samsung Galaxy Firmware via SamFirm

    These are the steps to download your desired firmware via SamFirm.

    Total Time: 10 minutes

    Open SamFirm on your computer first of all.

    The very first thing is to open the SamFirm.exe on your computer. It will open the tool on the computer with a few forms/tabs to be filled.SamFirm Tool

    From your Phone, get the CSC and Model Number.

    On your phone, go to Settings > About Phone > Get the Model Number. Now go to About Phone > Software Information > Get the CSC from the Service Provider section.Downloading Samsung Galaxy firmware via SamFirm

    Enter the CSC and Model Number in SamFirm.

    Enter the CSC in Region and the Model Number in the SamFirm tool as shown in the attached picture.Adding details to SamFirm

    Set SamFirm to Auto and Check for Update.

    Click on Auto next to the Region. Now you are all set. Click on the Check Update button and let SamFirm find the update.

    Download the Firmware on your computer.

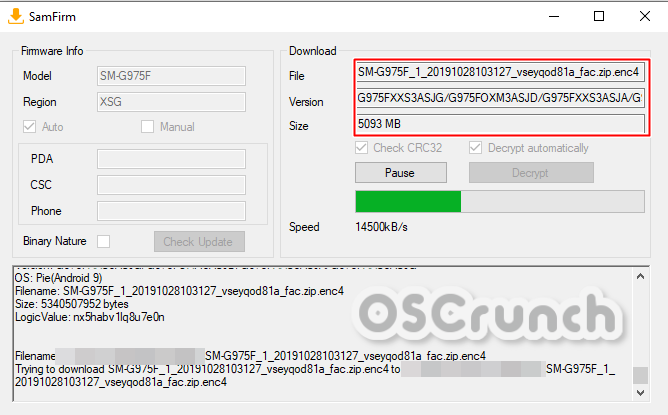
    As it finds the update, it will show File, Version, and Size on the right side. Click on Download to start downloading. Once the download speed appears, the download will start.Download Samsung Firmware via SamFirm

    The download time completely depends on the speed of your internet connection. 

    Follow the steps below to flash or install the firmware downloaded via SamFirm on your Samsung Galaxy phone.

    Preparation

    • You will get the firmware files in a zipped folder on location where you saved them.
    • Extract the zipped file to get the 5 firmware files i.e. AP, CP, BL, CSC, and Home_CSC file.Extract SamFirm Downloaded Firmware Files
      • You will use the CSC file if you want to factory reset the phone. Use the Home_CSC file only if you don’t want to factory reset.Firmware Files downloaded via SamFirm
    • Download and extract Odin 3.13.1 on your computer.
    • Put your Samsung Galaxy Phone in Download Mode. To  do so, turn it off. Now turn it on by pressing and holding one of the following combinations
      • For old Galaxy Phones: Press and hold Volume Down + Power + Home button. As the phone shows a warning, press Volume Up to continue.
      • For phones with no Home button: Press and hold Volume Down + Bixby + Power button. As the phone shows a warning, press Volume Up to continue.
      • For phones with no Home and Bixby button: You can Press and Hold Volume Up + Power button. As the phone boots into the recover mode, select “Reboot to bootloader” and press Power button again. Your phone will go into the Download Mode.
    • Follow the instructions below to flash the firmware now.

    How to install SamFirm downloaded Firmware via Odin

    1. Add the BL, AP, CP, and CSC/Home_CSC files to Odin.
      1. Click on the BL tab and select the BL file.
      2. In the AP tab, select the AP file.
      3. In the CP tab, select the CP file.
      4. Add the CSC or Home_CSC file in the CSC tab.
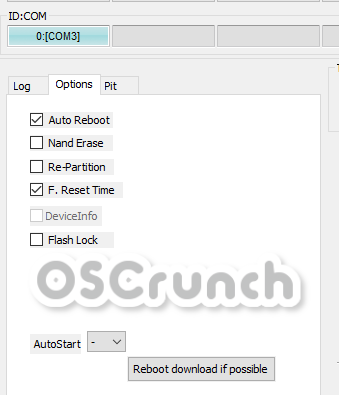
    2. Go to option in Odin and make sure that the only checked options are Auto Reboot and F.Reset.Time.Odin Options
    3. Connect your phone to your computer in Download Mode.
    4. As Odin detects the phone, it will show a blue light and also show “Added” in the logs.
    5. Making sure that all steps were followed, click on the “Start” button in Odin.Install Samsung Galaxy Firmware via Odin
    6. The firmware flashing will start and end in about 5 – 10 minutes.
    7. The phone will restart on its own. Disconnect it now and set it up.

    Conclusion

    That’s all with this guide. Those of you who still don’t know the exact use of flashing a new software, let me give you a few reasons. You can flash a new firmware using the guide given above to manually update your phone, unroot a rooted device, unbrick a bricked handset, or just to refresh everything on the phone. This guide is valid for all Samsung Galaxy phones and tablets released till date. If you have any questions or queries, drop them in the comments below. I will make sure to respond as soon as possible.

    Download N2Ping for PC on Windows and Mac

    0
    Download N2Ping for PC on Windows and Mac
    Running N2Ping for PC on my Windows 10 Computer

    These are the simple and easy steps to download N2Ping for PC. Windows and macOS users can get N2Ping for PC on their Desktop PCs and Laptops.

    N2Ping – Brief Overview

    N2Ping is a VPN application, but it’s not like every other VPN. N2Ping is specifically designed for Chinese users. If you are living inside China and want to access websites/apps outside your country/region, you can use N2Ping to do so. The application is designed using the protocols that will particularly help the Chinese users to bypass all the firewalls set by the Chinese authorities. N2Ping encrypts your data in such a way that none of the Chinese parties can spy on your online activity or know your identity. Another use of this application is that if you want to access a website inside mainland China from outside China, you can do so using this app. It works both ways and that’s what makes this application sweet.

    N2Ping comes for free and is available for both Android and iOS users. Before I show you the steps to install the same application on your computer, let me know why this application is built.

    N2Ping for PC
    Running N2Ping for PC on my Windows 10 Computer

    At this point, I’m assuming that you are not familiar with the Great Firewall of China. The Chinese government has set filters on the internet to keep all the outside traffic away from the Chinese internet space and vice versa. Chinese internet consumers cannot access any platform like Twitter, Facebook, Instagram, and even WhatsApp. They have alternatives to everything instead. For example, as a replacement for Facebook and Instagram, they have platforms like Weibo. As a replacement for WhatsApp, they have WeChat. As a replacement for Google Search, they have Baidu. Similarly, they have tens of replacements of the Google Play Store for Chinese Android phones.

    To use any of the platforms mentioned above, you can use N2Ping.

    In this guide, I am going to show you the steps to download, install, and use N2Ping for PC on your computer via an Android emulator. All you have to do now is to follow the instructions coming up next. 

    Requirements

    Download N2Ping for PC

    These are the 5 steps to get N2Ping on the computer right now.

    Total Time: 5 minutes

    Install the BlueStacks emulator on your computer.

    First of all, download and install the BlueStacks from the guide linked above. After installing, log into the BlueStacks using your Google Account.

    In BlueStacks, open the Play Store.

    Open the Play Store in the emulator now. Make sure that you are logged in. If you are not, log in now.

    In the Play Store, find N2Ping and install it.

    In the Play Store, type “N2Ping” and find it. As you find the app, install lit.

    Open N2Ping on the computer and log in.

    As you finish N2Ping installation, launch it from the BlueStacks Home screen.N2Ping for PC

    Connect to N2Ping and browse the internet. That’s all.

    Connect N2Ping and start browsing the websites and apps you want. That’s all you had to do.N2Ping for PC

    Conclusion

    By now, you should be smoothly running N2Ping on your computer. Remember that N2Ping will not work system-wide. It means that everytime you want to use N2Ping, you will open the BlueStacks, and then connect to it. Furthermore, you will also open the browser within the BlueStacks to start using N2Ping. It’s a must to have a Chinese phone number to create free N2Ping account. Without that, it will not work. If you have any questions regarding this tutorial or the app, feel free to drop them in the comments below. I will try my best to get back to you as soon as possible.
    Download GoldenKey VPN for PC on Windows and Mac

    0
    Download GoldenKey VPN for PC on Windows and Mac

    This is the tutorial on how you can download the GoldenKey VPN for PC. Users can download and install GoldenKey VPN for PC on Windows and Mac. 

    GoldenKey VPN for PC on Windows 10
    Using GoldenKey VPN for PC on Windows 10

    GoldenKey VPN

    The GoldenKey VPN is a free VPN application available for Android and iOS devices. With over 50,000 downloads this is one of the well-reputed applications. The GoldenKey VPN has all traits of a good VPN. It can perform most of its tasks flawlessly.

    When you pick up a VPN, your main concern is how it handles your privacy. GoldenKey VPN does that with the help of foolproof encryption. You can forget worrying about your online activity and your traces on the internet once connected through GoldenKey VPN. It will completely mask your identity so that no one can know you or your location for that matter.

    Apart from making your online presence secure, it also allows you to bypass the geographical internet restrictions. If your ISP, your institution, or your government has blocked you from accessing some websites or apps, you can easily bypass all of them with GoldenKey VPN.

    Another great use of GoldenKey VPN is to protect you from hackers and attackers. If someone with wrong intentions is spying on your internet and wants to get into your computer, you can block their ways with the help of the GoldenKey VPN.

    One of the most common uses of apps like GoldenKey VPN is with the public WiFi hotspots. You can never trust a public WiFi network so you should take measures to stay safe beforehand. GoldenKey VPN can do all of this without any registration or fee requirements. This is a completely free app.

    GoldenKey VPN for PC

    As mentioned above, GoldenKey VPN is specifically built for smartphone devices. If you have been using this VPN for a while and now you want to use it on your computer, you can do so with the help of this guide. I am going to show you the steps to install GoldenKey VPN on a computer running Windows 7/8/10 or macOS.

    Requirements:

    • Android Emulator – Download and Install. We recommend BlueStacks.
    • A desktop PC or Mac
    • Windows or macOS operating system.

    Download GoldenKey VPN for PC

    Follow these simple steps to get the GoldenKey VPN for PC up and running.

    Total Time: 5 minutes

    Install the BlueStacks emulator and open it.

    First of all, open the newly installed BlueStacks emulator. Log into the BlueStacks using your Google Account.

    In the BlueStacks, open the Play Store.

    Now open the Play Store. Make sure that you are already logged in. If you are not, login now.

    Look for GoldenKey VPN in the Play Store and install it.

    In the Play Store find “GoldenKey VPN”. As you find it, install it.GoldenKey VPN for PC

    Open GoldenKey VPN from Home.

    Now launch the VPN from the Home screen of the BlueStacks emulator.GoldenKey VPN for PC in BlueStacks

    Connect to the VPN and start browsing!

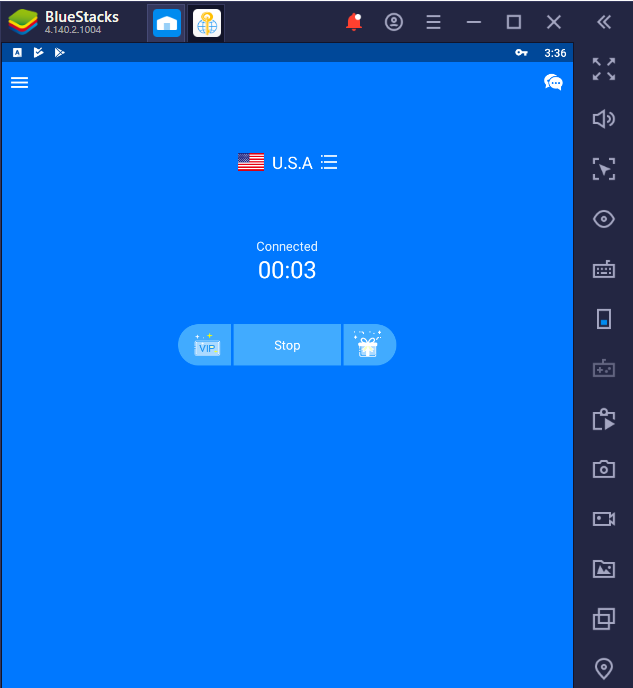
    Press the connect button in the GoldenKey VPN. Launch the browser inside the BlueStacks to start using the VPN. That’s all.GoldenKey VPN for PC on Windows 10

    Conclusion

    You have the GoldenKey VPN installed now. One important thing to keep in mind is that this VPN is not going to work with the browser installed on your Windows. Everytime you want to use the VPN, you will have to open the BlueStacks and use the browser inside the BlueStacks. I know it’s a downside, but that’s the only way to use this app for now. If you have any questions to ask, feel free to drop them in the comments section down below. I will try my best to get back to you as soon as possible.
    How to install Star VPN for PC on Windows 10 and macOS

    0

    This is the tutorial to download and install Star VPN for PC. Windows 10 and macOS users can install Star VPN for PC on their Desktop PC and Laptop.

    Star VPN for PC
    Running Star VPN for PC on my Windows 10 computer

    Star VPN – Make your Internet Safe!

    Applications like Star VPN are built to make the online activity of internet users safe and secure. Star VPN encrypts your internet in such a way that online parties with wrong intentions cannot look into your identity, they cannot see what you are doing online. Not even your location can be compromised when you are accessing the internet through Star VPN.

    You may or may not use VPNs for your ordinary internet use when you are at home, but if you use the Public WiFi Hotspots every now and then, Star VPN becomes a necessity. That’s because the open internet connections are easily prone to malicious attacks.

    Apart from securing your communication with websites and web apps, another great use of Star VPN is to access the websites and apps that do not work in your region and also the ones that are blocked by your ISP. Furthermore, if you are unable to access something from your institution, you can bypass all the gateways using the Star VPN.

    The best part about this app is that it comes for free. It has unlimited bandwidth and also makes your internet surfing slightly fast.

    Originally, the Star VPN is built for Android and iOS platforms. If you want to run it on your computer, you can follow the steps given below to get it right now.

    Requirements

    1. Android Emulator – Download and install. We recommend BlueStacks.
    2. A desktop PC or a Laptop.
    3. Windows or macOS operating system.

    Star VPN for PC

    These are the few simple and easy steps that will help you to install Star VPN on your computer right now.

    Total Time: 5 minutes

    Open the Android emulator on your computer and log in.

    On your computer, download and install the emulator of your choice. Now open the emulator and login using your Google Account. This is important to access the Play Store.

    In the emulator, open the Play Store and find Star VPN.

    Now open the Play Store and search for Star VPN in the search bar.

    Install Star VPN from the Play Store now.

    As you find the Star VPN, install it. It will take only 1 or 2 minutes.

    Open Star VPN and connect to any location.

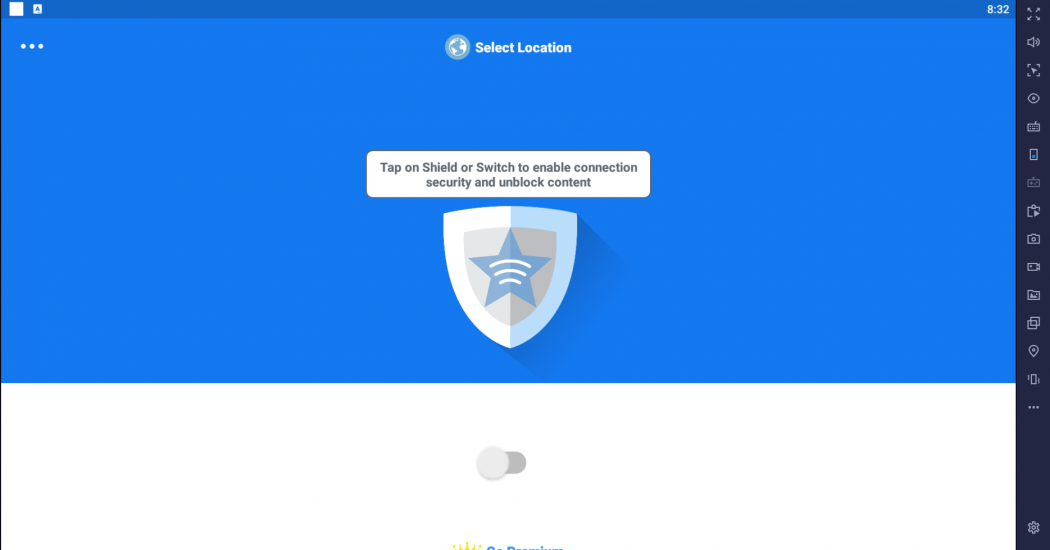
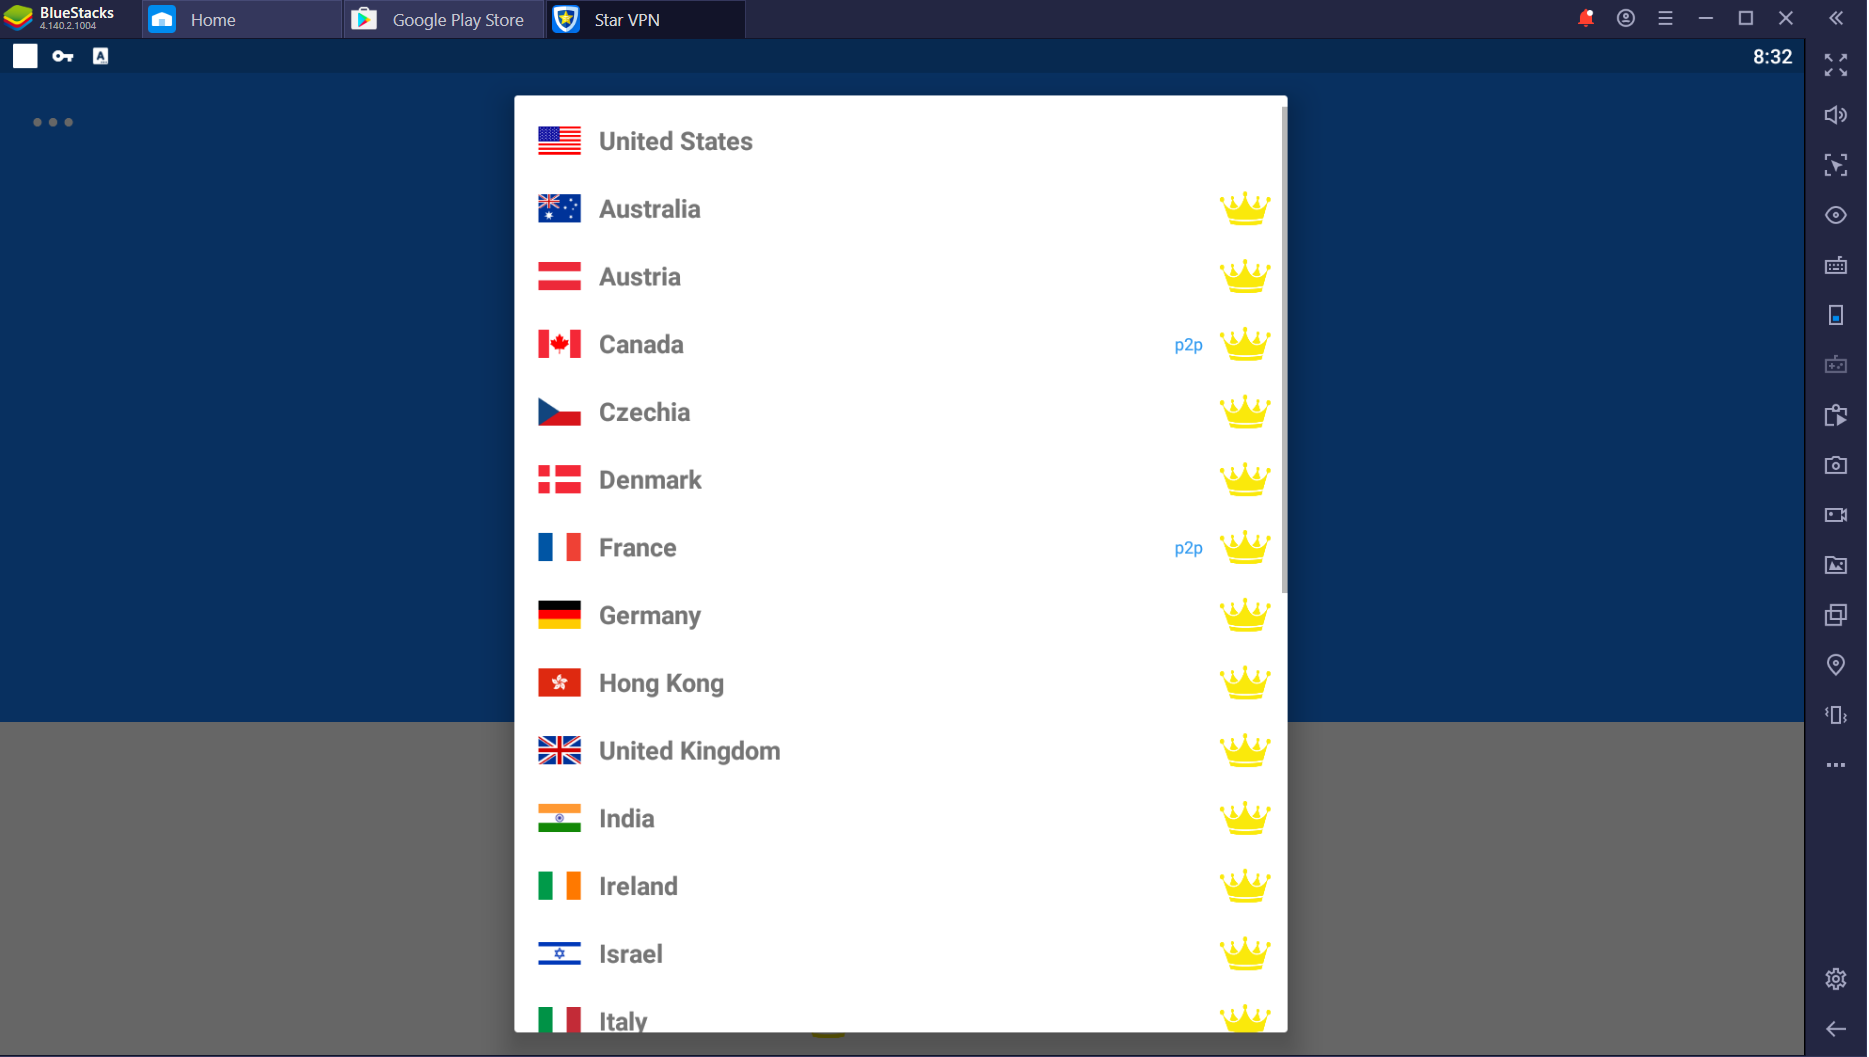
    Open Star VPN in the emulator and connect it.Star VPN for PC

    Access the internet securely now. That’s all.

    Now open the browser inside the emulator to start accessing websites through Star VPN.Star VPN for PC

    Conclusion

    At this point, Star VPN is running flawlessly on your computer, but there is one catch. It will not work system-wide in your computer. Everytime you want to use Star VPN, you will have to open the emulator and then open the browser within the emulator to use Star VPN. Unfortunatley, there is no other method to use Star VPN for PC at the moment. If you have any questions regarding this guide or the Star VPN, ask us in the comments down below.

    Easily download TradingView App on PC via Android Emulator

    0
    Easily download TradingView App on PC via Android Emulator

    Here in this guide, you will find the steps to download TradingView for PC. The TradingView App for PC can be installed on Windows 10/8/7 and macOS.

    TradingView app for PC
    Running TradingView for PC on my Windows 10 PC.

    TradingView – Charts for Investors

    TradingView, as its name suggests, is a financial platform for analysts, traders, and investors. On TradingView, users can create, view, and share charts showing analytics and data related to the Stock Market, Cryptocurrency, Forex, Futures, and Indices.

    The charts on TradingView can help investors and stock mark enthusiasts to keep a track on the performance of their target. TradingView is good enough to give the users an idea of when they should invest and when they should go out of an investment. The charts are designed to give various indicators to the viewers. 

    TradingView is connected to the world’s most popular exchanges for all of its features. It shows you the realtime data to make accurate decisions.

    The most popular use of TradingView is to watch the cryptocurrency charts. If you are a cryptocurrency investor, you can track the real-time performance of the Bitcoin. The indicators will give you an idea of the foreseen and unforeseen circumstances.

    A good feature of this application is the sync between the web and the app. It doesn’t matter where you are running TradingView, you will have your data synchronized across all your devices.

    For computers, TradingView has a website. If you don’t want to run the website all the time and you want to install its application on the PC instead, you have landed at the right place. We are going to install the TradingView application on the computer. The Android version of TradingView can be installed on computers via an Android emulator. Follow the instructions given below to get TradingView for PC without any further wait.

    Requirements

    1. Android Emulator – Download and install. We recommend BlueStacks.
    2. Windows or Mac PC or Laptop.
    3. Mouse & Keyboard.

    Download TradingView App on PC

    Follow these simple steps to download and install TradingView for PC.

    Total Time: 5 minutes

    Open the Emulator on your computer.

    First of all, log into the Emulator using your Google Account. This is important in order to access the Play Store.

    In the Emulator, open the Play Store.

    Open the Play Store now and search for “TradingView”.

    Install TradingView from the Play Store.

    As you find the TradingView App, install it.TradingView app for PC

    Launch TradingView on the computer now.

    Right after installation, open the application on your computer.

    Log into your TradingView Account and Enjoy it!

    You can either create an account or login using your existing TradingView account now. That’s all.TradingView app for PC

    Conclusion

    That’s all. You have now successfully installed the TradingView on computer. You can also watch the performance of all listings on TradingView without logging in. It should completely be your own preference how you want to use this applicatoin. If you have any questions regarding TradingView or this installation guide, feel free to reach out to us. I will try my best to get back to you.

    How to download Fire.onion TOR Browser for PC via BlueStacks

    0
    How to download Fire.onion TOR Browser for PC via BlueStacks

    Follow the steps given in this guide to download Fire.onion TOR Browser for PC. Users can install Fire.onion TOR Browser for PC on Windows 10 and macOS.

    Fire.onion TOR Browser for PC
    Running TOR Browser on my Windows 10 PC

    Fire.onion – TOR Browser

    When you go after a TOR Browser for you a PC or a smartphone, you will find a multitude of them in the app stores. Fire.onion is one of the best among those. It’s a TOR Browser with the basic features on the horizon. The TOR Browser’s purpose is to defend the users from malicious attacks that happen every now and then on the internet space. If you are someone who takes privacy very, very seriously, you can keep the trackers away with the help of this browser. With the help of its multi-layer encryption, it keeps your fingerprints off from the internet. It means that none of your traces will be left online when you use the internet through the TOR Browser. No history or cookies are recorded when browsed through TOR Browser.

    The sole purpose of TOR Browsers is to make your internet activity safe and secure,  and this is what these browsers should be limited to. Especially, when you are using a public WiFi hotspot, you must take your privacy and security seriously.

    Installing TOR Browser on PC

    That said, we will now move towards the guide to installing the Fire.onion – TOR Browser on PC. We are basically going to install the Android version of this browser on a Windows 10 PC and Mac. This will be done with the help of an Android emulator. You can use an emulator like the BlueStacks, NoxPlayer, MEmu or any other, but our recommendation is BlueStacks.

    Take a look at the steps to download Fire.onion TOR Browser for PC now.

    Requirements:

    1. Android Emulator – Download and install.
    2. Windows 10 PC or Mac
    3. Mouse & Keyboard

    Download Fire.onion TOR Browser for PC

    These are the simple steps to install and use TOR Browser for PC

    Open BlueStacks on your computer.

    On your computer, open the BlueStacks that you just installed. Login into the emulator using your Google Account.

    In the BlueStacks, open Play Store.

    Now open Play Store in the emulator and search for TOR Browser.TOR browser for pc

    Install TOR Browser from the Play Store.

    Install the TOR Browser from the Play Store search results.Fire.onion TOR Browser for PC on BlueSTacks

    Open TOR Browser from Home.

    After installation, open the TOR Browser from the Home of BlueStacks and click on connect.Fire.onion TOR Browser for PC on BlueSTacks

    Use TOR Browser inside BlueStacks. That’s all.

    You can now use the browser inside the BlueStacks. Remember that this will not work outside BlueStacks.Fire.onion TOR Browser for PC on BlueSTacks

    Final Words

    That’s all. You have now successfully installed the TOR Browser on your computer. If you have any questions or queries regarding this installation guide, feel free to drop your comments below.

    Download Videos From Instagram Directly on Android [ Free ]

    0
    Download Videos From Instagram Directly on Android [ Free ]

    Hello, I found a perfect app to download videos from Instagram directly on Android devices. You all know the fact that you cannot download videos and pictures from Instagram directly. We always need a third-party service or app which most of the time stop working or they won’t work at all. However, if you don’t want to try any other app, you can always go with the screenshot option. But, What of the videos? you cannot screenshot a video, but you can use screen recorder apps to capture the video in the frame.

    To make it short there is no direct option to download videos from Instagram. Until now, the app I am giving you today will do all the tasks without any issues. Not you will be able to download videos, you can also download pictures directly, no need to take screenshots.

    By going with the screenshot is not a bad option but the first thing you will notice bad image quality and afterward, you have to crop the screenshots. But with OGInsta+ you can download any video or image with their original resolution & quality.

    Moreover, the best part is, you can use OGInsta+ side by side with the stock Instagram app. Not like Instagram+ where you have to delete the stock app and then you can use Instagram+. One more thing, you can download the stories, you can zoom on profile pictures, and so much more.

    So If you want to learn how to use OGInsta+ and Download Videos From Instagram Directly on Android. You should keep reading and at the end of the post, you will get what you need.

    Download OGInsta+:

    Use the following link to download the latest version of OGInsta+. Keep that in mind, it would be nice If you download OGInsta+ APK on your Andorid device. Since it’s a modified version of Instagram. You cannot download it from Google Play, there is no need to worry about anything. OGInsta+ is not a spam app, I have tested it on my own device and then I am posting it here.

    download videos from Instagram

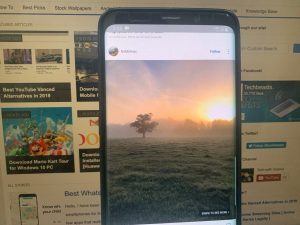
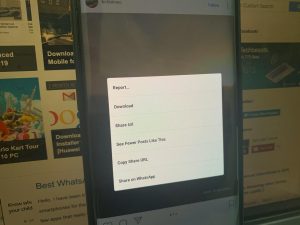
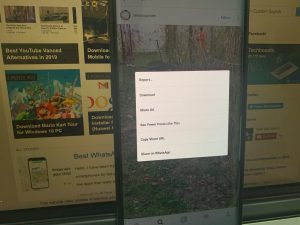
    You can see the screenshots below that I have tried OGInsta+ on my own Android device and it works perfectly.

    OGInsta+ Screenshots:

    OGInsta+ Features Infographic:

    download videos from Instagram

    Download Videos From Instagram Directly on Android:

    1. First, you need to download the OGInsta+ APK from the link above. Please directly download the APK on your Android device.
    2. Afterward, you need to install the OGInsta+ APK as you do with all the other APKs. Moreover, make sure you have enabled unknown sources installation on your device.
    3. Once the OGInsta+ App is installed, launch it and login with your Instagram account. Sometimes it gives an error when you are trying to login with Facebook. I would suggest you should use your Instagram login and password.
    4. Now that you have logged into your Instagram account, tap on any video, picture or story. Let it load up, now tap on the 3dot icon located at the top right side.
    5. You will see a number of options, Tap on the download, after that you will see the downloading pop-up at the bottom of the screen.
    6. After a few seconds, the video or image that you have downloaded will be in your Gallery.

    That’s all. This is how you can Download Videos From Instagram Directly on Android for free.

    How to manually install XAPK files on Android

    0
    How to manually install XAPK files on Android

    Follow the instructions given here to manually install XAPK files on Android. Not only Android smartphone, you can install the XAPK files manually on an Android emulator as well.

    XAPK files – What’s different?

    Before I explain what are the XAPK files, I’m assuming that you already know what are APK files. In case you don’t, you can assume the APK files to be the setup files for Android phones just like there are exe files for Windows PC and dmg files for macOS.

    While the term APK is the official Android application package file format, the XAPK is not. This term is invented by Android users for a specific purpose.

    The XAPK file includes the APK file of an Android application, and its data files too. For example, when you download a big Android game like PUBG Mobile or COD Mobile, you must have seen that the game downloads its data after you launch it. That data goes into the OBB files. If you have the OBB files beforehand, you can put them manually in the OBB folder. This will skip the need for downloading the game’s data after installation.

    manually install XAPK files on Android

    There are apps and games their whole data packed inside the APK files. For such games/apps, you don’t need the XAPK file. But if you want to install a big game manually, you would need its OBB files and the APK.

    Back in the day, there used to be unoffiical sources providing the OBB files along with the APK files. A couple of years back, this trend changed and the new unofficial sources started providing the XAPK files. XAPK files packed the OBB files and APK files into one file. To install the XAPK files, a number of XAPK installers landed in.

    Unfortunately, the XAPK installers are not available in the Play Store. They are all available on platforms other than the Play Store. If you have got an XAPK file of your desired game and now you are unable to find an XAPK installer, you can install it manually.

    I’m going to show you how you can unpack an XAPK file and how you can install it manually on your Android phone or even on an Android emulator.

    Manually install XAPK files on Android

    1. First of all, you need the XAPK file of the game you want to install.
    2. Also, install the 7zip tool on your computer.
    3. On the computer, locate the XAPK file and right-click on it > 7zip > Extract here.Manually install XAPK
    4. The file will be extracted and you will get the following files
      • your game’s apk going by the name “com.gamepackage.apk”.
      • A folder named Android with the folder obb having the game files inside.XAPK Files
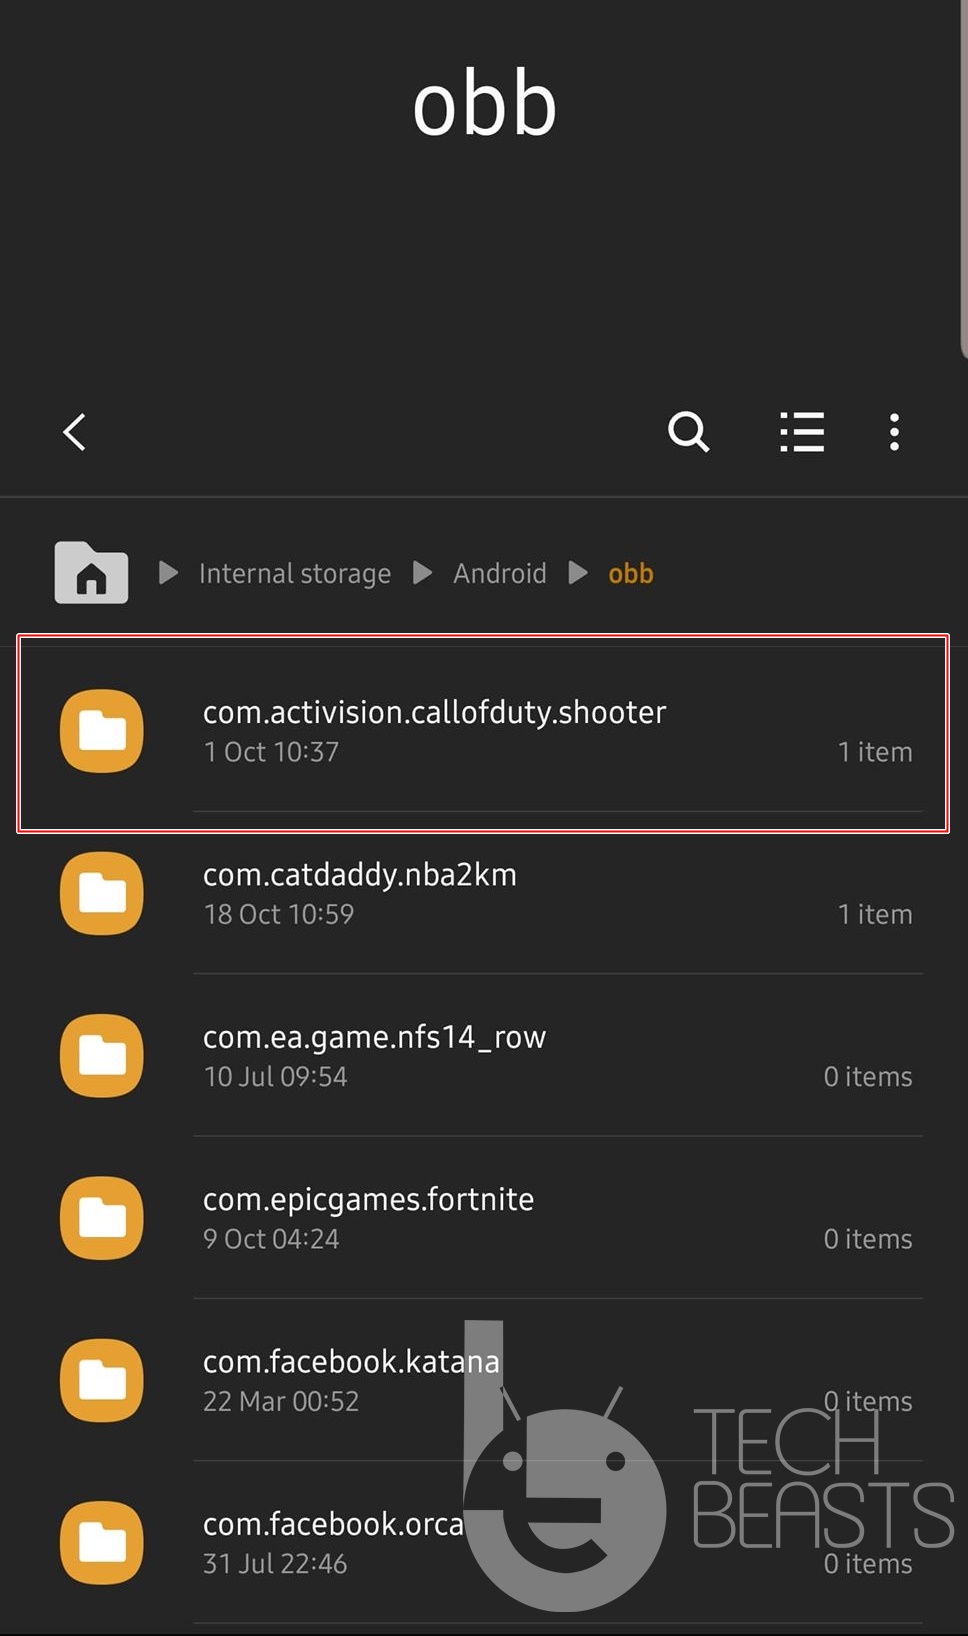
      • For example, in our case, the folder inside the obb is com.activision.callofduty.shooter – We will copy this folder.
    5. Copy the APK file and the content of the obb folder to your phone’s internal storage.
    6. On the phone, use a File Manager and locate the files that you just copied.
    7. Now copy the obb folder and paste it to Internal Stoage > Android > obb.
    8. Now open the APK file of the same game using the File Manager.
    9. Install the APK.
    10. Launch the game from the home screen.
    11. The game will automatically detect its files and run. That’s all.

    Installing XAPK files on Android Emulators

    The simplest method is to directly open an XAPK file on your computer. Emulators like BlueStacks have their own XAPK handlers which can automatically extract and install the XAPK files. In case your emulator doesn’t have this option, you can follow the instructions given below.

    manually install XAPK files

    These are the steps to install XAPK manually in the BlueStacks.

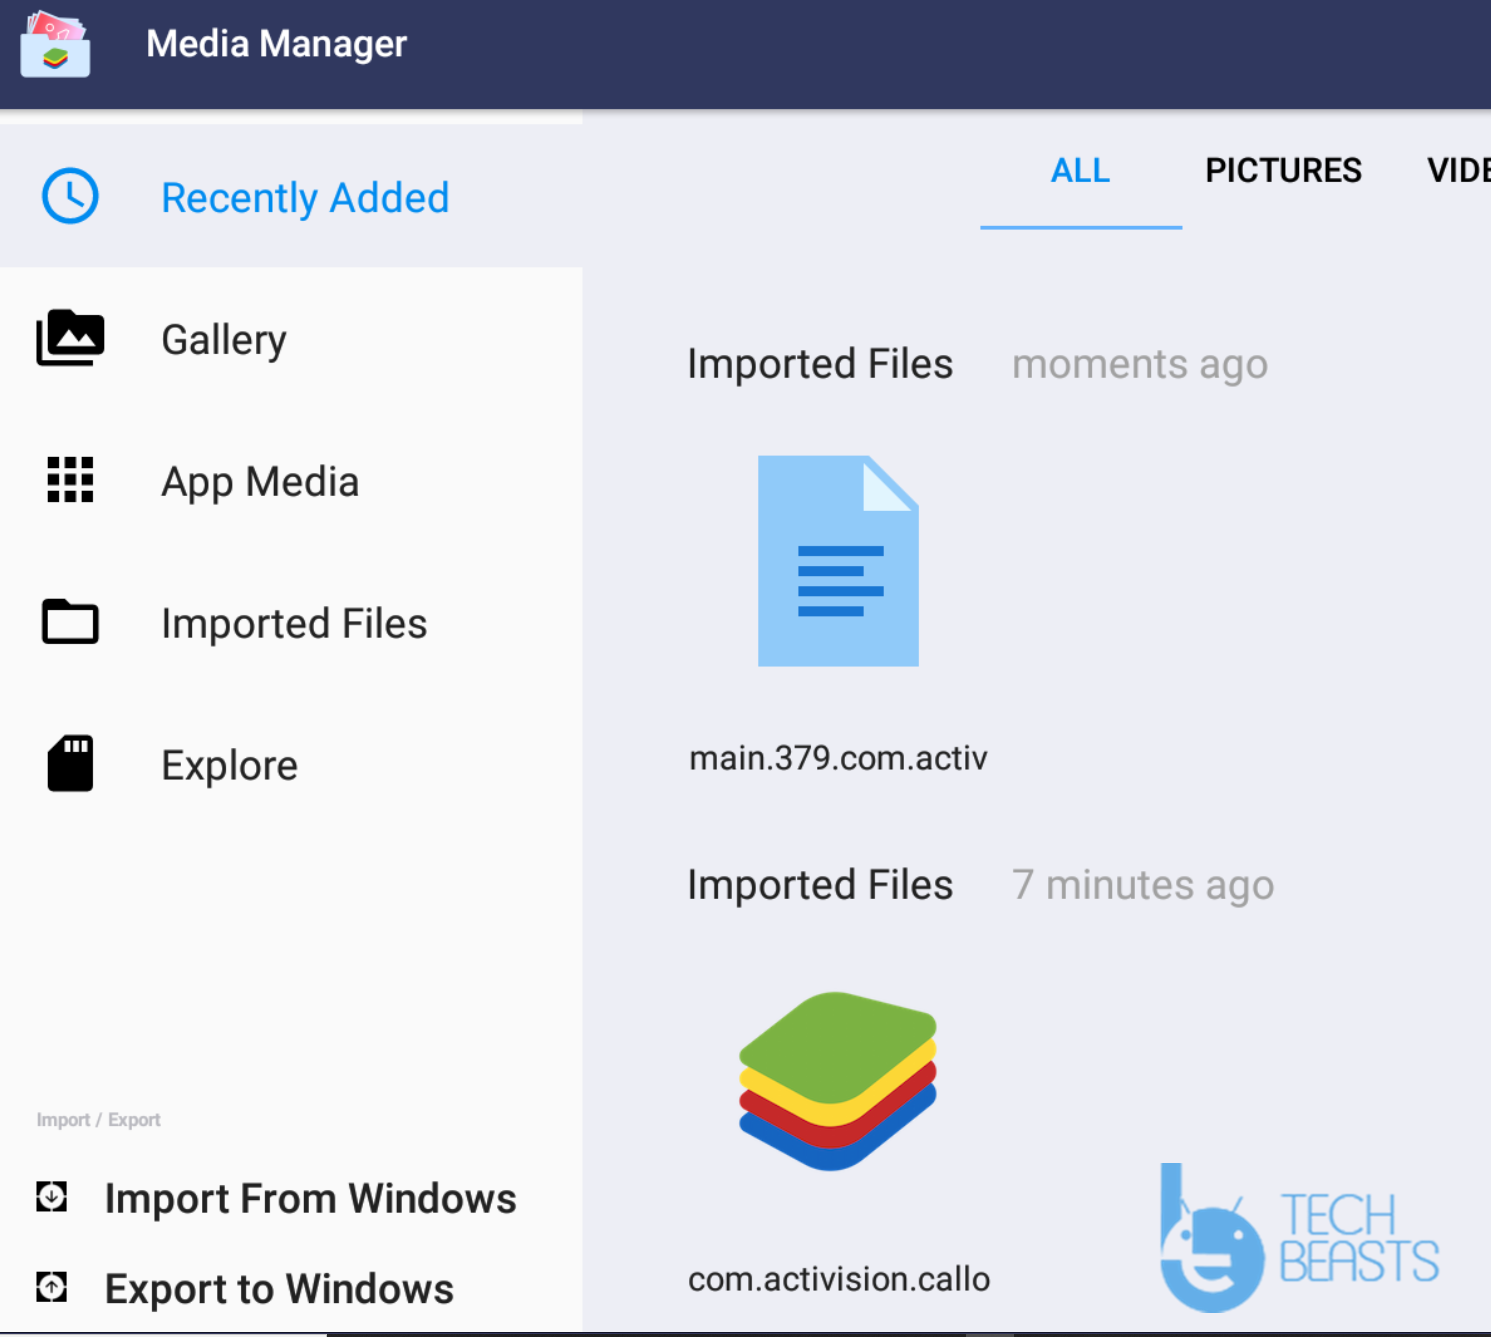
    1. To install the XAPK file on Android emulator like the BlueStacks, open the BlueStacks, and click on More Apps > Media Manager. 
    2. Click on Import from Windows.
    3. Now locate the folder where you extracted XAPK folder.
    4. Click on Android > obb > PackageName > obb file > import it.
    5. Similarly, copy the APK file from Windows to the emulator.
    6. Now in the BlueStacks, go to the Media Manager > Explore > Android > obb > Create a new folder with the name exactly as the obb package name.
    7. Copy the obb file to this folder now.
    8. Install the APK file in BlueStacks now.
    9. Launch the game.
    10. It will be up and running. That’s all.

    Final Words

    The method for all Android smartphones and tablets will remain the same, however, it may differ for the Android emulator. If you have any questions or queries regarding the XPAK files or this installation procedure, feel free to drop it in the comments section down below. I will try my best to get back to you as soon as possible.