Home Blog Page 27

How to Install TWRP Recovery using Odin
1
How to Install TWRP Recovery using Odin

Since the departure or the death of CWM recovery, the only custom recovery that has been keeping the Android custom development alive is the TWRP recovery. Apart from being the only active custom recovery, TWRP is also the best custom recovery if we just have a look at the past and compare it with the options we had earlier. TWRP has a touch interface, which makes the UI quite interactive and user-friendly.Install TWRP Recovery using Odin

The options available in TWRP recovery do not need a person with any past knowledge of  Android development or power usage. You can just push it onto your Android phone and start using it the way you wish to flash the files or utilize other features of the recovery.

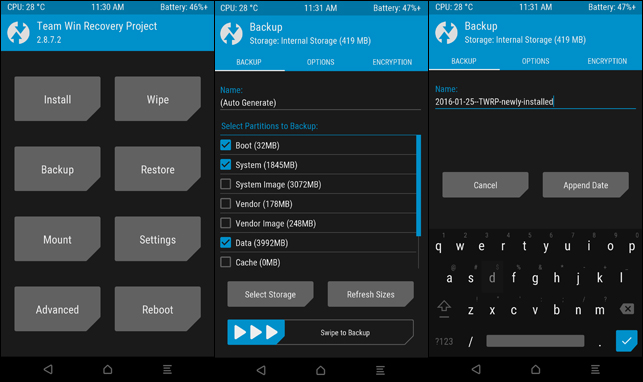
In case you are wondering what we are talking about, let’s clear that out first. Custom recoveries like TWRP allow you to flash files like Custom ROMs, SuperSU, MODs, and Tweaks. These recoveries also enable users to wipe cache, Dalvik cache and even the system of the phone. You can use a custom recovery to create a Nandroid backup as well.

The recovery also allows you to mount different storage partitions while you are out of the system and booted into the recovery. There are many other uses of a custom recovery, but the ones mentioned here are the basic features that you need to know about.

Now there are many different methods to install a TWRP recovery. You either flash it as a .img file through ADB commands, you can flash it using a .zip file as well and you can even use applications like Flashify to flash it using your phone only. When it comes to Samsung devices, I personally find it the easiest thing to flash a TWRP recovery.

On Samsung Galaxy smartphones, you can simply flash the TWRP recovery using an img.tar or .tar file in Odin. Samsung’s flash tool has made it easy for users to install custom recoveries, root the phone or flash stock firmware on the phone. Whenever you go out luck with your phone, Odin acts as a life savior by doing the necessary things to recover your phone.

To install TWRP Recovery using Odin, you need to follow a few steps. We have got them all written here. Have a look and learn to install/flash a TWRP recovery on your Samsung Galaxy device now.

Disclaimer: In case of a mishap, TechBeasts or the recovery developers may not be held responsible. Make sure that you are doing everything at your own risk.

How to Install TWRP Recovery using Odin


  1. Download and install Samsung USB drivers on your PC.
  2. Enable USB debugging mode and OEM Unlocking on your Samsung Galaxy smartphone.
  3. Download and extract Odin3 according to your choice. [For Galaxy smartphones prior to the Galaxy S7/S7 Edge, you can use any version of Odin from Odin 3.07 to Odin 3.10.5]
  4. Download the TWRP recovery in a .img.tar format according to your device.
  5. Copy the TWRP recovery file on your desktop.
  6. Now open the Odin.exe tool and click on PDA or AP tab.
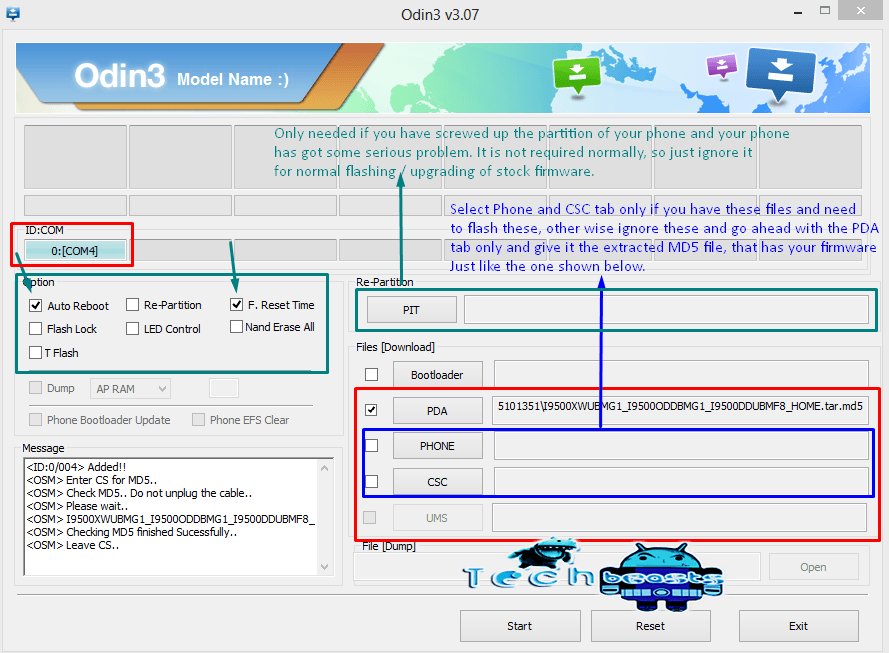
    Install TWRP Recovery using Odin
    In the PDA tab, you will select the TWRP-recovery.img.tar file. The image is only placed here as a reference and you shouldn’t get confused with the file shown in the PDA tab in the image.
  7. As soon as a small window pops up, select the recovery.img.tar file in that.
  8. Odin will now load the recovery file. The only options checked in Odin should F.Reset.Time and Auto-Reboot. Uncheck all other options.
  9. Once the recovery file has been loaded, it’s time to connect your phone to your PC in download mode. To do so, first, turn off your phone completely. Now turn it on by pressing and holding Volume Down + Home + Power key. As soon as you see a warning, press Volume Up to continue.
  10. Now that you are download mode, plug in the data cable.
  11. As soon as a successful connection has been established, the ID:COM box in Odin will turn blue or yellow depending upon your version of Odin.
  12. Now click Start in Odin and sit back while it flashes recovery for you. Once the recovery flashing process ends, your phone will reboot. Disconnect your phone now and boot into recovery mode by pressing Volume Up + Home + Power Key.
  13. That’s all.

Install TWRP Recovery using Odin

Don’t forget to create a Nandroid backup right after flashing the TWRP recovery.

That’s all. Now learn:  How To Flash Stock Firmware On Samsung Galaxy With Odin and How To Root Samsung Galaxy With CF-Auto-Root In Odin.

Download Asphalt 9 Legends on PC Windows 10

0
Download Asphalt 9 Legends on PC Windows 10

Follow this guide to download Asphalt 9 Legends for PC. You can download Asphalt 9 Legends on PC powered by Windows 10 or macOS.

Asphalt 9 Legends is the successor of the famous racing game Asphalt 8. Gameloft has been working on this game for the past few months. The game has entered its soft-launch phase. Asphalt 9 Legends is for all the gamers who have been missing the fun and thrill in the racing games.Asphalt 9 Legends on PC

Asphalt 9 Legends is much like the Asphalt 8, but with a number of new features. The game comes with several modes. You can start your career as a street racer or you can jump in the daily events to boost up your profile.

While racing in the career mode, players can race with up to 7 different players all over the world. These 7 players will be the real users sitting in another corner of the world. The 8 player multiplayer mode will take your adventure to a whole new level. The goal in the career mode is to become the best street racer. As you level up in the career mode, you will find out the difficulty increasing in accordance with your level.Asphalt 9 Legends on PC

Asphalt 9 Legends features over 50 different hypercars from real manufacturers. You can find cars from companies like Buggati, Lamborghini, Ford, Ferrari, Woks Wagen, Mercedes and many others. The cars in this game have been crafted to provide maximum attention to detail. You will find them as amazing as real cars that you see on the roads around you. The nail-biting racing tracks will literally give you chills. Gameloft has selected some tremendous locations to conduct the races on.Asphalt 9 Legends on PC

All the cars in this game are highly customizable. You can modify your car from its tires to its engine. If you don’t like the paint job of your car, go to the workshop and get it a new color. There is a variety of vinyl available. Apply body kits to give your car a monstrous look. Add the suspension upgrades for better handling.

Graphics is one department where Gameloft never disappoints its users. Asphalt 9 Legends sports console-quality graphics. If you are carrying a good device, you will definitely fall in love with the visuals of this game. Asphalt 9 Legends has outperformed all previous games of Gameloft in the graphics department.

Download Asphalt 9 Legends on PC Windows 10

If you are willing to play Asphalt 9 Legends on PC running Windows 10, you can easily do that. Usually, Gameloft releases its games for Windows OS as well. The Asphalt 8 and some other games of Gameloft are available in the Microsoft Store. The Asphalt 9 Legends will likely make it to the store too. However, in this guide, I will share two different methods to install Asphalt 9 Legends on PC. The first method will explain how to install it from the Windows Store and the 2nd method will use the BlueStacks N Android emulator. You can choose the method according to your liking. Here is how to install Asphalt 9 Legends on PC Windows 10.

Download Asphalt 9 Legends on PC via Microsoft Store

  1. On your computer, open Microsoft Store.
  2. In the Microsoft Store, search for “Asphalt 9 Legends”.
  3. The search results will show you the game.
  4. Install the game now.
  5. The game will appear in all programs after installation.
  6. You can launch the game and play it on your computer with the help of keyboard and mouse.

Download Asphalt 9 Legends on PC via BlueStacks N

  1. Download and install BlueStacks N on your Windows computer.
  2. Open BlueStacks N and navigate to My Apps > System App > Google Play Store.
  3. Now in the Play Store, type “Asphalt 9 Legends” in the search.
  4. The game will appear in search results, install it.
  5. After installation, the game will appear under My Apps.
  6. Launch the game and play it with your Mouse and Keyboard now. That’s all.

Conclusion

So that’s how we got the Asphalt 9 Legends on a computer. The game is built for the Android OS, however, the beauty of Android is, it can be easily emulated on a computer. Apart from that, Gameloft releases its mobile games for the Windows OS too. So, if you want to run an Android game by Gameloft on a computer, you can always do that either with the help of Microsoft Store or with the help of a good App Player. The Windows Store method is better as the game directly runs on your computer, it doesn’t lag or come up with any other issue. If the game is not available in the Windows Store and it’s out for Android, then the 2nd method is going to be your choice.

Let me know how did you get this game on your computer. If you have any queries, feel free to drop them in the comments section below.

Cast To Roku From Android, PC and Mac [Tutorial]

0
Cast To Roku From Android, PC and Mac [Tutorial]

Today, I will tell you how to Cast To Roku From Android, PC, and Mac. You will be thinking it’s very easy to do, nowadays, everyone uses YouTube and Netflix. Gladly both have screencast options and there is no doubt you can easily cast to Roku while using both of these apps.

Play a video either on Netflix or YouTube and tap on the cast button, select Roku from the list. However, it’s not the same case when it comes to other video streaming platforms. Moreover, if you have a video on your local storage, you won’t be able to Cast To Roku From Android, PC, and Mac.

Now when you will be in such type of situation you will be needing third-party apps and tools to cast your screen to Roku. This guide will be handy if you are not using YouTube & Netflix, they both have an open protocol called DIAL. This open protocol lets you cast your screen to Roku with any Hassle. But you must make sure that your device and Roku are in the same network.

Enough said, Let’s start my guide and tell how to Cast To Roku From Android, PC, and Mac.

Requirements:

  • Make sure Screen Mirroring is turned on Roku.
  • Settings > System > Screen Mirroring.
  • Also, both the devices should be on the same WiFi Network.

Cast To Roku From Windows:

Let’s start with Windows first. The good thing is that all the Windows version comes with the support of Miracast. That means you can easily cast to Roku from your Windows 10 & 8 PC or Laptop.

As I said before, make sure Roku and your Windows PC or Laptop should be on the same Wifi network, otherwise, you won’t be able to cast your PC screen to Roku TV.

Heed the instructions below:

  • Head over to the notification button located at the bottom right side of the screen.

Cast To Roku From Android, PC, and Mac

  • Click on it and you will be presented with a number of options.
  • Look for Project and click on it.
  • On the next page, you will again see different options.

  • Click on the ‘Connect to a wireless display’.
  • You will see the list of all the available devices ready to project.
  • Select Roku and allow the connection on your Roku TV.

Cast To Roku From Android:

When it comes to Android, it’s easy peasy. You don’t have to do anything special. All you need to do is head over to the Settings and follow the instructions below.

  • On my Samsung Galaxy S10 Plus, I used the following settings.
    • Settings -> Connections -> More Connection Setttings -> Nearby Devices Scanning.
  • On my Huawei, I used the following settings.
    • Settings-> Device Connection -> Mirror Share.
  • Lastly when I used the following settings to Cast To Roku From Google Pixel.
  • Open Settings on your device.

Cast To Roku From Android, PC, and Mac

  • Now look for Display -> Cast Screen or you can tap on the search bar, type in “cast”. Hit enter.

  • When you see the result, Tap on it.

Cast To Roku From Mac:

Apple eco-system never adopted Miracast protocol instead of that they have their own AirPlay. That works in the same manner as Miracast and easily connects with all the wireless displays. But that doesn’t mean we cannot cast our entire Mac screen to Roku.

There is a Chrome Extension called Rokucast, it works perfectly and allows you to cast to Roku from Mac. Heed the instructions below and learn how to do so.

  • First, you need to install Roku Cast on your Roku. Use this link and Install Rokucast.
  • When you open the link, you will be asked to enter your Roku account details. Log in with your Roku Account.
  • Then you will be presented with a warning message. Ignore it and let it install.
  • Once installed, head over to the Roku Settings page and update Rokucast.
  • Now connect your Mac and Roku on the same network. Also, you need to write down the Roku IP Address. This will come in handy.
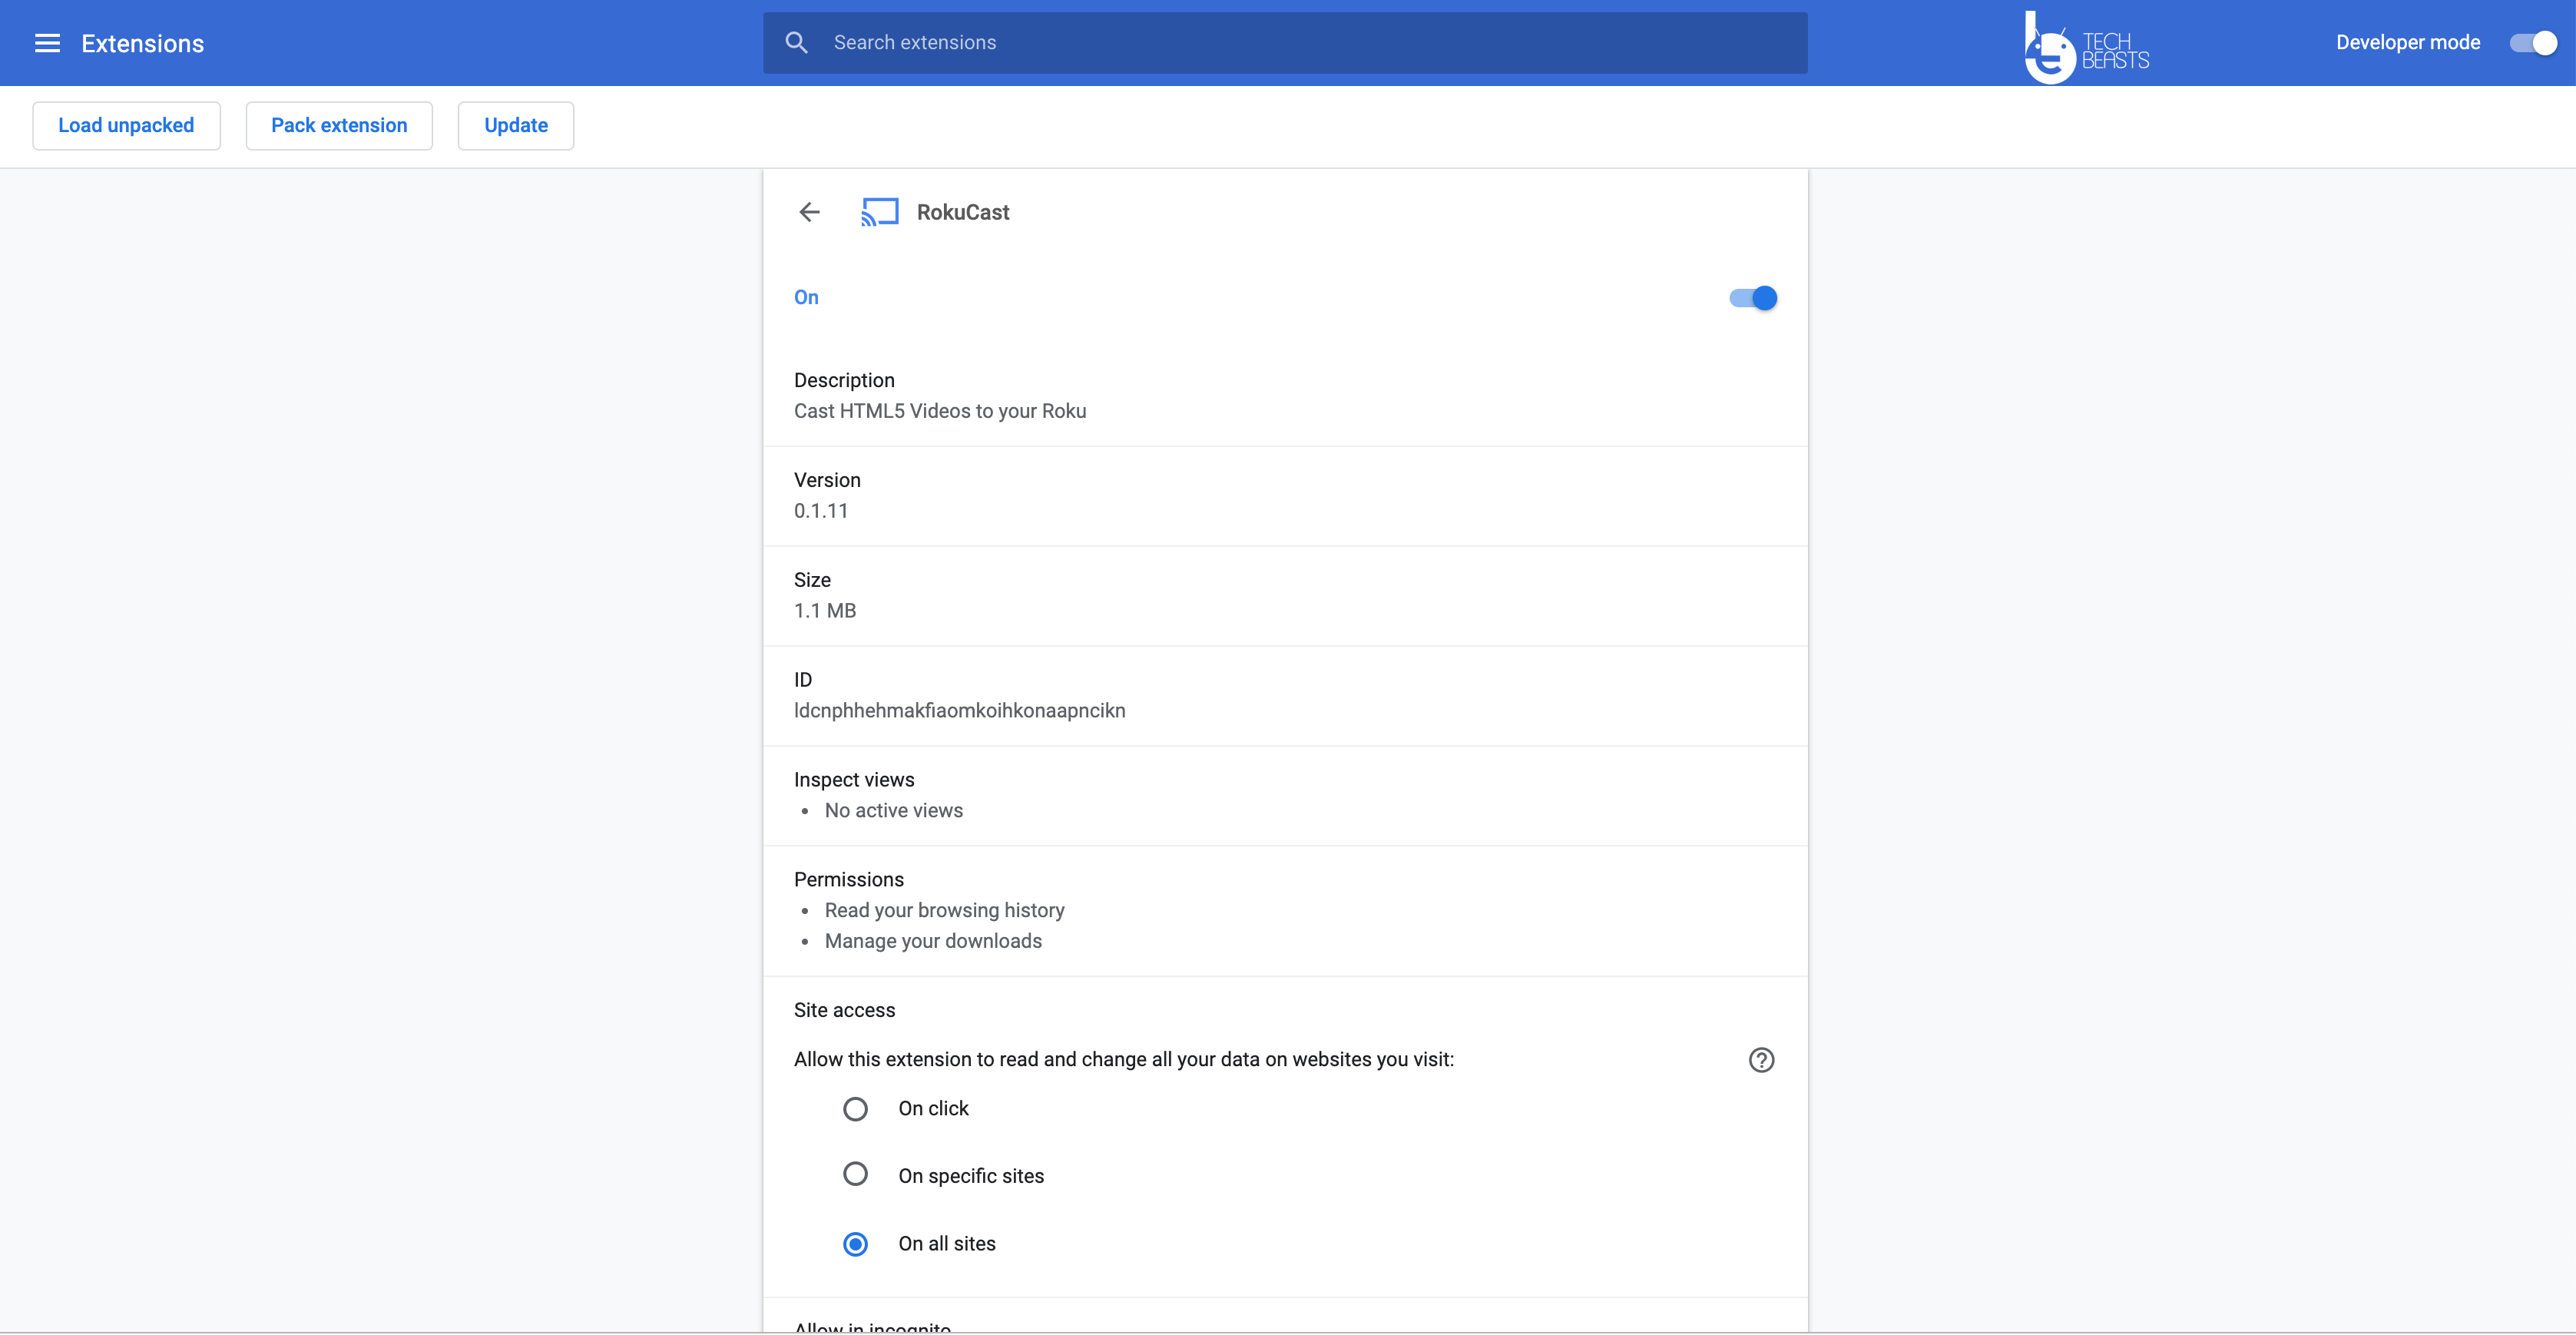
  • Open up Chrome on your Mac. Install Rokucast on your Chrome. You won’t be able to find it in the Chrome Store. Download it from Github, Unzip it and upload it manually.

Cast To Roku From Android, PC, and Mac

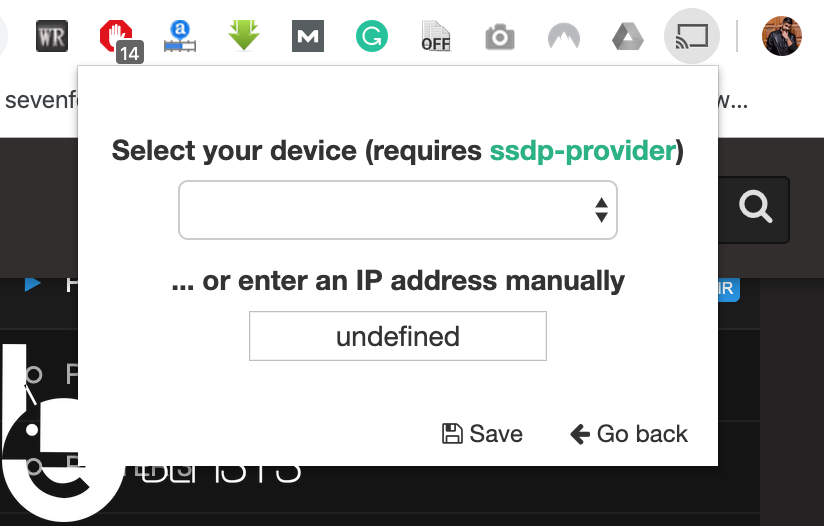
  • Once it is installed, you will see a cast icon on the top right sidebar of Chrome as shown below.

  • Click on that icon and you will see Settings icon at the end of the page. Click the gear icon and then enter the Roku IP Address you copied before.

Cast To Roku From Android, PC, and Mac

  • Play a Video and click on the RokuCast icon and there you will see your Video name and right next to it a download button and Cast button.

  • All you have do is click on the cast button. Roku cast will send the link to your Roku TV and that’s all.

Conclusion:

This is how you can Cast To Roku From Android, PC, and Mac. Please do try my methods and if they came handy please share it on Facebook & Twitter.

Download Granny Chapter Two APK for Android

0
Download Granny Chapter Two APK for Android
Post of Granny Chapter Two

Here is the latest APK of Granny Chapter Two. The Granny Chapter Two APK is for Android phones only. You can install it on any Android phone running Android 4.0 or higher.

Granny Chapter Two APK
Poster of Granny Chapter Two

Granny Chapter Two

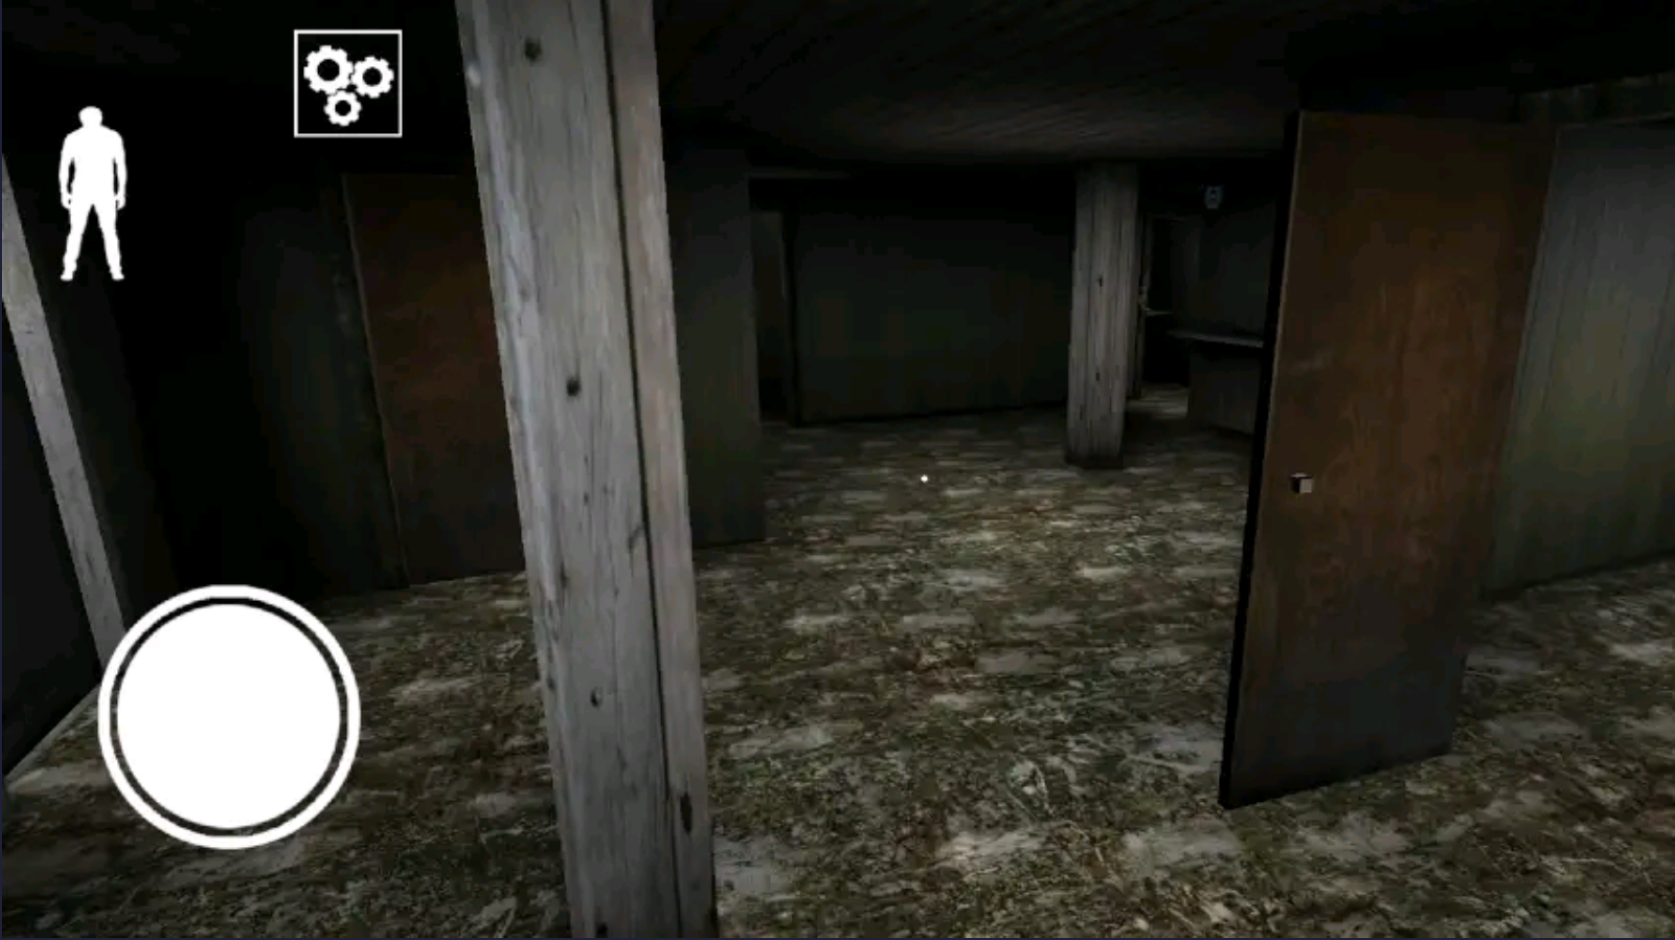
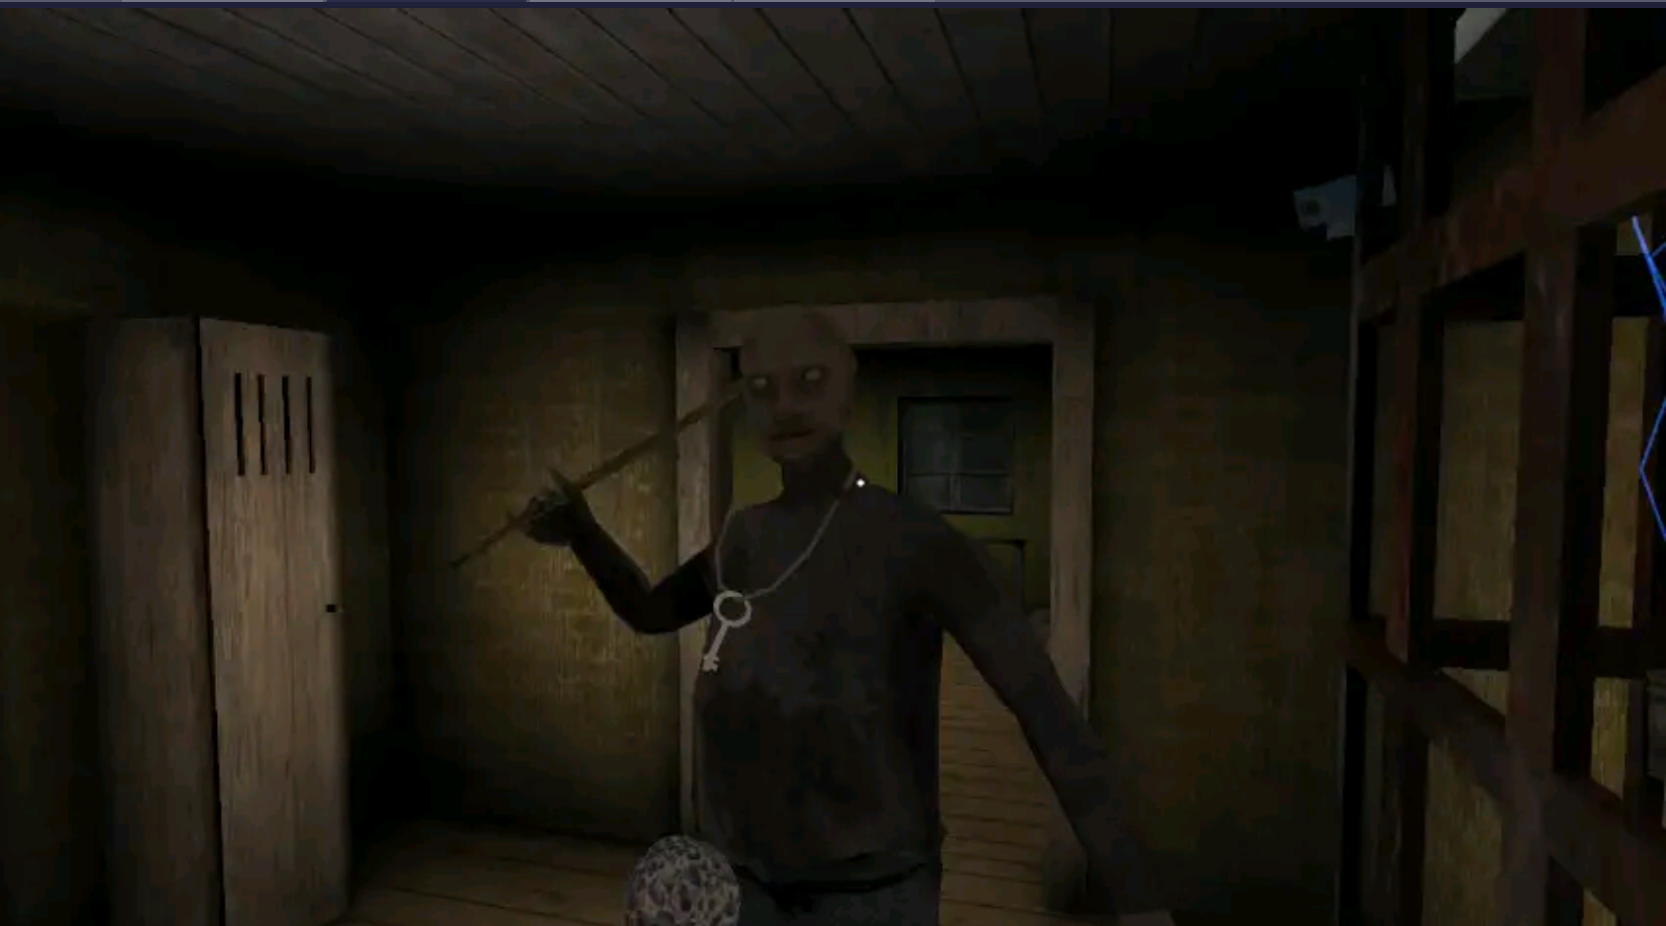
Granny Chapter Two is the sequel of the famous horror game Granny. This game basically belongs to the Arcade category but there is no reason to not to call it a horror game. The kind of audience this game is aimed at loves to play it only because of the full-of-fear gameplay. Just like the prequel, players have to save themselves from the zombies roaming around in Granny’s house.

The main plot of this game is that you are stuck in your Granny’s house. Players are have been locked in this house by their Granny and Grandpa. Now that you are stuck, you have to come up with a plan to escape. Making a small movement rings a bell in Granny’s ears. Grandpa doesn’t quite listen to many of the things, but Granny is going to be actively listening to everything. If you make any kind of noise, things will get ugly and Granny will come in running. In such a scenario, players have a few places to hide. They can hide inside a cupboard, inside a box, or under a bed. Granny Chapter Two APK

Players have only 5 days to escape Granny’s house. If you successfully escape, you win and if you don’t, the result is obvious. Like the Granny game, Granny Chapter Two also comes for free. The original Granny has over 100M downloads. Granny Chapter Two made it to the Play Store in a few select countries on September 6. The game isn’t available in all the countries as of now.Granny Chapter Two APK

If you are a fan of Granny and you’ve been waiting for Chapter Two, you can download its APK right now. There is no need to wait for the game to appear in the Play Store at your end. We have got our hands on the original Granny Chapter Two APK. Everyone can download Granny Chapter Two APK from below right now.

Granny Chapter Two APK for Android

  1. Granny Chapter Two APK 0.8.3: Download
  2. Copy the APK to your phone or you can download it directly on the phone.
  3. Using a File Manager, open the APK and install it.
  4. If the phone asks for any permission, give it.
  5. Complete the installation.
  6. Now open Granny Chapter Two from the app drawer.
  7. Set up the preferences and play the game. That’s all.

If you wish to play Granny Chapter Two on your computer, you can check this guide. In case you have any questions/queries, feel free to reach out to us through the comments section below.

Upload Video to Instagram from Computer Directly [ Methods ]

0
Upload Video to Instagram from Computer Directly [ Methods ]

We all know that Instagram won’t allow us to upload Photos or Videos from our PC. Although they should think about it and let’s use Instagram form PC aswell. Well, this is what I think I have no idea what their plans are but today, in this post, I will tell you how to Upload Video to Instagram from Computer Directly.

We see tons of Videos on Instagram which are professionally edited but the thing is, all the professional Videos are edited on PC and then they transfer it on their smartphones. After they are able to upload it on their Instagram account.

Upload Video to Instagram from Computer

It’s a very lengthy process and it takes a lot of time. However, what if I told you that are a number of ways through you can upload Video to Instagram from Computer Directly. Wouldn’t it be great? you can save a lot of your time. You won’t be needing to transfer the videos from your PC to Instagram and then post them?

I think that is a great idea. Next time when you are planning to upload a video on Instagram but the video is saved on your PC. I would suggest you use the following tools and upload your Video directly from your PC to Instagram.

Upload Video to Instagram from Computer Directly:

Before I continue, let me tell you one thing, I will be using third-party apps and tools. Since Instagram doesn’t allow us to upload anything for your PC directly. We will require third-party services and tools. Let’s get going.

If you want to upload photos on Instagram directly from your PC. You can easily do it, all you have to do is change your desktop browser to mobile view by going to developer option.

There are some requirements you should know before uploading Video to Instagram from Computer.

✒ A maximum of 100MB file size will be accepted.

✒ Not more than 60 Seconds.

✒ 30FPS or less.

✒ The video should be MP4.

✒ Landscape aspect ratio [1:91:1] -> Square aspect ratio [1:1] -> Vertical aspect ratio [4:5]

You must have these requirements fulfilled otherwise you won’t be able to upload Video to Instagram from Computer. Now let’s finally start now.

Cloud Storage:

I have used this method almost every time. This is one of the oldest tricks you can use to upload videos on Instagram.

It’s easy and simple, download DropBox or Google Drive app on your PC. Log in with your credentials, upload the video either on DropBox or Google Drive. Once uploaded, let it sync.

Now head over to your smartphone and open the Cloud Storage app. I use DropBox so I would go with that. Open DropBox and select your video, Tap on Share, Select Instagram.

That will be all, now your video is being uploaded on Instagram. This method is easy and simple. However, we are not saving anytime because we have to upload our video twice. But since it works so it’s worth trying.

Gramblr:

Gramblr is a free desktop app available for Mac & Windows. It allows you to upload Photos & Video on Instagram directly from your PC.

  • First off Download Gramblr on your Windows PC or Mac. Use the following link below.

Download

  • Install it on your Windows 10 or Mac. I am using the Windows version because I was not able to use it on Mac.
    • Create a free account on Gramblr using the desktop app.
    • Once your account is created you will be asked to provide your Instagram ID and Password.
    • No verification required. You will be logged into your Instagram account.
    • On the homepage of Gramblr, you will see an upload box, grab & drop your video on the upload box.
    • After your video is uploaded, Gramblr will provide you a number of options at the bottom of the screen.
    • Select your Settings, click the Red Thumbs up button.
    • On the next screen, you will see the upload details. You can add your description, you can even schedule your post or post it immediately.
    • Once you are done with everything, click on the Send button located at the bottom of the screen.

That’s all. This is how you can upload videos on your Instagram directly from your PC using Gramblr.

Flume:

Flume is a Mac dedicated app that is a perfect clone of the Instagram app. While using Flume you will feel like using Instagram on a Mac. You can directly upload photos & videos from Mac using Flume. Moreover, it has the same interface as Instagram.

You can easily download & Install Flume on your Mac OS. Head over the Flume website, download the Flume on your Mac. Install and Launch the app, once Flume loads up you will see that it is the same as the Instagram app.

Heed the instructions below to learn how to use Flume and Upload Video to Instagram from Computer Directly.

Total Time: 3 minutes

Download and Install Flume:

Head over to the official Website of Flume and click on the download button. Once downloaded, click on the DMG file start the installation process. After Flume is installed, Launch it.

Login with your Instagram Account:

Launch Flume App and you will be asked to log in with your Instagram account. Provide your username and password. Accept the Flume terms and conditions. Click on the login button.
Upload Video to Instagram from Computer

Head over to your Profile:

Once you are logged in. Hover your mouse on the bottom of the Flume screen a dock will show up. Click on your Profile icon the same as you do Instagram.
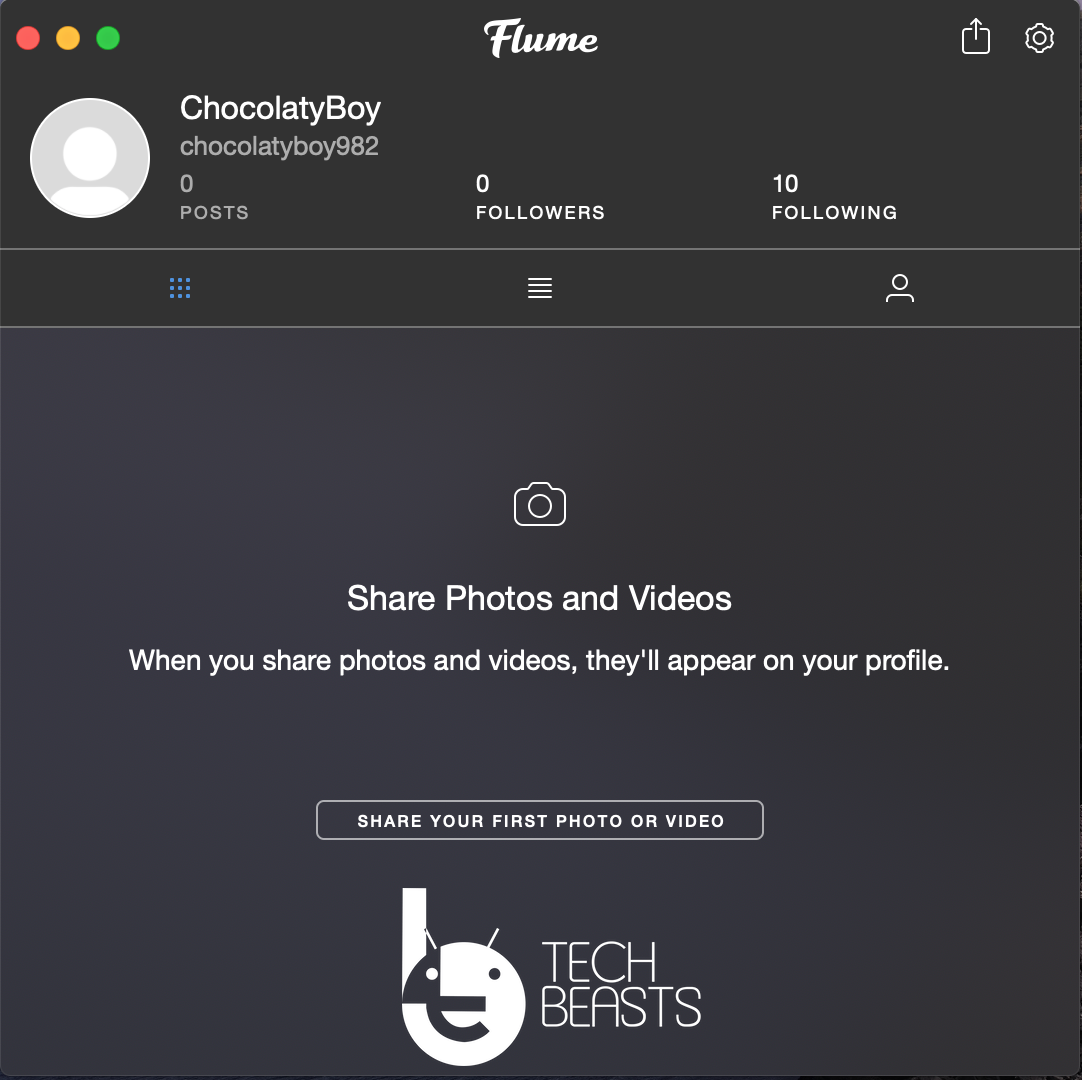
You can see the interface screenshots below. It’s the same as the Instagram app.

Upload Video to Instagram from Computer

Click on Share your First Photo or Video:

As you can see in the above screenshot. In order to upload your video click on the button in the middle of the screen ” Share Your First Photo or Video “.
When you click on that button you will be taken to another screen as shown below. From here click on the Camera icon or you can drag & drop any photo or video.
Upload Video to Instagram from Computer

Post Video to Instagram from Computer:

I clicked on the Camera icon and file explorer opened up, selected the video I wanted to upload, click on Open.
Once video is loaded, you will be presented with different options. Edit your video the way you want. Write a killer description and once done with everything. Click on the post.
Upload Video to Instagram from Computer

That’s all.

Conclusion:

I would prefer that Instagram should allow us to upload Videos and Photos directly form Computer. Rather than using these third-party apps. However, since I am not sure that when this will happen. So I think you should use my methods and Upload Video to Instagram from Computer Directly.

5 Best Craigslist Apps for Android [ 2020 ]

0
5 Best Craigslist Apps for Android [ 2020 ]

I have collected the 5 Best Craigslist Apps for Android devices. Those who don’t know about the Craigslist, they must be living in the cave. Craigslist is the biggest ads posting Website in the US and you will be surprised to know that not only in the US, but it is also popular around the globe.

The best thing about Craigslist is, it’s ad free and the interface is very user-friendly. Not like other ad posting websites that have tons of Ads. If you want to buy anything in the US, your number 1 priority should be Craigslist. You find everything in the listings of Craigslist, as per reports more than 60 million people use Craigslist to buy stuff in the US.

Craigslist is an American classified advertisements website with sections devoted to jobs, housing, for sale, items wanted, services, community service, gigs, résumés, and discussion forums.

Craigslist was founded in 2005 and you will be shocked to know, they don’t have any official app so far. It seems they never needed one and the good thing is Craigslist has no bad impact over not having an smartphone app.

Since there is no officail Android or iOS app of Craigslist. I have collected a few apps which will help you view, post, and edit ads on Craigslist. Let’s get going now.

5 Best Craigslist Apps for Android:

Following the Android apps which will let you access Craigslist listings on your Android devices.

Read more: Best Apps to Make Video Call from Android to iPhone

CPlus for Craigslist – Officially Licensed:

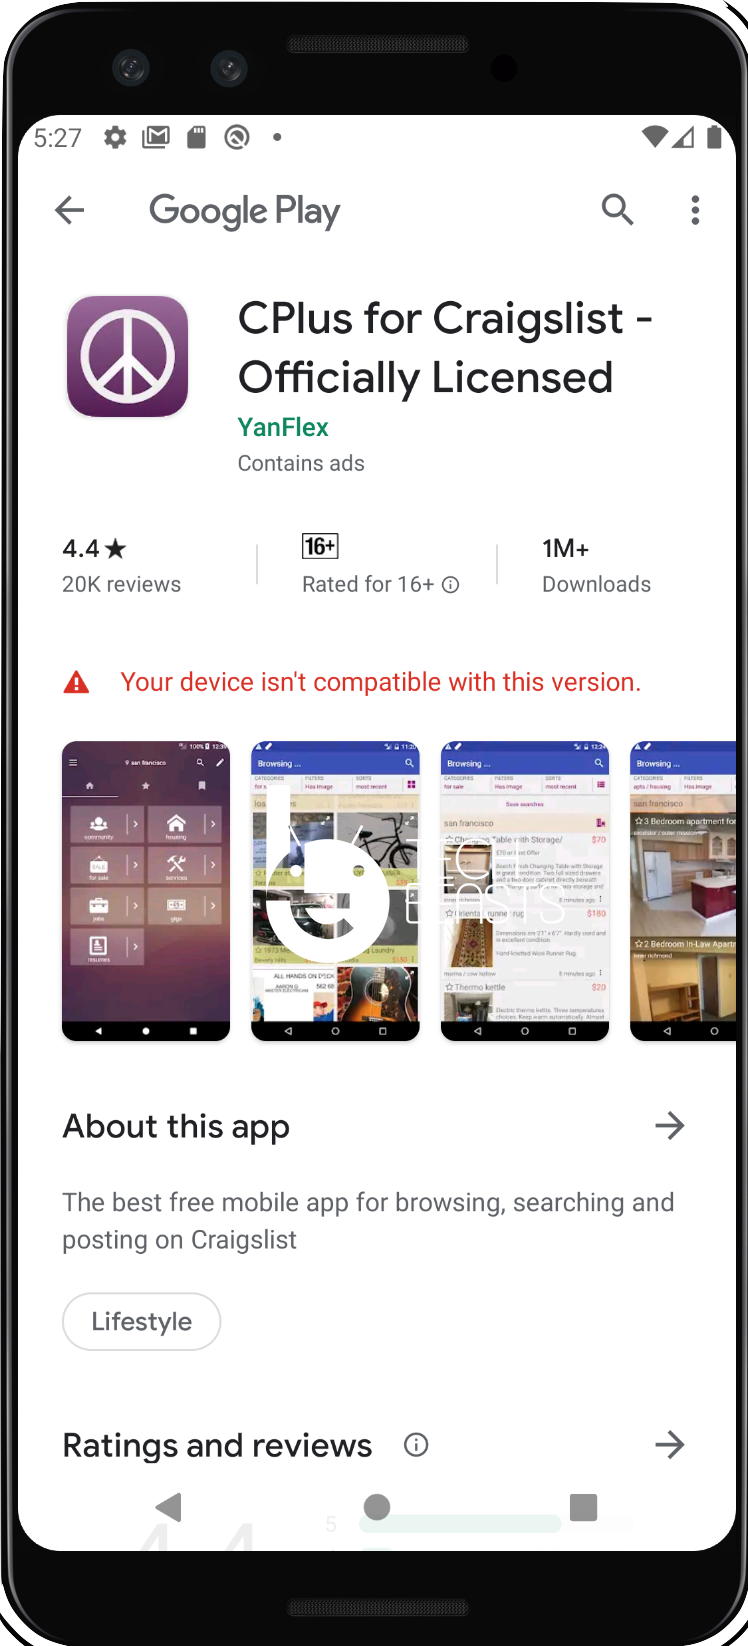
The first one on my list of Best Craigslist Apps for Android is CPlus. As the name says all, CPlus is the only app that has an official Licensed to use the Craigslist API.

Best Craigslist Apps for Android

CPlus works flawlessly and the user interface is clean and neat. One can easily navigate through menus and listings. If you have used Craigslist you will be well aware of the fact that when you search for something, you will get the listings of a single city. However, when you are using CPlus, it allows you to search for one thing in multiple cities.

You can easily adjust the search settings by using the filter option available on CPlus. Not only search filter, but CPlus also provide you a number of filters to improve your user experience. Filters like price, bundles, payment mode and more. Moreover, the most important feature that will make fell in love with CPlus. It allows you to create or edit your classifieds ads.

Use the following links to download CPlus on Android and iOS devices.

Download CPlus: AndroidiOS

Postings:

On number two, there is an app called Postings and it is only available for Andorid devices. Not only postings app show you the classified ads form Craigslist, but it also shows ads and listings form other popular websites.

Best Craigslist Apps for Android

It also allows you to search in multiple cities and they also have different layout patterns that can be adjusted according to user needs. Postings app support multiple location searches and you can save your searchers even ads from later.

Postings app has search filters that you can use to refine your search on Craigslist. Overall I like using the Postings app but there is one downside to it. This app has ads and in order to remove them, you have to use the in-app purchase.

In order to download the Postings app on your Android device. Use the following link.

Download Postings: Android.

Daily Craigslist Classifieds:

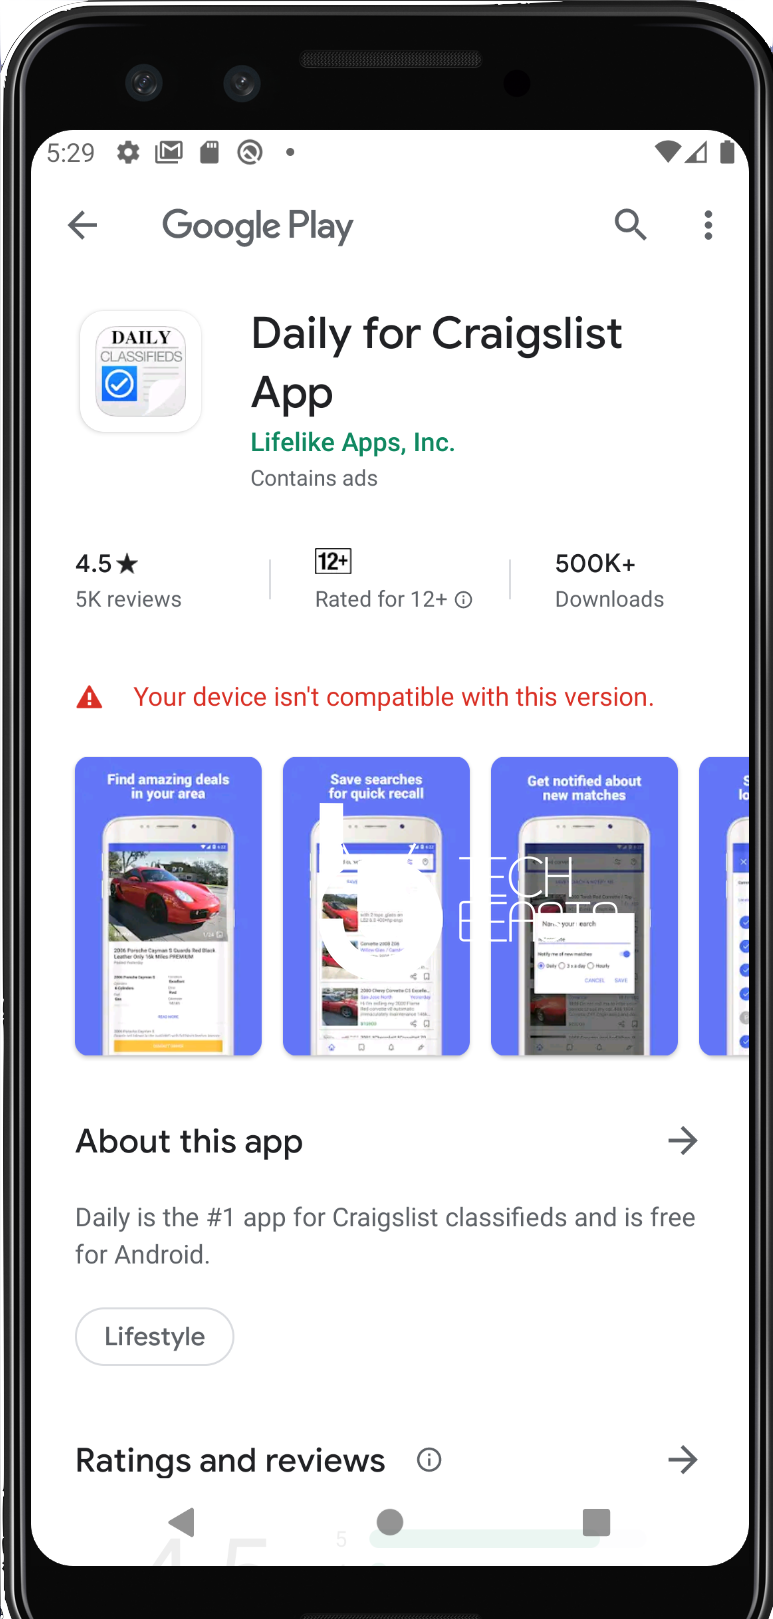
Daily Craigslist Classifieds is on number three in my list of Best Craigslist Apps for Android. This is not a full-function Craigslist app, it’s more like a web browser that allows you to access the Craigslist ads and classified listings on your Android device.

They made sure that it only serves the basic purpose nothing more. There are no advanced features like in other apps. You can start searching by choosing a city or you can let GPS do that for you. Enter the key phrase and start looking for what you need.

Moreover, the do have on thing I like to add, you can search in multiple cites at a time. Other than that, Daily Craigslist Classifieds is a free app but contains ads. You can remove all the ads by a one-time payment of $2.99.

If you want to download and use the Daily Craigslist Classifieds on your Android devices. Use the following link.

Download Daily Craigslist Classifieds: Android.

CL Mobile:

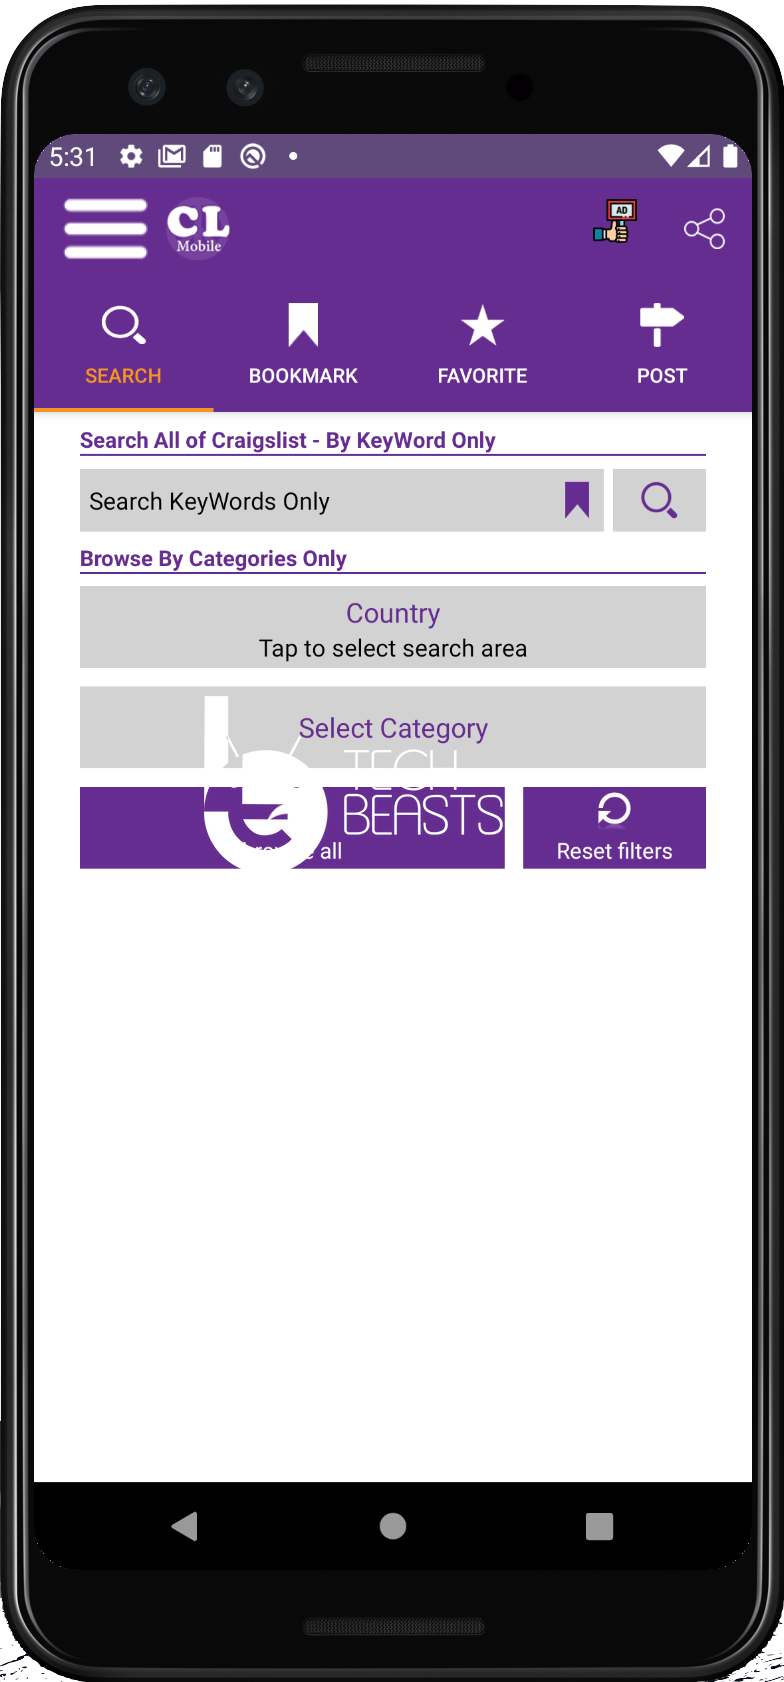
Next is the CL Mobile and it’s not just for Craigslist ads and listing. You can find classified ads and listings on CL Mobile from all the popular classified ad sites such as Facebook, Google, Locanto and many more.

This app has every basic thing you need to search on Craigslist, you can create an account and start posting your ads and edit them. However, when it comes to UI, I am disappointed because it’s messy and not easy to use. Moreover, you cannot save your favorite searches.

CL Mobile support multiple cities search at once, this app also allows you to save favorite ads for later. I can suggest CL Mobile, not only you will get listings to form Craigslist but also from all the popular classified ads websites. CL Mobile is free to use but it comes with ads and use the in-app purchase to remove ads.

This app is available for both Android & iOS. Use the following links to download the CL Mobile app on your smartphones.

Download CL Mobile: Android | iOS

cPro:

At number 5 in my Best Craigslist Apps for Android is cPro. Now, cPro may be my last option but you will be amazed to know that cPro allows you to make a purchase using cPro.

Best Craigslist Apps for Android

Yes, you have heard it right. They have in-app currency in the form of coins, you can purchase them using your money and when you purchase any product, you will get a guarantee. That makes your deal more secure and that is why cPro is unique from all the other apps.

Apart from that, you can create your ads and easily edit the ones you have posted before. The interface is clean and user-friendly but not that great. Moreover, cPro is available for free for Android & iOS devices. One other thing about cPro, it’s ad-free.

Download cPro: Android | iOS

Craigslist Apps:

Other than these five apps you can find a number of Craigslist Apps on Google Play and App Store. But none of them are official apps, the main reason behind this is the austere policies. It’s said that all the big classified ads websites use their personal ads and that is not acceptable. Google wants its piece in every app and they are not willing to do so.

Read more: 5 Best & Free HEIC/HEIF to JPEG Converters for Android

Well let them do what they do, you can use these 5 Best Craigslist Apps for Android for free. Enjoy!

10 Best Free RPG Games for Mac [ Free MMOS for Macs ]

0
10 Best Free RPG Games for Mac [ Free MMOS for Macs ]

Everyone loves RPG Games and if they are free, we do love to play them. So today, I am here with the 10 Best Free RPG Games for Mac or Free MMOs for Mac’s. Before I move on, let me tell you what is MMOs?

MMOs stand for (Massively multiplayer online Video Games). Yes, you all Mac users know that finding free multiplayer games for Mac isn’t easy. But I did it and it took me some time.

Now the games I am about to provide for you Mac are available on Steam. Well most of them are on Steam, so you can download using Steam and Play Free RPG Games on Mac. Let’s begin now.

Read more: Download Google Play Store on Gameloop

10 Best Free RPG Games for Mac [ Free MMOS for Macs ]:

Don’t get confused about why I am writing Free MMOS for Macs. You will be surprised to know that people do use this search term to find Free RPG Games for Mac. That’s why I am making things easier for them.

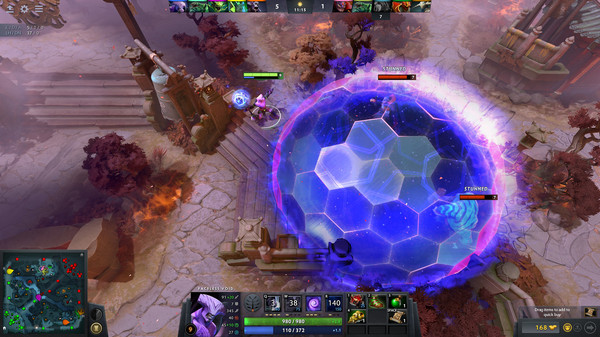
1. Dota 2

This game needs no introductions and that’s why Dota 2 is the top of the list in my Free RPG Games for Mac. This game has everything you can ask for, once you started playing it, you will get addicted. Believe me, you will.

The gameplay is simple, explore other worlds and fight & combat with others. In order to keep on going and wining you need to improve your skills. The best part is that there are no in-app purchases for any weapons or power-ups. The design and graphics are at best, you will love it. Moreover, if you have played the Dota then you will definitely love the new graphics of Dota 2.

System Requirements:

  • Intel Dual-Core.
  • 4G RAM.
  • NVIDIA 320M or Intel HD 3000.
  • 15 GB Space required.

Check Out Dota 2

2. Shakes and Fidget:

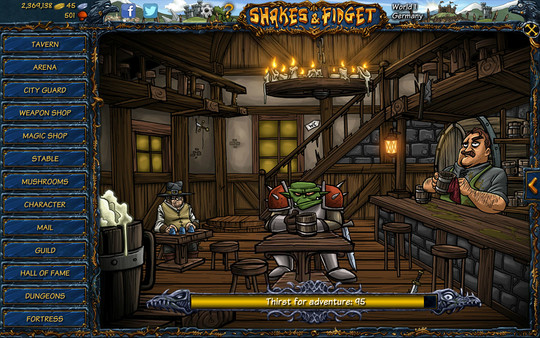
On my list of Free MMOs for Macs, Shakes and Fidget stand on the second spot. This game has everything you can ask for a role-playing game. Shakes and Fidget is a combination of fun & fantasy RPG. It has more than 50 Million users worldwide. You can enjoy online battles with your friends or players around the globe.

Shakes and Fidget offers a number of features and options that you can use to customize your characters. Moreover, when you are on quests you will get a chance to collect tons of collectibles. That will help you get along in the game.

System Requirements:

  1. 1GB RAM & 100MB Storage space.

Check out Shakes and Fidget

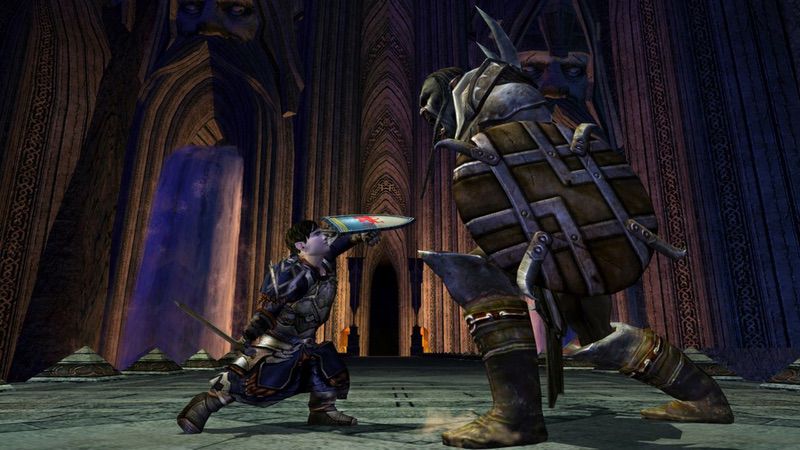
3. The Lord of the Rings Online:

The Lord of the Rings Online stands on number three spot. We all are the fans of the famous series of Lords of the Rings. The game is based on the same storyline, you have to explore the Mid Earth and bring out the best hero to save the lands.

Free RPG Games for Mac

This game is played by millions of users and the reason behind the success of The Lord of the Rings Online is the way you can customize your hero. You will be happy to know that there are a plethora of options to choose a character and then customize it.

Since this game is in the category of Free MMOs for Macs. That means it is a multiplayer game, you will able to do PvP battles and online arenas.

System Requirements:

  • Space needed 25 GB.
  • Processor: 2.0GHz Intel i5.
  • RAM: 2GB
  • Graphics Card: Intel HD3000 Minimum

Check Out The Lord of the Rings Online

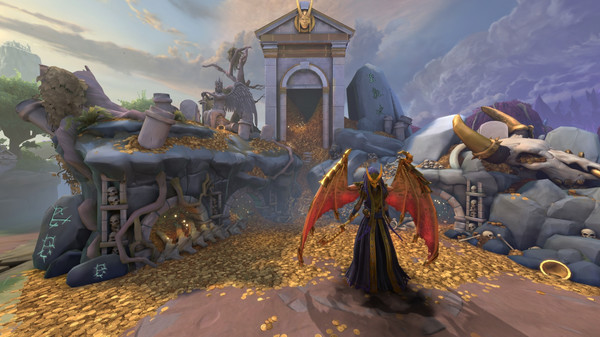
4. GuildWars 2

At my 4th spot, it’s GuildWars 2. Another big gun in the world of Free RPG Games for Mac. GuildWars 2 is not your average RPG game, it’s a massively multiplayer game. With all the graphics, storyline, PVP matches, weapons and more. You will require and high-end Mac to play this game.

Free RPG Games for Mac

GuildWars 2 was released back in 2012 and to this day, its online community is still growing. If you really want to enjoy the realtime or real-life-role playing experience you definitely need to play GuildWars 2.

Read more: Best Offline iPhone & Android Games without WiFi Internet

System Requirements:

  1. Processor: Intel Core i5 or Higher
  2. RAM: 4GB Minimum
  3. Storage: 50GB
  4. Graphics Card: GeForce 320MATI, Radeon HD 6630M ( Minimum )

Check Out GuildWars 2

5. SMITE

So on my 5th Spot, it’s SMITE. This game is really fun to play, I mean like fighting in big arenas with thousands of people watching you fight. The adrenaline, the excitement and being all said, you will enjoy playing SMITE on your Mac.

Free RPG Games for Mac

SMITE has a very big community worldwide, it’s said that SMITE has more than 25 million players online. This game is based on ancient mythology, where you will get a chance to choose thor and many more characters. Once you have chosen a character, you need to train him, fight, win battles, improve his skills and keep charging.

There is one rule to proceed further in SMITE, fight, and win. That’s all.

System Requirements:

  • Processor: Core 2 Duo
  • RAM: 2GB
  • Storage: 10GB
  • Graphics Card: 512MB required.

Check out SMITE

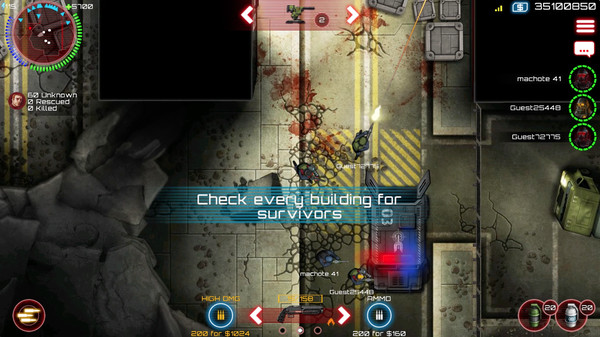
6. SAS: Zombie Assault 4:

It’s time to kill some Zombies now. On my Free RPG Games for Mac List, SAS: Zombie Assault 4 is on the 6th number.

Free RPG Games for Mac

SAS: Zombie Assault 4 is really high-end action & spec game for Mac users. The storyline is that a virus broke out ( normally when Zombie words come up, Virus is always there) and that deadly virus turned everyone into a Zombie.

You are the only hope left in the world, be a hero and kill them dead zombies. It’s a bit of role-playing game and more of an action and combat.

System Requirements:

  • Processor: 2GHz Processor.
  • RAM: 1GB.
  • Storage: 512MB.

Check out SAS: Zombie Assault 4

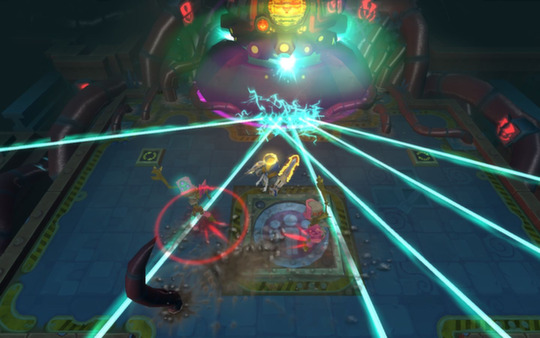
7. Spiral Knights:

Spiral Knights stand on number seven in my Free MMOs for Macs. Do you want to team up with your friends and kick some alien butt? Well if you do, I think you should play Spiral Knights.

Free RPG Games for Mac

This gameplay is that you are stranded in an alien planet and in order to progress you need to fight and compete with others. Spiral Knights is fun to play and but to be honest when it comes to customizing a character, it’s just OK.

Other than that, there is no doubt that Spiral Knights is worth playing the PRG game.

System Requirements:

  1. Processor:1.3GHz
  2. RAM: 1GB
  3. Storage: 720 MB
  4. Graphics Card: 64MB Video Memory

Check out Spiral Knights

8. RuneScape:

At number eight, it’s RuneScape. It’s kind of MMORPG for Mac but I don’t feel that way. But it has some aspects which make it an RPG game for Mac. The good thing is when you start playing it, you will love it, despite the gameplay.

Free RPG Games for Mac

When I started searching and asked my friends about free MMOs for Macs. I was surprised most of them suggested to me RuneScape and when I played it my self. It was really fun and also RuneScape has a very big community. Where you will find all the help and players you need.

System Requirements:

  1. Processor: Core i5 or i7
  2. RAM: 4GB
  3. Graphics Card: NVIDIA or ATI Radeon

Check out RuneScape

9. Clicker Heroes:

Let’s put our mouse to work rather than using the keyboard all the time. On number 9, it’s clicker heroes. As the name suggests, you don’t need to do anything just click, click, and click. That will be all.

Free RPG Games for Mac

It seems funny and but it’s not. I accept that you only have to do clicking but there is more to it. There are a number of characters to choose from and then you have to plan a good strategy to beat your enemies.

It fell in the RPG category because it has some elements which make it a role-playing game. But it is not completely an RPG. Who cares if it is or not, the best part is, it’s free and available for Mac.

System Requirements:

  1. Processor: Intel Core Duo
  2. RAM: 512 MB
  3. Storage: 90MB
  4. Graphics Card: None

Check out Clicker Heroes

10.Pixel Dungeon:

At number ten it’s Pixel Dungeon and this ends up my list of 10 Best Free RPG Games for Mac [ Free MMOS for Macs ].

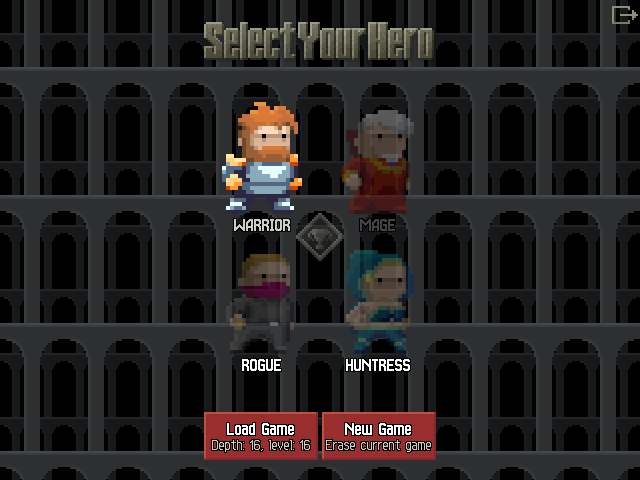
Free RPG Games for Mac

Pixel Dungeon is known to be the best role-playing game for Android. This game is available for iOS, Android, Windows 10 & Mac. On all the platforms it carries the same game-play.

Choose a character and start exploring the dungeons. Kill everything came in your way and collect things on the way.

Check out Pixel Dungeon

That is all. Please do share this post on Facebook and Twitter. Help us grow our community online.

Create Your Own Theme in Telegram [ Guide ]

0
Create Your Own Theme in Telegram [ Guide ]

Let me tell you how you can create your own Theme in Telegram. Although, Telegram has its own default themes which you can choose from Settings. But since Telegram gave you a choice to create your own theme why not try it.

Create Your Own Theme in Telegram

There are a number of Telegram themes available. You can try different themes to change the looks of your chats. But as I said before we have a choice to make our own theme. So why not give it a try. Everybody has a unique taste when it comes to choosing a color theme for anything. Not everyone goes with the stock themes even in smartphones.

Read more: Facebook Theme: Dark Facebook App and Messenger for Android

In this guide, I will tell you how to Create Your Own Theme in Telegram. This process may sound complicated but trust me it’s not. All you have to do is choose the colors and if you want you can add an image. Let’s get started now.

Create Your Own Theme in Telegram:

Heed the following instructions you will learn how to create a theme designed by you on Telegram.

Total Time: 5 minutes

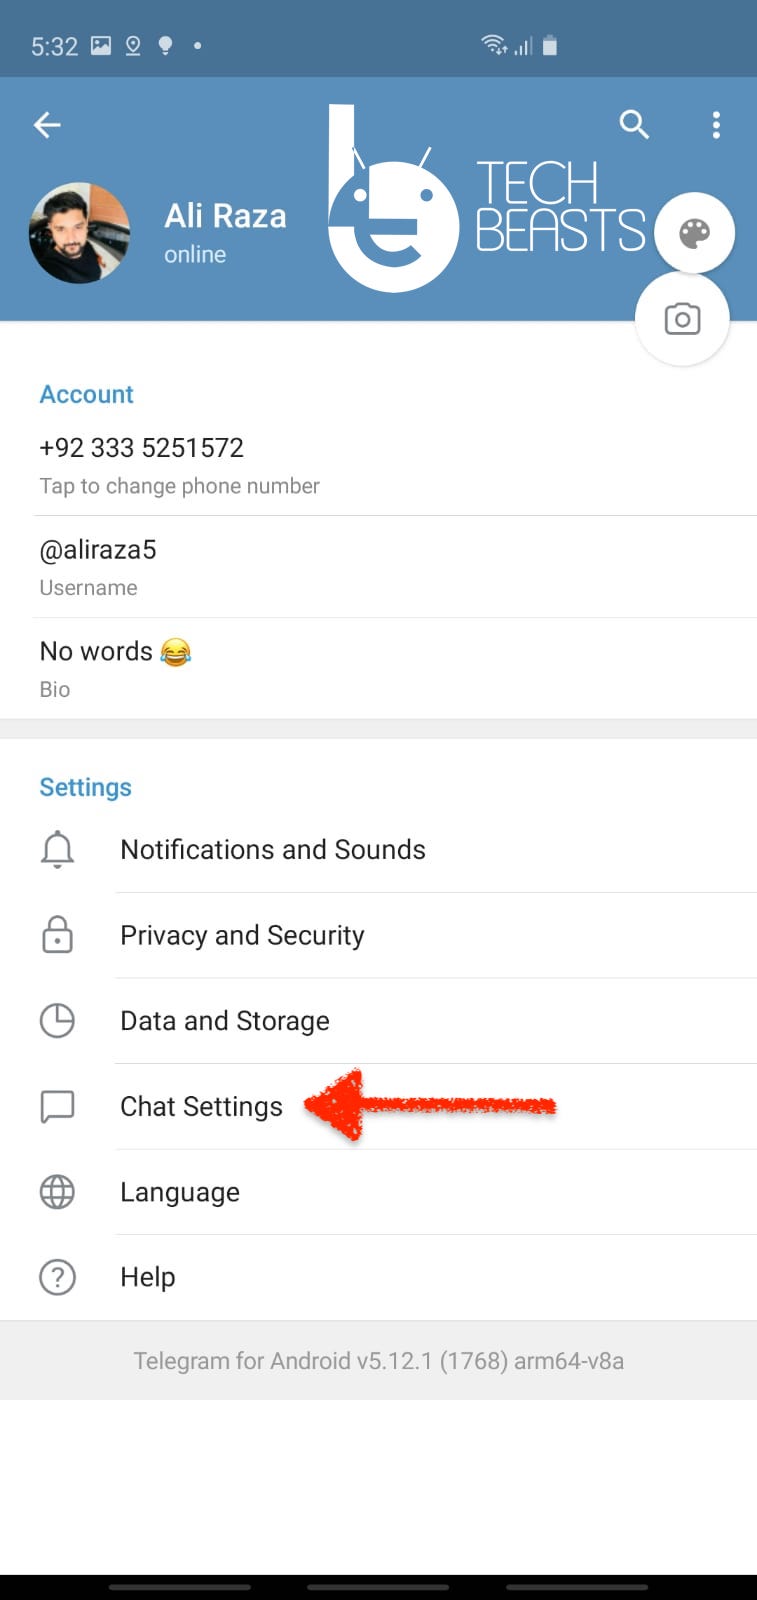
Open Settings:

Launch the Telegram app on your iPhone or Android device. Tap on the menu ⇶ icon located at the top left corner. A drop-down menu will appear. Tap on Settings.
Create Your Own Theme in Telegram

Chat Settings:

Now when you are in the Settings menu, Tap on Chat Settings. You will be taken to Chat Settings. Here you will find a number of options.
Create Your Own Theme in Telegram

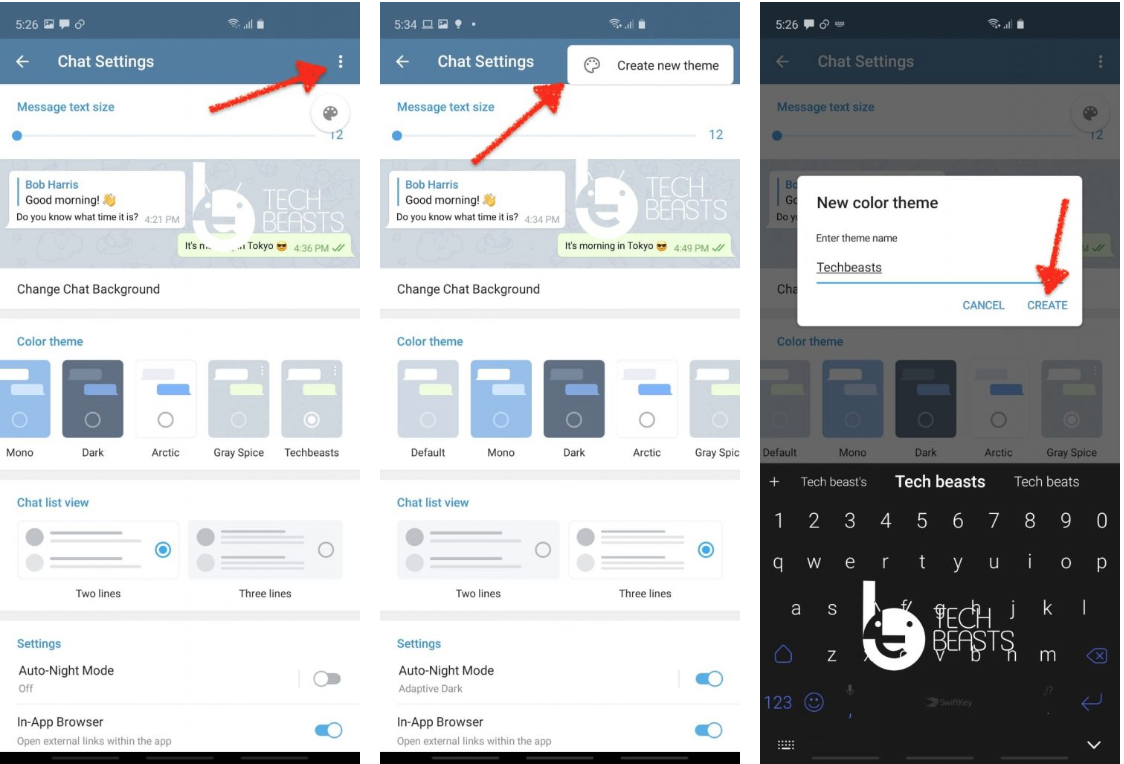
Create New Theme:

Tap on ⋯ located at the top right corner of the screen. You will get only one option. Create New theme, Tap on it. You will get a pop-up, Tap again on Create Theme. Enter your Theme Name, whatever you want.

Add A Color or Select a Background:

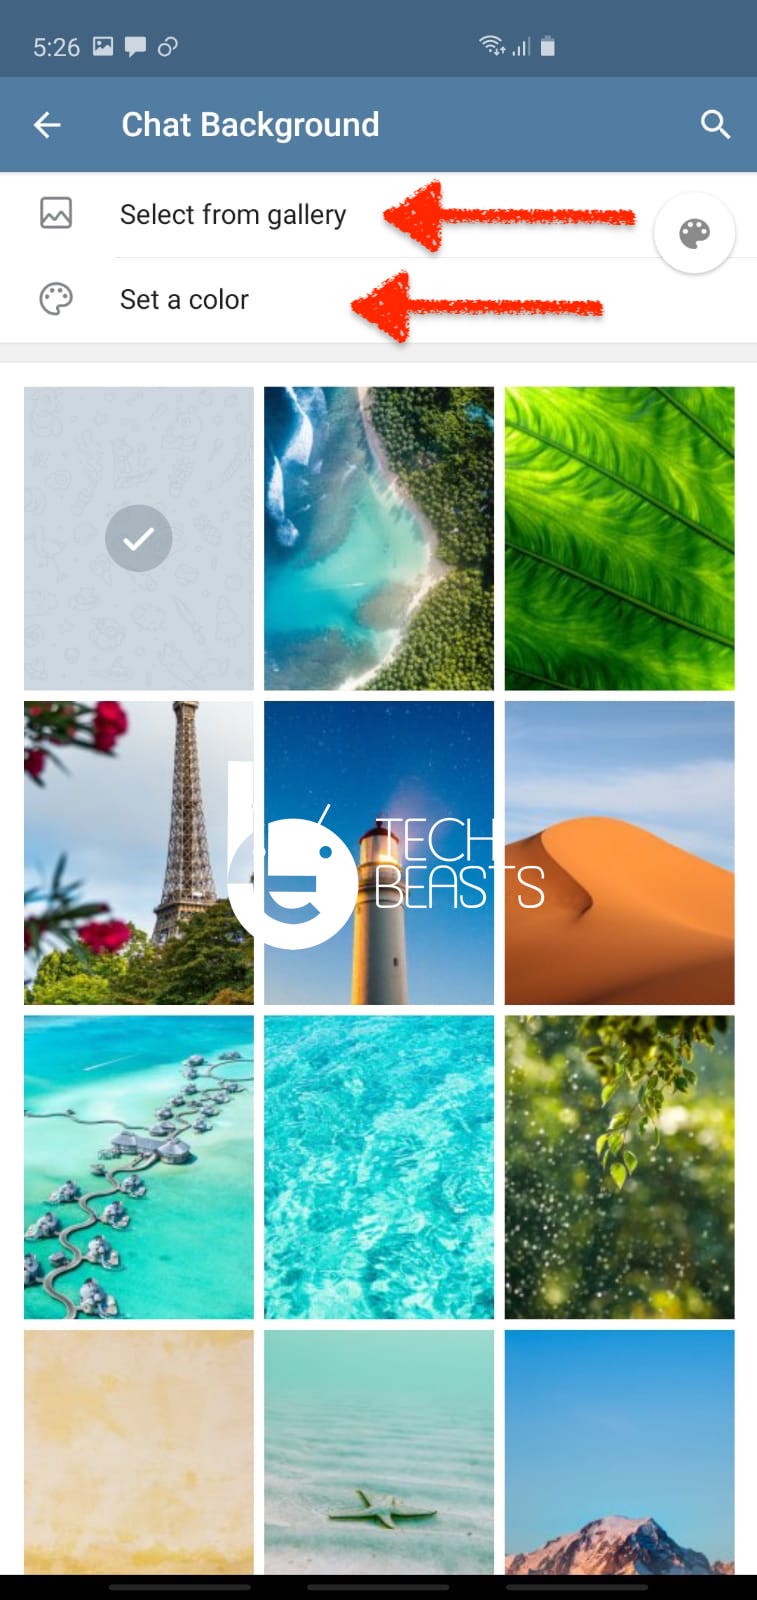
Now that you have created your theme. It’s time to choose a color pattern or add a background. Since you are in Chat Settings you can do a lot more. Scroll down and check the Settings you can change.
• Tap on Change Chat Background ➟ Choose from Select from Gallery or Set a Color ➟ Once done ➟ Tap on Set Background.

That will be all. Once you followed all the steps given above, you will be able to create your own theme in Telegram.

How to Add a Color Theme to Telegram:

If you want to settle at less, you can easily change the theme color of your Telegram app. It’s easier than creating a theme. Follow the instructions below to learn how to Add a Color Theme to Telegram.

Read more: How to Change WhatsApp Theme [No Root] 2019

  • Open Settings on Telegram. Tap on the main menu icon located at the top left side of the screen.
    • Now from the Settings Menu. Tap on Chat Settings.
    • In Chat Settings, you see the following options.

  • In color theme sections. Tap on any theme you like and that will be selected as your default color theme.

Conclusion:

Now you know how easy it is to create your own theme in Telegram. Also, how you can change the color of them in Telegram. Telegram has tons of features that make it famous and along all these, customizing is the best for me. 

Fix Samsung Galaxy Emergency Recovery without Smart Switch

5
Fix Samsung Galaxy Emergency Recovery without Smart Switch
Successfully flashing firmware while the phone is in Emergency Mode

This is the tutorial on how you can fix a Samsung Galaxy Emergency Recovery without Smart Switch.

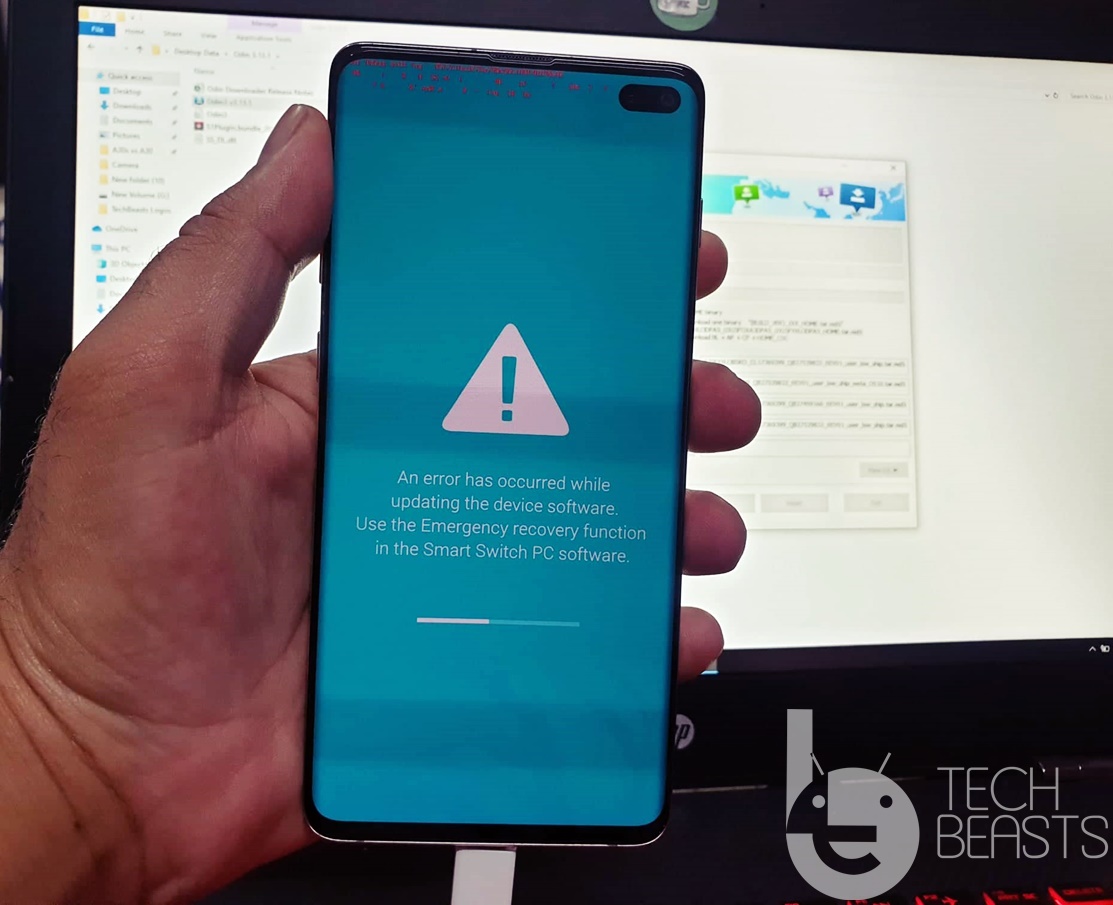
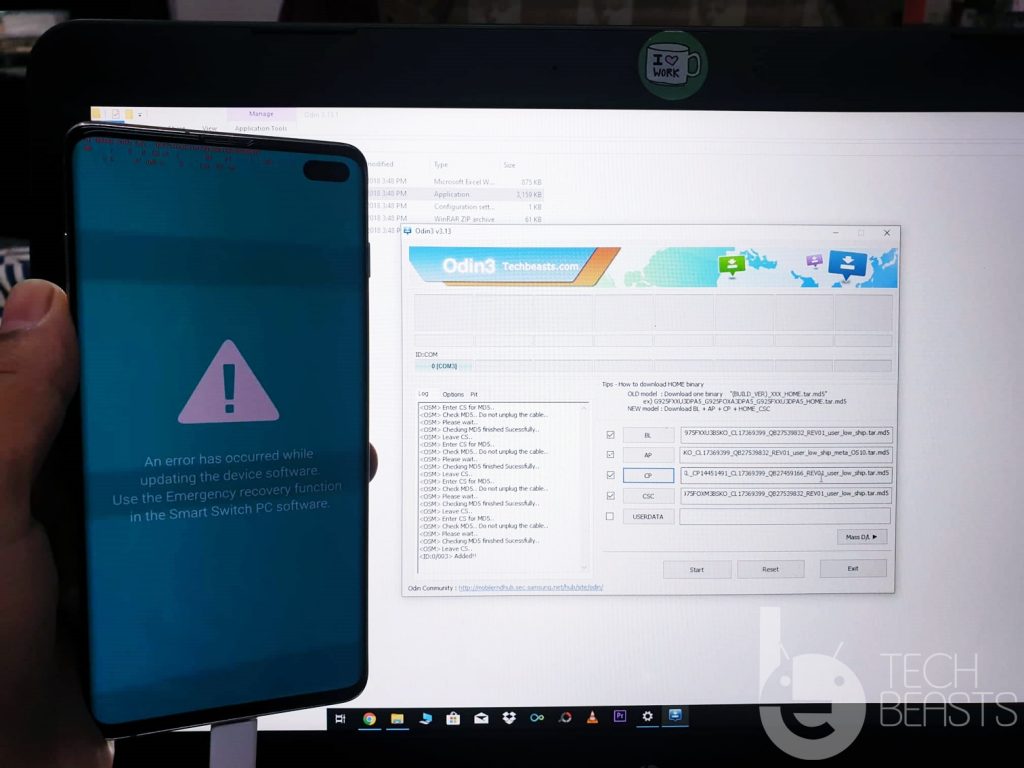
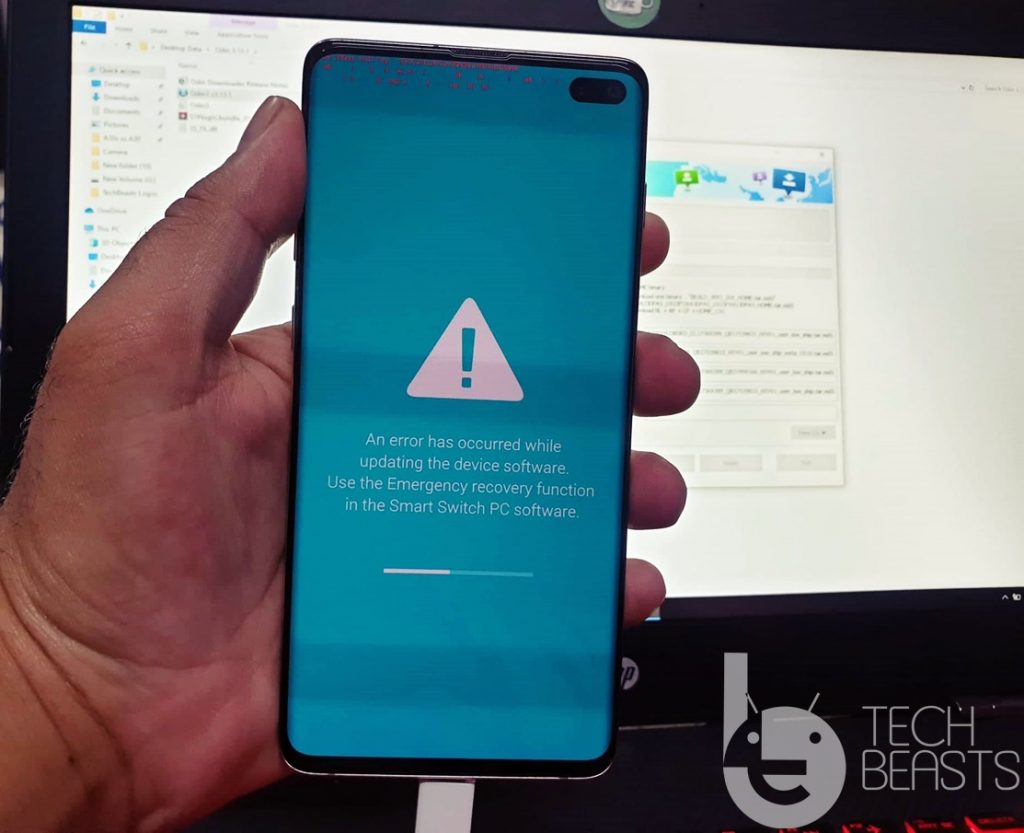
When you see this “An error has occurred while updating the device software. Use the emergency recovery feature in the Smart Switch PC software”, your first choice, typically, is to use the Smart Switch and attempt to recover the phone. But the moment you use Smart Switch, you are unable to find anything in the “emergency recovery mode”. Also, the new version of Smart Switch lacks the “Device initialization” feature which used to fix the emergency recovery screen in the good old days.

Fix Samsung Galaxy Emergency Recovery without Smart Switch
Emergency Recovery Screen

It is still unknown why Samsung has removed a feature that used to fix the phones in the emergency state. The lack of this feature has got Samsung Galaxy owners scratching their heads. Especially, when a huge number of Samsung Galaxy owners are not advanced users. 

For those who have no idea how to fix their phone now, I’m writing this guide to fix it via Odin. You don’t have to use the Smart Switch for this. I have personally fixed my phone in the Emergency Recovery Mode via Odin and that’s why you are on this page too. 

Go through the preparations, and follow the steps below to fix a Galaxy phone stuck on Emergency Recovery without Smart Switch.

Fix Samsung Galaxy Emergency Recovery without Smart Switch

Preparations

  • Your Samsung phone must be turned on and should be on the Emergency Recovery Mode.
  • A Windows computer is needed for this procedure.
  • Download and extract the latest Odin 3.13.1 on your computer.
  • You must have firmware files for your phone. Use SamFirm to download the latest firmware files.
    • Extract the firmware files to get the AP, CP, BL, CSC, and Home_CSC files.
  • Follow the instructions given below now.

Remember that when your phone showing you the Emergency Screen, it is basically in the “Download Mode”. The phone is ready for firmware flashing, and Odin will pick it up as it is.

Fixing a Samsung phone stuck on Emergency Recovery without Smart Switch

  1. Open Odin 3.13.1 on your computer.
  2. Add the AP file to the AP tab, BL file to the BL tab, CP file to the CP tab, CSC or Home_CSC file to the CSC tab.
  3. Go to options in Odin and make sure that no options other than F.Reset.Time and Auto-Reboot are checked.
  4. Connect your phone to the computer.
  5. Odin will detect the phone and show “Added” in the logs.
  6. In Odin, click on the “Start” button.
  7. As the installation ends, your phone will restart. Disconnect and let it boot up. That’s all.
Fix Samsung Galaxy Emergency Recovery without Smart Switch
Successfully flashing firmware while the phone is in Emergency Mode
Fix Samsung Galaxy Emergency Recovery without Smart Switch
Odin flashed the firmware and fixed the Emergency Screen

Final Words

By this time, you must have your Samsung Galaxy phone running on a new software once again. It was incredibly easy to fix this problem. In case you have any questions regarding this error or the guide given above, feel free to use the comment box below. I will ensure to getting back to you as soon as I can.

Stuck on Emergency Recovery Screen after Odin Flash Failed – HOW TO FIX

1
Stuck on Emergency Recovery Screen after Odin Flash Failed – HOW TO FIX
Firmware being flashed via Odin while the phone is still on the Emergency Recovery Screen.

An error has occurred while updating the device software. Use the emergency recovery feature in the Smart Switch PC software. To resolve this issue, you will connect the phone to PC and open Smart Switch, but the Smart Switch will refuse to recognize your phone? Now what? Well, this is where this guide is going to help you out. Follow this tutorial to fix a Samsung Galaxy stuck on Emergency Recovery Screen after Odin Flash Failed. Before you do so, let me tell you why this issue occurs and why Smart Switch can’t fix it.

Emergency Recovery Screen after Odin Flash Failed

An error has occurred while updating the device software. Use the emergency recovery feature in the Smart Switch PC software.

This is a very common problem that occurs when you are trying to load new firmware on a Galaxy phone via Odin. The problem happens when the software installation via Odin gets interrupted or you flash an inappropriate firmware file on your phone.

In both of the above-mentioned cases, your phone will start displaying an emergency recovery screen. This screen can frighten the naive Samsung Galaxy owners at first, but now that you are here on this page, there is no need to worry about it anymore.

The emergency recovery screen will have you kind of stuck with it. From this screen, you will not be able to fully power down your device. The phone will not be able to boot into the recovery screen either.

Samsung mentions on the recovery screen that you need to connect the phone to the Smart Switch to recover it. The moment you will download Smart Switch, and connect your phone to the computer, Smart Switch will refuse to detect your device. In the Smart Switch, you will find the emergency recovery mode. Going into this mode may seem like a silver lining. But in a second, you will find out that the emergency recovery mode is none of the help.

Old Smart Switch with Device Initialization

There used to be a “Device initialization” feature in Smart Switch. Samsung removed this feature back in 2017. Since then, Samsung Galaxy owners have become quite helpless. But wait, there is a way to fix your device and that’s much easier than the Smart Switch.

At times, the disease is the cure. In our case, the Odin tool, which sent your device in the emergency recovery mode, is going to fix it. Take a look at the steps below to fix the phone stuck on Emergency Recovery Screen after Odin Flash Failed.

FIX Stuck on Emergency Recovery Screen after Odin Flash Failed

I’m assuming that you already know everything about Odin and how it works. Down below, I’m going to list the steps to fix the Emergency Recovery Screen quickly. It must be kept in mind that when your phone is in the Emergency Recovery Mode, it is basically in the download mode, and that’s where the catch is. Take a look at the steps now.

  1. While your Galaxy phone is on the Emergency Recovery Screen, connect it to the computer.
  2. Open Odin and load all the firmware files.
  3. You will find that Odin has already detected your phone.
  4. The options checked in Odin should be F.Reset.Time and Auto-Reboot.
  5. After making all the preparations, click on the “Start” button in Odin.
  6. Let the firmware flashing end. Once done, disconnect the phone and let it turn on. You will be out of the Emergency Recovery Screen now.
Stuck on Emergency Recovery Screen
Firmware being flashed via Odin while the phone is still on the Emergency Recovery Screen.

Final Words

As soon as the phone restarts after Odin shows “PASS”, you will be out of the Emergency Screen. This is by far the easiest way to fix this problem on any Samsung Galaxy phone. I personally had this issue last night when I interrupted the Android 10 software installation on my Galaxy S10 Plus. The Odin fixed the problem within a few minutes. If you have any questions regarding this guide, feel free to use the comment section below. I will make sure to get back to you as soon as possible.

More: How to fix Odin stuck at NAND Write

How to fix Odin stuck at NAND Write

4
How to fix Odin stuck at NAND Write
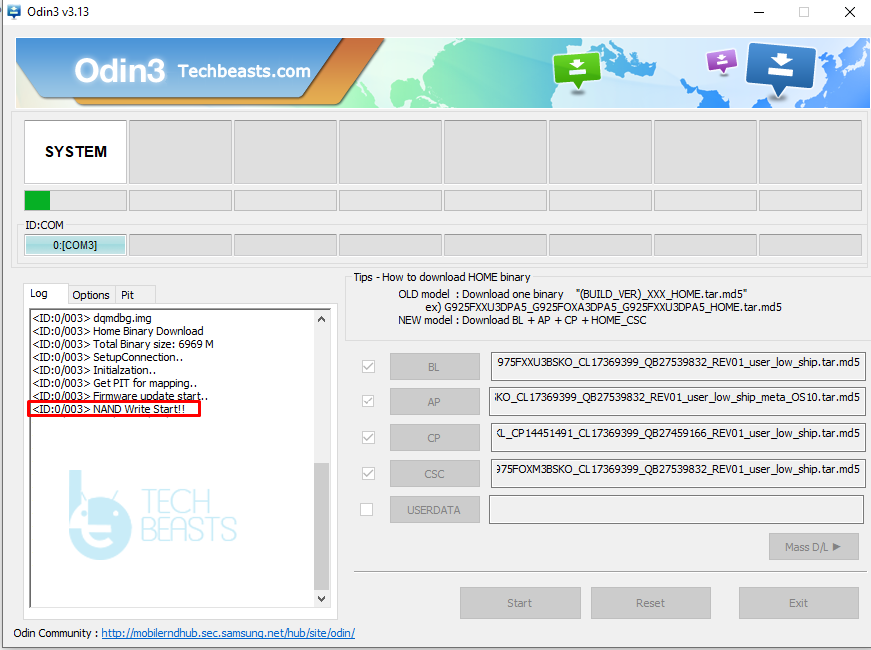
Odin unable to go beyond NAND Write

Are you unable to get past the NAND Write while trying to flash a stock Samsung firmware via Odin? Well, you are not alone. This is the guide on how you can fix Odin stuck at NAND Write. It is extremely easy to fix NAND Write issue. Before you attempt to solve this problem, let me tell you why it happens.

Odin stuck at NAND Write
Odin unable to go beyond NAND Write

NAND Write in Odin

For the unbeknownst, NAND is the non-volatile memory that saves the data when your phone is turned off. When you attempt to install new firmware on your Samsung Galaxy phone, the very first thing the Odin does is to write the NAND. This is the most important part of the firmware flashing. If for some reason, the Odin is unable to perform a complete NAND Write cycle, it will not flash the firmware. Basically, when you are stuck at NAND Write, your phone does not even know if anything is going to happen.

Being stuck on NAND Write also means that nothing happens to the existing firmware on your phone. From this state, you can turn on your phone and it will keep functioning normally on the previously installed software.

For the firmware flashing to begin, it is very important for Odin to move ahead of the NAND Write.

If the Odin logs are stuck at NAND Write for more than a minute or two, you can assume that there is something wrong with it that needs to be fixed.

This happened to me recently when I was trying to install the Android 10 on my Galaxy S10 Plus. For over 15 minutes, my Odin was stuck at NAND Write and I ended up removing the phone without upgrading. However, later on, I was able to figure out the problem and I managed to download the Android 10.

There is not a particular reason that makes Odin3 stay at NAND Write. In fact, there is a bunch of reasons that can contribute to the situation.

Down below, I’m going to list all the solutions that will help you fix Odin stuck at NAND Write.

Fix Odin stuck at NAND Write

  • First of all, make sure that OEM Unlocking is enabled on your phone. If the phone is OEM locked, Odin will never be able to flash the new ROM.
  • Always use the original data cable to connect it to the computer for flashing.
  • Make sure you are using the appropriate version of Odin. The Odin has two-way compatibility. Your phone must be compatible with Odin and vice versa. My S10 Plus was stuck and NAND Write because of Odin compatibility. I was using Odin 3.10.6 to flash Android 10, while the Odin I was supposed to use was the 3.13.1. Changing to Odin 3.13.1 resolved the NAND Write issue.
    • So, if you are using a phone that came in 2017 or later, you must use Odin 3.13.1. For older phones, you can use the older version of Odin. Also, for Android Pie and Android 10, make sure you use the Odin 3.13.1 only.
  • If something is broken in the firmware file you downloaded, there is a possibility that it will be stuck on NAND Write. Always download firmware files from credible sources. I recommend all Samsung Galaxy owners to use SamFirm to download firmware.
NAND Write problem in Odin

Conclusion

By now, you should be able to smoothly install new firmware via Odin. NAND Write is very easy to fix as you might have already noted. The issue can annoy you at first, but fortunately, it’s not very hard to take care of. If you have any additional questions, feel free to use the comment section below. I will try my best to get back to you as soon as possible.

How to update Galaxy S10/S10 Plus to Android 10 right now

How to update Galaxy S10/S10 Plus to Android 10 right now

Samsung Galaxy S10 lineup is getting the Android 10 official update now. If you carry any phone from the S10 series, you can update it right now. This is the tutorial to update Galaxy S10/S10 Plus to Android 10. The guide here will show you the steps to install official system update.

update Galaxy S10/S10 Plus to Android 10

Galaxy S10 Android 10 Update

After months of beta testing, the final Android 10 update for the S10 phones has finally rolled out. Samsung has released the update for Galaxy S10E, Galaxy S10, and the Galaxy S10 Plus. In the first phase, the update is reaching out to the Galaxy S10 owners in Germany via OTA. The update has been made available to the G97*F models of the S10 lineup.

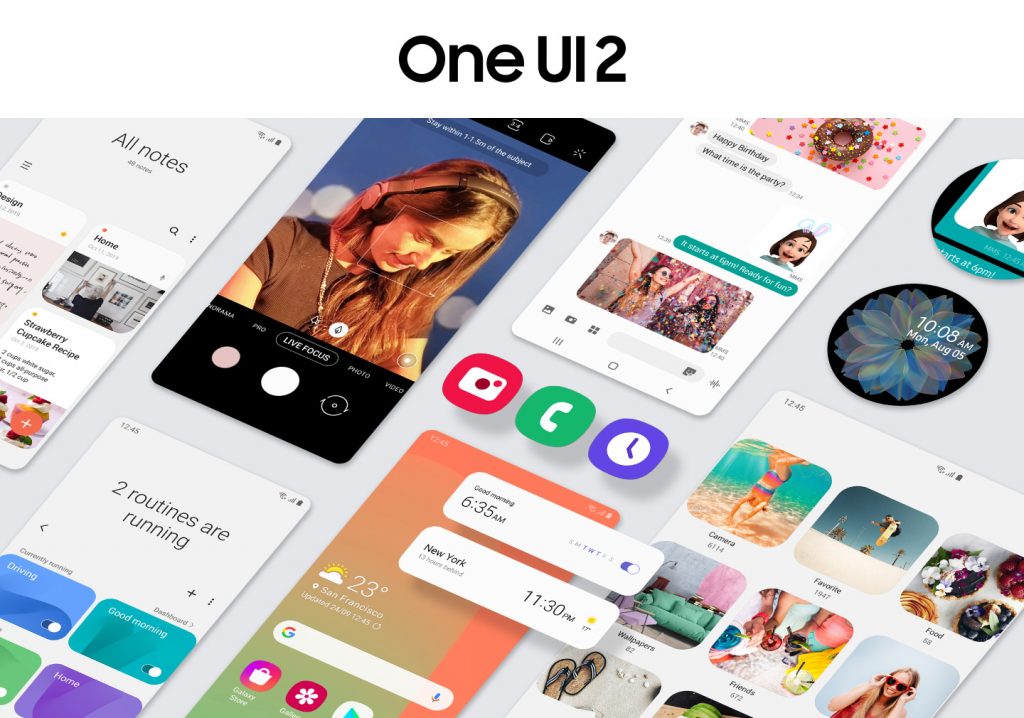
Android 10 Update, unlike the previous Android updates, isn’t focusing much on the new features. It rather focuses on a new UI. Samsung is updating the One UI to One UI 2.0. The new UI enhances the previous UI to make it look and feel better.

Starting from the lock screen to the settings of the phone, Samsung has changed pretty much everything. The new One UI 2.0’s inspiration comes from Samsung Good Lock 2019 app. If you have used the Good Lock, you will already be familiar with most of the One UI 2.0 features.

Galaxy S10 Plus Android 10 Firmware update
One UI 2 – Image CC: Samsung

Samsung has changed the way elements look on the screen. For example, the company has tried to fit in more toggles in one notification panel now. Similarly, more icons/options are fit into the settings app’s menu. Samsung has changed the UI of the camera app. From the camera symbol to the camera settings, everything is new. There is a new “More” button in the camera app which now lets you access more features of the camera.

The Dark Mode works with more apps now. It can now even make your wallpaper dark. The wallpaper app of the phone doesn’t take you to the Galaxy Store anymore. It will keep you in the wallpapers menu only. 

Samsung has also changed the way the phone app pops up a call when you are using a certain app. Instead of occupying the entire header of the phone, the call pop-up looks much smaller now distracting you the least from what you were previously doing on the phone.

Other than the new One UI 2.0, the Android 10 update brings performance and battery enhancements. You will find your phone performing better than before with this update. Also, it brings the latest security patch on the board.

Updating the Galaxy S10E/S10/S10 Plus to Android 10

If you are living inside Germany, you can just go to Settings of your phone, open Software Update, and check for updates. You will get the Android 10 over-the-air. But if you are living in another country and you don’t want to wait for OTA for your region, you can manually install the Android 10 update right now. This can be done via Odin 3.13.1. I’m going to show you the steps below to update Galaxy S10/S10 Plus to Android 10 manually now. You have to prepare your phone before you start flashing.

Preparations to flash Android 10 on Galaxy S10

  • This guide is for all Galaxy S10, S10E, and S10 Plus models. Do not try on any other phone.
  • Backup your phone’s data including pictures, documents, music, WhatsApp data, contacts, call logs, and messages.
  • You need the original USB Type-C of your phone for this installation.
  • On your phone, enable OEM Unlocking and USB Debugging Mode.
  • Turn off your Antivirus and Firewall if you have it enabled.
  • Also, turn off your Samsung Smart Switch if it was on.

Requirements

  • Download Android 10 for your Galaxy S10/S10E/S10 Plus
    • Extract the downloaded firmware to get AP, CP, BL, CSC, Home_CSC files.
    • If you want to factory reset your phone, you will use the CSC file. If you don’t want to wipe the phone, you will use the Home_CSC file.
  • Also, download Odin 3.13.1 on your Windows computer.
  • If you are using Mac, download Odin for macOS from here.

Update Galaxy S10/S10 Plus to Android 10

These are the simple steps to upgrade Galaxy S10 to Android 10 via Odin.

Total Time: 10 minutes

Open Odin 3.13.1 on your computer and add AP, CP, BL and CSC files.

First of all, open Odin on your computer and in Odin, click on the AP tab and add the AP file, add the BL file to the BL tab, CP file to CP tab, Home_CSC or CSC file to the CSC tab.

Set up options in Odin.

In Odin, go to Options and make sure the only checked options are F.Reset.Time and Auto-Reboot. No other option should be checked.

Boot your Galaxy S10 into the Download Mode.

Power down your S10 phone, now press and hold Volume Up + Bixby + Power button to boot into Recovery. As soon as you enter recovery, select “Reboot to bootloader” and press the power button.

Connect Galaxy S10 in Download Mode to your computer.

While your Galaxy S10 is in the Download Mode, connect it to your computer. Odin will now show “Added” in the logs.

Click on the Start button in Odin and update – That’s all!

Making sure that all files are added, the phone is connected, click on the “Start” button in Odin. Firmware flashing will start and finish in about 10 minutes. Your phone will restart automatically once done.Galaxy S10 Android 10 Update

After the firmware isntallation comes to an end, your Galaxy S10 will begin to re-install. This first boot can easily take up to 10-15 minutes so do not panic. Also, disconnect the phone from the computer once it restarts. Your phone will be running on the Android 10 as you see its homescreen. 

Final Words

This is it for this tutorial. I hope you liked this guide and by now, your Galaxy S10 is running on the latest Android 10 update with One UI 2.0. If you have any questions regarding this guide or the Android 10 for S10, feel free to use the comment box below. I will try my best to get back to you in time.