Home Blog Page 14

Garena Call of Duty Mobile PC FREE DOWNLOAD

Garena Call of Duty Mobile PC FREE DOWNLOAD

Garena’s COD Mobile is as good as Activision’s COD Mobile. If you just want to enjoy a new touch of graphics in the Call of Duty Mobile, you may try Garena’s version. COD lovers can easily download Garena Call of Duty Mobile PC. The Garena COD Mobile for PC will run on Windows or macOS. Before you download this game, let me give you its overview.

Overview of Garena Call of Duty Mobile

For those who don’t know, the Call of Duty is a decades-old FPS game from Activision. A year ago, Activision joined hands with Tencent to bring the mobile version of this famous game. The Call of Duty Mobile was in development for years before its official release. Before Activision rolled out the full and final version of COD Mobile, another company going by the name “Garena” released their version of the game. Garena named it Call of Duty Mobile too followed by their company name at the end.

garena call of duty mobile for pc

A huge number of users confused Garena’s COD Mobile version for the original COD Mobile. This was obvious as Garena’s version is a 100% pure rip-off of the original game. The graphics, color accents, weapons, element names, maps, everything else is similar to the original COD Mobile. The only thing where this game differs is the graphics.

For instance, if the shape of guns in Garena COD Mobile may differ from that of the same gun in COD Mobile. The number of elements in a map would differ and so on. Other than that, the gameplay, missions, tournaments, events, everything is the same. The good thing about Garena Call of Duty Mobile is that it is not a low-quality/poor rip-off. It is actually as good as the original game which is why it also has millions of players.

garena call of duty mobile pc

Garena COD Mobile Gameplay

Like Call of Duty Mobile, the Garena Call of Duty Mobile also has two modes i.e. Multiplayer and Battle Royale. In the Multiplayer mode, players are given a specific task which is to either capture the flag, secure an area, team deathmatch, or something else. The players finishing their task first win the game. In the Battle Royale, over 100 players land in the area and then the quest for life starts. The last man standing wins.

The battle royale in Call of Duty Mobile is just like PUBG, the only difference here is that this battle royale is more militarized. A wide range of weapons is available to the players. Players are also free to choose their class in both the multiplayer and battle royale matches. Garena COD Mobile also has a number of good vehicles including Jeeps, Trucks, Cars, and more. Players can also find Air Crafts and Helicopters in the game.

garena call of duty mobile pc

Activision COD Mobile vs Garena COD Mobile

It is very difficult to say which version of COD Mobile is better. Choosing one of the two versions is totally a personal choice. If you don’t want to experience the typical COD Mobile graphics, the Garena COD Mobile may be a good choice. But if you are a die-hard and old-school COD Mobile fan, there’s no reason not to play the Activision’s Call of Duty Mobile.

Garena Call of Duty Mobile for PC

We have already thoroughly covered the original Call of Duty Mobile on our site and you can take a look at all of its guides here. However, here in this guide, I am going to show you how to download Garena Call of Duty Mobile on PC. Take a look at the requirements below and install Garena Call of Duty Mobile for PC.

Requirements to download Garena COD Mobile on PC

  • Desktop PC or Laptop with Windows or macOS.
  • Internet Connection.
  • Mouse & Keyboard.
  • Google Account – If you do not have one, create it for free.
  • BlueStacks 4.2 for Windows or BlueStacks 4.1 for macOS. Download & set up the emulator using your Google Account.
  • Follow the remaining steps given in this guide.

Download Garena Call of Duty Mobile PC

  1. On your computer, open the BlueStacks emulator.
  2. In the BlueStacks, open the Play Store.
  3. Type “Garena Call of Duty Mobile” in the Play Store and search it.
  4. As you find the game, install it, installation can take time.garena call of duty mobile on pc
  5. Once done, launch Call of Duty Mobile Garena in the BlueStacks.
  6. Note down the keymapping for the game and go ahead.
  7. Choose the mode, your player, set up the basic configuration of the game, and start playing.

Final Notes

You’re all set to enjoy Garena COD Mobile for PC on a bigger screen. The advantages of playing this game on a computer are so many. For example, first of all, you’re able to see the battleground clear and better. The mouse & keyboard will give you an ultimate advantage over all those who are playing the game on their phones. FPS games are the best when played using a mouse.

You can easily take all of your enemies to the cleaners this way. With the bigger speakers attached to your computer, you can also get a better experience of the game’s sound effects. Furthermore, you will never run into storage/cache issues while playing Call of Duty Mobile Garena on PC. Just in case you run into any problems, feel free to reach out to us. We will try our best to help you out.

FAQs

Is Call of Duty Mobile Garena Free?

YES! Garena Call of Duty Mobile is a free game. The game does have some IAPs, but for the most part, it’s a free game.

Can I download Garena Call of Duty Mobile on Windows 10?

YES! You can download Garena Call of Duty Mobile on Windows 10 via BlueStacks Emulator 4.2.

Is Garena Call of Duty Mobile for PC Safe?

YES! We are download Garena Call of Duty Mobile for PC via Play Store and using the BlueStacks Android emulator. Rest assured, you can fully trust our method.

Is Call of Duty Mobile Garena better than COD Mobile?

YES and NO! This is a completely personal choice. You should try both versions of this game and stick to the one that appeals to you the more.

Is Garena COD Mobile available on the Play Store?

YES! Garena COD Mobile is officially available in the Google Play Store for all Android devices.
How to fix Call of Duty Mobile No Gun, No Shooting, Invisible Players Issue

0
How to fix Call of Duty Mobile No Gun, No Shooting, Invisible Players Issue
Invisible Players & Unable to shoot

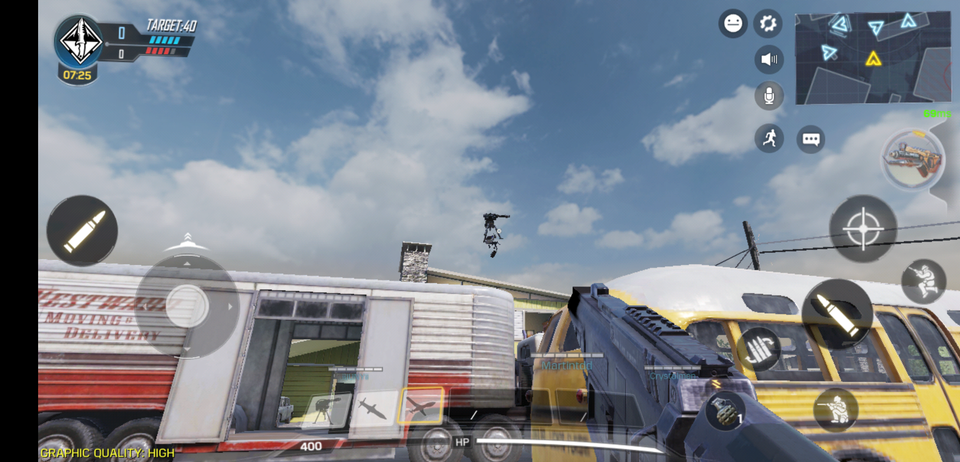
Call of Duty Mobile players is blushing out of happiness after getting this much-awaited game. Call of Duty Mobile is definitely worth the hype, but the bugs in the game are killing the excitement of players. The very first bug faced by almost all the COD Mobile Players is the presence of invisible players in the game. Players are unable to use the guns. The names of guns do not appear in the game. They are unable to shoot too. So, in this guide, we will take a look at the steps to fix Call of Duty Mobile No Gun, No Shooting, Invisible Players issue.

cod mobile bugs
Invisible Players & Unable to shoot

Call of Duty Mobile – The Craze at its peak

Call of Duty Mobile just took an exit from its alpha stage. The game is in the beta stage now and looks like the alpha-level bugs are still there.

There is a huge positive sentiment about the Call of Duty Mobile at the moment. The game is successfully taking over the PUBG Mobile madness now, and I guess for this very reason, the developers released this game in India first of all. The users who were eager to play this game in the beta stage, they choose Reddit to talk about the problems they were facing. A large number of users reported that they were unable to use the Guns in the game. If they had guns, they were unable to shoot. If they were able to shoot, an invisible opponent shot them from an unknown location. 

Call of Duty Unknown Guns, Shooting Problem – Invisible Players in a Video. Source: Reddit.

After the first post about the No Gun, No Shooting, Invisible Players, this was confirmed by a dozen of other players. The developers of Call of Duty Mobile were kind enough to take note and recognize this bug. It took 1 day for the developers to come up with a fix.

So, as of writing this guide, the No Gun, No Shooting, Invisible Players bug has been fixed. If you still can’t use Guns or if someone is acting ghostly in your game, its time to fix. 

Below are the easy steps to fix Call of Duty mobile No Gun, No Shooting, Invisible Players problem.

Fix Call of Duty Mobile No Gun, No Shooting, Invisible Players Issue

These steps will fix the problem for all of you. Before applying this fix, please update COD Mobile to its latest version. Also, close the game and then follow these steps.

Total Time: 5 minutes

Turn off WiFi and Mobile Data

Pull down the notifications panel and turn off the WiFi and Mobile data on your smartphone.

Open Call of Duty Mobile now.

While the internet is off, open COD Mobile now. An update error will occur here. Minimize the game. Do not exit, just minimize.

Connect WiFi, and then turn on VPN.

Turn on WiFi or Mobile Data now. Open the VPN you are using and connect to India. Any other country will not work.

Open Call of Duty Mobile again.

Now open COD Mobile and let it go through the updates and login process.

Play the game now. You should be able to shoot.

Start a match and try to shoot. Everything should work perfectly now. That’s all.

Check out: Best VPN to play Call of Duty Mobile.

Final Words

That’s all about fixing this problem in COD Mobile. I hope this fix has helped you. If you found it working, make sure that you drop feedback below.

Another thing that I would like to add is, the game is in beta stages and you have to understand how it works. The alpha/beta stages are meant to find out all the possible bugs in the game so that they do not make it to the final build. So, if you find any problem in Call of Duty Mobile, make sure that you report it to the developers to fix it.

For any queries or questions, you can reach out to us through the comments section or through our contact us page. Happy CODING!

Best Free CamScanner Alternatives 2020

0
Best Free CamScanner Alternatives 2020
Best Free CamScanner Alternatives

Looking for CamScanner Alternatives? You have landed at the right place. Here you will find the best free CamScanner Alternatives. Before taking a look at the CamScanner alternatives, let us take a look at what CamScanner is and why do you need its alternatives.

Best Free CamScanner Alternatives

The advent of smartphones made it very easy for people to keep a record of everything. Long ago, people stopped keeping the hard copies of their bills, challans, ID, passport, and other such documents. The cameras on smartphones helped users to capture the pictures of any documents.

People started relying more on the pictures rather than the actual hard copies of documents of importance. And obviously, it wasn’t that easy to head over to a printing/scanning ship just to get your documents scanned. Smartphones made things easy in every possible way.

How CamScanner beautified scanning?

Sharing the documents has never been this easy before. People today can snap the pictures of documents and send them out via Email, WhatsApp, and Messenger on the go. Now that this has become a norm, someone wanted to beautify this process and came up with the idea of CamScanner. It is undoubtedly one wonderful application.

With CamScanner, you can capture the pictures of documents, but they will not be the ordinary pictures. The magical process of CamScanner transforms your pictures into a look that you would usually get from an original scanner. The digitally transformed documents look way better than the ordinarily captured images.

CamScanner can also make PDF files of the documents you scan. This way, the documents look professional scanned as if you got them scanned from a shop. The quality/resolution of the scanned document is so high that you can go into each and every minor detail by zooming in. So basically, you are turning your phone into a scanner with the help of applications like CamScanner.

Flattering the concept of CamScanner

Whenever a concept takes the shape of an application for the first time, it ends up having a few downsides. Not exactly the downsides, but a new concept needs a lot of polishing. It takes a number of iterations for the developers to achieve perfection. They keep on coming with the applications based on the same concept until they achieve what they exactly want.

Developers keep on introducing new features to the application to see what users like the most. In the end, the users have a wide range of applications to perform one same thought. Since the users have freedom of choice, they can pick up whatever application fulfills their needs.

Also, check out: CamScanner for PC FREE Download Windows 10, macOS

The reason for explaining all this is that today, there is a number of applications similar to CamScanner. CamScanner is still, arguably, the best application to scan your documents, but just in case you don’t like this very application, you do have many other choices.

All such applications have their own pros and cons. Some applications give you additional features that you will not find in the CamScanner application.

So, in this post, we will take a look at the best free CamScanner alternatives. The CamScanner alternatives are handpicked after doing extensive research. These best free CamScanner alternatives are completely safe to use. All these CamScanner alternatives work up to the mark.

Best Free CamScanner Alternatives

HP Smart

Best Free CamScanner Alternatives
Image – HP Smart

HP Smart is HP’s official assistant application for its smart printer lineup. All the HP printers that have the WiFi capability, they can be controlled via the HP Smart application. I am listing this application here at the first number because of my personal experience. It doesn’t matter if you do not have an HP Printer, the features of this application are for all the Android and iPhone users.

You can download the HP Smart application to scan your documents. The scanned documents are exported in a very high-resolution PDF file or a JPEG file. The scanned files can be edited as well. The scanner in the HP Smart application is quite efficient which makes it the best alternative to CamScanner.

HP Smart for Android | HP Smart for iPhone

Adobe Scan

Best Free CamScanner Alternatives
Image – Adobe Scan

When it comes to creating PDF files, editing the PDFs, or going anything related to documents, nothing beats Adobe. Adobe’s tools are the most popular ones to edit/create/manage the documents.

The Adobe Scan application is just an addition to Adobe’s document-fleet. Adobe Scan can digitize any document anywhere anytime for you. This application can create high-quality PDFs and JPEGs of your ID, Passport, Bills, Documents, Challans, Cards, and everything else that you would want to scan.

Furthermore, the Adobe Scan can also scan the business cards. It has the ability to directly save business cards in the contacts. The OCR feature will let you extract the text out of the pictures. You can edit this text using the PDF file created by the application. Adobe Scan is also available for both the Android and iOS operating systems. The Adobe Scan is unarguably one of the best CamScanner alternatives.

Adobe Scan for Android | Adobe Scan for iPhone

Clear Scan

Best Free CamScanner Alternatives
Image – Clear Scan

Clear Scan, like the other two applications listed above, is a very neat application to scan your documents. This application is very small in size. It works quite fast. Clear Scan can give your documents a professional look.

You can create color-copies or the black & white copies of the documents. It can scan any photo or document. All the scanned items can be edited later on. Like the Adobe Scan, it also has the OCR feature to transform images into text.

The file manager of the Clear Scan application allows you to access all your scanned items in one page. This application also lets you set the page sizes for the PDF files. For example, you can specify whether you want the page to be Letter, Legal, or A4.

The PDFs can be directly saved on the cloud drives like Dropbox and Google Drive. It also has the backup feature which means you will never lose your data.

Clear Scan for Android | Clear Scan for iPhone

Scanbot

CamScanner Alternatives
Image – ScanBot

Scanbot is another nifty application to deal with your documents. This is a small-sized feature-rich application. The capabilities of Scanbot include scanning the documents, IDs, photos, cards, visiting cards, passports, and anything else that is of importance to you.

It also has the QR Code scanning feature. It can scan the Barcodes as well. You can scan multiple pages and create one file containing all those pages. The created PDFs can be stored in the local storage of your phone or uploaded to the cloud drive. You can edit the PDFs to highlight the text. This application has the OCR feature too. It is quite easy to search through the text within the scanned files.

Scanbot for Android | Scanbot for iPhone

Fast Scanner

CamScanner Alternatives
Image – Fast Scanner

Just as its name suggests, this is a fast scanner. This application is built to serve its purpose without any complications. Scan the documents or the books you want and save the PDFs in your phone. Email the scanned documents, share them over connectivity applications, or upload them on the cloud drives.

Like the Scanners mentioned above, this application also allows its users to edit the scanned files. It also has the AirPrint feature just in case you want to control a printer via Fast Scanner. There is nothing much to learn about this application. It serves its purpose splendidly. This application is for the users who do not want any extra features other than the CamScanning.

Fast Scanner for Android | Fast Scanner for iPhone

Simple Scanner

CamScanner Alternatives
Image – Simple Scanner

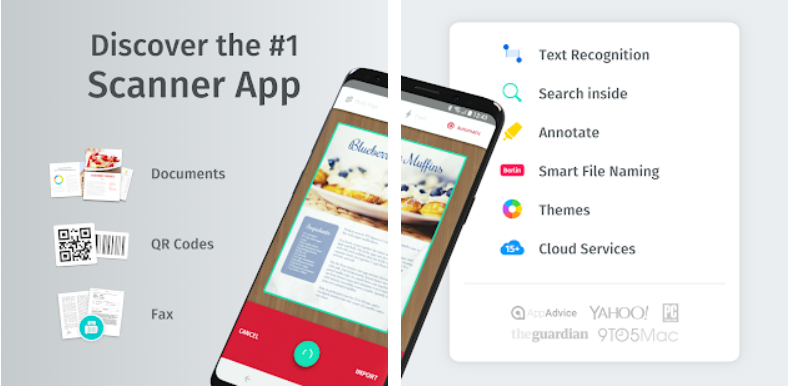
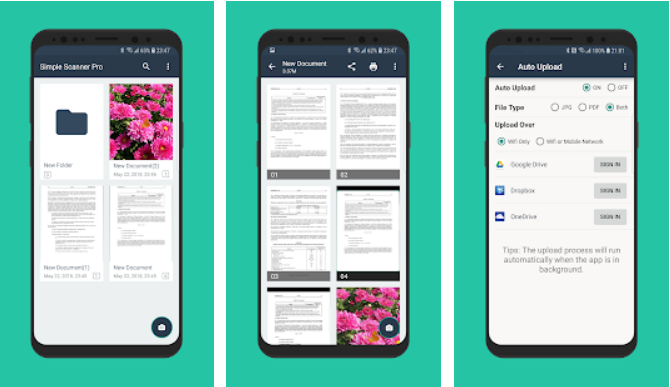
Another Simple Scanner to digitally transform your documents. This application detects the clutter on your documents and removes it. Even if you try to scan a little dull document, this application is going to enhance it to give the best possible look.

The scanned files are saved in the PDF format or the JPEG format. If you are interested in manually setting the image parameters, this application will let you do so. There are color scan, grayscale, or black and white scanning options. This app offers over 5 levels of contrast for monochrome text. You can also protect your scanned files by password. This is indeed a very nice alternative to CamScanner.

Simple Scanner for Android | Simple Scanner for iPhone(Easy Scanner for iPhone)

Tiny Scanner

CamScanner Alternatives
Tiny Scanner

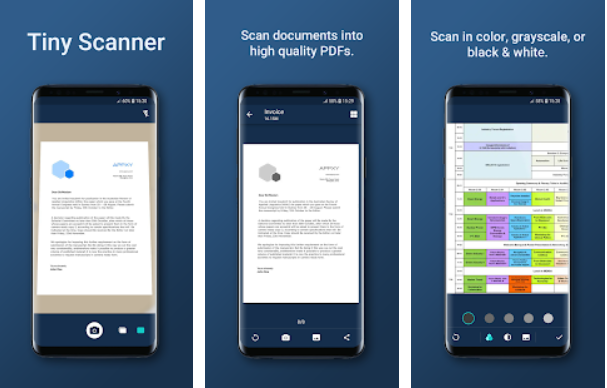
The name suggests this to be a Tiny Scanner, but when it comes to working, it is not really tiny. It is loaded with a plethora of features. This little application is built for professional use. Whether you have to scan documents in bulk at your office, school, or at home, this is the application you need. It adds a very neat touch to the edges of the scanned pages. The custom page size can be set in this application.

All the PDFs and JPEGs can be edited easily. You can protect your documents using a passcode. It shows very nice thumbnails of the scanned documents making it easy for the users to identify the files. The scanned documents can be uploaded to the cloud drives straight from Tiny Scanner. Tiny Scanner is also available for both the Android and iOS platforms.

Tiny Scanner for Android | Tiny Scanner for iPhone (Scanner++ for iPhone)

Conclusion

That’s all with the best alternatives to CamScanner. I hope that you guys really like these CamScanner Alternatives. If you want to find out alternatives to more applications, you can check our Best Picks section. If you have any other application to add to this guide, drop its name in the comments section below. You can reach out to us for any queries as well. We will try our best to get back to you as soon as possible.

More:

How to add Call of Duty Mobile FPS Counter on Android and iPhone

How to add Call of Duty Mobile FPS Counter on Android and iPhone
COD Mobile FPS Meter on my phone

This is the guide on how you can add Call of Duty Mobile FPS Counter on an Android phone or an iPhone. It will take a few seconds to enable the FPS counter for COD Mobile.

Call of Duty Mobile FPS Counter
COD Mobile FPS Meter on my phone

It goes without saying that Call of Duty Mobile has set new standards for the smartphone FPS games. Back in 2003, the first Call of Duty game landed. The game has seen numerous versions since then. A few weeks back, its mobile version came out and quickly broke all the records for both Android and iOS.

Call of Duty Mobile is being played by millions of players at the moment. It’s not just the Android and iOS users playing this game, even the Windows users are playing it with the help of COD Mobile emulators. To let the COD lovers play this game on the computer, the developers released their own emulator, the Gameloop.

Smartphone gaming has become a notable segment of the gaming industry. Gone are the days when gaming was a PC or console thing only. We even have gaming smartphones and these days we see companies like OnePlus, Google, and Realme coming up with 90Hz displays on their phones. It’s really amazing to see how this industry is shaping itself. The more powerful hardware the phones are getting, the more the users want to unlock the phone’s real potential. Running a game like Call of Duty Mobile at the maximum frame rate is also one of the ways to check a phone’s performance. If you want to check the FPS of a phone, there’s no other game better than COD Mobile to do this.

Call of Duty Mobile FPS Counter
Playing COD Mobile on my Redmi Note 8 Pro

Fortunately, it’s very easy to add FPS meter for Call of Duty Mobile. You can monitor the real time frame rate of the game in both the Multiplayer and the Battle Royale mode.

Recording the Call of Duty Mobile FPS on your phone will give you an idea of your phone’s performance. The game gives you different FPS options. You can find the low, medium, high, and max frame rates in the phone’s graphics settings. The same goes for graphics quality. These options vary from phone to phone. If you have a high-end phone like the iPhone XS Max, Galaxy Note 10 or another from this league, you will get the Max frame rate option. Similarly, if you have a high-end midrange like the Redmi Note 8 Pro, you will get a high or max FPS option too.

If you have got a new smartphone and you are now interested in checking its FPS for Call of Duty Mobile, you can do so by following the instructions in this guide. In a bit, I’m going to show you the steps to enable FPS meter for Call of Duty Mobile on both Android and iOS.

Add Call of Duty Mobile FPS Counter on Android and iPhone

Before you show Call of Duty Mobile FPS Counter on your phone, these are a few tools/apps you need on the phone.

Requirements

  1. You need your phone’s Data Cable.
  2. A Windows or Mac PC is needed.
  3. On your Windows or Mac PC, download the Gamebench Service Launcher – Download
  4. On the Android phone, download and install Gamebench – Play Store
  5. Call of Duty Mobile must be installed on the phone – Play Store | App Store
  6. On the Android phone, enable USB debugging. To do so, go to settings > About phone > Tap the build number 7 times. Now go back to settings > Developer options > enable USB debugging.

Adding COD Mobile FPS Counter on Android

  1. On the phone, launch the Gamebench application.
  2. Now launch the Gamebench service launcher on your computer too.
  3. Connect the phone to the computer.
  4. The phone will ask for some permissions, allow it.
  5. Gamebench service launcher on your computer will detect the phone and launch the service on the phone.
  6. On the phone, add your desired game to Gamebench.
  7. Now launch the game from Gamebench.
  8. The game will open with the FPS counter on the top-right corner.
Call of Duty Mobile FPS Counter
COD Mobile in Gamebench
COD Mobile FPS Counter
Uploading COD Mobile FPS stats to Gamebench
Call of Duty Mobile FPS Meter
Call of Duty Mobile FPS Meter on my Redmi Note 8 Pro

You will see a yellow FPS count on the top-right corner. A recording button will also appear on the screen. You can stop the FPS meter whenever you want. Remember that you will have to play the game for at least 15 minutes to record accurate metrics.

Call of Duty Mobile FPS Counter
Call of Duty Mobile FPS Stats, Battery, RAM and CPU Usage.

After recording the FPS in a game session, you will open Gamebench and upload your session to the Gamebench’s server. In a few seconds, you will get all stats for the game. These stats include the Battery usage by the game, CPU, RAM usage, and temperature of the phone.

COD Mobile FPS Counter
Battery, CPU, RAM, and FPS Stats for 15 mins session on my Redmi Note 8 Pro

COD Mobile FPS Counter for iPhone

To show the counter on an iPhone, you will launch the Gamebench tool on your macOS powered device. Launch the game on your phone and connect it to your phone. The macOS Gamebench tool will record the FPS and show you the results.

Conclusion

That’s all. You will be able to calculate the FPS produced by your phone easily using this method. Gamebench is not limited to FPS only as you might have seen above. This is a huge tool and it completely depends on you how you want to use it. If you have any questions or queries regarding Call of Duty Mobile or the Gamebench FPS counter for COD Mobile, feel free to drop them in the comments below. I will try my best to get back to you as soon as possible.

How to install ReProvision to SIGN Unc0ver 5.3.1 iOS 13.5 Jailbreak

0
How to install ReProvision to SIGN Unc0ver 5.3.1 iOS 13.5 Jailbreak

iOS 13.5 Jailbreak is still up and working well. If you have recently Jailbroken your iPhone or iPad, you may face the Unc0ver signing problems. To fix that, you can install ReProvision to sign Unc0ver 5.3.1 iOS 13.5 Jailbreak. Here in this tutorial, you will find the steps to download and install ReProvision on any iOS device.

Install Reprovision sign unc0ver

iOS 13.5 Jailbreak

The iOS 13.5 Jailbreak was a big breakthrough. It came out about a week back. The famous Unc0ver tool achieved this Jailbreak. Unc0ver’s development team started teasing the Jailbreak on twitter a couple of days before the tools official release. For the iOS 13.5 Jailbreak, the Unc0ver was bumped to version 5.0. At the moment, the latest version of Unc0ver is 5.3.1. Since Apple is still signing the iOS 13.5, it is pretty easy for users to get this newest iOS version and Jailbreak it right away. The best thing about Unc0ver is that it doesn’t require you to be an expert. Even if you are an average iOS user, you can Jailbreak an iPhone or iPad by simply following the tool’s instructions.

The real problem comes up when the certificates of the Unc0ver are revoked in about 7 days. The Unc0ver users temporary free developer accounts to let you install and sign the app. Once it revokes, you have to connect your iPhone to the computer and repeat the entire Jailbreak process all over again. After that, you can enjoy Jailbreak for 7 more days and it will be back to square 1.

To make this thing easy, an app called ReProvision can be used. ReProvision can sign Unc0ver without the need for connecting the iOS device to the computer. In fact, the App can sign the Unc0ver and many other apps in a few seconds on the go. Installing RePrivision is the most difficult part, but with the process that we are going to show you, that will become easy too. So, to sign Unc0ver iOS 13.5 Jailbreak, go ahead, and install ReProvision now. Make sure to follow the requirements and steps carefully.

Requirements to install ReProvision

  • Your iPhone/iPad must be iOS 13.5 or iPadOS 13.5.
  • The device must be Jailbroken via Unc0ver.
  • Unc0ver & Cydia must be installed.
  • Follow the steps carefully.

Install ReProvision on iPhone or iPad

  1. Open Cydia on the iPhone/iPad.
  2. Click on Sources > Add > Type this: https://repo.incendo.ws > Add source.
  3. Once the source is added, click on Return to Cydia.
  4. In Cydia, find the incendo repository now and go to All Packages inside it.
  5. Now find “ReProvision” in the list and click on it.
  6. Click on Modify > Install – If ReProvision asks for SpringBoard Restart, click on it.
  7. Wait for ReProvision to be installed now.
  8. Open ReProvision on the device now and click on the Dismiss button to remove the cover.
  9. Enter your Apple ID Password in the ReProvision app now.
  10. Now click on Unc0ver once it appears inside ReProvision, ad click on Sign.
  11. If you see any error, just go to ReProvision > Troubleshooting > Manage Certificates > Remove Device from ReProvision.
  12. Sign Unc0ver by repeating steps 9 & 10 again and it will be signed this time.

Final Notes

That’s all with this process. You have the ReProvision installed now and you can sign Unc0ver any moment without using a computer. Just in case you find anything difficult in this method, feel free to reach out to us. The best way to contact us would be via the comment section below or the contact us page on our site. We will try our best to get back to you as soon as possible.

Check out: Jailbreak iOS 13.5 without PC

How to UnJailbreak iOS 13.5 – Uninstall Unc0ver/CheckRa1n

0
How to UnJailbreak iOS 13.5 – Uninstall Unc0ver/CheckRa1n

So you Jailbroke your iPhone or iPad recently and now you want to UnJailbreak it. To do so, you have landed at the right place. Here you will find the steps to UnJailbreak iOS 13.5. You can uninstall Unc0ver or CheckRa1n to Unjailbreak iPhone/iPad running on iOS 13.5. Unjailbreaking the device will restore it back to stock.UnJailbreak iOS 13.5

UnJailbreak iOS 13.5 – Uninstall Unc0ver & Remove Cydia

  1. On your Jailbroken iPhone or iPad, open the app drawer.
  2. Now open Unc0ver.
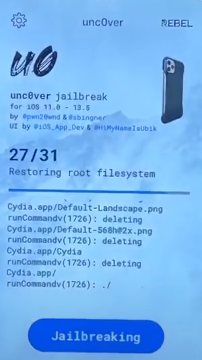
  3. Go to Settings in Un0cver App.unjailbreak ios 13.5
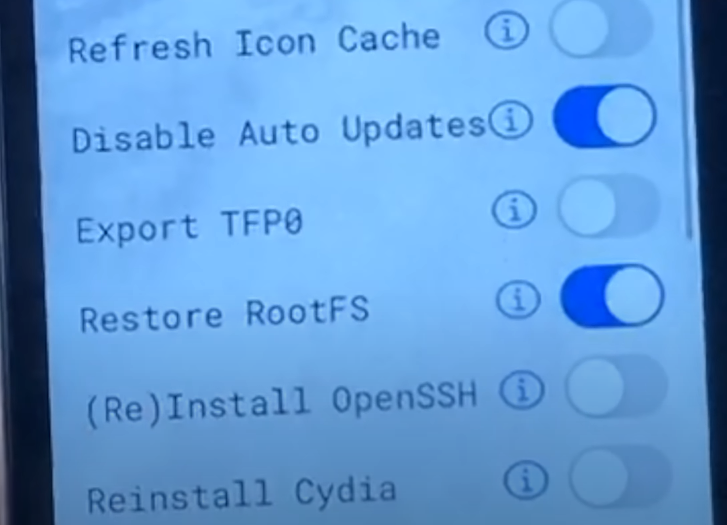
  4. Scroll down and find the option “Restore RootFS” and turn it on.unjailbreak ios 13.5
  5. Go back to the Unc0ver app and click on the Jailbreak button.
  6. The UnJailbreak process will start and take a few seconds.unjailbreak ios 13.5
  7. As soon as its done, your iPhone or iPad will restart.
  8. Unc0ver will be uninstalled and Cydia will be removed, all done!

UnJailbreak iOS 13.5 – Uninstall CheckRa1n

  1. If you have CheckRa1n, open it on your iPhone or iPad.
  2. Click on “Restore System”.unjailbreak ios 13.5
  3. Start the unjailbreak process and follow on-screen instructions.
  4. Once done, restart your device.
  5. Chimera will be gone and Cydia will be uninstalled too.
  6. Your iPhone or iPad is Jailbroken now.


From Jailbreaking iOS 13.5 to UnJailbreaking

iOS 13.5’s semi-untethered Jailbreak came out a few days back. The new Unc0ver 5.2.0 allowed achieving Jailbreak on all iPhones or iPads powered by the latest iOS 13.5. Unc0ver was updated after its version 4.3.1 which allowed Jailbreaking iOS 13.3. This was one of the biggest developments in the history of Unc0ver as it Jailbroke all iOS devices running all signed iOS versions. The Unc0ver basically supported iOS 11 to iOS 13.5 and also had the support for A12 and A13-powered devices.
When you Jailbreak an iOS device, you basically access its system files. Once you have that access, you can perform any kind of customizations and modifications. The changes made to the system can enhance the performance and battery life of your device too. In simple words, apart from adding new UI elements, you can manipulate the behavior of the iOS device. Apps like Unc0ver install Cydia on the iPhone/iPad. Cydia is a Jailbreaker’s heaven. The Cydia store has all the apps/tweaks/scripts which can either customize the UI of the phone or just add some performance features. Cydia supports thousands of repositories and each repository has thousands of tweaks. Some of the famous Cydia repositories include BigBox, Packix, and Chariz. You can also take a look at the best free iOS 13.5 Jailbreak tweaks here.

Other than Unc0ver, there is CheckRa1n, which uses some other exploits to achieve Jailbreak. CheckRa1n requires a specific system i.e. macOS to Jailbreak a device, which is why it’s not as popular as Unc0ver. The Unc0ver tool’s convenience convinces most of the iOS users to Jailbreak their phones. Whether you Jailbreak via Unc0ver or CheckRa1n, both tools will install Cydia.

What does UnJailbreaking mean?

When we talk about unjailbreaking an iPhone, our ultimate goal is to remove Cydia and revoke the access for all of its tweaks to the system. The parent app is removed along with Cydia.

So the process that we performed above, that actually removed Cydia and restored the system in its original form. This also gives you a very clear understanding of what the unjailbreaking means. It just brings the system’s restrictions back in the place. After unjailbreaking, you can continue updating your iPhone to new iOS versions and also start using the stock features as you were using before Jailbrekaing.

Final Notes

If, at any point, you plan to Jailbreak your device once again, you can follow one of these tutorials:

That’s all. I hope you found this tutorial to unjailbreak iOS 13.5 extremely easy and useful. If you run into any kind of problem, feel free to reach out to us. We will try our best to get back to you as soon as possible.

Download & Install Unc0ver 5.3.1 via AltStore – Jailbreak iOS 13.5

0
Download & Install Unc0ver 5.3.1 via AltStore – Jailbreak iOS 13.5

Unc0ver 5.3.1 is here which means you can finally Jailbreak iOS 13.5. The new Unc0ver 5.3.1 Jailbreaks every iOS device running every signed version of iOS. This supports all iOS 11 to iOS 13.5 devices and also the iPadOS devices. The best method to download Unc0ver 5.0 is via AltStore. Here are the steps to download and install Unc0ver 5.3.1 via AltStore. I have listed the instructions for both the macOS and Windows.
Jailbreak iOS 13.5 via Unc0ver 5.3.1

Unc0ver 5.3.1 is the latest version of this famous Jailbreak tool. It’s coming out the Unc0ver 4.3.1 which supports the iOS versions up to iOS 13.3 only. The Unc0ver 5.0 is based on the 0day exploit. For those who have no idea, the 0day is a software/hardware vulnerability that is found only once the product is shipped. The announcement for this latest Unc0ver version was made by its developer pwn20wnd on his official Twitter account.

After days of the announcement, the developer had put a timer on his website and began the countdown a couple of hours ago. The Unc0ver 5.0 is finally here. You can now download the Unc0ver 5.0 IPA as well. According to the Unc0ver 5.0 developer, the safest method to install this latest Jailbreak solution is via the AltStore. For Cydia Impactor, you would need a developer account which is quite a hassle. If you do not want to opt for the Cydia Impactor method, find the instructions given on this page to Jailbreak iOS 13.5 via AltStore now.

Unc0ver 5.3.1 Compatability list

  • All iOS & iPadOS devices running version 11.0 – 13.5.
  • All iPhones & iPads running signed iOS 11.0 – 13.5.
  • It also supports the newest iPhone 11, 11 Pro, and 11 Pro Max.
  • iPhone X, XS, XS Max.
  • iPhone 8 & 8 Plus.
  • Supports iPhone SE.
  • iPhone 7 & 7 Plus.
  • And many other devices.
Disclaimer: Remember that this is a semi-untethered Jailbreak method. It means that every time you restart the phone, you will lose the Jailbreak and you will have to repeat the “Unc0ver Jailbreak” steps again. Also, before Jailbreaking the device, take a full backup. A backup will bring back everything if you plan to unjailbreak your device at a later point. Make sure that you understand everything and you know well what you are about to do.

Download & setup AltStore on iMac/Macbook.

  1. Download AtlStore on iMac or Macbook from here.
  2. Unzip the AltStore setup and drop it on the Apps to install it.
  3. Open AltStore on the computer from the icon appearing in the top menu bar.
  4. Click on “Install Mail Plug-in > Install Plug-in”.Install Unc0ver 5.0 via AltStore
  5. Once it asks for the computer’s password, enter it to start the installation.
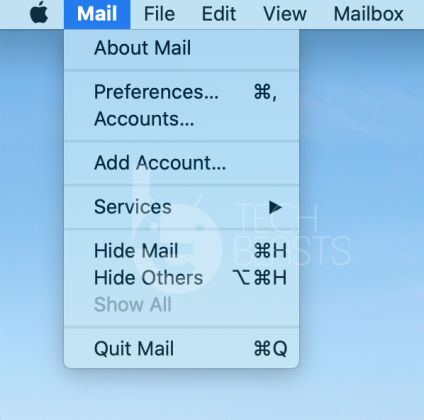
  6. After successfully installing the plug-in, open the Mail App on Mac, and go to Preferences.unc0ver 5.0 via altstore
  7. In Preferences, click on the General tab > Manage Plug-ins button.
  8. Click on the checkbox appearing next to AltPlugin.mailbundle and click on Apply & Restart Mail.installing mailbundle on altstore
  9. Connect the iPhone or iPad to the computer now.
  10. Click on AtlStore icon again > Install AltStore > Select your device > Enter your Apple ID/Password.altstore id password
  11. Finish the AltStore installation now.

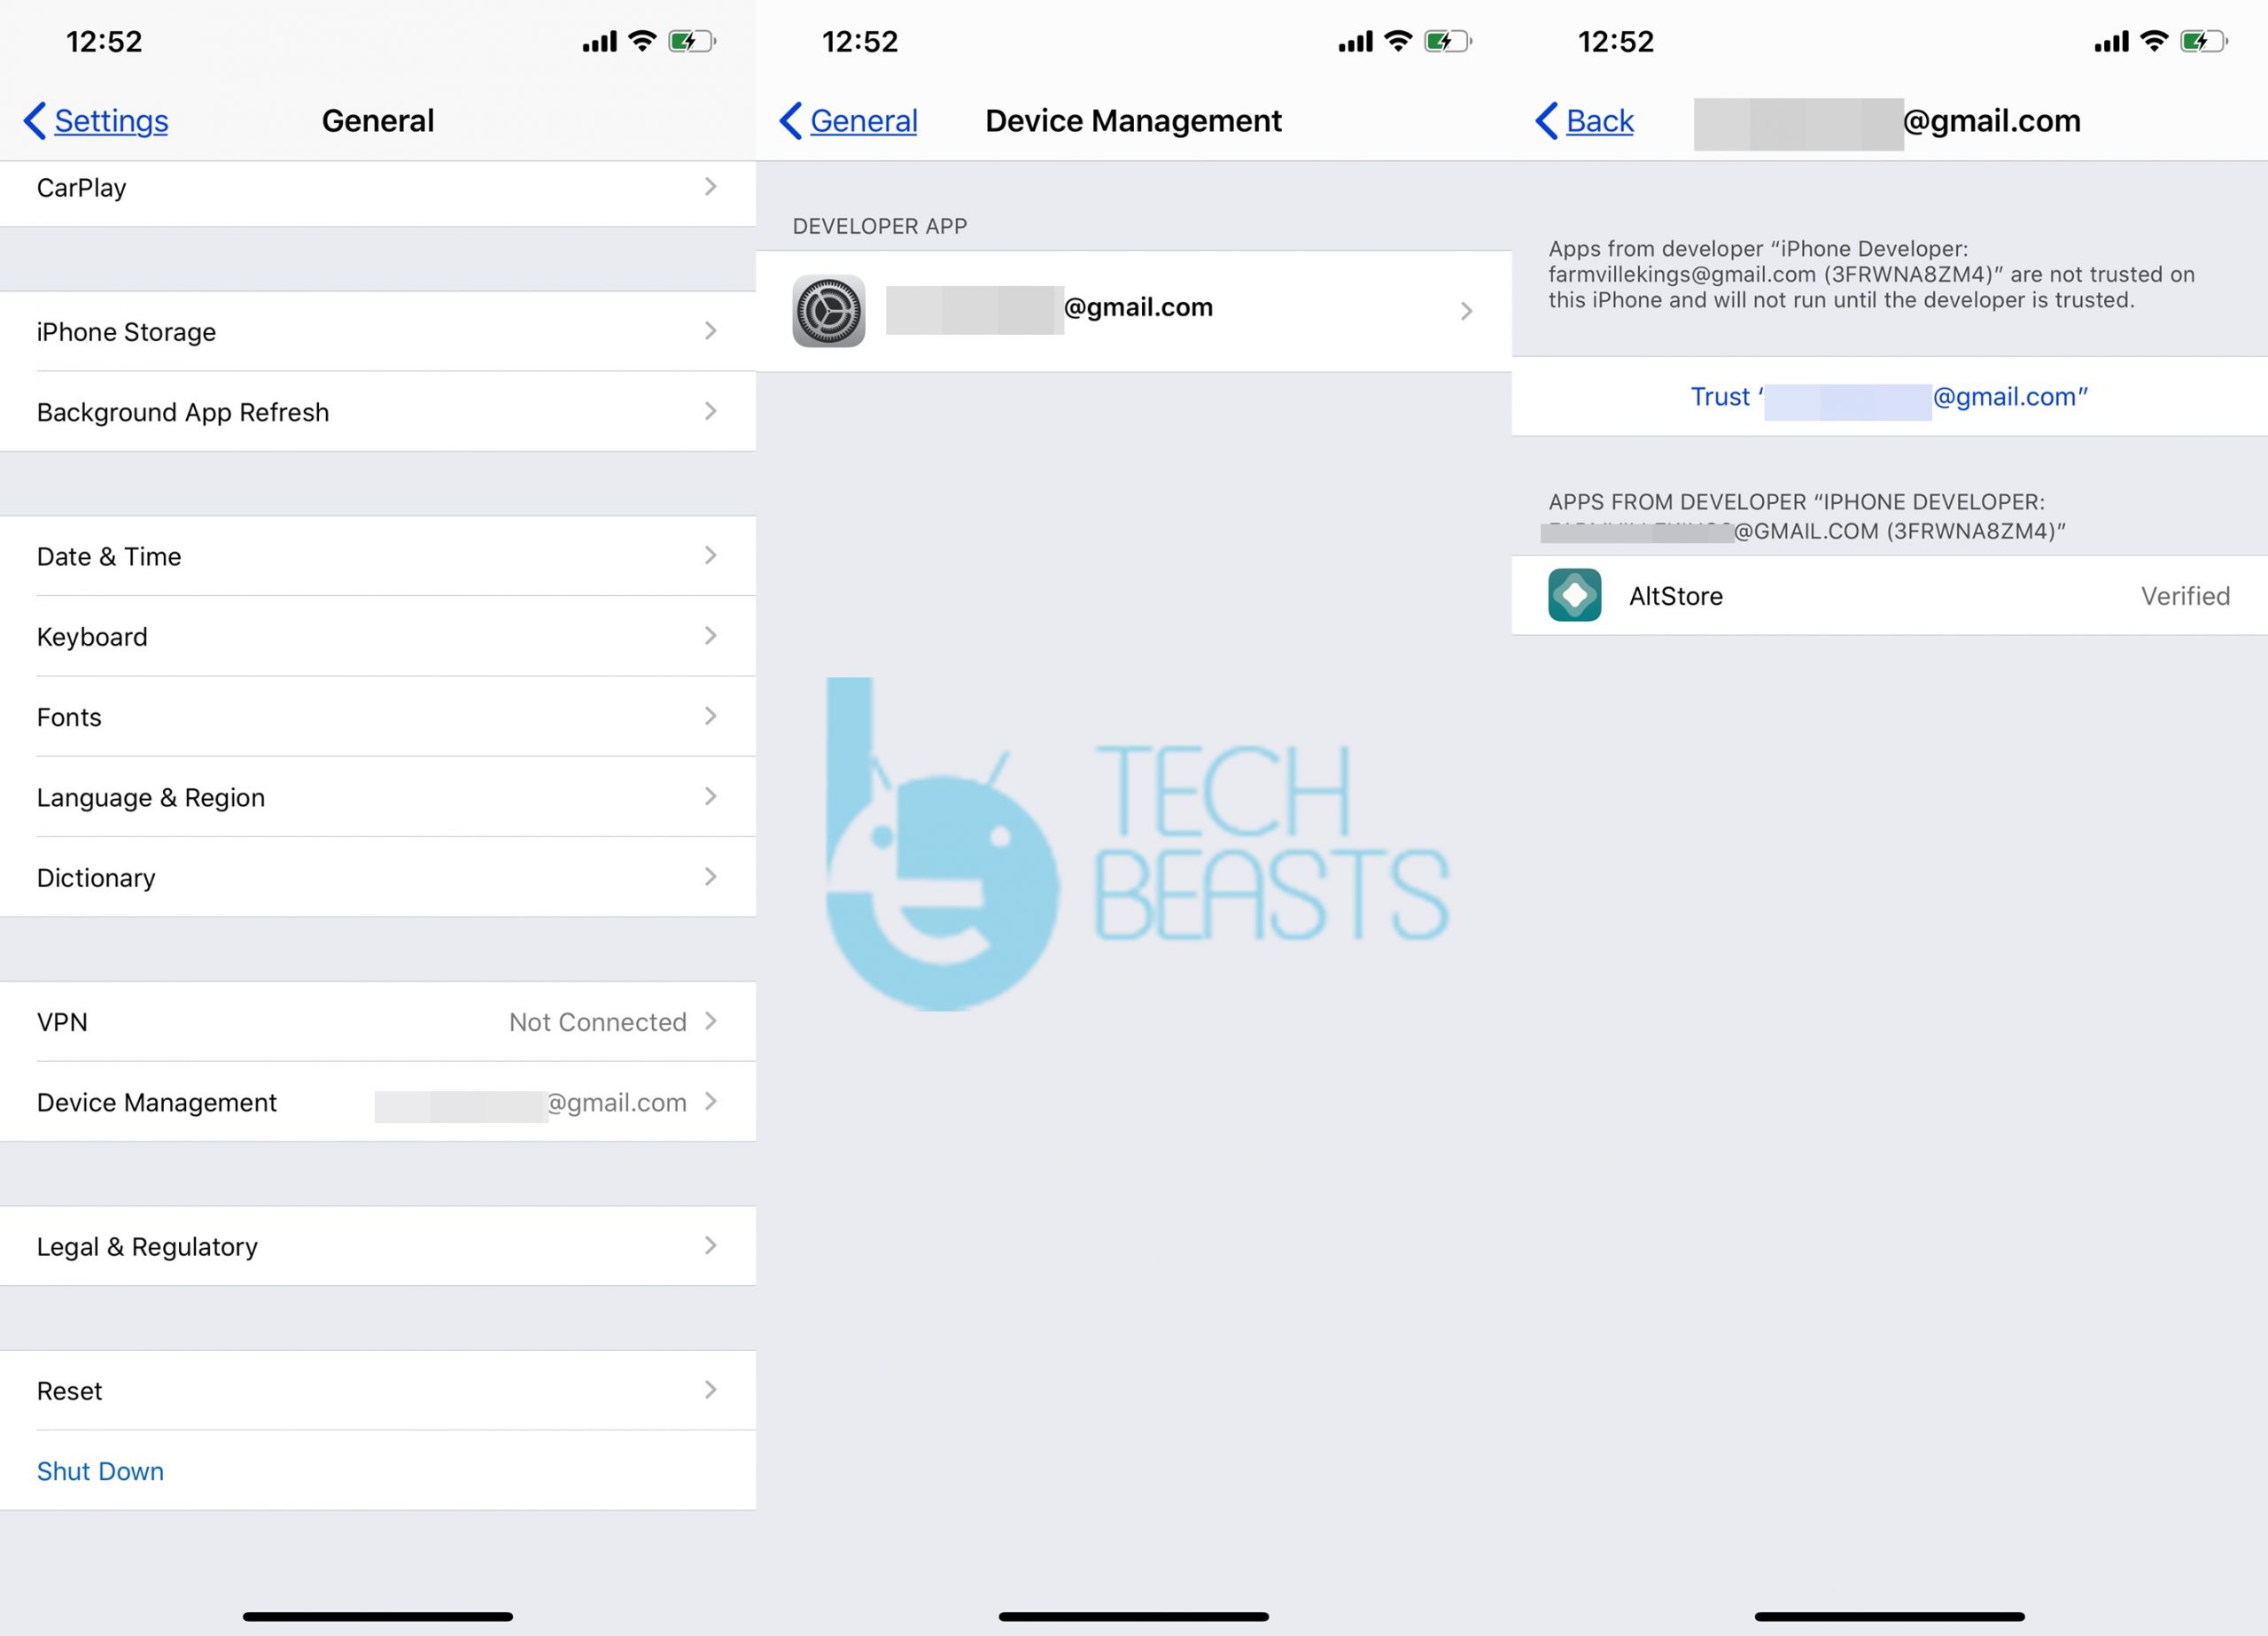
Do not launch the AltStore yet. On the iPhone, go to Settings > General > Device Management > Click on the Apple ID > Trust the AltStore profile now. AltStore is fully set up after this and you can follow the Jailbreak instructions now.altstore profile

Download & setup AltStore on Windows 10 & below

  1. On the Windows PC, download and install the latest iTunes: Windows 64 Bit | Windows 32 Bit
  2. Now download AltStore for Windows 10 using this link.
  3. Extract the downloaded file and run the AltStore setup.
  4. Now go to Windows search > find AltServer and launch it.
  5. Connect your iOS device to the computer now.
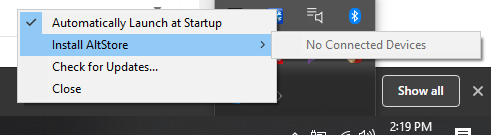
  6. Click on the more (arrow-up) button in the lower-left corner of the taskbar and click on the Diamond button > Install AltStore.altstore altserver on windows 10
  7. Select your device and install the AltStore now.
  8. Once AltStore asks for Apple ID & Password or App-Specific Password, enter it and finish the installation.

Do not launch the AltStore yet. On the iPhone, go to Settings > General > Device Management > Click on the Apple ID > Trust the AltStore profile now. AltStore is fully set up after this and you can follow the Jailbreak instructions now.

Install Unc0ver 5.3.1 via AltStore

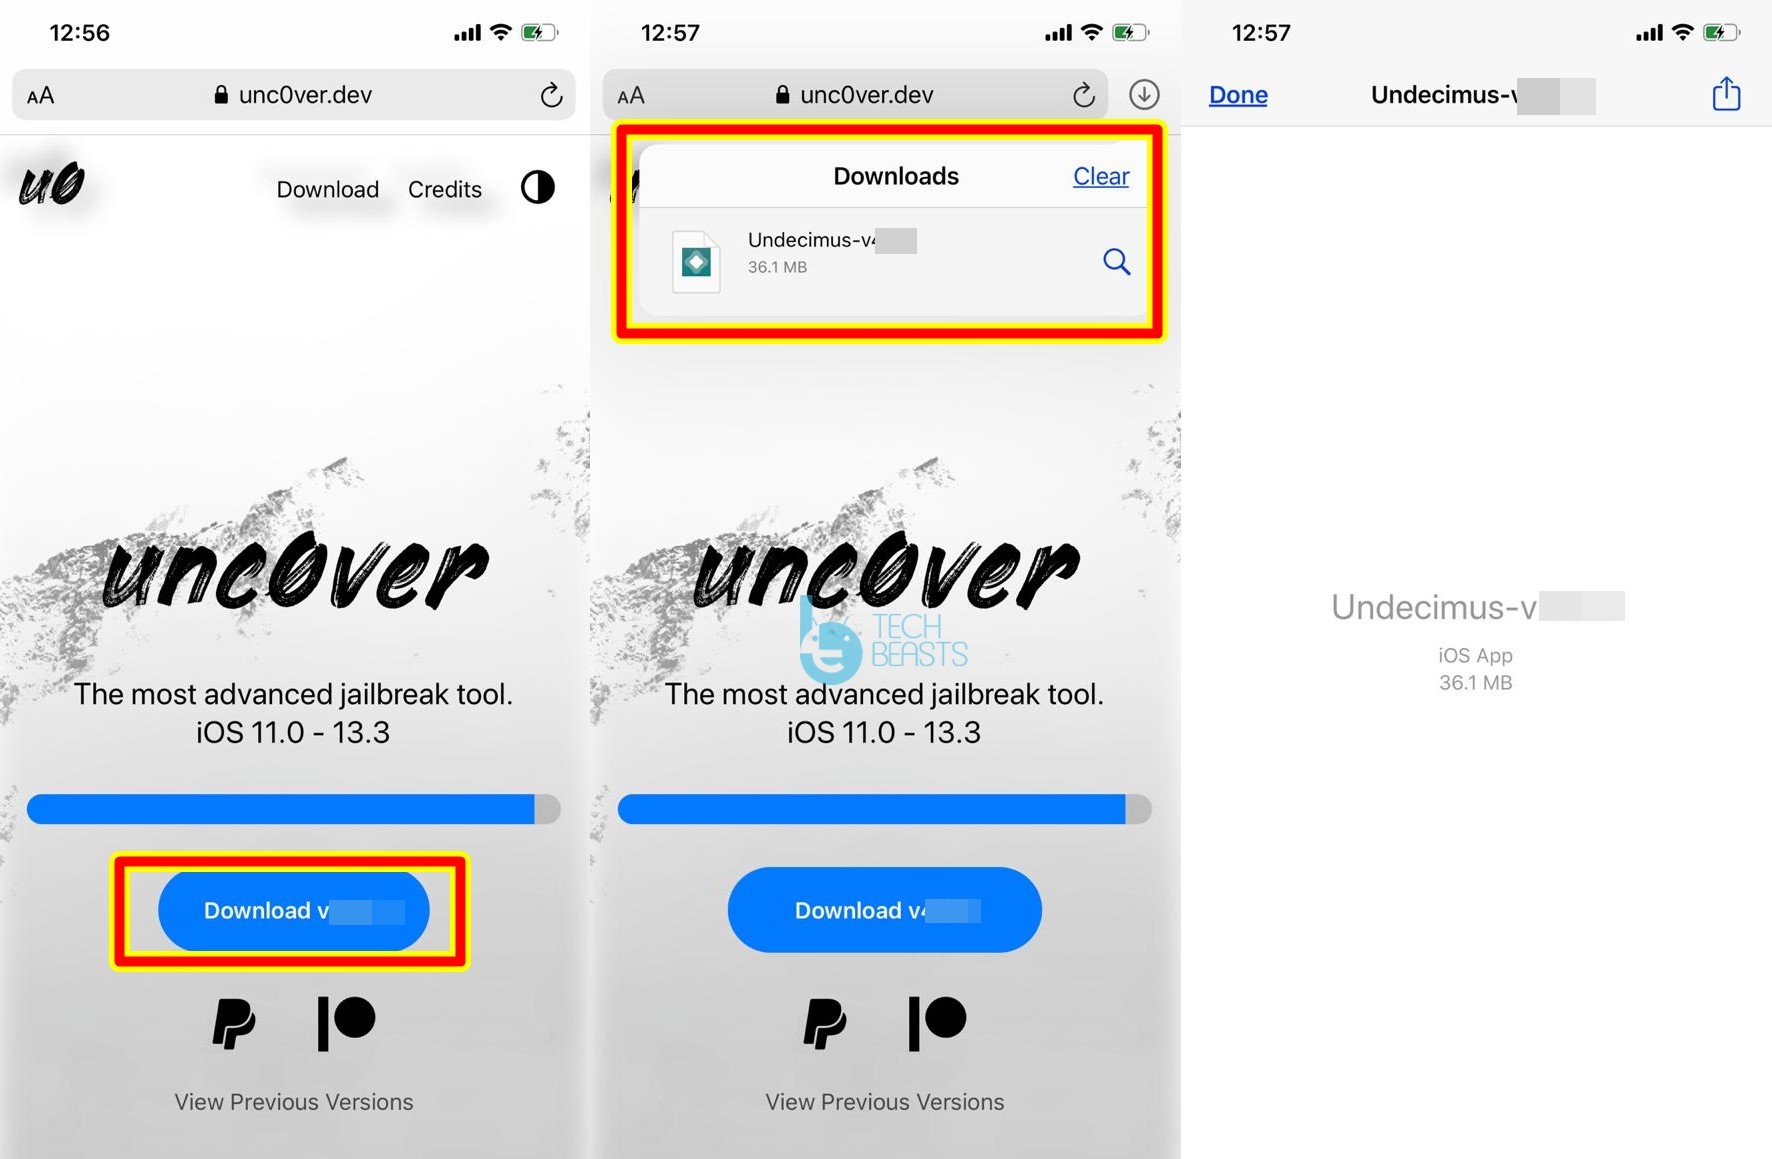
  1. On the iPhone/iPad, open the Safari Browser.
  2. Go to this site: Unc0ver.dev
  3. Click on “Download” button appearing on that page.
  4. This will download the Unc0ver 5.3.1 IPA on the iPhone.
  5. Click on the Download Manager in Safari and select the Unc0ver.ipa file to open it in the viewer.
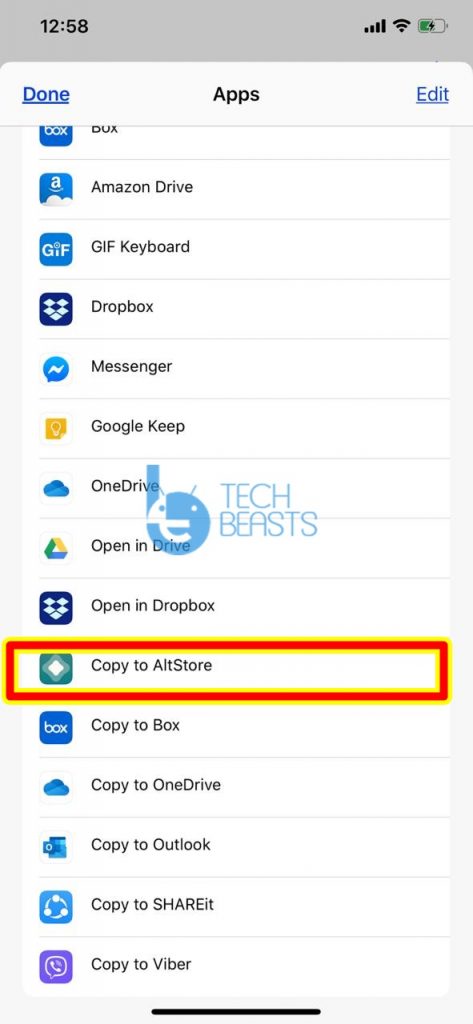
  6. Now click on the Share button > More > Copy to AltStore.copy unc0ver 5.0 to altstore
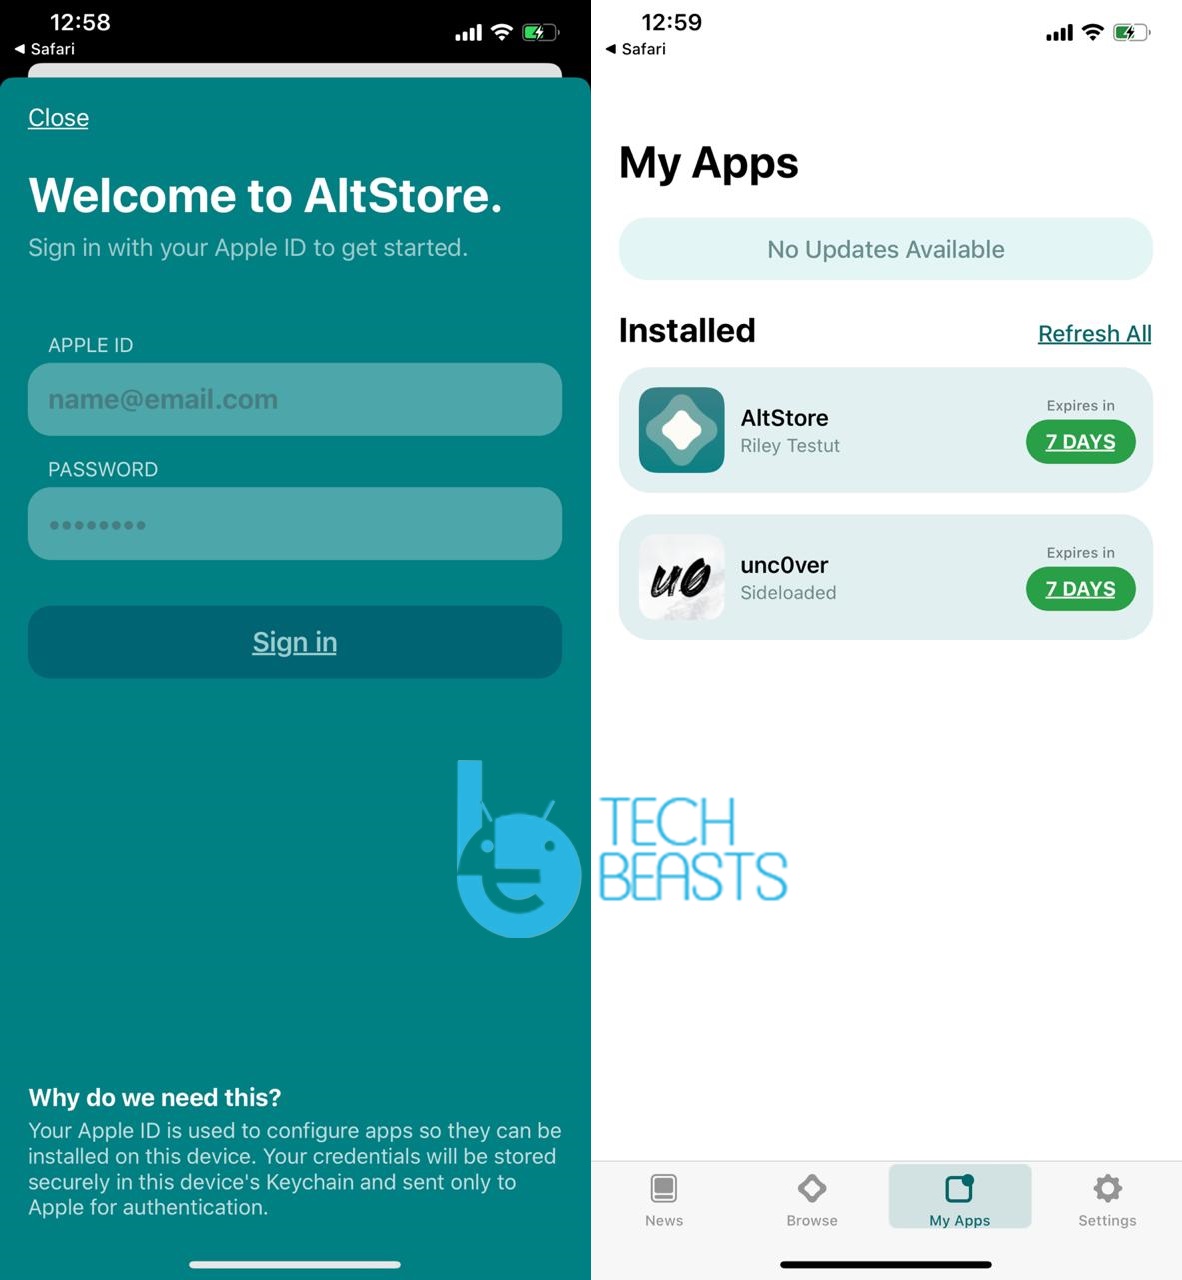
  7. AltStore will open up now, enter your Apple ID and Password that you used to install AltStore.altstore installed on iphone
  8. Unc0ver 5.0 IPA installation will begin now and it will appear in your sideloaded apps.
  9. Launch Unc0ver 5.0 from the apps, hit the Jailbreak button to Jailbreak iOS 13.5 now.

install unc0ver 5.0 via altstore

What’s next after installing Unc0ver 5.3.1?

Once the Unc0ver has been installed, you are all set to install Cydia. In fact, Cydia should appear once you have Jailbroken your iPhone or iPad. You can now open Cydia and start installing all compatible apps on your device. Cydia store is full of apps that can reveal the true potential of your iOS device. You can perform thousands of UI customizations. The button behavior and hardware behavior of the iPhone can be manipulated. You can also bring in new features using some of the coolest Jailbreak apps. One of the biggest advantages of Jailbreaking your iOS device is to be able to boost its battery life and performance.

For those of you who are worried about the legal aspects of Jailbreak, remember that Jailbreak is not illegal. It has been declared legal in a number of countries. You are free to do whatever you want to do with your personal iPhone/iPad.

Conclusion

If at any point you want to unjailbreak the iPhone or iPad, you can simply install new firmware via iTunes. New firmware will completely remove the Jailbreak including the Unc0ver 5.0 and Cydia along with its tweaks from the iOS-powered device. While doing so, make sure that you have had a backup of your iPhone prior to Jailbreaking it. Otherwise, you will just get a new/fresh iPhone without your previous data. If you run into any problems while Jailbreaking or unjailbreaking your iPhone, feel free to reach out to us using the comment section below. I will try my best to get back to you ASAP.

Download Unc0ver 5.3.1 via Cydia Impactor Jailbreak iOS 13.5

0
Download Unc0ver 5.3.1 via Cydia Impactor Jailbreak iOS 13.5

It is indeed a big day for all the iOS 13.5 users. iPhone & iPad owners can Jailbreak their devices running the latest iOS version via Unc0ver 5.0. The latest Unc0ver 5.3.1 just came out today. It turns out that this is by far the best Jailbreak solution with immense stability and a long compatibility list. There are multiple methods to download Unc0ver 5.3.1. We have already covered how to download Unc0ver 5.3.1 via AltStore. It is now the time to take a look at the steps to download Unc0ver 5.3.1 via Cydia Impactor. After installing Unc0ver 5.0 IPA, you can Jailbreak iOS 13.5 on any iPhone or iPad.

Jailbreak iOS 13.5 via Unc0ver 5.3.1

After Unc0ver 4.3.1, the Unc0ver 5.3.1 is the latest version of the most popular Jailbreak tool. The Unc0ver 5.3.1 brings a semi-tethered Jailbreak for every iOS device running every signed version of iOS. This new solution is using the 0day exploit. The 0day exploit is basically a vulnerability that is detected only once the device is shipped. Unc0ver’s developer pwn20wnd announced this newest Jailbreak solution on his official twitter handle a few days back.

Days after the hype was fully built, the Unc0ver 5.3.1 was released finally. If you have been eyeing a Jailbreak solution, it is now the perfect time to try it on the latest iOS version. The best part about the unc0ver 5.3.1 is that it is coming out only a day after Apple officially announced the iOS 13.5. It means that this tool is here to stay for a while and you can enjoy unlimited tweaks on the device. For those who have no idea what does Jailbreaking means, let me break it down for you.

What is Jailbreak and how can you benefit from it?

When you Jailbreak an iPhone or iPad, you basically bypass all the restrictions set by Apple on your device. You bypass all the security features of the device too. This allows the apps and tools to access the system files of the iOS-powered device. When you are capable of modifying the system files of the device, you are ultimately capable of bringing in new features or adding the UI modifications.

The basic idea behind Jailbreaking is to allow iOS users to customize the behavior of the software and hardware on their devices. If you don’t like a particular UI element of the phone, you can quickly change it using one of the Cydia tweaks. Apps like Unc0ver install the Cydia Store, which is a library listing all the tweaks for Jailbroken devices. You can pick up any tweak and achieve the results of your liking. In the original form, the iPhones or iPads do not offer many customization options, but with Jailbreak, you can make your device fly high.
Unc0ver 5.3.1 Device Compatability List

  • All Apple A8 – A11 devices running on iOS 13/13.1/13.2/13.3/13.5
  • iOS 11- 13/13.1/13.2/13.3/13.5 – Apple A12 and A13 Chipsets
  • Apple iPhone 6, 6 Plus, 6s, 6s Plus, iPhone 7, iPhone 7 Plus, iPhone 8, iPhone 8 Plus
  • iPhone X
  • iPhone XR
  • Apple iPhone Xs
  • Apple iPhone Xs Max
  • iPhone 11
  • iPhone 11 Pro
  • Apple iPhone 11 Pro Max
  • iPad Mini 5th Gen and iPad Air 3rd Gen/2019

Requirements to install Unc0ver 5.3.1 via Cydia Impactor

Download Unc0ver 5.3.1 via Cydia Impactor

  1. On your computer, launch the Cydia Impactor.
  2. Connect the iPhone/iPad to the computer.
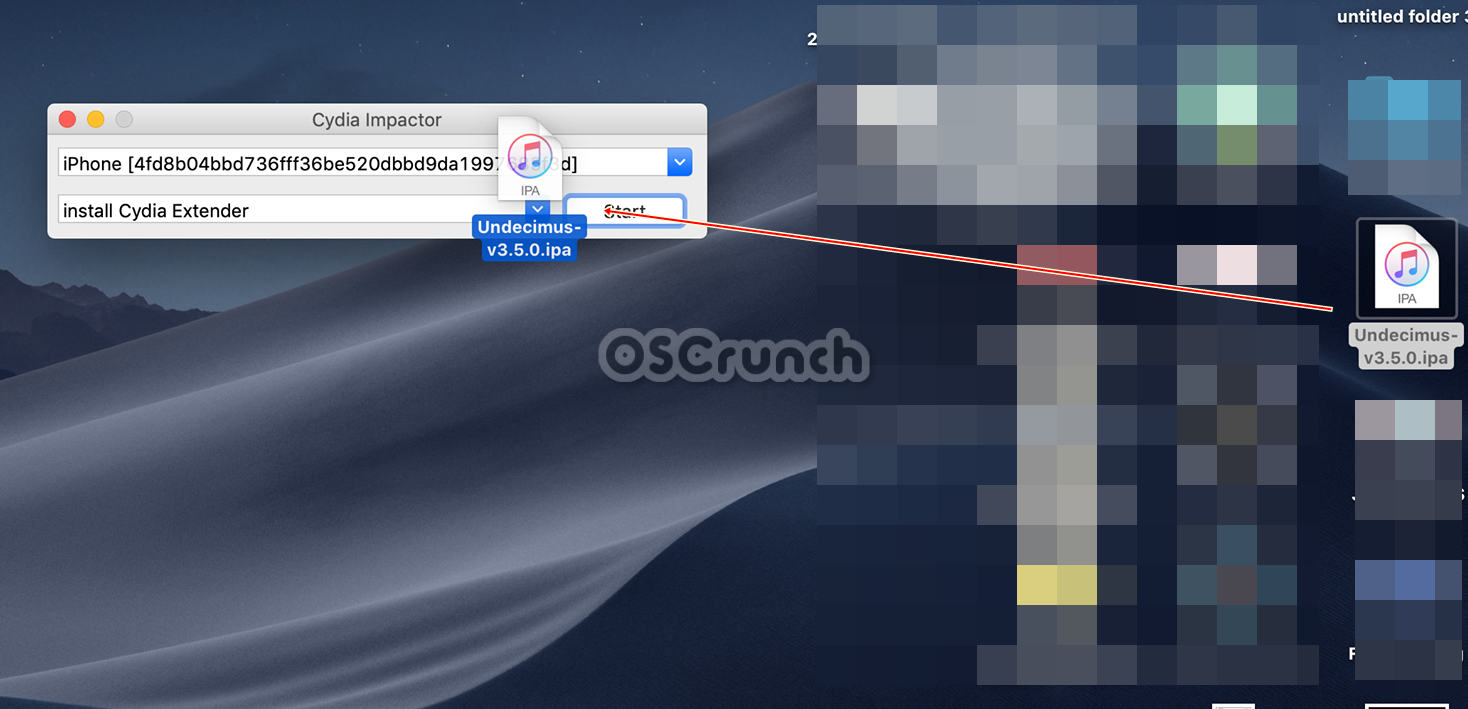
  3. Select your device in the Cydia Impactor now.Install Unc0ver 5.0 via Cydia Impactor
  4. Drag and drop the Unc0ver 5.0 IPA on to the Cydia Impactor.Install Unc0ver 5.0 via Cydia Impactor
  5. If the Impactor asks App-Specific Password, get it from your Apple Account > Security and enter it in the impactor along with your Apple ID.
  6. Unc0ver 5.0 will be installed now.
  7. On your iPhone, go to Settings > General > Device Management > Click on the Profile appearing there and click on Trust > Trust”.
  8. Congratulations, Unc0ver 5.0 is now installed via Cydia Impactor.

Jailbreak iOS 13.5 via Unc0ver 5.3.1

  1. On the iPhone/iPad, launch the Unc0ver from the app drawer.
  2. Click on the “Jailbreak iOS 13.5” button appearing inside Unc0ver.
  3. Unc0ver process will run and show you the results.
  4. Once Jailbroken, go back to the apps and launch Cydia.
  5. Start installing the compatible tweaks now, that’s all.Install Unc0ver 5.0 via Cydia Impactor

Final Notes

As mentioned earlier, this is a semi-tethered Jailbreak method which means you will lose the Jailbreak as you restart the device. But in such a case, you would just run the Unc0ver again and click on the Jailbreak button. It will bring back all the tweaks and everything back on the device. Also keep in mind that Jailbreak is a legal process and does not have any harsh implications. If at any point, you want to unjailbreak your device, you can simply run the Unc0ver app and click on the unjailbreak button. Otherwise, you can just install new firmware via iTunes.
Top 5 Things to Know About Self-Monitored Home Security Systems

0
Top 5 Things to Know About Self-Monitored Home Security Systems

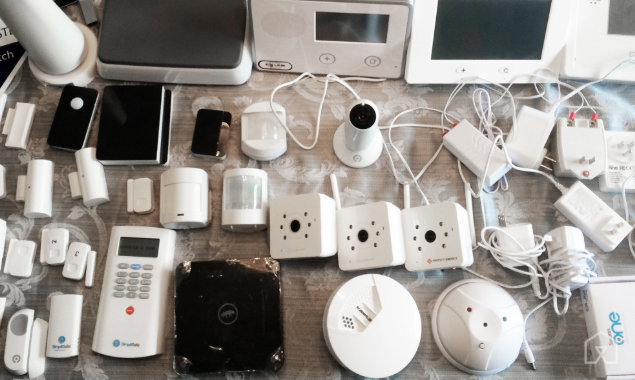
Self-monitored home security systems depend on homeowners to monitor their homes. They only contact the police when there is an emergency. But, a self-monitored security system doesn’t require a homeowner to sacrifice some features. Homeowners customize the Best Self Monitored Security Systems to suit their needs and decide to install the units themselves or professionally. The major advantage of self-monitored home security systems is that they do not have monthly monitoring fees.

Importance of Self-Monitored Home Security Systems

Research has shown that a home security system is more important now than ever. That’s because most individuals are working during the day, leaving their homes unattended during the day. Without a home security system, such homes can be easy targets for criminals.

The installation of a self-monitored home security system gives a homeowner peace of mind and protection without paying a monthly fee to a monitoring company. That’s because the alarm technology of the system is largely controlled using a mobile app. It notifies a homeowner about any disturbances in their home. Thus, they don’t require professional monitoring.

What’s more, a homeowner can purchase and install the system to self-monitor their home. That’s because self-monitored home security systems are affordable and easy to install. They also provide convenient monitoring using a smartphone. Additionally, self-monitored systems do not come with contracts, and homeowners own the equipment. Thus, nobody will come for the equipment after the termination of a contract because none of these exists with self-monitored systems. Essentially, price, ownership, and convenience are the major reasons why people choose self-monitoring home security systems.

Features to Pay Attention to When Choosing a Self-Monitored Home Security System

If you decide to install a self-monitored home security system, consider the following features when purchasing it.

  • Communication- How does the self-monitored system communicate with a homeowner? An ideal system should use push notifications to alert the homeowner about suspicious behavior. However, some systems communicate via email and text. The ideal communication feature or model of a self-monitored security system should depend on your preferences and lifestyle. Additionally, consider the volume and type of alarm.
  • Visuals- Security is the major purpose of a security system. However, you should choose a system that fits in the décor of your home better. A more intrusive and bulky system may not be ideal for your home.
  • Ease of Use- An ideal self-monitored home security syst5em should be easy to use. It should be easy to set up and get notifications from. Essentially, choose a system whose features are easy to use.

In addition to these features, it’s crucial to choose a secure, reputable arrangement. For instance, you can have the system supplier install the security system and leave you to monitor your home. Choosing a reputable company will ensure that important details of your home do not get to the wrong hands.

Things to Know Before You Choose an Ideal Self-Monitored Security System for Your Home

Several companies sell self-monitored home security systems. That means there are many choices to consider when purchasing a self-monitored home security system. To help you make a more informed choice, here are the top 5 things to know about self-monitored home security systems.

  1. Connection Options

Before you choose a self-monitored security system for your home, consider its connection options. Many units use cellular signals, Wi-Fi, or Ethernet cables. Wi-Fi connectivity is the most common option among homeowners. That’s because its installation and operations are easy.

But if you have a weak internet, don’t go for a system that uses Wi-Fi. That’s because the signal will keep dropping and make your system useless. A system that uses cellular connection can be a good alternative for a homeowner whose Wi-Fi is not an option. A system that uses Ethernet cables can also be a good option. However, systems that use Ethernet cables require professional installation because wires have to go via the wall and access the electrical grid of a home.

  1. Notification Abilities

Your home security system should send you notifications of any disturbance to your home. Different self-monitored home security systems have varying notification processes. Therefore, consider how different systems contact their owners and the triggers of alerts. An ideal self-monitored home security system should allow you to customize alerts. It should let you choose what you consider as a crucial event and how you will receive the notification. Notifications can be sent via email, push, or text.

  1. The Reputation of a Company

As hinted, many companies offer self-monitored home security systems. When choosing a home security system, select a reputable and reliable company. An ideal company to buy a self-monitored home security system should have been in business for years. Such a company has higher chances of supplying better equipment and providing improved customer service.

  1. Positive Reviews

Take your time to read reviews that other customers have written about the company that supplies self-monitored home security systems and its units. Find out whether any customer has complained about the supplier, equipment, or staff. You can also ask your neighbors and colleagues at work. Reading reviews will give you insights into what you can expect from the company.

  1. Video Recording

You might think that video recording is a standard option for home security systems. But this is not true. Therefore, don’t assume that your system will record and store videos automatically. Instead, make sure that the self-monitored home security system that you choose provides the video recording option. A system can come with video storage or send it to your cloud account, where it will be stored for a few days. In some cases, you may have to pay a monthly fee for video storage.

To minimize the need for video storage, choose a system that records video only when the motion sensor is triggered. That means you won’t need massive storage space for 24/7 recording.

The Bottom Line

Self-monitored home security systems are ideal options for people that want to enhance security in their homes without paying monthly monitoring fees. However, you must know certain things to choose the right self-monitored security system for your home. This will enable you to choose a system that will work more cost-effectively and efficiently in protecting your home and giving you peace of mind.


Download Google Play Store APK [21.1.27] [ Huawei Phones ]

2
Download Google Play Store APK [21.1.27] [ Huawei Phones ]

Updated on July 24: Download Google Play Store APK v21.1.27 from the following links below. You can also download the Google Play Store for Huawei Phones from the link below.

Download Google Play Store

Google Play Store got updated and I am here to provide you the latest updated Google Play Store APK. The new version is 21.1.27, If you bookmark our page, you will get your hands on all the Google Play Store updates before anyone.

Google Play offers people personalized collections of applications and games, based on criteria such as the user’s previous activities, the actions they are trying to complete, the location, and the main events.

These collections are automatically populated by the Google Play editorial team to ensure they include the best apps and games on offer.

Google Play Store on Huawei P40, P40 Pro or P40 Pro+ (GMS)

You can download apps, games, and digital content for your device using the Google Play Store app. The Play Store app is pre-installed on Android devices that support Google Play.

Update Google Play on Huawei Phones:

  • Download the latest Google Play APK on your Huawei Phones.
  • Head over to the downloads folder and tap on the Google Play Store APK.
  • Follow the on-screen instructions and you are good to go.

Download Play Store APK for Huawei & Honor

Play Store Chat-Partner APK – Download | Google Play Store APK [21.1.27]

  1. Copy the APK to your phone.
  2. Open Files on your phone and click on the copied APK.
  3. Allow the app installation and go ahead.
  4. Now launch the chat partner app from the home screen.
  5. In the Chat Partner app, click on the Repair button.
  6. Wait for the Chat Partner App to install Play Store.
  7. Once it is done fixing the phone, you will find the Play Store on the home screen.

Google Play Store Old Versions:

DreamLab for PC Windows 10,8,7 & Mac for Free

0
DreamLab for PC Windows 10,8,7 & Mac for Free

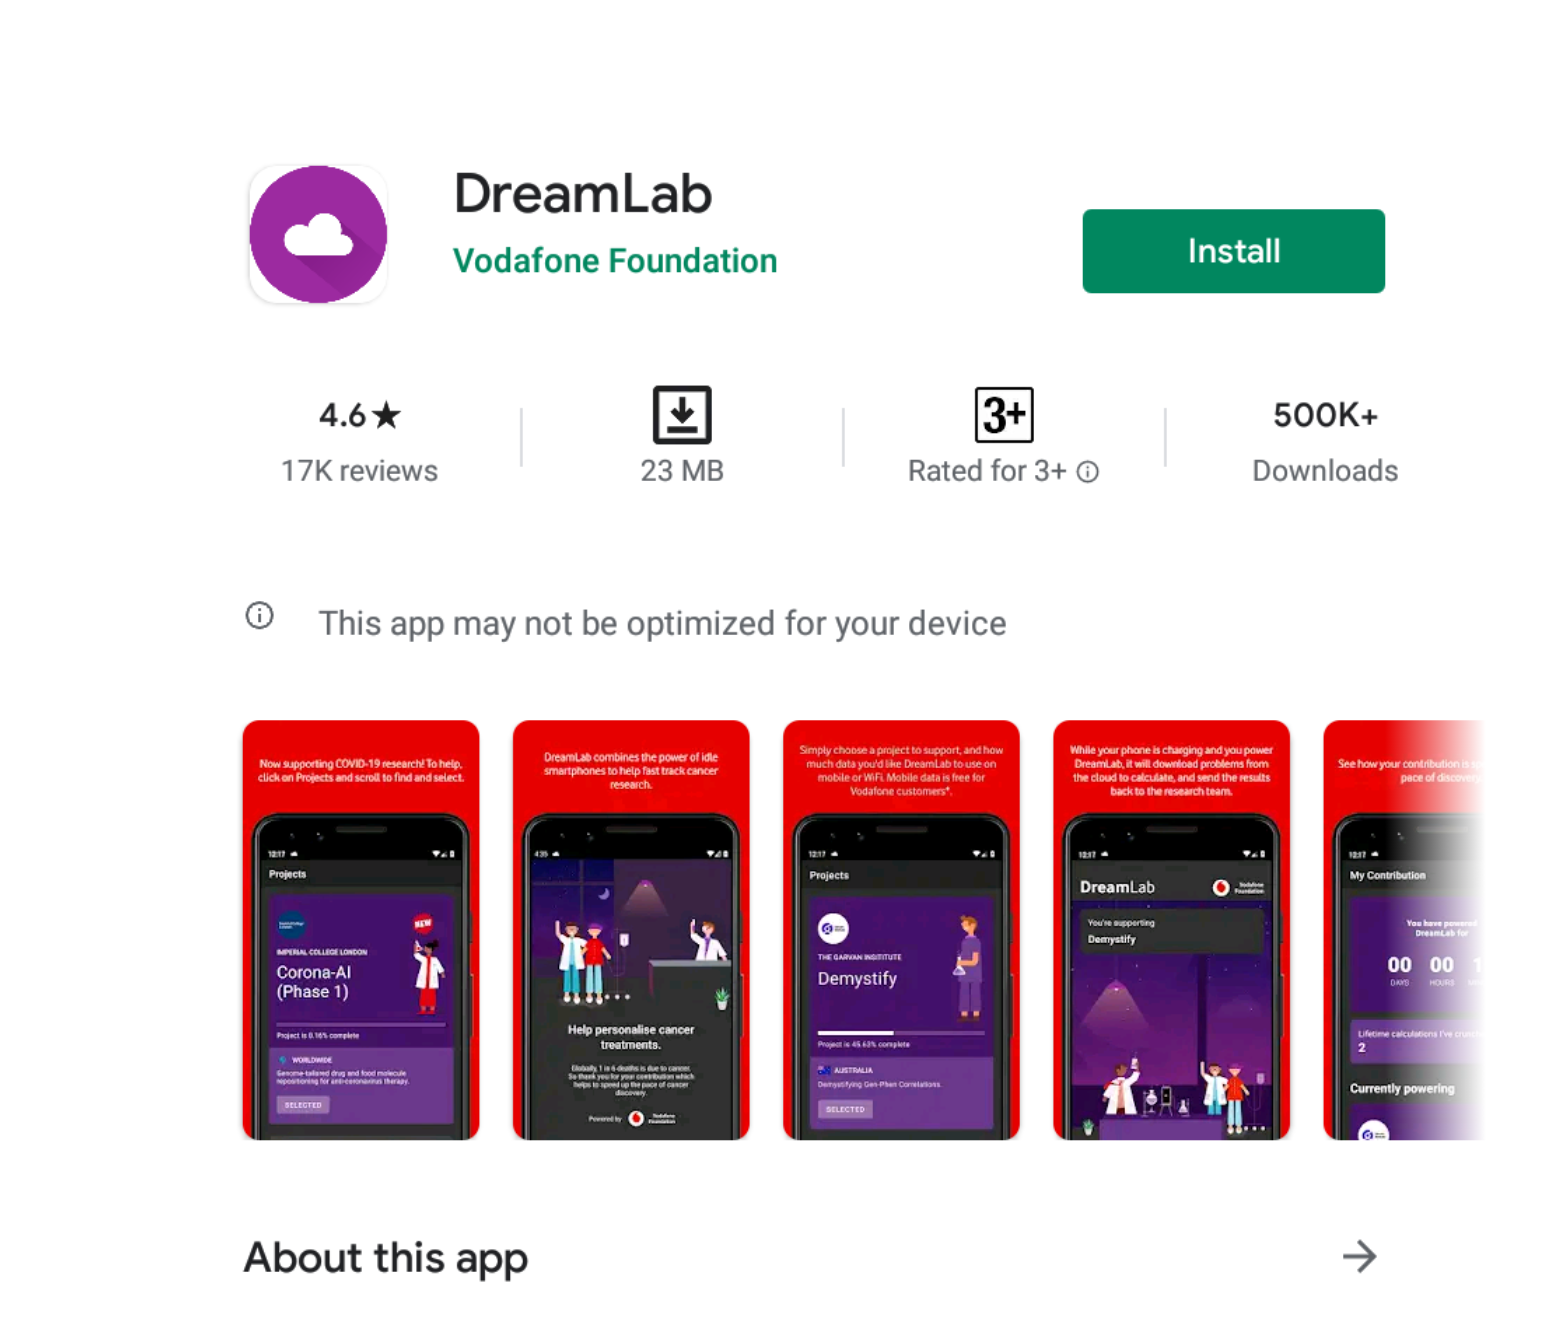
With the help of this tutorial, you will be able to download the DreamLab for PC Windows 10,8,7 & Mac for Free. We’ll be using a third-party Android emulator to install DreamLab for PC.

What is DreamLab?

DreamLab is an award-winning app that uses the combined power of smartphones to accelerate cancer research. Because cancer is a leading cause of premature death worldwide, it is extremely important to find answers through medical research. DreamLab is there to help us get there first. And the more people who use the app, the faster it works.

How DreamLab Works?

A supercomputer is needed to scan DNA as small data and decompose complex data. When you connect your phone and run DreamLab, it downloads a small portion of a large research project from the cloud, calculates the results, and sends it to your research team. The more people who support Dreamlab, the sooner you can do important research. Just set up DreamLab once and it works every time you connect your phone.

Why Install DreamLab on PC?

Using a Smartphone is good but sometimes there are limits and because of that we cannot perform certain actions. Since DreamLab is all about collecting data and using it on PC will help us understand the research work and we will be able to get better results.

Using DreamLab on PC is way easier than using it on a smartphone. That’s why I made this post and will help you install DreamLab on Windows 10 & Mac.

Requirements:

  • Desktop PC or Laptop with Windows or macOS.
  • Internet Connection.
  • Google Account – If you do not have one right now, create a new one for free.
  • Android Emulator i.e. NoxPlayer or BlueStacks.
  • Download and install the emulator, set up the emulator using your Google Account.
  • Follow the remaining part of this guide carefully.

Once you are done with the requirements it’s time to tell you how you can install DreamLab for PC Windows 10 & Mac.

Download DreamLab for PC Windows 10 & Mac:

  • First, Download and install BlueSacks on your Windows or Mac.
  • Open BlueStacks and log in using the Google Account.
  • Now open the Play Store in BlueStacks.
  • In the Play Store, type “DreamLab” and search it.

DreamLab for PC

  • As you find DreamLab, install it.

DreamLab for PC

  • Now open DreamLab in BlueStacks.
  • Follow on-screen instructions to set this application up.

That’s all.

Download MiniEye for PC Windows 10 & Mac for Free

0
Download MiniEye for PC Windows 10 & Mac for Free

In this post, you will learn how to download the MiniEye for PC Windows 10 & Mac. MiniEye is an Android app that allows you to control your IP camera through your Android device.

MiniEye for PC

What is MiniEye?

Android MiniEye is an IP camera app, which provides features like a one-key remote switch, support for WIFI network management. Moreover, you will get remote video viewing, custom user authorization settings, motion detection support. configurations.

Can we Install MiniEye for PC?

If you are looking for a direct installation you will be disappointed, because there is none. Since MiniEye is an Android app designed for smartphones, you cannot directly install MiniEye on Windows or Mac.

However, you can download MiniEye with the help of a third-party Andorid Emulator such as BlueStacks and Nox. I am also using both of these Android Emulators to download the MiniEye on my Windows 10 and Mac.

Before we move on to the installation process you need to meet the following requirements in order to install MiniEye on PC.

Requirements:

  • Desktop PC or Laptop with Windows or macOS.
  • Internet Connection.
  • Google Account – If you do not have one right now, create a new one for free.
  • Android Emulator i.e. NoxPlayer or BlueStacks.
  • Download and install the emulator, set up the emulator using your Google Account.
  • Follow the remaining part of this guide carefully.

Once you are done with the requirements it’s time to tell you how you can install MiniEye for PC Windows 10 & Mac.

Download MiniEye for PC Windows 10 & Mac:

  • First, Download and install BlueSacks on your Windows or Mac.
  • Open BlueStacks and log in using the Google Account.
  • Now open the Play Store in BlueStacks.
  • In the Play Store, type “MiniEye” and search it.

MiniEye for PC

  • As you find MiniEye, install it.

MiniEye for PC

  • Now open MiniEye in BlueStacks.
  • Follow on-screen instructions to set this application up.

That’s all.