Updated: 1/06/2020. In this post, you can find a list of best free VPN/Proxy Apps for Android in 2020. I have collected these applications after doing thorough research. All these best free VPN/Proxy Apps for Android in 2020 offer the most appropriate features that an average Android user would want at the moment.
What is a VPN and why do you need one?
Now that we are in the year 2020, the governments, ISPs and the institutions are focusing more on web security. As a part of security, they block access to certain websites and applications. Some countries do it to block access to the content which is against their cultural and religious values.
Youtube and Facebook are the two most popular websites that were blocked in a number of countries because of the published content. It’s not only the countries and institutions that keep their users from viewing the content, sometimes, but an application or website itself also doesn’t want to appear in some countries, or it only wants to appear inside only one single country. The best example in this regard is Spotify. Users in the United States and some other related countries can access Spotify, but if you want to access it from a country like Pakistan, you will not be able to do so.
Universities, colleges, and other education institutes often ban access to social media websites. This is done in order to keep their students from wasting time online. In your college/university, you must have noted that you are unable to open a website like Twitter, Facebook, or you are simply unable to use Instagram or Snapchat on your phone when connected to the internet through your college.
Internet’s most basic use for the masses today is access to information and content. Having any kind of limitations on over your internet access doesn’t seem to be a good idea anymore. An average internet user today wants to have freedom of choice. It should totally be the user’s choice what content he wants to see and what he doesn’t.
VPNs playing their part
This is where the VPN applications land in the scene. The term, which stands for Virtual Private Network, intelligently masks your IP address with another IP which bypasses all the geological and other restrictions set over your internet connection. Right now, there are a plethora of VPN applications available for almost all the operating systems. It is no longer an issue to view your desired content anymore.
Another popular use of VPN apps is anonymity. These applications completely hide your identity when you are connected. This means your government or your ISP both cannot access your personal data. Usually, when you are using the internet, there are various parties that can intercept your personal data. The VPN apps make you anonymous on the internet hiding all of your details.
In case you are wondering how a VPN application works, let’s understand that. The VPN companies behind the applications have their servers in different countries. These companies often use countries like the United States, the North American region, Canada, Germany, Italy, Netherlands etc for their servers. When a user installs a VPN application, he is presented by a menu to connect to the internet. A list of countries appears on the screen. Users just have to select the country and their IP address is masked by the IP address of the location that they selected in the application.
Best Free VPN/Proxy Apps for Android in July 2020
So, if you are using an Android-powered phone and you are confused about picking up a working VPN, here is a list that will help you out. Here are the 10+ best free VPN/Proxy Apps for Android in 2020. All these best VPN for Android in 2020 are completely free. Most of these Proxy Apps for Android offers unlimited bandwidth and they have up to 10 different locations to connect the internet from. Go ahead and download your favorite VPN/Proxy Apps right now.
Which is the best VPN to watch another country’s Netflix? What VPN will be the best choice to watch US Netflix? We are going to find that out here. Here is a list of the Best VPN for Netflix that are free and paid as well.
A quick look at the list of best VPN for Netflix in 2020. The Best VPN for Netflix list has the apps that will unblock the US Netflix as well. Some of these VPN apps have their free versions as well.
NordVPN
Express VPN
IPVanish
Cyberghost VPN
VyprVPN
VPN for Netflix – But why?
Netflix & chill – a line that you have heard over a thousand times, but at times, you run out of the content on Netflix that would make you chill. These are the times when you want to explore Netflix’s inventory for another country, especially the US. That’s because Netflix shows tailored content for each country/region. It’s not necessary that a user residing in Germany will find the same content on Netflix as the one in the US. One reason for all your favorite titles to appear in the US’ Netflix is that it has a 100% Netflix catalog. Take a look at the Netflix Catalog for other countries.
The percentage of Netflix Catalog in major countries
US
100%
UK
92%
India
84%
Brazo;
77%
Ukraine
67%
Russia
62%
France
58%
Germany
56%
Canada
55%
Spain
53%
At times it becomes really frustrating that you can find your desired title listed on Netflix in Google Search, but when you look for the same title inside Netflix, that particular title is not there. That’s also because the search results show you Netflix results from different countries. This has happened to me so many times and I can completely understand how much it can annoy you.
In such cases, your best bet is a VPN. You can quickly turn on a VPN on your computer, Android phone, or an iPhone and access Netflix of another country. You will be able to find your desired content in no time.
But there is one more bottleneck. Not all VPN apps allow Netflix to stream. That’s because Netflix doesn’t want the users to access the platform using fake locations. Netflix has a really strict policy and it has blocked a huge number of VPN service providers from accessing the site already. Many VPN companies have already given up on Netflix. Fortunately, there are still a few services that allow Netflix streaming and you will find those here.
Now before you take a look at the VPNs, let me tell you the criteria for picking up the best Netflix VPN.
Choosing the right VPN for Netflix
In this list, you will find the NordVPN at the top. I have hand-tested the NordVPN and it worked for me every single time. Furthermore, NordVPN streamed the highest quality of content on Netflix without any kind of interruptions. Because of the non-shady nature of Netflix, I did not get any Netflix warning emails to change my password. NordVPN helped me to set the criteria for getting my hands on the right VPN for Netflix and that’s how this list is crafted.
The 5 VPN mentioned here are tested regularly. As of January 2020, all those VPN applications are working with Netflix.
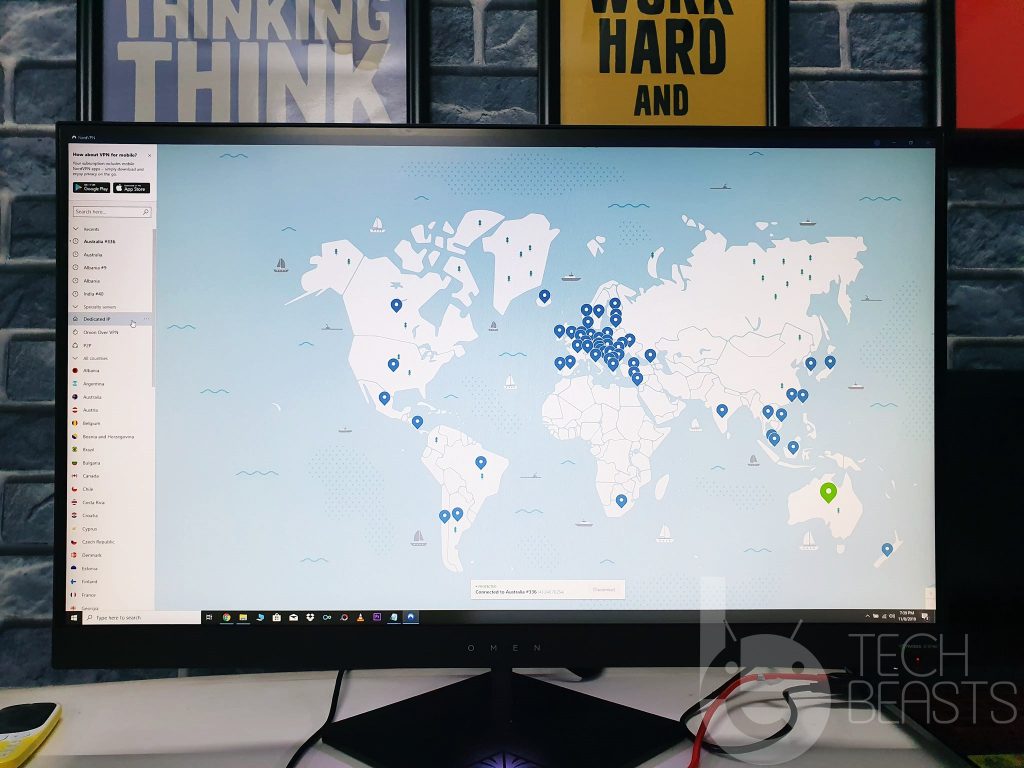
Using NordVPN on Android Phone
One of the main advantages of these VPNs is that most of them offer a money-back guarantee. That’s really important when your goal is to unblock the US Netflix. You can never trust Netflix with its policies. If they end up blocking your newly purchased VPN, you can easily claim a refund from the VPN service.
Before getting a paid VPN, I recommend you to check out the free versions of the same VPN applications. If the free or trial version allows you to stream Netflix without interruption, you may consider investing in that app.
Another thing to keep in mind is that these VPNs have a no-logs policy. They respect your privacy and security. None of your activities are tracked. Your online identity remains anonymous throughout the connection.
Best choice for not only Netflix but all things internet.
Number of Servers: > 5100 |Number of Countries: 59 |SimultaneousDevices: 6 |P2P & Obfuscated Servers | UDP & TCP OpenVPN | L2TP/IPSec | IPSec | IKEv2 | PPTP
NordVPN premium on a phone.
NordVPN’s flexibility and blazing speed allow users to unblock Netflix from locations like the US, UK, and Canada. With the help of the UDP Protocol, users can stream Netflix in HD. To browse the internet without a hassle, users can switch to the TCP Protocol. One of the best features of NordVPN is the presence of Obfuscated servers. The Obfuscated servers make it extremely difficult to detect encryption on your online presence.
NordVPN has a huge list of servers. The tool is set to find the best server on its own. If the selected server doesn’t work as per your expectations, you can switch to another server manually. For the most part, the NordVPN does its stuff on its own.
NordVPN comes with a 30-day money-back guarantee. If you feel like the application isn’t the right choice for you, you can immediately ask the company for a refund.
At the moment, NordVPN doesn’t work on game consoles and Apple TV, however, if you configure the VPN on your router, you can connect the device to that router and use the VPN. That’s the only downside for now. The NordVPN, otherwise, is the best choice and tops my list.
Number of Servers: >3000 |Number of Countries: 160/94 |UDP & TCP OpenVPN | L2TP/IPSec | IPSec | IKEv2 | PPTP
Using the ExpressVPN Trial version on a phone.
ExpressVPN is generally known for its speed. To stream through platforms like Netflix and Hulu, ExpressVPN is one of the best choices. It also comes with a 30-day money-back guarantee.
ExpressVPN does everything that a VPN should do, but when it comes to the support, the VPN goes a step further here. In case you are unable to find the best server, you can turn on a live chat session with the ExpressVPN support and they will help you find the best server.
ExpressVPN has its MediaStreamer DNS which will let you unblock and run Netflix on devices like Apple TV and game consoles. This is one feature that also helps ExpressVPN set itself apart from other VPNs.
Number of IPs: > 40,000 | Number of Servers: > 1,300 | Number of Locations: > 75 | UDP & TCP OpenVPN | L2TP/IPSec | IPSec | IKEv2 | PPTP | 10 Simultaneous Connections
Using IPVanish on a phone.
IPVanish should be your choice if you don’t want to go with NordVPN or ExpressVPN. There isn’t something that the IPVanish can do and the first two recommendations can’t. IPVanish, overall, is a nice VPN. It has impressive numbers.
The UDP protocol is there which means the IPVanish will also let you stream Netflix in HD. IPVanish’s best servers are located in the US. You can use the IPVanish on 10 devices at the same time.
In this list, the IPVanish offers the highest number of simultaneous connections. IPVanish offers a 7-day money-back guarantee only. This may be a very short timespan to fully test this VPN.
Number of Servers: 5745 | Countries: 90 | Locations: 112 |OpenVPN, L2TP-IPsec and PPTP protocols
Using Cyberghost VPN on a phone.
Cyberghost is also among the impressive VPN apps. It can unblock streaming websites. It will also let you play region-blocked games. Cyberghost offers military-grade protection. It comes with DNS and IP Leak Protection features.
What makes Cyberghost’s way to our list is the number of platforms it supports. Whether you are using Windows, Android, macOS, iOS, Firefox OS, Linux, FireStick, or any other operating system/platform, you will the Cyberghost application for that.
With over 5745 servers, this is one of the most reliable VPNs for Netflix. Cyberghost is originally based in Germany, but it works flawlessly to stream the US Netflix. The US Servers will work best to have a smooth Netflix experience. Furthermore, you can also stream Netflix from Germany and the UK.
Cyberghost offers a 7-days money-back guarantee for monthly subscriptions and a 45-days money-back guarantee for yearly subscriptions.
Number of IP Addresses: 200,000 |Locations: 70 |Simultaneous Devices: 5
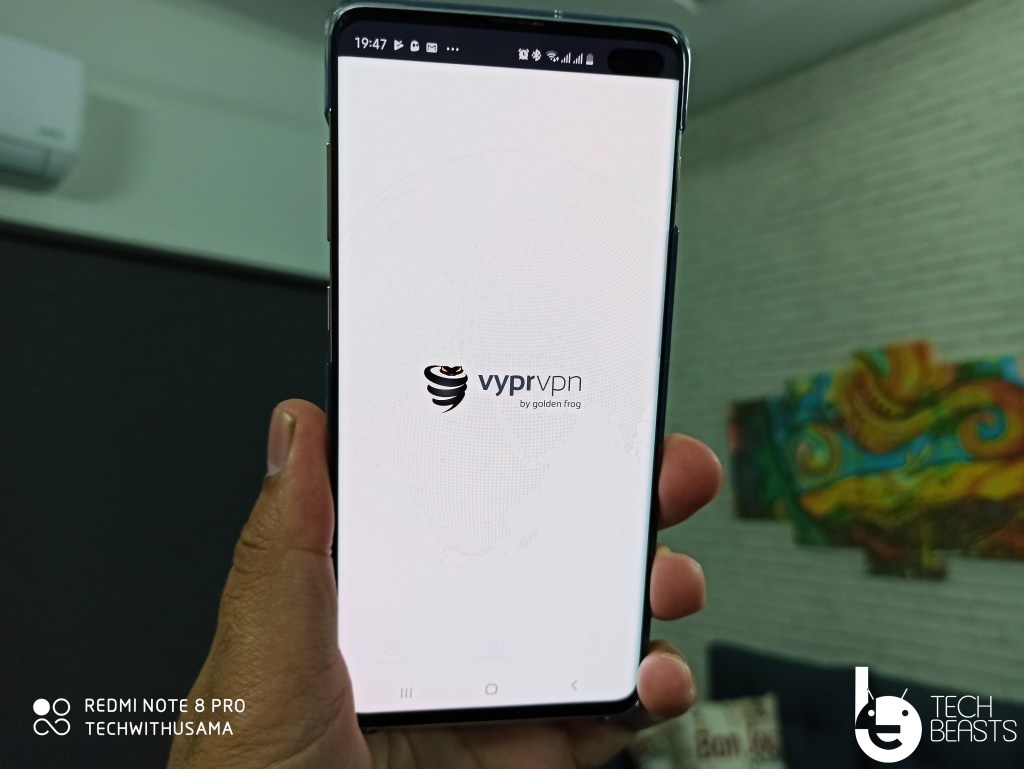
Using VyprVPN on a phone.
There isn’t so much to talk about VyprVPN except for the fact that it supports the US Netflix. The VyprVPN’s official page has clearly mentioned that users can watch Netflix in HD. Folks over VyprVPN also claim it to be the best VPN for streaming.
The VyprVPN also supports streaming on YouTube, Hulu, HBO, and BBC iPlayer. It unblocks all the geo-restricted websites and apps. The military-grade encryption can be found in VyprVPN as well.
VyprVPN also has a no-logs policy which means none of your online activities will be recorded. It does its best to hide your online identity. The snoopers cannot easily snoop into your personal data when you are connected through VyprVPN. It also offers a 30-day money-back guarantee.
Final Words
That’s all. Hopefully, you have picked up the right VPN to stream Netflix on your device. If you have any other suggestions or recommendations, feel free to drop them in the comment section below. In case you have any queries, ask them below and I will try my best to get back to you.
Want to hide WhatsApp Photos and Videos in Gallery on Android? In this guide, you will learn how to do so. As you go ahead, you will find a step-by-step guide to hide WhatsApp photos and videos in Gallery on Android smartphone.
WhatsApp, having 900 Million users around the globe has almost become the primary source of communication for Android users. With the addition of calling feature, WhatsApp raised the number of its users. You can share any images, video clips or audio clips on WhatsApp that has helped the users to share their special moments or pieces of knowledge and information with each other. Any of your friends can send you any kind of stuff on WhatsApp. The pictures and videos you receive on your WhatsApp chat, all those appear in your Android smartphone’s galleries.
Why hide WhatsApp photos and videos?
Sometimes you may have received some confidential stuff or some other images that may be offensive and you don’t want anyone else to see those while exploring your smartphone’s gallery. You never know if any of your friends or anyone else, picking up your smartphone can unexpectedly explore its gallery and come across the WhatsApp pictures and videos as well or for instance, we all have some people in our life whom we want to show one picture but they go ahead and explore the hell out of our phones. In this case, you would like to do something about these WhatsApp pictures or videos from your Android phone’s gallery. This will help you to keep them safe and sound, and you will be able to see your image either using a file manager or only within WhatsApp messenger.
Now that you have an idea of the significance of hiding WhatsApp photos and videos from the gallery, we can get back to the purpose we were here for. Let’s go ahead now and hide the images and videos of WhatsApp from your gallery.
.NOMEDIA File
In order to hide WhatsApp photos and videos, we will add a .nomedia file to your WhatsApp’s Media folder. Basically, this .nomedia file restricts certain applications from accessing the media content of applications like WhatsApp. For instance, if you have the .nomedia file in the media folder of your WhatsApp messenger, it will restrict the Gallery and some other applications from accessing the images and videos of WhatsApp. Gallery of your phone will not show any images or videos from WhatsApp after the addition of this file in the WhatsApp’s Media directory.
We will be taking you through a method to add this .nomedia file to hide WhatsApp photos and videos from your gallery. Here are the steps to do so.
Hide WhatsApp Photos and Videos in Gallery on Android
Download and install ES file explorer or any other file manager according to your liking. Here’s a list of 5 best and free File Managers for Android.
Once you’ve downloaded a file manager, preferably ES file explorer, go to your app drawer and open it.
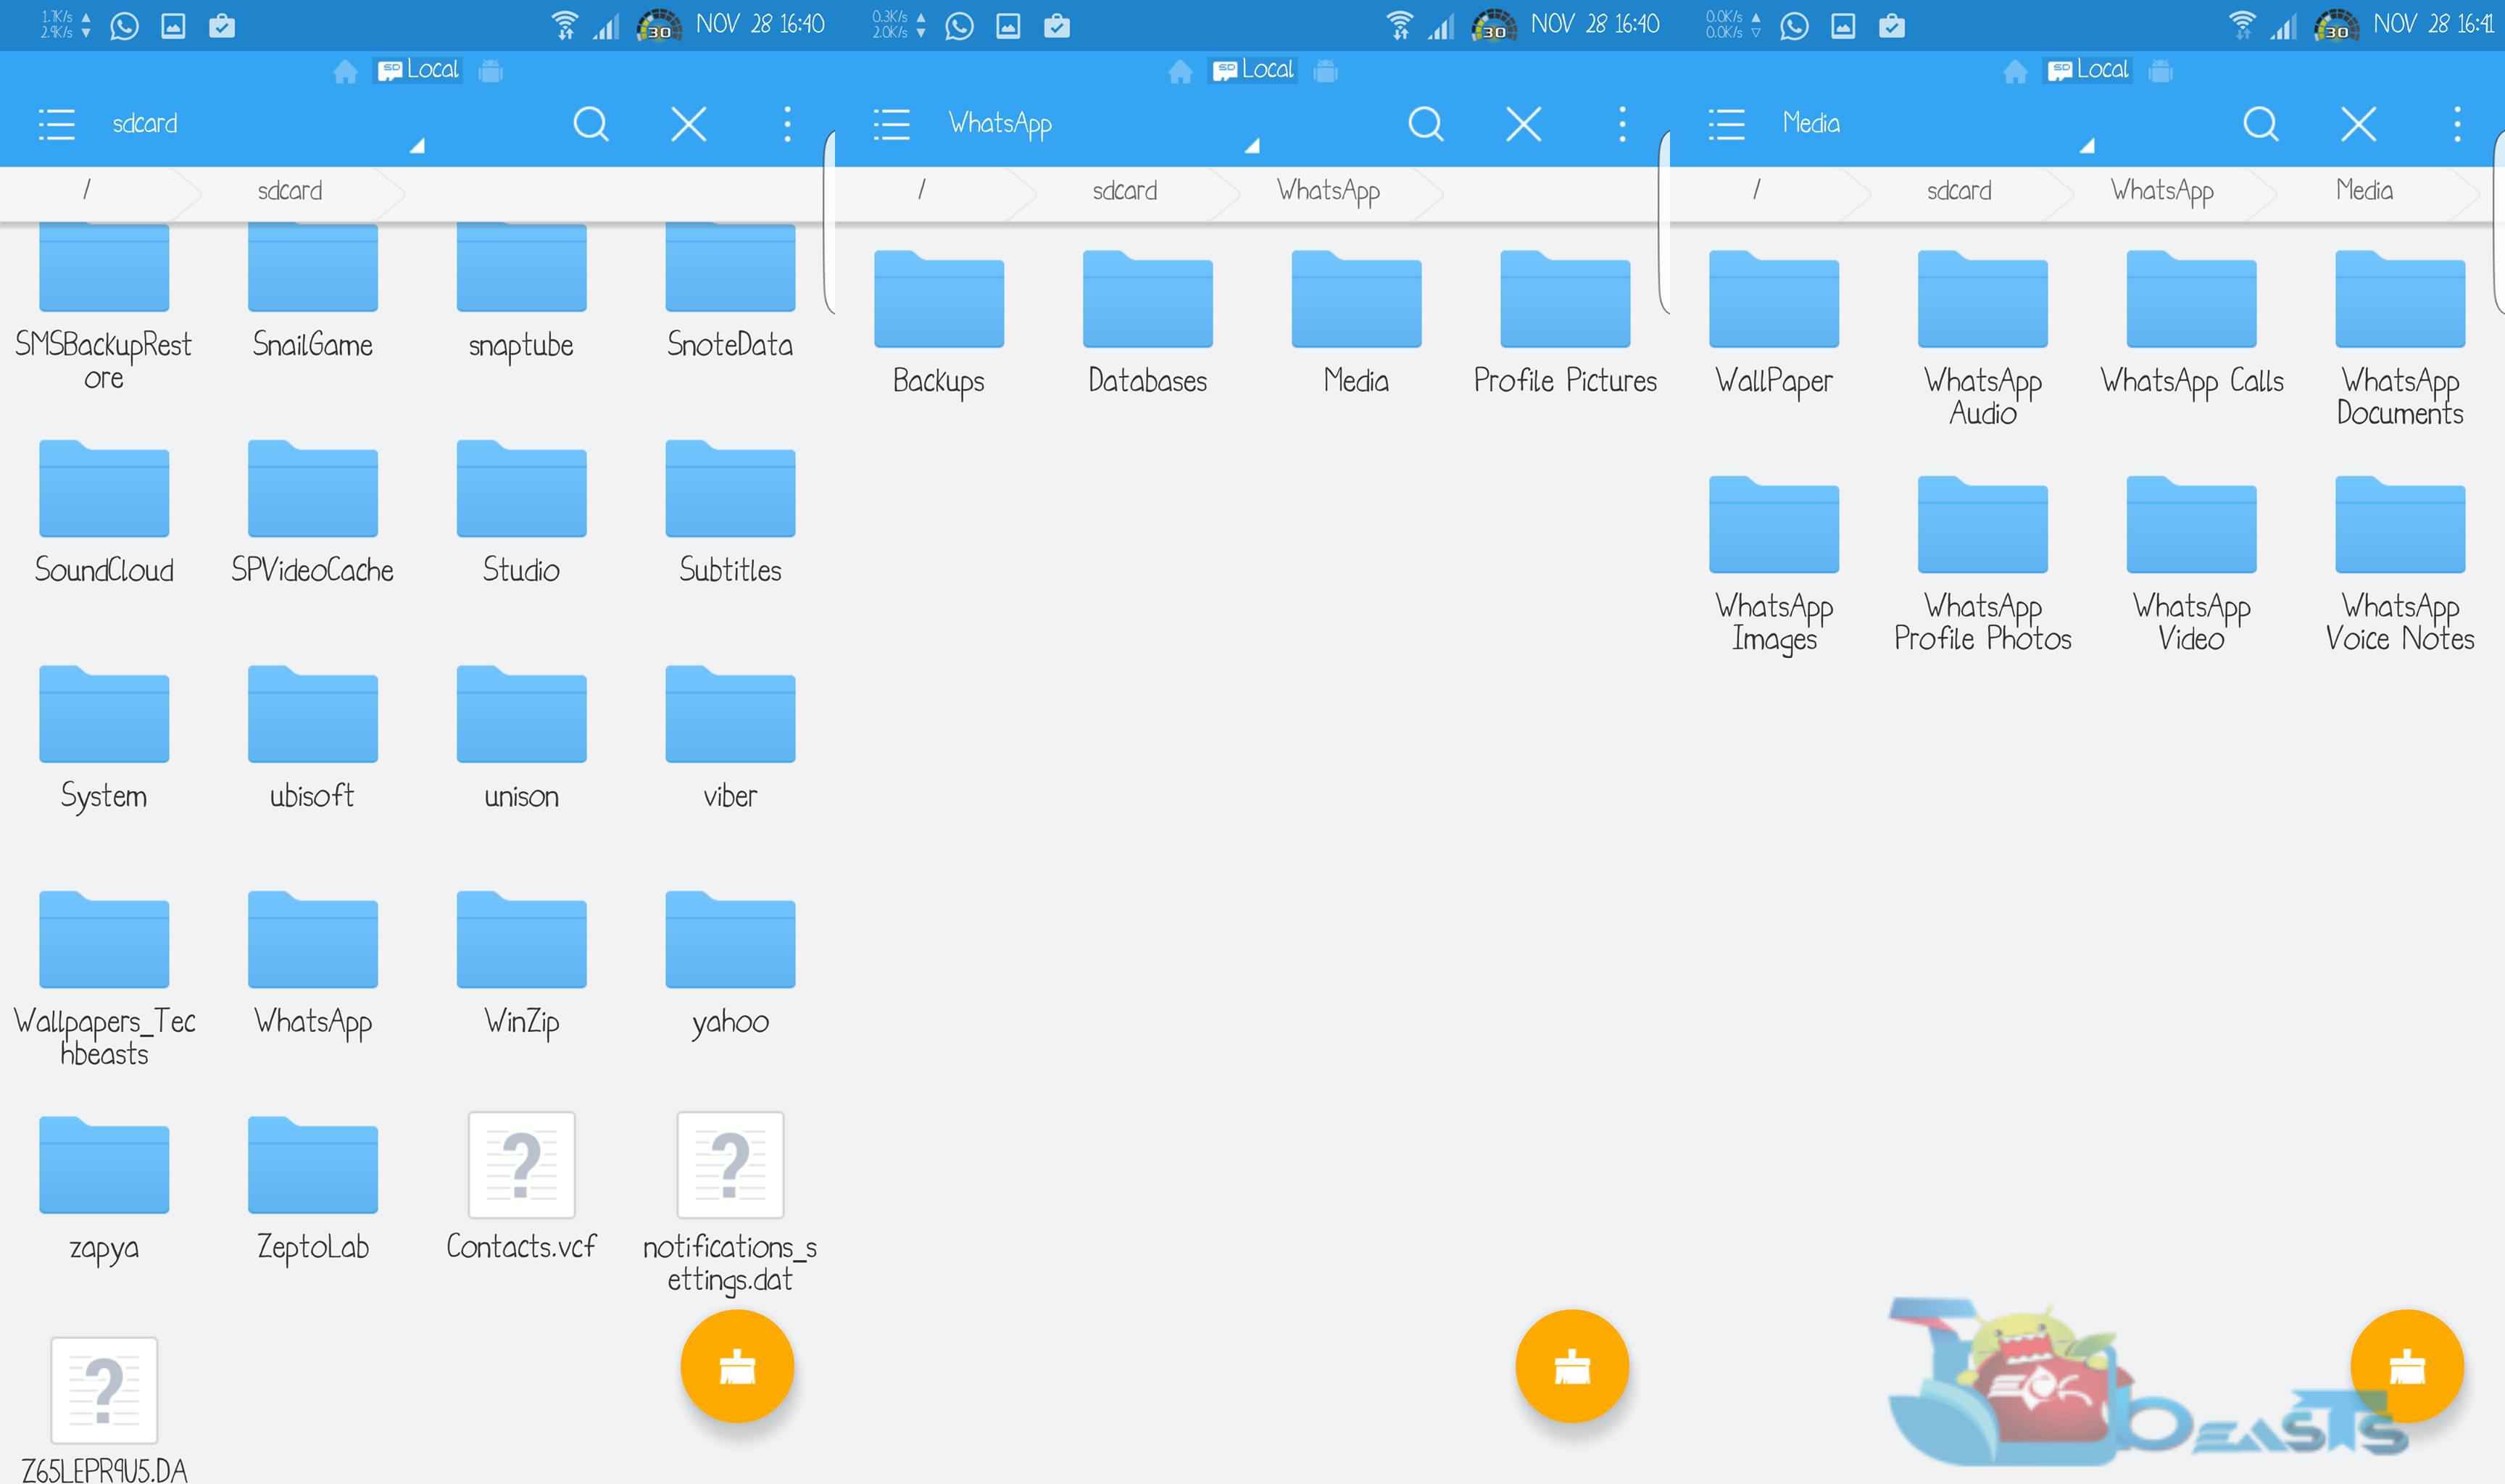
Swipe towards the right to access the SD card directory of your Android phone.
Now scroll all the way down and locate WhatsApp.
Tap WhatsApp > Media > WhatsApp Images or WhatsApp Videos depending on your choice.
Open your desired directory (WhatsApp Images or Videos).
Now when you’re in your desired directory, tap the three dots on the top right and then tap on new.
Now a small pop-up will come up asking you what do you want to add. Tap “File”.
Now it will ask you type the filed name dot no media as.nomedia and tap ok.
This file will be added in your desired images or video directory but it won’t be shown since .nomedia is a hidden file. You can tap the options icon on the top left and enable hidden files under tools in ES File Explorer options.
Once you’ve added .nomedia file, go to your gallery and you will find that the directory where you added this file, that won’t be showing up in the gallery anymore.
That’s all with hiding WhatsApp photos and videos from your gallery.
In case you want to show your hidden images and videos in the gallery once again, you can simply open the directory where you added the .nomedia file and delete the .nomedia file. After deleting .nomedia file, open settings > application manager > all > Gallery > Clear Data and Cache. You will have your hidden files back.
That’s all. I hope that this guide helps you out. In case of any queries, reach us out through the comment box below. Thanks all.
Instagram stories have become a part of our everyday life now. There are a million ways to create Instagram stories, but a dedicated Instagram Story story editing app with Instagram story templates would be an even better choice. FocoDesign is one such platform that takes away the hassle of creating & crafting your stories from scratch. You just pick up a ready-made template and create a cool story that will look quite appealing to your followers. Let’s take a deep look into what exactly the FocoDesign Instagram Story Editing app is and how it works.
FocoDesign – Instagram Story Editing App
Instagram Stories are one of the nicest ways to express our thoughts to our audience. In fact, Instagram is slowly becoming a new platform for brands replacing the likes of Snapchat. You can create countless Instagram stories to explain something, or just give an overview of what you are exactly up to. Instagram itself offers a number of features to make your stories look creative and extravagant, but that might not be enough for some. In fact, there is a huge number of Instagram Tips & Tricks to create beautiful stories, but I have to admit that those tricks are not as simple or easy to follow. This is the hassle that FocoDesign aims to kill. It provides countless templates and graphics that you can fit your stories into. No matter what kind of stories you want to make, you will find the appropriate and relevant templates in FocoDesign.
FocoDesign offers a web interface and a dedicated FocoDesign app for smartphones. Users can create stories using a bigger screen of their PC or just create using the phone on the go. The FocoDesign Instagram story editor offers over 5000 templates. The app allows for adding videos & photos together in a video. It also incorporates a Background remover. For videos, you can find a mixer in the video editor of FocoDesign.
The best part is that it is not only for brands or corporates, but independent influencers can also benefit from the app. The app welcomes you with an intuitive interface. You can pick up a template of your choice and replace the photo or video inside that template. The text over a template can be replaced using hundreds of unique font styles given in the FocoDesign Instagram Story Editing app. Once you’ve created your custom story, you can export it to your phone’s gallery and share it on Instagram.
FocoDesign is a great tool for marketers. A nice story can impress the masses and you can get countless interactions. If the first look of your story impresses the followers, that’s also going to result in a possible conversion.
The app is loaded with templates for different niches/business. Depending on what kind of marketing you are into, you can find an appropriate template. Not only that, but the app also offers covers for story highlights. Different templates are categorized nicely for the users to easily pick them up.
The best part? Well, FocoDesign is a free app. All the templates/images/text in the app is completely free. Not only that, but FocoDesign also doesn’t even put a watermark on your Instagram stories? How cool is that for a dedicated Instagram Story Editing app? Well, you can try it all yourself and start impressing the people following you on Instagram. FocoDesign lays the ground for potential Instagram growth. If you haven’t been enjoying a good following so far, try FocoDesign and you might end up hitting the right chords.
Heed the instructions below in order to use the Full Facebook Desktop Site from your iPhone and Android. Let’s begin.
Overview of Desktop Site:
People have relied more on their smartphones to meet their browsing needs. As a result, more and more websites offer two different versions: the mobile version, the light version, and the full desktop version. Mobile versions of websites typically offer the same original content but lack full-page functionality such as zooming in and out of posts, photos, and other page elements. Websites are increasingly using responsive or responsive web design to modify themselves to fit pages of any shape or size while displaying carefully designed content.
However, mobile sites are often unsatisfactory in one way or another. Often times, sites hide certain features behind their desktop versions, limiting the performance that mobile users can see or do while browsing the site. While this is done to maintain usability and usability for mobile device users, they can often keep users calm when looking for specific skills or options on their favorite sites. It can be very frustrating that the only reason you are trying to visit a particular site is to use a particular feature that was removed from the mobile site.
So in order to access and use all the features, it’s best to use a desktop site rather than using a mobile site/app on your Android or iPhone device.
Facebook Desktop Site:
Facebook is no exception. Although their iOS and Android mobile apps theoretically have more of the same functionality as the desktop version, many prefer to access Facebook through a browser on their smartphones. It’s no secret that the Facebook app uses a lot of space, battery, and memory on your phone, and the mobile site can be a faster or easier way to access your social networks.
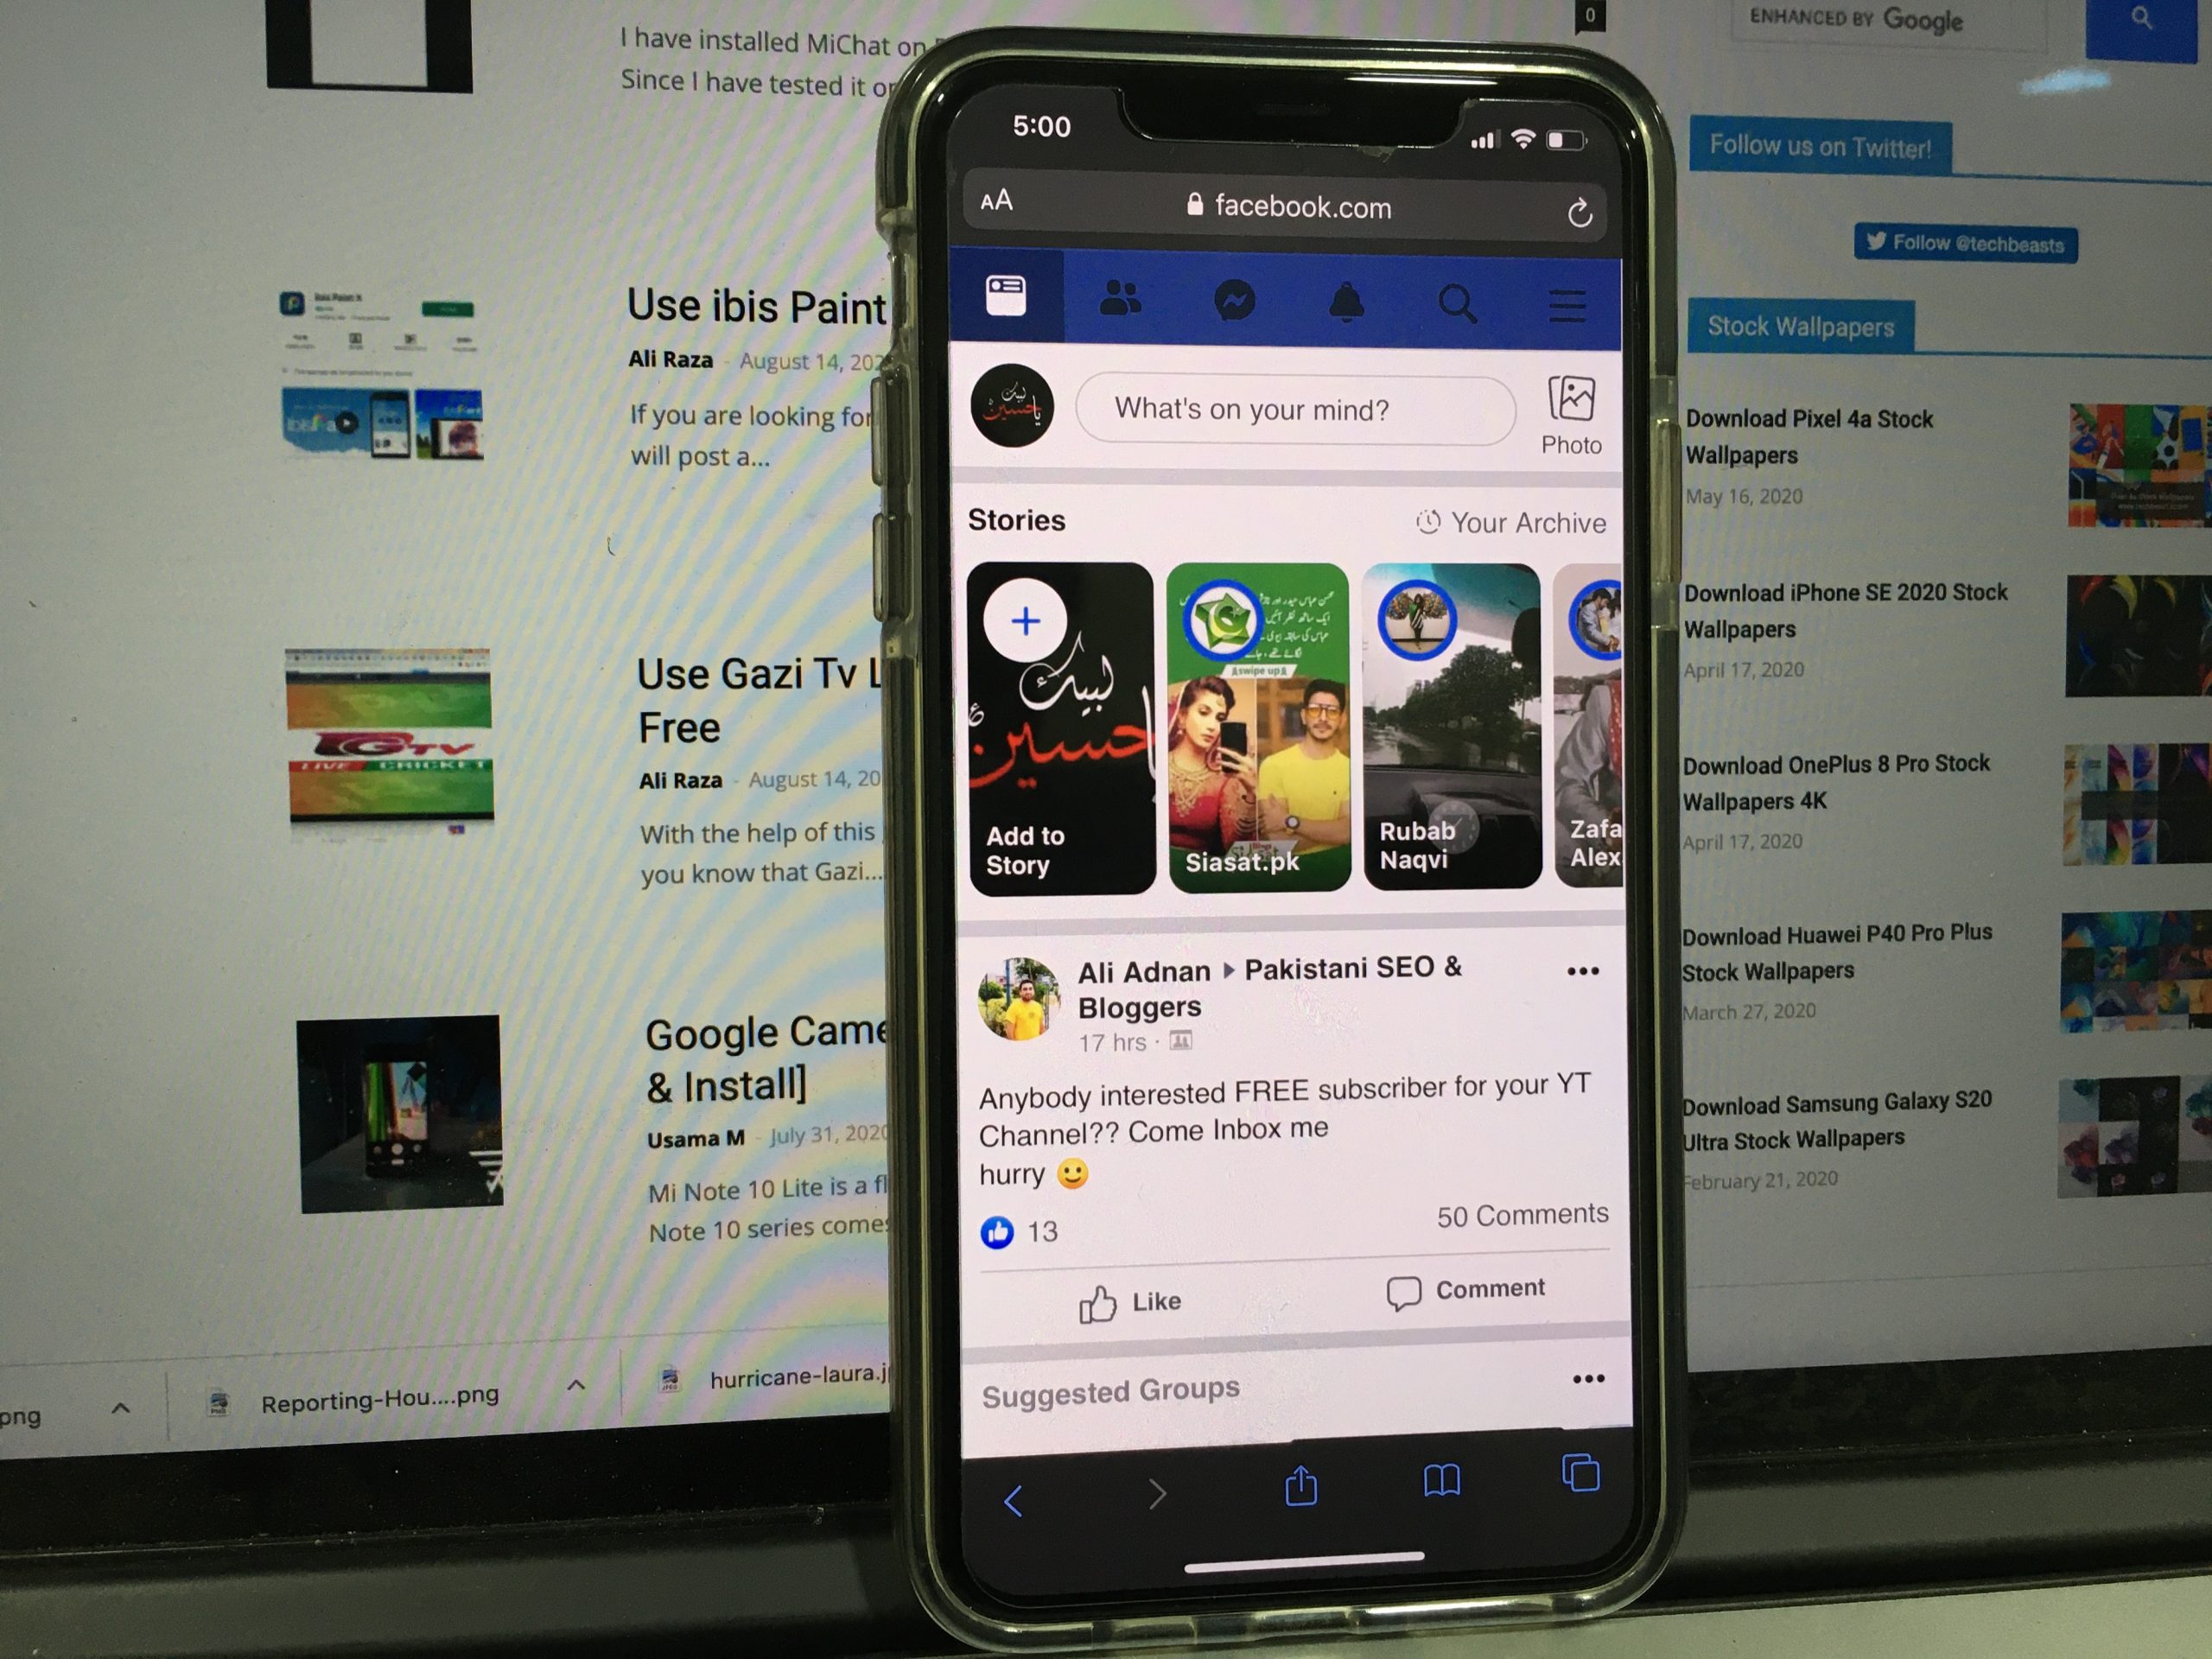
Unfortunately, the Facebook mobile browser site is much more limited in terms of functionality than the app. Facebook does not allow you to use Messenger on your mobile browser. Instead, it asks you to install the Messenger app. Changing settings or hiding your news posts can be really scary. If you are annoyed with the restrictions you face while using the Facebook mobile site, or if you want to change a setting, you cannot change the view of the mobile phone in your browser, you are in luck. Android and iOS allow you to easily switch between the mobile and desktop versions of Facebook with just one option. You can even bookmark the desktop version of the site to use whenever you want.
Now it’s time to tell you how you can Use The Full Facebook Desktop Site From Your Phone.
How to Use The Full Facebook Desktop Site From Your Phone:
You can use the following instruction on both Android and iOS smartphones. There is no rocket science behind it. Just follow the steps below.
To get started, open your web browser and tap on the URL bar at the top of the page.
Enter this URL ( www.facebook.com/home.php )
If you are already logged into your Facebook account on your mobile browser, the desktop version of Facebook should load in its full multi-column view.
If you have not logged into your Facebook account or have not exited your mobile browser, you will be prompted to enter your login information. Log into your account and you will always be transferred to the mobile web version or the Facebook application on your device. Don’t worry, you are not wrong
Delete the tab or exit the mobile app and go back to your browser.
Put the above link back in your phone’s URL bar and you should be taken to the desktop version of the page now that you’ve successfully logged in.
Alternate Method:
Both Android and iOS devices have their own different method. We have explained both of them below. Let’s with Android first.
Android:
Open up your browser and type in Facebook.com.
Log in with your Facebook account and let it take to the app version.
Once you are logged in, tap on the 3dots icon and select ” Request Desktop Site”.
That’s it.
Open Facebook Desktop Site iOS 13:
On your iPhone with iOS 13, open Safari and go to the website where you want to see the desktop version.
Wait a few moments for the download page to complete. Once downloaded, scroll up to see the search bar, then press the “Aa” button.
From the drop-down list that appears, select “Office Site Request”.
Note that while all sites allow you to request a desktop site, not all sites actually allow it; some simply refresh the page but continue to display the mobile site.
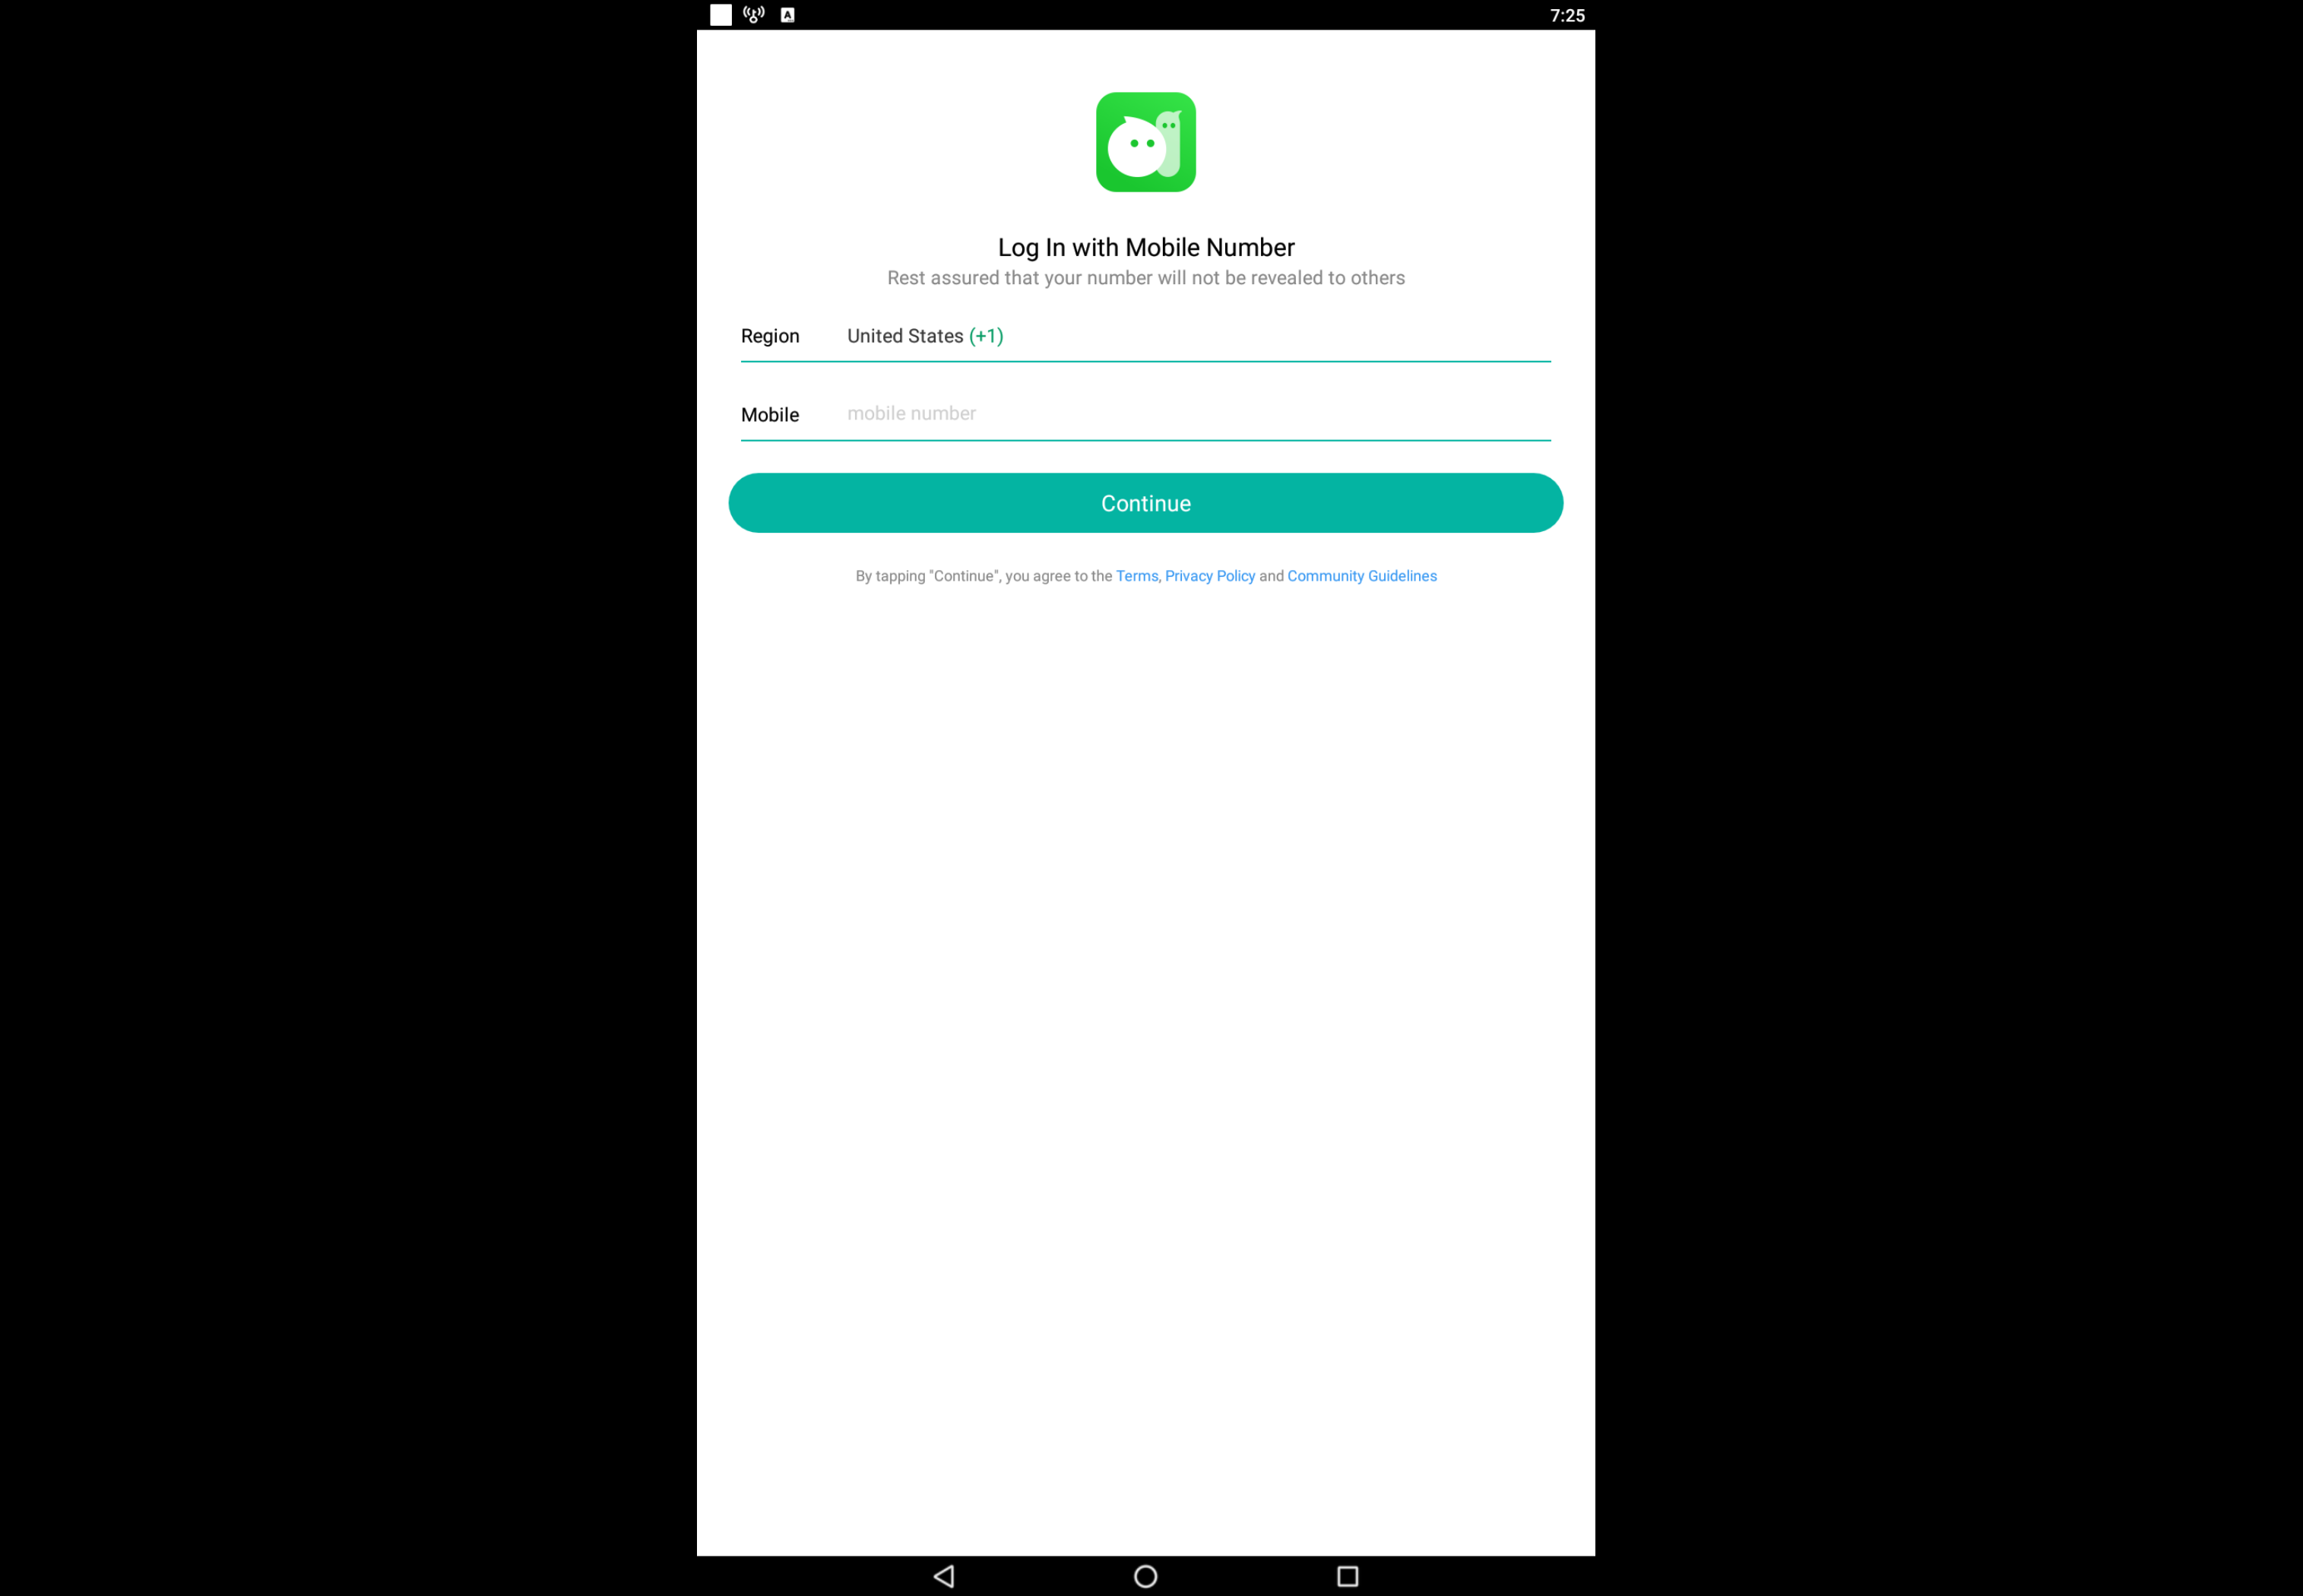
I have installed MiChat on PC with the help of BlueStacks and it is working perfectly. Since I have tested it on my Windows 10 & Mac, I thought I should share this same method with all of you.
MiChat:
MiChat is a free messaging app with great features. This is not just for family and friends, MiChat helps you find new friends by expanding your social network and finding people nearby.
Main Features of MiChat PC:
Free one-on-one or group messages! Send messages faster and save data!
Find people close to you. 50 meters? 100 meters? 1 km? Find new friends nearby! Maybe that special person is just around the corner!
Take pictures of your life to capture small pieces. Share exciting moments with your friends!
Each message has a specific idea. Choose or hang a message on the tree to look for that special person!
Upload and receive videos, photos, files, texts, and voice messages in MiChat Messenger.
How can we install MiChat on a Windows 10 & Mac?
The answer to your question is pretty simple, we will third-party Android Emulators to provide the Android environment on our PC. Once you have installed the Andorid emulator you will be able to download Android apps on your PC.
Which Emulator do I use to Install MiChat on PC?
There are a number of emulators you can find on the internet but the best of them is BlueStacks and I also used it. BlueStacks is available for both Windows 10 & Mac. Moreover, Bluestacks runs the latest Android version, that is the main reason behind its success.
Requirements:
Desktop PC or Laptop with Windows or macOS.
Internet Connection.
Mouse & Keyboard.
Google Account – If you do not have one right now, create a new one for free.
If you are looking for a method to install ibis Paint X on PC, you are in the right place. I will post a simple 100% working method to install ibis Paint X on PC.
NOTE: We are not associated with the makers of iBis Paint X. The full credit for this application goes to its original developers. We are only providing a guide to the iBis users in order to install this application on their computer via an Android emulator, which is an absolutely safe and right method. In case of any queries, feel free to reach out to us via our Contact Us page.
About ibis Paint X:
IbisPaint X is a drawing application that you can use to create thousands of detailed drawings. Many of its features may remind you of the tools you can find in essential design programs like Adobe Photoshop, but the IbisPaint X comes with everything in one program.
With this app the possibilities are endless. By choosing different types of canvases, 142 different pencils, and tons of different tools that you can use according to your heart, you can create what you want in the smallest detail. You can import images from your gallery and drag them on the layers, making the whole process much easier.
One of the best parts of IbisPaint X is its social skills. With this app, you can share the design process of anything you create with a large community. You can also check out how other users create their projects and you may even learn something in the process.
IbisPaint X is a great painting app that will delight both amateur and professional artists. It has many options, it is easily one of the best programs of its kind.
Is ibis Paint X is available on PC?
The answer to this question is no. ibis Paint X is designed for smartphones and there is no PC version available for it. However, since it’s available for Android smartphones, we can install ibis Paint X on PC using a third-party Android Emulator.
There are tons of Android Emulators available on the Web. But not all of them are worth trying. In my guide I will be using BlueStacks, it’s the best Android Emulator you can get for Windows 10 & Mac.
Before we move on to the installation process. You need to meet the following requirements.
Requirements:
Desktop PC or Laptop with Windows or macOS.
Internet Connection.
Mouse & Keyboard.
Google Account – If you do not have one right now, create a new one for free.
Mi Note 10 Lite is a flagship killer device from Xiaomi. The low-end variant of the Mi Note 10 series comes with promising cameras on very powerful hardware in a solid build. Mi Note 10 Lite has attracted masses mainly because of its price point. Xiaomi has used the Sony IMX686 as its main camera sensor and this phone uses Qualcomm Snapdragon 730G’s image processing. The use of SD730G opens doors for Google Camera on this handset. In this guide, I am going to show you how you can download Google Camera aka GCam for Mi Note 10 Lite. The tutorial will show how to download and install GCam on Mi Note 10 Lite.
About the Mi Note 10 Lite
Mi Note 10 Lite is the world’s first mid-range device with a curved screen. Xiaomi has used a 6.4-inches Super AMOLED panel on this phone. The phone uses a waterdrop notch with no bezels and an extremely sleek chin. Mi Note 10 Lite is built out of glass which is surrounded by an Aluminium frame. The phone uses Gorilla Glass 5 on the front and at the back. This is also among the phones that successfully retain a headphone jack in the year 2020. The phone further has a fingerprint scanner underneath its display. Mi Note 10 Lite uses a RAM of 6 or 8 Gigabytes along with a 128 Gigabytes internal storage. The phone doesn’t have a MicroSD card slot inside. It runs on the MIUI 11 based on Android 10 out of the box, the phone is yet to receive its MIUI 12 update.
In the camera department, Mi Note 10 Lite uses a 64 megapixels main Sony IMX686 sensor along with an 8 megapixels ultrawide, 2 megapixels macro, and 5 megapixels depth camera. The camera app of this phone is feature-rich, but it doesn’t really unleash the real potential of its main camera sensor.
To pull the best use out of the Mi Note 10 Lite’s cameras, you can get your hands on the Google Camera. A working port of the GCam has made its way, thanks to the developer’s community.
GCam on Mi Note 10 Lite
In the available GCam for Mi Note 10 Lite, almost all the features are working fine. Here is a complete list of everything that is working.
Ultrawide camera works.
The main camera works.
The macro camera works.
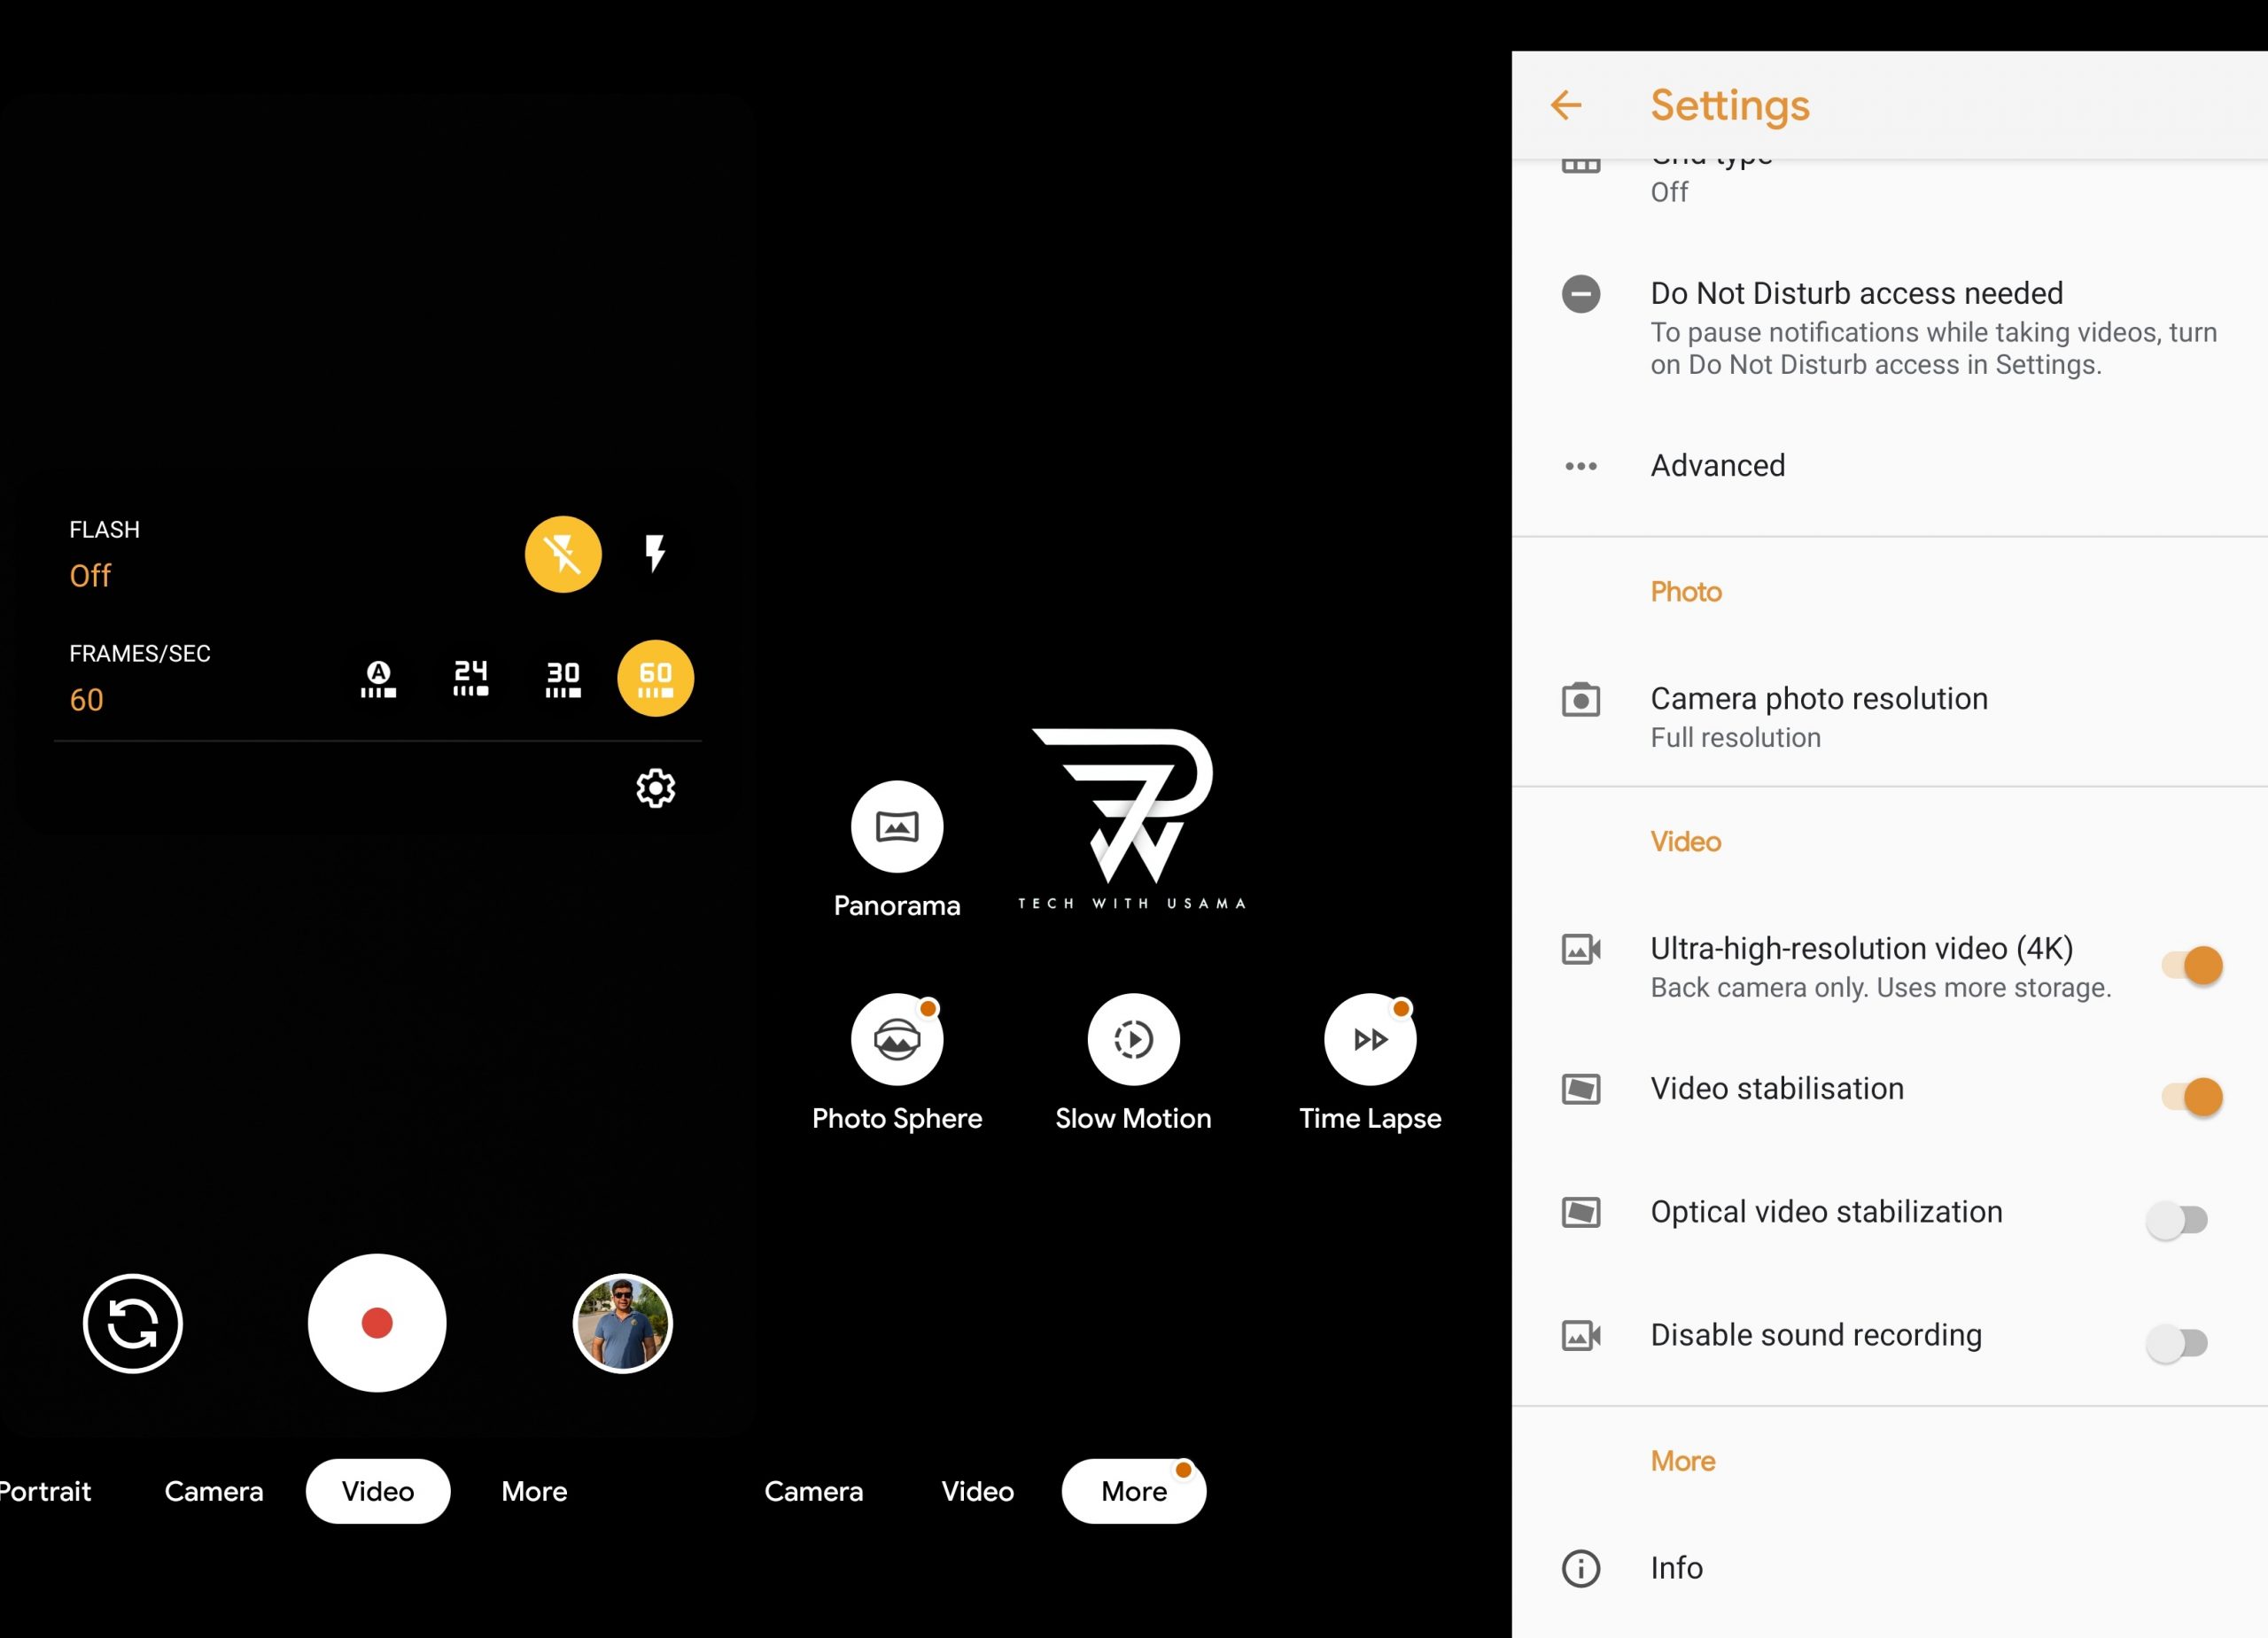
4K & 1080P videos @ 60/30/24FPS.
Videos work for the main camera only.
Astrophotography works.
Google’s HDR+ works.
Portrait mode for both front and rear cameras works.
Night Sight for both front and rear cameras works.
Slow-Mo works.
Timelapse works as well.
I have personally tested all these features on my Mi Note 10 Lite. Take a look at the steps below to get it up and running right away.
Download GCam for Mi Note 10 Lite
Mi Note 10 Lite GCam – PixelCam Plus APK & Config File: Download
Extract the zip to get the PixelCam Plus APK and the MN10L.xml file.
Copy the downloaded files to your phone’s internal storage.
Install GCam on Mi Note 10 Lite
Go to the Internal storage on your Mi Note 10 Lite.
Create a new folder named “GCam” in the main internal storage.
Inside the GCam folder, create another folder named “Configs7”.
Now move the MN10Lite.xml file into the Configs7 folder.
Open the PixelCam Plus APK on the phone and install it.
Now launch the PixelCam Plus (GCam) from the app drawer.
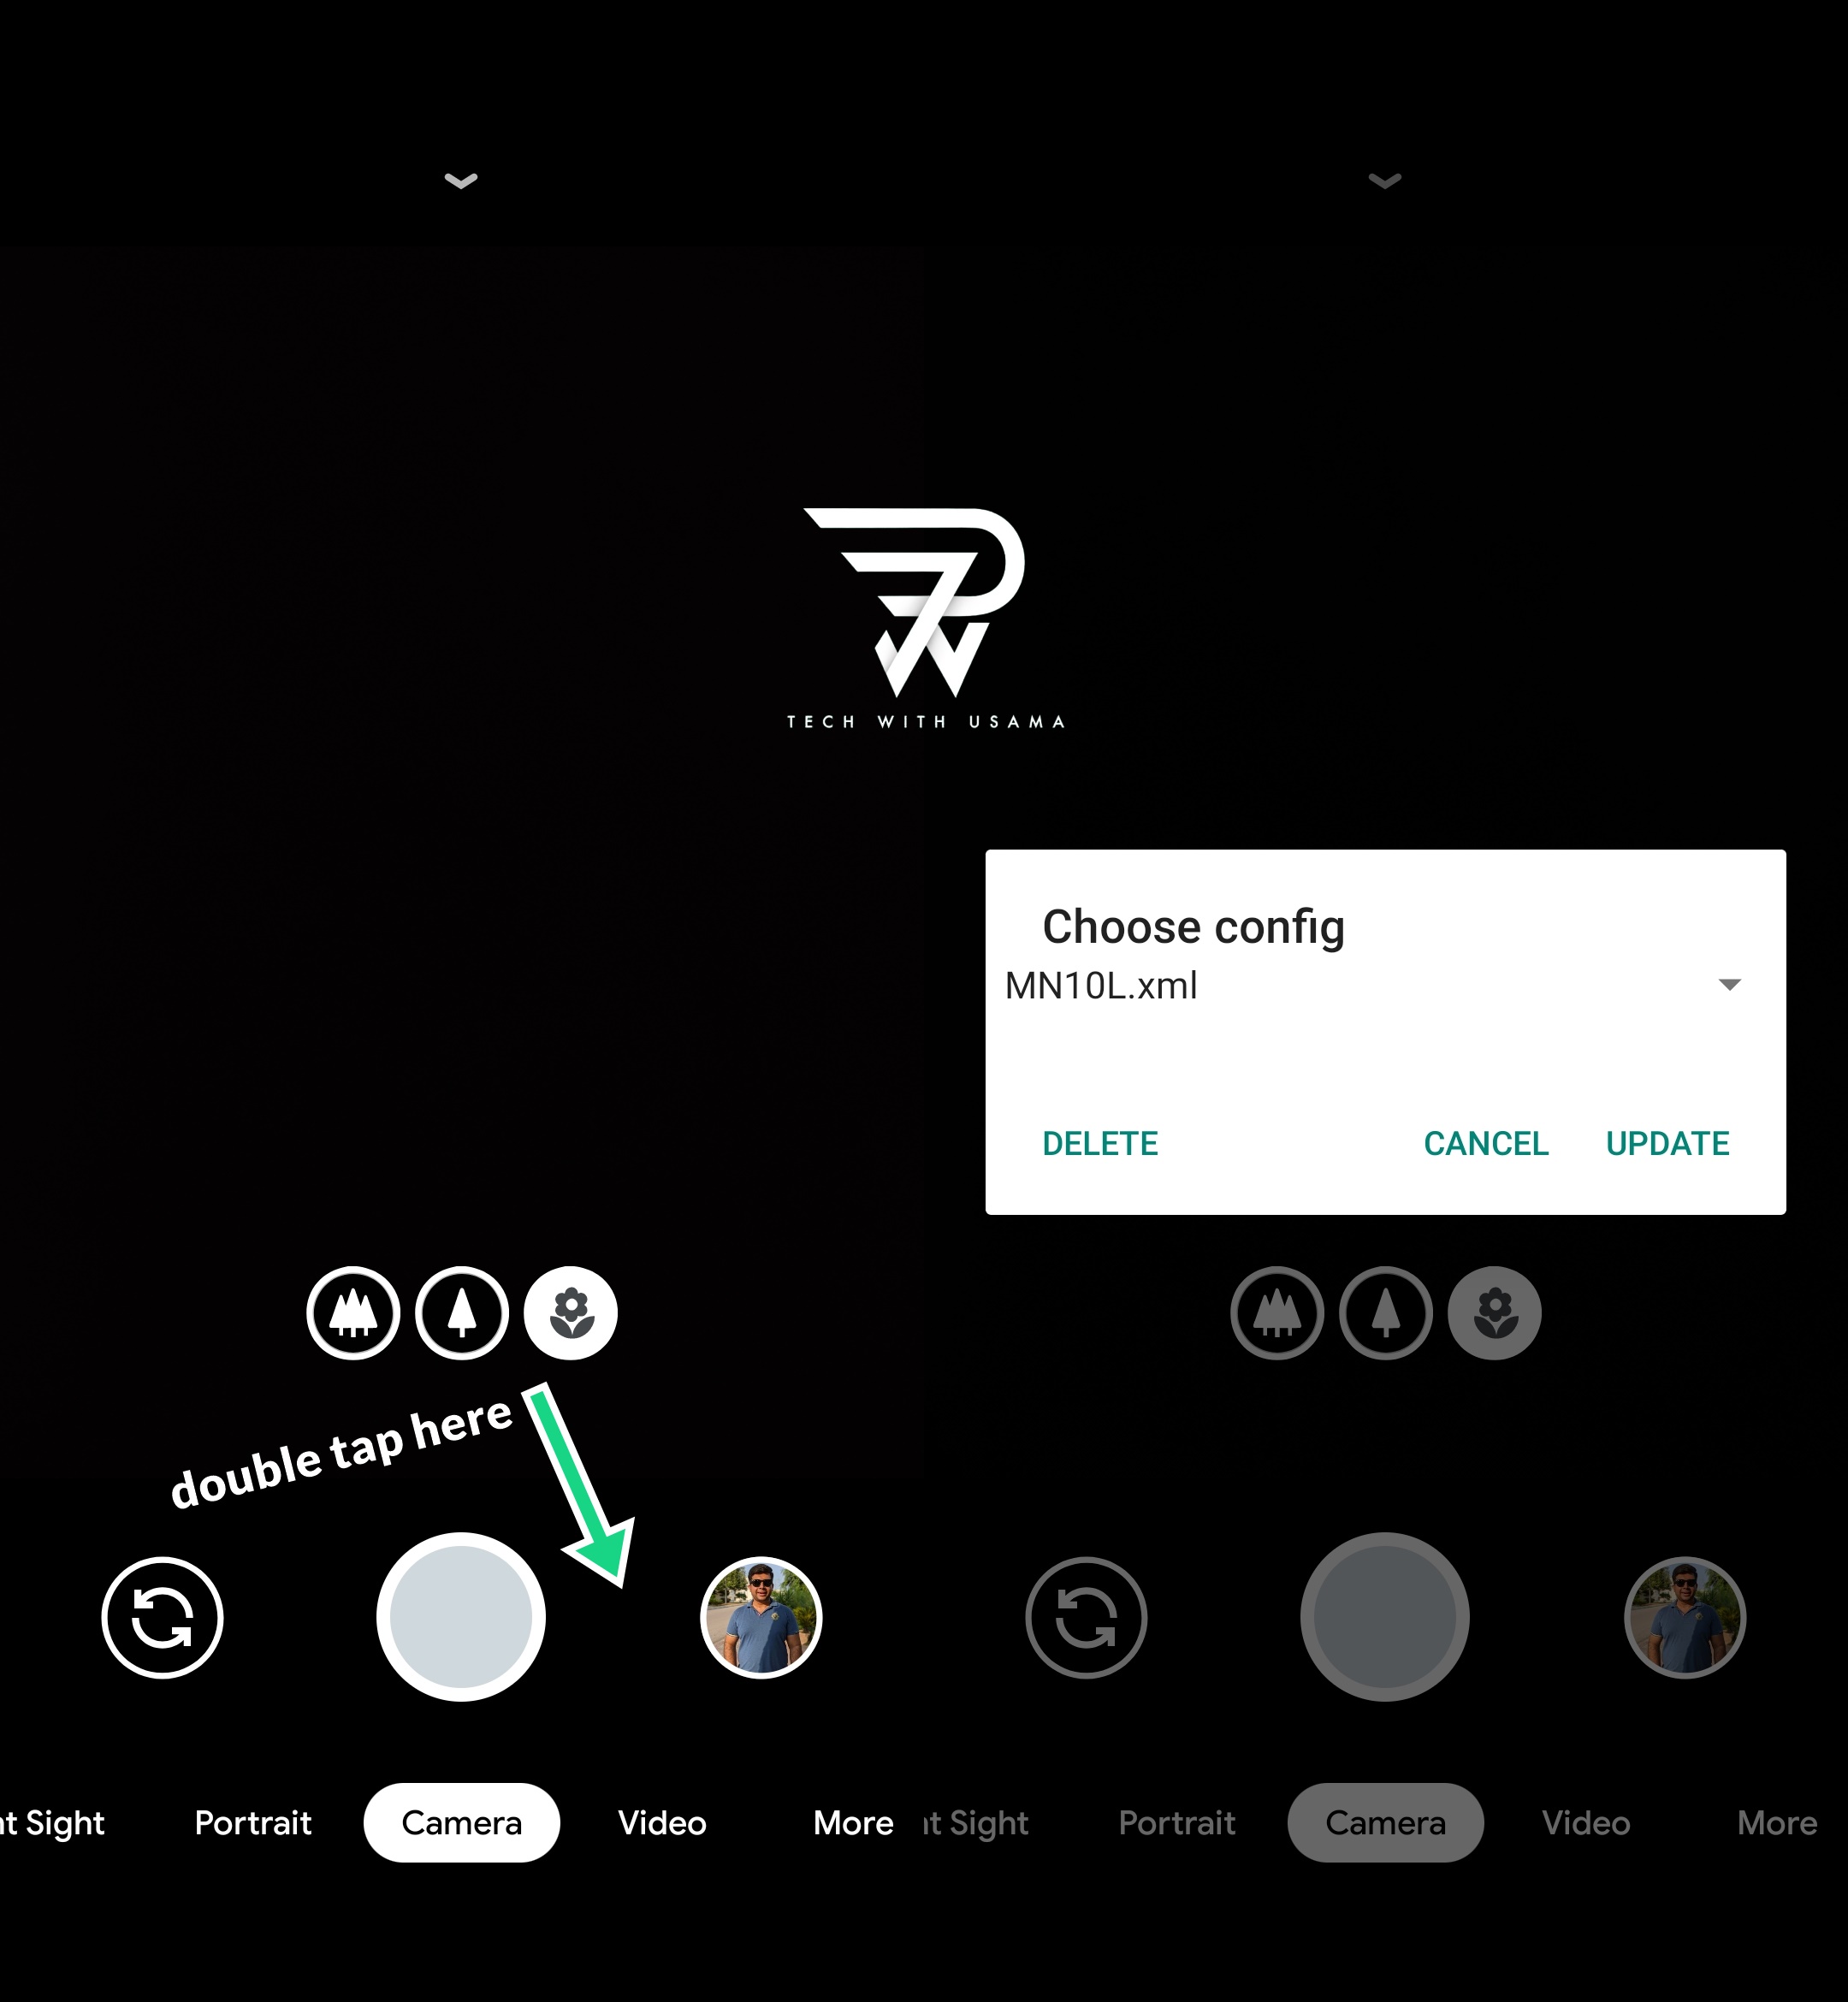
Double-tap on the black area between the Gallery & Shutter button in the GCam app.
It will ask you to restore the MN10Lite.xml config file.
Restore the file and you are good to go.
GCam has been installed on your Mi Note 10 Lite now. Feel free to change the settings and take any photos on your Mi Note 10 Lite now.
Pro Tip: GCam on the Mi Note 10 Lite captures immensely stunning selfies in the normal and portrait mode. You should also give a try to its astrophotography feature.
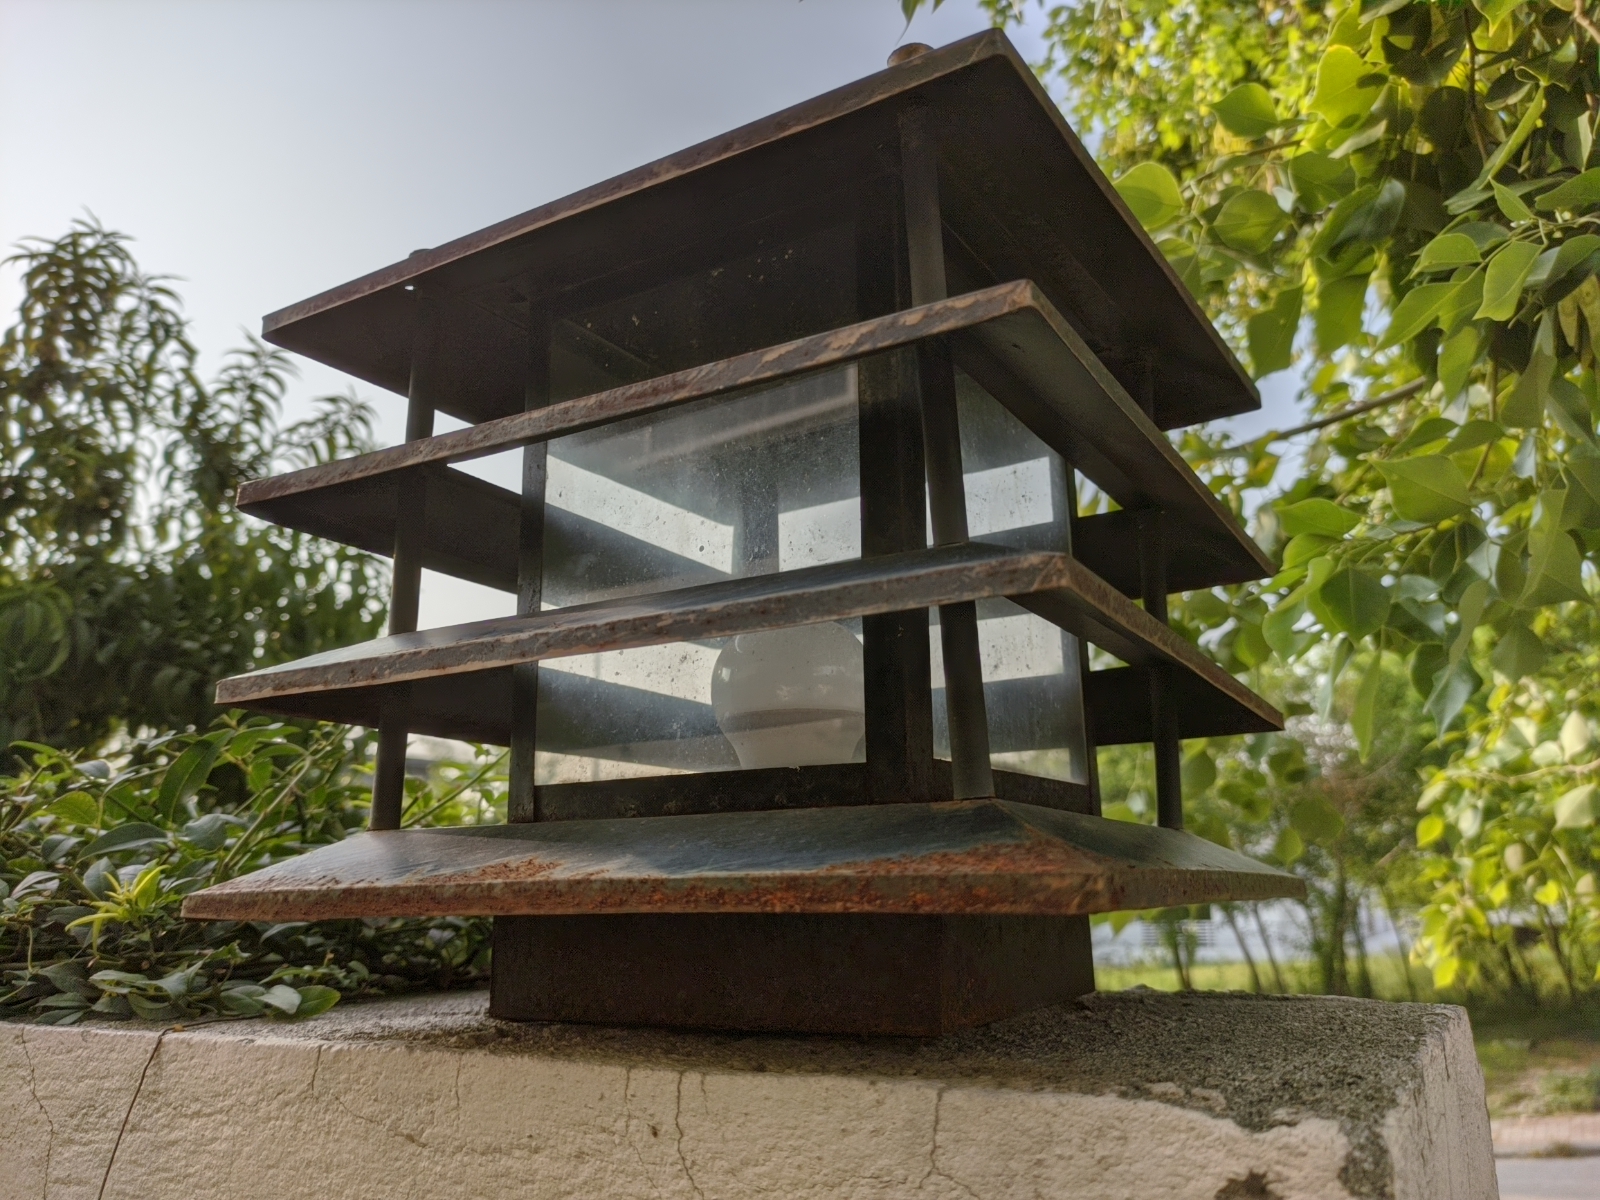
For now, I am attaching some camera samples here. Take a look.
Macro Camera
Final Words
I have also created a video tutorial on the same, and I have also done a complete camera comparison between the stock camera and GCam on Mi Note 10 Lite. I hope you guys really like all of this work and if you are facing any kind of issues, feel free to reach out to me through the comment section below. I will try my best to get back to you as soon as possible.
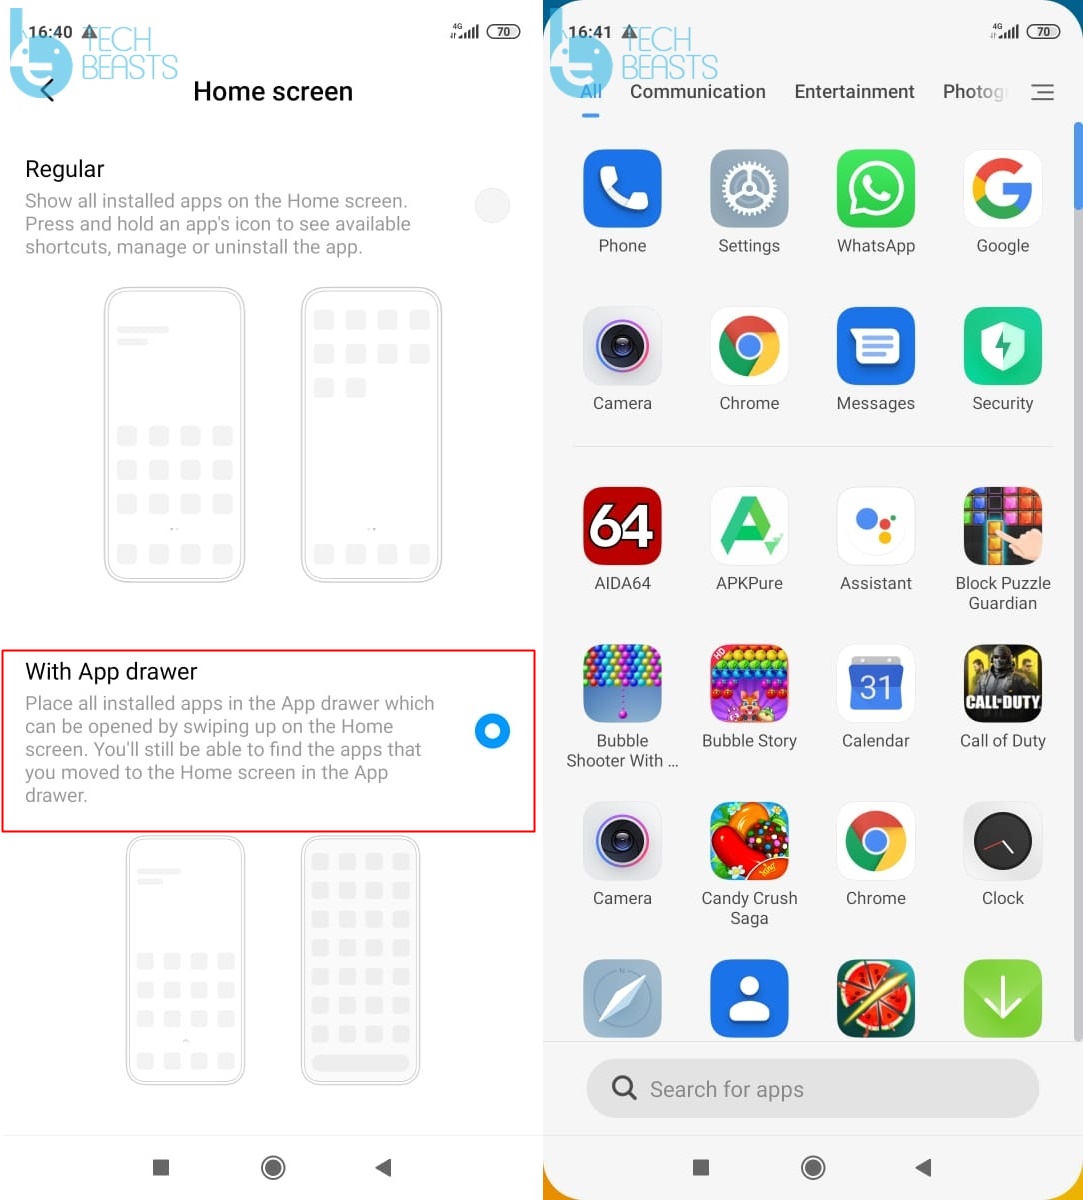
Do you know that you can finally get the App Drawer on your Xiaomi or Redmi phone? Well, Xiaomi officially added the app drawer support to its MIUI back in November. To enable to MIUI App Drawer on your MIUI device, you would need the latest MIUI System Launcher. We have attached the latest 4.17.1 MIUI System Launcher APKhere. Download it and enable the App Drawer on your phone right now.
miui app drawer
About MIUI System Launcher
MIUI’s official system launcher did not have the app drawer option previously. It lacked a number of home screen settings on the Xiaomi and Redmi phones. In November 2019, Xiaomi officially added the app drawer support but made it limited to the MIUI Chinese ROM only. The Global MIUI users did not get it at that time.
However, in early 2020, Xiaomi rolled out the same support for Global users too. The feature, however, does not appear in the Xiaomi or Redmi phones out of the box. It is a part of the newest version of the MIUI System Launcher. Thankfully, the official APK of MIUI Launcher is widely available and you can install it on your phone within a second. This is not a third-party app or a third-party solution, and it will keep your phone as good as it was before.
The MIUI System Launcher cleverly adds all the missing features to your MIUI 11 device. Remember that this will not work with any device running MIUI 10 or lower. You must have the MIUI 11 installed. Let’s bring the missing MIUI app drawer back now.
What will the MIUI System Launcher add?
Here are all the features that the MIUI System Launcher will potentially bring to your phone.
Copy the APK to your phone, if downloaed on phone already, just follow the simple steps below.
How to enable MIUI App Drawer [MIUI 11 – Xiaomi & Redmi]
Open the File Manager on the phone and click on the MIUI System Launcher APK.
Install the APK by following the on-screen instructions.
Go to the home screen of your phone.
On an empty area, long-press and click on Settings.
Now click on “More”.
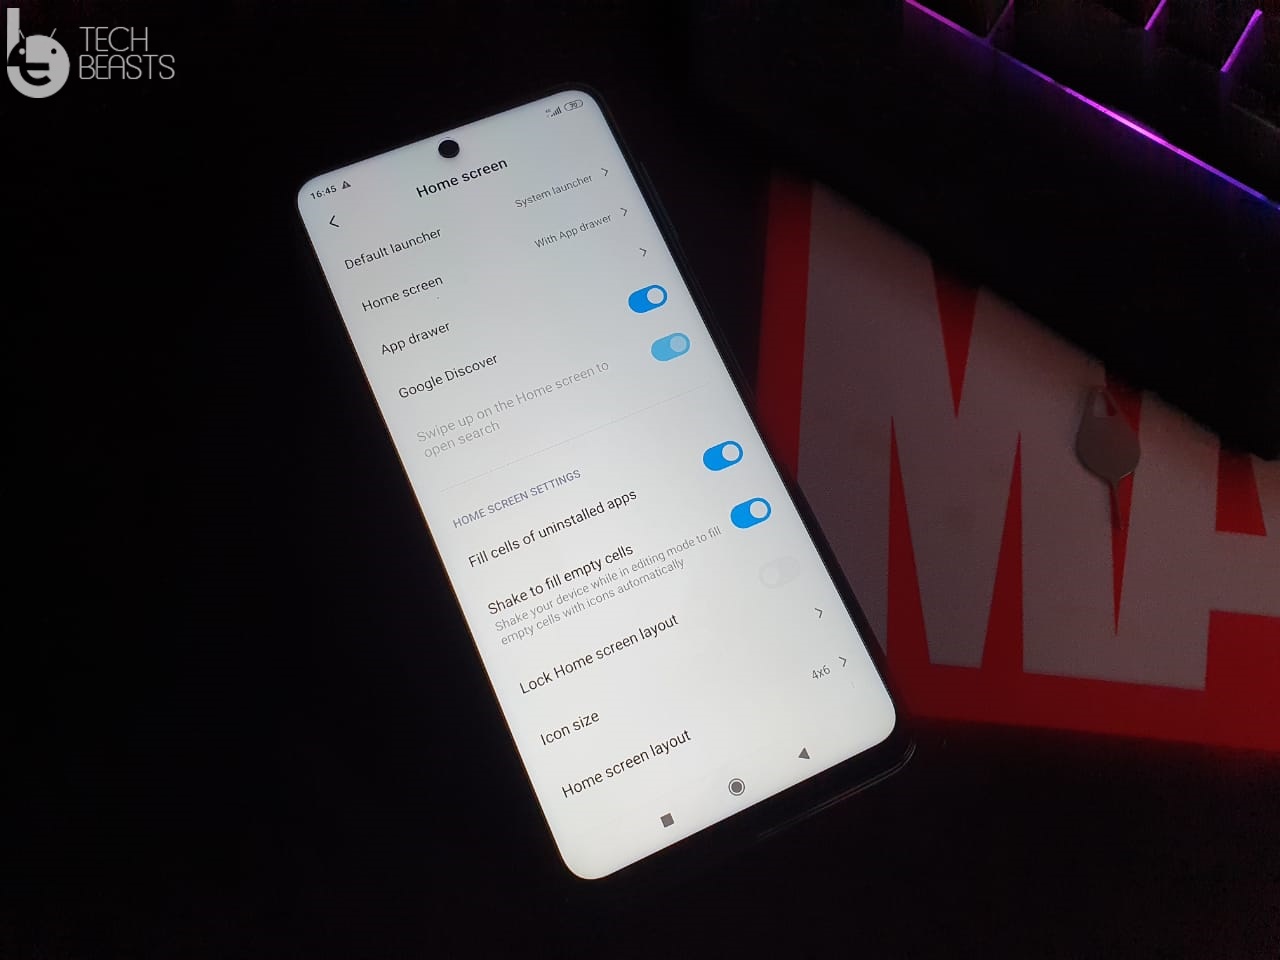
Click on Home screen > select App drawer.
Go to the home screen again, swipe up to access app drawer.
What’s next?
By now, you should have successfully enabled the MIUI app drawer. You can customize the behavior of the app drawer by going into the same home screen settings. The transition effects, categories, scroll bars, and pretty much everything can be customized. The best feature of this app drawer is how it sorts everything under its specific category. With the app drawer enabled, the MIUI 11 looks much more cleaner.
I hope you guys found this guide useful. If you are facing any issues, feel free to reach out to me through the comment section below. I will try my best to get back to you ASAP.
Good day for the iOS 13.5 users. The iOS 13.5 Jailbreak is here. It has come from none other than the famous Jailbreak tool Unc0ver. Unc0ver’s version has been bumped to 5.3.1. Download Unc0ver 5.3.1 IPA from here in order to Jailbreak iOS 13.5. You can use Windows or Mac to Jailbreak iOS 13.4 via Unc0ver 5.3.1.
About Unc0ver 5.3.1
Unc0ver 5.0.1has full-fledged support for all iOS 11 – iOS 13.5 powered devices & tweak injection.
Unc0ver is the most popular Jailbreak solution. It has been around for several years. So far, the tool has allowed iOS users a handful of times to unleash the true potential of their devices. The most recent version, the Unc0ver 4.3 allowed Jailbreaking all iOS devices running on iOS 13.3 or below. Since then, we did not find any new Unc0ver version to Jailbreak any higher version of iOS. Unc0ver’s developer pwn20wnd took it to twitter to announce the Unc0ver Jailbreak 5.3.1 based on 0day exploit. For those who don’t know, 0day is a vulnerability found in hardware or software of the devices found only once the products are shipped.
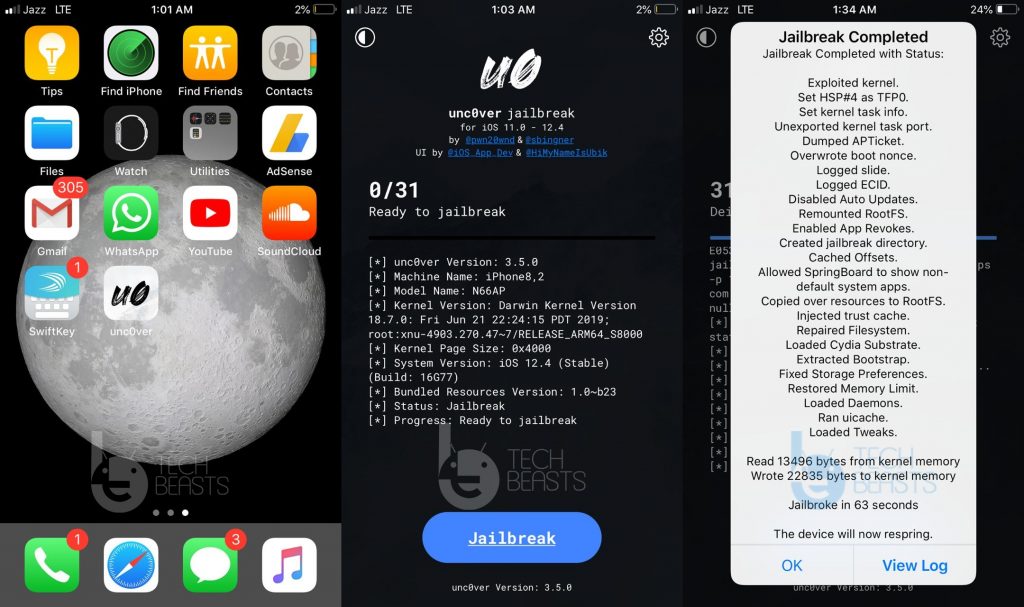
Image used for reference only – old Jailbreak screenshots.Unc0ver 5.3.1 IPA Jailbreak
At the moment, Unc0ver 5.3.1 is offering a semi-tethered Jailbreak solution. This essentially means that you will lose the Jailbreak whenever you reboot your phone. But the longer battery backup your iPhone/iPad will have, the less you would need to repeat the Jailbreak process. Jailbreaking your iPhone, again and again, may seem a lot of hassle, but to ensure that you don’t do it again and again, you have to keep the iOS device alive at any cost. Furthermore, the AltStore installation is performed one-time only. Once you have the AltStore running on the device, it would be extremely simple to get Unc0ver and press the Jailbreak button again.
Unc0ver 5.3.1 Compatability
The Unc0ver 5.3.1 is compatible with every iOS device using a signed iOS version. Yes, you heard that right, you can Jailbreak any iPhone or the iPad now. This also includes the latest iPhone 11, 11 Pro, and the iPhone 11 Pro Max.
Here is a list of all the devices that you can Jailbreak via Unc0ver 5.3.1.
All Apple A8 – A11 devices running on iOS 13/13.1/13.2/13.3/13.5
iOS 13/13.1/13.2/13.3/13.5 – Apple A12 and A13 Chipsets
Apple iPhone 6, 6 Plus, 6s, 6s Plus, iPhone 7, iPhone 7 Plus, iPhone 8, iPhone 8 Plus
iPhone X
iPhone XR
Apple iPhone Xs
Apple iPhone Xs Max
iPhone 11
iPhone 11 Pro
Apple iPhone 11 Pro Max
iPad Mini 5th Gen and iPad Air 3rd Gen/2019
Update: Unc0ver 5.3.1 is now out
The latest version of Unc0ver, the Unc0ver 5.3.1 is out now. It still supports all the devices listed above. Unc0ver 5.3.1 is more stable and it should be used to Jailbreak iOS 13.5 now.
Unc0ver Jailbreak Usecase
Jailbreaking your iOS device is going to be your personal choice. If you look at the things that you can do on a Jailbroken device, you are probably going to do it. Once Jailbroken, you can access the app stores like Cydia or Sileo. These stores bring a whole lot of applications that can modify the UI of your iPhone. You can also change the behavior of keys on the iOS device. Furthermore, you can add new features to every corner of the iPhone or iPad. The whole purpose of Jailbreak is to allow immense customization on your device. You can add new themes, change the icons, change the elements inside the apps, and a lot more. There are numerous apps to boost the performance and battery life of the Jailbroken iOS gadget.
There are two methods to install the Unc0ver 5.3.1 IPA on your iPhone/iPad. You can either install it via AltStore or the Cydia Impactor. For the latter, you would need a Developer account. I am going to list down the instructions for AltStore here only.
Follow this guide to download Unc0ver 5.3.1 via AltStore.
Conclusion
That’s all for now. Have you Jailbroken your device already? If so, share your experience with us using the comment section below. What are your favorite iOS 13.5 Jailbreak tweaks? Do list them below as well.
NVMS7000 is a client application to control IP Cameras. This Android-only app can be downloaded on computers too. Here you will find the steps to setup NVMS7000 on PC. In order to download NVMS7000 for PC, you would need an Android emulator. Complete step-by-step instructions are given in this post. Before you download NVMS7000 PC, let me give you its brief overview.
What is NVMS7000?
IP Cameras have become an essential part of security measures. Whether you’re working on making your home or office secure, you would need a good camera that can be controlled remotely. IP Cameras have this capability that they can either be controlled with their own application, or you can use a third-party client like the NVMS7000. It doesn’t matter which brand’s IP or Network camera you are using, the NVMS7000 supports all of them.
This remote surveillance software is equipped with tons of features, the modern-day features in fact. First of all, it gives you the ability to watch your cameras from anywhere in the world. Yes, the first time connection is important and for that, you should be near the cameras. After a first-time-connection, you are free to go anywhere.
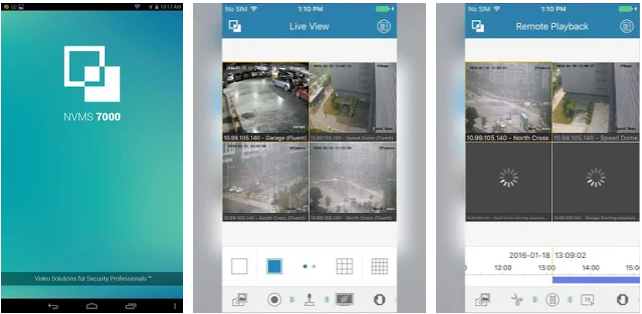
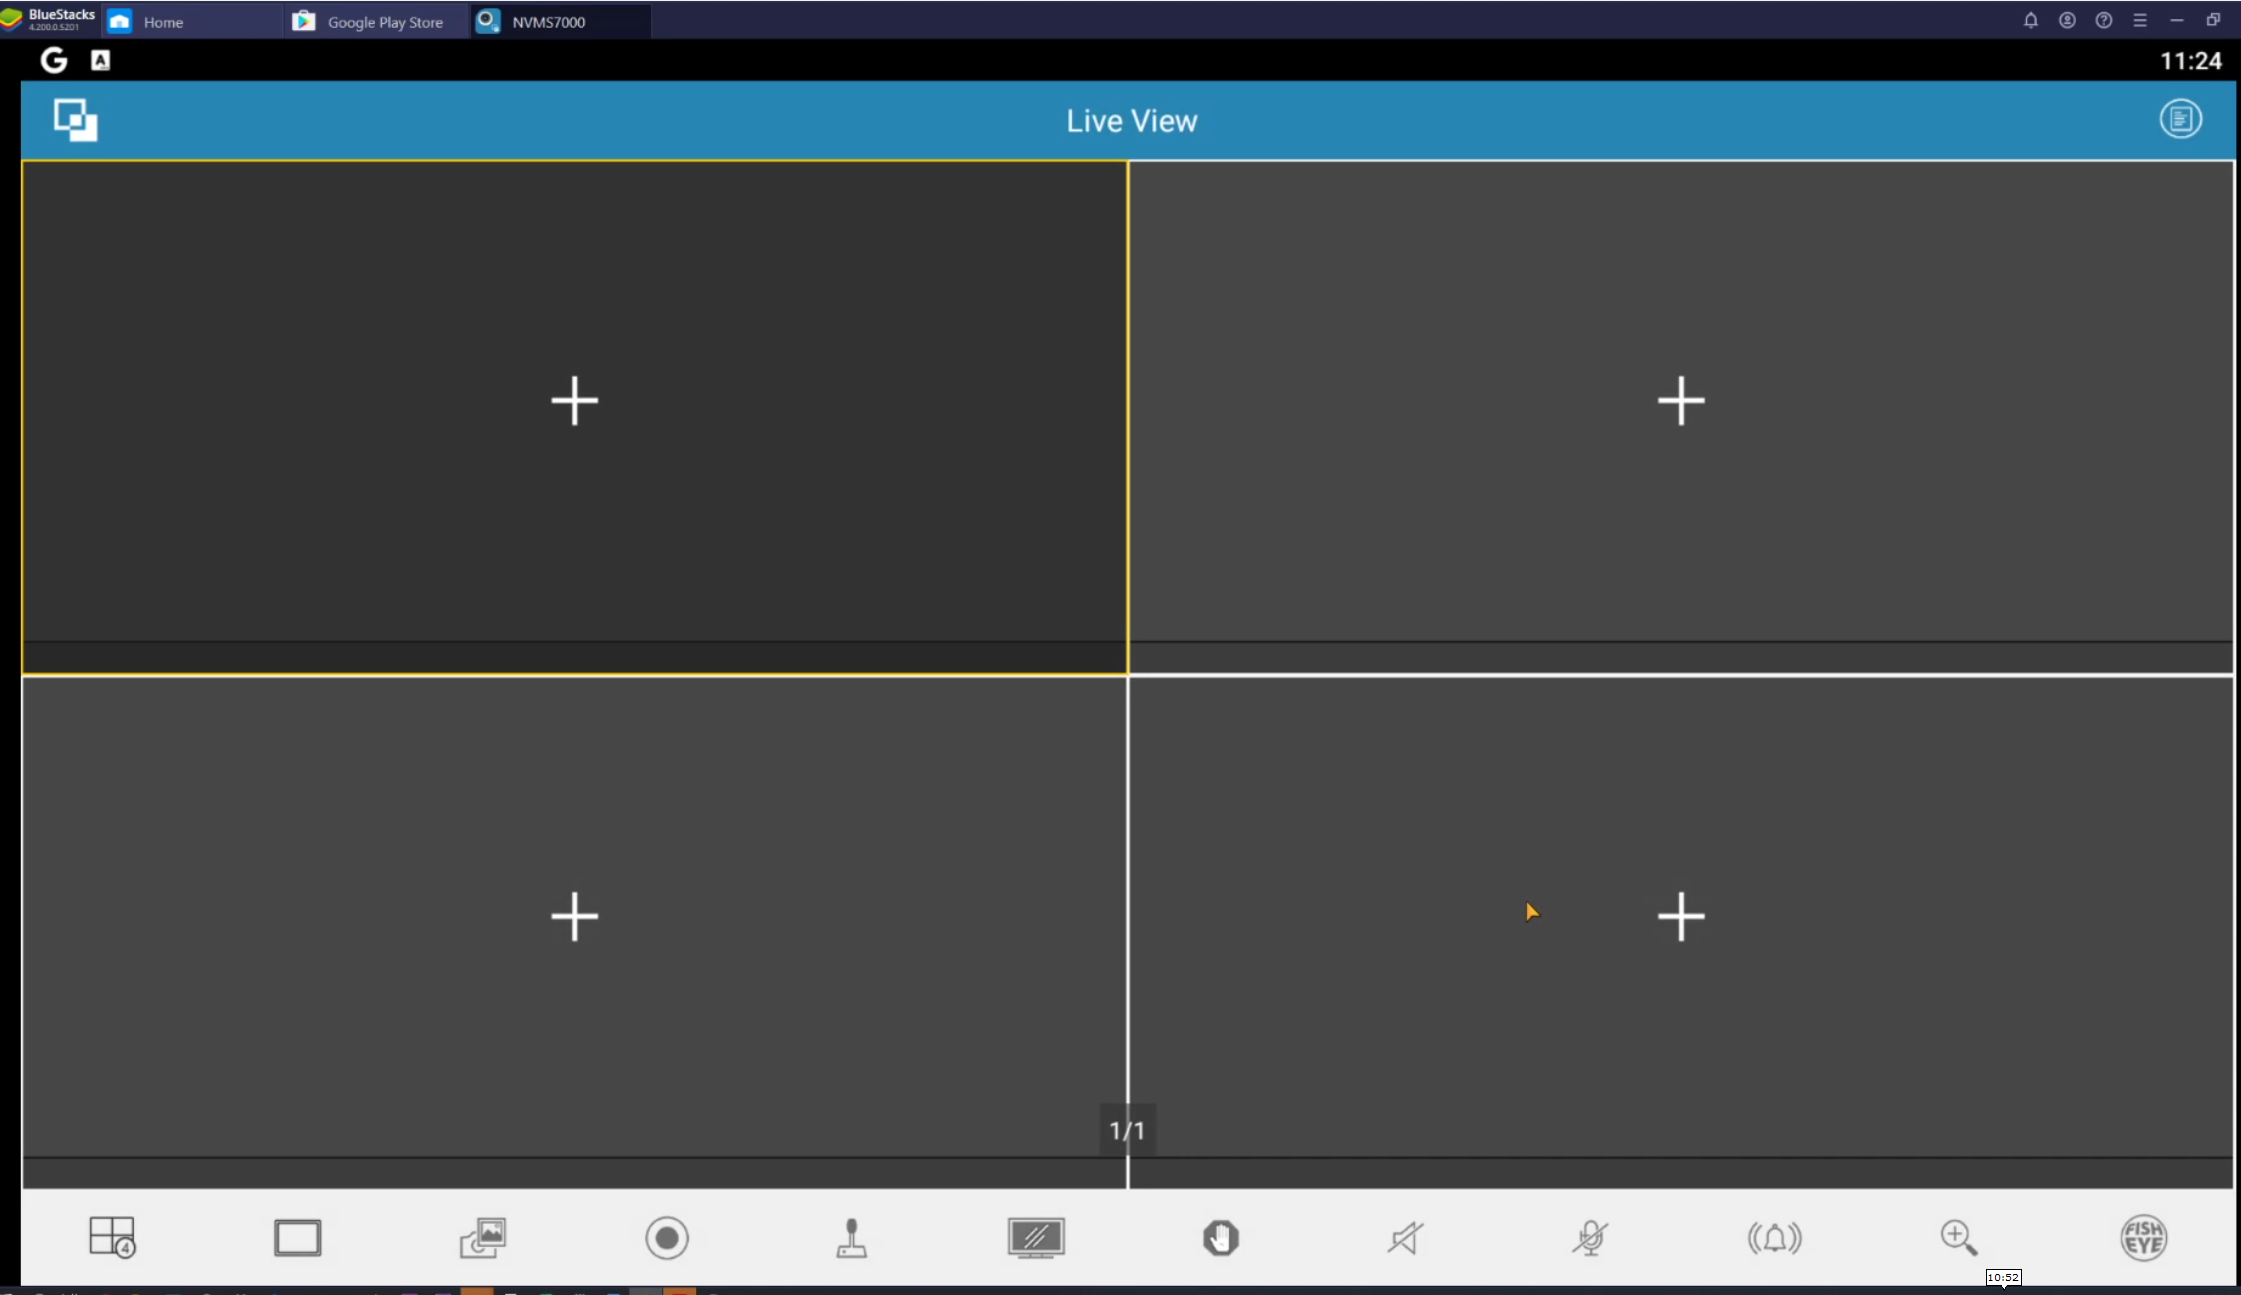
The app allows connecting up to 4 cameras at the same time. The view of all cameras appears on the home screen of the app in tiled form. NVMS7000 displays live view on the front, but you can also use the remote playback feature to see what as going on a while back. It has a talk-back feature too. The app supports a handful of video formats and resolutions. It works with any kind of internet connection. Take a look at the complete list of features of NVMS7000 below.
NVMS7000 Features
Live view – performance depends on your internet connection.
PTZ – Pan | Tilt | Zoom feature.
Camera Management.
Preset activation.
Custom configuration of the camera.
Brightness & color controls.
Snapshot/Screen Capture support.
Video recording support.
Video Playback feature.
App Gallery support.
Ship detection feature.
Fire sensor.
Motion sensors.
Temperature monitor and sensor.
Add up to 100 devices at the same time.
What makes NVMS7000 the best choice?
There are over a thousand apps similar to NVMS7000, but you may wonder what brings us here today. Well, the very first thing is that this is a completely free application. After that, this app has no brand-restrictions. It works with almost any IP or Network Camera from any manufacturer. NVMS7000 syncs your recorded videos and pictures with your device’s local storage or with the cloud storage. The app further has the ability to alert you in case any unusual activity takes place in front of the cameras.
NVMS7000 PC – How is it possible?
We all know that NVMS7000 does not have a PC version. Then how are we supposed to run it on the computer? Well, the Android version of this app can be used via an Android emulator. You can download NVMS7000 on PC via BlueStacks 4.2 or the latest version of Nox. It will work on all versions of Windows and also the macOS. The only thing you have to do is to follow the requirements and then the steps part.
Requirements to download NVMS7000 for PC
Desktop PC or Laptop powered by Windows or macOS.
IP or Network Camera installed at your home/office.
Details of your Camera including the IP address, configuration, and other data.
WiFi Connection.
The same WiFi must be connected to both the camera and the PC.
Google Account. If you don’t have one, create a new one for free.
Install the Emulator and set it up using your Google Account.
Follow the remaining part of this guide.
Download NVMS7000 on PC
Open NoxPlayer or BlueStacks on the PC.
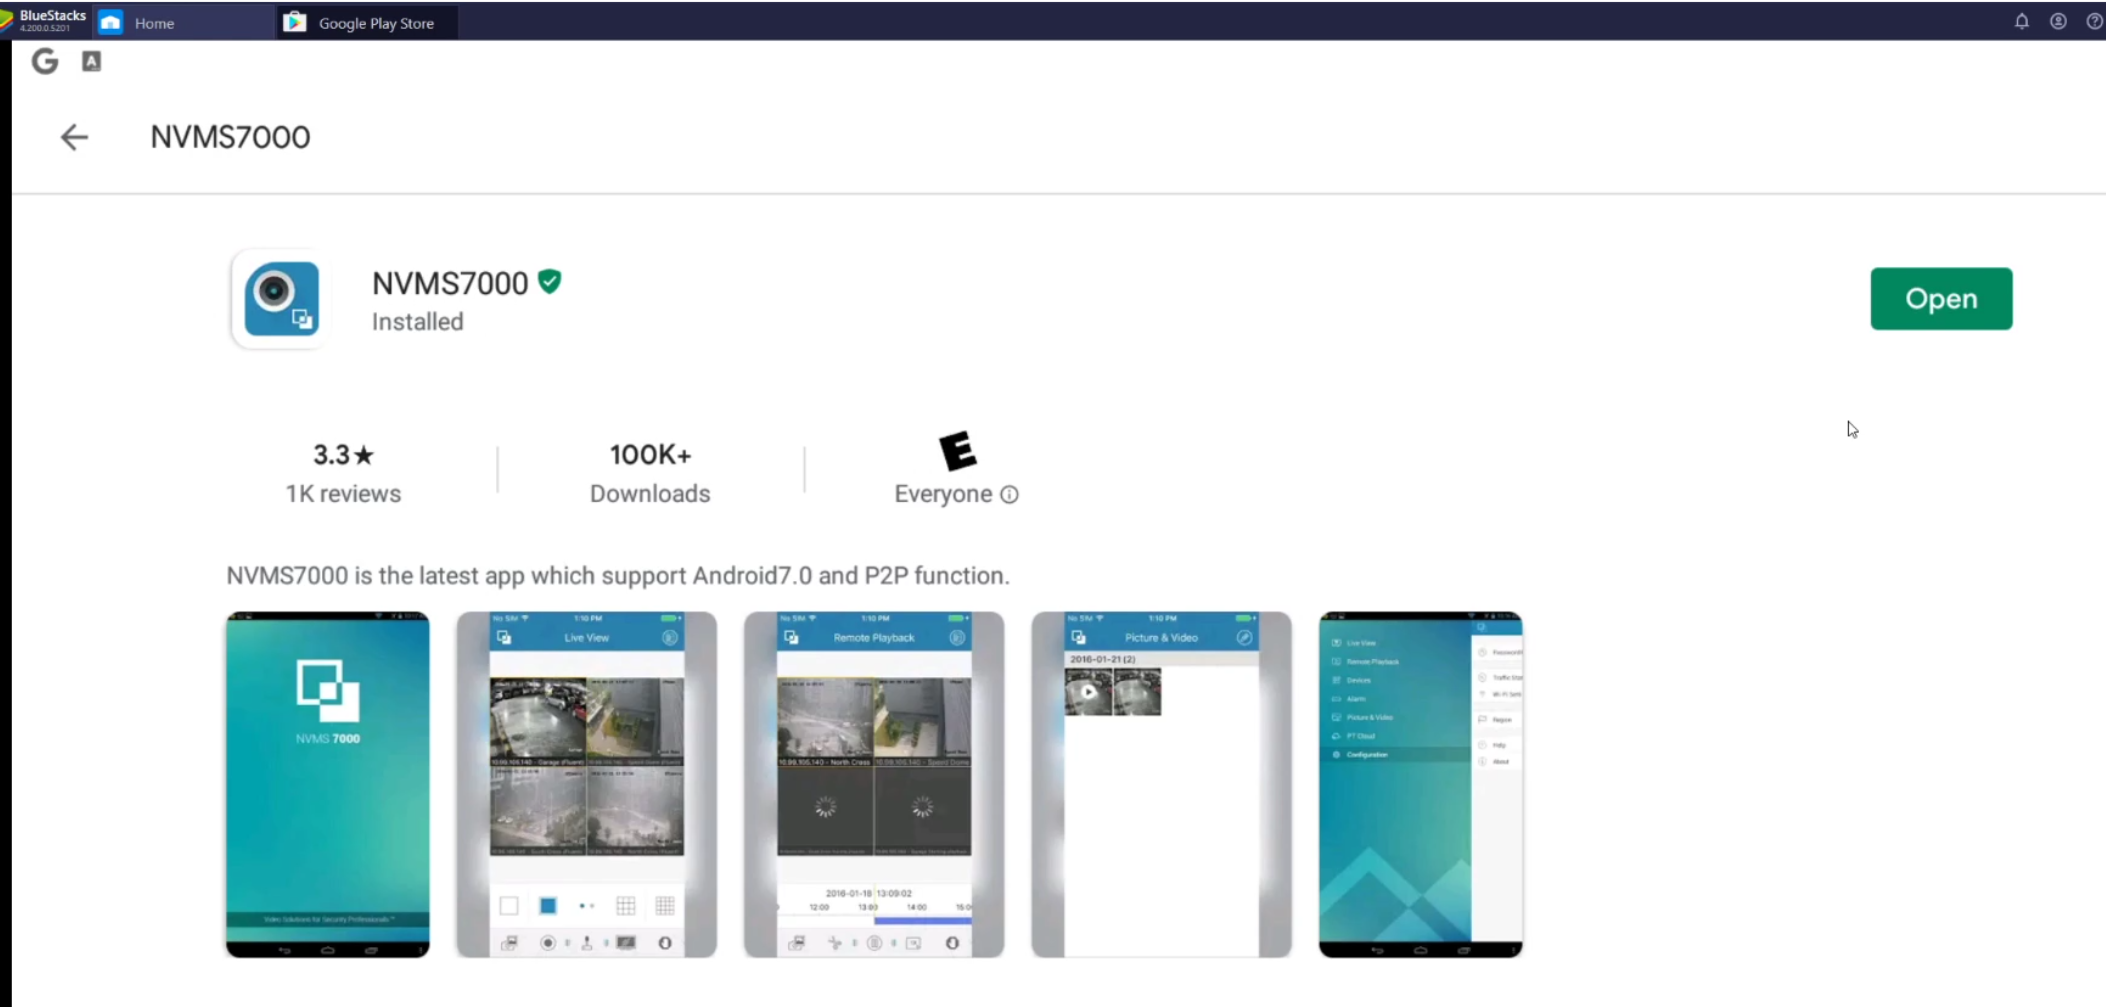
In the emulator, launch the Play Store.
Using the Play Store’s search bar, find “NVMS7000″.
As you find the app, install it.
Open NVMS7000 PC after the installation ends.
Now add your configure NVMS7000 on PC by following the on-screen steps.
Setup NVMS7000 on PC
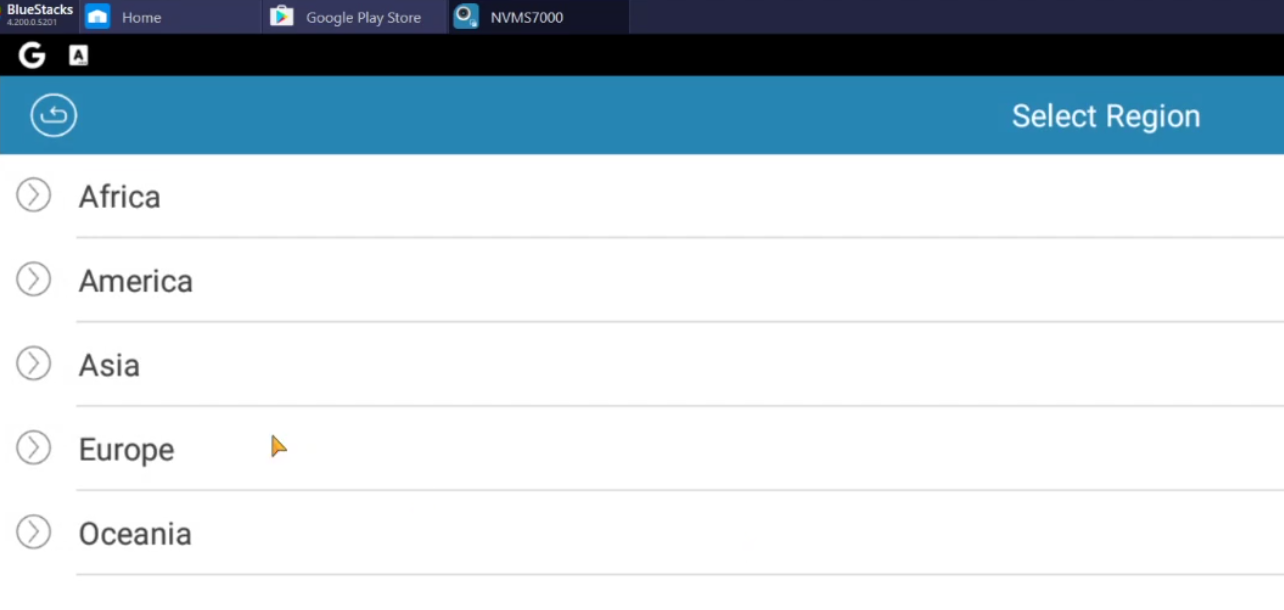
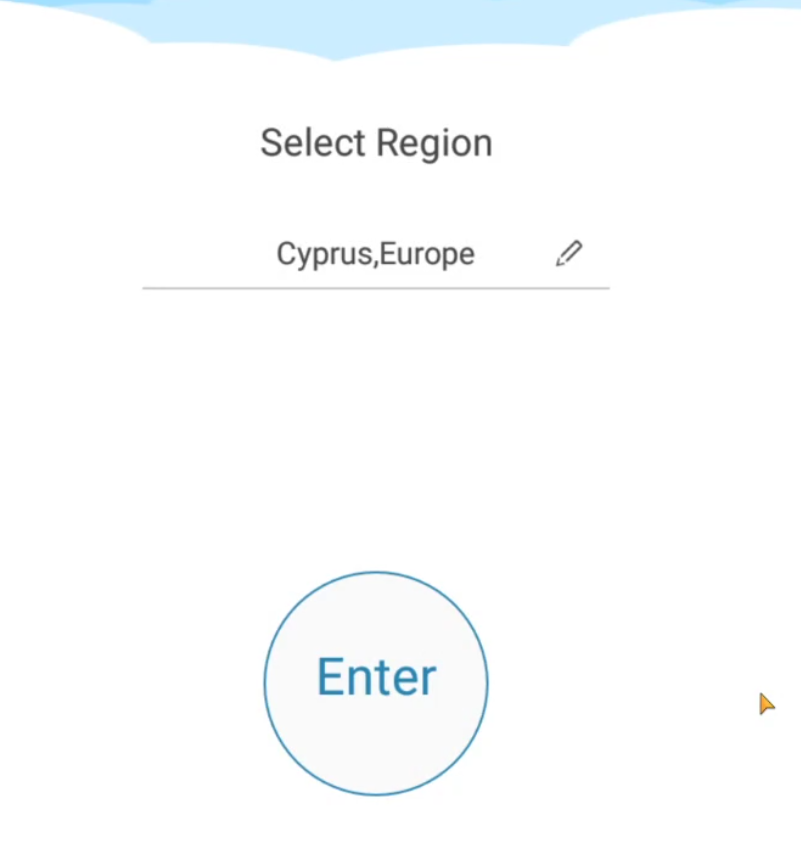
First of all, select your region in the NVMS7000 app.
After selecting region, add your country to the application.
Now click on the “+” button in any of the available Camera slots.
Add your Camera details one by one.
Connect the camera and start monitoring.
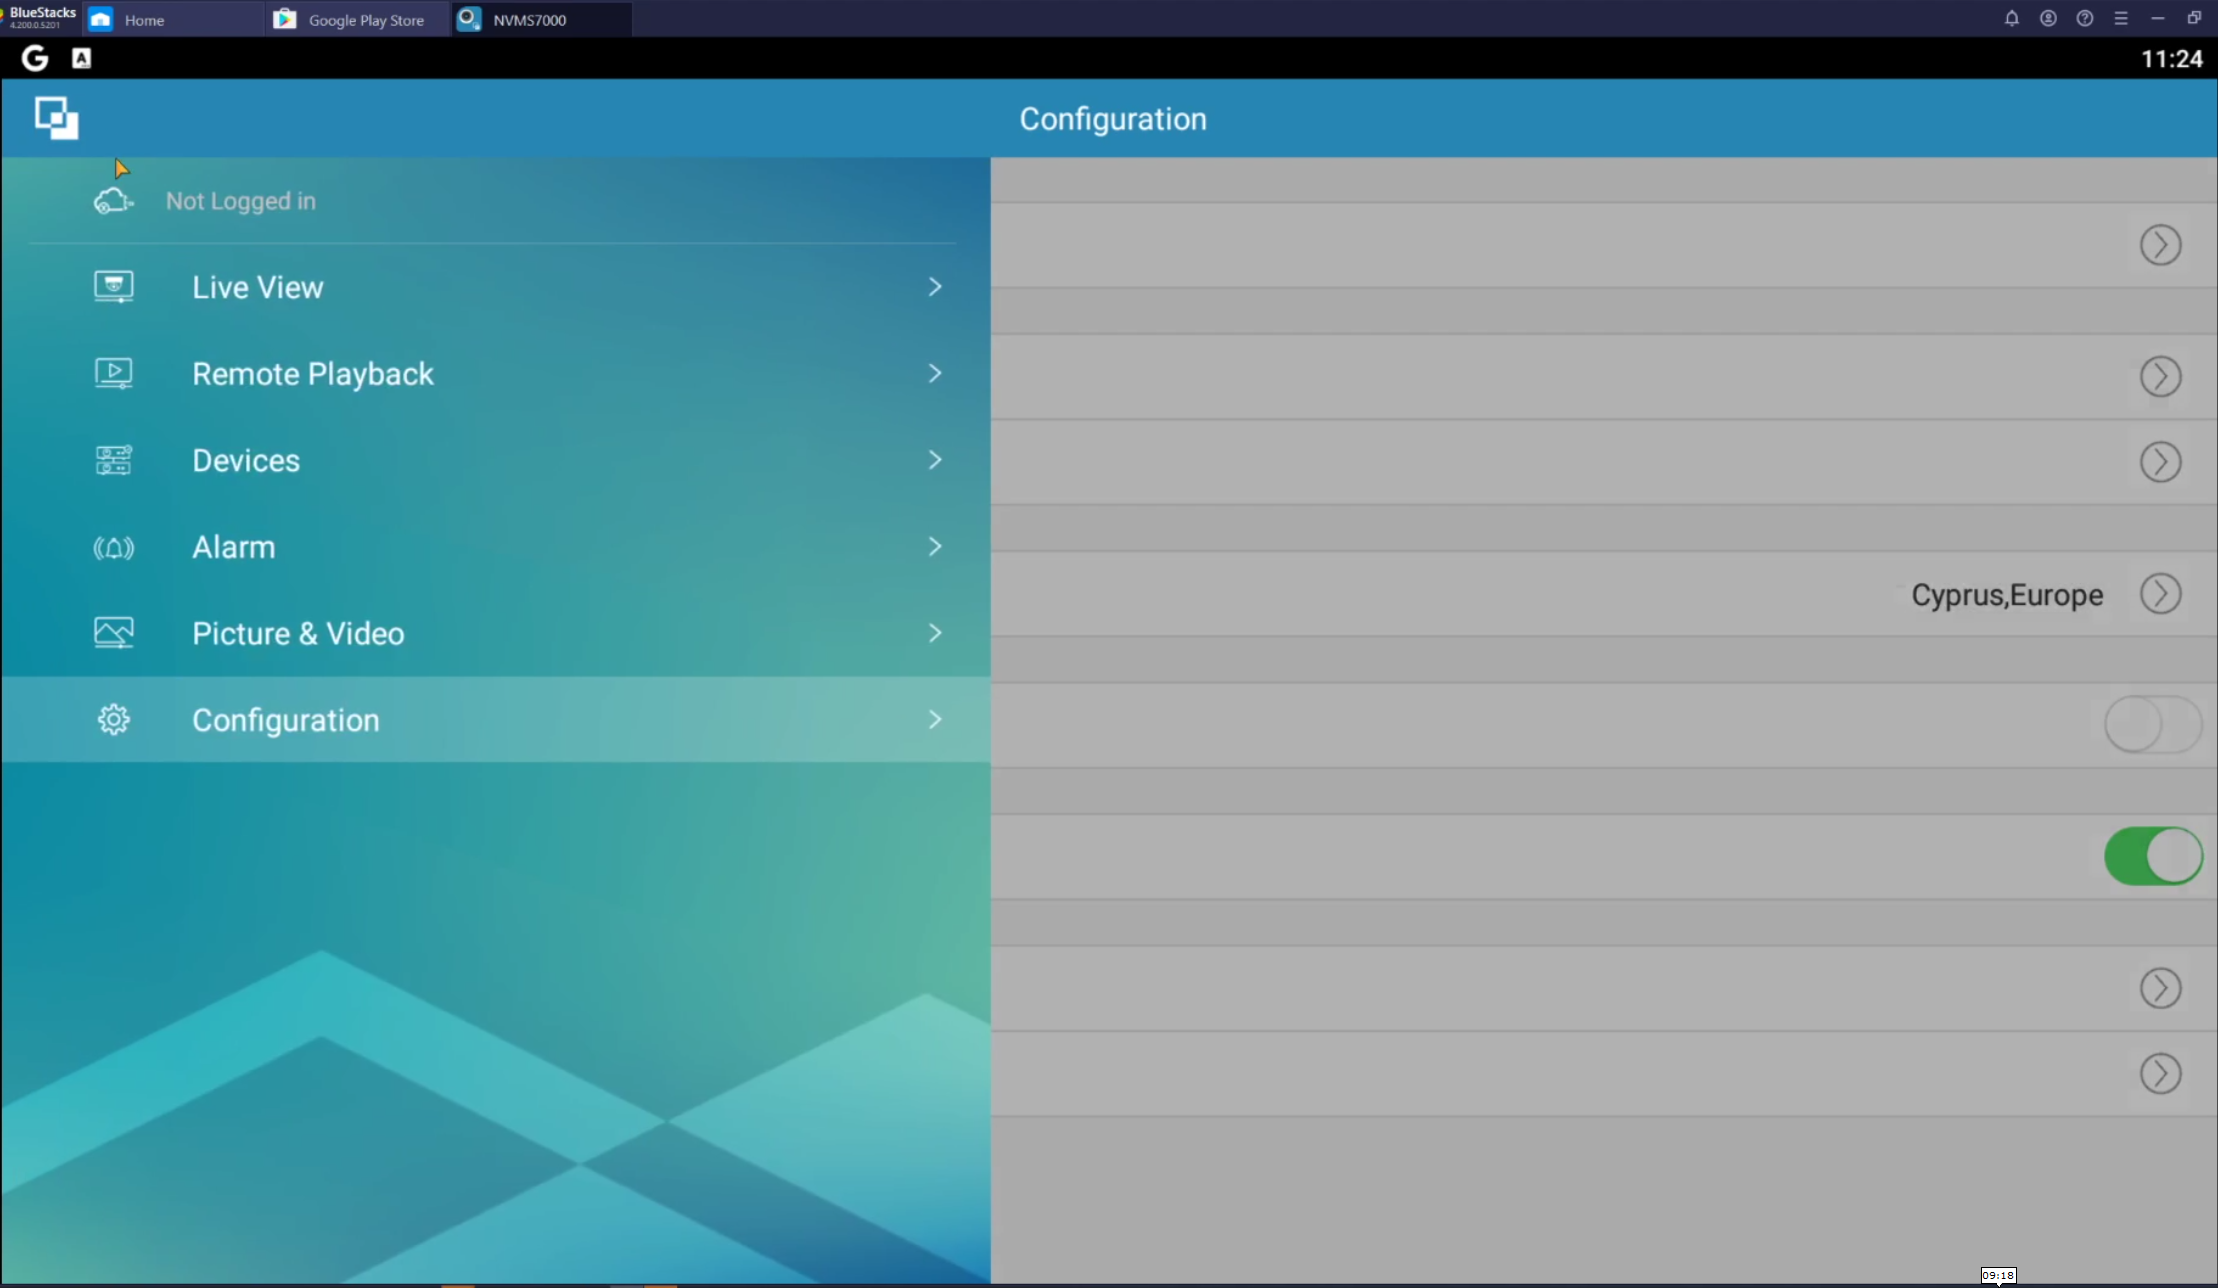
To access further options, either click on the buttons appearing at the bottom tray or just click on the options buttons on the top-left side.
Final Words
After configuring NVMS7000 on PC, you should be able to monitor the cameras live. The controls appear at the bottom of the screen. You can find the PTZ controls, the recording, screen capture, gallery, and other features at the bottom of the emulator’s screen too. To make the best out of NMVS7000, you can create profiles for different cameras. If you end up facing any problems, feel free to reach out to us using the comments section below.
FAQs
Is NVMS7000 for PC Safe?
YES! This app is safe and sound and that is why it appears in the Play Store. We are using a verified method to install it so you can run it without worries.
Is NVMS7000 available for Windows?
Officially, it’s not available, but with the guide given above, you can download it on Windows using BlueStacks 4.2.
Can I connect any IP camera to NVMS7000?
Yes, you can connect any IP camera from any company to NVMS7000.
What Network Cameras does NVMS7000?
Any Network Camera from any brand will easily connect with the NVMS7000 app.
Can I configure NVMS7000 on computer?
YES! Absolutely. You can configure it and monitor the cameras on a bigger screen with better controls.
What is the best way to install NVMS7000 on computer?
The best method is to use the BlueStacks 4.2 emulator in order to get NVMS7000 on PC.
Is NVMS7000 Free?
YES! This is one of the only few applications which offer a lot of goodies at no cost.
Call of Duty Mobile has a gyroscope which isn’t working quite well for many. In this guide, we will take a look at the steps to fix Call of Duty Mobile Gyroscope problem.
Before fixing the Gyroscope on Call of Duty Mobile, take a look at what Gyroscope is and how it can improve your Call of Duty Mobile gameplay.
Gyroscope in Call of Duty Mobile
When we are playing an FPS game like Call of Duty Mobile or PUBG Mobile, we have a wide field of view. We have to move our player in all the directions to see around. Normally, this movement is controlled by tapping & swiping anywhere on the screen. The most common practice is to move the screen using your left and right thumb while you are holding the smartphone. But if you want the screen/game view to change automatically by simply tilting or leaning the phone, you will need the gyroscope for that.
Gyroscope is a sensor in all the latest Android smartphones. This sensor keeps a track of your phone’s X and Y-axis positions. When you activate Gyroscope in a game, it automatically detects in what position you are holding the phone and then it shows you the game view which is appropriate for that posture.
For example, if you tilt the phone upward, it will show you the sky and if you tilt it downwards, it will show you the ground, and if tilt it inward, it will show you the left side, while tilting outward will show you what’s on the right side.
To master Gyroscope’s movements, you have to be an expert. It is not easy to control it. You can get killed in a game while trying to locate your enemies through the Gyroscopic-movements. Its a really good mode to switch from one place to another, but that needs a lot of practice.
Another downside of the Gyroscope is that you can’t really play your game while you are lying down or sitting in an idle position. Because when you are lying down, your phone will be in your hands in front of your face and that position is going to be very weird for Gyroscope. Hence, it will fail to show you the exact front view.
Gyroscope comes with its exclusive controls. In a game like Call of Duty, you will find numerous Sensitivity controls which will make the Gyroscope slow/fast or smooth.
Assuming that you know what Gyroscope is and how it works, let’s move on to the steps to fix Call of Duty Mobile Gyroscope.
Guide on How to Fix Call of Duty Mobile Gyroscope
Open Call of Duty Mobile on your Android phone.
Go to Settings > Turn off Gyroscope in both the MP and BR modes.
Now launch any match in the Battle Royale mode or in the MP mode.
As the match starts, pause the game and go to Settings again.
Enable Gyroscope from the settings.
Get back to the game now.
The Gyroscope will start working now.
To set increase or decrease the sensitivity of Gyroscope, go to Settings > Sensitivity, and set the values according to your own choice. Remember that the Sensitivity settings are global. Setting these up here will apply to both the BR and MP modes.
Wrap Up
That’s all. Hopefully, you have the Gyroscope working now. Just move your phone to see anywhere in any direction in Call of Duty Mobile now. We have covered many other problems of COD Mobile on our site that you can find below. If you have any further queries or questions, feel free to reach out to us.












![Google Camera Gcam for Mi Note 10 Lite [Download & Install]](https://techbeasts.com/wp-content/uploads/2020/07/Mi-Note-10-Lite-GCam.jpg "Google Camera Gcam for Mi Note 10 Lite [Download & Install]")