Home Blog Page 71

How to fix PUBG Mobile Lag Issue on Android
2
How to fix PUBG Mobile Lag Issue on Android

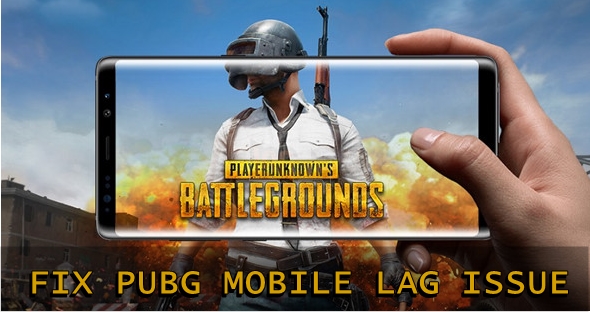
If you have been playing PUBG Mobile lately, you must have noted a slight lag in the gameplay. At times, the player takes a bit longer to move, it also takes time to use the weapon. The animations also lag in the game. If the game lags, it makes the experience very poor. Such a lag issue in the PUBG Mobile can actually kill your interest in the game. It’s very important to learn how to fix PUBG Mobile Lag issue on Android.fix PUBG Mobile Lag Issue on Android

Those of you who do not have an idea about PUBG Mobile, let’s discuss it beforehand. PUBG Mobile is an offshoot of PLAYERUNKNOWN’S BATTLEGROUNDS. The mobile version is developed by Tencent. PUBG Mobile is a battle royale game. In the game, players are dropped off on an abandoned Island. Players make their way to the Island with the help of a parachute. The moment they hit the ground, their quest for life starts. There are over 100 different players who are dropped off. All of them have to find weapons and resources to stay alive on this Island.

Players can explore the houses. They can drive the vehicles which are parked here and there. In the houses, players will find weapons, clothes, food to eat and much more. Other players are hidden in the bushes, behind the trees and even behind the rocks. It will be really hard to identify the direction from where the bullets are coming in. You have to be really sharp to pinpoint your enemies and take them down. The game offers amazing graphics. PUBG Mobile is running on millions of smartphones at the moment.

PUBG Mobile has a really amazing development team. There are not so many issues reported by the users so far. PUBG Mobile Internet Error is the one that’s reported, but that also isn’t widespread. Lag issue can be fixed without waiting for an official PUBG Mobile update. Here, you will learn to fix the PUBG Mobile lag issue on Android. Follow the steps carefully to get rid of lag in your PUBG Mobile.

Fix PUBG Mobile Lag Issue on Android

Clear the Cache of your phone

PUBG Mobile will lag on your phone if its cache is cluttered. You simply need to clear the cache of your phone and restart it to fix a minor lag in your game. Here is how to do so.

  • Samsung Galaxy users can turn off their phone and then turn it on by using Volume Up + Home + Power button or Volume Up + Bixby + Power button. Once the phone is in the recovery, using Volume Down to select Wipe cache partition and then use Power button to wipe it. Restart your phone after wiping cache.
  • Google Pixel and Nexus users will turn off their phone and then turn it on by pressing and holding Volume Up + Volume Down + Power button or Volume Down + Power button to boot into Bootloader. From the bootloader, select Recovery and then wipe the cache.
  • Other phone users can try the same button combination or use the ADB and Fastboot command window to boot into the recovery mode.

Clear PUBG Mobile Cache and Data

  1. On your phone, go to Settings.
  2. From the settings, open Apps, App Manager or the Application settings.
  3. Now open the All Apps tab and find PUBG Mobile.
  4. Clear the PUBG Cache and Storage now. If there is a storage option, then open it and clear Cache and Data.
  5. Restart your phone now.
  6. Open the game and check if it’s performing well or not.

Delete PUBG Mobile and Reinstall it

At times, deleting the game and reinstalling it can do wonders. A bad installation will not let you play the game smoothly. You can delete PUBG Mobile from your phone and reinstall it for the sake fixing the lag issue.

Make sure that the animations are not turned off

Android users often turn off the animations to boost the performance of their phone. Make sure that the animations are not disabled on your phone. To check animations, you can go to Settings > Developer options > Check the animations if they are turned off, change their value to 1x for all the three animation types. If the developer options are not enabled on your phone, you can totally skip this step.

Make sure your Mobile and your OS is compatible with the PUBG Mobile

If your phone and your OS is not compatible with the game, you will not be able to run it smoothly. You need to check your device’s compatibility and identify whether it’s fine to go ahead or not. If your phone’s OS is not compatible, you can upgrade it. If your phone is not compatible, you will have to get a new device.
How to transfer Passwords from iPhone to Android

0
How to transfer Passwords from iPhone to Android

In the modern day, every user has accounts in numerous services. This includes both websites and applications on phones. For example, users may be logged into Snapchat, Instagram, Facebook, Shazam, Hulu and so many other apps on their iPhone. Now, not everyone remembers these passwords. Therefore, iPhone and Apple users in general user iCloud Keychain. This utility remembers all the passwords for you. This guide shows how to transfer passwords from iPhone to Android device. It covers any kind of password and username login that is saved with iCloud Keychain.

Recommended: Best Password Managers for Android

The advantage and purpose of doing this is basically ease. It is practically impossible to remember all the passwords. Therefore, when shifting from an iPhone to Android, logging into every single app or website requires either using “Forget Password” option or just an amazing memory. Moreover, hardcore Apple users do not venture into the world of third-party password Managers, therefore it is even harder to export.transfer passwords from iPhone to Android icloud keychain

Transfer all App Passwords from iPhone to Android

Lets say for example someone has been using an iPhone for a very long time. Their passwords are all stored in Keychain. Such a time has come that they want to switch to Android (Which is a better choice of course). Content like media, contacts, messages etc are easy to transfer. All of these files are basically there to copy and paste. However, when it comes to shifting passwords from an iPhone to Android phone or tablet, it’s a bit tricky.

There is no default way of doing this. Therefore, we rely on third-party utility for it. Moreover, this works for all iPhone models as well as all Android models like Samsung Galaxy series, OnePlus, Google Pixel, Huawei, Sony and HTC. Other uncommon Android based brands are going to work of course.

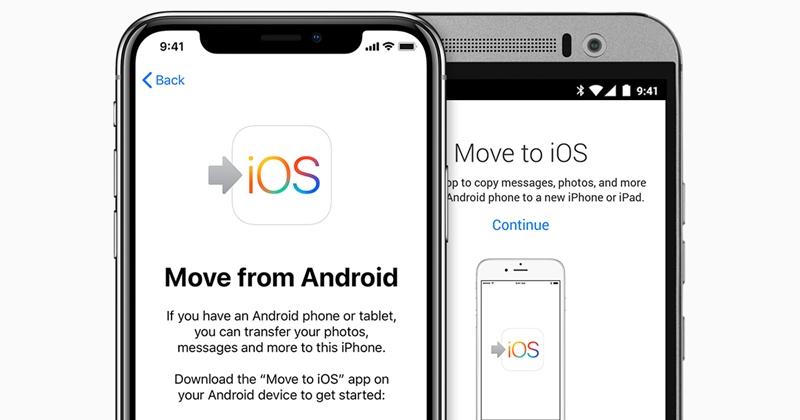
Related: Move to iOS could not communicate with the device – FIXED

In this method, we are going to use 1Password utility. This is a cross-platform password manager. It has apps for Windows, Mac, Android and iOS. Therefore, once someone shifts to it, there is no particular need to switch to any other manager.

When to use this guide?

Before continuing to use this method, make sure that you meet following requirements. Otherwise, you may not be able to complete it.

  • It requires Mac OSX and Keychain utility installed on it.
  • All passwords on your iPhone must be stored in iCloud Keychain account. If not, then just use a third-party password manager and this guide is irrelevant for you.
  • This guide is basically about transferring / copying passwords from iCloud Keychain to Android device. It extracts the passwords from iCloud Keychain account and put them into 1Password account.

Disclaimer: This method involves a third-party utility. Even though it works well, it is not owned by Apple or Android. Therefore, use it at your own risk. Also keep a manual backup in case something goes wrong.

How to transfer Passwords from iPhone to Android – Guide

This process uses the MrC’s Convert to 1Password Utility. It works pretty well and you need to use it on Mac OSX for this guide specifically. Since, iCloud Keychain app on Mac is the base of operation for it.

The utility converts data from iCloud Keychain into 1Password readable form. Once exported, we import it into 1Password Mac App and let it upload. Just use this same account on the Android device and sync all passwords.

transfer passwords from iPhone to Android

1 – Export data from iCloud Keychain to local Keychain

  • Note that you cannot directly export data from iCloud, therefore, first copy data to a local keychain.
  • To do so, open Keychain Access App. Click on File > New Keychain. Name it local-icloud. Remember the password that you enter for local keychain just created.
  • Open the iCloud Keychain under Keychains section. Copy all of its contents on right with cmd + C keys.
  • Paste these items in local-icloud using cmd + V keys.
  • Users need to enter the password for local-icloud keychain on every entry.
  • Alternatively, run following Apple Script by creating new Script file. Run it after you paste the contents. It will automatically enter password every time for you. Replace MYPASSWORD with your newly created password.
    • set keychainPassword to "MYPASSWORD"
      tell application "System Events"
      repeat while exists (processes where name is "SecurityAgent")
      tell process "SecurityAgent"
      set frontmost to true
      if (count of windows) > 0 then
      set window_name to name of front window
      end if
      try
      # keystroke "password"
      keystroke keychainPassword
      delay 0.1
      keystroke return
      delay 0.1
      on error
      -- do nothing to skip the error
      end try
      end tell
      delay 0.4
      end repeat
      end tell
  • If you do not know or understand how to run Applescript, the do it the traditional way instead.
  • Once done, all passwords from iCloud Keychain are copied into newly created local keychain.

2 – Convert into 1Password Readable Form

  • Download this FILE and place it on desktop. Unizip it on desktop. It is important!
  • Next up, locate “AppleScript_Conversion_Helper.app” inside it.
  • Run it and select the local-icloud you created in previous section.
  • Enter the password when prompted. This is the password for local-icloud.
  • Once the utility script is completed, you’ll get a .1pif format file on desktop.

3 – Import on 1Password App

  • All the hardwork is basically done at this point!
  • Go ahead and install 1Password App on your Mac. (Link)
  • Make an account and login with it.
  • Now click on Import option in menu.
  • Select the .1pif file created in previous step.
  • It will automatically upload all passwords to your account.

4 – Install 1Password on Android

  • Open Play Store on your Android device and install 1Password app. (Link)
  • Login with the same credentials as step 3.
  • It will automatically sync all the passwords and usernames for you.

Note: Note that this method may not be able to copy all the content from iCloud Keychain. It is because of certain restrictions set by Apple. Therefore, transfer that data manually, in case there is any.

Conclusion

This method is specifically for those who use Apple products and store all passwords and usernames on Keychain iCloud. At the end of this guide, all passwords are transferred from iCloud Keychain to Android. The good bit is that it is a third-party password manager. Therefore, from here on out, use it with almost any platform. Enjoy the freedom!

Source and Credits: Link

Last Updated: 26th October 2019

.NET Framework Offline Installers Direct Download [ All Versions ]

0
.NET Framework Offline Installers Direct Download [ All Versions ]

From here, you can download .NET Framework Offline Installers. We are providing you with all the versions of the .NET Framework. .NET Framework is a free framework designed especially for Visual Studio applications. Every Windows user is well aware of .NET Framework because when you see system requirements of most the softwares for Windows. .NET Framework will be the most important requirement. Otherwise, you won’t be able to run that software on your Windows PC.

In the past years, Microsoft did a very great job, they released an open source version of .NET. It means now .NET Framework will be available for all the other platforms. Including Linux and Mac. I mean it’s really good & because of that now you can use your favorite Windows softwares on other platforms.

Now let’s get back to our topic. If you are an advanced user or let’s say, developer. Then you’ll be needing more than one version of .Net Framework. The good thing is that you can download any version from the officail website for Microsft. However, in order to download a version, you have to go through with a long process. Moreover, the long process is one thing, all downloads available on the official site have diverged all around.

That’s why we have created this post to provide you direct download links of .NET Framework Offline Installers. Just with a single click, you will be able to download the desired version.

Read more: Download Odin For Samsung Galaxy (All Versions)

.NET Framework Offline Installers

.NET Framework Offline Installers Direct Download [ All Versions ]:

Below are all the versions of .NET Framework Offline Installers. As I said earlier, all you have to do is click on the following link and your downloading will start.

Read more: Download Android USB Drivers 2019 Edition for Windows 10

Download .NET Framework 1.0:

Download .NET Framework 1.1:

Download .NET Framework 2.0:

Download .NET Framework 3.0:

Download .NET Framework 3.5:

Download .NET Framework 4.0:

Download .NET Framework 4.5:

Download .NET Framework 4.5.1:

Download .NET Framework 4.5.2:

Download .NET Framework 4.6:

Download .NET Framework 4.6.1:

Download .NET Framework 4.6.2:

Download .NET Framework 4.7:

Download .NET Framework 4.7.1:

Download .NET Framework 4.8:

These were all the version of .NET Framework Offline Installers. You can Install & Useall of these at same time but for that, you need use a third-party software.

Update Galaxy Note 9 to Android Pie XXU2CRLT Firmware [One UI]

0
Update Galaxy Note 9 to Android Pie XXU2CRLT Firmware [One UI]
Update Galaxy Note 9 to Android Pie

Good news for the Galaxy Note 9 owners is here. Samsung has started the official rollout of the Android Pie update. The update has hit the German region first of all. Galaxy Note 9 owners can start updating their phone to the latest Android Pie XXU2CRLT firmware now. This is the guide to update Galaxy Note 9 to Android Pie XXU2CRLT firmware. This firmware is based on the latest One UI. Before you update your Galaxy Note 9 to Android Pie One UI, it is important to know what’s new in this update. Let us take a look at the Android Pie One UI features for Galaxy Note 9 and then move towards the steps to update the phone.

Update Galaxy Note 9 to Android Pie

Android Pie for Galaxy Note 9 – What’s new?

The Android Pie for Samsung Galaxy smartphones is a major update. It’s not major because it shifts the Android version to Android 9.0. The update carries a lot of features and enhancements that we have never seen before. This is, in fact, the biggest software update to ever happen for the Samsung Galaxy smartphones. In this update, Samsung has added the most demanded features from the users. Samsung has also completely overhauled the looks of its UI.

One UI – An enhanced look

Galaxy Note 9 One UI

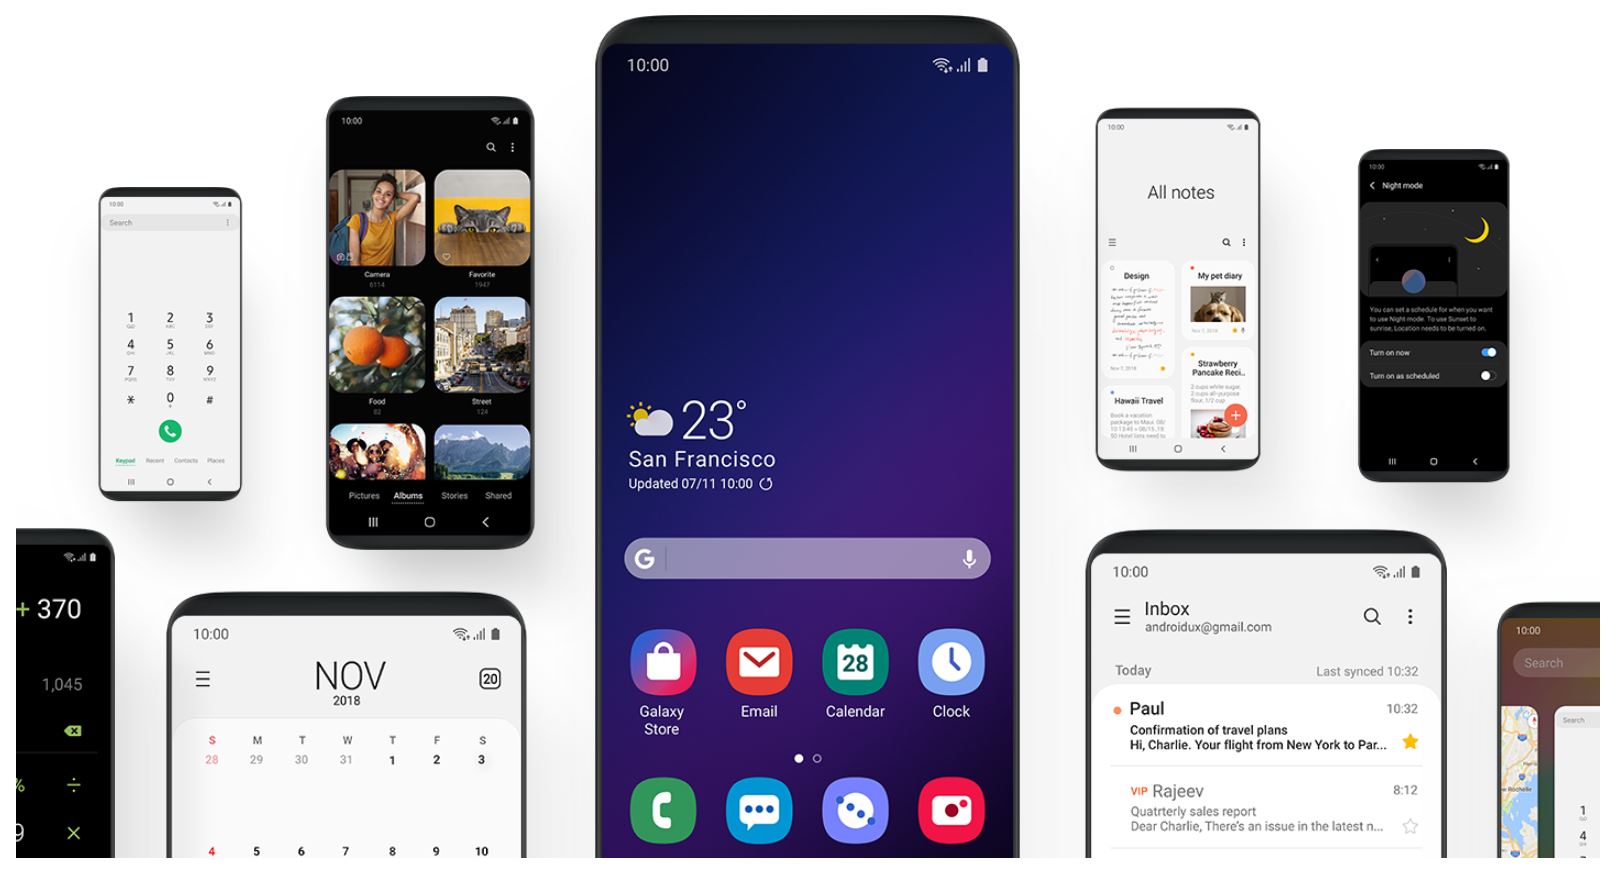
First things first. This update brings a brand new UI called the One UI. With this update, Samsung says goodbye to the Samsung Experience UI. The Experience UI will be a part of Android Oreo firmware only. All the devices which will be getting the Android Pie update, they will get the One UI as well. The One UI has got the looks that Samsung Galaxy owners have been waiting for.

Samsung One UI is pretty much inspired by the UI of the stock Android Pie. It has got rounded icons. It has got the rounded recent application panel. The Samsung One UI also brings a brand new look for the toggles in the notifications area. You will find all the toggles having round icons now. Samsung has added the Navigation gestures to the phone. You can enable Navigation gestures to stop using the typical navigation buttons on your Galaxy handset.

The settings application has been completely upgraded. New icons, new colors, new menus are there. Samsung has moved some of the settings from their previous location to a new location. The About Phone section has sorted the information in a much better way now.

Features

The One UI is loaded with new features. It is not just about the looks of the phones. Users will now find the Adaptive Battery mode in the phone. This mode is supposed to learn the usage of the phone owners in order to set the battery consumption accordingly. There is the new Night Mode on the phone. The Night Mode turns the whole UI into a dark interface. This is super beneficial to save battery life on the Super AMOLED panels.

Samsung has also added the native private DNS support now. You can now use any trust-worthy DNS on your phone. For example, you can use a good DNS to block Ads on your Galaxy Note 9 without any third-party application.

Furthermore, Samsung has revamped the UI of the Camera application. Some users are loving the new Camera UI while some are greatly disappointed. It is totally up to the personal choice of the users.

Overall, Samsung has enhanced the performance of the phones. This update is supposed to fix the bugs that existed in the Beta built of Android Pie or in the Android Oreo update.

Update Galaxy Note 9 to Android Pie XXU2CRLT Firmware

Update Galaxy Note 9 to Android Pie via OTA update

If your phone is running on Android Pie Beta build or Android Oreo, you can first of all check for the OTA update. To do so, open Settings > About Phone > Software Update > Check for update. If you are on Android Pie Beta Build, you will get an update of around 100 MB. You can update your phone right away to get the Android Pie official build.

If your phone was running on Android Oreo, you will get a good-sized software update. Download it and update the phone without going through any kind of complexity.

Update Galaxy Note 9 to Android Pie via Odin

Since the Android Pie is an incremental update, it is going to take a lot of time for this update to reach your region. In case you cannot wait for the OTA update, your best option is to go with the Odin installation. Installing this update via Odin is incredibly easy. All you have to do is to download the firmware manually and flash it on the go. Here is how to do this.

Preparations:

  • At the moment, this update is available for Note N960F only. Make sure that you download the firmware for your phone’s model.
  • Backup all of your previous data since we want to perform a clean software installation.
  • Charge your phone up to 50% to avoid power loss during the installation process.
  • Use original data cable to connect your Note 9 to the computer.
  • Enable OEM Unlocking and USB Debugging on the Note 9.
  • Disable Windows Firewall, Antivirus, and Samsung Smart Switch (if you have any of this) while using Odin.
  • Follow the instructions carefully.

Required downloads

  • Galaxy Note 9 Android Pie Update – Open this page and enter your model number. Download the Android 9 firmware.
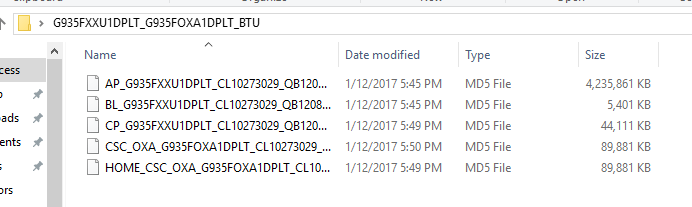
    • Extract the downloaded firmware file to get the following files: AP, BL, CP, CSC, Home_CSC.
      Firmware Files
      Firmware Files
  • Odin 3.13.1 for PC – Download, and extract.
  • Samsung USB Drivers – Download and install.

Install Galaxy Note 9 Android Pie Official Update

  1. Open Odin 3.13.1.exe on your computer.
  2. In Odin, click on options and make sure that the Auto Reboot and F.Reset.Time is checked. No other option should be checked.
    1. In Odin, click on the AP tab and select the AP file.
    2. In the BL tab, select the BL file.
    3. Under the CP, select the CP file.
    4. In CSC, select the CSC file if you want to wipe your phone and if you do not want to wipe data, select the Home_CSC file.
    5. It is always recommended to perform a clean installation.
  3. Now power down your Galaxy Note 9. Press and hold Volume Down + Home + Power button on the phone.
  4. As the phone boots showing a warning, press the Volume Up button to continue. Your phone is in the download mode now.
  5. Connect your phone to the computer now.
  6. As Odin shows the blue light in ID:COM box and “Added” in the log box, click the Start button.
    Firmware Installation
    Firmware Installation
  7. Odin will now start flashing the firmware. It can take up to 7 minutes.
  8. Once done, your phone will automatically reboot.
  9. Disconnect the phone and enjoy the all-new Android Pie with One UI on it.

Conclusion

That’s all with the update process. Your phone should be running on a new firmware. If you have any questions or queries, feel free to ask them in the comments section below. You can always go back to Android Oreo firmware by flashing the Android Oreo firmware files. That is just in case you don’t like the new Android Pie update. If you have any suggestions for this guide, feel free to reach out to us through our contact us page.

How to fix YouTube disconnects from Chromecast

0
How to fix YouTube disconnects from Chromecast

Google Chromecast is probably the most popular casting device on this planet right now. It is compatible with a ton of apps. It supports both Android and iOS. However, one issue is plaguing it for quite long. YouTube disconnects from Chromecast randomly after some time. This happens even on the latest devices like Google Pixel 3 and Pixel 3 XL. Moreover, users report the Chromecast and YouTube connection issues after upgrading their devices’ OS like Oreo or Android Pie 9.0.fix youtube disconnects from chromecast no controls

How does YouTube connect with Chromecast?

Before heading into the solution, you may want to understand how the whole process works. Knowing this is important because understanding the entire chain of events can make identifying issues easier.

In order to connect Chromecast with the YouTube app on your phone, first connect both devicesthe  to same WiFi network. Once connected and set up, the phone or tablet will sthe how cast iconthe  in top right of compatible apps. This means that a casting device is available in this network. Tapping on this icon shows a list of Chromecast devices. This feature is for those users who use multiple Chromecast sticks in their homes.the

In case of YouTube, once a user starts casting, the video link is sent overthe  to device. At this point, you may lock the screenthe  of phone and leave it anywhere. The video will keep playing. This is casting and not streaming. Casting means that the device is actually playing the video fa rom direct sourYour You phone or tablet is not sending any data.

The only connection left at this point is for volume controls and changing videos. Howevthe er, YouTube app disconnects from Chromecast after playthe ing video a for few minutes. The phone no longer has volume controls for it. Moreover, users cannot change the videos either. In order to regain controls, tap on the cast icon again and connect wthe ith same device.

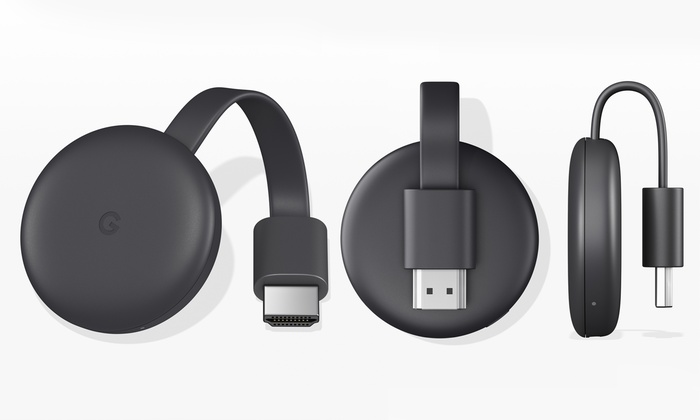
Chromecast has 4 main variants until now. These include the versions from 1st generation and up to 3rd Gen Chromecast released in 2018. This also includes the Chromecast Ultra that suppohigh-qualitylity 4K content playback. This YouTube disconnection issue can happen on any of these variants. Therefore, the issue is most likely on the casting source and not the Chromecast.

YouTube Chromecast has no Volume controls!

When users start casting YouTube videos on their Chromecast dongles, they do not need to kthe eep phone on or anything. The phone should always remain connected to it unless the user terminates this connection themselves. This is important for stuff like changing volume instantly, changing videos, pausing, and even seeking in videos.

Nlet’slets try to analyze why this actually happens. In order for Chromecast to stay connected to phone, they keep sending data packets back and forth. This is pretty much like how clients and servers maintain contact. As soon as one of the two devices lose connection (stop sending / receiving data packets) the connection is cut.

When phone cannot controls volume of YouTube on Chromecast, this means that phone/tablet is no longer communicating with dongle. It can happen even if the internet and WiFi are working perfectly. Therefore, the main culprit in this case is actually the background data limiters and  battery saver features. These features are introduced and improved with every new update. The main reason for including these features is to make sure that battery runs longest. Since all of modern phones come with battery-hungry hardware out of the box.

Fix “YouTube disconnects from Chromecast” & “No Volume controls on Chromecast for YouTube”

We have already discussed how the battery saving features are the main reason behind this issue. However, this is not always the case. There are always some variations therefore multiple solutions are listed below.

Note that the given solutions may have different steps on different interfaces and phones. For example, Samsung Galaxy devices like Note 9, S9+, Note 8 have quite different interfaces compared to devices like Pixel 3, Pixel 3 XL, OnePlus 6 and OnePlus 6T. However, the base concept is same and these settings are found on all modern Android devices.

Solution 1

  1.  Head over to Settings > Apps > Open All Apps list.
  2. Scroll down and find YouTube.
  3. Open it, tap on Storage > Clear Cache and Clear Data.
  4. Restart the phone and try using it again.

Solution 2

  1. Head over to Settings > Apps > YouTube.
  2. Hit the menu button in top right (3 vertical dots).
  3. Tap on “Uninstall Updates”.
  4. Now restart the phone and install latest version of YouTube once again.
  5. Try using it with Chromecast now.

Solution 3

  1. It is actually a simple one.
  2. Turn off Chromecast and WiFi router.
  3. Follow solution 1 and 2 and then move to step 4.
  4. Restart the phone now.
  5. Restart the router and Chromecast dongle now.
  6. You may try using phone’s YouTube app with Chromecast dongle now.

Solution 4

  1. Head over to Settings > Battery Management.
  2. Open the “Unmonitored Apps” Section.
  3. Tap on the “Add App” button.
  4. Find and add YouTube from the list.
  5. If you cannot find YouTube in this list, then turn off “App Power Monitor” inside advanced settings of Battery Management.

Note that App Power Monitor may be under different names in different devices i.e. Background Battery Usage, Battery Usage, Adaptive Battery, App Monitor, Battery Saver etc. You just need to find the one for your device and turn it off.

Solution 5

  1. Open Settings > Connections > WiFi.
  2. Open Advanced tab.
  3. Search for option “Keep WiFi on during Sleep”.
  4. Set this option to Always on.

fix youtube disconnects from chromecast no volume controls 3This setting prevents WiFi from turning off while phone enters sleep mode. This option is enabled by default in some cases and therefdisconnectsnect YouTube app from Chromecast.

Solution 6

  1. Go to Settings > Connections > WiFi.
  2. Open the Advanced options tab.
  3. Search for “Smart Network Switch” and turn it off.

fix youtube disconnects from chromecast no controls 2hrThis setting is turned on by default in some devices and works only when users keep mobile data and WiFi on at same time. Its task is to keep switching between both sources to ensure that you have best internet connection at all times. Therefore, once it switches from WiFi to mobile data, the connection with Chromecast will terminate.

Conclusion

Chromecast disconnecting from YouTube is a pretty annoying issue and usually starts happening after an OS upgrade or changing phone. This is most likely due to some new settings that prevent background data usage and also apps staying alive in background. If you cannot find a very specific solution here, it is most probably a related setting. Let us know in the comments below if you’re having a hard time solving this problem.

Feel free to leave your feedback in the comments below. Also use the comments section for any kind of query that you may have. We will try to respond as quickly as possible!

Find Friends on Kik – Best Kik Friend Finder

0
Find Friends on Kik – Best Kik Friend Finder

Today you will learn how to Find Friends on Kik and we will also provide you with the Best Kik Friend Finder. If you want to make new friends and you are using Kik but you don’t know how? Don’t worry keep reading and you will find out how. Since social network is all about connecting with new people. So why no meet with new people. Let’s get to it now.

Find Friends on KikFind Friends on Kik:

Now before we start telling you how you can find friends on Kik. Let’s tell you how you can set up Kik for the first time. This is for those who are new Kik.

Setting Up Kik:

Heed the instructions below in order to Set up Kik for the first time.

Here's How you can Set Up Kik.
★ First, you need to download & Install the latest version of Kik. It is available for both Android & iOS.
★ After Kik is installed, enter your phone number when prompted.
★ Now you need to give Kik some permissions, start with your contacts book. Head over to the Settings -> Privacy -> allow Address Book Matching.
★ Once done with it, start chatting with your friends to make sure you people are connected.

So now you are on Kik and you have added your close friends in your circle, it is time to expand now. Moreover, if some of your friends on not on Kik yet, you can a direct link to download Kik and join. You can find that option in settings ” “Tell Friends About Kik”. This link can be shared through Facebook, Twitter, Instagram, SnapChat, Vimeo, & More.

Best Kik Friend Finder:

If you a Kik user then you are well aware of Kik Cards and this is the best way to find friends on Kik. Those of you who are new to Kik, let me tell you what Kik Cards are? Basically, these Kik Cards are your profile card and they contain all of your profile details. Through these cards, you will be able to find friends on Kik without leaving the Kik app. Heed the instructions below to learn that.

Use Kik Cards:
★ Open Setting in the Kik app, you will find Share your Profile option here. Tap on it.
★ On the next step, select the social media of your choice.
★ Open Kik Conversation & Tap on a little global icon. Here you need to use a search term to find a chat.

Using this search feature you will be able to find ongoing public chats. join them and interact with new peoples. Moreover, there are hundreds of public group, join them too to make friends on Kik. In order to do so, heed the instructions below.

  • Open Kik app, head over to the main Chat List. Tap on the “+” icon and after that tap on Public Groups.
  • Again use the search and find a subject in which you are interested.
  • Before you join any group, Tap a group and you will be provided with all the information.
  • Now in order to join, Tap on Join and start making new friends.

Kik Friends Finder Website:

Whenever we want to go to the next level, there are always third-party services and in this case, we have found some potential websites. All of these Websites will provide you with your desired service. However, this issue is that most of these will come up with popups, ads, & adware. Moreover, not only that, we have tried a number of Websites and they were all scammers. But still, if you want to go with all this, the following are the best Kik Friends Finder Websites.

Kik Contacts:

Kik Contacts is one of the better Website among worst. It is not annoying as all others, you can see users online, you can browse users through search. Moreover, it allows you to use user matching based on age, gender, interests, and location.

Kik Friends Finder:

Kik Friends Finder is same in many aspects but it also allows you to generate new Kik usernames. Moreover, you can meet new friends, girls, guys, chat with them and a lot more. The best thing we found about this websites is, they don’t have any popups.

Kik Friends:

Kik friends is a simple website, you can search for users using gender and also who is online. Moreover, they provide an advanced search mechanism, you can search for friends using age, interest, or image. The interface of this website neat and clean.

There you go, these are the Best Kik friend finder websites we can give you for now. All of these are way better than all the others. So now you know, how you can find Friends on Kik and also the best Kik Friend Finder.

Download IG Hoot APK 2019 [ Latest Version ]

0
Download IG Hoot APK 2019 [ Latest Version ]

With help of this guide, you can download IG Hoot APK and also you can learn how to install it. Those who want to get free likes and followers on Instagram, they will love IG Hoot app for Android. Moreover, IG Hoot is totally safe and secure to use.

We’ve tried a number of free apps to get Instagram followers but none of them did the magic. But when we used the IG Hoot app, it worked like a charm. Unfortunately, IG Hoot 1.0 is not available on Google Play. That’s why you have to download the IG Hoot 1.0 APK from the following links.

Not only this app gives you free followers, but it will also provide you free likes for your pictures & Photos. There is no hidden fee for this app. You can download it for free and start using it.

IG Hoot

App Info:

Author:TheSuperDev
Latest Version:1.0
Requirements:2.3 or higher+
Downloads:10,000,000+

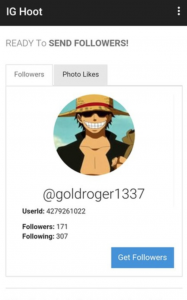
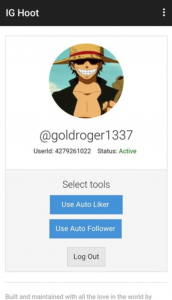
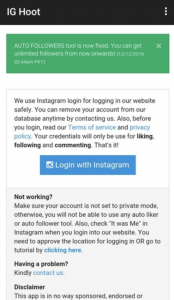
IG Hoot Screenshots:

IG Hoot Alternatives:

Following are the best Alternatives to IG Hoot. Since this app is no longer working, that is why we have collected some of the Apps just like IG Hoot.

IG Hoot Alternatives.

If you are looking for real IG Hoot App, sorry to break it you. This app is no longer available or working. Bet you can find a number of Websites offering IG Hoot App but it is nothing. We can give you the best suggestion as the alternates to IG Hoot. Above apps and websites are the best matches you can get.

Moreover, if you want to know who visited your Facebook profile, you can visit our guide here. However, if you still want to download IG Hoot APK, you can heed the instructions below.

Download Links:

How To Install IG Hoot APK on Android:

  1. Download the Latest version of IG Hoot. It would be better if you download the file to your phone straight away, or copy it to your phone from your PC.
  2. Now on your phone, go to settings > security > allow unknown sources > check this.
  3. Now using a file manager, locate the APK file that you just copied or downloaded.
  4. Tap the APK file and finish installation using the on-screen instructions.
  5. Once installed, access the newly installed application through the app drawer.

Top 7 Best Volume Booster Apps for Android: 2019

0
Top 7 Best Volume Booster Apps for Android: 2019

Listening to music on Android devices is one of the most convenient things to do. There is no residing in the old-fashioned ways to look for songs in records. There are several music apps for Android. However, the experience of listening to music is incomplete if you do not have the left volume and player. Here are the best Volume Booster Apps for Android. These apps will help you get a better experience the next time you want to enjoy your favorite music.

These volume booster apps are introduced for Android devices because even though the devices come with great sound quality, it is prone to get degraded in older devices. For this problem, getting a new phone isn’t a solution but, getting the best volume booster apps is.

Volume Booster Apps

Best Volume Booster Apps for Android:

I have created a list of the best volume booster apps for Android that you must try. If you feel the need to boost up your phone’s volume more, these apps are great. Before we move on to the list, it is important to note that these apps will only work to some extent depending on the size and quality of the speaker on your Android device.

Also, boosting up too much volume can lead to damaging the speakers so you should limit the use to the extent the speakers can take it.

Read more:

Volume Booster Sound Equalizer – By MixIT Studio:

If you are looking for a minimalistic volume booster that does the job but does not consume too much of space on phone’s memory, this one is a great option. The app can be accessed from the homepage where it pops-up as a small mixer.

You can use it to adjust and boost the volume. There is a feature added to the app called ‘non-uniform boost’ which is designed to protect the speakers from getting damaged as well as adjust clarity by controlling high and low frequencies.

Ultimate Volume Booster by porrassoft:

This is a compact and minimalist app that works by one-tap. The app’s results were seen really affective with a significant increase in volume. The app is extremely easy to use with no complicated settings and is best for headphones and speakers.

Volume Booster GOODEV:

This one is of the best volume boosters for Android. If you like to do adjustments yourself and play around with the equalizer then this app is for you.

The app is great and effective and lets you have full control over your device’s volume where you can individually adjust speakers, notifications, alarm, ringtone and other volumes on your phone.

Sound Booster:

If you are someone who not only wants an effective volume booster app but also want it to look good, then this one has the most colorful and creative interface. The app itself is very useful and is seen to boost volume by up to 50%.

Volume Booster Pro:

A simple and easy to use, for those who like to Boost up the volume on their Android devices. Volume Booster Pro is totally free and all the interface is user-friendly. Moreover, the size of Volume Booster Pro is 5MB, so it won’t eat up any space on your device.

Ultimate Volume Booster:

They claim that the Ultimate Volume Booster app will boost up your device volume 30-40%. To be very honest it’s a bit much, but on the other hand, it’s helpful for those who love to hear it loud. This app will boost up the volume of notifications, alarms, message, ringtone, and other media.

Also, you’ll get the control panel, that means you can easily control audio quality. Moreover, volume controls works for both device speakers and headphones.

Divi Volume Booster:

I added this app especially in the list of Best Volume Booster Apps for Android. Divi Volume Booster provides you with professional sound booster quality. Moreover, Divi works with both speakers and headphones. It boosts up the volume of everything.

Top Free Android Pedometer Apps 2019 | Count Your Steps

0
Top Free Android Pedometer Apps 2019 | Count Your Steps

To all the Health Freaks these are Best Android Pedometer Apps of 2019. Nowadays, people are getting more curious about their health and that’s why all smartphone manufacturers are providing health assistance apps. You can find a number of health apps which help you track all of your activities.

Moreover, you can get a different type of bands which are specifically designed to monitor your health activities. But all the bands and gadgets have to connect with an app to collect and save your health data. That’s is why we are providing you the best Free Android Pedometer Apps. You can say Step counting or pedometry but to be honest, everyone is talking about it. Let’s get started.

Android Pedometer Apps

Best Android Pedometer Apps:

Following are the Top Free Android Pedometer Apps of 2019. Start monitoring your health activities and keep yourself fit.

Read more:

Free Keyboard Apps for Android 2019.

10 Best Lightweight Android Emulators for PC in 2019.

Best Teamviewer Alternatives 2019 | Remote Desktop Software.

Argus Calorie Counter Diet, Activity, Step Tracker:

Argus is more than a Pedometer App. Not only it helps you count your steps, it also provides you a quick heart rate check, helps you improve your sleep by tracking your sleep cycle. Moreover, it has a Calorie Counter which helps you Track your diet, nutrition, macronutrients and more. You can download the Argus from Google Play for free.

Pedometer:

This app is perfect for those who love to walk. The pedometer will give you all the stats of your calories that you have burned, distance, walking time and speed per hour. You can easily use this app, the UI is neat and you can also get a wide range of themes.

ViewRanger:

This app is designed for those who love to Hike, Ride or Walk. ViewRanger has a wide range of offline maps. These maps will help you choose the best path for you whenever you are planning to backpack trip or outdoor adventure. The best feature of ViewRange is that it operates without internet and mobile data.

ViewRanger
Price: Free

Fitbit:

Fitbit is one of the best apps when it comes to monitoring your health activities. This is the one app who has the most elegant interface of all time. Fitbit is compatible with Blaze, Alta, Alta HR, Charge 2, Flex 2, Surge, Charge HR, Charge, Flex, Aria, One or Zip tracker with your Android device. Other than that, it works the same way like all other apps.

Pedometer, Step Counter & Weight Loss Tracker App:

This app will help you track your steps and maintain all the record. Moreover, it will help you stay active by telling you how much you need to walk. It analyzes all of your performance and compares with your old track record. Moreover, there is one other feature worth mentioning. It records all of your activities using maps and data. You can easily share your activities with your friends.

Moves:

Moves app has a pretty clean interface and it’s easy to use. All the record and stats are shown in the circles of different sizes. That will help you easily check all of your health activities. It tracks your step, health rate, how many miles you’ve run and more. All of your data is stored for daily activity and has a map to check the results.

That’s all.

10 Best Productivity Apps for Android in 2019

0
10 Best Productivity Apps for Android in 2019

Smartphones have been turning humans smart as well with their innovative features. That’s the primary reason to have a smartphone; to make it help us become better each day. These phones are like mini sized supercomputers connecting us to the world of Internet and making things easier for us. If you are looking for apps that can help you save energy and time, and can make some of the tasks easier for you, then there are tons of options. Let’s look at some of the top productivity apps for Android.

10 Best Productivity Apps for Android 2018

1- Evernote


If you like to have a platform for jotting things down and sharing them with others, then Evernote is one of the best. It has a plethora of features like the ability to sync between devices, offline support, and the features that allow you to make lists, videos, and texts. You can share data with your friends and enjoy saving time. It’s a must try.

Download Here

2- Google Drive


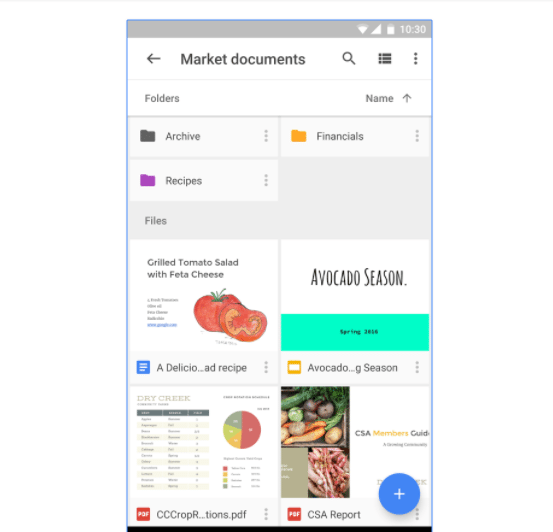
What’s more annoying than losing your data after accidentally losing your phone? Well, the Google Drive is the useful cloud storage app that supports all file types. It has features like Google Keep, Docs, Sheets, and Slides that let you make everything from word documents to presentations.  It can make things easier for you at the office or even at school. Google Photos lets you store your memorable photos and videos. This app allows you to do everything from file sharing, to note taking apps and photo storage. Businesses have been revolutionized due to Google Drive as things can be done super-fast and easily than before.

Download Here

3- IFTTT

Are you a kind of person that prefers your day organized? If you are a productivity freak, then IFTTT is an interesting productivity app on Android that can make it happen for you. It directs various apps to do different things at specific times. It makes your phone do things automatically and is a must-have. Try it.

Download Here

4- LastPass Password Manager


LastPass is the best productivity apps and the best security app as well. This means this app serves two important purposes. It stores your login information for different sites and allows you to choose harder passwords for your websites. Moreover, you can log in faster with this app as well. You can also set a specific PIN if you want to.

Download Here

5- Microsoft Apps

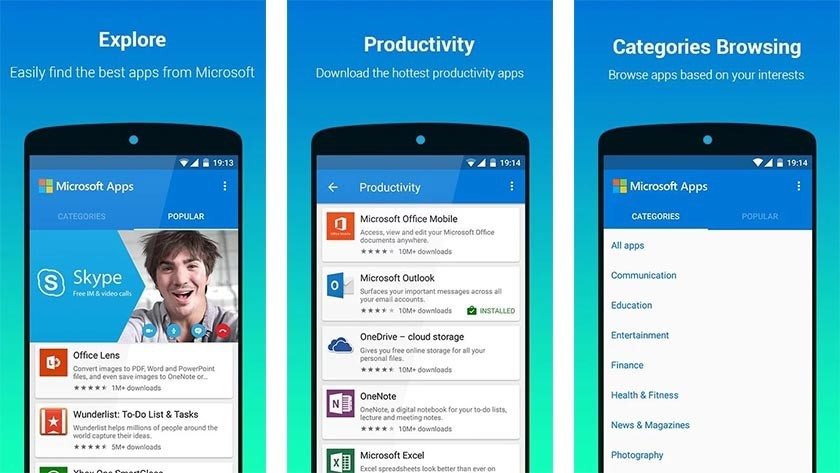
Microsoft has earned its name over the years and the apps by Microsoft are no less. These apps include the famous OneDrive, Microsoft Word, Microsoft Excel, PowerPoint,  Outlook, and many more apps which work together to bring everything under one roof for you. You can even sync your desktop with your phone, and enjoy these productive apps to the fullest.

Download Here

6- Newton Mail

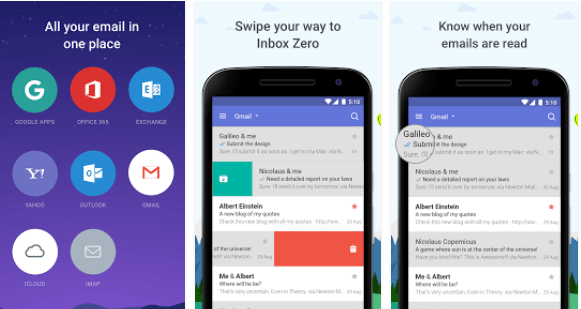
Do you want to work faster than before? If yes, then Newton Mail is the app that supports every email provider and has plugins for different productive apps like Evernote, Pocket, Zendesk, and many others. This allows smooth and fast work. It also has a user-friendly interface. Moreover, you can sync different devices together.

Download Here

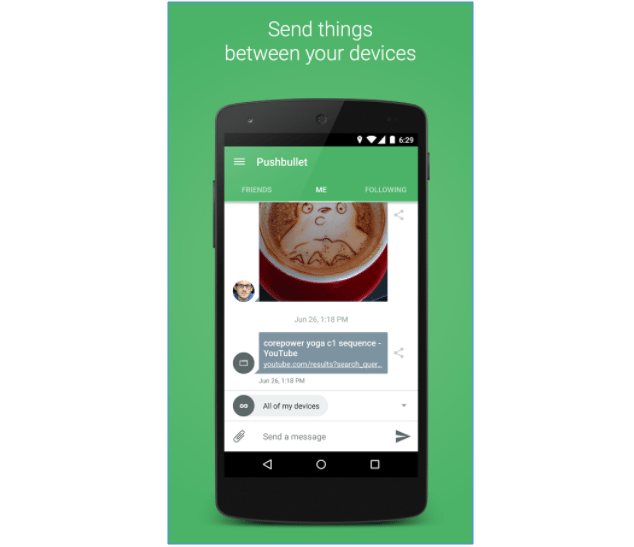
7- Pushbullet


Pushbullet is an outstanding productivity app that can help you sync your phone with your computer. It lets you respond to text messages and send different files. You can even set up channels of your choice and get notified regularly. You can enjoy many features on its free version and become more productive than before.

Download Here

8- Slack

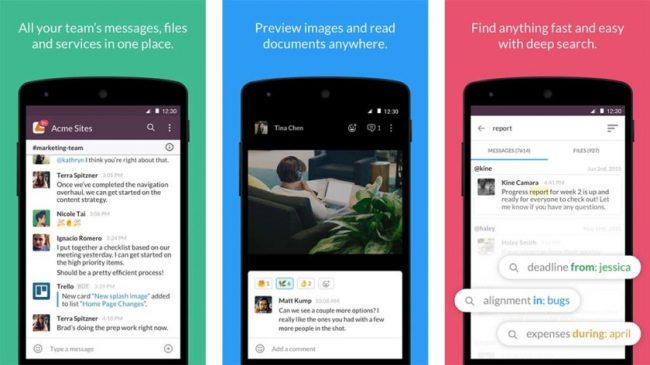
Slack has been called the best business chat app as it supports text and voice chats. It even supports for Giphy and lets you have all the fun you want while chatting. The best thing about this app is that you can make a large number of channels. It’s easy to use and interesting. You won’t regret installing it.

Download Here

9- Trello


Trello is a task manager that helps you stay organized at work or at home. It comes with a feature called Boards where you can jot down important stuff and focus on essential tasks. The app allows you to share important things with your co-workers. You can use Google Drive, Dropbox, and other apps with it too.

Download Here

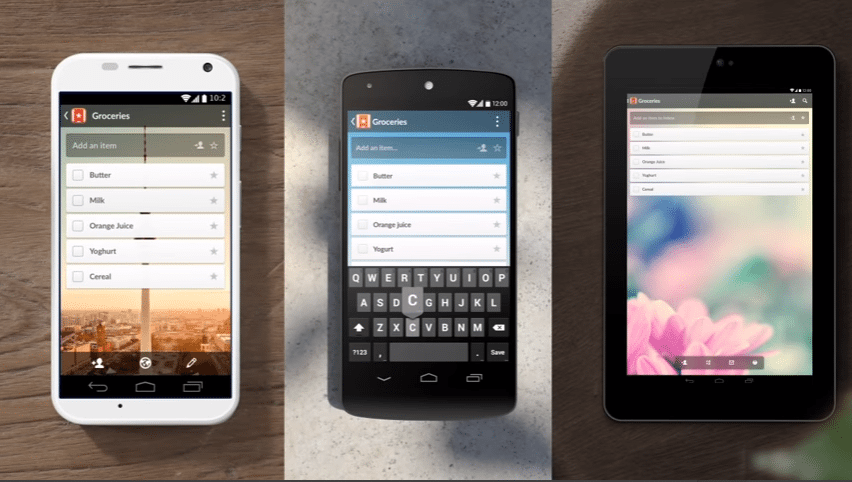
10- Wunderlist

Wunderlist is a to-do list app that helps you create to-do lists, daily tasks, and other essential things. You can make a list for your daily grocery shopping. You can even make sub-folders for new tasks as it is easy to use. This app uses a calendar to help you mark off important dates, put reminders, and add notes.

Download Here

If you think that there are other apps that you love and could have made it to our list, then don’t hesitate to leave a comment and let us know.

Also, check:

How to Install Official TWRP Recovery and Root OnePlus 6T

0
How to Install Official TWRP Recovery and Root OnePlus 6T

The OnePlus 6T continues to embarrass other more expensive Android phones with incredible features and value. As fantastic as the OnePlus 6T hardware and pricing are, mimicking the best parts of the most popular phones and selling them in your own device can only get you so far. The device took its covers with Android Pie based OnePlus’s own UI skin Oxygen OS 9.0.5. In the month of November itself, an unofficial TWRP recovery dressed up to this device. No sooner the OnePlus 6T now got an Offical TWRP recovery build. Some senior XDA members  eng.stkjoemossjrDees_Troyxls654, and twinnfamous contributed to this build. This guide will help you out on how to Install Official TWRP Recovery and Root OnePlus 6T.

Install Official TWRP Recovery and Root OnePlus 6T

Features

Unlike many other manufacturers, OnePlus has a clean record when it comes to software updates. The company is supporting devices as old as two years such as the OnePlus 3/3T. The OnePlus 6T is the perfect size for a phone, without compromising the utility of a large screen. The decent 6.41-inch optic AMOLED display is quite big with 1080 x 2340 pixels, 19.5:9 ratio resolution. Following the trend, OnePlus packs in the in-display fingerprint sensor having a speed of 0.34s to unlock. Shrinking the notch makes the OnePlus 6T look better than other phones, but the Face Unlock feature is still less secure than Face ID.

The base variant now is 128gigs. No more 64gigs Variant & memory card slot. There is no 3.5mm audio port so as to place in-built fingerprint scanner. It is powered by the massive processor Qualcomm Snapdragon 845 (10 nm) chipset coupled with 8GB RAM for the 128/256GB variant & 6GB RAM for the 128GB RAM variant. The battery life on the phone is good with moderate 3700mah cell and will last you a full day, or about 18 hours. The Android Pie features like adaptive battery and the battery saver options give you more control. The phone packs a dual camera set up at the rear end with 16MP+20MP. The selfie camera came with 16MP f/2.0, 25mm lens. A night mode for the camera of One plus 6T which tweaks and plays around with the exposure and dark scenarios to give out a better looking low-light photos.

TWRP recover on OnePlus 6T

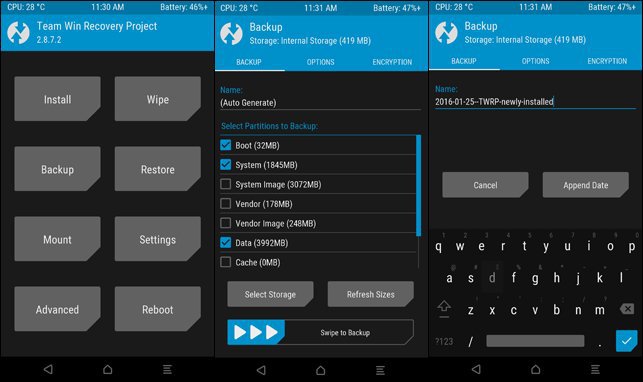
TWRP is one of the most popular custom recoveries for Android smartphones. It is a touch-based custom recovery with an intuitive interface and a lot of useful functions. TWRP is a recovery-level UI packed with powerful features that will make your rooted life easier. It also tries to stand out by giving users extra features not found in ClockworkMod Recovery, as well as an attractive interface. It offers hardcore Android smartphones users quite a few features, including a way to flash custom ROMs, install ZIP-file-based updates, create and restore backups of ROMS and much more.

TWRP has an intuitive touch interface with a lot of useful options. You can take Nandroid backups, restore the backups in case your device stuck at bootloop, flash custom ROMs, mods and any flashable ZIP file. Apart from that, you can wipe individual partitions on your device, run custom scripts and much more.

Prerequisites

  1. Your device needs to have at least 60% charge to ensure it doesn’t run out of battery during the installation process.
  2. Enable USB Debugging on your phone. To do this, go to the device Settings » Developer options » toggle the “USB Debugging” switch.
  3. Install ADB & Fastboot tools on your PC. You can follow our simple guide which lets you install ADB & Fastboot tools in 15 seconds.
  4. Enable OEM Unlocking and USB Debugging mode on your device.
  5. Make sure to backup all the data on your device as this process will wipe all data on your device.

Downloads

  1. Download the latest TWRP image file from here. Rename this file to recovery.img and copy it to the ADB and Fastboot folder.
  2. Download Magisk Rename this file to magisk.img and copy it to the ADB and Fastboot folder.
  3. OnePlus USB drivers

How to Install Official TWRP Recovery and Root OnePlus 6T

Unlock Bootloader on OnePlus 6T

  1. Navigate to the folder where you have installed ADB and fastboot files on your computer.
  2. Connect your device to the PC using a USB cable.
  3. Open a command prompt window from the ADB and Fastboot folder [Press shift key + right-click on any blank space of the folder] and then select “Open command window here” from the context menu.
  4. Execute the below command to reboot to bootloader. The list of all the connected devices to the PC will be shown.
    adb devices
  5. Now enter the following commands sequentially.
    adb reboot bootloader
    fastboot devices
  6. Upon executing this command the internal storage will wipe off from the device.
  7. Now enter the following command to unlock the bootloader on your device.
    fastboot OEM unlock
    
  8. The device will ask your permission to unlock the bootloader. Use the volume buttons to navigate and power button to hit yes box.

You have now unlocked the bootloader on your OnePlus 6T. Without any ado lets see how to Install Official TWRP Recovery and Root OnePlus 6T.

Install Official TWRP on OnePlus 6T

  1. Navigate to the folder where you have installed ADB and fastboot files on your computer.
  2. Connect your device to the PC using a USB cable.
  3. Open a command prompt window from the ADB and Fastboot folder [Press shift key + right-click on any blank space of the folder] and then select “Open command window here” from the context menu.
  4. Execute the below command to reboot to bootloader.
    adb reboot bootloader
  5. Make sure the “recovery.img” file is in the fastboot folder and execute the below command to flash it on your device.
    fastboot flash recovery recovery.img
  6. It will take a couple of seconds for the TWRP recovery image to flash.
  7. Once the flashing process is complete, reboot the device.
    Install Official TWRP Recovery and Root OnePlus 6T

That’s all! Now its time to root the device.

Rooting your smartphone gives you administrative rights that means you have full access over your smartphone whether it is hardware related or software related. You can flash custom ROM which makes your phone look even cooler, can increase the RAM, GPU, etc. The main thing users intend to root their device is to get rid of bloatware apps and software. Root is actually a directory or a folder in Linux based Operating Systems which contains critical files for the computer to run properly including the software that boots your device. Normal users do not have access to this folder for security purposes. Most of the Linux Operating Systems including Ubuntu, Kali provide System Administrators or the Root Users to access the root folder.

Rooting your smartphone will void its warranty. Sometimes rooting process won’t go smoothly hence you may end up bricking your lovely phone.

Root OnePlus 6T

  1. Make sure you have installed correct TWRP & the bootloader unlocked on OnePlus 6T.
  2. Navigate to the folder where you have installed ADB and fastboot files on your computer.
  3. Connect your device to the PC using a USB cable.
  4. Open a command prompt window from the ADB and Fastboot folder [Press shift key + right-click on any blank space of the folder] and then select “Open command window here” from the context menu.
  5. Execute the below command to reboot to bootloader. The list of all the connected devices to the PC will be shown.
    adb devices
  6. Now enter the following commands sequentially.
    adb reboot bootloader
    fastboot devices
  7. Upon executing this command the internal storage will wipe off from the device.
  8. Now enter the following command to flash Magisk img file on your device.
    fastboot boot magisk.img

    Install Official TWRP Recovery and Root OnePlus 6T

  9. This will also reboot your device.
  10. Now open the file manager navigate to Magisk Manager APK file and install it.
  11. Open the Magisk Manager goto to the settings menu, navigate to Update Channel > Change it to Beta.
  12. On the Magisk main screen click on the following boxes, Preserve force encryption & Preserve AVB 2.0/db-verity.
  13. Select Install and then Direct Install, it will patch the boot.img and asks you to reboot the device.
  14. Reboot the device.

Done! Your brand new OnePlus 6T is now successfully rooted.

Transfer iPhone Notes to Google Keep [ Tutorial ]

0
Transfer iPhone Notes to Google Keep [ Tutorial ]

With the help of this guide, you will be able to Transfer iPhone Notes to Google Keep. Normally, users think that it will be a long process to do so. But in reality, it is not. However, it is not a piece of cake since there is no import or export option available. Maybe in the future, we could get lucky.

iPhone Notes app is good but Google Keep offers a lot more than Notes. Now Let’s get back to our problem. Let’s tell you how you can Transfer iPhone Notes to Google Keep. We have found a number of workarounds that will help you transfer all of your iOS Notes to Google Keep. Moreover, you can use both of these apps on daily basis, if you don’t want to go through with all that. Let’s get started now.

Transfer iPhone Notes to Google KeepTransfer iPhone Notes to Google Keep:

As said earlier, We have found a number of Workarounds to Transfer iPhone Notes to Google Keep. Let’s start with the easy one.

Upload to Google Keep Manually:

This method is the simplest of them all. You can easily transfer all of your Notes to Google Keep. Make sure you have installed Google Keep before you proceed.

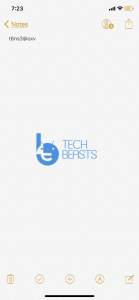
  • Launch the Notes app on your iPhone. Now open the Note that you want Transfer to Google Keep.
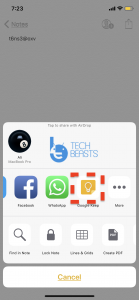
  • Tap on the Share button located at the top right side of the screen.
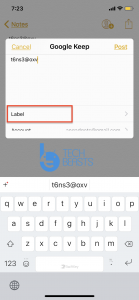
  • From the Pop-up, Tap on Google Keep icon.
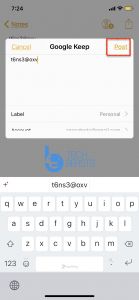
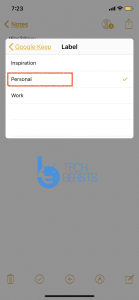
  • Another pop-up will show up, here you have to label the Note and you will see your Google Account will be shown below the label.
  • Once you have done everything, Tap on Post.
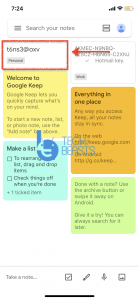
  • Now Open Google Keep app and you will see your Note will be there.

Apple Notes To Gmail To Google Keep:

When it comes to Sync data between iPhone and Android. Neither of these companies has given us the plain road to walk on. Moreover, you will be surprised to know that even the Android switch app doesn’t copy your Notes to Google Keep. What if you have hundreds of Notes, you cannot share them individually to Google Keep. This is really bad, right? Well not so much. Heed the instructions below.

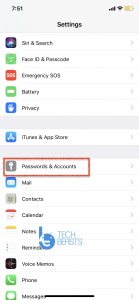
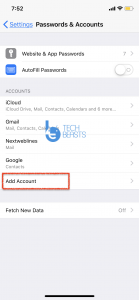
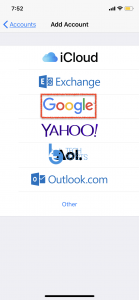
  • Head over to the iPhone Setting -> Passwords & Accounts -> Add Account.
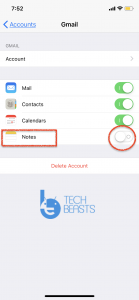
  • From the list, Select Google and enter your login details. Once your Google Account is added, you will be asked to enable sync. Every service will be turned on by default expect Notes. Tap on Notes to enable it.
  • Now download Gmail app on your iPhone, if you haven’t done that already. Sign in with the same Google Account.
  • In iPhone by default, your Notes are synced with iCloud. But after now, they will also sync with Google too.
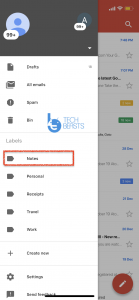
  • Open Gmail app, there you will see a new label called Notes. All of you Notes will be there.

Change the Default Account [ iCloud to Gmail ]:

After successfully Apple Notes to Gmail. Now you can change the default settings on your iPhone. It means all of your New can be saved in Gmail rather than iCloud.

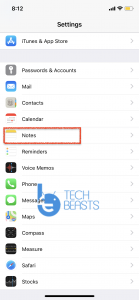
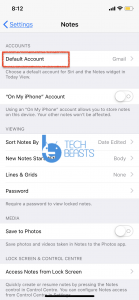
  • Open Settings on your iPhone.
  • Scroll down and tap on Notes.
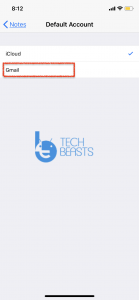
  • Here you will see Default Account under Accounts Tab. Tap on it.
  • By default, iCloud will be selected. Tap on Gmail to change it.
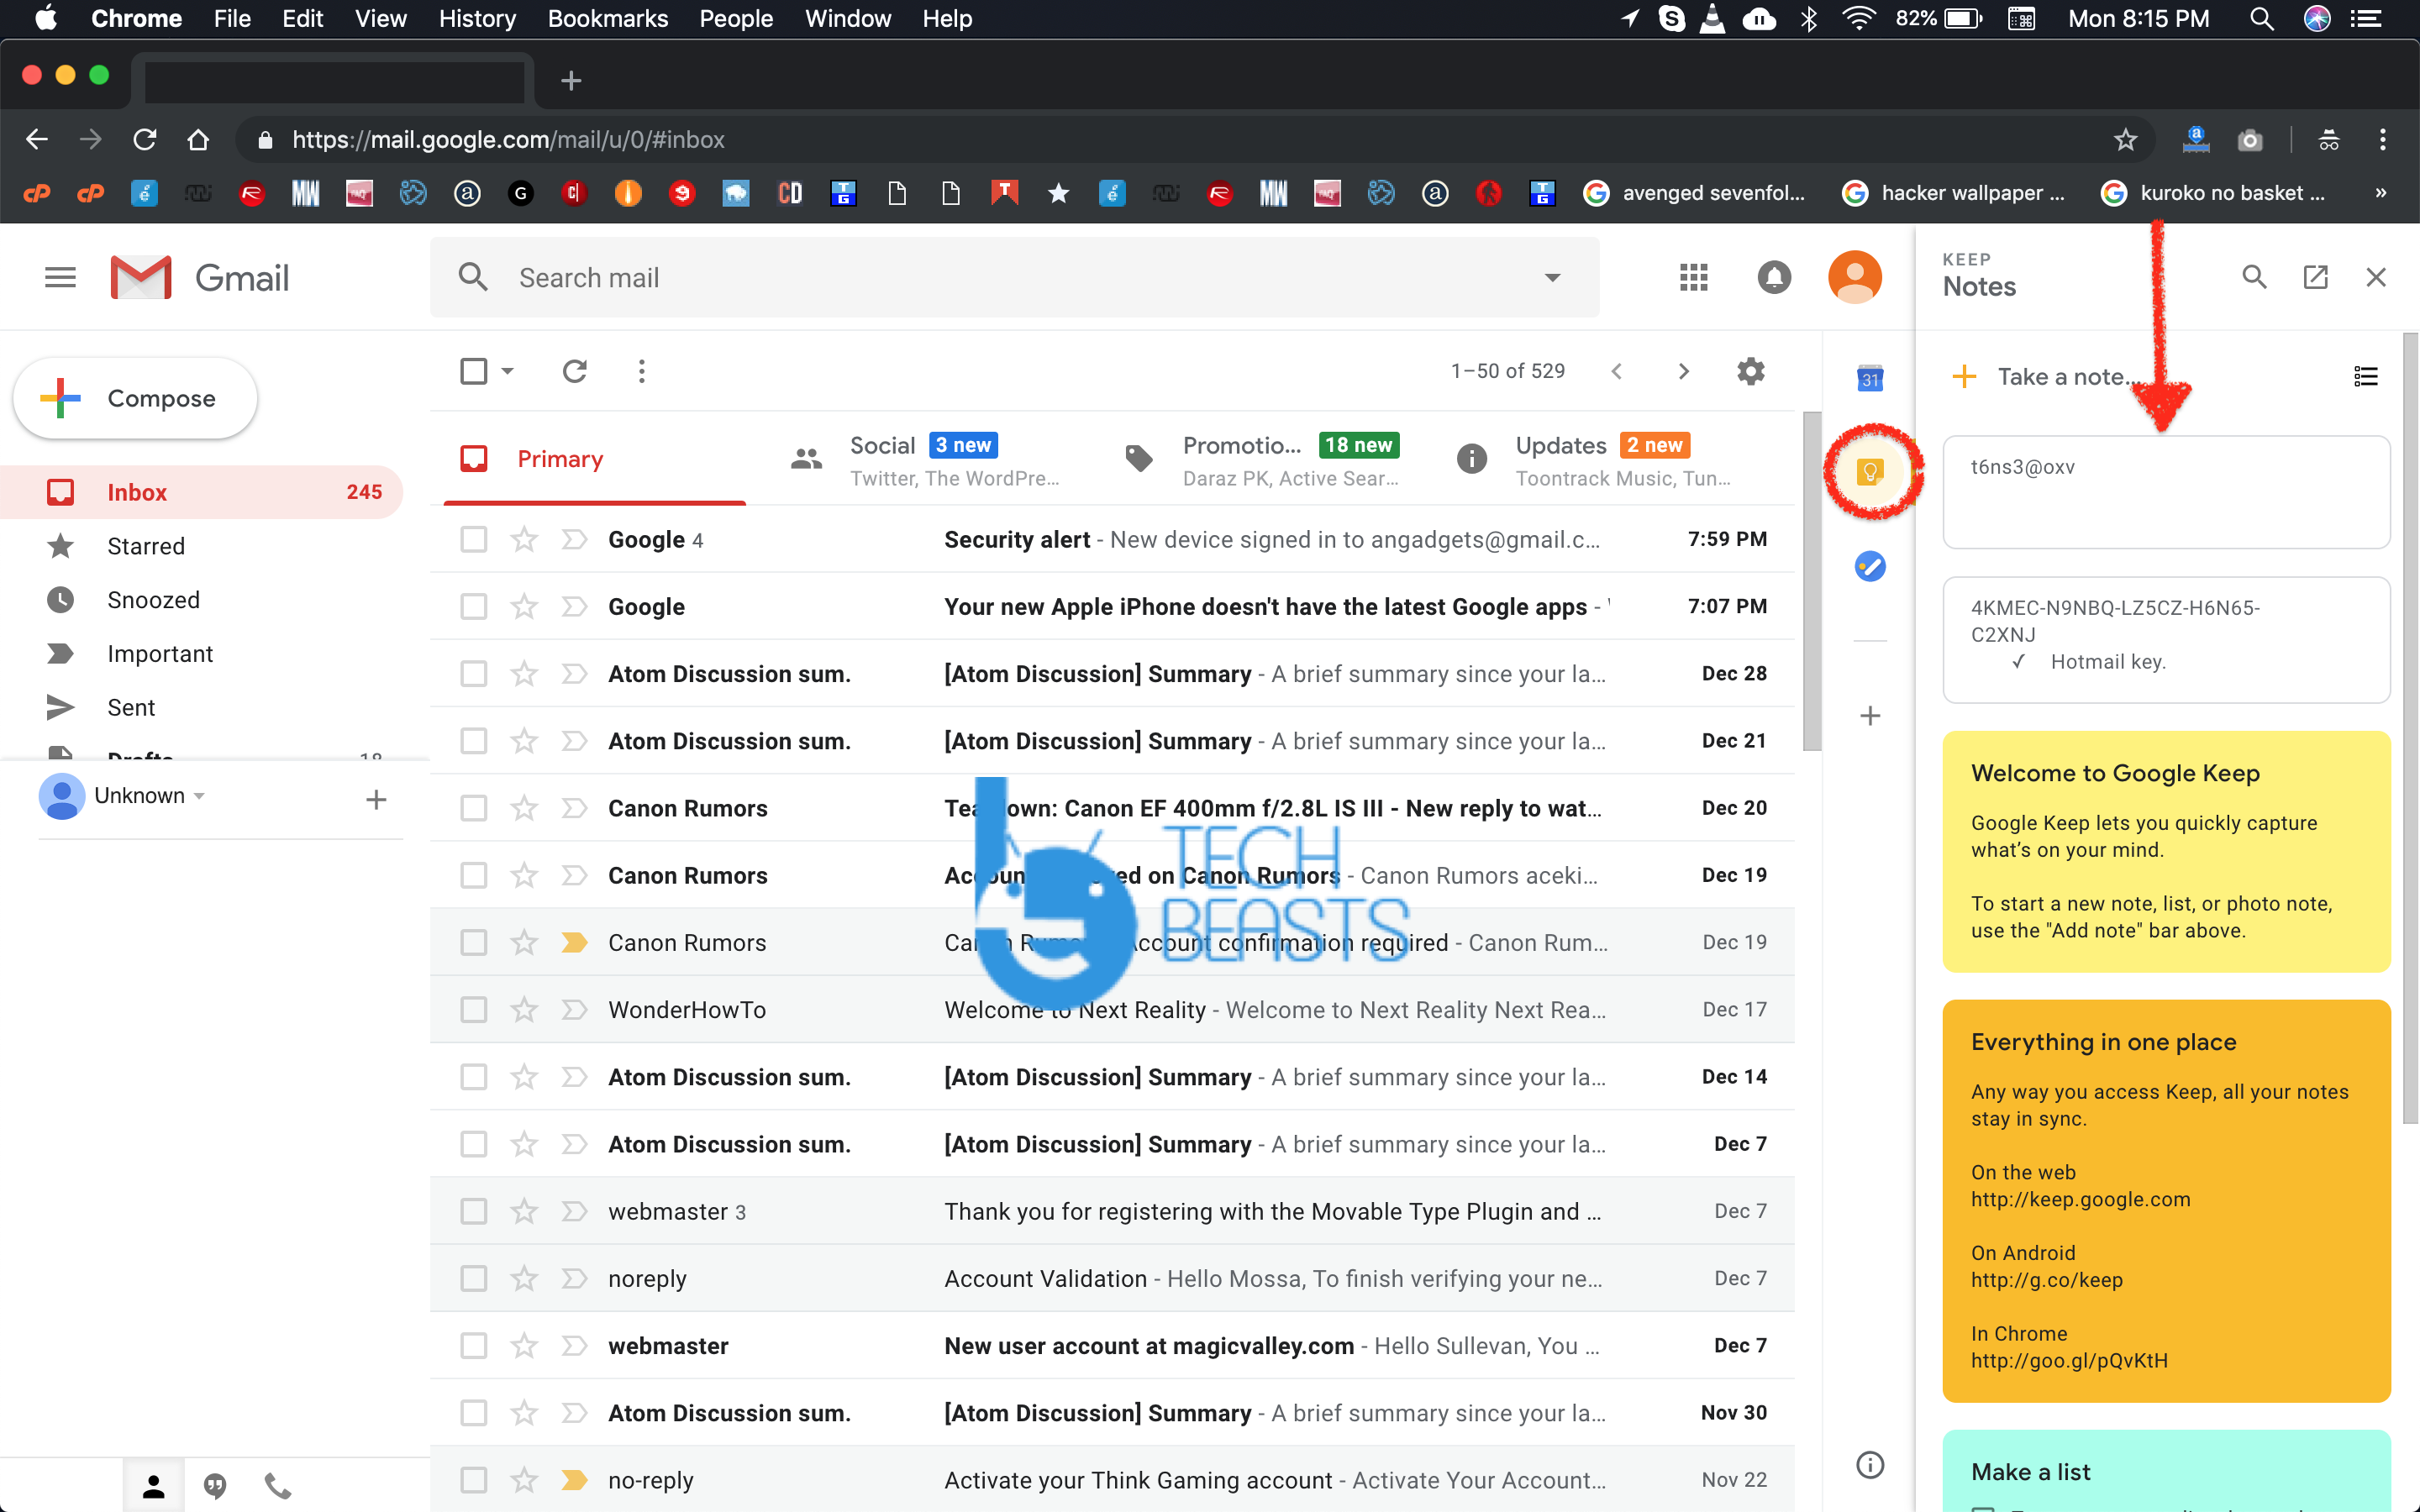
  • Open Gmail on your PC. There you will see Google Keep shortcut in the Sidebar.


Keep that in mind. The Apple Notes, which are synced with Gmail, will not appear here. You can view Apple Notes but you cannot edit them and don’t expect that the changes you have made will reflect in Apple Notes. However, if you delete a Note from Gmail, it will be deleted from Apple Notes too.

That will be all. Through these methods, you will be able to Transfer iPhone Notes to Google Keep. If you face any issue while trying these workarounds, you can reach us through comments.