The Xperia SP brought a mid-range price with a lot of technology in the year 2013 borrowed from its predecessor, Xperia Z. The device shipped with Android 4.1.2 Jelly Bean which is far away to the trend & technology. The news from the center is there’s an Official Android Oreo-based LineageOS 15.1 build to this device. The LineageOS 15.1 is an extremely stable ROM. It’s heavily skinned & tweaked for better performance. It has got all those features a common user needs & is quite stable. Here is a simple guide on how to Install Official LineageOS 15.1 ROM on Sony Xperia SP.
The device itself is a step down from the 5-inch models that have dominated 2013’s headlines. Its screen doesn’t reach the giddy heights of the FullHD display on the Xperia Z, but it’s still no slouch for a mid-range handset, as its 4.6-inch frame packs in a resolution of 1280×720 pixels. The bezel around the screen is instead covered in glossy plastic, while there’s a matt finish on the removable rear cover. The Sony Xperia SP sports an 8-megapixel Exmor RS rear camera with autofocus and LED flash also it leaves outburst mode. It features a VGA front-facing camera. The front camera is strictly functional and can be used for casual video chats.
LineageOS 15.1 ROM
The LineageOS 15.1 is an extremely stable ROM. It’s heavily skinned & tweaked for better performance. It has got all those features a common user needs. LineageOS ROMs are quite stable. They are ROMs just ported from the CM branch. No major changes are there between the initial LineageOS builds and the last CM builds. If you observe Google’s vanilla Android OS and Lineage OS, you’ll find a lot of granular settings in the latter. You can customize your device to your own taste and have more security options as well. You might experience random reboots and minor glitches in the functionality but its splendid customizations drop shadow over them.
Preparations
Charge your device at least 50% before flashing the ROM.
Backup your device to make sure you’ve all the important data if something doesn’t go as per the plan.
How to Install Official LineageOS 15.1 ROM on Sony Xperia SP
Make sure you have the TWRP recovery installed on your phone.
Also, ensure that you have copied the Gapps and Official OS 15.1 ROM files after installing TWRP.
Power down your smartphone.
Boot in recovery mode by pressing and holding Volume Up, Volume Down and Power Button at the same time. When the screen flickers, release all buttons and you will see the recovery screen in a few seconds.
Make a nandroid backup of your device in TWRP recovery. To do this, navigate to Backup option, select the partitions available and swipe right to make a backup.
Format your device, once the backup is completed.
In TWRP recovery, click on Wipe »Advanced Wipe. Select data, system, cache and, Dalvik-cache on this page and wipe them.
In the TWRP, click on Install » Install Zip » Locate and select the Official OS ROM file. Swipe screen to flash this file.
Similarly, flash the Gapps for Android Pie.
In the end, get back to the main menu in TWRP and click on Wipe » Advanced Wipe » Select Cache & Dalvik Cache » Swipe screen to wipe.
After wiping, reboot your device.
That’s all. The first boot will take some time as it needs to build the cache. Once the device boots up, you can see the Android Pie setup screen.
Sony Xperia T took its covers on September 2018. The device came with Android 4.0.4 Ice Cream Sandwich out of the box. Running on top of Ice Cream Sandwich is Sony’s own Timescape UI, itself a very beautiful and navigable user interface. Aside from a few hiccups here and there, Sony’s UI is solid. But the outdated ROM’s will always find a fence for the new interface and customizations. Presently Android 8.1 Oreo-based LineageOS 15.1 build got ready for this device. Here is a simple guide on how to download and Install Official LineageOS 15.1 ROM on Sony Xperia T.
The Xperia T is a strange mixture of design influences and combines the refined edges of the Xperia S with the unique curved back of the Sony Ericsson Xperia Arc. The 4.6-inch screen uses Sony’s Bravia Engine to create a convincing and bold picture. Sony’s insistence that the dual-core Snapdragon S4 can match the performance of rival quad-core chipsets like Nvidia’s Tegra 3 seems credible. The rear shooter is of 13MP with Autofocus.
LineageOS 15.1 ROM
The LineageOS 15.1 is an extremely stable ROM. It’s heavily skinned & tweaked for better performance. It has got all those features a common user needs. LineageOS ROMs are quite stable. They are ROMs just ported from the CM branch. No major changes are there between the initial LineageOS builds and the last CM builds. If you observe Google’s vanilla Android OS and Lineage OS, you’ll find a lot of granular settings in the latter. You can customize your device to your own taste and have more security options as well. You might experience random reboots and minor glitches in the functionality but its splendid customizations drop shadow over them.
Preparations
Charge your device at least 50% before flashing the ROM.
Backup your device to make sure you’ve all the important data if something doesn’t go as per the plan.
How to Install Official LineageOS 15.1 ROM on Sony Xperia T
Make sure you have the TWRP recovery installed on your phone.
Also, ensure that you have copied the Gapps and Official OS 15.1 ROM files after installing TWRP.
Power down your smartphone.
Boot in recovery mode by pressing and holding Volume Up and Power Button at the same time. When the screen flickers, release all buttons and you will see the recovery screen in a few seconds.
Make a nandroid backup of your device in TWRP recovery. To do this, navigate to Backup option, select the partitions available and swipe right to make a backup.
Format your device, once the backup is completed.
In TWRP recovery, click on Wipe »Advanced Wipe. Select data, system, cache and, Dalvik-cache on this page and wipe them.
In the TWRP, click on Install » Install Zip » Locate and select the Official OS ROM file. Swipe screen to flash this file.
Similarly, flash the Gapps for Android Pie.
In the end, get back to the main menu in TWRP and click on Wipe » Advanced Wipe » Select Cache & Dalvik Cache » Swipe screen to wipe.
After wiping, reboot your device.
That’s all. The first boot will take some time as it needs to build the cache. Once the device boots up, you can see the Android Pie setup screen.
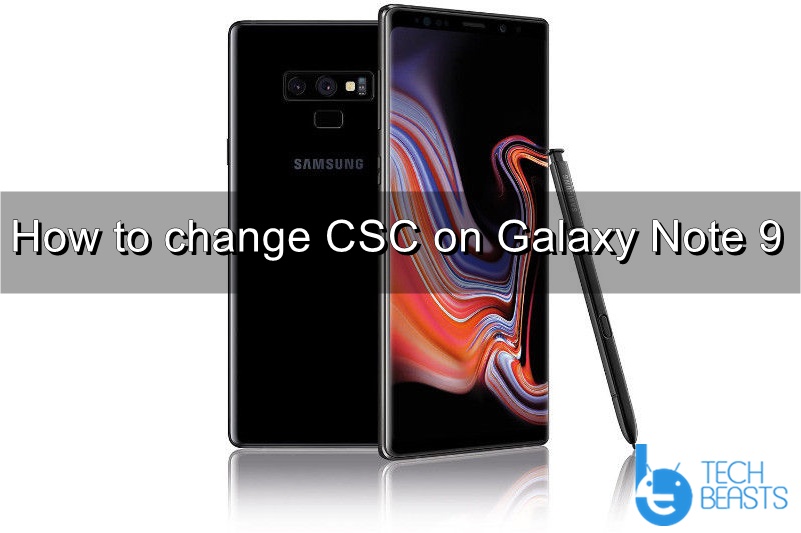
Looking for a method to change CSC on your Galaxy Note 9? You have landed at the right place. In this guide, you will find the steps to change Galaxy Note 9 CSC. To change the CSC on your Galaxy Note 9, you have to use multiple tools and follow a number of steps. Make sure that you follow this guide with your full attention. Before we change Galaxy Note 9 CSC, let us understand what CSC and why do people change it.
Change Galaxy Note 9 CSC
About Galaxy Note 9
Galaxy Note 9 is Samsung’s flagship Note from the year 2018. Galaxy Note 9 has got a 6.4-inch Infinity Display having a screen ratio of 18:9. The Note 9 has a WQHD+ screen. This is a Super AMOLED display. Galaxy Note 9 has got a single 8MP camera on the front. At the back, it has a 12MP + 12MP dual camera system. The Note 9 has variable aperture just like the Galaxy S9 Plus.
Under the hood, the Note 9 has the Exynos 9810 or the Qualcomm Snapdragon 845 SoC. It has a RAM of 6GB or 8GB with the internal storage of 128GB or 512GB. Galaxy Note 9 is the first ever Note from Samsung to come with a battery of 4000 mAh. The Note 9 has a fingerprint scanner at the back. It also has the stereo speaker to enhance the sound. The Note 9 is powered by a liquid-cooling system which keeps it cool while heavy usage. It runs on Android Oreo out of the box. The Note 9 is all set to get the Android Pie update these days.
What is CSC and why Galaxy Note 9 owners change it?
CSC stands for Consumer Software Customization or Country-Specific Code. This code is responsible for all the region and carrier-specific features on a Samsung Galaxy handset. The CSC code basically specifies the region and carrier branding as well. If you have ever compared two same Samsung Galaxy smartphones from two different regions, you must have noted that there is a difference between the stock applications and features on both the phones. For example, the Galaxy S9 launched in Germany and the Galaxy S9 launched in the UAE will not have the same stock applications. These applications vary according to the region. Moreover, the Galaxy S9 from Germany may have the WiFi calling feature while the Galaxy S9 from the UAE may not have the WiFi calling feature. There is a number of features that differentiate on the basis of the CSC code.
So, when users find out that their phone in another region has more useful features, they tend to change the CSC of their phone to that region’s CSC. This allows them to get all those features on the go. Furthermore, have been changing the CSC codes of their phones to get faster updates as well. For example, Samsung releases the Android updates faster in the German, Polish, and the Turkish region. Users from all across the world change the CSC of their phone to these regions in order to get the updates as soon as Samsung pushes them.
As you have seen all the reasons that urge the Galaxy Note 9 owners to change the CSC, It is time to take a look at the steps to change Galaxy Note 9 CSC now.
Change Galaxy Note 9 CSC
Preparations
This guide is for the Exynos and Snapdragon Galaxy Note 9 only. This is applicable to all the models that have the combination files available.
Backup each and everything from your phone beforehand.
Flashing the combination firmware before using RealTerm is necessary.
Enable OEM Unlocking and USB Debugging on your phone.
Use the original data cable to connect the phone to your computer. Using any other cable can cause issues.
This is a custom method and it requires flashing expertise, if you do not have an idea about anything prior to this procedure, make sure that you follow each and every step with extra precautions.
If you are afraid of something, it is advised to stay away from this procedure.
Links to all the necessary files are given below for your ease. Download the files carefully for your phone’s model number.
You can flash the CSC of the same model on your phone. Do not flash the CSC of a different model as it can cause extreme trouble. For example, if you have a Galaxy Note 9 N960FD, flash the CSC of another N960FD only.
Go ahead now and follow the steps carefully.
Note:
Changing CSC of your Samsung smartphone is a very dangerous process. You should only do this if you have the know-how of what you are exactly playing with. A wrong CSC can wipe the IMEI of your phone which will result in making your phone a WiFi only device. It means that you will not be able to make calls, send SMS, or use Mobile data on your phone. As this is a highly custom process, it is absolutely not recommended by Samsung. In case something goes wrong, TechBeasts may not be held responsible. You must take full responsibility before trying to change the CSC of your phone.
Unzip the Combination Firmware file on your computer. You will get the COMBINATION file that has .tar format.
Download Odin 3.13.1 and extract it. Open Odin3.exe file.
Open Options in Odin and make sure that the only option checked is F.Reset.Time. Uncheck all other options.
In Odin, click on the AP tab and select the COMBINATION.tar file that you got after extracting the Combination Firmware.
Combination Firmware Galaxy Note 9
Now turn off your Note 9.
Connect USB Type-C cable to your computer. Press and hold Volume Down + Bixby button. While keeping the keys pressed, plug in the USB Type-C cable into the phone. As the phone shows a warning, press Volume UP to continue.
You are in the download mode now.
Connect your Note 9 to the computer now. Odin will show “Added” in the log box and also show a blue light in the ID:COM box.
Click on the start button. It will flash the combination firmware on your phone.
Disconnect your phone and reboot it. Your phone should show you the model number now. Proceed to the next part now.
Change Galaxy Note 9 CSC via RealTerm
First of all, decide the CSC that you want to change your current CSC too. You must download the firmware of the same CSC as well. The firmware download links are given in the next part. You can just go to that part, download the firmware of your desired CSC and then follow this procedure.
In case you don’t already know, CSC is the region code and is often listed with the firmware details. For example, the CSC of Germany is DBT, the CSC of UAE is XSG, the CSC of Turkey is TUR and so on. You must already know what CSC you want to move your phone to. After deciding the CSC, carefully download all the files while you follow the procedure given below.
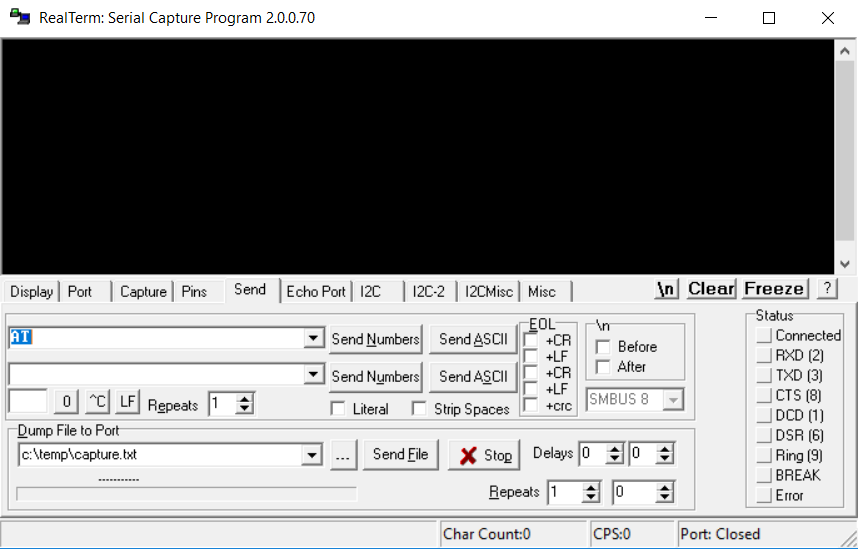
Download and install RealTerm on your computer. Download Link.
Open RealTerm on your computer and then go to the “Port” tab.
Now set Baud to 230400, select Port to ssudmdm0000.
Open Send tab now and enter “AT” and then click on “Send ASCII”.
You will now get a response which will look like this
+USB READY
BOOTING COMPLETED
AT
or AT or OK or COMPLETED AT
Now go to the next number in RealTerm.
In case you were unable to get a response, click +CR and then send again.
If you get a response showing “ERROR”, go to the next number.
If you did not get the response even now, check the connection of your phone and ensure that it is connected fine.
Making sure that everything is normal, proceed to the next number.
Now enter “AT+PRECONFIG=1,0” and then click on Send ASCII.
This time, the response will be something like this:
AT+PRECONFIG=1,0 + PRECONFG:1, XXX
OK
The XXX here is your current CSC.
Now once again, enter “AT+PRECONFG=2,XXX” and click on Send ASCII.
Enter the CSC (XXX) that you want to switch to. This is the new CSC you are changing to.
You will get the response:
AT+PRECONFG=2, XXX+PRECONFG:2,OK
OK
XXX is your changed CSC
Now enter “AT+PRECONFG=1,0” and click on Send ASCII.
You will get this response:
AT+PRECONFIG=1,0+PRECONFG:1,XXX
OK
XXX is your changed and current CSC.
Now proceed to the next part and flash the changed CSC’s firmware.
Extract the firmware on your computer to get the AP, BL, CP, and CSC file.
Open Odin3.exe on your computer.
Click on Options in Odin and make sure that the only options checked are F.Reset.Time and Auto Reboot. No other option should be checked.
Click on AP tab and add the AP file. Click on the BL tab and add the BL file. Now click on the CP tab and select the CP file. In the CSC tab, select the CSC file.
Put your Note 9 in download mode. Follow the 8th step under combination firmware flashing instructions.
As Odin detects your phone, click on the start button.
Let Odin flash the firmware.
Galaxy Note 9 CSC Flashing
Once done, disconnect your phone.
As the phone boots up, check its CSC. It should be the CSC that you wanted on your phone. That’s all.
Final Words
That’s all with the CSC guide for the Note 9. You are now free to enjoy the features of another region on your Galaxy Note 9. If you have any queries, suggestions, or anything to add to this guide, feel free to reach out to me. I will try my best to get back to you as soon as I get your query. Thank you all. Stay connected.
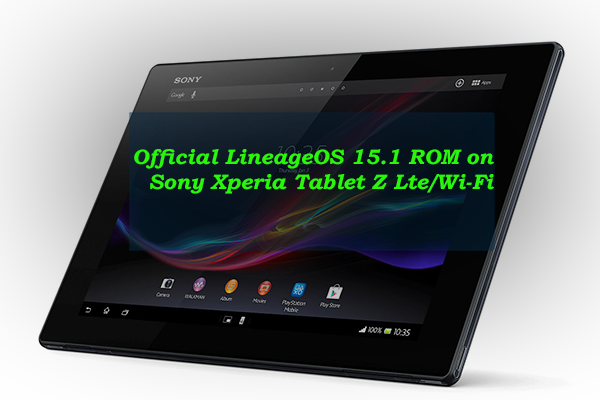
Sony Xperia Tablet Z tablet was launched in February 2013. This is Sony’s entrant into the 10-inch tablet arena, pitting itself against the likes of the Google Nexus 10 and iPad 4. Its 1,920 x 1,200 resolution screen falls a little short of both, but its trump card is that, just like Sony Xperia Z phone, it’s water resistant up to 1m for about 30 min, and also dust resistant. Both the devices came with Android 4.1.2 Jelly Bean out of the box. There is an official build based on Android 8.1 Oreo to these devices. Here is a simple guide on how to download and Install Official LineageOS 15.1 ROM on Sony Xperia Tablet Z LTE/Wi-Fi.
The Tablet Z is powered by 1.5GHz quad-core Qualcomm SoC (APQ8064) along with 2GB of RAM. Both the devices share the same features with the cellular network as an exception. Extremely slim and light, Fast processor and graphics, Vibrant screen with good viewing angles are the common build and performance specs. The Sony Xperia Tablet Z’s screen, however, is more than ordinary. Colors are rich, vivid and eye-popping at times. The tablet comes with a 10.10-inch display with a resolution of 1920 pixels by 1200 pixels at a PPI of 224 pixels per inch. As far as the cameras are concerned, the Sony Xperia Tablet Z packs an 8.1-megapixel primary camera on the rear and a 2.2-megapixel front shooter for selfies. A massive 6000 mAh battery will support your needs.
LineageOS 15.1 ROM
The LineageOS is an AOSP based aftermarket custom ROM and is a continuation to the highly popular CyanogenMod ROM. It brings stock Android interface to your device along with a plethora of customizations.. It’s heavily skinned & tweaked for better performance. It has got all those features a common user needs. LineageOS ROMs are quite stable. They are ROMs just ported from the CM branch. No major changes are there between the initial LineageOS builds and the last CM builds. If you observe Google’s vanilla Android OS and Lineage OS, you’ll find a lot of granular settings in the latter. You can customize your device to your own taste and have more security options as well. You might experience random reboots and minor glitches in the functionality but its splendid customizations drop shadow over them.
Installing a custom ROM is quite simple and you will need a custom ROM like TWRP to install flashable ZIP files. As installing the ROM would wipe your device, make sure to take a Nandroid backup. This ensures that you have a complete backup of your device in case you run into a boot loop issue or a bricked device. However, the Nandroid backup doesn’t include your internal storage. So, make sure to back up your photos and other important stuff on your internal storage to PC.
The LineageOS 15.1 is Android Oreo-based customized build. It provides near to stock experience of Android. And… gives you the latest security updates and is the base ROM for many other ROMs like Resurrection and Pixel Experience. It has always been an ideal ROM since its arrival. So without any ado lets see how to Install Official LineageOS 15.1 ROM on Sony Xperia Tablet Z LTE/Wi-Fi.
Preparations
Charge your device at least 50% before flashing the ROM.
Backup your device to make sure you’ve all the important data if something doesn’t go as per the plan.
How to Install Official LineageOS 15.1 ROM on Sony Xperia Tablet Z LTE/Wi-Fi
Make sure you have the TWRP recovery installed on your phone.
Also, ensure that you have copied the Gapps and Official OS 15.1 ROM files after installing TWRP.
Power down your smartphone.
Boot in recovery mode by pressing and holding Volume Up and Power Button at the same time. When the screen flickers, release all buttons and you will see the recovery screen in a few seconds.
Make a Nandroid backup of your device in TWRP recovery. To do this, navigate to Backup option, select the partitions available and swipe right to make a backup.
Format your device, once the backup is completed.
In TWRP recovery, click on Wipe »Advanced Wipe. Select data, system, cache and, Dalvik-cache on this page and wipe them.
In the TWRP, click on Install » Install Zip » Locate and select the Official OS ROM file. Swipe screen to flash this file.
Similarly, flash the Gapps for Android Pie.
In the end, get back to the main menu in TWRP and click on Wipe » Advanced Wipe » Select Cache & Dalvik Cache » Swipe screen to wipe.
After wiping, reboot your device.
That’s all. The first boot will take some time as it needs to build the cache. Once the device boots up, you can see the Android Pie setup screen.
Sony Xperia ZL got released in March 2013 and marked as a featured flagship from Sony as of that time. Aside from a few minor gripes, Sony has put together a great device with the Xperia ZL. The phone looks great and feels good in the hand even with the large display. The device came with Android 4.1.2 Jelly Bean out of the box. The OS runs on Sony’s own Timescape UI, itself a very beautiful and navigable user interface. Updating the interface always boost your device with a plethora of customizations, System Apps, Layouts and so many things. Official build based on Android 8.1 Oreo to this device has been released. Here is a simple guide on how to download and Install Official LineageOS 15.1 ROM on Sony Xperia ZL.
Even with a 5-inch display, the Xperia ZL is no harder to use in one hand than smaller devices with very small bezels and on-screen navigation buttons. Sony went all the way on making sure the Xperia ZL had every high-end spec available to it when the phone was announced. Making this phone tick is a Snapdragon S4 Pro (APQ8064) processor clocked at 1.5GHz, backed up by 2GB of RAM and 16GB of internal storage. On the front of the device you’ll find a pleasantly pixel-dense 5-inch 1080×1920 display, and around back you’ll see the camera pod holding a 13MP camera. There is an unusual hardware bit on the Sony Xperia ZL, though. There’s a flip-out plastic hatch on the rear that hides the microSD memory card and SIM slot, and the user-facing camera is in a very unusual position. It’s near the bottom-right of the screen, in the bezel.
LineageOS 15.1 ROM
The LineageOS is an AOSP based aftermarket custom ROM and is a continuation to the highly popular CyanogenMod ROM. It brings stock Android interface to your device along with a plethora of customizations.. It’s heavily skinned & tweaked for better performance. It has got all those features a common user needs. LineageOS ROMs are quite stable. They are ROMs just ported from the CM branch. No major changes are there between the initial LineageOS builds and the last CM builds. If you observe Google’s vanilla Android OS and Lineage OS, you’ll find a lot of granular settings in the latter. You can customize your device to your own taste and have more security options as well. You might experience random reboots and minor glitches in the functionality but its splendid customizations drop shadow over them.
Installing a custom ROM is quite simple and you will need a custom ROM like TWRP to install flashable ZIP files. As installing the ROM would wipe your device, make sure to take a nandroid backup. This ensures that you have a complete backup of your device in case you run into boot loop issue or a bricked device. However, the nandroid backup doesn’t include your internal storage. So, make sure to back up your photos and other important stuff on your internal storage to PC. So without any ado lets see how to Install Official LineageOS 15.1 ROM on Sony Xperia ZL.
Preparations
Charge your device at least 50% before flashing the ROM.
Backup your device to make sure you’ve all the important data if something doesn’t go as per the plan.
How to Install Official LineageOS 15.1 ROM on Sony Xperia ZL
Make sure you have the TWRP recovery installed on your phone.
Also, ensure that you have copied the Gapps and Official OS 15.1 ROM files after installing TWRP.
Power down your smartphone.
Boot in recovery mode by pressing and holding Volume Up, Home button and Power Button at the same time. When the screen flickers, release all buttons and you will see the recovery screen in a few seconds.
Make a Nandroid backup of your device in TWRP recovery. To do this, navigate to Backup option, select the partitions available and swipe right to make a backup.
Format your device, once the backup is completed.
In TWRP recovery, click on Wipe »Advanced Wipe. Select data, system, cache and, Dalvik-cache on this page and wipe them.
In the TWRP, click on Install » Install Zip » Locate and select the Official OS ROM file. Swipe screen to flash this file.
Similarly, flash the Gapps for Android Pie.
In the end, get back to the main menu in TWRP and click on Wipe » Advanced Wipe » Select Cache & Dalvik Cache » Swipe screen to wipe.
After wiping, reboot your device.
That’s all. The first boot will take some time as it needs to build the cache. Once the device boots up, you can see the Android Pie setup screen.
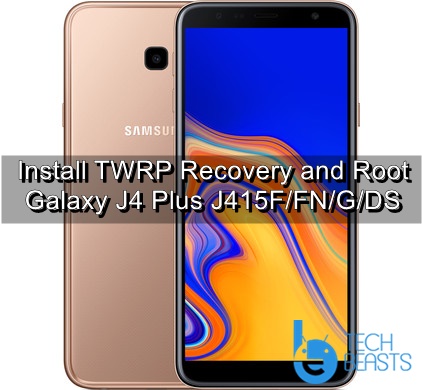
This is the guide to install TWRP Recovery and Root Galaxy J4 Plus. By following the steps given below, you will be able to install TWRP Recovery on Galaxy J4 Plus first. After installing the TWRP Recovery, steps to root Galaxy J4 Plus J415F/FN/G/DS will come up. This is a lengthy guide and it requires your undivided attention. If you successfully want to flash a custom recovery on your J4 Plus and also root it, you must follow the steps carefully. Before we move towards the steps, let us take a look at the Galaxy J4 Plus, the uses of TWRP recovery and Root.
Install TWRP Recovery and Root Galaxy J4 Plus
About the Galaxy J4+
In September this year, Samsung released the Galaxy J4+. This is a new mid-range device in the Galaxy J series. Galaxy J4+ is the first smartphone in the Galaxy J series to come with an infinity display. Galaxy J4+ has a side-mounted fingerprint scanner which also happens to be unique for a Samsung smartphone. The Galaxy J4+ has a 6.0-inches IPS LCD display. It has a resolution of 720 x 1480 pixels. This phone is powered by Qualcomm Snapdragon 425 SoC. There is Adreno 308 GPU in this phone. Galaxy J4+ has a RAM of 2GB or 3GB and its internal storage is 16GB or 32GB. At the back, this phone has a 13MP single camera. On the front, it has a single 5MP camera. Galaxy J4+ runs on Android Oreo out of the box. It has a battery of 3300 mAh under the hood.
Samsung Galaxy J4+ comes in at a price of around $180. This is not a really cheap mid-range smartphone, especially considering the choices given by manufacturers like Huawei and Xiaomi. The Galaxy J4+ is a good choice for those who want a phone having a better build quality. Otherwise, this phone has got nothing special.
TWRP Recovery for Galaxy J4 Plus
Galaxy J4 Plus comes with very mediocre hardware and software. If you wish to get the full out of your Galaxy J4 Plus, flashing TWRP recovery is the way to go. TWRP recovery will open your ways for custom operating systems. Most of the custom ROMs come in the form of ZIP files that you can flash via TWRP recovery only. If you are looking forward to making a Nandroid backup, and also backup all other partitions of your Galaxy J4 Plus, you will find all those options in the TWRP recovery. The recovery also has an inbuilt terminal that can be used to sideload applications, custom ROMs, and Mods from your computer. There is a wipe option that will let you wipe Cache, Dalvik Cache, and the individual partitions of your phone. The TWRP Recovery has advanced options for the users who want to go the extra mile with the customization on their device.
TWRP runs in the bootloader of the phone. It is also useful if something goes wrong with your phone and you want to restore it back to the working state. TWRP is often useful to recover a soft-bricked Android smartphone. Flashing TWRP is not recommended by the phone makers, however, if you think that you can handle it well, you can install it by following the appropriate instructions.
What does Root mean for Galaxy J4 Plus?
Rooting your Galaxy J4 Plus will get the system access to applications. This would mean that any application that requires root access, will be able to modify the system files of your phone. For example, you want to add a new feature to the UI of your phone and you are using an application to add it, that applications will ask you for the permissions to modify the System UI files. As soon as you grant permission to that application, it will modify the System UI to add that new feature. Similarly, if you want to back up the data files of applications, you will use an application like Titanium Backup to pull those backups from the system directories of your phone. The root is useful to introduce new features and also to enhance the performance and battery life of your phone. Just like the TWRP recovery flashing, Rooting your phone is also a custom process which is not recommended by the phone companies. It is totally up to the users whether they want to root their phone or not.
Install TWRP Recovery and Root Galaxy J4 Plus
Preparations
This guide is for the Galaxy J4 Plus J415F/FN/G/DS. Do not try on any other phone.
Backup all of your data as this process will wipe your phone.
Now press and hold Volume Down + Power button for a while. As your phone shows Download Mode, press Volume Up to continue.
Connect your phone to the computer now.
On your computer, open Odin3.exe.
While your phone is connected already, Odin should show “Added” in the log box, and also show a Blue light in the ID:COM box. This will mean a successful connection.
Go to Options in Odin and uncheck“Auto Reboot” if it is checked. Only F.Reset.Time should be checked.
Now come back to the main screen in Odin and click on AP tab. Select the TWRP Recovery.tar file in the AP tab.
Click on the Start button to flash TWRP now.
TWRP will be flashed in a few seconds.
After TWRP has been flashed, your phone will not reboot as we have disabled Auto Reboot. Follow the procedure given below now.
Root Galaxy J4 Plus J415F/FN/G/DS
While your phone is still connected to the computer, press and hold Volume Down + Power button for about 7-8 seconds.
As soon as the screen of your phone goes black, switch from Volume Down to Volume Up button. This will take your phone into the TWRP recovery.
Now TWRP will ask you if you want to allow modifications. Swipe the screen to allow now.
TWRP Recovery
In TWRP, click on Wipe > Format Data > Type Yes. Your phone will be formatted now.
Now go back to the main menu in TWRP and click on Reboot > Recovery. Your Galaxy J4+ will reboot into the Recovery.
By this time, you should have a Galaxy J4 Plus ready for custom ROM and Mods. You can now unleash the full potential of your phone. Those of you who wish to unroot the device and go back to stock firmware, they can flash a stock ROM at any time. Here is a guide to install stock Android Oreo on Samsung Galaxy phones. If you have any queries or suggestions, feel free to reach out to us. We will try our best to reach out to you as soon as we get your comment or message.
The credit for this recovery and root procedure goes to Ashyx.
Sony Xperia V got released in December 2012 which is a pretty cool device as of that time. The device came with Android 4.0.4 Ice Cream Sandwich out of the box. Running on top of Ice Cream Sandwich is Sony’s own Timescape UI, itself a very beautiful and navigable user interface. But the outdated ROM’s will always find a fence for the new interface and customizations. Round the corner, there is an official build based on Android 8.1 Oreo to this device. Here is a simple guide on how to download and Install Official LineageOS 15.1 ROM on Sony Xperia V.
The front features a black slate consisting of a 4.3-inch display and the black bezel surrounding it. At the top is the phone speaker grill with the front-facing camera on the left and a notification light found on the top right. The 4.3 inches might not sound as appealing as the display offerings found on other devices, but rest assured that Sony has the capability to create a nice viewing experience on their Xperia phones. As far as the battery goes, its capacity coupled with whatever optimizations Sony has managed to put into its dual-core 1.5 GHz Krait Snapdragon processor affords the Xperia V decent longevity. Over that, as far as the rear camera is concerned this mobile has a 13 MP camera. Other sensors include a Light sensor, Proximity sensor, Accelerometer, Compass, Gyroscope.
LineageOS 15.1 ROM
The LineageOS is an AOSP based aftermarket custom ROM and is a continuation to the highly popular CyanogenMod ROM. It brings stock Android interface to your device along with a plethora of customizations.. It’s heavily skinned & tweaked for better performance. It has got all those features a common user needs. LineageOS ROMs are quite stable. They are ROMs just ported from the CM branch. No major changes are there between the initial LineageOS builds and the last CM builds. If you observe Google’s vanilla Android OS and Lineage OS, you’ll find a lot of granular settings in the latter. You can customize your device to your own taste and have more security options as well. You might experience random reboots and minor glitches in the functionality but its splendid customizations drop shadow over them.
The LineageOS 15.1 is Android Oreo based customized build. It provides near to stock experience of Android. And… gives you the latest security updates and is the base ROM for many other ROMs like Resurrection and Pixel Experience. It has always been an ideal ROM since its arrival. So without any ado lets see how to Install Official LineageOS 15.1 ROM on Sony Xperia V.
Preparations
Charge your device at least 50% before flashing the ROM.
Backup your device to make sure you’ve all the important data if something doesn’t go as per the plan.
How to Install Official LineageOS 15.1 ROM on Sony Xperia V
Make sure you have the TWRP recovery installed on your phone.
Also, ensure that you have copied the Gapps and Official OS 15.1 ROM files after installing TWRP.
Power down your smartphone.
Boot in recovery mode by pressing and holding Volume Up and Power Button at the same time. When the screen flickers, release all buttons and you will see the recovery screen in a few seconds.
Make a nandroid backup of your device in TWRP recovery. To do this, navigate to Backup option, select the partitions available and swipe right to make a backup.
Format your device, once the backup is completed.
In TWRP recovery, click on Wipe »Advanced Wipe. Select data, system, cache and, Dalvik-cache on this page and wipe them.
In the TWRP, click on Install » Install Zip » Locate and select the Official OS ROM file. Swipe screen to flash this file.
Similarly, flash the Gapps for Android Pie.
In the end, get back to the main menu in TWRP and click on Wipe » Advanced Wipe » Select Cache & Dalvik Cache » Swipe screen to wipe.
After wiping, reboot your device.
That’s all. The first boot will take some time as it needs to build the cache. Once the device boots up, you can see the Android Pie setup screen.
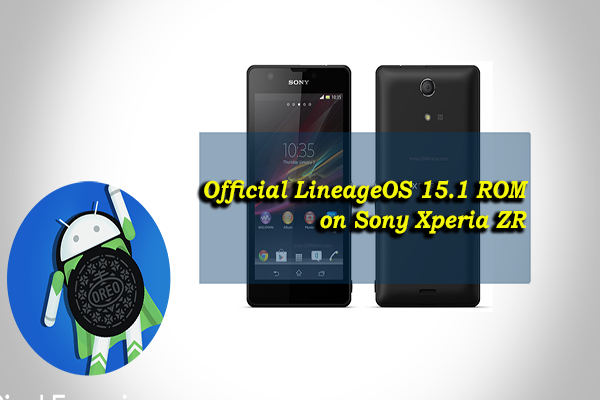
Sony Xperia ZR got released in June 2013 and marked as a featured flagship from Sony as of that time. The device came with Android 4.1.2 Jelly Bean out of the box. The OS runs on Sony’s own Timescape UI, itself a very beautiful and navigable user interface. Updating the interface always boost your device with a plethora of customizations, System Apps, Layouts and so many things. Official build based on Android 8.1 Oreo to this device has been released. Here is a simple guide on how to download and Install Official LineageOS 15.1 ROM on Sony Xperia ZR.
Sizable display with very good pixel density & powerful chipset good enough for device’s flawless performance. Based on the similar chipset and almost identical hardware specs from the older siblings, the Xperia Z and Xperia ZL, the Xperia ZR is an ideal device with some patches filled. The front is an entire glass panel with just the opening for the earpiece on the top. Alongside are the front camera and a translucent window for the sensors beneath it. The device is powered by Qualcomm Snapdragon S4 Pro APQ8064 chipset which is a quad-core 1.5 GHz Krait coupled with 2GB RAM. Graphics required to run this device is powered by Adreno 302.
LineageOS 15.1 ROM
Lineage OS is a popular after-market custom ROM for Android phones and it runs stock Android OS with a wide variety of customizations. If you observe Google’s vanilla Android OS and Lineage OS, you’ll find a lot of granular settings in the latter. You can customize your device to your own taste and have more security options as well. The LineageOS is an AOSP based aftermarket custom ROM and is a continuation of the highly popular CyanogenMod ROM. It brings stock Android interface to your device along with a plethora of customizations. It’s heavily skinned & tweaked for better performance. It has got all those features a common user needs. LineageOS ROMs are quite stable. You can customize your device to your own taste and have more security options as well. You might experience random reboots and minor glitches in the functionality but its splendid customizations drop shadow over them.
Installing a custom ROM is quite simple and you will need a custom ROM like TWRP to install flashable ZIP files. As installing the ROM would wipe your device, make sure to take a nandroid backup. This ensures that you have a complete backup of your device in case you run into boot loop issue or a bricked device. However, the nandroid backup doesn’t include your internal storage. So, make sure to back up your photos and other important stuff on your internal storage to PC. So without any ado lets see how to Install Official LineageOS 15.1 ROM on Sony Xperia ZR.
Preparations
Charge your device at least 50% before flashing the ROM.
Backup your device to make sure you’ve all the important data if something doesn’t go as per the plan.
How to Install Official LineageOS 15.1 ROM on Sony Xperia ZR
Make sure you have the TWRP recovery installed on your phone.
Also, ensure that you have copied the Gapps and Official OS 15.1 ROM files after installing TWRP.
Power down your smartphone.
Boot in recovery mode by pressing and holding Volume Up/Volume Down and Power Button at the same time. When the screen flickers, release all buttons and you will see the recovery screen in a few seconds.
Make a nandroid backup of your device in TWRP recovery. To do this, navigate to Backup option, select the partitions available and swipe right to make a backup.
Format your device, once the backup is completed.
In TWRP recovery, click on Wipe »Advanced Wipe. Select data, system, cache and, Dalvik-cache on this page and wipe them.
In the TWRP, click on Install » Install Zip » Locate and select the Official OS ROM file. Swipe screen to flash this file.
Similarly, flash the Gapps for Android Pie.
In the end, get back to the main menu in TWRP and click on Wipe » Advanced Wipe » Select Cache & Dalvik Cache » Swipe screen to wipe.
After wiping, reboot your device.
That’s all. The first boot will take some time as it needs to build the cache. Once the device boots up, you can see the Android Pie setup screen.
This is the guide to install TWRP Recovery and Root Galaxy J6 Plus. As you follow this guide, you will be able to root Galaxy J6 Plus J610F/FN/G/DS as well. This guide will first explain how to install TWRP recovery on Galaxy J6 Plus. After installing TWRP, the steps to root Galaxy J6 Plus will come up. Before we install TWRP Recovery and Root Galaxy J6 Plus, let us take a look at what this device has to offer.
Install TWRP Recovery and Root Galaxy J6 Plus
About Galaxy J6+
Samsung released the Galaxy J6+ this year in October. Galaxy J6+ is the first Samsung device to have a side-mounted fingerprint scanner. The Galaxy J6+ comes with a 6.0-inches IPS LCD screen. It has a resolution of 720 x 1480 pixels. This phone is powered by Qualcomm Snapdragon 425 SoC which is accompanied by the Adreno 308 GPU. Galaxy J6+ has the internal storage of 64GB or 32GB along with a RAM of 4GB or 3GB. It has a dual camera system at the back including a 13MP shooter and another 5MP shooter. On the front, it has a 5MP shooter. Galaxy J6+ has the Dolby Atmos tuned sound. It has got a 3300 mAh battery under the hood. This phone runs on Android Oreo out of the box. Samsung has constructed this phone in Black Gray, Red, and Blue Colors. It costs about $240. Galaxy J6+ is an expensive midrange smartphone.
Assuming that you have a clear idea about the Galaxy J6 Plus, let us learn a little bit about the TWRP recovery and root now.
Why install TWRP Recovery and Root Galaxy J6 Plus?
TWRP recovery runs in the bootloader of the device. Loading TWRP recovery is just like loading the BIOS setup on your Windows PC. The purpose of a custom recovery like TWRP is to give the users an extended choice of options to tweak their device. TWRP recovery allows the Android smartphone users to make Nandroid Backups, flash custom ZIP files, flash root files, install mods like Xposed, backup all the partitions, wipe cache and Dalvik cache and a lot more. TWRP recovery is quite useful when something goes wrong and you quickly want to recover your device. It is also useful to recover your soft-bricked Android smartphone. Most of the custom operations on an Android smartphone take place with the help of a custom recovery like the TWRP.
Root access is similar to the TWRP recovery, but root works inside the phone. The term root means that applications on your phone get complete access to your phone’s system files. For example, there is an application that you are using to make changes to the UI of your phone, it will be given the permission to tweak the System UI files of your phone. It is not like the applications access the system files on their own. When your device is rooted, all applications seeking access to system files first ask the device administrator for permission. It is totally up to you whether you want to allow a specific application to access any system files or not. Android users root their devices to add new features to their phones. There is a handful of root applications that can make the battery life and performance of your Android phone much better.
The TWRP Recovery and Root method for the Galaxy J6 Plus has been presented by none other than Ashyx.XDA Recognized contributor Ashyx has already presented such methods for dozens of Android smartphones.
Assuming that Galaxy J6 Plus owners have a clear idea of what TWRP and root are, we can now head towards the guide to install TWRP recovery and root Galaxy J6 Plus.
Install TWRP Recovery and Root Galaxy J6 Plus
Preparations
This guide is for the Galaxy J6 Plus J610F/FN/G/DS. Do not try on any other phone.
Backup all of your data as this process will wipe your phone.
Now press and hold Volume Down + Power button for a while. As your phone shows Download Mode, press Volume Up to continue.
Connect your phone to the computer now.
On your computer, open Odin3.exe.
While your phone is connected already, Odin should show “Added” in the log box, and also show a Blue light in the ID:COM box. This will mean a successful connection.
Go to Options in Odin and uncheck“Auto Reboot” if it is checked. Only F.Reset.Time should be checked.
Now come back to the main screen in Odin and click on AP tab. Select the TWRP Recovery.tar file in the AP tab.
Click on the Start button to flash TWRP now.
TWRP will be flashed in a few seconds.
After TWRP has been flashed, your phone will not reboot as we have disabled Auto Reboot. Follow the procedure given below now.
Root Galaxy J6 Plus J610F/FN/G/DS
While your phone is still connected to the computer, press and hold Volume Down + Power button for about 7-8 seconds.
As soon as the screen of your phone goes black, switch from Volume Down to Volume Up button. This will take your phone into the TWRP recovery.
Now TWRP will ask you if you want to allow modifications. Swipe the screen to allow now.
TWRP Recovery
In TWRP, click on Wipe > Format Data > Type Yes. Your phone will be formatted now.
Now go back to the main menu in TWRP and click on Reboot > Recovery. Your Galaxy J6+ will reboot into the Recovery.
By this time, you should have a Galaxy J6 Plus ready for custom ROM and Mods. You can now unleash the full potential of your phone. Those of you who wish to unroot the device and go back to stock firmware, they can flash a stock ROM at any time. Here is a guide to install stock Android Oreo on Samsung Galaxy phones. If you have any queries or suggestions, feel free to reach out to us. We will try our best to reach out to you as soon as we get your comment or message.
The Xperia Z was Sony’s flagship phone for 2013 and continued the screen size and resolution arms race with its 5in, 1,920×1,080 display, which compares well to contemporary rivals such as the Full HD-equipped HTC One. The phone looks great and feels good in the hand even with the large display. The device started with Android 4.4 Kit Kat OS initially, but that’s not the end of the road for it. Early in 2015, Sony is promising to update the Xperia Z to Android 5.0, effectively giving the phone a whole new lease of life. Recent news is that there is an Official Android 8.1 Oreo-based custom ROM ported to this device. Here is a simple guide on how to download and Install Official LineageOS 15.1 ROM on Sony Xperia Z.
Both sides of the Xperia Z are encased in a tempered, shatter-resistant glass that already makes the phone look pretty darn sleek. That black slate look that I love so much is here, as the phone is, save for its various logos and legal information, completely black. On the front, you don’t even get any capacitive buttons because the Xperia UI has it built in like a Nexus device. The front camera is a 2.2-MP shooter powered by an EXMOR R sensor capable of HDR. It also has all the specifications (during that time) you would expect from a high-end smartphone, including a quad-core 1.5GHz processor and a camera with a huge 13-megapixel sensor. It features a 5-inch display with 1080 x 1920 pixels, 16:9 ratio resolution. The result is a pretty great TFT capacitive display that unfortunately has a few minor but noticeable flaws.
LineageOS 15.1 ROM
The LineageOS is an AOSP based aftermarket custom ROM and is a continuation to the highly popular CyanogenMod ROM. It brings stock Android interface to your device along with a plethora of customizations.. It’s heavily skinned & tweaked for better performance. It has got all those features a common user needs. LineageOS ROMs are quite stable. They are ROMs just ported from the CM branch. No major changes are there between the initial LineageOS builds and the last CM builds. If you observe Google’s vanilla Android OS and Lineage OS, you’ll find a lot of granular settings in the latter. You can customize your device to your own taste and have more security options as well. You might experience random reboots and minor glitches in the functionality but its splendid customizations drop shadow over them.
Installing a custom ROM is quite simple and you will need a custom ROM like TWRP to install flashable ZIP files. As installing the ROM would wipe your device, make sure to take a nandroid backup. This ensures that you have a complete backup of your device in case you run into boot loop issue or a bricked device. However, the nandroid backup doesn’t include your internal storage. So, make sure to back up your photos and other important stuff on your internal storage to PC.
The LineageOS 15.1 is Android Oreo-based customized build. It provides near to stock experience of Android. And… gives you the latest security updates and is the base ROM for many other ROMs like Resurrection and Pixel Experience. It has always been an ideal ROM since its arrival. So without any ado lets see how to Install Official LineageOS 15.1 ROM on Sony Xperia Z.
Preparations
Charge your device at least 50% before flashing the ROM.
Backup your device to make sure you’ve all the important data if something doesn’t go as per the plan.
How to Install Official LineageOS 15.1 ROM on Sony Xperia Z
Make sure you have the TWRP recovery installed on your phone.
Also, ensure that you have copied the Gapps and Official OS 15.1 ROM files after installing TWRP.
Power down your smartphone.
Boot in recovery mode by pressing and holding Volume Up/Volume Down and Power Button at the same time. When the screen flickers, release all buttons and you will see the recovery screen in a few seconds.
Make a nandroid backup of your device in TWRP recovery. To do this, navigate to Backup option, select the partitions available and swipe right to make a backup.
Format your device, once the backup is completed.
In TWRP recovery, click on Wipe »Advanced Wipe. Select data, system, cache and, Dalvik-cache on this page and wipe them.
In the TWRP, click on Install » Install Zip » Locate and select the Official OS ROM file. Swipe screen to flash this file.
Similarly, flash the Gapps for Android Pie.
In the end, get back to the main menu in TWRP and click on Wipe » Advanced Wipe » Select Cache & Dalvik Cache » Swipe screen to wipe.
After wiping, reboot your device.
That’s all. The first boot will take some time as it needs to build the cache. Once the device boots up, you can see the Android Pie setup screen.
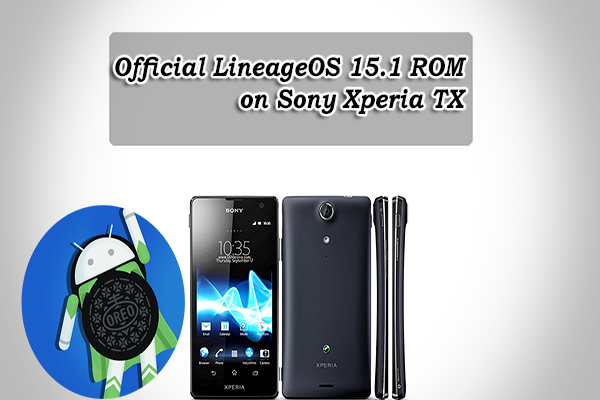
The Sony Xperia TX was released on October 2012 & is equally gorgeous, with its curved back, thin strip of silver, and mirror-like front. A sense of class, sophistication, and elegance emanates from this phone. Its insides, however, aren’t quite as impressive. The device comes with Android 4.0.4 Ice Cream Sandwich out of the box. Running on top of Ice Cream Sandwich is Sony’s own Timescape UI, itself a very beautiful and navigable user interface. The official builds of LineageOS 15.1 for Xperia TX are now available for download. Here is a simple guide on how to download and Install Official LineageOS 15.1 ROM on Sony Xperia TX.
The Xperia TX feels almost feather-light at 127 grams and is pocketable with its dimensions of 131 x 68.6 x 8.6 mm. It’s mostly made of plastic and glass. The front looks like a black rectangle surrounded by a thin white frame, a great visual move. Only the speaker grille, the Sony and Xperia logos, and the 1.3 MP front camera are visible, plus the sensors and the notification LED if you look close enough. When you unlock the device, the XPERIA logo lights up. It’s a very cool touch. The high pixel density gives you crisp images on the Xperia TX’s screen. Videos and images appear vivid on the screen but maybe a little oversaturated. The device is powered by Qualcomm Snapdragon S4 MSM8260A chipset. The rear camera is of 13MP with Autofocus.
LineageOS 15.1 ROM
The LineageOS 15.1 is an extremely stable ROM. It’s heavily skinned & tweaked for better performance. It has got all those features a common user needs. LineageOS ROMs are quite stable. They are ROMs just ported from the CM branch. No major changes are there between the initial LineageOS builds and the last CM builds. If you observe Google’s vanilla Android OS and Lineage OS, you’ll find a lot of granular settings in the latter. You can customize your device to your own taste and have more security options as well. You might experience random reboots and minor glitches in the functionality but its splendid customizations drop shadow over them.
Preparations
Charge your device at least 50% before flashing the ROM.
Backup your device to make sure you’ve all the important data if something doesn’t go as per the plan.
How to Install Official LineageOS 15.1 ROM on Sony Xperia TX
Make sure you have the TWRP recovery installed on your phone.
Also, ensure that you have copied the Gapps and Official OS 15.1 ROM files after installing TWRP.
Power down your smartphone.
Boot in recovery mode by pressing and holding Volume Up and Power Button at the same time. When the screen flickers, release all buttons and you will see the recovery screen in a few seconds.
Make a nandroid backup of your device in TWRP recovery. To do this, navigate to Backup option, select the partitions available and swipe right to make a backup.
Format your device, once the backup is completed.
In TWRP recovery, click on Wipe »Advanced Wipe. Select data, system, cache and, Dalvik-cache on this page and wipe them.
In the TWRP, click on Install » Install Zip » Locate and select the Official OS ROM file. Swipe screen to flash this file.
Similarly, flash the Gapps for Android Pie.
In the end, get back to the main menu in TWRP and click on Wipe » Advanced Wipe » Select Cache & Dalvik Cache » Swipe screen to wipe.
After wiping, reboot your device.
That’s all. The first boot will take some time as it needs to build the cache. Once the device boots up, you can see the Android Pie setup screen.
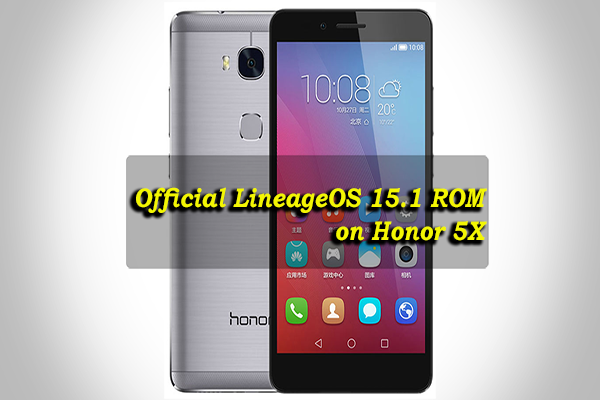
The Honor 5X is yet another affordable handset from Huawei’s spin-off brand, Honor during 2015. The Honor 5X disclosed initially with EMUI 3.1 skin based on Android 5.1 Lollipop and slowly entered into EMUI 4.0 based Marshmallow. The software package is of course, very different from stock Android, but that isn’t necessarily a bad thing. Customizations are seen in the form of themes, transition animations, and home screen grid, and you also get some fun features like shake to re-align icons and auto-align. Quickly there is an Android 8.1 Oreo-based Custom ROM build to this device. Here is a simple guide on how to download and Install Official LineageOS 15.1 ROM on Honor 5X.
Great battery life, Premium metal build, Fast and accurate fingerprint scanner, Useful gesture controls with a scanner, Affordable price point are some of the key features. Honor 5X’s premium allure is let down by its plastic top and bottom edges. The edges are designed to look like metal and have a textured finish so you won’t notice them from a distance. But up close they look like they’ve been awkwardly bolted on and break the illusion that the Honor 5X is a top-end phone. The device features a 5.5-inch IPS screen with1080 x 1920 resolution & 401ppi density. This easily beat 2015 special affordable smartphone, the Moto G, which features a slightly disappointing 720p display.
LineageOS 15.1 ROM
The LineageOS is an AOSP based aftermarket custom ROM and is a continuation to the highly popular CyanogenMod ROM. It brings stock Android interface to your device along with a plethora of customizations.. It’s heavily skinned & tweaked for better performance. It has got all those features a common user needs. LineageOS ROMs are quite stable. They are ROMs just ported from the CM branch. No major changes are there between the initial LineageOS builds and the last CM builds. If you observe Google’s vanilla Android OS and Lineage OS, you’ll find a lot of granular settings in the latter. You can customize your device to your own taste and have more security options as well. You might experience random reboots and minor glitches in the functionality but its splendid customizations drop shadow over them.
Installing a custom ROM is quite simple and you will need a custom ROM like TWRP to install flashable ZIP files. As installing the ROM would wipe your device, make sure to take a nandroid backup. This ensures that you have a complete backup of your device in case you run into boot loop issue or a bricked device. However, the nandroid backup doesn’t include your internal storage. So, make sure to back up your photos and other important stuff on your internal storage to PC. So without any ado lets see how to Install Official LineageOS 15.1 ROM on Honor 5X.
Preparations
Charge your device at least 50% before flashing the ROM.
Backup your device to make sure you’ve all the important data if something doesn’t go as per the plan.
How to Install Official LineageOS 15.1 ROM on Honor 5X
Make sure you have the TWRP recovery installed on your phone.
Also, ensure that you have copied the Gapps and Official OS 15.1 ROM files after installing TWRP.
Power down your smartphone.
Boot in recovery mode by pressing and holding Volume Up and Power Button at the same time. When the screen flickers, release all buttons and you will see the recovery screen in a few seconds.
Make a nandroid backup of your device in TWRP recovery. To do this, navigate to Backup option, select the partitions available and swipe right to make a backup.
Format your device, once the backup is completed.
In TWRP recovery, click on Wipe »Advanced Wipe. Select data, system, cache and, Dalvik-cache on this page and wipe them.
In the TWRP, click on Install » Install Zip » Locate and select the Official OS ROM file. Swipe screen to flash this file.
Similarly, flash the Gapps for Android Pie.
In the end, get back to the main menu in TWRP and click on Wipe » Advanced Wipe » Select Cache & Dalvik Cache » Swipe screen to wipe.
After wiping, reboot your device.
That’s all. The first boot will take some time as it needs to build the cache. Once the device boots up, you can see the Android Pie setup screen.