

Good news for the Galaxy Note 9 owners is here. Samsung has started the official rollout of the Android Pie update. The update has hit the German region first of all. Galaxy Note 9 owners can start updating their phone to the latest Android Pie XXU2CRLT firmware now. This is the guide to update Galaxy Note 9 to Android Pie XXU2CRLT firmware. This firmware is based on the latest One UI. Before you update your Galaxy Note 9 to Android Pie One UI, it is important to know what’s new in this update. Let us take a look at the Android Pie One UI features for Galaxy Note 9 and then move towards the steps to update the phone.

Android Pie for Galaxy Note 9 – What’s new?
The Android Pie for Samsung Galaxy smartphones is a major update. It’s not major because it shifts the Android version to Android 9.0. The update carries a lot of features and enhancements that we have never seen before. This is, in fact, the biggest software update to ever happen for the Samsung Galaxy smartphones. In this update, Samsung has added the most demanded features from the users. Samsung has also completely overhauled the looks of its UI.
One UI – An enhanced look

First things first. This update brings a brand new UI called the One UI. With this update, Samsung says goodbye to the Samsung Experience UI. The Experience UI will be a part of Android Oreo firmware only. All the devices which will be getting the Android Pie update, they will get the One UI as well. The One UI has got the looks that Samsung Galaxy owners have been waiting for.
Samsung One UI is pretty much inspired by the UI of the stock Android Pie. It has got rounded icons. It has got the rounded recent application panel. The Samsung One UI also brings a brand new look for the toggles in the notifications area. You will find all the toggles having round icons now. Samsung has added the Navigation gestures to the phone. You can enable Navigation gestures to stop using the typical navigation buttons on your Galaxy handset.
The settings application has been completely upgraded. New icons, new colors, new menus are there. Samsung has moved some of the settings from their previous location to a new location. The About Phone section has sorted the information in a much better way now.
Features
The One UI is loaded with new features. It is not just about the looks of the phones. Users will now find the Adaptive Battery mode in the phone. This mode is supposed to learn the usage of the phone owners in order to set the battery consumption accordingly. There is the new Night Mode on the phone. The Night Mode turns the whole UI into a dark interface. This is super beneficial to save battery life on the Super AMOLED panels.
Samsung has also added the native private DNS support now. You can now use any trust-worthy DNS on your phone. For example, you can use a good DNS to block Ads on your Galaxy Note 9 without any third-party application.
Furthermore, Samsung has revamped the UI of the Camera application. Some users are loving the new Camera UI while some are greatly disappointed. It is totally up to the personal choice of the users.
Overall, Samsung has enhanced the performance of the phones. This update is supposed to fix the bugs that existed in the Beta built of Android Pie or in the Android Oreo update.
Update Galaxy Note 9 to Android Pie XXU2CRLT Firmware
Update Galaxy Note 9 to Android Pie via OTA update
If your phone is running on Android Pie Beta build or Android Oreo, you can first of all check for the OTA update. To do so, open Settings > About Phone > Software Update > Check for update. If you are on Android Pie Beta Build, you will get an update of around 100 MB. You can update your phone right away to get the Android Pie official build.
If your phone was running on Android Oreo, you will get a good-sized software update. Download it and update the phone without going through any kind of complexity.
Update Galaxy Note 9 to Android Pie via Odin
Since the Android Pie is an incremental update, it is going to take a lot of time for this update to reach your region. In case you cannot wait for the OTA update, your best option is to go with the Odin installation. Installing this update via Odin is incredibly easy. All you have to do is to download the firmware manually and flash it on the go. Here is how to do this.
Preparations:
- At the moment, this update is available for Note N960F only. Make sure that you download the firmware for your phone’s model.
- Backup all of your previous data since we want to perform a clean software installation.
- Charge your phone up to 50% to avoid power loss during the installation process.
- Use original data cable to connect your Note 9 to the computer.
- Enable OEM Unlocking and USB Debugging on the Note 9.
- Disable Windows Firewall, Antivirus, and Samsung Smart Switch (if you have any of this) while using Odin.
- Follow the instructions carefully.
Required downloads
- Galaxy Note 9 Android Pie Update – Open this page and enter your model number. Download the Android 9 firmware.
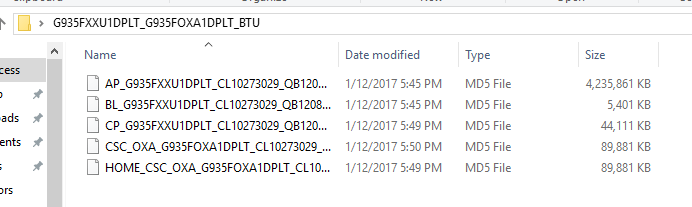
- Extract the downloaded firmware file to get the following files: AP, BL, CP, CSC, Home_CSC.
Firmware Files
- Extract the downloaded firmware file to get the following files: AP, BL, CP, CSC, Home_CSC.
- Odin 3.13.1 for PC – Download, and extract.
- Samsung USB Drivers – Download and install.
Install Galaxy Note 9 Android Pie Official Update
- Open Odin 3.13.1.exe on your computer.
- In Odin, click on options and make sure that the Auto Reboot and F.Reset.Time is checked. No other option should be checked.
- In Odin, click on the AP tab and select the AP file.
- In the BL tab, select the BL file.
- Under the CP, select the CP file.
- In CSC, select the CSC file if you want to wipe your phone and if you do not want to wipe data, select the Home_CSC file.
- It is always recommended to perform a clean installation.
- Now power down your Galaxy Note 9. Press and hold Volume Down + Home + Power button on the phone.
- As the phone boots showing a warning, press the Volume Up button to continue. Your phone is in the download mode now.
- Connect your phone to the computer now.
- As Odin shows the blue light in ID:COM box and “Added” in the log box, click the Start button.

Firmware Installation - Odin will now start flashing the firmware. It can take up to 7 minutes.
- Once done, your phone will automatically reboot.
- Disconnect the phone and enjoy the all-new Android Pie with One UI on it.
Conclusion
That’s all with the update process. Your phone should be running on a new firmware. If you have any questions or queries, feel free to ask them in the comments section below. You can always go back to Android Oreo firmware by flashing the Android Oreo firmware files. That is just in case you don’t like the new Android Pie update. If you have any suggestions for this guide, feel free to reach out to us through our contact us page.
")


