

Install Community Portal on Kodi. Community Portal is a program Add-on for Kodi, this Add-on will help you install all the famous Kodi Add-ons, you don’t have to individually add the source for each Add-on. You can also create your own custom build using Community Portal, this plugin also provides you the maintenance. Community Portal has a wide maintenance section and along with that large numbers of helpful tutorials. In this tutorial, We’ll show you how to Install Community Portal on Kodi 17.3 Krypton, you can use this method on FireStick, PC, Mac, Android, Raspberry Pi, and more.

Contents
*Must Do*:
- Now keep that in mind if you need a proper coverage of Kodi then we would suggest you install IPVanish the best and low-cost VPN. IPVanish is specially designed for Kodi and it has multiple high-speed servers with no throttling or logs.
- Learn how to enable Unknown Sources in Kodi. Click here.
Best Kodi Builds:
- Install Celtic Dragon Builds Kodi 17.3 Krypton
- Install Raze Reborn Builds Kodi 17.3 Krypton [Tutorial]
- Install Chappie Build Kodi 17.3 Krypton [ Tutorial ]
How-To Install Community Portal on Kodi:
We’ll tell you methods for both Kodi Builds Jarvis and Krypton, if you are running Kodi Jarvis then follow the method for Kodi 16.1 and if you are running Kodi Krypton then use the method for Kodi 17.3.
Install Community Portal on Kodi 16.1 Jarvis:
- Click on the System icon.
- Click on the File Manager.
- Click on Add Sources.
- Click on None.
- Type in URL: http://noobsandnerds.com/portal/, Click on OK.
- Now you have to name it ( Noobs) and Click OK.
- Head back to the main menu and click on System Settings-> Add-ons.
- Click on Install from Zip.
- Click on Noobs.
- Click on repository.noobsandnerds-2.0.zip.
- You have to wait for few seconds and you’ll see a pop-up saying NoobsandNerds Add-on is Enabled.
- select Install from Repository.
- Click noobsandnerds Repository.
- Click on Program Add-ons.
- Select Community Portal.
- Click Install.
Install Community Portal on Kodi 17.3 Krypton:
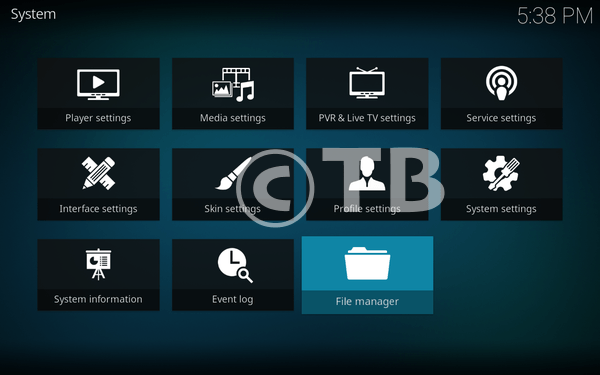
- Download Kodi and Install it. Launch Kodi, Click on Settings.

- Click on File Manager.
- Click on Add Sources.

- Click on None.
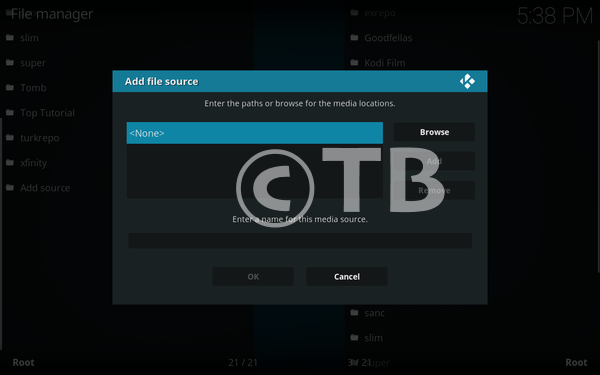
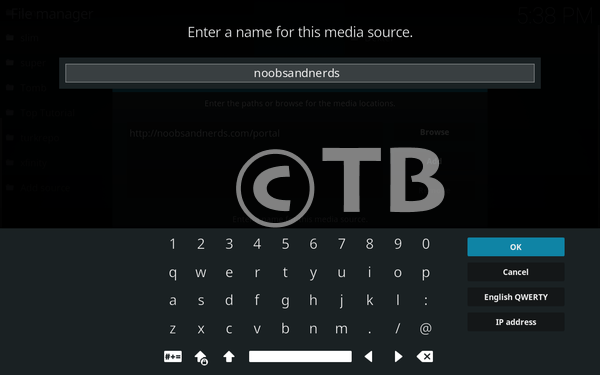
- Add this URL: http://noobsandnerds.com/portal – Name it noobsandnerds.
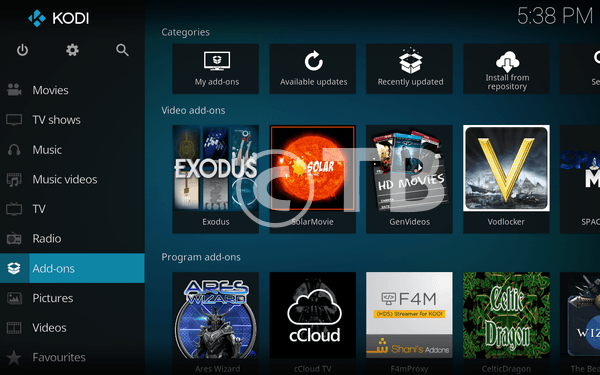
- Head back to the home page -> Click on Add-ons.
- Click on the Package Installer icon.

- Click on Install from ZIP File.
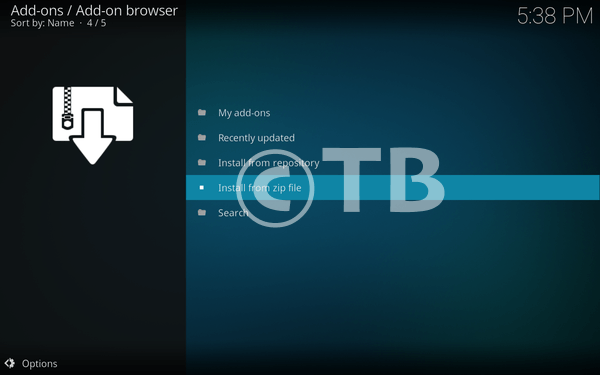
- Click on NoobsandNerds.
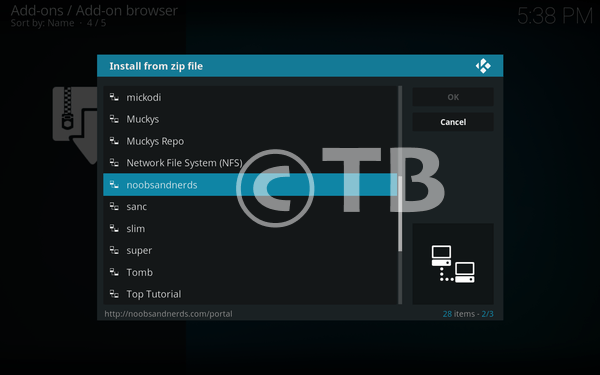
- Click on noobsandnerds Repo.
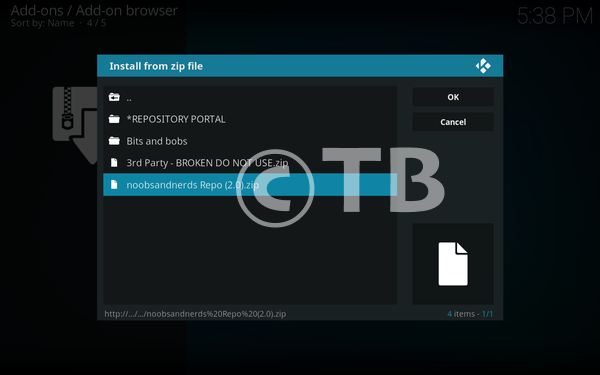
- You have to wait for few seconds When you see noobsandnerds add-on installed pop-up. Follow next step.
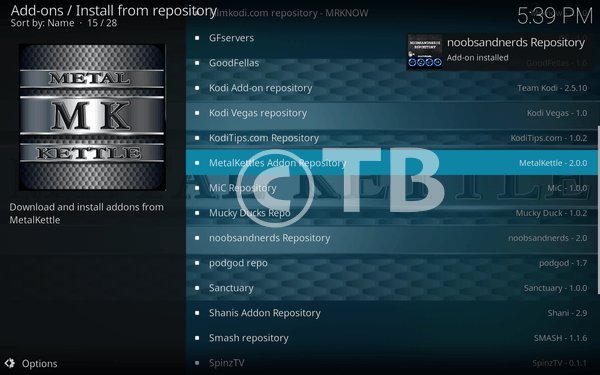
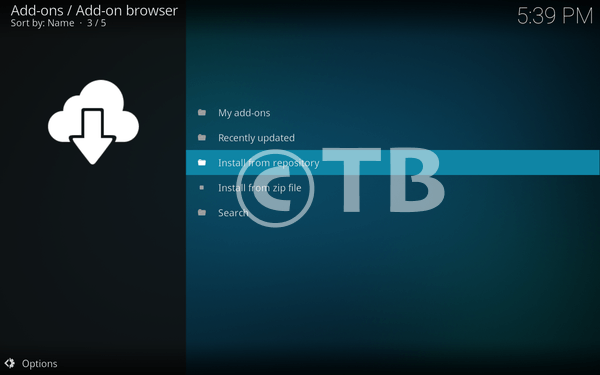
- Click on Install from Repository.
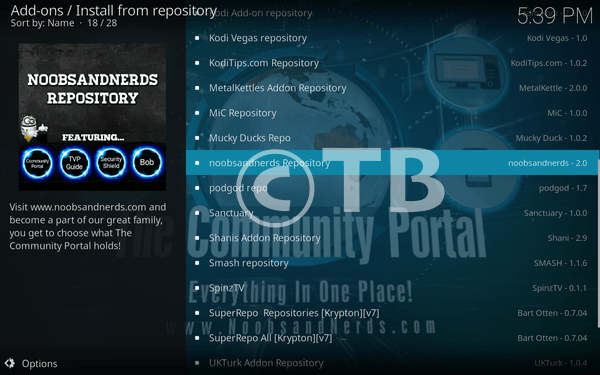
- Click on noobsandnerds Repository.
- Click on Program Add-ons -> Community Portal and press install.


")


