Home Blog Page 43

unJailbreak iOS 12 – 12.1.2 [Uninstall Unc0ver / Chimera ]

0
unJailbreak iOS 12 – 12.1.2 [Uninstall Unc0ver / Chimera ]

If you have Jailbroken your Apple device running iOS 12 – 12.1.2 and now for some reason you to unJailbreak iOS 12 – 12.1.2. This is the article worth reading for, you will learn how to unJailbreak iOS 12 – 12.1.2. We also tell you how to Uninstall Cydia, Unc0ver / Chimera.

But before we move on, let me remind you, once you have deleted or UnJailbreak iOS 12 – 12.1.2. You will lose all of your Tweaks, Apps, and Cydia. We have created a step by Step guide to delete Jailbreak on iOS 12. I made it short and to the point just follow the steps below.

unJailbreak iOS 12

unJailbreak iOS 12 – 12.1.2 [Uninstall Unc0ver / Chimera ]:

Step1: First of all, you need to turn off the auto lock feature. Because it will make things harder if we left it enabled. It’s easy, head over to the Settings -> Display & Brightness > Auto-Lock. Make sure your battery is charged and you are not running your device on low power mode.

Step2: You will also require the latest versions of both Chimera A12 or the unc0ver iOS 12 jailbreak app. You can download the latest versions from our homepage or I will share the link at the end of this post.

Step3: Now if you have uncover iOS 12.1.2 jailbreak app. Open the app, Head over to the settings and scroll, look for “Restore RootFS (rec0ver)“. Once you do Tap on it. Same goes for Chimera jailbreak app but for Chimera, you have to restart your device once and then Tap on “Restore RootFS“.

Step4: After selecting “Restore RootFS“, head back to the main screen of the app and Tap on Re-Jailbreak / Jailbreak / Restore Filesystem.

Step5: Now let the app do its work. When prompted, tap “Ok”. This process may take 15 to 20 minutes. Once the process is finished, you will be only left with unc0ver and Cydia app icons.

Step6: At this point, you have successfully unJailbreak iOS 12 – 12.1.2 on your iPhone or iPad. But since the Cydia apps and tweaks or not on your system now. You won’t be able to delete’em. However, you can delete unc0ver or Chimera app with ease.

Step7: In order to delete Cydia apps icon you need to factory reset your device. Please don’t try to restore your device in this situation. The best bet is to make a backup of your device using iTunes. Head over to the Settings > General > Reset > Erase All Content & Settings.

Step8: Now that you have erased all your content, it’s time put everything back. You should be careful, choose to restore from an iTunes backup. Don’t try to simply restore your device using iTunes. If you did, your device will be updated to the latest iOS version. After that, there is no coming back.

Jailbreak iOS 12.1.2:

Use the following link to Jailbreak your device again. We have both methods, you can either choose to do it with PC or Without PC.

Download Chimera iOS 12.2 Jailbreak [ iOS 12.1.3 – 12.2 ]

0
Download Chimera iOS 12.2 Jailbreak [ iOS 12.1.3 – 12.2 ]

Good news for Jailbreak lovers, Electra Team is not coming slow and they have released the Chimera iOS 12.2 jailbreak update. In this latest update for theirs, they have integrated Sock Puppet support. Moreover, this updated version is a complete package. With Chimera v1.2.2 comes the integration support of Ned Williamson’s tfp0 exploit and now you can Jailbreak iOS 12.2.

After their initial release, they pushed out two new versions. First, they said it was for testing, so they can be sure that this new update is working perfectly and it’s stable. At that time, they didn’t know, the newly released update doesn’t offer support for A7-A8 and A12(X) devices. That is not fun, it seems they were unaware of the fact that Sock Puppet exploit doesn’t work well with such type of devices.

Chimera 1.2.0 is now available on chimera.sh, adding support for A9-A11 devices on iOS 12.1.3 – 12.2. All devices on 12.0 – 12.1.2 are supported Chimera

That’s the reason behind disabling the support for A7-A8 and A12(X) devices. They need to make sure that they can work with Ned Williamson’s exploit so that they can provide a stable Jailbreak. You can read the following tweets for Electra Team.

Chimera iOS 12.2 Jailbreak

Still, Want to Try?

After knowing all this, you are still willing to give it a try. What Can I Say? Go ahead, if you have a device running iOS 12.1.3 through iOS 12.2. You can download Chimera v1.2.2 and Jailbreak your device. Those who are new to Chimera iOS 12.2 Jailbreak, they follow our instructions below.

Download Chimera v1.2.2:


Chimera iOS 12.2 Jailbreak:

iOS 12.2 Jailbreak
✔: Download Chimera IPA File and also download Cydia Impactor on your Mac or Windows PC.
✔: Connect your iPhone and launch Cydia Impactor. Your iPhone will be detected automatically.
✔: Now Drag and Drop Chimera IPA file on Cydia Impactor. You will be asked to enter your developer Apple ID. It doesn’t matter if you don’t have any. You can use your regular Apple ID.
✔: Once your Apple ID is verified, Cydia Impactor will start installing Chimera app on your iPhone.
✔: After the installation process is finished. Head over to your iPhone and open up Settings-> General -> Profile Management -> Tap on your Apple ID profile -> Tap Trust.
✔: Open Chimera app and Tap on Jailbreak. Sit back and let Chimera do its magic.

That’s all. You may find the following links interesting if you love Jailbreak.

Harry Potter Wizards Unite GPS Wizard Character Not Moving

0

It is officially acknowledged that Harry Potter Wizards players often face a bug where Unite GPS location is not updating continuously. This is a known bug. What it means is that the wizard avatar does not move on game’s map. This is an annoying error since most of this game’s tasks and challenges are based on walking and going places. Therefore, your avatar’s location may not update on map of HPWU or the character catches up after sometime. This, in turn, gives the “Don’t drive” pop-up.

When you move around and character is not moving on map, traces still show up on phone camera. This is worrisome since you won’t be able to tap on runestones, fortresses etc since game thinks that you’re actually far away. Therefore, the game progress is totally hindered by this glitch. Until it is resolved, we have summed up some working solutions that should work for both iOS (iPhone & iPad) and Android devices. 

harry potter wizards unite character not moving location not updating

How to fix Character not moving / GPS Location not updating glitch on HPWU

AR games directly use the location services and use them to track you on real-world map. Next step is to generate the AR map and change everything around. This takes up lot of processing power. Therefore, it is possible that the GPS location may lag and character stops moving even if you’re walking in real-life. It is a known bug for Harry Potter Wizards Unite. Here’s how to fix it.

Fix GPS Location not updating / Character not moving on Harry Potter Wizards Unite game.

Restart the game.

Yes it works! This may seem trivial but it is official step in case of wireless network error as mentioned here.

[Android Only] Clear HPWU Cache from Settings.

Head over to Settings > Apps > Search for Harry Potter Wizards Unite > Open it > Storage > Clear Cache.

[Android Only] Disable battery optimization for Harry Potter Wizards Unite from settings.

The latest versions of Android OS use aggressive battery optimization. Head over to Settings > Battery > Battery Optimization > Search for Wizards Unite and turn off optimization for it.

Check your Location Services and make sure it’s turned on and Wizards Unite is in active list.

You can always check which apps are using location services. If HPWU is not in list, then it is possible that it’s being cut off by OS.

Change Location Services mode to High Accuracy.

This allows the device to freely use both GPS and internet connection to detect location.

Battery Optimization causes “character not moving” error on HPWU?

Android’s battery optimization is really good. But it often proves to be the reason why some apps don’t work normally. When the OS detects that some app is consuming too much battery, then it either warns user or just pulls the plug. In this case, it may turn off the GPS and internet services to Harry Potter: WU. It would make your character stuck on map even if you’re moving. (ref)

We’d love to know if our solutions worked out for you. Let us know in the comments below.

Click Here to read more guides, tips and tricks for Harry Potter Wizards Unite

Harry Potter Wizards Unite “Error has occurred with wireless network”

8
Harry Potter Wizards Unite “Error has occurred with wireless network”

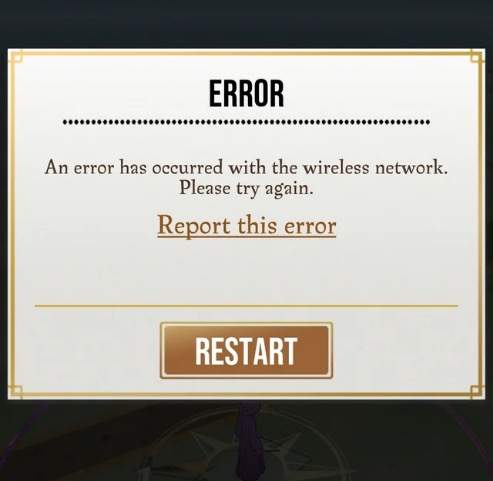
The main problem with games like PoGo and HPWU is the fact that we have to go outside home. This means that we cannot depend on trusty broadband connections. Instead, Harry Potter Wizards Unite players get “Error has occurred with wireless network” error on game screen. This error totally wipes the walking progress and disconnects you from server. Sometimes, the game may just not connect to server in first place or HPWU keeps disconnecting with Wireless Network error.

harry potter wizards unite Error has occurred with wireless network guide

HPWU “Error has occurred with wireless network” – Guide

Let’s get to the basics of it which will help you better understand the main cause. We realize that there are some universal solutions however, some users may suffer from unique issues. Therefore, it is important to understand the possible cause of Harry Potter Wizards Unite error with Wireless Network. 

Whenever this error pops up, the game shows a ‘Restart’ button. This clearly shows that it is not a problem with WiFi or LTE entirely. Otherwise, the game would just ask you to reconnect and try again. It could also be due to the fact that AR games need to load the whole world based on GPS and use network consistently. Therefore, a game restart just helps clear all cache and get rid of any glitches. Anyhow, below are the best ways to fix HPWU “Error has occurred with wireless network” error.

How to fix it

HPWU you may show errors when playing the game on mobile data (5G / 4G LTE / 3G) or carrying a mobile internet device around. These are also 4G devices basically but work as WiFi hotspots. In most cases, the culprit is the bad network reception. Your Android or iPhone disconnects from Harry Potter Wizards Unite server during a fortress battle. This not only wastes runestones, but makes the game frustrating to play. 

How to fix “Error has occurred with wireless network” on Harry Potter Wizards Unite game. This works for both Android and iOS devices (iPhone & iPad).

Restart Game and try connecting again.

This is the most basic option. If the network error is small, then there’s a good chance that game will take care of this itself. Something as simple as restarting game would solve it.

[Android Only] Reset Network settings and clear network cache.

The Android users need to go to Settings > System > Reset Options > Reset WiFi, Mobile & Bluetooth > and tap the reset button.

[Android Only] Clear DNS Cache from Chrome browser.

Open Chrome, type “Chrome://net-internals” in address bar and press enter. Now open DNS tab and tap on “clear host cache”.

[iOS Only] Flush DNS Cache on iOS.

Open Settings > General > Reset > Reset Network Settings and confirm this option.

[Android Only] Clear Harry Potter Wizards Unite Cache from Settings.

Go to App Drawer > Long Tap on Wizards Unit icon > Tap on “App Info”. Open Storage settings and clear cache from here.

Disable any Network manipulating applications like boosters and VPN.

Since this error mainly depends on network, therefore, it is possible that you if you’re using a VPN or network booster, then it may be interfering with server connection.

Check your network reception in case of Mobile data (5G/LTE/3G).

Just like last option, it is highly possible that the network reception in particular area is sketchy. It makes the phone change from 4G to 3G randomly. Therefore, the connection to server is lost. Either force your phone to use one band only or check network connection reception.

Uninstall and re-install HPWU from Play Store or App Store.

When all hope is lost, this is the only thing that’ll work for you. Simply uninstall and re-install it. It works for almost everyone. Play Store | App Store.

Conclusion

We covered pretty much anything that could remotely relate to this issue. Therefore, we are sure that if you follow all the steps, game must be running by now. Best of luck!

Click Here to read more guides, tips and tricks for Harry Potter Wizards Unite

Harry Potter Wizards Unite Re’em blood – Guide

0
Harry Potter Wizards Unite Re’em blood – Guide

This guide goes through everything that you need to about Re’em blood in Harry Potter Wizards Unite. It is one of the rare potion ingredients. To be precise, it’s used in Exstimulo Potions. Wondering where to find Re’em blood? Or you’re stuck in SOS challenge because you’re unable to find Re’em blood to brew potions? Keep reading and you’ll find all the answers.

Harry Potter  Wizards Unite is a pretty complex game. Since it is totally based on the lore of books and movies, there is a lot of stuff to learn about. Most people don’t even pay attention to the names of potions and their ingredients named in movies. Guess what? This is not gonna work in HPWU. You need complete command on how everything works and what makes it work. A lot of SOS challenges require players to brew Exstimulo potions. However, they cannot find Re’em blood for it. Now, it is not a super rare ingredient. However, just like other things, just when you need it, you cannot seem to stumble upon any.

How to find Re’em blood in HPWU

The most daunting thing about this ingredient is that you cannot actually grow it. Normally, players would just grow the ingredients that they need in greenhouses. However, you cannot spawn or grow Re’em blood in Harry Potter Wizards Unite. Therefore, it makes the task a little bit more difficult. Here are the possible solutions to help you find Harry Potter Wizards Unite Re’em blood ingredient.

Where does it come from?

Where does Re’em blood come from? This kind of information is not readily available in game only. Therefore, we did some digging for you. Re’em is described as a rare breed of unicorns. The blood is extracted from these creatures. It makes it one of the rarest ingredients to just come by.

However, the books claim that a magizoologist actually brewed a herbal concoction that replicated magical effects of Re’em blood. Due to this remarkable discovery, it is now possible to buy it from open market. 

Re’em blood looks like Newt Spleen

Red. Round. Small. No wonder Re’em blood and Newt Spleet a lot alike. Therefore, a lot of players mistakenly fill up their inventory with newt spleens instead of what they actually need. You need to be able to differentiate between two. 

Here’s what Re’em blood looks like. It is a small cylindrical dot that’s lying on the ground. On ther hand, Newt Spleen is more round and floating. You may not find it on ground. Color wise, Re’em blood is darker than Newt Spleen.

If you pay close attention to above mentioned details, we’re sure that you won’t make the same mistake again.

Try different times of day

Here’s something that a lot of new players don’t realize. A lot of ingredients like Re’em blood in Harry Potter Wizards Unite are available in different times of day’s cycle. It means that, you may have a better chance of finding snowdrops in day time and Re’em blood in night time. However, these cycles may keep shifting. Therefore, if you are consistently not able to find it during a specific period of day, then try another time. Or just ask a friend if you cannot make it.

Use Greenhouses more often

Although there is no direct connection, yet players seem to get more Re’em blood spawns if they grow more stuff in greenhouses. Moreover, you actually have a better chance of finding more rare ingredients with this simple task. HPWU is all about travelling, completing tasks and making this game a part of daily life. If you really take it seriously, then you’d easily understand the pattern and cycle of how things come and go.

Harry Potter Wizards Unite Re’em blood Information

Here’s a brief overview of its properties and how it’s used.

harry potter wizards unite Re'em blood guide

We covered everything related to Re’em blood in HPWU. It stands to be one of rarest ingredients. However, often must-have for challenges, tasks and wizarding challenges. Therefore, always keep an eye out and keep a small stock of it.

Click Here to read more guides, tips and tricks for Harry Potter Wizards Unite

Fix HPWU An error has occurred with the wireless network

0
Fix HPWU An error has occurred with the wireless network

Harry Potter Wizards Unite players have faced a strange error while playing the game. The game shows “An error has occurred with the wireless network” error all of a sudden. This annoying error can hinder the gameplay. Fortunately, it is very easy to fix this problem. Follow the steps given in this guide to Fix HPWU An error has occurred with the wireless network. Before you fix the HPWU wireless network error, let me give you its background.

HPWU An error has occurred with the wireless network

Harry Potter Wizards Unite – An error has occurred with the wireless network

There is no specific event which generates this error. It happens randomly. Some of the users faced this error while playing the Fortress Battles and some encountered it on the normal gameplay. Whenever it pops up, it disconnects you from the Harry Potter Wizards Unite server and you lose all your progress. To play the game again, you have to establish a connection. As long as this error keeps you disconnected, you will not be able to play the game.

The users who first came across this problem tried a variety of solutions. There wasn’t a specific fix to this error. In fact, different fixes worked for all the users. Some users changed their WiFi network, some switched to LTE and some tried uninstalling/installing this game. Furthermore, this error is not specific to Android or iOS. It is happening with the users on both the ecosystems.

HPWU An error has occurred with the wireless network

I am listing down all the possible solutions to fix wireless network error on harry potter wizards unite. Follow the solutions one by one to fix HPWU An error has occurred with the wireless network.

Check your Internet Connection

First of all, make sure that your internet connection is working properly. Since this error has to do with the Wireless Network, check the signal strength of your WiFi router. If it is not working fine, you need to check your router. Also, try restarting your WiFi router.

Alternatively, try switching to LTE or 4G which may fix the problem too. If both these fail, try using another new internet connection. For most of the users, switching to LTE and switching back to WiFi has worked fine.

You may check your phone’s WiFi reception too. If you are using 2 SIM cards in a Dual-SIM phone, try switching off or pulling out one SIM card. This solution worked on my Samsung Galaxy S10 Plus which wasn’t showing a good WiFi signal reception.

Disable Download Boosters & Optimizers

If you have any download booster application installed on your Android phone or iPhone, its time to uninstall it. In case you have a Network enhancer application from your Network Carrier, you must disable/delete it too. The boosters can indulge in with the WiFi functionality of your phone which can pull out the wireless network error on HPWU.

Location Services & GPS Should Be Fully Connected

Since HPWU is an AR game which requires the users to go places, your GPS must be fully enabled. None of the features of the location services should be turned off. Go to the Settings of your phone and check all the location services. If there are any services disabled, turn it on and restart your phone. Run HPWU unite now to see if the error is gone or not.

Clear Game Cache & Data

On your Android phone, open settings, go to Apps/Application Manager > All Apps > Harry Potter Wizards Unite > Storage > Clear its Data and Cache. Restart your phone now. Launch the game. The error should be gone now.

Uninstall & Re-install Harry Potter Wizards Unite

The last solution is to completely delete the game from your phone. Before deleting the game, save all of your progress and sync it with your iTunes or Google Play Games account. After deleting the game, restart your phone. Installing the game from the Play Store or App Store again. It should work smoothly this time.

That’s all. These were the only few possible fixed of the Harry Potter Wizards Unite network error. If one of these solutions has worked for you, do let us know in the comments section below. If you have used a different solution which is not listed above, make sure that you drop it below to help others. Stay connected.

More:

Download Unc0ver 3.3.0 IPA – Jailbreak iOS 12.2

0
Download Unc0ver 3.3.0 IPA – Jailbreak iOS 12.2

iOS users can download Unc0ver 3.3.0 IPA from here. The Unc0ver 3.3.0 IPA can be installed via Cydia Impactor.

Unc0ver 3.3.0 IPA

Unc0ver 3.3.0 iOS 12.2. Jailbreak is out now. The Unc0ver 3.3.0 supports all version of iOS from iOS 12.1.3 to iOS 12.2. It takes only one tap to Jailbreak your iPhone or iPad. 

The iOS 12.2 Jailbreak Unc0ver 3.3.0 uses NedWilliamson’s Sock Puppet exploit to Jailbreak. The announcement of this new version of Unc0ver came from none other than Pwn20wnd. It has been found running smoothly on the said version of iOS.

The Unc0ver 3.3.0 is in the beta stages right now. As of today, we have the Unc0ver 3.3.0 beta 7 which has most of the bugs already fixed. For the most part, the Unc0ver 3.3.0 should serve its purpose very well. All the reported and known bugs have been fixed in the latest beta release. The beta 7 of Unc0ver is already out for public testing. It means that if you have an iPhone with the iOS 12.2 or lower, its time to Jailbreak it.

Previously, there was a method to install Unc0ver via Tweakbox. The Tweakbox method seems to be failing for users. The Unc0ver installation page goes dead on Tweakbox. This is why you have to use another route. We did try installing Unc0ver via Cydia Impactor and it worked. Our successful experiment leads us to this post.

Go ahead, download Unc0ver 3.3.0 IPA from below. Follow the instructions given on the Cydia Impactor guide to install it.

Download Unc0ver 3.3.0 IPA

Download Unc0ver 3.3.0 via Cydia Impactor [Jailbreak iOS 12.2]

0
Download Unc0ver 3.3.0 via Cydia Impactor [Jailbreak iOS 12.2]

This is the guide to download Unc0ver 3.3.0 via Cydia Impactor. Unc0ver 3.3.0 will Jailbreak iOS 12.2, iOS 12.1.4, iOS 12.1.3, and below.. The iOS 12.2 Jailbreak Unc0ver 3.3.0 works on all Apple devices powered by A7, A8, A9, A10, A11, and A12 chipset.

Unc0ver – iOS 12.2 Jailbreak

The Unc0ver 3.3.0 is here with iOS 12.2 support. iOS 12.2 users can finally Jailbreak their iPhones. So far, the Unc0ver supported the previous version of iOS. For a very long time, iOS users were eyeing the Unc0ver support for 12.2. The Unc0ver 3.3.0 update was announced by its developer Pwn20wnd. Unc0ver 3.3.0 uses NedWilliamson’s Sock Puppet exploit which leads to the iOS 12.1.3 to iOS 12.2 Jailbreak.

Download Unc0ver 3.3.0 via Cydia Impactor

Apart from the Jailbreak support for iOS 12.1.3 to iOS 12.2, the Unc0ver 3.3.0 brings major bug fixes. It may be noted here that the version 3.3.0 is in beta stages. The initially Unc0ver 3.3.0 Beta 3 is helped Jailbreak iOS 12.2 first of all. As of writing this post, we have already received the Beta 7 of Unc0ver 3.3.0.

The Unc0ver 3.3.0 b7 fixes the false unsupported error on the iOS 12.2. It also fixes the reboot button. It also fixes all the bugs that were reported in the previous betas of Unc0ver 3.3.0. The latest version is also out for public beta testing. 

Unfortunately, the direct installation of Unc0ver via Tweakbox is not working at the moment. I did try installing it on my iPhone, but that didn’t show any positive results. The Cydia Impactor method worked for me.

If you have an iPhone lying around with the iOS 12.1.3, 12.1.4 or 12.2, its time to Jailbreak it. Using this post, you can download Unc0ver 3.3.0 via Cydia Impactor. The installation of Unc0ver does not require Jailbreak, however, after installing Unc0ver, you will be able to Jailbreak your iPhone or iPad.

Preparations

  • Disable pending updates on your iPhone.
  • The iPhone must be running on iOS 12.2 or lower.
  • Backup all of your data beforehand.
  • Understand the involved risks and do it at your own risk.

Download Unc0ver 3.3.0 via Cydia Impactor

Follow these steps to get Unc0ver using Cydia Impactor.

Download and install Cydia Impactor.

You can use this guide to download/install Cydia Impactor on your Windows or Mac-powered computer.

Connect iPhone and select it in Cydia Impactor.

Now using the original data cable, connect your iPhone to the computer. Select your iPhone in the Cydia drop-down.

Add Unc0ver 3.3.0 IPA to Cydia Impactor

Download the Unc0ver IPA from here | Mirror. Drag and drop this IPA onto the Cydia Impactor tool.

Enter your Apple ID and Password in the Impactor.

Click on the Start button. Cydia Impactor will ask for your Apple ID and Password. Add the details. If it asks for App-specific password, open your Apple ID on your computer, go to Security > get the App-specific password and paste it in the Cydia Impactor field.

Trust Unc0ver on your iPhone.

As soon as the installation comes to an end on the PC, open settings on your iPhone. Go to General > Profiles and Device Management > Click on Trust > Click on Trust once again.

Open Unc0ver and click on Jailbreak.

Now open Unc0ver from all apps and click on Jailbreak. Unc0ver will do its job and kind-of restart the iPhone. As you see the screen, click on Jailbreak once again. This will fully Jailbreak your iPhone.

Conclusion

That’s all. You have a Jailbroken iPhone now. You can check further Cydia apps to change the look and feel of your iOS device. Furthermore, you can take a look at the Tweakbox apps to try a whole new bunch of apps. Jailbreak will let you add new features to your iPhone. To sum it up, it will unleash the real potential of your iPhone. If you have got any queries regarding Unc0ver or Jailbreak process, feel free to reach out to us. I will try my best to get back to you as soon as possible.

Download iTorrent on iOS 13 and iPadOS 13 without Jailbreak [Cydia Impactor]

0
Download iTorrent on iOS 13 and iPadOS 13 without Jailbreak [Cydia Impactor]
iPhone XS Max - iOS 13 - Photo Credits: TrustedReviews

This is the guide to download iTorrent on iOS 13 and iPadOS 13. iTorrent installation on iOS 13/iPadOS 13 does not require Jailbreak. By installing iTorrent, you will be able to download torrents directly on your Apple handset and tablet.

Download iTorrent on iOS 13
iPhone XS Max – iOS 13 – Photo Credits: TrustedReviews

Torrents and iTorrent

Torrents have existed since forever, however, the legality of torrents is still a question. In some regions, Torrents are completely prohibited while some states are yet to declare their positions about Torrents. Torrents have been used for all kind of purposes. We have used them to download the educational content, and we have used them to grab our favorite movies too. It is really difficult to identify safe boundaries while using Torrents. There is no doubt in the fact that Torrents have been used widely to download pirated content. Despite a very good awareness of how Torrents work, computer geeks use them all the time. 

iTorrent on iOS 13 and iPadOS 13
Running iTorrent on iOS 13 – the Unc0ver in the picture is for demonstration only.

Torrents clients like UTorrent and BitTorrent are the most popular at the moment. You can easily download them on your Windows computer and even on an Android phone. When it comes to finding the same applications for iPhones or iPads, you will not find them in the app store. This is because Apple has a strict policy against Torrents. It does not allow the Torrent clients in its official stores. So, there is no way to download a Torrent client or Torrents on your Apple device officially. However, there is a way to download them unofficially.

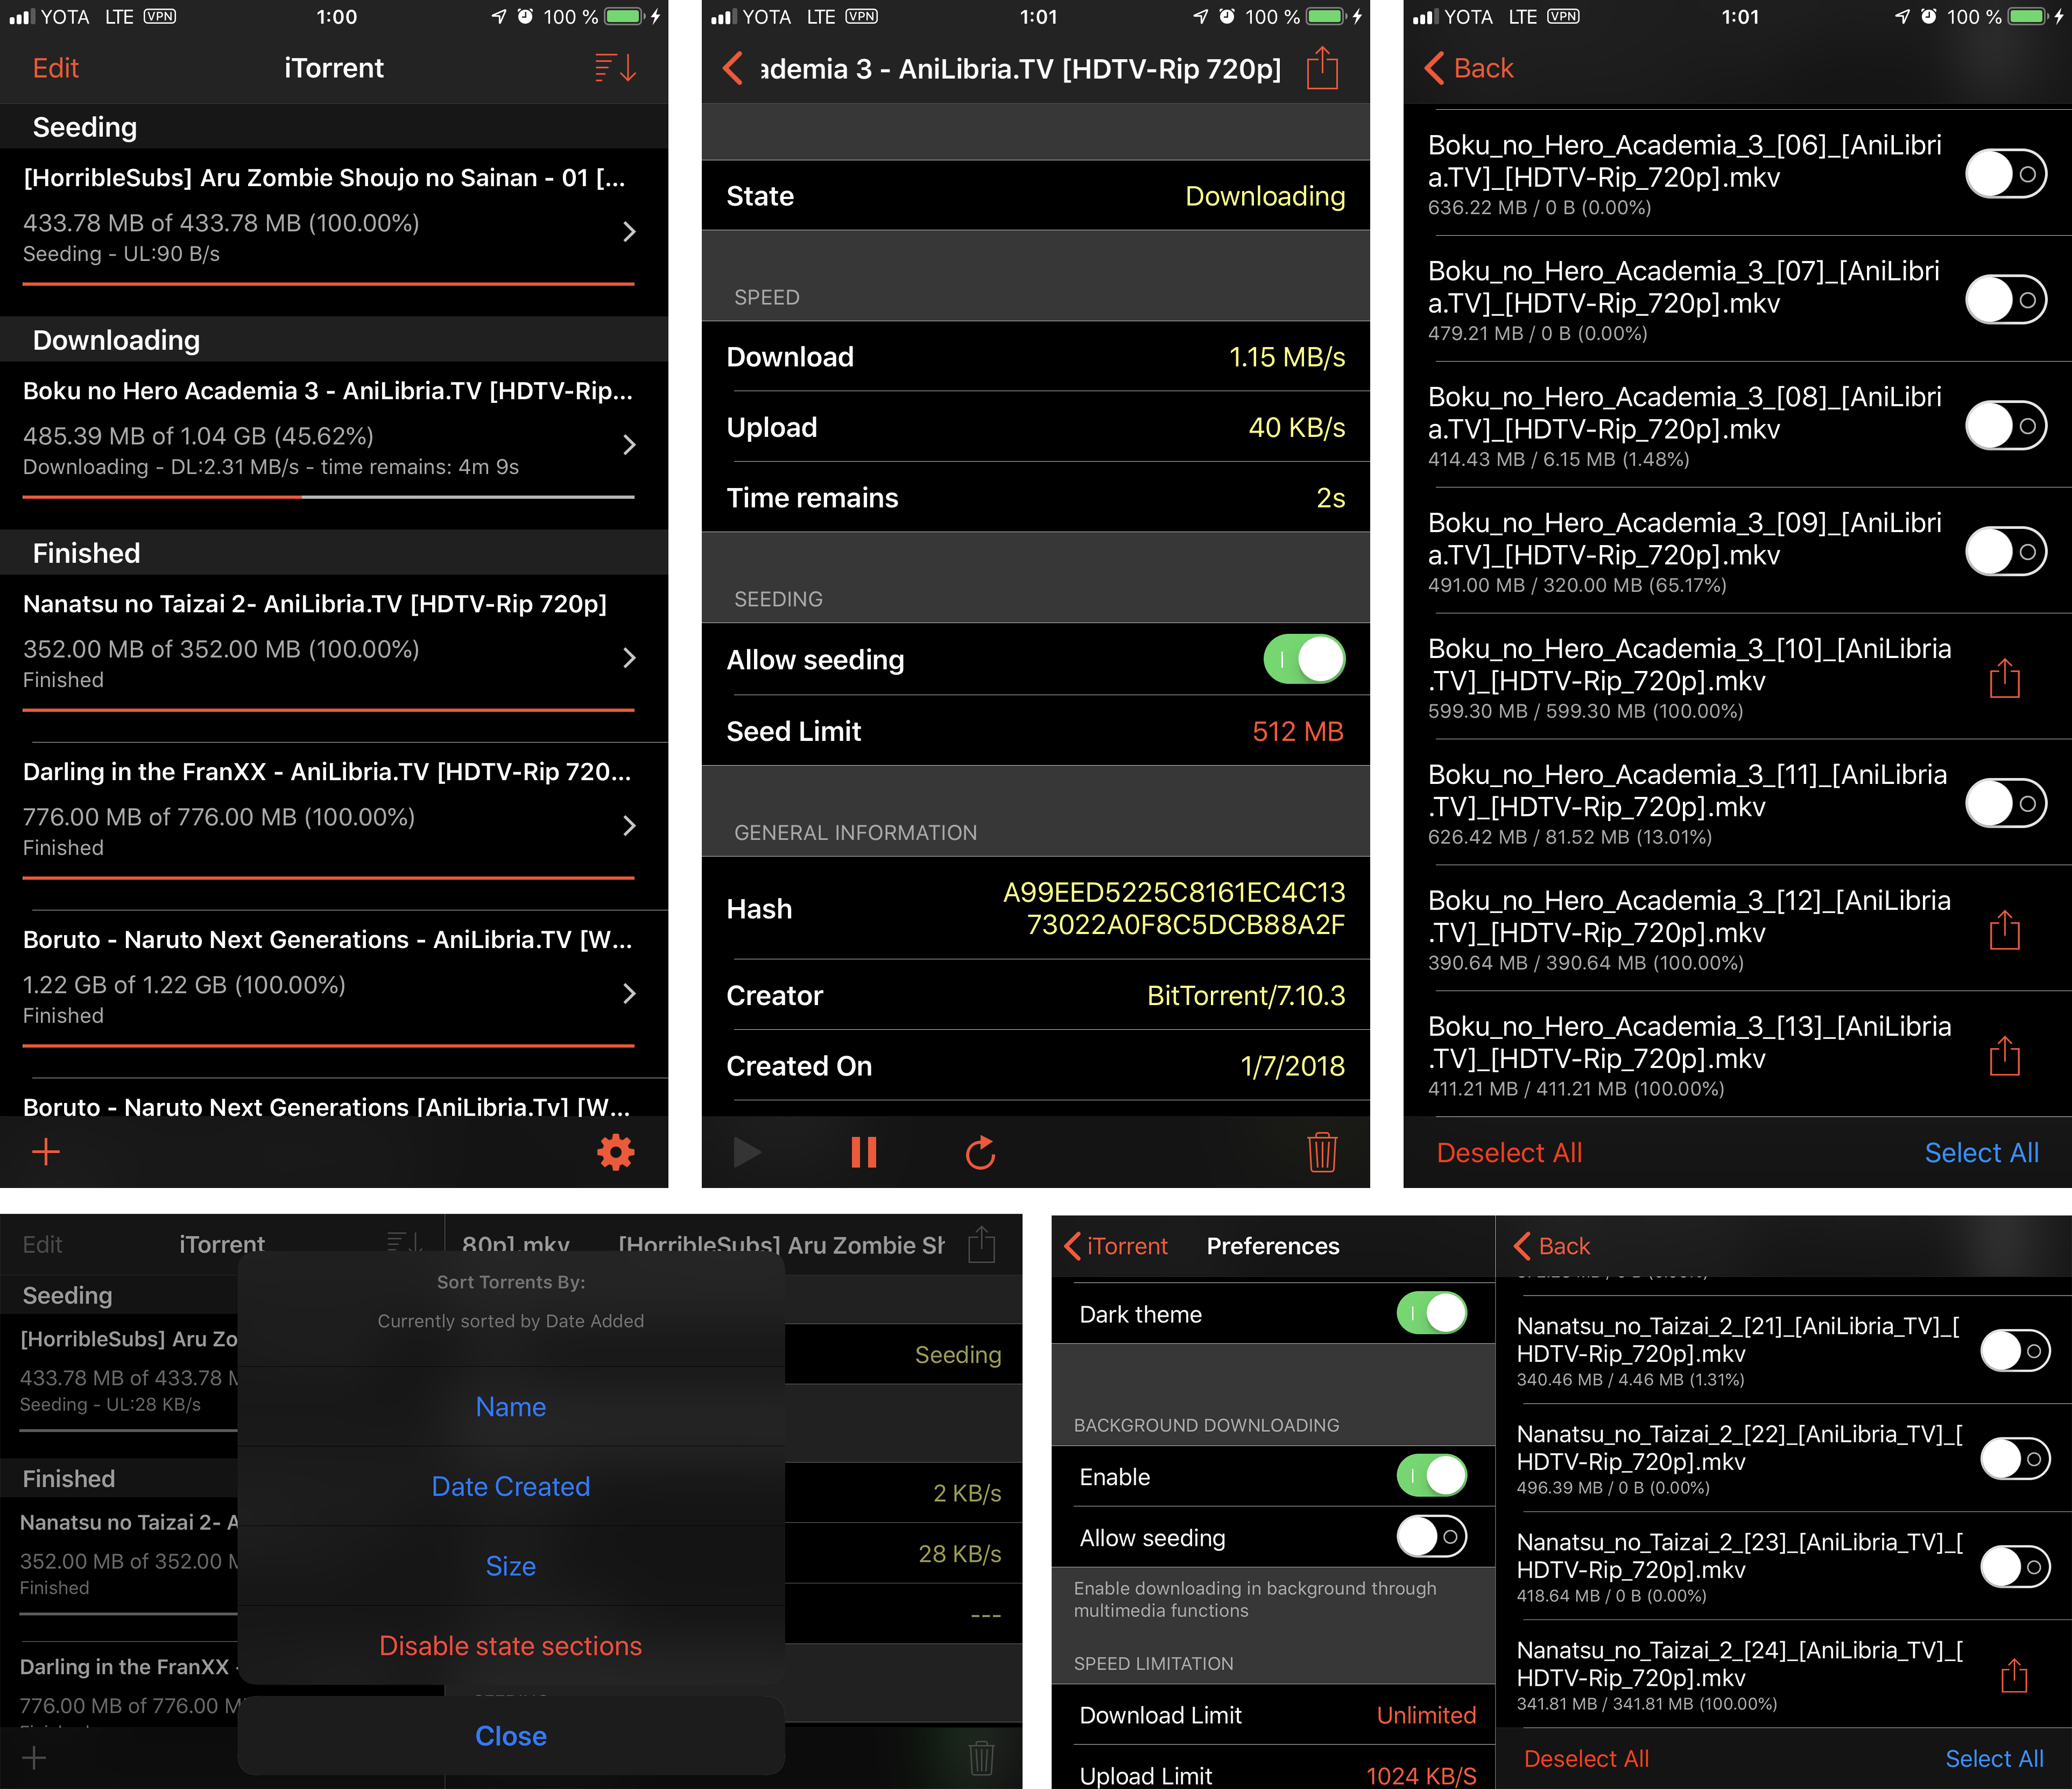
With the help of Cydia Impactor, you can sideload iTorrent on your iOS 13-powered device. iTorrent is the only working Torrent client for iOS at the moment. It will save the files directly on the storage of your iPhone.

iTorrent has existed for almost a couple of years now. It worked very well on iOS 9, 10, 11, 12, and now, it’s time to download iTorrent on iOS 13. To install iTorrent via Cydia Impactor, you need the iTorrent IPA file. Go ahead, take a look at the steps to install it without any further ado.

Download iTorrent on iOS 13 and iPadOS

  1. Download and install Cydia Impactor on your computer.
  2. Get the iTorrent IPA file – Download.
  3. Open Cydia Impactor on the computer.
  4. Connect your iPhone/iPad to the computer.
  5. Select your connected device in Cydia Impactor.
  6. Drag the iTorrent IPA and drop it onto the Cydia Impactor.
  7. It will now ask you to enter your Apple ID details. Enter the details and click on Start/Ok.
  8. iTorrent will be sideloaded in a few seconds.
  9. After installation, open Settings on iPhone > General > Profiles and Device Management > Cick on your Apple ID > Trust > Trust.
  10. Open iTorrent now. You can add any Torrent and it will download that. That’s all.
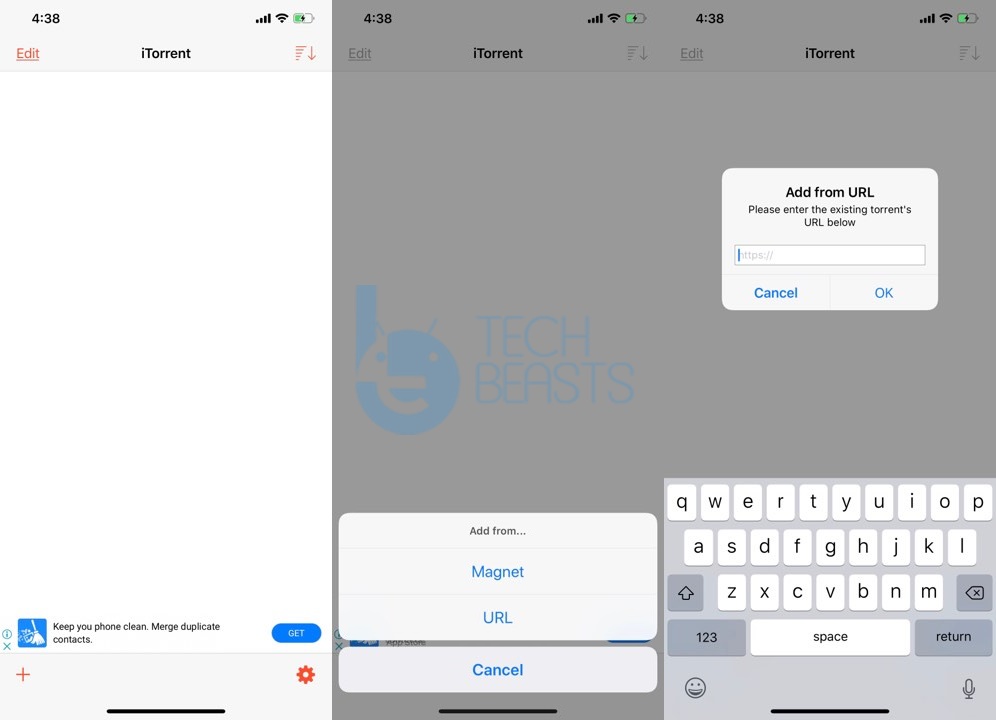
You can add torrents to iTorrent via Magnet or via URL.

At step 7, if the Cydia Impactor does not accept your password, you would need the App-specific password. To get the app-specific password, open login to your Apple ID on the computer. Go to Security > App Specific password. Copy that password and paste it into Cydia Impactor.

Final Words

You are now all set to download your desired movies, documentaries, songs, or anything else directly on your device. iTorrent works quite good in the background. Make sure that you choose to run iTorrent on the WiFi only. Running iTorrent on Mobile Data will eat it up within no time.

Before you download Torrents, make sure that you have an understanding of any possible laws regarding Torrents in your country. If they are not allowed, we suggest you to staying away.

Jailbreak iOS 12.2 using Unc0ver without PC

0
Jailbreak iOS 12.2 using Unc0ver without PC

The iOS 12.2 Jailbreak is finally here. iOS users can now Jailbreak iOS 12.2, iOS 12.1.4, iOS 12.1.3, 12.1.2 and lower using Unc0ver. This works for all Apple devices using the A7, A8, A9, A10, and A11 chipset. To Jailbreak iOS 12.2 using UnCover, you don’t need a PC. Follow the simple instructions given in this guide to Jailbreak your iPhone or iPad. 

Before you Jailbreak iOS 12.2 via Unc0ver, let us give the credit to the developers. Unc0ver v3.3.0 beta has come out as a result of Pwn20wnd’s hard work. The support for iOS 12.2 Jailbreak and iOS 12.1.2, 12.1.3 and 12.1.4 Jailbreak comes with the help of Ned Williamson’s new tfp0 exploit.

Let me give you a brief idea of Jailbreak and Un0cover before you Jailbreak iOS 12.2 without PC.

Jailbreaking your iPhone or iPad via Unc0ver

When you Jailbreak your Apple iPhone or iPad, you allow the third-party apps to access the system of your iOS device. Jailbreaking the iPhone is exactly the same as rooting your Android phone or gaining the root access of a Linux system. This allows the installation of the apps that are usually not allowed on an operating system. Jailbreaking your iPhone/iPad will also let you add new features in the UI and system. It can help you change the look of your phone’s interface. If you don’t like a default feature of the iOS or iPadOS, you can remove it or you can tweak it with the help of Jailbreak.

Processes like Jailbreaking and rooting your phone are not recommended and allowed by the device manufacturers. The reason is the lack of security. As long your device has its official and unmodified operating system running, its totally safe. The moment you Jailbreak, you certainly put your device on risk too. This is why the phone makers tell you to perform all the experiments at your own risk.

After Jailbreaking, you will remove all limits and bottlenecks set by Apple on your iOS device. If you ever plan of un-jailbreaking your iPhone, you will simply have to install a brand new firmware on it. Removing the Jailbreak makes your device secure once again.

As far as the legal sides of Jailbreak are concerned, as of July 2019, it is legal in the US and almost all other countries. The only thing you should be careful about is the tool you use to Jailbreak your iPhone. Since Jailbreak has become a little rare and difficult these days, you will find many fake tools and applications claiming to Jailbreak your device. 

The only working solution to Jailbreak iOS 12.2 and lower, at the moment, is through Unc0ver. The Unc0ver tool will Jailbreak your iPhone or iPad within a few seconds.

Prerequisites

  • You must have an iPhone or iPad.
  • The iPhone or iPad must be running on iOS 12.2, 12.1.4, 12.1.3, 12.1.4 or lower.
  • This works will Apple devices powered by A7, A8, A9, A10, A11, and A12 chipsets.
  • There should be no pending software update on your iPhone.
  • Backup all your data for safety purposes.
  • Understand that you are doing it at your own risk.

How to Jailbreak iOS 12.2 using Unc0ver

These are the steps to install iOS 12.2 Jailbreak Unc0ver to remove all limits from your iPhone.

Total Time: 2 minutes

Install TweakBox on your iPhone.

Open the TweakBox page on iPhone or iPad. Click on “Install Now”. When TweakBox asks for any permission, allow it. It will be installed in a minute.

Install Unc0ver from TweakBox Apps now.

Open the TweakBox on your iPhone now. Click on TweakBox Apps on the top and then search for Un0ver. Install Unc0ver now.

Trust the Enterprise App certificate now.

On the iPhone, open Settings > General > Device Management > Click on the certificate under “Enterprise App” and then click on Trust. If it asks to trust again, click on it.

Delete pending Software Updates.

On the iPhone, go to Settings > General > iPhone Storage > Find if there is any downloaded OTA. Now click on “Delete Update”.

Open Unc0ver and click on Jailbreak!

Its time to open the Unc0ver app on your iPhone now. In the app, click on “Jailbreak” button. The iPhone will start the Jailbreak process. When it shows you the screen again, open the iOS 12 Jailbreak Unc0ver app and click on Jailbreak again. At this point, you will have your iOS 12.2 or lower Jailbroken. That’s all.

Final Words

By this time, you must have your iPhone with the Unc0ver Jailbreak. You have now opened your door to an endless world of Cydia Tweaks. Modify your iOS the way you want. If you have any queries regarind Jailbreaking your iPhone or the Unc0ver app, feel free to reach out to us. I will try my best to get back to you as soon as possible.

Save WhatsApp Status – No Root Needed

0
Save WhatsApp Status – No Root Needed

When WhatsApp introduced Status, Unfortunately, they forgot to add a saving option for WhatsApp status. Now because of that, people have to use third-party apps to Save WhatsApp Status. Moreover, you can save the picture or video if someone directly sends you on WhatsApp.

Save WhatsApp Status

The only problem using third-party apps is privacy, such apps ask for number permissions which are not related to saving WhatsApp status. Not only that, most of the methods and apps only work on rooted Android devices. In result, people face piracy issues, their personal information is taken without there will and more.

Now in this article, we will tell you how to Save WhatsApp Status without rooting your Android device. You may be surprised to know that, your file manager contains a hidden folder which has all the status images that you have looked. In this post, we’ll show you different methods which will help you Save WhatsApp Status and again no root required.

Save WhatsApp Status:

The first method will be the one in which we will look for the hidden folder in our file manager. Which contains all the images that we have looked at. Let’s start now.

Download WhatsApp Status Through File Manager:

Step1: First, you need to download a third-party file manager. There are few but ES Explorer and Solid File Manager are the ones I would suggest to you.

Step2: Open up the file manager and look for WhatsApp folder. Once you do find it, tap on 3 dots to bring up the settings pop-up. Now here check the box which says, Show hidden files.

Step3: Now open up the Media folder and top of all, you will find the Statuses folder. This folder contains all the images that you have looked at. You can now easily Save WhatsApp Status photos. Moreover, if you don’t want these photos, delete them and free up your space.

Save WhatsApp Status With Third-Party App:

Let’s make things easier for you, Although I am not a fan of any third-party apps which are involved with any of my social media accounts. But what can I say, they do work and people will still use them no matter what we say. So It’s time for you people to download Status Saver app.

  • Status Saver app is available on Google Play that is why I recommended this one. Once installed, Open up WhatsApp, Open a Status, There you will see a ‘+’ icon tap on it and save WhatsApp Status. Moreover, you can also save videos using Status Saver and it works perfectly with all the modified WhatsApp Versions.

Modded WhatsApp Version:

There are a number of WhatsApp Modded version available for Android. All of these WhatsApp Forked versions have more features than the original WhatsApp. Most of these apps come preloaded with the saving status features. That means you don’t have to Install any third-party app to download WhatsApp status.

That’s all.

GCam for OnePlus 3/3T Stable Version

0
GCam for OnePlus 3/3T Stable Version

It has been three years now since OnePlus 3/3T was launched as a flagship device form OnePlus. Without any doubt, both of these devices performed pretty well, either if it’s processing or camera. Moreover, OnePlus didn’t leave this device behind and because of that, both the devices are running on Android 9 Pie currently.

GCam for OnePlus 3

But today I am not here to tell you how good both devices were. I am here to tell you that in this article we’ll provide you with GCam for OnePlus 3/3T and it’s a Stable Version. As far as I know, Google Camera is used by most of the Android users, whether they are Samsung, OnePlus, Sony, HTC, Huwaie, and more.

The best thing about Google Camera is that it offers so much more. The image quality is better than others, the night mode works perfectly and a lot more. I will tell you more about Google Camera in a bit, Let’s get started and provide you with the download link of GCam for OnePlus 3/3T Stable version.

About GCam [ Google Camera ]:

Nowadays, when it comes to smartphones camera, Google Pixel devices are sitting at the top of the list. We have seen some extraordinary photos from the Camera of Google Pixel. But you will be surprised to know, It’s not hardware which provides such amazing photos, It’s the software behind it. And that Software is Google Camera, that is why whenever a new Google Pixel device steps out in the market. Developers start working hard to port-out the Google Camera app from Pixel devices.

In the past, we’ve provided Gcam for different brands and the good thing is Google Camera is supported by almost all the Android devices. You can use the following links to download Google Cam for other devices. But if you want to download GCam for OnePlus 3/3T, you have to wait.

The main reason behind everyone trying to get their hands on port Gcam for their devices is the Night Sight mode. It doesn’t matter which device you are using, GCam Night Sight mode will work perfectly on your device. As you know, there is a beta mode GCam for OnePlus 3/3T is available. But now we have the Stable Version.

Ported GCam for OnePlus 3/3T:

This is Ported version of GCam for One Plus 3/3T, you will get features like AR Stickers, Google Lens, Night Sight mode, Portrait, Panorama, Lens Blur, Photo Sphere, Slow-Motion, etc. Now the main thing, we have tested this stable version and the following is the list fo the features which are working properly.

Features which are working.
*Camera
*Video
*Panorama
*Photo Sphere
*Lens Blur
*Image Stabilization
*Portrait Mode
*RAW Image File
*ZSL (With Pixel Configuration)
*Burst Mode ( Pixel Configuration)
*Motion Photos (Android 8+)
*AR Stickers (Android 8+)
*Slow Motion (Only on Android Nougat)

Download Links:

GCam for OnePlus 3/3T

★Download OnePlus 3/3T GCam:

Google Camera Mod 5.1.018.apk

How To Install GCam for OnePlus 3/3T Stable Version:

  1. Google Camera for OnePlus 3/3T – Download
  2. Copy the APK to your phone.
  3. Using File Manager, install the Google Camera APK.
  4. Now launch the Google Camera from the app drawer.
  5. In the Google Camera, set the saturation and other preferences according to your own choice.
  6. You are all set to take better Night Sight pictures and Portraits now.

That’s all.