Home Blog Page 42

Download and Install BlueStacks 3

3
Download and Install BlueStacks 3

BlueStacks 3 has been released as the successor of BlueStacks 3. The BlueStacks Inc. has once again managed to come up with brand new elements in its famous Android App Player. BlueStacks 3 is loaded with a new UI and some new feature that we haven’t seen before in the App Player. It now brings a new menu with new controls.

BlueStacks 3’s menu bar now contains a profile box where you can view the information of your Google Account. BlueStacks Friends is another new feature in which you can connect with your BlueStacks buddies. With this BlueStacks Friends feature, BlueStacks goes a little bit social. Another option to speed up BlueStacks has been added.

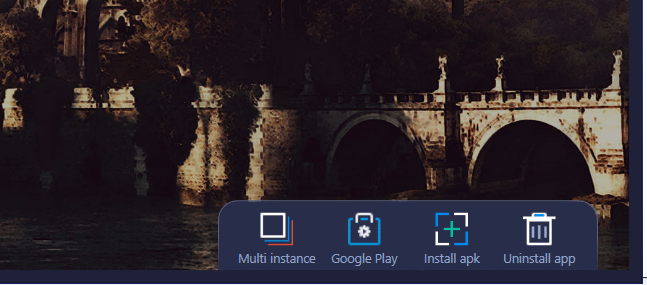
If you look at the bottom, you will find the new multi-instance feature. Using this feature, you can run BlueStacks in another new window in which you can login using a different account. This is useful if you wish to maintain two Google accounts in BlueStacks. The option to install APKs has been added right next to the multi-instance feature. Google Play Store has been made visible in this BlueStacks as well. You can find a Google Play Store button in the taskbar as well.
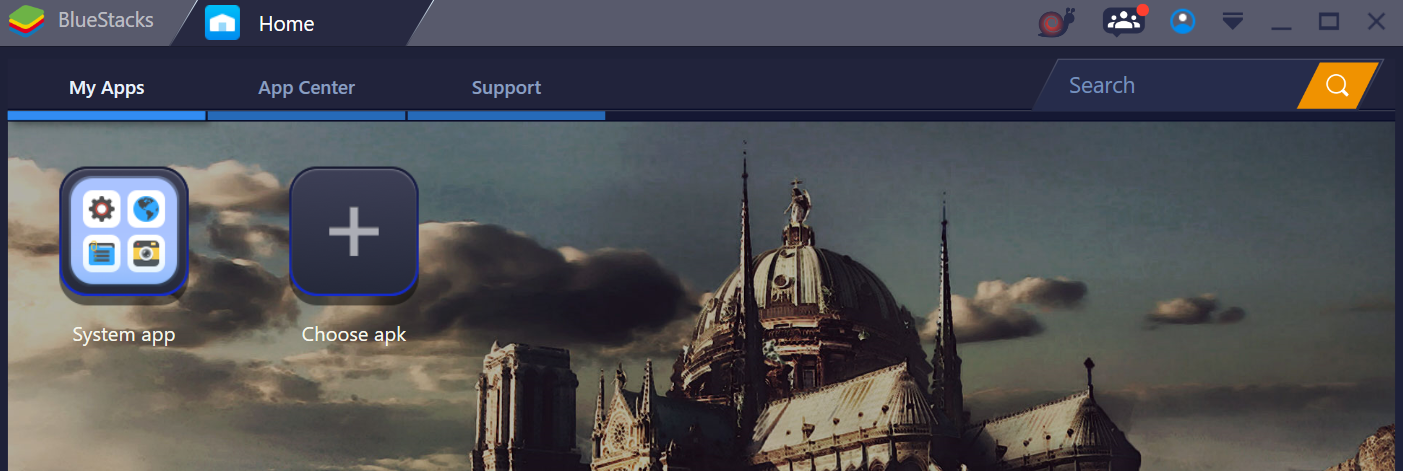
Inside My Apps section, you can find the System Apps folder in which you can find all the pre-loaded applications. This section includes the settings application, the Play Store, Browser and the camera application. Running games in the BlueStacks has been made much easier. Now you can play multiple games at the same time. BlueStacks 3 allows its users to minimize a current game and launch another.
The overall performance and smoothness of BlueStacks have been improved in this new version. BlueStacks 3 runs quite impressive. Let’s have a look at the steps to download and install BlueStacks 3 now.

Update: Latest BlueStacks 4.1 is out now!

Download and Install BlueStacks 3

How to install Apps or Games using BlueStacks 3

  1. Download BlueStacks 3 setup and install it.
  2. Once installed, BlueStacks 3 will ask you to setup Google Account. Follow the on-screen instructions and set it up.
  3. Once done setting up Google Account, click on My Apps section.
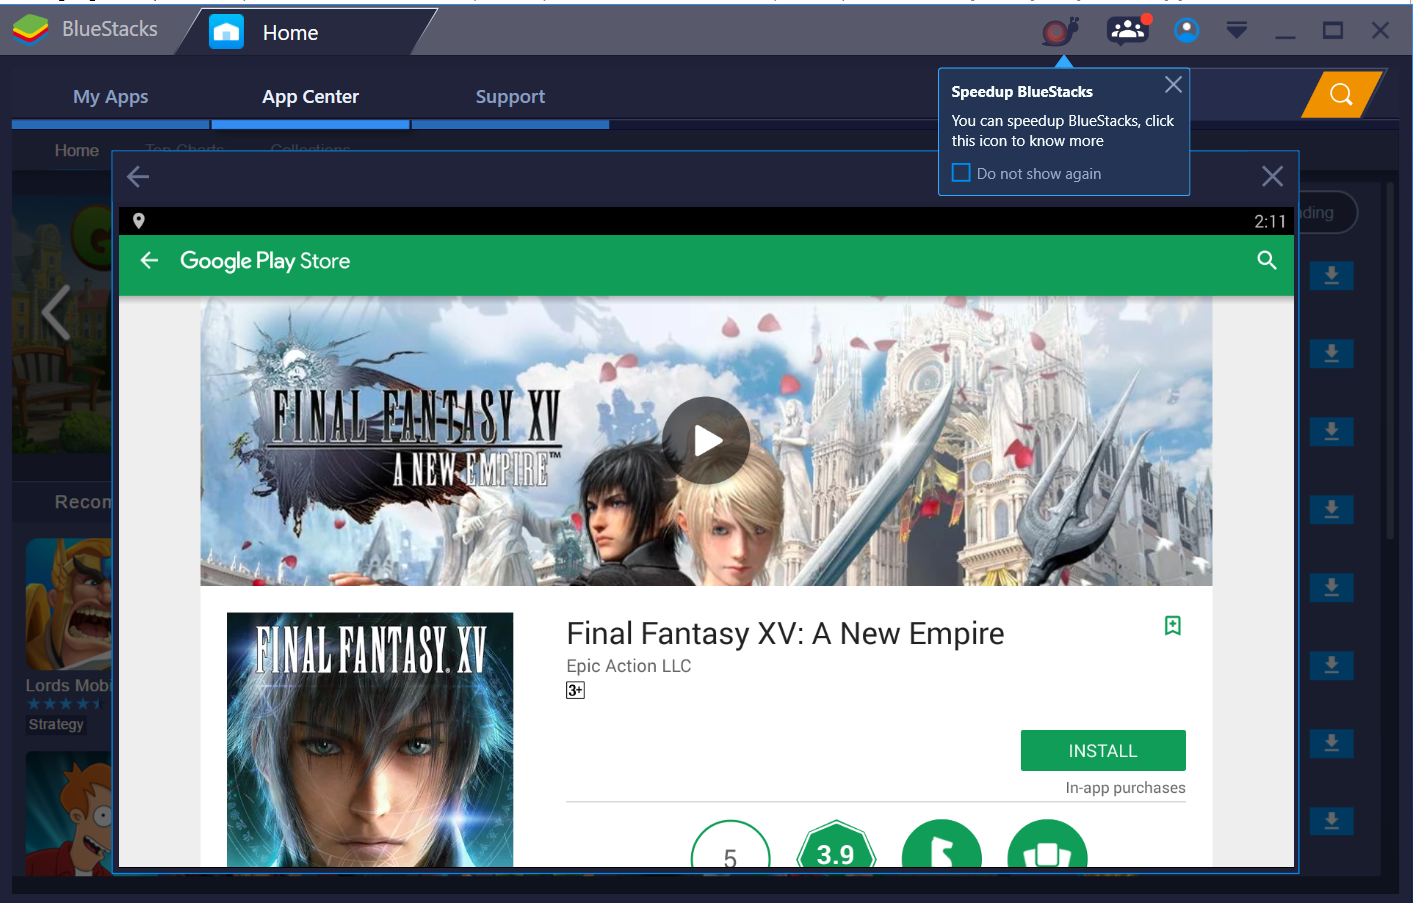
  4. In the My Apps section. In My Apps, go to System Apps > Google Play.
  5. Now in the Play Store, type the name of your desired game or application.
  6. Search for the game or application and install it.
  7. After installation, the game or application will appear under My Apps tab.
  8. You can now launch the newly installed App and run it. You can also set your own customized controls. That’s all.

How to install Apps or Games using APK files in BlueStacks 3

  1. Download, install, and setup BlueStacks 3.
  2. Download the APK file of your desired game or application.
  3. Open BlueStacks 3 and click on My Apps tab.
  4. Now in the My Apps tab, click on the Install APK option appearing at the bottom.
  5. Locate and select the APK file that you want to install.
  6. Let BlueStacks 3 install the application. After installation, it will appear in the My Apps tab. You can run it now and play it. That’s all.
 

Fix common COD Mobile error/s (Network errors & more)

0
Fix common COD Mobile error/s (Network errors & more)

Year 2018 and 2019 were lit with battle royale games. The mobile industry is not left far behind either. Excellent games like PUBG Mobile rocked the scene. Now there is another big player entering the competition. Call of Duty Mobile is one of the most anticipated shooting games for Android and iOS. It is a direct adaptation of original PC version. However, the gaming mechanics are actually unique and probably something that nobody expected. Since it is still in beta phase, a lot of errors pop up now and then. Therefore, this guide explores most common COD Mobile errors and how to fix those.

cod mobile errors fixes

Here is a list of COD Mobile errors and their respective solutions. Some of theses are network related while others are based on local details. 

COD Mobile errors and their solutions:

Network Error 4,50 / 4,28

At the time of writing, this game is only available to play in India. Although it is free to download, people outside of India cannot get it from Play Store. Therefore, people use guides like THIS to install it on their phones and run it. 

It is not just blocked for download to rest of world but they cannot login either. Even if the game is installed, network error 4.50, 4.28 or 4.51 may show up. None of these are actually related to user’s internet. It only pops up when the location of device is not inside allowed region. Therefore,we need to use the correct VPN and location server to fix it. 

Here is out detailed guide to fix COD Mobile Network Error 4.28, 4.51 – READ HERE

COD Mobile “Authorization” error

Just like the previous error, you may get authorization error on COD Mobile while trying to login with personal account. Even if it was created and used in India before, it won’t work outside.

Sometimes, is comes up if the servers are offline. In that case, no VPN can fix it. You’ll just have to wait for the servers to come back online.

In order to solve this issue, use a VPN and try to change the server location within this region. Otherwise, it won’t let you log in. 

  • Download and install any trusted VPN from HERE.
  • Select India as server location in here.
  • Now try to start game.
  • If the error still pops up, then go back into VPN menu and choose a different Indian VPN server from given list.
  • Irrespective of whichever VPN App you use, most have multiple servers located within one region. Some may work for your specific task while others may not.
  • Keep trying new servers until the game lets you log in.
  • That’s it! Now the Authorization error on COD Mobile is fixed

COD Mobile Network Unstable error

This error is pretty self-explanatory. This means that the internet connection on your phone is experiencing lag or just regular disconnecting issues. It mainly pops up when the ping from your phone or game server is very high. It not only makes the game worse for you but for other players in same lobby as well.

Now, there are two main cases. Either someone is using a VPN to play its beta version or it is just on regular internet connection within allowed region. 

In case of VPN, try to change server location. And then check its speed on Speedtest.net. Make sure you connect to a server with lowest ping. Otherwise, gameplay would be choppy and slow. It would affect other players the same.

If you’re playing it without a VPN, then just check or restart internet router. Then again, check ping on speedtest. If the ping is higher than usual, then contact your service provider to fix it. Once the internet is back to decent quality, network unstable error on COD mobile would no longer show up.

“This device does not meet the minimum requirements” error

It is no surprise that Call of Duty Mobile is a demanding title. Not every Android device is capable of running it. The minimum requirements are Adreno 506 or its equivalents. That’d be Mali G71 is other category. 

When trying to install from Play Store, if your phone or tablet is not compatible with it, then it won’t install anyway. However, there are still lot of ways to install it manually. Such method is described HERE.

Some people have success with running it on low-end devices despite the system requirements and those limitations. Needless to say that the game does not run in its full capacity in such conditions. 

In some cases, when you try to install COD Mobile obb and APK manually, it may give the “This device does not meet the minimum requirements”. There is no apparent solution for this as it is a hardware limitation. The only possible workaround is to play COD Mobile on PC. Here is the guide to do it. Apart from this, there is no way but upgrading the phone or tablet with better GPU and chipset.

COD Mobile Black screen after the Activision logo error

This is the most common error and it only shows up when trying to install COD Mobile APK and data files manually. The reason for this is very simple. If you put obb file and folder in wrong directory, then game will just show a black screen after activision logo. Either close the game or keep waiting. Nothing will change. 

In order to solve this issue, first of all delete all the game files from your phone. Then install the APK once again. Copy “com.activision.callofduty.shooter” to Android/obb folder. Do not put it in Android/data or any other directory. It is just one file. 

call of duty mobile obb data file

When you launch the game, it may create a new folder in Android/data itself. But that is automatic and you should not interfere with that. 

Conclusion

We have covered all errors of COD Mobile known yet. As this game grows and more feedback comes up, we’d update this guide with more fixes. 

Note that any game in its beta phase is bound to pop up with some issues here and there. Hence, you should not worry about these. The main objective of beta testing is to find issues even unknown to developers and make the game as perfect as possible for final release.

Feel free to leave your queries in comments below

Last Updated: 26th October 2019

Best Call of Duty Mobile PC Key Mapping for BlueStacks

Best Call of Duty Mobile PC Key Mapping for BlueStacks

Follow the guide here to get the best Call of Duty Mobile PC Key Mapping for BlueStacks Android emulator. The configuration given here will enhance your COD Mobile experience on the PC.

Call of Duty Mobile PC Key Mapping for BlueStacks

Before you take a look at the best COD Mobile PC Key Mapping for BlueStacks, let me give you an idea about COD Mobile’s gameplay on the emulator.

Call of Duty Mobile for PC on BlueStacks

Call of Duty Mobile came out about 2 weeks back. It didn’t take even a couple of days for this game to cross over 100M downloads. We are not talking about downloads from one platform, we are talking about the accumulative downloads.

As soon as the game came out, emulator players, as usual, tried running this game on their computers via Android emulators like BlueStacks. The game failed to run on BlueStacks at first. Within the same day, Call of Duty Mobile developer, Tencent, released the official COD Mobile emulator named Gameloop. The Gameloop is basically a revision of the Tencent Gaming Buddy. It has been rebranded with the added support for Call of Duty Mobile. A huge number of COD Mobile players jumped towards the Gameloop emulator which gave a wakeup call to the BlueStacks developers to update their emulator. The BlueStacks was updated to support Call of Duty Mobile later on.

As of writing this post, BlueStacks fully supports Call of Duty Mobile. Not only it runs the game, but it also brings completely custom controls for the game as well. On top of that, BlueStacks guys have been educating users on how they can improve their overall COD Mobile gameplay.

cod mobile pc bluestacks keymapping

BlueStacks is not doing something entirely special here. It’s just letting you play the most popular smartphone game on your computer. When it comes to choosing one between the BlueStacks and Gameloop, it depends entirely on the end-user. If you have been a lifelong BlueStacks user, you should probably stick to it, and if you want to experience something tailor-made to run COD Mobile on PC, you should go with the Gameloop.

Although BlueStacks shows you a complete list of controls when you launch Call of Duty Mobile on it, those controls are not something many users will stick to. Down below, I’m going to list all the key configurations and key mapping of COD Mobile for BlueStacks. I am also going to show you how you can re-configure COD Mobile Key Mapping on the BlueStacks.

Call of Duty Mobile PC Key Mapping for BlueStacks

Default COD Mobile Key Mapping for BlueStacks – Multiplayer

In the BlueStacks, you will see the controls tutorial first of all. It’s a long list of controls. You will see the Combat controls first of all.

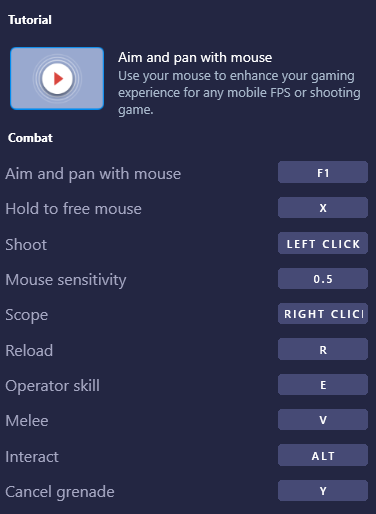
You can Aim and Pan with the mouse. If you don’t want to Aim and Pan with the mouse, you can press the F1 key on the keyboard. After this, your control will be shifted to the touch controls. You will have to click on each button in the game using your mouse. It’s always recommended to use your Mouse to Aim and Pan. Basically, you will be using your Mouse to freely move in the game. Here are the combat controls of COD Mobil

  • Hold to free mouse: X
  • Shoot: Left Mouse click
  • Scope: Right Mouse Click
  • Default Mouse Sensitivity: 0.5
  • Reload: R
  • Operator Skill: E
  • Melee: V
  • Interact: ALT
  • Cancel Grenade: Y

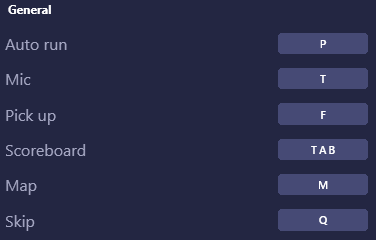
These are the general controls of the game.

  • Autorun: P
  • Mic on/off: T
  • Pick up items/drop items: F
  • Scoreboard and Stats: TAB
  • Map: M
  • Skip: Q
cod mobile pc best controls


Following are the movement controls. These are the typical controls that you usually have for all the PC FPS games.

  • Move Forward/Backward/Left/Right: W-A-S-D
  • Sprint: Shift + W
  • Jump: Space
  • Crouch/Go Prone: C

To control or change the weapons, you will use the following keys.

  • Weapon 1: 1
  • Weapon 2: 2
  • Grenade: 3
  • Strike 1: 4
  • Also, Strike 2: 5
  • Strike 3: 6
  • Strike 4: CTRL

More COD Mobile PC Tutorials:

COD Mobile PC Key Mapping BlueStacks – Battle Royale Mode

The general controls for Battle Royale mode are not very different from the multiplayer mode, however, there are some additional controls here that you need to learn about.

  • Autorun: P
  • Exit plane: E
  • Change view of player: 5
  • Pick up/open door/box/loot: F
  • Pick up: G
  • Ping: Mouse Middle Click – Scroll Button
  • Map: M
  • Backpack: TAB
  • Revive another player: V

You do not get the Helicopter in the multiplayer mode. There are a lot of Helicopters in the battle royale mode and the players are absolutely in love with this one feature. A helicopter is the easiest way to navigate through the maps in COD Mobile. This is also where BlueStacks has edge over other emulators. It’s nearly impossible to handle a copter in Gameloop, but BlueStacks is giving you exclusive controls for the Helicopter. Here are the keys.

  • Increase altitude (Go up): Arrow Up
  • Decrease Altitude (Go down): Arrow Down
  • Turn Left: Left Arrow
  • Turn Right: Right Arrow
  • Exit Helicopter: Q
  • Enter Helicopter: F
  • Get in a helicopter with other players: B
  • Tilt forward: U
  • Tilt backward: J
  • left tilt: H
  • right tilt: K

The movement controls of the Battle Royale mode are exactly the same as the multiplayer mode.

  • Move Forward/Backward/Left/Right: W-A-S-D
  • Sprint: Shift + W
  • Jump: Space
  • Crouch/Go Prone: C

In Battle Royale mode, you also get to drive various vehicles including Jeeps, Trucks, Motorbikes, and more. Here are the vehicle controls.

  • Enter Vehicle: F
  • Enter Vehicle with others: B
  • Change seat: CTRL
  • Exit Vehicle: F/Q
  • Brake: Up
  • Boost: Down

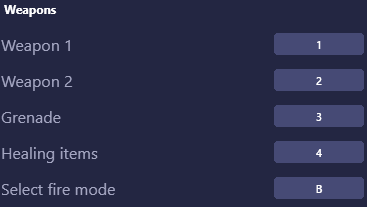
Here are the weapon controls for the Battle Royale mode.

  • Weapon 1 & 2: 1 and 2
  • Grenade: 3
  • Healing items: 4
  • Change Fire Mode: B

Best Call of Duty Mobile PC Key Mapping for BlueStacks – Recommended Settings

Now the default BlueStacks settings might not be the ones that all COD Mobile PC players want. Here are the recommended settings.

  • Move: WASD [W – A – S – D keys on the left side of Keyboard]
  • Jump/Surface: Space button
  • Slide while running: Shift + W + Hold C
  • Enter Vehicle/Helicopter/Pick up items/Open Box/Backpack/Change Class: F
  • Open your own bag: Tab
  • Crouch/Go Prone/Slide: Press C to Couch. Hold C to Go Prone.
  • Reload: R
  • Free: Alt
  • Sprint: Shift + W
  • Stun Grenade: 3
  • Cluster Grenade: 4
  • Air Strike, Nova Gas or Smoke Grenade: 5
  • Multi-bang: 6
  • Hemostatic or First Aid Kit: 7/8/9
  • Pick Up Items, Open Doors, Parachute etc: F
  • Change loadout: F
  • Ragdoll: F4
  • Game Stats/Match Stats (multiplayer only): Tab
  • Mic On/Off: Y
  • Run: =
  • Volume On/Off: T
  • Settings: ESC
  • Map: M
  • Chat/Player Statis: F2
  • Use Skill Class/First Aid: E
  • Enemy/Attack/Retreat: Press X & Move the Mouse

Some of these settings will be applicable to multiplayer and some will be applicable to Battle Royale mode only.

Remember that these are the settings that you get in Gameloop. These settings seemed the best to me which is why I am recommending the BlueStacks players to opt for these. In case you don’t know how you can change the settings in BlueStacks, take a look at the settings below.

How to change Call of Duty Mobile Key Mapping in BlueStacks

  • Open BlueStacks on the computer.
  • Now open Call of Duty Mobile.
  • The game will show you the controls. If it doesn’t, click on the small Keyboard button appearing on the right side.
  • When you see the controls, you will see options at the top. Select Multiplayer or Battle Royale to start viewing/editing.
  • Now click on the Edit button.
keymapping for cod mobile bluestacks
  • You will see that all keys are now customizable.
  • Now click on your desired button and enter your desired replacement key.
  • After changing the key mapping, save the controls.
  • That’s all. You have re-configured BlueStacks Key Mapping for COD Mobile.

Conclusion

That’s all for now. I hope that you guys enjoyed this tutorial. If you have anything to add to this guide or you have a more friendly key configuration for BlueStacks, make sure to share it with everyone through the comments section below. I will try my best to get back to you in time.

How to fix Call of Duty Mobile Authorization Error

0
How to fix Call of Duty Mobile Authorization Error

Many COD Mobile players are giving up because of the initial errors they have to face. The Authorization Error has also killed the hopes of many players. In this guide, you will learn how you can fix Call of Duty Mobile Authorization Error.

Call of Duty Mobile Authorization Error

Background of Authorization Error in COD Mobile

Call of Duty Mobile craze is at its peak at the moment. The game has made it to only 1 or country only, and that too in the beta stage, but the players can’t really hold off. Call of Duty Mobile, with some exclusive modes developed for smartphones, has got the young gamers glued with their handsets. Since the game is not globally available, the majority of the players are using tricks to get this game in the ineligible countries.

Yes, the game does work, and you can install Call of Duty Mobile on Android right now too, but there are going to be a few downsides. The downsides are not something like the game will not work or some of its features will not work. Downsides are here are basically the errors that you will initially face. The Authorization Error is also one of those errors. Before you give up on Call of Duty Mobile because of Authorization Error, give a try to the solution that you will find here.

Before you take a look at the steps to fix the Authorization Error, you need to understand why you are getting it. As I mentioned above, there are tricks to run the game in incompatible countries. The most popular trick is to use a VPN, connect to a country where this game is available, and then launch the game and play it.

When you open the game, it needs to find its servers. To find the servers, the game will check your geo-location and then find the servers. Now that this game is out in 1 country at the moment i.e. India, it quickly tries to connect to India as COD Mobile servers are up in India only. 

So, what’s basically going on here is, when you try to launch this game without a VPN, or with a VPN but not through India, you get the Authorization Error. So in case you are wondering why you are unable to get past the authorization error even when you have a VPN enabled, you have got that answer now.

To get away from this error, all you have to do now is to follow a few steps given below.

Guide to Fix Call of Duty Mobile Authorization Error

  1. First of all, find a good VPN that has India in its list.
  2. Install the VPN and open it. Connect to India in the VPN.
  3. Now launch Call of Duty Mobile.
  4. Wait for the game to initialize.
  5. Login into the game now. It should go smooth.
  6. If it fails again, open the VPN and connect another server in India.
  7. In case you don’t have a server choice in the VPN app, try another VPN, or go for a premium VPN.
  8. Launch the game with a different IP now and it should work.

More:

Common Facebook Slang Words [Chatting and Status Messages Meaning]

0
Common Facebook Slang Words [Chatting and Status Messages Meaning]

In this article, I will tell you most Common Facebook Slang Words and their meanings. In our daily life, we use the social network more than anything. People use Facebook, Twitter, SnapChat and more, rather than any other thing. Once you started using Facebook or twitter there is no stopping to that, you will keep on scrolling and you will find never-ending updates.

Common Facebook Slang Words

Not only we follow our friends on social media, but we also follow other people, communities, discussion, pages, chat groups and more. There is another thing that is most common in all social networks. I am talking about the online-slang words like LoL, ASAP, ASL, OMG and more. Such words are used widely by social media users. Mostly while they are updating status and commenting on a post.

Most of us know all the Common Facebook Slang Words but not all of us. In this post, I will provide you all the common and mostly used Facebook Slang words and also their meanings. This will help you understand what you are typing in your status and also what people are saying.

Moreover, you can use these Slang Words anywhere because it’s commonly used by everyone. Use them on iMessage, WhatsApp, Twitter, SnapChat, etc. You will be surprised to know, BBC News stated that ASAP, LoL, OMG, ASL is the most popular Slang Words and they should be added in the Oxford Dictionary.

Common Facebook Slang Words [Chatting and Status Messages Meaning]:

The basic reason behind using the Slang words is to save your time while chatting or communicating with others. Why we need to write a complete word or sentence when we can use Slang word and tell that same thing in 2-3 words. But that being said, it is not highly likable that others also know what you are saying.

If you are among those who really don’t know what your friends are saying, no need to be sad or ashamed. We’ll here to help you, Following is the list of all the common Common Facebook Slang Words and their meanings. These are collected from all the big social networks like Facebook, Twitter, Linkedin, and more. Let’s tell you the meanings of Common Slang Words.

Meanings of Common Slang Words:

  1. ASAP – As Soon As Possible
  2. ASAIC-: As Soon As I Can
  3. LOL – Laugh Out Loud
  4. ASL – Tell me your Age, Sex, and Location
  5. TU – Thank You
  6. GM – Good Morning
  7. GE – Good Evening
  8. GN – Good Night
  9. JFY-: Just For You
  10. MTUK-: More Than You Know
  11. OSLT -: Or Something Like That
  12. ACC – Actually
  13. ACE – Excellent or Great
  14. AFS – Always Forever and Seriously
  15. APP – Application
  16. AUO -: I don’t know
  17. AW – Anyway
  18. B4 – Before
  19. BBS – Be Back Soon
  20. BBL – Be Back Later
  21. BBN – Be Back Never
  22. BBT – Be Back TomorroBF – Boy Friend
  23. GF – Girl Friend
  24. BFF – Best Friend Forever
  25. BOT – Back On Topic
  26. BBZ – Babes
  27. CYL – Catch You Late
  28. D8 – Date
  29. DAM – Don’t Ask Me
  30. DAQ – Don’t Ask question
  31. DARL – Darling
  32. DAT – That
  33. DDT – Don’t Do That
  34. F9 – Fine
  35. FBF – Facebook Friend
  36. G2E – Go To Eat
  37. G8 – Great
  38. GTH – Go To Hell
  39. H2CUS – Hope To See You Soon
  40. HAGL – Have A Good Life
  41. HAGD – Have A Good Day
  42. HAGN – Have A Good Night
  43. HAGE – Have A Good Evening
  44. HAND – Have A Nice Day
  45. HBU – How About You
  46. HDU – How Dare You
  47. HEY – Hello, Hi
  48. HF – Have Fun
  49. HHOJ – Ha Ha, Only Joking
  50. HHOK – Ha Ha, Only Kidding
  51. HHVF – Ha Ha, Very Funny
  52. hm… – Thinking
  53. I IAS – In A Second
  54. IB – I’m Back
  55. IHS – I Hope So
  56. IIL – I’m in Love
  57. IK – I Know
  58. J4F – Just For Fun
  59. J4L – Just For Laugh
  60. J4U – Just For You
  61. JLT – Just Like That
  62. K – Okay
  63. KL – Cool
  64. B4 – Before
  65. M/F – Are you Male or Female
  66. IDK – I Don’t Know
  67. L8 – Later
  68. L8ER – Later
  69. ME2 – Me Too
  70. N – And
  71. N2G – Need To Go
  72. NOPE – No
  73. O7 – Salute
  74. OOPS – If you make a mistake, you can say
  75. OYE – Listen up
  76. PPL – People
  77. PRO – Professional
  78. PLZ – Please
  79. PM – Private Message
  80. Q&A – Question and Answer
  81. RI8 – Right
  82. S2U – Same to You
  83. SRY – Sorry
  84. THANQ – Thank You
  85. THANX, TNX, TX – Thanks
  86. THN – Then
  87. TTLY – Totally
  88. TTUL – Talk To You Later
  89. TTUS – Talk To You Soon
  90. U – You
  91. UR – Your
  92. W/ – With
  93. W/O – Without
  94. W/E – Whatever
  95. W8 – Wait
  96. WC – Welcome
  97. W^ – What’s up
  98. XLNT – Excellent
  99. X_X – Dead
  100. Y – Why
  101. YEAH, YH – Yes
  102. SD – Sweet Dreams
  103. WTF – What The F**k
  104. BTW – By The Way
  105. BRB – Be Right Back
  106. JK – Just Kidding
  107. zzz – Sleeping
  108. JK – Just Kidding
  109. FYI – For Your Information
  110. FB – Facebook
  111. WTH – What The Hell
  112. LMK – Let Me Know
  113. OMG – Oh! My God

That’s all. Please do share this article with your friends and families. Let them know what is the meaning of most Common Facebook Slang Words.

Use Bitmoji on Facebook [ PC & Mac ] [ Tutorial ]

0
Use Bitmoji on Facebook [ PC & Mac ] [ Tutorial ]

In this article, you will learn how to use Bitmoji on Facebook, If you are a SnapChat user then you are well aware of Bitmoji. It is mostly used by SnapChat users. Sadly, it is not available for Facebook or other social media platforms. Not available means, it is easy to use and compatible with SnapChat rather than others.

Here in this guide, we will show you how to use Bitmoji on Facebook, Use Bitmoji with Facebook status and also you can use Bitmoji in Facebook comments. Through our guide, you will be able to use Bitmoji on your iPhone, Android, Windows PC and Mac.

Read more: Get the Bitmoji Keyboard on Android

What is Bitmoji:

Those who don’t know What is Bitmoji and why everyone wants it so badly. Basically, Bitmoji is an app which provides you custom emoji which really look like you. Since the app name is Bitmoji that is why we called it Bimoji rather than Emoji. The fun part is that you can easily customize the looks of your Bitmoji character. You add different things like looks, hair, and clothing.

That is not it, not only you can change the looks of your Bitmoji character. You can also express yourself with Bitmoji props, signs, sayings memes and other options. Once you started using Bitmoji, you won’t have to write anything at all. I am pretty sure that sums up thing for Bitmoji and it’s time tell you how to use Bitmoji on Facebook.

How to Use Bitmoji on Facebook:

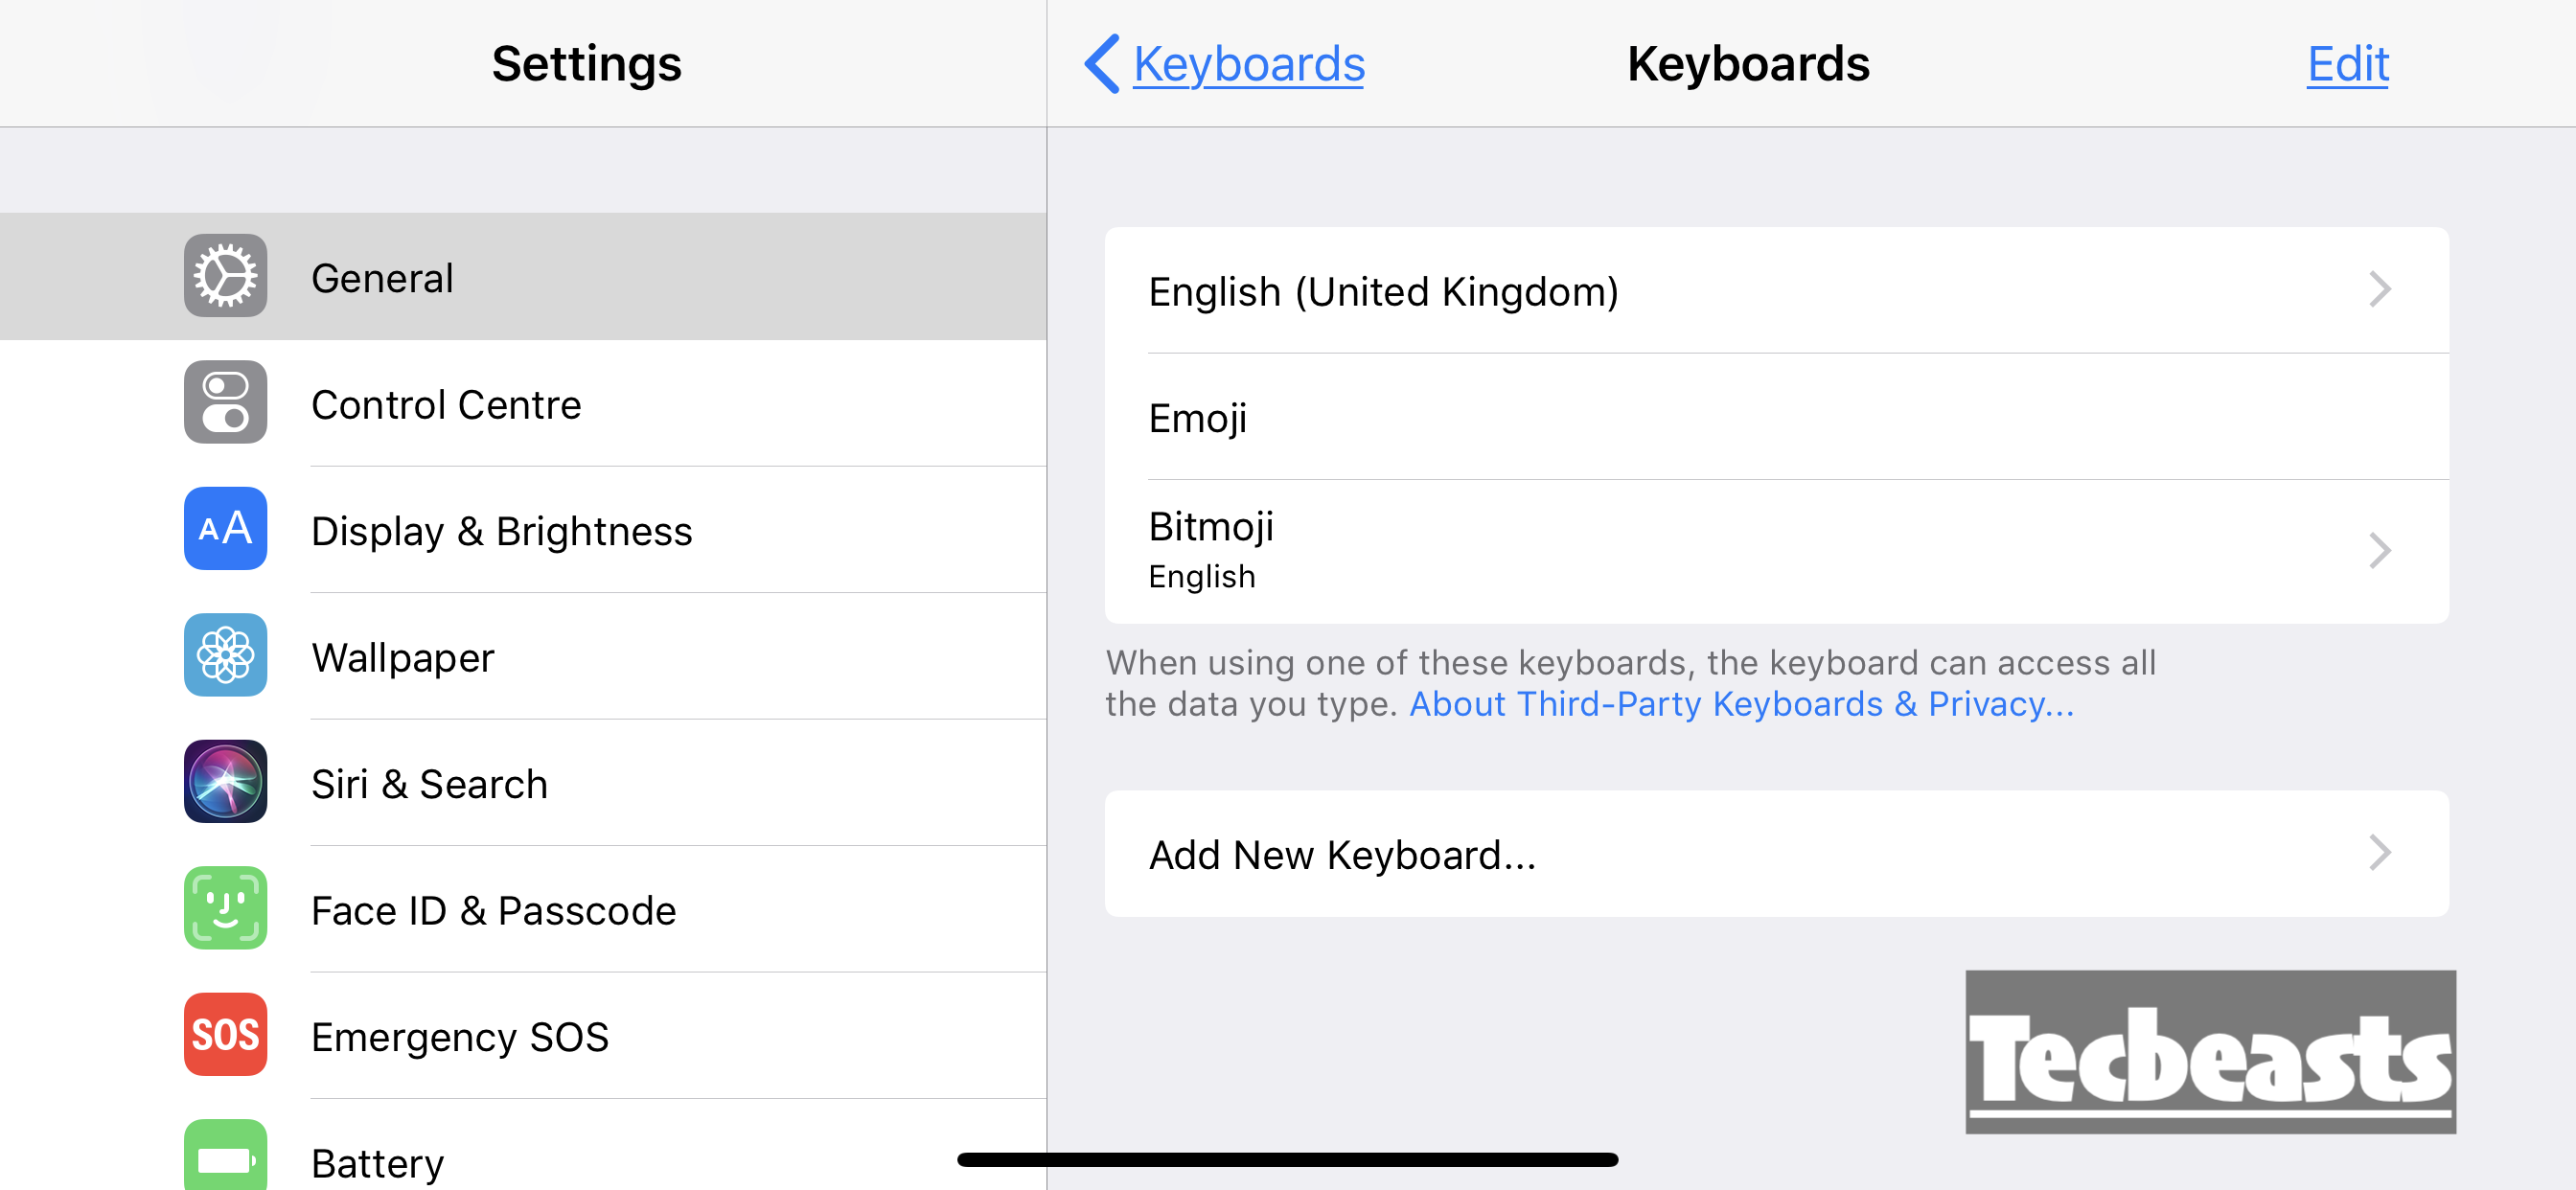
The thing is, As compared to Windows and Mac, it is relatively easy to use Bitmoji on iPhone and Android. For smartphones, all you have to do is install Bitmoji and add it to your iPhone or Android Keyboard. But When it comes to PC or Mac, you need to install a Bitmoji Chrome extension. Afterward, you have to sign-in with your Bitmoji account.

Bitmoji on Facebook

iPhone:

  • Settings.
  • General.
  • Keyboards.
  • Add New Keyboard.
  • Pick Bitmoji.
  • Tap on Bitmoji.
  • Allow Full Access.

Android:

  • Settings.
  • Language & Input.
  • On-Screen Keyboard
  • Manage Keyboard.
  • Toggle On Bitmoji Keyboard.

Windows & Mac:

It’s simple as well, click on the link here and download the Bitmoji Chrome extension. Once added, use your Bitmoji credentials to log-in. Afterward, follow the instructions below in which we will tell you how to Add Bitmoji to Facebook Posts.

Add Bitmoji to Facebook Posts:

Now things will get easier than before. Once you have installed Bitmoji and created your Character. Let’s tell you how to use it with ease and add Bitmoji to Facebook posts. Open Up Facebook app on your iPhone and Android. On iOS devices Tap on Globe Icon and Select Bitmoji Keyboard. For Android devices, Tap on the Keyboard icon located at the bottom right corner and select Bitmoji.

  • After that, Select any Bitmoji and tap on paste. You will see your select Bitmoji is added on your Facebook post. That was for smartphone users, now let’s head over to the PC and Mac.
  • Open Up Chrome and Log-in to the Facebook account. Click on the Bitmoji extension > Right Click > Copy the Bitmoji. Head over to the Facebook, right-click and paste. See as simple as it gets.

Post-Bitmoji to Facebook Comments:

Open up the post and tap on comments, make sure you have select Bitmoji as your keyboard. Tap on a Bitmoji and you well a green pop-up “Bitmoji Copied Now Paste it”. Tap on the comment filed and then tap on paste.

That’s all. This is how you can use Bitmoji on Facebook while using Facebook on Pc or smartphones. Please do share this with your friends and if you want to ask anything regarding this article. Use the comment section below.

Add Apple CarPlay To Any Car [ Third-party Services ]

0
Add Apple CarPlay To Any Car [ Third-party Services ]

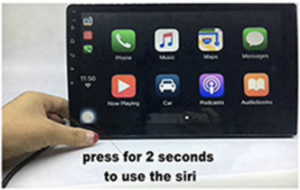
In this article, we’ll guide you on how to AddApple CarPlay To Any Car. Well, it’s not just a single app that we can download on our car infotainment system. So if we cannot do that, means we need the other thing. In this post, you will get that other thing which allows you to add Apple CarPlay To Any Car.

Apple CarPlay To Any Car

A bit about Apple CarPlay:

You all are well aware of the fact that Wireless CarPlay is a great addition to any car. I mean it takes the entertainment level to a height. Moreover, those who are Apple die-hard fans and they don’t have the car which comes with built-in CarPlay. They know very well, in order to get the CarPlay head unit they need to pay $700+. Not only that, if a car supports Apple CarPlay, its price will be a bit steep.

So to get away from all that hassle, we have found a perfect solution. It’s called Chytah Wireless Apple CarPlay USB Dongle. The best and the easiest way to add Apple CarPlay to Android car head units. Moreover, this Wireless Apple CarPlay USB Dongle will work on any car, as long as the car head unit support CarPlay.

Using this Dongle is simple, even a layman can use it. All you have to do is plug in the Wireless Apple CarPlay USB Dongle into the USB port of a car entertainment system. This is all, once the dongle is plugged in, you will have immediate access to Apple CarPlay. See how simple it was but before making your final mind. Read the main features and requirements list below.

Features & Requirements:

  • Full support for Wireless Apple CarPlay (for iPhone).
  • Supports wired Android Auto.
  • Works on all Android head units running version 4.4.2 or above.
  • HD output for crystal clear experience on the go.
  • Full support for Siri for voice commands.
  • Works with Maps, Music, Phone, Messages, etc.
  • Supports multiple screen sizes for an unprecedented experience.

ScreenShots:

Add Apple CarPlay To Any Car:

Use the following link to purchase the Chytah Wireless Apple CarPlay USB Dongle. Once you get your hands of the dongle, all you have to do is plug-in into the USB port of your car entertainment system.

Harry Potter Wizards Unite Fan Festival Tickets – Guide

0

Ever since it came onto the scene, Wizards Unite has take world by storm. The wizards and witches are everywhere! In order to celebrate it and get everyone together, Niantic is arranging Harry Potter Wizards Unite Fan Festival. It is a comic-con’esque event but solely focused on HPWU and its universe. Moreover, dragons in Wizards Unite Fan Festival is another great event coming up. To put it simply, you just cannot afford to miss it! Lets go throught the most important details.

harry potter wizards unite fan festival tickets

When is Harry Potter Wizards Unite Fan Festival being held?

The said event is actually a 2 day festival. However, people will be allocated to 2 separate days only. It means that if you are invited to first day of Wizards Unite Fan Festival, then it’s not possible to go on day 2. 

The dates for HPWU Fan Festival are August 31 and September 1. 

Make sure to mark these dates on your calendar right now!

Location of HPWU Fan Festival

Some fans might be wondering where is Harry Potter Unite Festivals being held? Well, this location was kept secret until now. However, thanks to the recent information, now we know.

HPWU Fan Festival is located in White River State Park, Indianapolis, Indiana, USA.

Now that you know where it is, make sure to book tickets and hotels online. Otherwise, you may have to settle for some unpleasant pricing at 11th hour.

How to get tickets for Harry Potter Wizards Unite Fan Festival?

Unfortunately, this event is not available for everyone. To be fair, this is actually a good thing. Otherwise there would be too many people for a small area. It may not turn out to be a good experience in that case.

Wondering how to get Harry Potter Wizards Unite Fan Festival tickets? Well, the correct information is recently revealed. 

Follow these steps to get tickets for yourself and your buddies.

  • Launch WU game on your phone.
  • Open the suitcase in-game.
  • Next up, tap on the Ticket logo in next screen.
  • It will show you the list of coming events. Tap on WU Fan Fest for this guide.
  • Enter the Email Address in given box here.
  • This will enter you into tickets lottery.
  • Now wait for the lottery to roll and if you’re lucky, then your own name will be selected.
  • Wait for the invite email.

Note that the people who can buy Wizards Unite Fan Fest tickets are selected at random. And it is not confirmed yet, but we are sure that each person that won in lottery can invite up to 4 buddies.

Make sure to enter your correct usernames when purchasing tickets. These tickets are linked directly to game accounts. 

Final Words

We understand that every fan of this game and book/movie series wants to be there. However, this is a lottery system since the number of tickets are limited. The main reason for this is to ensure that you can enjoy festival without overcrowding. Also avoid people who try to sell these tickets in illegal ways. Best of luck!

Click Here to read more guides, tips and tricks for Harry Potter Wizards Unite

Harry Potter Wizards Unite Spell Energy – Guide

0
Harry Potter Wizards Unite Spell Energy – Guide

Most of challenges in Harry Potter Wizards Unite involve taking care of counfoundables. They vary in rarity from low threat to extremely rare and powerful ones. Therefore, Harry Potter Wizards Unite Spell Energy becomes a hugely important material. Spell energy number basically represents the number of times you can cast spells / complete traces. Therefore, if someone runs out of Spell Energy in Harry Potter Wizards Unite, then they cannot cast anymore spells. Therefore, if there is a rare confoundables or creature, you’d fail to complete that challenge.

harry potter wizards unite spell energy guide

Running out Spell Energy in Harry Potter Wizards Unite

One of the most disappointing things to happen while playing this game is when you run out of Spell Energy. HPWU players may run out of it when trying to defeat a rare creature or confoundable. This not only results in loss of all of previously stored energy but you also lose the chance to capture that rare item. Consequently, players lose both spell energy and not gain any XP either.

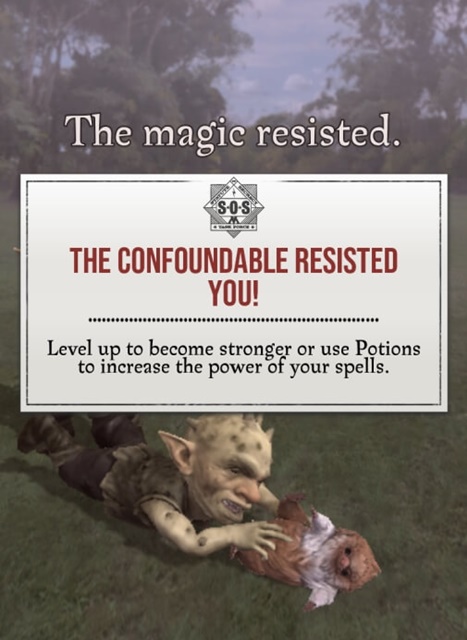
Note that even if a spell fails and the counfoundable resists it, energy is still used. Therefore, making HPWU Spell Energy one of the most valuable resources to look out for.

In this guide, we go through several points on how to save and get more spell energy in Harry Potter Wizards Unite. You’d never have a Spell Energy shortage. In addition to this, there are some useful tips to manage the existing resources.

How to get Spell Energy in HPWU

Lets get some basic facts out of the way first. The most important being, Spell Energy does not regenerate automatically. Once you’ve lost some, it won’t fill up itself. Therefore, no one can just keep the game on and farm Spell Energy without doing anything. It does not work like that.

Secondly, each trace / spell uses 1 spell energy point. Initially, the bar is set at max limit of 75. However, you can increase the limit over time. Moreover, it does not matter if your spell or magic is successful or fails. Either way, it’d irreversibly use up the spell energy.

We listed the best sources of Spell Energy in Harry Potter Wizards Unite world below. Go through these one by one and see whichever is best option for you.

Get 3-10 Spell Energy from Inns

When someone wants to replenish their energy and feel fresh again, where do they go in wizarding world? Yes, you guessed it right. The inns of Harry Potter Universe are there for wizards to sit in and just chill. The game developer, very cleverly, also made it the place that recharges Spell Energy. And you don’t really have to do anything special about it either.

In order to get Spell Energy from a HPWU Inn, just visit it. You can see the tiny hut on game map. Tap on it to enter one. Once you’ve entered it, you’d get anywhere between 3-10 spell energy. The amount is not always same. You may sometimes get lucky and get 10 Spell Energy from inn or just get a mere 3. Anyways, it is the best free source of Spell Energy in Harry Potter Wizards Unite.

There’s a catch though! Once you’ve visited an inn, it won’t give off more spell energy for 5 minutes. This is the cooldown time basically. Everytime you visit an inn, smoke will start coming out of it. As long as this smoke continues, it means that you won’t get any spell energy by entering that inn specifically.

This small break is there to encourage players to keep walking to new areas and avoid farming energy from just one inn.

Get 10 Spell Energy from Daily Tasks

Almost every video game now comes with daily login rewards. Every new day login comes with a list of new tasks. One of these tasks gives off 10 Spell Energy. This is a good way to start the day. Therefore, whatever you do, always complete the spell Energy task in Harry Potter Wizards Unite first.

Greenhouses

The rewards from greenhouses are random. It mostly gives off potion ingredients. However, sometimes they spill out 4 Spell Energy points as well. This could be really useful.

Collect Spell Energy while walking

When you’re walking down the streets looking for traces, foundables and what not, also be on the lookout for inns and greenhouses. The more places you visit, better the Spell Energy inventory will be. It helps you stay in shape for when a powerful and rare item pops up. Since is highly impossible to defeat powerful counfoundable in one go, therefore, try and save more spell energy for such encounters.

How to manage Harry Potter Wizards Unite Spell Energy Effectively

harry potter wizards unite spell energy low

Since it is such a limited resource, therefore you must learn how to never run out of Spell Energy. It’s shortage really hits you when a rare counfoundable shows up and you don’t have enough juice to fight it. Moreover, you may run out of spell energy during a wizarding competition, spell tracing or something else even more important.

In order to keep it all in check, avoid tacking common confoundables and traces just for XP. Especially, if you are aware of how often they appear on map. Always try to keep at least 20 Spell Energy as a reserve for unexpected fights and challenges.

Jailbreak iOS 12.3 With Chimera [ Download Chimera 1.2.4 ]

0
Jailbreak iOS 12.3 With Chimera [ Download Chimera 1.2.4 ]

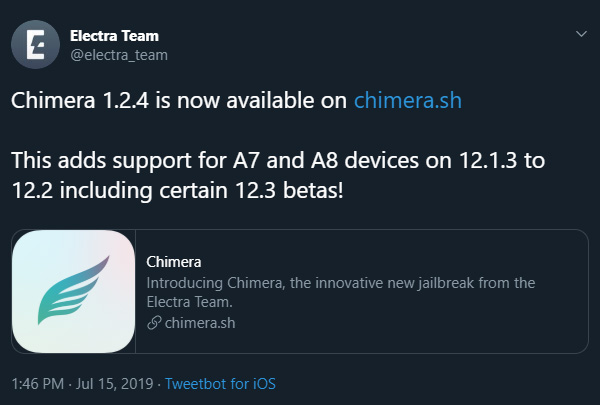
In the past few weeks, we have seen the Jailbreaking community is coming back to life. Moreover, the development teams behind Jailbreaking tools are catching up with Apple. Yesterday, Electra Team has released Chimera 1.2.4, in this latest update of theirs, they have added support for Apple devices running the A7 and A8 chips. Also, Chimera 1.2.4 allow you to Jailbreak 12.1.3 through iOS 12.2.

Now that’s not it, If you are running iOS 12.3 beta version, you will be glad to know that you can Jailbreak iOS 12.3 With Chimera. However, not all the beta version are in one Jailbreak. Only 12.3 beta 6 can be Jailbreak using Chimera 1.2.4. Now if you have used beta version before then you should know that they are full of bugs. And if you are trying to Jailbreak an unstable iOS version, you are well aware of the risks. But I think it’s worth taking a risk.

Jailbreak iOS 12.3

Jailbreak iOS 12.3 With Chimera:

So, If you are among those who want to give it a try, start with downloading the latest version of Chimera from chimera.sh. Once it is done heed the instruction below to install it and Jailbreak iOS 12.3.

Download Chimera v1.2.4:


Chimera iOS 12.3 Jailbreak:

iOS 12.3 Jailbreak
✔: Download Chimera IPA File and also download Cydia Impactor on your Mac or Windows PC.
✔: Connect your iPhone and launch Cydia Impactor. Your iPhone will be detected automatically.
✔: Now Drag and Drop Chimera IPA file on Cydia Impactor. You will be asked to enter your developer Apple ID. It doesn’t matter if you don’t have any. You can use your regular Apple ID.
✔: Once your Apple ID is verified, Cydia Impactor will start installing Chimera app on your iPhone.
✔: After the installation process is finished. Head over to your iPhone and open up Settings-> General -> Profile Management -> Tap on your Apple ID profile -> Tap Trust.
✔: Open Chimera app and Tap on Jailbreak. Sit back and let Chimera do its magic.

That’s all. You may find the following links interesting if you love Jailbreak.

There may be a number of reasons you should not try Jailbreak for the beta version. But on the other hand, if you really go it, then you will enjoy it more than usual. Since there will be nothing to stop you from installing any tweaks. There will be no warnings since it is a beta version of iOS.

This is how you can Jailbreak iOS 12.3 with Chimera. Please do share your experience with us in the comments sections below.

How to Install iOS 13 Beta 4 [ No Computer ]

0
How to Install iOS 13 Beta 4 [ No Computer ]

Here in this article, you will learn today, How to Install iOS Beta 4 without any computer. We will provide you the latest iOS 13 Beta 4 download links for iPhone and iPad. The good news is that now you can download the Developer Profile directly on your device. It means goodbye computer, all you have to do is install the iOS 13 Beta 4 profile and you will able to install iOS 13 beta on your iPhone and iPad. 

iOS 13 Beta

Download iOS 13 Beta 4:

Use the following link to download iOS 13 developer profile. It would be easy if you access our site from your device because we don’t need a PC. Moreover, one the profile is downloaded, all you have to is follow the on-screen instructions.

Now it’s time to tell you what you have to do after the iOS 13 Beta 4 Profile is downloaded.

How to Install iOS 13 Beta 4:

As I said before, it would be better to open our post on your device and then proceed with the downloading and installation process.

Step1: Open Safari on your device and download the developer profile from the link given above.

Step2: When you will tap on the download link, you will be redirected to a new page. Tap on the download button and then tap on the allow button.

Step3: Now head over to the Settings -> General -> Profile Management and Tap on developer profile. A pop-up will show up, Tap on install three times after that enter your passcode. Reboot your device.

Step4: When your device is turned back on, head over to the settings once again. Tap General > Software Update > Download and Install.

Step5: Sit back and let it work, while preparing the update, it will take time. Once the process is finished, you will be notified and once it does, Tap on Install Now.

That’s all. This is how you will be able to install iOS 13 without PC or Computer. Please do share your experience with us and let’s know how we can help you. If you want to get the latest news and updates about iOS 13, we would recommend you to bookmark this page.

Jailbreak Guides:

Jailbreak iOS 12.2 and below using Unc0ver 3.3.0 & Chimera 1.2.0 [Cydia Impactor]

0
Jailbreak iOS 12.2 and below using Unc0ver 3.3.0 & Chimera 1.2.0 [Cydia Impactor]

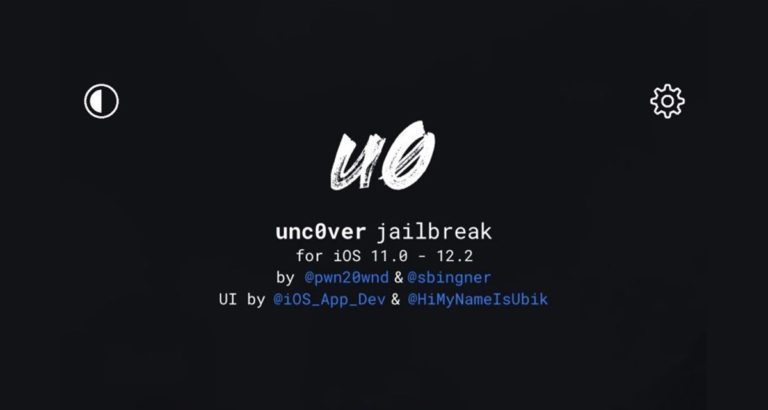
This is the guide to Jailbreak iOS 12.2 and below using Unc0ver 3.3.0 and Chimera 1.2.0. We will install Unc0ver 3.3.0 IPA or Chimera 1.2.0 IPA via Cydia Impactor. You can Jailbreak iOS 12.2, 12.1.3, 12.1.2, and 12.0 through this method.

Jailbreak iOS 12.2

Unc0ver & Chimera

The wait is over. iOS 12.2 Jailbreak is here. The news came from none other than Pwn20wnd, the developer of Unc0ver. So far, Unc0ver has allowed iOS users to Jailbreak their devices on a handful of versions. The iOS 12 Jailbreak was what everyone was eyeing. It is finally here. The best part is, Chimera has been updated as well to support iOS 12.2 Jailbreak. If you have any iPhone running on iOS 12.0 – 12.1.2 and iOS 12.1.3 to iOS 12.2.

Both Unc0ver 3.3.0 and Chimera 12.2 use Ned Williamson’s tfp0 exploit to achieve Jailbreak on the said versions of iOS. These tools actually Jailbroke these iOS versions before, but they were not stable. Because of the stability issues, users had to switch back to the official iOS firmware.

Unc0ver started with the 3.3.0 Beta 3. This version was available for public testing. It turned out to be stable and worked well for all iOS 12.2 owners on A7 to A11-powered devices. At the time of writing this post, we have the Unc0ver 3.3.0 Beta 7 out. It fixes false “Unsupported” device reporting and a few more bugs.

Chimera also follows in the footsteps of Unc0ver. It also supports the same iOS version and same chipsets. Both these tools will achieve the exact same results, so, there should be no confusion here at all.

Choice of the tool totally depends on you. Whether you are comfortable with Unc0ver or Chimera, you can pick it up. I am going to show you the Jailbreak method using Unc0ver 3.3.0 and Chimera 1.2.0.

In case you are new to Jailbreak, let me give you a brief idea about it.

Jailbreak – What does it mean?

The Jailbreak process gives the applications and processes access to the system of your iOS device. If you have heard of the terms Root for Android and Linux, the Jailbreak is similar to those. Jailbreaking your iPhone is just like rooting your Android device.

On a Jailbroken iPhone, you can install all those apps that Apple doesn’t allow officially. You can change the UI of your phone. New features can be added. Each and every element of your iOS can be modified with the help of Jailbreak. It helps you to unleash the true potential of your phone. There are endless modification/customization possibilities on a device with Jailbreak.

While Jailbreak comes with a lot of flexibility, it has got some risks too. For example, you will not get any more OTA updates on a Jailbroken iOS 12.2 device. Furthermore, you will not be eligible for any Apple services either. Before taking your phone to Apple Service center, you will have to unJailbreak it. Simply installing a new official firmware removes the Jailbreak from the iPhone.

The things that can go wrong with an iPhone on Jailbreak include soft-brick. In this state, the iPhone goes dead and shows you the Apple logo only. This is a rare happening. Given that you follow all the instructions to the word, this event is highly unlikely to happen.

Assuming that you have learned what Jailbreak is and you have a know-how of all the risks involved, move on to the steps to Jailbreak iOS 12.2 and below using Unc0ver 3.3.0 & Chimera 1.2.0 via Cydia Impactor.

Update: Download Checkra1n 0.9.1 – Jailbreak iOS 13.2.2

Requirements

  • You need an iPhone with iOS 12.0, 12.1.2, 12.1.3, or 12.2.
  • The iPhone must be powered by Apple chipset A7-A11.
  • Backup each and everything on your iPhone.
  • A Windows or Mac-powered PC/Laptop is needed.
  • You also need the original data cable of your iPhone.
  • Cydia Impactor download: Windows | Mac.
  • Unc0ver 3.3.0 IPA: Download
  • Chimera 1.2.0 IPA: Download

Jailbreak iOS 12.2 and below using Unc0ver 3.3.0 & Chimera 1.2.0 – Cydia Impactor 

Download and install Cydia Impactor on Windows/Mac computer.

First of all, download Cydia Impactor for Windows or Mac and install it on your computer.

Connect your iPhone to the computer.

Using the data cable, connect the iPhone to the computer. If the iPhone asks for any permission, allow it. Select the connected iPhone in the Cydia Impactor drop-down.

Add Unc0ver or Chimera IPA to Cydia Impactor.

Now drag the Unc0ver or Chimera IPA and drop it onto the Cydia Impactor.

Enter your Apple ID details to Cydia Impactor.

As Cydia Impactor asks for ID details, enter them. If it asks for an app-specific password, open your Apple ID on the PC, go to Settings > Security > Get the App-specific password and enter it in the Impactor.

Install the Unc0ver/Chimera on your iPhone now.

Click on the Start button in Cydia Impactor now. It will install the Unc0ver or Chimera tool on your iPhone within 2-3 seconds.

Authorize Unc0ver/Chimera to work with your Apple ID.

On the iPhone, open Settings > General > Profiles & Device Management > Click on Trust > Click on Trust again.

Open Unc0ver/Chimera and press Jailbreak. That’s it.

Open the installed tools i.e. Unc0ver or Chimera and click on Jailbreak. The phone will act like its sleeping. As soon as it shows you the screen again, click on Jailbreak once again. Congratulations! Your iPhone is Jailbroken now. That’s all.

Final Words

That’s all and that’s how easy it was. You have successfully achieved iOS 12.2 Jailbreak on the iPhone. You are now all set to bring in a plethora of cydia-specific apps. Furthermore, you can explore TweakBox to find all the compatible apps. Its time to check out the real potential of your iPhone. If you have got any questions regarding the Unc0ver, Chimera, or the Jailbreak process, feel free to reach out to us. The best way to contact us is through the comments section below.