

TWRP Recovery is officially available for the Nokia 8 now. If you own this device, it is time to unleash its true power. The TWRP Recovery can be installed on the Nokia 8 in order to flash any custom ROM or root package. At the moment, the Nokia 8 can be rooted easily via Magisk. As you go ahead in this guide, you will come across the steps to install TWRP Recovery and Root Nokia 8. Before flashing TWRP and rooting the Nokia 8, let us take a look at what the Nokia 8 has to offer in terms of hardware and software.
Contents
Nokia 8 Recap
HMD Global brought Nokia back from the ashes back in 2017. Right after acquiring the Nokia brand, HMD Global introduced a revised version of the Nokia 3310. Along with this phone, the company launched a series of handsets including the Nokia 3, Nokia 5 and the Nokia 6. The very first phones introduced by HMD Global were not the flagship devices. The company took a little while to bring a phone with the top of the line hardware. In September 2017, HMD Global introduced the Nokia 8, the company’s first true flagship phone.
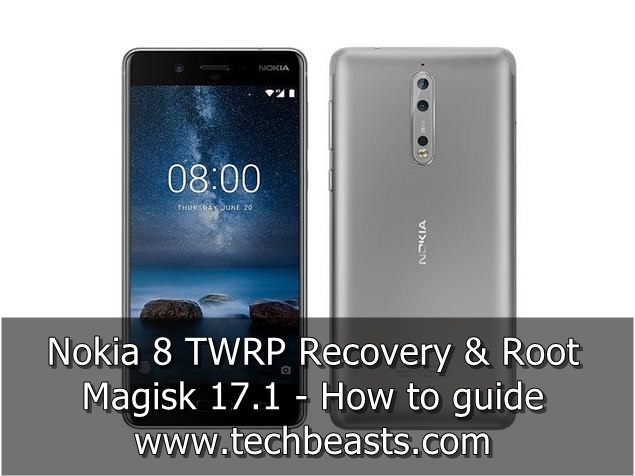
Nokia 8 comes in with a 5.3-inch IPS LCD display. The phone has a resolution of 1440 x 2560 pixels (QHD). The Nokia 8 has a screen ratio of 16:9. Back then, there was no trend of 18:9 screens or the notch. This phone is powered by Qualcomm Snapdragon 835 CPU accompanied by Adreno 540 GPU. Nokia 8 RAM and storage configurations include 128GB with 6GB RAM or 64GB with 4GB RAM.
The phone has a dual shooter at the back housing both the shooters of 13MP. On the front, it has a single 13MP camera. The Nokia 8 uses USB Type-C to connect to the computer. This phone has a battery of 3,090 mAh under the hood. The Nokia 8 was available in Tempered Blue, Polished Blue, Steel and Polished Copper colors. It ran on Android Nougat out of the box.
 TWRP Recovery for Nokia 8
The TWRP Recovery comes with a number of perks. The recovery will allow Nokia 8 users to back up their phone. In the TWRP, there is a backup option using which the users can backup the selective partitions from their phone.
TWRP Recovery has the terminal in which different commands can be issued. The terminal can be used to customize the phone in a number of ways.
The wipe option under TWRP makes the users capable of wiping the partitions individually. For example, you just want to wipe cache and Dalvik cache, the advanced wipe options will let you do that. If you want to wipe the system or data only, you can do that too using this option. The format data option under the wipe option will factory reset your phone.
The install option in TWRP has two options. You can either install ZIP files or the IMG files. Using this option, you can flash any custom ROM, a MOD, or any root package in order to gain root access on the phone.
Flashing the TWRP requires an unlocked bootloader on the phone. This also means you will void the warranty of your phone. So while you plan on flashing a custom recovery on the phone, beware of the downsides as well.
Magisk for Nokia 8
In order to root the Nokia 8, the latest version of the Magisk can come in handy. The Magisk 17.1 can be flashed on the Nokia 8 right after flashing the TWRP custom recovery.
To learn more about root, take a look at the following posts:
Without any further ado, proceed to the instructions given below in order to get the process done.
Install TWRP Recovery and Root Nokia 8
Preparations
- This guide is only for the Nokia 8. Do not try on any other phone.
- Charge your phone’s battery up to 50%.
- Backup all of your data to avoid data loss.
- Use OEM Data Cable to connect Nokia 8 to the computer.
- Enable USB Debugging and OEM Unlocking on the phone.
- Unlock the bootloader of your Nokia 8.
- Follow the remaining steps carefully.
Downloads
- Minimal ADB and Fastboot Drivers
- As a result of installing these drivers, you will get the following folder: C:\Program Files (x86)\Minimal ADB and Fastboot
- Nokia Android USB Drivers
- twrp-3.2.3-0-NB1.img
- Rename this file to only “twrp.img”. Copy the twrp.img file to C:\Program Files (x86)\Minimal ADB and Fastboot.
- twrp-installer-NB1-3.2.3-0.zip
- Magisk.zip file
Flashing TWRP Custom Recovery on Nokia 8
- Connect Nokia 8 to the computer.
- Open the C:\Program Files (x86)\Minimal ADB and Fastboot folder and launch the cmd-here.exe file.
- You will now see a command window. In the command window, enter the following commands.
- adb reboot bootloader
- If your phone asks for any permission on the screen, allow it. This command will reboot your phone into the bootloader
- fastboot boot twrp.img
- This command will boot your Nokia 8 into the TWRP recovery.
- adb reboot bootloader
- Now in TWRP, click on the “Mount” button and mount all partitions.
- Copy the twrp-installer and Magisk.zip files to your phone now.
- Disconnect the phone from the computer now.
- In the TWRP recovery, click on Install > Install Zip > Locate the twrp-installer.zip file > Swipe to flash.
- After flashing this file, go back to the main menu in TWRP, click on Reboot > Reboot into Recovery.
- The phone will now reboot into the TWRP recovery once again. Look at the steps below to root the phone now.
Rooting the Nokia 8
- In TWRP, click on Install > Install Zip.
- Locate and select the Magisk.zip file.
- Swipe the screen to flash Magisk now.
- After flashing Magisk, go back to the main menu in TWRP, click on Reboot > System.
- Your phone will now boot into the system.
- Find the Magisk Manager in the app drawer.
- Congrats! Your phone is now rooted with the TWRP installed on it.
Conclusion
That’s all. Your phone is now ready for all kinds of customization. You can install a good custom ROM to change the UI of your phone. The root access will let you add new features to the phone or enhance its performance. If you are stuck with something, feel free to reach out to me through the comments section below.


")


