Home Blog Page 68

Kraken TV for PC Free Download on Windows and Mac
0
Kraken TV for PC Free Download on Windows and Mac

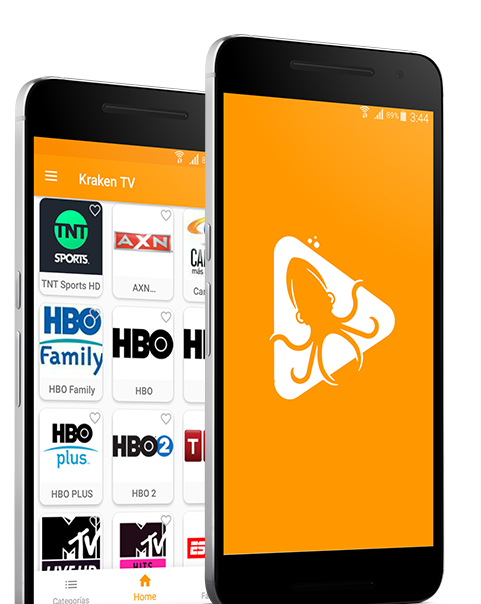
Kraken TV is a famous entertainment application to watch live TV channels, movies, and TV shows. There are only a few TV applications that work up to the mark, and Kraken TV is one of those. This guide is the Kraken TV fans who have been looking for a way to run this application on their computers. As you go ahead to take a look at the steps to install Kraken TV for PC, you will also find more details about this application. So, it is the time to go through an overview of Kraken TV and then download Kraken TV for PC.

Kraken TV – It stands out!

Before take a deep dive into the features of Krakten TV, let us understand how the trends have changed over the course of past few years which urged the smartphone users to opt for such applications.

Smartphones and Computers have killed TVs

Smartphones these days have replaced most of the gadgets we used to own one. For examples, our smartphones these days perform every single job that we usually use our computer for. Smartphones have replaced our scientific calculators. The MP3, MP4 Players, iPods (to some extent) have been replaced by smartphones too. Smartphones outnumbered Telephones too. Another important gadget that’s now being replaced by smartphones is the TV.

Gone are the days when watchers used to sit in front of TVs switching between channels waiting for their favorite show. Smartphone users demand portability now. Keeping in view this growing interest for portability, companies have built applications which stream live TV channels directly on smartphones and computers. And of course, Kraken TV is one such application.

Kraken TV – What’s good?

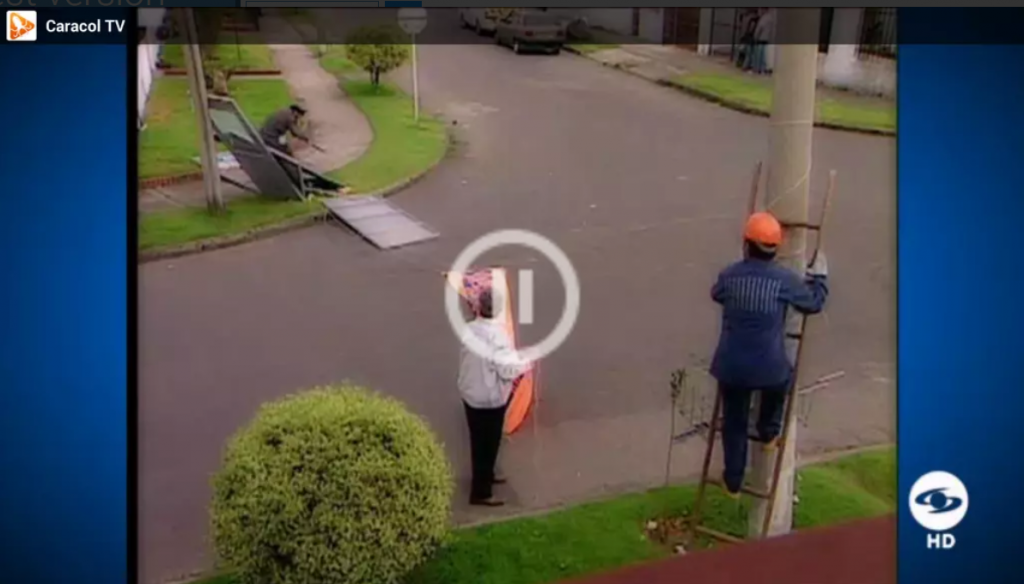
While most applications like Kraken TV focus on free movies and TV shows, Kraken TV brings slightly different content for its viewers. It brings 100s of TV channels right into the palm of your hand. Kraken TV hosts TV channels from dozens of countries. Whether you are living in the Americas, in the Europe, in Asia, Middle East, or South Africa, you will find the TV channels of your liking in Kraken TV.
Kraken TV for PC
Kraken TV for PC

The Kraken TV has got all the channels sorted into their appropriate genres. Users can find Sports, Entertainment, News, Knowledge, Science & IT, and many other categories. Since Kraken TV has a very easy-to-use UI, navigating through this application couldn’t be easier.

Another interesting thing about Kraken TV is that like other applications, it does not require the users to download any files. It does not require users to make any configurations either. No registration is required either. It’s a simple install-and-watch application.

Kraken TV for PC – What do we want to do?

By this time, you should have a clear idea about Kraken TV. Now here’s what we are going to do. Kraken TV is an Android application. It does not have a desktop/PC version. It brings to our point here. We will use a neat trick to install the Android version of Kraken TV on our computer. Kraken TV for PC will run smoothly on Windows 7, Windows 8, Windows 10, MacOS/OS X. Furthermore, Kraken TV for PC will work fine on all desktop PCs and Laptops. In case you don’t know, we can run all Android Apps for PC using Android emulators. So, without wasting a further minute, let’s install Kraken TV for PC.

Kraken TV for PC

Time needed: 5 minutes.

Follow these steps to get Kraken TV running on your computer(Desktop or Laptop) right away.

  1. Download and install Nox App Player or BlueStacks 4 Emulator.

    BlueStacks 4 is the best choice for Windows users. Nox App Player is for the Mac users. Download and install the emulator based on your OS. After installation, open the emulator.

  2. Add your Google Account to the emulator.

    Just like an Android phone, set up the emulator using your Google Account. You can either use your existing account or create a new account. Once done, open Play Store in the emulator.

  3. Open Play Store and search for “Kraken TV”.

    As you find Kraken TV in the search results, install it. It will appear on the Home Screen of BlueStacks 4 and under the application drawer of Nox.

  4. Open Kraken TV now to watch any TV channel now.

    You are all set now. Launch Kraken TV now. Check out the huge list of the channels. Watch anything you want.Kraken TV for PC

The method given above should work fine. However, if you are unable to find Kraken TV in the Play Store, the other way to install it would be via its APK file. You can download Kraken TV APK from here. Having BlueStacks 4 or Nox installed, double-click to launch Kraken TV APK. It will be installed via emulator automatically. You can now open Kraken TV on the computer now.

Wrap up!

That’s it, that’s all. I am assuming that by this time you are successfully watching your desired TV channels on your computer. If you have anything to ask about the emulators or about the Kraken TV app, feel free to ask. I will make sure to get back to you as soon as I get your message.

Maximize a Picture in a Photoset in Tumblr [ Quick Guide ]

0
Maximize a Picture in a Photoset in Tumblr [ Quick Guide ]

Here’s how you can Maximize a Picture in a Photoset in Tumblr. Those who run blogs on Tumblr they are we aware of Photoset feature. Still, we will shed some light on Tumblr Photoset feature below.

Overview:

The basic purpose of Tumblr Photoset feature is to allow users to add embed clickable thumbnail galleries. You can add up to 10 images from your computer to your blog post. Creating photoset is as simple as you are uploading photos on Facebook, Twitter etc. All you have to do is drag and drop a photo. Moreover, you can easily resize the thumbnails according to specific Tumblr dimensions.

If you easily re-order thumbnails as you like, resizing will help set the proper format of your posts. In order to get your message delivered, you must have decent formatting of your post. However, if you want to feature an single photo in the photoset or you want to add the largest thumbnail size. You need to heed the following instructions.

Maximize a Picture in a Photoset in Tumblr

Maximize a Picture in a Photoset in Tumblr:

Follow the steps below and you will learn how to Maximize a Photo in Tumblr Photoset. Log in into your Tumblr account, select the blog you wish to post your photoset. However, if you have only one blog then you don’t need to select any blog from the list. By default, Tumblr will publish all your post on the default one.

Try: Disable Tumblr Safe Mode Without Account [ Tutorial ]

  • Click the Photo button, in order to create a new photoset.
  • On the next page, click on the camera icon. Select the photo from your PC, you wish to upload.

Tip: If you want to add your photo quickly on Tumblr, Double Click on an image to automatically upload it.

  • Now Click on the “Upload Another Photo” to upload another photo. Repeat the same process until you upload all the photos you wish to add in Photoset.
  • Click and drag the photos you want to minimize. Keep on doing this until you see a blue line appears next to the second image. Once you see the blue line release the cursor now, by doing this you have dropped the first image next to second.
  • Tumblr will now automatically generates a row of thumbnails for your photoset gallery.
  • Again Click and Drag with your course any image you want to Maximize in the photoset. By doing this you, the select image will obtain its own row. You can do this to all of you images if you want to Maximize them in the photoset.
  • After that, you can go with your post and add the content. In the End, Click on Post to publish your photoset.

Must Read: Download Audio or Music from Tumblr – Tutorial

That’s all. You have successfully Maximize a Picture in a Photoset in Tumblr. Please do share feedback if you face any issue while trying our guide.

Twitter vs Twitter Lite: What’s the difference?

Twitter vs Twitter Lite: What’s the difference?

If you want to know Who is the best between Twitter vs Twitter Lite, you should keep on reading.

George Washington once said, “If freedom of speech is taken away, then dumb and silent we may be led, like sheep to the slaughter.”

However, in this 21st century, social media platforms play a vital role in exercising freedom of speech. Out of those astounding tycoons ‘Twitter’ isn’t ignorable. Twitter was created in March 2006 by Jack Dorsey, Noah Glass, Biz Stone, and Evan Williams and launched in July of that year.

It provides an elixir to access news and connect with people all around the world. It provides a relaxation of 140 characters, and it’s a stunning place to share your thoughts and your completely unbiased viewpoint. This article describes the contrast between Twitter and Twitter Lite applications. As you move further, you will find a detailed comparison showing Twitter vs Twitter Lite.

Twitter vs Twitter Lite

In later years the developers decided to launch a lite version of the main application. Hence ‘Twitter Lite’ was launched on 2017 in and was made accessible to the rest of the world later on.

The prime focus on developing this app was to provide access to the people residing in those places when they are obstructed by low-speed internet connection and the app could run smoothly in low-end smartphones. Now let me walk you through what are the basic differences between the main app and the lite version of it.

Twitter vs Twitter Lite

APP SIZE

The memory consuming feature is the trump card of these lite versions. Twitter lite consumes less than 1MB of the virtual memory, it weighs around 500k to 600k only. On the other hand, the main app consumes about 25 MB of the storage spaces. So basically this features is peerless when it comes between these two versions.

INTERFACE

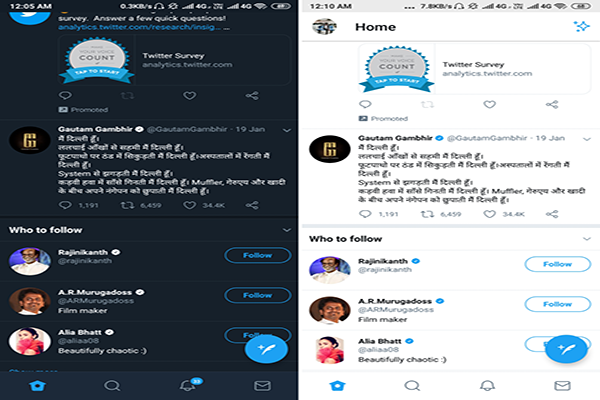
The developers we convinced to keep the user interface of these two versions nearly identical. On an overview, one may not find much difference in these two applications. The text size in the lite version is a bit small when observed closely.

There’s a  dedicated floating tweet button in both the apps when one wishes to tweet something and it follows you everywhere. In the main app, it hides when you reply or tweet appears, while there are no such provisions provided in the lite.

Twitter

Twitter vs Twitter Lite
The Twitter App

Twitter Lite

Twitter vs Twitter Lite
Twitter Lite App

SPEED

The prime objective of a lite version shouldn’t be distended by unnecessary features, which are most likely a problem associated with most of the applications. Unlike Twitter, lite is anchored with only the requisite features that boost up its performance. On general surveillance, one may find twitter lite a bit faster than the main application because of its undiverted functions even in 2G or 3G network.

EMOJI SUPPORT

The developers were able to provide amazement for the typos out there when tend to use emojis as their second language to communicate. Unlike applications like Facebook and facebook lite, twitter lite supports emojis in an efficient way.

As nothing in this whole wide world is perfect so, twitter lite do carry some cons in it. Listing them as

GESTURES

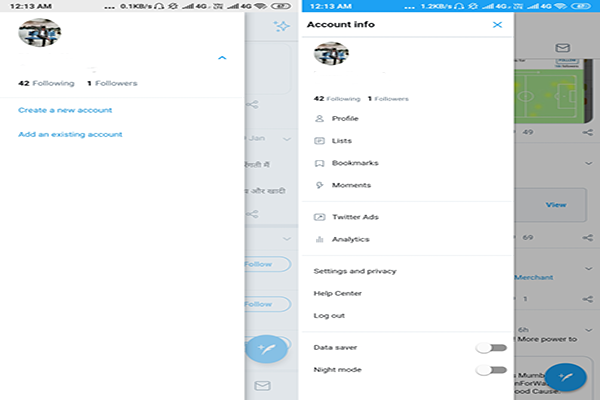
There is no allocation of swipe gesture animation in the lite version. Which means you are allowed to glide through the windows like you used to do in the main app. So all the functions are accessible via the profile picture in the top left side with a single click. You can find the options to move to the home screen, search, DM tabs or notifications in one single list. So if you are a tinder enthusiast, there’s no room for you in this version.

NIGHT MODE

To all those black lovers out there, this app might disappoint you in this context too. Since there isn’t the availability of the night mode which turns your screen black after a scheduled time in the actual version.

Twitter and Twitter Lite

MULTIPLE ACCOUNTS

The feature of holding multiple accounts has also been disabled in the lite version. As a result, one single app is dedicated to hold one account only, unlike the main one.

Twitter and Twitter Lite

DRAFT

This app also doesn’t allow you to save draft text while you tweet or reply. Which is available in the prime version. Hence it may teach you a lesson on procrastinating your work.

Twitter   Twitter Lite
  1. Size is standard.
  2. Can hold more than one account.
  3. Enabled night mode.
  4. Enabled swipe gesture animations.
  5. Speed is moderate.
  6. Enabled emoji support.
  1. Tiny size around 500-600kb.
  2. Cannot hold more than one account.
  3. Defective night mode.
  4. Disabled swipe gesture animations.
  5. Quick speed as it removes some bloatware.
  6. Enabled emoji support as well.

Apart from all these drawbacks, twitter lite is an eminent app, if one is ok with all these missing features then it’s highly compatible and can use your data and space in an effective and efficient way.

Download Links:

You Must Try These:

How to Connect iPad to Wireless Printer [ Tips ]

0
How to Connect iPad to Wireless Printer [ Tips ]

With the help of this guide, you will be able to Connect iPad to Wireless Printer. It may seems a bit shocking, cause we know that Apple is not that supportive when it comes to third-party products. However, we do know that iPad comes with the support of Wireless intercommunication. It means we can connect a wireless printer at home or office.

Moreover, iPad doesn’t need any software or app to print wirelessly. But you must know that your printer must be compatible with your iPad. Not only that, your iPad and Wireless Printer must be connected to same WiFi network. Now let’s get started.

Connect iPad to Wireless Printer

How to Connect iPad to Wireless Printer:

As I mentioned earlier that, Apple iPad, iPhone and iPod Touch doesn’t need any extra app or software to print wirelessly. Now you all be wondering if they don’t require any software or app, how does it do then. Keep reading and you will know.

AirPrint:

All of Apple devices come with a feature called AirPrint which lets you connect to a wireless printer. With the help of AirPrint, you can print anything thing through your iPad. Moreover, AirPrint is a core program of Apple Inc, just like Safari, Photos, and Mail. You can even print Webpage through it.

Read more:

Compatible Printer:

Now let’s tell you about the Compatible Printers. AirPrint works with most of the printers available in the market. But not with all. It is very easy to find the Compatible Printer for your iOS devices. Head over to the Apple official Website and see for your self, you need to check the resources page. You will be glad to know that, all of the major printer brands are compatible with Apple AirPrint.

It would be good if you check the Compatible Printer list before you try to connect it with your iPad. However, if haven’t purchased the printer yet, it would be helpful to check the list.

[vdgk_video_sticky videotype=”youtube” src=”https://www.youtube.com/watch?v=P_64MdjFoL0″ height=”295″ width=”525″]

Setting Up the Printer:

Before you start printing, you need to set up your printer on your Wireless network. After that, you will be able to connect it with your iPad. Every manufacturer has its own setup process, some require connecting it to PC and then Installing the software and others are just plug and play.

It would be best to follow the instructions on the manual and work with it. Once the printer is connected and it is available on your Wireless network, you need to head over to the setting and look for “Enable AirPrint.” When you find it, enable it. As I have said before that not all the printer are compatible with AirPrint. So not all the printers have that setting.

Configuring AirPrint:

  • Connect your iPad with the same WiFi network on which your printer is connected.
  • Open Up Safari, Mail, Photos etc. The content you want to print.
  • Select the Tap on Sharing icon and the Tap on the Print Icon.
  • On the Next page, Tap on Printer and your Wireless printer will show up.
  • Tap on your printer to send the print command.
  • If your printer is not available on your WiFi network. You will see “No AirPrint devices found” error message.

That’s all. This is how How to Connect iPad to Wireless Printer. Please let us know how did it go for you.

Turn Off Notification Vibration on Huawei Phones

3
Turn Off Notification Vibration on Huawei Phones
Turn Off Notification Vibration on Huawei

In this guide, I will walk you through the steps to turn off notification vibration on Huawei Phones.

Turn Off Notification Vibration on Huawei

Recently, a number of Huawei and Honor smartphone owners reached out to us for something they were unable to find. The Huawei and Honor phone owners couldn’t find the option to turn off the Notifications Vibration. After looking up the internet, I realized that it was not the just the people who contacted us. There were many other people who wished to do the same but they couldn’t find the option. This is because Huawei and Honor phones do not have the notification vibration settings under the Sounds setting of the phone. So, if you own a Huawei or Honor phone, and now you want to disable Message vibration or WhatsApp vibration, you have landed at the right place.

Why would you turn off Notification Vibration on Huawei?

Before moving on to the method, it is important to learn about the reasons that will make you consider disabling message vibration on your phone.

The world is becoming a busy place these days. We are so much connected to our smartphones that we have completely started relying on them. All our communication takes place through our smartphones. It is very much important to manage the tasks and notifications on our phones in such a way that we always stay informed about the most important stuff. To cut it short, we have to prioritize the notifications in such a way that we do not miss something important for something less important.

Almost every single application these days has the notifications. These notifications keep popping up every now and then. Some times, we do not have enough of time to check our phone again and again. When we take a minute out of our very busy routine just to take a look at what the notification is all about, and we saw an application spamming our notifications, we just end up being disappointed.

Channel the notifications

This is when we have to channel all the notifications on our phone. In such a case, you would simply want to disable the notifications or at least the vibration for the less important notifications on your phone. It is the best idea to keep the vibration turned on only for the applications that matter the most to you.

If you don’t want to be spammed by those marketing messages applications all the time, go ahead and turn off messages vibration on your Huawei or Honor phone. If you are not a fan of WhatsApp conversations, go ahead and disable vibration for WhatsApp messages. In case you do not want a game like PUBG to vibrate your phone, you can turn off PUBG’s vibration and so on.

Disable Unwanted Notifications, Unwanted Vibration

So, keeping in view the need for the knowledge to disable notification vibration on Huawei Phones, I decided to write this tutorial down. As you go ahead now, you will find the few, easy, simple, and short steps to get rid of the vibration for unwanted notifications on your phone.

Note: This tutorial is valid for all the Huawei and Honor phones. You can use this on latest Huawei phones like the Mate 20 Pro and prior, P30 Pro and prior, Huawei Y5, Y7, Y9 series. This is also valid for Huawei Nova series. You can use it on Huawei Honor 10 Lite, Honor 8 series, all previous Honor phones as well.

How to turn off Notification Vibration on Huawei Phones

Time needed: 1 minute.

This is how you will turn off vibrate for notifications on Huawei Phones. Also those of you who are looking for the steps on “How do I turn off vibration when I receive text messages” will find this tutorial useful.

  1. Open Settings.

    First of all, open Settings on your Huawei or Honor smartphone.

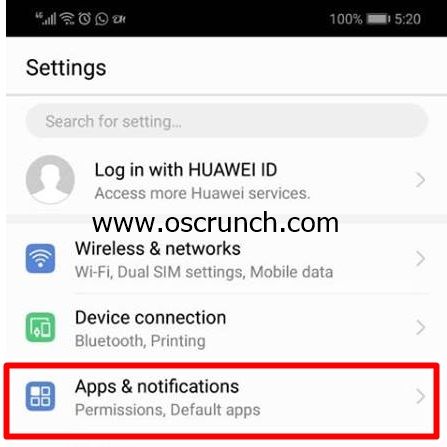
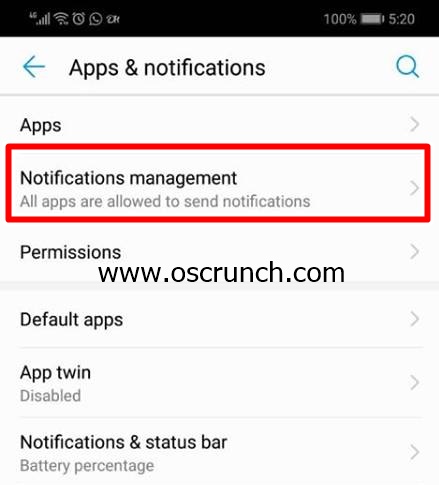
  2. In Settings, click on Apps & Notifications.

    Scroll down in settings and open the Apps & Notifications option. You will find various options under this menu.Apps & Notifications.

  3. Now click on Notifications Management.

    Open the Notifications management option now to see all the applications.
    Notifications Management

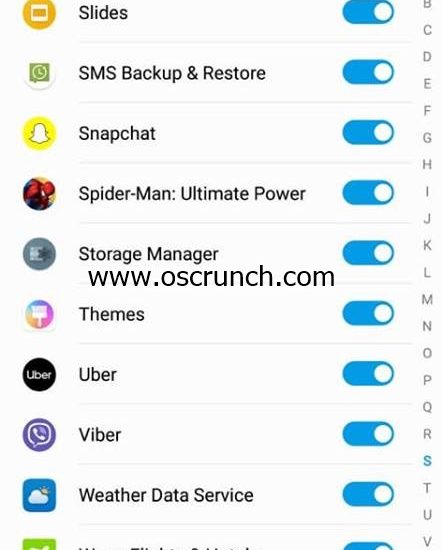
  4. Select the application for which you want to disable vibration.

    You will now have a list of all the applications installed on your phone. Now click on the application for which you have to disable the vibration. For example, you want to turn off vibration for messages, open the click on Messages app. If you want to disable the vibration for WhatsApp messages, click on WhatsApp in this menu.

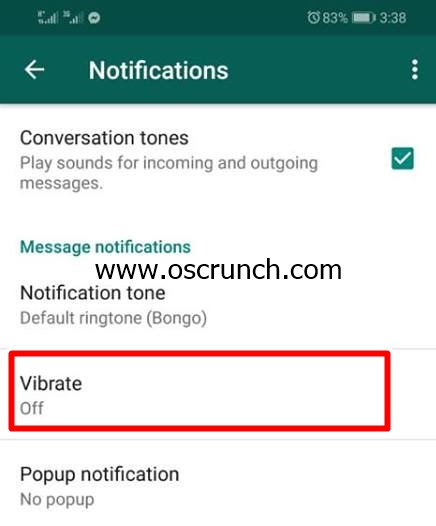
  5. Disable the Vibration now or all notifications if you want.

    You will now find all the notification options for your desired application. Either turn off the vibration only or disable all the notifications if you wish. That’s all.Turn off WhatsApp Vibration

Batch Management

You will find the Batch Management option in Notifications Management panel. If you click on Batch Management, you will see a list of all of your apps with the radio toggles next to them. This is a quicker way to disable all notifications for the apps. Remember that this will not only disable the vibration but will also disable other notifications.

Batch Management
Batch Management

Wrap Up

That is all guys. I am sure that by now you have gotten rid of the unwanted vibration on your phone. If you need help with anything else regarding your Huawei or Honor smartphone, feel free to reach out to us. You can either use the comments section below or use our Contact Us page. We will try our best to get back to you as soon as possible. Thank you all.

MaskGun Multiplayer FPS for PC Windows and Mac

0
MaskGun Multiplayer FPS for PC Windows and Mac
MaskGun Multiplayer FPS for PC

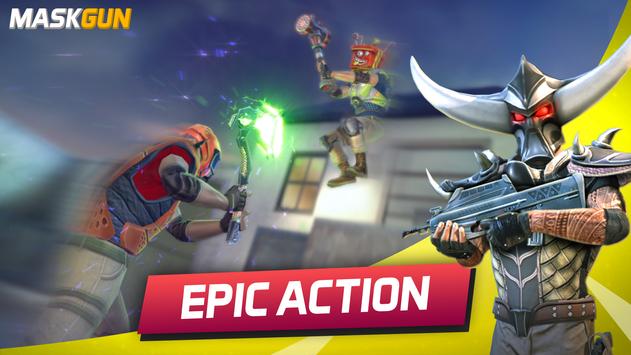
This is the guide to download MaskGun Multiplayer FPS for PC. Players can install MaskGun Multiplayer FPS for PC on Windows and Mac. The MaskGun Multiplayer FPS for PC will run smoothly on desktop PCs and Laptops.

MaskGun Multiplayer FPS for PC

The year 2018 was full of survival games. We saw some great games like PUBG Mobile, Rules of Survival, and Fortnite. We saw the same concept getting repeated every now and then with new aesthetics and cosmetics. This time, we have a new game that looks inspired by the graphics of Fortnite, but its concept is a lot different. This new game is named as MaskGun Multiplayer FPS. MaskGun is a real time multiplayer online shooter game. The game has become popular in a very short span of time. There are a few reasons why this game has reached the top charts. Let us look into those reasons now.

MaskGun Multiplayer FPS – Overview

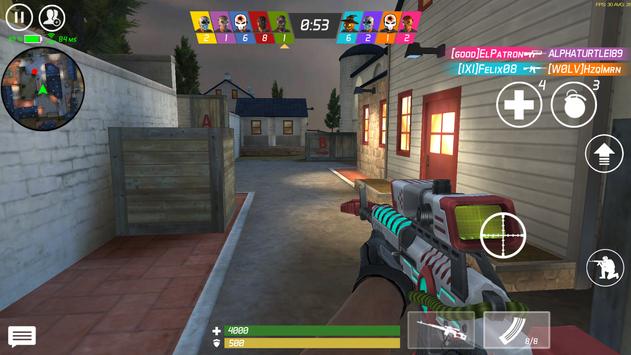
MaskGun Multiplayer FPS is the most straightforward FPS game you will ever come across. There are no confusions and complexities involved with this game. No, the players do not jump off from a plane in this game. Players make their way to the battlefield full of opponents. Players have multiple choices in this game. Either they can play the game to take on their enemies all alone or they can join their friends to form a team. There is also an option to make clans in this game.

Gameplay

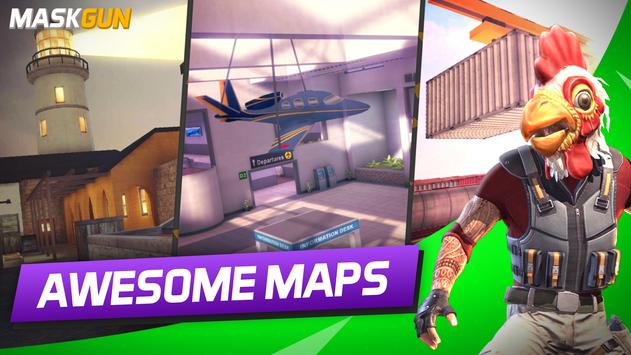
MaskGun consists of three modes. Players will have the DeathMatch, Team DeathMatch, and the Bomb Defusal Modes. There are five maps in this game in total. These maps include the Diwali Yard, GhostTown, Lighthouse, and the Ryokan. The choice of game mode and map is completely up to the players.

Players have to follow the no-mercy rules in this game. They cannot spare anyone around. The moment you see the opponent, pull your gun out and kill him. The opponents will be highlighted by a red outline. You have a variety of weapons, and also a lot of explosives too. For example, you can throw the hand grenades to kill a handful of your enemies.

Maps
Maps

There is no lifetime or energy system in this game. Your character will not die unless you let it die deliberately. You can play this game for as long as you want. You can break into the buildings, collect items, add to your inventory, and utilize all the resources. Get a vehicle and drive around the map in any direction you want. This is a completely free to play game. There are some IAPs, but those are totally up to you.

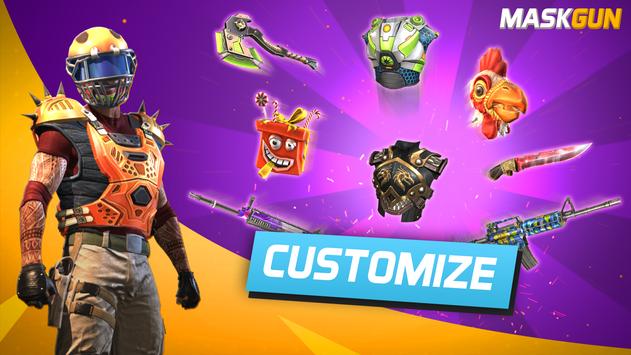
The gear in this game can be customized. You can also customize the look of your character. From the weapons to the shoes of your character, everything is upgradable.

Graphics and Quality

This game is beautifully crafted to please the eyes of its players. The 3D grahpics definitely enhance the experience. The game is built to run smoothly on devices with a slightly older hardware. The quality of this game is good enough to call it a console-quality game. This is the very reason why we are interested in running this game on the computers. Head over to the steps below to download MaskGun Multiplayer FPS for PC.

Playing MaskGun Multiplayer FPS for PC via Android Emulator

MaskGun is built for Android and iOS platforms only. There is no desktop version of this game. The game has attracted enough of the masses to raise a demand for its PC version, but there hasn’t been any sign of any such thing yet. If you still wish to play MaskGun on your computer, you will have to opt for a trick. Since there is an Android version of this game, and Android can be easily emulated on Windows and Mac, it means you can definitely run this game on your computer too. For this, you need a best lightweight Android emulator. The best choices are the BlueStacks 4 and the Nox Player. As you move further, you will find the steps to download MaskGun Multiplayer FPS for PC. All you have to do is to follow the steps carefully.

MaskGun Multiplayer FPS for PC

These are the steps to download and install MaskGun Multiplayer FPS for PC on Windows 7/8/10 and Mac.

  1. Download and install BlueStacks 4 or Nox Player.

    If you are using Windows, you should get the BlueStacks 4 emulator. In case you have the MacOS, get the Nox App Player. Install the emulator and open it.

  2. Set up the BlueStacks 4/Nox Player using Google Account.

    As you open the emulator, it will ask you to add your Google Account. You can use your existing Google Account or create a new one. Add the Google Account and proceed.

  3. Open Google Play Store and install “MaskGun Multiplayer FPS”.

    After setting up the Google Account, launch the Play Store in emulator. In the Play Store, search for “MaskGun”. As you find the game, install it.

  4. Launch MaskGun Multiplayer FPS and play it.

    After installation, the game will appear on the Home Screen of BlueStacks 4 and in the app drawer of the Nox Player. Open the game and use your Mouse/Keyboard to start playing it. That’s all.

MaskGun Multiplayer FPS for PC

Conclusion

That was all with the installation of MaskGun for PC. I am assuming that by this time you have this game up and running on your PC. If you have any questions related to the installation of MaskGun Multiplayer FPS for PC or regarding the emulators given above, feel free to reach out to me. I will try my best to respond back as soon as I get your comment/message.

Samsung Galaxy M20 Stock Wallpapers Download

0
Samsung Galaxy M20 Stock Wallpapers Download

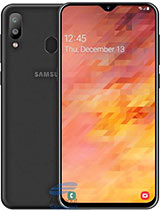
Samsung is gearing up to launch its new Galaxy M series in a couple of days. Just before the Galaxy M series goes official, its stock wallpapers have already surfaced. Samsung Galaxy M20’s stock wallpapers are what have made it to the internet. Those of you who love trying new wallpapers every now and then, they can download Galaxy M20 Stock Wallpapers from here now. There are 5 Galaxy M20 Stock Wallpapers in total. Before you download the official Galaxy M20 Stock Wallpapers, it is important to learn more about the upcoming Galaxy M series.

Galaxy M – Samsung’s take on Xiaomi

For years and years, Samsung has been struggling in the midrange and low-end smartphone segment. Samsung was easily ousted by its competitors like Xiaomi, Huawei, Oppo, and others. Samsung realized that the real damage has been done in India where Xiaomi completely replaced Samsung to become the first choice for the consumers. The Indian consumers are quite intelligent when it comes to picking up a smartphone. They look for value for money. Only the brand is not enough to impress the millennials in India. They want the best return for the money they invest in a smartphone.

Xiaomi found the best opportunity in India. It kept coming up with the smartphone that easily found spaces in pockets of the Indian users. Samsung finally opened its eyes and realized that the kind of smartphones it is selling currently is not going to help its boat sink. Samsung’s Galaxy A and Galaxy J series had some good phones, but they were definitely overpriced. The phones were overpriced to this extent that the low-end smartphones of the Galaxy A series were much more expensive than the flagships by the companies like OnePlus.

Samsung is now following the principle “It’s better late than never”. The South Korean giant is desperate to grab its top spot from Xiaomi, therefore, it brought the idea of Galaxy M series to the table. Samsung is now going an extra mile with the upcoming series which shows how desperate it is to reach the top once again. From what has leaked so far, the Galaxy M series looks impressive. Here is what Samsung has poured so far about the Galaxy M series.

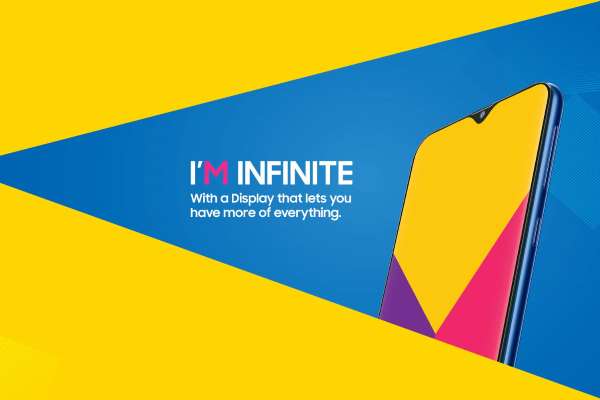
First of all, the Galaxy M series is going to have several smartphones. These phones will have tens of variants with different storage and RAM configurations. Galaxy M10, Galaxy M20, and the Galaxy M30 are rumored to come first. These phones will fall in the price bracket of INR 10,000 to INR 20,000. These phones will utilize Samsung’s latest Infinity -V display. Samsung will bring its triple camera shooter to one of these phones. The minimum camera configuration will be a dual camera system. This series will also have a phone with a whopping 5000 mAh battery. If this is true, this will be the first-ever Samsung smartphone to have this battery capacity. Samsung will also use its Super AMOLED displays on some of these phones. Galaxy M Series will also get fast Android updates. The series is all set to come out on 28th of January 2019.

Samsung Galaxy M20

The rumored specifications of the Galaxy M20 include a 6.3-inches 1080 x 2340 pixels PLS TFT display. The display ratio will be 19:9 as this phone will have the Infinity -V screen. Samsung will use its latest Exynos SoC in this phone. It will have 64GB or 32GB internal storage with a 4GB or 3GB RAM. At the back, the Galaxy M20 is rumored to have a 13MP + 5MP dual camera. It will likely have an 8MP camera on the front. Galaxy M20 will have a rear-mounted fingerprint scanner. The battery, as mentioned above, will be 5000 mAh.

Download Galaxy M20 Stock Wallpapers

Here are the 5 stock wallpapers from the Galaxy M20. To download the wallpaper, simply open it and then right-click on it. After this, click on “Save image as” and save it to your computer. To download on your phone, long-press the desired wallpaper and then save it to your phone. These wallpapers can be applied to any Android or iOS-powered smartphone. All these wallpapers have a resolution of 1080 x 1920 pixels. You can also download all these wallpapers using the all-in-one link given below.

All Galaxy M20 Stock Wallpapers – Download

Langrisser for PC Free Download for Windows and Mac

0
Langrisser for PC Free Download for Windows and Mac
Langrisser for PC

Langrisser is a famous Japanese RPG. For a very long time, this game was available to the Japanese audience only. Just recently, a global version of Langrisser came out. The global version is already available for the Android and iOS platforms. If you are interested in playing Langrisser for PC, that is possible too. In this guide, I will show you how you can download Langrisser for PC. Before installing Langrisser for PC, let us take a look at the overview of this game.

Langrisser
Langrisser

Langrisser – Adventure Takes A Toll

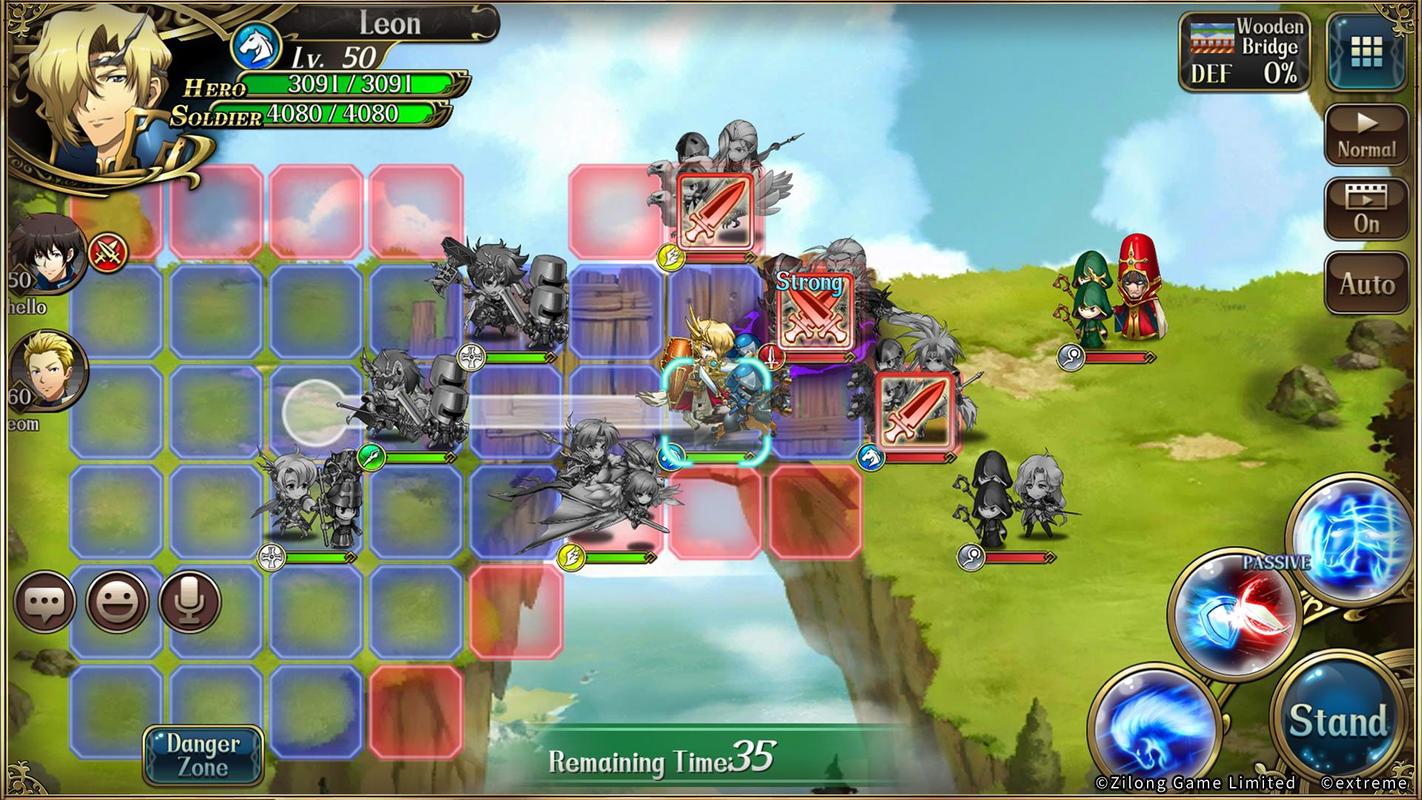
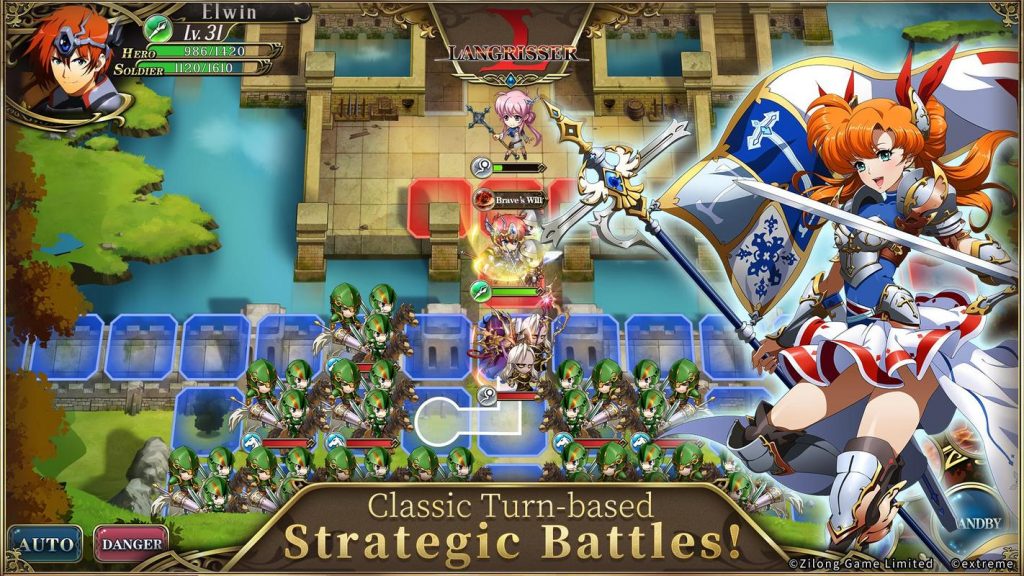
Langrisser’s newly released English version is a treat. This is a strategy-based role-playing game. Langrisser brings thrilling turn-based battles to please the gamers. If you have been missing the real-time PvP fun for a while, it’s time to play Langrisser to fulfill your gaming buds. Langrisser is packed with world-class artwork. The game is calling you to save the El Sallia continent which is on the brink of devastation.

Anime Inspired

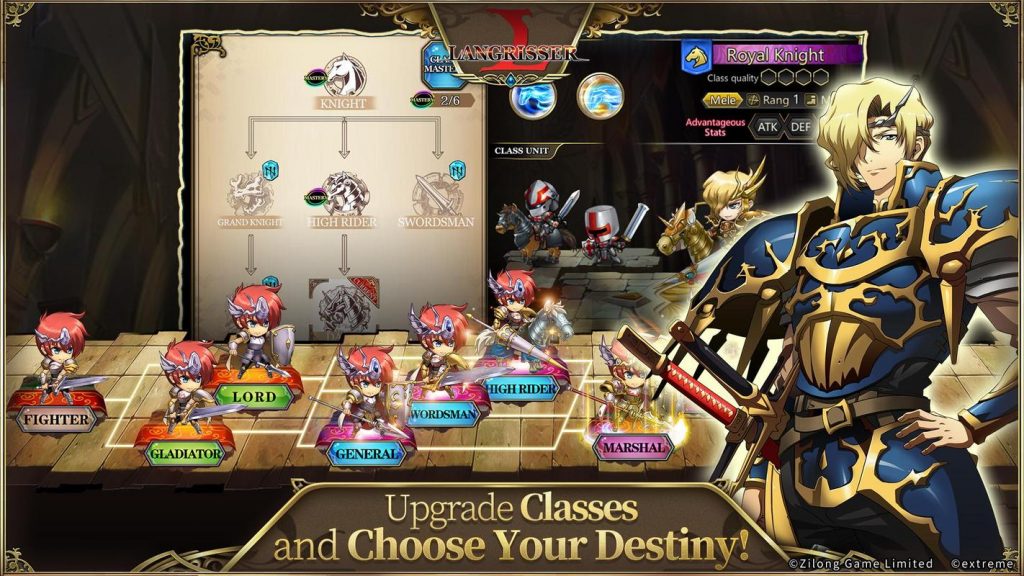
Langrisser is an anime-inspired game. Each character in this game has its own storyline. The characters come with unique power-ups and magic tricks. All the characters have their own class-based upgrade tree. The more classes you surpass, the more powerful your character will be in this game.

Gameplay

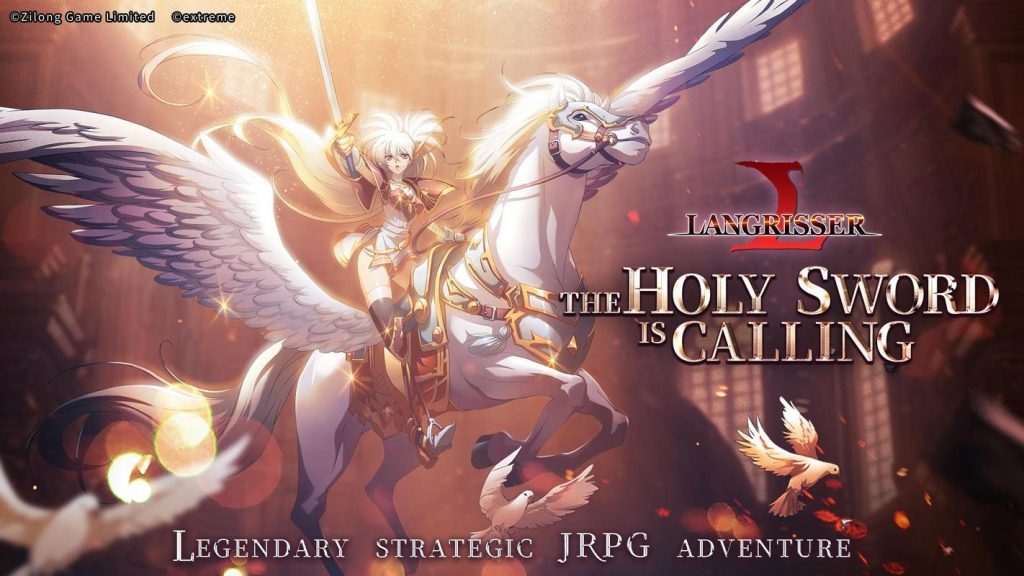
In this game, players will make their way to the El Sallia continent. This continent is all about the great legend of the holy sword. The land of El Sallia is under attack by the forces of evil. The bad times for this peaceful continent are upon the players now. they must take action before the continent breaks down. The action against the dark forces requires your heroes to be trained professionally and super powerful too. You may cast your magic spell to weaken the forces. Do whatever you can to save El Sallia. The holy sword should stay intact no matter what.

The PvP mode in this game will give you a chance to take on the powerful bosses all alone. You can indulge in a fight with another player sitting somewhere else in the world. Join other players to help them in their endeavors.

Graphics

As far as the graphics are concerned, this game comes from ZlongGames, who already have some really amazing games to their credit. The developers have a good reputation when it comes to the graphics. Langrisser is built out of 3D graphics. The graphics are good enough to enjoy this game on a bigger screen and that is what we are here for. As you go ahead now, you will learn how to install Langrisser for PC.

Langrisser for PC via Android Emulator

Langrisser’s Android version can be downloaded on Desktop PCs and Laptops with the help of an Android emulator. The purpose of Android emulators is to bring the whole Android experience to your computer. There are some really good emulators out there including tdhe BlueStacks 4 and the Nox App Player. With the help of such emulators, you can play any Android game or run any Android applications on your Windows or Mac computer. Go ahead now to download Langrisser for PC on Windows 7/8/8.1/10 and Mac.

Langrisser for PC

Time needed: 5 minutes.

These are the steps to install Langrisser for PC on desktop PC and Laptop.

  1. Download and install Android emulator of your choice.

    If you are using Windows 7, 8, or 10, it is advised to get the BlueStacks 4. Mac users should get the Nox App Player. Download and install the emulator depending on your operating system.

  2. Set up BlueStacks 4 or Nox Player using Google Account.

    After installation, open your Emulator and set it up using your new or existing Google Account.

  3. Open Google Play Store and search for “Langrisser”.

    Now open Play Store in BlueStacks 4/Nox and look for “Langrisser”. As you find the game, install it.

  4. Launch Langrisser and play it.

    After installation, Langrisser will appear on the Home Screen of BlueStacks 4, and in the App Drawer of Nox Player. Launch the game and play it using your Mouse and Keyboard. That’s it.

Langrisser for PC
Langrisser for PC

Conclusion

That is all with the installation of Langrisser for PC. I hope that by this time, you are playing the game on your computer. If you are unable to play the game using BlueStacks 4 or Nox, you can try using another Android emulator. There are best lightweight Android emulators in 2019 listed on our site. For any king of queries/suggestions, feel free to reach out to us.

Download an iPhone Ringtone [ How To ]

0
Download an iPhone Ringtone [ How To ]

Wondering How to Download an iPhone Ringtone? The answer is Yes. Heed the instructions below and you will be able to download Ringtones on iPhone.

With the release of iOS 8, Apple added a feature which allows you to download and install ringtones on iPhone. Once downloaded, these Tones can be used as Ringtones for text messages and calls. Moreover, you can also download ringtone apps for your iOS devices. These apps allow you to convert your music & audio files into ringtones.

Download an iPhone Ringtone

Download an iPhone Ringtone:

There are several methods you can use to Download an iPhone Ringtone. But not all of them are easy to use. However, we’ll provide both of them. Choose the one you think is easy for you.

Try This: How to log out of Facebook Messenger on iPhone

Downloading Ring Tones From the iTunes Store:

You can directly purchase Ringtones form iTunes app on your iPhone. Follow the instructions below:

  • Open iTunes app on your iPhone.
  • Tap Tones Tab to view the Ringtones category.
  • If you don’t see Tones Tab in your iTunes app, Tap More and the Tap Tones.
  • You will be provided with a list of Ringtones. Choose the desired one and tap on it. On the next-page tap on download.

If the Ringtones is free then you don’t have to do anything. However, If the Ringtone is paid, that will cost you money. Now that you have downloaded a Ringtone. Let’s tell you how you can assign a New Ring Tone.

[vdgk_video_sticky videotype=”youtube” src=”https://www.youtube.com/watch?v=TsOosWxGP-Y” height=”295″ width=”525″]

You Might Like this: Transfer iPhone Notes to Google Keep [ Tutorial ]

Assigning a New Ring Tone in the iTunes Store App:

Once you have downloaded the Ringtone on iPhone. You will see a dialog box on your iPhone screen, you will be asked what to do with the new ringtone. You can do two things with it, either you can set it as your default ringtone or text tone or you can assign it to one of your contacts. Proceed as you desire. However, if you are sure what to do with it, Tap on done to keep browsing the iTunes store.

Download iPhone Ringtone with a Computer:

  • Download iTunes on your PC Windows. If you haven’t already downloaded it. Moreover, if you are a Mac user you don’t have to download iTunes, it comes pre-installed.
  • Make sure you are connected to the internet. ( If you are using iTunes for the first time, you need to log in with your Apple ID on iTunes ).
  • Open iTunes on your Windows or Mac. Click on iTunes Store.
  • Type Ringtone in the search box and hit enter. You will be provided with a list of ringtones. Click on the desired ringtone, in order to listen to it.
  • Once you have selected the ringtone you need to download. Click on the download button, if the ringtone is free you will see the download button. However, if the ringtone is paid, click on the Buy button to download it.
  • Follow the on-screen instructions to purchase the ringtone. Once you have purchased it, Double click on the ringtone play it.

Must Read: Download Facebook Videos on iPhone [ Tutorial ]

Installing Ring Tone-Making Apps:

After such a long time Apple gave some room to third-party apps. In the case of this event, now we can use third-party apps to add few tweaks. Now when it comes to installing Ringtone Apps, you will find a plethora of apps in the iTunes Store. All you have to do is the type ring tone makers. As I said you can find tons of such apps, choose the best among them and if you want our suggestion, try Ringtones for iPhone.

Once you have downloaded this app, launch it. Select a music or audio file, select a section of the music file and this app will convert it into a ringtone.

That’s all.

Download Redmi Note 7 Stock Wallpapers

0
Download Redmi Note 7 Stock Wallpapers
Redmi Note 7 Stock Wallpapers

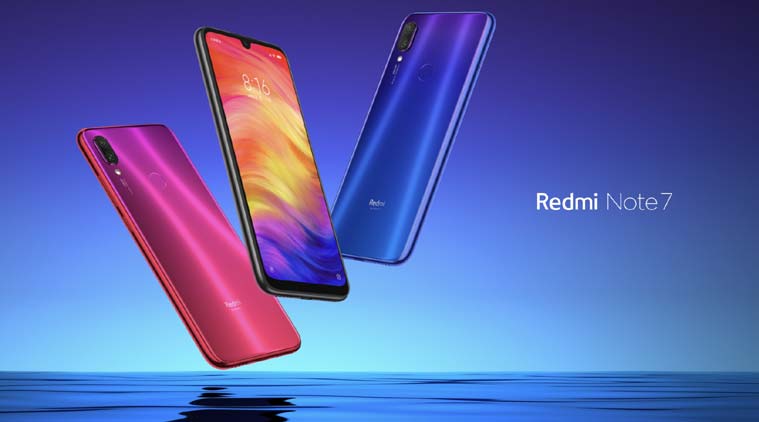
Looking for the Xiaomi Redmi Note 7 Stock Wallpapers? You have landed at the right spot. From here, you can download all the Redmi Note 7 Stock Wallpapers. The Redmi Note 7 Stock Wallpapers can be applied to any Android phone or even on an iPhone. All of the official Redmi Note 7 wallpapers are available in the full HD resolution. Take a look at an overview of the Redmi Note 7 before you download its wallpapers.

Redmi Note 7 Stock Wallpaper
Redmi Note 7 Stock Wallpapers

Redmi Note 7 – The Budget-Friendly Camera Monster

Earlier this month, Xiaomi announced the Redmi Note 7. The Redmi Note 7 made waves in the news industry because of its camera. Under a very friendly budget, the Redmi Note 7 offers a camera that most even the most flagships do not have till date. The Redmi Note 7 brings a 48MP + 5MP dual camera system at the back. This camera is powered by all the features that you need as a phone-photographer. On the front, the Redmi Note 7 has a 13MP camera. The cameras on this phone are artificla intelligence-powered.

Redmi Note 7
Redmi Note 7

There is a big 6.3-inch display on the front. The resolution of this device is 1080 x 2340 pixels. This phone has a waterdrop notch which leaves the maximum room for the display. The display ratio is 19.5:9. Xiaomi has used the older Gorilla Glass 5 to protect the screen here. The other specifications of this phone include the midrange Snapdragon 660 SoC. The GPU is Adreno 512. This phone has the internal storage of 64GB or 32GB with a RAM of 4GB or 3GB. The Redmi Note 7 uses the USB Type-C port for the charging and connection purposes. It has a whopping 4000 mAh battery under the hood. This phone runs on the latest Android Pie out of the box. Color options of the Redmi Note 7 include Blue, Black, and Twilight Gold. Starting price of the Redmi Note 7 is about EUR 150.

Let us get back to the stock wallpapers of the Redmi Note 7 without any further ado.

Download Redmi Note 7 Stock Wallpapers

There are 10 stock wallpapers from the Redmi Note 7 in total. These wallpapers are available in a resolution of 1080 x 2280 pixels. Wallpaper lovers are free to use these wallpapers on any device i.e. Android or iPhone. Go ahead and download your favorite Redmi Note 7 stock wallpaper.

To save the wallpaper, simply open your desired image and then click on “Save image as”. You can also download all the wallpapers from the all-in-one link attached below.

All Redmi Note 7 Stock WallpapersDownload

That’s all. I hope you like these wallpapers. Don’t forget to drop your feedback below.


Mobile Royale for PC Free Download

0
Mobile Royale for PC Free Download
Mobile Royale for PC

Mobile Royale is IGG’s contribution to the world of fantasy games. As the name suggests, this game is all about battling it out with the enemies. The fight between the good and the evil is on once again. Mobile Royale is calling all the strategy and RPG lovers to come and rescue those in need. In this guide, we will learn how to download Mobile Royale for PC. Before we install Mobile Royale for PC, let us take a look at a brief overview of this game.

Mobile Royale – Overview

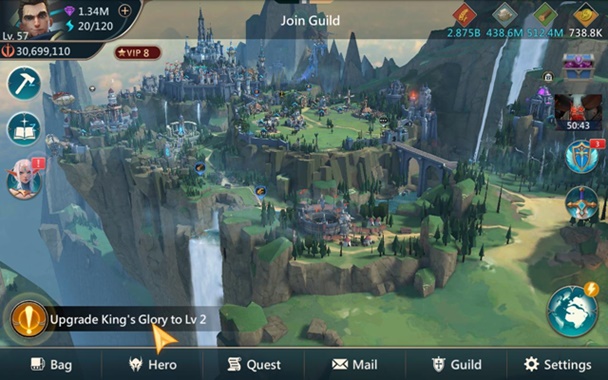
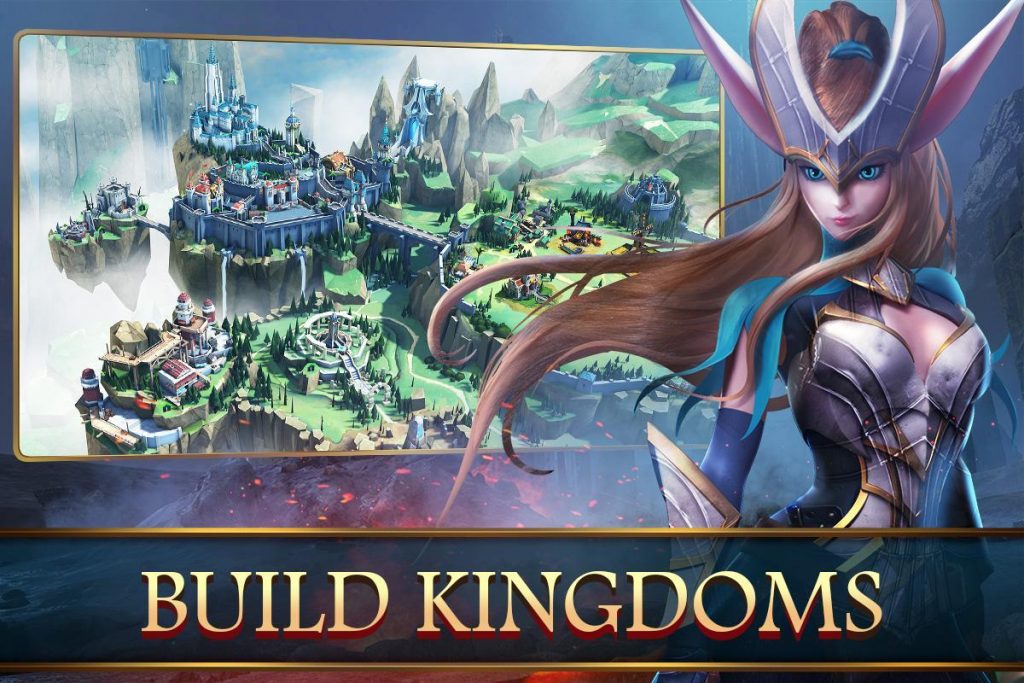
The game Mobile Royale is about online strategy battles. This game has an immersive gameplay. The moment the game starts off, you start all alone. You have to go ahead and start looking for resources to build your regime. In Mobile Royale, players are urged to develop their city. Besides developing the city, they have to establish a whole lifecycle for the citiziens. Players have to provide the resources for the citizens to make a living. Apart from fulfilling the every day need of the people living in the city, players have to take appropriate measures for the security too.

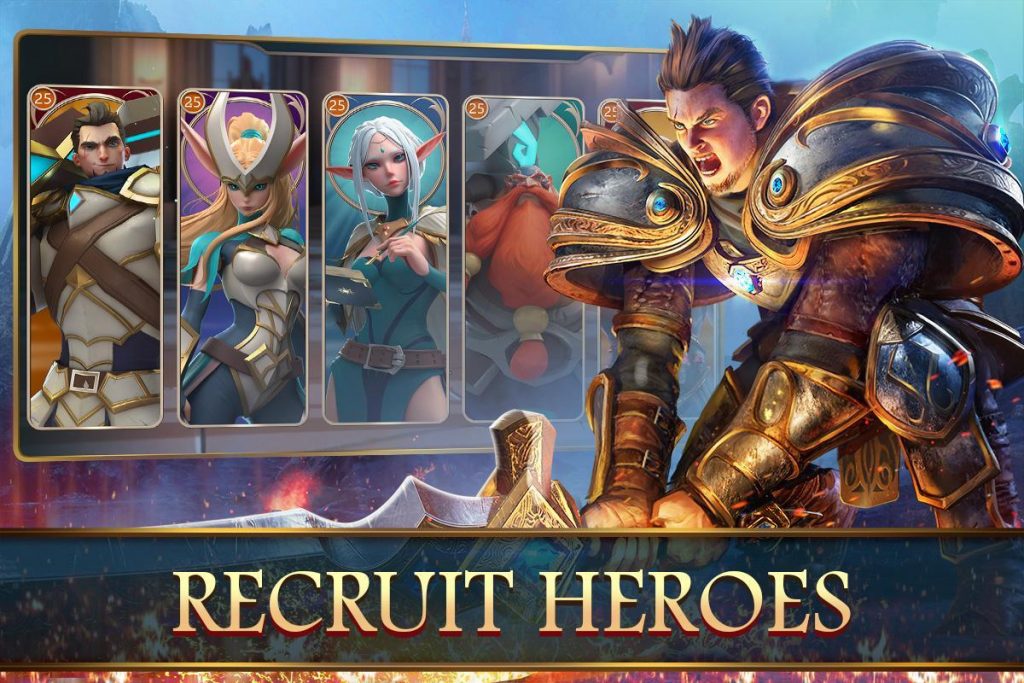
Security is when the game takes off. The very first step will be to start recruiting heroes in your team. The heroes will come with their unique powers and skills. These heroes will train other heroes, and this is how your clan will evolve. Provide your heroes with the latest weapons. Since the heroes are customizable and upgradable, you must perform all the upgrades in time.

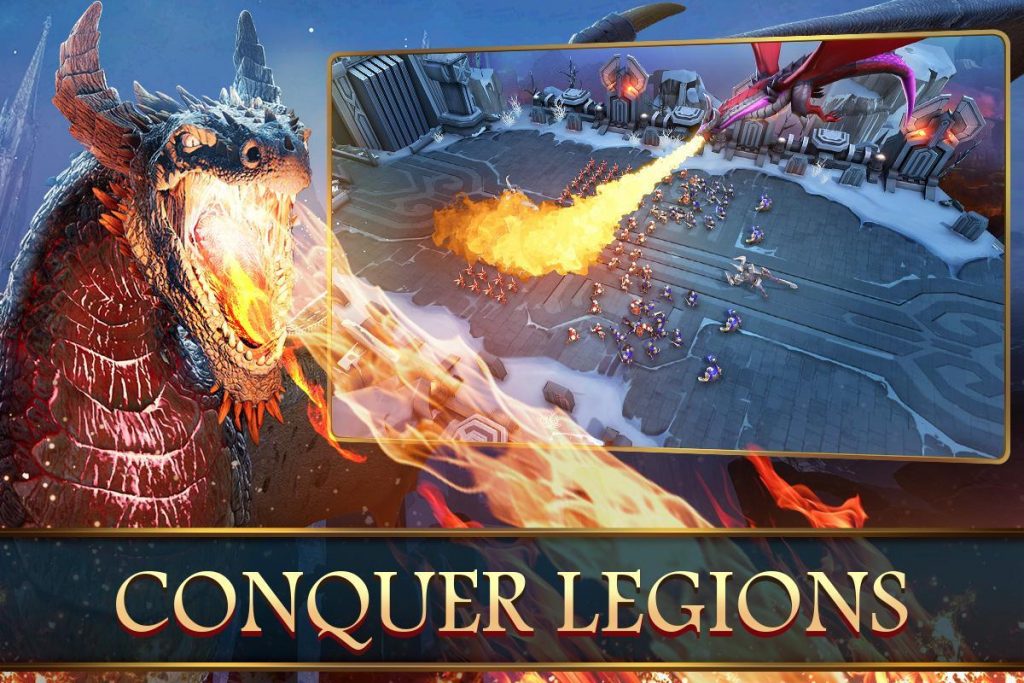
Heroes in this game will not be the human beings only. You will also command other characters such as Elves, Beatskins, and Dwarves. A dragon will put all of his trust in you. You must command the dragon for all the good means. The dragon will do anything that you want him to do.

The matches take place in real-time. The game connects you with the other players sitting in another corner of the world through internet. You can join guilds, form alliances, and indulge in the wars.

The means of transportation in this game seem interesting. You will have the Airships, a floating fort, and many other vehicles that will help you to handle the trade affairs. Your army will also have powerful troops for the sake of defense.

Overall, this is a good-looking game. The game is built out of 3D graphics. The graphics are totally worth enjoying on the bigger screen of a computer. Head over to the steps below to start playing Mobile Royale for PC.

Mobile Royale – Available Platforms

Mobile Royale is orginally available for Android and iOS platforms. Since the Android OS can be emulated on a Windows or Mac-powered computer easily, you can run the Mobile Royale game on the computer too. This is going to be possible with the help of Android emulators like the BlueStacks 4 and Nox Player. Before I show you how to get Mobile Royale for PC, let me give you a brief idea about the Android emulators.

Mobile Royale via Android Emulators

Android Emulators are built to bring the whole Android experience to your computer. Emulators like BlueStacks and Nox Player run the virtual Android tablet-like devices in your computer. This is the best way to enjoy all those Android applications and games on your computer. There are thousands of Android games and apps that are not built for Windows and Mac platforms. To run such games/apps on your computer, you can use Android Emulators. The Android Emulators are also known as the Android App Players. As you go ahead now, you will find the method to run Mobile Royale for PC on Windows 7/8/10 and Mac-powered Desktop PCs and Laptops.

Download Mobile Royale for PC

Time needed: 5 minutes.

This is how you will install Mobile Royale for PC on Windows and Mac.

  1. Download and install BlueStacks 4 or Nox App Player.

    If you are using Windows, download BlueStacks 4. In case you are on MacOS, download Nox App Player. Install the emulator.

  2. Launch the Android Emulator.

    Once the installation of BlueStacks 4 or Nox App Player comes to an end, open it on your computer.

  3. Set up the Android Emulator via Google Account.

    As you open the emulator, it will ask you to add your Google Account. You can either create a new Google Account or use your existing account.

  4. Open Google Play Store and search for “Mobile Royale”.

    After setting up Google Account, open Google Play Store in BlueStacks 4 or Nox. In the Play Store, search for “Mobile Royale”. Install Mobile Royale game now.

  5. Launch Mobile Royale.

    Mobile Royale will now appear in the Home Screen of BlueStacks 4 and App Drawer of Nox App Player. Launch the game now.

  6. Play Mobile Royale using Mouse and Keyboard.

    As the game starts off, use your Mouse and Keyboard to play it. You also have the option of keymapping. Play it according to your liking now. That’s all.

Mobile Royale for PC

Conclusion

That is pretty much it. I hope that by this time you are successfully playing the Mobile Royale for PC. If you have any problems with this tutorial or with the game, feel free to reach out to us. The best way to reach out to us is via the comments section below or using our Contact Us page.

Color Bump 3D for PC and Laptop Free Download

0
Color Bump 3D for PC and Laptop Free Download
Color Bump 3D

Back in the good old days, there used to be a handful of mini fun-oriented games for smartphones. We used to have games like Flappy Bird, Color Twist, Slither.io, and many others. For quite a while, that kind of fun was missing. We did have some big games like PUBG Mobile, Fortnite, and Pokemon Go, but these games are for a very different kind of audience. It looks like the fun days for Android and iOS gamers are here once again. This is about to happen because of the Color Bump 3D, a new game that’s rocking the top-charts of the app stores at the moment. Color Bump 3D comes from Good Job Games. The game brings a whole new concept. This is the game that you need to play if you are looking to kill some time. Before downloading Color Bump 3D for PC, let us take a look at what Color Bump 3D has to offer.

Color Bump 3D for PC
Color Bump 3D

Color Bump 3D – Do not bump into that color!

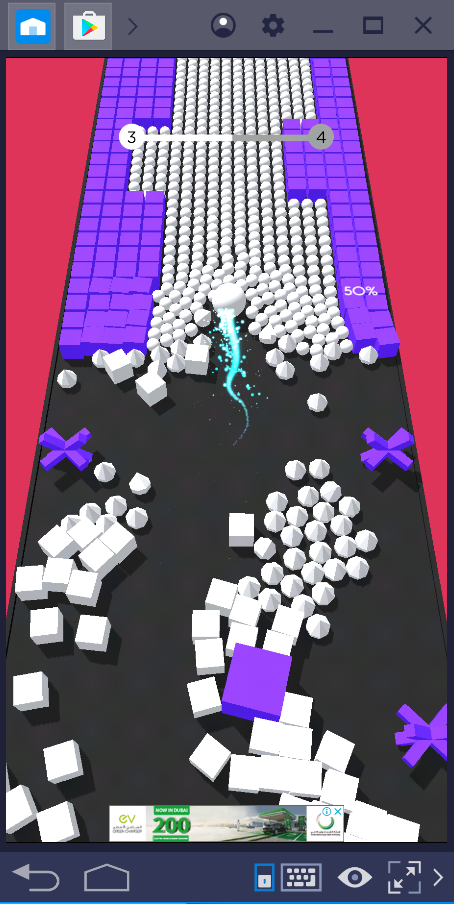
The concept of this game is simple, but it can definitely make you bite your nails. In this very neat game, all you have to do is to roll a ball through a ramp that is full of obstacles. Sounds simple right? Wait, that’s not it.

As the game starts off, you will get a ball of white color on a ramp. The ramp will be filled with different obstacles of the same white color and one different color. Now while you roll your ball through this ramp, you can only bump into the white color. You are not allowed to bump into a different color. The idea is that you can hit your ball into the same color only. If you hit it into another color, your game will come to an end.

Do not hit any other color!

The ramp is not going to be empty. It will be filled with the obstacles of all the kinds. You just have to make your way through these obstacles. The obstacles have to be hit in such a way that your ball does not interact with the other colors. As long as you are bumping into the same color, you are going to be fine.

As you level up in this game, you will see that the obstacles of white color will be getting reduced while the other colors are taking a toll. This is when the difficulty starts. At one point in this game, you will not find any friendly obstacles at all. The speed of the ball will also keep on increasing. You have to play the game active-mindedly. The moment you lose the control, your game will end right there. That is all about the Color Bump 3D gameplay.

Looks easy, hard to play

From the very first glimpse, the game looks too easy. But believe me, it is not. This game becomes too hard to master on the higher levels. It is going to eat up all of your time. Color Bump 3D has got everything that an addictive game should have. It brings over 100 different levels. The initial levels will be very easy to surpass. You will get stuck on the higher levels for hours if not days. Before playing this game, make sure that you do not fall so much in love with it that you forget to do the important things in your everyday life.

Color Bump 3D – Available on what platforms?

Primarily, Color Bump 3D is built for the Android and iOS platforms. There is no doubt that this game is worth playing on a computer, but it has no official desktop version. What you can do is, you can run the Android version of this game on your computer. Wondering how? Well, that’s what I am about to tell you. With the help of an Android emulator, you can run Color Bump 3D for PC. There is a variety of Android emulators out there. We do have a list of Best lightweight Android Emulators in 2019 list on our site too. Before picking up an Android emulator, let us learn a little bit about them.

Color Bump 3D for PC via Android emulator, but does it mean?

Android emulators are built to emulate the Android OS on your Windows or Mac-powered computer. Since Android is open-source software, it makes it easy for the developers to mold it into whatever the way. There is Google’s official Android x86 emulator, and it does have the whole Android Studio as well. Originally, the Android emulators were built to let the developers test their applications on their computers before releasing them for phones. However, some intelligent people used the same idea to bring the whole Android ecosystem on Windows and Mac ecosystems. As of today, you can run the entire Android OS on your computer as if you are using a virtual Android tablet. Some famous Android emulators include the BlueStacks, Nox App Player, Genymotion, and Andy Emulator.

Color Bump 3D for PC

Installing Color Bump 3D for PC is fairly simple. You can run Color Bump 3D for PC on Windows 7/8/10 and Mac. Users can download Color Bump 3D for PC on their desktop PCs and Laptops. All you have to do now is to follow the few easy steps given below.

Time needed: 5 minutes.


  1. Install Android Emulator i.e. BlueStacks or Nox Player.

    Install BlueStacks 4 if you are using Windows. Install Nox Player if you have Mac.

  2. Launch Emulator

    Launch the emulator i.e. BlueStacks 4 or Nox Player.

  3. Use Google Account to set up emulator.

    Set up the emulator using your new or existing Google (GMAIL) Account.

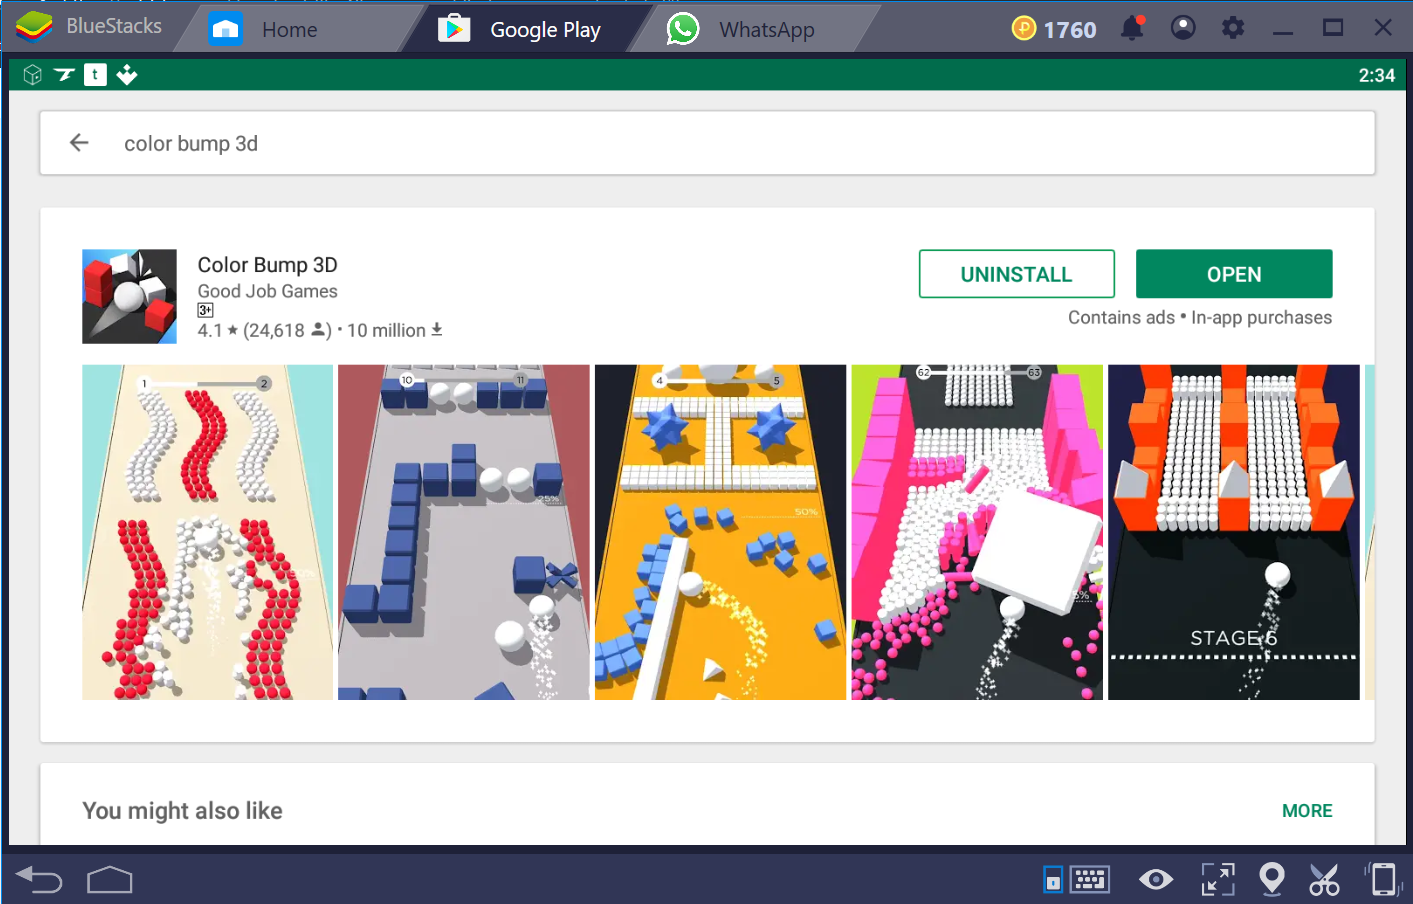
  4. Now Search for Color Bump 3D in the Play Store.

    Open Play Store in emulator and search for “Color Bump 3D”. Color Bump 3D for PC

  5. Install Color Bump 3D for PC

    As you find Color Bump 3D, install it.

  6. Open Color Bump 3D for PC from Emulator.

    After installation, open the game from Home Screen or the application drawer.

  7. Play the game using your Mouse!

    Use your mouse to play the game now. That’s all. Enjoy! Color Bump 3D for PC