Home Blog Page 67

Download Tencent Gaming Buddy for PC
0
Download Tencent Gaming Buddy for PC
Tencent Gaming Buddy for PC

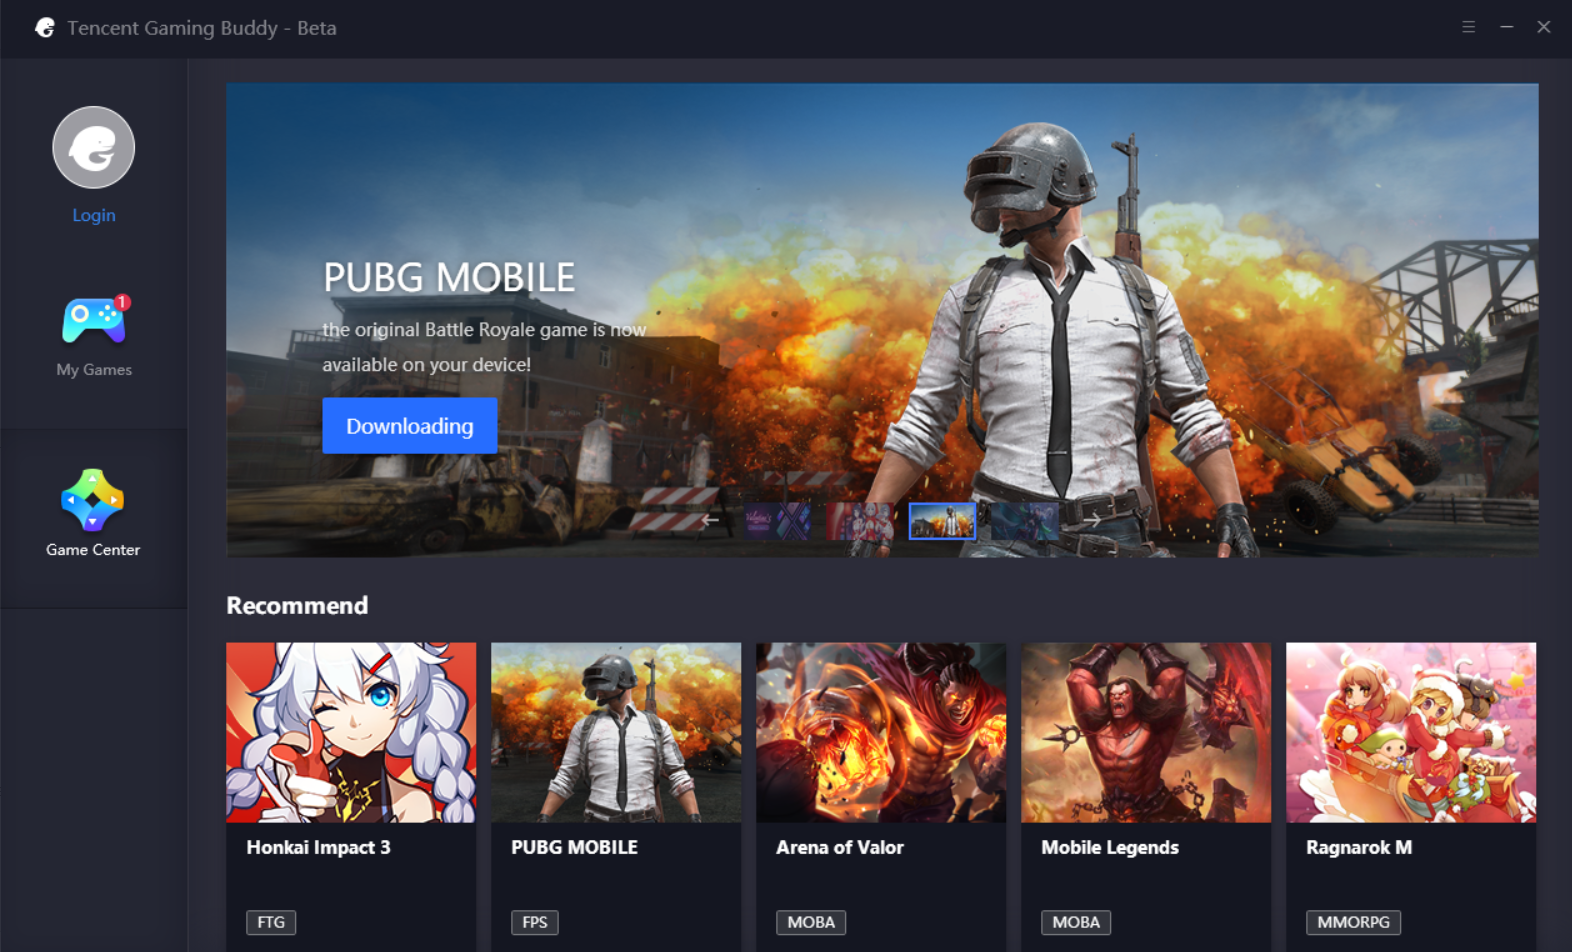
PUBG Mobile is arguably the most popular Battle Royale game till date. The developers of PUBG Mobile have made this game available for all the platforms. Soon after the release of the mobile version of PUBG, the developers realised that the mobile version was liked more by the users. Instead of playing the PUBG’s PC version on the computers, the players preferred playing the PUBG Mobile via Android emulators. Keeping this demand of the players in view, the PUBG Mobile developers crafted the Tencent Gaming Buddy. In this guide, you will learn how to run or download Tencent Gaming Buddy for PC. Before you install Tencent Gaming Buddy for PC, let us shed some light on its features.

Tencent Gaming Buddy for PC

Tencent Gaming Buddy

First of all, you need to know that it is Tencent’s official emulator. Tencent has released this emulator in order to make sure that PUBG Mobile gamers get the best possible experience on their computers. Rather than letting the gamers use emulators like BlueStacks and Nox, Tencent wants them to use its very own emulator. The Tencent Gaming Buddy for PC comes with extended features exclusively designed for the PUBG Mobile. The emulator runs on Windows PCs.

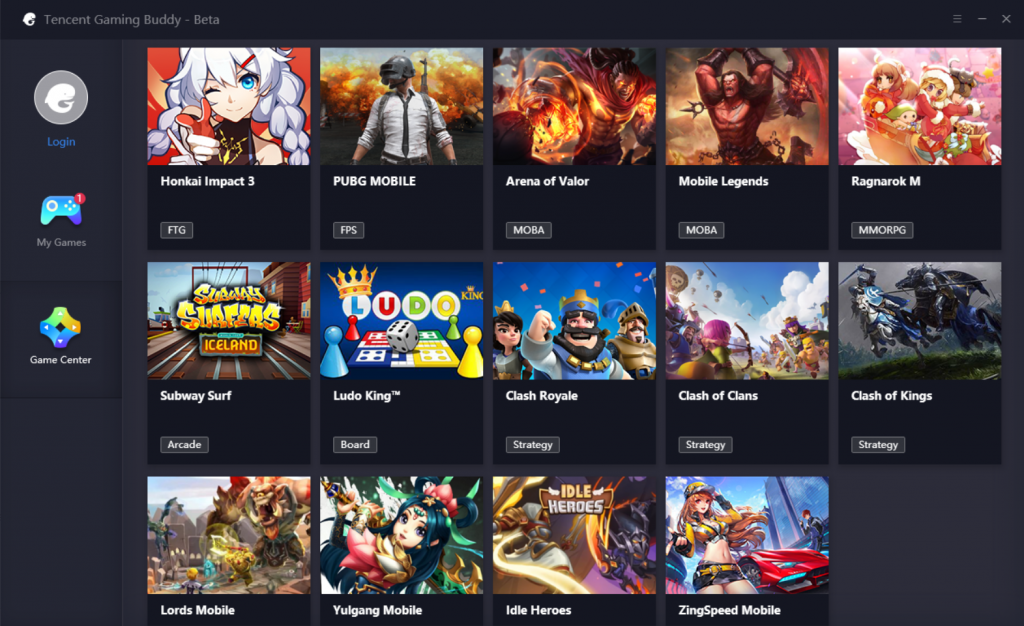
Initially, the Tencent Gaming Buddy was specifically designed for PUBG Mobile. Later on, the developers added support for more games in the player. As of now, Tencent Gaming Buddy supports over 14 different games by default. Some of the popular titles supported by Tencent Gaming Buddy are Ragnarok M, Honkai Impact 3, Ludo King etc.
Tencent GAming Buddy for PC

Tencent Gaming Buddy is equipped with the Google Installer. The purpose of this installer is to bring the Google Play Games to your emulator. If you have your game synced with your Google Account, Google Play Games will shift all of its data to your PC.

When the users open the Gaming Buddy, it first asks the users about the installation of PUBG Mobile. The emulator shows different versions of PUBG Mobile. At the time of writing this post, it either installs the international version or the Vietnam version of PUBG Mobile.

Upon launching PUBG Mobile in Tencent Gaming Buddy, players can access the settings for the game. The emulator will let you set the Display Settings, Basic Settings, and the Engine for the game. Let me tell you a little bit about PUBG Mobile and then download Tencent Gaming Buddy for PC.

PUBG Mobile & Why you should play it on your PC?

PUBG Mobile is about an open battle taking place on an abandoned island. As the game starts off, 100 different players take a flight on a C130 to the island. The players have to jump off from the plane one by one. They can use a parachute to land. As the players land on the ground, they have to start looking for cloths, supplies, and weapons.

The idea in this game is to kill all other 99 players. Only you should be the one standing alive in the end. Being the last man alive will win you the Chicken Dinner. There are no friends on the island. Everyone is your enemy which means you cannot do anyone a favor by letting them go. Keep your gun loaded all the time. The moment you run out of bullets and someone finds you, you are dead. The game brings interesting maps. You can roam freely in any direction throughout the map. There are many vehicles to move around.

Players can team up in order to indulge in the Team Battles. In the team battles, players have the support of 3 or 4 other players. The team standing till the end wins the game.

PUBG Mobile is quite a big game. This was just an idea about this game. To know everything about it, it is better to play it yourself.

Let us get back to the point now. Why you should play this game on your computer rather than on your phone? Well, PUBG Mobile has kind of an FPS gameplay. It means that you need a better control over your weapons and also need your moves to be appropriate. This particular thing is a little bit tricky on the screen of your smartphone.

Playing the same game with the help of a Mouse and a Keyboard can give you an edge over all those playing it on a phone. Since you are playing this game on a bigger screen now, it is easy to keep an eye on the enemies. To cut it short, PUBG Mobile for PC will help you win every single match. It’s time to go ahead to download Tencent Gaming Buddy for PC now.
Tencent Gaming Buddy for PC

Follow these steps to download Tencent Gaming Buddy for PC.

  1. Download Tencent Gaming Buddy.

    You can download Tencent Gaming Buddy from their official website. Here is the download link.

  2. Open Tencent Gaming Buddy setup and install it.

    As you have downloaded the setup file, open it. Now install the emulator. Finish the installation and open it.

  3. Finish the initial setup of Tencent Gaming Buddy.

    Once you open the emulator, it will ask you to finish the basic setup. Use your PUBG Mobile Account or your Facebook Account to login.

  4. Install PUBG Mobile and start playing it.

    Now you can find the PUBG Mobile on the home screen of Tencent Gaming Buddy. Install the game and start playing it. That’s all.

Wrap Up

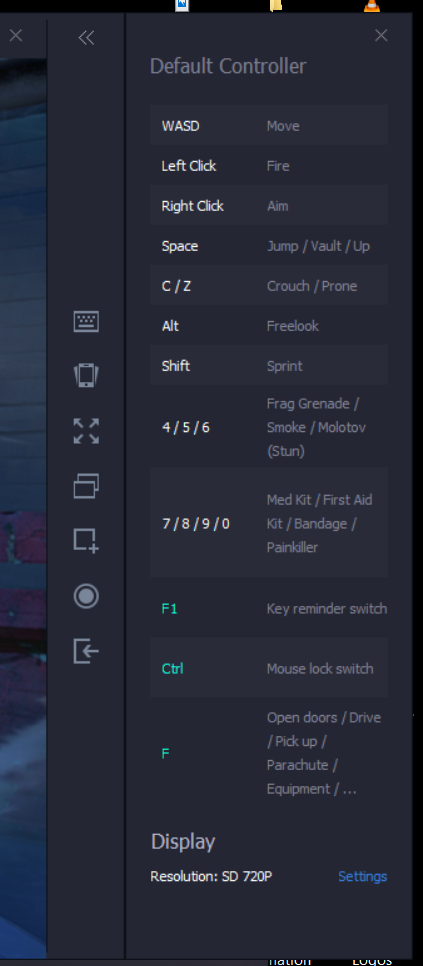
That is all about the installation of Tencent Gaming Buddy for PC. You can set the controls for the games according to your liking. If you have any problems with the installation process or if you have any queries about PUBG Mobile, feel free to drop them below. I will try my best to get back to you as soon as possible.
More:

Download Gmsanzhuangqi APK GMS Installer

Download Gmsanzhuangqi APK GMS Installer
Google Mobile Services

Gmsanzhuangqi is the new version of GMS Installer. The Gmsanzhuangqi installer works on almost all the latest Chinese Android phones. The purpose Gmsanzhuangqi is to lay down the basis for Google Services in such phones. Users looking for Gmsanzhuangqi can download the Gmsanzhuangqi APK from this post. Before download Gmsanzhuangqi APK, let me tell you everything about this installer.

Gmsanzhuangqi GMS Installer

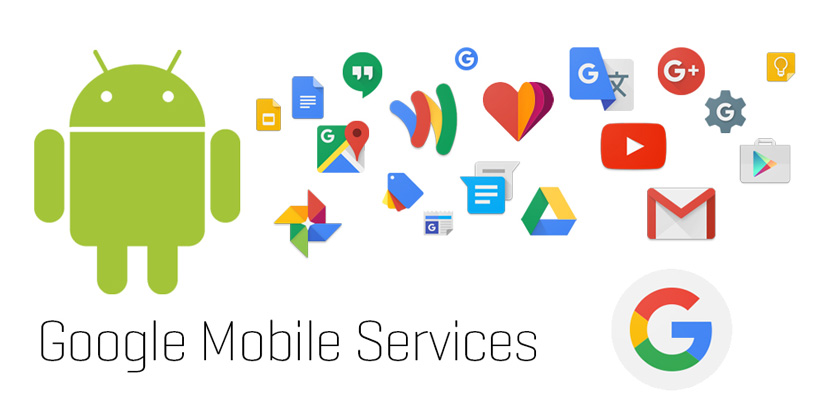
GMS stands for Google Mobile Services. The GMS Installers are supposed to install the Google Mobile Services in Android phones. By default, all Android phones come with these services pre-installed. However, when it comes to China, things are a bit different. The Chinese phones do not have any Google Services pre-installed. It means that you cannot run Google Play Services, Play Store, Contacts, or Calender in your Chinese Android smartphones.

Gmsanzhuangqi APK
Google Mobile Services

To enable any Google Services on your Chinese Android phone, you need the Google Mobile Services. GMS Installer or apps like Gmsanzhuangqi install the Google Mobile Services in your phone. On top of these services, you can use an application like Google Installer to install Google Play Services and Play Store.

GMS Installer or Gmsanzhuangqi itself does not install the Play Services or Play Store. It, in fact, installs the framework on which the Google Apps are based. This is why it is very important to install Gmsanzhuangqi before installing the Google Installer. If you are getting confused, let me make things a bit clear. We are talking about two different things at the moment.

  • GMS Installer – Google Mobile Services Installer.
  • GMSanzhuangqi – Another version of GMS Installer.
  • Google Installer – Google Apps Installer (Play Store, Play Services etc.

So, which one do you need out of the GMS Installer or Gmsanzhuangqi? Well, it totally depends on your phone. If you are using an old Huawei, Vivo, Oppo smartphone, you will go with GMS Installer. If you are using a latest phone like the Huawei Honor 8X, Honor 8, Honor 10 Lite, Nova 3i, or some other, you will go with the Gmsanzhuangqi APK.

The latest version of Gmsanzhuangqi APK is available below. Before you download Gmsanzhuangqi APK now, let me tell you why the Chinese phones do not have Google Mobile Framework pre-installed.

Lack of GMS in Chinese Android Phones

China is being run by a communist goverment at the moment. The goverment in China does not trust the companies like Google, Facebook, WhatsApp, Snapchat etc. Not only that, China also does not believe in right to information. It wants to control every bit of information that flows through its territory.

This is why China bans all social media platforms, connectivity applications, and app stores that do not comply with its policies. China has its own search engines, it has its own application stores, it has its own alternatives of Facebook, Instagram, and WhatsApp. Even if you get to install any such application on your phone inside China, you have to use a VPN to go online. It’s time to get back Gmsanzhuangqi APK now.

Gmsanzhuangqi Compatibility

  • Gmsanzhuangqi is the GMS installer for all Huawei Phones.
  • The Gmsanzhuangqi APK is also the GMS installer for all Honor Phones.
  • The Gmsanzhuangqi also works on all Oppo phones.
  • You can use Gmsanzhuangqi GMS Installer on Vivo, Coolpad, OnePlus, Nokia, Xiaomi, ZTE, and all other phones that belong to China.

Gmsanzhuangqi APK

  • Get the Gmsanzhuangqi APK – Download Link
  • Copy the APK to your Huawei or Honor or any other Chinese phone.
  • Enable Unknown Sources on the phone.
  • Install the downloaded Gmsanzhuangqi APK.
  • Now install the Google Installer. You can follow instructions in this guide.
  • Enjoy the Google Play Store now..

Update 9/25/2019: Google Core Installer for EMUI 10 & Below

A new version of Google Core Installer is available. It can install all the missing Google Framework and Services apps including the Google Play Store on your phone running on EMUI 10 and below. The new app has been tested on the Huawei Mate 30 series and it was found running flawlessly. You can download the latest Google Core Installer from below.

Google Core Framework & Services Installer: Download

Wrap Up

The only thing to note here is that only install this GMS Installer will not bring the Play Store in your phone. You must understand that this phone only brings the Google Mobile Framework. You must install the Google Installer in order to get those Google Apps. If you face any difficulties with this process, feel free to drop your questions below. I will try my best to get back to you as soon as possible.
How to enable Face ID for WhatsApp on iOS

0
How to enable Face ID for WhatsApp on iOS

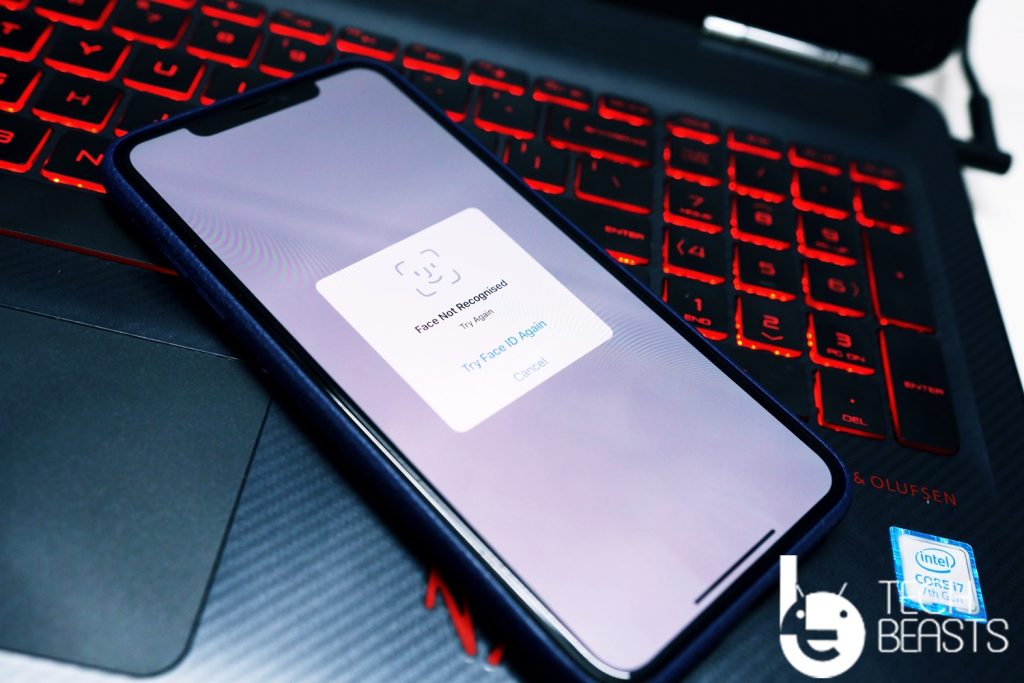
WhatsApp has been updated with a new security feature today. WhatsApp adds the Face ID and Fingerprint ID unlock support for iOS users. All the iPhone and iPad owners can now benefit from this new feature. This feature has been added to the latest WhatsApp carrying the build number 2.19.20. In this guide, you will find the steps to enable Face ID for WhatsApp on iOS. Before learning how you can turn on the Face ID or Fingerprint ID for WhatsApp on iOS, it is important to learn about the background of this feature.

Enable Face ID for WhatsApp

Face ID and Fingerprint ID support for WhatsApp

The Face ID and Fingeprint ID features for WhatsApp were being anticipated since October 2018. It was not clear when WhatsApp will add these features or if the rumors are even going to be true or not. The application was finally updated with the rumored features today, but only for iOS. It is still unclear when these features will make their way to the Android version of WhatsApp.

WhatsApp has become much more secure with this added layer of security. The most popular messaging platform already uses end-to-end encryption. With this new addition, WhatsApp takes security to a whole new level. Users do not have to worry about leaving their phones unlocked now or leaving their phone in someone else’s hands. No one should be able to snoop into your personal/private WhatsApp messages.

Users can still reply to messages from the notifications using the quick reply feature. However, every time you want to open WhatsApp, it is going to ask you for biometric verification. It is to be noted here that this lock does not apply to each and every single chat individually. This applies to the WhatsApp application as a whole. Unlocking once means you will have access to all of your chats.

Face ID Unlock and Fingeprint Unlock Feature for More Apps

In past, we have seen a number of smartphone users getting third-party applications to lock other applications on their phones. The third-party applications have a ton of loopholes. Those apps do not protect anything at all. It is a great idea to have this kind of a feature as a native feature on an application like WhatsApp. This does not only minimize the need of a third-party application, but this also leaves space for other applications to follow WhatsApp’s footsteps. It would be great to see Viber, IMO, Messenger, and Facebook taking similar security measures.

It’s time to get back to the tutorial to enable Face ID for WhatsApp on iOS.

Note: This guide is applicable to all iPhones and iPads that have Fingperprint ID or Face ID Unlock. It supports iPhone 5S, 6, 6 Plus, 6S, 6S Plus, 7, 7 Plus, 8, 8 Plus, X, XR, XS, XS Max, and all iPads.

Enable Face ID for WhatsApp on iOS

Follow these steps now to enable Face ID or Fingerprint ID for WhatsApp on iOS.

  1. First of all, open App Store and update WhatsApp to v2.19.20.

    This feature has been added to the latest WhatsApp updated with version number 2.19.20. Open the App Store on your iPhone/iPad and update WhatsApp first. If you have already updated, skip this step.

  2. Now open WhatsApp on your iPhone.

    The next step is to open the WhatsApp application on your phone. If this is your first time, set up WhatsApp using your phone number.

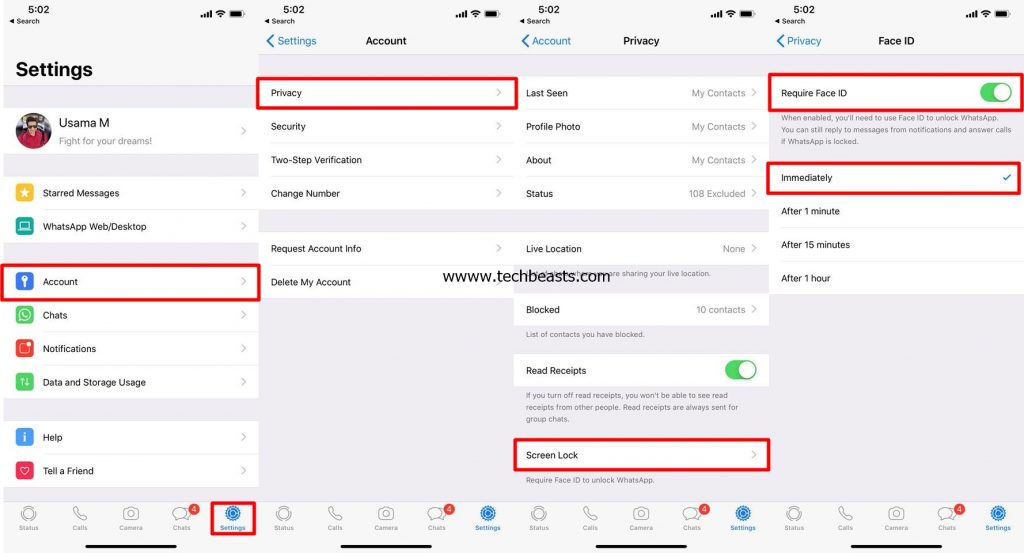
  3. Go to Settings > Account > Privacy > Screen Lock

    Now in WhatsApp, click on Settings and then go to Account. Under Account, click on Privacy. You will find the “Screen Lock” option at the bottom. Click on it to open the Face ID settings.

  4. Click on “Require Face ID” and set the time, that’s all.

    Tap the Radio button to turn on Face ID or Fingerprint ID now. Set the time whether you want WhatsApp to ask for Face ID immediately, after 1 minute, or after any other timespan. Close WhatsApp. Open it again and it will ask for biometric verification. That’s all.

Face ID for WhatsApp

Wrap Up

That is pretty much it with this tutorial. This is a great feature for those looking for more privacy and security. If you find something difficult in this guide, or something is wrong with WhatsApp on your phone, feel free to reach out to us. I will try my best to get back to you as soon as possible.
Quick guide to install Stock ROM on Galaxy M10

0
Quick guide to install Stock ROM on Galaxy M10
install Stock ROM on Galaxy M10

Samsung Galaxy M10 is out in the markets now. As soon as the users get their hands on this phone, they would want to exrperiment. It is essential to learn about how to fix your phone if something goes wrong as a result of an experiment. One solution for over a hundred problems is to flash a stock ROM on Galaxy M10. This guide is just about that. Galaxy M10 owners will find steps in this guide to install stock ROM on Galaxy M10. Before learning how to install stock firmware on Galaxy M10, it is important to learn more about this phone.

Galaxy M10 – Samsung’s answer to Xiaomi

Samsung introduced the Galaxy M series to tackle Xiaomi in India. The Indian smartphone users are intelligent when it comes to choosing a smartphone. Indian milennials look for “Value” rather then focusing on the brand. What Samsung offered them for $500, Xiaomi offered them for $250. This helped Xiaomi to become India’s top smartphone brand.

Since the Indian market has a major share in the global smartphone rankings, it seemed more likely that Samsung will lose its top spot in the global charts soon. Samsung did realize this and decided to launch the Galaxy M series, purely built for the millennials. The Galaxy M series handsets included the Galaxy M10 and the Galaxy M20. The Galaxy M20 is the superior variant here while the Galaxy M10 is low-end.

Galaxy M10 Specifications

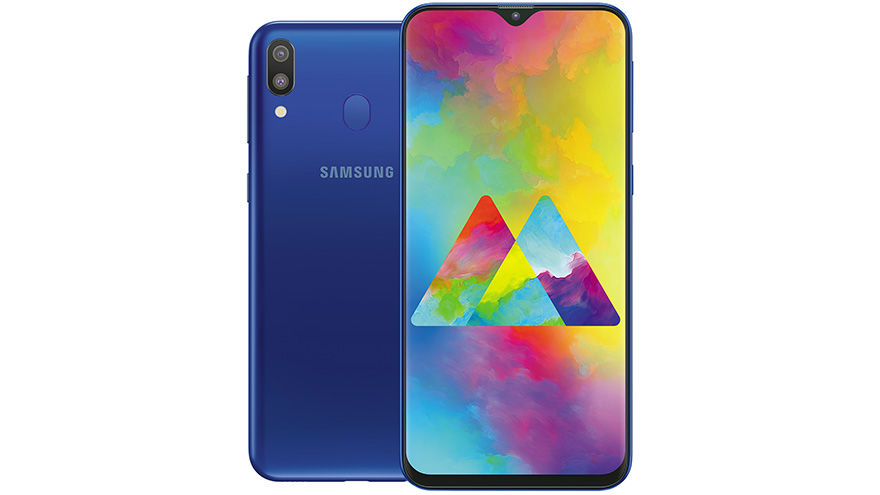
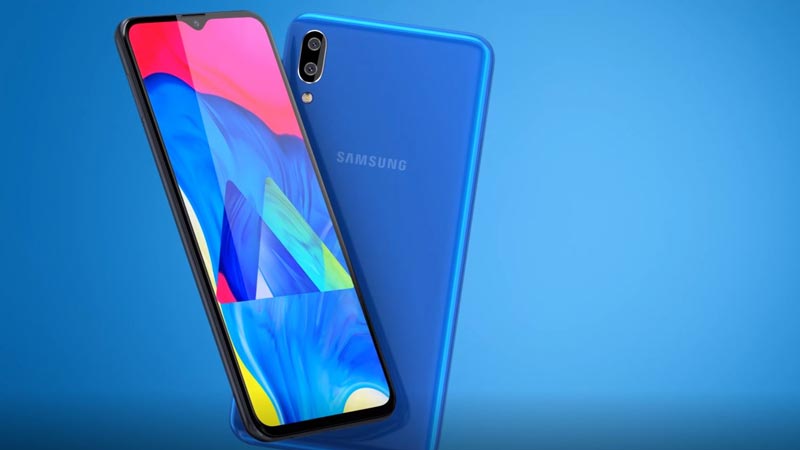
Galaxy M10 comes with a new design language and a new form factor. This is the first ever Samsung smartphone to come with a notch. Samsung has named this display as Infinity -V. The V-like notch is actually a waterdrop notch. Galaxy M10 has a screen of 6.22-inches with a ratio of 19:9. This is a PLS TFT display and it has a resolution of 720 x 1520 pixels. This phone is powered by Samsung’s in-house Exynos 7870 Octa-core SoC. There is Mali-T830 MP1 GPU inside this phone. Galaxy M10 has two configurations; 32GB Storage + 3GB RAM or 16GB Storage + 2GB RAM.

install Stock ROM on Galaxy M10

Galaxy M10 has a dual camera set up at the back. There is a 13MP + 5MP camera setup. On the front, it has a single 5MP camera. Galaxy M10 has a 3400 mAh battery inside. This phone uses the USB Type-C for charging purposes. It also supports fast charging. There is a headphone jack in there. Galaxy M10 runs on Android Oreo out of the box. This phone will be updated to Android Pie in a few months from now. Samsung has built this phone in the Charcoal Black and Ocean Blue colors.

How the stock ROM will help your Galaxy M10?

That’s all about the Galaxy M10. It’s time to take a look a the reasons or situations or circumstances in what this guide is going to help you.

  • Galaxy M10 stuck in a bootloop can be fixed via stock ROM installation.
  • Any Galaxy M10 that is soft-bricked, can be fixed by installing new firmware.
  • You can unroot a rooted Galaxy M10 through this process.
  • Just in case you want to factory reset or hard reset your Galaxy M10, stock ROM is the way to go.
  • Galaxy M10 can be manually updated to a new software through this method.
  • You can fix the performance lag on your phone and also boost its battery life.
  • And many more reasons are there…

Let’s get back to the Galaxy M10 firmware flashing guide now. Follow the instructions carefully to install new stock firmware on Galaxy M10.

How to Install Stock ROM on Galaxy M10

Preparing your Galaxy M10 for firmware installation

  • This guide is only for Galaxy M10. You can install software on Galaxy M10 M105F and M105G. Do not try this on any other phone.
  • Charge your phone’s battery up to 30%.
  • Backup all of your contacts, call logs, and text messages.
  • Enable OEM Unlocking and USB Debugging mode on your Galaxy M10.
  • Use OEM Data Cable to connect your phone to the computer.
  • Turn off Samsung Kies or Samsung Smart Switch if you have it.
  • Disable Windows Firewall and Antivirus before using Odin.
  • Follow the remaining steps carefully.

Required Downloads

Install stock firmware on Galaxy M10

Follow these steps to install the official stock firmware on your Galaxy M10.

  1. Open Odin 3.13.1.exe and add AP, BL, CP, and CSC files.

    First of all, open Odin on your computer. In Odin, go to Options and make sure that only options checked are F.Reset.Time and Auto Reboot.
    Now get back to main menu in Odin and click on AP. In AP, select the AP file. Click on BL and select the BL file. Now click on CP and add the CP file. Lastly, click on CSC and add the CSC file if you want to perform a factory reset otherwise add the HOME_CSC file.

  2. Put your Galaxy M10 in Download Mode.

    Turn off your Galaxy M10 now. Press and hold Volume Up + Volume Down + Power button. As your phone shows a warning, press the Volume Up button. Your phone should be showing “Downloading…” now.

  3. Connect your Galaxy M10 to the computer now.

    Go ahead and connect the phone to the computer. As the connection is established, Odin will show you a blue light in the ID:COM box, and also show “Added” in the log box. This means that the connection is successful.

  4. Click on Start Button in Odin, let it flash the firmware.

    Now click on the Start button in Odin. It will start flashing the software. This process will easily take up to 7 minutes. Keep patience and let it end. Once it ends, your phone will reboot.

  5. Disconnect the phone and enjoy new firmware.

    As the phone reboots, disconnect it from your computer. You will find the brand new software running smoothly on it now. That’s all.

Galaxy M10 Stock Firmware

Conclusion

This guide ends here. I hope that you have fixed the issue with your phone or have it updated to a new version of Android. Remember that this guide makes the use of stock firmware which is completely safe and secure to use. This method will not damage your phone or void its warranty. If you have any questions about the installation, feel free to reach out to us. I will try my best to get back to you as soon as I get your query.

Download Hotstar for PC and Laptop

0
Download Hotstar for PC and Laptop

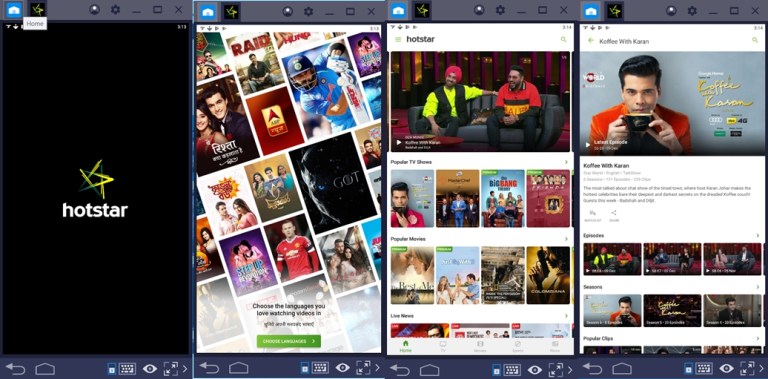
Hotstar by Novi Digital is a video streaming application. Hotstar is loaded with thousands of movies, TV shows, and hundreds of TV channels. This application is for those looking to killing time on the go. This post is about installing Hotstar for PC. In a while, you will take a look at the procedure to download Hotstar for PC. Before installing Hotstar for PC, we will learn more about this application.

Hotstar for PC

Hotstar – Movies & TV Shows

Hotstar has got the content divided into three sections. It has a section for Movie Buffs. The Movies section hosts movies from Hollywood, Bollywood, and the Vernacular Movies. In the Hollywood Movies section, users can find the latest to oldest movies. The most recent addition to this section is Kingsman. Similarly, the Bollywood and Vernacular Movies sections also bring latest movies. The movies are added every now and then.

The TV Shows section adds shows from the Indian Cinema. It also brings English shows. It has Vernacular shows too. Lastly, it has the Hotstar original shows. The Hotstar originals show off the emerging talent. If you are bored of watching the mainstream cinema again and again, Hotstar originals has got some amazing content for you.

Hotstar TV Channels

Hotstar has some famous Indian and English channels. The Indian channels include Star Plus, Star Bharat, Star Sports, Star World and a handful of other channels from the Star group. The English channels include HBO, NAT Geo, Fox Life. There is this Asian channel Asianet in Hotstar.

Hotstar Player Quality

Hotstar has a premium player to stream the movies, TV shows, and TV channels. The player is very easy to use. It streams all the content in HD. If you go on to buying a premium membership of Hotstar, you will unlock some exclusive features too. The Hostar premium player also live streams the cricket matches happening around the world.

Hotstar has the content for everyone. All the content on Hotstar can be streamed for free. You can watch the movies, TV shows, and live TV channels either on your phone or on your computer. There is no official Hotstar application for computers, however, we can install its mobile version on the computers.

Hotstar for PC

To download Hotstar for PC, users need an Android emulator on their computer. The Android emulators make it possible to run all the Android apps on computers running on Windows and Mac. Those of you willing to get Hotstar for PC can follow the steps given below to get it running right now.

Follow these easy steps to download Hotstar for PC on Windows 7/8/10 and MacOS/OS X.

  1. Download and install BlueStacks or Nox Player.

    If you are a Windows user, download and install BlueStacks 4. If you are a Mac user, download the Nox App Player and install it. Open the emulator right after installing it.

  2. Set up your Google Account in the emulator.

    Now the Nox Player or BlueStacks 4 will ask you for the Google Account. You can either use your existing Google Account or create a new one. Add the account and go ahead.

  3. Open Google Play Store and install “Hotstar”.

    Open the Play Store in the emulator now and search for “Hotstar”. As soon as you find Hotstar, install it. It will now appear in the Home Screen or under the App Drawer of the emulator.

  4. Launch Hotstar and Happy Streaming!

    Launch the Hoststar application now. Navigate through the application to watch the content of your choice now. That’s all.

Hotstar for PC
Hotstar for PC

Wrap Up

As you have now successfully installed Hotstar for PC, you should be able to watch unlimited movies and TV shows on your computer. Hotstar gives you portability. You can take your laptop anywhere with you and stream the live TV channels while sitting in another corner of the world. If you are facing issues with the installation process or anything else, feel free to reach out to me. I will try my best to get back to you as soon as possible.
Download Thunder VPN for PC and Laptop

0
Download Thunder VPN for PC and Laptop
Thunder VPN for PC

Surfing through the Internet is becoming a part of our everyday life. When the access to a certain type of content is restricted, it doesn’t remain fun anymore. Internet is all about freedom, but this freedom comes with a lot of risks as well. While browsing websites, you have to make sure that your data is not being compromised. To deal with the restrictions and safety concerns, VPN applications are there. We are also going to talk about a VPN application today which goes by the name “Thunder VPN”. In this guide, we will learn the procedure to install Thunder VPN for PC. While performing the installation of Thunder VPN for PC, we will also learn all about it.

Thunder VPN for PC

Why do you need a VPN?

There is an array of reasons which will force you to use a VPN, but let us be precise with the help of the most important reasons.

Geo-restrictions

As the freedom of speech, freedom of expression, and the right to information are taking a toll in the world, the Governments and authorities are becoming conservative. In many countries, the Governments are trying to censor the internet. They are trying to manipulate the information that reaches out to their citizens. Many countries have put a ban on certain websites and applications so their citizens cannot access them. Some countries have even banned websites like YouTube and Facebook.

Similarly, the educational institutes and offices sometimes prefer to ban the social media websites/apps on their internet. This is done only to keep the students and employees focused on their goals.

Applications and Website owners sometimes restrict their property from loading in certain countries. This is done in order to get the audience from a specific region only or if that particular application/website is for a very limited number of users.

Safety Concerns

Those were all the loading restrictions. Let’s discuss the privacy and security concerns now.

On the internet, nothing is safe. When you are using a public Wi-Fi hotspot, you are actually inviting the hackers and attackers to look into your data. While using an unsecured internet connection, it is very important to mask you geographical location and your IP address in order to keep the evils away.

While the VPN applications let bypass geographical restrictions, and also make your online identity anonymous, they also speed up your internet surfing.

Thunder VPN – It has got it all!

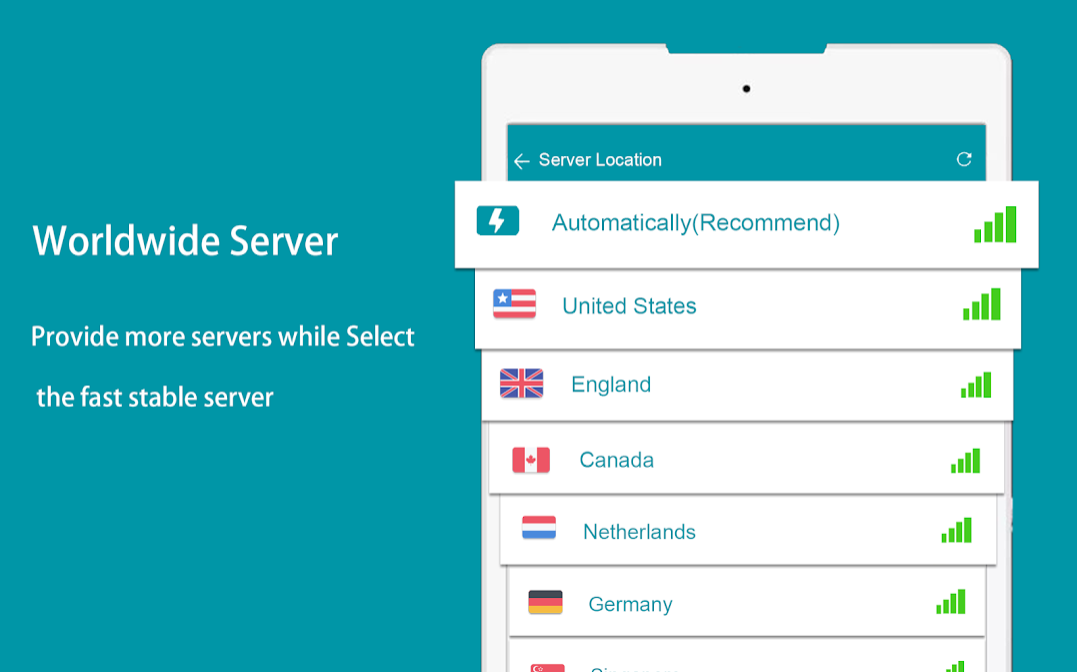
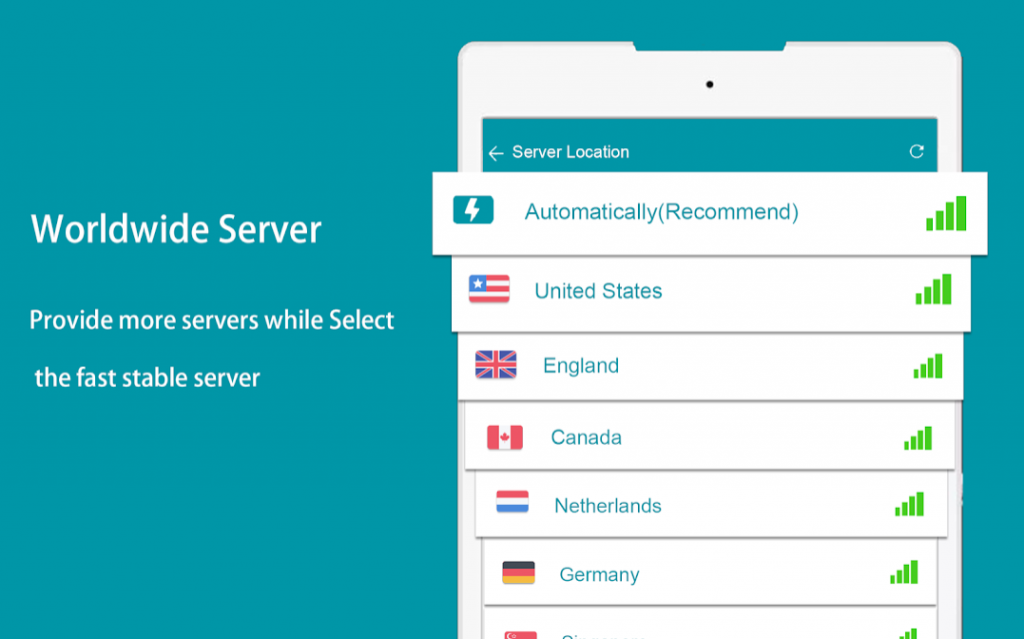
Thunder VPN comes from Signal Lab. It’s a free application with over 5 Million downloads. Thunder VPN is popular for a few main reasons. This VPN has a large number of servers at the backend. It means that the users have a variety of countries to choose from while setting up their connection. Thunder VPN works with all the connection types including WiFi, LTE, 4GB, and 3G. It does not log your data which means all of your internet activity is going to be wiped off the moment you turn it off. There is no registration required for this application. Thunder VPN comes with a simple and straightforward UI.

Thunder VPN for PC

Thunder VPN adds an extra layer of security to your internet connection. Your geographical location and your IP address are hidden behind a fake location and fake IP address. Anyone who wants to know your location or your IP, will not be able to see your original details. All the parties over the internet will see your fake details only. Thunder VPN encrypts your internet connection in order to secure the communication taking place over it.

Thunder VPN for PC

Let’s get back to the installation of Thunder VPN for PC. Assuming that you have a clear idea about what a VPN is and why do you need one, we can now download Thunder VPN for PC.

Thunder VPN for PC

As you all know that Thunder VPN is an Android and iOS application, so how we are exactly supposed to install it on a PC? Well, this is why we have the Android emulators. The emulators let you run all the Android applications on your computer. We will be using an Android emulator to get Thunder VPN for PC. Since the Thunder VPN comes for free, it is really easy to install on a desktop PC and Mac. All you have to do now is to follow these steps to get Thunder VPN for PC on Windows and Mac.

These are the steps to download Thunder VPN for PC on Windows 7/8/10 and MacOS/OS X.

  1. Download and then install Nox App Player or BlueStacks 4.

    If you are using MacOS or Mac OS X, get the Nox App Player. Those of you who are running Windows, they should get the BlueStacks 4 emulator. Install the emulator and then open it on your computer.

  2. Add the Google Account to the emulator.

    The BlueStacks 4 or Nox Player will now ask you to add your Google Account. You can either add your existing Google Account or create a new one.

  3. Open Google Play Store and install “Thunder VPN”.

    Now open Play Store in the emulator. In the Play Store’s search bar, type “Thunder VPN”. As soon as you find the VPN, install it. It will now appear under the Home Screen or in the App Drawer of the BlueStacks 4/Nox App Player.

  4. Launch Thunder VPN, connect and enjoy!

    Open Thunder VPN now. Click on the connect button. Chose the location you want to go live from. Enjoy the safe and secure internet now. That’s all.

Thunder VPN for PC
Thunder VPN for PC

Conclusion

You have now successfully installed Thunder VPN for PC. Remember that Thunder VPN for PC will not work with your Google Chrome or Firefox browser inside your computer. In order to use the VPN, you will have to launch the browser inside the emulator. If you have any questions related to the installation of Thunder VPN for PC or the emulators mentioned above, feel free to reach out to me. I will try my best to get back to you as soon as possible.

How to install Stock ROM on Galaxy M20

0
How to install Stock ROM on Galaxy M20
Install stock ROM on Galaxy M20

Planning to get the all-new Samsung Galaxy M20? If so, you are going to need this guide too. This is the guide to install stock ROM on Galaxy M20. The stock ROM comes in handy every now and then. Before I tell you about the benefits of flashing/install a brand new stock ROM on Galaxy M20, it is important to learn more about this phone.

install stock ROM on Galaxy M20
Install stock ROM on Galaxy M20

Samsung’s Answer to Xiaomi – The Galaxy M Series

The year 2018 was a tough one for Smartphone giants like Samsung and Apple. In 2018, Huawei grabbed the 2nd spot from Apple to become the 2nd most popular smartphone brand in the world. At the same time, Xiaomi grabbed the top spot from Samsung in India to become India’s most popular smartphone brand. The reason for Samsung to push itself to the second spot is not because its no making great phones. The reason is the price point of Samsung Galaxy handsets. What Samsung sells for $500, Xiaomi sells it for $250. This is what attracts the Indian millenials as they look for “Value for Money”.

Samsung realised that its not going to succeed with its current lineup of smartphones. The South Korean giant decided to come up with a whole new series of smartphones at a whole new price point. This is when the idea of Samsung Galaxy M series was dropped in by Samsung. Samsung kept on teasing the Galaxy M series for quite a while.

Before launching the Galaxy M10 and Galaxy M20 smartphones, Samsung ensured that these phones are purely going to be for millenials. They will come with great specifications and with a very impressive pricetag. When these phones came out of the curtains on January 28th, every single promised made by Samsung turned into reality.

Samsung Galaxy M20 is exactly what the India smartphone users had been looking for. The phone comes in a very impressive price bracket. The phone has got great hardware, a slightly old software which will be updated soon, and a brand new design. Let’s take a deep dive into the specifications and features of the Galaxy M20.

Samsung Galaxy M20

Samsung Galaxy M20 comes with Samsugn’s latest Infinity -V display. There is a small waterdrop notch right int the middle of the screen. This phone uses the PLS TFT display. The display size is 6.3-inches. Galaxy M20 has a resolution of 1080 x 2340 pixels. Samsung has used its all-new Exynos 7904 Octra-Core CPU in this phone.

Galaxy M20 comes in two configurations. This phone has a RAM of 3GB and storage of 32GB or a RAM of 4GB and storage of 64GB. There is a microSD card slot too. Galaxy M20 has a dual rear camera. It has a 13MP + 5MP camera setup at the back. On the front, the Galaxy M20 has a single 8MP camera. Galaxy M20 happens to be the first ever Samsung Galaxy smartphone to have a 5000 mAh battery.

It has a fingerprint scanner mounted at the back. There is facial recognition in this phone. Galaxy M20 uses a USB Type-C port. It supports fast charging as well. Samsung has manufactured this phone in the Ocean Blue and Charcoal Black colors. The Galaxy M20 runs on Android Oreo out of the box. The phone will be updated to Android Pie in a few months.

Stock ROM on Galaxy M20 – Why it’s needed?

These are the reasons that will urge you to flash a stock firmware on your Galaxy M20.

  • To update your phone to a newer version of Android.
  • In order to refresh the software on your phone.
  • If your phone is stuck in a bootloop, stock firmware installation is the way to go.
  • To unroot a rooted Samsung Galaxy M20.
  • You can also recover a soft-bricked Galaxy M20 by installing a stock ROM.
  • To factory-reset or hard-reset your Galaxy M20.
  • To boost the performance and battery life of your Galaxy M20.

Install Stock ROM on Galaxy M20

Follow these steps carefully to install a stock firmware on Galaxy M20 now.

  • This guide is only for Galaxy M20 SM-M205F/M205G. Do not try this on any other phone.
  • Charge your phone up to 30% to avoid power loss during software installation.
  • Backup each and everything on your phone as we will wipe it.
  • Enable USB Debugging and OEM Unlock on your Galaxy M20.
  • While using Odin, turn off Samsung Kies or Samsung Smart Switch if you have it.
  • Also, disable the Windows Firewall or Antivirus if you have one.
  • Follow the remaining steps carefully.

Required Downloads

  • Download and extract Odin 3.13.1 for PC.
  • Also, download and install Samsung USB Drivers.
  • Download and extract Firmware for Galaxy M20.
    • Make sure that you download the latest firmware or your required firmware accordingly. Extract the firmware to get the 5 firmware files including AP, CP, BL, CSC, and HOME_CSC files.

This is how to install a stock ROM on Galaxy M20.

  1. Open Odin 3.13.1.exe, add Firmware files.

    Open Odin 3.13.1.exe on your computer. Now in Odin, click on Options and make sure that the only options checked are F.Reset.Time and Auto-Reboot. Now get back to main menu in Odin and click on AP tab, load the AP file here. Click on the BL tab and load the BL file. Now click on the CP tab in order to load the CP file. In the end, click on the CSC tab and select the CSC file if you want to reset your phone, or select the HOME_CSC file if you don’t want to reset your phone.

  2. Put your Galaxy M20 in Download Mode.

    Power down your Galaxy M20. Now press and hold Volume Up + Volume Down + Power button to boot into the Download Mode. As soon as you see the warning, press Volume Up to continue.

  3. Connect your Galaxy M20 to the computer.

    Now connect the Galaxy M20 to your computer. The ID:COM box in Odin will turn Blue. Odin will also show “Added” on the left side in the log box. This means the phone is successfully connected.

  4. Click Start to install Stock ROM on Galaxy M20 now.

    You are all set now. Simply click the “Start” button in Odin to start the firmware installation. The installation will take about 5 minutes. As soon as the phone restarts, disconnect it and see it running on the new software.

Conclusion

That is all folks. You don’t have to do anything else now. Your phone should be running on a whole new refreshed software. Remember that this is a stock firmware, it does not modify anything in your phone. It is completely safe and secure to install. If you have any questions, feel free to drop them in the comments section below. I will try my best to get back to you as soon as possible.

JioTV Live for PC and Laptop FREE Download

0
JioTV Live for PC and Laptop FREE Download
JioTV Live for PC

JioTV is a live and catch-up TV application by Reliance Industries Ltd. With over 10 Million downloads, this is one of the best applications watch live TV channels. JioTV comes for free. Users who do not have a phone to run JioTV application, they are looking for its desktop counterpart. This guide is for all such users. JioTV fans will find the steps to download JioTV Live for PC in this post. As you go ahead, you will find the instructions to install JioTV Live for PC. Before installing it, let us learn more about it.

JioTV Live for PC

JioTV Live – over 600 channels

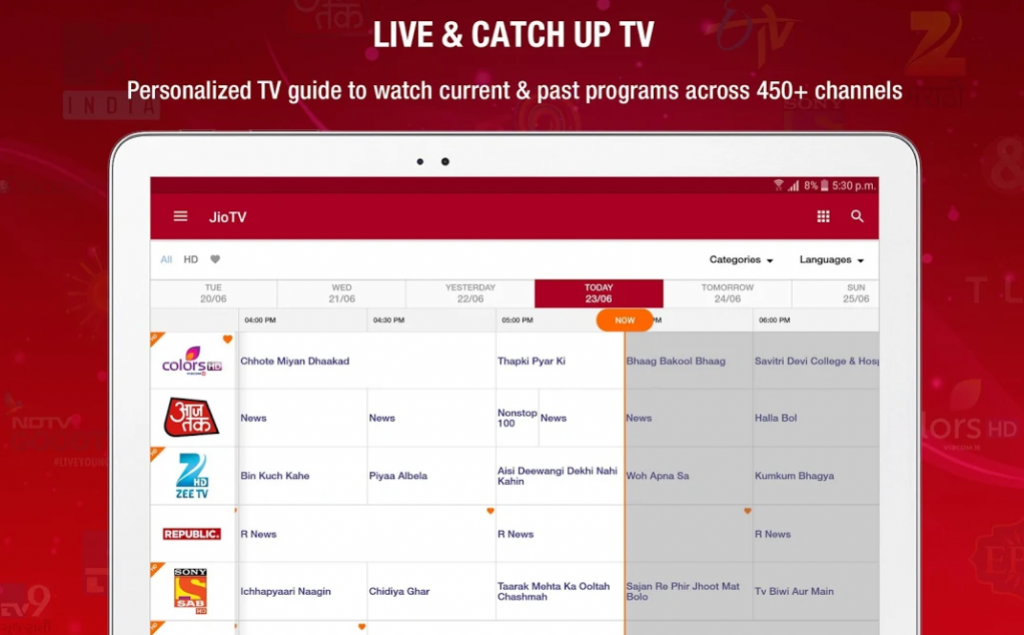
JioTV Live brings a variety of TV channels. The application offers over 600 TV channels from all across the world. It has TV channels in over 15 different languages. The app is loaded with over 100 HD TV channels. This application does not display the content from a specific region. It shows content from multiple regions. Whether you are a fan of Indian movies/shows, you love to watch Bollywood movies, Hollywood movies, South Korean TV shows, any comedy shows or anything else, you will find the content of your choice in JioTV Live.

JioTV Live for PC

Variety of Genres

Jio TV Live has the content sorted into appropriate genres. Users can find the TV Shows, Movies, News, Sports, Entertainment, Music channels in the app. Popular comedy shows like the Kapil Sharm Show, Fear Factor are given a special space in this app. There is a plethora of reality shows in the JioTV Live. It is never going to let you get bored.

The languages include English, Tail, Bengali, Punjabi, Urdu and many more. Some of the famous entertainment channels in this app include the Colors, Zee TV, Life OK, SAB TV, and Comedy Central. The famous movie channels include the Zee Cinema HD, HBO, WB, and Sony Pix. As far as the sports channels are concerned, users will find the Sony Six, Sony ESPN, JioSports, JioFootball, and DD Sports among the popular ones. Almost all the famous news channels like the BBC, CNN, and Times Now along with many others are a part of JioTV Live.

Easy to navigate

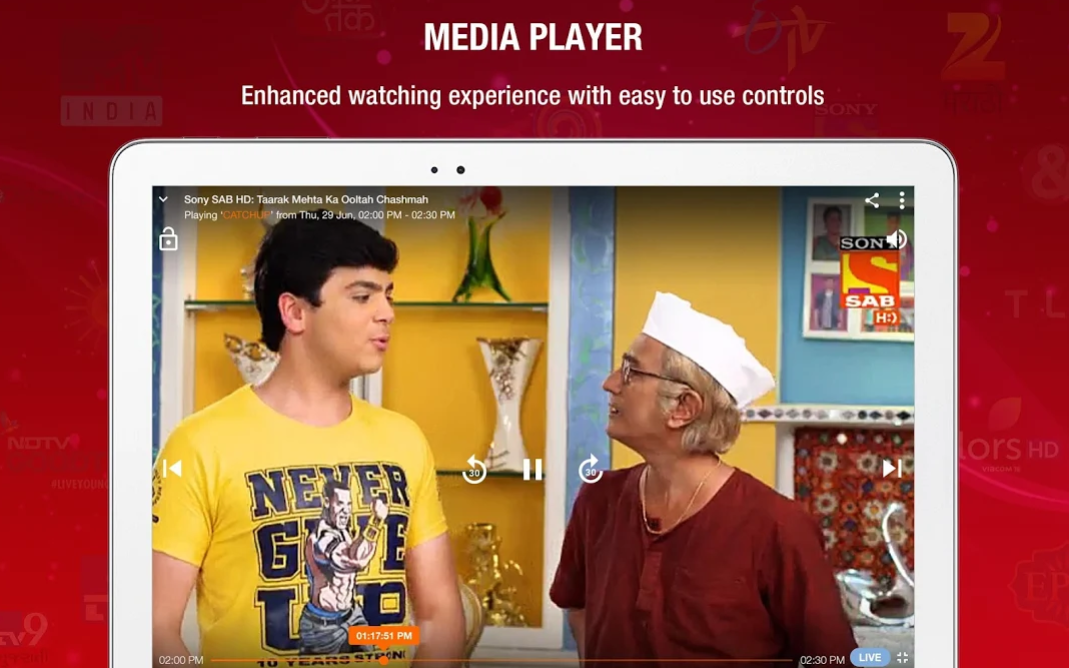
The JioTV Live comes with a very easy-to-use UI. There is a featured tab in the app. This tab brings you the trending shows and movies. It recommends the movies, channels, and shows based on your interest. There is a 7-days catch-up feature in this app. You can easily watch a missed TV shows for up to 7 days. It also lets you rewind or forward the live TV for 30 seconds. Search filters of JioTV Live are coded to show the most appropriate results to the users.

Overall, JioTV Live is among the few working Live TV applications. This is the reason why this application is so much popular. JioTV Live works way better if you are using the Jio network. Its application is primarily designed for Android and iOS platforms. We are going to run the Android version of JioTV Live on a computer now. Take a look to see how it’s done.

JioTV Live for PC

By now, all of you know that there is no desktop or computer version of JioTV Live. So what we are going to do is, we are going to run it on the computers with the help of an Android emulator. Using an Emulator, it is possible to run all the Android applications on a computer. Just follow the steps below to download JioTV Live for PC on Windows 7, 8, 10, and MacOS/OS X.

This is how to install JioTV Live for PC on Desktop PC and Mac. You can watch free movies and TV shows on over 600 channels by running JioTV Live for PC.

  1. First of all, download and install BlueStacks 4 or Nox App Player.

    If you are running Windows 10, download BlueStacks 4. If you are using Mac OS X or MacOS, download Nox App Player. Install the emulator. The guides are given in their respective posts. After installation, open the emulator.

  2. Add Google Account to the BlueStacks 4 or Nox Player.

    The emulator will now ask you for Google Account. Either add your existing account or create a new account on the go. This will complete the initial setup of the BlueStacks 4 or Nox.

  3. Open Google Play Store and search for “JioTV Live”.

    Now go ahead and open Play Store. In Play Store, type “JioTV Live”. As soon as you find the app, install it. It will appear under the Home Screen or App Drawer in the emulator now.

  4. Open JioTV Live in order to entertain yourself now.

    Launch JioTV Live. Start watching any channel you want. That’s all.

JioTV Live for PC
JioTV Live for PC

Conclusion

There is nothing more you need to know about JioTV Live for PC. I hope that you are successfully running this application on your computer now. If you have any queries, questions, and suggestions, feel free to reach out to me through the comments section below. I will try my best to get back to you as soon as possible.

Also check: Download Just Proxy VPN for PC and Laptop

Download Just Proxy VPN for PC and Laptop

0
Download Just Proxy VPN for PC and Laptop
Just Proxy VPN for PC

Internet these days is becoming more cluttered than it ever was. It is very important to protect your data while browsing through your favorite websites. This is when the VPN applications come into the play. Just Proxy VPN is also one of those applications. Fortunately, the purpose of a VPN application like Just Proxy VPN is much more than just to protect your data. In this guide, we will take a look at the steps to download Just Proxy VPN for PC. Before we download Just Proxy VPN for PC, let us take a look at its features and functionality.

The need of a VPN

Virtual Private Networks are supposed to make the access to internet easy for everyone. We are living in the era of “Freedom of Speech” and “Right to information”. People today are more informed about everything, thanks to the internet. Today, it is more easy for the people to raise their voice for a cause. It has been made too easy for people to keep in touch with each other with the help of platforms like Facebook, Instagram, and WhatsApp. It is now easy for celebrities, politicians, and atheletes to keep in touch with their fans through their twitter profiles.

There is no doubt that the Internet has driven the world into a new direction. Unfortunately, there happen to be Governments, Authorities, and ISPs that don’t quite like this new space created by the internet.

Censorship and privacy issues

The restrictions set on the internet sometimes make sense, and sometimes they don’t. For example, companies restrict the internet to keep their employees from distractions. Universities, colleges restrict access to certain websites and apps to keep their students focused on what’s important. But when it comes to governments and other specific authorities, they literally restrict access to certain sites just to keep the users away from information. We see this thing happening every now and then in countries like China, Iran, Pakistan, and many others.

Benefits of a VPN

At times, the website developers or app developers do not want their material to be used in a specific country. They keep their sites/apps from loading the countries they don’t want it to appear.

After the censorship part comes the privacy part. When we are using an insecure internet connection, there is a great chance that we will end up getting our data compromised. This is likely to happen while using a public Wi-Fi hotspot. There are many parties sitting on the internet trying to crack someone else’s privacy all the time. So this is also when you would want to get your hands on a VPN like the Just Proxy VPN.

Just Proxy VPN – Speed, Privacy, Access, and more

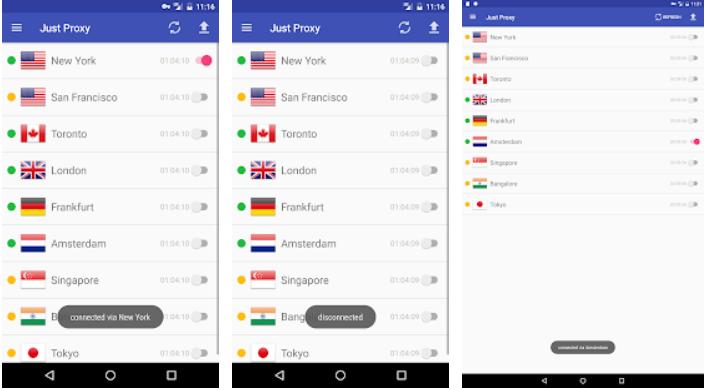
Just Proxy VPN for PC
Image of Just Proxy VPN for PC

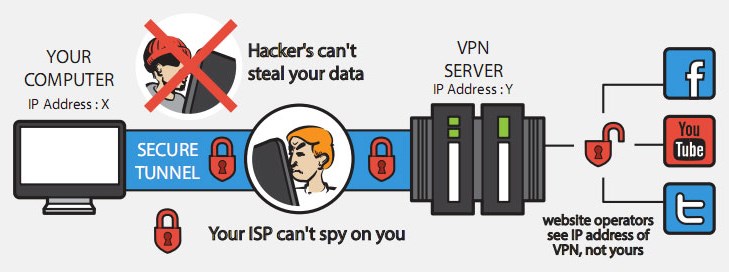
Just Proxy VPN changes your physical location and the real IP address. It acts as a middleware between your internet and the website or application you are trying to access. The IP address assigned to you by your ISP remains the same, however, the website or app you are opening does not see your real location or IP.

This is done in order to lay off all the restrictions set by the ISP or by the government. If there is any website blocked in your area, just activate the Just Proxy VPN and you will have it running.

Since the Just Proxy VPN masks your IP address, no one on the internet can snoop into your private data. This is a great way to access the internet anonymously. No one is going to have any idea about your physical location.

For example, you are sitting in the United Kingdom trying to use an application which works only in the US, you can activate Just Proxy VPN and connect through US. Now that application will see that this user is coming from the US, so it will run smoothly.

Just Proxy VPN is a must have it you use the public Wi-Fi hotspots all the time. The connections on the Subway Stations, Airports, and Restaurants are mostly insecure. Having an app like Just Proxy VPN for PC will give you an extra layer of security.

Just Proxy VPN has a free version and a premium version. You can use a few countries in the free version. The premium version brings hundreds of countries to choose from. It’s time to encrypt the inbound and outbound traffic with the help of Just Proxy VPN. Let us go ahead to install Just Proxy VPN for PC now.

Just Proxy VPN for PC

Just Proxy VPN is built for Android and iOS devices. Incase you wish to run this very same VPN on your PC, you will not find its desktop counterpart. However, there is a very neat trick that helps running all Android applications on computers. The solution is to use an Android emulator to bring Just Proxy VPN for PC on your Windows or Mac-powered machine. As you scroll down a little more, you will find the steps to install it. So, go ahead and download Just Proxy VPN for PC on Windows 7/8/10 and Mac-powered Desktop PCs and Laptops.

Time needed: 5 minutes.

Follow these few steps to install Just Proxy VPN for PC on Windows and Mac.

  1. Download and install BlueStacks 4 or Nox App Player.

    Windows 10 users should install the BlueStacks 4 Android emulator, and the Nox App Player should be the choice of Mac users. Download the emulator and install it. Open the emulator after installation.

  2. Set up the emulator using Google Account.

    Just like an Android phone, the emulator will ask you to add your Google Account. Either add your existing account or create a new account.

  3. Now open Play Store and look for “Just Proxy VPN”.

    Open Play Store in BlueStacks 4 or Nox App Player and look for “Just Proxy VPN”. As soon as you find it, install it. Now open the Just Proxy VPN from the Home Screen or from the App Drawer.

  4. Set up Just Proxy VPN and say goodbye to restrictions.

    Go through the initial setup of the Just Proxy VPN. After getting to the main screen in the VPN, connect to the country of your choice. Now open any restricted website or make your web-surfing safe and secure.

Conclusion

That’s all with the installation of Just Proxy VPN for PC. Remember that we have installed this VPN inside an emulator which means that it will also work only inside the emulator. It will not be enabled system-wide. You will have to open the browser inside your BlueStacks 4 or Nox Player in order to get benefited from the Just Proxy VPN for PC. If you have any questions, feel free to drop them below.

Don’t forget to check out Best Free VPN Apps in 2019.

Best Pirate Bay Alternatives To Use [ 2019 ]

0
Best Pirate Bay Alternatives To Use [ 2019 ]

Today we will give you the Best Pirate Bay Alternatives. We all know that The Pirate Bay was the most popular Torrent website. However, in the past few years, we have seen Pirate Bay has faced a lot of heat. Due to this reason, every now and then The Pirate Bay website was down.  Although, they are out of this midst, still it better to have a backup. That’s why we have created this post, you can find the best Pirate Bay Alternatives of 2019.

TPB is the best torrent website, also it has been around for almost 15 years or so. As I said before that Pirate Bay has seen bad days, it was taken down multiple times. Also, they have changed the URL a number of times. Moreover, they have done everything to stay out of law enforcement reach. But eventually, they caught up in the net. Its founder was arrested back in 2013. After KickAss Torrents took their place until the Pirate Bay got back up and regain its throne again.

Pirate Bay Alternatives

Now that The Pirate Bay is back and standing on the top of the list, but the question remains, what if The Pirate Bay is down again? Then what, you will need these Pirate Bay Alternatives, so when are in this type situation, you don’t have to wait for Pirate Bay to come back online. Let’s get started.

Best Pirate Bay Alternatives To Use:

Before we move on, let’s clear one thing. All the Torrent sites provided below are only for informational purpose. We don’t encourage our users to download copyright-protected content. Moreover, if any of these websites are blocked in your region, you can always use VPN or Proxy to unblock any website.

1. OfflineBay

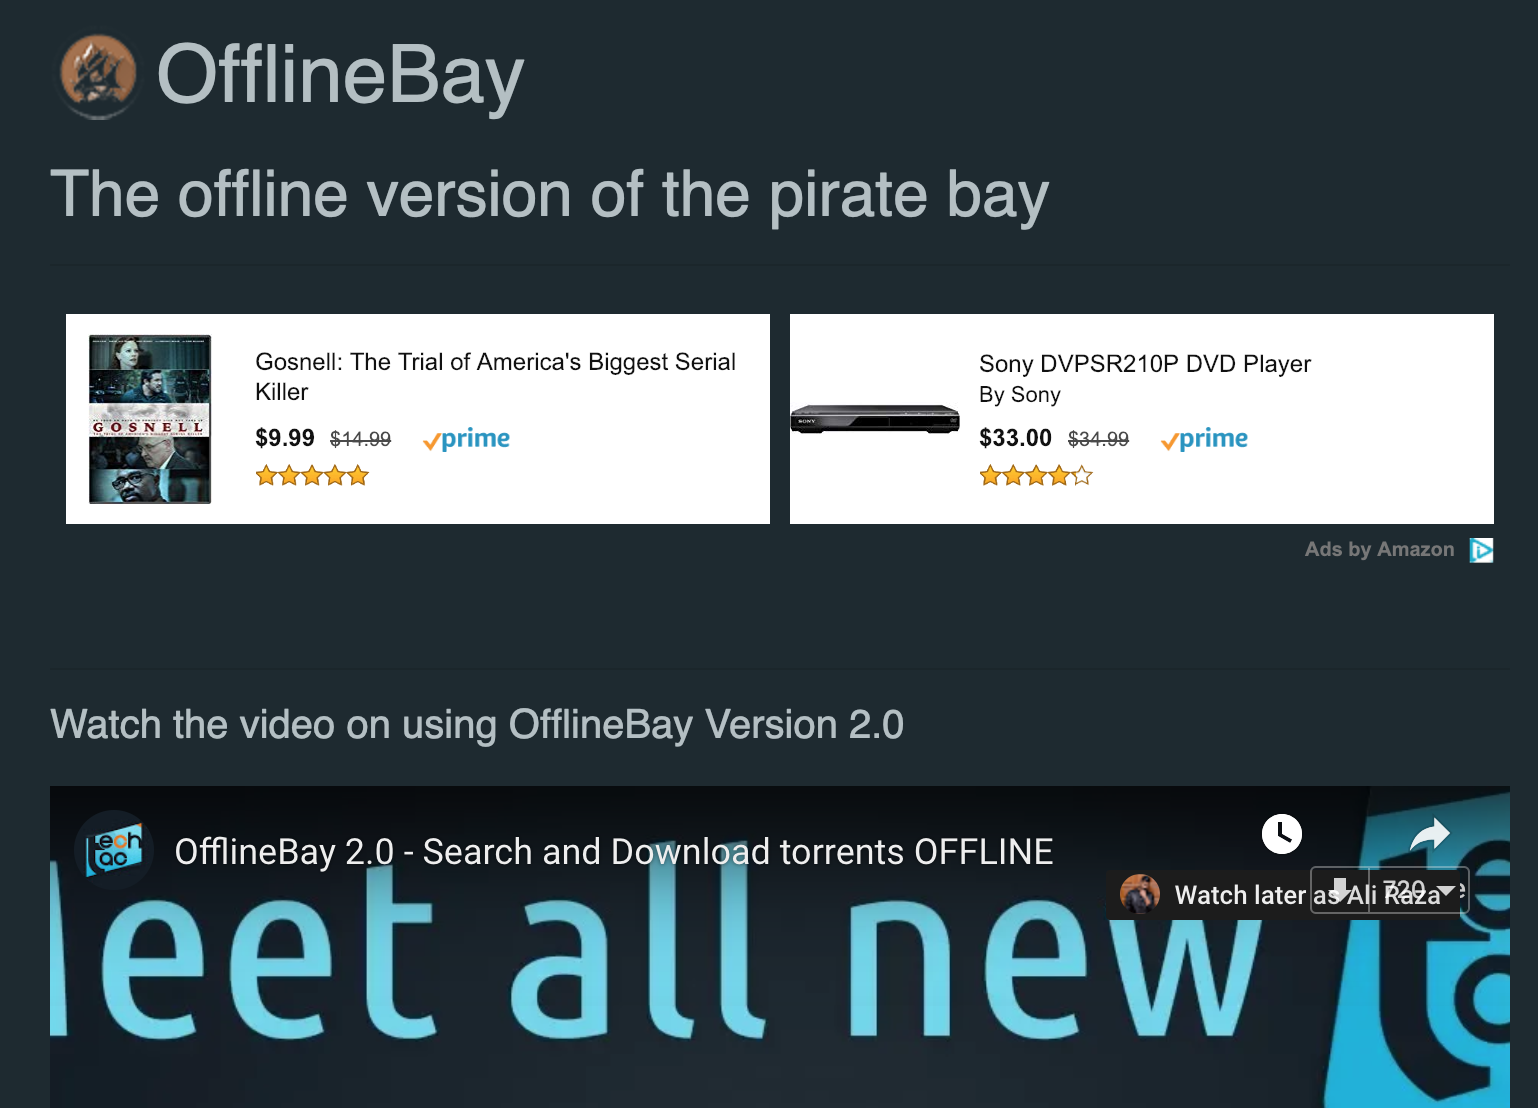
OfflineBay is the best The Pirate Bay alternatives. The service is launched as a backup in case TPB goes down again. It works totally different from a normal Torrent site. Basically, OfflineBay will provide you with the cache pages of thepiratebay.org.

We cannot say that OfflineBay is the full-fledged torrent site because it is still open source. The best feature of OfflineBay is that it works without an active internet connection. It stores all the cache of TBP and provides you the download links of the available Torrents.

2. 1337x

We’ve seen that all the big guns of Torrent industry are under the radar of law-enforcement agencies. However, there is one Torrent site which is stable and running in all of this midst. It is named as 1337x, also it is the best working alternative to The Pirate Bay. You can download Movies, Television, Games, Music, Documentaries, etc. Everything is categorized on 1337x.

1337x user interface is simple and neat, you can easily navigate through categories. Moreover, you will find a number of 1337x Torrent sites but the best among all of them is 1337x.to.

3. LimeTorrents

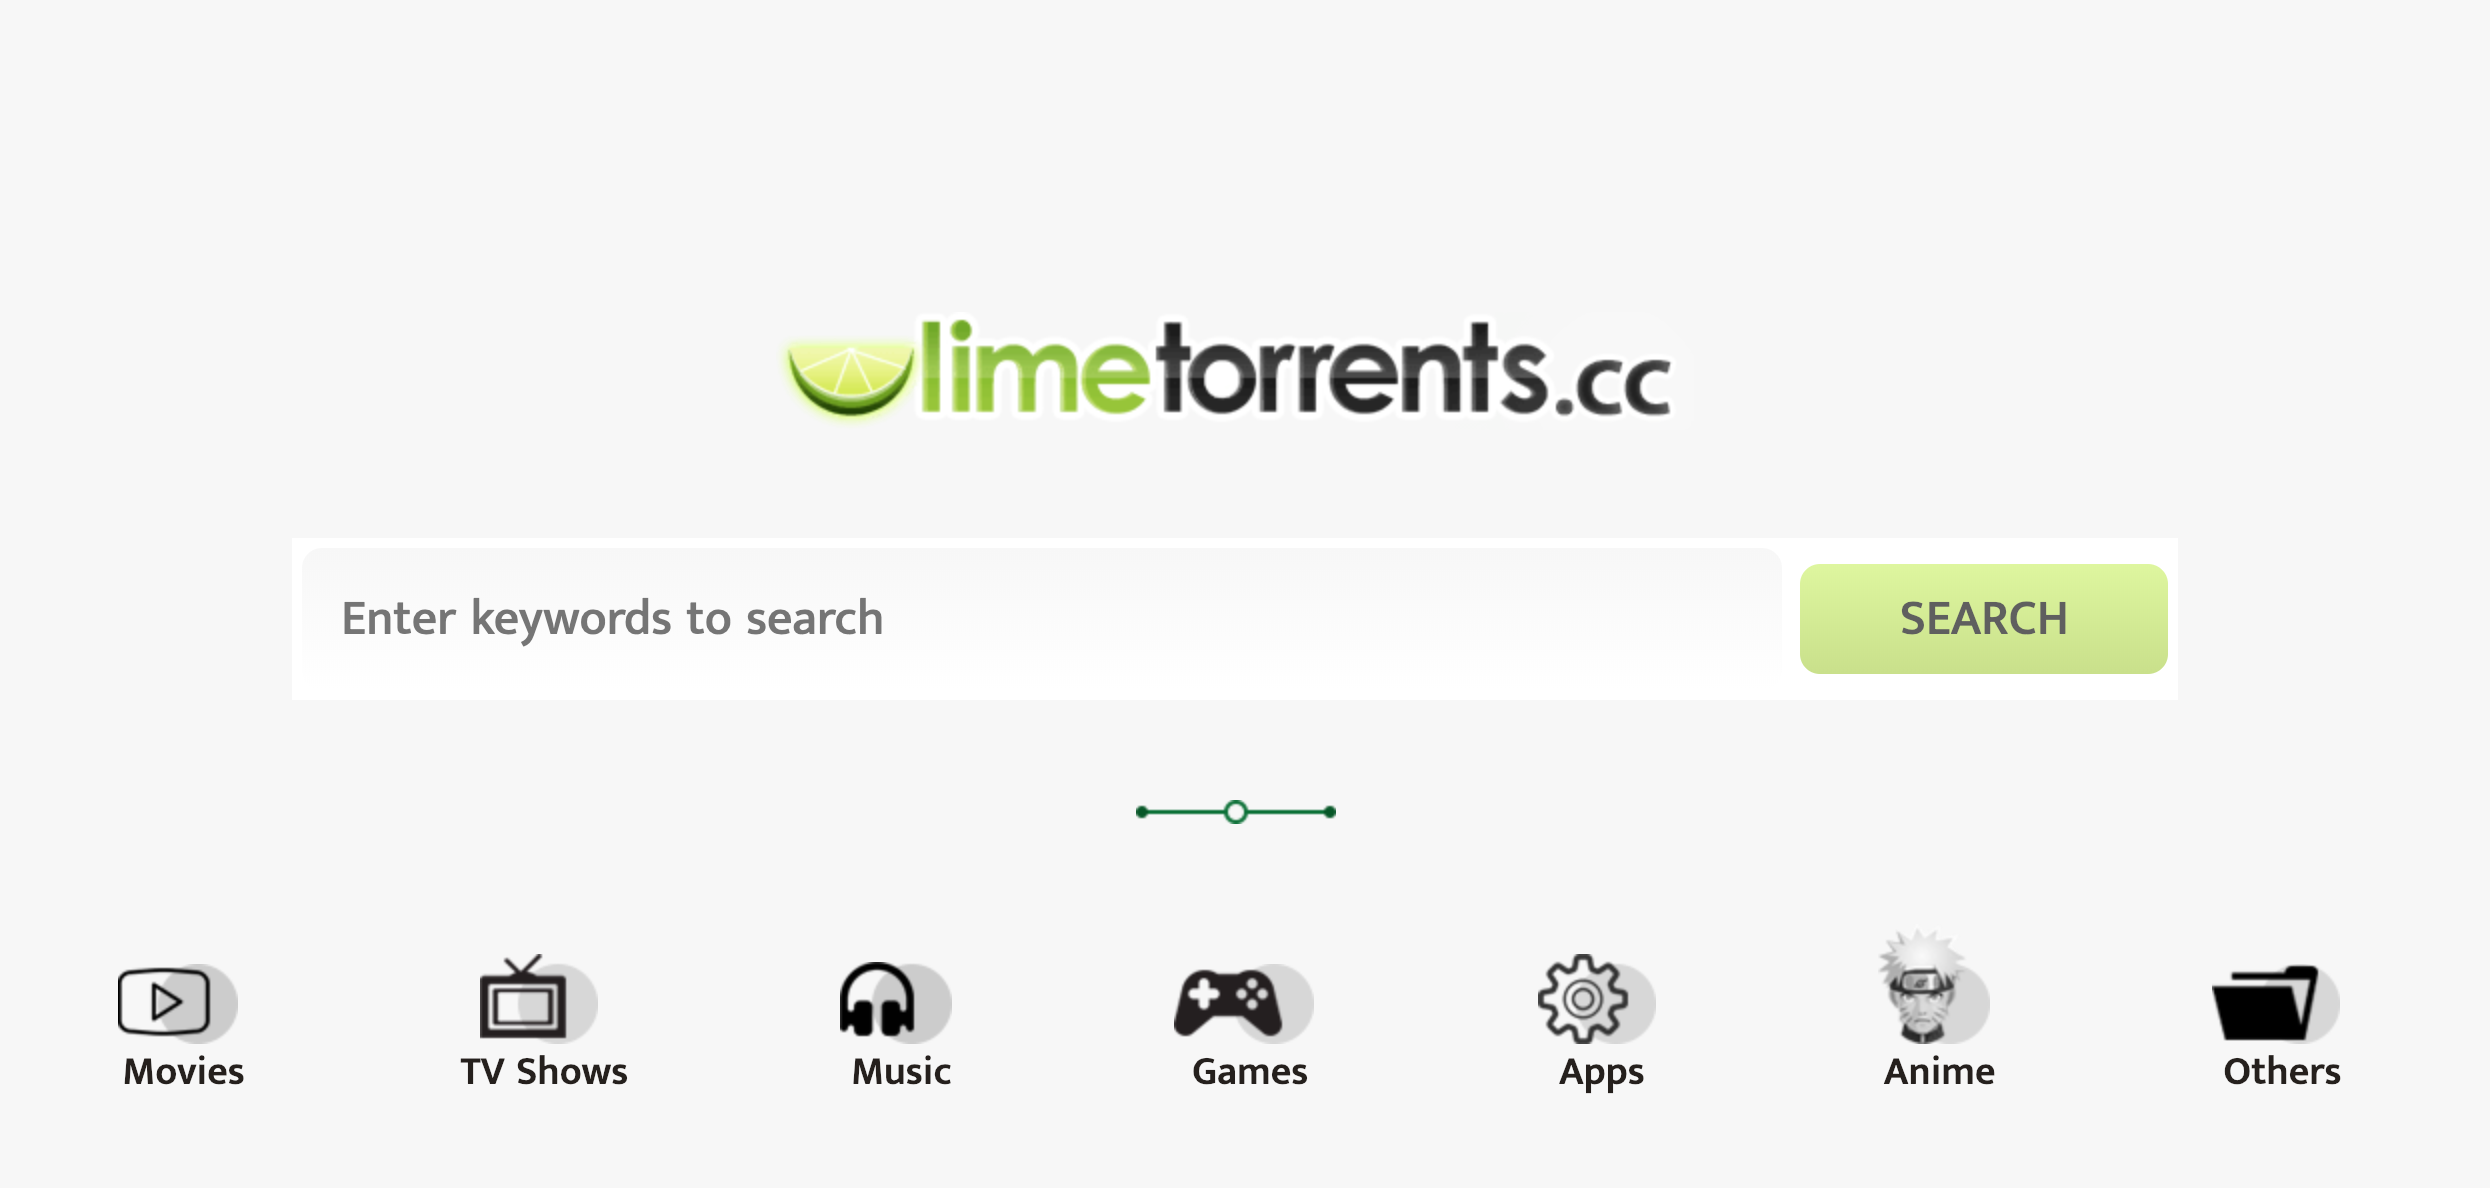
LimeTorrents is getting popular day by day and it is liked by many users who use BitTorrent. You will find torrents of  Apps, Games, Music, TV Shows, etc. All the content on LimeTorrents is categorized, you can easily find the desired Torrent of anything. Moreover, they have added a new customizable search bar on their homepage.

They update their site on daily basis, hundreds of new torrents are added daily. This is the reason why LimeTorrents is considered to be a Pirate Bay Alternatives.

4. Zooqle

Zooqle may not seem familiar but you will be surprised to know, Zooqle claims to have 4 million torrents in their library. This is the reason behind the popularity of Zooqle. Just like the Pirate Bay, you can find Torrents of movies, songs, tv shows, and softwares on Zooqle.

Moreover, you can create a free account of Zooqle, this way you can add torrents as favorites. There are many features which make Zooqle better from others. However, there is one we would love to tell you, not only Zooqle provides download link Torrents, it also provides very useful information of torrents.

5. Katcr.co

Pirate Bay Alternatives

The KickAss was the king of the torrents when TPB was down but after getting the fame KickAss got the same treatment as TPB. The original KickAss Torrent Website was taken down just like TPB. However, after the original Website was gone, there was another who took its place in a short period of time, Katcr.co. It is not as good as its predecessor, but its the best Pirate Bay Alternatives.

Katcr.co is the clone of the original KickAss Torrent that is why it has a user-friendly interface and with a huge collection of Torrents. All Torrents are organized on the basis of date, size, seeds, peers, age, etc. Through this, they made user interaction very friendly.

6. TorLock

Best Pirate Bay Alternatives

TorLock is also in the list of Pirates bay alternative. You can easily find Torrents on TorLock, they have categorized all the Torrents in different categories such as fresh, movie, tv shows, music, games, software, ebook, etc. Moreover, you can sort the Torrents from the category page. However, you cannot sort Torrents from the homepage. Not only that, Torlock has Tons of Ads, so should be ready for that.


Remove Noad Variance TV Adware Virus on PC

0
Remove Noad Variance TV Adware Virus on PC

Are you the victim of Noad Variance TV Adware Virus? Looking a way to rid of this virus from your PC? This is the right place for. In this article, we’ll tell you how to Remove Noad Variance TV Adware Virus on PC.

Once Noad Variance TV Adware Virus is injected into your PC. It starts displaying some nosy Ads on the Websites you visit. Moreover, it starts gathering information, such as IP, Browser History, Ads you’ve clicked. In order to determine what sort of Ads it starts showing on a webpage, to ensure whether your PC is infected by Noad Variance or not.

Noad Variance TV Adware Virus

Noad Variance TV Adware Virus Ads:

Following are the bearing that you will see on your Website after your PC is infected by Noad Variance TV Adware Virus.

  • Ads powered by Noad Steep TV.
  • Powered by Noad Steep TV.
  • Brought to you by Noad Steep TV etc.

Once you start seeing the Ads bearing such titles, it is for sure that your PC has been infected by Noad Adware Virus. Most of the time this Virus injected to your PC by downloading softwares from non-secure portals. Noad Variance TV Adware Virus is bundled within the download package. That’s why we always recommend secure sources to download softwares on your PC. Moreover, once you have downloaded a software we will suggest you use custom settings of the installer. Thus, you will know what you are installing.

Now let’s get back to our main topic and help you Remove Noad Variance TV Adware Virus on PC. If your PC is infected with Noad Adware Virus, then you should try the following steps.

You Might like:

Remove Noad Variance TV Adware Virus on PC:

Before you jump on any conclusion, you need to remove the root cause of the problem. Which in this particular case is the Variance TV program, you have installed on your Computer.

  • Head over to the start menu, click on Control Panel.
  • When you are in Control Panel -> Click on Programs -> Uninstall a Program.
  • You will be provided with a list of program that you have installed on your PC. You need to look for a Variance Tv program.
  • Once you find it, Select it and right-click on it and select Uninstall.

Remove Noad Variance TV Adware Virus on Mac:

  • On Mac, head over to the Applications folder. You can access it from the Dock.
  • In Applications Folder, look for Variance Tv. Once you find it drag it to the trash and drop.

That’s all. After you have removed the Noad Variance TV Adware Virus. You need to reset the setting of your browser. Uninstall all the Add-ons and Apps that Noad Adware virus has installed. Once you have done all that, reboot your PC or Mac and you will be good to go.

Conclusion:

You can always use a good Antivirus to remove the Noad Tv adware virus. However, even if you have removed the Noad Adware Virus through your Antivirus, still you have to remove all the content and Add-ons installed by the virus. One more thing, Next time when you wish to install a third-party app, it would be better to Install it through a secure source rather than an untrusted portal.

How to Enable Javascript on a Phone?

0
How to Enable Javascript on a Phone?

With the help of this guide, you will be able to Enable Javascript on a Phone. We will tell you how you can enable Javascript on Android, iOS, & other devices. Before we move on to the methods, let’s give you an overview of Javascript.

What’s Javascript:

JavaScript also known as JS, it is a programming language which allows you to make interactive web pages. Thus this makes JS the imperative of Web applications. As you all know that, HTML and CSS are the most important pillars of the World Wide Web. Along with these two, Javascript also required in Web Development and more. Without JavaScript, the developer won’t be able to make new web pages and widgets.

Enable Javascript on a Phone

Moreover, all the major Web Browser such as Chrome, FireFox, Safari etc, they also have a dedicated JavaScript engine to make user experience smooth. Same goes for smartphones, in order to use the heavy web application, you will need javascript. In order to enable javascript on a smartphone, you need to enable it through the browser settings.

As a multi-paradigm language, JavaScript supports event-driven, functional, and imperative (including object-oriented and prototype-based) programming styles.Wikipedia.org

Now let’s get back to our main topic and help you enable Enable Javascript on a Phone.

How to Enable Javascript on iPhone:

  • Open Settings on your iPhone.
  • Scroll down and Tap on Safari.
  • On the next page, you will be provided with a number of options. Scroll down and go to the end of the screen.
  • Tap on Advanced, By Default Javascript, will be enabled. However, if it is not, side the Javascript toggle.
  •  Head back to the home screen. Open Safari, open a webpage that requires Javascript. You will see how it will load up without any lagging.

You Might Like:

How to Enable Javascript on Blackberry:

  • Open your browser, load up a new web page, tap on the settings icon and select options.
  • From there Tap on Browser Configuration. In the Browser Configuration, you will see a label Support Javascript.
  • Tap on Support Javascript box and check it on or off.
  • Head back to the options menu. Tap on Save.

How to Enable Javascript On BlackBerry:

  • If you are using a Windows Phone. You will need to download the Opera browser. The default browser of Windows Phone is Internet Explorer. As we know that Internet Explorer only runs a small chunk of Javascript functions. That is why you will require a third-party browser app.
  • Open Opera Browser, load a web page, Tap on the Tools tab. Tap Quick Preferences menu and from there enable Javascript.

[vdgk_video_sticky videotype=”youtube” src=”https://youtu.be/EGSqfHol9uo” height=”295″ width=”525″]

How to Enable Javascript On Android:

  • Open Up Chrome on your Android devices. Tap on the 3dot icon located at the top right corner of the screen.
  • From the menu pop-up, Tap on Settings.
  • Scroll down and Tap on Site Settings -> JavaScript -> By Default it will be turned on. However, if it is not, Tap on the toggle switch to turn it on.

That’s all. This how you can Enable Javascript on a Phone. Please do share your feedback in the comments.