Home Blog Page 75

Download Huawei Nova 4 Stock Wallpapers

0
Download Huawei Nova 4 Stock Wallpapers
Huawei Nova 4 Stock Wallpapers

Looking for the Huawei Nova 4 stock wallpapers? Here they are. The 14 official stock wallpapers of the brand new Huawei Nova 4 are here. You can download the Huawei Nova 4 Stock Wallpapers from here now. These wallpapers can be applied to any Android device and on an iPhone as well. Before jumping to the wallpapers, let us take a look at the Huawei Nova 4.

Huawei Nova 4 Stock Wallpapers

Huawei Nova 4 – Huawei’s Answer to Samsung

A few months back, Samsung showcased a new kind of Displays at its developer conference in China. These displays were called Infinity -O, Infinity -V, Infinity -U, and New Infinity. At that time, rumors started taking place that Samsung has an Infinity -O smartphone coming soon. Huawei was way too quick to come up and announce that it will also bring a smartphone with the Infinity -O display. On December 10, 2018, Samsung announced the Galaxy A8s which totally killed Huawei’s chance to be the world’s first phone maker using the Infinity -O display. Just after two days of the Galaxy A8s’s release, Huawei released the Nova 4, which looked like a very neat copy of the Galaxy A8s.

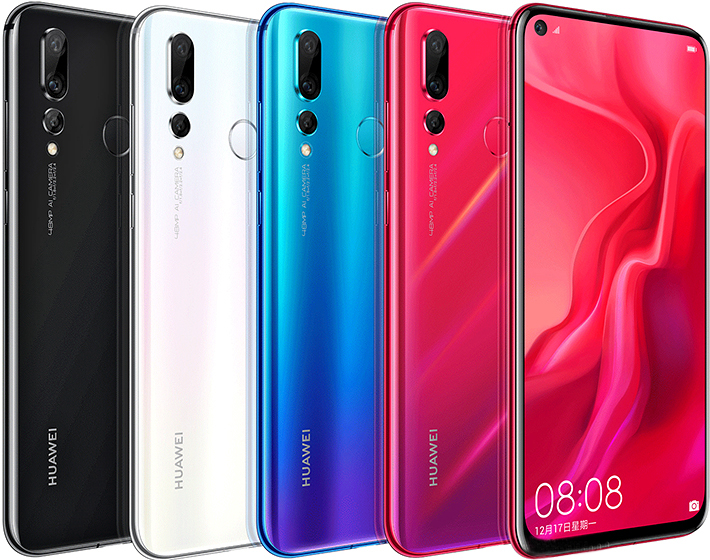
The Huawei Nova 4 on the front has a 6.4-inch IPS LCD display. This display has a resolution of 1080 x 2310 pixels. The display ratio on this phone is 19:9. Under the hood, it has the Kirin 970 SoC. The Nova 4 has an internal storage of 128GB and a RAM of 8GB. It has a triple camera set up at the back including a 48MP shooter, a 16MP shooter, and a 2MP shooter. On the front, it has a single 25MP camera fixed inside that punch-hole. The Nova 4 has a massive 3750 mAh battery inside. It runs on Android Pie themed by EMUI 9 out of the box.

Huawei Nova 4 has flagship-grade specifications. It uses Huawei’s flagship SoC from last year. Huawei could have used the latest Kirin 980 SoC on this phone, but it looks like it went with the Kirin 970 to keep the price low. The Nova 4 comes at a price of $450. This phone comes in a number of exciting colors. Overall, the Nova 4 looks like a good option for the users who are looking for a budget-friendly phone with top-notch specifications.

Huawei Nova 4 Stock Wallpapers

Here are the stock wallpapers of the Huawei Nova 4. The Nova 4 stock wallpapers carry a resolution of 2160 x 2310 pixels. These wallpapers can be applied to any Android phone and also on an iPhone. Basically, you can use these wallpapers on any compatible screen. There are 14 wallpapers in total.

To download the wallpapers, simply click on your desired image and open it. Right-click on the image and then click on “Save image as”. Save the images to your computer. If you want to save them to your phone, open the image and then long-press the image and download to your phone.

All Huawei Nova 4 Stock Wallpapers: Download

More stock wallpapers:

Fix Phone unable to find Chromecast device on WiFi network

0
Fix Phone unable to find Chromecast device on WiFi network

Chromecast and Chromecast Ultra are top of the link casting devices by Google. The working principle of these devices is pretty simple. The phone and device are connected to the same WiFi or network (via a LAN cable). Open the phone, launch any app, and just click on the cast iron to shift content to the TV. However, this buttery smooth method may not go as planned sometimes. It is reported by users that phones or app cannot find Chromecast devices even though they are connected to the same WiFi network.fix phone unable to find chromecast on same network

This applies in both cases whether users are trying to cast apps or just mirroring the phone screen itself. The casting is when Chromecast picks the link of media from the phone and just plays it itself. It does not require a phone anymore. The mirroring is when the entire phone screen shows on TV in real-time. The device must stay connected to WiFi for it to work.

When the Chromecast or cast icon does not show up on the phone or tablet anymore, it could be due to several reasons. In this article, we are going to explore the possible reasons and how to tackle those.

Applicable Queries / Problems

The basic issue that this article covers is that “Phone does not show or connect to Chromecast on the same WiFi (network)”. However, this piece goes into more depth and explains how to fix this and related problems.

  • Apps like YouTube, Netflix, Hulu, HBO Go, Media Players, SoundCloud cannot find Chromecast devices on the same network. This issue is persistent on one or more than one device.
  • The cast iron does not appear in the phone and apps for Chromecast.
  • Mirroring in Chromecast does not work. The device does not show up on a phone or tablet.
  • Phone unable to find only one Chromecast device on the network. It shows the rest of the devices.
  • Tablet and phone cannot control Chromecast devices on the same network.
  • The Chromecast device and cast icon disappear a few minutes after starting it.
  • Once the phone starts casting an app, video, or screen to Chromecast, it loses control or connection after a few minutes.
  • There are no volume controls for Chromecast after connecting it for few minutes or some time.
  • One of the phones cannot find a Chromecast device on the same WiFi network. All other devices can still see that particular device and control it.

Possible Apps

  • YouTube
  • Netflix
  • Hulu
  • HBO Go
  • SoundCloud
  • AllCast
  • Chromecast Mirroring
  • etc..

Also Read: How to fix Prime Video Black Screen issue with Chromecast

Fix “Phone or Apps unable to find Chromecast device on same WiFi network”

The issue being discussed here can be caused by a variety of issues. Therefore, it is not possible to pinpoint just one. Below is the list of all possible bugs and fixes for when phones or apps cannot connect to or find Chromecast devices on the network.

Make sure to check the easiest methods first and then move on to more advanced solutions.

Restart Router and Chromecast Device

Restarting is the most common troubleshooting method that works for over 90% of problems. And this is not just a coincidence. Both and old modern devices can get worn out if they run for a long time. Or they just did not set up correctly. Therefore, just restarting can fix the most basic issues.

Do this in the following order:

  1. Switch off the router.
  2. Unplug the Chromecast device.
  3. Turn on the router and wait for its WiFi to be active.
  4. Plugin Chromecast device again.
  5. You may also restart your phone just to be sure.

Now just check your apps and see if the casting is working now. Otherwise, move on to the next step.

Check Network

The network for the Chromecast device and your phone may be actually different. It can happen due to several reasons. Maybe one of these two got connected to a different router and you did not realize.

Another possible culprit is the Smart Network Switch. This is a modern option now available in almost all Android smartphones. This feature allows users to constantly switch between WiFi and Mobile data. The switch happens when one of the networks is weak. The switching in the network can disconnect you from Chromecast.

For those who report that their phone disconnects from Chromecast after a few minutes, this may just be the answer. To fix this, either just turn it off and use normal switching or add casting apps to filtered apps.  Smart Network Switch option is available under the WiFi tab in settings. However, this filtering is not always available or very successful, therefore, just turn the smart network switch off.

Try using Chromecast after this. If it is not fixed, let us move on to the next step.

Factory Reset Chromecast

Not so long ago, Google released a software update for Chromecast devices. It also warned the users that it may break it! It may have stopped working just like so many users have reported it. The mentioned solution for this is to factory reset it. The factory reset method for Chromecast 1st Gen and 2nd Gen is the same. Follow these steps:

  1. Plugin Chromecast device to a USB power outlet.
  2. Locate a button near its USB port.
  3. Keep it pressed for few seconds until the light turns white.
  4. Once it is white, let the button go.
  5. Your Chromecast device is now factory reset!

From here on, use the usual method to set up your Chromecast device using the Google Home app.

Check if Battery Saver is messing with Chromecast

Chromecast may disconnect from your phone if the battery saving services in the phone cut the connection. How does it work? Well, most modern devices have built-in battery saver apps to maximize battery life. They monitor all apps for background usage. When the usage is extended for a long time in the background, they cut it off to save battery. The app thinks that it is not in use and just consuming battery.

What actually happens is that Chromecast although does not use a phone to cast it required persistent connection. Otherwise, users may encounter issues like Chromecast controls do not work after some time on the phone. This issue in particular is caused by battery-saving apps.

To fix this, read the dedicated guide for this issue HERE.

Check WiFi bands (2.4Ghz or 5GHz) and Channels

First-generation Chromecast devices connect with older 2.4GHz WiFi connections. However, the second generation supports even 5GHz. While it is faster and good, it could still cause some bugs.

The Chromecast may stop showing up on phone after some time if the WiFi connection is messed up. Therefore, try switching the WiFi connections for it. To do so, follow these steps:

  1. Reset the Chromecast as shown above.
  2. When connecting it to WiFi again, select 2.4GHz if it was previously connected to 5GHz (2nd Gen models). 1st Gen models only connect to 2.4GHz though. You can see the 5G sign on WiFi SSID while connecting. The 2.4GHz channel only shows the WiFi name.
  3. Now try casting from your device.

If it does not work, then change the channel for 2.4GHz to 11 from the router settings page. This option is available under Wireless settings. Below is an example but this interface is different for all routers. Also, note that some routers may not have channel 11 as an option. Try other channels in this case.

fix phone unable to find chromecast on same network 2

Clear Cache of Apps with this issue

Only certain apps may be causing this issue. For example, YouTube may stop working with Chromecast after a while. Or Netflix cannot find Chromecast on the same network. Maybe Hulu App loses Chromecast volume controls after casting for a few minutes.

It makes one realize that maybe the problem is with apps. The cache build-up can cause these kinds of issues. To fix this, follow these steps:

  1. Go to Settings > Apps.
  2. Search for a particular app on this list.
  3. Tap on Storage.
  4. Now tap on the Clear Cache button.
  5. Restart the phone.

Now try using Chromecast with these apps once again.

Conclusion

The issue that we discussed in this article is widespread and it happens from time to time. It is possible that only one phone or tablet may not find a Chromecast device on the network. In such a case, the issue is certainly with the phone. Try clearing its cache from Settings > Storage > Management > Clear Cache Storage. Or just clear it from stock or custom recovery.

Try out these methods listed here and your problem should be solved. Feel free to leave your feedback in the comments below. Also, use the comments section for any queries that you may have.

How to fix Prime Video Black Screen on Chromecast Mirror

3
How to fix Prime Video Black Screen on Chromecast Mirror

Google and Amz are two of the biggest competitors in the tech World. Both of these companies are continuously working hard to make products and beat other to it! Google’s Chromecast is a modern mirroring / casting devices. It works pretty well with apps like YouTube, Netflix, Hulu, HBO Go. However, Prime Video App does not work with Chromecast. This is not a matter of developers just missing out on it but the problems runs much deeper.

fix amazon prime video black screen issue on chromecast 2

Because of the lack of integration, users have to come up with some workarounds. In order to stream Prime to Chromecast, users just mirror the entire phone to Chromecast. This works well for almost every app out there. However, when trying to mirror Prime App with Chromecast, the screen turns black. You may hear the sound of media played or media controls, but the actual video does not show up. This issue is persistent on both Android and iOS versions of this app.

Applicable Queries / Problems

In this article, we are going to explore the solutions for fixing Prime Video and Chromecast’s connection. The key problem is screen going black when Prime Video is cast or mirrored on Chromecast enabled TV. Here is a list of queries that apply to this method.

  • The TV screen turns black when Prime Video is mirrored or cast on Chromecast.
  • When mirroring Prime Video on Chromecast, there is only audio and screen is black.
  • The UI controls of Prime App show up only but the video does not play on Chromecast.
  • Prime Video goes dark when mirrored with Chromecast device on a TV. The rest of apps work just fine and audio works too.
  • Unable to cast Prime content directly on Chromecast. When trying to mirror Prime Video App, the video goes black on Chromecast TV. The UI controls and audio still work but there is no image or video.

Why Prime Video App doesn’t work with Google Chromecast

This is the big question here. Why such a famous application with millions of users is not supported by Chromecast? The answer is simple: Fire TV or Firestick TV. This is a similar casting / mirroring device made by itself. It is the direct competitor of Google’s Chromecast.amazon prime video does not work with chromecast

Think of it like an all out war! Both companies are going out of their way to block each others’ services. The reason is just to compel users to use their own devices. Maker of Prime Video wants its users to get Fire TV rather than using Chromecast. Therefore, the Prime Video App (Android and iOS) does not work with Chromecast.

Initially, only the native casting was made unavailable. However, when people started using the Mirror service instead, they blocked it too. This is why, the Prime Video turns black screen when mirrored using Chromecast device. It does not matter if someone uses normal or Chromecast Ultra. The main software is bugged.

Fix to “Prime Video App Black Screen on Chromecast Mirror”

The solution to this problem has one unique requirement. You cannot use a phone or tablet for it. It requires a PC or laptop to fix it. Therefore, make sure that you are following these steps on a computer or laptop. Moreover, install Google Chrome on your PC beforehand.

Before jumping into it, let us understand what’s going on here first. When trying to cast or mirror Prime Video App (Android / iOS) on the Chromecast device, the screen goes black. The audio may keep playing and UI controls may be available too. This happens because Prime Video Maker is trying to limit the use of its apps on Google’s products. This is all in an attempt to promote their own lineup of casting devices.

Since the app is blocking content on phones and tablets, the first observation is to switch platforms. Use a computer rather than a phone or tablet. This removes the possibility of any kind of blocking. Even though it is not as convenient as using it on a handheld device, still we have to think of something!

So here it goes. Follow the steps down below to fix Prime Video Black screen issue on Chromecast (Normal or Ultra).

  1. Make sure that latest version of Google Chrome is installed on your laptop or PC.
  2. Connect this PC and Chromecast to same WiFi network. It is very important! Otherwise, the device won’t show up.
  3. Open Chrome browser.
  4. Head over to Prime Video website and load the movies or shows that you want to watch.
  5. Click on more icon (3 vertical dots) in top right.
  6. Now click on “Cast”.fix amazon prime video black screen chromecast
  7. It will open up a list of available Chromecast devices on this WiFi network.
  8. Click on the one that you want to watch Prime Video on.
  9. The entire Google Chrome tab will now be mirrored to TV.
  10. It will show video as well as image.
  11. To make it full screen, just press full screen button on media player.

That’s it! Even though it is a very annoying problem, the solution is pretty straightforward. Make sure to leave your feedback in the comments below.

List of Android Phones with Notch

0
List of Android Phones with Notch

This is the list of Android phones with Notch. This list contains all phones that have a screen cutout notch or the new Waterdrop notch. Let us shed some light at the background of the notch and then take a look at the Android phones with Notch.

Android Phones with Notch

Essential was the first ever company to bring a notch into the smartphone industry. Essential’s PH-1 came with a waterdrop notch, but it failed to catch any attention. At that time, Essential was greatly criticized as the waterdrop notch looked more like a design flaw.

Back in 2017, Apple introduced the iPhone X. It was the first ever Apple smartphone to have an all-screen design. This all-screen design came with a downside.  It had an ugly notch which was not warmly welcomed by the audience. As if the notch on the Essential phone wasn’t ugly enough. As the Apple iPhone users embraced the nefarious notch, the Android phone makers jumped up the notch bandwagon. Android phone manufacturers deliberately copied Apple and started making the phones with notches every now and then.

3 Notch phones by Apple, over 140 by Android companies

Till date, Apple has manufactured 3 iPhone(s) in total that have a notch. At the same time, Android manufacturers have produced over 140 smartphones that have a notch. Huawei tops this list, as usual, being the biggest copycat. Xiaomi, Vivo, Oppo, OnePlus, LG, Google, Asus, RealMe, Lenovo, and Nokia are the other brands copying the footsteps of Apple.

Android smartphone makers have been trying to bring a new all-screen design for almost a year now. There have been phones with sliders hiding the front cameras, there are phones with dual-screens, there are also the phones with the tiny notches on the left and on the right side. However, the industry seems to be settling at the notches. Companies like OnePlus went ahead and brought in their flagship devices carrying the notches. OnePlus’s OnePlus 6 came with the bigger notch while its new OnePlus 6T came with the waterdrop notch.

After realizing that Apple’s screen cutout notch is much more uglier than Essential’s Waterdrop notch, the Android manufacturers started copying Essential instead. The current trend of Android screens has settled at waterdrop notches. To much extent, the smartphone audience has now accepted the notch and realized that the no matter what, the notch is not going away anytime soon.

Android Phones with Notch

If you are now looking forward to buying an Android phone with a notch, and you want to check each and every phone with a notch, then here is a list for all of you. This list includes all Android phones that have a notch. Check this list of Android phones with Notch. The list also includes the CPU, Storage, and RAM details of the Android phones with Notch.

Company Phone Name/Model Notch Type CPU Storage & RAM

Huawei Phones with a Notch

Huawei Mate 20 Pro Kirin 980 Screen Cutout Notch 128GB/256GB/6GB/8GB
Huawei Mate 20 X Kirin 980 Waterdrop Notch 128GB/6GB
Huawei Mate 20 Lite Kirin 710 Screen Cutout Notch 64GB/6GB/4GB
Huawei Mate 20 RS Porsche Design Kirin 980 Screen Cutout Notch 512GB/256GB/8GB
Huawei Mate 20 Kirin 980 Waterdrop Notch 128GB/64GB/6GB/4GB
Huawei P Smart+ or Nova 3i Kirin 710 Screen Cutout 128GB/4GB
Huawei P20 Pro Kirin 970 Screen Cutout 256GB/128GB/8GB/6GB
Huawei P20 Lite Kirin 659 Screen Cutout 32GB/64GB/4GB
Huawei P20 Kirin 970 Screen Cutout 128GB/4GB
Huawei Nova 3 Kirin 970 Screen Cutout 128GB/6GB/4GB
Huawei Y9 2019 Kirin 710 Screen Cutout 128GB/64GB/4GB

Honor Phones with a Notch

Honor Honor 8C Screen Cutout Snapdragon 632 32GB/64GB/4GB
Honor Honor 8X Screen Cutout Kirin 710 128GB/4GB
Honor Honor 8X Max Waterdrop Snapdragon 636 64GB/128GB/4GB/6GB
Honor Honor Play Screen Cutout Kirin 970 64GB/4GB/6GB
Honor Honor 10 Screen Cutout Kirin 970 64GB/128GB/4GB/6GB
Honor Honor 10 Lite Waterdrop Kirin 710 64GB/128GB/6GB
Honor Honor 9N or 9i Screen Cutout Kirin 659 64GB/128GB/4GB

Xiaomi Phones with a Notch

Xiaomi Redmi Note 6 Pro Screen Cutout Snapdragon 636 64GB/4GB/6GB
Xiaomi Redmi 6 Pro Screen Cutout Snapdragon 625 64GB/32GB/4GB/3GB
Xiaomi Pocophone F1 Screen Cutout Snapdragon 845 256GB/128GB/8GB/6GB
Xiaomi Mi A2 Lite Screen Cutout Snapdragon 625 64GB/32GB/4GB/3GB
Xiaomi Mi 8 Lite Screen Cutout Snapdragon 660 64GB/128GB/4GB/6GB
Xiaomi Mi 8 Screen Cutout Snapdragon 845 64GB/128GB/256GB/6GB/8GB
Xiaomi Mi 8 Pro Screen Cutout Snapdragon 845 128GB/6GB/8GB
Xiaomi Mi 8 SE Screen Cutout Snapdragon 710 128GB/64GB/4GB/6GB
Xiaomi Mi 8 Explorer Screen Cutout Snapdragon 845 128GB/8GB

Oppo phones with a Notch

Oppo Oppo A7 Screen Cutout Snapdragon 450 32GB/64GB/3GB/4GB
Oppo Oppo F9 Pro Waterdrop MediaTek MT6771 Helio P60 64GB/6GB/4GB
Oppo Oppo F9 Waterdrop MediaTek MT6771 Helio P60 64GB/6GB/4GB
Oppo Oppo A3s Screen Cutout Snapdragon 450 16GB/2GB
Oppo Oppo R17 Waterdrop Snapdragon 670 128GB/8GB
Oppo RX17 Pro Waterdrop Snapdragon 710 128GB/6GB/8GB
Oppo Oppo F7 Screen Cutout MediaTek MT6771 Helio P60 64GB/128GB/4GB/6GB

OnePlus Phones with Notch

OnePlus OnePlus 6 Screen Cutout Snapdragon 845 64GB/128GB/256GB/6GB/8GB
OnePlus OnePlus 6T Screen Cutout Snapdragon 845 128GB/256GB/8GB
OnePlus OnePlus 6T McLaren Edition Screen Cutout Snapdragon 845 256GB/10GB

Vivo Phones with Notch

Vivo V11 Pro Waterdrop Snapdragon 660 64GB/128GB/6GB
Vivo Y81 Screen Cutout MediaTek MT6762 Helio P22 32GB/3GB/4GB
Vivo Y95 Waterdrop Snapdragon 439 64GB/4GB
Vivo V9 Screen Cutout Snapdragon 626 64GB/4GB
Vivo Y83 Screen Cutout MediaTek MT6762 Helio P22 64GB/32GB/4GB
Vivo V11i Waterdrop MediaTek MT6771 Helio P60 128GB/64GB/4GB/6GB
Vivo Y93 Waterdrop MediaTek MT6762 Helio P22 32GB/4GB
Vivo Y83 Pro Screen Cutout MediaTek MT6762 Helio P22 64GB/4GB
Vivo Y91 Waterdrop Snapdragon 439 32GB/3GB

RealMe

RealMe RealMe C1 Screen Cutout Snapdragon 450 16GB/2GB
RealMe RealMe 2 Pro Waterdrop Snapdragon 660 128GB/64GB/6GB/4GB
RealMe RealMe U1 Waterdrop MediaTek Helio P70 64GB/32GB/4GB/3GB
RealMe RealMe 2 Screen Cutout Snapdragon 450 64GB/32GB/4GB/3GB

Asus

Asus Zenfone Max Pro Screen Cutout Snapdragon 660 64GB/32GB/4GB/6GB/3GB
Asus Zenfone Max Screen Cutout Snapdragon 632 64GB/32GB/4GB/3GB
Asus Zenfone 5 Screen Cutout Snapdragon 636 64GB/4GB/3GB

Lenovo

Lenovo Lenovo S5 Pro GT Screen Cutout Snapdragon 660 64GB/128GB/4GB/6GB
Lenovo Lenovo Z5s Waterdrop Snapdragon 710 128GB/64GB/6GB/4GB
Lenovo Lenovo Z5 Screen Cutout Snapdragon 636 64GB/128GB/6GB

Samsung

Samsung Galaxy A8s Infinity-O Snapdragon 710 128GB/6GB
Samsung Galaxy M20 Waterdrop Exynos 7885 128GB/4GB

Tecno

Tecno Tecno Cam 11 Pro Screen Cutout MediaTek MT6762 Helio P22 64GB/6GB

Nokia

Nokia Nokia 8.1/X7 Screen Cutout Snapdragon 710 64GB/128GB/4GB/6GB
Nokia Nokia 6.1 Plus/X6 Screen Cutout  Snapdragon 636 64GB/32GB/4GB/6GB/3GB
Nokia Nokia 7.1 Screen Cutout Snapdragon 636 64GB/32GB/4GB/3GB
Nokia Nokia 5.1 Plus/X5 Screen Cutout MediaTek MT6771 Helio P60 64GB/32GB/4GB/3GB
Nokia Nokia 9 Screen Cutout Snapdragon 845 128GB/8GB

Motorola

Motorola Motorola One Power Screen Cutout Snapdragon 636 64GB/32GB/4GB/3GB
Motorola Motorola One Screen Cutout Snapdragon 625 64GB/4GB

Google

Google Pixel 3 XL Big Screen Cutout Snapdragon 845 64GB/128GB/4GB

LG

LG LG V40 Screen Cutout Snapdragon 845 64GB/128GB/6GB
LG LG G7 ThinQ Screen Cutout Snapdragon 845 64GB/128GB/4GB/6GB

Essential Phone

Essential PH-1  Waterdrop Snapdragon 835 128GB/4GB

That’s all for now. If you think that I have missed any phone, drop its name in the comments section below. I will try to add it as soon as possible.

How to download One UI Beta on Samsung Galaxy S9 and S9+

How to download One UI Beta on Samsung Galaxy S9 and S9+

Samsung continues to ship its flagships with greater built-in qualities. The Galaxy S9 and Galaxy S9+ have been launched in India very shortly after being announced globally at MWC 2018, for the same starting prices as last year’s models. The Galaxy S9+ is definitely a handful in the literal sense and is a little tough to manage with just one hand. Also, due to the near bezel-less design, we often had many accidental screen touches with the bigger model. Samsung recently launched their latest One UI beta for the Exynos devices. This beta was launched in Germany, South Korea, and the United States. Snapdragon users can also add this firmware to their devices as One UI beta builds leaked. This article will help you out on how to download One UI Beta on Samsung Galaxy S9 & S9+.

One UI Beta on Samsung Galaxy S9 & S9+

The Galaxy S9 has 2 apertures in one camera while S9+ comes with two camera lens where it can be used for depth mode or portrait mode. In storage section, S9 consists of 4gb ram and S9+ consist of 6gb. Coming to the display modem, S9 comes with a 5.8inch display and S9+ comes with a 6.2inch display. The screen featured with the Super AMOLED capacitive touchscreen, 16M colors display. Each pixel lights itself up which makes for amazing viewing angles and a beautiful image. This also allows for features like always on display which only lights the pixels that display time when the phone is asleep.

One UI

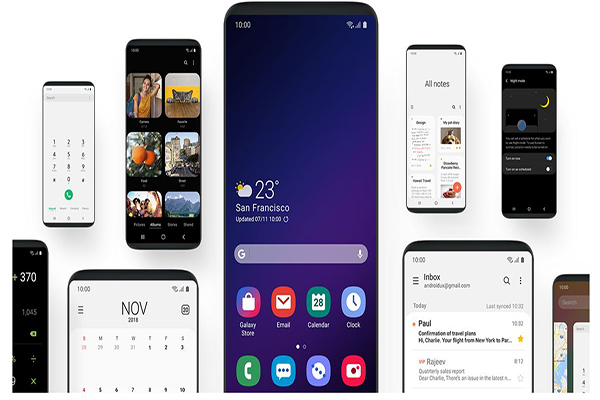
One UI is the all-new user interface developed by Samsung for its Android smartphones. There are numerous new features and visual improvements in One UI. The One UI build is based on Android 9 Pie.  You can thereby expect to see additional white settings menus with bright blue accents. Instead of including touch targets at the top of an app, Samsung is now reserving that space for visual-only elements. The bottom half of each app is for interactive elements. Once you swipe down twice to reveal all the quick settings, the top half of the screen shows the time and date while the bottom portion shows your quick settings. This not only makes it easier to reach things with one hand it also makes each app look much cleaner.

One UI Beta on Samsung Galaxy S9 & S9+

More deeply all the related settings are now grouped together into subheadings. The apps and notifications sections are now bundled together, while lock screen and security are grouped together. A system-wide dark mode also added to One UI which enhances a greater display. A dark theme is given to almost all customizable settings and apps. Parallel to this, you can save some battery life. Mere change has been brought to navigation buttons too. The recent apps menu has been overhauled. It now scrolls horizontally as most other Android Pie builds, and it’s quite fast. You also get a search bar at the top if you want to quickly type out the app you’re looking for.

A gesture navigation option has already loaded in this build. Basically, the new gestures remove the navigation buttons and replace each one with a swipe up from the bottom of the screen. If you need to go back, swipe up from the left side. Similarly, you can use this for the home button and recent apps.

Features

  1. New Interface
  2. System-Wide Night mode
  3. Re-designed apps
  4. Refreshed Home & Bixby
  5. Smarter camera
  6. Always On display
  7. Dockless DeX
  8. Navigation Gestures

Both phones are powered by the same latest Qualcomm Snapdragon 845 chip that’s built using the same ultra-efficient 10nm process as the 835. In Europe, the devices powered by Samsung’s own Exynos 9810 chip, but there really isn’t much difference between the two. In this article, we have discussed how to download One UI Beta on Samsung Galaxy S9 & S9+ (both Exynos & Snapdragon models).

Downloads

  1. You can download the Odin down here. Download Odin For Samsung Galaxy (All Versions)
  2. One UI beta for Samsung Galaxy S9(Exynos) Odin file
  3. The One UI beta for Samsung Galaxy S9 Plus(Exynos) Odin file
  4. One UI beta for Samsung Galaxy S9(Snapdragon) Odin file
  5. The One UI beta for Samsung Galaxy S9 Plus(Snapdragon) Odin file

How to download One UI Beta on Samsung Galaxy S9 & S9+

  1. Download the Odin 3.13.1, One UI beta update zip, and Odin files respectively for Galaxy S9 /S9 +.
  2. The zip files will automatically be downloaded to internal storage. Users having access to SD card should copy the zip to SD card.
  3. Now open the Odin files containing the zip files will be named as SM-G960F_1_20181031161553_2yj261n7q7_fac.zip(S9 Exynos)/G965FXXS2BRJ6.zip(S9+ Exynos)/G960USQU3BRJ5_G960UOYN3BRJ5_VZW.zip(S9 Snapdragon)/G965USQU3BRJ5.zip(S9+ Snapdragon). Yow will see 6 files.
  4. Switch off the device and hold Power + Volume Down + Bixby button to enter in Odin mode.
  5. Open the Odin and click on BL, AP, CP, and HOME_CSC only (which might erase all the device’s data) and click on the start button.
    One UI Beta on Samsung Galaxy S9 & S9+
  6. The device will flash the new firmware and reboot.
  7. Once again switch off the device and enter into recovery mode by holding Power + Volume Up + Bixby.
  8. Navigate to the location of One UI beta zip and swipe to flash the zip.
  9. If the device doesn’t have the SD card navigate to ‘apply update from adb‘. Connect the device to PC, Open command prompt and enter the following command
    adb sideload <file location of update.zip>
  10. Don’t panic as the update takes nearly 5-10 minutes.
  11. Reboot the device once the file flashed.

That’s it, you can now enjoy the new One UI features on your device.

How to Install One UI Beta on Snapdragon Samsung Galaxy S8+

How to Install One UI Beta on Snapdragon Samsung Galaxy S8+

One UI has been raining endlessly on Samsung flagships in the recent days. The all-new user interface firmware developed by Samsung for its flagships touching roofs with a mere upgrade of security patches, personalizations, system apps & lot more. Samsung’s one of the stable device Galaxy S8+ now got a closed beta update of One UI(Snapdragon users). An XDA Member nochlab1 was able to find out how to install the first One UI closed Android Pie beta update on the Snapdragon Samsung Galaxy S8+. Here is how to Install One UI Beta on Snapdragon Samsung Galaxy S8+.

One UI Beta on Snapdragon Samsung Galaxy S8+

Galaxy S8+ is powered by Exynos 8895 Octa (10 nm) /Qualcomm MSM8998 Snapdragon 835 (10 nm) chipset coupled with 6GB RAM for 128GB variant & 4GB RAM for 64GB variant. The Samsung Galaxy S8+ features a seemingly endless 6.2-inch display having Quad HD+ display (2960 x 1440) with support for HDR videos. With a bigger display on the latter, that extra battery power will be needed, and in the aggregate, it will likely mean both phones offer similar battery life. The Galaxy S8+ comes with a 3500mAh cell. The primary camera has a 12MP setup in the back and the selfie camera is 8MP.

One UI

Samsung took the wraps off of a new Android skin for its phones going forward. The new skin is called One UI and apart from the sweet visual aspects it has on offer, it could make using your phone that little bit easier. One UI helps you focus on what really matters to you. With hardware and software working together in harmony, see only what you need, using and viewing your phone with an experience that feels second nature. Because it’s the small details that make a big difference. In One UI, Samsung seems to be prioritizing being able to use your phone with one hand. Most of Samsung’s apps had the majority of their controls at the bottom of the user interface, with other information that you might not want or need to interact with being found at the top.

There are numerous new features and visual improvements in One UI. The One UI build is based on Android 9 Pie.  You can thereby expect to see additional white settings menus with bright blue accents. Instead of including touch targets at the top of an app, Samsung is now reserving that space for visual-only elements. The bottom half of each app is for interactive elements. Once you swipe down twice to reveal all the quick settings, the top half of the screen shows the time and date while the bottom portion shows your quick settings. This not only makes it easier to reach things with one hand it also makes each app look much cleaner.

One UI Beta on Snapdragon Samsung Galaxy S8+

Overview

The recent apps menu has been overhauled. It now scrolls horizontally as most other Android Pie builds, and it’s quite fast. You also get a search bar at the top if you want to quickly type out the app you’re looking for. The focus from Samsung for One UI has been on showing what really matters on the screen and eliminating the distractions.

A dark theme is given to almost all customizable settings and apps. gives apps a black background to make it easier to read elements on the screen in the dark without straining your eyes. Parallel to this, you can save some battery life. A gesture navigation option has already loaded in this build. Basically, the new gestures remove the navigation buttons and replace each one with a swipe up from the bottom of the screen. If you need to go back, swipe up from the left side. Similarly, you can use this for the home button and recent apps.

Features

  1. New Interface
  2. System-Wide Night mode
  3. Re-designed apps
  4. Refreshed Home & Bixby
  5. Smarter camera
  6. Always On display
  7. Dockless DeX
  8. Navigation Gestures

Downloads

  1. You can download the Odin down here Download Odin For Samsung Galaxy (All Versions)
  2. Oreo Update Zip File
  3. One UI beta Zip File
  4. Odin Files

How to download One UI Beta on Snapdragon Samsung Galaxy S8+

  1. Download the Odin 3.13.1, Oreo Update zip, One UI beta update zip, and Odin files respectively for Galaxy S8 +.
  2. The zip files will automatically be downloaded to internal storage. Users having access to SD card should copy the zip to SD card.
  3. Now open the Odin files containing zip named as SM-G955U_1_20181108095727_feno0ruhgd_fac.zip. Six files will be displayed.
  4. Switch off the device and hold Power + Volume Down + Bixby button to enter in Odin mode.
  5. Open the Odin and click on BL, AP, CP, and HOME_CSC only (which might erase all the device’s data) and click on the start button.
    One UI Beta on Snapdragon Samsung Galaxy S8+
  6. The device will flash the new firmware and reboot.
  7. Once again switch off the device and enter into recovery mode by holding Power + Volume Up + Bixby.
  8. First, flash the Oreo Update Zip File given in the downloads section.
  9. Navigate to the location of Oreo update zip file and swipe to flash the zip.
  10. If the device doesn’t have the SD card navigate to ‘apply update from adb’. Connect the device to PC, Open command prompt and enter the following command
    adb sideload <file location of update.zip>
  11. Don’t panic as the update takes nearly 5-10 minutes.
  12. Reboot the device once the file flashed.
  13. Once again switch off the device and enter into recovery mode by holding Power + Volume Up + Bixby.
  14. Now flash the One UI beta Zip File given in the downloads section.
  15. Navigate to the location of One UI beta zip and swipe to flash the zip.
  16. If the device doesn’t have the SD card navigate to ‘apply update from adb’. Connect the device to PC, Open command prompt and enter the following command
    adb sideload <file location of update.zip>
  17. Don’t panic as the update takes nearly 5-10 minutes.
  18. Reboot the device once the file flashed.

That’s it, you can now enjoy the new One UI features on your device.

Download Facebook Videos on iPhone [ Tutorial ]

0
Download Facebook Videos on iPhone [ Tutorial ]

Are you an iPhone user and you want to download Facebook Videos on iPhone? This is the guide, which will help you download Facebook Videos on your iPhone, iPad or iPod.

Nowadays, people don’t use Laptop and PC to stream movies online. The trend has shifted from PC to smartphones, that is the reason behind the success of apps like Netflix and Amazon Prime. Not only that, smartphones have taken over the world of music, people don’t use MP3 Players or any other devices which were used to listen to music. You can watch anything on YouTube and Facebook since these two are the most used social media platforms. However, a fact remains which is a downside, not everyone has unlimited and free data packages.

Although Youtube has introduced a new feature which lets you download videos while you are connecting to a WiFi. However, it more like an offline mode. But when it comes to Facebook there is no such option available. I mean if we are Android, there are hundreds of ways through which we can download Facebook Videos. On the other, iOS devices are not that user-friendly. If you want to download Facebook Videos on iPhone directly, you need to do a lot more.

Still, if you don’t want to use any app or wait for Facebook to introduce an official feature, you can wait. Moreover, you can always save a video on Facebook to watch it later. In order to download Facebook Videos on iPhones, you need to use a third-party app.

Download Facebook Videos on iPhone

In the past, we have discussed an app which lets you download Facebook videos on your iPhone. Unfortunately, that app was removed from the App Store. However, there are still a few apps which sell the same tagline. But they are full of Ads and most of them don’t work.

No need to be sad, Today we will tell you a new trick and by using it you can download Facebook Videos on iPhone, iPad or iPod. Let’s get started.


Download Facebook Videos on iPhone:

Heed the instructions provided below and you will be able to download Facebook Videos on your iPhone, iPad, and iPod. But before you proceed you need to download an app from the following link.

Download Links:

Method:

  • First, you need to download My Media app on your iPhone.

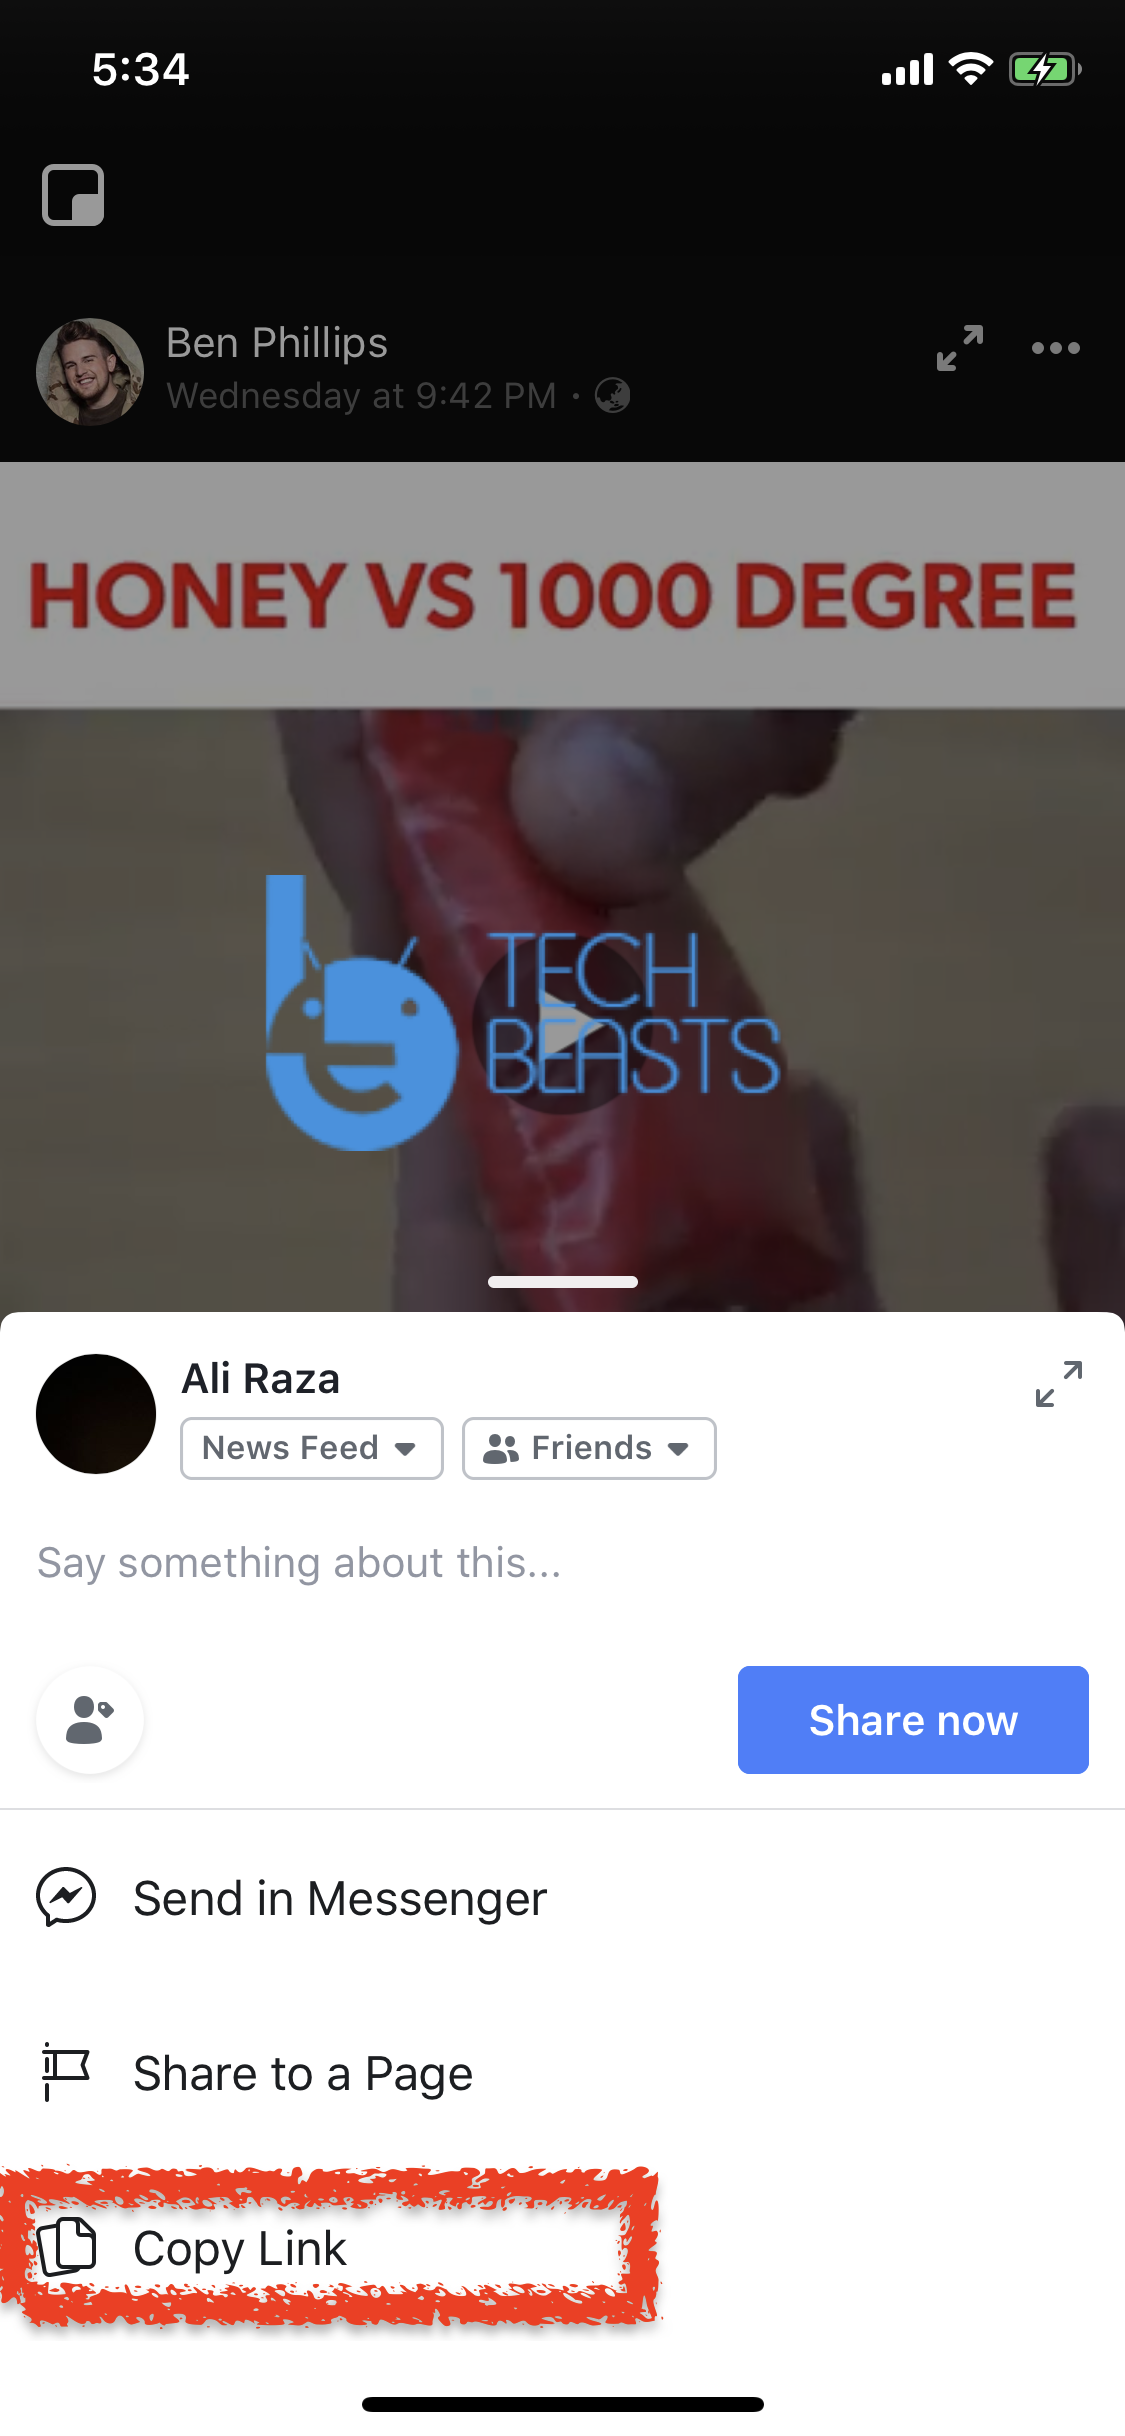
  • Now Open Facebook and open the video you want to download. Tap on the Share button and you will see an option ” Copy Link “, Tap on it. The Video link be copied to the clipboard.

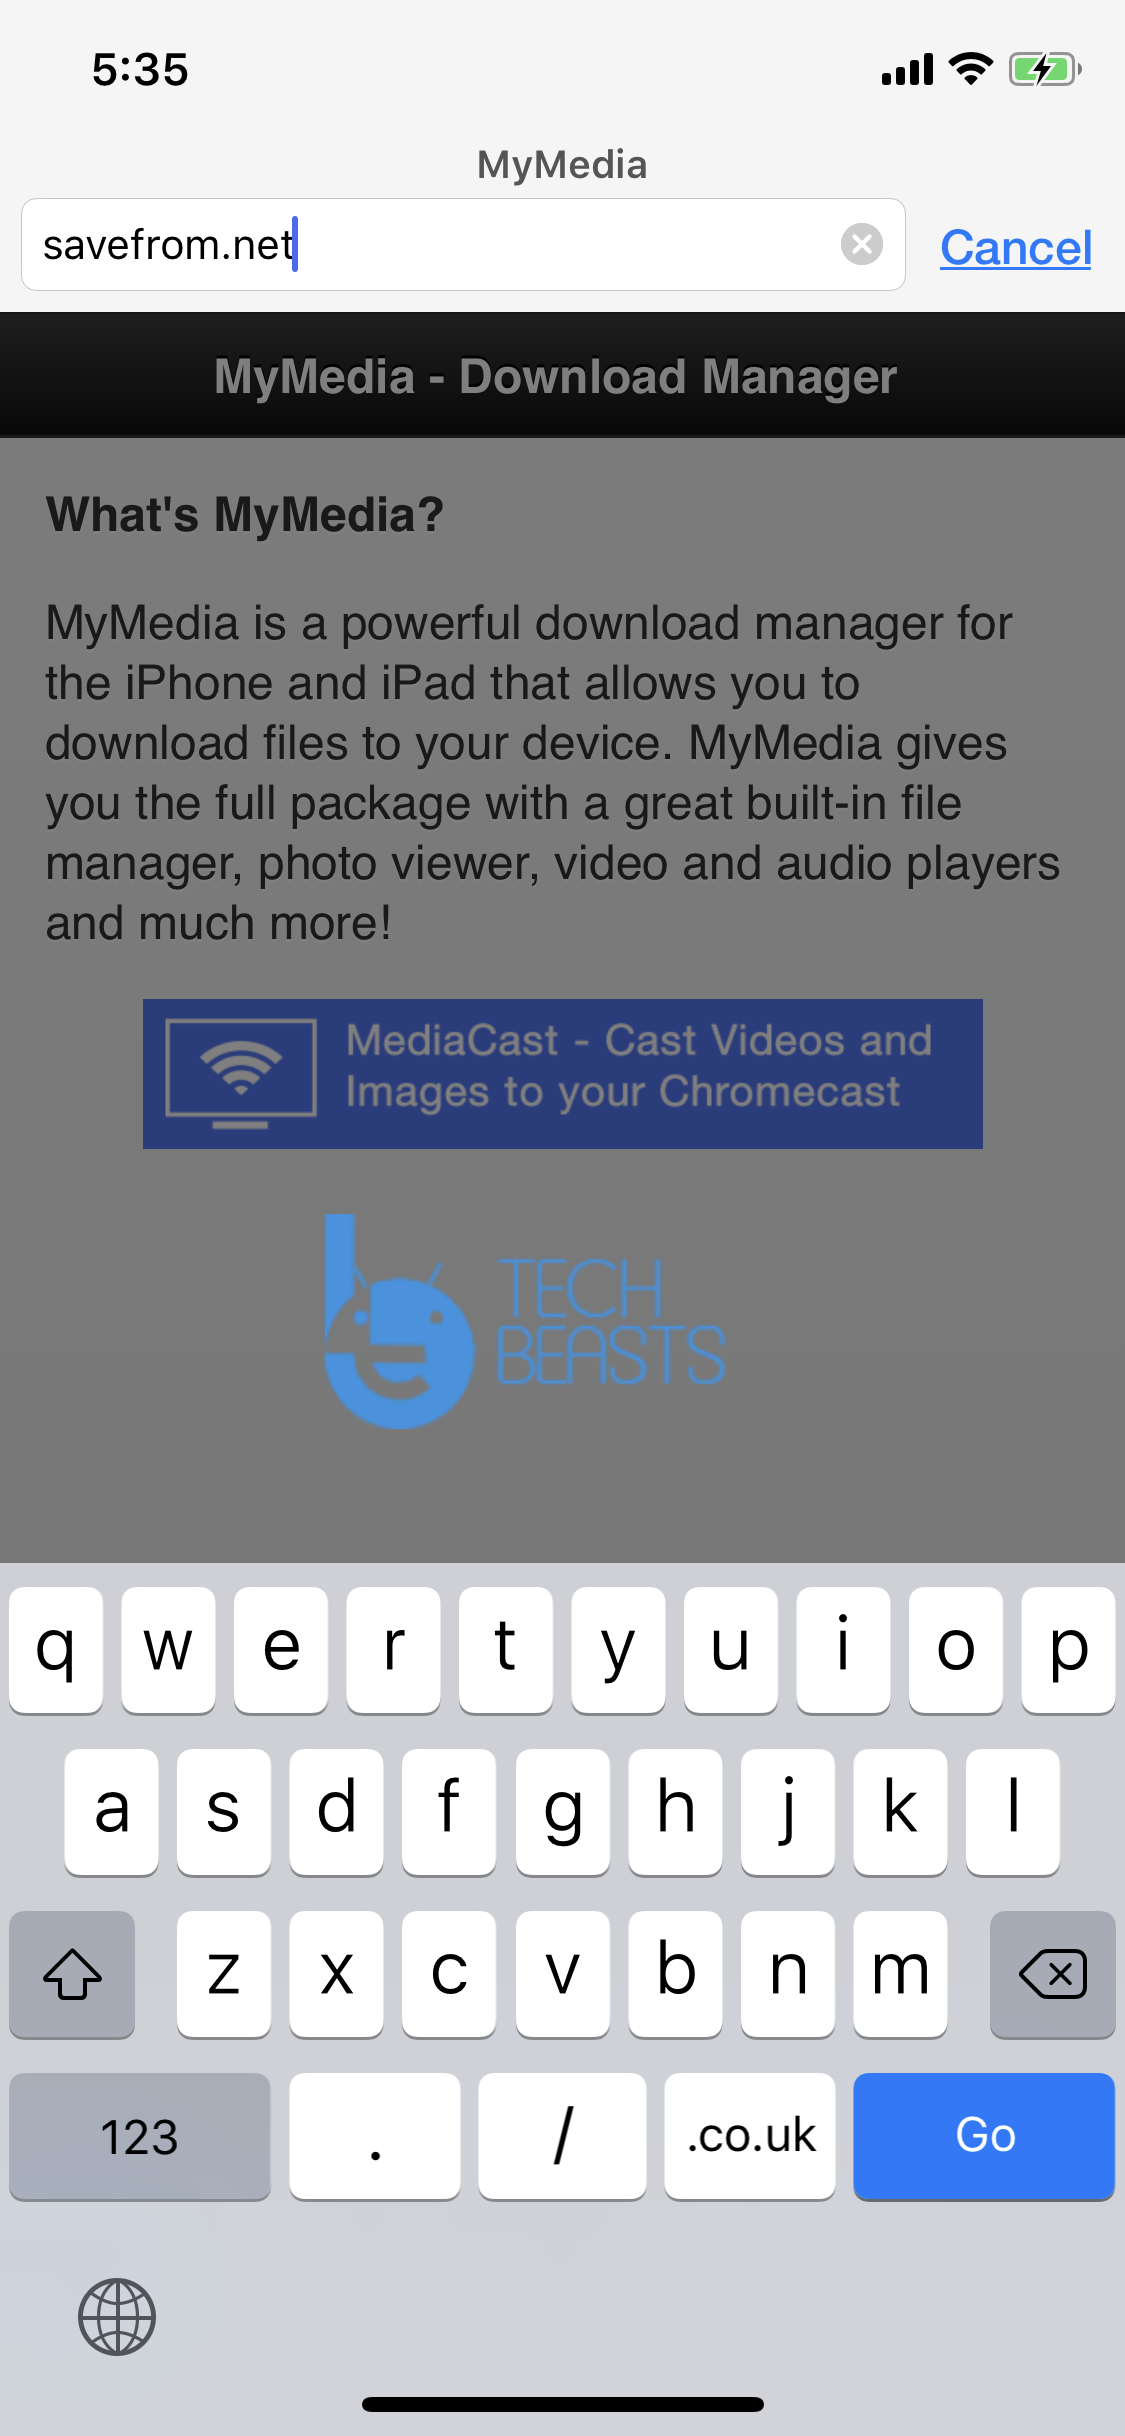
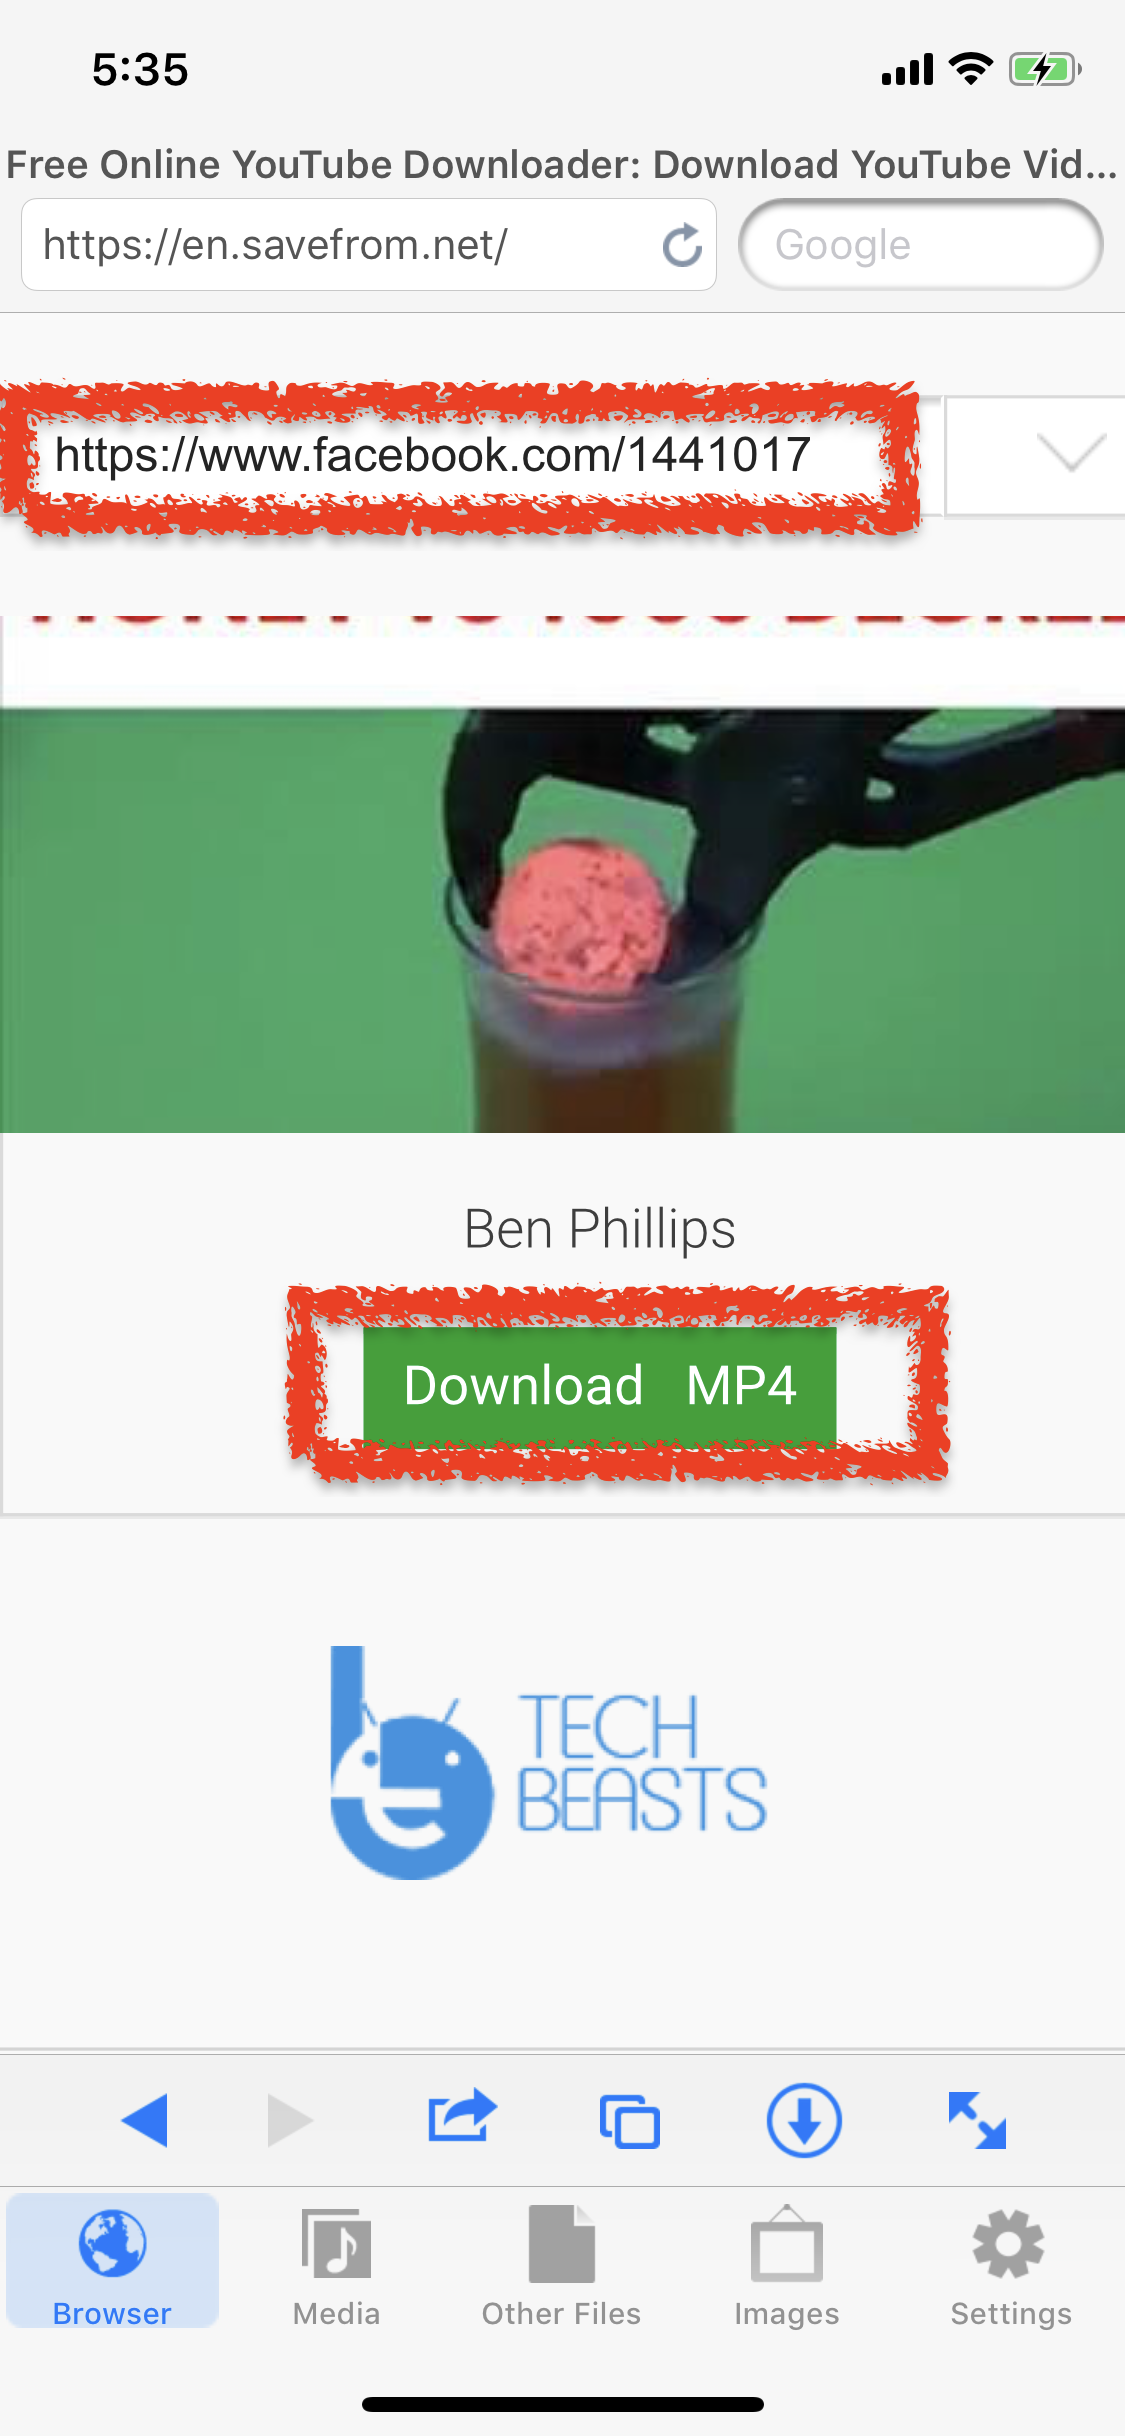
  • Open My Media app, You will see a search bar at the top of the screen. It is a browser, Type Savefrom.net and hit enter.

  • Saveform.net website will load up, paste the URL in the given filed. After that, you will see a Download Button, Tap on it. A new popup will show up, Tap on Download the File.

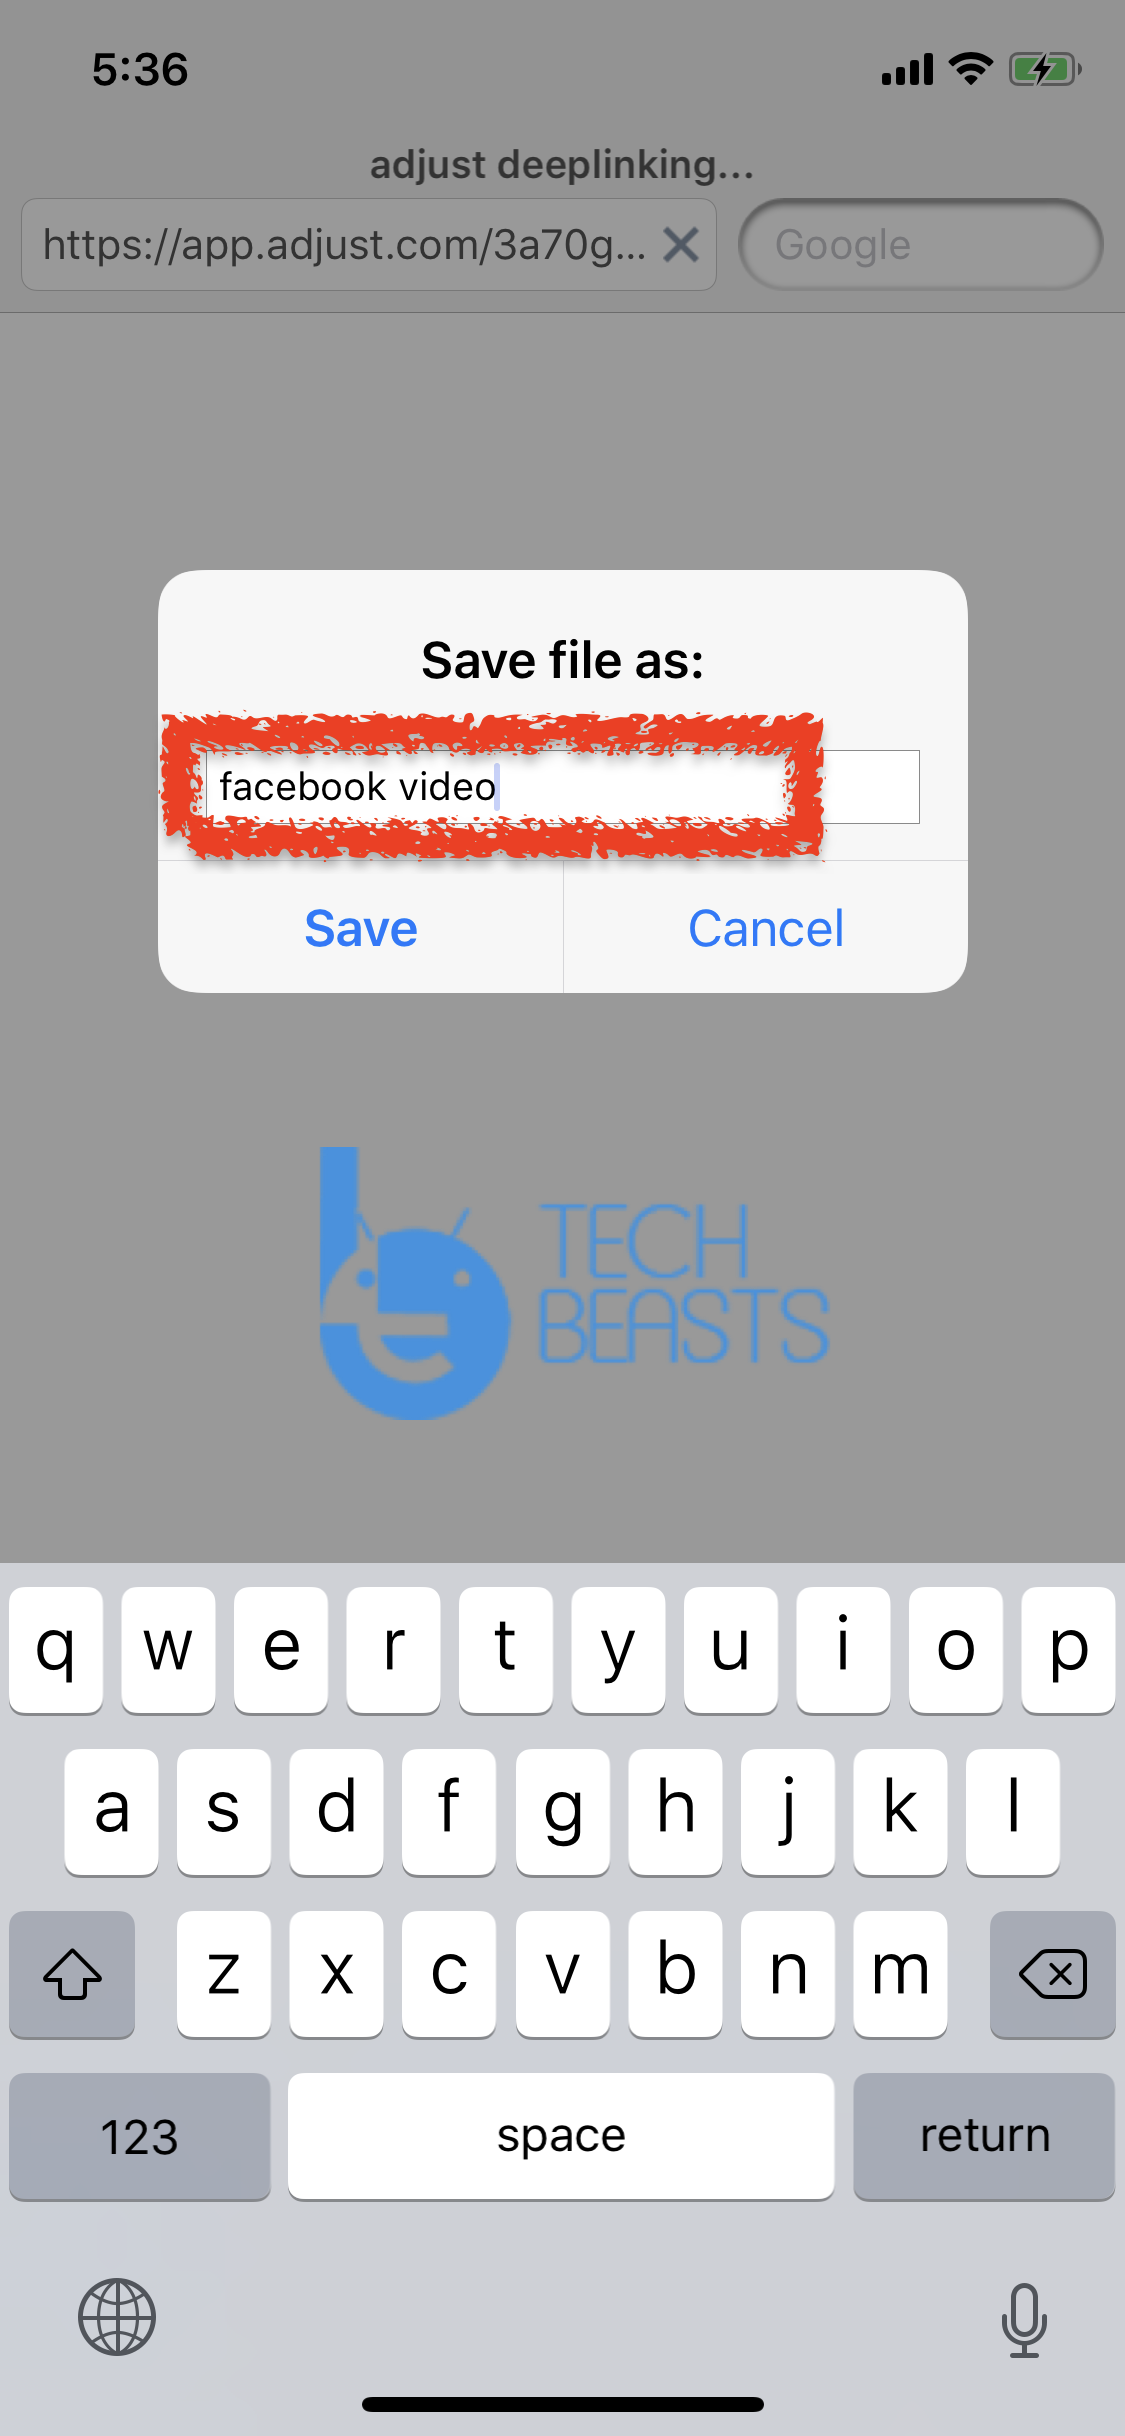
  • Before the downloading begins, you need to give a name to this video. Type the name in the given filed and Tap Save. 

  • Now you downloading will begin and it will take time to download the video, depending on your Video size and internet speed.

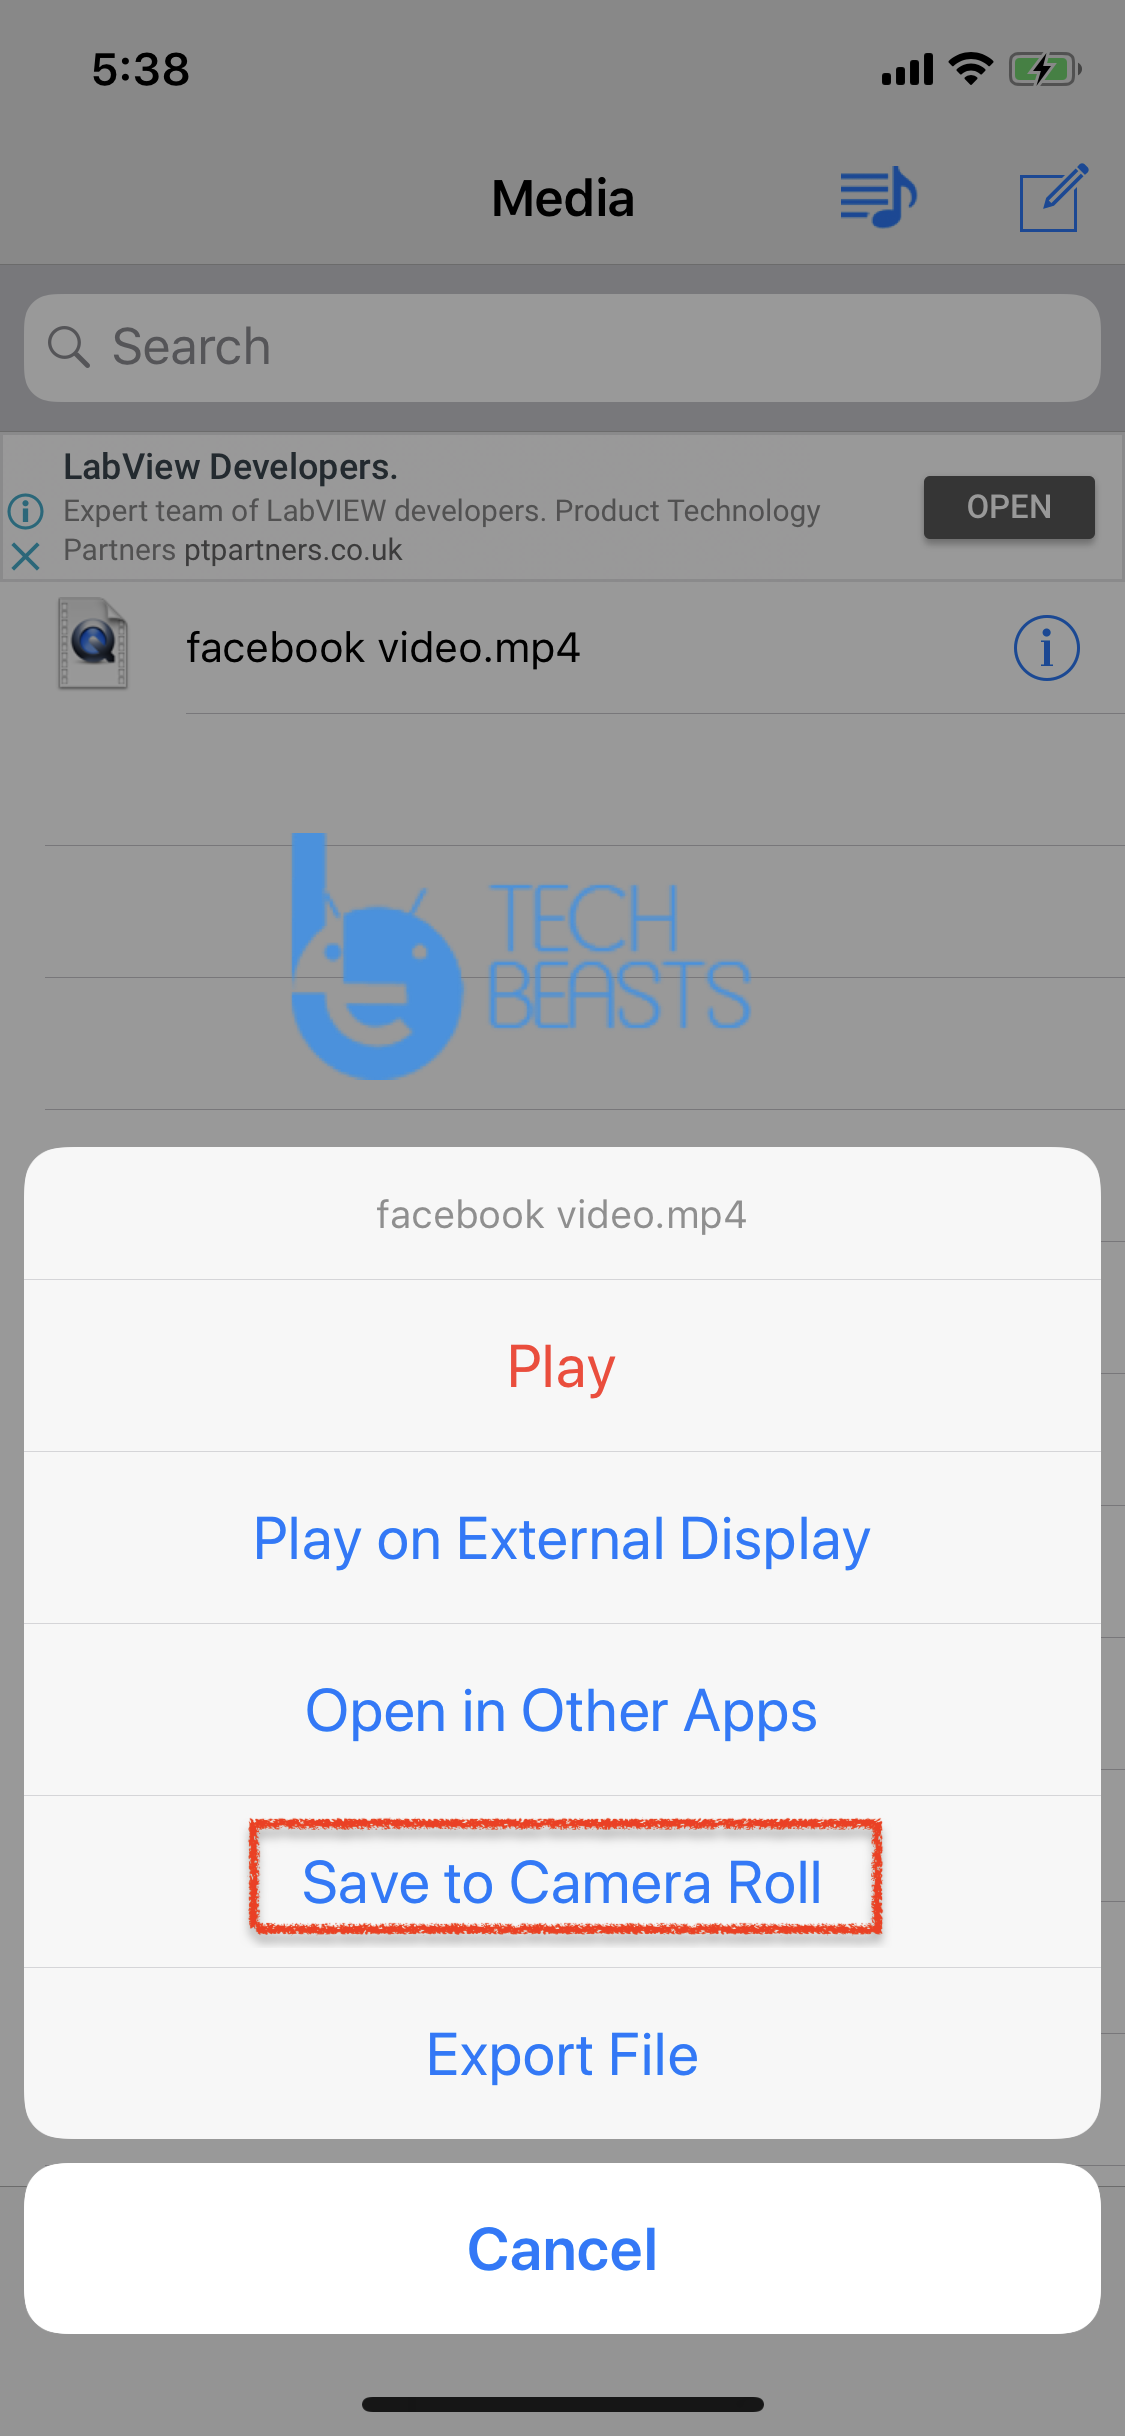
  • Once the Video is downloaded, Tap on the back button and then Tap on media button to access your downloaded video.

  • Now in order to save the video to your iPhone Camera Roll or you want to share it to Twitter or WhatsApp. Tap on the Blue icon right next to the Video. Now Tap on Open and you will get all the options. In order to save it your camera roll Tap on save to camera roll.

That’s all. This is how you can download Facebook Videos on iPhone. If you face any issue while trying out method, Please reach us through comments.

Important Message.
Please follow us on Facebook, Twitter, and Google Plus. Help us grow our social family.

Who Viewed my Facebook Profile? Can We See?

0
Who Viewed my Facebook Profile? Can We See?

Do you want to see Who Viewed My Facebook Profile? Hmm, you are among millions of Facebook users who want to check who is stalking them. Moreover, I have seen many click-bait apps nowadays, who are selling lie by saying ” Click here to see who viewed your Facebook profile “. Well, it is our nature that we are deeply curious to see how much we are popular. Just because of that, some of us use the subscription to check Who viewed my Facebook profile. Whether you like it or not they keyword who visited my Facebook page is the most popular.

Before we move on, let me clear one thing, there is no way Facebook let you check who has visited your profile. Moreover, there is no other alternative to find out who has visited your Facebook profile.

Who Viewed my Facebook Profile

Who Viewed My Facebook Profile?

Why after all the awareness, people still think that there is any way to check it. Well after doing some research, we have found that this Myth still remains because of Orkut, I have seen it on many blogs. They also think that this Myth is originated from the days when Orkut use to live. Well, all have used Orkut and everyone is well aware of their best feature which was Profile Visitors. Now, this is the reason why people still believe that they can see who visited their Facebook Profile. 

Not only that, the third-party app don’t let it fade away. They always found their way to make us look like a fool. However, you cannot deny the fact that, it is possible to track. Since Facebook has invested a lot in tracking online movement of their users. It is for sure that they have this data. But I think they are not interested in to share it with all of you.

Read more: Fix Instagram Share to Facebook Not Working

Are there Apps which let us view?

To be honest, There is none. But as I said before that ” Who Viewed My Facebook Profile ” is hottest search word in Google. So you will find hundreds of Websites, Facebook apps, Android apps or Google Chrome extensions, which have the same tagline. Click here to see who viewed your Facebook profile. Moreover, every day we see someone shared a post containing the same tagline and there you go. It gets viral  😛

There are such apps which will ask you to do something favor if you want to see the results. Some of us might do, some of us won’t, it can be anything such as payment, personal information, or share it with your friends etc. Sometimes we have seen that they ask us to download something and trust me always it was malware.

There is nothing you can do unless you are a hacker and you can hack through Facebook security. Other than that, there is nothing to do, you will end up giving third-party app permissions, which will take a lot form you. So If someone is selling check out who visited your Facebook profile, it will be better you don’t buy it.

Stay Safe:

The best bet is to stay safe and don’t give fake apps such permissions that you end up giving away your important information. In case you already did that, head over to the Settings-> Apps -> Revoke the access of such apps. 

Whether you believe it or not Facebook is tracking you, as we have seen that they are selling data by making us fools. Stop wasting your time enjoy using social media.

Fix Chromecast disconnects from phone (YouTube, Netflix)

3
Fix Chromecast disconnects from phone (YouTube, Netflix)

Google’s Chromecast device is used to stream videos directly from YouTube, Netflix, etc on onto TV. A common issue faced by new phone owners is that after playing a video on YouTube, the phone disconnects from Chromecast. It usually happens after they put the phone in sleep mode by turning the screen off. Whether it is done manually by pressing the power button or the phone’s screen turns off automatically. In this article, learn how to fix the issue when Netflix, YouTube, or similar apps get disconnected from Chromecast and videos keep playing anyway.fix apps disconnecting from chromecast youtube netflix

Applicable Queries / Problems

This article discusses the solution for Chromecast disconnecting from the phone even when a video is playing on TV (Chromecast device). Here, we are going to lay down the possible issues that can be solved by using this method:

  • YouTube App disconnects from Chromecast. The video can no longer be controlled unless you refresh the app. It does not allow forwarding or reversing in the video. Users have to restart the app and connect it again to get back controls.
  • Netflix app disconnects from the Chromecast device but a movie or TV show keeps playing. When users try to move the show forward or some other controls like that, it does not work.
  • The volume controls on YouTube or Netflix apps do not work.
  • YouTube, Netflix, or another similar app stops working a little while after the phone’s screen turns off. By stop working, we mean that it is no longer connected to the Chromecast device that it was casting to.
  • Chromecast keeps disconnecting on phone sleep or after leaving it idle for a while.

Apps List

This is a brief list of the apps that can easily get affected by this issue. These apps lose connection to Chromecast a little time after the phone’s screen turns off. When the user does not use the phone for a few minutes, these apps need to be refreshed (closed and reopened) to cast to Chromecast again.

  • YouTube
  • Netflix
  • Hulu
  • SoundCloud
  • HBO Now
  • IPTV Apps
  • Sling TV
  • and other similar apps

Fix to “Apps disconnecting from Chromecast (YouTube, Netflix, etc)”

As we mentioned at the start of this post, mostly new phone owners face this issue. The phones like Galaxy Note 8, Note 9, Galaxy S9, S9+, and others especially have this problem. Its root cause is the battery saving feature.

Phone manufacturers like Samsung, Huawei, etc are adding battery saving features to prolong the battery lives. Since there are so many battery-draining apps, high DPI screens, and backend services, it does help a little.

The battery-saving feature regulates the usage of all apps on phone. If any particular is running in the background and using battery more than the safe limit, then it automatically kills that app. Therefore, when users cast YouTube, Netflix, Hulu, or similar apps on Chromecast, they are automatically killed in the background by battery saver. Even if the app does not close, their on-going connection with Chromecast is cut.

To fix this issue, follow these steps:

  • Open Settings and head into the battery menu.fix apps disconnecting from chromecast 1
  • Now open the Battery Saver menu. fix apps disconnecting from chromecast 2
  • Next up, enter the Un-monitored/monitored apps tab.fix apps disconnecting from chromecast 3
  • Here tap on the “Add new App” button.fix apps disconnecting from chromecast 4
  • Search for Netflix for example in the list and select it.
  • Once selected, add it to the un-monitored list of apps. fix apps disconnecting from chromecast 5
  • Now it can use data in the background even when the phone is idle or in sleep mode.
  • Using the same method, add any apps that keep disconnecting from Chromecast on phone.

Note: This particular method does not apply to every brand of phone. Since the user interface is different for all brands, minor details will be different. If you are having trouble, ask for help in the comments below. The overall concept and method however are the same for all brands of phones.

Feel free to share your comments and queries with us in the comments section below

Disable Tumblr Safe Mode Without Account [ Tutorial ]

0
Disable Tumblr Safe Mode Without Account [ Tutorial ]

With the help of this guide, you will be able to Disable Tumblr Safe Mode Without Account. If you want to get awesome GIFs and memes, Tumblr is the one you should go for. Over the past few years, we have seen a significant amount of NSFW content on Tumblr. Those who use Tumblr on daily basis, they are well aware of restricted blogs, you will get a Safe Mode warning.

Note:

There is an age check on Tumblr if you haven’t turned 18, then you will see the warning message. This is good, you should Tumblr with Safe Mode on since you are not ready to see adult-related content. But not everyone is under 18, so in this post, we will tell you how to Disable Tumblr Safe Mode. Moreover, we won’t stop here, if you don’t have an account on Tumblr, then you don’t need to create it. We’ll also tell you how you can Disable Tumblr Safe Mode Without Account.

Disable Tumblr Safe Mode Without Account
Disable Tumblr Safe Mode

Disable Tumblr Safe Mode:

Heed the instructions below in order to Disable Tumblr Safe Mode. Keep that in mind, by default Safe Mode is Turned on Tumblr. Moreover, we have seen in many forums, that Tumblr has removed Safe Mode feature. We’ll we not so sure about it, because it is a good thing to have. Especially, when you have kids.

PC:

Disable Tumblr Safe Mode Without Account

  • Open Tumblr on your PC browser, log in into your Tumblr account.
  • Click on the profile icon located at the top right corner. Click on the Settings.
  • When you in the Settings page, look for Filtering section. Here you will find Safe Mode, Toggle it to turn it off.

Read more: How To Add New Contacts to WhatsApp Web [ Tutorial ]

iOS:

  • Open Settings on your iPhone or iPad.
  • Scroll down and look for Tumblr in the Apps Section.
  • Tap on it to access the settings.
  • At the end of the page, you will see Safe Mode settings.
  • Tap on it to access the settings. Now select Don’t Hide Anything.

Android:

  • Open Tumblr app, Tap on profile icon.
  • Now tap on the gear icon located at the top right side of the screen.
  • Tap on General Settings. Scroll down and Tap on Filtering.
  • Here you will find the Safe Mode, Tap on it to Turn it off.

Disable Tumblr Safe Mode Without Account:

Now if you don’t have a Tumblr account but want to access a specific blog. But it is blocked due to some reasons, no need to worry about. We’ll help you with it, you don’t need to create a Tumblr account just to visit a blog which is blocked. Keep reading and you will come to know how to Disable Tumblr Safe Mode Without Account.

There are many websites which are created for this specific reason. They will let you access Tumblr blogs by directly bypassing the restriction. Following are the websites which will serve you very well.

GramUnion:

This website lets you access any Tumblr blog whether it is restricted or not. All you have to do is put the blog name in the search bar and hit enter.

TumblViewr:

You may not like the interface of TumblViewr, but don’t underestimate the functionality of TumblViewr. All you have to do is enter the blog name and you will get all the photos and GIFs in thumbnail format. Through this, it will easy for you to find the right content for you.

Install Android ADB & Fastboot Drivers Quickly with Minimal Tool On Windows PC

66
Install Android ADB & Fastboot Drivers Quickly with Minimal Tool On Windows PC

Android ADB & Fastboot are the two terms that you must have heard of while exploring the custom recoveries, unlocking the bootloader, or rooting your device by flashing .img files. Basically ADB stands for Android Debug Bridge that helps you to establish connection between your PC and your Phone, this can be accomplished by turning on USB debugging mode in your phone under the settings tab > developer options, while the Fastboot mode can be turned on by bringing your phone in Fastboot and plugging in the USB data cable.

Fastboot mode helps you to flash .img files and several other similar tasks. Well, to install Android ADB & Fastboot drivers on your Windows PC you need to install Android SDK tools and use the Platform tools. Earlier we posted a complete guide on how to install Android ADB & Fastboot Drivers on your Windows PC but I realized that it’s quite time-consuming and hard to understand, So while exploring a lightweight tool to overcome the difficulty, I found Minimal Android ADB and Fastboot driver tool on the XDA forum. Thanks to shimp208 for developing this awesome tool.

The tool is packed up in just 2 MBs and using it, I was able to successfully install the drivers on the VMware that I use for Windows 7. I’ve explained below how to install and use this tool in detail.sdk-cube

Please keep in mind that this tool is only to save the time, and for those who don’t want to go in many details and use the fastboot and adb only for the flashing purposes. Perhaps if you want to install the Android ADB & Fastboot drivers for real Android development purposes, it is highly recommended to install the drivers using Android SDK tools, the full guide can be found here.

Minimal ADB and Fastboot Drivers

How to Install Android ADB & Fastboot Drivers Quickly:

      1. Download the Minimal ADB & Fastboot Drivers tool: Latest V1.4 Link 1 | Link 2 
      2. Run the minimaltool.exe file that you downloaded and install the tool.
      3. During installation, tick “Create a desktop icon or Create a desktop shortcut“.
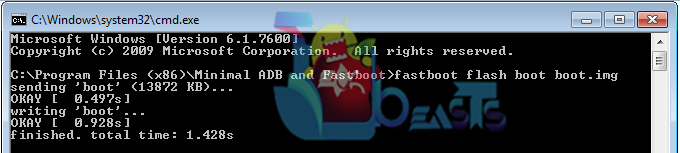
      4. You can run the tool now by either through the Start menu, through the icon that you created on the desktop or by opening Program files > Minimal ADB & Fastboot > Right click on an empty area while keeping the shift key pressed and click on “Open Command Window Here”. Screenshot_2
      5. Use the Command prompt to do whatever you want now!
      6. To install any .img file, you will have to place that file in the Minimal Tool folder that is located in program files x86.
      7. To access the Fastboot mode, you’ll have to first bring the Fastboot mode on your device and then connect it. E.g on HTC devices you can highlight Fastboot mode by accessing it through HBoot and then connect it, while on Sony you can turn off the device and then while keeping the back or volume up key pressed plug in the USB cable.
      8. That’s All! You’ve successfully installed Android ADB & Fastboot drivers. I hope that it didn’t take more than 2 minutes for you.Screenshot_1

In case you got any queries, suggestions or face any difficulties regarding this post, please feel free to stop by the comment box below and leave us a message. We will try our best to help you out.

Also Check: How to Install ADB & Fastboot drivers on Windows 8/8.1 with USB 3.0

Download BlueStacks 4 Android Emulator

0
Download BlueStacks 4 Android Emulator

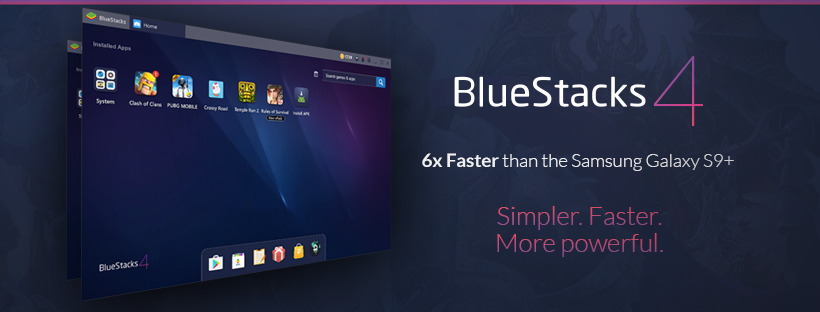
BlueStacks recently received an update. The update pushes the version to 4. The BlueStacks 4 is the successor of the BlueStacks 3. A few months ago, BlueStacks released the BlueStacks N. The BlueStacks N was here with Android Nougat. The BlueStacks N was not a direct successor of the BlueStacks 3. It was in the testing stages for quite a while. It looks like the company has now replaced the BlueStacks N with BlueStacks 4. The BlueStacks 4 is based on Android 7.1.2 Nougat, which is why I believe that it’s the same BlueStacks N that has got a final shape now. The BlueStacks 4 promises to give you a performance boost. The company has shown the phone performing better than most of the flagship Android phones available at the moment. According to the company, the BlueStacks 4 performs 6x better than the Galaxy S9 Plus. 

Unlike the BlueStacks 2, and BlueStacks 3, the BlueStacks 4 is more about performance updates. The previous 2 versions focused more on the cosmetic changes.

BlueStacks 4

UI Changes in the BlueStacks 4

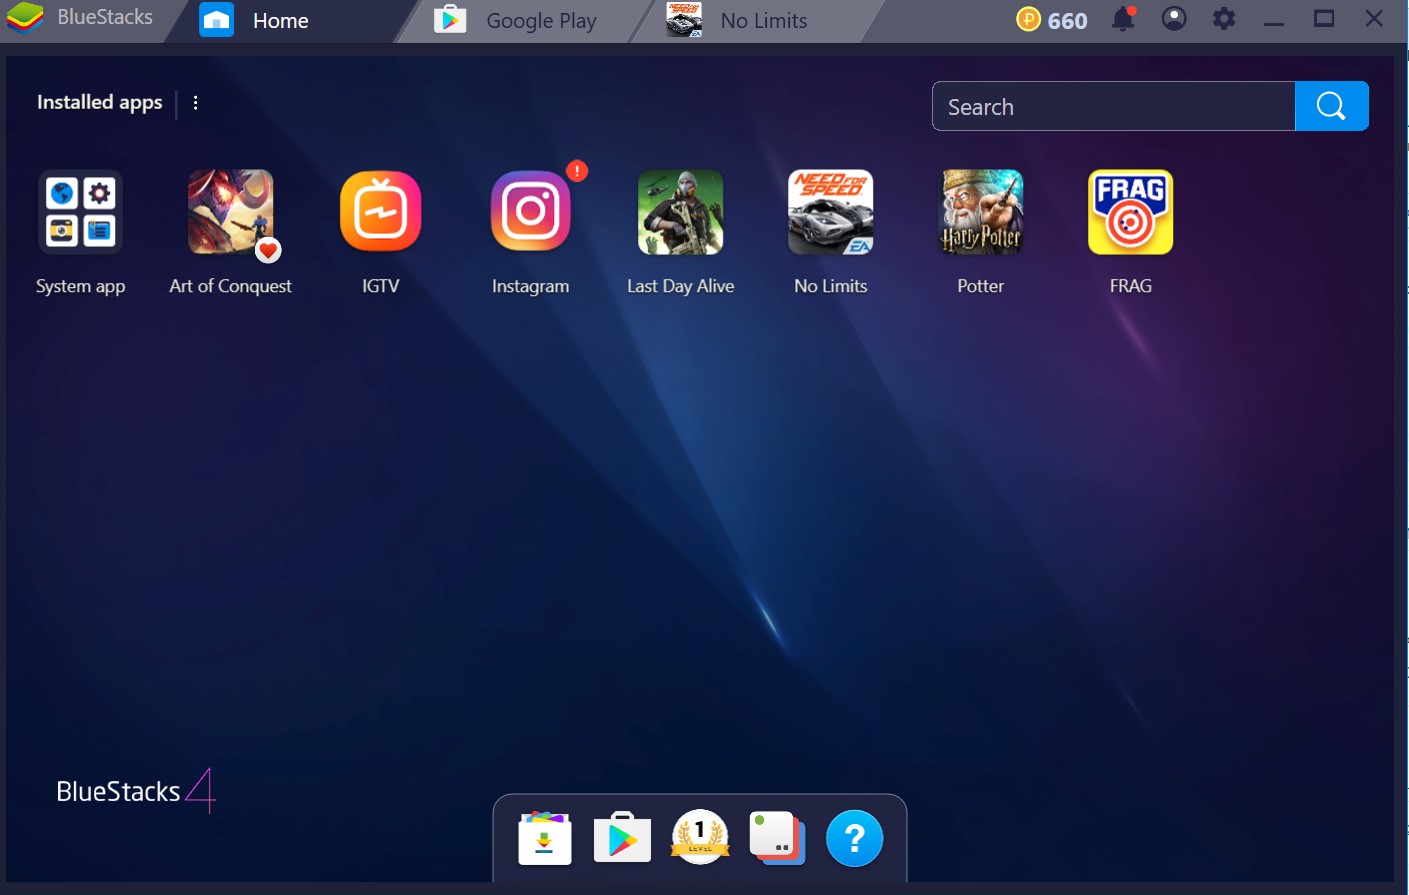
There are UI changes in the BlueStacks 4, but they are not as prominent as they were in the previous update. For example, in the BlueStacks 3, we had an Apps menu in which we could see the System Apps having applications like Google Play Store and others. In the BlueStacks 4, the company has added a little toolbar that sticks to the bottom. This toolbar has the Apps Center, Instance Manager, Google Play Store, Help Center, and Rewards Manager.

BlueStacks now gives you BlueStacks points for installing each application. I tried installing Need for Speed No Limits and it gave me 5 BlueStacks points. The more games you play, more reward points you will earn.

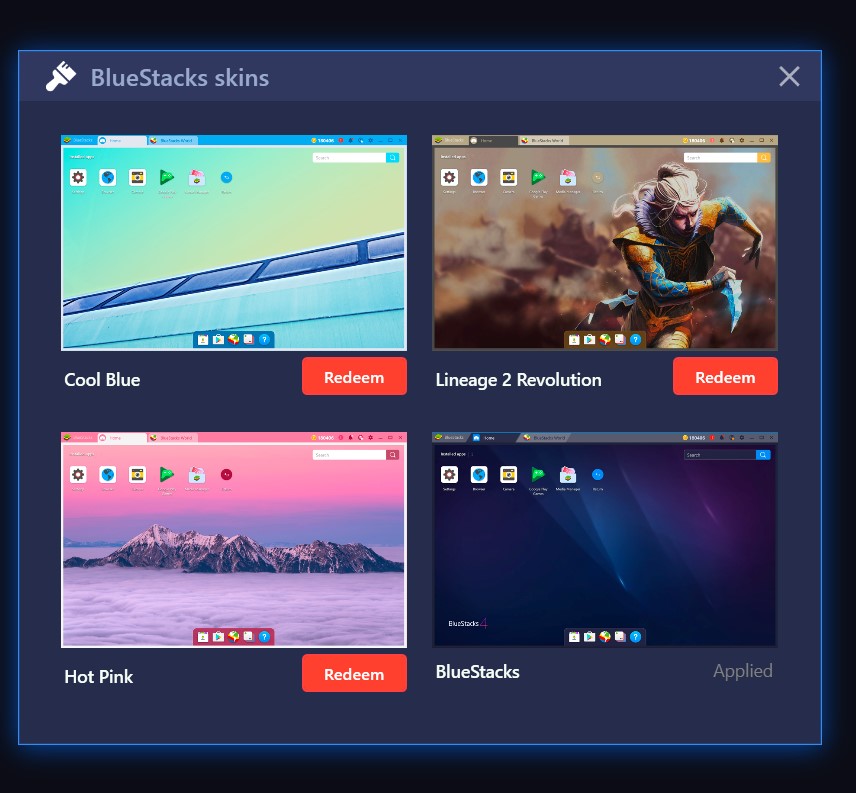
In the Settings of the emulator, you can find the options to change wallpaper and the skins. The wallpapers feature is premium. If you happen to be an avid BlueStacks user, you may consider investing a few bucks in order to get the wallpaper feature. There are 3 skins that are available for free, but you will have to redeem those skins.

In the bottom menu bar of the BlueStacks 4, you can find the options such as Keyboard Controls, Toggle Keys Tips Display, Screenshot, and Toggle Full Screen. At the top, you can see the tabs of all the apps that are open in the BlueStacks. The notifications bar also appears at the top. The notifications for your BlueStacks Account appear in the icon right next to the Account icon. 

On the Home screen of BlueStacks 4, you can find System Apps. These Apps include the Play Store, Browser, Camera, Google Play Games, and Media Manager. If you want to copy any files from your computer to the BlueStacks 4, you will have to open Settings > Import windows files. The imported files will appear in the Media Manager of the BlueStacks 4.

All the enhancements in BlueStacks 4:

  • Performance and Robustness
    • Performs better than most of the Android Flagship phones of today.
  • Simplified UI
    • I personally think that pervious versions of BlueStacks were a little bit complex to use. BlueStacks 4 takes this angle into account and minimizes all the complexity.
  • Multi-instance
    • The previous BlueStacks also supported Multi-instance, however, the company has now improved this Multi-instance feature to run faster and better.
  • Search Recommendations
    • It can now make search recommendations based on your interest.
  • New installer
    • The new installer is fast and consumes fewer resources.
  • New Key Mapping
    • It is easy to map keys according to your liking now.
  • More Languages
    • It supports more languages than the previous versions.
  • Easy Navigation
    • It is easy to move through this version of BlueStacks.

BlueStacks 3 vs BlueStacks 4 in a nutshell

Gameplay on BlueStacks 4

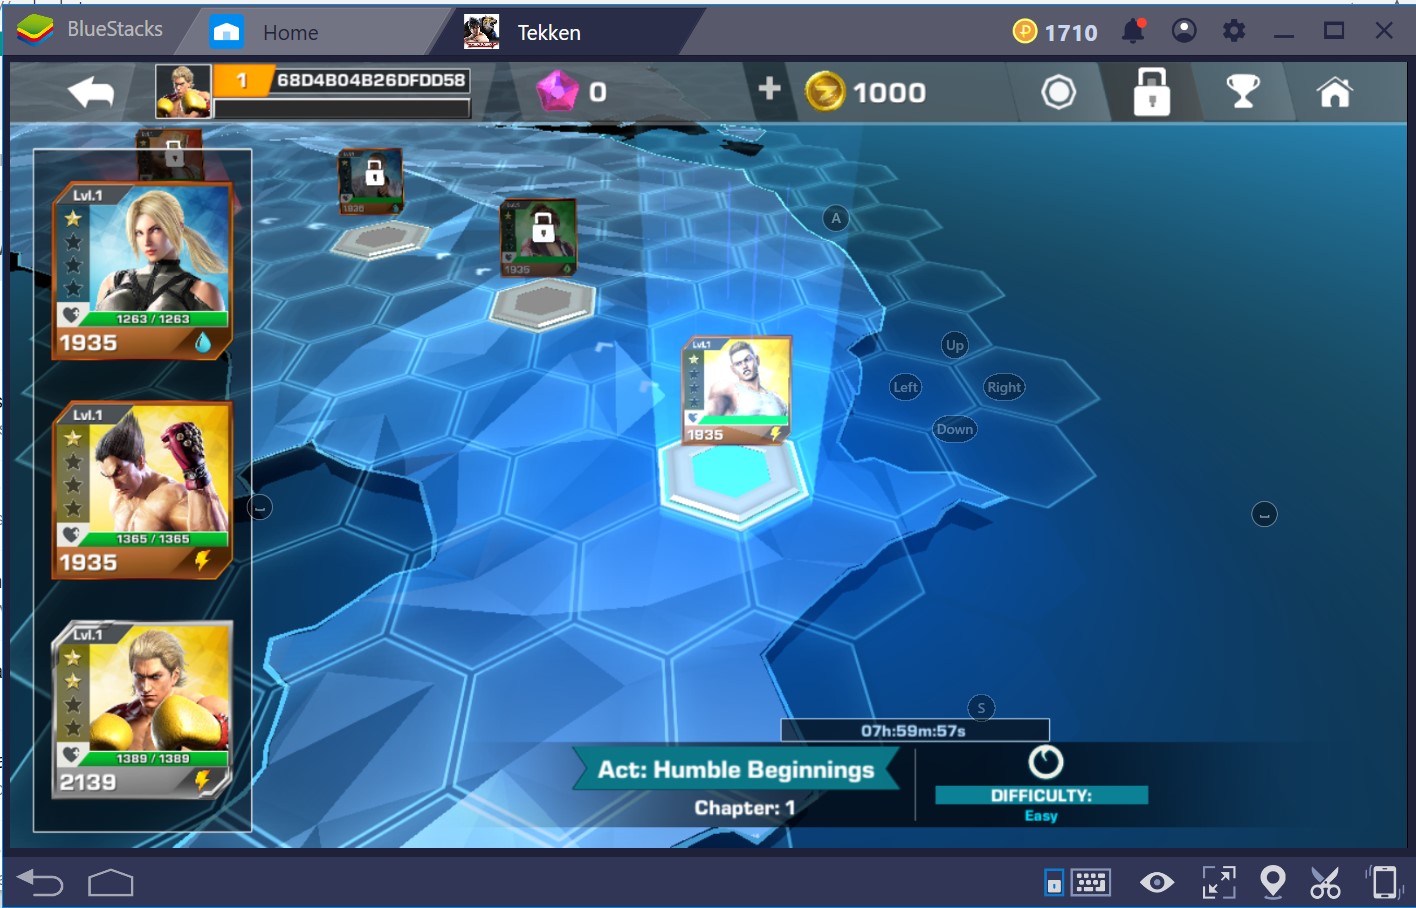
To give the BlueStacks 4 a run, I installed the Tekken on it. By default, you have to use your mouse to swipe on the screen or to perform any action in the game. However, with the new keymapping, it was really easy for me to set up all the controls. I mapped the keys to work with Tekken and played the game just like I’d play on a console. The graphics of this game are quite impressive so they did not disappoint me on the BlueStacks 4.

I also tried playing PUBG Mobile on the emulator and found it running flawlessly. If BlueStacks supports Fortnite for Android as it comes out, it will definitely run impressively on this emulator.

BlueStacks 4 – The best Android Emulator

BlueStacks has been around for last 8 years. The BlueStacks, initially, was not a very solid Android Emulator. It also faced a lot of competition from the Android Emulators like the Andy Android Emulator, NoxPlayer, MEmu, KO Player, and others. The only thing that resulted in the popularity of BlueStacks is the way it extemporized over the course of the past couple of years.

BlueStacks got an update to BlueStacks 2 in 2015. This was an update after 5 years of the original BlueStacks. From 2015 to 2018, BlueStacks got updated to BlueStacks 3, BlueStacks N, and now the emulator has got an update to BlueStacks 4.

This shows how consistent the team has been in keeping the BlueStacks up to the mark. The emulator which consumed a lot of resources of a computer back in the day now works utilizing the least amount of resources. Where BlueStacks 4 comes with a performance boost, it also puts the least amount of load on your computer. BlueStacks 4 has been designed to give you the best possible performance with the games like PUBG Mobile, Fortnite, Asphalt 9, and all other such popular games.

Download BlueStacks 4

BlueStacks 4 is now up for the grabs. Following are the system requirements for BlueStacks 4.

BlueStacks 4 System Requirements:

  • OS: Windows 10, Windows 8.1, Windows 8, Windows 7, Windows Vista SP2, Windows XP SP3 (32-bit only)
  • You must be an Administrator on your PC.
  • Processor:  Intel Core i5-680  (PassMark 3500) or higher processor with virtualization extensions enabled in the BIOS
  • Graphics: Intel HD 5200 (PassMark 750) or higher
  • Memory: 2GB – 6GB or higher
  • HDD: SSD (or fusion)
  • storage HDD Space: 4GB – 40GB
  • Internet: Broadband connection to access games, accounts and related content

Download BlueStacks 4Download Link

About BlueStacks

BlueStacks is an Android App Player. This Player can be used to emulate on your computer running on Windows or Mac OS. BlueStacks uses the virtualization to work on your computer. Inside your computer, it works just like an Android tablet. BlueStacks is a great tool if you want to play your favorite Android games on your computer or if you want to use your favorite applications like WhatsApp, Instagram, and Prisma on the computer.