The stock wallpapers of Honor View 20 are now available for download. Wallpaper lovers can download Honor View 20 Stock Wallpapers in full HD resolution from here now. The Honor View 20 Stock Wallpapers can be applied to any Android phone and also on an iPhone. Before download the Honor View official stock wallpapers, let us learn a little bit about this new monster by Honor.
Honor View 20 Stock Wallpapers
The Punch-Hole Culture
Samsung laid the foundation of punch-hole displays with its Galaxy A8s. On 10th of December, Samsung introduced the Samsung Galaxy A8s with the infinity-o display. The Galaxy A8s has a big hole on the top-left side of the screen housing the front camera sensor. Huawei was also due to release a phone with a similar display, but it couldn’t beat Samsung. Huawei’s first phone with a punch-hole camera came out 2 days later. The punch-hole competition now seems to be taking a toll. Just today, we saw the third smartphone with the infinity-o kind of display and this phone comes from none other than Huawei.
Honor View 20 – Another punch at the notch
Honor, the subsidiary of Huawei released the Honor View 20 just yesterday. This is the 2nd phone from Huawei to have the punch-hole camera. Earlier, we saw the Huawei Nova 4 carrying the similar camera on the front. The Huawei Honor 20 comes with a display of 6.4-inch. It has the screen resolution of 1080 x 2310 pixels. Its a flagship-grade device. This phone is powered by the latest 7nm Kirin 980 SoC accompanied by the Mali-G76 MP10 GPU. Under the hood, it has the internal storage of 128GB or 256GB with a RAM of 6GB or 8GB. It does have the support sd card as well. Honor View 20 has a dual camera system at the back. There is 48MP main camera at the back and another TOF 3D stereo camera. On the front, it has a single 25MP camera fixed inside the punch-hole on the top-left corner of the screen.
Huawei Honor View 20 runs on Android Pie out of the box. This Android Pie is themed by the Magic UI 2.0. The View 20 does have a headphone jack as well. It has a battery of 4000 mAh. This phone will be available in Sea Blue, Red, and Magic Night Black Colors. The price of Honor View 20 is expected to be around 380 EUR.
Let us get back to the stock wallpapers of the Huawei Honor View 20. Go ahead and grab them right away.
Huawei Honor View 20 Stock Wallpapers
The Honor View 20 comes with 9 stock wallpapers in total. These wallpapers are beautifully crafted to show off the vibrant 19:9 screen of the View 20. The Honor View 20 stock wallpapers are available in 2160 x 2340 resolution, which means all these wallpapers are Full HD. These wallpapers can be applied to any compatible display. So, even if you are not going to get the Honor View 20, you can enjoy its wallpapers at the least.
To download the View 20 wallpapers, simply open your desired wallpaper from below and then click on “Save image as..”. Save the wallpapers to your computer and then copy to your phone or else you can download them directly on your phone as well. I have also attached a link to download all the wallpapers at once. It’s completely up to you how you want to get your hands on these wallpapers.
The team at OnePlus has been hard at work for producing a stable Android 9 Pie build for OnePlus 5 and OnePlus 5T. After a few betas build, we finally got our hands on a stable full ROM of OxygenOS 9.0.0. This is based on Android Pie 9.0 of course. Moreover, the update file here is actually a complete update and not partial. Therefore, even if someone is using a modified OS on OnePlus 5 or 5T, they can use it directly.
OxygenOS 9.0.0 OnePlus 5 and OxygenOS 9.0.0 OnePlus 5T ROMs are pretty much the same except for one small difference. The 5T variant now has support for navigation gestures. It is however not present on 5 because of the hardware home button. Since it is only made for phones with no hardware keys at the bottom, 5T is only one of these two to support it properly and logically.
In this guide, learn how to install stock OxygenOS 9 Full ROM on OnePlus 5 and OnePlus 5T. Don’t worry about download links. We’ve got you. These are listed below as well. For those who are interested, below is a brief overview of what to expect in this brand new update.
What’s new in Android Pie (Android 9)
The major addition to Android Pie is the learning AI. These are called adaptive modes. So how this works is that as you use the phone more and more, it learn user preferences and makes changes based on pattern behaviors. This includes examples like adjusting brightness and battery optimization in the background.
Adaptive Learning
If someone likes to up their phone’s brightness only when watching a video, then OS will learn this behavior and do it for you next time. Similarly, Adaptive battery monitors which apps you use and how you use them. The most inactive apps will be cut in the background to save both data and power. The battery saver features are notorious for causing issues with certain apps. Here’s to hoping that it “learns” to not make those mistakes.
Another cool example of adaptive learning is playing the exact playlist you mostly listen to at certain times or places. For example, if someone has a different playlist set up for a workout, the phone will automatically play that playlist when you plug-in earphones or headphones. This feature seems pretty cool because it makes the device look really proactive.
Slices
Slices are probably the most exciting addition. To be fair, the team behind Android deserves all the credit for implementing such cool and useful features with such precision. What this feature does is that when the user searches for an app or app-related activity, they automatically get bits of useful information and usable activities. For example, searching for Uber would bring up results for the nearest driver, etc even before you open the app. This makes it super fast and crisp to use such apps.
Navigation Gestures
These gestures are common in hardware keys-less phones. These include swiping up to launch recent apps menu and more.
Improved Do-not-Disturb Mode
Schedule or activate this mode anytime. As soon as they do not disturb mode goes off, the screen turns to gray-scale and mutes all notifications. If someone wants to just disconnect from the digital world for a while, it one of the most aesthetically pleasing additions. It looks and works great!
Time Spent Dashboard
While this feature is not something new but it is still cool to see that Android now supports it by default. What it actually does is monitoring apps for their usage time. All apps and their usage times are listed in a user-friendly manner.
It comes in handy when you put time limits on using any app. For example, if someone sets 1 hour daily limit for the Facebook app, its icon will gray out when the time has ended. It reminds users of what their goals are. Small touches like this can help make days more productive.
What’s new in OxygenOS 9.0.0 (OnePlus 5/5T)
Brand new Android 9 Pie-based UI.
Navigation gestures were added. These are not available for OnePlus 5 due to the hardware home button.
A new Gaming Mode 3.0. It has a new notification system.
The camera apps now have Google Lens Mode.
Apart from this, there are only system performance improvements and new security patches. Most of the changes are the same as mentioned above in Android Pie features.
How to install OxygenOS 9.0.0 ROM on OnePlus 5/5T
Note that you should make a full backup of your datA before attempting to update the phone. The update may result in loss of user data. Also charge the phone above 50% before updating.
Downloads
OnePlus 5 OxygenOS 9.0.0 Full ROM Zip – Download Here
OnePlus 5T OxygenOS 9.0.0 Full ROM Zip – Download Here
Note that the OTA update for OxygenOS 9 is incremental and may take some time to reach users in all parts of the world. Therefore, the manual update is the only solution. Follow the guides below to manually update OnePlus 5/5T to Android 9 Pie with OxygenOS 9.0.0 Full ROM Zip.
Non-Rooted Users
This method is for those who are using their phones in stock state. No changes like rooting were made. If you do not understand what rooting is, then this method is probably for you. Follow the steps below to install OxygenOS 9 on stock OP 5T/5 without a custom recovery.
Download and put the zip file in the “Download” folder in the root of internal storage. By root we mean, the default directory. You can get here by pressing the UP or back button on file manager until there are no more directories left to go back to.
Next up, head over to Settings > System Update > Settings > Local Upgrade.
Select the downloaded file here.
Follow the on-screen instructions to flash the zip on phone.
Once the installation starts, leave the phone as it is until it completes.
Once the installation is complete and the phone restarts, head back to stock recovery. It may stay in recovery. In this case, wipe the cache partition to ensure maximum performance and no glitches while using a new update.
Enter stock recovery in OnePlus 5/5T manually by turning off the phone first and then hold volume down + power keys together until you see recovery.
Use the volume buttons to navigate and the power button to select an option.
Wipe Cache partition from here.
Then restart the phone.
Rooted Users
This method specifies the steps to update rooted OnePlus 5/5T to OxygenOS 9.0.0 and keep it rooted. For this to work, your phone must already be rooted of course. Follow the steps below.
Head over to Magisk Manager > Uninstall > Restore Images. Don’t reboot.
Now follow steps 1-6 from the previous heading. (non-rooted users update method). Still do not restart the phone.
Open Magisk > Install > Install > Install to Inactive/Second Slot (After OTA).
Close background apps before installing magisk.
Once the magisk installation is complete, restart the phone.
That’s it! Enjoy the latest Android Pie on both devices. Note that the update method for installing OxygenOS 9.0.0 ROM Zip on OnePlus 5 and OnePlus 5T is identical. Therefore, the above-mentioned method works for both devices.
Feel free to leave your feedback and queries in the comments section below.
China is one of the few countries in the world with strong internet censorship. It extends from the websites and services and blocks Google apps on Android phones altogether. Let us be clear here. Android does not need Google’s apps to work. It is an open-source OS. However, Google apps like Play Store, Maps, Play Movies, Play Music etc add a lot of value to it. Since Chinese Android phones do not ship with it, learn how to install Google apps like Play Store on Chines Android phones.
This article goes through this process with the help of a third-party package installer. It is known as Google Installer 3.0 (formerly 2.0). In order to activate some backend Google services, users are required to install GMSanzhuangqi first. All of these files with installation steps are mentioned below.
What is Google Installer?
The main applications by Google do not work properly if you just install their regular APKs. All Google Apps require some backend services to be installed beforehand. This includes Google Play services and a few others. Therefore, in order to save an average user from the hassle of finding all necessary apps and installing one by one, Google Installer provides an all-in-one solution. It installs the following apps:
Google Services Framework
Google Account Management
Calendar Synchronization Service
Google Play Service
Google Contact Synchronization Service
These are the most basic apps that set up the Google Play Store on Chinese Huawei Android phones. Moreover, this works for brands like ZTE, Xiaomi, Oppo, Vivo, Coolpad, Chuwi, Lenovo, Cube, Teclast, Onda, PiPo, Ployer and OnePlus. There are a certain number of other brands that do not come with Google services pre-installed. This guide caters to all of these devices.
How does Google Installer work?
The basic motivation behind Google Installer is to make it easy setting up Play Store and basic services on Chinese Android phones and tablets. When anyone installs Google Installer APK on their device, it prompts with basic message and introduction of the app. Let us take a deeper look at it and how it works.
It is no secret that China is always taking steps to make sure that the entire internet traffic in this country is censored. The most prominent policy in this regard is “China’s Great Firewall”. This protocol keeps working to ensure that major services like Google, Facebook, WhatsApp, Skype, and others stay blocked. The main reason is that Govt wants to intercept entire traffic in and out of the country. And these companies do not comply with their policies.
Over the past few years, people have started believing that Android requires Google. However, this is not entirely true. Android is an open-source OS which was acquired by Google. Actually, it is still an open-source project but Google has integrated lot of its core apps and services with it. Therefore, when using Android without these apps, it feels quite useless. I mean, come on, Play Store has over 30 Million Apps. Android seems lifeless without it.
Play Store in China
Now, one may assume that they can just go on and install Play Store APK. However, it is not possible. These apps require specific backend framework to work. Since it is quite hectic to find all the right apps and install incorrect order, Google Installer does that for you. It packages all the required apps to run Play Store on Chinese phones and installs them in a specific order. At the end of the process, it is ready to use.
Note that, even if someone installs Play Store in China, they cannot use it without VPN. Check out the guide below and learn how to use it inside China without restrictions.
Go ahead and download the required files on to your phone.
Open File Manager, navigate to the folder with GMS APK in it.
Tap on its icon and click on Install.
The phone may ask you to give permission to Install Anyway. Allow it.
Once it is installed, go to the folder with Google Installer APK in it.
Tap on its icon and then on Install.
It may also require you to install it anyway.
Next up, open the Google Installer and follow on-screen instructions to install the aforementioned Google Apps including Play Store.
That’s pretty much it! Make sure to follow all the steps mentioned here carefully. Note that these steps are for installing Google Apps (Play Store etc) on Chinese Android Phones only. Whether the device came from China or it is just from one of these manufacturers.
Feel free to leave your feedback and queries in the comments section below
The most commonly used Chromecast control is changing volume. When casting an app via Chromecast, users can change the volume of video or music being played even when the screen is locked. It is the main volume control. However, a very common issue causes Chromecast to lose volume controls after a while. This happens in almost every app including YouTube, Netflix, Hulu, Spotify, SoundCloud, Sling TV, and more.
Let’s understand how and why this really happens. The casting on Chromecast removes the need for a phone or PC after media is once cast. Therefore, even if you disconnect the phone form WiFi, Chromecast would still keep playing. However, the phone still stays connected in order to change volume, track/video, etc. These are the basic media player controls.
A lot of users report that they cannot control Chromecast volume a little while after starting casting. Instead, when the volume button is pressed, it changes ringtone volume. This means that the phone has completely lost contact with Chromecast and it does not detect any media playing. Otherwise, pressing the volume button would change the Chromecast volume first.
Frequent Queries / Problems
The main problem that we are going to tackle in this article is when the phone cannot control Chromecast volume. It happens a little while after starting video or music. Below is a brief list of related issues that can also get fixed with this solution.
Losing volume control with Chromecast in Spotify, YT, etc. A user plays music or video from their phone. Then, they just lock the screen. However, after leaving it either idle for a while or using another app, they cannot change the volume of Chromecast from the phone.
Chromecast audio is not controlled by phone. This happens in numerous apps like Netflix, Hulu, Sling TV, etc. Usually, when someone changes the volume on phone, they get volume indicators on TV as well. However, the changing volume only changes the phone ringtone level. There is not Chromecast indicator in the extended menu either.
There is no volume control for Chromecast while the app is running in the background. Since casting does not require apps to stay in the foreground even if it is a video, users keep switching between apps. Therefore, they lose volume controls after keeping the main playing app in the background after a while.
Cannot change volume when casting (Music, Video) to Chromecast. Just like the above-mentioned issues, this happens after user switches from the main app to other apps like WhatsApp, Facebook, Messenger, etc.
Apps like Netflix, YouTube, Spotify ignore Chromecast volume changes from the phone.
Apps List
The issues with Chromecast audio are not limited to a small set of apps. It can happen randomly. Below is the list of apps that have been reported with this issue. We are sure that this list is far from complete.
YouTube
Netflix
Spotify
Hulu
Plex
SoundCloud
Sling TV
HBO Now
Showtime
Tidal
WatchTBS
Twitch
WatchESPN
Nick
MLS Live
HGTV
Google Play Movies
Google Play Music
Fox Now
CBS Sports
Deezer
etc..
Fix for “Chromecast losing Volume Control (YT, Hulu, Netflix, Spotify etc..)”
Phones from manufacturers like Samsung, Huawei, OnePlus, HTC all face the same issue. Its main cause is the addition of aggressive battery saving utilities.
The main reason for this is the fact that all these new phones are powered by super-powerful processors and high-res screens. Devices like one plus 6, OnePlus6T, Galaxy Note 9, S9+, Huawei Mate 20 Pro, Honor 8X Max are few examples. All of these devices use aggressive means to make sure that none of the apps or services consume too much battery in the background.
While this is a pretty cool and useful feature, it messes up Chromecast and its connected apps. When using it, CC requires a consistent connection with the phone. Therefore, it is active in the background, sending, and receiving data as long as the user is casting. The battery saver detects it as overuse and cuts the process. This in turns disconnects the phone and app from Chromecast.
Since CC does not require a connection to play media, it keeps playing. But the user feels that they cannot control the volume of their Chromecast. However, it is because the phone itself has cut the cord! Follow the steps below to fix this issue.
Head over to Settings > Battery.
Find the Battery Saving settings and open the Unmonitored apps menu.
Now scroll through the list and find the app causing this issue. We are using Hulu as an example.
Add it to list of unmonitored apps.
Verify it from the apps list that are free from Battery Saver.
That’s it! Now volume controls issues with Chromecast should be fixed for good!
Note that this method may not work the same way on all phones and tablets. All manufacturers make slight changes to their menus in Settings. Therefore, you may have to look around to find these settings. However, the main working concept is the same.
Feel free to leave your feedback and queries in the comments section below.
The support for local video casts and streaming was added to Chromecast officially by Google. This feature allows watching downloaded shows and movies without using third-party extensions. However, there is one big issue. It does not support subtitles. Moreover, the famous VLC app cannot show subtitles on Chromecast either. In this guide, learn how to get Subtitles on Chromecast with local video casts and streams.
Why do Subtitles not work with Chromecast Local Files
Before continuing, lets understand how subtitles really work. The most common format for subtitles on downloaded files is .srt. Normally, when someone, for example wants to watch a movie or show’s episode on VLC, they’d either just drag the subtitle into VLC Player or change its title to same as video files. It enables the subtitle in video.
However, when casting local video files to Chromecast, the srt file is not picked up. It only casts the original video files. Be it mkv, MP4 or any other format. The reason for this is that VLC player or Chromecast extension on browser does not support subtitle srt files.
When a user tries to cast a video files locally saved on PC, Chromecast will only pick the video files. Now, it is not some sort of feature lacking in Chromecast, but the player. Therefore, a player that supports subtitle on Chromecast will fix the issue.
Sol: Get Subtitles on Chromecast with Plex
Plex is a free-to-use media server with optional premium membership. It is not necessary because we can easily get the required functionality for free. This is best app to fix no subtitles on local files cast with Chromecast.
The goal behind development of Plex was to make it easier for users to organize their medial files on PC. Moreover, since it acts as a server, naturally, anyone with proper access can get these files anywhere. Only requirement is that the PC is up and running. It also requires an active network connection.
The beauty of Plex server is that it automatically downloads all the meta data for movies and Seasons stored on PC. This includes thumbnails, cast etc. Moreover, you get a very clean and user-friendly interface for it. The only requirement is that it works on Google Chrome if someone wants to use it with Chromecast.
Steps
Download and install Plex Media Server on PC from HERE.
Once it is installed, launch it in the Chrome Browser.
Now hit the + icon next to Libraries in left sidebar.
Select the folder where all movies or shows are.
You can create multiple and customized libraries here.
Next up, download the subtitles srt file for any movie or TV episode.
Put it in the same folder as the movie.
It is preferred that movie and srt file are in same folder. Do not put any other media file in that folder.
Head back to Plex server in Chrome.
Click on menu button next to the library that you just created.
Find and click the option “Scan Library Files”.
It will go through only those folder which made some changes. Therefore, it scans pretty much instantly.
Now select the media file thumbnail from given thumbnails’ list.
Inside its menu, click on Subtitles dropdown and select the files you want to play.
Once selected, just click the play button.
In order to cast it to Chromecast, just click cast icon in top right and select specific device you want to play it on.
Note that it does not matter if subtitle srt file name is same as media file or not. Just remember to select it from Plex’s menu as mentioned in step 14.
Conclusion
The purpose of this article is to help people who are having trouble using subtitles on casting local files from PC. It includes both movies and seasons. Moreover, we introduced you to the Plex media server. It comes in handy more often than not.
To conclude it all, install Plex, scan the media files, download subtitles file and put media file + srt file in separate folder. Then select it from Plex’s menu and then cast it to any device. Voila! Now you get subtitles on casting or streaming local videos to Chromecast devices.
Feel free to leave your feedback and queries in the comments section below.
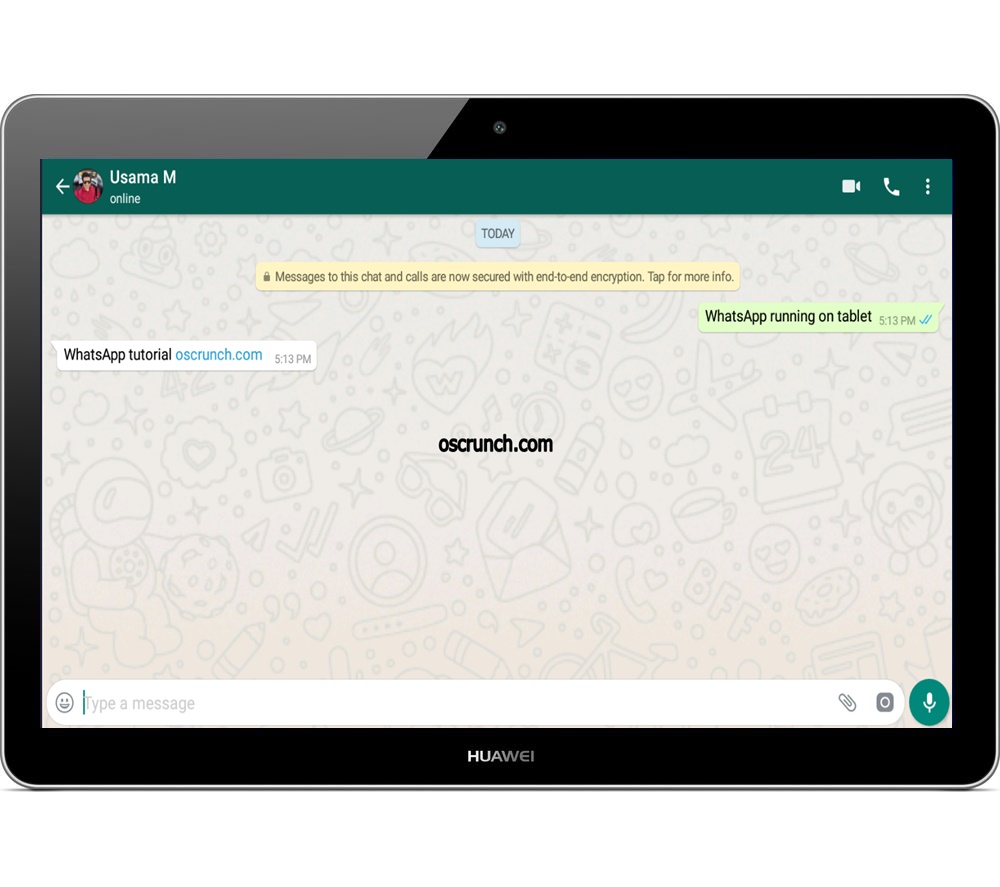
This is the guide to download WhatsApp on WiFi Tablet without SIM card. By following this guide, you can installWhatsApp on WiFi Tablet that has absolutely no GSM, 3G, and LTE connectivity. This applies to tablets by companies like Samsung, Huawei, Asus, Lenovo, Xiaomi, and many others. Before learning how to get the WhatsApp on WiFi Tablets, let us take a look at the significance of WhatsApp.
WhatsApp on WiFi Tablet
WhatsApp – The World’s Most Popular Messaging Platform
WhatsApp is unarguably the best communication application available till date. WhatsApp’s journey started back in 2009. At that time, no one knew where this application will be in the next 10 years. The free messaging platform was set to establish a whole new segment of applications in the smartphone industry. As of today, WhatsApp has nearly 2 Billion active users and nearly 70 Billion messages are sent through WhatsApp every day. WhatsApp saw a significant growth after Facebook’s acquisition. The platform has only evolved over the course of past few years. There are thousands of applications which offer the functionality similar to WhatsApp, but WhatsApp still remains at the top, offering the best means of worldwide communication.
WhatsApp used to be an application to send text messages, photos, and videos only. After acquiring, Facebook started adding more and more features to this application. WhatsApp was updated with the voice calling feature, video calling feature, and then the group video calling feature. WhatsApp now even has a business version. If you control your business through your smartphone, you can register an account on WhatsApp business to make communication easy with your customers. It is also possible to post 30-second long video clips and images on WhatsApp status.
WhatsApp is completely free, available for millions of devices
Surprisingly, WhatsApp still remains completely free. Facebook has not added any ads to this application till date. I am not sure if Facebook will start monetizing WhatsApp in near future, but while it’s free, one must use it.
WhatsApp is available for Android smartphones and tablets. It requires a SIM card connectivity in order to let you register the number. If the smartphone or tablet does not have SIM card slot or functionality, WhatsApp will not appear in the Google Play Store for that device. To install WhatsApp on such devices, you need to follow a slightly different method. You will find that method as you go ahead in this post.
WhatsApp on WiFi Tablet
So you recently purchased a WiFi Tablet from Samsung, Huawei, Xiaomi, or any other company. You logged on to the Google Play Store, searched for the WhatsApp and it did not appear in the search results. Why is that so? Well, that is because the WiFi tablets do not support WhatsApp. As mentioned above, your device must have a SIM card slot in order to support WhatsApp. If you will try finding WhatsApp on a GSM Tablet, you will quickly find it and you will be able to install it as well. The case is not the same with the WiFi-only tablets.
Installing WhatsApp on WiFi Tablets requires a slightly different approach. Yes, it is possible to install it on WiFi Tablet, and you do need a SIM card in this case as well, however, this method requires two different devices. First of all, you need the WiFi Tablet in which you want to install the WhatsApp, and then you need a phone with a SIM card which does not have WhatsApp registered on it.
I will explain the entire method in very easy steps below. The method will require your undivided attention. So go through the steps now in order to downloadWhatsApp on WiFi Tablet.
Download WhatsApp on WiFi Tablet without SIM
First of all, you need two devices and here is how we will classify them.
Device A: Your WiFi Tablet on which you want to install WhatsApp.
Device B: A spare phone with a SIM card that does not have WhatsApp registered on it.
On your Tablet, open Settings > Security / Security & Privacy > Unknown Sources / Allow Apps from Unknown Sources > Check the radio icon to allow installations.
Now using a File Manager, locate the WhatsApp APK.
Install the APK.
After the installation comes to an end, launch the installed WhatsApp from the app drawer.
WhatsApp will now ask you to enter a phone number.
Now enter the phone number of the SIM card that is inserted in the other phone (Device B).
Whatsapp on WiFi Tablet: Enter the phone number from Device B.
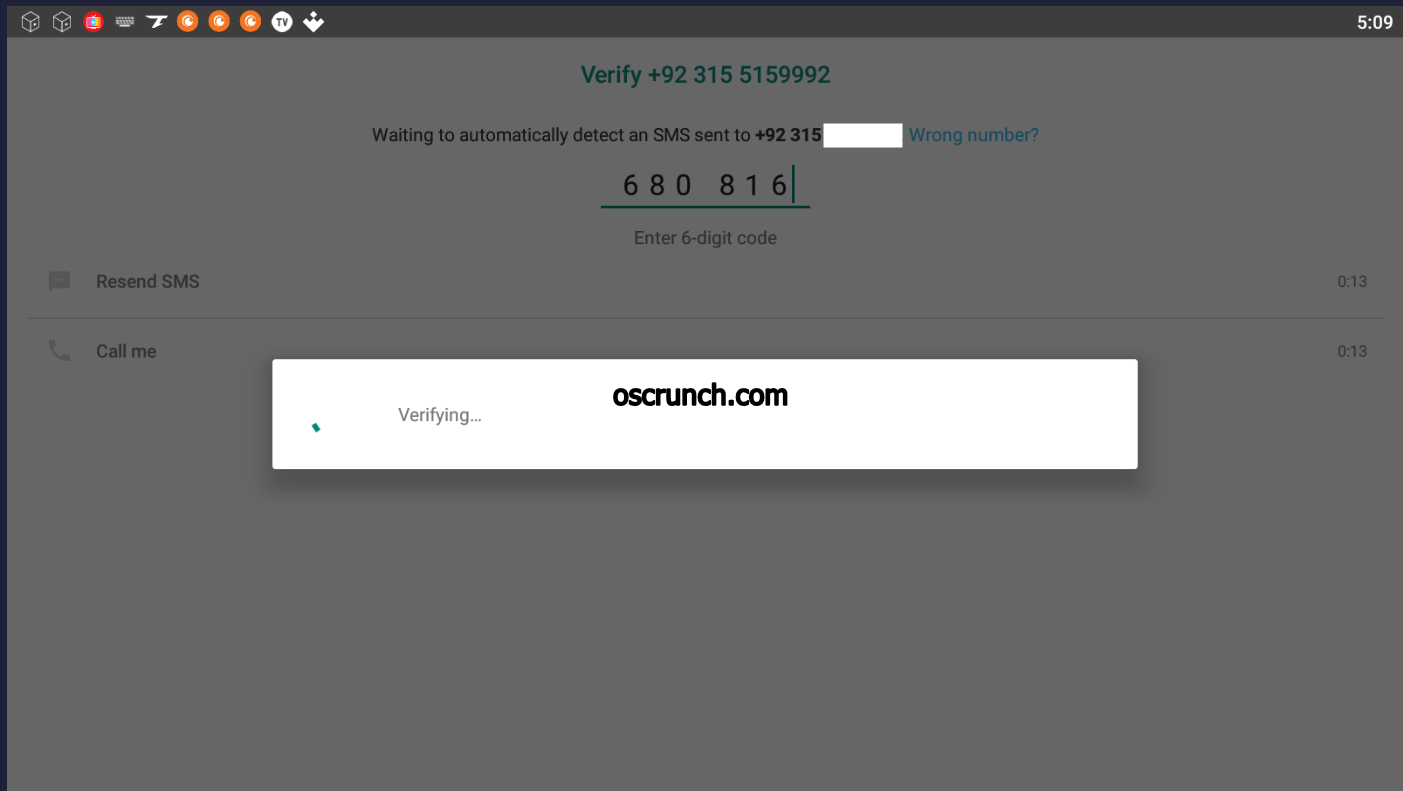
Device B will get the WhatsApp verification code.
Get the code and enter it on your Tablet (Device A).
WhatsApp will be registered and you can now use it. You can use WhatsApp to make voice and video calls as well.
Set the Profile Name
Adding Contacts on WiFi Tablet
Now you will note that there is no contacts application in your WiFi Tablet. To solve this problem, you can either grab a third-party contacts application or add contacts using the contact options inside WhatsApp. For example, here I will show you how to add contacts in WhatsApp.
Open WhatsApp and click on the Chat button.
Click on New Chat button to launch chat
Now click on the “New contact” button.
New Contact to add a new contact via WhatsApp
Fill in the contact details now.
Contact Details
Add the contact.
After adding, the contact will automatically appear in WhatsApp contacts whenever you wish to start a new chat.
Chat, Voice Call, and Video Call on WhatsApp for WiFi Tab
That’s all.
Chat Box
Call LogsOngoing Voice Call
Conclusion
That’s all with the installation of WhatsApp on a tab. I hope that you guys found this guide useful. If you have anything to add to this guide or any queries, feel free to reach out to us. I will try to get back to you with a solution as soon as possible. Thank you all.
Learn how to cast and watch torrents on Chromecast devices (regular and ultra). This works for both Android and Windows PC. The peer-to-peer method of downloading and streaming content has been around for quite a while. It is an efficient way of downloading stuff when somebody does not have access to a good and stable internet connection.
Google Chromecast is one of the best casting dongles out there. It works directly for Android, iOS and PC. However, not many people know how to watch torrents on Chromecast. Whether it is about watching downloaded content or just streaming it from the get go. The streaming torrents are rare and few apps support it. It is because of the fact that it defies the basic concept of this entire download process. The download needs to be sequential in this case. Most torrents do not download this way.
How do Torrents work with Chromecast?
Torrents are just download links basically. They provide the address for the file to download. The most dominant method of using torrents is downloading it in parts. Users connect to other users that are seeding the same file. They download whatever chunk is available and if its missing from their own file. After downloading all the parts, these are merged in the end.
The cool thing about using torrents is that there is no dedicated download server involved. Users are constantly downloading and uploading the files. This is why it is called peer-to-peer. Now how does someone watch torrents (movies, shows) on Chromecast enabled TV?
Well, Google does not officially support streaming torrents because it requires specific software for it to work. Therefore, we use third-party apps to make it work. There are two method of using it. The first one is to download a torrent on PC or mobile and then stream the locally downloaded file. Or use a specific app and stream torrent while it is also being downloaded.
The streaming is limited and not all torrents can work this way. However it does work and below is the method explaining specifically how to stream torrents on Chromecast. The most used method is when users download the file completely. Now, just watch these torrents on Chromecast using third-party apps.
There is a good news though. Google has recently added support to Chrome extension for casting local files. You may not even need third-party apps anymore. However, the list below contains some pretty tasty apps that not only help streaming torrents on Chromecast but provide some extra useful feature alongside too.
List of Apps to watch/cast Torrents on Chromecast
Chrome Browser Extension
The support for watching local files was added recently on to Chromecast. It used to be in beta for most users but now it is available for everybody. This method is used to watch downloaded torrents on Chromecast only. It does not support sequential downloads and streaming. This method is useful for when someone likes to download files when they are not using PC and watch it later.
It works only with Chrome Browser on PC. This is a desirable method because it works by default. Does not require any third-party apps whatsoever.
How to do it
Click on the menu button (3 vertical dots) in top right of Chrome.
Now click on cast icon.
From the given lists, select “Cast file”.
It will open the file explorer.
Just go to the folder where file is placed and double-click it to open it.
And yes, also select the specific Chromecast devices that you want it on.
Plex (PC, Android)
Before Google added the support for casting local files, Plex was the boss in this game. It is a media server that has been around for quite a long time. Note that casting torrents to Chromecast is not actually its main function. It is just another feature added to it.
The benefit of using Plex is that it offers a super amazing interface for all of your media files. It downloads the covers for all seasons and movies automatically. Moreover, you get seasons count number and other meta info on the main UI. Small things like these really make a difference. Using Plex is actually much better than using a regular file explorer interface with thumbnail-less folders.
Another cool thing about this app is that its users can watch all the movies, shows on this server from anywhere. For example, if someone has enabled Plex on their PC and allowed it to be accessed from outside the house, then just stream movies directly to phone or even another PC. The only requirement for this is that main server (your PC with Plex on) should be one and connected to internet.
Essentially, Plex serves as a main media server for your entire devices line-up. It is especially useful for people who like to download all of their content on one device and keep it organized.
Moreover, install Plugin and channels on Plex to get access to even more online and live content. Some are free while others are premium. Recently it has also added support for Tidal which is a music streaming service. All in all, it is a great package. Users can install appropriate plugins to stream torrents on Chromecast with Plex too.
How to use it
Head over to Plex’s website and download media server on your PC.
Once it is installed, launch it. It will open a new tab in default browser with link looking something like “127.0.0.1:32400/web/….”. This is the address for localhost server of Plex.
If your default browser is not Chrome, then copy this link and open it in Chrome. It is necessary to use Chrome for casting.
Next up, hit the + icon next to Libraries in left sidebar and add the folder/s of movies, shows, music and even photos here.
Plex will work in the background to fetch all the meta data like thumbnails and organize it all for you.
Now just head to the main menu, click on any thumbnail and it will start playing.
To cast it, hit the casting icon in top right of the tab. Select the Chromecast device in pop-up menu and you’re done!
Popcorn Time (PC, Android, iOS) – Stream Torrents on Chromecast
Before continuing, we’d like to notify users that Popcorn Time is a pirated content App. Therefore, it can get you into trouble if your ISP keeps track of torrent based traffic.
Putting that aside, lets move on to the real discussion. Popcorn Time is the only app in this list that supports sequential torrent downloads. This means that it supports streaming torrent on Chromecast live by default. If the internet connection is good enough and selected torrent has enough seeders, you can watche it live.
How to use it
It is actually one of the simplest apps to use. Just download it on preferred platform from its official website.
Once installed, launch the app and search for whatever you want to watch.
Hit the play button.
Next, click on the cast icon and select specific Chromecast device you want it on.
That’s pretty much it. It does not require additional settings. The app itself keeps searching the web for new and reliable torrents. All users get is a nice looking interface that is free of *bad torrents.
Final Words
The technologies of torrents and Chromecast are legal and free to use. These are available for everyone in the world. However, some people may want to watch pirated content using torrents on Chromecast. We however take no responsibility for it since it is entirely up to the user.
We highly recommend users for watching original content which in turn helps the creators of these amazing shows and movies.
Also, feel free to leave your feedback in the comments below. If you have any queries, ask us in the comments section below.
Download the Redsn0w All Versions from here. Redsn0w is an application that allows you to Jailbreak your iOS device. It is one of the easiest and the most popular tool, in this case, developed by iPhone Dev Team. Every Redsnow version is restricted to Jailbreak the Specific version and for every update, there is a new version. So, if you are still using older iOS devices and the old iOS version. Also looking for older versions of Redsn0w is not easy since the official site will only show the updated version. But that is why we are here. We have got our hands on the complete collection of Redsn0w, all the versions till date.
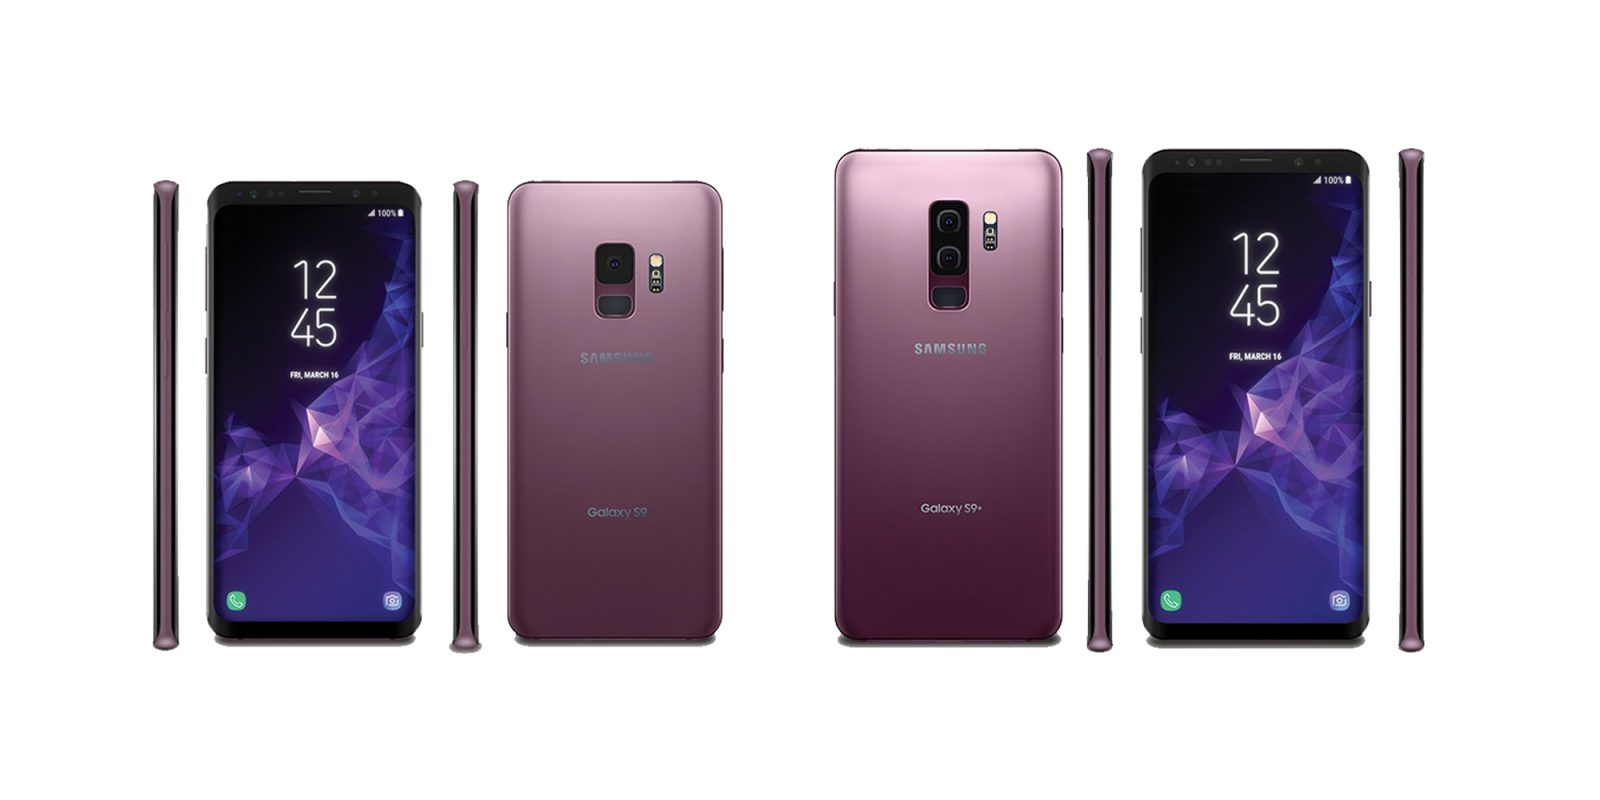
Android Pie update for the Galaxy S9 and S9 Plus is here. We have managed to get our hands on the firmware files. The firmware files are uploaded on a fast mirror. Users can download Galaxy S9 and S9 Plus Android Pie XXU2CRLI firmware files right now. Before you jump to the firmware files, it is important to know what is new in this update.
Galaxy S9 and S9 Plus Android Pie XXU2CRLI
Android Pie – One UI and More
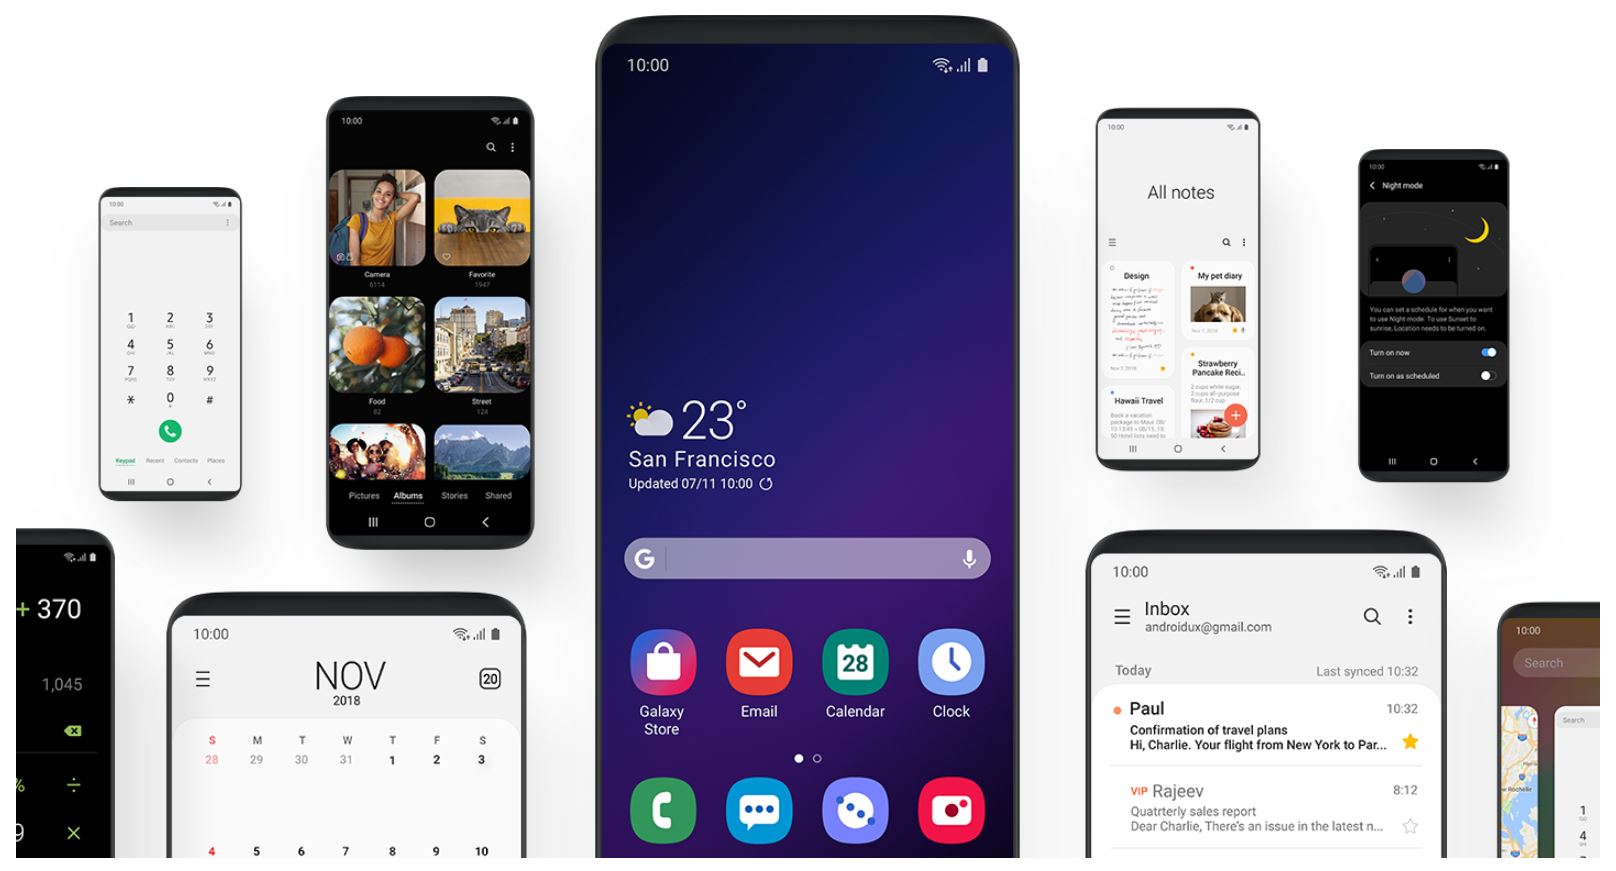
First of all, this is the biggest update in the history of Samsung. This update completely revamps the UI of Samsung flagship devices. Samsung has introduced the new One UI which is a part of the Android Pie. The One UI follows the footsteps of the Android look put forward by other phone manufacturers. This update uses the rounded elements in the UI. The rounded icons, rounded buttons, and rounded toggles look amazing in this UI. The One UI introduces a new launcher, new UI for settings application, the recent applications panel has a new look, and all the stock applications of Samsung have a new look too.
Android Pie – One UI
The button to rotate the screen between portrait and landscape modes has been added to the navigation bar. Samsung has also added the Kids mode button to the quick toggles. The camera application has got a few new icons for the ease of access of users. Adaptive Mode and the Dark UI are also a part of this Android Pie update.
Adaptive Battery mode keeps a track of your phone’s battery consumption. This is an AI-based feature. It learns how you use your phone and then sets the battery to be consumed accordingly. On the other hand, the Dark UI feature is something that the Samsung users have been waiting for long. Since the Samsung phones use the Super AMOLED screens, a Dark UI can save a good amount of battery. The Dark UI turns all the elements into the black.
This update improves the overall performance of the phones. All the previous bugs have been fixed. The battery of the phones will perform better now. This is a progressive update. All the Galaxy S9 and S9 Plus owners who have been using Android Pie Beta or the Android Oreo firmware, they must update to this latest Android Pie firmware now.
Android Pie XXU2CRLI Firmware Details
This update made it to Germany first of all. It has rolled out for the Galaxy S9 G960F and the Galaxy S9 Plus G965F. You can flash this update on any Galaxy S9 or S9 Plus carrying the model number G960F/G965F, regardless of the region. Here are all the firmware details.
Region: Germany (DBT)
Android: Android 9.0 Pie [One UI]
Changelist: 15044066
Build Date: 19th December 2018
Security Patch Level: 12/01/2018
PDA: G960FXXU2CRLI | G965FXXU2CRLI
CSC: G960FOXM2CRLI | G965FOXM2CRLI
Download Galaxy S9 and S9 Plus Android Pie XXU2CRLI Firmware
That’s all folks. I hope that you found the fast download links really helpful. It took me more than 8 hours to grab this update and upload here. If you have any queries or anything to add to this post, let me know in the comments section below.
The Android ecosystem is blessed with millions of cool applications and games. Most of the Android games and applications are not available for desktop computers and laptops. Keeping this in view, different companies and developers have developed a number of Android emulators. The purpose of these Android emulators is to run the Android games and applications on Windows and Mac-powered computers. As of 2019, we have a huge number of Android emulators serving the same purpose. When it comes to picking up one Android emulator that puts the minimum load on your computer fulfilling all your requirements, things get tough. This is why I am making this list of best Lightweight Android Emulators for Windows and MacOS in the year 2019.
The best lightweight Android Emulators list includes the emulators built for Android Developers, for expert users, and for the newbies. I have also explained what kind of applications these Android emulators can run and what are the system requirements. Before we take a look at the lightweight Android Emulators, let us take a look at the reasons why you would want to use an Android Emulator.
Why do you need an Android Emulator?
Android Emulators let you enjoy Android games on a bigger screen.
You can enjoy the sound effects of your games on speakers attached to your computer.
It is much more fun to play FPS games on your computer with extended key-control.
You can use your mouse and keyboard to play games.
Applications that are not available for Windows and Mac, you can run them on your computer via Android Emulators.
No application compatibility problems.
No storage problems.
You can run communication applications like WhatsApp, IMO, Viber on your computer.
Instagram and Snapchat can be used on the computers via Emulators.
Developers can test their applications using Emulators on the go.
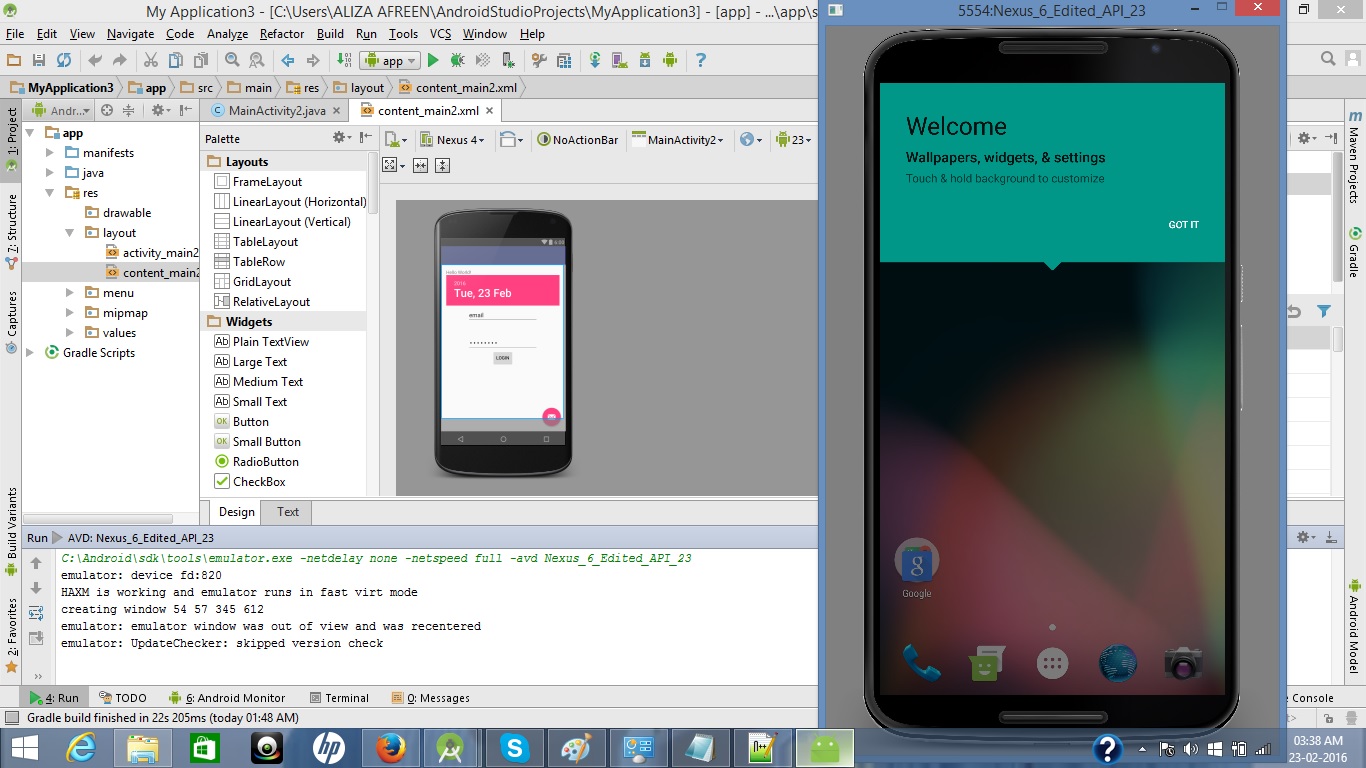
Android Studio is Google’s official Android IDE. The Android Studio is not something that the average users would want to use. However, if you are a developer who has to test the under-development applications, again and again, the Android Studio is your go-to tool. It gives the developers an opportunity to test their applications with the latest version of Android. Android Studio comes with an in-built emulator that runs smoothly on your computer. Setting up the Android Studio takes a bit of time and it is complex too. Once set up, it is quite easy to use. If you can set it up easily, you may keep it for your everyday use too. Android Studio is available for both the Windows and Mac.
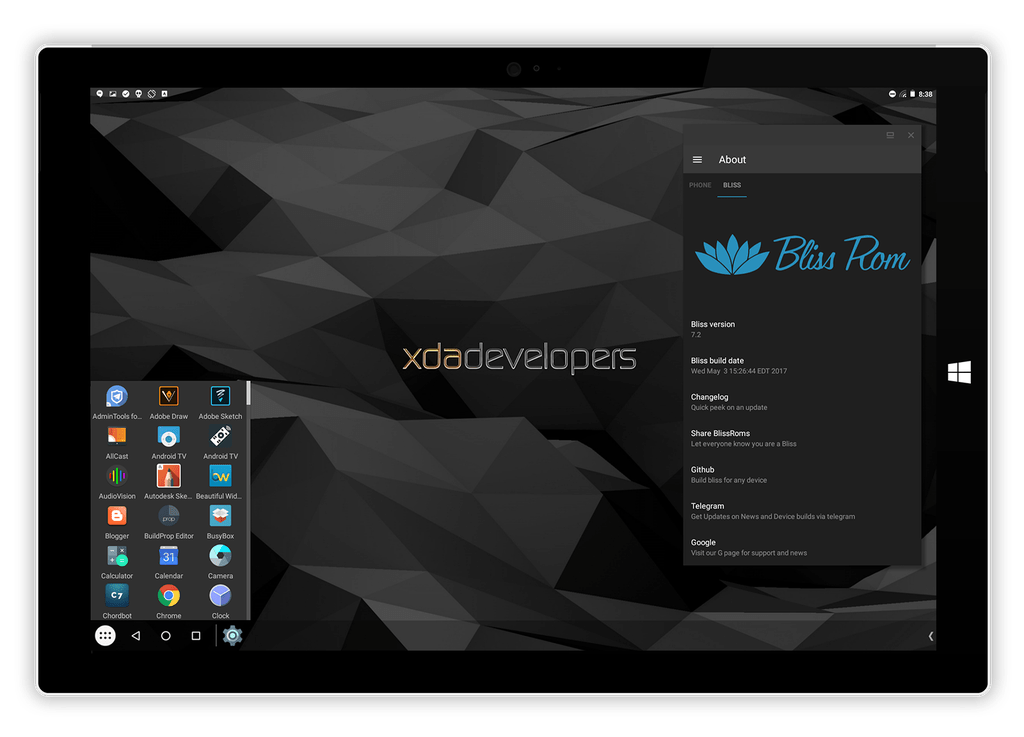
Bliss is a very famous custom ROM for a handful of Android devices. The developers of Bliss transformed their custom ROM into an Android emulator for the consumers. It is based on the Android Oreo, which makes it the only proper Android emulator to be running on this version of Android. Even the BlueStacks 4 runs on Android Nougat, so as far as the software is concerned, Bliss wins.
Bliss is available as a standalone operating system now. It runs with the help of a Virtual Machine. So, if you are looking forward to running it on your computer, you will have to install the Virtual Machine first. Bliss can be installed via a USB as well. Having it installed on a USB stick will simply require you to plug in the USB and boot into the Bliss OS.
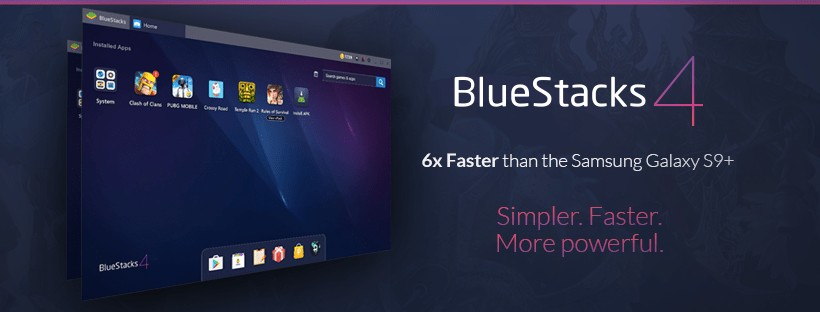
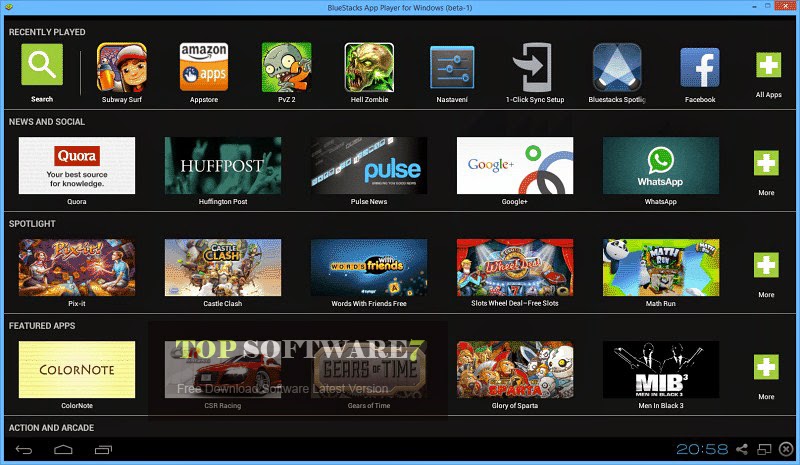
The evolution of BlueStacks has only improved it over the course of the past few years. For more than 5 years, we had only one version of BlueStacks which was the original BlueStacks. Back in 2015, the company finally released BlueStacks 2 which was a major overhaul in all the ways. BlueStacks 2 was very quickly surpassed by the BlueStacks 3. BlueStacks 3 resembled BlueStacks 2, it did not have any major UI changes and new features. Both the BlueStacks 2 and BlueStacks 3 ran on Android Lollipop and Android Marshmallow respectively. After BlueStacks 3, the company released the BlueStacks N which was a beta build. This was the predecessor of the BlueStacks 4. BlueStacks N was based on Android Nougat.
The BlueStacks N was later transformed into the BlueStacks 4 running on the same Android Nougat. It brought a whole new UI. BlueStacks 4 carried numerous UI changes as well. It brought a dock having the basic applications like Settings, Google Play, and more. The BlueStacks 4 carried major performance upgrades as well. As compared to the previous versions, it is much lighter and easy to run. It offers multiple-instances. Multiple accounts can be added to the emulator at the same time. Keymapping in this version has improved enormously. BlueStacks 4 is available for free for Windows. There is no BlueStacks 4 for Mac users, they still have to use the old BlueStacks which can be found below.
BlueStacks Requirements
Minimum Requirements
OS: Windows 10, 8.1, 8, 7, Vista SP2, XP SP3 (32-bit only)
2GB of RAM
4GB of disk space available for storing Android apps/games.
Updated Graphics Drivers. The Drivers must be compatible with BlueStacks.
Internet connection.
Recommended Requirements
Windows 10
Processor: Intel Core i5-680 (PassMark 3500) or higher processor with virtualization extensions enabled in the BIOS
Since the BlueStacks 4 is not available for Mac, the only BlueStacks option for Mac users is the old BlueStacks. This is still one of the very best choices that the Mac owners have. The BlueStacks may be nearly a decade old, it still runs smoothly on the MacOS and previous versions too. Because of the software and hardware optimization on the Mac-powered devices, the BlueStacks does not lag or get stuck. Remember that this version of BlueStacks is based on the Android 4.4 KitKat. It does not even have the Google Play Store installed. So, right after getting it, the very first thing you should do is to install the Play Store on it. It does have a few downsides, but keeping in view the very limited options for Mac, it’s not a bad choice either.
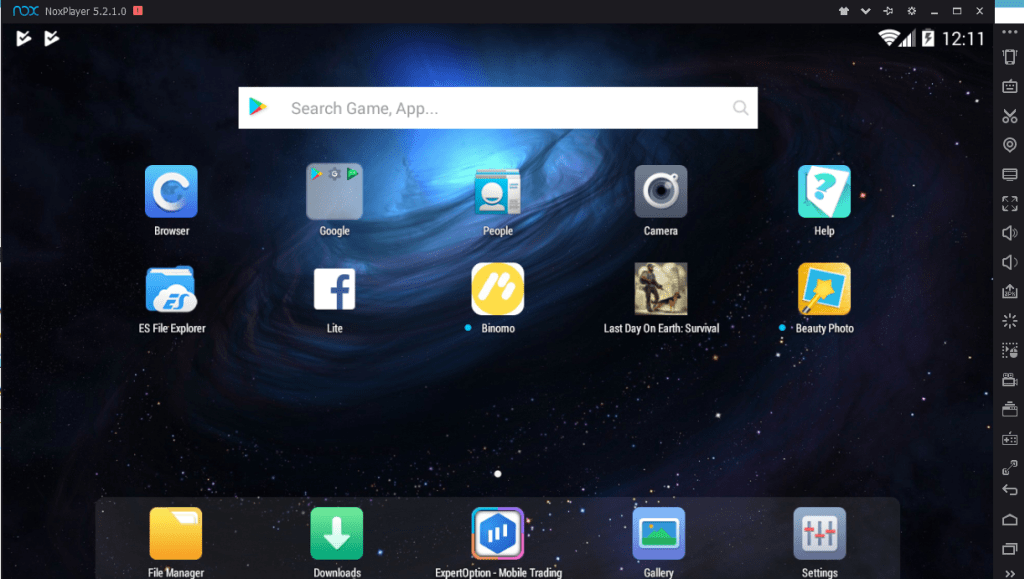
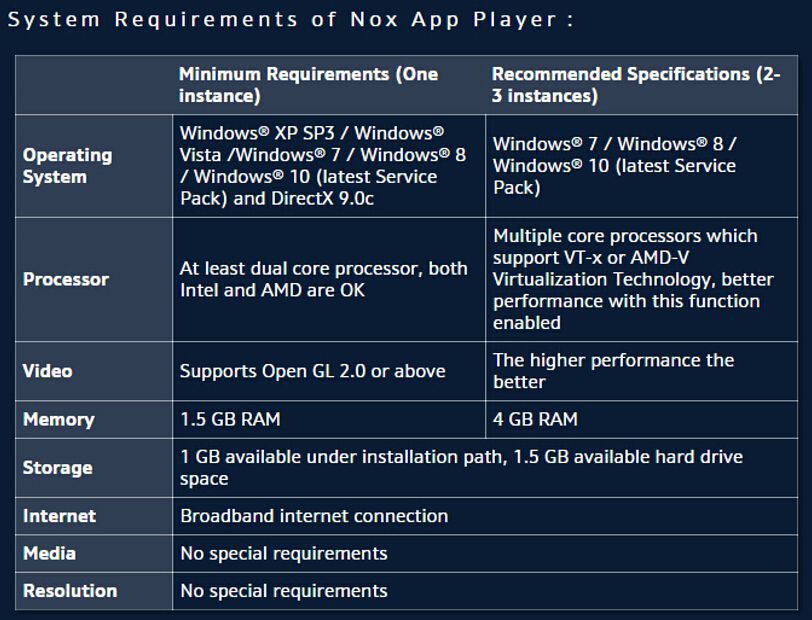
After BlueStacks, Nox Player is the best choice for both the Windows and Mac users. It runs on the Android 7 Nougat. Nox Player runs inside your computer as if you are using a tablet. Nox Player has the basic Andapplicationsitons preinstalled. Users are less likely to face application compatibility and storage problems while using Nox Player. The multi-instance option on Nox allows the users to run the emulator either using Android 5 Lollipop or the Android 7 Nougat. It also has very decent requirements that most of the computers would easily meet. Nox Player comes for free.
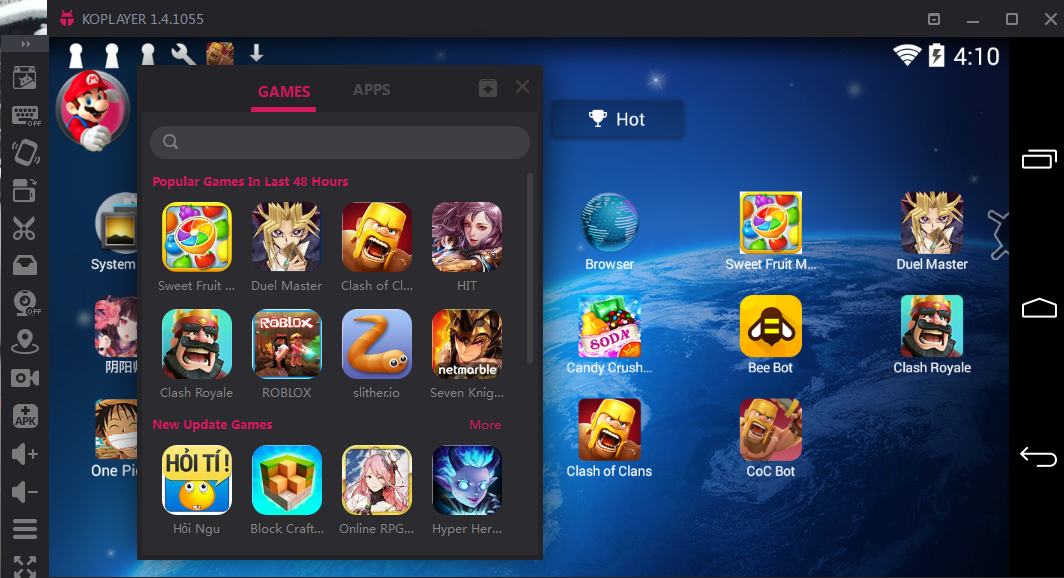
KoPlayer is a very straightforward Android emulator. There is nothing complex about this emulator. All the users have to do is to install and start playing their desired Android games on the computer. KoPlayer focuses on gaming. It has got intuitive controls. The keymapping makes gaming quite easy. The requirements of KoPlayer are much less as compared to the BlueStacks and Nox Player. KoPlayer also works on both the Windows and MacOS.
KoPlayer requirements
Graphic card supports OpenGL 2.0.
CPU supports VT-x or AMD-V virtualization,which can be opened in BIOS.
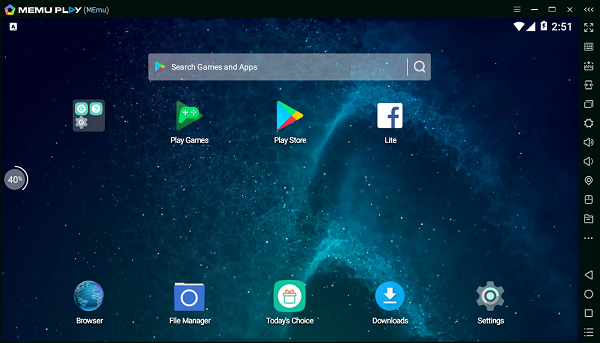
MEmu, also known as MEmuplay is another decent choice for Windows users. It is not available for Macc. MEmu is also based on Android 4.4 KitKat, 5.0 Lollipop, 6.0 Marshmallow, and Android 7.0 Nougat. You can switch between the Android versions by running different instances of this emulator. The different instances with different software versions on these Android emulators are given so that the users do not face compatibility problems with applications. MEmu is lightweight, its requirements are much less as compared to all the Android emulators listed above. It is completely free to use.
MEmu System Requirements
Windows Vista/7/8/8.1/10
Intel or AMD CPU (with Virtualization Technology support preferred)
GPU with OpenGL 2.0+ support
Minimum 1 GB RAM
Minimum 2 GB Storage Space
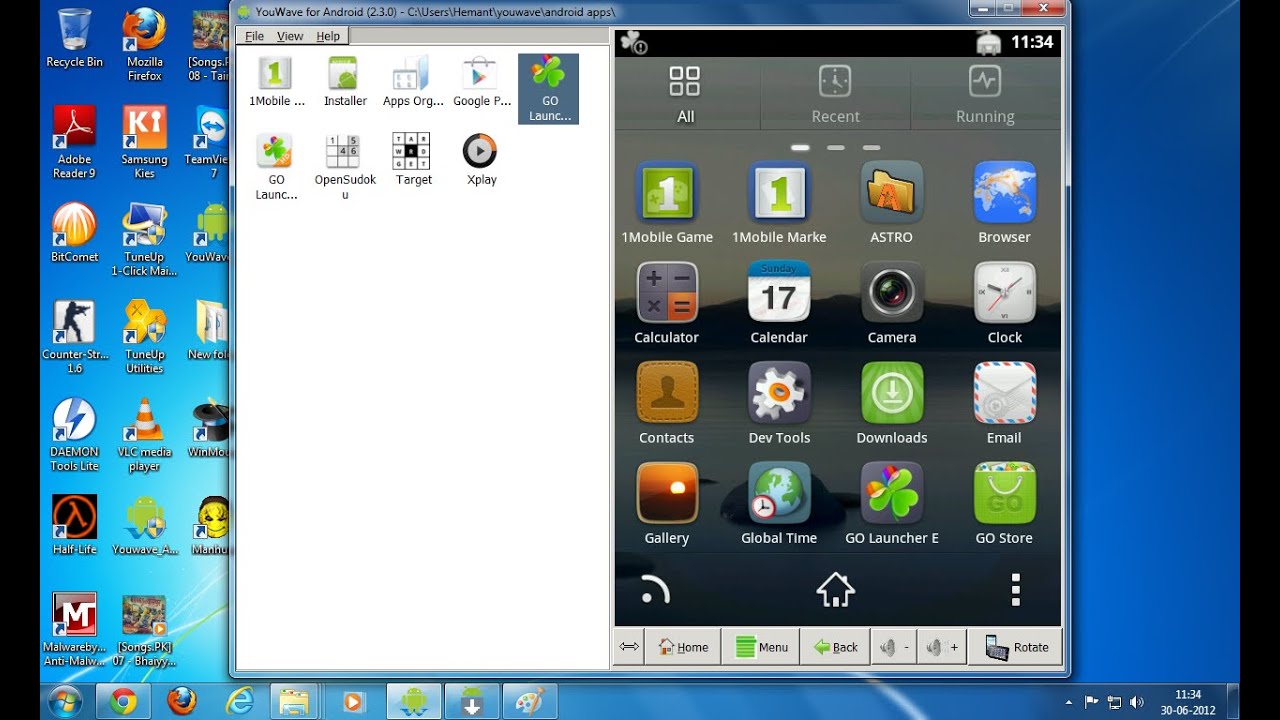
YouWave
YouWave Android Emulator
If you want to run light Android games and applications on your computer, you may opt for YouWave. By light games, I mean that games like Subway Surfers, Temple Run 2, Angry Birds, and other similar games like these. You can run applications like Instagram, Facebook, WhatsApp, IMO, etc using YouWave. This emulator cannot handle games like PUBG Mobile. It is built to perform all the tasks quickly and that is why it is a very light emulator. YouWave’s free version is based on Android KitKat and its premium version runs on Android Lollipop. YouWave is available for Windows only. Here are its requirements.
YouWave Requirements
Intel Pentium 1.6GHz CPU
2 GB RAM
500 MB Disk Space
Windows XP/Vista/7/8/8.1/10
Premium Version requires 64-bit Windows and VT-x support.
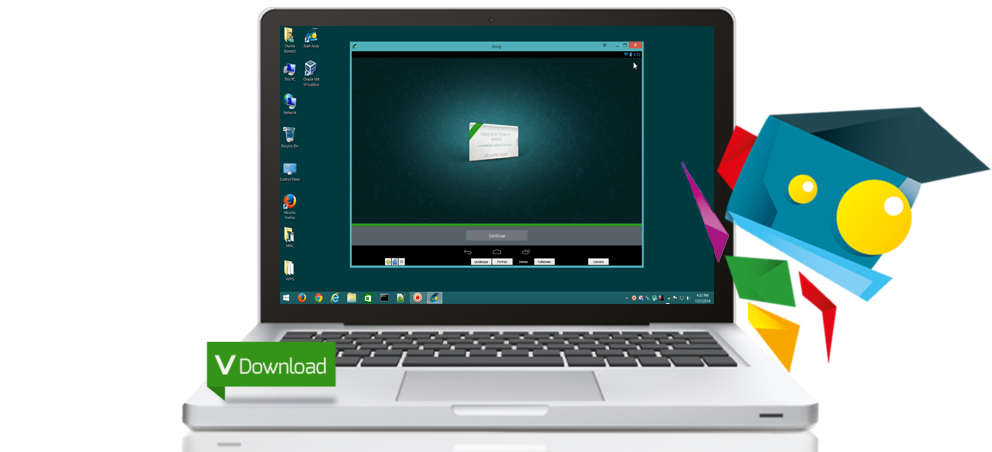
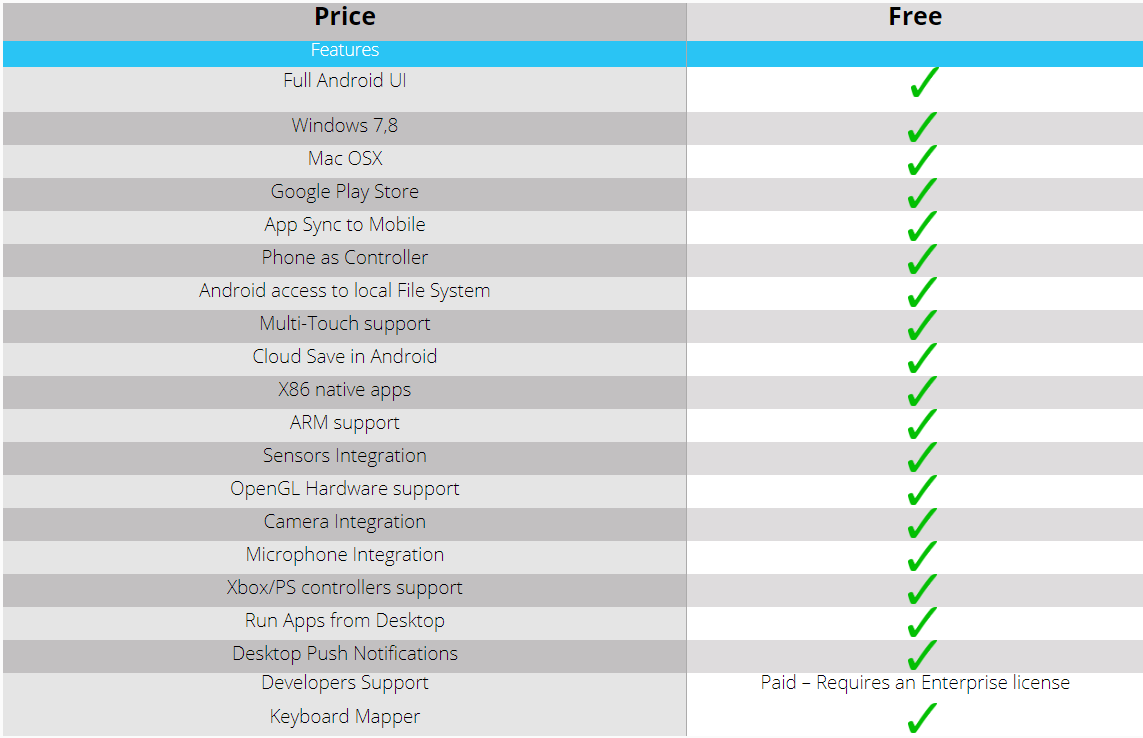
Andy Android Emulator is similar to the Nox Player. It runs just like a virtual tablet on your computer. If you have an Android phone based on pure stock Android, you will find Andy Emulator resembling that. Any has an application drawer which contains all the applications like the Google Play Store, Gmail, and others. If you have a laptop with a touchscreen, the Andy emulator can give you the full experience of an Android device. It has multi-touch support. All the features that you would want to see in an Android emulator, they are there in Andy. The downside of Andy is that it hasn’t been updated in a long while. It still runs on the very old version of Android. Here are all the features of Andy.
Andy Requirements (Minimum)
Dual-core AMD or Intel CPU with Virtualization support
3Gb of RAM; Andy uses less than 1Gb while running apps
At least 10Gb of free disk space
GPU with OpenGL 2.1 support
Windows 7 SP1 / Windows 8.1 / Ubuntu 14.04+ / OSX 10.8+
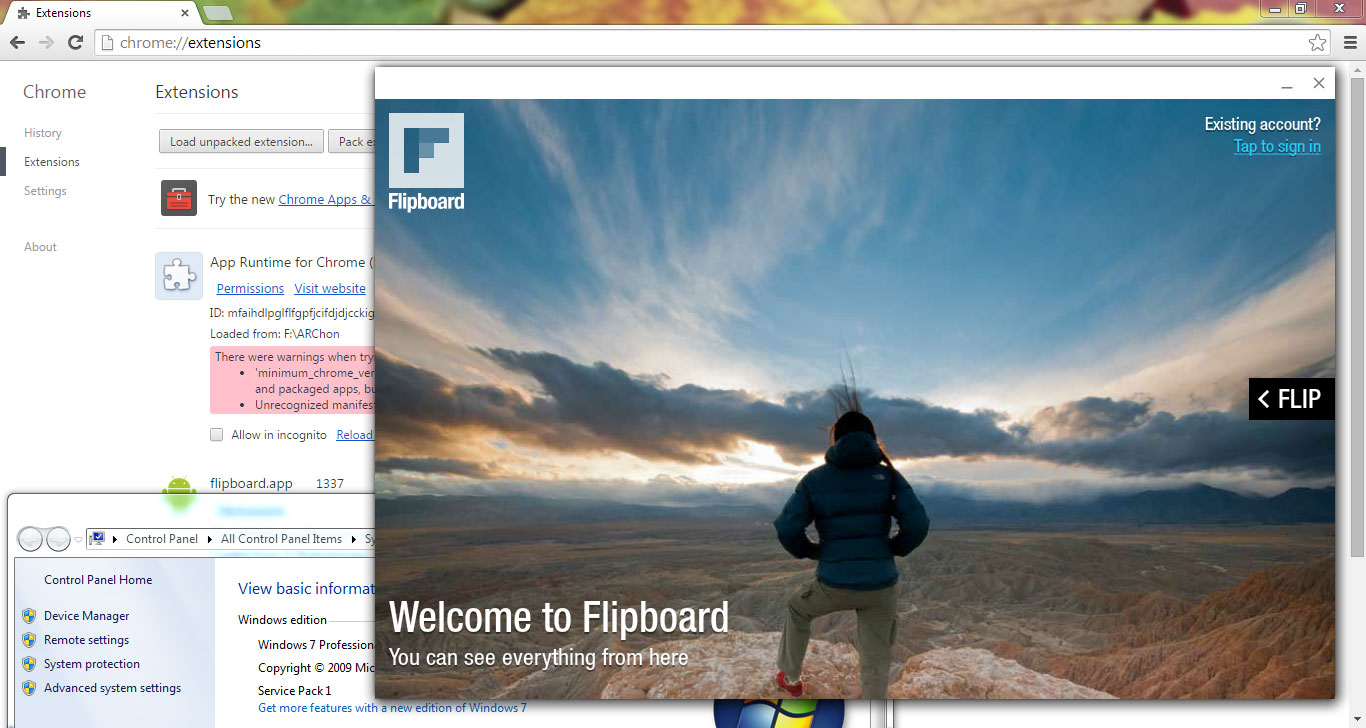
ARChon is not exactly an Android emulator. It is basically a Google Chrome extension. To run the lightest Android applications, ARChon is the best choice. It does not support Google Play Store. Users have to download the APK files and install them manually. The ARChon does not support every other Android application as well. You will have to make some applications compatible if you want to run them in ARChon.
Conclusion
That’s all with the best Android Emulators for Windows and Mac. It totally depends on what kind of usage you want to obtain from an Android Emulator. Also, it also depends on what kind of load your computer can handle. I have listed the Emulators that consume the maximum resource to the Emulators that have close to 0 system requirements. For example, the ARChon runtime does not depend on your computer, it solely depends on your Google Chrome browser. To play heavier games, you can go with BlueStacks or Nox Player and so on.
If you have anything to add to this list or any query, please feel free to reach out to us through the comments section or through our contact us page.
Those who are curious to know What’s the Download Limit on Netflix? This is the post, where you will find all the answers to these questions. Let’s get started now.
Netflix is the best online streaming service and if you want to know how much popular it is? Search for best online series and TV shows, you will surprise that Netflix will be rocking the charts. Netflix was the one to introduce the most awaited offline viewing feature. But always keep in mind, not everything looks the way as it should be. Although, it seems that Netflix has no limitation but as we start using it, you will get to know there are limitations on Netflix.
Now in order to give you a clear picture, there are two kinds of limitations. One is related to your device storage and the other one is Netflix’s content licensing. Don’t get confused, Netflix’s content licensing means how it works etc. For an average user, these limitations won’t be a big matter. However, if you are heavy Netflix user then these limitations will haunt you.
What’s the Download Limit on Netflix?:
As I have told you earlier that in order to determine the Download Limit on Netflix, you need to break it down in two steps.
Storage Space Issues:
Keep that in mind, every TV show or movie, which you download for offline viewing. Takes a certain amount of space on your device, Whether it is a PC or Smartphone. The bigger the better, means if you download a movie or a TV show in the 1080p format rather then 720p or less. It will take more space.
Since not everyone has a device which comes in high internal storage. You will be able to download a limited number of movies or TV shows. Your best bet is to expand your device storage, that way you won’t face any issue while downloading movies from Netflix. Through this aspect, it doesn’t seem there is any download limit on Netflix.
When it comes to Licensing Issues on Netflix. It means Netflix is not the one stopping you from downloading movies or TV Show again. Netflix has certain licensing agreements with a number of production companies and with some distributors. So whenever you get this ‘You have downloaded too many videos’. It will be not from Netflix, the company owning the content is the one stopping you from downloading. Read the following message and you will get to know.
“Our content is typically licensed in bundles of titles from individual studios and distributors. There may be limits to the number of titles from the same agreement that you can download at the same time,”Netflix
If you want to get rid of this problem, you need to delete some of your videos, which you have seen it.
In order to keep thing under control, Netflix has its own subscription plans. Some of them are one device, some of them are for multiple devices. However, if a single title or video is downloaded simultaneously from a device too many times. You will see this message. ” You have downloads on too many devices. ”
Through this, it seems Netflix has some limitation but these are set to keep things under control. If you ever get this message ” You have downloads on too many devices “. That means either you need to upgrade your subscription plan or you need to delete the downloads from your device.
That will be all. I am sure now you have a clear picture of Download Limits on Netflix. If you want to ask anything more on this topic, you should use the comments section.
Ladies and Gentlemen! It is a big day for the Galaxy S9 and S9 Plus owners. Samsung has finally started rolling out the official Android Pie build for the Galaxy S9/S9 Plus. The update first rolled out in Germany. The update carries the build XXU2CRLI. You can update your Galaxy S9 and S9 Plus to Android Pie XXU2CRLI Firmware right away. This is official and stable update. It’s not Android Pie beta anymore. Follow the steps given in this guide to update your S9 or S9 Plus to Android Pie. Before we begin updating, let us learn a little bit about this firmware.
Update Galaxy S9 and S9 Plus to Android Pie
Galaxy S9 and S9 Plus Android Pie
For the last couple of months, Samsung has been teasing the Android Pie for Galaxy S9, Galaxy S9 Plus, Galaxy Note 9 and the Galaxy Note 8. Samsung was all set to introduce a brand new UI for all of its flagship devices. The Android Pie beta update gave the users a great idea about all the upcoming features. Although Samsung is the slowest manufacturer when it comes to Android updates, it managed to keep the excitement of the users alive by giving them an early look to the changes it was set to bring.
The Android Pie for Samsung handsets is the biggest overhaul in Samsung’s history of Android updates. This update brings a whole new UI which is named as the One UI. One UI changes the way elements look on the screen of your phone. Samsung has completely revamped the icons, the recent apps menu, the settings application and also all other stock applications. One UI also adds rounded icons to the notifications panel of the phones. Samsung has now added a button in the navigation bar of the phone to rotate between portrait and landscape modes on the phone. This update also adds the Kids mode button to the quick toggles. The camera application has got a completely new look too.
Android Pie – One UI
The Android Pie update introduces the Adaptive battery mode. This is the AI-based mode which learns how to maintain the battery of your phone according to your usage. The much-awaited Dark Mode is also available on the Samsung phones now. This mode will help you to save further battery since the flagship Android phones use the Super AMOLED screens.
Head over the Android Pie firmware details before you upgrade your phone.
Android Pie Firmware Details
This update first appeared in Germany. The update is available for the Galaxy S9 carrying the model number G960F and the Galaxy S9 Plus carrying the model numberG965F. It does not matter what region your Galaxy S9 or S9 Plus belongs to, as long as it has the G960F or G965F model number, you can flash it. You only need to match the model number here. Here are the other details of this official stable Android Pie update.
Region: Germany (DBT)
Android: Android 9.0 Pie [One UI]
Changelist: 15044066
Build Date: 19th December 2018
Security Patch Level: 12/01/2018
PDA: G960FXXU2CRLI | G965FXXU2CRLI
CSC: G960FOXM2CRLI | G965FOXM2CRLI
Update Galaxy S9 and S9 Plus to Android Pie XXU2CRLI
Preparations
First of all, go to Settings > About Phone > Check the model number of your phone. It must be G960F or G965F. This update will not work on any other model of the S9/S9 Plus.
Enable OEM Unlocking on your phone. To do so, open Settings > About phone > Tap the Build number 7 times. Now go back to Settings > Developer Options > Enable OEM Unlocking.
Enable USB Debugging mode from the Developer Options as well.
Back up all of your contacts, messages, call logs, and media content.
Use OEM Data cable to connect your phone to the computer.
Make sure your S9/S9 Plus is running on latest Android Oreo or Android Pie Beta.
This is an official update. It will not harm your phone. You can flash it without any fear.
Download and extract the firmware file for your phone. You will get 5 files including the AP file, the BL file, CP file, CSC, and Home_CSC files.Odin Files – Reference Only – TechBeasts.com
Odin 3.13.1 for PC [Download and extract to get Odin3.exe file]
In Odin, click on options and make sure that the Auto Reboot and F.Reset.Time is checked. No other option should be checked.
In Odin, click on the AP tab and select the AP file.
In the BL tab, select the BL file.
Under the CP, select the CP file.
In CSC, select the CSC file if you want to wipe your phone and if you do not want to wipe data, select the Home_CSC file.
It is always recommended to perform a clean installation.
Now power down your Galaxy S9 or S9 Plus. Press and hold Volume Down + Home + Power button on the phone.
As the phone boots showing a warning, press the Volume Up button to continue. Your phone is in the download mode now.
Connect your phone to the computer now.
As Odin shows the blue light in ID:COM box and “Added” in the log box, click the Start button.
Galaxy S9 Android Pie – Reference Only
Odin will now start flashing the firmware. It can take up to 7 minutes.
Once done, your phone will automatically reboot.
Disconnect the phone and enjoy the all-new Android Pie with One UI on it.
Conclusion
So, guys, that’s all with the Android Pie installation on the Galaxy S9 and Galaxy S9 Plus. This update is supposed run flawlessly on your phone. You can enjoy the brand new One UI with all the new features. One UI brings massive improvements and the features that we have never seen on the Samsung Galaxy handsets before. I hope that you found this guide useful. If you have anything to ask or anything to add to this guide, feel free to reach out to us.