Home Blog Page 56

How to get YouTube picture-in-picture Mode outside US

0
How to get YouTube picture-in-picture Mode outside US

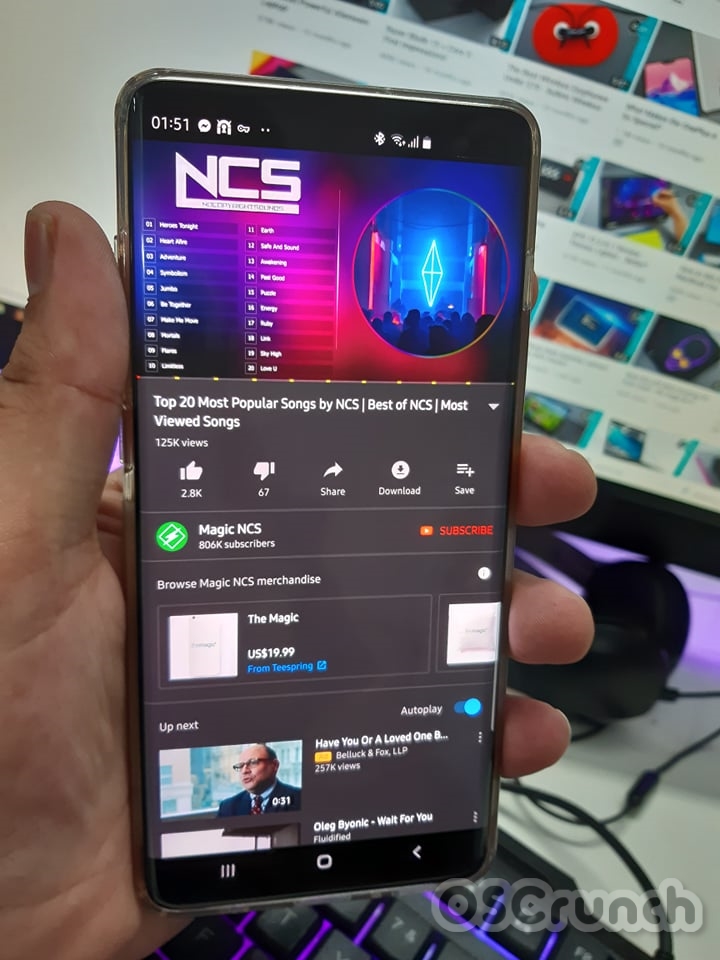
YouTube for Android has a very nice Picture-in-picture mode. This YouTube PIP works only in the US. Outside the US, the PIP fails to work. So, in this guide, I’m going to show you the steps to get YouTube picture-in-picture mode outside US. I discovered this trick on my own and found it working flawlessly, which is why I’m going to share it with everyone today.

YouTube picture-in-picture Mode outside US

Before taking a look at how to use YouTube PIP outside the US, take a look at PIP is and how it works.

What is YouTube Picture-in-picture mode?

Picture-in-picture mode is not something new. It has existed since forever. The mode basically allows an application to run in a smaller window while there is something else already running in the full window. Back in the day, the picture-in-picture mode was popular on TVs. This mode was incorporated in a number of applications by Android and iOS developers to make it easy for users to use a certain application. We had the Picture-in-picture mode for video calling applications first. The mode also made its way to the WhatsApp video call applications. Users have been waiting for the picture-in-picture mode for the YouTube application for long.

Usually, the users cannot pop-out a YouTube video or they cannot just minimize YouTube to keep it playing in the background. With the picture-in-picture mode, they can let a video keep running in a small window and they can do something else easily on their phone.

Last year, YouTube released the PIP mode for smartphone users based in the US. This feature worked on all Android phones running on Android Oreo or higher. There was a word in the air that the picture-in-picture mode works for all the users across the world, but that wasn’t the case. Initially, the picture-in-picture mode worked only for the YouTube premium users. Later on, it started working for non-premium users in the US.

So, if you are still in the US, you can simply play a video on YouTube and then press the home key of your phone. The video will keep playing in a small window while you can perform other tasks on the phone.

How do you exactly get this mode while you are not in the US? That is exactly what we are going to do here today. Follow the steps below to start using YouTube picture-in-picture mode outside US.

YouTube picture-in-picture Mode outside US

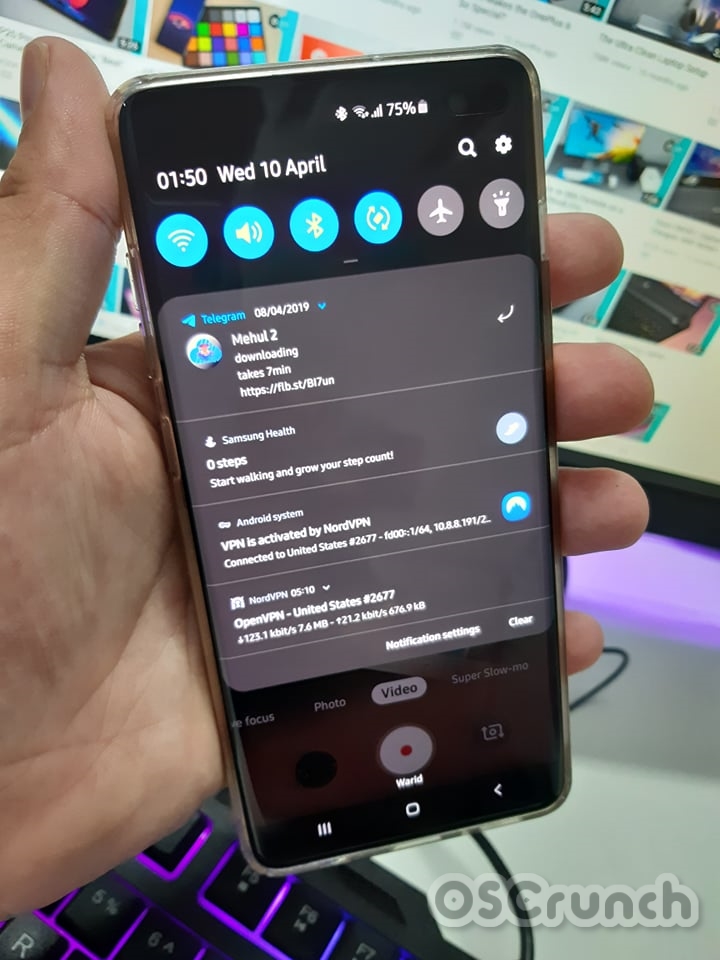
A couple of days back, I was using a VPN on my phone to run Telegram since it is banned in my country. I played a video on YouTube and accidentally pressed the home key. I noted that the YouTube video did not stop. It kept running. When I tried to do the same without a VPN later on, the video stopped every time. That is when I realized that while the VPN was connected to the US, the picture-in-picture mode worked. I did some research on the internet and found that the picture-in-picture mode was limited to 4 or 5 countries only. 

If you use a VPN to connect to any country that has the YouTube PIP support, it will work for you. This is how simple this trick is. So, you need a good VPN and you are all good to go. No need to customize anything on your phone, no root, no weird app installations required. I will list the method down in simple steps.

Before following the steps, make sure that your phone is running on Android Oreo or higher. Also, make sure that you have the latest version of YouTube installed on your phone.

  1. Download a good VPN on your phone. You can check the best free Android VPN of 2019 here.
  2. Using the VPN, connect to the US.
  3. Now open YouTube on your phone and play any video.
  4. Once the video plays, press the home button on the phone.
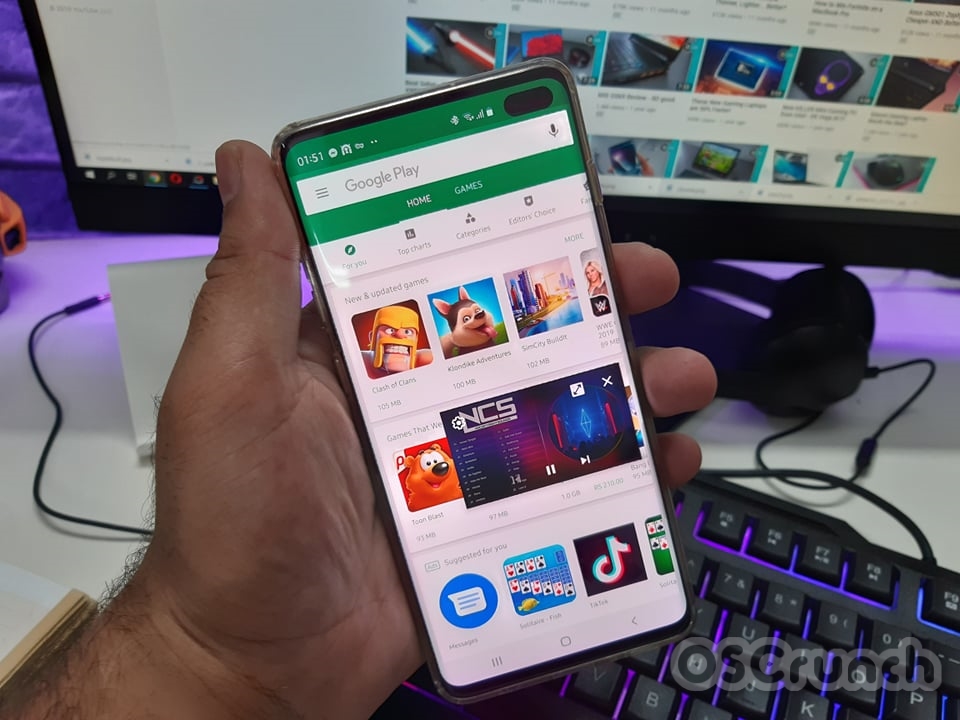
  5. You will see that the video is playing in a smaller window now.
  6. That’s all. You have got the YouTube picture-in-picture mode.

Wrap Up

That’s all for now. This may not be the most viable solution for many of the YouTuber users, but this is the only one you have right now. YouTube is rolling out this feature to the users outside the US, but that rollout is limited to only a couple of countries only. If you have found this tutorial useful, drop your feedback in the comments section down below. For any queries, feel free to reach out to us.

Samsung Galaxy S10 Not Registered on Network – Fixed

Samsung Galaxy S10 Not Registered on Network – Fixed

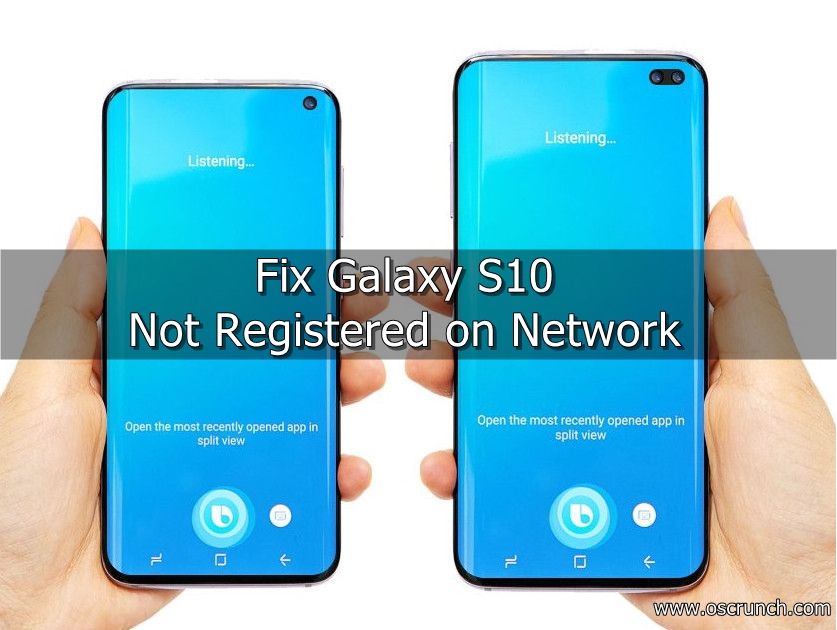
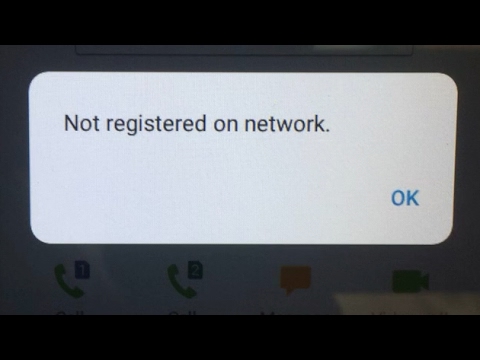
Have you landed here on this page looking for the fix to Galaxy S10 Not Registered on Network? You have landed at the right place. The solution to fix Galaxy S10 not registered on network is given in this guide.

Galaxy S10 Not Registered on Network

If there is one perfect smartphone in the market right now, that is the Samsung Galaxy S10. All three variants of the Galaxy S10 have something unique to offer. For example, the cheaper variant, the S10E is the most beautiful small-sized powerhouse out there. The standard Galaxy S10, at 6.1-inches, is a perfect flagship for users looking for more screen and while making no compromises in the power department. The Galaxy S10 Plus, with its industry-altering design, is arguably the best smartphone to date. But the greatness of these devices does not mean that you will never encounter any issue. A number of Galaxy S10 owners reached out to us asking for the fix to Not Registered on Network error.

Galaxy S10 Not Registered on Network – Stop Worrying!

As a Samsung Galaxy S10 Plus owner, I can completely understand your frustration. It shouldn’t happen on your brand new smartphone. Its merely been a month since this phone started shipping out. But now that it has happened, you got to fix it and I am going to help you to fix it. Before jumping up to the solution, I’d first like to tell you that stop worrying. This issue is not something that you cannot fix. It definitely has a number of solutions and all of them are easy to implement.

Why Not Registered on Network happens?

This issue can pop up due to a number of reasons. In case you have inappropriately inserted your SIM card in the phone, it can lead to not registered on network. If your network’s signal strength is weak, that can also result in this error. If the network coverage in your area is restricted for a while (which keeps happening in my area every now and then), it is definitely going to show this error. Another reason for this issue to come up is the messed up configuration of network on your phone. The worst reason for this error to show up is the null IMEI or your EFS partition is gone corrupt, and I really hope that is not the case at your end.

Let’s take a look at the solutions to fix Galaxy S10 not registered on network problem.

Galaxy S10 Not Registered on Network

I have listed a number of solutions. You need to apply these solutions one by one. If a solution works for you, you do not need to apply any other solution. The difficulty of these solutions is easy to hard.

#1 Check the SIM Card of your Phone

First of all, you have to check the SIM card of your phone. Use the SIM Eject Tool to pull your SIM card out of the phone. Make sure that the SIM card is not damaged. Now insert the SIM card back properly. The SIM card should not slip here and there while putting it back. After doing this, restart your phone and check the network again. You can try making a call to see if the not registered on network issue is gone or not.

#2 Check the Signal Strength of your Network

The 2nd solution is to ensure that your Network is working. In some areas, the carriers sometimes turn off the Network for a while. In this case, your phone will show a block symbol in the status bar. Whenever you will try to make a call, it will show you the error not registered on network. So first, you need to make sure that you are not in an area where the signal reception is low, and 2ndly, you need to check that the network carrier is working fine.

#3 Clear the Cache of your Galaxy S10

Clearing cache is one pill for a hundred diseases. Clear the cache of your Galaxy S10 and see if it fixes the problem.

  1. Power down your S10.
  2. Press and hold Volume Up + Bixby + Power button to boot the phone.
  3. Let the keys go as you see Samsung Logo on screen.
  4. The phone will go into recovery now.
  5. Press Volume Down to highlight “wipe cache partition”.
  6. Clear the cache now.
  7. Reboot the phone now.

The problem should be fixed.

#4 Boot your Galaxy S10 in Safe Mode

Booting your phone in Safe Mode will disable all third-party apps. If an application was creating problems on your phone, you can check this by booting the phone in the Safe Mode. Applications can definitely bring in this error. So, here is how to boot S10 in the Safe Mode.

  1. Turn off your Galaxy S10.
  2. Now turn on the phone.
  3. As soon as the phone boots up, press the Volume Down key and hold.
  4. Keep the key pressed unless you see the home screen.
  5. Now when you are on the home screen, you will see Safe Mode on the lower-left corner of the screen.
  6. All apps have been disabled. Make a call now to see if the error exists.
  7. If the error doesn’t exist, you need to go through your recent installations and delete the culprit.

#5 Reset Network Settings of your Galaxy S10

  1. On your Galaxy S10, go to Settings.
  2. In Settings > About Phone.
  3. Click on Reset at the bottom.
  4. Now click on Reset Network Settings.
  5. Reset settings now.
  6. Reboot your phone after resetting the Network Settings.

Make a call now to see what it has fixed.

#6 Factory Reset your Galaxy S10

If all solutions given above fail to work, you can try hard-resetting your Galaxy S10. Keep in mind that you will loose your data by factory resetting the phone. Here is how to do this.

  1. Turn off the Galaxy S10.
  2. Press and hold Volume Up + Bixby + Power button on your phone to boot it up.
  3. It will go into recovery now.
  4. Use Volume Down to highlight “wipe factory data”.
  5. Press Power Button to wipe the phone now.
  6. Reboot your phone after this. The issue should be resolved.

#7 Install new Stock Firmware

The last solution on this list is the installation of a brand new software on your Samsung Galaxy S10, S10E, or the S10 Plus. This should be done only if none of the solutions given above work for you. Follow this guide to install stock firmware on Galaxy S10.

Wrap Up

If you have successfully fixed this issue, congratulations. If not, it would mean that either you have corrupted the EFS partition or your phone has a hardware issue with its radios. In either cases, take your phone to your nearest Samsung Service Center and claim its warranty. Make sure that you did not root your phone beforehand otherwise you will not be able to claim the warranty. If you have any other questions, feel free to reach out to us. I will try my best to get back as soon as possible.

Download Google Core GMS for Huawei and Honor Chinese Phones

Download Google Core GMS for Huawei and Honor Chinese Phones

Phones in China come without Google Play Services. This includes all Google Apps. You do not have the Play Store, Play Music, Play Books, or any other Google Apps on your phone. Not even the basic Calendar and Google Contacts Sync is there. To install and run the Google Apps on your Huawei and Honor Chinese phones, you need the Core GMS package. The Core GMS is the Core Google Mobile Services framework. The GMS framework is responsible for letting all Google Apps run flawlessly on an Android phone. From here, you can download the Google Core GMS for Huawei and Honor Chinese phones. I will also show you the steps to install the Core GMS on Huawei and Honor phones. Let’s learn a little more about Core GMS before you get your hands on it.

Google Apps

GMS – Google Mobile Services

Google Mobile Services is basically a collection of applications and APIs that work across an Android device. The idea of GMS is to let those apps and APIs run flawlessly, without errors across your device. All Android phones are equipped with the core GMS package by default, but the scenario is a bit different for Chinese Android phones.

The Chinese Phone makers turn a blind eye towards Google Mobile Services when it comes to launching phones for their own region. For example, the phones in China by Xiaomi, Huawei, Oppo, Vivo, and others do not have the basic Google Apps.

The GMS is also used to run apps like Google Chrome, YouTube, and Google Search on your Android phone. Since Android is an open-source operating system, Google allows vendors to install the GMS separately on their systems. For example, you can install the entire GMS alongside the Google Apps on a custom ROM separately. The same goes for Android phones without GMS. You can download GMS manually, and install it on a Chinese Android phone given that you are using that Chinese phone outside China. 

You may actually run the Google Apps inside China too, but for that, you will have to use a good VPN. Without a VPN, the internet-based apps will fail to load.

Why no GMS in Chinese phones?

So, why does China block these apps? The answer is simple. It is internet censorship which forces phone manufacturers to equip phones with the government-allowed apps only. The government in China controls every bit of information. Nothing called freedom exists in China. Chinese phone consumers do not even have the right to information. China doesn’t trust the apps built by US companies either. As a result, it has banned all popular platforms like Facebook, Instagram, WhatsApp, All Apps by Google, and many other such platforms. 

Assuming that you know what is GMS and why you don’t have it in a Chinese phone, go ahead and download it right now.

Download Core GMS for Huawei and Honor Chinese

Although the heading says that you can download Core GMS for Huawei and Honor Chinese phones, but this Core GMS given below will work on all other Chinese Android phones too.

The Core GMS comes in the form of APK files. There are two versions, one is called the GMS Installer and the other is called GMSanzhuangqi. GMS Installer is a slightly older version while the GMSanzhuangqi is the latest version and works on all phones released in 2018 onwards.

The GMS will be installed as a simple APK file on your Android phone. After installing GMS, you need to separately install the Google Apps or you can install them all using the Google Installer.

Update 9/25/2019: A new Google Installer is available for EMUI 10, EMUI 9 and below. You can download it from below.

  1. Download Google Core GMS APK – Google Core Installer [September-October 2019] | GMS Installer | GMSanzhuangqi
  2. Copy the GMS APK to your phone.
  3. Using a File Manager, open the GMS APK.
  4. If the phone asks for permission, allow it.
  5. Install the GMS now and finish the installation.

You can follow on-screen instructions to install all the Google Framework Services through the Core Installer.

You can also download Google Play Services and Google Play Store APK separately to install it.

That’s all with the download and installation of Google Core GMS on your Chinese Android phone. If you have any questions or queries, feel free to reach out to us. We will try our best to get back to you as soon as possible.

Last Updated: 26th October 2019

RARBG unblock – Ultrafast Mirror sites and Proxy List

0
RARBG unblock  – Ultrafast Mirror sites and Proxy List

This post is all about RARBG. Today, we’ll tell about RARBG Mirror sites, Proxy List, and RARBG unblock Sites. Before we move on let me tell you what is RARBG. Those who want to download the latest movies in HD, they should try RARBG. It is said that RARBG is the biggest BitTorrent tracker or act like it.

RARBG unblock

There are hundreds of Torrent sites but RARBG stands on the top of the list. There are two factors which sperate RARBG from all other torrent websites. One is the biggest collection of Torrents and the other is the high-speed downloading.

As per reports, RARBG is accessed by billion of visitors on a monthly basis. Moreover, on a daily basis, thousands of new Torrents are added. The greatest strength of RARBG is the social community, they have millions of active users. All you have to do is register on RARBG and create threads, help others and also get helped by others. We’ve seen a number of active discussions on RARBG community. All of these discussions and thread were about new movies, TV Show and softwares.

One other thing I would like to add, you can easily find if a Torrent is fake or spam. Because of users at RARBG community will blast on the thread if it is fake. Now let’s tell you a bit about the history of RARBG.

RARBG History and Why it is Blocked?

When the site was launched, all the servers were hosted in Bulgaria. As the website started growing, they moved the servers to different locations. We all know that a Torrent Website is always under the radar. Although RARBG was not providing copyright material. But if you are providing links to such files, it also comes under the umbrella of the copyright act.

At the moment, RARBG is blocked in countries like Saudi Arabia, the United Kingdom, Pakistan, Denmark, Portugal, Bulgaria, and more. In the age of the internet, there is no such thing as blocked. We can easily unblock RARBG with the help of certain methods.

You will be surprised to know after RARBG was blocked in many regions. It got more popular and in light of these events countries like Australia issued court order to completely block several pirate websites. If you are in Australia, you all well aware of this fact that all the ISP’s in Australia have blocked a number of Torrent Websites. However, as per reports, users from Australia searched for RARBG unblock mirrors and proxies.

Best Free VPN/Proxy Apps for Android in 2019

What are the Mirror Sites:

Whenever a Website is blocked in any country, the developers of these Websites create a replica of their Website. The main reason behind creating the Mirror site is simple, every time a Website gets blocked, they use the domain name to block it. If the same website with different URL is available, you can easily access and use it. That’s why Mirror sites are launched, they are the replica of the main Website, all the features and functionality remains the same, they only change the URL.

The only downside of the Mirror Website is, they don’t show easily in search. If you are known to a term called Plagiarism, you’ll get the clear picture. But when it comes to Torrent Websites, people usually don’t use Google to find them. They directly access the URL.

RARBG unblock With Mirror sites 2019:

Name Speed Status
http://rarbgmirror.xyz Very Fast Online
http://rarbgmirror.org Very Fast Online
https://www.rarbg.is Very Fast Online
http://rarbgaccess.org Very Fast Online
http://rarbg.to Very Fast Online
https://rarbgprx.org Very Fast Online
https://rarbgunblock.com Very Fast Online
https://rarbgmirror.com Very Fast Online

All of these Websites are tested and they are working perfectly. You will be able to access these RARBG unblock sites from anywhere in the world. However, if any of these are not working, it might be because of the ISP level restriction. No need to worry, there is always a solution for everything. Following are the best VPN’s to Bypass ISP level Restriction of RARBG. By using these VPN’s you will be able to open RARBG unblock sites.

Best VPN To Bypass ISP level Restriction of RARBG:

With the help of following VPN services, you can easily Unblock RARBG. Keep that in mind, not all of these VPN’s are free to use. In order to get the best VPN service, you need to purchase a subscription.

What Is a VPN?

A VPN stands for virtual private network. When a user connects to a VPN, they’re able to encrypt their connection and anonymize their IP address. Here’s an example: If someone in California connects to a VPN server in Australia, they’ll be able to browse the internet as if they were actually in Australia. A website would simply assume they were in Australia based on their IP address, allowing a user to not only browse anonymously but also access all the sites and services that are available in that area.

Most VPNs also offer their own encryption networks. When you connect to a VPN, your information in encapsulated through a secure tunnel. This works by taking your data packets and essentially placing them inside another data packet. ExpressVPN offers military-grade 256-bit encryption on all their servers, so if someone was to spy on your network, all they would see is a random string of numbers and letters.

That’s all.

Download WhatsApp Lite APK for Android

0
Download WhatsApp Lite APK for Android

You can download WhatsApp Lite APK from here. There is no official WhatsApp Lite version available but there are few WhatsApp Forked versions which are lightweight.

As we all know that Lite version of every app is designed to work with minimal specs. It is mostly designed for low-end devices. Since not everyone can afford high-end smartphones. Moreover, lite versions consume less battery, low storage, and they also consume less mobile data. However, you will not be able to use all the features.

WhatsApp Lite

The official WhatsApp version eats up a lot of resources. Not only that, but it also eats up your storage and drains the life out of your battery. That is the reason we made this post, here you will find best WhatsApp Lite versions for your Android devices. You can use these apps on low-end Android devices and they won’t slow down your device.

All of these WhatsApp versions developed by other developers. None of these are designed by official developers of Facebook. You will get the most of the features of WhatsApp and along with them, you will get a number of new features. Moreover, all of these WhatsApp alternates are low in size. Let’s get started now.

What is WhatsApp Lite?

WhatsApp Lite is the forked version of Worlds popular cross-messaging platform. WA allows you to send text messages, GIF, Photos, Videos, Documents, You can make video and audio calls for free. WhatsApp is compatible with Android and iOS devices. Moreover, they also launched a WhatsApp Web version.

You can run WhatsApp on mobile data and also on your internet connection. WhatsApp performs really well on both connections. However, when it comes to Video calling, you need to have a good WiFi or mobile data connection.

WhatsApp Lite App for Android:

Download WhatsApp Lite App for your Android device from below. All of the provided WhatsApp alternates are lightweight.

WhatsApp Lite:

This is the best WhatsApp lite version available for Android devices. It has all the functionalities of the official WhatsApp app. However, it is lightweight, it eats up fewer resources as compare to the original WA App. The interface is the same as the original one. Moreover, you can restore your original WhatsApp account data on WhatsApp Lite.

GBWhatsApp MiNi:

If you have used GBWhatsApp then you will be glad to know that, it also has a lite version. It is lightweight and also it carries all the core function of GBWhatsApp. This mini version of GBWA is specially designed for low-end Android devices.

Features:

  • You can read the message after being deleted by the sender.
  • GB WhatsApp made downloading status easier.
  • Send file up to 1GB.
  • Automatic updates are supported.
  • Lock your chat.
  • Hide Online Status, Blue Ticks, Double Tick, Blue microphone

Soula WhatsApp Lite:

The second one the list is Soula WhatsApp Lite, this app is fast & secure. Works perfectly on low-end Android devices. Clean UI and also you will get a number of good options to customize your interface. Soula WhatsApp Lite comes with all the new and updated Emoji packs.

Features:

  • All the hidden features are unlocked.
  • You can send upto 100 different file formats using Soula WhatsApp.
  • At a time you can send 100 images in one go.

WhatsApp Prime Lite:

On the third number, we have WhatsApp Prime Lite. I am not quite sure why the developer of WhatsApp Prime Lite said: ” This app is better than the original one “. I don’t agree with that. However, there is no doubt that WhatsApp Prime Lite comes with a bundle of new features which are not available on the original WA application.

To be honest, this app is the perfect clone of the original WhatsApp. The developer added a number of customization options to engage more users.

Features:

How to Download WhatsApp Lite?

  • Use the links provided above to download WA Lite APK.
  • Enable Unknown Sources on your Android device.
  • Head over to the Downloads Folder. Tap on WA lite APK file.
  • Heed the instruction provided on the screen to install it.

Restore WhatsApp Chat on Lite Version?

  • First, you need to make a backup of your WhatsApp. [ Open Whatsapp → Go to Settings → Chats → Backup chats.]
  • Uninstall the official version of WhatsApp.
  • Head over to the file manager, look for WhatsApp folder. Rename it, for e.g If you have download GBWhatsApp, rename the folder to GBWhatsApp.
  • Also, change the WA Media folder name to GBWhatsApp.

That’s all.

How to add or remove WhatsApp Stickers

0
How to add or remove WhatsApp Stickers

Back in October 2018, WhatsApp was updated with stickers. Users can now express their feelings better with the help of stickers. While emojis are still there, stickers just let you express your feelings a bit deeper. Stickers basically are just a bigger form of emojis, but they come with a lot of customization options. For example, you can download and install thousands of stickers to your WhatsApp. You can also create your own custom stickers and add them. If you don’t know how to add stickers to WhatsApp, you can use this guide to do it now. This guide will help you to add or remove WhatsApp stickers. The process is really simple. Before you add or remove WhatsApp stickers, learn a little more about them.

WhatsApp Stickers

WhatsApp Stickers

First off, these work independently from the stickers of your phone or the stickers of your Keyboard. For example, your Samsung Galaxy phone may have its own entire collection of these lovely images, similarly, if you are using SwiftKey Keyboard, it also may have a huge collection of these, but WhatsApp stickers are completely different.

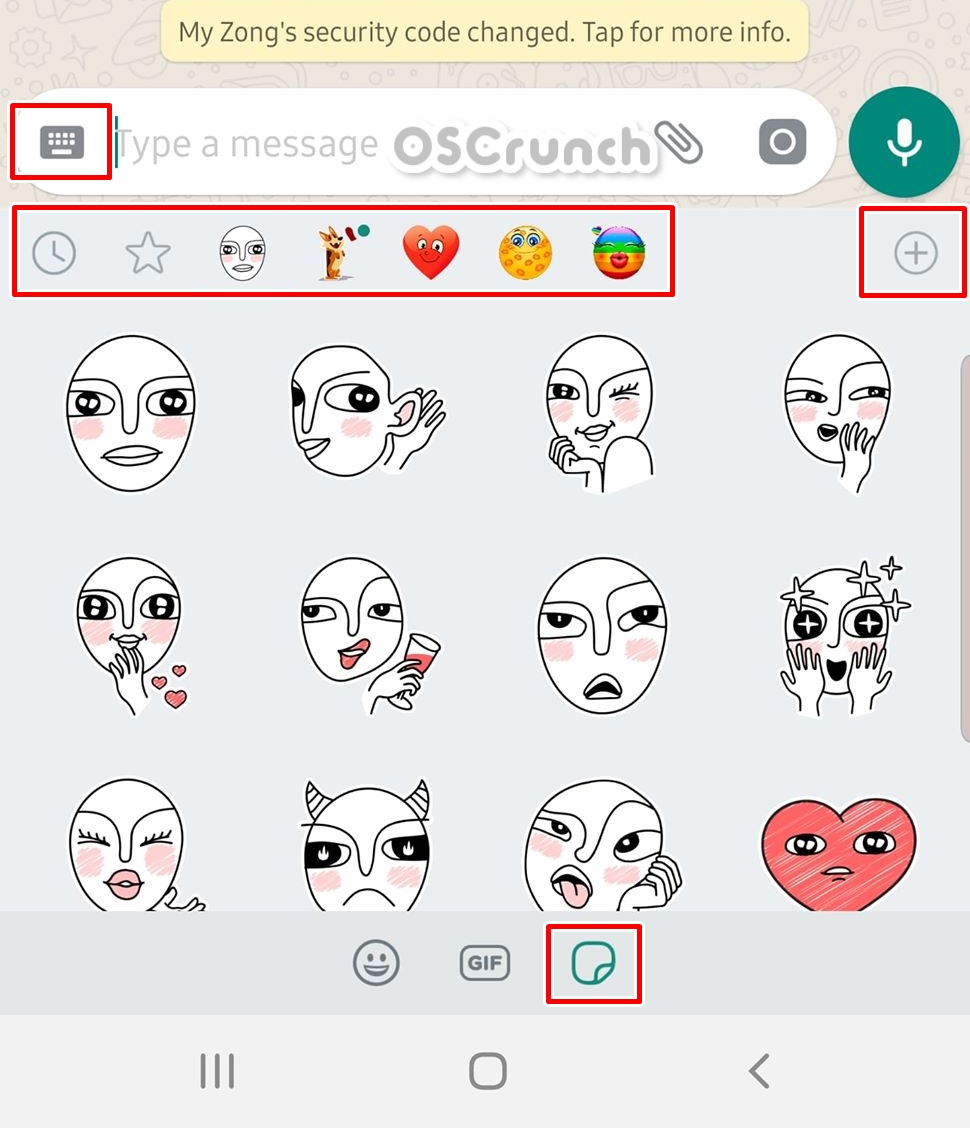
WhatsApp stickers reside in the emoji section of your messenger. In your WhatsApp Messenger, the message bar where you type the text, you will find an emoji icon on the left side. Clicking on this will open the emojis. At the bottom of this screen, you will find GIF and Stickers.

Clicking on Stickers will take you to the few default stickers that you have in the WhatsApp. There are only 2 or 3 packs in WhatsApp by default. These sticker packs are not that good.

If you are not liking those stickers on your app, you can add a whole lot of new easily. The option to do so is there in the stickers, you just need to explore it. Take a look at the few steps given below to add them.

How to Add WhatsApp Stickers

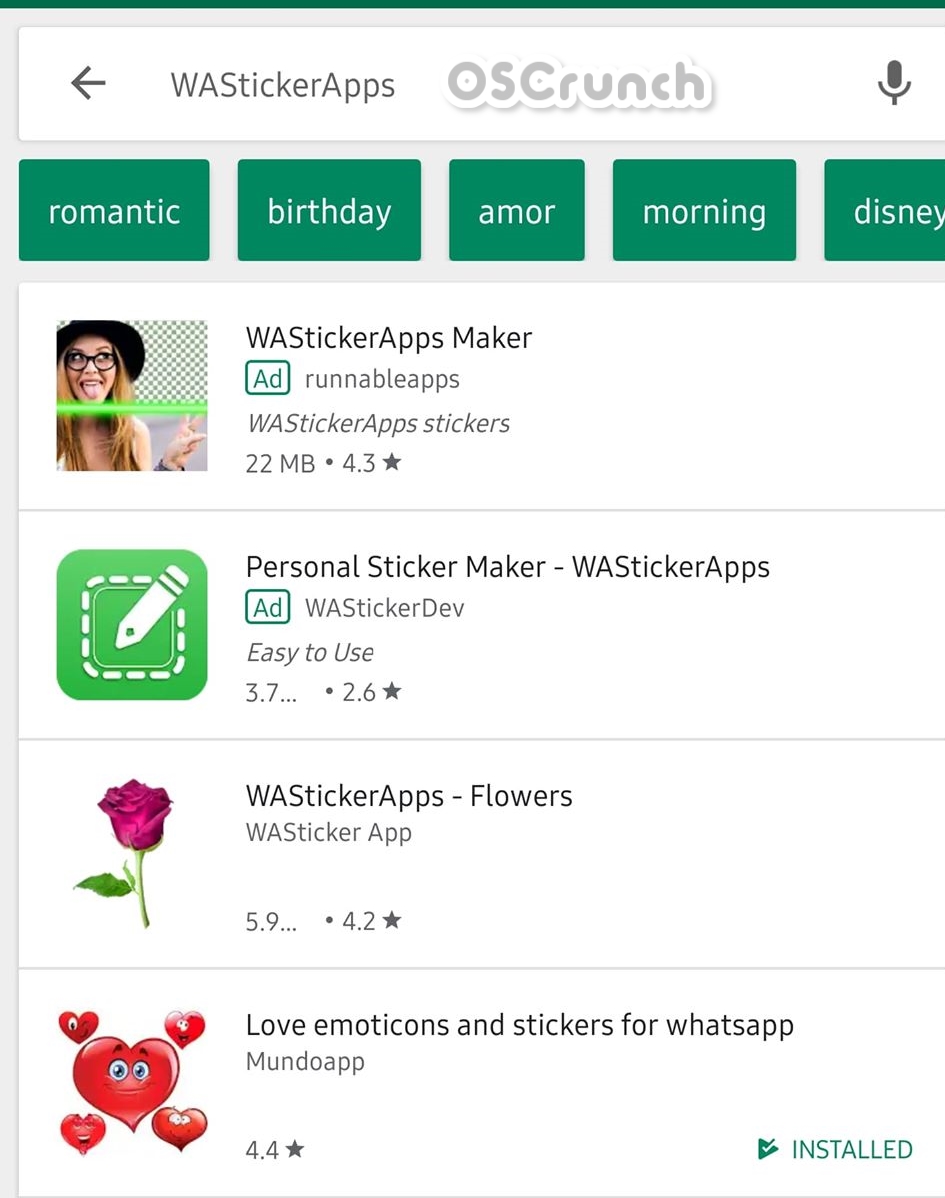
There are two ways to add these Stickers. Either you can add them through the stickers given in options, or you can add them through the Google Play Store. Here is how to do this.

  • Open WhatsApp on your phone.
  • Click on the Emoji icon appearing the text bar.
  • Now click on the Stickers button at the bottom.
  • In the stickers screen, you will find a + button next to the stickers bar.
  • Click on the + button and it will show you “All Stickers” and “My Stickers”.
  • All Stickers are the ones that WhatsApp is offering you for free. You can find 12 sticker packs in All Stickers. Click on the download button next to your favorite pack to download them.
  • If you scroll down, you will find “Get More Stickers” option.
  • Click on Get More Stickers and it will take you to the Play Store.
  • Now you will find Hundreds if not Thousands of WhatsApp Sticker Apps.
  • Install the Application with your desired stickers.
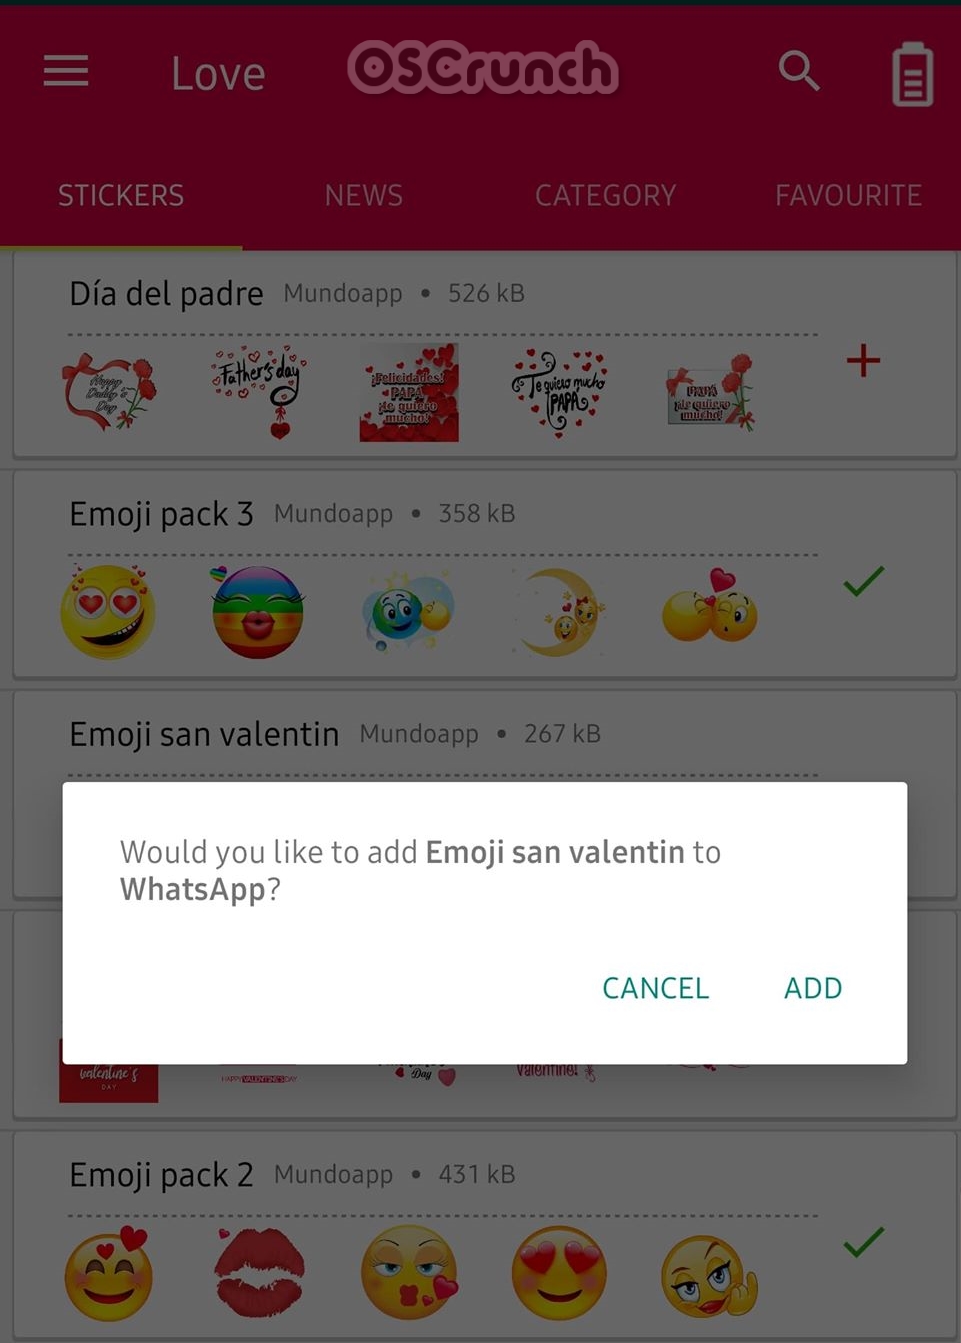
  • Now open that application on your phone and download your desired sticker pack within that application.
  • The sticker pack will be added to WhatsApp.
  • To start using those stickers, simply open WhatsApp again and go to stickers. You will find newly installed stickers there.

How to remove WhatsApp Stickers

If you simply uninstall a stickers application, it will take away all the sticker packs, but if you want to uninstall a specific sticker pack, here is how you can do that.

  • Open WhatsApp, go to Stickers > Click on the + button > My Stickers.
  • Here you will see all of your installed stickers.
  • Uninstall the pack you don’t like. That’s all.

If you are not sure what WhatsApp Sticker applications you should install, you can take a look at these Best Free WhatsApp Sticker Apps for Android in 2019.

That’s all for now. If you have any queries or questions, feel free to reach out to us. We will try our best to get back to you as soon as possible.

Huawei P30 Pro Guides [ Hard Reset, Recovery, Fastboot, Download, Reset Setting etc ]

0
Huawei P30 Pro Guides [ Hard Reset, Recovery, Fastboot, Download, Reset Setting etc ]

Huawei P30 Pro Guides, Tips & Tricks: Since Huawei P30 Pro is the latest flagship device from Huawei and sale response is pretty good. That’s why we’ve made this post to tell you all about Huawei P30 Pro. We’ll tell you how to boot into recovery mode, Fastboot, Download mode, reset settings, etc.

Whenever a new device made its way to the market. It takes time to learn everything about it. Moreover, those who are new a device they take more time. But with the help of our Huawei P30 Pro Guides post. You will be able to master your Huawei P30 Pro with ease.

Before we move on to the technical stuff, let me tell a little bit about Huawei P30 Pro. The best thing about this device is the cameras. All new and with 5X Zoom, keep reading and you will find out what is loaded in Huawei P30 Pro.

Huawei P30 Pro Guides

Huawei P30 Pro Specs:

P30 Pro is the expensive variant of P30. This phone has the same processor and GPU as that of the P30. The difference is in the display department first of all. The P30 Pro comes with a 6.47-inches screen. It storage variants include a 512GB with 8GB variant too.

The P30 Pro has 4 cameras at the back, which are way superior to the cameras of P30. It has a 40MP main camera, a 20MP ultrawide camera, an 8MP periscope camera with 5x optical zoom, and a third TOF 3D camera. It has the same 32MP camera on the front. P30 Pro also offers 40W fast charging. It has a battery of 4200 mAH inside.

The colors of P30 Pro are also as same as the P30. It also runs on Android 9 themed by EMUI 9 out of the box.

Quick Summary
Hard Reset.
Soft Reset.
Codes.
Recovery Mode.
Fastboot Mode.
Reset Settings.
Download Mode.
Reset Network Settings.
Portable Hotspot.
Power Saving Mode.
Add Fingerprint.
Screenshot.
Video Tutorials.
Back Up Data.
Bypass Google Verification.
Check IMEI.

Huawei P30 Pro Guides:

Heed the instructions below in order to learn everything about Huawei P30 Pro. These Huawei P30 Pro Guides will help you master everything on your device.

How To Hard Reset Huawei P30 Pro:

We’ve posted this guide yesterday. You can use the following link to learn how you can hard reset Huawei P30 Pro.

Hard Reset Huawei P30 Pro

Soft Reset Huawei P30 Pro:

In order to Soft Reset your Huawei P30 Pro, all you have to do is hold down the power button for 2-3 seconds and your device will turn off.

Secret Codes for Huawei P30 Pro:

Every Android device has different service codes to access a number of settings. Following are the Huawei P30 Pro Codes.

Project menu *#*#2846579#*#*
Testing  *#*#6130#*#*
About phone *#*#0000#*#*
Calendar info  *#*#225#*#*
Google Play service  *#*#426#*#*
IMEI   *#06#

Boot Huawei P30 Pro into Recovery Mode:

  • Turn off your Huawei P30 Pro by holding the power button for 2-3 seconds.
  • Once your device is turned off completely. Press + Hold Volume Up and Power button together for 2-3 seconds.
  • Now when you see the Huawei logo, let go of all the buttons.

Boot Huawei P30 Pro into FastBoot Mode:

  • Turn off your Mate 20 by holding down the power button for 2-3 seconds.
  • Connect your device to PC using USB Cable and While doing that Hold Volume Down button.
  • When you see the FastBoot Icon on your home screen let go of the button.

How to Reset Settings on Huawei P30 Pro:

  • Open Settings -> Advanced Settings.
  • Tap Backup & reset -> Reset all Settings.
  • Now you have to tap two times on Reset all Settings.

Download Mode on Mate 20:

  • Turn off your device using the power button.
  • Connect it to your PC and Press + Hold Volume Down and Up button.

Reset Network Settings on Huawei P30 Pro:

  • Open Settings -> Advanced Settings.
  • Tap Backup & reset -> Reset Network Settings.
  • Now you have to tap two times on Reset Network Settings.

Enable Portable Hotspot on Huawei P30 Pro:

  • Open Settings on your device.
  • Head over to the Wireless & networks –> Tethering & portable hotspot.
  • Now select Portable Wi-Fi hotspot and Configure Wi-Fi hotspot.
  • In the end, Turn on Portable Hotspot.

Power Saving Mode on Huawei P30 Pro:

  • Open Settings.
  • Tap on the Battery.
  • Here you will find all the options related to power saving mode. Customize as you like.
  • Pull down the notification menu, Tap on Ultra Saving Mode to enable it.

Add Fingerprint Huawei P30 Pro:

Now before you Add Fingerprint on your Huawei P30 Pro, you have to set Pin or Pattern Lock first.

  • Launch Settings on your device.
  • Head over to Security & privacy.
  • Tap on Fingerprint and you will be asked to set up a Pin or Pattern. Do as you like.
  • Once you’ve set your passcode or pattern, now you can add fingerprint on Huawei P30 Pro.

Take Screenshots on Huawei P30 Pro:

There are three methods which can be used to take screenshots on Huawei P30 Pro.

Method1:
  • Open the Screen of which you want to take a screenshot of.
  • Press Volume Up + Volume Down button together for once.
  • You will hear a splash voice. Done.
Method2:
  • Open the screen or page of which you want a screenshot
  • Drag down the notification bar.
  • Tap on the screenshot.
Method3:
  • Open the Screen -> Knock 2 times -> Open Gallery.

BackUp data on Huawei P30 Pro:

We have posted a complete tutorial on how to backup data on Huawei devices. Use the link below to access that guide and following instructions provided in that post will help you back up the data on Huawei P30 Pro.

How to Backup Data on Huawei Phones.

How to Bypass Google Verification on Huawei P30 Pro:

Heed the instructions provided below in the guide to bypass FRP lock on Huawei P30 Pro.

How to Bypass FRP Lock.

Check IMEI Number on Huawei P30 Pro:

Finding IMEI number on any Android is same, all you have to do is open your phone’s dialer. Type *#06#, Voila. You’ll see a pop-up with numbers written on it. That is your IMEI number.

That’s all.

Fix Samsung Galaxy S10 Stuck in Phone is starting

Fix Samsung Galaxy S10 Stuck in Phone is starting

Samsung Galaxy S10 is the best smartphone that you can get right now. The phone comes in 3 forms. Galaxy S10, Galaxy S10 Plus, and the Galaxy S10  are the three variants in this lineup. By all the means, the S10 phones are superb. Being the best device on the market doesn’t let the Galaxy S10 be a problem free phone. Recently, a few Samsung Galaxy S10 owners reached out to us asking about the Galaxy S10 Stuck in “Phone is starting” state. Now this problem, it persists for long, can get really frustrating. If you have landed on this page looking for a solution to this issue, you have landed at the right place. You can finally fix Galaxy S10 stuck in Phone is starting. I totally understand that pain you are going through, and we will take care of it in a bit.

Galaxy S10 Plus stuck in Phone is starting.

Before you fix this problem, let us understand its background.

Galaxy S10 Stuck in Phone is starting

After getting your hands on a brand new Galaxy S10, you must have very high expectations from the phone. The moment you get stuck on the Phone is starting screen, it can spoil your excitement, but you don’t really need to worry. Despite this little problem, the Galaxy S10, Galaxy S10E, and the Galaxy S10 Plus are still great devices. Problems occur and you have to fix them.

When does this happen?

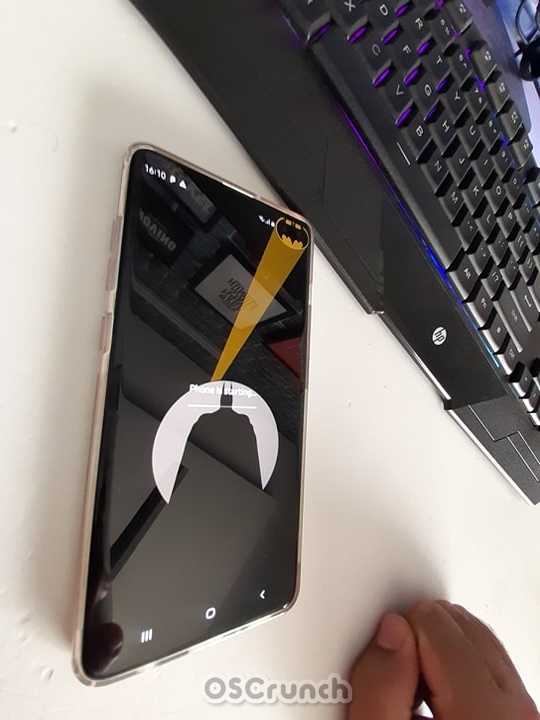
So when and why do the Galaxy S10 stucks in Phone is starting screen? Well, when you boot up the phone and its going through the initial setup, ti shows you a progress bar with the “Phone is starting” written on it. This is when the phone is doing the app set up on the system to run flawlessly. Generally, the phone is expected to take a couple of minutes on this screen. The phone is starting screen’s time also depends on the number of applications installed on your phone.

For example, if you are setting up a brand new phone, it would take only 2-3 minutes on this screen, but if you just installed a new software without factory reset and you have a load of apps on the phone, this screen can take as long as 30 minutes too.

But the situation that we are talking about, that has to do with a brand new phone. You just turned it on and it’s stuck on the Phone is starting screen forever. What are you going to do now? The solution coming up next is what you need.

Now that you know everything about the Phone is starting screen, you can just move forward and fix this problem right away.

Check out: Samsung Galaxy S10 Plus Top Ten Features

How to Samsung Galaxy S10 Stuck in Phone is starting

There can be multiple solutions to the fix Samsung Galaxy S10 stuck in phone is starting, we will start with the basic one, which is to clear the cache of your phone. For this, you will have to boot your phone into the recovery mode. Follow the instructions given below to get this done.

These are the few simple and easy steps to fix Galaxy S10 stuck in phone is starting.

Turn off your Galaxy S10, S10 Plus, or S10.

Press the power button of your phone for about 5 seconds to bring the Power off option. Now tap or click on Power off to shut it down.

Boot your Galaxy S10 into recovery mode.

Press and hole the Volume Up + Bixby + Power button to boot the phone up. As the phone turns on, let the keys go. Your phone will go into the recovery mode now.

Wipe cache partition of your S10.

In the recovery mode, use the Volume Down to select “wipe cache partition”. Use the power button to select. Wipe the cache now.

Reboot the phone now.

After wiping cache, reboot your phone.

Wait for a few minutes and the phone is starting will be gone.

When the phone boots up, the phone is starting screen will not take more than a minute to go away. This will fix the problem. That’s all.

Here is our video guide to boot Galaxy S10 into recovery mode and clear cache.

This is all you need to fix the problem. If clearing cache doesn’t help, you can try hard-resetting your Galaxy S10. In case the hard-reset fails too, the best solution is to flash a brand new firmware on the phone. Here is a guide to install stock firmware on Galaxy S10 phones. The problem should be fixed now hopefully.

Wrap Up

This is all with this guide. Let us know if you were able to get your Galaxy S10 out of the Phone is starting screen. If you are facing any other problems on your Galaxy S10, feel free to reach out to us. We will try our best to craft a solution for you. For any queries, use the comments section given below.

Hard Reset Huawei P30 Pro [ 2 Methods ]

0
Hard Reset Huawei P30 Pro [ 2 Methods ]

Let’s tell you how you can Hard Reset Huawei P30 Pro. Huawei P30 Pro is the latest flagship device from Huawei. Those of you who don’t know how to factory reset Huawei P30 pro. Heed the instructions below and you will learn how to soft & hard reset Huawei P30 Pro.

Most of the time, you can factory reset devices in the same manner you used on the previous device. But there is a possibility, the new device comes with different design and you cannot use the old methods. So, whenever a new device hits the market, we post the hard reset working methods after testing.

Below you will all the methods which you can use to Factory Reset Huawei P30 Pro. But before we move on, let me give you an overview of Huawei P30 Pro.

Hard Reset Huawei P30 Pro

Huawei P30 Pro:

P30 Pro is the expensive variant of P30. This phone has the same processor and GPU as that of the P30. The difference is in the display department first of all. The P30 Pro comes with a 6.47-inches screen. It storage variants include a 512GB with 8GB variant too.

The P30 Pro has 4 cameras at the back, which are way superior to the cameras of P30. It has a 40MP main camera, a 20MP ultrawide camera, an 8MP periscope camera with 5x optical zoom, and a third TOF 3D camera. It has the same 32MP camera on the front. P30 Pro also offers 40W fast charging. It has a battery of 4200 mAH inside.

The colors of P30 Pro are also as same as the P30. It also runs on Android 9 themed by EMUI 9 out of the box.

Benefits of Hard Reset:

Summary:
*You can Wipe all of your Data Stored on your device.
*Easily fix all the performance issue.
*Bypass screen lock through hard reset.
*Bring the factory state.
*Fix all the firmware issues.
*Get rid of signal problems, loop issues, rebooting problems and power problems.

How To Hard Reset Huawei P30 Pro:

  • First, Turn off your device using the power button. Press + Hold power button for few seconds.

Hard Reset Huawei P30 Pro

  • Once your device is turned off completely, Press + Hold Volume Up & Power Keys.

  • Let go of all the buttons when you see the recovery menu on your device screen.
  • In the recovery mode, Select “wipe data/factory reset” using the volume keys. After that press to power button to confirm your selection.
  • On the next screen, Tap “Yes” & select “wipe data/factory reset“.
  • After the process is completed, Reboot your device.

Method2:

  • Open Settings from the Home Screen.
  • Scroll down and Tap on Backup & Reset -> Factory Reset.
  • Now select Reset device.
  • To Confirm Choose Erase everything.
  • That will be all, wait for the process to complete.

Once your device boots, set up the device as you did it before. You will good to go.

Best free Android Photo Editing Apps in 2019

0
Best free Android Photo Editing Apps in 2019

The cameras on modern smartphones are getting better with every iteration. Photography on smartphones is now a thing. Phones like Huawei P30 Pro, Galaxy S10 come equipped with top of the line technology. However, it does not mean that mid-range phones are far off. Mid-tier and even low-budget phones now sport dual-lens camera setups. They produce crisp and vibrant photos under the right conditions. In addition to the first photo, we can make the photos even better with dedicated Android Photo editing apps. 

Since the processors, chipsets, and RAM are also bumped up inside phones in recent times, the photo editing tools for Android can handle even more complex processing and image processing. Therefore, creative users literally do not have to depend on laptops and PCs to produce good looking images for small projects. Note that the picture editing apps for Android are mainly used to post stuff on social media and Instagram stories. These are not meant to be professional-grade software. Surprisingly, these apps are way better than anyone would expect. You can have apps for both amateurs and professional editors.

Below is the list of best and free Android photo editing apps. This list contains both expert levels as well as amateur tools. Now what we mean by this is that some apps just provide built-in filters and some basic tools to “beautify” pictures. These are easy to use and do not take much time. It is good for editing a picture quickly. However, some expert-like tools offer a lot more variety of tools to not only enhance the picture but completely transform them. 

Best Android Photo Editing Apps in 2019

1: Snapseed

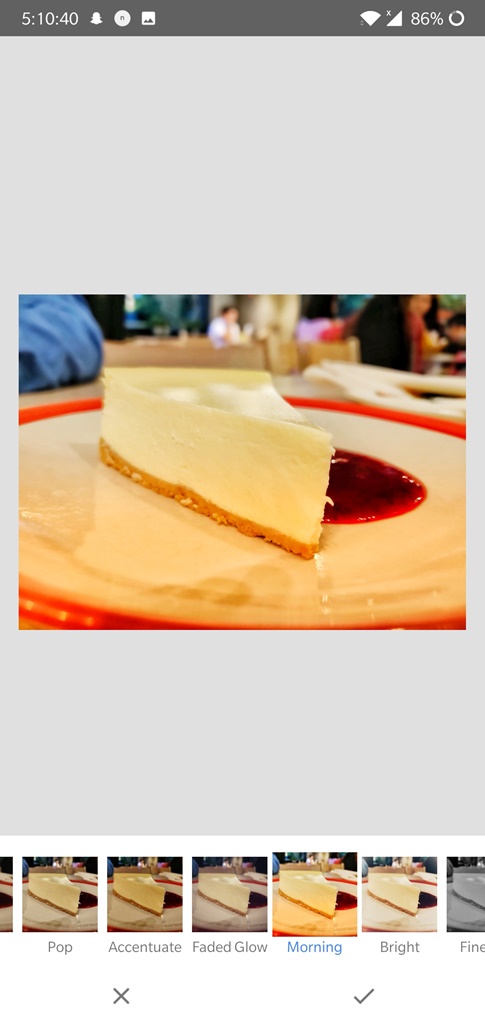
Talking about a perfect mix between a pro-level photo editor and a quick beautifying tool, Snapseed is the best option. This app is officially supported by Google therefore, we get to enjoy one of the best software experiences.
snapseed best android photo editors

Snapseed offers some cool AI tools like head-turning, eye correction, and other picture-fixing tools. However, if someone does not want to get into the advanced stuff, then just use pre-built filters in the ‘looks’ section.

Snapseed Notable Features

  • Support for RAW images
  • 29+ tools and filters
  • Save personal look templates and use later on different pictures
  • Double Exposure

Snapseed is also featured in our list of Best and Free Essential Android Apps.

2: VSCO

One of the most common hashtags on Instagram is #VSCO. It is actually a photo editing and camera app. On top of this, the users of the VSCO app have to sign up. This is required to become a part of its thriving community. You will find the most creative and inspiring creators here. It is not only good for exploring, but we get a lot of new ideas as well. 

vsco best android photo editors

If someone wants to light up their Instagram account with most creative pictures, whether personal or public account, then VSCO is a nice community to hang out and explore new ideas.

The only downside of this app is that not all the filters are available in free mode. You can still try those on pictures but they don’t save or publish to any social media. 

Highlight features of VSCO

  • Huge range of filters and tools
  • Built-in Camera app with filters
  • VSCO Community

3: Adobe Photoshop Fix

Adobe Photoshop is arguably the most popular photo editing tool in the world! It has gained all of its popularity thanks to the immense amount of flexibility added with new plugins. Moreover, the tools built-in in it can pretty much do anything. We can completely re-model or transform a face in Photoshop. Adobe Photoshop Fix is an Android App designed specifically with tools used in fixing photos. It does not contain filters or stuff like that. 

adobe photoshop fix best android photo editors

You get access to tools like Liquify, healing, warp, and many more. All of these tools come in handy when someone has a near-perfect picture and only a few tweaks would make it one. Note that this app is not suitable for everybody. Some may find it a bit complex. However, those who know what they’re doing, are gonna love it.

Best Features of Adobe Photoshop Fix

  • Re-touch and re-structure photos
  • Liquify tool
  • Heal and patch
  • DeFocus. Add background blur with it

4: Photo Editor Pro by InShot

Fans of video editing are certainly familiar with InShot. It is one of the most popular Video Editing apps for Android. Photo Editor Pro by InShot it another great product. It follows the footsteps of its successful big brother. Photo Editor Pro provides ‘super’ easy to use yet effective tools to beautify the pictures. 
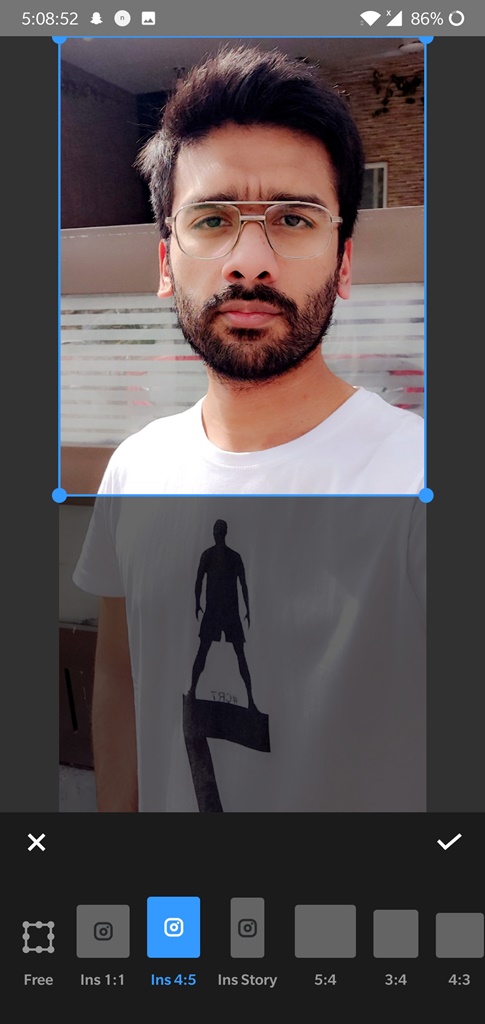
inshot best android photo editors

There is a whole range of pre-built filters for pictures available. On top of that, we can add ‘glitch’ filters to make the photos stand out.

Top features of Photo Editor Pro

  • More than 60 Filters for pictures
  • Glitch Effect Filters
  • Add Lens blur background
  • Retouch the body, face, and other features
  • Dedicated Collage Maker
  • Instagram 1:1 picture builder and other ratios for Stories, FB, etc

5: PicsArt Photo Studio

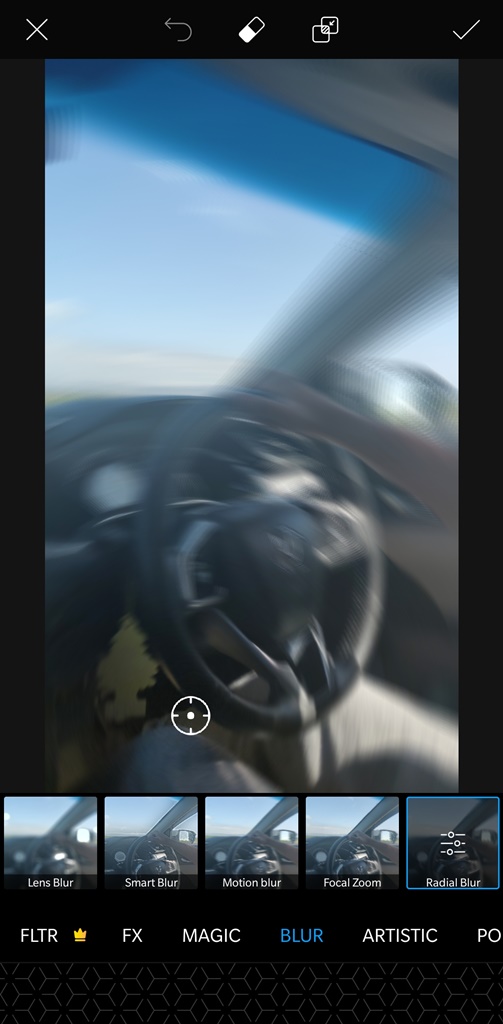
PicsArt is a comprehensive photo studio for Android! It is not a tech-savvy piece of software yet it offers a ton of pro-level filters. Ranging from simple photo effects to re-structuring and healing photos, we have got everything. 
picsart best android photo editors

Moreover, we get some unique artistic and lens blur filters. These include the likes of motion blur, radial blur, and many more. You can add background blur to the photos as well.

Standout features of PicsArt Photo Studio

  • Collage Maker
  • Tons of filters, backgrounds, and effects
  • Stickers, cliparts, and sticker maker 
  • Lense Blur effects

6: Pixlr

Pixlr is a totally free-to-use photo editor for Android. None of the filters or effects available in-app are locked by a subscription. This itself is a big plus point for it. Moreover, you get a huge array of photo editing features like AutoFix, blur, smooth, red-eye correction, and more. 
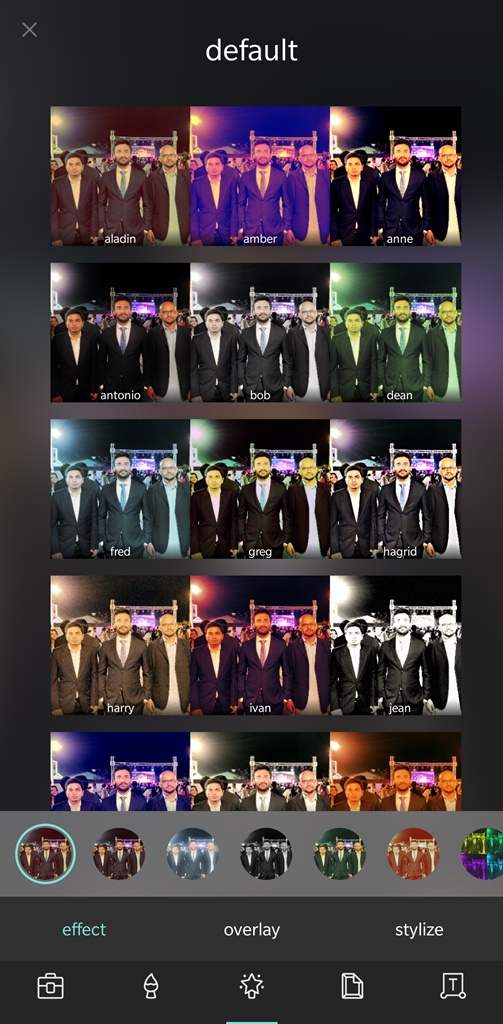
pixlr best android photo editors

Either edit a single photo or create a collage with it. The photo editing tools for photos contain a huge collection of filters. You can change the intensity of each of these filters manually. Moreover, add stylish overlay effects like lens blur and more to give a more artistic look to photos.

Best Features of Pixlr

  • Free to use
  • Collage Maker
  • Photo correction tools work flawlessly
  • Huge collection of filters
  • Background blur
  • Color correction

7: Afterlight

Want elegant looking photos with lens light leak effects? Well, Afterlight, is probably one of the best photo editors on Android to do so. It is simple to use and pretty effective. Moreover, there is no hidden subscription fee to unlock all the filters. However, users are still forced to like the Facebook page to unlock some filters. Still, it is free to do.

afterlight best android photo editors

The coolest feature of all is the Light Leak effect. Normally, apps contain one or two such effects. However, we get access to a whole list of lense light leak effects. There is also a slider at the bottom to adjust the intensity of these overlays.

Top Features of Afterlight

  • Lense Light Leak Overlay effects
  • Picture filters of various categories
  • Photo fixing tools
  • Built-in camera
  • Overlay frames

8: Unfold

All the photo editor apps until now are all about adding filters and correcting the photos’ structures. While it is important and necessary, it is time we add another dimension. Unfold is a cool photo editing app that creates unique Polaroid-like pictures. 

unfold best android photo editors

The good part is that we are not limited to just one of a few layouts. There are tons of customizable layouts with optional text overlays as well. Add headers and captions to these images. Overall, it is a great tool to create pictures as memories and post them on social media like Instagram and Facebook. It is even cool for Instagram stories.

Highlight Features of Unfold

  • 115+ templates
  • 5+ Fonts and text styles
  • Customize text
  • Add captions

9: Lens Distortions®

Speaking of artistic effects, how can we leave Lens Distortions out. At the time of writing, it is still in its beta phase. But oh boy, is it good. This app is dedicated to adding overlay effects in photos only. As clear by the title of the app itself, you can add several types of lens blur and light leak effects. 
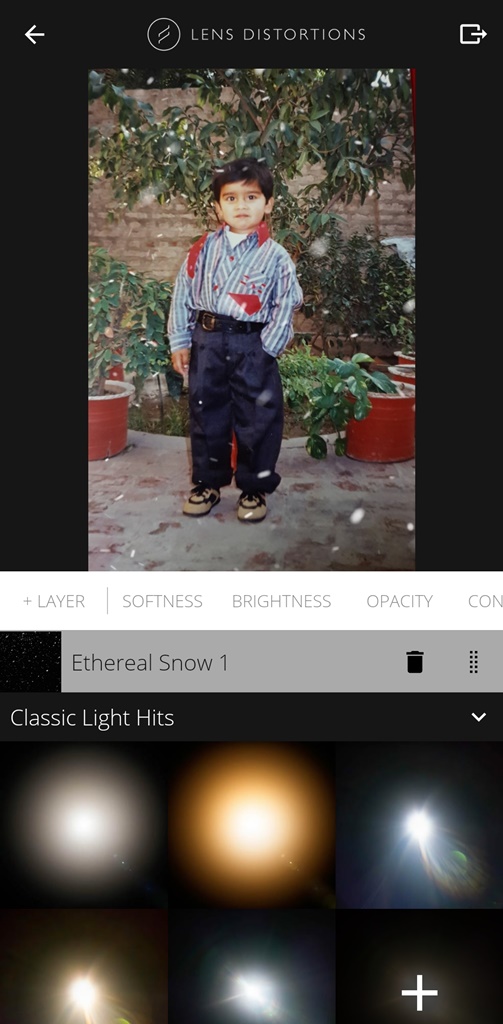
lens distortions best android photo editors

Moreover, choose from several variations to further enhance your experience. Additionally, download more packs for a huge number of options to choose from.

Key Features of Lens Distortions

  • A minimalistic photo editing tool
  • Add lens blur, lens flare, and leak effects
  • Other effects like snow are also available

10: Adobe Photoshop Express

We’ve saved the best one for last. Adobe Photoshop Express is the closest to the desktop version in terms of features and usability. It offers a practically an unlimited number of options for editing photos, adding effects, texts, stickers, cliparts, overlays, and what not! 

adobe photoshop express best android photo editors

From fixing the pictures, re-structuring faces and bodies, and adding beautiful effects and overlays, it has got it all. If not the most powerful, Adobe Photoshop Express is one of the most powerful photo editors for Android.

Highlight Features of Adobe Photoshop Express

  • Basic tools for re-structuring photos
  • Text editors and styles
  • Lens blue effects, overlays
  • Background blur
  • Red-eye correction
  • Collage Maker
  • Perspective Correction

Conclusion

We’ve managed to compile a list of some of the best photo editors for Android devices here. It contains both pro-level and amateur level tools. The low-effort tools are used by everyone to quickly edit photos and post them on personal social media or stories of Instagram, Snapchat, and more. 

At end of the day, it all comes down to personal preference. Whether you’re the kind of person that likes to spend time and effort into making and editing photos or just would like a quick filter to fix the photos. Both kinds of tools are available. In addition to regular Android photo editors, we’ve added tools like Unfold and Lens Distortions to add more variety for creative people out there.
Download Always On Edge APK: Notification LED for Galaxy S10

Download Always On Edge APK: Notification LED for Galaxy S10

Galaxy S10 owners can use the Always on Edge application to add notification LED around camera cutout. Always on Edge APK is available here. You can download latest Always on Edge APK and follow the instructions to install it right now.

Always on Edge APK
Always on Edge in action.

Samsung Galaxy S10 is the talk of the town right now. The South Korean giant has set the bar very high for its competitors. The Galaxy S10 lineup has successfully become the most popular one to date. We get the Galaxy S10E, which is the cheapest, then we have the S10, and lastly, we have the S10 Plus. These are all the best phones in their own category. The highlighted feature of these phones is the camera cutout on the front, which as been added to achieve maximum display. In a race to go all-screen, Samsung has removed the notification LED from the Galaxy S10 phones. You do not get the notification light for any messages, missed calls, or low battery now. The absence of notification LED on the Galaxy S10 has given the app developers a whole new opportunity. Earlier, we saw Energy Ring, an application to add battery indicator around camera cutout, and now we have the Always On Edge with support for Galaxy S10.

Before you download Always on Edge APK, let’s take a deeper look at this application.

Always on Edge Review

First off, this is not a new application specifically designed for the S10. This app was basically designed to put the edge display of Samsung phones to use. It also runs on a number of other devices like the OnePlus and Huawei handsets.

The basic purpose of this application was to add an animated lightning effect around the edges of the phones. Samsung’s phones come with their own edge lightning feature, but they are very limited. Edge lightning extended the use of this feature.

When the Galaxy S10 came out, Energy Ring application popped up adding a ring around the phone’s camera cutout. This idea urged other developers to show their creativity too. Always on Edge developers took the idea of ring light to a whole new level and utilized it for the notifications.

Using the Always on Edge, you can now add a beautiful notification light around the hole-punch of S10, S10E, and S10 Plus.

It still has the options to enhance the animations around the edges of the phone, but on a Galaxy S10, you will find it more useful around the camera cutout only. The application comes with options for the notch of the phone.

When you open this app, it gives you a huge list of options. The configuration looks complex, but it isn’t that complex in real. You have to give it some permissions to run without any hiccups.

You can then select when and how you want this application to run. It gives you the option to pick colors of your choice from the Hex chart. A handful of animation patterns is available too. Always on Edge has its on Always on Display too, but it isn’t as good as the stock Always on Display of the phone.

Furthermore, you can set this application to run for each specific application differently. You can choose whether you want it to run for system apps only or you want all the apps to use it.

Its a free application, but it comes with ads. When you want to save the preferences, you can either watch a 30 seconds long video to save the settings, or you can pay the developer to get premium options.

Downsides of Always on Edge

  • When enabled, the phone’s stock notifications will not work. No more pop-ups on lock-screen.
  • Needs extra permissions you may not want to grant.
  • Full of bugs, lock screen doesn’t work properly after enabling this application.
  • Too many unnecessary options that make it look complex.
  • Applications’ own icon pops-up on the lock screen when enabled.
  • The application works when it wants to doesn’t work at times.
  • It can consume a slight amount of battery.
  • On pop-up notifications, it starts showing the package name of the application.

I liked the application at a glance, but the recurring issues forced me to uninstall it. Go ahead to install it now in order to experience on your phone.

Always On Edge APK

  • Always on Edge APK – Download
  • Copy the APK to your phone or download it directly on your S10.
  • Now using File Manager, install the APK. If it asks for permissions, allow it.
  • Open Always On Edge on your phone now.
  • First, of allow, tick all the options including notification access, show over another app, phone state, and change system settings.
  • Now allow this app to run without restriction.
  • Under “How/When to Light”, check “when a notification comes” and the screen is off. Also, set the Reminder while the screen is off for your desired time span. Select the apps that you want to work with AOE. Also, run this application over your default home screen, this will require you to reset the wallpaper.
  • Scroll down to “enable edge lighting” and select “around notch only”. Also, enable notch support.
  • Select the Edge Style now.
  • Select the Edges color number now.
  • Turn off the Display clock.
  • Ignore other options and click on Save.
  • Now watch an ad for 30 seconds to save the settings.

You can also find Always on Edge in the Play Store.

Wrap Up

You will find Always on Edge in action now. It looks really good around the notch of S10E, S10, and S10 Plus. In my opinion, this application is good only for a while. It has so many bugs that it will end up going out of your phone only. I hope that the developer fixes the bugs as soon as possible.
Without those downsides mentioned above, this would and could have been a great application for the S10. Drop your experience with this application in the comments section down below.

More:

Download Hidey Hole APK: Wallpapers to Hide Galaxy S10 Camera Hole

Download Hidey Hole APK: Wallpapers to Hide Galaxy S10 Camera Hole
Batman Wallpaper on my S10 Plus.

You can download Hidey Hole APK from here now. The Hidey Hole APK can be installed on Galaxy S10, S10E, and S10 Plus. You can use Hidey Hole APK to hide Galaxy S10 Camera Hole.

Samsung Galaxy S10 is the greatest Android smartphone by all the means. Samsung has introduced 3 phones in the Galaxy S10 lineup. There is the Galaxy S10E, Galaxy S10, and the Galaxy S10 Plus. All three of them come with a punch hole camera on the front. This has been done in order to achieve maximum room for the display on the front. The Galaxy S10’s amazing design has urged the developers and designers to put its camera hole to use. Some developers are coming up with apps to add a ring light around the camera for notifications and battery, while the designers are playing their part to make the best use of this hole. The Hidey Hole application is also a part of these efforts.

Hidey Hole APK
Batman Wallpaper on my S10 Plus.

Before you download Hidey Hole APK, let’s take a look at what this application is all about.

Hidey Hole Review

First of all, this application has a great name. The name is actually a little bit funky. It doesn’t exactly give you an idea about the app’s exact use. Hidey Hole is a wallpapers app. This app has been developed by Chainfire, the renowned SuperSU developer.

Hidey Hole brings thousands of wallpapers exclusively designed for the Galaxy S10, S10E, and the Galaxy S10 Plus. This application is linked to Reddit. The application automatically looks through Reddit to find out the wallpapers designed for Samsung’s latest flagship.

So, how does this application exactly hide the cameras? Well, it doesn’t exactly move your camera somewhere else. The wallpapers have been designed in a way to surround the camera holes with something interesting. For example, you will find a spider man hiding the 2 front cameras of Galaxy S10 Plus in his eyes. You can find Batman’s Bat hiding S10 Plus’s dual cameras. Minions will take care of the cameras sometimes. There are Big Hero wallpapers to add beauty to Galaxy S10’s screen.

Hidey Hole does not only bring the wallpapers, it is equipped with a number of other features. For example, when you choose a wallpaper, you can manually set its brightness, contrast, and saturation. These options will help you to avoid that over-shadow effect that some wallpapers cause on the screen.

So far, the Hidey Hole has been the best wallpaper app for the Galaxy S10. If you want to unleash the real potential of your Galaxy S10’s Dynamic AMOLED screen, you can use Hidey Hole to hide Galaxy S10 Camera Hole.

Go ahead to download Hidey Hole APK and follow the instructions to install it on your phone.

Hidey Hole APK

  • Hidey Hole APK – Download Link
  • Copy the APK to your S10, or download it on the phone directly.
  • Using a file manager, open the APK and install it.
  • If the phone asks for permission, allow it.
  • Now open Hidey Hole application and let it load all the wallpapers.
  • Choose your desired wallpaper and set its colors, brightness, etc.
  • Now press the Save button to save the wallpaper to your phone.
  • You can also download the wallpapers on the local storage of your phone. That’s all.
Wallpapers in Hidey Hole.

Furthermore, you can find Hidey Hole in the Google Play Store too. It’s a completely free application.

Wrap Up

That’s all with this application. We keep posting such apps for the Galaxy S10. Stay tuned with our site to find out more for your phone. If you have any questions to ask, feel free to ask them down in the comments section. We will try our best to get back to you as soon as possible.