Home Blog Page 55

How to install Android Pie One UI on Galaxy S7 and S7 Edge

How to install Android Pie One UI on Galaxy S7 and S7 Edge

Samsung Galaxy S7 and Galaxy S7 Edge, the 2016 flagships from the South Korean giant are still not clear for an official Android Pie update. S7 owners are anxiously waiting for an update. While Samsung itself doesn’t have anything to say, custom ROM developers look active in this matter. A custom ROM based on Android Pie with One UI is now out for the Galaxy S7 and S7 Edge. In this guide, I will show you the steps to install Android Pie One UI on Galaxy S7 and S7 Edge.

install Android Pie One UI on Galaxy S7 and S7 Edge

Before you update your Galaxy S7 or Galaxy S7 Edge to Android Pie, let me tell you more about this custom ROM.

Android Pie One UI for Galaxy S7 and S7 Edge

A few days back, Samsung released the Android Pie update for the Galaxy Note FE. The Galaxy Note FE is a revised version of Galaxy Note 7, which was released in the same year as the Galaxy S7. Surprisingly, the Galaxy Note FE and the Galaxy S7 both share the same SoC and other hardware power, even then the Android Pie update for this phone remains a mystery.

XDA Senior Member Kill-Switch took this task of bringing the Android Pie One UI to the Galaxy S7/S7 Edge. He basically ported the ROM of Galaxy Note FE for the Galaxy S7 handsets. This ROM brings the entire Android Pie with One UI and all of its new features to the S7.

So, even if Samsung doesn’t update the phone officially, you still have the Android Pie port from the Galaxy Note FE. Yes, this is a custom ROM, but it is better than the AOSP custom ROMs in a number of ways.

At first, this is a stock-based custom ROM, which means you will get all the official features. This ROM comes with all the Google Apps installed too. You don’t have to install the apps manually on it. Furthermore, this ROM is supposed to have minimum to no bugs. To cut it short, it is totally safe to run this ROM on your phone as a daily driver. The only thing you have to do is to pay full attention to the installation instructions.

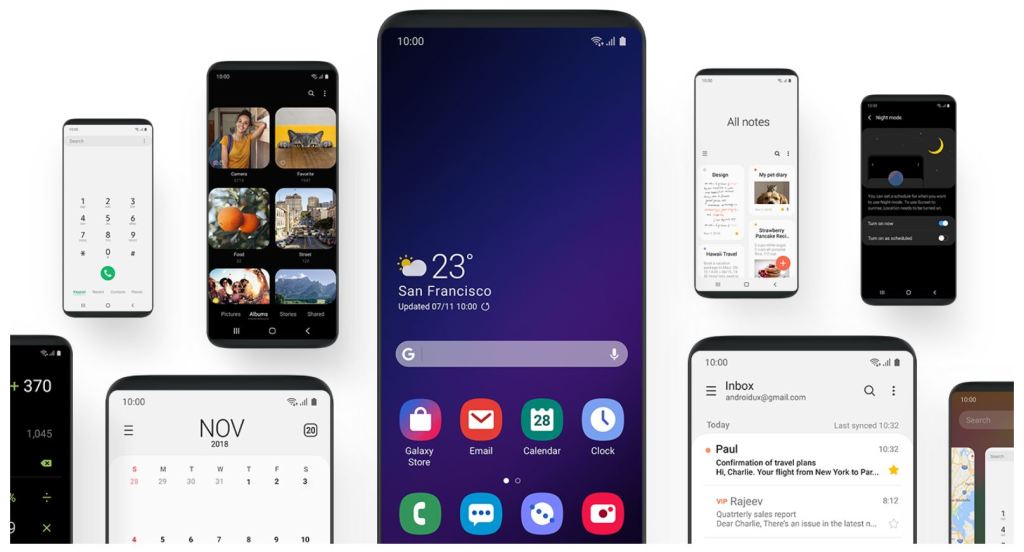
Let me tell you about the features of Android Pie One UI update which make this update worthy.

Android Pie One UI features for Galaxy S7/S7 Edge

The Android Pie update is loaded with tons of new features. I will just list a few of them down below.

  • New Samsung One UI
  • Applications UI Overhaul
  • Settings Application New Interface
  • Navigation Gestures
  • Interaction Control
  • Pin Windows
  • Video Wallpaper
  • Native Private DNS Support
  • Dark Mode a.k.a Night Mode
  • Adaptive Battery Mode
  • New Interface for “About Phone”
  • New Smart Sharing
  • And many more…

Install Android Pie One UI on Galaxy S7 and S7 Edge

This process is divided into three parts. At first, you have to go through the preparations. After preparations, the downloads section will provide you required files and then you will have the installation instructions.

Preparations

  • This guide is for Exynos Galaxy S7/S7 Edge only. It stands valid for G930F/FD and G935F/FD models only. Do not flash on any other phone.
  • Backup each and everything from your phone as it can potentially wipe the phone.
  • Charge your phone up to 50% to avoid a power mishap during installation.
  • Enable OEM Unlocking and USB Debugging mode on your phone.
  • Install TWRP Custom Recovery on Galaxy S7 and S7 Edge.
  • Follow remaining steps carefully.

Required Downloads

Update Galaxy S7/S7 Edge to Android Pie:

  1. Boot your phone in the TWRP recovery now. To do so, turn off the phone. Now press and hold Volume Up + Home + Power button to go into recovery.
  2. Once you are in the recovery, click on Wipe > Advanced Wipe > Wipe internal memory, system, data, Dalvik cache, and cache.
  3. Get back to the main menu in TWRP and click on Install.
  4. Click on Install Zip > Locate the ROM.zip file and flash it.
  5. It will now start the AROMA installer. Select Full Wipe in AROMA installer too.
  6. You can choose whether you want to install Magisk or not. If you install Magisk, you will reboot the phone twice during installation.
  7. Complete the ROM installation by the following AROMA on-screen instructions now.
  8. Reboot your phone in the end.
  9. You will have it running on the latest Android Pie firmware.

Wrap up

That is it. You have successfully upgraded your phone to Android 9. If something seems to be gone wrong, you can immediately clear the cache of your phone and reboot it again. If you are not liking the current ROM, you can go back to stock firmware anytime. Here is how to install stock firmware on both the S7 and S7 Edge. In case you have any questions ore queries, feel free to reach out to us. I will try my best to get back to you as soon as possible.

Best Free Android VPN Apps in 2019

2
Best Free Android VPN Apps in 2019

A Virtual Private Network or VPN is a network utility to mask personal identity online. Moreover, it is used to fake your IP Address online and show yourself surfing from a different location. There are multiple uses for VPN. Therefore, we have compiled a list of Best Android VPN Apps. This list goes through the best overall services that work all around the world. Some countries have tighter security than normal. You can read about Best VPN Apps for Chinese Android Phones here. Since, not everyone uses a VPN for the same purpose, therefore, what’s good for one individual isn’t necessarily good for everyone. Go through the list below and find the most suitable deal for yourself.

How to choose a VPN for Android?

If you open the Play Store and search for a VPN, there are practically countless options available. However, from time to time we come across a bunch of Apps that are actually a scam. Either they do not work at all or steal users’ data. 

It is pretty easy to avoid these kinds of mistakes. Before continuing, the first thing everyone should know is that ‘nothing is free’. If an app is offering free VPN services, it is either supported by a huge number of intrusive ads, stealing data or it just does not work anyway. However, a lot of paid VPNs offer free trials or limited versions of their services. These are somewhere in the range of 300-600MB per month and limited bandwidth. 

In case of free trials for paid VPNs, those are pretty safe to use. The only reason for providing free trials is to allow users to experience their product before buying. However, the data is so limited therefore, you cannot actually use it for free in long term.

Completely free VPNs could be outright scams. These VPNs most likely steal and sell your data to interested parties. It is used for stuff like targeted ads. Some free VPNs even inject malware and viruses in phones. Therefore, always be careful and go with a VPN that is trusted and has a good record.

Free VPN vs Paid VPN

When it comes to peace of mind and overall satisfaction, there is not even an argument. Paid VPNs are the way to go. These work with high-speed internet and offers premium security to its users.

Free VPNs on other hand could be shady a lot of times. Therefore, it is advisable to not use free VPNs for any sensitive work. This involves using personal accounts, banking, credit card transactions, and social media. Use the free VPNs for small tasks only. Normally, the free VPNs run out of speed after using it for a while anyway.

Note that most of the free VPNs mentioned in this list are actually free trials of paid VPNs. Some of these may require credit card info but most of these do not. You just need to sign up with Email and it’s good to go. Completely free VPNs are mostly shady and we cannot recommend questionable tech to our readers.

Best Free Android VPN Apps

1: NordVPN

nordvpn best free android vpn apps

Either going for the free version or buying a premium package, NordVPN is one of the best options out there. It works in the tightest of firewalls. A lot of people working in China use NordVPN because it constantly keeps updating its software to bypass China’s Great Firewall.

In addition to awesome access, premium users get amazing deals and discounts on long-term plans. The free users however are not disappointed either. There is a decent bandwidth available every month. All you need to do is just sign up with Email and that’s it! Use the same account in up to 6 devices.

Best Features:

  • 24/7 customer support
  • Over 5,000 servers in more than 60 locations around the globe
  • Military-grade protection and Double VPN option
  • Automatic Kill-Switch
  • Works well with Netflix, Hulu,  Prime, and other streaming sites/services

nordvpn china android phones2: Express VPN

best free android vpn app express vpn

Just like our first pick, Express VPN is another trusted name in its genre. It is secure, fast, and reliable. Moreover, use the same account on more than one device. Let’s say someone uses an Android, a tablet, a PC, and another phone. Just sign up once and login with the same ID on all of these accounts. The speed on any of the devices is not affected. Use all the devices at the same time and they all will get their personal full possible speed.

Best Features:

  • Optimized for Video Calling
  • 24/7 Customer Support
  • Works in China
  • Optimized for streaming movies and TV shows like Netflix,  Prime, Hulu and lot of other sites
  • Servers available in over 148 cities around the globe
  • First month of premium service is free (Credit card needed to buy and refund service)

nordvpn china android phones3: PrivateVPN

best vpn for android private vpn

Very concerned about privacy? Or you’re a tech savvy that loves to mess with different VPN protocols. Then PrivateVPN is one of the best options out there. It offers multiple protocols like OpenVPN, PPTP, L2TP, IKEv2 And IPSec. Moreover, the special security system helps avoid IPv6 leaks.

Another cool thing about PrivateVPN is how to secure the transferred data it. Every bit of data passing through is encrypted using a 2048-bit encryption key. Lastly, use PrivateVPN to download torrents anonymously on Android. It is specially optimized for P2P traffic. 

Best Features:

  • Optimized for P2P traffic. Download torrents at fast speeds
  • 2048-bit data encryption
  • VPN servers in over 50 locations 
  • Kill Switch

nordvpn china android phones4: Tunnelbear VPN

best android vpn tunnelbear vpn

When it comes to interface and cool animations, we have to give it to Tunnelbear. It is one of the best looking VPNs for Android. The bear digs a tunnel for you and when he comes out, the IP address is changed to a different location. It is a small detail but looks cool.

When it comes to real business, isn’t shy of quality. It provides end-to-end 256-bit AES encryption. Therefore, every bit of data transferred is actually safe from the prying eyes of hackers and government agencies. Just like any good premium VPN, use Tunnelbear one multiple devices with the same account. 

Best Features:

  • Complete anonymity and company promise not to log any of users’ data
  • 500MB of free data every month for free users
  • 256-bit AES encryption
  • One of the best Android VPNs for Skype, WhatsApp, Instagram, Viber, etc
  • Superfast streaming of movies and shows all over the world

nordvpn china android phones

5: AstrillVPN

best vpn app android astrillvpn

It is one of the lesser-known VPNs for Android. Overall, AstrillVPN’s servers are located in over 65 countries. That is a big number for any regular VPN services. Moreover, each location hosts multiple servers to ensure that none of the users face sluggish internet speeds.

The most notable feature of AstrillVPN is the Multi-hop VPN network. This is something not available in every option. What it does is that, instead of just connecting you to just one server, the traffic actually goes through more than one server. This way, it is even harder to track the original IP address of VPN users.

When using AstrillVPN on Android or any other service, choose from one of the following protocols: OpenWeb, StealthVPN, WireGuard, OpenVPN, CiscoIPSec, IKEv2, L2TP, SSTP, PPTP. It is possible that one protocol may not work under certain firewall or security. Therefore, keep changing until you find the right one.

Best Features:

  • Multi-hop VPN network feature for added security
  • Available in over 65 countries
  • 7-Day free trial
  • Kill Switch to avoid accidental DNS and IPv4/IPv6 leaks

nordvpn china android phones

6: VyprVPN

best free vpn for android vyprvpn

Get access to one of the fast VPN services available. With VPN servers in over 70 locations, rest assured, everyone will find their desired location to connect to. Moreover, encrypt all personal data with a 256-bit unmodified encryption protocol. 

It is also one of the best VPNs to use in China and bypass its firewall. Therefore, if anyone is looking for an Android VPN in China specifically, then give this app a go.

Best Features

  • One of the fastest connection
  • Great to use in China
  • 256-bit Encryption
  • NAT firewall

nordvpn china android phones

7: IPVanish

best free vpns for android ipvanish

With some extra extras and impressive speeds, IPVanish manages to make it into our list for the best Android VPN services. The only major feature missing from it is “Kill Switch”. For those who are not aware, Kill Switch automatically turns the internet off in case the VPN is disconnected. Note that not a single VPN has 100% uptime. Therefore, the disconnects are bound to happen now and then. Therefore, it is good to have a kill switch, so that it automatically saves you from leaking the actual IP Addresses.

Overall, it is available in more than 60 locations and comes with 256-bit encryption. 

Best Features:

  • High internet connection speed
  • 60+ server locations
  • Lauded by many as the fastest Android VPN!

nordvpn china android phones

8: Private Internet Access

best free android vpns private internet access

Private Internet Access or PIA is a simple and “Do-what-it-says” kind of app. There is nothing less, nothing more. The best thing about using PIA is that it is one of the cheapest options on the market. Therefore, you don’t have to dig deep into your wallet to get access to a fast VPN with good enough security.

With over 3,000 servers around the world, Private Internet Access manages super quick internet connection speeds. Therefore, you’d never get stuck buggering videos, movies, and TV shows. The video calls should be pretty smooth as well.

  • Adblocking
  • Superfast Internet Connection Speed (Up to 80%)
  • 3,300+ servers
  • Cheap and Affordable

nordvpn china android phones

9: HideMyAss!

best free android vpn apps hidemyass

HMA! is the largest VPN network in the world. It is quite an impressive feat. Thus giving birth to the feature “Favorite server”. Since there are thousands of servers, therefore, if users enjoy their experience with a certain server, save it for later use. How convenient is that? The servers are not just based on countries or cities. There are multiple servers in the same location.

Use HideMyAss! to protect your data on public WiFi hotspots, streaming content from around the world, or just masking your location. Unblock sites and apps that are locked either by owners or the country’s government.

Best Features:

  • Biggest VPN servers network in almost every country 
  • Fast internet speeds
  • Save favorite networks
  • Kill Switch
  • Public Wi-Fi hotspot protection

nordvpn china android phones

10: CyberGhost VPN

android vpn cyberghost

Become a Ghostie with CyberGhost VPN and enjoy your freedom online. It is no secret that a lot of agencies try to track the personal data of every user they can reach. This could be for a lot of purposes. However, not everyone likes their privacy breached. Use CyberGhost VPN for Android to protect all the activities on phone. Use the same account on multiple devices at the same time.

The company promises that it does not keep any logs or data. Since all data is encrypted by VPN, therefore, none of the activities of users are either tracked or saved anywhere.

  • Free Trial without Credit Card
  • No logs or records saved by the company. Complete anonymity
  • Over 3,000 servers in 60+ countries
  • Protect Online privacy by masing IP Address

nordvpn china android phonesConclusion

Whichever VPN you choose from the given list above, we assure you that all of these are high-quality products. However, there are slight differences between these. For example, HideMyAss! is the largest network. However, their data privacy policy is a bit sketchy. Privacy-conscious people can go for other VPNs like IPVanish and NordVPN. It all comes down to personal preference.

We would love to know your feedback and experience with whichever VPN you chose to go for Android. Since all of these work across multiple platforms, therefore, make full use of this option and install VPN on all devices.

Samsung Galaxy S10 Biometrics Update Failed FIXED

Samsung Galaxy S10 Biometrics Update Failed FIXED
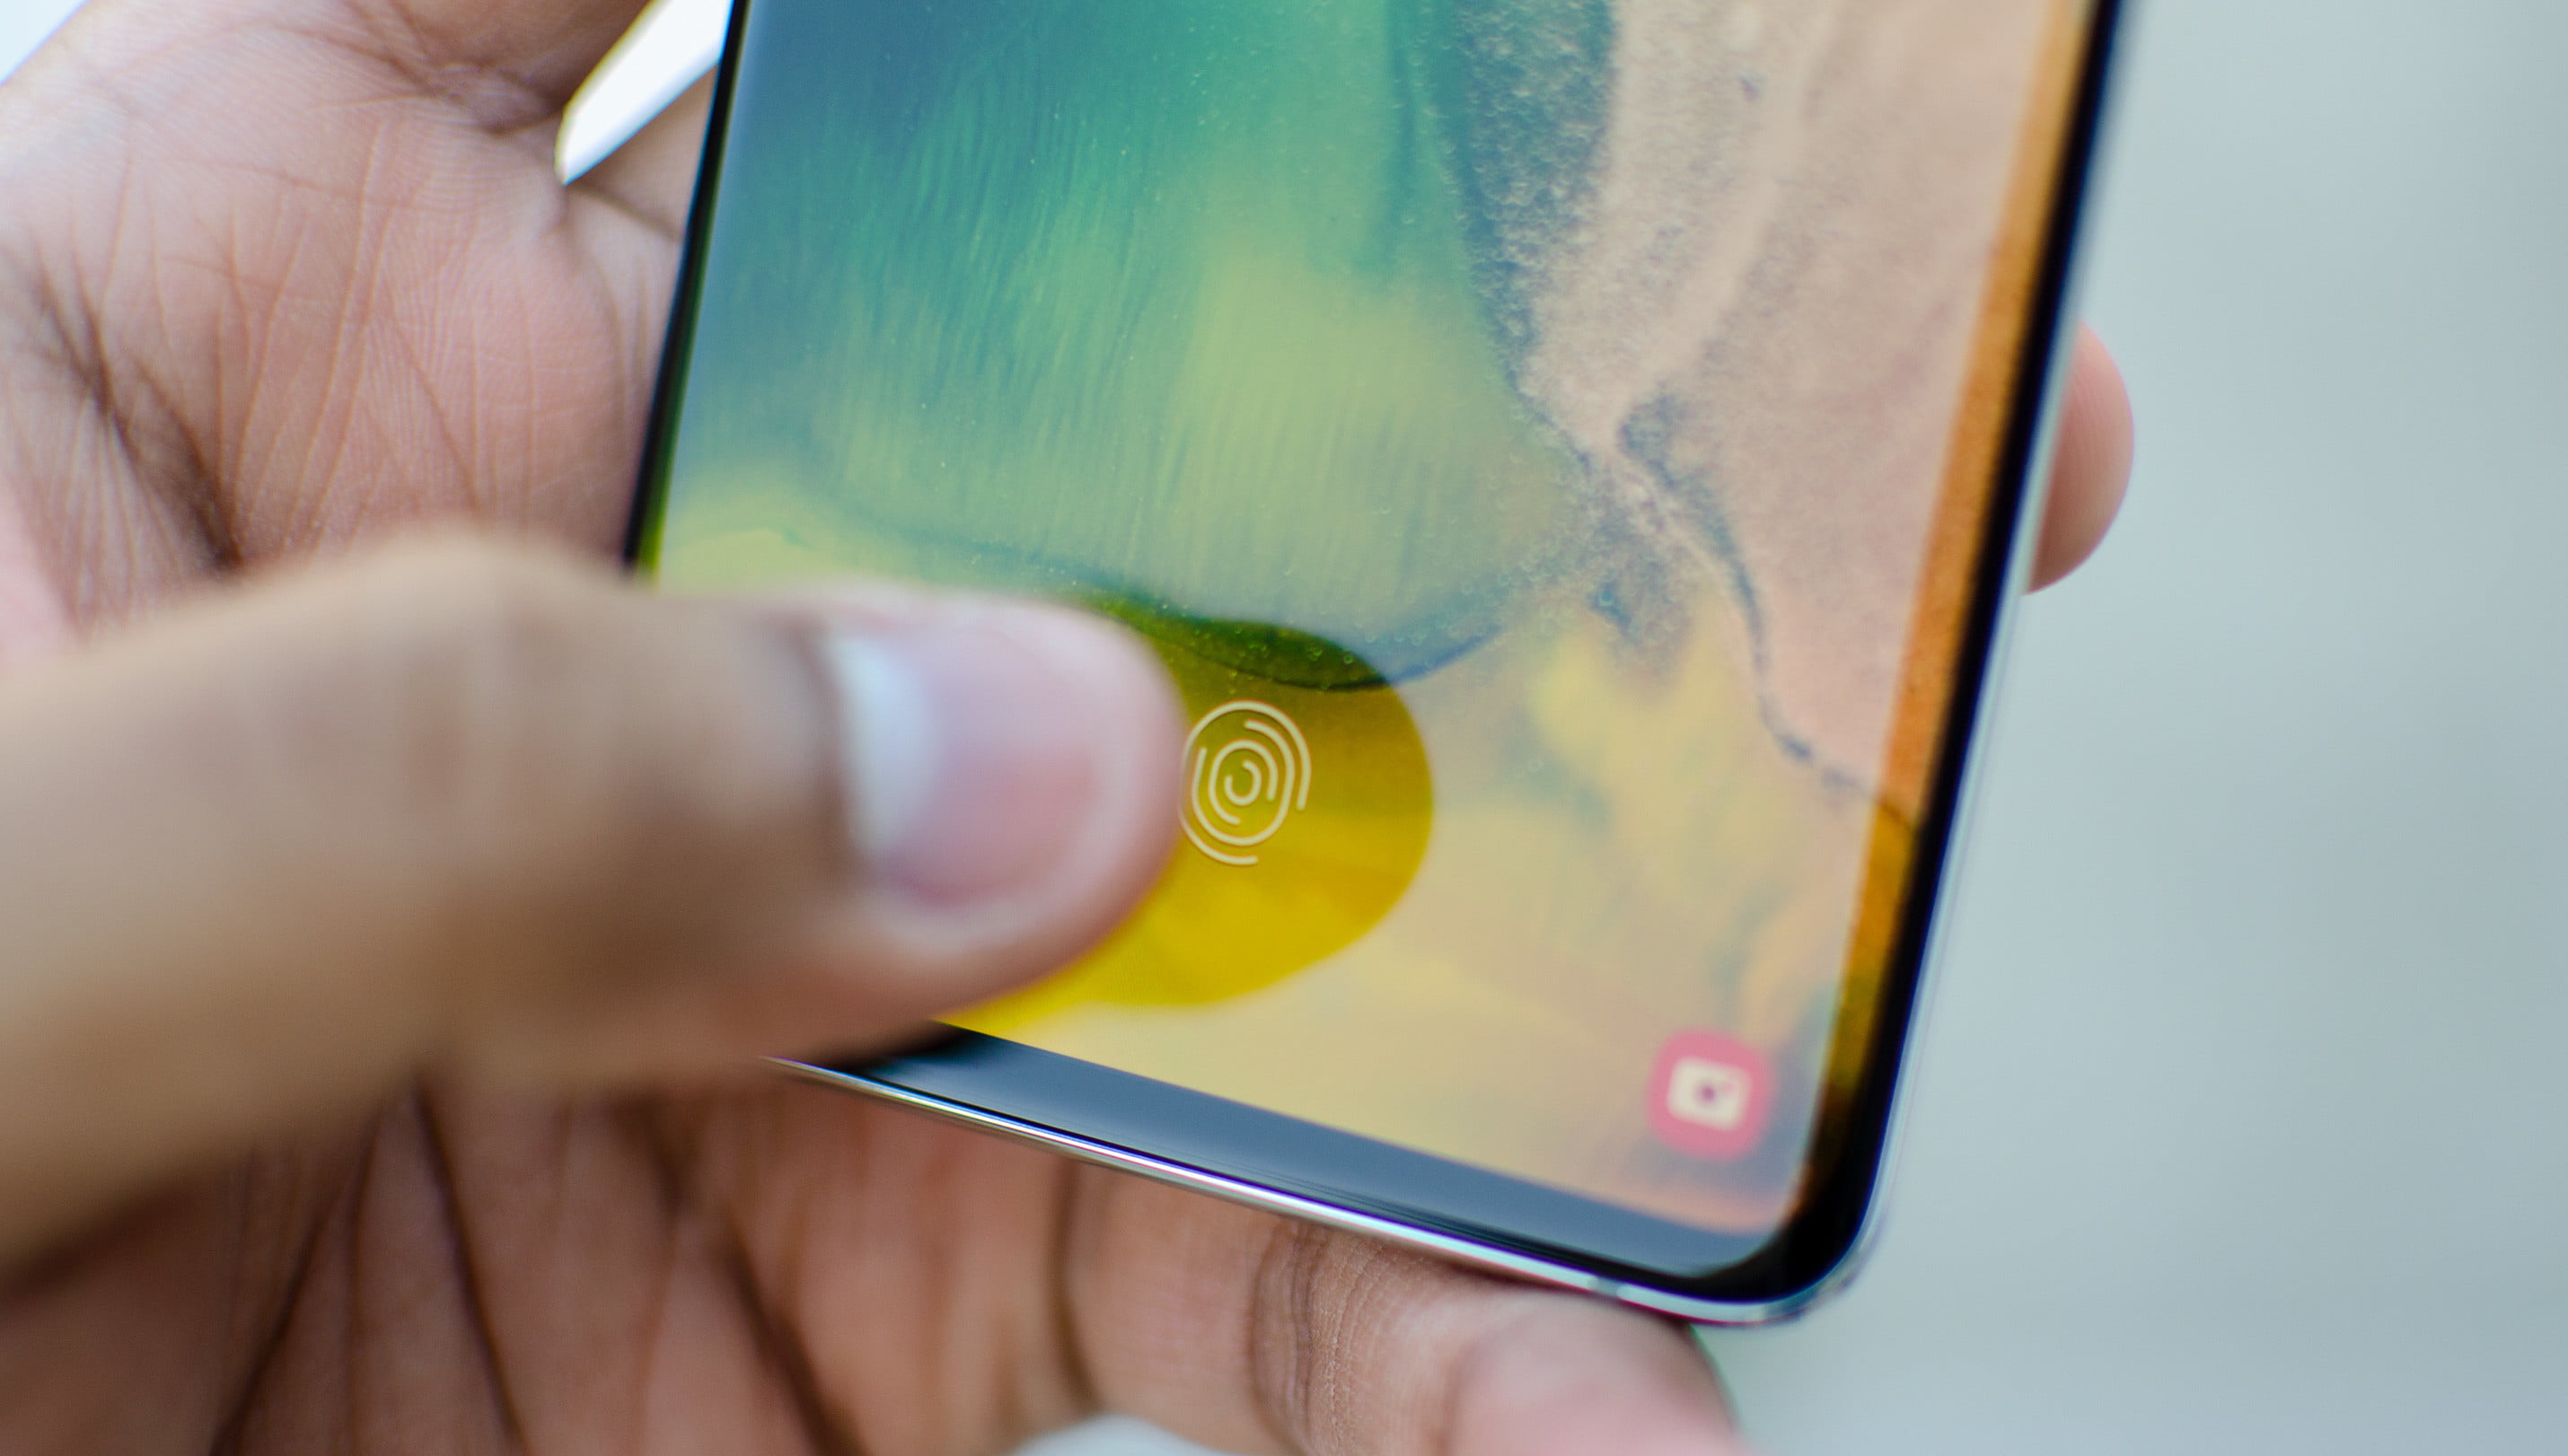
Image Credits: Digital Trends

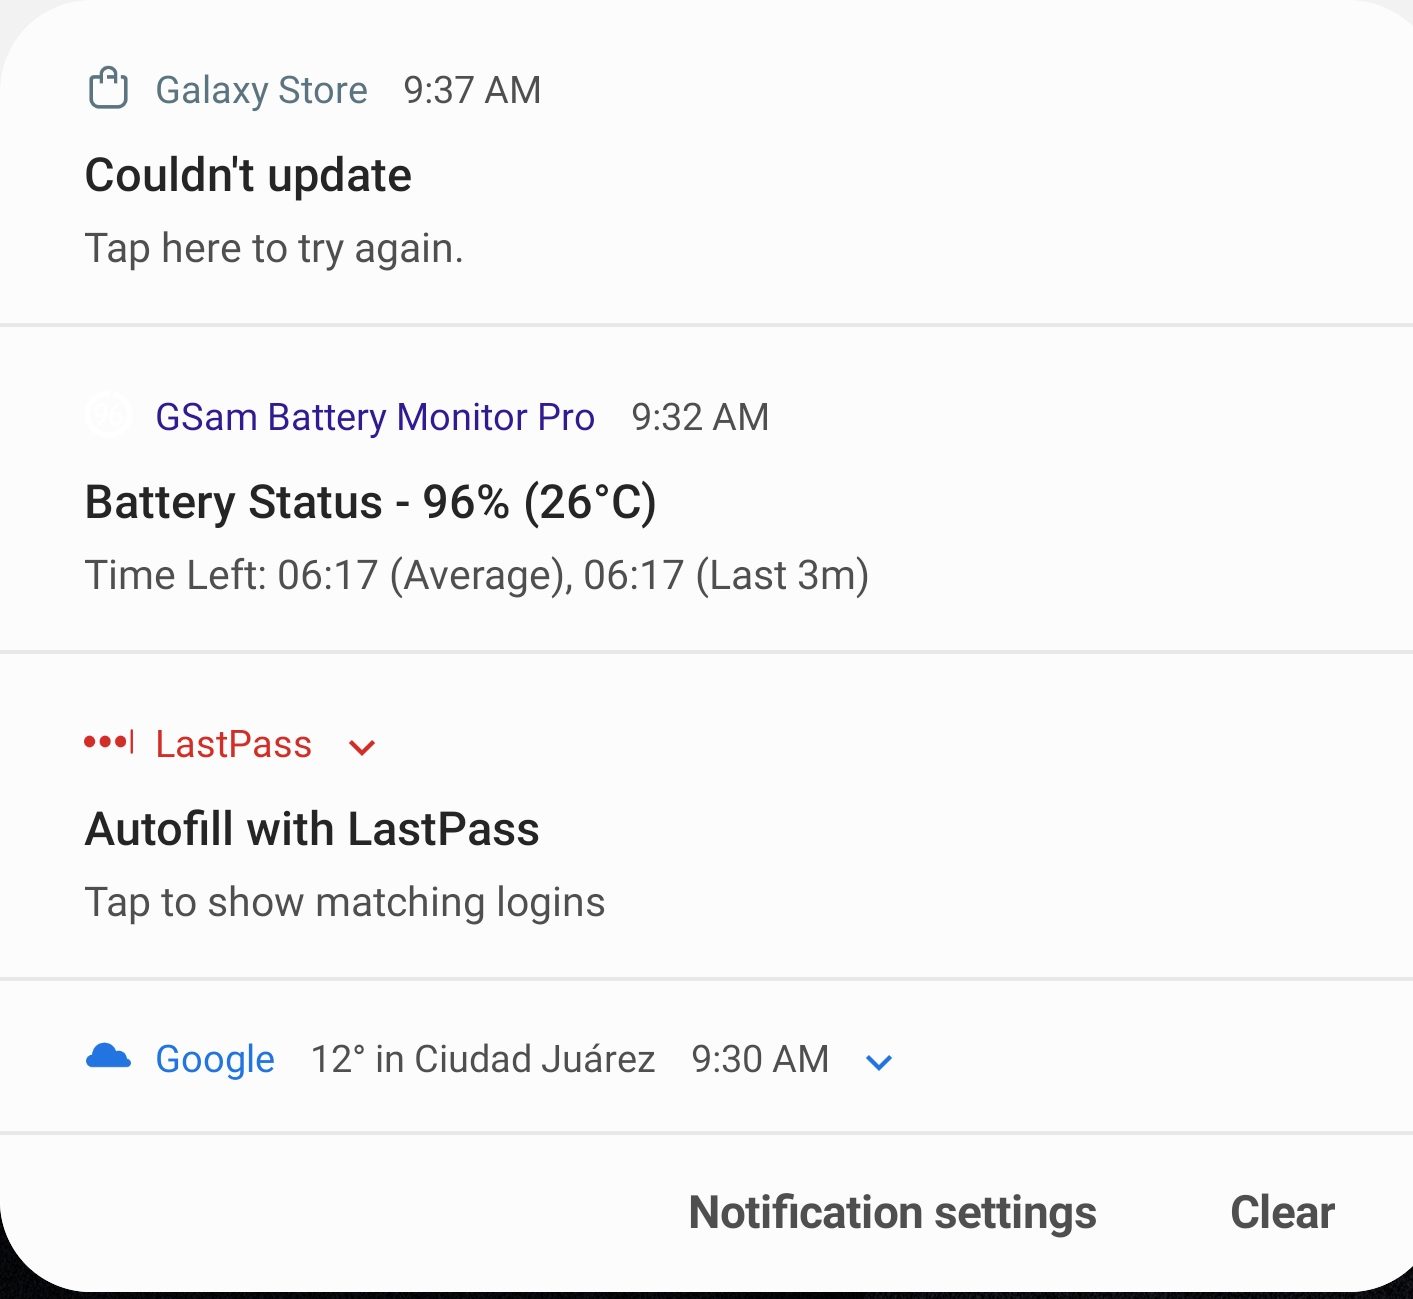
Samsung released the Biometrics software update yesterday for the Galaxy S10. The purpose of this update is to improve the fingerprint scanner of the S10/S10 Plus. A huge number of Galaxy S10 and S10 Plus owners have got this update, but some can’t seem to install it. The update, for some reason, is failing for them. Galaxy S10 owners can download the update, but it fails upon installation. Those who have got this update, they are loving the functionality of the fingerprint scanner now. Those who are unable to install it, they are disliking this update. So, if you are one of the users who is getting the Galaxy S10 biometrics update failed error or Couldn’t Update in the notifications panel, It’s time to fix it.

Samsung Galaxy S10 Biometrics Update

Fixing the Galaxy S10 Biometrics Security Patch update failed error is fairly simple. You just have to follow a few simple steps. Before you fix it on your S10, let me give you an idea of this update’s background.

Galaxy S10 Biometrics – What was wrong?

Samsung Galaxy S10 is Samsung’s first phone to have and under-display fingerprint scanner. It is the world’s first phone to have the ultrasonic fingerprint scanner. The ultrasonic fingerprint scanner was supposed to fix the flaws of the optical fingerprint scanner. However, things did not work quite well initially. The ultrasonic fingerprint scanner uses sound waves to cast your thumb impression on the fingerprint scanner. At first, the fingerprint scanner failed to work with glass protectors as there was no air for the sound waves to travel between the glass protector and phone’s Dynamic AMOLED screen. Other than this, using the fingerprint scanner was more like a hit and trial thing. It missed for at least 4 out of 10 times. YouTube was flooded with the videos on how bad the Galaxy S10’s fingerprint scanner is. Some users even recommended an optical fingerprint scanner over the ultrasonic fingerprint scanner.

Samsung was quick enough to take note of this issue and it promised to improve the fingerprint scanner via a software update. The fingerprint scanner patch finally started rolling out. A 6.9MB patch named “Biometrics Security Patch” started rolling out to the Snapdragon Galaxy S10 owners yesterday. Some users in Canada got the update. It was reported by several users that the fingerprint scanner is now much better and faster. It worked instantly. All those with this update were found appreciating Samsung on Reddit until the reports of this update failing came up.

Apparently, the Galaxy S10 Biometrics Security Patch was on a mass rollout, but not all the S10 fans were in luck. According to this Reddit thread, Galaxy Store popped the notification “Couldn’t update” in the notifications panel. I can completely understand the frustration you are going through. So, without any further ado, let’s take a look at the solutions to get this update working.

Galaxy S10 Biometrics Update Failed

Samsung Galaxy S10 Biometrics Update Failed – How to Fix?

There are three different solutions that I am going to share with all of you. You should try these solutions one by one to fix this.

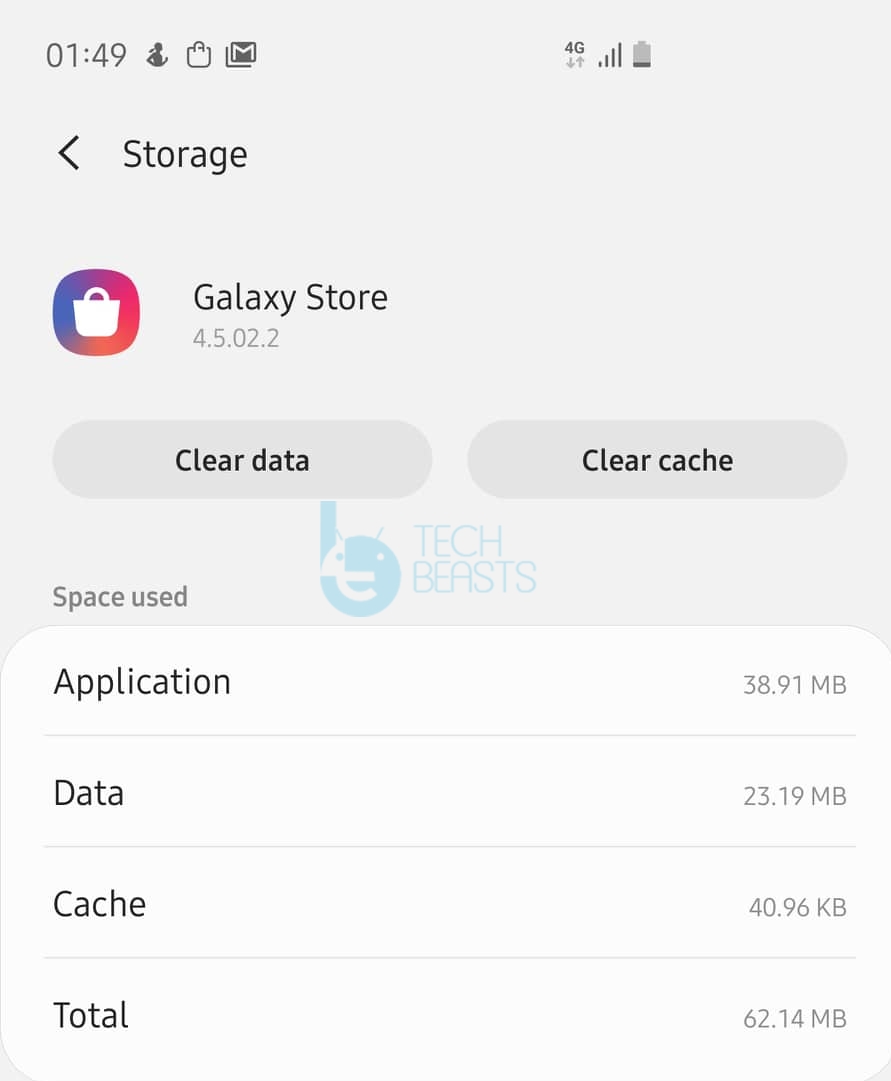
Clear the Galaxy Store Cache & Data

  1. On your phone, go to Settings.
  2. In Settings, go to Apps > Galaxy Store.
  3. Click on Storage in Galaxy Store.
  4. Now click on Clear Data and Clear Cache.Clear Galaxy Store Data and Cache
  5. Reboot your phone.
  6. Try installing the update again. It should work.

Note: It will log you out of your Galaxy Store. You will have to log in again.

Just in case this fails, try the next method.

Clear Biometrics Cache & Data

  1. On your phone, go to Settings > Click on Three Dots on top-right corner > Show System Apps.
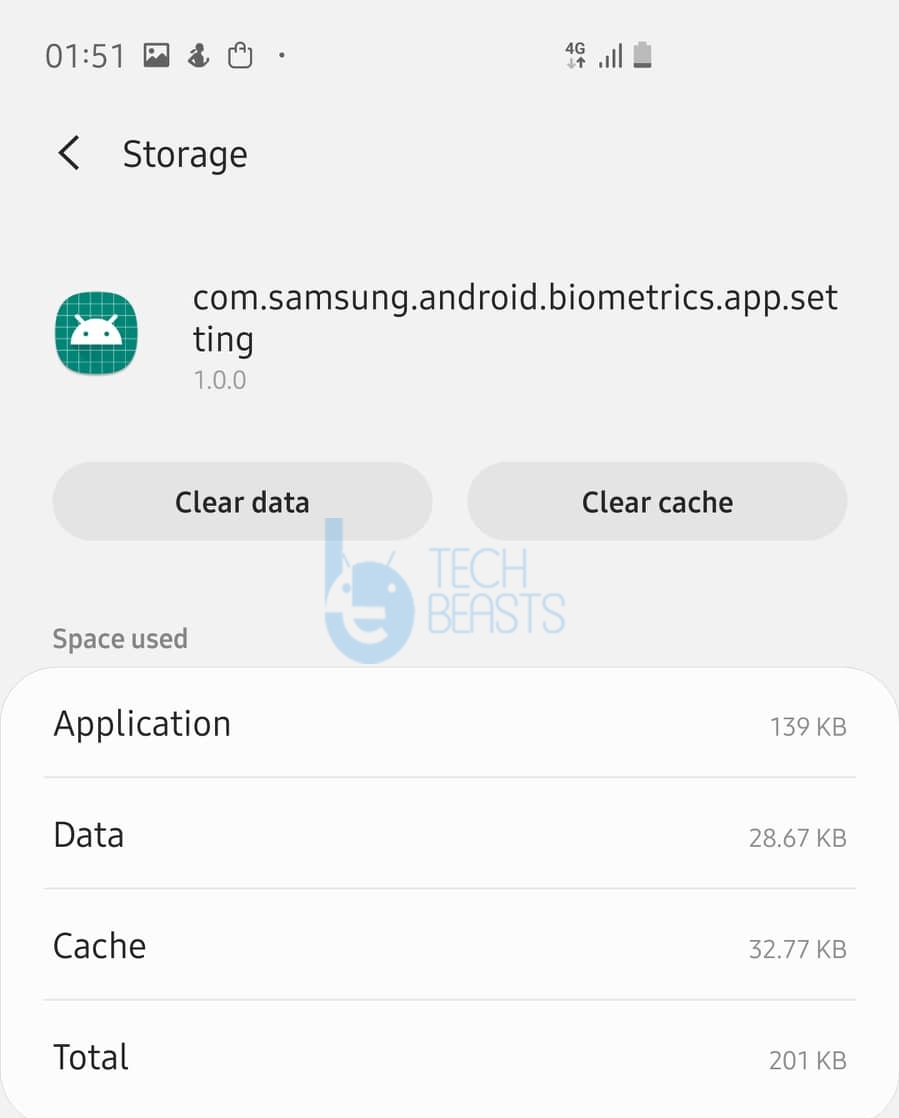
  2. Now find “com.samsung.android.biometrics.app.settings” and open it.
  3. Go to Storage and clear its Cache and Data.Clear Biometrics Cache and Data
  4. Now restart the phone.
  5. Try installing the update now. It should work.

Note: You may have to set up your Fingerprint scanner from scratch after this.

Clear the Cache of your Galaxy S10

  1. Power off your phone completely.
  2. Press and hold Volume Up + Bixby + Power button for a few seconds.
  3. As your phone boots up, let the keys go.
  4. You should see the recovery mode.
  5. In recovery mode, highlight “wipe cache partition” using the Volume Down button.
  6. Press the Power button to wipe the cache now.
  7. Reboot the phone after wiping cache.
  8. Install the update now.

That’s all. IMHO, the very first method should work fine for all of you. If you are still facing the problem, let me know in the comments section down below. I will try my best to get back to you as soon as possible.

More:

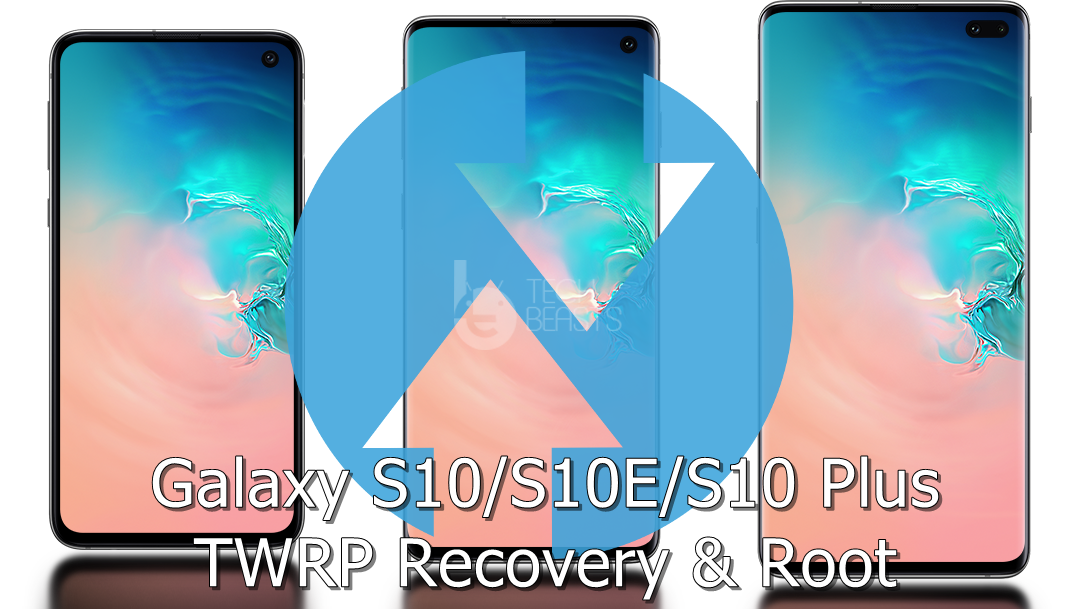
Install TWRP Recovery on Galaxy S10, S10 Plus, and S10E

Install TWRP Recovery on Galaxy S10, S10 Plus, and S10E
Install TWRP Recovery on Galaxy S10

Samsung Galaxy S10 series has finally got its TWRP custom recovery. Android customization enthusiasts who own a Galaxy S10 can finally install this recovery. The TWRP Recovery is available for the Galaxy S10, Galaxy S10 Plus, and S10E. Follow the instructions in this guide to install TWRP Recovery on Galaxy S10, S10 Plus, and S10E.

Install TWRP Recovery on Galaxy S10

Before I show you how you can install this custom recovery on your S10, let me give you an idea about custom recoveries.

TWRP Recovery for Galaxy S10 – What does it mean?

Okay, this is the paragraph for the users who have never heard of a custom recovery before. If you already know everything about a recovery like TWRP, you may skip this part.

Recovery is a setup hidden in the bootloader of an Android phone. On different Android phones, you can access this hidden menu by powering off your phone and then turning it on using a combination of Volume and Power buttons. This menu gives you the options to wipe the cache of your phone, boot the phone into bootloader, and hard reset the phone too. Now, this recovery is capable of much more than what you see on the phone, but the phone makers lock those features down for the sake of security. This is the gap that the custom recoveries like TWRP fill.

The TWRP Recovery on Galaxy S10

Back in the day, we used to have recoveries like CWM and Philz Advanced CWM. TWRP came later on. Now that there is no CWM or Philz CWM, TWRP still exists and that is actually the best thing for Android users. TWRP has been enhanced so much that using it now has become a piece of cake. TWRP comes with an interactive touch interface. The recovery is pretty much self-explanatory which means that the chances of you messing up your phone are very low.

TWRP Recovery for Galaxy S10.

The TWRP Recovery for Galaxy S10 gives you a plethora of options. S10 Owners can wipe cache partition of their phone. They can clear the Dalvik cache as well. Each parittion can be formatted manually, which is not possible otherwise. Another great option is the backup of all the partitions including the EFS Backup and Nandroid. The Install option will let you flash all the .img and .zip files. The recovery has its adb terminal as well which can be used to sideload files on the phone. TWRP Recovery, in past, has helped phone owners to recover data from their soft bricked phones.

If you are a pro-Android user, having a custom recovery on your Android phone is a must. Every day, we see 100s of useful MODs coming in from the developer community. Along with the MODs, there are custom ROMs which help to unleash the full potential of the phone. To install any such thing, you need a custom recovery. Rest of the uses are already explained above.

Assuming that you have a full understanding of a TWRP Recovery, let us move on to the steps to install it now.

Note

Although I have tried to explain the process in laymen terms, the risks regarding a custom recovery still remain high. See, the custom recoveries, ROMs, MODs, and Root are highly prohibited by the device manufacturers. These customizations have the ability to damage your device. Remember that the damage is supposed to happen only if you do not follow the instructions properly. This will trip the Knox counter and void the warranty of your phone. If you are sure that you can follow the instructions to the letter, you may go ahead with the procedure for your Galaxy S10.

Install TWRP Recovery on Galaxy S10, S10 Plus, and S10E

Preparations

  • This guide is only for the Exynos Galaxy S10E, S10, and S10 Plus.
  • Do not try to flash this recovery on any other phone.
  • Charge your phone’s battery up to 50% before following the steps.
  • Backup each and everything on your Galaxy S10.
  • You need an external microSD Card for this.
  • Enable OEM Unlocking and USB Debugging Mode on the phone.
  • Disable Samsung Smart Switch while using Odin. If you do not have Smart Switch, skip this step.
  • Follow the instructions with full attention.

Required Downloads

  • TWRP Recovery for Galaxy S10 –
  • Galaxy S10E TWRP Recovery –
  • TWRP Recovery for Galaxy S10 Plus –
    • Note: All recoveries come with Magisk pre-patched. This means that your phone will be rooted in the recovery installation.
  • Encryption Disabler.zip File
    • Copy this file to an external microSD card. The SD card should be in your phone.

Before you go ahead…Unlock the Galaxy S10 Bootloader

Samsung has started locking the bootloader of its devices. Usually, enabling the OEM Unlock simply unlocked the bootloader, but things have changed a bit now. The OEM Unlock option is still there on the FD variants of the S10 phones, but some variants have a slightly different unlocking method. This can be checked by only going into the Download Mode on the phone. Here is what you have to do in such a case.

  • Turn off your phone.
  • Press and hold Volume Up + Bixby + Power button to boot into recovery.
  • In the recovery, select “Reboot to bootloader” and press Power button.
  • This will boot your phone into the Download Mode.
  • The Download Mode will show you “Press Volume Up for bootloader unlock”. Long pressing this key will unlock the bootloader and wipe your phone.
  • Boot up your phone and immediately connect it to the internet. It will enter the rmm prenormal state otherwise. We don’t want the rmm prenormal.
  • Skip the Google account part. We do not need the Google Account.
  • Now power down your phone after setting it up.
  • Press and hold Volume Up + Power + Bixby key to boot into Recovery.
  • In the recovery, select “wipe factory data reset”, press Power button and wipe the phone.
  • Go back to the main menu in recovery and select “Reboot to bootloader”. Enter the Download Mode and follow the remaining instructions.

If your phone does not show anything called “Bootloader Unlock” in the Download Mode, you may skip the above process. Your phone will work simply with the OEM Unlock option.

Finally, here is the method to install TWRP and Root your Samsung Galaxy S10.

Guide to install TWRP Recovery on Galaxy S10 and Root it

  1. Open Odin 3.13.1.exe on your computer.
  2. In Odin, go to Options > Make sure the only checked option is F.Reset.Time. No other option should be checked.
  3. Come back to the main menu in Odin and click on AP tab.
  4. Select the TWRP Recovery.tar file for your S10/E/PLUS in the AP tab.
  5. Now boot your Galaxy S10 in the Download Mode. While your phone is in the Download Mode, connect it to the computer.
  6. Odin will show “Added” in the logs and also show a Blue light in the ID:COM box.
  7. Click on Start button in Odin. Odin will flash the Recovery with Pre-patched Magisk in only 2-3 minutes.
  8. Disconnect the phone after it ends, do not restart the phone.
  9. On the phone, press and hold Volume Up + Bixby + Power button for a few seconds. It will take you into the TWRP Recovery directly.
  10. Click on Install in TWRP. Now click on Install Zip > Locate Encryption Disabler.zip file and flash it.
  11. Reboot your Galaxy S10 into the system now. That’s all.

Congratulations! Your Galaxy S10 is now rooted and has the TWRP Recovery installed too. If your phone doesn’t have the Magisk Manager installed, you can download the Magisk Manager APK and install it manually. You can now start installing the root apps on your phone. Here is our list of best root Apps for Android in 2019. If your phone is having some issues, you may consider clearing its cache and boot it up again.

If something goes incredibly wrong, immediately flash stock firmware on your phone to recover it. Here is the guide to Install Stock Firmware on Galaxy S10, S10E, and S10 Plus.

Wrap Up

That’s all you had to do in order to get the custom recovery on your S10. You are now all set to explore the real strength of your all-new Samsung Galaxy S10. Its time to unleash the hidden power of your handset. If you are facing any kind of issues, feel free to reach out to us through the comments section below. I will try my best to get back to you.

Download and install Play Store on EMUI 9

Download and install Play Store on EMUI 9

Got a Huawei or Honor phone running on EMUI 9 without Play Store? It’s time to install it. Here is the guide with comprehensive steps to install Play Store on EMUI 9 powered Huawei and Honor Chinese phones.

install Play Store on EMUI 9
Honor 8X and Y9.

A couple of months back, I posted a tutorial to install Google Play Store on Huawei Honor 8X and 8X Max. The tutorial did not only work for the Honor 8X and 8X Max, but it also worked for a number of other phones too. Basically, that tutorial installed Play Store on all Huawei and Honor phones running EMUI 8. Later on, Huawei released the Android 9 update which brought the EMUI 9 update to the devices. That’s when that guide stopped working. A huge number of Huawei and Honor phones reached to me telling me that the Play Store stopped working. They were unable to install the Play Store again on the latest version of EMUI 9. Since then, I have been trying hard to get the Play Store working on the EMUI 9. I did a lot of research on the internet to see if someone has already posted a method or not, but there was no word about it.

Why no Play Store?

The Play Store problem is basically with the Chinese variants of Huawei and Honor phones. For example, if you purchased your phone under warranty from any country other than China, it probably has the Play Store. You do not need to worry about such a device. The real problem is for the Chinese Huawei and Honor owners. The Chinese variants are usually a bit cheaper, but the downside is that you compromise on a number of Apps. Chinese phones do not even have Facebook, WhatsApp. You cannot even install the apps of your choice as you do not have Play Store. The entire Google Core GMS is missing on the Huawei and Honor Chinese devices.

The Play Store.

Workarounds So Far

There are workarounds to get the Google Apps working on those phones, but the workarounds die when the companies update their phones to the new version of Android. The same happened when Huawei updated its devices from EMUI 8 to EMUI 9.

It’s already there!

Now there is a huge catch. On the EMUI 8, the GMS package was missing. This is why users had to install the whole package using GMS Installer and then install the Play Services, Play Store, Calendar, etc using Google Installer. With the EMUI 9 things have changed, and they have changed for good.

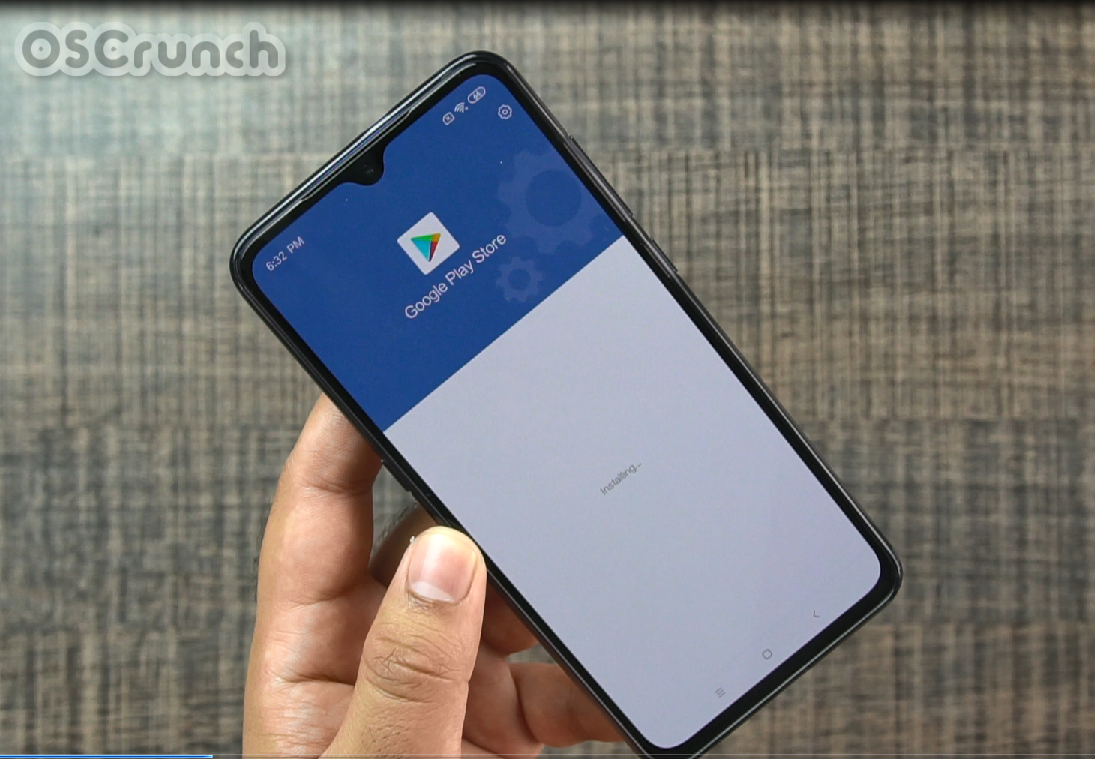
The EMUI 9 has the Core GMS installed by default. The only thing you have to do is to install the Play Store manually using its APK file. I figured this out when I was using a Xiaomi Mi 9. While trying to install GMS, the Mi 9 gave me a hint that it already has GMS. All I had to do was to install Google Play Store on the Xiaomi Mi 9. After this, I did some research for EMUI 9 and found the same.

The Solution to install Play Store on EMUI 9

So, in this guide, in the upcoming few steps, I will show you how you can install the Google Play Store on EMUI 9. Remember this guide will work for all the Huawei and Honor phones out there.

Huawei EMUI 9

Install Play Store on EMUI 9

Update 9/25/2019: A new Google Core Framework is now available which works flawlessly on EMUI 10 and below. It will also work for EMUI 9. I have added the link below and you can install it.

  1. Download Google Play Core Installer.
  2. Copy the APK to your phone.
  3. Using a File Manager, open the APK file on the phone.
  4. If the APK asks for permissions for installation, allow the Unknown Sources immediately.
  5. Now finish the Play Store and other Google Framework Services installation on the phone.
  6. Once done, you will have the Play Store on the home screen of the phone.
  7. Launch the Play Store and enjoy. That’s all.

Note: Play Services are already there on the phone. You don’t need to install them.

Final Words

That’s how simple it was. By now, you have the Play Store up and running on your EMUI 9 running on any Huawei or Honor phone. If you are living inside China, you may get a VPN for Chinese Android phone to run the Play Store. If you have any questions or queries, feel free to reach out to me through the comments section below. I will try my best to get back to you as soon as possible. Stay connected. Thank you all.

Last Updated: 26th October 2019

More:

Download Android 9 Pie on Samsung Galaxy J6 [Official Firmware]

0
Download Android 9 Pie on Samsung Galaxy J6 [Official Firmware]

Another low-end phone, the Galaxy J6 has started getting the Android Pie update. Galaxy J6 owners can update the phone to latest Android 9 Pie straight away. The update has first started rolling out for the J600FN model. This update carries the PDA J600FNXXU3BSD1. At the time of writing this post, the Galaxy J6 Android Pie firmware is rolling out for the Italian region. If you are living outside Italy and you have the J600F model, you can update your phone manually. This guide will explain how you can download Android 9 Pie on Samsung Galaxy J6.  Before you download Android Pie on Galaxy J6, let us learn more about this phone and the Android Pie firmware.

 Android 9 Pie on Samsung Galaxy J6
Android 9 Pie on Samsung Galaxy J6

Android Pie for Samsung Galaxy J6

Just yesterday, we saw the Android Pie update rolling out for the Galaxy J8. The Galaxy J8 update made it evident that Samsung will be updating low-end smartphones to the Android Pie now. And today, we have the Android Pie for Galaxy J6 here. Samsung Galaxy J6 was released last year in May. At that time, this phone was coming running on Android 8.0 Oreo out of the box. Galaxy J6 was powered by 14 nm Exynos 7870 Octa SoC and had a RAM of 3GB or 4GB. This hardware made this phone good enough for another mega Android update.

The update for the Galaxy J6 is happening in Italy through OTA. If you are living inside Italy, you can quickly check for OTA update through the software section of your phone or you can use the Samsung Smart Switch too. But outside Italy, you are limited to the manual update method only.

The manual update method involves the use of Odin, which is Samsung’s Flashtool. Using Odin to upgrade your Galaxy J6 to Android Pie is fairly simple. The only thing you have to do is to follow the instructions carefully, rest assured, the process will go smooth.

What’s new in Android Pie for Galaxy J6?

Android Pie is a major update. This update brings almost everything new. Starting from the UI of your device to the addition of new features. Samsung has replaced its Samsung Experience UI with the new Samsung One UI. This UI is designed for users who prefer one-handed use of the phone. The One UI has a new launcher. It has changed icons of all the applications. The UI of all stock Samsung apps has been changed too. If you look at the settings application, it has got some new features enhancing the use of the phone.

Samsung has also changed the look of the quick toggles panel. Not only the look, but it has also added new options there too. The new UI carries much-awaited Night Mode. It has the Adaptive Battery mode too. Device optimization section has some new options. Android Pie also brings native private DNS support. It has the option to turn the phone’s home screen into landscape mode and the list of features goes on.

Overall, new software is more secure, stable, and comes with bug fixes. Whether you like it or not, it is always recommended to have your phone running on the latest and greatest version of Android.

Assuming that you have understood everything, let’s move on to the guide to download Android 9 Pie on Samsung Galaxy J6.

Android 9 Pie on Samsung Galaxy J6

Preparations

  • This guide is only for Galaxy J6 J600FN. Do not try on other models.
  • Charge your phone up to 50%.
  • Back up each and everything as this update will wipe the phone.
  • From the Developer Options, enable OEM Unlocking and USB Debugging mode.
  • Use Original Data Cable to connect your phone to the computer.
  • Close Samsung Smart Switch while using Odin.
  • Follow the remaining steps carefully.

Required Downloads:

  • Galaxy J6 J600F Android Pie Firmware: Download
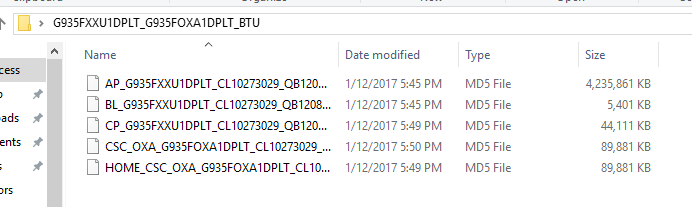
    • Extract the downloaded firmware file to get the AP, CP, BL, CSC, and Home_CSC files.
Image used for reference only.

Guide to install Android Pie 9.0 on Samsung Galaxy J6

  1. Open Odin 3.13.1 on your computer. In Odin, go to Options and make sure that only checked options are Auto Reboot and F.Reset.Time.
  2. Now in Odin, click on the AP tab and add the AP file here. In the CP and BL slots, add the CP and BL files. In the CSC tab, add the CSC file if you want to factory reset, add the Home_CSC file otherwise.
  3. Put your Galaxy J6 in Download Mode. Connect the USB Cable to your computer. Do not connect it to the phone yet. Now, turn off your phone completely first. Now press and hold Volume Up + Volume Down keys. While keeping the keys pressed, connect the USB Cable to your phone. It will now go into Download Mode. Press Volume Up to continue.
  4. Odin will detect your phone and show you “Added” in the logs. It will also show you a Blue light in the ID:COM box.
  5. Making sure that all files are added and your phone is connected, click on the “Start” button now.
  6. Odin will take around 5-7 minutes to flash Android Pie on your Galaxy J8. Your phone will reboot automatically in a while and you will have the latest One UI running on it.
Image for reference only.

Final Words

That is pretty much it. You now have the most recent version of Android running on your Galaxy J6. If you think that the firmware is taking too long to boot up for the first time, you may consider clearing the cache of your phone. If you are facing any other problems with your phone, feel free to reach out to us. The best way to contact us is through the comments section below. I will try my best to get back to you as soon as possible.

Download Android Pie on Samsung Galaxy J8

0
Download Android Pie on Samsung Galaxy J8

Samsung Galaxy J8 is now receiving the Android Pie update. Those of you willing to update their phone manually can do so by using this guide. By following the steps given here, you can download Android Pie on Samsung Galaxy J8. For this purpose, we will make use of Samsung’s Odin Flashtool. Learn a little more about the Android Pie for Galaxy J8 before you update the phone.

Android Pie on Samsung Galaxy J8

Android Pie for Samsung Galaxy J8

The Galaxy J8 was released last year running on Android Oreo out of the box. This was a low-end smartphone and also one of the very first Galaxy J phones to have an infinity display. The Galaxy J8 was expected to get the Android Pie update.

So far, Samsung is done releasing the Android Pie update for all of its high-end phones. A couple of months back, Samsung started rolling out the Pie update for its mid-range devices. It has released Android Pie for Galaxy A7 2018 and the Galaxy A8 too. The Galaxy J8’s term is here too now. The update started rolling out yesterday.

Android Pie

In the first phase, the update has started rolling out for the Galaxy J8 J810F. It has made its way in the Russian region. The update comes with the PDA
J810FPUU3BSD1. This is an incremental update and its going to take its time to reach out to all other regions. If you are living in some other region with the Galaxy J810F, and you don’t want to wait for the OTA, the only option you have right now is the use of Odin.

The method that I am going to share below, can be used for any Samsung Galaxy J8 having the model number J810F. You don’t need to take care of the region. The update will work in any region as long as you follow the instructions carefully.

Before downloading Android Pie on your Galaxy J8, let me tell you about the features this update brings.

Android Pie – One UI for Galaxy J8 is here

The Android Pie update has the latest One UI. The old Samsung Experience UI is gone now. You can enjoy a brand new interface on your Galaxy J8. The One UI has massive improvements. Its designed to make the phone more usable for people who prefer using it with one hand.

The One UI has new features such as Night Mode, Native Private DNS Support, Adaptive Battery, File Sharing, extended control in the quick toggles, and a lot more.

Samsung One UI
Samsung One UI

It has redesigned the UI of settings application. Other stock applications of the Samsung phones have got a whole new look too. It definitely improves the performance and battery life of the Samsung phones. Overall, the Android Pie with Samsung One UI is a worthy upgrade.

Having said that, let’s move on to the guide to download stock Android Pie on Galaxy J8 now.

Download Android Pie on Samsung Galaxy J8

Preparations

  • This guide is only for Galaxy J8 J810F. Do not try on other models.
  • Charge your phone up to 50%.
  • Back up each and everything as this update will wipe the phone.
  • From the Developer Options, enable OEM Unlocking and USB Debugging mode.
  • Use Original Data Cable to connect your phone to the computer.
  • Close Samsung Smart Switch while using Odin.
  • Follow the remaining steps carefully.

Required Downloads

  • Galaxy J8 J810F Android Pie Firmware: Download
    • Extract the downloaded firmware file to get the AP, CP, BL, CSC, and Home_CSC files.
Android Pie firmware files for S8 Plus
Image used for reference only.

Guide to install Android Pie 9.0 on Samsung Galaxy J8

  1. Open Odin 3.13.1 on your computer. In Odin, go to Options and make sure that only checked options are Auto Reboot and F.Reset.Time.
  2. Now in Odin, click on the AP tab and add the AP file here. In the CP and BL slots, add the CP and BL files. In the CSC tab, add the CSC file if you want to factory reset, add the Home_CSC file otherwise.
  3. Put your Galaxy J8 in Download Mode. Connect the USB Cable to your computer. Do not connect it to the phone yet. Now, turn off your phone completely first. Now press and hold Volume Up + Volume Down keys. While keeping the keys pressed, connect the USB Cable to your phone. It will now go into Download Mode. Press Volume Up to continue.
  4. Odin will detect your phone and show you “Added” in the logs. It will also show you a Blue light in the ID:COM box.
  5. Making sure that all files are added and your phone is connected, click on the “Start” button now.
  6. Odin will take around 5-7 minutes to flash Android Pie on your Galaxy J8. Your phone will reboot automatically in a while and you will have the latest One UI running on it.
Image for reference only.

Wrap Up

That is pretty much it. You now have the latest Android Pie running on your Galaxy J8. If your phone has run into a problem while booting up, you may try clearing its cache. For any queries and questions, feel free to reach out to us. I will try my best to respond you as soon as possible.

Samsung Galaxy A80 Released Officially

0
Samsung Galaxy A80 Released Officially

Samsung is probably the online smartphone manufacturing company that did not opt for a notch in its smartphones for a long time. The closest that we got was a punch-hole camera in the S10 series. Despite the appearance of mini notches on previous A-series smartphones, Samsung is actively trying to find an alternative solution. Galaxy A80 is the first of its kind released by Samsung. There is no notch or an earpiece. The entire front of the phone is just the display panel. To achieve this, a rotating and sliding camera mechanism is implemented. This means that we get the same powerful camera setup for both back and front camera selfies.

galaxy a80 everything you need to know

Another noteworthy feature is the inclusion of Qualcomm’s Snapdragon 730 chip. It is the latest model in 7 series and a massive improvement over the previous generation. Read more about Snapdragon 730 here. This new chip is capable of high-end AI Computation on-device. Moreover, there is a significant improvement in the department of performance and improved battery efficiency.

Galaxy A80 First look

Here are some of the first-look photos of the Galaxy A80. We have to admit that this phone looks and feels much more premium compared to other units in the A-series (A30, A50, A70). Moreover, the sliding / rotating camera on A80 is something everyone is looking forward too. Even though it is not the first time that this kind of setup is implemented, we are interested to see the quality of implementation by Samsung itself. 

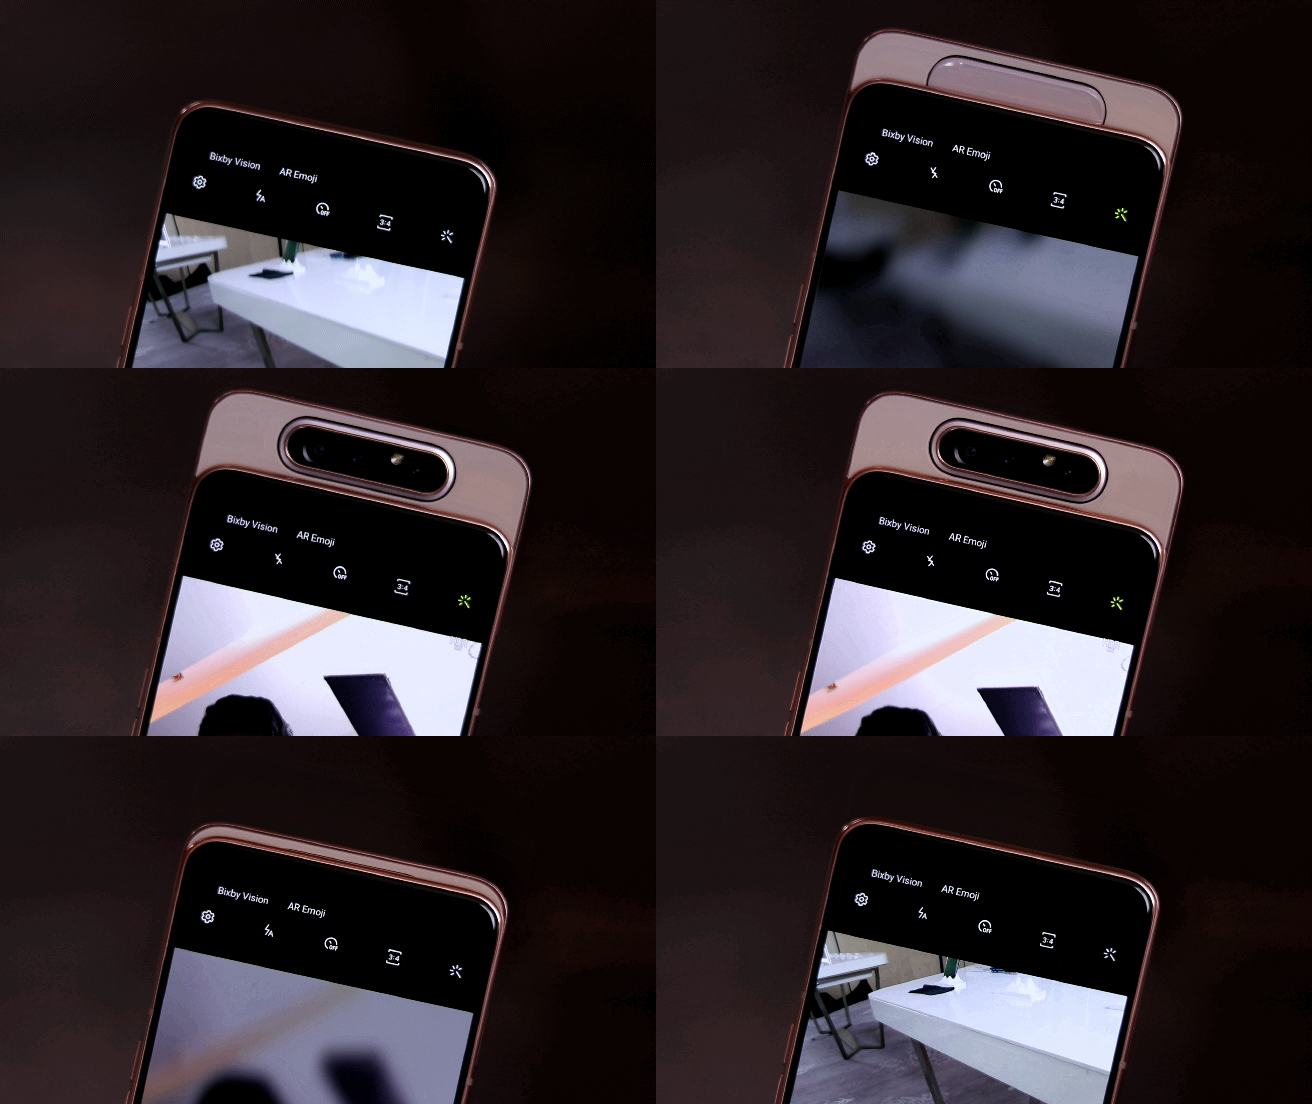
Galaxy A80 Rotating Camera Setup in Action

Galaxy A80 rotating camera setup
Source

At first glance, the rotating mechanism looks pretty smooth and fast. However, note that this camera setup is good only for taking photos. Unfortunately, it is not a good solution to use this setup for face unlock. Since it requires a camera to popup every time therefore, the unlock speed would be slow and the overall process is a bit tedious. Moreover, the motorized camera setup may end up consuming extra battery power if used to unlock the phone every time.

galaxy a80 triple camera setup 2 galaxy a80 triple camera setup

Here are the detailed specs of the Galaxy A80 Camera Setup:

  • 48 MP, f/2.0, PDAF
  • 8 MP, f/2.2, 12mm (ultrawide)
  • TOF 3D camera
  • LED flash
  • HDR
  • Video: 2160p@30fps, 1080p@30fps

The first two lenses are pretty much common knowledge these days. The main 48MP shooter comes with a normal viewing angle. However, the 8MP ultrawide lens can shoot at a 123-degree field of view. Lastly, the Time-of-Flight camera is there for real-time depth sensing. Its main advantage is to allow smooth and jitter-free video recording. You will get premium looking bokeh effect in both still photos and live videos.

Galaxy A80 Specs

  Galaxy A80
Display

6.7-inch

FHD+ (1080×2400)

Super AMOLED

Processor

Snapdragon 730

Octa-Core (2.2GHz 2 Cores + 1.8GHz 6 Cores)

GPU

Adreno 618

RAM 8GB
Camera Setup
  • 48 MP, f/2.0, PDAF
  • 8 MP, f/2.2, 12mm (ultrawide)
  • TOF 3D camera
  • ideo: 2160p@30fps, 1080p@30fps

Same camera setup for both back and front. Motorized rotating camera.

Storage 128GB, no microSD slot
Software

Android 9 Pie

Samsung One UI

Battery

3,700 mAh

Support for Fast Charging  with 25W Charger

Connectivity

4G LTE

Bluetooth 5.0

Wi-Fi a/b/g/n/ac

USB Type-C

Dual SIM standby

Dimensions 165.2 x 76.5 x 9.3 mm
Other features

Dolby Atmos (wired audio)

No Headphone Jack

Samsung Pay

Bixby Voice

Bixby Routines

In-Display fingerprint sensor

Colors

Angel Gold

Ghost White

Phantom Black

Galaxy A80 Colors

At launch, Samsung announced A80 in 3 colors only. Normally, a phone of this caliber launches with more colors. However, we will have to wait and see if more color options come up in the future. 

galaxy a80 colors

galaxy a80 colors 2
Source

Galaxy A80 Price

According to Samsung officials, the price of Samsung Galaxy A80 is:

  • 649 Euros
  • 729 US Dollars (Converted)
  • 50,457 Indian Rupee (Converted)

Conclusion

In a nutshell, Galaxy A80 is a modern experiment. The biggest concern for this phone is how the motorized camera will work over a long period of time. There is an obvious issue of dust collection. Therefore, only time will tell how successful or unsuccessful this rotating camera really is.

The main advantage of this camera setup is an edge-to-edge “Infinity Display”. We get a huge 6.7-inch screen in such a compact form factor. Moreover, there is no earpiece. Instead, it uses screen vibrational technology to produce sound. Some companies have introduced this tech already as well. However, none of those implementations were up to the mark. Once again, we have to wait and see how both the camera and no earpiece solution work out over long periods of time.

The price range for this smartphone is in the upper range of mid-tier. Therefore, anyone looking for a powerful smartphone in the budget definitely should consider this beast. The new Snapdragon 730 chipset accompanied with triple camera setup (especially ToF) promise to deliver stunning photos and videos.

Qualcomm Snapdragon 665 and 730/730G all about them

0
Qualcomm Snapdragon 665 and 730/730G all about them

Qualcomm’s Snapdragon chipset is the most widely installed chipset for Android smartphones. These are power efficient as well as good performers overall. The latest additions to the Snapdragon lineup is the low-mid tier of the spectrum. Qualcomm announced 3 new chips under the 6 and 7 series. Now, most people must be familiar with Snapdragon 660 chipset. It is one of the most common setups for mid-tier and low-budget phones. The new update is not just about hardware improvements. It targets the new AI technology and camera improvements seen in new smartphones.

Snapdragon 665 is the successor to the 660 chipsets. Evident from the naming convention, it is not a massive improvement in terms of raw power. However, under the hood, there are massive improvements and we can see a lot of companies adopting it later this year. The core selling point of the SD 665 chip is improved AI computation capabilities. Therefore, it is going to improve the AI scene recognition and computation in-camera apps. Since most new smartphones use a multi-lens setup, aided by AI scene recognition (bokeh effect, depth sensing, and more), therefore it is a huge improvement.

snapdragon 665 730 730G

The other two chips introduced are Snapdragon 730 and 730G. G is for gaming actually. Yes, there is a dedicated chipset for improved gaming performance with lower power consumption. These two chips are successors for Snapdragon 710. The overall performance gain for these chips over 710 is pretty big. These are also the first mid-range chips to use the 8nm manufacturing process. This is a massive improvement over SD 710. This promises not only performance gains but low power consumption while gaming.

Qualcomm Snapdragon 665 vs Snapdragon 660 Specs Comparison

Below is the table comparing the specs of the new Snapdragon 665 chip vs older Snapdragon 660. To make the comparison easier to comprehend, we have highlighted the main improvement of the new-gen chipset.

  Qualcomm Snapdragon 660 Qualcomm Snapdragon 665
CPU

Octa-Core

4 Performance Cores

4 Efficient Cores

Up to 2.2GHz

Kyro 260

Octa-Core

4 Performance Cores

4 Efficient Cores

Up to 2.2GHz

Kyro 260

GPU

Adreno 512

Vulkan 1.0 support

Adreno 610

Vulkan 1.1 support

DSP Hexagon 680 Hexagon 686
Memory

Up to 8GB RAM

Type LPDDR4/4X

Up to 1866MHz speed

Up to 8GB RAM

Type LPDDR3/LPDDR4x

Up to 1866MHz speed

ISP Dual 14-bit Spectra 160 ISP

Single-camera: Up to 25 MP, MFNR, ZSL, 30fps; Up to 48MP

Dual camera: Up to 16 MP, MFNR, ZSL, 30fps

4k @ 30fps video

Dual 14-bit Spectra 165 ISP

Single-camera: Up to 25 MP, MFNR, ZSL, 30fps; Up to 48MP

Dual camera: Up to 16 MP, MFNR, ZSL, 30fps

4K @ 30fps video

Modem

Snapdragon X12

Download: 600Mbps (Cat. 12)

Upload: 150Mbps (Cat. 13)

Snapdragon X12

Download: 600Mbps (Cat. 12)

Upload: 150Mbps (Cat. 13)

Manufacturing Process 14nm 11nm

The key improvement evident from the spec sheet and as claimed by Qualcomm are 1: 2x faster AI Processing on-device, 2: 20% reduced power consumption, 3: Support for triple camera setup including Telephoto lens.

When it comes to gaming, now the new Adreno 610 GPU will definitely boost the performance compared to the older Adreno 512. Moreover, this GPU now supports Vulkan 1.1 library. For those who do not know what this means and why is it important, keep reading. Traditionally, games for Android are built with the OpenGL graphics library. The library provides basic tools for building the graphics, animations in a game. The next improvement is Vulkan API. If the developers choose to support a game with Vulkan 1.1, it gains a potential 20% power efficiency rating. Therefore, users can enjoy longer gaming sessions without needing a charge for the phone.

The shift from 14nm to 11nm manufacturing process plays a key role in improving power efficiency. Since the release of Android Pie, OS is becoming smarter in battery management. The added help of hardware will make upcoming phones’ batteries last even longer. 

The maximum supported resolution for a phone with Snapdragon 665 chip is FHD+ (2520×1080). This is fair since the phone sporting this chipset will most likely come with a 1080p display at best.

Qualcomm Snapdragon 730 vs Snapdragon 710 Specs Comparison

Below is the comparison table that pits older brother Snapdragon 710 against the newer 730 chip. The performance gain in this bracket is actually huge. We have highlighted all the evident improvements too.

  Qualcomm Snapdragon 710 Qualcomm Snapdragon 730
CPU

Octa-Core

2 Performance Cores

6 Efficient Cores

Kyro 360 CPU

Up to 2.2GHz

Octa-Core

2 Performance Cores

6 Efficient Cores

Kyro 470 CPU

Up to 2.2GHz

GPU Adreno 616

Adreno 618

DSP Hexagon 685 Hexagon 688
Memory

Up to 8GB RAM

Type 2 x 16-bit, LPDDR4

Up to 1866MHz Speed

Up to 8GB RAM

Type 2 x 16-bit, LPDDR4

Up to 1866MHz Speed

ISP Dual 14-bit Spectra 250 ISP

Single-camera: Up to 25MP, MFNR, ZSL, 30fps; Up to 48MP, MFNR

Dual camera: Up to 16MP, MFNR, ZSL, 30fps

4k @ 30 fps video

Dual 14-bit Spectra 350 ISP

Single-camera: Up to 36MP, MFNR, ZSL, 30fps; Up to 48MP, MFNR

Dual camera: Up to 22MP, MFNR, ZSL, 30fps

4K HDR @ 30 fps video

Modem

Snapdragon X15

Download: 800 Mbps (Cat. 15)

Upload: 150 Mbps (Cat. 13)

Snapdragon X15

Download: 800 Mbps (Cat. 15)

Upload: 150 Mbps (Cat. 13)

Manufacturing Process 10nm 8nm

Performance-wise, 730 is a huge improvement over its predecessor. The Kyro 470 CPU in 730 will provide a 35% improvement in performance. These numbers are promised by Qualcomm. Another major improvement is Vulkan 1.1 support with the new Adreno 618 GPU. Games that are built with Vulkan 1.1 API will enjoy up to 20% less power consumption. This kind of number would really benefit the game developers. Let’s be real, nobody wants to play games that go hard on the battery.

One of the core improvements in the new Spectra 350 ISP. New Image Processing supports much faster on-device AI computation. Its integrated AI is the same one as used in Snapdragon 855. You can expect a much better real-time focus, bokeh shots, and depth sensing.

The Snapdragon 730 chip now supports Wi-Fi 6 standard as well. Overall, Snapdragon 730 is a massive improvement and a big step in the right direction. The upcoming phones at the higher end of the mid-range will benefit from these improvements. It seems like more value for money phones are on their way.

Qualcomm Snapdragon 730G vs Snapdragon 730 Specs Comparison

In a nutshell, Snapdragon 730G is the same as 730 but with added capabilities to enhance the gaming experience. Note that these improvements are not minor changes. By the looks of it, we feel like we are going to see actual performance gains that will make smartphone gaming on a budget real good.

Let’s go through the key differences between Snapdragon 730 and Snapdragon 730G. If it is not clear already, G in the title stands for ‘Gaming’. The first thing to note is that GPU in 730G is overclocked to support higher resolutions and better framerates. Unlike 730, devices with 730G can sport a QHD+ display. 

The overclocked GPU in 730G is supposed to deliver 15% more performance and rendering improvement. Other gaming related features are WiFi Latency Manager, Jank Reducer, and Anti-Cheat Extensions. The first two features are there to reduce screen tearing, latency and delay, and stuttering in-game. Anti-Cheat Extension is supposed to find out if someone is cheating in a game. Don’t know how that really works though! Guess, we’ll find out with a proper release.

Snapdragon 730G offers all key features from the Snapdragon Elite Gaming series. We are likely to see this chip in both normal mid-tier devices as well as gaming-centric mid-range smartphones. 

Here’s a quick rundown of specs of the Snapdragon 730G chip. Since there are no major differences in terms of hardware, therefore, we have highlighted the stuff that is additional or different in 730G compared to the 730 chips.

  Qualcomm Snapdragon 730G
CPU

Octa-Core

2 Performance Cores

6 Efficient Cores

Kyro 470 CPU

Up to 2.2GHz

GPU

Adreno 618 (Overclocked with 15% improved performance)

Support for True HDR10 Gaming

DSP Hexagon 688
Memory

Up to 8GB RAM

Type 2 x 16-bit, LPDDR4

Up to 1866MHz Speed

ISP

Dual 14-bit Spectra 350 ISP

Single-camera: Up to 36MP, MFNR, ZSL, 30fps; Up to 48MP, MFNR

Dual camera: Up to 22MP, MFNR, ZSL, 30fps

4K HDR @ 30 fps video

Super Slo-mo Video Capture – 720 at 960FPS (Interpolated Frames from 240FPS)

Modem

Snapdragon X15

Download: 800 Mbps (Cat. 15)

Upload: 150 Mbps (Cat. 13)

Wi-Fi 6 Standard-Ready

Manufacturing Process 8nm

Conclusion

The introduction of these three new chips is definitely something we’ve all been waiting for. Phones like Galaxy A30, Galaxy 50 are the indication of how low-budget smartphones are much more value for money opposed to 5 years ago. These devices now offer multi-camera setups, fast charging capability, smooth gaming, and gorgeous displays. With the release of new Snapdragon 665, 730, and 730G, we have appropriate chips for upcoming mid-range smartphones. These chips come equipped with proper hardware and support for AI computing and better image processing. Since the camera setups are getting better, this will definitely make a noticeable difference in overall performance.

Snapdragon 730G is an interesting one. Even though it is only released as a gaming chip, we can certainly see it making its way to phones at the higher end of the mid-tier spectrum. It supports QHD+ display with new technologies like Wi-Fi 6 and Spectra 380 AI for ISP. 

Feel free to add your thoughts using the comments section below.

How to install Core GMS on Huawei and Honor Chinese Phones

13
How to install Core GMS on Huawei and Honor Chinese Phones

Chinese Huawei and Honor devices do not have the Google Play Services pre-installed. If you wish to install any Google App on your Chinese Huawei or Honor phone, you will have to manually install that app. Installing Google Apps requires the Google Mobile Services framework to run on. The Google Mobile Services, also known as GMS, is the core package that lays the base for all Google Apps to run on an Android phone. Chinese phones do not have Core GMS. Even if you try to install a Google App manually, it will fail to run because of the absence of Google GMS. So, before installing any Google App like the Play Store or Play Services on your Huawei or Honor Chinese phone, you need to install Core GMS first. This is the guide to download and install Core GMS on Huawei and Honor Chinese phones. 

install Core GMS on Huawei and Honor Chinese Phones
Install Core GMS on Huawei and Honor Chinese Phones

Core GMS – Google Mobile GMS

Google Mobile Services or GMS is a set of applications and APIs that helps Google Apps work across the Android system. Android phones all across the world have GMS pre-installed. Google releases the GMS as a separate package to help custom ROM developers and other users to install it manually. The core GMS can be installed on any Android phone that doesn’t have it. Without the Core GMS, Google Apps will not run.

All the Google Apps including Google Search, YouTube, Google Chrome, Play Store, Play Services, Play Books, and every other application uses the Core GMS to run without errors. Another purpose of GMS is to keep all the applications in sync with each other.

Since the Chinese Huawei and Honor phones do not have the GMS by default, we will install them by using a method given below. Before you install GMS on your Chinese handset, let’s learn why it doesn’t exist in the first place.

Why Huawei and Honor Chinese Phones do not have Core GMS?

In my previous guides, I have discussed this reason for over 5 times. I will just give you a brief idea here. In China, the government controls everything. The Chinese government doesn’t want US based applications to grab the data of its citizens. Chinese authorities do not trust apps like Facebook, WhatsApp, Google, and others. They have banned them altogether and have developed alternatives for everything. Not only that, the Chinese citizens do not have the right to information. Internet censorship in China is too strong to let any good platform run without problems.

Install Core GMS on Huawei and Honor Chinese Phones

There are two GMS solutions available at the moment. We have the GMS Installer and the GMSanzhuangqi. The GMS Installer works on older Huawei and Honor phones that came before the year 2018. The GMSanzhuangqi will work on all phones that came in 2018 and onwards. 

Depending on your phone, download the GMS package from below. After downloading the GMS package, you also need the Google Installer or Google Play Store/Google Play Services. GMS itself is just an architecture. It will not bring the apps to your phone. You will have to install the apps separately later on.

  1. Core GMS – GMS Installer | GMSanzhuangqi
  2. Copy the APK to your phone.
  3. Using a File Manager, open the APK.
  4. If the phone asks for any permission, allow it.
  5. Install the GMS now.
  6. Once done, download the Google Installer and install it to get Play Store or Play Services.

You can also download Play Store and Play Services APK separately.

Wrap Up

That’s all. You should have the Google apps running smoothly on your phone now. If you have any questions or queries, feel free to reach out to us. The best way to contact us is through the comments section below. I will try my best to get back to you as soon as possible.

How to install Google Play Store on Xiaomi Mi 9

How to install Google Play Store on Xiaomi Mi 9

Xiaomi Mi 9 is the latest flagship by the Chinese giant. The Mi 9 is one wonderful phone. If you are planning on buying this phone from China, it is not going to have the Play Store in it. A friend of mine did the same and approached me later on asking for a method to install Play Store. After successfully installing Play Store on my friend’s Xiaomi Mi 9, I decided to share the method with all of you. In this guide, you can take a look a the steps to install Google Play Store on Xiaomi Mi 9. Before you install Play Store on Xiaomi Mi 9, let’s take a look at this phone and learn why it doesn’t have the Play Store.

install Google Play Store on Xiaomi Mi 9
Google Play Store on Xiaomi Mi 9

Xiaomi Mi 9

Xiaomi Mi 9 was released last month. This phone is the successor of the Xiaomi Mi 8. Just like the Mi 8, Xiaomi has released a number of variants of this phone too. The Mi 9 comes in with a 6.39-inches Super AMOLED screen having a resolution of 1080 x 2340 pixels. The glass sandwich design has Gorilla Glass 6 on the front and Gorilla Glass 5 at the back. It has an aspect ratio of 19:9 with the help of the dew-drop notch on the front.

The Xiaomi Mi 9 – Image @usamam – OSCrunch

Mi 9 is equipped with the Qualcomm Snapdragon 855 SoC accompanied by an Adreno 640 GPU. It has a RAM of 6 or 8GB and internal storage of 128 or 256GB. The Mi 9 has 3 cameras at the back. It has a main 48MP camera, a 16MP ultrawide camera, and a 12MP telephoto camera. On the front, it has a single 20MP camera.

The Mi 9 also has a fingerprint scanner under its display. This phone uses USB Type-C for charging. Inside the box, users can find a 27W charger. It supports 20W fast wireless charging too. The phone has a 3300 mAh battery. Mi 9 runs on Android Pie out of the box.

Why the Mi 9 does not have the Play Store?

The Chinese version of Xiaomi Mi 9 does not have anything called Google in it. If you are buying the Mi 9 from China but you are going to use it outside China, you are definitely going to need the Play Store. The Google Play Store is the biggest Android application repository after all. 

In China, phone makers have to comply with the policies of the government. Since the Chinese government controls all the information, it doesn’t allow companies like Facebook, WhatsApp, Google, Instagram, and Twitter to work inside its boundaries. At first, China has strict internet censorship. The residents of China do not have the right to information. China has built its own alternatives to almost everything. For example, it has Baidu as a replacement for Facebook. It has WeChat as a replacement of WhatsApp. It has Baidu and Sogou search engines as a replacement for Google Search. China also has a number of Google Play Store alternatives.

So, as long as you are going to live in China, you may have good alternatives, but they cannot be as good as the original idea. Now that you have got your Xiaomi Mi 9, it’s time to install the Play Store on it.

When I got my friend’s Xiaomi Mi 9, I was quite amazed to see that It already had the Google Mobile Services (Google Core GMS). The Play Services were also there. The only problem was that Xiaomi did not install any applications. So the only thing I had to do was to install the Google Play Store via its APK. I am going to show you the same here.

Install Google Play Store on Xiaomi Mi 9

  1. Google Play Store APK – Download.
  2. Copy the APK to your Xiaomi Mi 9.
  3. Now using File Manager, open the copied APK.
  4. The APK will ask you for unknown sources permission. Allow it.
  5. Complete the APK installation now.
  6. Play Store will now appear on the home screen of your Mi 9.
  7. Open the Google Play Store and log in using your Google Account.
  8. That’s all.

The Google Contacts Sync will be installed once you install the Play Store. You can try installing and uninstalling applications. Play Store and all other Google Services should work perfectly well. I have tested this for several times and found this working. If you are facing any kind of problems, you may contact us freely. I will try my best to get back to you as soon as possible.

Guide to Install Stock Firmware on Samsung Galaxy A50

0
Guide to Install Stock Firmware on Samsung Galaxy A50

Got a Samsung Galaxy A50 and now want to install new stock firmware on it? You have landed at the right page. In this guide, I will show you the steps to install stock firmware on Samsung Galaxy A50. This guide will work for all variants of the Samsung Galaxy A50. Before you take a look at the guide to install stock firmware on Samsung Galaxy A50, let’s refresh our knowledge regarding this phone.

Install Stock Firmware on Samsung Galaxy A50

Samsung Galaxy A50

Galaxy A50 is the very first phone of the refreshed Galaxy A series. Samsung has replaced its Galaxy J series with the Galaxy A series. This new Galaxy A series is meant to take on Samsung’s Chinese competitors. The South Korean giant desperately wants its low-end and middle-range smartphone market share back. To start off, it released the Samsung Galaxy A30 and Galaxy A50. Both phones offer immense value for money.

The Samsung Galaxy A50 comes with a 6.4-inch Super AMOLED screen having 1080P resolution. This phone has a dew-drop notch on the front which Samsung calls its infinity-U display. The Galaxy A50’s screen ratio is 19:9. It has a fingerprint scanner hidden under its display. The phone has a curvy back with three cameras mounted at the back and a single camera fixed on the front in its notch. Galaxy A50 offers a USB Type-C port and it also supports Fast Charging.

The phone is powered by Exynos 9610 CPU. It has a RAM of 4GB and its internal storage is 64GB or 128GB. Galaxy A50’s triple camera system includes a main 25MP camera, an 8MP ultrawide camera, and a 5MP depth sensor. On the front, it has a single 25MP camera. These cameras can do justice with your photos.

It has a battery of 4000 mAh under the hood. The Galaxy A50 comes in Blue, Black, and White colors. These are the gradient colors and look really cool under a good amount of light.

Samsung Galaxy A50 runs on Android Pie out of the box. It uses Samsung’s latest One UI which itself is a feature-rich interface. The One UI takes the usability of the Galaxy A50 to a whole new level. Samsung has already started rolling out new security patches for the Galaxy A50.

That’s all about this new great smartphone. Let’s take a look a the reasons to install new stock firmware on your phone.

Install Stock Firmware on Samsung Galaxy A50 – But Why?

There can be a number of reasons which can push you to install new stock firmware on your phone. I will list them down so that it is easy for you to understand.

  1. You want to update your Galaxy A50 to a new version of Android, the update is available in another country. The only way is to update your phone manually. This guide will help you to update your phone manually from Android 9 Pie to Android 10 Q.
  2. Something is gone wrong with your Galaxy A50 and its soft-bricked. Flash new firmware to fix it.
  3. Your Galaxy A50 is restarting randomly. To fix it, you can install stock firmware or stock ROM.
  4. Galaxy A50 is giving your poor battery life. You want to check new software.
  5. Your Samsung A50 is stuck in a bootloop. The only way to get out of it is to install a new stock ROM. Follow this guide to fix it.
  6. The Samsung A50 has started lagging, it hangs every now and then. Install new stock firmware to finish the lag. 
  7. You want to go back to the factory. Hard reset your Galaxy A50 with the help of stock firmware.
  8. You rooted your Galaxy A50 and now you want to unroot it.

This guide to install stock firmware on Samsung Galaxy A50 can help you in many other ways. Assuming that you have understood everything, we can move forward.

Methods to install stock firmware on Galaxy A50

There are two methods to install stock firmware on your A50. The first method is through Samsung Smart Switch. It is Samsung’s official PC Suite software. Smart Switch is good for the users who want to check for updates within their regions or who want to perform an emergency software recovery. Smart Switch comes with backup options too. If you are an average user and don’t want to delve into something complex, the Smart Switch method is for you.

On the other hand, we have the Odin method. The Odin method is for advanced users. For the Odin method, you download the firmware files, load them in the tool, and flash manually. This method is useful when you want to upgrade your phone. Odin can also help you to make a clean installation of a new firmware resetting your phone back to the factory.

I am going to explain both the methods below. Based on your need, choose the method and go ahead.

Guide to install stock firmware on Samsung Galaxy A50 via Smart Switch

First of all, download and install Samsung Smart Switch on your PC.

Preparation

  1. You need the USB Type-C cable.
  2. A computer with a Windows or Mac operating system.
  3. Your galaxy A50 is needed.
  4. A little bit of attention.

Steps to install Stock Firmware via Smart Switch

  • Connect your Galaxy A50 to the computer.
  • Open Samsung Smart Switch on the computer now.
  • Smart Switch will detect your phone and show you the options.
  • If your phone is working fine, click on the Backup button and back up everything.
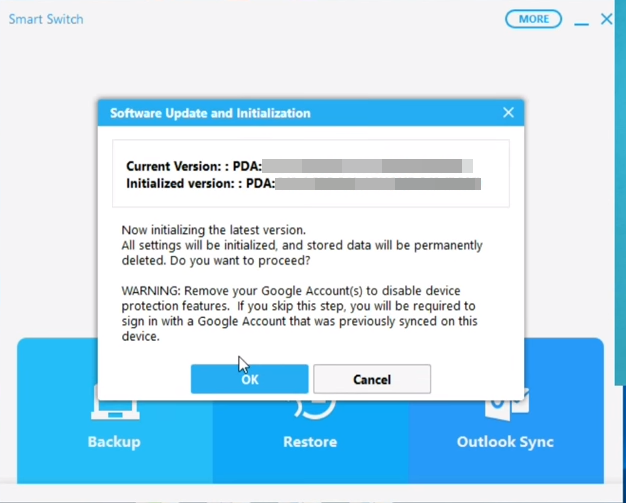
  • Now click on the small settings gear icon on the top-right corner and then click on Preferences > Emergency Software Recovery and Initialization.

  • You will go to a new Window. Here you have two options: Emergency Software Recovery & Device Initialization.
  • If your phone has a problem, go with the Software Recovery. If you just want to check and update, click on Device Initialization.
  • Device Initialization will look for an update for your device. This is going to be a long process. It will ask you for back up too.
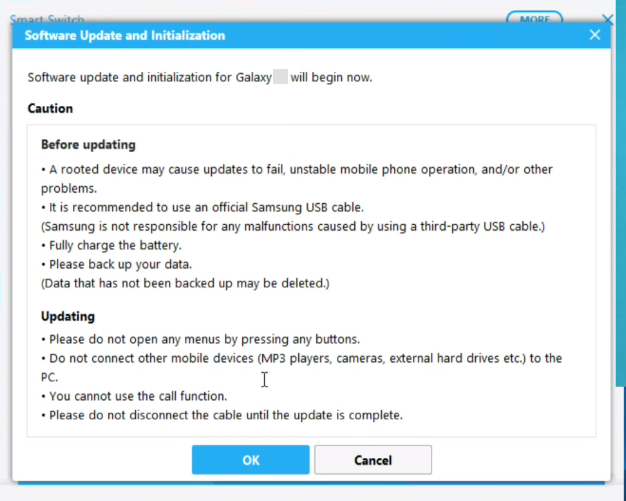
  • If there is an update available, it will show you the update details.
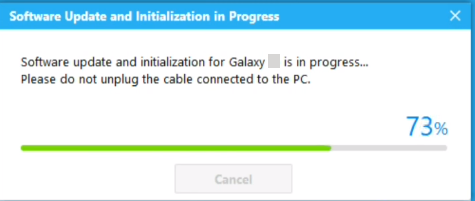
  • In case you update the phone, it will show you the progress with the details.

  • Follow the on-screen instructions to get this done. This is pretty much self-explanatory.

That’s it with the Samsung Smart Switch method.

Guide to install stock firmware on Samsung Galaxy A50 via Odin

Preparations

  1. You need the USB Type-C Cable.
  2. On your phone, go to Settings > About Phone > Software Information > Tap the Build Number for 7 times. This will enable Developer Options. Now go back to Settings > Developer Options > Enable OEM Unlocking.
  3. From the Developer Options, turn on USB Debugging too.
  4. Back up each and everything from your Galaxy A50.
  5. Charge the A50 up to 50% for this method.
  6. Follow the steps with full attention.

Downloads:

  • Open this page and enter the model number of your Galaxy A50. Download the latest available firmware file for your phone.
    • Extract the downloaded firmware file to get the AP, CP, BL, CSC, and HOME_CSC files.
Image for reference only.

Boot your Galaxy A50 into Download Mode

Turn off your Samsung Galaxy A50. While the phone is off, press and hold Volume Up + Power button to go into the recovery mode. As your phone boots in the recovery, you will see the Reboot option at the top. Press the Power button to enter Reboot options. Now highlight “Reboot Bootloader” using the Volume Down key. Press the Power button on Reboot Bootloader. The phone will boot up in the Download Mode and show you a warning. Press the Volume Up button to continue. Follow the steps given below now.

Steps to install firmware via Odin

  1. Open Odin 3.13.1.exe on your computer.
  2. In Odin, click on the AP slot and add the AP file. In the CP slot, add the CP file. Add the BL file in the BL slot. In the CSC slot, add the CSC file if you want to factory reset, add the Home_CSC file if you don’t want to wipe anything.
  3. Connect your phone to the computer now while its in the Download Mode. Odin will show “Added” in the logs and also show a Blue light in the ID:COM box.
  4. In Odin, click on Options and make sure only checked options are F.Reset.Time and Auto Reboot. No other options should be ticked.
  5. Get back to the main menu in Odin and click on Start.
  6. Odin will start installing the firmware. It will take about 5-7 minutes.
  7. After installation, your phone will reboot. Disconnect the phone now.
  8. New firmware has been installed. Congratulations!
Image for reference only.

Wrap Up

So, the firmware has been successfully installed. You can now find your Galaxy A50 completely refreshed. The first boot always takes a while. If you think that the phone is not booting up fine, you can try clearing its cache or you can try flashing the firmware again. For any queries or questions, feel free to reach out to us through the comments section below. We will try our best to get back to you as soon as possible.