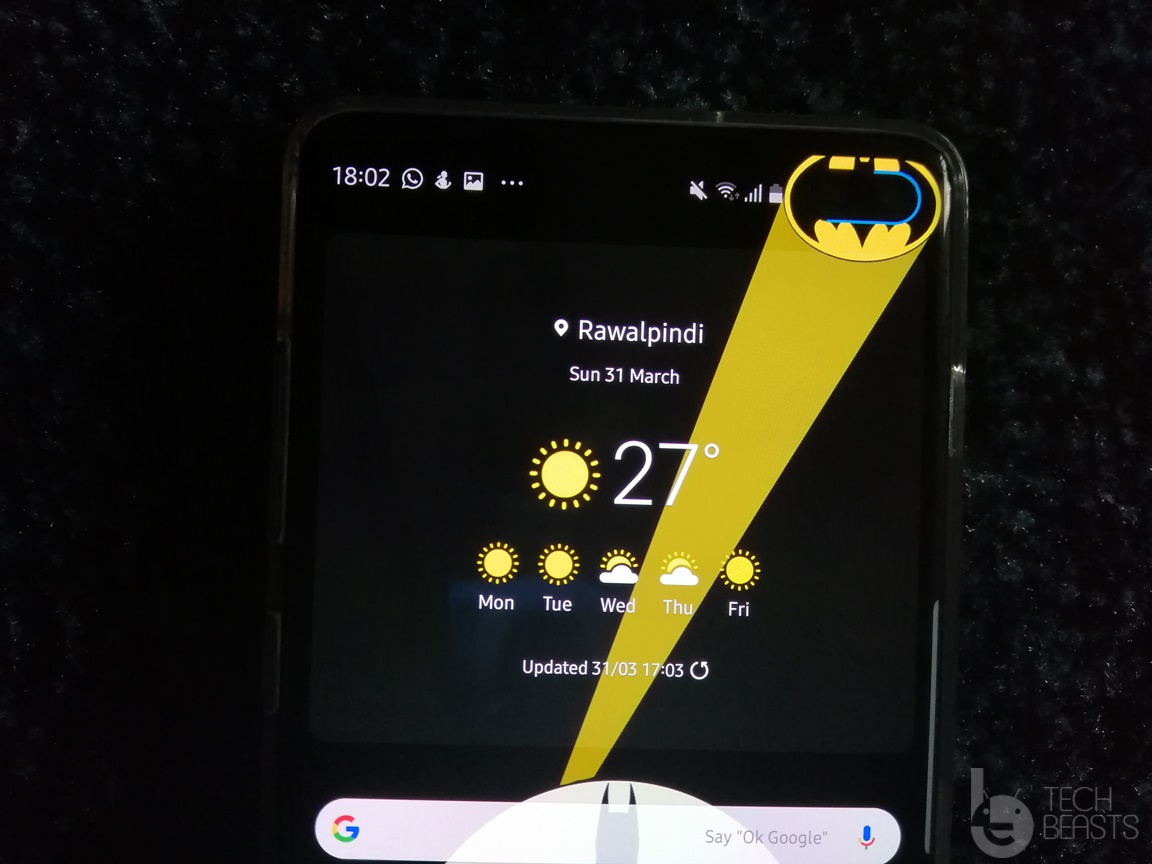
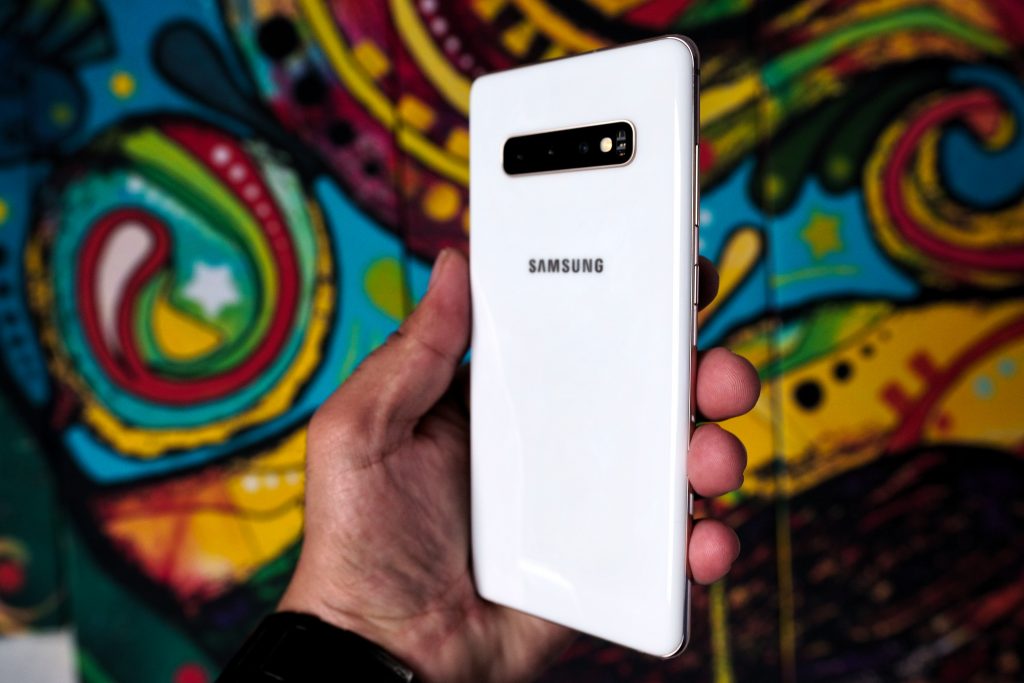
Energy Ring application can add a marvelous feature to your Galaxy S10 handset. The Energy Ring application, as its name suggests, adds a ring around the punch-hole of your S10. The ring around the camera tells you about the battery percentage of your phone. To add the battery indicator to your Galaxy S10, you can download Energy Ring APK from here. The latest version of Energy Ring APK is available below.
Energy Ring on Galaxy S10 Plus
No more notification LED
Samsung Galaxy S10 series comes with the hole-punch camera setup. The Galaxy S10E and Galaxy S10 have a single hole-punch on the top-right corner of the phone. The Galaxy S10 Plus has a dual hole-punch camera. To keep more room for the display, Samsung has not added anything other than the font-cameras on the screen. For example, there is no LED notification indicator on the new Galaxy S10 phones.
Previously, we had the LED notification light on all Samsung Galaxy phones. The notification LED was a good feature to stay informed about the incoming messages and alerts. The notification indicator light was also useful for the battery life of the phone. You could see the light informing you about the battery percentage while charging and when the phone hits 100% battery. On the S10 and S10 Plus, you have to check the phone by tapping the display to see the battery on always-on-display, or you have to check the percentage in the notifications panel. This gap has been filled by Energy Ring, a superb application for the S10 trio.
Energy Ring Review
Energy Ring is a completely free application. It’s loaded with a huge number of features. You can set different colors for the indicator for different percentages of the battery life. The application also has a handful of animations for the indicator. For example, it has the acceleration, deceleration, accelerate then decelerate, bounce, anticipation, launch and slow down, and speed breaker animations. You can also adjust the thickness of the ring. The ring direction can be set to clockwise, anti-clockwise, or bidirectional. You can hide the battery indicator when you are using a full-screen application. There is a whole color chart available to set the colors according to your wish.
The Energy Ring is optimized to consume the least amount of battery on the phone. If you consider running this application 24/7, there is going to be an unnotable drop in the battery because of this app. One downside that I noted is that when you have this enabled and you capture a screenshot, the camera cutout appears in the screenshots too. So if you want to take screenshots without the camera cutout, you will have to disable the energy ring first.
Go ahead to download Energy Ring APK to light up the camera hole on Galaxy S10. I have added a small tutorial to set up Energy Ring on all the Galaxy S10 variants.
Copy the APK to your S10/S10E/S10 Plus, or directly download it on your phone.
Using File Manager, install the Energy Ring APK. If it asks for permission, allow unknown sources.
Now open Energy Ring from the application drawer.
Set up Energy Ring to light up Galaxy S10 Hole-Punch
After opening Energy Ring, tap the radio toggle at the top-right corner. It will take you to notification access, tap the toggle for Energy Ring to activate it.
Get back to the Energy Ring application now and set the Ring Thickness first of all. Recommended Thickness is 5.
Now choose the direction of the Ring. I have set it to clockwise on my phone.
Scroll down and set the Bar Visibility now.
You can now set the charging animation according to your own liking.
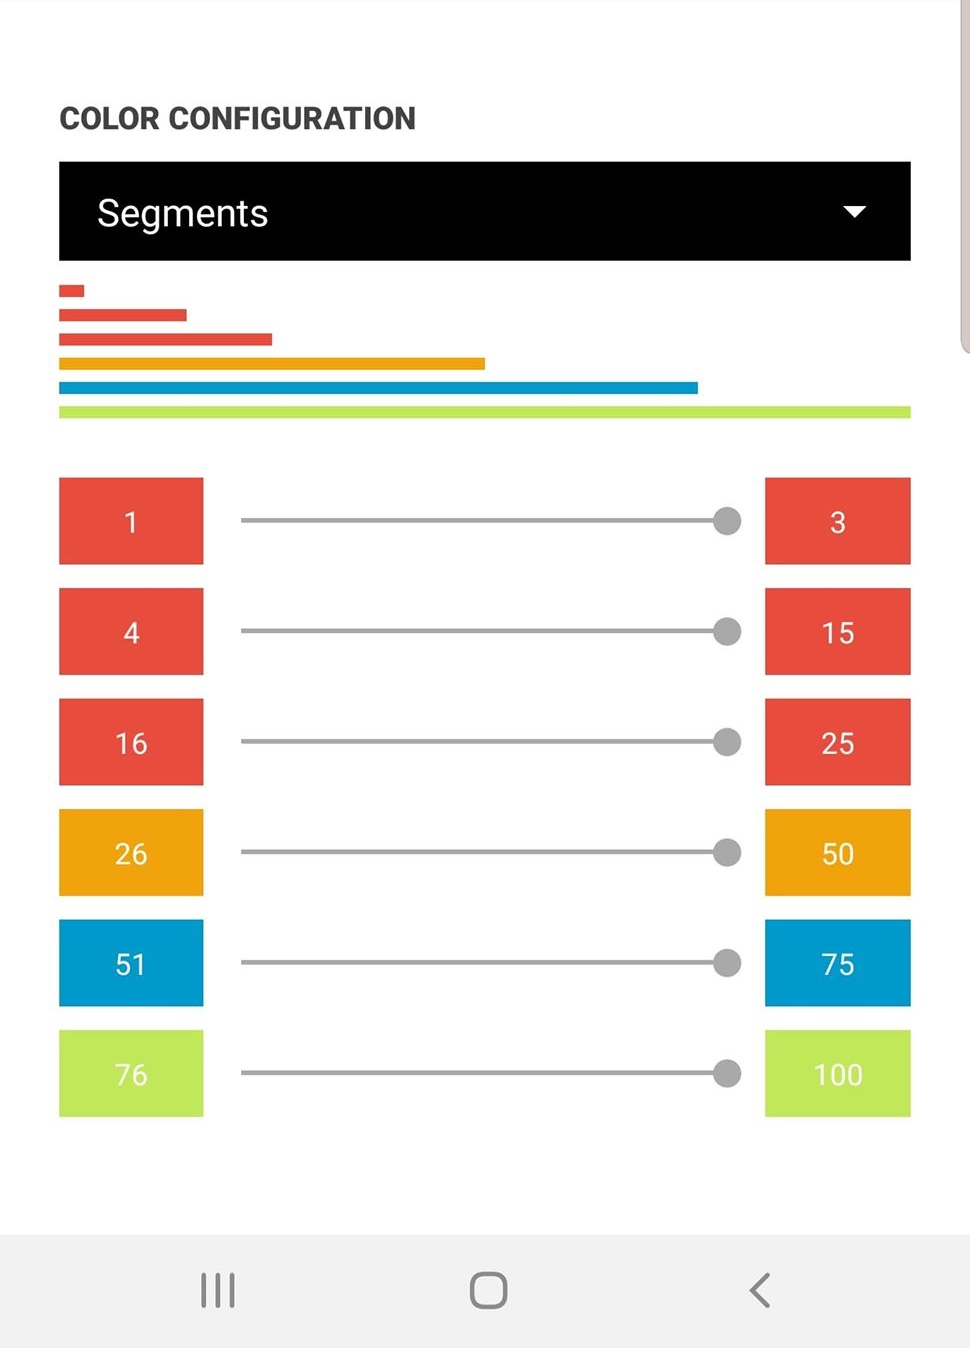
In the end, you have a color configuration. Set the colors for specific battery percentages.
That’s it. You have it turned on now. To disable Energy Ring, simply open the app again and turn off the radio toggle to get rid of it.
Wrap Up
You have successfully setup the Energy Ring on your Galaxy S10. You can now see a beautiful light around the camera hole of S10. Keep changing its look unless you find the best one. If you have any questions regarding this application, feel free to ask them below. I will try my best to get back to you as soon as possible. Stay connected.
Apple’s new iMac and iPad are out. The 2019 iMac and iPad come with Apple’s latest hardware. The devices carry the same old design, but the hardware improvement are notable. The new iMac and iPad 2019 are equipped with a bunch of new wallpapers. The stock wallpapers of iMac and iPad 2019 are out now. We have got our hands on these wallpapers and added them down below. You can download iMac and iPad 2019 stock wallpapers from here now.
Both the iMac and iPad come with the latest CPU by Apple. The iPad comes with the latest A12 bionic SoC, which is Apple’s 7nm processor. The new iPad also comes with a headphone jack. It’s got more powerful hardware overall. The design, build, and form factory are the old. You can learn more about these devices at Apple’s official site.
For now, we will just go ahead to download the stock wallpapers of iMac and iPad 2019.
iMac and iPad 2019 Stock Wallpapers
To download these wallpapers, simply right click on your desired image and then click on save image as.. If you are downloading these wallpapers on a phone, you will long-press the image to get the Download Image option.
These wallpapers are in high resolution. You can apply these iMac and iPad 2019 stock wallpapers to any iPhone, iMac, Macbook, and to an Android phone or a Windows PC too.
That’s all with the wallpapers of latest Apple devices. We have a huge number of stock wallpapers posted on our site. You can find stock wallpapers of Samsung, Huawei, Xiaomi, OnePlus, Oppo, and many other devices in the stock wallpapers section of our site. Head over to the stock wallpapers to get the latest wallpapers like the Huawei P30 Pro stock wallpapers and the Galaxy Fold stock wallpapers.
If you have any questions to ask, or if you have any wallpapers request, reach out to us through the comments section below. We will try our best to get back to your as soon as possible.
Samsung has once again tried to set a new trend in the smartphone industry. The industry-altering Galaxy Fold is out in all its glory. The South Korean giant has done a lot of hard work to make this phone look beautiful. A huge number of beautiful wallpapers is also a part of Samsung’s efforts. The Galaxy Fold’s startling stock wallpapers are out now. If you are a fan of wallpapers, it’s time to download Samsung Galaxy Fold stock wallpapers. I have uploaded all Galaxy Fold stock wallpapers here.
Samsung Galaxy Fold Stock Wallpapers
Before you download Galaxy Fold wallpapers, take a look at what this phone is all about.
Samsung Galaxy Fold
Samsung Galaxy Fold, as its name suggests, is the world’s first foldable smartphone. The phone opens up like a small book. It has two screens attached by very fine hinges. There’s a third screen of this phone which is at the back when the phone is opened, and on the front when the phone is closed.
The Galaxy Fold’s display size is 7.3-inches in total. The cover display has a size of 4.6-inches. The main display is Dynamic AMOLED with a resolution of 1536 x 2152 pixels while the cover display is HD+ Super AMOLED.
Galaxy Fold is powered by Qualcomm Snapdragon 855 CPU accompanied by Adreno 640 GPU. It has 3 cameras at the back including a 12MP main shooter, a 12MP telephoto, and a 16MP ultrawide camera. On the front, it has 2 cameras including a 10MP main camera and an 8MP depth sensor. The cover camera is of 10MP. In total, the Galaxy Fold has 6 cameras.
This phone has a whopping 4380 mAh battery inside and it supports 18W fast charging. Samsung has built this phone in the Space Silver, Cosmos Black, Martian Green, and Astro Blue colors.
Galaxy Fold is an experimental device. Hopefully, the Galaxy Fold 2 will be a much better device than this. We will only see a 2nd generation of the Galaxy Fold if this new smartphone language impresses the users, which looks highly unlikely right now. The Galaxy Fold may be too expensive to get your hands on, but you can definitely get its wallpapers. Go ahead to download Samsung Galaxy Fold Stock Wallpapers now.
Samsung Galaxy Fold Stock Wallpapers
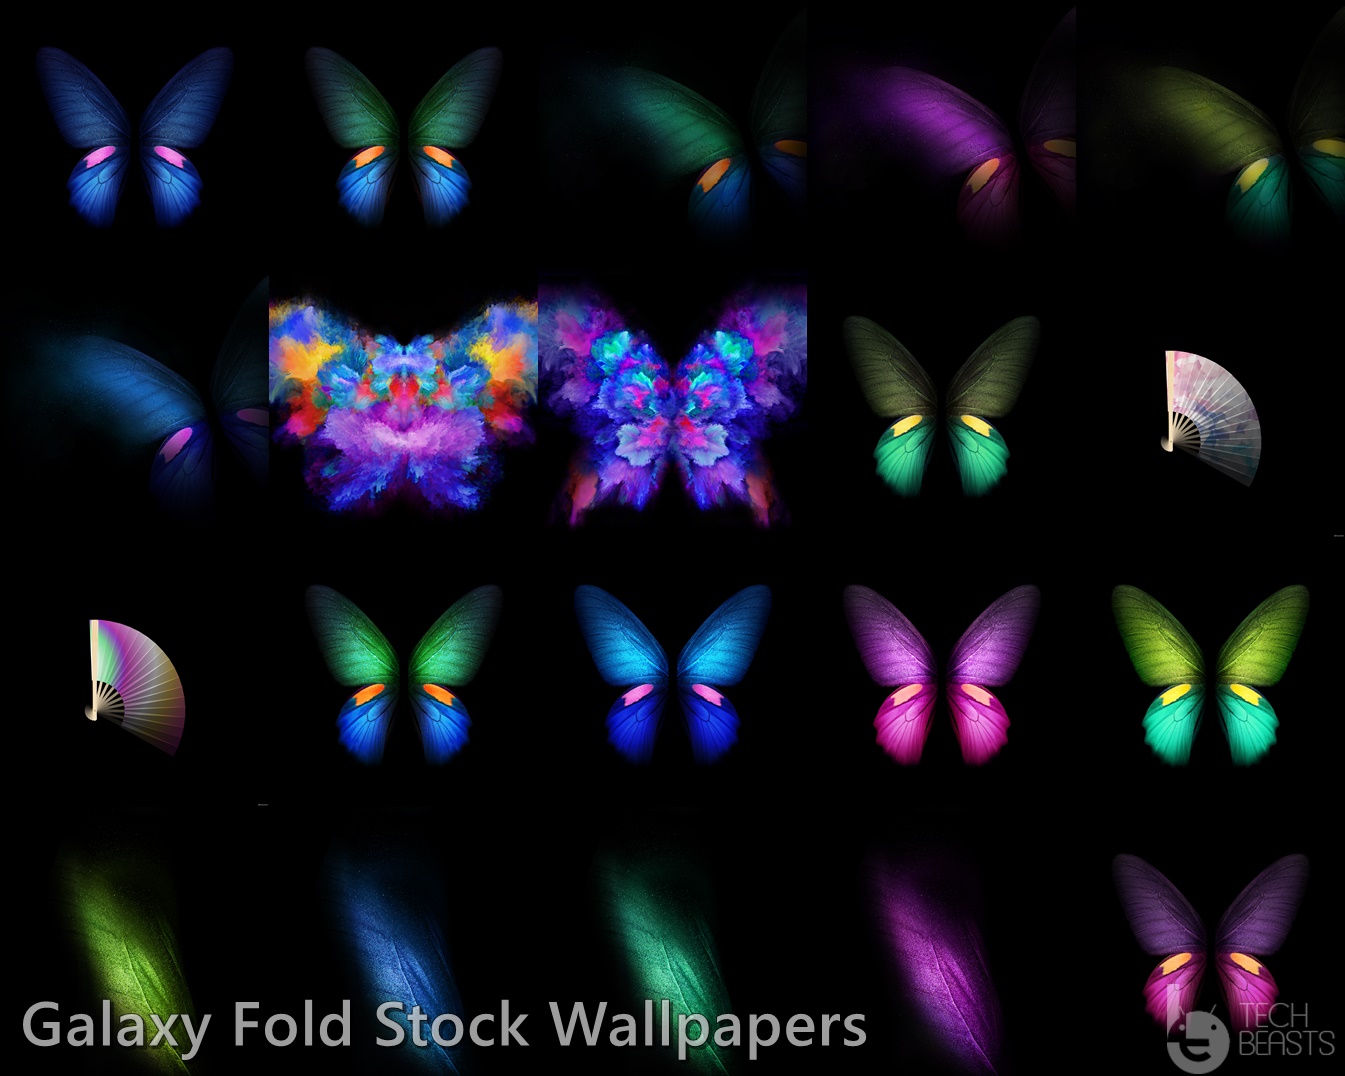
There are 32 static wallpapers in the Galaxy Fold. More than half of these wallpapers are about butterflies. It looks like Samsung compares its Galaxy Fold to a butterfly. The stock wallpapers of Galaxy Fold are in a resolution of 2152 x 2152 pixels and 1418 x 3072 pixels. Other than the 32 static wallpapers, Galaxy Fold has 4 video wallpapers too. The video wallpapers can be set on the lock screen of any Samsung Galaxy running on Android Pie. You can download the static wallpapers first.
To download the wallpapers, simply right click on the image and then click on Save image as… If you are downloading wallpapers on an Android phone, you will long-press the image to download it.
These wallpapers can be applied to any Android phone or even to an iPhone. You can also download all wallpapers at once using the all-in-one link attached below.
That’s all. You can take a look at more such wallpapers in the Stock Wallpapers section of our site. I hope that you liked the Samsung Galaxy Fold stock wallpapers. If you have any questions to ask, feel free to drop them in the comments section down below.
Huawei has joined the 2019 flagship battle. A week ago, the company released its latest P30 and the P30 Pro. Huawei’s P30 lineup comes with some promising features. To beautify the phones further, Huawei has added a slew of stock wallpapers. The beautiful Huawei P30 and P30 Pro stock wallpapers are up on the internet now. We have got our hands on the P30 Pro stock wallpapers too and added them here. Wallpaper enthusiasts can download Huawei P30 Pro stock wallpapers from here now.
Huawei P30 and P30 Pro Official Stock Wallpapers
Let us take a look the P30 and P30 Pro before downloading the wallpapers.
Huawei P30
The Huawei P30 comes with Huawei’s latest design language and ergonomics. This phone has a screen of 6.1-inches with a resolution of 1080 2340 pixels. It has a tiny notch in the center bumping its screen ratio to 19:9. The front panel is OLED, screen protection isn’t mentioned. Huawei P30 is powered by company’s in-house Kirin 980 chipset. Mali-G76MP10 is helping the CPU here.
Huawei P30
Internal storage options of this phone include 64GB/128GB/256GB with a RAM of 6 or 8GB. As far as the cameras are concerned, P30 has 3 of them at the back. It has a 40MP main camera, a 16MP ultrawide camera, and an 8MP telephoto camera with 3x optical zoom. On the front, it has a single 32MP camera. The P30 supports 22.5W fast charging. It has a battery of 3650 mAh. Huawei offers this phone in Aurora, Amber Sunrise, Breathing Crystal, Black, and Pearl White colors. The P30 runs on Android Pie out of the box themed by EMUI.
Huawei P30 Pro
P30 Pro is the expensive variant of P30. This phone has same processor and GPU as that of the P30. The difference is in the display department first of all. The P30 Pro comes with a 6.47-inches screen. It storage variants include a 512GB with 8GB variant too. The P30 Pro has 4 cameras at the back, which are way superior than the cameras of P30. It has a 40MP main camera, a 20MP ultrawide camera, an 8MP periscope camera with 5x optical zoom, and a third TOF 3D camera. It has the same 32MP camera on the front. P30 Pro also offers 40W fast charging. It has a battery of 4200 mAH inside. The colors of P30 Pro are also as same of the P30. It also runs on Android 9 themed by EMUI 9 out of the box.
Huawei P30 Pro
That’s all about these phones. Let’s get the stock Huawei P30 and P30 Pro stock wallpapers now.
Huawei P30 Pro Stock Wallpapers
The Huawei P30 and P30 Pro stock wallpapers are all same. So, you don’t need to get confused at all.
There are 12 vibrant wallpapers in the Huawei P30 phones in total. These wallpapers have a resolution of 2340 x 2340. You can apply the Huawei P30 stock wallpapers to any Android phone or even an iPhone.
To download Huawei P30 Pro stock wallpapers, simply open your desired image from below and then right click > save image as. If you are viewing this post on your Android phone, you will long-tap the image to download it. I have also attached an all-in-one link, you can download all the wallpapers at once too.
All Huawei P30/P30 Pro Stock Wallpapers – Download
That’s all. If you have any questions to ask, feel free to drop them in the comments section down below. You can find stock wallpapers of more devices in the stock wallpapers section of our site. Some wallpapers are also attached below.
Galaxy S10 series comes with incredible cameras. All three phones of the S10 lineup come with a new ultra-wide shooter. Samsung has done a great job in the camera department this time. The Galaxy S10, before the Huawei Mate 30, was the best camera-smartphone. It scored 109 points at DxOMark. Users all over the world are enjoying the crisp photos captured with the Galaxy S10, but there’s a little problem. The problem is with the new ultra-wide camera on the Galaxy S10. It distorts the wide images. If you have already noted this problem, its time to fix it. The steps to fix Galaxy S10 ultrawide camera distortion are given below.
Image by UsamaM @ TechBeasts
FishEye effect on Galaxy S10 UltraWide Photos
There is a 16MP ultrawide camera fixed on the Galaxy S10E, Galaxy S10, and the Galaxy S10 Plus. This camera can take extra wide photos giving you more space to adjust more people in the photos. The problem with the ultrawide photos pops up when you shoot buildings, landscapes, and objects. The area towards the corner of the picture shows off a FishEye effect. The objects at the corners look curved. They are not curved too much to be notable. You can only note it when you keenly inspect an image.
Without shape correction – Fisheye effect on the left corner.With shape correction – no fisheye effect.
If you are shooting ultrawide photos since day 1 and you have not noted anything wrong, chances are that you are already used to the fisheye effect in the photos. But if you just want to fix it for the sake of removing that effect, you can do so now.
Samsung has added an ultra wide shape correction feature in the camera settings of the Galaxy S10. This feature is turned off by default. If you just turn this feature on, it will fix all the ultra wide photos. Follow the steps given below to fix Galaxy S10 UltraWide Camera Distortion now.
Fix Galaxy S10 UltraWide Camera Distortion
Open Camera on your Galaxy S10.
Now go to Settings of Camera.
Go to the Save Options in Camera Settings.
Tap the toggle next to ultra wide shape correction to turn this one.
Capture the photos now. There should be no distortion.
That’s all. Hopefully, your issue is resolved now. If you have anything else to ask about the Galaxy S10, feel free to reach out to us. I will try my best to get back to you as soon as possible.
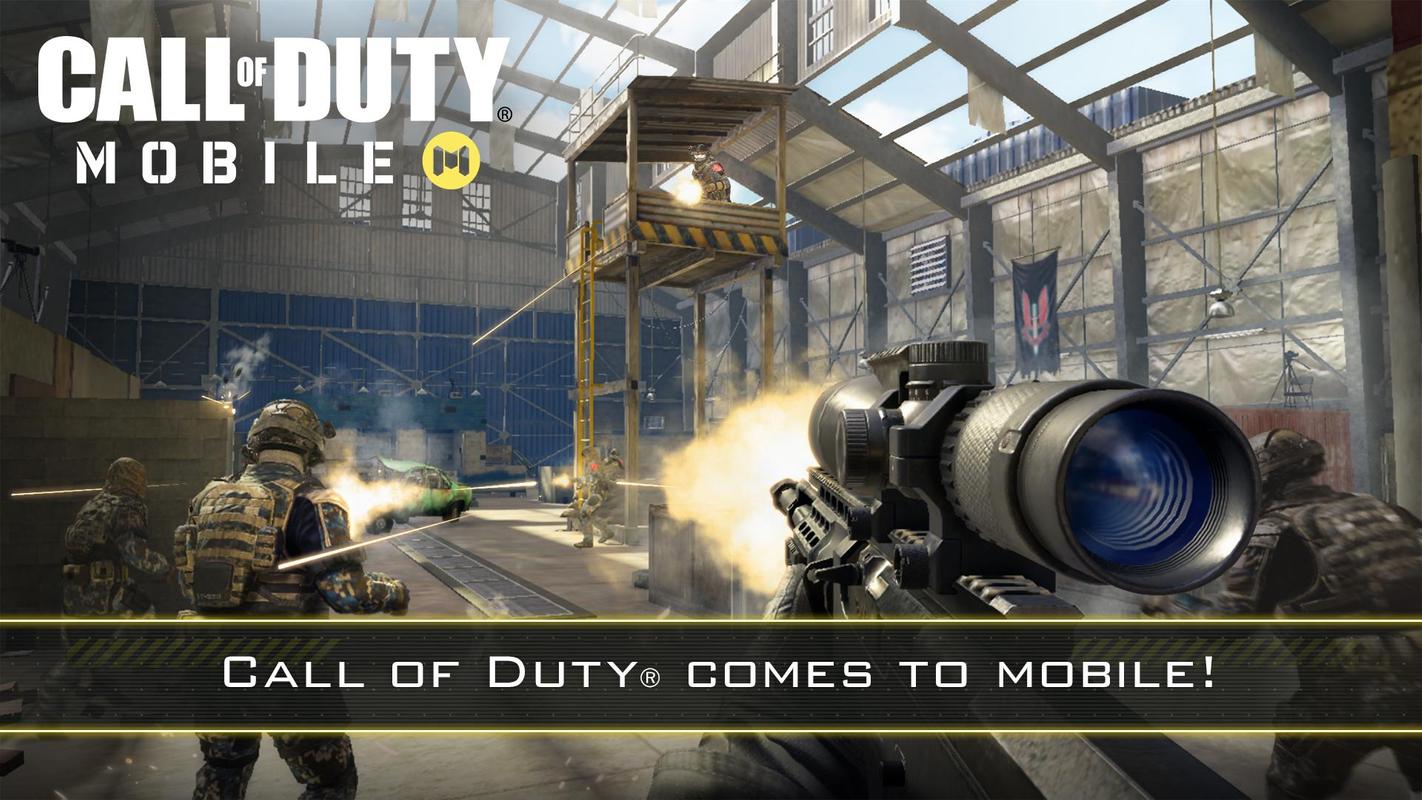
Call of Duty, one of the most popular FPS games is all set to make its way to Android. The game will be named as Call of Duty Mobile. Call of Duty Mobile has been around for quite a while. Previously, this game was called Call of Duty Legends of War. Since the game was in Alpha stages, the company never announced any further plans. A week back, Call of Duty publisher Activision Publishing, Inc. announced that they are bringing Call of Duty Mobile for Android and iOS users. Those of you looking for Call of Duty Mobile APK can download it from here now. The original Call of Duty Mobile APK is attached down below. Before you download Call of Duty Mobile APK, let us learn a little more about this game.
Call of Duty Mobile
The original Call of Duty has a number of variants including Call of Duty Modern Warfare, Call of Duty Universe, and many others. The Call of Duty Mobile is supposed to be inspired by all of its PC variants. The gameplay will resemble all other variants. Maps, characters, vehicles, weapons, dialogues, and elements are from the original Call of Duty series.
As far as the gameplay is concerned, you either play it as a single player of multiplayer. The goal in the game is to shoot down the enemies hiding in the area. The essence of Call of Duty is the multiplayer mode basically. You can team up with your friends or random people to take on another team which will be your enemy. Players can hide in the abandon buildings, they can find the safe points from where they can easily target the enemies.
Call of Duty Mobile will be a free game. Users will be able to download it from both the Google Play Store and Apple’s App Store. The company will released this game in phases which means it will take its time to reach out to all the regions in the world. If you are unable to find Call of Duty Mobile in the Play Store at your end, you can get the Call of Duty Mobile APK and install it manually.
Call of Duty Mobile APK
Here is the Call of Duty Mobile APK. The APK can be downloaded and installed on all the Android phones. This is completely safe and secure APK so you don’t have to worry about anything while installing it. Download it now and follow the instructions to install it.
If the phone asks for any permissions from unknown sources, allow it.
Now complete the Call of Duty Mobile installation.
Launch the game from the app drawer.
Let the game download its data. Play once it is ready.
Note: The APK attached above is of Call of Duty Legends of War. Since the new Call of Duty Mobile will be the continuation of Legends of War, the game is good enough to give you an idea of whats coming in the future. The Call of Duty Mobile APK is not out yet. Once it comes out, we will make sure to be the first one to add it to this post.
Just yesterday, Samsung rolled out the Android Pie update for the Galaxy Note FE. The Galaxy Note FE now runs on the Android 9.0 Pie. This update started rolling out in the Phillippines and the KSA. This is an incremental OTA. The update will take its time to reach out to all the regions. If you are living in a region where this update is not available yet, you can install it manually. This is the guide you need to manually update Galaxy Note FE to Android Pie. Follow the steps given in this guide to download Android Pie on Galaxy Note FE. We will be using Odin to get Android Pie on Galaxy Note FE. Before installing the update, let’s take a look at the features of this new Android version for the Note FE.
Android Pie for Galaxy Note FE
Galaxy Note FE originally came out with Android Nougat. This phone was basically released to overcome the damage caused by the Galaxy Note 7. The Galaxy Note FE was released in the same year as the Galaxy S7, however, the Galaxy S7 is not getting the Android Pie. It looks like Samsung is releasing the Android Pie just to reward the loyal Galaxy Note FE owners. This is the 2nd big update for the Galaxy Note FE since its release and probably it will be last big update too.
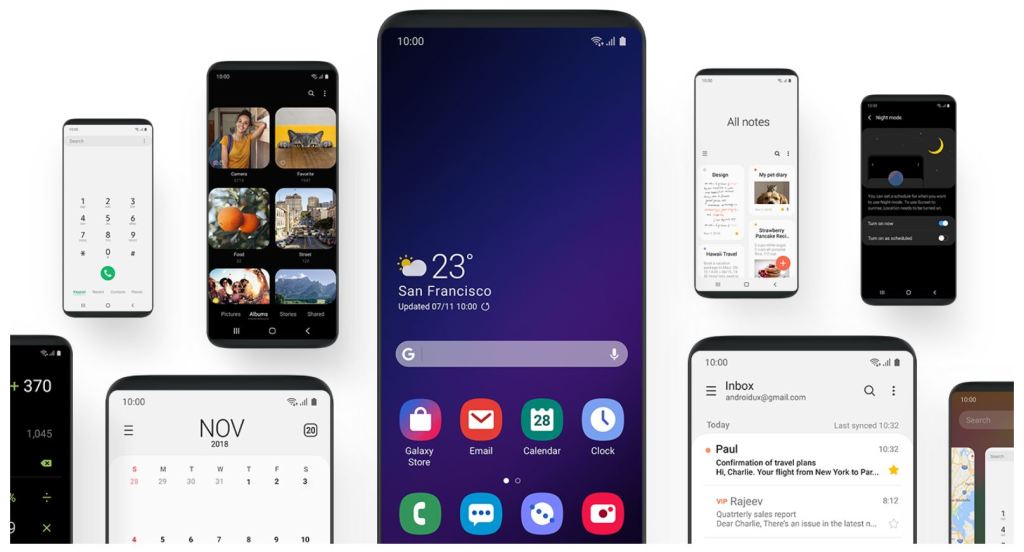
The Android Pie, first of all, changes the version number to Android 9. This update brings massive changes and a handful of new features. This update carries the new Samsung UI named as the Samsung One UI. It replaces the old Samsung Experience UI. The One UI is designed to make things easy for users who use the phone with a single hand only. Samsung One UI changes the look of most of the elements of the phone. It has a new launcher, it has a new UI for Settings application, the Phone, Contacts, Gallery, and almost all other stock applications have got a new look.
Android Pie update also adds the Night Mode to the Galaxy Note FE. The Night Mode is the same as the Dark Mode on other Android phones. The update also brings navigation gestures to Samsung devices. It adds the Adaptive Battery mode to the phone too. Furthermore, the Android Pie brings native private DNS support to the devices. Samsung has changed the place of some options under the settings panel. The About Phone section has got a new look too. Overall, the Android Pie update is quite stable and smooth. It carries the latest security patch too. Whether or not you like the Android Pie update, you must update your Galaxy Note FE for the sake of security.
Updating Galaxy Note FE to Android Pie
There are two methods to update your Galaxy Note FE to Android Pie. The first method is to go to the Settings of your phone and then go to the Software Section. Check for an OTA update. If there is an Android Pie OTA available, you can update the phone right away. Since this method is unlikely to work, you will need the second method which is the Odin method. I will show you the steps to install the official Android Pie firmware on the Galaxy Note FE via Odin. You have to download the appropriate Android Pie firmware files and the required tools to download Android Pie on Galaxy Note FE.
Before you download Android Pie on Galaxy Note FE, you must keep in mind that the firmware we are going to flash is completely official. It will not void the warranty or the Knox counter of your phone. To avoid a mishap, you must pay full attention to the steps coming up next.
How to download Android Pie on Galaxy Note FE
Preparations
This guide is for Galaxy Note FE N935F/DS. Do not try on any other model.
Backup each and everything on your phone.
Enable OEM Unlocking and USB Debugging on the Galaxy Note FE.
Use original data cable to connect Note FE to the computer.
Close Samsung Smart Switch while using Odin. If you do not have Smart Switch, skip this step.
Pay attention to the remaining steps.
Required Downloads
Galaxy Note FE Android Pie Philippines Version: Download
Galaxy Note FE Android Pie Saudi Arabia Version: Download
Extract the downloaded firmware file to get AP, CP, BL, CSC, and Home_CSC files.
Note: Your region doesn’t matter. You can download any firmware from above and flash it on any Galaxy Note FE belonging to any country as long as your phone’s model number is N935F/DS.
Open Odin3.exe on your computer. In Odin, click on Options and make sure the only options ticked are F.Reset.Time and Auto Reboot.
Get back to the main menu in Odin and click on the AP tab. Add the AP file here. Now add the CP file in the CP tab. Similarly, add the BL file in the BL slot. Add the CSC file in CSC slot if you want to factory reset, otherwise, add the Home_CSC file in the CSC slot.
Now power down your Galaxy Note FE. Press and hold Volume Down + Home + Power button to go into download mode. As your phone boots up, press Volume Up to continue.
Connect your phone to the computer now. Odin should show “Added” in the logs.
Making sure that you are all set, click on the Start button.
The firmware will be flashed in 5-10 minutes and your phone will reboot automatically.
Image for reference only.
Disconnect the phone now and enjoy the all-new Android Pie on Galaxy Note FE.
Wrap Up
That is pretty much it. You have now successfully updated your Galaxy Note FE to Android 9 Pie. If you think that your phone is taking too long to boot up, you can clear its cache and reboot it. In case something else goes wrong, feel free to reach out to us. I will try my best to get back to you as soon as possible. Stay connected.
Call Forwarding is a standard feature for pretty much every telecom company in the world. The main purpose of call forwarding is to divert the calls to carrier’s service when you are unreachable, busy in another call, not answering the call or just set the divert for every call. In this article, learn how to enable or disable call forwarding on Galaxy S10 and Galaxy S10+. Same settings and method apply to Galaxy S10e and other One UI phones by Samsung as well.
Samsung’s latest flagship is currently one of the hottest devices in the market. It offers some of the best hardware options in each department. The most outstanding feature of Galaxy S10 and S10+ is under-screen ultrasonic fingerprint scanner. With the trend of bezel-less phones going crazy, it was inevitable that normal capacitive fingerprint scanners are replaced by in-screen scanners. However, it is not yet at the level of reliability as older tech.
By all means, Galaxy S10 and S10+ are modern and by far ahead of its competition. It has got the best design, there’s no notch (Wink wink!), fastest hardware, one of the best camera setup and without a doubt, the best screen in any mobile phone. When setting up a newly bought device, there are a lot of settings that may be in different place compared to other devices. One of these is Call Forwarding in Galaxy S10/S10+. It may be active by default in few phones and it could cause some issues. S10 or S10+ may not ring for more than 4 bell or 4 times. Or the calls may be forwarded when you’re busy on another call. The call waiting settings may override because of this.
How does Call Forwarding work?
Call divert or Call forwarding is a basic network feature. All networks provide their own settings for this. This feature is either used to divert calls from one number to another depending on a certain condition or just to send a popup to caller.
If you set the call forwarding enabled and set the divert to secondary number, then whenever someone calls, and a condition is met (for example calls are set to divert or forward when it is busy or unreachable), the caller will automatically be redirected to second number. This is a cool feature when someone uses more than one SIM and would love not to miss any calls.
Some networks enable call forwarding without any secondary SIM involved. In this case, the caller’s call is cut after 3, 4 or 5 bells / beeps. Normally, the call goes on for more than 9 beeps. In this case, the caller may get a popup for sending a quick message to recipient or call is just cut anyway.
In any of these cases, the user may or may not have activated this service. In this guide, we are going through the process of either enabling or disabling call forwarding or call diverts on Galaxy S10, Galaxy 10+, Galaxy S10e and every other Samsung phone with Android 9.0+ Pie and One UI.
How to enable or disable Call Forwarding on Galaxy S10 or S10+ / Call Diverts
Note that the following method is for Samsung Galaxy S10 series. Moreover, use this same method for any Samsung phone with Android Pie 9.0+ and One UI interface.
Follow these steps to disable or enable call forwarding on Samsung Galaxy S10, Galaxy S10 Plus or Galaxy S10e. This method applies to all Galaxy devices with One UI on Android Pie 9.0 and later.
Total Time:2 minutes
Open the Dialer app.
Either access the dialer app from homescreen (if added) or app drawer. Only use the Samsung’s official dialer app for this to work.
Tap on settings icon.
In top right, there it is a three-dot button for settings. Tap on it to access Call Settings.
Tap on Supplementary Services.
This particular tab contains all the settings that we are looking for.
Open “Call Forwarding” tab from here.
You may see the options for Call barring, Call Waiting and Call Forwarding here. Only open the Call Forwarding tab from here.
Disable or Enable Call Forwarding in this tab for selection options.
The four options here are for “Always Forward, When busy, Unanswered and Unreachable”. If your S10 or S10+ does not ring for more than 4 times, then disable “Forward when Unanswered” option. Rest of the options are pretty self-explanatory.
That’s it! Use the same steps to change these settings in future.
Feel free to leave your feedback and queries in the comments below. We will get back to you as soon as possible.
In this guide, you will find steps to install stock firmware on Galaxy S10, S10E, and S10 Plus. We will use Smart Switch and Samsung’s Odin Flash Tool to install Stock Firmware on Galaxy S10.
Samsung Galaxy S10 is arguably the best phone at the moment. The South Korean giant has managed to set the bar high for all other phone makers. The Galaxy S10 lineup comes with three phones i.e. Galaxy S10E, S10, and the S10 Plus. Out of these 3 phones, the S10 Plus is the most powerful and premium, then comes the S10 and then there is the budget-friendly S10E. Now that the phones are out in their glory, users have already tweaked them. In order to fully master your new Galaxy S10, you must know each and everything about the phone’s troubleshooting. The most important part of mastering your Galaxy S10 is the installation of Stock Firmware.
Refresh your knowledge about the Galaxy S10 series before you start flashing stock firmware.
Galaxy S10E, S10, and S10 Plus
Galaxy S10E is the smallest S10. It has a 5.8-inch screen. It doesn’t have an under-display fingerprint scanner. The S10E has 2 cameras (12MP + 16MP) at the back and a single camera (10MP) on the front. It has a RAM of 6GB or 8GB and internal storage of 128GB or 256GB. Galaxy S10E is equipped with a battery of 3100 mAh. It does have wireless and reverse wireless charging.
Galaxy S10 has a 6.1-inch display. It has three cameras (12MP + 12MP + 16MP) at the back and a single camera (10MP) on the front. It has a RAM of 8GB with internal storage of 128GB or 512GB. Galaxy S10 is also equipped with an under-display ultrasonic fingerprint scanner. This phone has a 3400 mAh battery inside.
At the end, we have the S10 Plus. This phone has a 6.4-inch screen. It has three cameras at the back like the S10. On the front, it has 2 shooters including an 8MP camera and a 10MP camera. Galaxy S10 Plus also uses ultrasonic fingerprints scanner. It has a battery of 4100 mAh.
All these phones are powered either by the Qualcomm Snapdragon 855 or the Exynos 9820 SoC. These phones run on Android Pie out of the box. The entire Galaxy S10 lineup uses Samsung’s new Dynamic AMOLED screens. These phones also have the stereo speakers. A wide range of color options is available for these phones. The S10E comes in the Canary Yellow color too.
That’s all about the phones. Let’s take a look at the reasons to install stock firmware on Galaxy S10E.
Why install stock firmware on Galaxy S10?
Stock firmware can hard reset your Galaxy S10.
It can also factory reset your phone completely.
Stock firmware installation can fix a soft or even hard bricked Galaxy S10.
You can install stock firmware to update your phone manually.
To update the phone when the OTA is not available in your region.
You may flash stock firmware on Galaxy S10 to fix bootloop.
Random Reboot issue can be fixed by install stock ROM.
The stock firmware on Galaxy S10 can unroot the phone.
You can uninstall the recovery via this guide.
And many more things…
What are the methods to install Galaxy S10 stock firmware?
We have two methods on the table. The first method is through Samsung Smart Switch. Smart Switch is Samsung’s PC Suite for all Galaxy phones. This tool is very easy. It comes with a clean UI. It has all the nice buttons with descriptions which will let you install the stock firmware. The Smart Switch can be used to update the phone to a new version or it can also fix your phone in case you have bricked it. It comes with firmware installation and emergency software recovery features. So, we will take a look at Samsung Smart Switch method first.
The 2nd method is the use of Odin Flash Tool. This tool, no matter what, will work on your phone. It can be used to flash the firmware files manually on your phone. You can skip the wait for an OTA update and flash the new firmware directly using Odin. In the 2nd part of this guide, we will use the Odin tool.
Let’s learn about the stock firmware that we will use in this guide and then proceed with the first method.
Note
The firmware that you will install using this guide will be official. The firmware will not damage your device. It will not void the warranty or touch the Knox counter of your phone. The only thing you have to do is to pay attention to the guide carefully. This guide stands valid for all models of the Galaxy S10E, S10, and the S10 Plus.
Guide to install stock firmware on Galaxy S10E, S10, and S10 Plus via Smart Switch
These are the steps to install stock firmware or update your Galaxy S10 via Smart Switch.
Connect your Galaxy S10 to the computer.
First of all, use the USB Type-C cable to connect your S10 the computer. If the phone asks about trusting the computer, click on Allow/Trust.
Open Smart Switch on the computer now.
Open Samsung Smart Switch on your computer now. It will detect the phone.
Backup your data via Smart Switch.
Before performing a recovery or install new firmware, backup each and everything from your phone.
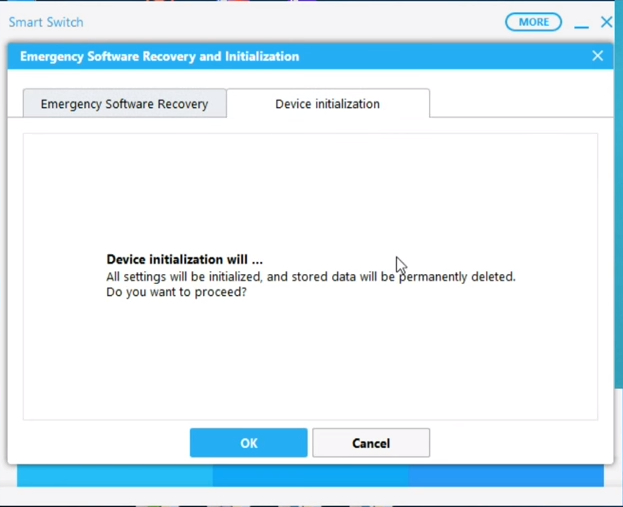
Now go to Emergency Software Recovery & Initialization > Software Recovery or Device Initialization.
Now click on the settings gear icon and then click on Emergency Software Recovery & Initialization. Under this menu, you will click on Emergency Software Recovery if you want to fix your phone. If you just want to install a new update, you will click on Device Initialization.
If you are in Recovery, you can perform software recovery as mentioned on the screen.
The software recovery screen is self-explanatory. Just follow the on-screen options to finish it.
If you are in device initialization, let Smart Switch find an update and then you can flash it.
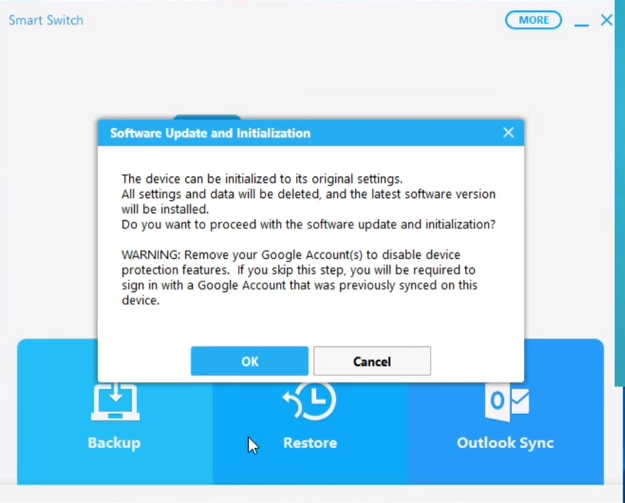
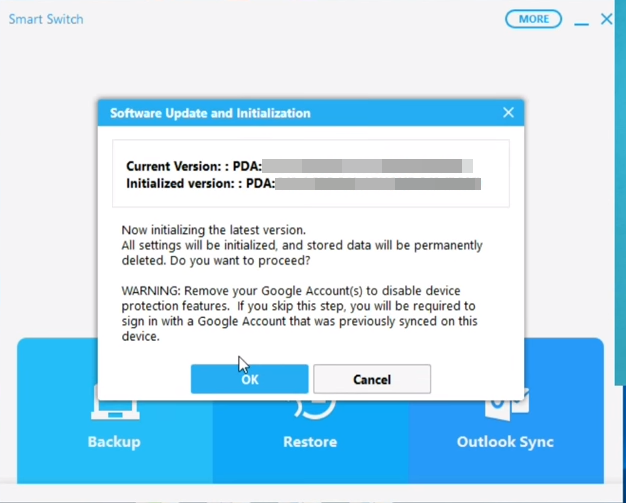
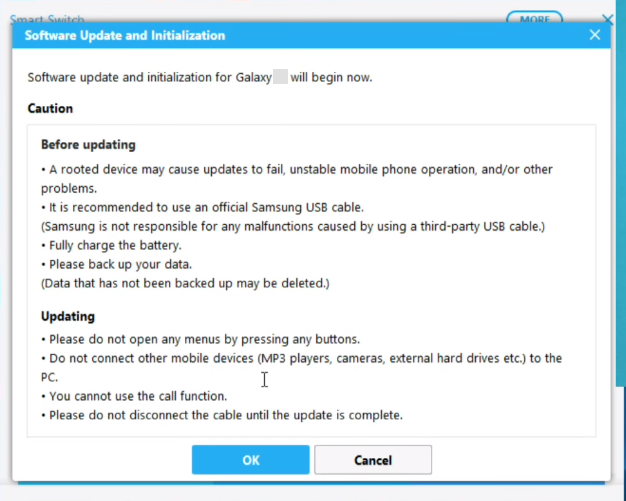
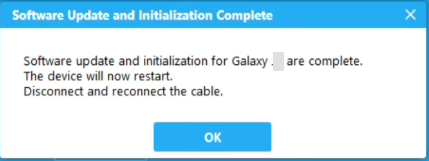
If you are in the device initialization process, its going to ask you about a number of things. First of all, it will show you the disclaimer, after this, it will show you the software version number and then it will ask you about creating a backup. Go through all the screens one by one to perform device initialization. This process will factory reset your phone with the help of a new firmware.
The Smart Switch method is considerably safe, and easy. The only problem with this method is that it will find the software updates that are built only for your regions. For example, there is a new version of Android available in another country and you are trying to find it in Smart Switch, it will not work. In such a case, you need to use the Odin method through which you can flash any region’s software update.
Guide to Install Stock Firmware on Galaxy S10 via Odin
This method is slightly complex, so you need pay attention.
Preparations
This guide is valid for all models of Galaxy S10E, S10, and S10 Plus. Do not try on any other phone.
Charge your phone up to 50% to ensure power backup.
Use original data cable to connect your S10 to the computer.
On your phone, go to Settings > About Phone > Software Information > Tap the build number for 7 times. This will enable Developer Options. Now go the Developer Options in settings and enable USB Debugging and also enable OEM Unlocking.
Follow remaining steps carefully.
Required Downloads
Open this page and enter your device model number. Download the latest firmware for your phone.
Extract the downloaded firmware to get the AP, CP, BL, CSC and Home_CSC files.
Samsung USB Drivers for Windows – Download and install.
Install Stock Firmware on Galaxy S10
Open Odin3.exe on your computer. In Odin, go to Options. Make sure that the only options checked are F.Reset.Time and Auto Reboot. No other option should be checked. Get back to the main menu in Odin now.
In Odin, click on the AP tab and select the AP file. Add the BL file to the BL tab. Now add the CP file to the CP tab. In the CSC tab, add the CSC file if you wish to factory reset, add the Home_CSC file otherwise.
Put your Galaxy S10E, S10, or S10 Plus in download mode now. To do so, connect the USB Cable to the computer. Now power down your phone. Press and hold Volume Down + Bixby Button. While keeping the keys pressed, connect the USB Type-C to your phone. Your phone will be in the download mode now.
Odin will show “Added” in the logs and it will also show a Blue light in the ID:COM box.
You are all set now. Click on the Start button in Odin. The firmware installation will begin.
It will take about 7 minutes for the new software to be installed. Once it ends, the phone will reboot.
Disconnect the phone and enjoy all new firmware.
Image used for reference only.
The first boot can easily take up to 10 minutes. Keep patience during this process. If you think that something is wrong with the phone, you can try clearing its cache. As your phone boots up, you should have the brand new firmware running on it. Your phone has been factory reset now.
Wrap Up
That’s all with the firmware installation on the Galaxy S10 phones. If you have any questions or queries related to this guide, feel free to reach out to us. The best way to contact us is through the comments section below. I will try my best to get back to you as soon as possible.
Samsung Galaxy A6+ has started receiving the Android Pie update. Samsung has fulfilled its promise of updating this mid-range device to Android Pie. Galaxy A6+ now runs on Android 9.0 Pie. This update is taking place through OTA, but the incremental OTA will take all the time in this world to reach out to all the countries. If you cannot wait for official OTA, you can update your phone manually. The manual procedure is lengthy, but it is easy as well. This is the guide to update Galaxy A6 Plus to Android Pie XXU3BSC6official firmware via Odin. To update Galaxy A6 Plus to Android Pie firmware, you need to follow the procedure carefully. Before installing Android Pie on your Galaxy A6 Plus, learn a little more about the new update.
Guide to install Galaxy A6 Plus 2018 Android Pie
Galaxy A6 Plus Android Pie
The Android Pie update for Samsung phones is the biggest update to date. This update carries cosmetical changes, bug fixes, battery and performance improvements, and the best part is the addition of some new useful features.
As far as the cosmetics are concerned, the update brings One UI. As the name says, this UI is supposed to make the phone more useful with a single hand. Samsung has added big banners/cards in all apps which push the menu and other elements down the display to make accessible for single-hand usage.
The One UI has its own new launcher. It makes the icons rounded. The toggles area has been revamped. Notifications panel has some new icons. Samsung has changed the place of clock/date in the status bar of the phone. Some settings have shifted under a new menu.
Samsung One UI
The settings application of the phone has been overhauled completely. New icons can be seen for all the options. Some new options such as Adaptive battery can be seen in the settings too. Samsung has also changed the About Phone section.
Android Pie brings the Dark Mode aka Night Mode in Galaxy Phones. It also has the native private DNS support.
Overall, the One UI is a good-looking interface with a handful of new features. The new updates always bring the latest security patch which is also why you should update your phone at your earliest.
Assuming that you have a clear idea of One UI now, let’s head towards the guide to update Galaxy A6 Plus to Android Pie.
An important note
Before updating through this guide, you can connect your phone to the computer and check for updates through Samsung Smart Switch. If Smart Switch detects the Android Pie update, you may update through that method. You may try checking for OTA update through the Software section of your phone. If both these do not show you the Android Pie update, you may go ahead with this guide to download Android Pie on Galaxy A6 Plus.
The update that you are about to flash, it is for the Polish region. You can flash this update on any Galaxy A6 Plus regardless of the country. It will not affect your CSC. The only thing you need to take care of the model number of your phone. You may not flash this update on any other model other than the one mentioned here in this guide. Furthermore, this update is official and it will not touch Knox or void the warranty of your phone. You can successfully flash Android Pie on Galaxy A6 Plus without falling into any problems provided that you follow the instructions carefully.
We will be using Odin flash tool. Odin is Samsung’s official flash tool for flashing firmware on all Galaxy phones. You can find Odin and all other necessary tools/files in the downloads section below. Let’s take a look at the firmware details now.
Firmware Details
Phone: Galaxy A6+ 2018
Model: A605FN
Firmware: Android 9 Pie
Changelog: 15574486
Build Date: 2019-03-01
Region: Poland – XEO
PDA: A605FNXXU3BSC6
CSC: A605FNOXM3BSC6
Guide to update Galaxy A6 Plus to Android Pie XXU3BSC6
Download and extract to get AP, CP, BL, CSC, and Home_CSC files.
You will choose CSC file if you want to factory reset the phone, choose the Home_CSC file otherwise.
Image used for reference only.
Preparations
This guide is only for Galaxy A6 Plus A605FN. Check your phone’s model number in About Phone.
Charge your phone up to 50% to avoid power loss during firmware installation.
Backup your contacts, messages, call logs, and other data.
Use OEM data cable to connect the phone to the computer.
Enable OEM Unlocking and USB Debugging mode on your A6 Plus.
Follow the remaining steps with full attention.
Update Galaxy A6 Plus to Android Pie
These are the steps to install Android Pie on Galaxy A6 Plus 2018.
Open Odin and add the AP, CP, BL, and CSC files in it.
First of all, open Odin3.exe on your computer. In Odin, go to Options and make sure the only options selected are F.Reset.Time and Auto Reboot. Now get back to main menu in Odin and click on AP slot, select the AP file. In the BL tab, load the BL file. Add the CP file in the CP slot. And depending on your choice, add the CSC or Home_CSC file in the CSC tab.
Put your Galaxy A6 Plus in the Download Mode.
Connect the USB Type-C cable of your phone to the computer first. Now power down your Galaxy A6 Plus. Press and hold the Volume Up key. While keeping the key pressed, connect the USB Type-C cable to your phone which is already connected to your PC as well. You will now see a warning on the screen. Press Volume Up again to continue. You are in the download mode now.
Start the Firmware installation hitting Start in Odin.
Now your phone is connected. Odin should show “Added” in the logs on the left side, and also show Blue light in the ID:COM box. Verifying that everything is set, click on Start button in Odin. It will now start firmware installation. It can take up to 7 minutes.
Disconnect the phone after it restarts.
As soon as the firmware installation comes to an end, the phone will restart. Disconnect the phone now and let it boot up.
Set up your Galaxy A6 Plus and enjoy Android Pie.
As your phone boots up, set it up with your details. You will now find the latest Android Pie running on it having the new One UI. That’s all. You have installed the Android Pie on your A6 Plus.
Image used for reference only.
Conclusion
That is all you had to do to update your phone. If you think that there is something wrong with your phone, you can try clearing its cache. You may also go back to the previous firmware if you don’t find the new firmware useful. The Android Pie update should be good enough to give a whole new start to your phone. If you have any queries regarding this guide or the firmware, feel free to reach out to us through the comments section below. I will try my best to get back to you as soon as possible.
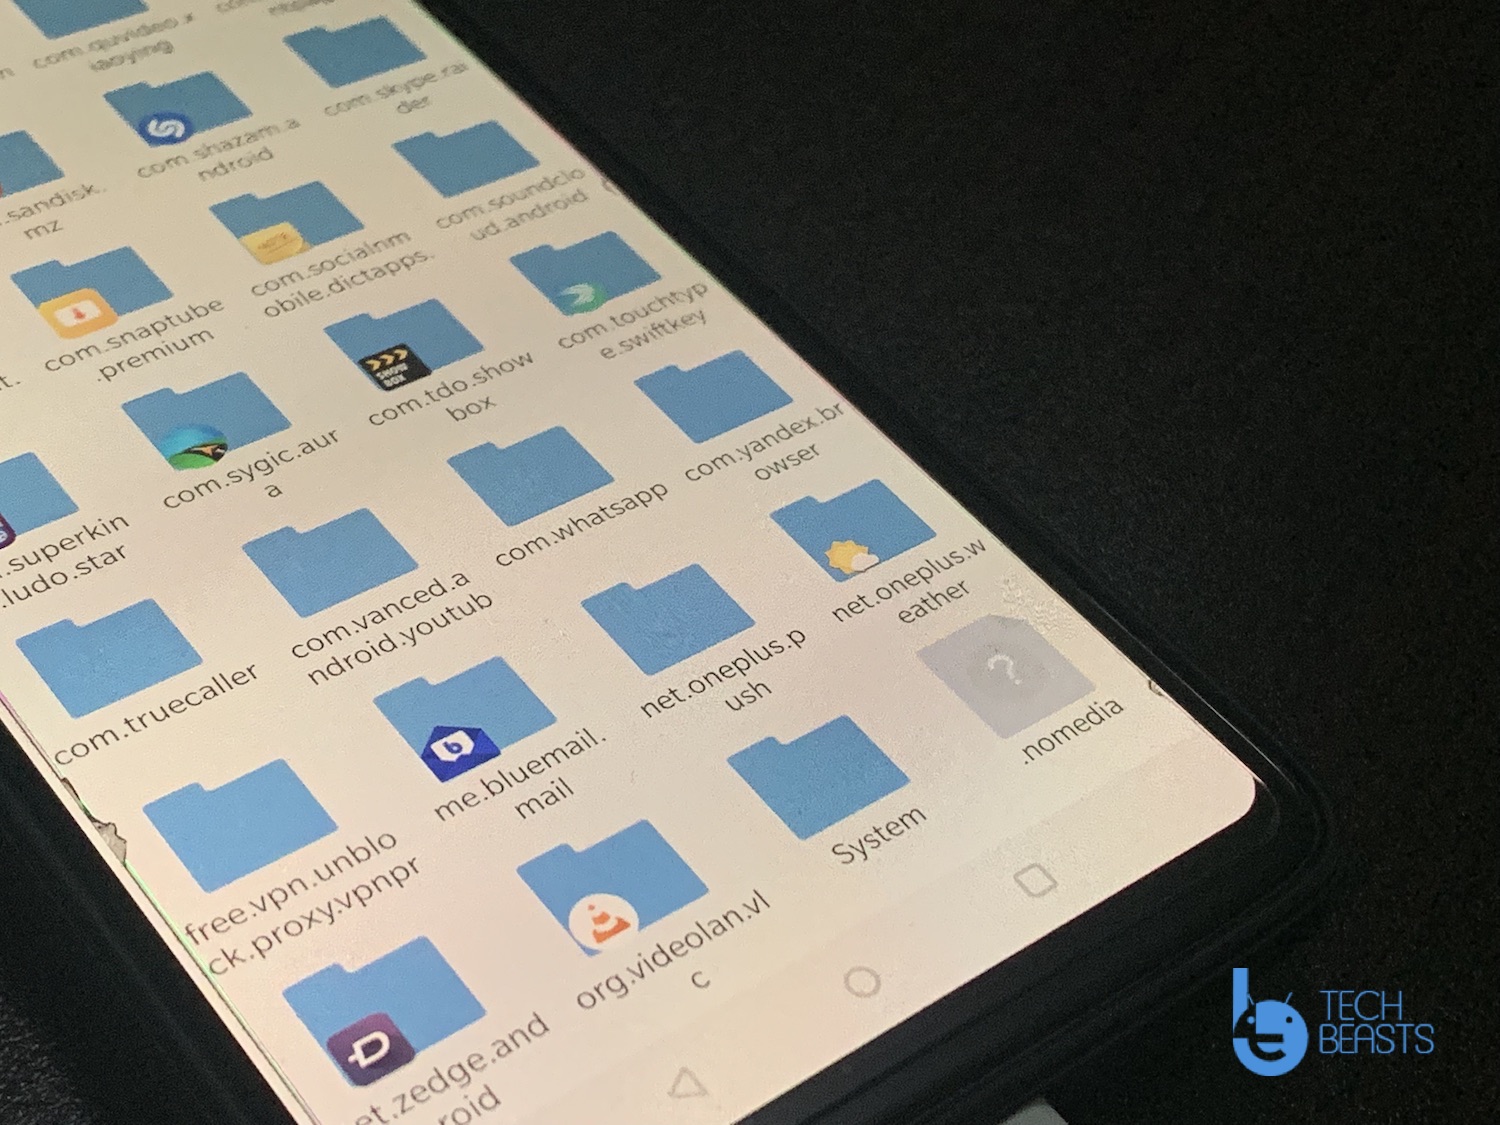
Let’s tell you how you can view and delete NOMEDIA Files on Android devices. You might not know of NoMedia files but they do exist. You can not view them using the stock file manager, most of the time NoMedia files are hidden on your device. They do eat up your space but on the other hand, they boost up the performance level of your device, how?. I will cover this in the next headings.
An average Joe cannot find them and he didn’t even know such files exists. In this tutorial, I will show you how you can easily view and delete NoMedia files using a third-party file manager. But before that, let me give you an overview of NOMEDIA file.
What is a NOMEDIA file?
Basically, NOMEDIA file is stored on your Android device, either in the external or internal drive. The basic purpose of NOMEDIA file is to exclude empty media folders from scanning or indexed by your media player. As I said, it would help you boost up the performance, How? Using NOMEDIA file you can exclude any type of folder whom you don’t want to be scanned.
Suppose you have a folder which contains thousands of songs or images, now if you want to remain untouched when it comes to scanning. All you have to do put the NOMEDIA file in that folder and it will be excluded from the scanning. However, sometimes we want to access the content of a folder from Gallery or a player. But you cannot because of the NOMEDIA file, this is where my tutorial will work for you.
How to view and delete NOMEDIA Files on Android:
First, you need to download the ES File Explorer on your Android smartphone.
Launch it, Tap on the menu icon located at the top left corner of the screen.
Scroll down and Enable the “Show Hidden Files”.
Head over to the file manager and you will find all the hidden NOMEDIA files.
Once you are done with that, You will notice all your pictures will be in your Gallery. Moreover, all of your media files will be added to your Player.
The brand new game by NetEase has entered its beta stage. This game is called FortCraft. It’s all set to make its way to the gamers in a matter of a few days. FortCraft takes the concept of survival games to a whole new level. This game has everything to offer that you have been missing in the games like Rules of Survival and Survival Royale.
FortCraft
NetEase brought up FortCraft right after the plans of Fortnite to make its way to Android were announced. This game actually looks like a mobile version of the Fortnite. At first, it can even confuse you whether it’s Fortnite or some other game. However, it’s just a Fortnite Knock-off.
FortCraft game is about a guy is roaming around in a city. This guy has got a huge hammer in his hand. He can break into anything with the help of his hammer. First of all, this guy will break into a shed to get a gun for himself. Once he gets a gun, he will be able to kill other players to ensure his survival. As the game moves on, players will find more weapons like the snipers and the hand grenades. Players are free to interact with all the elements and objects in the game. You can smash the concrete blocks, they can break into houses, they can kill the birds, they can swim the rivers, they can climb up the hills and every other possible thing that this game has.
Fortunately, FortCraft has got amazing graphics. The animations of this game are extremely cool. The moment you fire a shot using your sniper or you throw a hand grenade, you realize how well the graphics of this game have been put. NetEase has done a tremendous job in the graphics department. The game has got equally good sound effects as well. It has the potential to become an addiction while the original Fortnite takes its time to come out.
FortCraft is worth giving a try. If you have played previous games by NetEase, then you do know that this game is not going to disappoint you at all. FortCraft comes for free. Its APK is already available which means it can be installed manually. Since this game comes with impressive graphics, it would be an absolute treat to play it on a computer. Running FortCraft on a computer is extremely easy.
You can download, install and play FortCraft for PC on a desktop PC or a Laptop. FortCraft for PC will run smoothly on Windows 10, Windows 8.1, Windows 8, Windows 7, MacOS and Mac OS X powered computers. To run FortCraft for PC, follow the tutorial given here.
Download FortCraft for PC using Nox App Player – Windows/Mac