You can download the latest HTC U11 Plus Launcher APK from this post. Moreover, you can install HTC U11 launcher on any Andorid device without any root. HTC may be not releasing the best Android device as it used to do back in the days. But you cannot deny the fact, HTC UI is far better from most of the manufacturer. Moreover, they also release new updates to make the user experience better.
Now before we move on, let me give you an overview of HTC U11 Plus. You might want to know the specs of HTC U11 Plus.
The HTC U11 Plus touts a beautiful 6.0-inch QHD Plus display with 538ppi. HTC U11 Plus pulls out the 18:9 aspect ratio to give a tough competition to other flagship phones available at the moment.
HTC U11 Plus is equipped with the latest and the most powerful hardware. This phone has a Qualcomm Snapdragon 835 CPU inside accompanied by Adreno 540 GPU and a RAM of 4GB or 6GB.
There is a huge 3930 mAh battery placed inside. There is a 12 MP Ultrapixel 3 Sensor inside this phone. On the front, it has an 8MP shooter. It does have a fingerprint scanner. It has a 3.5mm headphone jack as well. The HTC U11 Plus runs on Android 8.0 Oreo out of the box.
HTC U11 Launcher:
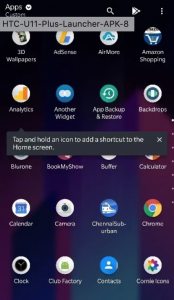
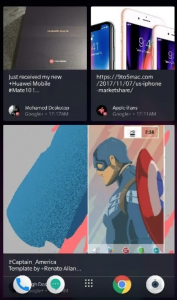
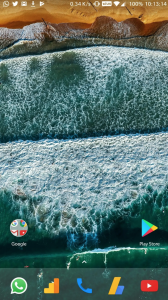
The APK file we are providing you below is extracted from the HTC U11 Plus. This device comes with the HTC Sense 9, the latest OS from HTC. Moreover, HTC U11 Plus Launcher has all the main features, the best among all is, swipe anywhere. You can access the app drawer by swiping up and in order to access the notification shade swipe down from the top.
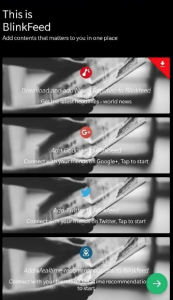
Screenshots:
Download HTC U11 Plus Launcher APK:
Use the following links to download Download HTC U11+ Launcher APK for your Android devices. You can install HTC Launcher on any Android device without rooting your device.
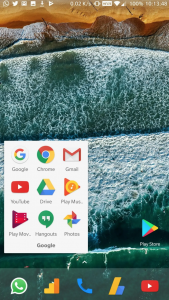
Want to try Nokia 6 Stock launcher on your Android device? This is the right place for you. You can download the latest Nokia 6 Stock Launcher APK from this post. Nokia 6 was launched back in January 2017. At that time, Nokia 6 was a good choice for those who were looking for a budget Android Phone. However, now there are other options when it comes to mid-range devices.
Now before we move on let me give you an overview of Nokia 6 and after that, I will provide you the Nokia 6 Stock Launcher APK. Also, I will tell you the main features of the Nokia 6 Launcher.
Nokia 6:
The Nokia 6 was released in 2017, January. The Phone came out with a screen of 5.5 inches having 1080 x 1920 pixels resolution. Nokia 6 was powered by Qualcomm MSM8937 Snapdragon 430, Octa-core 1.4 GHz Cortex-A53 and Adreno 505. It had internal storage of 32 GB, 3 GB RAM & 64 GB, 4 GB RAM. The camera at the back of this phone is 16 MP, f/2.0 and on the front, it is 8 MP, f/2.0, 1/4. Inside this Phone, there was a 3000 mAh battery. The Phone originally ran on Android 7.1.1 (Nougat), upgradable to Android 9.0 (Pie).
That was it, now let’s get back to our main topic.
Now you can download Android Q beta version for all the Pixel devices. It seems March is the month of new Android versions. Today Google released the developer preview of Android Q for all Pixel devices. They are saying, this update will bring a number of new features. You will see improved privacy controls and also Android Q will support the foldable phones.
From the looks of Android Q, it seems we will get a completely new UI for our Android devices. However, Android Q is in beta stage, only Google Pixel owner will enjoy this latest Android OS. Moreover, even the first-gen Pixel and Pixel XL will get the taste of Android Q. Just for heads up, we will suggest you avoid installing Android Q beta version on your main device.
The best bet is to wait for the final release, this early preview will only give you the new look and some features. Now in order to download Download Android Q Beta version, you can use the following links.
Download Android Q Beta for Pixel devices:
Click on the following links to download Android Q for your Google Pixel device. At the moment the Google official download page seems to be not working. But the following links are working.
In order to flash Android Q beta, you need to unlock the bootloader of your Google Pixel device. However, if you don’t want to unlock the bootloader, you can always sideload OTA. Click here to download the Android Q beta OTA.
Those who are already enrolled in the Android beta program, they better stay with it. However, we have tried it but there is no live update available for Android Q yet. I think it would take some time to be available, use the links provided above to download Android Q for your Pixel devices.
Galaxy shooters! The good news is here! Google Camera has been ported for the Samsung Galaxy S10 trio. You can now install Google Camera on Galaxy S10E, S10, or S10 Plus. Let’s go.
If there is one thing that I love about Google’s Pixel phones, that is the Camera. What phone manufacturers couldn’t achieve with 3 or 4 cameras, Google has achieved that with a single rear camera. In a fast paced world where companies like Huawei and Samsung are trying to put more and more cameras on their phones, Google is beating them all with its one shooter. Its not just the hardware aspect of the Google Camera that is great, the Google Camera is backed by Google’s powerful software optimization.
The hardware of the Google Pixel phones cannot be integrated onto the board of another Android phone, but the software can be ported. This is how all other Android users have been benefitting from Google Camera’s amazing photography modes. Every time a new phone comes out, fans start talking about Google Camera port for that particular phone. The same happened when the Samsung Galaxy S10 series came out.
Triple cameras on the S10, but not that good
Galaxy S10 Plus and S10 deploy a triple-camera setup and the S10E uses a double-camera setup at the back. Despite having the upgraded camera modules, these phones failed to impress masses. The dynamic range on the Galaxy S10 cameras isn’t that good. The colors, as always, are blown out. Samsung’s AI adds too much modification to a picture that it ends up in quality loss. In short, it’s really hard to capture a picture close to reality.
The problem is not with Samsung’s camera hardware, it is with the software. The image processing is not up to the mark which wipes off that vibrance from the pictures. Samsung Galaxy S10’s camera hardware, when combined with Google camera’s software, achieves perfection.
Google Camera for the Galaxy S10
The early samples of Google Camera app on Samsung Galaxy S10’s camera will leave you awestruck. A clear difference between the pictures taken by Samsung’s stock camera and Google camera can be seen. Google Camera’s Night Mode is way better than Samsung’s Bright Night Mode. Google Pixel’s HDR+ and Portrait Mode can be used on the S10 too. Not only that, the Google Camera can also utilize the ultrawide shooter installed on your Galaxy S10.
So, Samsung Galaxy S10 owners, it’s time to get the Google Camera on your phone. You can unleash the full potential of those camera sensors on your Galaxy S10 by using the Google Camera app. At the time of writing this, the Google Camera app supports Snapdragon version of Galaxy S10 phones only. Basically, the Google Camera uses Hexagon DSP, which exists on the Qualcomm SoCs only. This is why it’s nearly impossible to see the Google Camera on the Exynos-powered Galaxy S10.
If you have a Qualcomm Snapdragon-powered Galaxy S10E, S10, or S10 Plus, it’s time to install the Google Camera on it. Follow the instructions given below to install Google Camera on Galaxy S10E, S10, or S10 Plus.
Before we install Google Camera on Galaxy S10, let’s not forget to thank cstark27, the XDA Senior Member who ported Google Camera to the Galaxy S10.
You must enable Unknown Sources on your Galaxy S10 to be able to install an APK file.
Install Google Camera on Galaxy S10
Follow these simple steps to get Google Camera on your Galaxy S10E, S10, or S10 Plus.
Download Google Camera APK and copy it to your phone.
Download the Google Camera APK from here. Copy this APK to your phone at a known location.
Download GCam.zip folder with config files and copy it to your phone as well.
Now download the GCam.zip file from here. Extract the GCam.zip file so that you get the GCam folder. Copy this GCam folder as it is on the root of your phone’s internal storage. It’s path should be like this /Internal Storage/GCam/Configs/
Open Google Camera APK from where you copied it on your phone.
Open the Google Camera APK now to start its installation.
Install Google Camera APK on your S10 now.
Follow on-screen instructions and finish the Camera APK installation. It will now appear in the application drawer of your phone.
Launch Google Camera and tap black area next to the shutter button.
Open Google Camera now and then click on the black area next to the shutter button. We want to access some options now so this is important.
Select s10csMar2.xml and then select Restore. Enjoy Google Camera now.
As you tap on the black area, you will see the options. Click on s10cMar2.xml and then click on Restore. That’s all. You are all set to run Google Camera on your Galaxy S10 now.
That’s all. For any questions related to this guide, feel free to contact us.
Not liking the Samsung Cloud Notifications cluttering your phone’s notifications area? Well, shed them away. This is the guide you need in order to turn off Samsung Cloud Notifications on Galaxy phones. The guide toturning off Samsung Cloud Notifications is valid for all Samsung Galaxy handsets.
Samsung Galaxy handsets come with in-built Samsung Cloud service. When the users sign up for a Samsung account while setting up their phone for the first time, the Samsung Cloud services are activated automatically. Samsung Cloud keeps your contacts, messages, gallery, calendar, emails, and everything else synced with it. All of your data is backed up through Samsung Cloud so that you never lose it. Despite the usefulness of Samsung Cloud, a huge number of users dislike this service. Some users prefer other services over Samsung Cloud, while some just don’t like the way it works. One main reason for users to dislike Samsung Cloud is the way it spams your notifications area.
Whether you want to keep Samsung Cloud enabled or disabled, its notifications are going to haunt you. It keeps informing you about the backup status every now and then. Rather than getting rid of the notifications, Samsung Galaxy owners end up getting away from the Samsung Cloud. Since you have free 15GB storage over Samsung Cloud, it’s not a good idea to leave this space for free. You paid a hefty amount for your Samsung Galaxy handset after all. So, today, in this guide, we will take a look at how to disable Samsung Cloud Notifications. It’s very easy to turn off Samsung Cloud Notifications on Galaxy Phones. All you have to do is to follow a few simple steps to turn off Samsung Cloud Notifications.
Turn off Samsung Cloud Notifications
Here are the few simple steps to turn those notifications off.
Open Settings on your Samsung Phone.
You can open settings either from the application drawer or from the quick toggles.
In Settings, go to Accounts and Backup.
Scroll down in settings to find Accounts and Backup. Open this option to access Samsung Cloud.
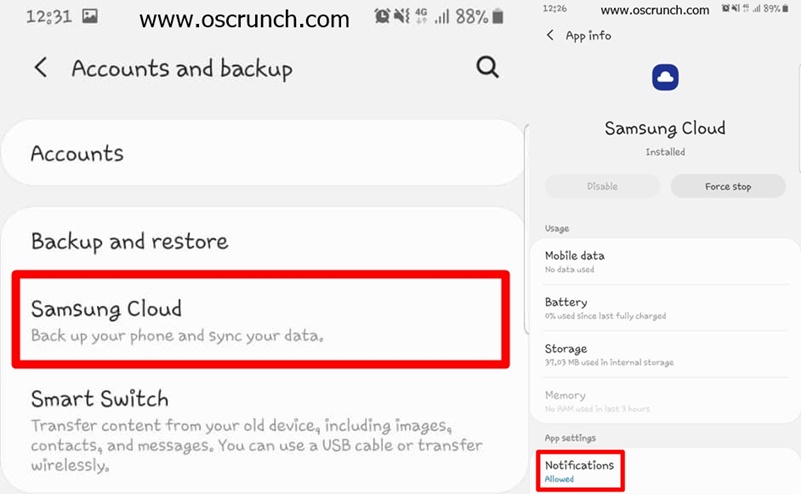
Now click on Samsung Cloud.
The 2nd option in Accounts and Backup is Samsung Cloud. Click on it to access its settings now.
In Samsung Cloud, click on Notifications.
In Samsung Cloud, click on notifications to open further options.
Tap the radio button next to “Allow interruption” to turn it off.
The very first option says “Allow interruption”. You have to click on the radio button next to it to turn this option off. This will completely disable the Samsung Cloud Notifications.
Wrap Up
Congratulations! You have turned off Samsung Cloud Notifications. Turning off the notifications is much better than turning off this service. You should continue using Samsung Cloud for the data safety. If you have any questions regarding this guide, feel free to reach out to us.
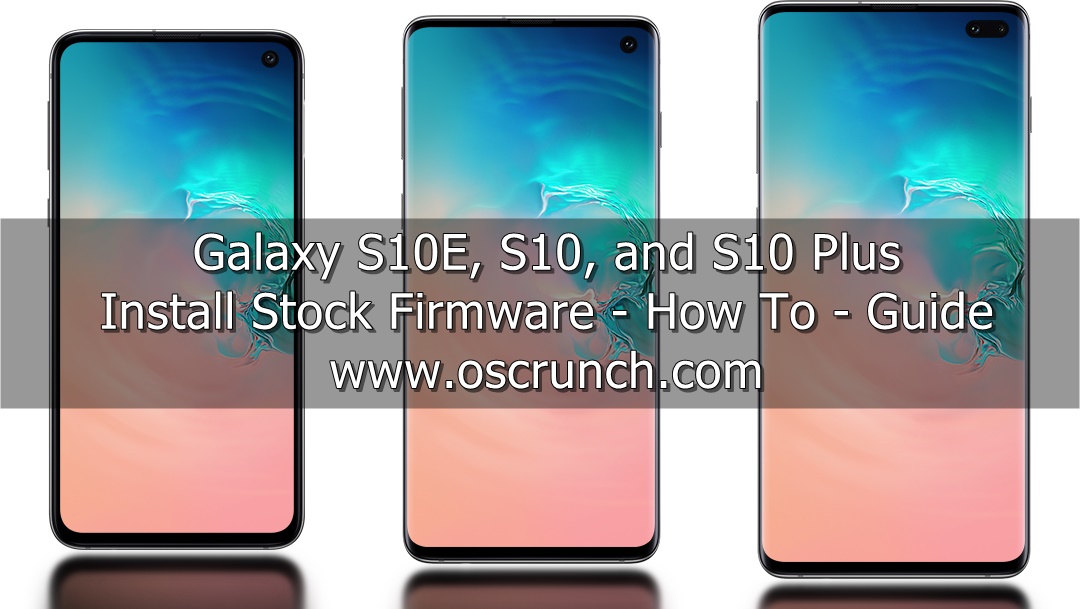
Samsung Galaxy S10 series has broken all previous records of Samsung. The phones are being adored all across the globe now. Samsung has released the phones in over 80 countries as of today. Galaxy S10E, S10, and S10 Plus are based on Android OS. Since Android offers a lot of customization, chances are that you are going to unleash the full potential of your Galaxy S10. Before you start playing around with your device, you learn everything about your phone. Learning how to install stock firmware on Galaxy S10E, S10, or S10 Plus is a part of this process too. This guide will show you the method to install stock firmware on Galaxy S10E, S10, or S10 Plus via Samsung Smart Switch and Odin. The stock firmware installation will help you in a number of situations.
Before you install stock firmware on your new Galaxy S10, let’s take a look at the offerings of these devices and then learn more about the firmware installation.
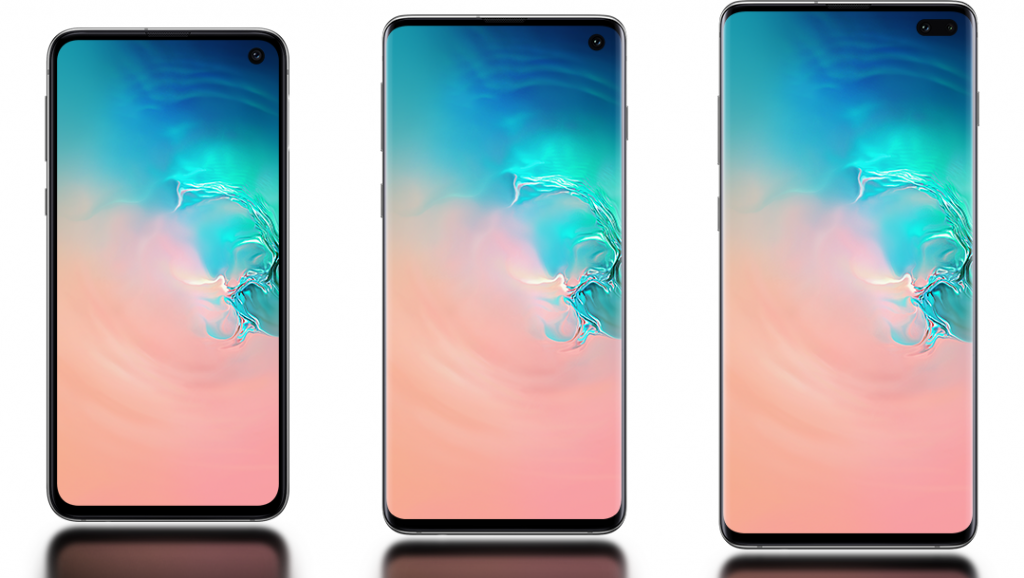
Samsung Galaxy S10 lineup includes three phones for this year. There is the Galaxy S10E, Galaxy S10, and the Galaxy S10 Plus. These phones have some similarities and a few differences.
The Galaxy S10E comes with a 5.8-inch display. It has a dual 12MP + 16MP camera at the back. A single 10MP camera is there on the front. S10E has a side-mounted fingerprint scanner. It has a battery of 3100 mAh. This phone has a RAM of 6GB or 8GB with internal storage of 128GB or 256GB.
On the other hand, the S10 has a 6.1-inch Dynamic AMOLED screen. It has 3 cameras at the back including 12MP + 12MP + 16MP. On the front, the S10 has a single 10MP camera. S10 has a battery of 3400 mAh inside. It has a RAM of 8GB and internal storage of 128GB or 512GB. Galaxy S10 has an in-display ultrasonic fingerprint scanner.
The Galaxy S10 Plus has a 6.4-inch screen. It has a 4100 mAh battery inside. On the front, this phone has a dual camera including 10MP + 8MP shooters. The remaining specifications of the Galaxy S10 Plus are as same as that of the Galaxy S10.
All these phones are powered by Qualcomm Snapdragon 855 or the Exynos 9820 SoC. The GPU on these phones is Adreno 640 or Mali-G76 MP12.
As you can see that these phones come with the most powerful spec-sheet till date, there is definitely going to be a lot of experimentation on these. In a matter of a few months, the custom ROM developers will start releasing the ROMs for this phone. It will be rooted too. There is going to be a handful of custom MODs for the Galaxy S10 series. And in the end, Samsung will also roll out the software updates.
To handle all this, you must learn how to install stock firmware on Galaxy S10E, S10, or S10 Plus. If you are still confused, take a look at the reasons listed below to install stock ROM on Galaxy S10.
Why you need to install stock Firmware on Galaxy S10?
To update your phone manually.
In order to restore your phone to factory settings.
To recover a Samsung Galaxy S10 stuck in bootloop.
Flashing stock firmware also hard resets your phone.
To unroot a rooted Galaxy S10E/S10/S10 Plus.
In order to uninstall a custom ROM from the Galaxy S10.
To uninstall any custom MOD from the phone.
A custom recovery can be uninstalled via a stock firmware.
To fix a Galaxy S10 that has performance issues.
Fix a Galaxy S10 that has a poor battery life or S10 having a battery drain issue.
Fix a randomly rebooting Galaxy S10 by installing a stock firmware.
And many more…
There are two methods to install stock firmware on Galaxy S10. The first method is through Samsung’s official PC Suite which is known as Samsung Smart Switch. The 2nd method is through Odin, which is Samsung’s official flashtool.
If you simply want to install stock firmware on Galaxy S10 just to update it or to perform an emergency software recovery, the method you need to follow the Smart Switch one. To remove any customisations, or to unroot the phone, or to fix a soft-bricked S10, you will use the Odin method.
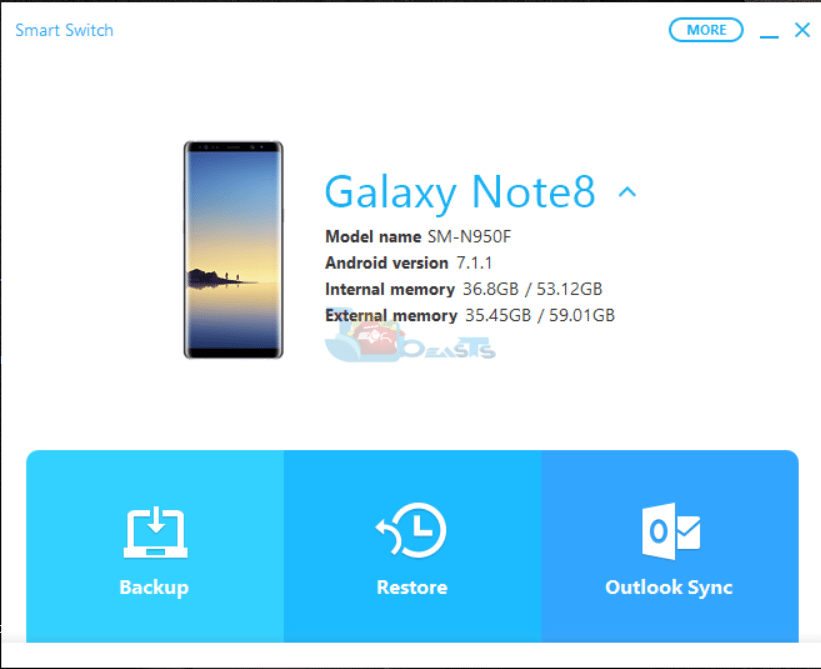
The Samsung Smart Switch comes with the most basic options. Most part of Smart Switch is self explanatory. Take a look at the Samsung Smart Switch method first.
Steps to install stock firmware on Galaxy S10E, S10, or S10 Plus via Smart Switch
You have to take a few preparatory measures to follow this method. Here is what you have to do.
Preparations
Prepare your Galaxy S10 and your Windows computer. You can also follow this method on a Mac.
Backup each and everything on your Galaxy S10.
Charge your phone’s battery up to 50% for this process.
Use the OEM Data Cable to connect your phone to the computer.
Note:This method cannot be used on a rooted phone. If your S10 is rooted, you can use the Odin method.
How to install stock firmware on Galaxy S10 using Smart Switch
Connect your Galaxy S10E, S10, or S10 Plus to the computer. If the phone asks for any permission, allow it.
Smart Switch will now detect your phone and show you the options in a while.
Now click on the gear icon in Smart Switch at the top-right corner and click on Emergency software recovery and initialization.
Initialization.
You will see a screen with two options now. Click on “Device initialization”. This is the option which will initiate software update for your S10.
Update initiating.
Now the Device Initialization will begin. First of all, it will show you the available update. After this, it will show you a few disclaimers and also ask you about creating a backup. Go through all screens and in the end you will find the option to start the update.
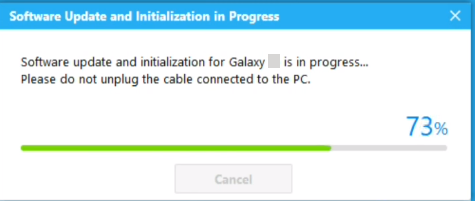
After accepting all warnings and reading details, the update will start and show you the progress.
Update in progress.
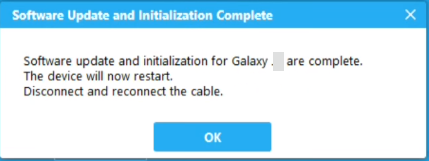
As the update ends, your phone will automatically reboot. Smart Switch will ask you to disconnect the phone and reconnect it.
Update finished.
If you created a backup, you may reconnect your phone. Skip reconnecting the phone otherwise. That’s all. Your phone has been updated.
Odin method to install stock firmware on Galaxy S10E/S10/S10 Plus
This is a tricky method. You have to pay full attention to avoid a mishap. Read each and every instruction at least twice in order to make this successful.
Preparations
This method is only for the Galaxy S10E, S10, and S10 Plus. It is applicable to all models of these phones.
Charge your S10 up to 50%.
Backup call logs, messages, contacts, pictures, and everything else.
Use only a Windows computer for this process. Odin is not available for Mac.
Use the original data cable to connect your phone to the computer.
On the computer, disable Antivirus and Windows Firewall. This should be done to let Odin run without interruption.
Enable OEM Unlocking and USB Debugging on S10
On your S10 phone, go to Settings > About Phone > Software Information > Tap the build number 7 times. This will enable the developer options on your phone. Now go back to Settings > Developer options > find the OEM Unlocking and USB Debugging. Turn both these options on. Without these options, Odin will not work.
Required Downloads
Open this page. Enter the model number of your Galaxy S10. You will find a list of firmware. Download the latest available firmware.
Extract the downloaded firmware file to get AP, CP, BL, CSC or Home_CSC files.
CSC file factory resets/wipes your phone. Home_CSC file does not wipe the phone. You can select only one of these in the CSC slot.
Galaxy S10 Stock Firmware Files – Image used for understanding only.
Install the downloaded Samsung USB Drivers for S10.
Install Stock Firmware on Galaxy S10 using Odin
Open Odin 3.13.1.exe on your computer.
In Odin, go to Options > make sure that the options checked are Auto Reboot and F.Reset.time. No other option should be checked.
Now get back to the main menu in Odin.
Click on the AP slot and add the AP file. Add the BL file to the BL slot. Add the CP file to the CP slot and in the end, add the CSC or Home_CSC file to the CSC slot.
Connect the Galaxy S10 USB Cable to your computer.
Power down your Galaxy S10 now.
While the phone is off, press and hold Volume Down + Bixby button. While keeping the keys pressed, connect the USB Type-C cable to the phone. Make sure that the other end of the cable is connected to the computer. This will boot your S10 in the Download Mode.
Odin will now show “Added” in the logs on the left side and also show a Blue light in the ID:COM box.
You are all set now. Click on the Start button in Odin.
Flashing will start and take about 5 minutes to end.
Galaxy S10 Stock Firmware – Image used for reference only.
Your phone will automatically restart after installation now. That’s all.
Final Words
Congratulations, you have successfully factory reset/fixed/updated/unrooted your Galaxy S10. The phone can easily take up to 10 minutes for the first boot. In case you think that there is something wrong with the phone or If you are still facing some issues with your phone, don’t worry, you haven’t run out of options yet. You can boot your Galaxy S10 into the recovery mode and then wipe its cache. This will refresh everything on your phone and potentially fix any problem if there is one. For any questions and queries, feel free to reach out to us. We will try our best to get back to you. Stay connected.
In 2017, Samsung started enabling its cloud services on all Galaxy handsets by default. When you set up your new Samsung phone, it asks you to log into your Samsung account. The moment you log in, it automatically enables the Samsung Cloud. This feature starts backing up each and everything from your Galaxy handset. The feature uses your WiFi to create those backups. Now, the Samsung Cloud is a really useful, but it has annoyed a number of users. The Samsung Cloud keeps on backing up data in the background while dropping notifications in the notification panel. Every now and then, the users find a new message by the Samsung Cloud. Also, it keeps doing this whenever it detects a WiFi connection for over an hour. These pings by the Samsung Cloud have pushed the Galaxy users to get rid of it. If you also happen to dislike the Samsung Cloud and now you want to turn it off, you may have just landed at the right place. In this guide, Samsung Galaxy owners can find the steps to turn off Samsung Cloud on Galaxy phones.
Before you turn off Samsung Cloud on your phone, let’s understand its importance and a few things to consider.
Samsung Cloud
Just like Google has its Google Drive, Apple has its iCloud, Samsung has its Samsung Cloud. Like Google and unlike Apple, Samsung Cloud gives the users free 15GB storage. This storage can be used to store contacts, call logs, SMS messages, calendar and clock data, photos, and everything else that is there on your phone.
Samsung adds the Samsung Cloud to the Galaxy phones in order to provide a hassle-free data backup mechanism. The Samsung Cloud keeps working in the background and takes care of each and everything running on your phone. It just drops in a notification when there’s something wrong or when it’s done performing its job.
The Gallery, Contacts, Call Logs, and Messages stay in sync with the Samsung Cloud. Data stored on the Samsung Cloud can be accessed on your computer via your Samsung Account.
Samsung Cloud can back up the following
Phone (Call Logs)
Messages
Contacts
Calendar
Clock
Settings
Bixby Home
Home Screen
Apps
Keyboard Data
Samsung Internet
Samsung Notes
Gallery
and many other things stored on your phone.
In contrast to the Samsung’s service, there are many other automatic and manual data back up services. For example, you can use Google Drive or your Google Account to back up your data in parallel with the Samsung Cloud. You can also connect your Galaxy phone to the computer and use Smart Switch to create a complete backup.
To cut it short, Samsung Cloud is a nifty service, but it’s not the only service to rely on. The users who reached out to us asking for the method to turn off Samsung Cloud, either didn’t like the service and its notifications, or they preferred another service over it.
So, whatever reason you have to turn off Samsung Cloud, let’s go ahead to do it now.
Turn off Samsung Cloud on Galaxy phones
Follow these steps to completely disable or turn off Samsung Cloud right now.
On your Samsung phone, go to Settings.
First of all, open Settings either from the application drawer or from the quick toggles.
In Settings, go to Accounts and Backup.
Scroll down in settings and open Accounts and Backup. This is where you will find your Samsung Cloud profile along with other accounts.
Now go to Backup and restore > Back up data.
Open Backup and Restore and then click on Back up data appearing under “Samsung account”. This should be the very first option.
In Samsung Cloud, click on Backup data.
As you can see the Back up data option, click on it to access the Sync and Auto backup options.
Disable the Sync and Auto backup for everything. That’s all.
Under Sync, you will find all options that are being synced continuously. You can disable the sync for the options you want. Under the Auto backup option, you will find all the items that are being backed up periodically. You can disable them all one by one.
Note: You may have disabled the Samsung Cloud now, but keep in mind the complications that may occur after this. First of all, none of your data will be backed up to the Samsung Cloud. The free 15GB storage on Samsung Cloud will be lying around for free. If you are not using an alternative data backup service, you may put your entire data at risk. Having your data backed up at Samsung Cloud gives you the peace of mind as you can always access it even if a mishap takes place with your phone. It is always recommended to have the Samsung Cloud enabled.
Disabling Samsung Cloud Notifications
Now that you have turned off Samsung Cloud, it doesn’t mean that it will let you live in peace. After every few minutes, it will keep shooting a notification in your status bar about activating or enabling the Samsung Cloud again. These notifications are really annoying, so to turn off the Samsung Cloud Notifications, you can follow these steps.
On your phone, go to Settings > Accounts and Backup.
Click on Samsung Cloud > Notifications.
Turn off the radio button appearing next to “Allow interruption”.
This will completely turn off the Samsung Cloud notifications.
Final Words
That is pretty much it. You have completely disabled the Samsung Cloud along with its notifications. If you wish to enabled these services again, you can simply open the very same settings and turn on sync and auto backup. The notifications can be turned on the same way as well. If you have any questions regarding this guide, feel free to drop them below.
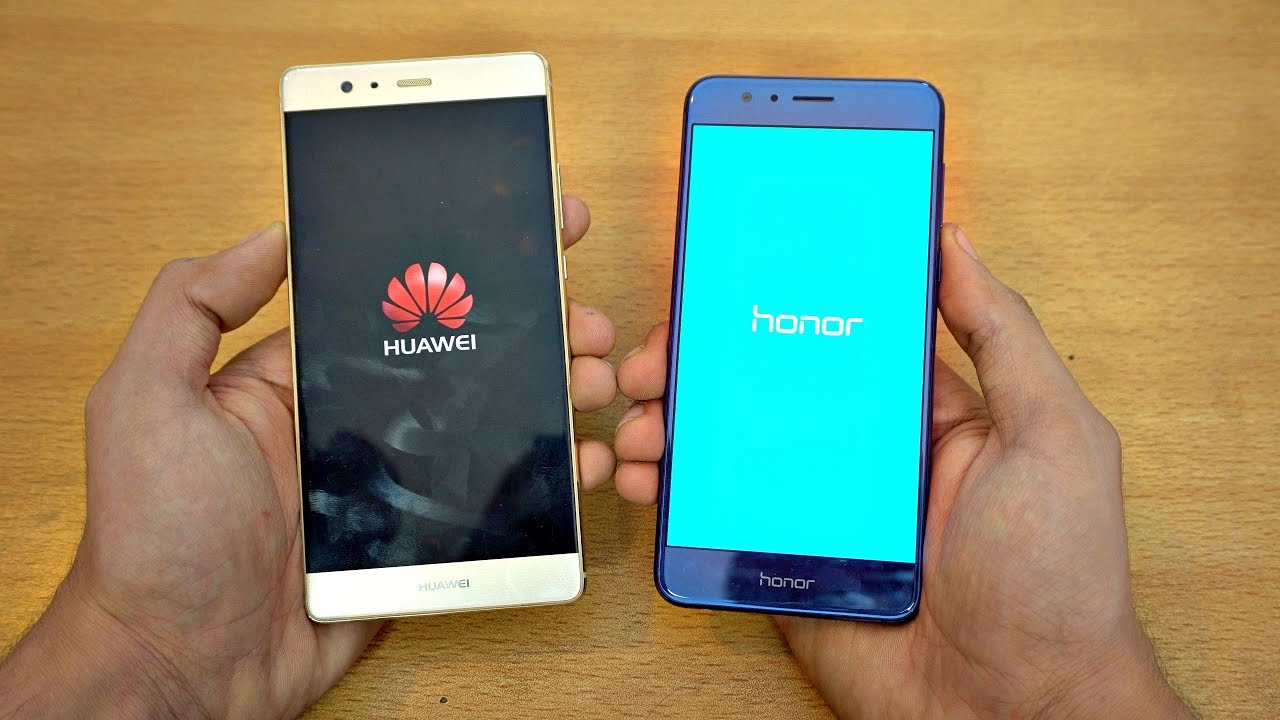
Huawei and Honor devices come with the SwiftKey Keyboard as their default keyboard. The SwiftKey has a very annoying vibration. Typing on the Huawei and Honor phones with the keyboard vibration enabled is quite a task. So, those of you who are looking for a way to turn off Keyboard Vibration on Huawei & Honor phones, they have found the right place. In this guide, you can find the steps to disable or turn off Huawei and Honor Keyboard Vibration.
Earlier, we shared a method to disable Notifications Vibration on Huawei phones. I have got no idea why Huawei has this obsession with the vibration on its phones that it cannot provide a simple and straight forward option in the settings to disable it. In fact, finding a very basic option in the settings on a Huawei phone can annoy you. Same goes for the Keyboard vibration. Since Huawei doesn’t use its own keyboard as its default keyboard on the phones, there is no option to disable the vibration from under the settings of the phone either. To turn off Keyboard Vibration on Huawei and Honor phones, you have to navigate through the settings of SwiftKey and get it done.
Now here’s the catch, in an ordinary Android phone, or in a non-Huawei/Honor phone, SwiftKey appears in the application drawer. Generally, you could just go to App Drawer, open SwiftKey, and disable the key vibration, however, that’s not the case when it comes to this Chinese phone maker. You cannot find SwiftKey in the application drawer of your Huawei or Honor smartphone. This is why you need this guide to get rid of Keyboard Vibration on Huawei handset. Before you take a look at the steps, let me tell you a little bit about the SwiftKey.
SwiftKey
The SwiftKey Keyboard is the most popular third-party keyboard for Android. This is a multilingual keyboard supporting all the popular languages. SwiftKey has a huge collection of Emojis and stickers. What I personally love about SwiftKey is the emoji prediction feature. You can just type in the emotion and it will automatically pull the emoji matching that emotion. For example, typing “sad” will show you the sad emojis.
SwiftKey
As far as the typing-experience is concerned, I have never seen a more flawless keyboard. Be it the Google Keyboard, Samsung Keyboard, or Apple Keyboard, the SwiftKey beats them all because of its fluent UI. The extended settings and hundreds of themes are also what make this keyboard the no.1 choice. These are the reasons that have pushed manufacturers like Huawei to add SwiftKey as their default keyboard.
It’s time to say goodbye to the Keyboard Vibration on Huawei & Honor now. Take a look at the steps below now.
Turn off Keyboard Vibration on Huawei & Honor
On your Huawei phone, go to Settings > System.
Open the Settings from application drawer or from the quick toggles. In settings, scroll all the way down and open system.
Under System, go to Language & input.
In system, you can see navigation, language & input, and many other settings. You have to open Language & input from here.
Click on SiwftKey keyboard and it will open its settings.
Language and input will show you the Keyboard preferences of your Huawei phone. You have to click on SwiftKey here to open the settings of SwiftKey.
Now click on Typing > Sound & Vibration
As you see Swiftkey settings, click on Typing. Under Typing, you will find Sound & Vibration. This is where the vibration settings exist.
Turn off Keypress vibration or lower it down. That’s all.
Tap the radio button appearing in front of Keypress vibration to turn it off. If you don’t want to completely turn off the vibration, you can also lower it down.
Final Words
You have now successfully disabled the keyboard vibration on your Huawei handset. The Keyboard vibration is also known as haptics or haptic feedback on some phones. If you are confused between Haptic feedback and vibration, you must know that they are the same. You can use this method for either of these options. If you want us to help you resolving another Huawei issue you are facing, feel free to reach out to us. Stay connected.
Samsung rolled out the Galaxy A8 Plus Android Pie update yesterday. This is the first ever Samsung mid-range device to get this update. The update first came out in Russia. This is an incremental update and it will take its time to reach out to all the regions. Those of you who own the Galaxy A8 Plus and can’t wait for the OTA to hit their region, they can update the phone manually. This is the guide to update Galaxy A8 Plus to Android 9 Pie manually. To install Android 9 Pie on Galaxy A8 Plus, we will use Odin Flash Tool. The steps to download Android Pie on Galaxy A8 Plus are very simple. Take a look at the features of this new update before installing it.
Android 9 Pie for Galaxy A8 Plus
First things first, this is the biggest update in Samsung’s history. Not only this update changes the version number to Android 9, but it also brings some features never seen before on Samsung phones.
Android Pie brings a new UI called the One UI. This new One UI replaces the old Samsung Experience UI. Samsung has changed the look of almost all the elements on the phone. Applications have now got cards showing the application name in a banner-style. The settings application has been overhauled from top to bottom. Samsung has also changed the icons in the quick toggles.
One UI has been designed to make the phone usage comfortable for the users who prefer operating it with one hand. All the elements have been put together while keeping one-handed usage in mind. This is what it is named as One UI.
As far as new features are concerned, this update packs a bunch of them. In the Android Pie, users can find the new Night Mode. The Night Mode is called Dark Mode on other Android phones. It make the entire UI black which is very useful for the Super AMOLED screens.
Another useful feature is the Adaptive battery mode. This mode can adjust the battery consumption according to your usage now. Samsung has improved the performance of the phone too.
It’s time to get back to the topic in order to install Android 9 Pie on the Galaxy A8 Plus.
Note
This update is for the Galaxy A8 Plus A730F only. You can update Galaxy A8 Plus to Android 9 Pie from any region. All you have to do is to ensure that the model number of your phone is A730F. The firmware we are going to use is OXM-based. It means that the CSC will adjust according to your region. You can update your phone without worrying about CSC change or OTA updates. Keep in mind that this is the official stock firmware and it will not void the warranty of your phone or damage it.
Preparations
On your phone, go to Settings > About Phone. Check the model number. It must be A730F. Do not try on any other phone.
Charge your phone up to 30%.
Backup everything from your phone.
Enable OEM Unlocking and USB Debugging from the Developer Options.
Use original data cable to connect the A8 Plus to the computer.
Follow these steps to get Android Pie on your Galaxy A8+.
Open Odin 3.13.1 on your computer.
Open Odin.exe file on your computer. In Odin, go to Options. Make sure that the only options checked are Auto Reboot and F.Reset.Time. All other options should be unchecked.
Add AP, CP, BL, and CSC files to Odin.
In Odin, click on the AP tab and select the AP file. Click on the CP tab and add the CP file, add the BL file to the BL tab. In the CSC tab, add the CSC file if you want to factory reset the phone, otherwise add the Home_CSC file.
Connect your Galaxy A8 Plus in Download Mode to the computer.
Power down your Galaxy A8 Plus now. While the phone is off, press and hold Volume Up + Down + Home button to boot into the Download Mode. As the phone shows a warning, press Volume Up. Now connect the phone to the computer. Odin should show “Added” in the logs on the lower-left side.
Click on Start button in Odin to flash Android Pie.
You are all set now. Click on the start button in Odin. Firmware installation will begin. It can take 5-7 minutes for the whole process. Once the firmware installation ends, your phone will automatically reboot.
Disconnect the phone.
As the phone reboots now, disconnect it from the computer. Enjoy the all new Android Pie on it now.
Image used for reference only.
Ending Note
You have now successfully updated your Samsung Galaxy A8 Plus. The new firmware can take up to 10 minutes to boot up. If you feel that there is something wrong with it, you can consider clearing its cache. If you have any kind of questions regarding this guide or your Galaxy A8 Plus, feel free to reach out to us.
backup and restore data on Galaxy S10 - Image: Business Insider
Samsung Galaxy S10 is out in all its glory. Starting yesterday, Samsung started shipping the device. The South Korean giant has started this process in over 70 countries. If you have got your Galaxy S10, we would like to congratulate you first of all. It’s time to take the security measures for your data on the new Galaxy S10 now. To prevent the loss of data, you should back it up every now and then. This guide will show you the steps to backup and restore data on Galaxy S10. To backup and restore data on Galaxy S10, we will be using Samsung’s official Smart Switch tool.
backup and restore data on Galaxy S10 – Image: Business Insider
Below is a recap of the Galaxy S10 series and an overview of the Samsung Smart Switch. After this, you will find the procedure to backup and restore data on Galaxy S10.
Samsung Galaxy S10
Samsung has launched three phones in the Galaxy S10 series. There is the Galaxy S10E, Galaxy S10, and the Galaxy S10 Plus. Galaxy S10E is the budget-friendly phone, S10 is the standard flagship, and the S10 Plus is the most expensive and premium flagship.
Galaxy S10 series is powered by latest Qualcomm Snapdragon 855 or Exynos 9820 CPU. These phones either have the Adreno 640 or the Mali-G76 MP12 GPU. These phones have differences in the screen size, battery size, and security features.
Galaxy S10E, S10, and S10 Plus
For example, the Galaxy S10E comes with a 5.8-inch Dynamic AMOLED screen. It has a dual-camera system at the back and a front camera on the front. The battery capacity of S10E is 3100 mAh. S10E has a flat display, but with a punch-hole camera, this display’s aspect ratio bumps up to 19:9. It has a side-mounted fingerprint scanner. It comes with a RAM of 6GB and internal storage of 128GB or a RAM of 8GB and internal storage of 256GB.
On the other hand, the Galaxy S10 has a 6.1-inch Dynamic AMOLED screen with a single camera on the front. The Galaxy S10 Plus has a 6.4-inch screen with a dual camera on the front. Both the S10 and S10 Plus have a triple-rear camera. Galaxy S10 has a 3400 mAh batter and the S10 Plus has a 4100 mAh battery. These phones come with storage and RAM configuration of 8GB + 128GB or 8GB + 512GB. The S10 Plus has a 12GB + 1TB variant too.
All Galaxy S10 phones come with reverse wireless charging. These phones feature the latest WiFi 6 module. These phones run on One UI-based Android Pie out of the box.
That’s all about the new Galaxy handsets. Take a look at Smart Switch, the tool to backup and restore Galaxy S10 data.
Samsung Smart Switch
Smart Switch is Samsung’s official tool. This is a whole PC suite for your Galaxy handset. Smart Switch can help you migrate your entire data from any Android phone or iPhone to your Samsung phone. It can also help you to perform emergency software recovery. The smart switch can be used to install factory firmware on your Samsung phone too.
The most useful feature of this tool is the backup and restore function. You can back up your entire phone to your computer with just one click. Smart Switch allows the users to select what data they want to copy to the computer. It automatically detects all files and puts them in their appropriate folders. Smart Switch can backup contacts, call logs, text messages, notes, bookmarks, applications with data, whatsapp files, music, videos, pictures, and everything else that is there on your phone.
It’s an all in one solution for your device. You don’t have to use a bunch of applications to back up the contents of your phone one by one. If you are into customising your phone, you should definitely benefit from the backup feature of the Samsung Smart Switch. Take a look at the steps to below to backup and restore data on Galaxy S10 now.
Backup and restore data on Galaxy S10
These are the steps to backup Galaxy S10 data and then restore it. This guide is valid for Galaxy S10E, S10, and S10 Plus.
Install Smart Switch on your computer.
Download Smart Switch from Samsung’s official website and install it on your Windows computer. The installation should take a minute or two.
Connect Galaxy S10 to the computer.
Connect your Galaxy S10 to the computer using the original data cable. If the S10 asks for any permission, allow it.
Open Smart Switch now and select the data you want to backup.
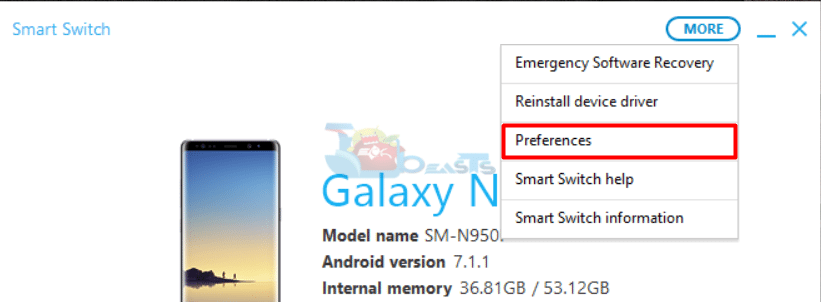
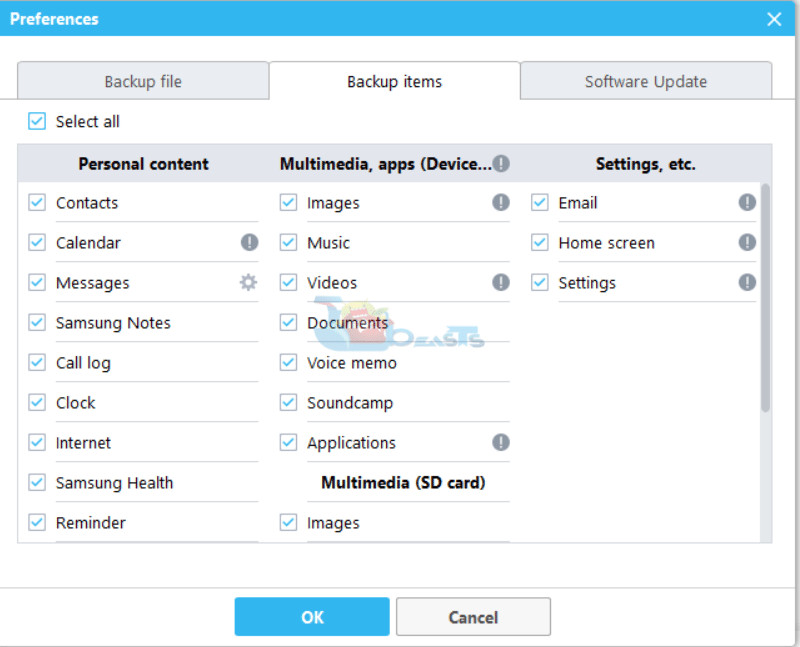
Now open Smart Switch, it will detect your phone. Click on the Settings gear icon on the top-right corner of Smart Switch, go to Preferences > Backup items > Select the data you wan to save to your computer.
Get back to the main menu now and click on Backup.
After selecting backup items, go back to main menu in Smart Switch. Now click on the Backup button to start the backup.
The backup process will start and end in a few minutes.
You will now see the progress of the backup process. It should end in a while. That’s all you had to do for backing up your Galaxy S10.
Galaxy Note 8 Backup Process images – used for reference only. Process for S10 will remain the same.
Settings > PreferencesBackup items – Select the data you want to copy to the computer.Data being backed up.
Restoring data to Galaxy S10 or any other phone
You can now restore data to your Galaxy S10 or any other Galaxy handset any time you want. Here’s how to do that.
Connect your Galaxy handset to the computer.
Open Samsung Smart Switch.
Click on the Restore button.
Wait for the restore to finish. That’s all.
Click on the restore button to start restore process.
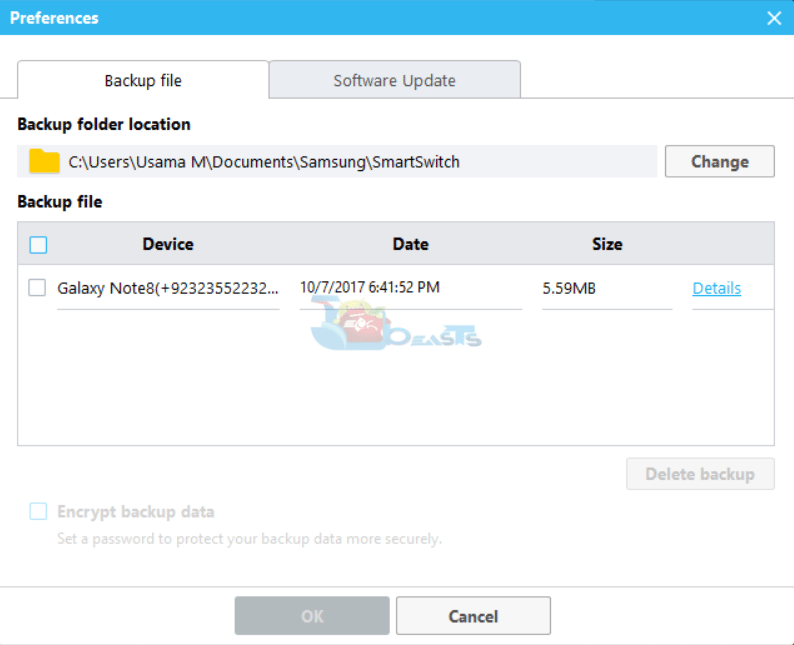
Accessing the Backup folder on your computer
Open Samsung Smart Switch and go to Settings > Preferences.
Now click on the Backup File tab.
You will see Details next to the file that you just created.
Click on Details.
You will now find folder options to view the data you just backed up.
You can now create multiple copies of your backup. That’s all.
The details button to access the folder.
Final Words
You have now successfully backed up data on your computer. Remember that backing up data periodically is the safest choice. Smart Switch will keep a record of your data and it will only backup new data when you connect the phone again and again. The old data will just keep getting updated and all of your data will stay in one place. Smart Switch provides the hassle-free backup/restore experience. If you need any help regarding this tool or the Galaxy S10, feel free to reach out to us. The best way to contact us through the comments section below.
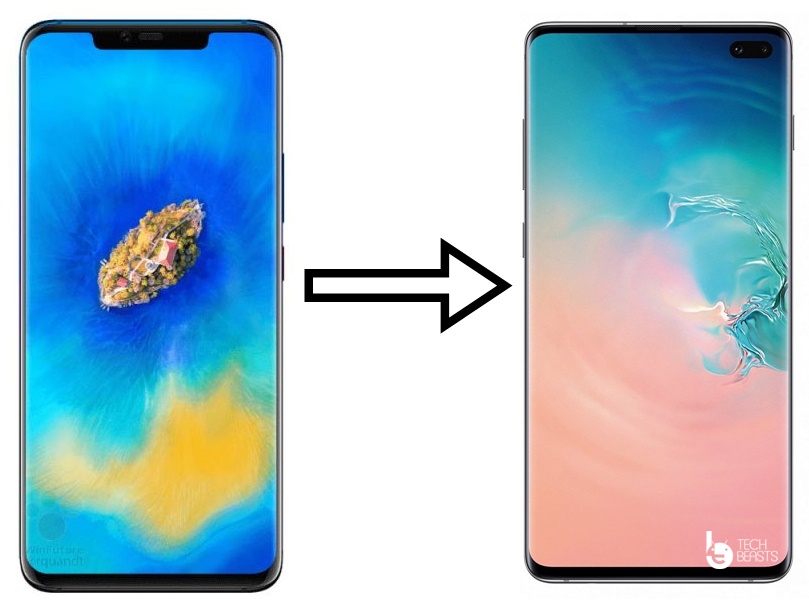
Samsung Galaxy S10 line up is out in the markets now. Once again, Samsung has managed to pull out the best Android smartphones ever. The Galaxy S10, S10E, and S10 Plus have impressed masses. The record-breaking pre-orders tell us about how many users these devices have attracted. While the Samsung Galaxy owners are all set to upgrade to Galaxy S10, there is a huge number of other Android phone owners also set to move to Galaxy S10. For the Android users who are now migrating to Galaxy S10, we have made this guide. You can find a method to transfer data from Android phone to Galaxy S10. The instructions to transfer data from Android phone to Galaxy S10 will let you shift each and everything to the new Samsung phone.
Transfer Data from Android Phone to Galaxy S10
Before start migrating data from Android phone to Galaxy S10, let’s us take a look at the features that make the Galaxy S10 a better choice than existing Android flagships.
Galaxy S10 vs other Android flagships
Google, Huawei, Xiaomi, OnePlus, and all other companies have already released their flagship phones recently. In the competition prior to the release of Galaxy S10, the Huawei Mate 20 Pro easily beaten other devices. The Mate 20 Pro comes with a fingerprint scanner, a triple-camera setup at the back which grabbed the top spot at DxOmark, and a curved display. After this, all eyes were on Samsung.
To win this competition, Samsung launched three Samsung Galaxy S10 devices. In the Galaxy S10 Trio, the Galaxy S10E is the budget-friendly device while the S10 and S10 Plus are expensive devices. Galaxy S10E is a compact device with slightly fewer features than the other two devices. The Galaxy S10 and Galaxy S10 Plus have successfully seized the top spot from the likes of Huawei Mate 20 Pro.
Galaxy S10E, S10, and S10 Plus
What makes Galaxy S10 awesome?
Samsung Galaxy S10 lineup uses the latest Dynamic AMOLED display. This is the world’s first ever HDR10+ compliant display. Galaxy S10 and S10 Plus use an ultrasonic fingerprint scanner. These are the first phones to host this fingerprint scanner. Previous in-display fingerprint scanners were optical. The ultrasonic fingerprint scanner has set the bar high for other phone makers now. Galaxy S10 Plus has a 1TB storage variant supporting microSD card which means you can expand this storage to 1.5TB. The new Samsung lineup uses WiFi 6, which is also a first in the smartphone industry. Samsung Galaxy S10 series has already grabbed the top spot from DisplayMate for its display, and from DxOMark for a stunning camera.
Those were all the features making the Galaxy S10 phones better than the competition. These phones are using the latest Qualcomm Snapdragon 855 SoC which we will see on future Android phones only. For now, the Galaxy S10 and S10 Plus are the arguably the best Android phones out there. The phones have even forced iPhone users to switch from iPhone to Galaxy S10.
Switching to Galaxy S10
So, if you are planning on ditching your current Android flagship for the Galaxy S10, you must be on the lookout for safe data migration methods. This is the guide you need to transfer all of your data in a matter of a few minutes. The following guide will help you to transfer Messages, Call Logs, Contacts, Emails, Calendar, WhatsApp Data, Media Content, and everything else to the Galaxy S10. Take a look at the list of items that you can transfer.
What can you transfer from Android Phone to Galaxy S10?
Contacts
Messages
Calendar
WhatsApp with Data
Notes
Settings (Samsung devices only)
Home Screen with Widgets & shortcuts (Samsung Devices only)
Applications with all Data
Call Log/Block List
Clock
WiFi
Wallpaper
Music
Photos
Videos
Voice Memos
Documents
What do you need to make this data transfer?
There are two ways to make this data transfer. You can use a data cable to establish a connection between your Android device and Galaxy S10 or you can transfer the data wirelessly. Choose the method depending on your convenience.
To wirelessly transfer data, you just need to have both the phones i.e. Android phone and Galaxy S10. The Wireless method is self-explanatory, you just have to follow on-screen instructions to transfer data that way.
Since the wired method is fast and there are scarcer chances of a mishap using this method, I am going to put it up first. Follow it below.
To transfer data using wires, you need the following.
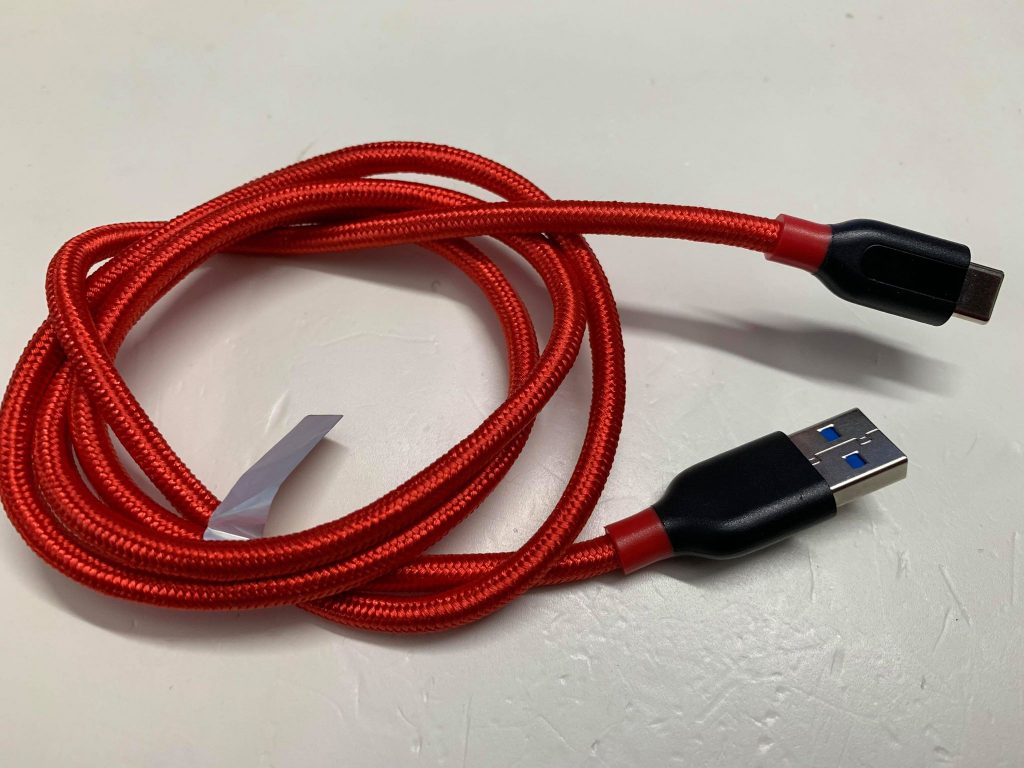
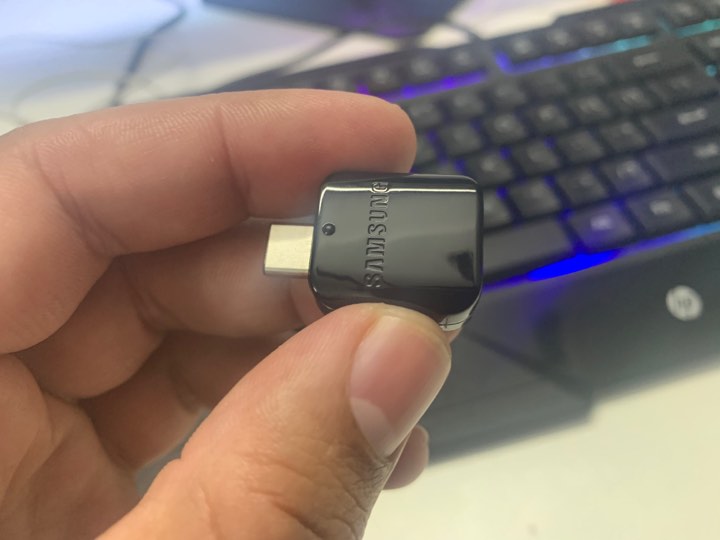
Samsung USB Connector
USB Type-C or Type-A data cable connecting on your device.
Both phones.
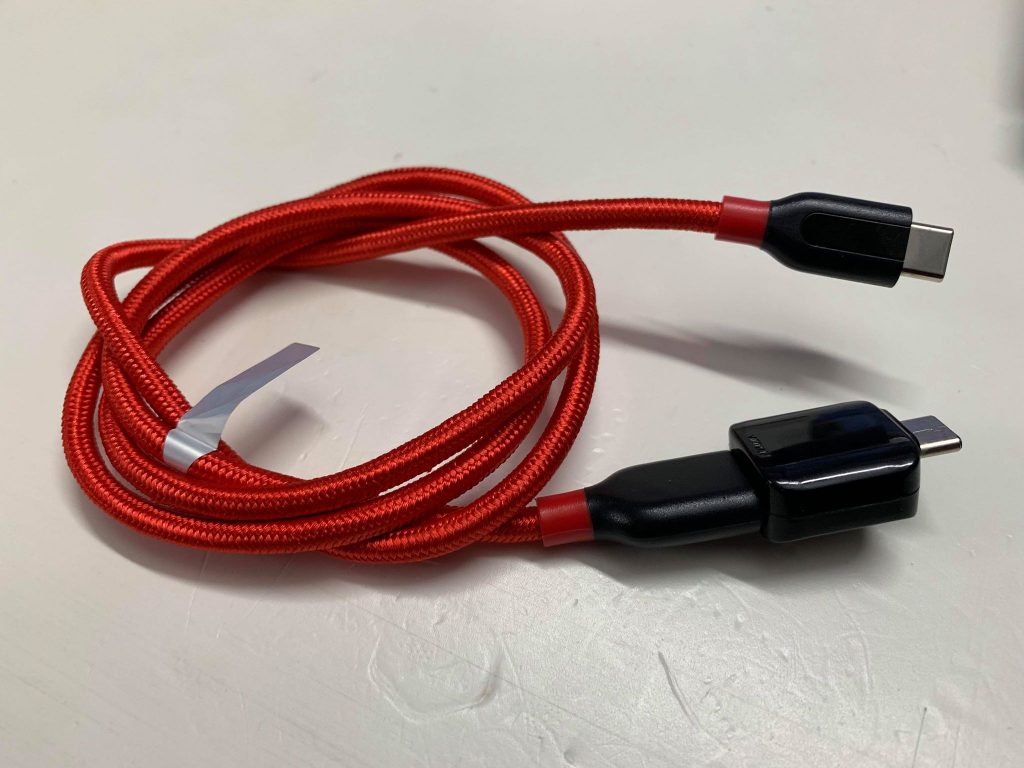
Connect the USB Type-C or USB Type-A cable to the Samsung USB Connector.
USB Type-C Cable
Samsung USB Connector
USB Connector with Type-C Cable
Note: This guide is valid to transfer data from any Android phone to all new Galaxy S10 models including Galaxy S10E, Galaxy S10, and Galaxy S10 Plus. Whether you want to migrate data from a previous Samsung Galaxy or phone from any other manufacturer, this guide will work for you. To transfer data from Android phone to Galaxy S10, we will use Samsung Smart Switch.
Transfer Data from Android Phone to Galaxy S10
Follow these steps to transfer data from any Android phone to Galaxy S10.
Open Samsung Smart Switch on your Galaxy S10.
On your Galaxy S10, open Settings > Cloud & Accounts > Samsung Smart Switch > Click on the menu button on top-right corner > About > Update. If there’s an update, update the Smart Switch. Now get back to Cloud & Accounts and click on Smart Switch again. Your phone should be in the data transfer mode now.
Connect Galaxy S10 and your other Android phone.
Connect the USB Connector side of the cable into your Galaxy S10, and plug the other end of the cable into your other Android phone. If any of the phones asks for any kind of permission, allow it.
From the list, select the data you want to transfer.
Galaxy S10 will now read data from your other Android phone. It will take a few minutes and then show you a list. From the list, select the data you want to transfer. While selecting the data, you can also specify a date range for the messages. Do as you wish.
Click on Next button to start the data transfer.
After selecting the data and verifying that you have selected everything you wish to transfer, click on the Next button. This will start the transfer process. The transfer process will take time depending on the amount of data. You can track the time on the top of your Galaxy S10.
Disconnect the phones now and set up your Galaxy S10.
After the data transfer comes to an end, disconnect both the phones. Check the data on your Galaxy S10. You will have everything shifted to it now. That’s all.
The data transfer process should have gone successful for you. As you have seen, the Android Apps with their data have been transferred to your phone. When you open the applications on your Galaxy S10, all the apps will automatically pick up their data from the internal storage of your phone. In case there is any Music or Video file that the stock player of your Galaxy S10 doesn’t support, you can get a third-party player from the Play Store. All of your pictures should also appear the Gallery of S10 just like they were in your previous phone.
Wrap Up
I am assuming that by this time, you have successfully got everything shifted to your brand new handset. If you have anything to ask, feel free to ask in the comments section below. Feel free to drop your queries and suggestions below. We will try our best to get back to you as soon as possible.
Galaxy S10 and S10 Plus have started shipping today. Consumers in over 70 countries have started receiving their devices today. A huge number of iPhone users are set to switch to the Galaxy S10 or S10 Plus. iPhone users who are now migrating to the Galaxy S10 would want to transfer data safely. This is the guide with the method to safely switch from iPhone to Galaxy S10 or S10 Plus. You will find the safest method to switch from iPhone to Galaxy S10 here.
Let ‘s draw a comparison between the iPhone and new Galaxy S10 smartphones before switching.
Switch from iPhone to Galaxy S10
iPhone vs Galaxy S10 or S10 Plus
Apple’s iPhone(s) are arguably the most premium and beautiful devices till date. If there is any Android competitor that gives Apple a run for its money, that is Samsung. Over the past few years, Samsung has managed to come up with the devices that have totally outnumbered the iPhones. The Galaxy S10 and Galaxy S10 Plus are also such devices.
iPhone XS Max
While Apple has released its iPhone XS and iPhone XS Max with ugly notch on the front, Samsung has opted for the punch-hole display which looks much more beautiful. Samsung has also added a top-notch display that has never been seen before. Samsung’s Galaxy S10 lineup has impressed the masses. iPhone fans, who have been using iPhone for over a decade, even they have decided to pick up the Galaxy S10 instead.
Galaxy S10E, S10, and S10 Plus
Samsung’s latest Galaxy S10 handsets come with triple-camera shooters, an ultrasonic fingerprint reader, a dual-camera setup on the front, reverse wireless charging, and a Dynamic AMOLED display with HDR 10+ screen. These are all the features that are nowhere on the iPhone XS and XS Max. To cut it short, Samsung is already years ahead of Apple at the moment.
iOS vs Android
When we try to draw a line between iPhone and Samsung’s Galaxy smartphone’s, it’s not entirely Apple vs Samsung. It is more about iOS vs Android. A never endingwar is still on between these ecosystems.
While iOS comes with its own limitations for the sake of security, Android is the most versatile mobile operating system.
Android has features like lock screen and home screen customization. Android comes with a file system which is compatible with the Windows-powered computers. The Android phones offer status bar customisation and notification panel customisation too. Users can get basic features like contacts search integration with the phone dialer, clipboard for text, direct YouTube forwarding and a lot more on Android. These basic features are absent on the iOS.
For years and years, users have been opting for iOS just for the sake of security, but if you do not intend to root your Android device, you can get the same level of security on your Android phone too. Google has been working hard to make Android secure with the recent Android updates. The latest Android Pie, which is running on almost all the latest Android phones, is the most secure version of Android.
Switch from iPhone to Galaxy S10 or S10 Plus
The reasons I’ve talked about above, are more than enough for an iPhone user to switch to Galaxy S10. Now the hardest part while switching from iPhone to Galaxy S10 is going to be the data migration. We have seen that transferring data from an Android phone to iPhone is nearly impossible, but, fortunately, that’s not the case when it comes to transferring data from iPhone to Android.
Companies like Samsung have developed their applications to move all of the data from the iPhone to their phones. Samsung’s has its application named Smart Switch. The Smart Switch can move each and everything from iPhone to Galaxy S10 or S10 Plus. All you have to do is to establish a connection between two phones.
As a new Galaxy S10 owner having iPhone background, this is the guide you need. In a bit, you will find steps to safely switch from iPhone to Galaxy S10 or Galaxy S10 Plus. I have used the Samsung Smart Switch for this. Take a look at the steps to shift data from iPhone to Galaxy S10 now.
What can you transfer from iPhone to Samsung S10?
Contacts
Messages
Calendar
Notes
App List
Call Log/Block List
Clock
WiFi
Wallpaper
Music
Photos
Videos
Voice Memos
Documents
What do you need for this migration?
Your iPhone – Any iPhone from iPhone 5 to iPhone XS Max.
How to Switch from iPhone to Galaxy S10 or S10 Plus
Follow these steps to migrate data from iPhone to Galaxy S10.
Open Samsung Smart Switch on Galaxy 10.
On your new Galaxy S10, go to Settings > Cloud and Accounts > Samsung Smart Switch. Tap the Menu icon now and open Settings > About. Click on the update button to check update for Smart Switch. If there is an update available, perform the update. Skip this otherwise.Get back to the Cloud and Accounts again and then click on Samsung Smart Switch. It should be ready for data transfer now.
Turn off iCloud for Contacts iPhone.
On your iPhone, go to Settings > Passwords & Accounts > iCloud > Turn off Contacts. Now click on “Keep on My iPhone”. If you do not turn this off, iCloud will not let the contacts move to the Galaxy S10.
Connect iPhone to the Galaxy S10.
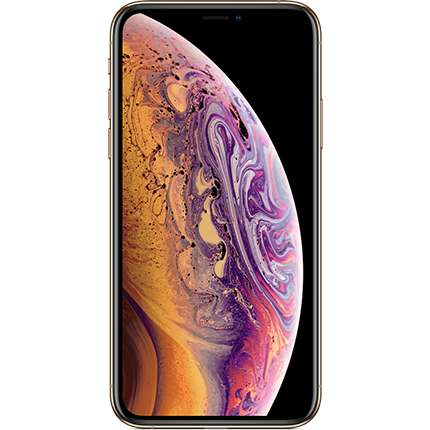
Now connect the lightning connector of cable to the iPhone, and connect the USB Type-C end of the cable to the Galaxy S10. If the iPhone asks for trust permission, click on “Trust this computer”. You are all set now.
Select the data you want to transfer.
Galaxy S10 will now read the data from your iPhone. It will show you the list of data you can transfer. Select all of your preferences. You can also select a message data range.
Transfer the data from iPhone to Galaxy S10 now.
Once you have made all the selections, click on Next. The transfer will begin now. It can take a few minutes for all data to shift.
Set up the data on Galaxy S10.
Once the migration ends, the Galaxy S10 will show you all the data. You can set up the data according to your liking now. Go through the App list to install the applications. You may not be able to find some of the applications for Android i.e. Facetime. That’s all.
A few things to note
As you have now switched from iPhone to Galaxy S10, you must have noted that there is no mention of WhatsApp data. iPhone uses a different filesystem as mentioned above. You cannot move WhatsApp data or transfer your app installations. You will have to compromise on the WhatsApp data. All you can do is to email your important WhatsApp chat. The WhatsApp media content cannot be moved.
Another thing to note here is that the videos on your iPhone were in the .MOV format. They will fail to play in the default video player of the Galaxy S10. To play the .MOV videos on your Samsung S10, you can get a video player like the MX Player or VLC Media Player.
Wrap up
That’s all you had to do in order to switch from iPhone to Galaxy S10. If you have any queries regarding this guide, feel free to reach out to us. I hope that this tutorial helped you for real. We are open to all suggestions as well. The best way to contact is through the comments section below.
![Download HTC U11 Plus Launcher APK [ 2019 ]](https://techbeasts.com/wp-content/uploads/2019/03/Screen-Shot-2019-03-15-at-3.42.55-AM.png "Download HTC U11 Plus Launcher APK [ 2019 ]")



![Download Nokia 6 Stock Launcher [ APK ] 2019](https://techbeasts.com/wp-content/uploads/2019/03/Screen-Shot-2019-03-15-at-2.35.46-AM.png "Download Nokia 6 Stock Launcher [ APK ] 2019")




![Install Stock Firmware on Galaxy S10E, S10, or S10 Plus [Back to factory]](https://techbeasts.com/wp-content/uploads/2019/03/Install-Stock-Firmware-on-Galaxy-S10.jpg "Install Stock Firmware on Galaxy S10E, S10, or S10 Plus [Back to factory]")