Home Blog Page 47

Download iOS 13 Stock Wallpapers

0
Download iOS 13 Stock Wallpapers
iOS 13 Stock Wallpapers

Apple has released the iOS 13. One major feature of the new iOS 13 is its new wallpapers. Yes, the iOS 13 comes with a whole bunch of new wallpapers. There are 8 subtle wallpapers in the iOS 13. We have got our hands on all of the new iOS 13 stock wallpapers. You can download the iOS 13 stock wallpapers from here now. Before you get your hands on the stock wallpapers of iOS 13, let me tell you a little bit about Apple’s new iOS iteration.

iOS 13 Stock Wallpapers
The iOS 13 Stock Wallpapers

iOS 13

iOS 13 is loaded with new features. Primarily, it brings the features that Android users had 5 years ago from today, but as they say, its better late than never. iOS users are now partially in 2019.

The iOS 13 adds the Dark Mode now. The system-wide Dark Mode will put less strain on your eyes. It will also save up a little bit of battery percentage on those Super AMOLED panels. Apple has also added the Dark Mode to its stock applications. At the iOS 13 launch event, Apple showed off the Dark Mode on its messaging app which looked incredible.

Apple has also updated the Photos and Videos apps. One problem with the Photos app of the iOS was that it never organized or sorted the pictures in proper order. It was such a pain to find pictures in the Photos app. It can finally organize pictures like Google photos. The iOS photos app will also show you daily highlights from your memories. Apple has also updated the photo editing tool.

Another feature that has existed on Android for ages, the Swipe keyboard is finally available to the iOS users. Users can swipe on the keyboard to type anything now. This is a good feature for those who don’t like pressing each and every single key separately.

Apple has also enhanced the Find My Device feature. The feature has been renamed as Find My and it merges the Find My Friends into Find My Device. You can now locate your device without an internet connection too. The Find My feature uses Bluetooth to locate the device.

One of the biggest iOS 13 features is the Sign in with Apple. You must have seen Sign in with Facebook and Google in most of your daily driver apps. There is no doubt that Google and Facebook are not trustworthy with your login information, so this Sign in with Apple is something that Apple should be praised for. There is no other company better than Apple when it comes to privacy.

Other features of the iOS 13 include adding attachments to events in the calendar app, the low data mode, support for 3D AR apps, time-synced lyrics in the music app, silence unknown callers and more.

iOS 13 Stock Wallpapers

The stock wallpapers of iOS 13 have a resolution of 1242 x 2208. These wallpapers can be applied to any Android smartphone or tablet and on any previous or new iPhone as well. You can download the wallpapers one by one or download them all using the all-in-one file given below.

All iOS 13 Stock Wallpapers – Download

Check out more Stock Wallpapers:

Guide to install Stock Firmware on Samsung Galaxy A70

0
Guide to install Stock Firmware on Samsung Galaxy A70

This is the guide on how to install stock firmware on Samsung Galaxy A70. The guide explains two different methods to install new firmware or restore the stock firmware on the Galaxy A70. Take a look at a brief overview of the A70 before following the instructions.

Samsung Galaxy A70

Samsung Galaxy A70 was announced a couple of months back. This phone was released after the Galaxy A50. While the Galaxy A50 was a true midrange device, the A70 joined the premium midrange club. Galaxy A70 has the nature of a flagship while carrying a very budget-friendly price tag. Its top-notch spec-sheet makes it worthwhile.

install Stock Firmware on Samsung Galaxy A70
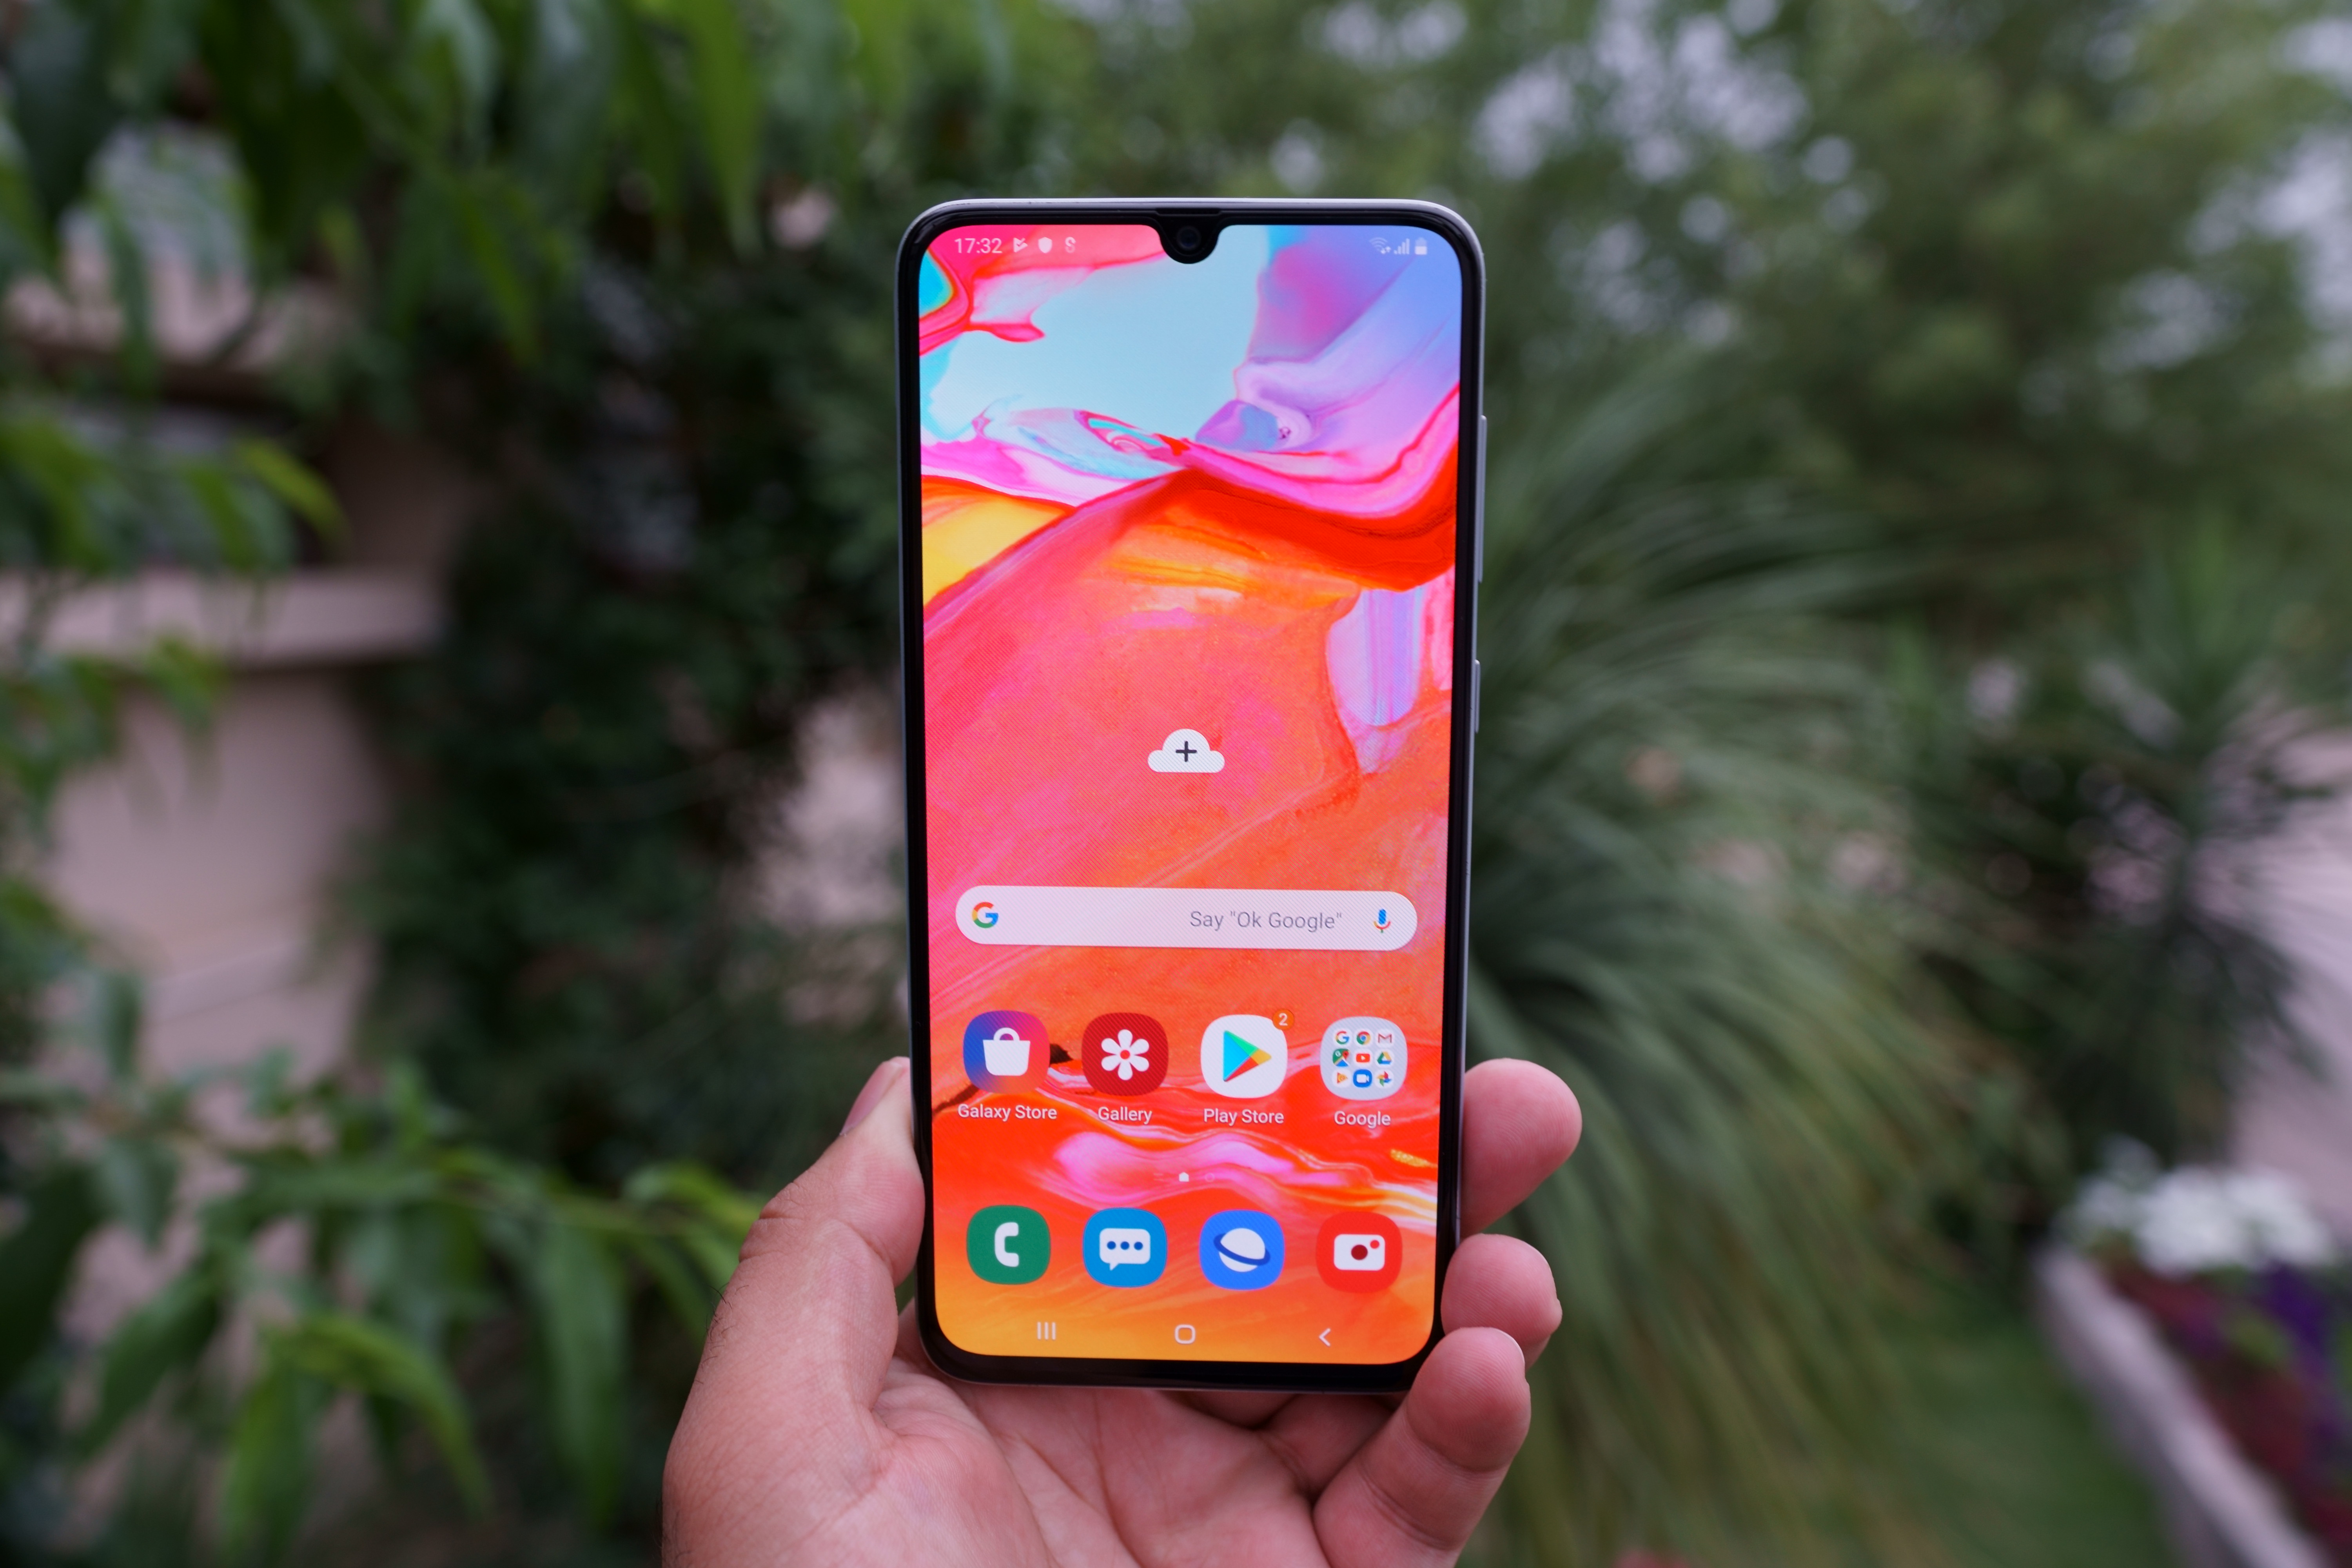
Samsung Galaxy A70 – Image @usamam – TechBeasts

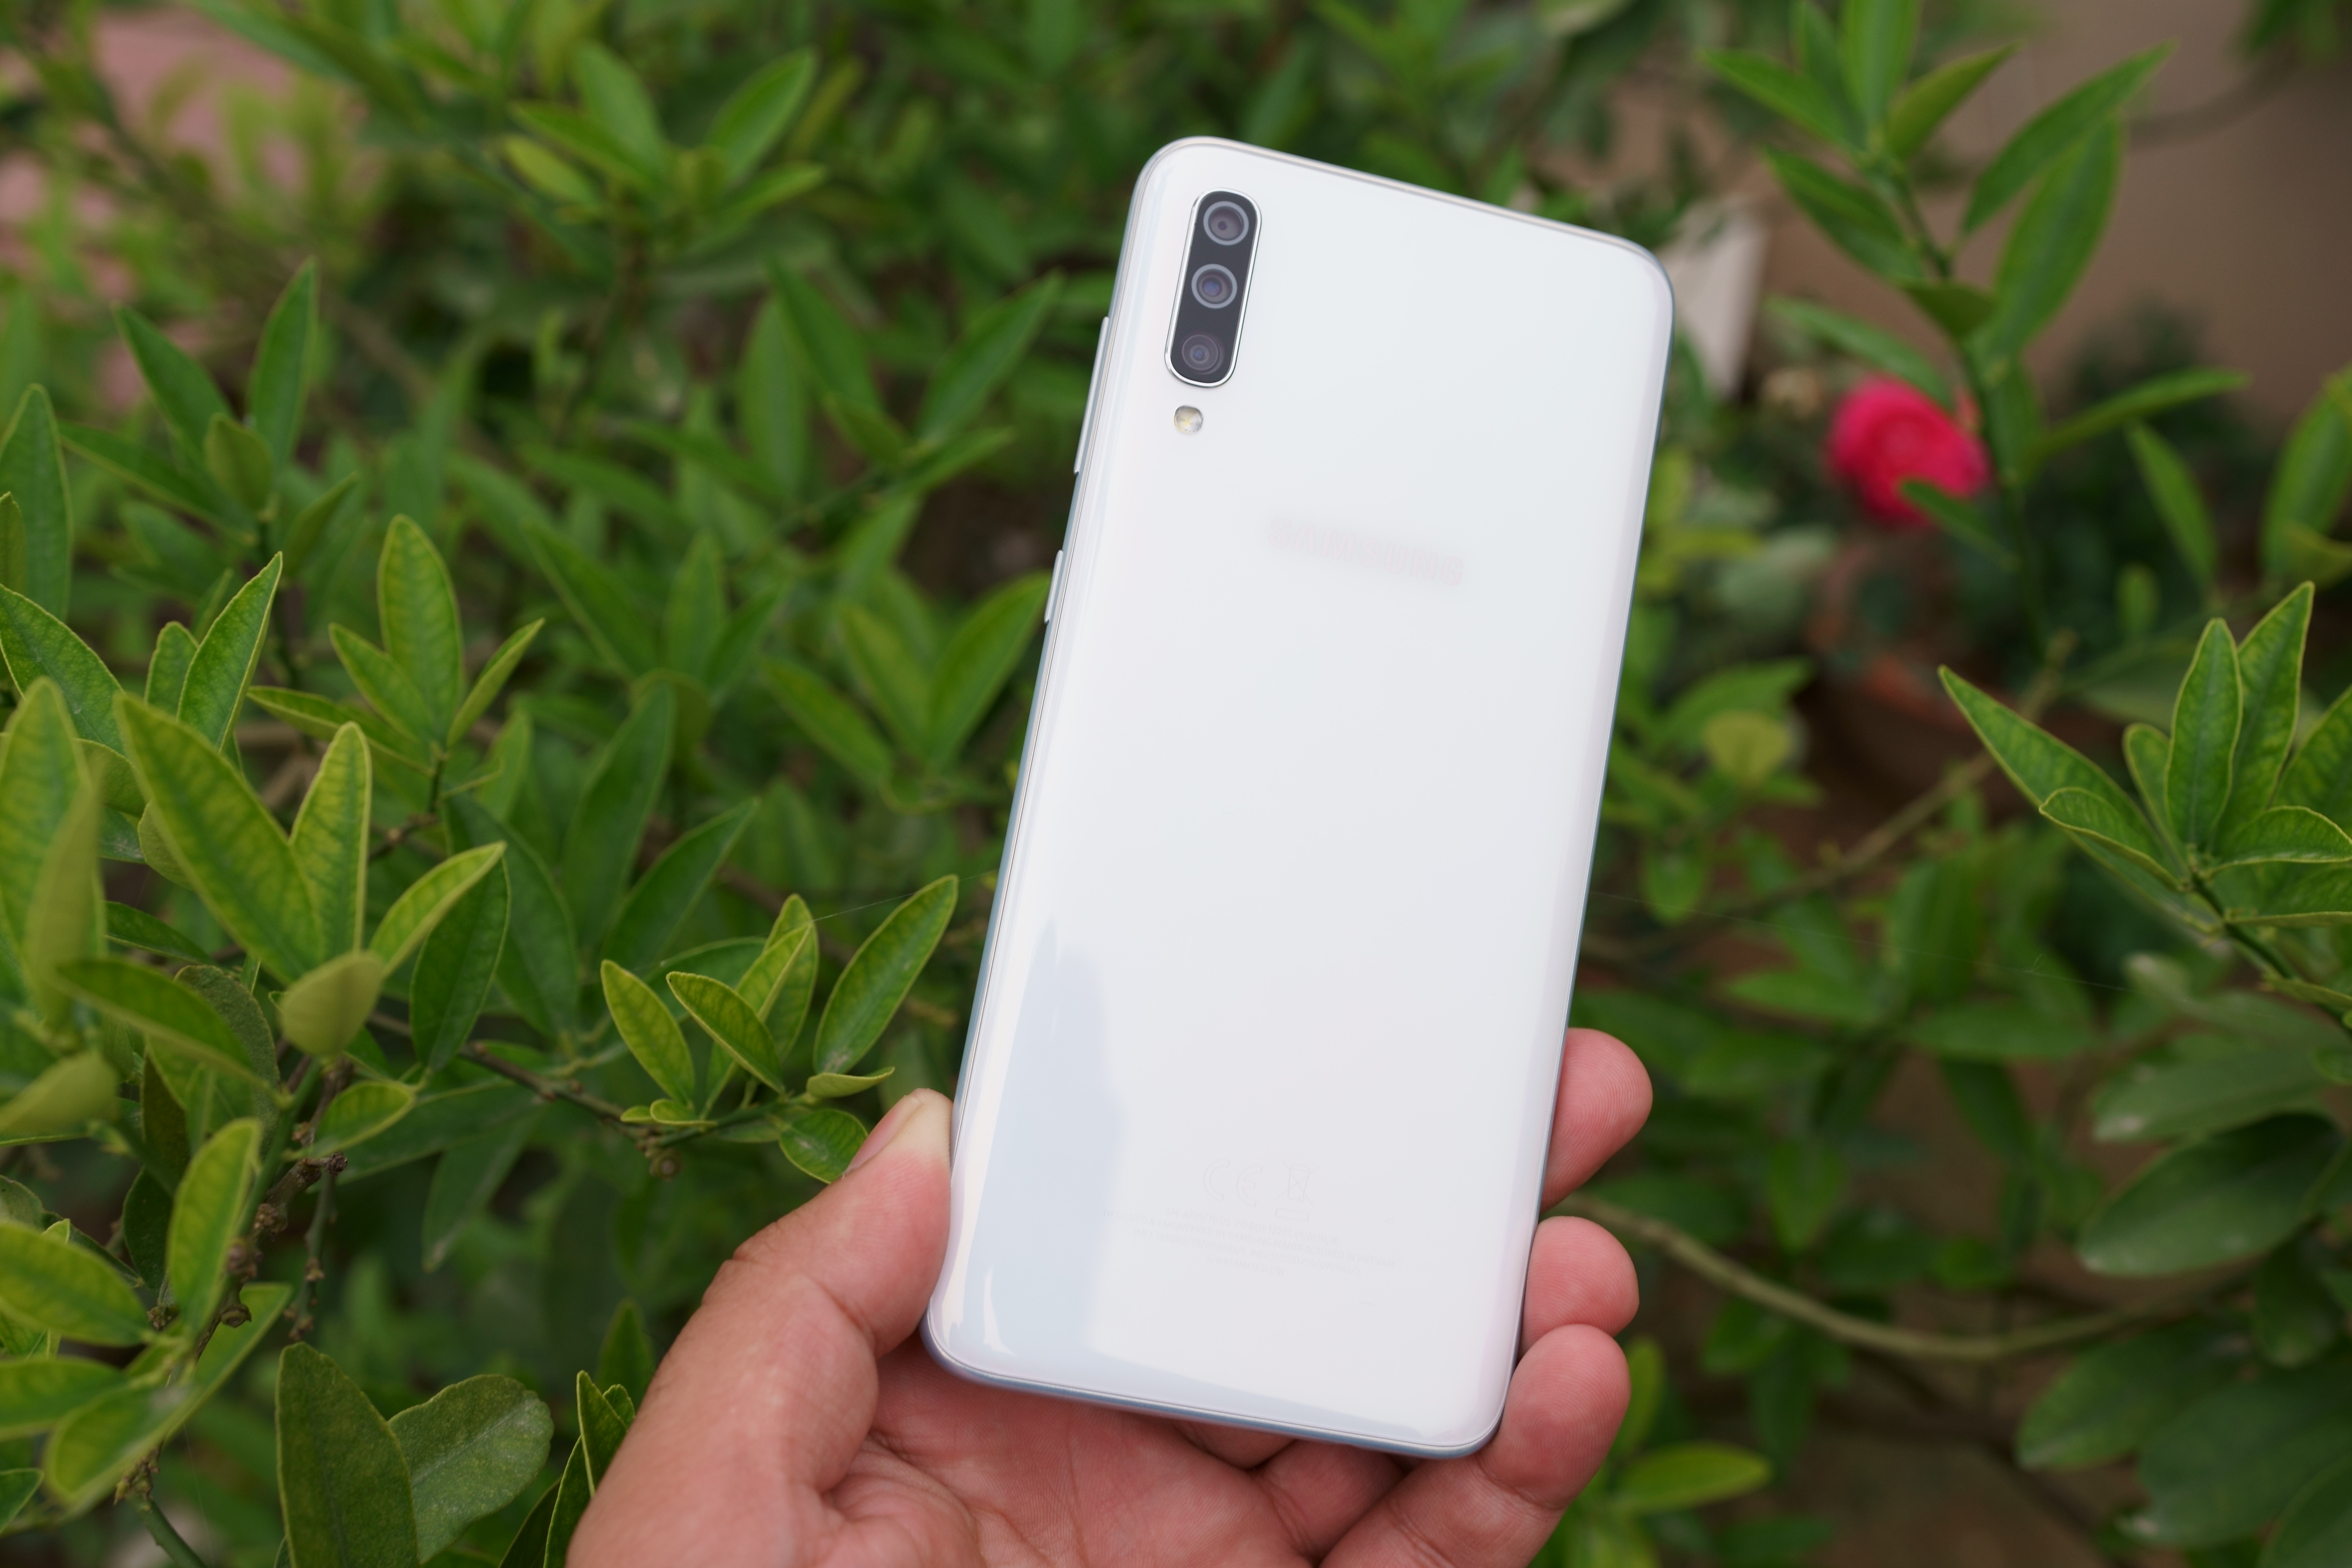
The A70 is equipped with a 6.7-inch Super AMOLED 1080P screen on the front. This screen has a 19.5:9 aspect ratio with the help of a waterdrop notch. The notch on the front holds the 32MP camera sensor for selfies. It’s got 3 cameras at the back. The main back camera is a 32MP Samsung GD1 sensor. After this, there is an 8MP ultrawide camera and a 5MP depth sensor.

Samsung has added the Qualcomm Snapdragon 675 processor in this phone. It has a RAM of 6GB and internal storage of 128GB. Galaxy A70 has a whopping 4500 mAh battery inside. It uses a 25W super fast charger to charge that battery. Galaxy A70 has a fingerprint scanner under its display. It’s got a headphone jack and it uses a USB Type-C for connection and charging.

Samsung Galaxy A70 – Image @usamam – TechBeasts

Now that you have a good idea of this phone or you have had a recap, let me tell you about a few situations that will require the installation of new firmware on your A70.

Stock firmware on Samsung Galaxy A70 – Why?

Brand new stock firmware on your Galaxy A70 can be helpful in a number of ways. Some times, you would want to flash the firmware and some times, the situation will demand a new firmware installation. Take a look at all the scenarios in which you will find this guide useful.

  1. You want to factory reset your Galaxy A70 through new software.
  2. The Galaxy A70 has started lagging, it’s having performance issues and you want to fix them all by installing new firmware.
  3. Your Galaxy A70 randomly reboots or it’s stuck in the bootloop. You want to fix it by flashing new firmware.
  4. The Galaxy A70 you own has been rooted. You want to unroot it with the help of this firmware installation guide.
  5. There is a new Software update available, but it is not available in your region. You don’t want to wait and you want to follow the Odin method to update your A70 right away.
  6. Your Galaxy A70 is having battery life problems and you want to give a try to another software.
  7. The Galaxy A70 came with software of another region, you want to get the software of your region on it.
  8. You want to uninstall a custom recovery or a custom ROM from your A70.
  9. And many more that I could not remember at this moment…

Methods to install the Stock Firmware

There are two ways to install a stock ROM on Galaxy A70. The first method is for average users. It uses the Samsung Smart Switch tool which is Samsung’s official tool. The Smart Switch can recover your soft-bricked device or look for OTA updates in your region. If these are the only two things you want to do, you may use the first method.

The 2nd method is to flash the firmware through Odin. This method is for pro users, but if you just follow the instructions to the letter, you can use it being an average user too. The Odin method is also known as manual firmware installation. In this case, you will download the firmware files of your choice and then flash them. This method is useful to completely wipe the previous firmware and install a new one over it. It will let you flash a new software updating without waiting for it in your region. It will also unroot the phone and restore everything back to factory settings.

How to install Stock Firmware on Samsung Galaxy A70 via Smart Switch

  1. On your Galaxy A70, download and install the Smart Switch application.
  2. Download and install the Smart Switch on your Windows or Mac computer too.
  3. Now open Smart Switch on the computer.
  4. Connect Galaxy A70 to the computer. If the A70 asks to trust the computer, trust it.
  5. Smart Switch will detect the device and show you the options.
  6. The very first thing that you should do is to create a backup of your phone.
  7. After creating a backup, click on More > Emergency Software Recovery.
  8. Smart Switch will start looking for a new software update. If it finds it, it will show it in the logs.
  9. If you want to recover the phone, click on Emergency Software Recovery once again and enter the recovery code.
  10. The Smart Switch will restore your phone to the previous working state.

That’s all with the Smart Switch method. Next up is the Odin method.

Preparing Galaxy A70 for Odin

  1. This method is only for Galaxy A70. Do not try on any other device.
  2. Download all the files carefully. Always download the latest firmware file for the A70.
  3. Charge the A70 up to 50% for this process.
  4. Backup contacts, call logs, text messages, and media content.
  5. Use OEM data cable to connect A70 to the computer.
  6. On the A70, enable USB Debugging and OEM Unlocking.
  7. Turn off Smart Switch and Windows Firewall while using Odin.
  8. Pay attention to the rest of the steps.

Downloads

  • Samsung Android USB Drivers – Download and install
  • Odin 3.13.1 for PC – Download and extract
  • Galaxy A70 Firmware: Download [Enter the model number of A70 on this page to find firmware.]
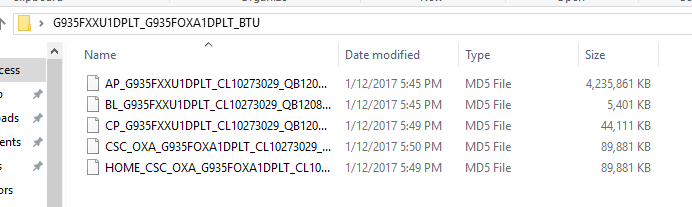
    • Extract the downloaded firmware file to get the AP, CP, BL, CSC, and Home_CSC files.
      Galaxy A70 Firmware files
      Image for Reference only.
How to boot Galaxy A70 into Download Mode
Turn off Samsung Galaxy A70. While the phone is off, press and hold Volume Up + Bixby + Power button to boot into recovery. As your phone vibrates, let the keys go. You will see the recovery now. In the recovery, using Volume Down, highlight “reboot to bootloader” and press Power button to reboot. Your phone will now reboot in the Download Mode now. Press Volume Up to continue.

Guide on how to install stock firmware on Samsung Galaxy A70 via Odin

  1. Open Odin3.exe on your computer.
  2. In Odin, click on Options > Make sure that only options checked are Auto Reboot and F.Reset.Time. No other option should be ticked.
  3. Now click on the AP tab in Odin and add the AP file.
  4. In the CP tab, add the CP file. Add the BL file in the BL tab.
  5. In the CSC tab, add the CSC file if you want to factory reset the phone, add the Home_CSC file otherwise.
  6. Boot your Galaxy A70 into the Download Mode now.
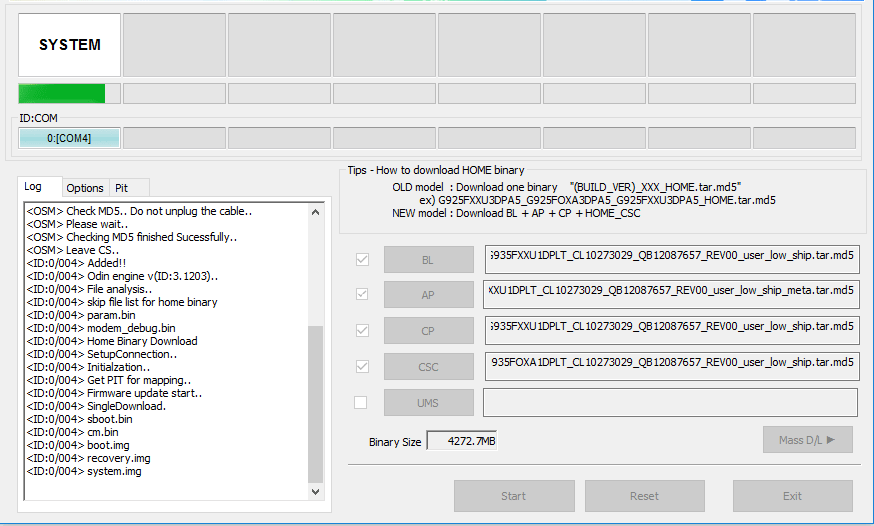
  7. Connect the A70 to the computer. Odin will show “Added” in the logs or show a Blue light in the ID:COM box.
  8. You are all set now. Hit the “Start” button in Odin now.
  9. Odin will take about 5-7 minutes to flash the firmware. Your phone will restart automatically after this.
Odin showing Firmware installation
Odin showing Firmware installation – Image for Reference only.

Conclusion

It was easy, wasn’t it? you have successfully installed new software on the A70. The first boot can easily take up to 10 minutes so keep patience. If you think that something is wrong with the phone, consider clearing its cache. In case you have got any questions or queries, feel free to reach out to us. I will try my best to get back to you as soon as possible.

Download Marvel Super War for PC and Laptop

Download Marvel Super War for PC and Laptop
Playing Marvel Super War for PC in the BlueStacks 4

This is the guide on how to download and install Marvel Super War for PC. Marvel Super War for PC can be played on Desktop PC and Laptop. This game will support Windows 10, Windows 8.1, Windows 8, Windows 7, and Mac OS X/MacOS. 

Marvel Super War for PC
Playing Marvel Super War for PC in the BlueStacks 4


Marvel Super War is the latest game to have the gamers glued to the screens of their devices. NetEase Games have built this game in collaboration with Marvel. If you have been a fan of Marvel’s movies, this game is your perfect chance to show off your fan love. Marvel Super War comes for free. This game is primarily built for Android and iOS devices, but its graphics and sound effects are good enough to run it on a computer. For that very reason, I’m going to show you how you can play Marvel Super War on your computer. In a while, this guide will show you the steps to install Marvel Super War for PC. Before that, it’s very important to understand the concept of Marvel Super War.

Marvel Super War – Brief Overview

First of all, Marvel Super War is a multiplayer online battle arena game. This is a 5v5 game which means up to 5 players can form a team to play against a team of other 5 players. The players can either form their own team or they can join a random team online. After deciding their side, and the character they want to play as, they jump into the battlefield. The battlefield is a beautiful placed filled with a lot of decore. It will either be a park, a colony, or a garden. Players start moving in the battle arena to find the enemies. As you encounter enemies, you have to use your unique powers to wipe them.

Players have to master their character. If you are not sure of the powers and skills of your character, you can master them in the training mode first. The characters in the game are from all the Marvel franchises. You will get Black Panther, Thor, Hulk, Black Widow, Iron Man, Spiderman, Deadpool, and all others. Picking up the character is totally your choice. One thing to note here is that the characters look extremely beautiful. NetEase has done a great job to make these characters look as close to the real Marvel characters.

There is no rule-to-win system in MSW. It offers balanced gameplay. The more enemies you kill, the more numbers you put in your backpack. The idea in this game is to go as far as you can. With each new level, you will upgrade the powers of your characters and also get to visit new places. This game has spontaneous gameplay. It’s time to test your mettle. Marvel fans have a great opportunity to prove how much they love their favorite character.

So, have you got what it takes to keep the stones from falling into wrong hands? Can you save the universe? Do you have what it takes to fix the ones who call themselves inevitable? Well, Marvel Super War provides you with the stage to prove all this.

That was an idea about this game. Let’s get back to the steps to installing Marvel Super War on a computer.

Marvel Super War for PC

  1. First of all, get an Android emulator. Windows users can get BlueStacks. Mac users can get NoxPlayer.
  2. Install the Emulator and set it up using your Google Account.
  3. Now open the Emulator and go to the Google Play Store.
  4. In the Play Store, type “Marvel Super War”.
  5. As you find the game, install it.
  6. Now open the game from the home screen.
  7. Play the game the way you want. That’s all.Marvel Super War for PC

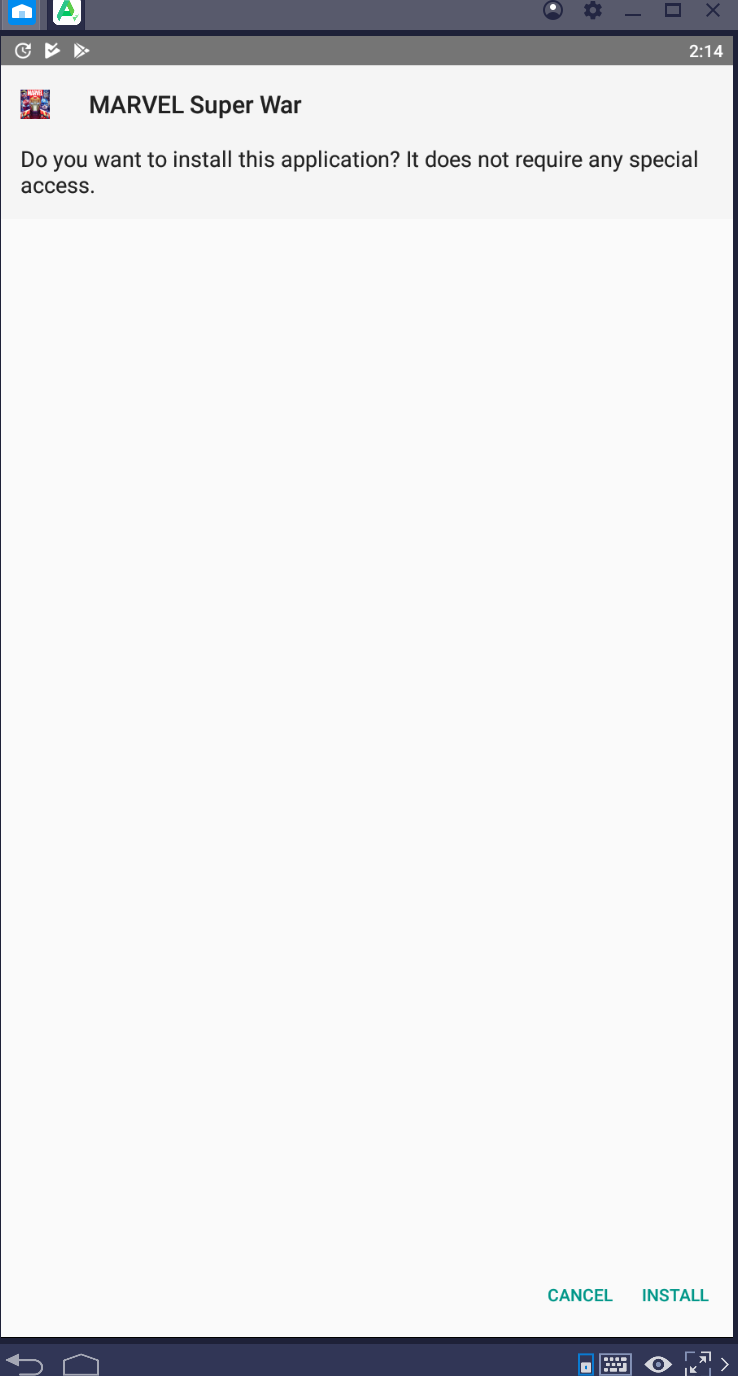
If you are unable to find Marvel Super War in the Play Store, you can download its APK from here. After installing the Android Emulator, you will simply open the APK and it will be installed automatically.

Conclusion

That’s all with the installation of Marvel Super War for PC. You can set up the controls in the emulators to play it using your keyboard and mouse. If you have any questions or queries regarding this game, feel free to drop them below in the comments section. I will try my best to get back to you as soon as possible.

Download Marvel Super War APK for Android

Download Marvel Super War APK for Android
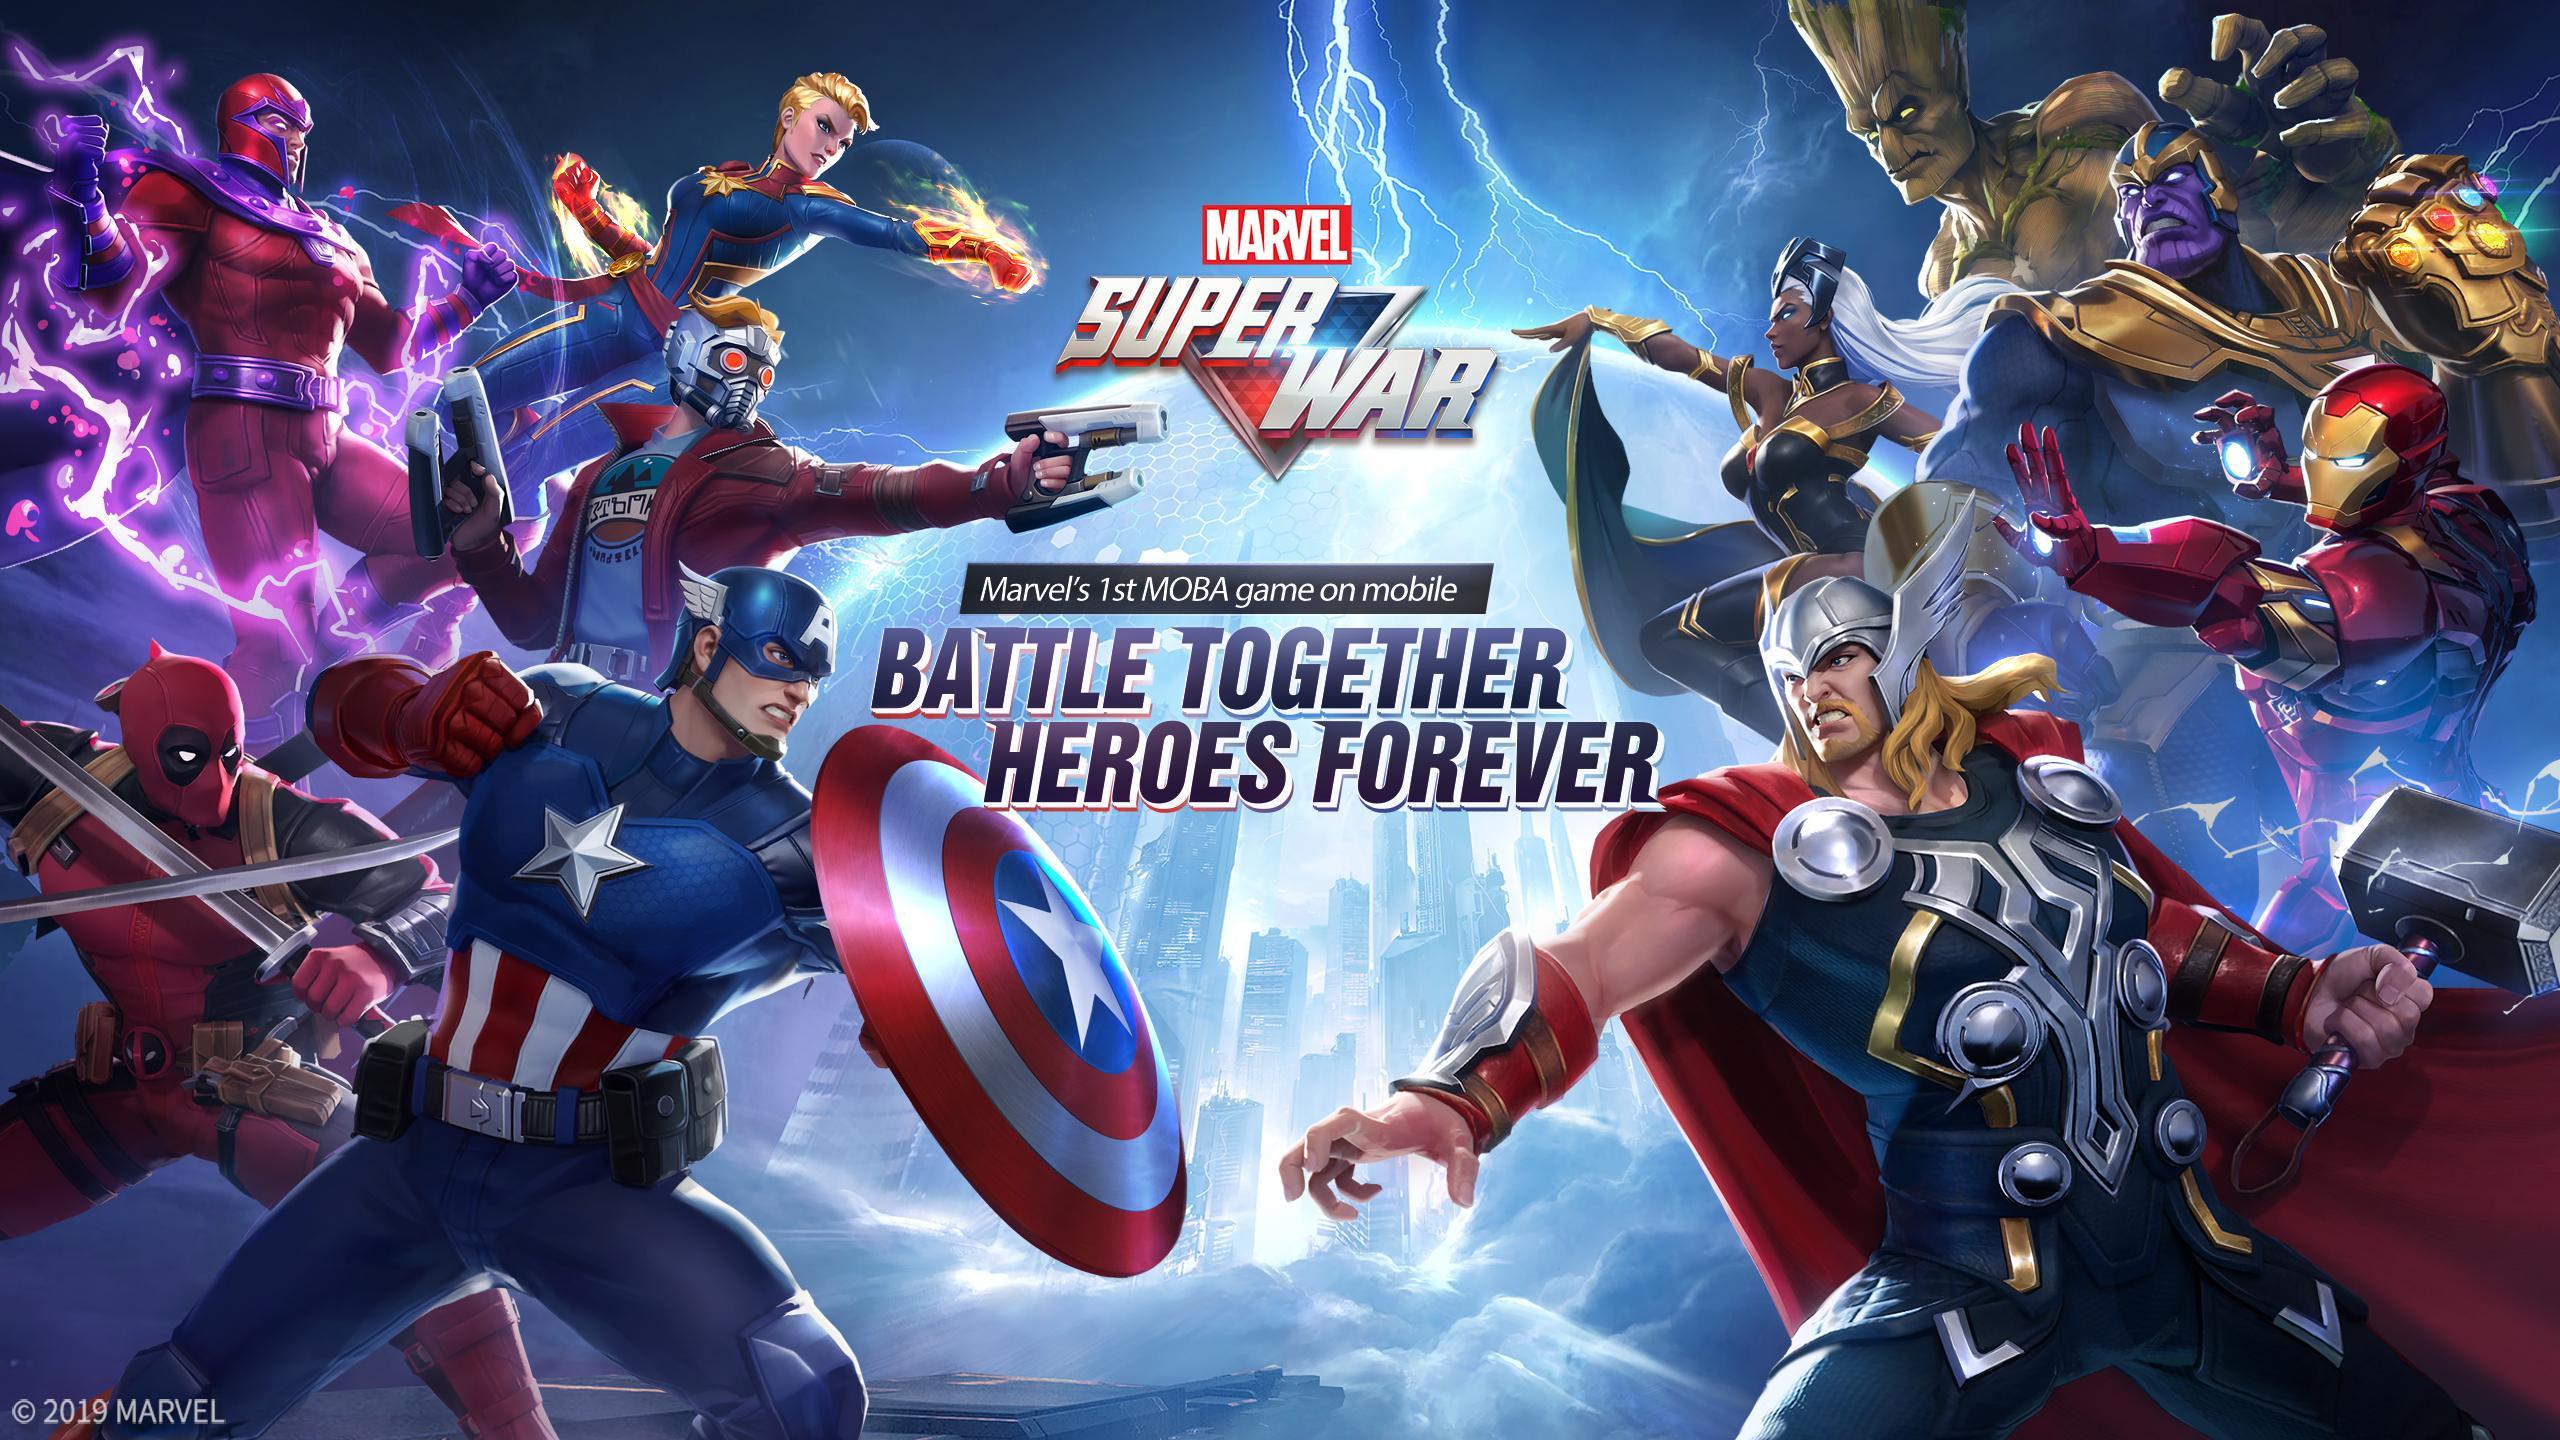
The Marvel Super War Game Poster

Here is the latest Marvel Super War APK for Android. The Marvel Super War APK will work on all Android phones running on Android 4.1 or higher. The attached APK of Marvel Super War is safe to install.

Marvel Super War APK
The Marvel Super War Game Poster

Marvel’s all-time famous Avengers series may have come to an end, but its relationship with the fans will live on forever. Marvel and NetEase games have partnered up to bring this game called Marvel Super War. This game is kind of a way for the fans to express their love with their favorite Marvel characters. The 5v5 MOBA comes for free for Android and iOS. Marvel Super War is out in a few regions already. It’s gonna take a lot of time for this game to make its way to all the countries. If you are a diehard Marvel fan, and you can’t wait for this game’s official arrival in your region, you can download its APK. The Marvel Super War APK will let you play this game right now anywhere in the world. Before you Download Marvel Super War APK, let me give you a brief overview of this game.

Marvel Super War

The new MOBA Marvel Super War is set in a world of fantasy. This game brings characters from all Marvel franchises. For example, you will get the characters like Deadpool, Iron Man, Captain America, Spiderman, Hulk, and all others. Since this is a 5v5 game, the battles will be taking place between a team of 5 series and 5 villains. Players will get to choose their side. Once they’ve chosen, they will be sent into the battlefield.

Players have to master all the moves and skills of the superheroes. Only then they will be able to show off their abilities when the fight is happening. If you are not sure of the skills of your hero, you can spend some time in training to master them. At one time, you can play as one superhero only. The other 4 superheroes of your team will be computer-controlled.Marvel Super War APK

There is no win-to-rule system in the game. It comes with balanced gameplay. Players have to perform their best to take home most of the prizes. Furthermore, the victory does not depend on one player here. It’s going to be a team effort.

As you level up in the game, you will unlock new powers of your superheroes. The game comes with intuitive gameplay. It has been designed to keep your interest alive. It comes with console-quality graphics and sound effects. The best part of this game is that it comes for free in the Google Play Store.

Download Marvel Super War APK

  1. Marvel Super War APK – Download.
  2. Copy the APK to your phone.
  3. On the phone, open the APK through a file manager.
  4. Install the Marvel Super War game now.
  5. Open the game from the app drawer. That’s all.

If you are interested in Marvel Super WAR XAPK, you can download it from here.

Conclusion

The Marvel Super War game will take a few minutes to download all of its data. In case you are unable to download its data, try connecting your internet to another country through a VPN and try again. If both these options fail to work, you can get the XAPK which is given above, and then use an XAPK installer to install it. If you have any question or query, feel free to reach out to us. I will try my best to get back to you as soon as possible.

More:

Download Samsung Good Lock 2019 for Galaxy A70

0
Download Samsung Good Lock 2019 for Galaxy A70
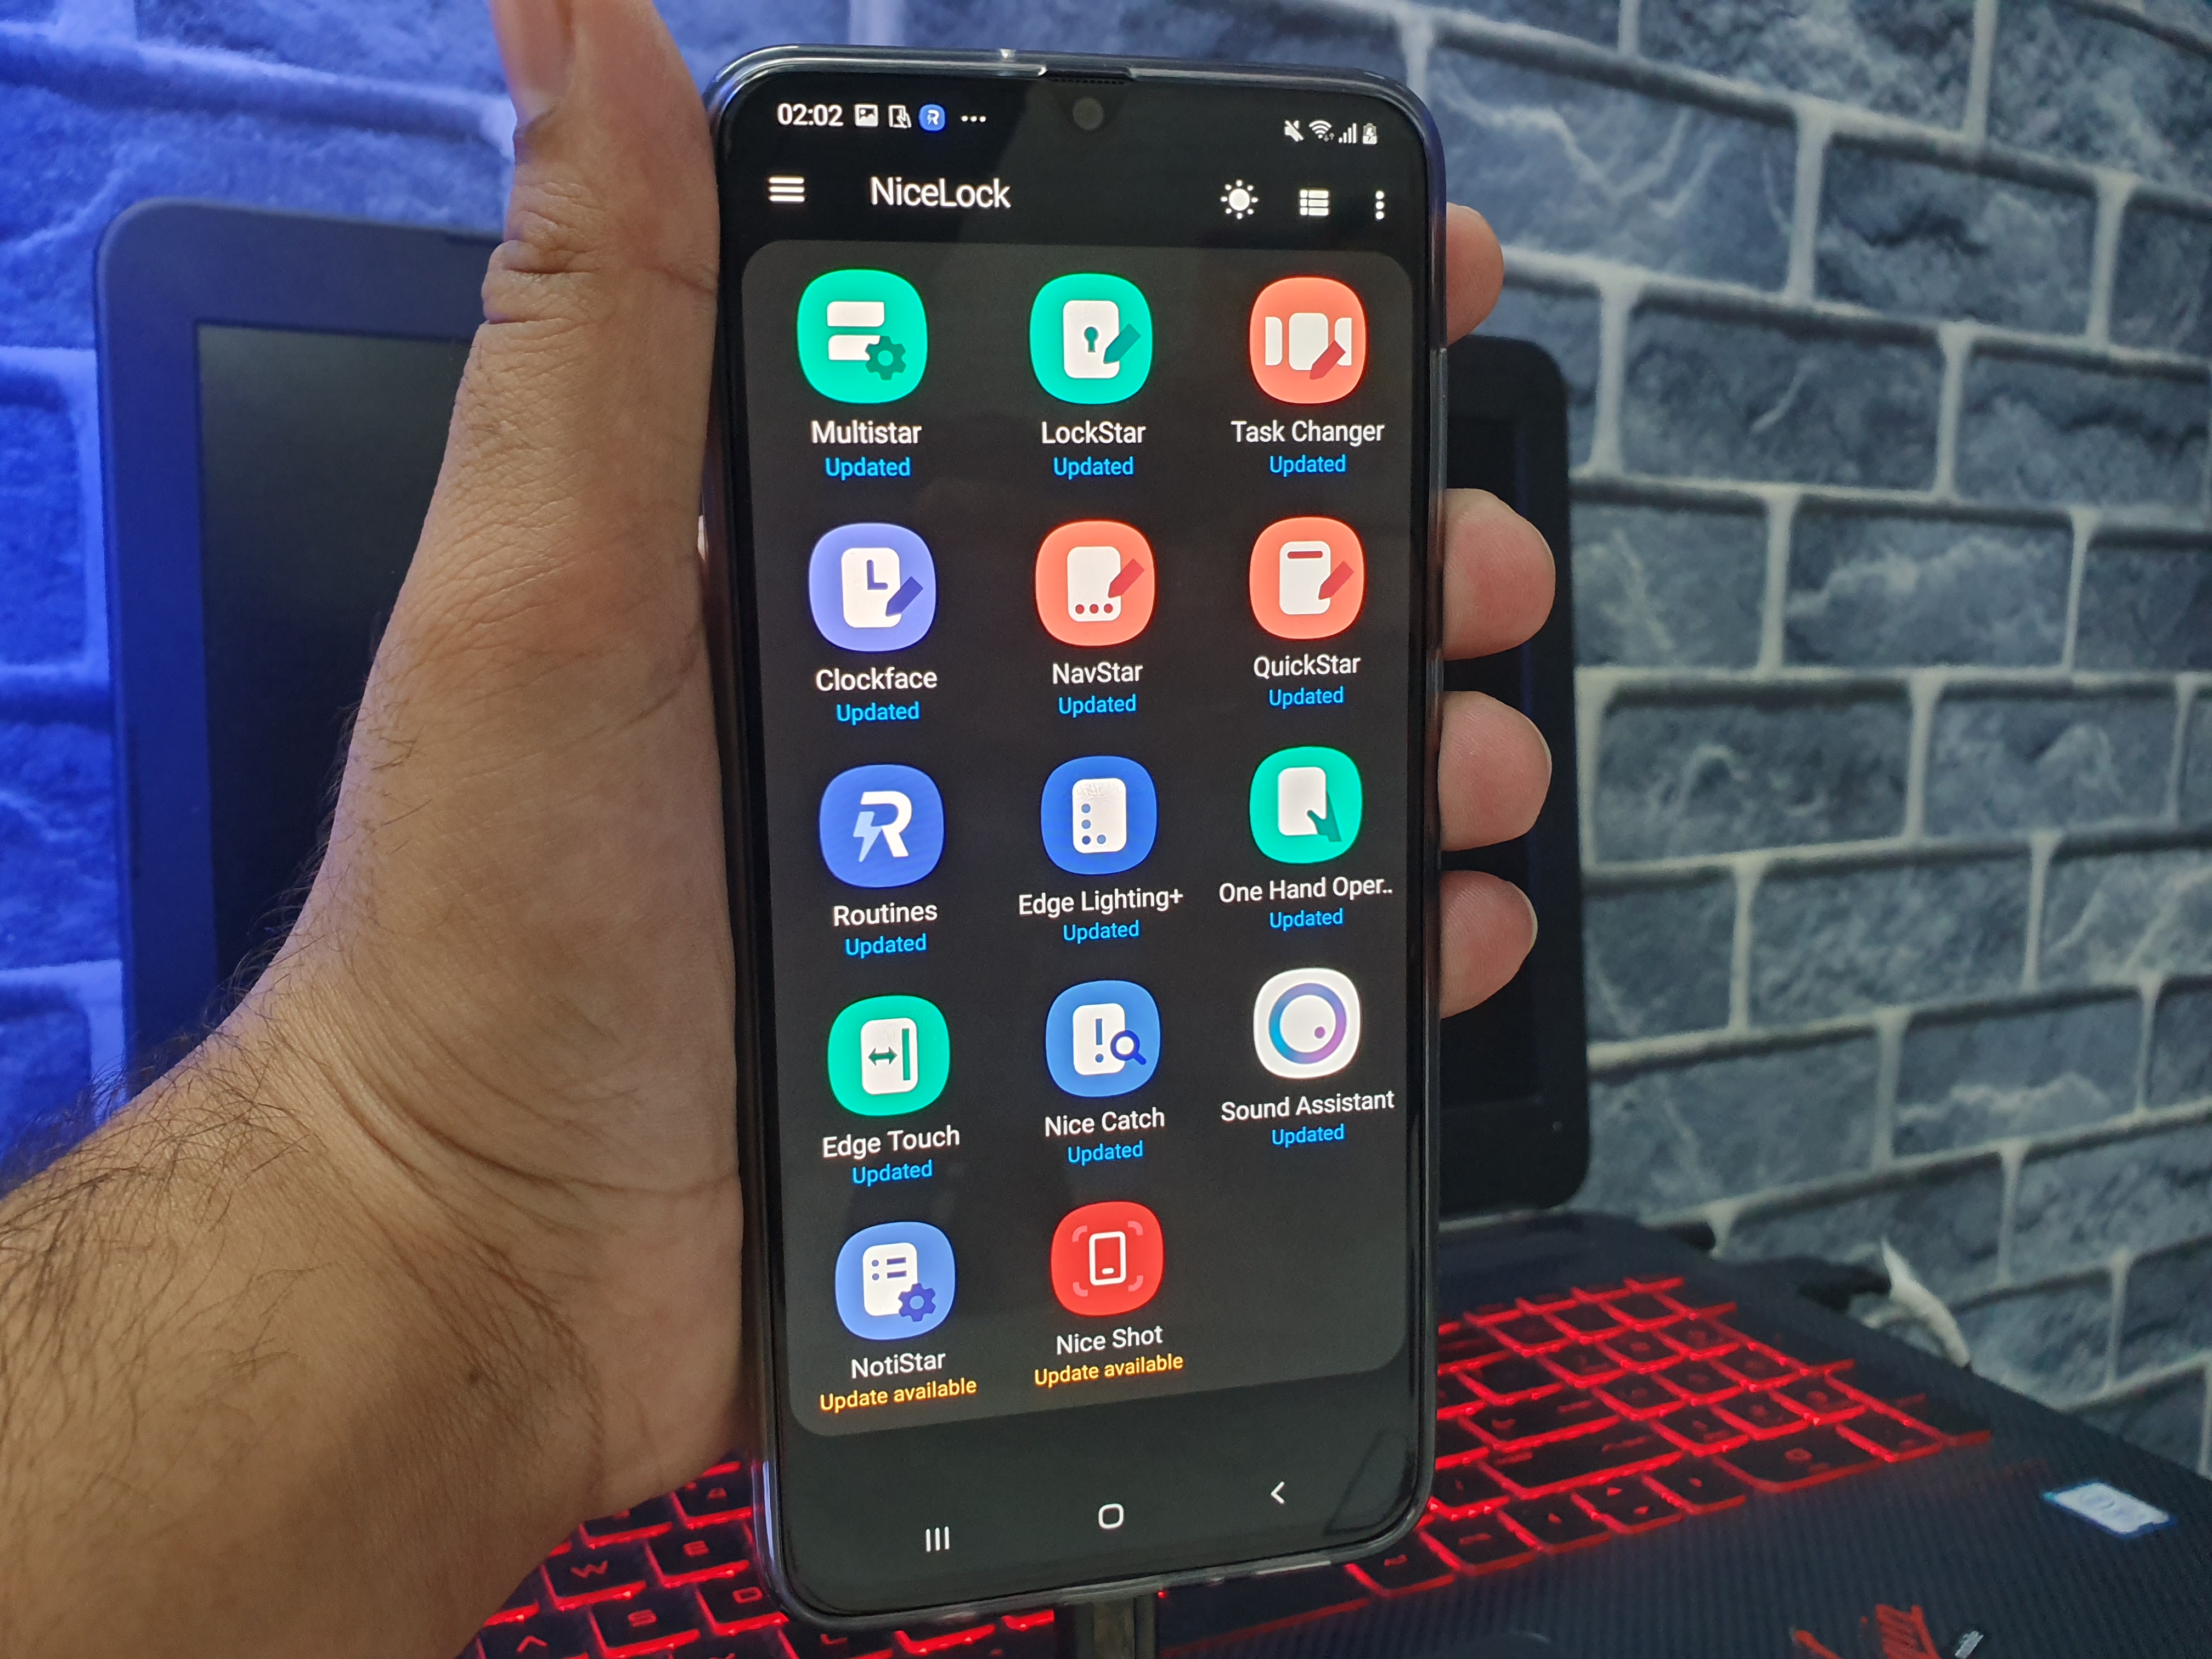
Good Lock 2019 running on Galaxy A70

Want to make your already-great Galaxy A70 better? You can do so with the help of Samsung Good Lock 2019. This is the detailed guide to download Samsung Good Lock 2019 for Galaxy A70.

Before you learn how to install Good Lock 2019 on the Galaxy A70, let me give you an idea of the phone itself and the Good Lock app.

Samsung Galaxy A70

Samsung Galaxy A70 was announced a couple of months back. The A70 replaced the A50 as the most powerful phone in the new Galaxy A lineup. Samsung Galaxy A70 is a midrange device, but it has a few characteristics of a flagship. Let me break down its specifications right here for you.

The A70 comes with a whopping 6.7-inches 1080P Super AMOLED screen. It’s got a waterdrop notch which means it has a 19:9 aspect ratio. This display is bigger than all existing Samsung Galaxy phones. It’s even bigger than the Galaxy Note 9, and the Galaxy S10 Plus. On the power end, the A70 uses Qualcomm Snapdragon 675 processor. it’s got a RAM of 6GB and internal storage of 128GB. It does have an external SD card slot too.

Samsung Galaxy A70
Samsung Galaxy A70 – Image by @usamam – TechBeasts

On the photography end, this handset has got 3 shooters at the back. It has the main 32MP camera, 8MP ultrawide camera, and 5MP depth sensor. The main 32MP camera is a GD1 sensor, which uses Tetra cell technology to combine 4 smaller sensors to form one bigger sensor. On the front of this device, Samsung uses the same 32MP camera. Galaxy A70 can shoot 1080P@60FPS and 4K videos. Also, it can shoot Super Slow-Mo videos.

There is a massive 4500 mAh battery in this phone. It’s got a 25W fast charging support. For charging and connection, the A70 uses USB Type-C. Galaxy A70 runs on Android 9 Pie, which is themed by the Samsung One UI.

That’s all about the A70. To unleash the real potential of this smartphone, you can install the Samsung Good Lock 2019 on it. Below is a brief overview of the Samsung Good Lock 2019 and then the steps to install Good Lock 2019 on the A70.

Samsung Good Lock 2019

Good Lock is a UI customization app which was introduced back in 2016. This is Samsung’s official application. It can add new features to the UI of your phone. The Good Lock was released for Android Marshmallow first, it was updated for Android Nougat and Oreo. This year, Samsung introduced Good Lock 2019 for Android 9 Pie which means for the One UI.

Samsung Good Lock 2019 has 14 different plugins. All plugins have a different purpose. These 14 plugins will let you enjoy your Galaxy A70 at its best. The Good Lock itself is like a dashboard or a plugin handler that is used to control the addons. The 14 plugins include Multstar, Quikstar, Notistar, Nice Shot, Task Changer, Edge Lightning, Edge Touch, Lockstar, Clockface, & a few others. Some of these plugins are really useful. Like Task Changer, which can change the look of the recent apps panel. The Nice Shot can add native video recording option to the phone. The Multistar is a great tool for changing the way you use Multi windows on your phone.

I have already explained the purpose of all these plugins in a video about the Good Lock 2019. In the very same video, I have also explained how to install it on the A70, however, right now, I will show you the text-guide to install it and at the end of this post, you can find the video about Good Lock too.

Now follow the simple steps given below to download Samsung Good Lock 2019 for Galaxy A70.

How to download Samsung Good Lock 2019 for Galaxy A70

Download all the apps mentioned below and copy them to your phone.

  1. On your Galaxy A70, install all these APKs one by one.
  2. Install the NiceLock app on the A70 now.
  3. Open NiceLock from the app drawer now.
  4. In the NiceLock, you will find all the plugins that you just installed.
  5. Now open any plugin and set it up as you like.
  6. That’s all. You have the Good Lock 2019 up and running on your phone.
Samsung Good Lock 2019 for Galaxy A70
Good Lock 2019 running on Galaxy A70

In case you are wondering why did we use NiceLock, then let me tell you that first. Good Lock 2019 is available in only 5 countries at the moment. As I mentioned above that Good Lock itself is nothing more than a dashboard, there are several plugin handlers that can serve the same purpose as Good Lock 2019. Of all those handlers, the NiceLock is the closest to official Good Lock, and it is also one of the most trusted apps. So, rather than using the difficult VPN approach, I’d prefer going with the NiceLock to run all Good Lock Addons on your Galaxy A70.

Video on how to download Good Lock 2019 on Galaxy A70

Conclusion

That’s all. I hope you guys found this guide useful. The Good Lock 2019 can change the entire look of your Galaxy A70. My personal favorite plugins of the Good Lock app are the Sound Assistant, Nice Shot, and the Task Changer. Sound Assistant gives you extended control over the sounds of your phone while the Task Changer has a handful of designs for the recent apps menu. Nice Shot is a really great replacement of all those third-party screen recorders. It will let you choose what sound you want to record over a screen recording of yours.

If you have any queries or questions related to the Good Lock 2019, feel free to reach out to us. We would love to hear your feedback too. Stay connected!


More: How to install Samsung Good Lock on Phones running Android Oreo

How to fix Galaxy S10/S10 Plus poor battery life

How to fix Galaxy S10/S10 Plus poor battery life
Picture Source:AndroidCentral

At its launch, Galaxy S10 and S10+ were two of the best smartphones in market. Both of them offer fairly large battery packs, 3,400mAh and 4,100 mAh. In theory, both of these phones should at least last a day with medium to heavy use. However, a lot of people experience poor battery life on Galaxy S10 and Galaxy S10+. The main culprit for is not hardware but the software. Samsung’s TouchWiz was notorious for excessive bloatware sucking up battery and speed. Things are now changed with One UI but you still get glimpses of past with this OS.

What’s ideal battery life on S10 and S10+?

The screenshot below shows what a good day on single charge looks like. Following example from a Galaxy S10 and it’s completely opposite of bad or poor battery life. The screen-on time is over 6 hours with almost 24Hrs on a single charge. It involves using social media, chatting, camera, music, calls and other basic tasks.

Galaxy S10 battery life

This is a great example of what we want to achieve. Therefore, lets follow the simple steps that make this phone’s battery life great, to fix poor battery life on your S10 and S10 Plus.

How to fix poor battery life on S10 & S10 Plus

Before continuing to read this guide, note that there is no hard’n fast rule for fixing bad battery life on these phones. It is a very vague issue and solution may vary from one person to another. Below are the most general guidelines on how to fix these issues and get the most out of your phone’s battery juice.

Follow the steps below to fix poor battery life on Galaxy S10 and S10 Plus.

Use Dark Mode / Dark Theme.

If you notice the screenshot above, that phone is on default dark theme. It can make impactful difference to overall battery life since dark theme consumes less power for screen-on time.

Delete unnecessary Apps.

Some people love to test out new apps. However, they forget to delete those apps afterwards. More the apps, more the load in background. Therefore, if there are any unused apps in your phone, uninstall those.

Turn on Adaptive Battery in Settings.

One of my favorite features in Android Pie is adaptive battery. It is working pretty great on modern devices. In contrast to popular opinion, you don’t really miss notifications. However, turning this feature on makes huge difference to battery life especially when using specific apps in foreground for long times.

Don’t keep WiFi and Data turned on at same time. Disable smart switch.

Staying connected to internet all the time is very important for some people. Android offers a feature called Smart Switch for network. This allows phone to switch between Data and WiFi seamlessly. However, it also accounts for lot of battery life since both bands are active at same time.

Use Adaptive / Auto Brightness controls.

The screens on both of these phones great really bright! These are the two best smartphone screens out there. However, this comes at a huge price. Screen consumes most of the battery juice. Therefore, either tune it down or just turn on auto controls.

Always charge phone over 90% and don’t use Power banks frequently.

I know this may come as a surprise for many. However, I’ve observed that in order to maintain a healthy battery, you need to adopt some healthy charging habits too. Charging your phone over 90% and never let it go below 5%. Secondly, don’t use power banks to charge phone on daily basis. It seriously destroys the battery.

Keep ‘useless’ quick settings turned off (NFC, Bluetooth, Location etc).

If you pull down notifications menu, there are quite a few quick settings icons. Now, some of these are necessary while others are there for specific purposes only. If you turn on NFC for example and forget to turn it off, it may consume battery life. Similarly, location services, idle bluetooth, idle WiFi and other settings like this contribute to poor S10/S10+ battery life.

Clear cache from recovery.

If the battery life is getting really annoying and none of the regular fixes can make it work, then try some advanced methods. It is possible that some part of software or app is corrupted. Therefore, clear the cache storage from either stock or custom recovery. It basically resets the data for all installed apps.

What if none of these tips work?

The above mentioned tips should work for majority of users. However, there are still going to be odd cases where nothing seems to works and battery life is constantly bad. Clearing cache does not fix the battery life or any of the other steps. While we recommend still following those, here are some additional and advanced options for fixing battery drain issues on S10 or S10 Plus.

Factory Reset

A complete factory reset wipes everything from the phone. It includes all stored settings, apps and data (photos, music etc). This restores the phone back to its factory configuration. In this environment, the phone should work at its fastest and perform with max battery life. There is nothing but Samsung’s own software. Follow this guide:

How to factory or hard reset Galaxy S10 and S10 Plus – GUIDE

Install only few necessary apps afterwards and test the battery life for one full day. If the battery drain issue is now fixed, then install your apps one by one. Do not convert it back to its old self at once. It is possible that one of the user-installed apps was using too much of processing in background. Keep testing the apps and then battery life. If one of the apps was the issue, then it should be fixed now. 

Battery Calibration

The battery pack on phone and software may sometimes be not on the same page. The numbers and actual battery life may vary. This causes the phone to turn off suddenly at, lets say 15% battery. Or the battery is normal and it starts draining faster after certain number.

In such a case, try battery calibration on S10 or S10 Plus using the guide below.

  • Dial *#0228# on your phone.
  • It is the BatteryStatus window.
  • Tap on Quick Start and press OK in next pop up.
  • Restart the phone after it’s completed. 
  • Now drain your phone back to 0% and then let it charge while turned off to 100%. (VERY IMPORTANT).
  • That’s pretty much it. It worked on a lot of devices and ROMs for us!

How to clear cache on S10/S10 Plus to fix poor battery life

This step is mentioned in the main tips section. However, for those who don’t know how to clear cache, follow the steps in guide below.

How to clear cache of Galaxy S10 and S10 Plus – GUIDE

It helps reset all the apps to basic state. If there was any problem in any of the apps’ cache, it should now be gone. Moreover, it is rebuilt as soon as the phone restarts. Therefore, you don’t lose speed. It does not wipe the user data either.

Re-install/Update firmware to fix battery drain issue on S10 or S10 Plus

If you’ve tried both factory resetting and clearing cache, but the phone’s battery life is still bad, then there is just one thing left to do. Either re-install the current firmware or update it to a newer version (if available). Follow the guide below:

How to install stock firmware on Galaxy S10 or S10 Plus – GUIDE

Hardware Issues

If none of the above mentioned methods work and your phone is behaving abnormally i.e. S10 battery drains fast or suddenly. Then try contacting Samsung support and ask for a replacement. None of the above fixes will work if battery isn’t in correct condition.

Conclusion

When someone gets one of these phones, they expect best of the best in terms of performance, battery life and camera. Although there is absolutely no doubt about performance and camera, battery life may be hit and miss for certain people. It could be due to number of reasons. We have summed up all possible reasons for poor battery life on both S10 and S10+. Follow these guidelines and let us know how it improved for you.

Drop your queries and feedback in comments below

Download Redmi K20 Pro Stock Wallpapers

0
Download Redmi K20 Pro Stock Wallpapers
The Redmi K20 and K20 Pro

Xiaomi’s flagship killer Redmi K20 Pro is out now. Redmi K20 Pro is the elder sibling of the Redmi K20. Both phones have incredible displays. To highlight the color accuracy and vibrancy of these screens, Redmi has added 5 beautiful wallpapers. The stock wallpapers of Redmi K20 Pro and K20 are available here. You can download the Redmi K20 Pro stock wallpapers from below. The Redmi K20 Pro stock wallpapers can be applied to any Android phone or iPhone. Let me give you an idea of the new Xiaomi Redmi phones before you take a look at their stock wallpapers.

Redmi K20 Pro

The Redmi K20 Pro is what Xiaomi is calling its flagship killer. This handset comes in with a screen of 6.39-inches. This is a Super AMOLED panel with a resolution of 1080 x 2340 pixels. There is now a punch hole or notch on this phone. It’s an all-screen device with dimensions of 156.7 x 74.3 x 8.8 mm. The weight of this device is 191 g. Xiaomi has protected the front with Corning Gorilla Glass 5.

Redmi K20 Pro Stock Wallpapers
The Redmi K20 and K20 Pro

The Redmi K20 Pro is equipped with Qualcomm Snapdragon 855 CPU and Adreno 640 GPU. It has a RAM of 6 or 8GB with an internal storage of 128 or 256GB. This handset has 3 cameras at the back. It has the main 48MP camera, 13MP ultrawide camera, and an 8MP telephoto camera. On the front, it’s got a 20MP pop-up camera. The Redmi K20 Pro has a 4000 mAh battery inside. It uses 22w fast charging. It also has an under-display fingerprint scanner. The Redmi K20 Pro runs on Android 9 Pie out of the box.

Redmi K20

If you are thinking that the Redmi K20 is like a typical younger sibling of a phone, you may be wrong. Usually, a lower variant of the flagship device compromises on the display, it also compromises on the battery, camera, and power of course. The Redmi K20, however, compromises only on the display technology, CPU/GPU, and charging technology. It uses an AMOLED display instead of Super AMOLED. It’s got a Qualcomm Snapdragon 730 alongside the Adreno 618 GPU. The K20 supports 18W charging instead of 27W. These are the only few changes in this handset. Rest of the specifications, dimensions, camera, software, everything is similar to the K20 Pro.Redmi K20/K20 Pro

Both the Redmi K20 and K20 Pro share the same stock wallpapers. You can find them below now.

Redmi K20 Pro Stock Wallpapers

There are 5 wallpapers in these phones in total. All wallpapers carry a resolution of 2340 x 1080 pixels. The Redmi K20 and K20 Pro wallpapers are a perfect phone for all phones with HD resolution or even QHD+ resolution.

To download the wallpaper, right click on your desired image > save image as. To download on your phone, long-press the image > Download image.

I have also added an all-in-one file below. You can download it to get all stock wallpapers of Redmi K20 at once.

All Redmi K20/Pro Stock Wallpapers – Download

Explore more stock wallpapers on our site.


Download Honor 20 Pro Stock Wallpapers

0
Download Honor 20 Pro Stock Wallpapers
The Honor 20 Pro

Honor 20 Pro is one of the most beautiful smartphones by the Chinese company. The phone comes with a punch hole display which makes its display standout. Honor has added 3 stunning wallpapers to highlight the beauty of the Honor 20 Pro’s screen. Fortunately, all three wallpapers have made their way to the web. This means that if you are a fan of stock wallpapers of other Android phones, you can get the Honor 20 Pro’s right now. From here you can download all Honor 20 Pro stock wallpapers. The Honor 20 Pro stock wallpapers can be applied to any Android phone. You can also apply these wallpapers to an iPhone.

honor 20 pro stock wallpapers
The Honor 20 Pro

Before you download the stock wallpapers of Huawei Honor 20 Pro, it’s important to learn about the internals and externals of this device.

Honor 20 Pro

Honor 20 Pro brings a glass sandwich design. The glass sandwich body has dimensions of 154.6 x 74 x 8.4 mm. This device weighs at 182 g. It has a 6.2-inch IPS LCD display. The resolution is 2340 1080 pixels. Since it has a punch hole camera on the front, its aspect ratio is 19.5:9.

The Honor 20 Pro used Huawei’s HiSilicon Kirin 980 chipset to live on. This CPU is coupled with the Mali-G76 MP10 GPU. There is a RAM of 8GB in this handset and it has an internal storage of 256GB. There is no microSD card slot or the nano card slot in the Honor 20 Pro.

As far as the cameras are concerned, the Honor 20 Pro has 4 of them at the back. The main shooter is of 48MP with f/1.4. After this, there is a 16MP ultrawide shooter with f/2.2. The third one is an 8MP telephoto shooter with 3x optical zoom. The 4th one is a 2MP dedicated macro camera. If you are a fan of shooting objects from the shortest possible distance, the macro lens is going to be your greatest companion.

Honor 20 Pro comes with a 4000 mAh inside. This battery can be charged with the help of a 22W fast charger. It uses USB Type-C for connection and charging. It has a side-mounted fingerprint scanner, which is a downside as most of the phones these days are coming with under display scanners.

That’s all about the Honor 20 Pro. Let’s get back to its wallpapers now.

Download Honor 20 Pro Stock Wallpapers

The Honor 20 Pro has 3 stock wallpapers in total. All these wallpapers have a resolution of 2340 x 1080P. These wallpapers can be used on any handset with a similar or a higher resolution.

To download the wallpapers, right-click on your desired image > save image as. To download these on your phone, long-press the wallpaper and then click on Download image.

Explore more stock wallpapers on our site.

Download Frostborn for PC on Windows & Mac

Download Frostborn for PC on Windows & Mac
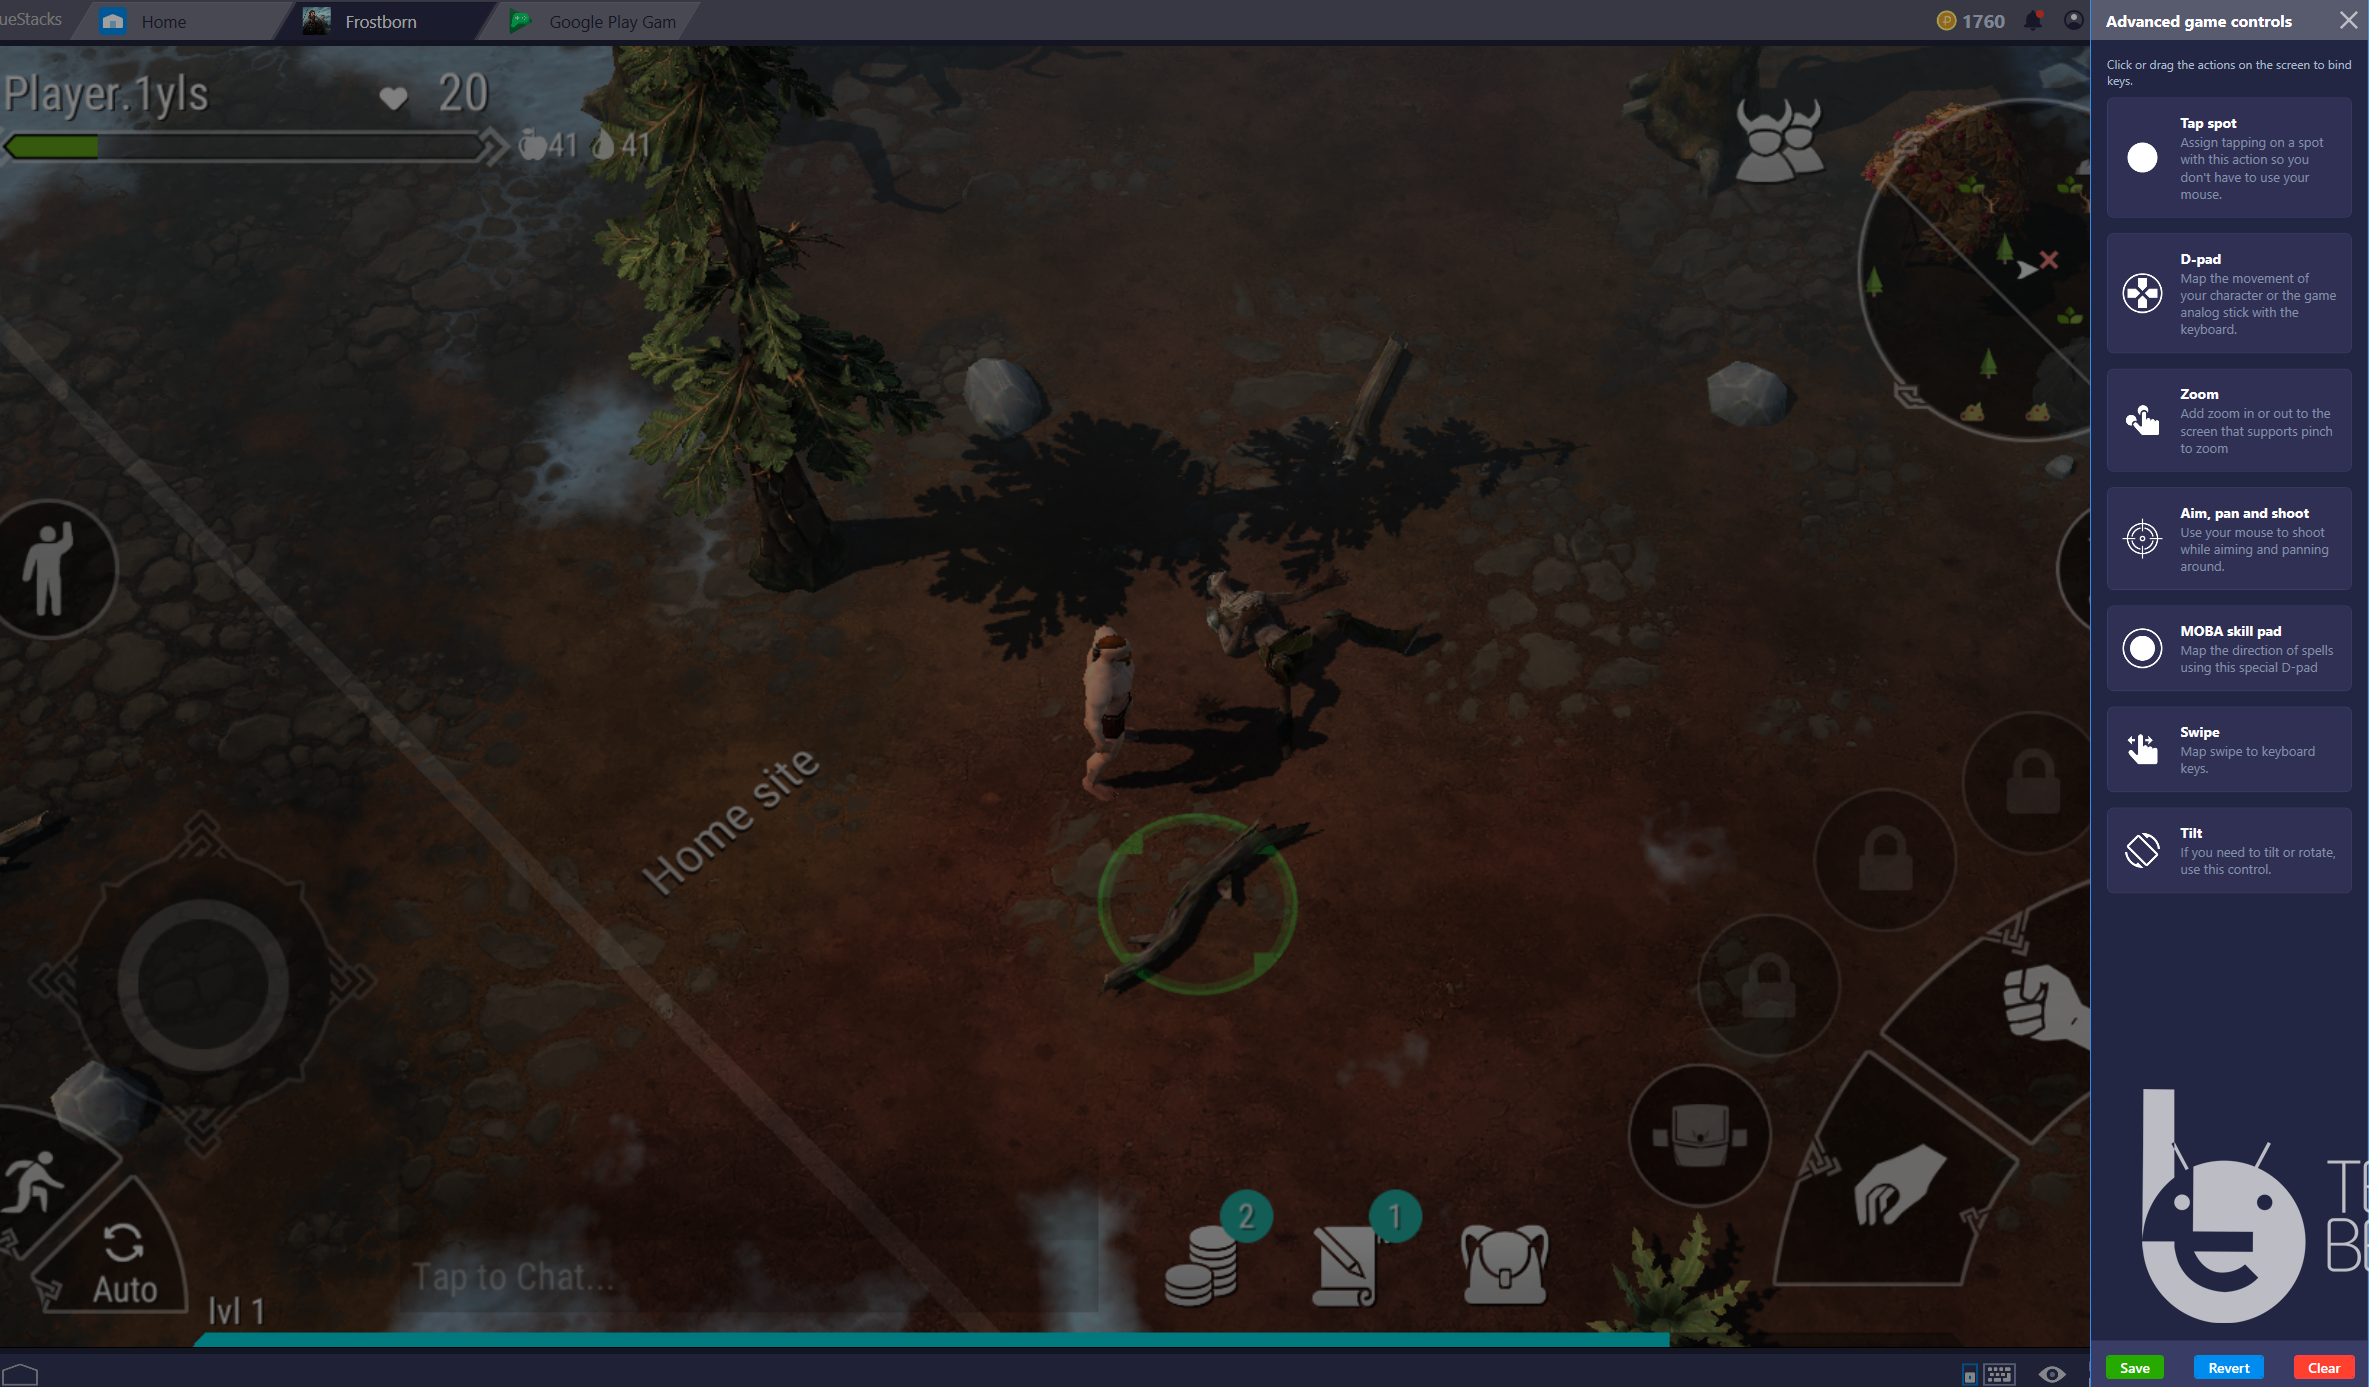
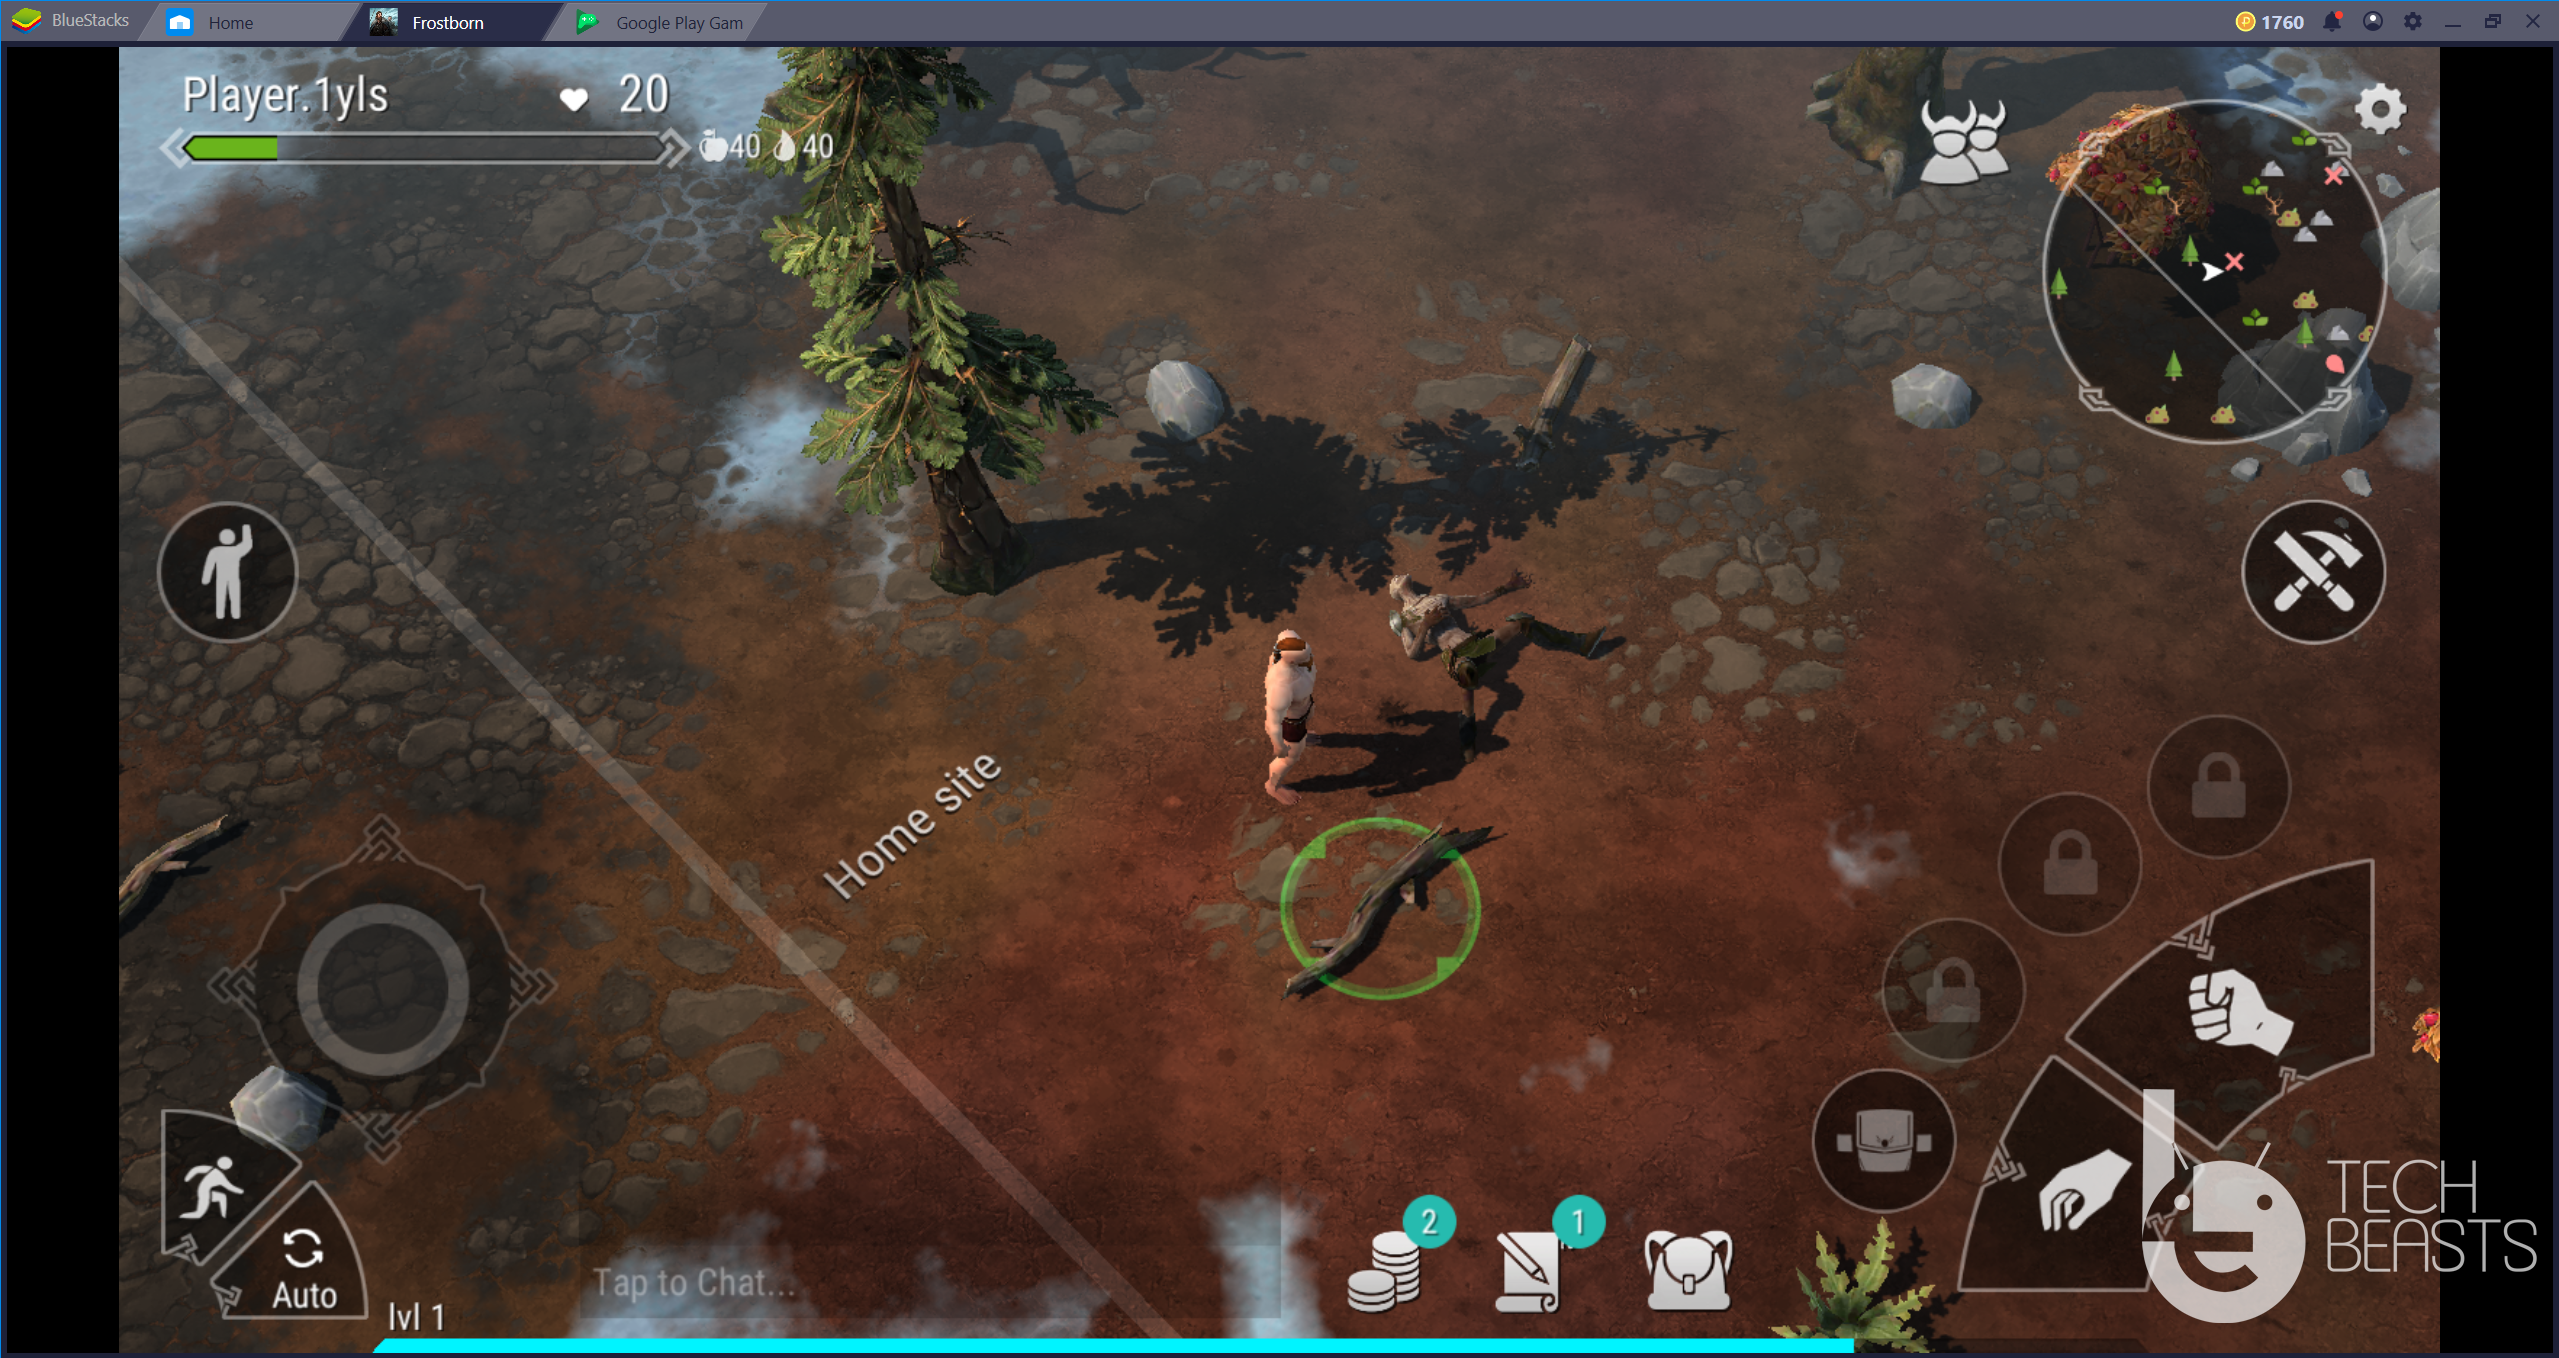
Playing Frostborn on BlueStacks 4 - Windows 10

This is your ultimate guide to download Frostborn for PC. You can install Frostborn for PC on Windows and Mac. This will work on Windows 10, Windows 7/8/8.1, and Mac-powered computers. Before downloading Frostborn for PC, learn a little bit about this game.

Frostborn for PC
Playing Frostborn on BlueStacks 4 – Windows 10

Frostborn, the latest RPG by the makers of Last Day on Earth is here. Just like the LDOE, this game will also take you on an adventure. This adventure is going to take place in a beautiful world. Frostborn is reminiscent of the LDOE, but this game has its emphasis on the multiplayer mode. Right when the games start, it prompts the players to make friends in the game. We all know that the multiplayer mode in LDOE was not up to the mark, and the developers did say that they are working on a game with real-time multiplayer mode. I guess, they were hinting towards Frostborn, which keeps telling you about its multiplayer mode at every single turn in the game. Frostborn presents the plot of LDOE in a polished form. If you didn’t like the previous action-packed RPG for some reason, then this is the game that you are definitely going to love.

Frostborn – Storyline

Frostborn is set in the world of ancient Scandinavia. After the players have set their feet, they will enter the gate opened by Hel, who is the goddess of death. Hel was sent to Helheim by Odin, who was the very first ruler of Frostborn. Hel couldn’t make it to Helheim, so she decided to create a rift between the world of Gods and the world of Humans. Through the clashes between Gods and Humans, Hel is trying to gain the maximum possible benefits.

Now to restore the grace of Odin, Vikings are summoned to tackle Hel. Since you are going be one of the Vikings, the responsibility is all set to fall in your shoulders. On your journey, you will go through sanctums of Thor and Odin, you will face the Cursed Forests, Sacred Trees, and Winter’s Gate. This is where you will learn to cast magic spells as well. The game is full of wicket places which is why you must master your magic. All these locations are full of your enemies, there are some players who will be the daredevils for you. You must be equipped with your best weapons to accomplish your goals.

So, have you got what it takes to be worthy of Odin’s Hall? Test your mettle in Frostborn. Prove it to the world that you are the best Viking.

Gameplay

The game starts with the players all alone on a piece of land with some trees, an unfinished house, and some collectibles. Players have to start gathering resources to build a home. The very first place is where they will build a base. Players can invite their friends to build the base too or they can join someone else to build their base. Around this base, gamers will find zombies and wolves. They have to kill the zombies and wolves to collect meat, ropes, and skin.

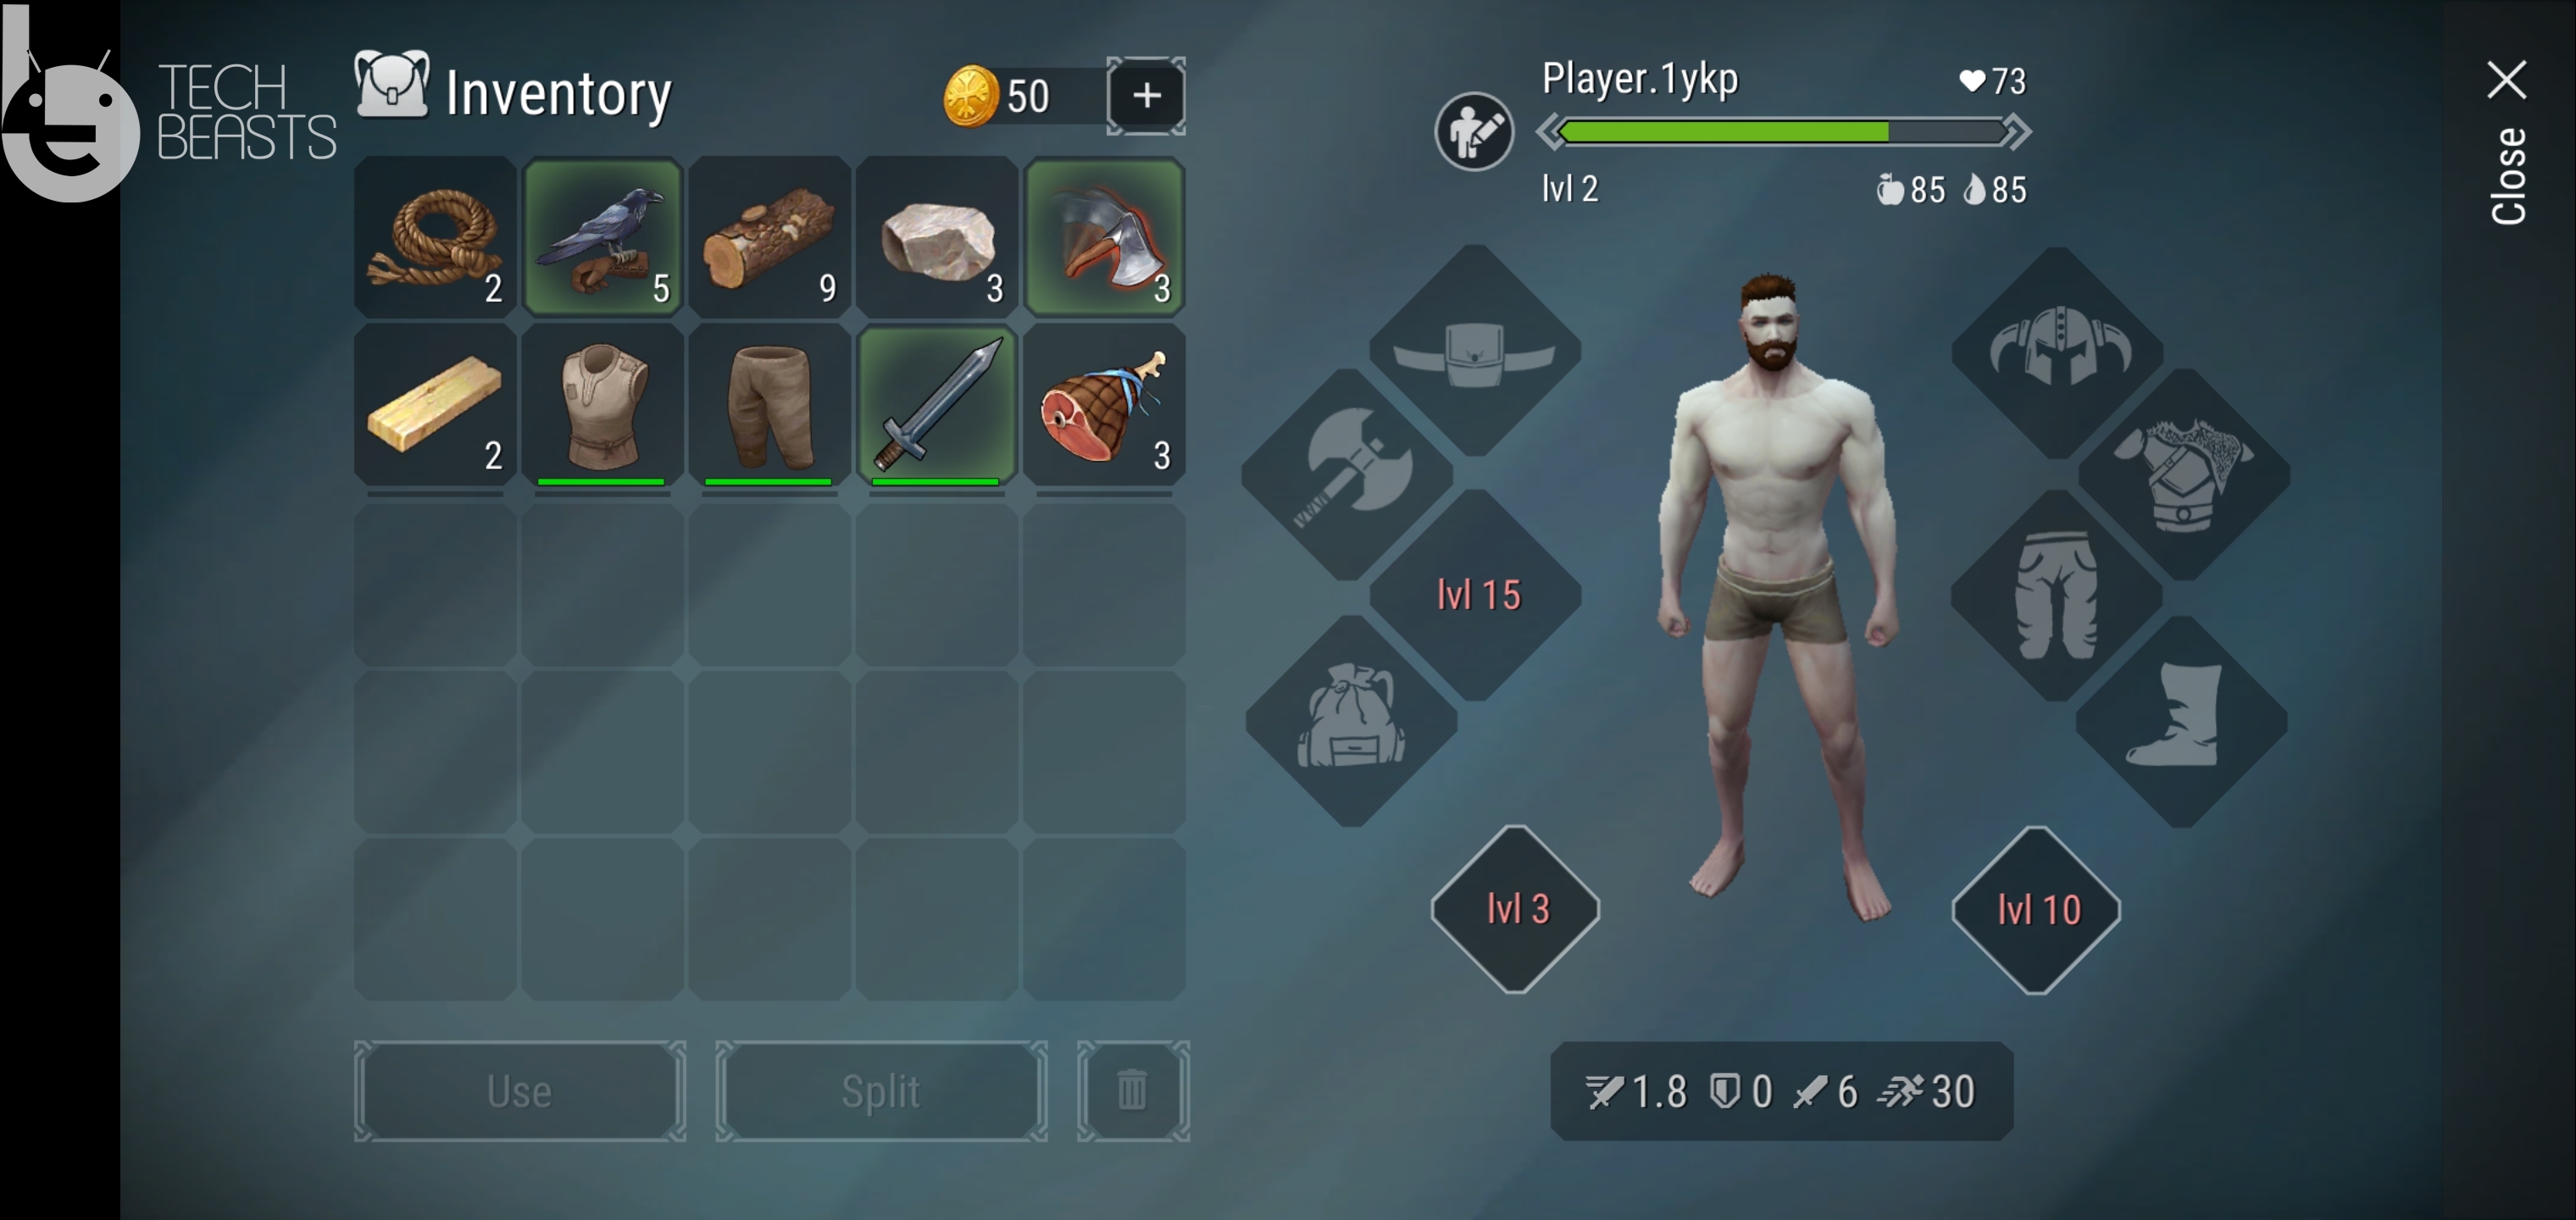
Pluck the fruit off from the trees, chop the trees, and break the rocks to collect material to build something. The inventory can hold 10 items at a time, and these items must be of your use. The very first thing that you would want to do is to build everything that is needed to survive during your adventure.

After this, you will start exploring the enchanting locations. You will meet new people, form a team, and move towards your destiny. You can either create a clan or join one. This game is full of beautiful locations. It is going to take a lot of time to explore them all. The rich-craft system will let you craft anything. Frostborn has the PvP and PvE modes. Up to 4 Players can be a part of one clan at the same time. The graphics and sound effects of this game are one of its-own-kind.

Frostborn comes for free and right now, it is out in a few countries. I have successfully installed Frostborn on my computer and I am going to show you how you can do the same. Follow the simple steps below to download Frostborn for PC.

Download Frostborn for PC

  1. Download and install BlueStacks 4 or Nox Player on your computer.
  2. Set up the emulator using your Google Account.
  3. Now download the Frostborn APK.
  4. Open the Frostborn APK on your computer now.
  5. Frostborn will be installed via BlueStacks 4 or Nox Player now.
  6. Open the emulator and launch Frostborn now.
  7. Set up your character and start your adventure.Frostborn Character Setting
  8. You can set the keyboard controls if you want. That’s all.

Frostborn Keymapping BlueStacks 4

You can find Frostborn in the Google Play Store too.

Video on how to install Frostborn on a computer


Wrap Up

That’s all. I believe that by this time, you have this game running on your computer. Frostborn is primarily built for Android, but the graphics and sound effects of this game are good enough to run it on a computer. I personally found this game to be of console-quality. Playing it on my laptop running Windows 10 was much more fun than my Samsung Galaxy S10 Plus. I had more control over the character. The environment looked cleaner on a bigger screen. The game was impeccable on the PC.

One thing that I would like to mention here is, you don’t really need keymapping for Frostborn. The WASD keys on your keyboard will help you to move your character, while you can use your mouse to smash the enemies or use the Ax. If you want, you can use keymapping to move the screen, the image above will help you to set those controls. If you have any queries or questions regarding this game, feel free to leave them below. I will try my best to get back to you as soon as possible.


Download Frostborn Android APK – Latest 2019

0
Download Frostborn Android APK – Latest 2019
In-game-Frostborn

Frostborn is the latest game by the developers of Last Day on Earth. Here is the latest Frostborn Android APK pulled by us. This Frostborn APK will work on all Android phones in all the countries.

Frostborn Android APK
In-game-Frostborn

Before you download the Frostborn APK, let me give you a brief idea of this game.

Frostborn – What this game is about?

Frostborn is the latest role-playing-game from Kefir, the developers of Last Day on Earth. The action-adventure game promises to give the players a unique RPG experience that they have never had before. The game is set in a beautiful world full of sceneries and dangers at the same time.

Frostborn is actually quite similar to the Last Day on Earth Survival, but the developers have emphasized on the multiplayer mode on Frostborn. When LDOE came out and it didn’t work quite well, the developers did realize that there was a need for the game with a better multiplayer mode. I believe that their game with the best multiplayer integration is Frostborn. This game was under developer for last 2 or 3 years and its finally out in a couple of countries.

Frostborn Gameplay

Frostborn is taking place in the ancient Scandinavia. The goal in this game is to become the greatest Viking of all the time. On your mission to becoming the most powerful Viking, you can join hands with others. This game implements the real multiplayer mode as I mentioned above. Players can form a base where they can invite other players to join them. The cooperative basis will give the players a stronger defense. In the form of groups, players can raid the bases of enemies. They can break into abandoned buildings to find the items to fill in their inventory.

Remember that the very first thing you have to do is to find a Pickaxe and a hatchet. Without these, you will not be able to chop the trees or crush the larger stones. Also, it is better to have the weapons to deal with wolves and zombies. Yes, you can smash the wolfs and zombies too, but it would be better with a weapon. At a time, you can store only 10 items in the inventory, so make sure that you store the items that you need only. Do not save unnecessary items that you cannot use at your current level. Going into your backpack will show you all the items that you can equip at your current level/stage.

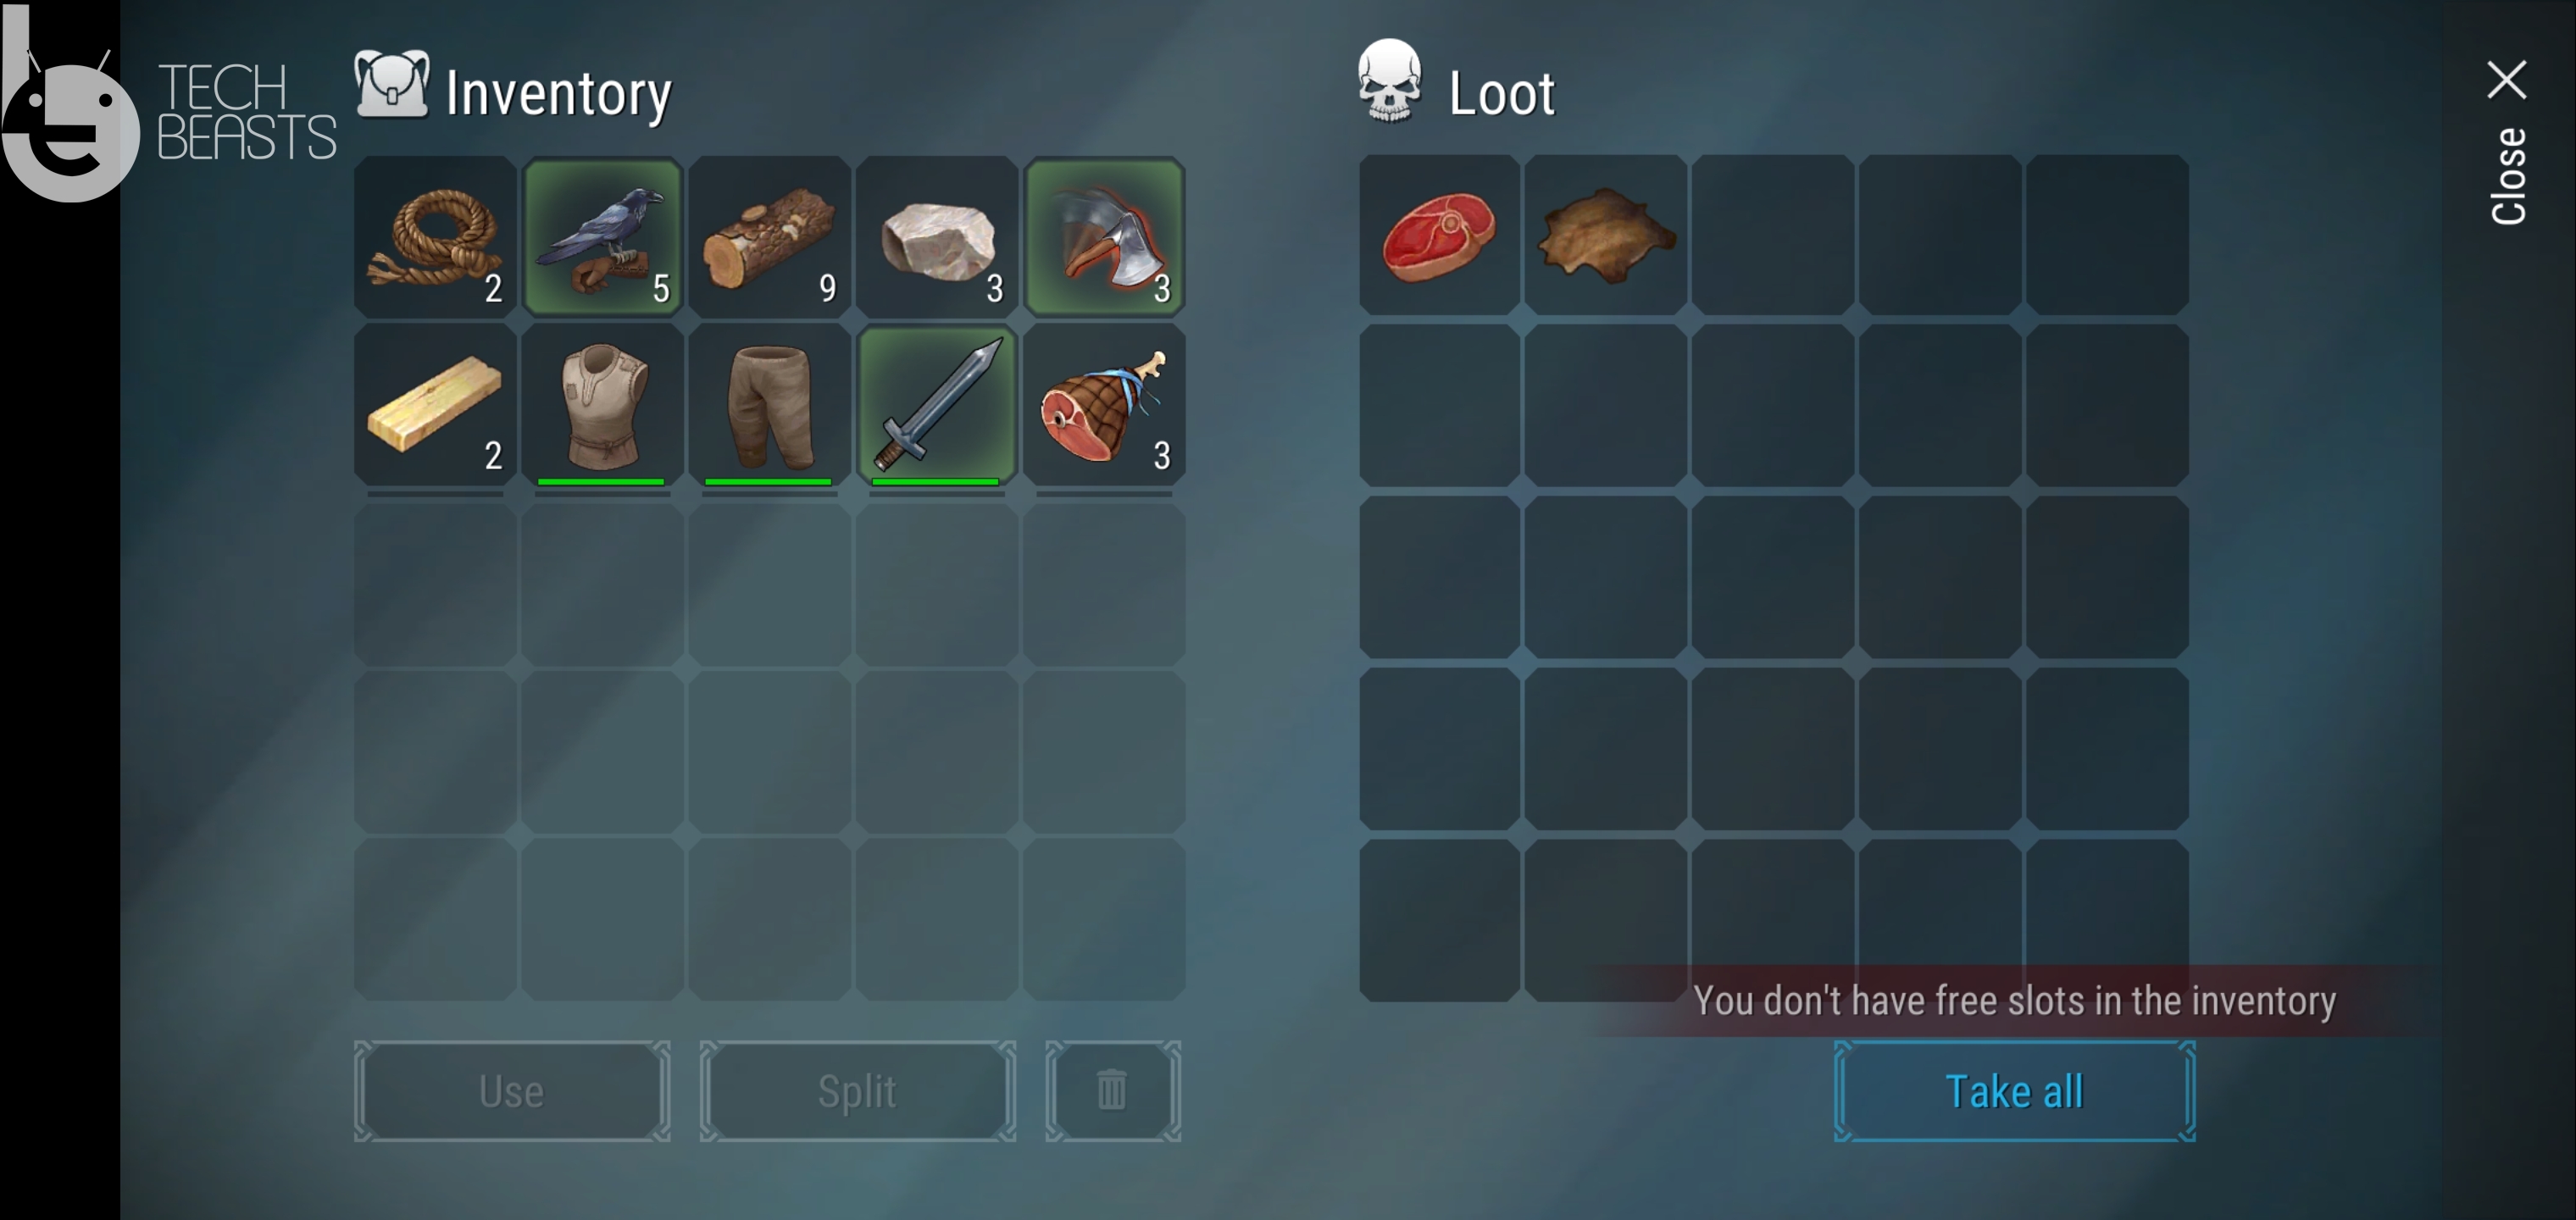
Loot the Wolves, Loot the Zombies, Loot the Enemies

Like the LDOE, players will loot the zombies, animals, and enemies. The meat of wolves can be eaten in the game, and their skin can be used to craft something. Players can also pick up the resources which are spread all over the forest too. These can be really useful resources, but be careful while picking them up. As mentioned above, filling your inventory with useless items is not a good idea either. Gamers will craft their own weapons, own groceries, crockery, and their own vehicles. This game boasts of a handful of locations.

The developers have done justice with the locations in this game by keeping its graphics as good as they could. The atmospheric sound environment is a perfect combination with those HD graphics.

Over the top of all those nice features and with such seamless gameplay, Frostborn comes for free. Frostborn is already out in Canada and a few other countries. The game will soon make its way to other countries.

Download Frostborn Android APK

If you can’t wait for Frostborn to make it to your country officially, you can install it right now too. That can be done by getting its APK. Before making this guide, I did try a number of Frostborn APKs and they all failed to work. The Frostborn APK gave me the “New version available” error. Upon trying to update to the new version, you will see that the game is not available in the Play Store and that’s it. So, you do need an APK that will work, and we have that. I personally extracted the latest Frostborn APK from the Play Store. Frostborn was updated on May 28th, and the APK linked here is of the 28th May update. It will not give you any errors. You can install this on any Android handset running on Android 4.1 or higher.

  1. Frostborn APK – Download
  2. Copy Frostborn Android APK to your phone.
  3. Using a File Manager, open the APK and install it.
  4. Now open Frostborn from the drawer.
  5. Connect with the Play Games and choose your character.
  6. Your adventure starts now. Best of luck.

You can find Frostborn in the Play Store here.

Wrap Up

That’s all. I hope that by now, you have Frostborn running on your Android handset. The APK given above is completely safe and sound. If you don’t want to use the APK, you will have to use a VPN to connect to Canada. After that, you will make a new Google Account from Canada, open the Play Store with that account and then install this game. Since this is a very long method, I’d recommend going with the APK. If you have anything to say, feel free to drop it in the comments section below. I will try my best to get back to you as soon as possible.

Check Amazon Gift Card Balance Without Redeeming It

0
Check Amazon Gift Card Balance Without Redeeming It

With the help of this guide, you will be able to check Amazon Gift Card Balance Without Redeeming It. I mean this helps in so many ways, you will know which product you can purchase, the total amount of the Amazon Gift Card. You can easily manage your budget and buy gifts from Amazon.

Those who don’t know about Amazon Gift cards, let me give you an overview. It’s the best Gift you can give to anyone, basically, it is a redeem gift card with a balance. While you are shopping on Amazon, you can use the Amazon Gift Card to pay. But since it is a gift card so no one knows how you can they got, unless they redeem it in their Amazon Account.


However, today we will tell you to check Check Amazon Gift Card Balance Without Redeeming. You can also say, how to check an Amazon gift card balance without adding it to the account. Just add some details, you can use Amazon gift cards to purchase anything from Amazon. But If the total amount is exceeded from your gift card balance then you have to pay the remaining balance using your credit or debit card.

Try: 4 Best Amazon Price Tracker Tools

So without any further ado, let’s jump right in and tell you how to check Amazon Balance.

Check Amazon Gift Card Balance Without Redeeming It:

Follow the instructions provided below and you will find the balance of your Amazon Gift Card. This will make things easier for you and then you will know what you can afford.

Check Amazon Gift Card Balance:

  • Open your Browser and then open the official Amazon website.
  • Now you need to sign in with your Amazon account, click on Sign in button.
  • Provide your login details. If you don’t have an Amazon account, I would suggest you should make one.
  • Once you are logged in, head over to the Account setting page.
  • Look for Gift cards option to view balance. Click on Redeem a Gift Card
  • Here you have to provide your claim code. Now when you enter your claim code, you will get two options. “Check” and “Apply to your balance”.
  • Proceed with the check option to find the balance of your Amazon Gift Card without redeeming it.

Read more: Delete Order History On Amazon Permanently

IF you are still confused, Kindly follow the Instructions provided in the video below. A complete Video tutorial.

Checking Amazon Balance without Redeeming [ Video ]

Final Words:

This is how you can check your Amazon Balance with ease. Please do tell us how was your experience and if this guide was helpful. Kindly Share it with your friends and Families.

How to enable Tab Groups on Chrome Android

0
How to enable Tab Groups on Chrome Android

Chrome is one of the most used apps on any Android phone out there. It is simply one of the best browsers with tons of cool features. The highlight feature is how quickly everything syncs across multiple devices. However, this guide is about enabling tab groups on Chrome Android. It was a work in progress finally it is stable to use. This new feature completely revamps the ‘opened tabs’ interface with a certain addition. 

Also Read: Guide to enable Dark Mode in Chrome Android Browser

Myself included, people love to keep tabs open on their Chrome on phones. Just to keep information or pages in system until next time they use it. Therefore, the addition of Chrome tab groups on Android makes everything a lot easier. Instead of keeping all tabs in just one unordered array, we can now add tabs to certain groups and keep them separate from main interface. Use the tabs whenever needed. Moreover, create as many groups as you’d like.

Guide to enable Tab Groups on Chrome Android Browser

This feature was actually available long ago. However, until the latest update, it was unpolished and often buggy. A lot of unnecessary features are now gone and some needed ones are added. The current interface looks fantastic. It seems more organizable and aesthetically appealing. People who love to organize their stuff are going to absolutely love it!

Follow the simple steps below to enable tab groups on Chrome Android browser. Before continuing, make sure that your app is updated to latest version available on Play Store. Otherwise, it may not work. 

This will also change the layout for opened tabs interface. Therefore, if for some reason, you don’t like it, just disable it.

Follow these steps to enable Tab Groups on Chrome Android browser.

Total Time: 1 minute

Open Chrome on your Android device.

Make sure that it is running on latest Play Store version.

Open a new tab by tapping on plus sign in top bar.

We need to open flags page in new tab.

Enter “Chrome://flags” in address bar and press enter on keyboard.

This is a hidden page with all experimental features for Chrome.

Type “#enable-tab-groups” in search bar.

It will show up the Tab Groups feature with #enable-tab-groups under it.
Change its status from default to “Enabled”.

Just tap on the button with default written on it and change it to Enabled.

Once done, close the Chrome browser from Recent Apps menu and then launch it again.

The normal relaunch button does not seem to work for some reason.

In order to make a new tab group, just long press on a link or quick icon and tap on “Open in new tab in group”.

It will create a new group with one empty tab and other with the URL you just opened.

Alternatively, open a page, swipe down from address bar and then tap on “Create group” button on its thumbnail.

This is the alternative method to do so.

That’s it! You’ve done it! Groups tabs are now available in your Chrome browser.

Conclusion

With increasing demand and overall growing competition, it is no secret that devs behind these apps are constantly working to make them better, secure and more usable. Therefore, the group tabs is just another addition that we think is really useful. The changed opened tabs interface also looks very cool. Now we can actually see the mini version of opened tabs even inside group thumbnail.

Got any questions? Lets us know in the comments below