Home Blog Page 65

Update Galaxy Note 8 to Android Pie Official Firmware

0
Update Galaxy Note 8 to Android Pie Official Firmware
Update Galaxy Note 8 to Android Pie

The South Korean giant has finally updated the Galaxy Note 8 to Android 9 Pie. Galaxy Note 8 was continuously receiving the beta Android 9 Pie updates for quite a while. Samsung released the final Android 9 Pie update just today. The update hit only two regions in the first phase. At the moment, this update is available in Bulgaria and Slovakia regions. Those of you who can’t wait for the OTA update to hit their region, they can update the Note 8 manually. Galaxy Note 8 owners can find the steps to update Galaxy Note 8 to Android Pie in this guide. We will flash the Android Pie N950FXXU5DSB2 firmware on the phone. Bear with us for a while in order to install Android Pie on Galaxy Note 8.

Update Galaxy Note 8 to Android Pie

Android Pie for Galaxy Note 8

A couple of months back, Samsung started testing the Android Pie update on the Galaxy Note 8. Till date, Samsung released 4 beta versions of the Android Pie. After going through extensive testing, the company finally came up with the final version. This is indeed a great news for the Galaxy Note 8 owners since they have been running Android Oreo for over a year.

Galaxy Note 8 was initially released with the Android Nougat on-board. The phone was updated to Android Oreo later on. As you all know, Samsung is slower than a turtle when it comes to updating its smartphones, the wait frustrated so many Galaxy Note 8 owners. Now that the update is finally here, we would like to tell you that it is actually worth the wait. Here is what’s new in this update.

First of all, Samsung has said Goodbye to its old Samsung Experience UI. The phone now uses the latest Samsung One UI. This UI is inspired by the stock Android Pie UI. The icons are rounded now. The elements on the screen are all rounded. There are new icons in the notifications panel, status bar of the phone is new. Samsung has introduced navigation gestures as well. Settings application along with some other applications has got an overhaul. Samsung has also introduced a new Night Mode which is basically the dark mode. Adaptive battery mode is also a part of this update.
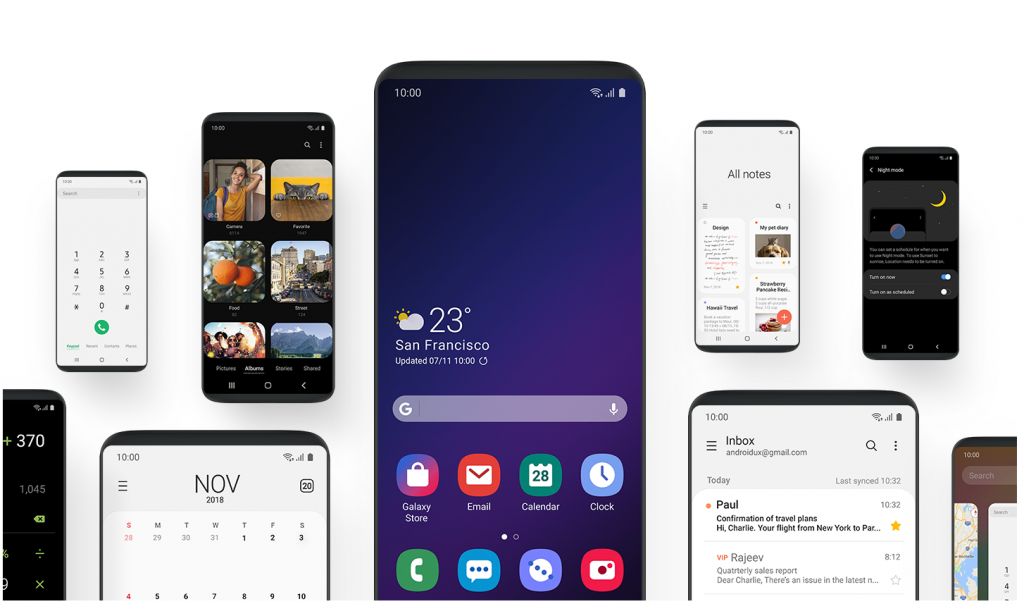
Samsung One UI for Note 8

Galaxy Note 8 has got a battery and performance boost in this update. Samsung has fixed all previous bugs. This is a stable update with the latest security patch. Whether you were waiting for this update or not, you must update the phone now to avoid any issues on an older firmware.

That is all about the Android Pie update. It’s time to get back to downloading Android Pie on Galaxy Note 8. Follow the steps coming ahead to install the stock Android Pie ROM on your Note 8 right away.

Galaxy Note 8 Android 9 Pie Firmware

Before installing the firmware, there are some important details you need to have an idea about.

The firmware we are going to install belongs to the Bulgarian and Slovakian regions. This firmware is rolled out for the Galaxy Note 8 N950F and N950FD. If you live outside those two regions, and you cannot wait for the update to officially make it to your region, you can flash this very firmware manually.

Manually updating your phone requires using Odin. The process is extremely simple as you will find it below. Galaxy Note 8 owners must keep in mind that flashing the firmware of another region does not cause any harm at all. All you need to do is to make sure that you are flashing it on the compatible device i.e. N950F or N950FD. As long you do not flash the firmware of N950F/FD on another model, everything is going to be fine.

After flashing this stock ROM, you will continue getting the OTA updates too. This firmware will not void the warranty of your phone either. Before trying to flash the firmware manually, you must check for OTA updates on your phone. To do so, you can go to Settings > About phone > Software > Check for updates. If there is an official Android Pie OTA available, you can install that, otherwise, you have this guide. Take a look the firmware details below.

Android Pie for Note 8 Firmware Details

  • Firmware: Android 9 Pie
  • Changelist: 15325116
  • Build Date: 08 Feb 2019
  • PDA: N950FXXU5DSB2
  • CSC: N950FOXM5DSB2
  • Device: N950F & N950FD
  • Regions available on our site: BGL & ORX

Preparations to install stock Android Pie on Note 8

  • Ensure that your phone’s model number is N950F or N950FD. Do not flash on any other phone.
  • You can update any Note 8 running on Android Pie Beta, Android Oreo, or Android Nougat to Android Pie.
  • Charge your phone up to 50% to avoid power issues during installation.
  • Backup your contacts, call logs, text messages, and media content.
  • Enable OEM Unlocking and USB Debugging on your Note 8.
  • Use OEM Data Cable to connect Note 8 to the computer.
  • Disable Windows Firewall, Antivirus, and Samsung Smart Switch if you have any of these.
  • This process has been explained in laymen terms. If you follow the instructions carefully, nothing will go wrong. Go ahead and pay attention to the procedure now.

Require Downloads

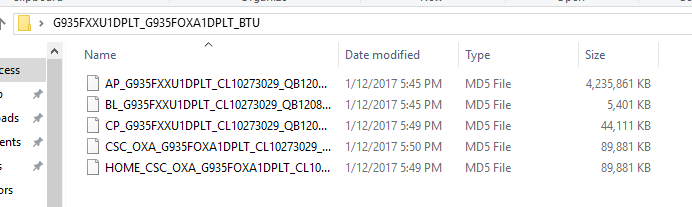
Android Pie firmware files
Android Pie firmware files after extraction – Image used for Reference only.

Update Galaxy Note 8 to Android Pie

These are the steps to install Android Pie official firmware/ROM on Galaxy Note 8 N950F or N950FD.

  1. Open Odin 3.13.1 and add the AP, CP, BL, CSC or HOME_CSC files.

    First of all, open Odin 3.13.1.exe from the extracted Odin files. In Odin, click on the AP tab on the right side and load the AP file. Now load the CP file in the CP tab. Similarly, add the BL file in the BL tab. Lastly, if you want to factory reset your phone, load the CSC file in the CSC tab, load the Home_CSC file otherwise.

  2. F.Reset.Time & Auto Reboot options in Odin should be checked.

    Go to the Options tab in Odin. The only options checked should be F.Reset.Time and Auto Reboot. If there is any other option checked, uncheck it.

  3. Boot Galaxy Note 8 in Download Mode.

    Power down your Note 8 now. Press and hold Volume Down + Bixby + Home button to boot into the Download Mode. As your phone goes into Download Mode, press Volume Up to continue.

  4. Connect Note 8 to the computer now.

    Connect your Note 8 to the PC now. Odin will show a Blue light in the ID:COM box. It will also show “Added” in the logs appearing on the left side. This means your phone is successfully connected in the download mode.

  5. Click on the Start button in Odin. Finish installation.

    Now you are all set. Click on the Start button in Odin. It will start flashing the firmware. This process can take 5 – 10 minutes. As soon as installation ends, your phone will reboot. Disconnect the phone and enjoy the all new Android Pie running on it.

Galaxy Note 8 Android Pie installation
Image used for reference only.

Final Words

That is all about the installation of latest Android 9 on the Galaxy Note 8. I hope you guys found this process extremely simple and easy. If you are facing any problems on your Note 8 after installing Android Pie, feel free to reach out to us. You can contact us via our Contact Us page or through the comments section given below. We will try our best to get back to you as soon as possible.

Download Google Play Store 13.6.20 APK [ Latest ]

0
Download Google Play Store 13.6.20 APK [ Latest ]

Download Google Play Store APK: From here you will be able to download the latest version of Google Play Store. We’re seeing a number of Google Play Store updates in the month of February. Although there is no big update, it’s always better to have the latest version of any app. In this case it Google Play Store, the most essential app of Android eco-system.

Today we are providing you with the latest Google Play Store 13.6.20 APK. why APK? Well if you want to wait for the OTA update, it can take time. Why wait when you can have it this way. As I have told you that it is not a big update. However, this update is out to fix all bugs. You do know, Google Play Store has problems which can be annoying.

Google Play Store APK

Google Play Store:

Google Play Store defines Android. The former Android Market, now known as Google Play Store is responsible for showcasing and allowing you to install all your desired applications from a repository of over 2.2 Million applications.

The Google Play Store hosts paid and free applications categorized into Music, Entertainment, Tools, Productivity, Photography, Games and a lot more.

The number of downloads from the Google Play Store has already crossed a milestone of 50-billion. Recently, the Google Play Store also managed to push Apple’s App Store down the list to grab the number 1 spot having the highest number of applications in it.

Why Update it?

Having Google Play Store up and running in your Android smartphone avoids the need for any third party sources to install applications on your smartphone. To keep running the Google Play Store flawlessly, you always need to have its latest version installed and updated on your Android smartphones.

If the latest version is not installed and for some reason, the update isn’t hitting your device, you may start facing force close errors or the Play Store will simply stop working for you. Another reason to have the Play Store updated all the time is to stay in touch with the most recent changes and experience the enhanced version of the application.

Play Store consistently works on the updates to keep improving the stability of the application and also to prevent any bugs. Installing the latest version is not only good for the sake of enhancements, but it’s also good for the security of your Android smartphone.

Download Google Play Store APK:

You can Download Google Play Store 13.6.20 APK from the following button. Moreover, we’ll be updating this post asap. If you want to get your hands on the latest version of Google Play Store APK. Bookmark this page and keep visiting, whenever a new updates pops-up, you will be the first to get it.

App Info:

Version: 13.6.20-all [0] [PR] 233508395 (81362000)

Package: com.android.vending
Size: 18.1 MB
Requirements: Android 4.1
Updated: February 15, 2019

Google Play Store 13.6.20 APK:

How to Install Google Play Store APK:

In order to Install Google Play Store using APK. You need to follow the instructions provided in the link below. There you will find a detailed guide on how to Install Googe Play Store.

That’s all.

Download Galaxy Note 8 Android Pie Firmware [Official]

0
Download Galaxy Note 8 Android Pie Firmware [Official]

Samsung Galaxy Note 8 has got the Android Pie update today. After getting 4 beta versions of Android Pie, the phone finally gets the final Android Pie. The update has hit the Slovakia and Bulgaria regions first of all. If you are looking for the firmware to flash this update manually, you have landed at the right place. Galaxy Note 8 owners can download Galaxy Note 8 Android Pie firmware from here now. The first firmware carries the build number N950FXXU5DSB2. We have got our hands on the firmware files and we have managed to upload the files on a fast mirror. Before you download Galaxy Note 8 Android Pie ROM, let us take a look at what’s new in this update.Download Galaxy Note 8 Android Pie

Android Pie for Galaxy Note 8

Samsung hasn’t released the official changelog for this update yet, however, based on the features seen in beta versions, here is what’s new in this update. The first and foremost feature is the brand new UI. Samsung has added the new One UI to the Galaxy Note 8 now. The Galaxy Note 8 has got a design overhaul for the launcher, notifications panel, status bar, stock applications like Settings, Calendar, Gallery, and more. The icons are new.

Samsung added the new dark mode, which is named as the Night Mode. The adaptive battery is there to boost the battery life of your phone. Samsung has also enhanced the performance of the device. The Android Pie update for Galaxy Note 8 is a feature-rich update. It has taken a very long time for Samsung to roll out this update for a flagship device of 2018, but as they say, it’s better late than never.

Galaxy Note 8 Android Pie Firmware Details:

  • Firmware: Android 9 Pie
  • Changelist: 15325116
  • Build Date: 08 Feb 2019
  • PDA: N950FXXU5DSB2
  • CSC: N950FOXM5DSB2
  • Device: N950F & N950FD
  • Regions available on our site: BGL & ORX

Download Galaxy Note 8 Android Pie

Here are the download links for the Galaxy Note 8 Android Pie firmware. The only reason for us to upload the firmware here is to provide the users with a fast alternative. There is a number of sources to download this firmware from, but they are extremely slow. Go ahead, download the Galaxy Note 8 Android Pie N950FXXU5DSB2 update and flash it on your phone. Remember you will have to use the Odin tool to flash the Android Pie update.

Note: This Android Pie firmware is compatible with both the N950F and FD models. You can flash it on your Galaxy Note 8 regardless of the region. All you have to take care of is the model number of your phone.

Wrap up

That’s all. I hope you guys found this post useful. If you need any help with the installation of this firmware, or you are facing any issues with the downloads, feel free to reach out to us. Don’t forget to share your experience on the Galaxy Note 8 Android Pie firmware. Stay connected.

How to fix OnePlus 6T battery draining fast

0
How to fix OnePlus 6T battery draining fast

OnePlus is the only brand in world right now that brings out flagship killer devices in half the price or even lesser! OnePlus 6T is the current flagship device. It offers a new type of notch. The water drop notch undoubtedly looks better compared to its predecessor in OP6. Good things aside, OnePlus 6T users are claiming a battery bug. All of a sudden, OnePlus 6T battery started draining faster. The screen on time is cut in half. From a screen time of about 6-8 hours, now users are getting about 4 hours of screen on time (SOT) on OnePlus 6T. This is concerning since all tests and reviews have showed that OnePlus 6T is one of the most lasting phones out there.

Battery pack in OnePlus 6T is 3700mAh. It is a 400mAh improvement over its predecessor. As expected, the battery life got better too. Note that OnePlus devices are generally known for great battery life compared to the likes of Galaxy Note 9. Those flagships constantly underform when it comes to battery despite packing huge batteries. The average screen on time for OnePlus 6T is 6-8 hours. This is actually massive! And contrary to the popular rumors, these numbers just do not die off after few weeks of use. You can get similar battery life for a very long time, given the battery is kept in good condition.

fix OnePlus 6T battery draining fast

Reasons + Fixes for low battery life on OnePlus 6T

Some users claim that their phone starts running low on battery gradually while for others it happens suddenly. If someone is using OnePlus 6T for only few weeks, then the battery life should be perfect. It does not matter if their charging habits are good or not. A new battery pack has this much resistance. On the other hand, as a phone gets older, the battery cells start to die off. Of course, users can adopt certain healthy charging habits to make this life longer. However, the gradual decrease in battery life is pretty imminent.

Below is the list of possible reasons for decreased OnePlus 6T battery life. It covers both new and old phones. Moreover, this issue could be due to either hardware or a software bug. Therefore, make sure to go through all these points and check your device accordingly.

You let the battery go below 10% very often

This is one of key reasons for batteries to go bad. While not many people realize, if you continuously let a phone’s battery go below 10% and charge it only when it’s dead, then battery cells deteriorate.

Note that one should always put phone on charge before it reaches 10%. Moreover, plug it off charging when it is over 90%. Going to 100% is okay too, if someone wants to satisfy their OCD!

Always using Power-banks for charging

This may come off as a surprise to many people. However, I have experimented it myself. If you always charge a phone with power bank, then its battery life reduces drastically. Moreover, the batteries may start behaving abnormally. The percentage may drop 10, 20 or more points instantly.

This is due to the fact that battery is not properly charged with power banks. And this is not true for low quality products only. Make sure that you use power bank with OnePlus 6T only when necessary. Otherwise, the authentic wall charger is best option.

Another important point here is the use of low-power chargers. While there is no solid proof for this, still make sure to use the certified charger and cable. You can see the difference in charging capabilities of chargers by checking time to full charge on lock screen. A DC wall charger with certified power rating keeps the battery at optimal level. OnePlus 6T uses 5V/4A 20W charger. It is a fast charger.

When using the dash charging feature, it is best to leave the phone. Do not use OnePlus 6T while it is charging. It will not only increase the overall charging time but reduce the battery life and on-screen time in long run.

Check background Apps battery usage

One of the most common reasons for suddenly faster battery drain in OnePlus 6T is unmonitored background usage. This could be the culprit if your phone has started behaving all of a sudden. It’s battery was perfectly fine a day ago, and suddenly the screen on time is reduced to half.

In order to check this, go to Settings > Battery > Usage. Here is the list of all apps and their share of battery use. Check this graph when the phone is below 15%. This way, you will get the most refined and accurate data.

The top usage in this list should be screen. Open it and you will get the screen on time. If it is anything below 6 hours, then know that phone is not at its optimal.

Check the usage of other apps. If you do not expect an app to be at a higher position, then it may be consuming battery in background.

Unless someone uses an app for very long time, Netflix, YouTube, Twitch for example, the battery usage for apps is well below 5%. If you do not use an app for this long and it is consuming more battery, their either get rid of it or clear its cache.

Google Play Services battery drain bug in OnePlus 6T

Google’s Play Service controls almost every Google made application / service for Android. It is always active in background. The Google services like Maps and Play Store will not work if Play Service is not working. Therefore, it is more or less active in the background.

It can access device’s location several times a day too. Since it may activate the GPS of phone quite often, if you are not using it, turn it off.

The Google Play Services battery draining bug is pretty old. Even though it is quite rare for it to appear in the wild, it can still happen. Check the battery usage and if Play Services is one of the top users, then your phone is its culprit.

In order to fix fast battery drain in OnePlus 6T due to Google Play Services, follow these steps:

  • Go to Settings > Apps > All.
  • Look for Google Play Services in the list.
  • Inside the Google Play Service’s app menu, click on “Clear cache” and “Clear data”.
  • Once the cache is cleared, simply restart your phone.

Wipe Cache partition of OnePlus 6T

Sometimes it is impossible to pinpoint exact app overusing battery. This is also due to some bugs in the cache partition. This is a temporary storage that stores stuff like preferences, images etc. This helps the apps load faster. However, a corrupted may either slow down OnePlus 6T or reduce battery life. Follow the steps below to wipe cache partition in OnePlus 6T.

How to wipe cache partition in OnePlus 6T to fix battery draining fast.

  1. Turn off phone by pressing power button for few seconds.

    Hold the power button for few seconds until your phone is turned off.

  2. Once phone is off, hold Volume Down and Power keys together until you see OnePlus recovery screen

    Wait for a few seconds after turning OnePlus 6T off. Then hold the volume down + Power keys until OnePlus logo appears.

  3. Navigate to Wipe data and cache tab

    Select English or any other preferred language in fist screen after OnePlus logo. Then tap on “Wipe data and cache”.

  4. Tap on Wipe cache in next screen and confirm it

    In this screen, you’ll see two options for wiping data and cache. Use the Wipe cache option only. Then tap on Yes in next screen.

  5. Restart your phone after wiping cache is complete

    After tapping on yes, you’ll see a progress bar that indicated wiping cache. Once done, click on Restart in next screen.

Final Option: Factory Reset!

The battery issues can pop up sometimes after OnePlus 6T is updated to either a new major OS or just a security patch. These kind of updates rarely mess the phone up. Most techies prefer clean install over OTA update for this plain reason. However, if nothing else is working for you, then head over to settings and factory reset your phone.

Note that you must make a backup of data before performing factory reset. Follow these steps:

  • Head over to Settings > General > Reset.
  • Select the Factory data reset option here.
  • Confirm it and wait for device to restart.
  • Do not start using it right away. Put it on a charge and let it top up first.
  • Once done, start using normally and copy your data back to phone.

Conclusion

Above mentioned is a list of all possible reasons for OnePlus 6T draining battery faster than normal. Note that it is highly possible that in some cases none of these solutions work. That is because of either a hardware issue or a bug in latest OS update. If it is any of these, then above mentioned solutions may be of little help.

Also try putting OnePlus 6T in Airplane mode and check the battery life. It may improve the battery life. This could also point towards another hardware issue. In case of OS bug, either roll back to previous version or just update for an update.

Feel free to leave your feedback and queries in the comments section below.

Remove Bloatware From Xiaomi Device (No Root)

0
Remove Bloatware From Xiaomi Device (No Root)

Own a Xiaomi device, want to remove bloatware from Xiaomi Device? You’ve come to the right place. In this post, we’ll tell you how to Remove Bloatware From Xiaomi Devices without any root. We’ve found pretty simple workarounds to which will let you remove the stock apps or Bloatware from all the Xiaomi devices.

As you all know that Xiaomi is taking over the budget smartphones market. Moreover, we have seen Xiaomi devices have taken over in the Indian and Chinese market. This has given Xiamoi an edge over all the other smartphone manufacturers. There is no denying that Xiaomi is giving the best low priced phones with high-end specs.

However, the fact remains that like all the other manufacturers, Xiaomi also put a pile of pre-installed, Stock or you can say Bloatware. I hate that, about all the Android phones, putting stupid apps without any reason. Most of the time there is no use what so ever of all these apps. All they do is occupy free space, that we can use for many other purposes. Now let’s get started and tell you how you can Remove Bloatware From Xiaomi Device without Root.

Remove Bloatware From Xiaomi Device

What is Bloatware?

Manufacturers are in a race with each other nowadays and coming up with their smartphones loaded with tons of new features. Samsung is focusing more on the software and hardware features of the devices. Every time we receive a new flagship device from Samsung, it brings in new software features that add to the load the device handles at times.

HTC is trying its best to improve its Sense UI, while LG is focusing on making its phone’s display more attractive. Same goes for other manufacturers. While focusing on something else, device manufacturers literally forget the burden on the software that the phone can handle at a time.

Because of this, many users come across the laggy behavior of their device. Bloatware is even more common with the carrier branded devices. Carriers incorporate their applications in smartphones to achieve some exclusiveness.

Google doesn’t stand under this umbrella as Nexus devices sport the pure stock Android OS, that contains almost no extra or heavy features. Some custom operating systems are a point of attention only because they do not contain any un-necessary and heavy applications.

Uninstall Carrier/OEM Bloatware Without Root Access

Remove Bloatware From Xiaomi Device (No Root):

Following are both methods through you can remove bloatware from your Xiamoi devices. Both methods are effective and working.

MIUI Hidden Settings:

Good news is, you can easily remove bloatware from Xiaomi devices using MIUI Hidden Settings. You can do a lot with the help of MIUI Hidden Settings, one worth mention feature is, you can access Notification log.

You can download MIUI Hidden Settings from Google Play. But you must know that Android 8 or Android 7 running on your Android device. If you have it, with the help of MIUI hidden features, you can remove most of the pre-installed apps. let get to it.

  • First of all, open MIUI hidden settings app.
  • Now you need to choose the Android version. After that Tap on the Manage Applications.
  • You will get the list of the apps that you can manage, all you have to do is tap on the app you want to remove.
  • On the next page, Tap on either “Disable” or “Uninstall”. Then again tap on disable app when you see the pop-up.

ADB and Fastboot:

  1. Download Android ADB and Fastboot binary for your computer.
  2. On your phone, go to settings > about device > tap the build number for 7 times to enable developer options.
  3. Get back to the main menu in settings > scroll all the way down and locate Developer Options. In Developer Options, enable USB debugging mode.
  4. Extract the downloaded Android ADB and Fastboot binary package.
  5. Open the extracted folder now.
  6. Press and hold the shift key and then Right-Click on an empty area within the ADB and Fastboot extracted folder. As the options come up, click on Open command window here. Alternatively, you can open the command window from anywhere on your computer as they ADB and Fastboot binary system-wide.
  7. Now in the command window, execute the following command
Adb devices
  • This command will ask for connection verification on your phone. Allow the connection on your phone.
  • After the command returns your device’s successful connection, enter the following commands to remove bloatware.
Adb shell
pm list packages | grep 'Carrier/OEM name'
  • This command will list all the applications installed by the Carrier or OEM
  • To remove any application now, enter the following command.
pm uninstall -k --user 0 'package name'

That’s all.

Delete Message Sent to the wrong person in Facebook Messenger

0
Delete Message Sent to the wrong person in Facebook Messenger

This is how you can Delete Message Sent to the wrong person in Facebook Messenger. This happens to all of us, I mean it’s a natural thing. There are a number of ways to explain it if you did send the wrong message to the wrong person. But maybe, you won’t get that time and in a matter of seconds, this all goes north. However, thanks to Facebook, in the latest update of Facebook messenger you can delete a message sent to the wrong person in a single chat or within a group.

With this update, they really did solve this awkward problem, I hope others do learn from this. Now you can delete a message from the Facebook messenger after it has been sent. However, there is a catch, you can delete a message within the 10 minutes after you sent it. As you all know that, in the past, we were able to delete the only message from our own view. But now things are changed.

Let’s tell you how you can Delete Message Sent to the wrong person in Facebook Messenger.

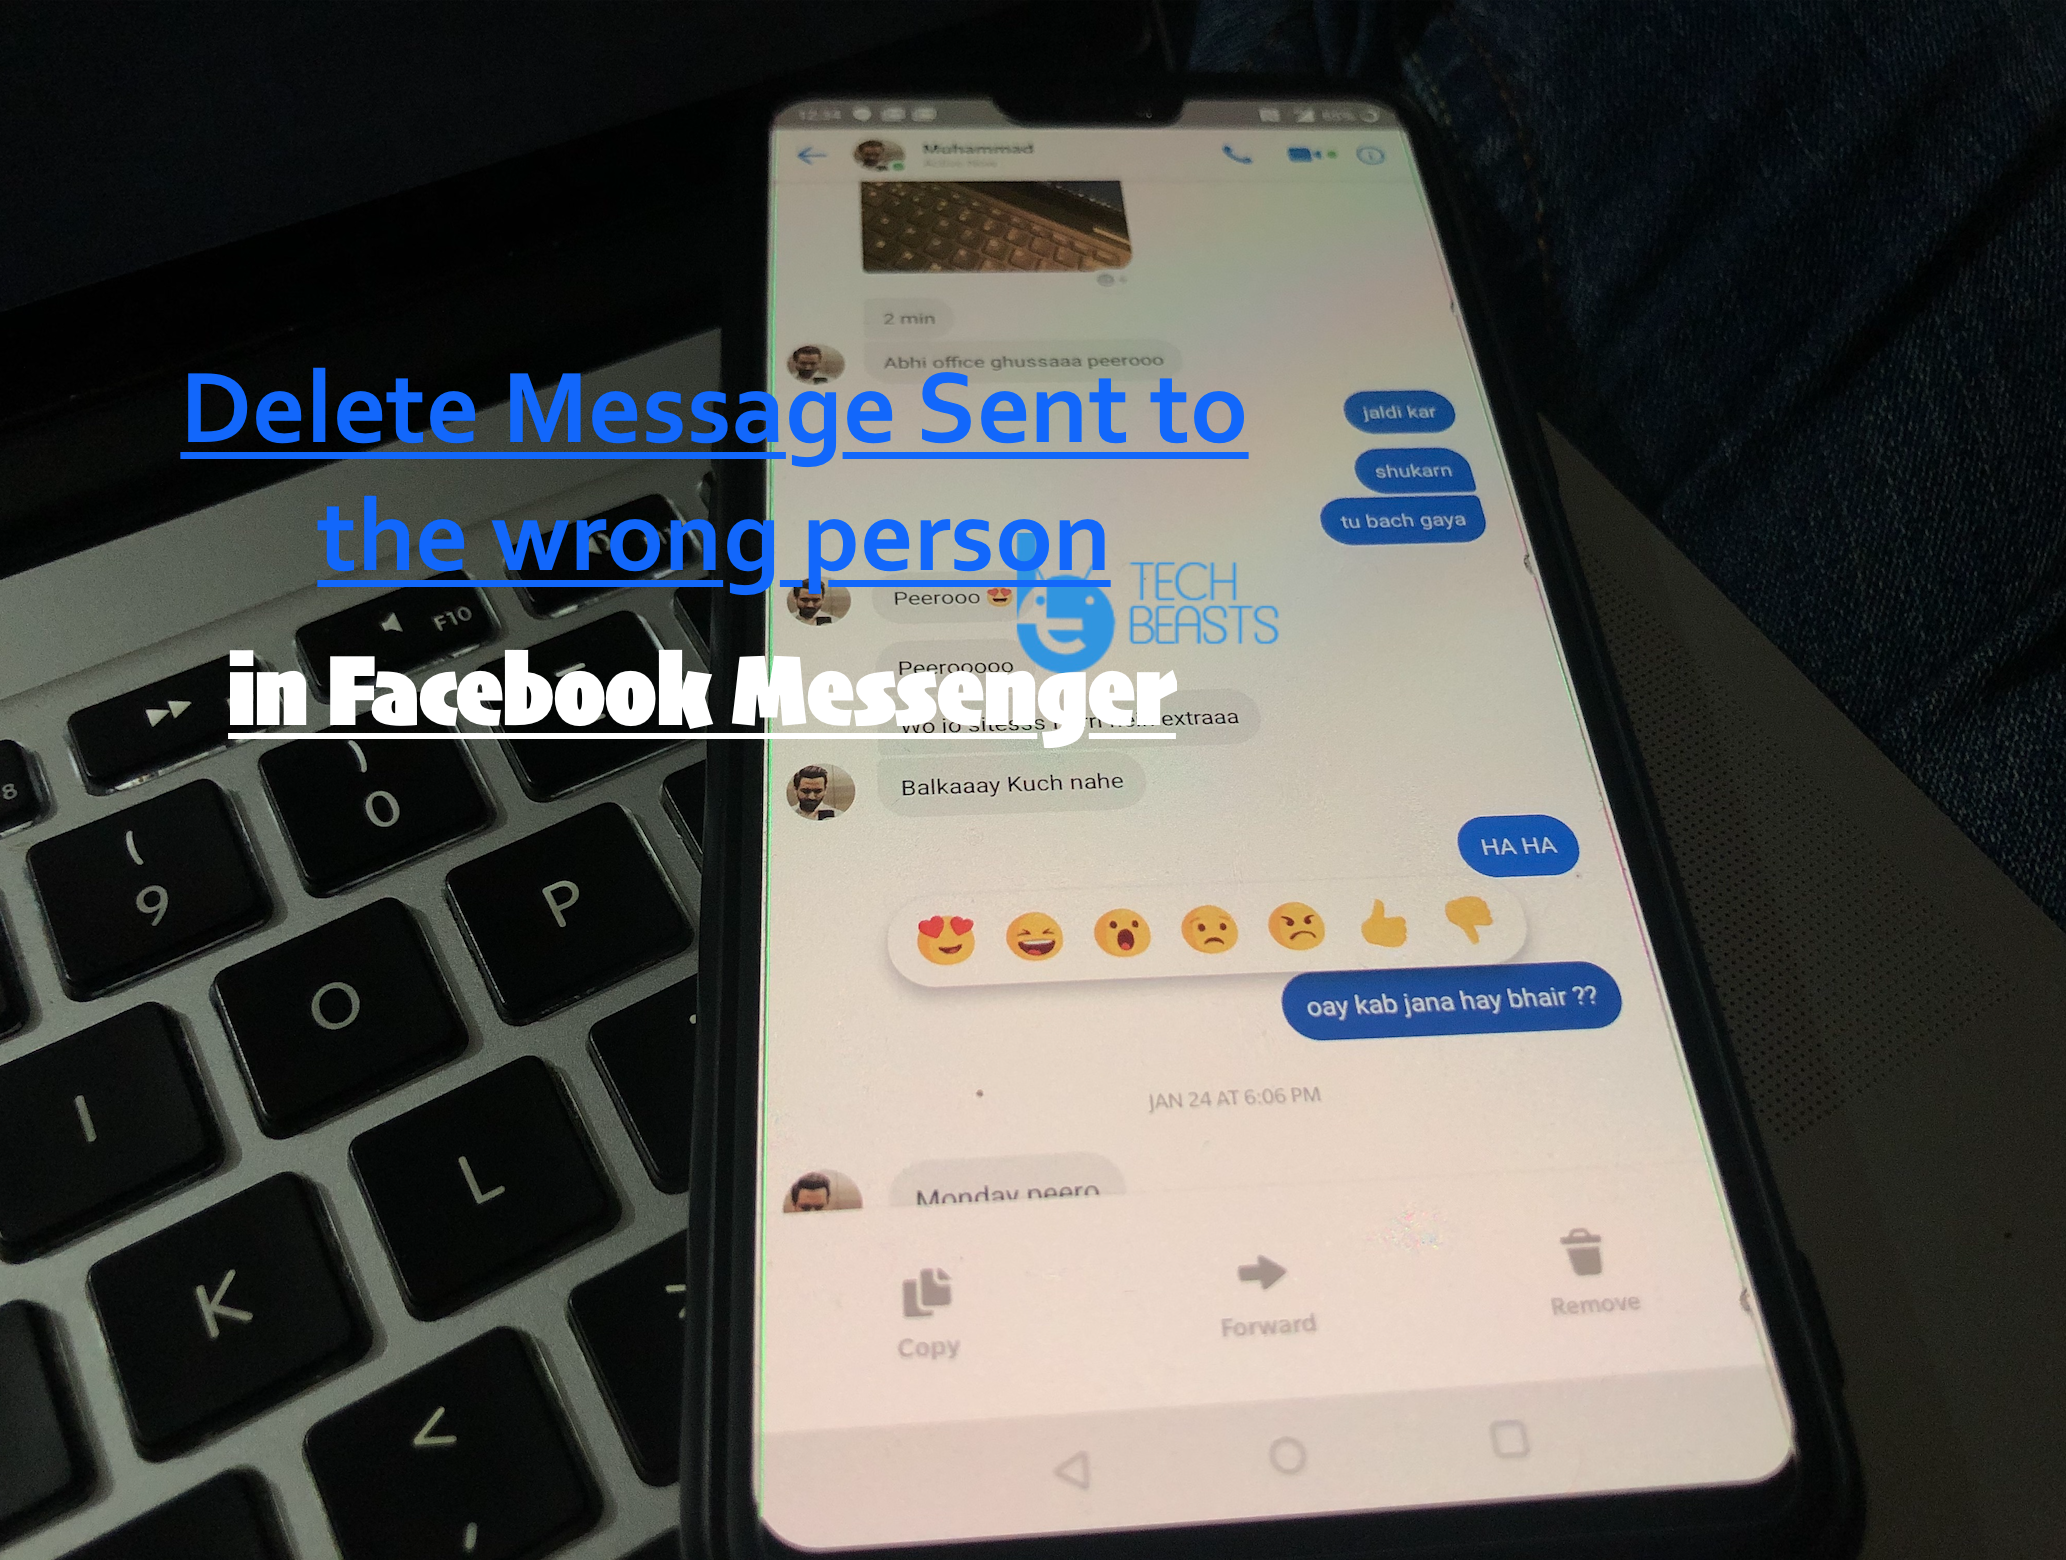
Delete Message Sent to the wrong person in Facebook Messenger

How To Delete Message Sent to the wrong person in Facebook Messenger:

 1 minute.

Heed the instructions provided below and you will be able to delete a message you sent to the wrong person in Facebook messenger.

  1. Launch Messenger

    Open Up Facebook Messenger, open the chat from which you want to delete the message.

  2. Select the Message

    Once you have selected the message, long press on the message.

  3. Remove the Message

    When you long-press on the message, a pop-up will show up. You will see some reactions emoji. Also, you will see another pop-up at the end of the page. Tap on Remove.

  4. Remove for all

    After you Tap on Remove button, you will get two options Remove for you & remove for everyone. Tap on remove for everyone.

That’s all. Once you have selected remove for all. Your message will be deleted for everyone if you were fast then no one got the chance to read that message. However, they will know there was a message which got deleted. 
Read more: logout of Facebook Messenger on Android and iPhone
If you haven’t got the latest Facebook Messenger Update, you can download it from the following link. After installing this latest update you will get ” Remove for all option “. 

OnePlus 6 Randomly Rebooting after Android Pie Update – FIXED

0
OnePlus 6 Randomly Rebooting after Android Pie Update – FIXED


If your OnePlus 6 has been randomly rebooting after Android Pie update, its time to fix it. As you go down in this guide, you will find steps to fix OnePlus 6 randomly reboot after Android Pie update.

OnePlus 6 is still one of the best Android phones out there. If there is any budget-friendly phone that can give you close to stock Android experience, that is the OnePlus 6. OnePlus 6 comes with specifications similar to flagships from companies like Samsung and Google, but only at a half price. The company updates its phones as soon as a new version of Android is available. The OnePlus 6 was updated to Android Pie last year. It looks like some users are having issues with the phone running on Android Pie. A number of OnePlus 6 owners were found reporting random reboot issues. Before we fix OnePlus 6’s randomly rebooting problem, let us take a look at the specifications of this phone.

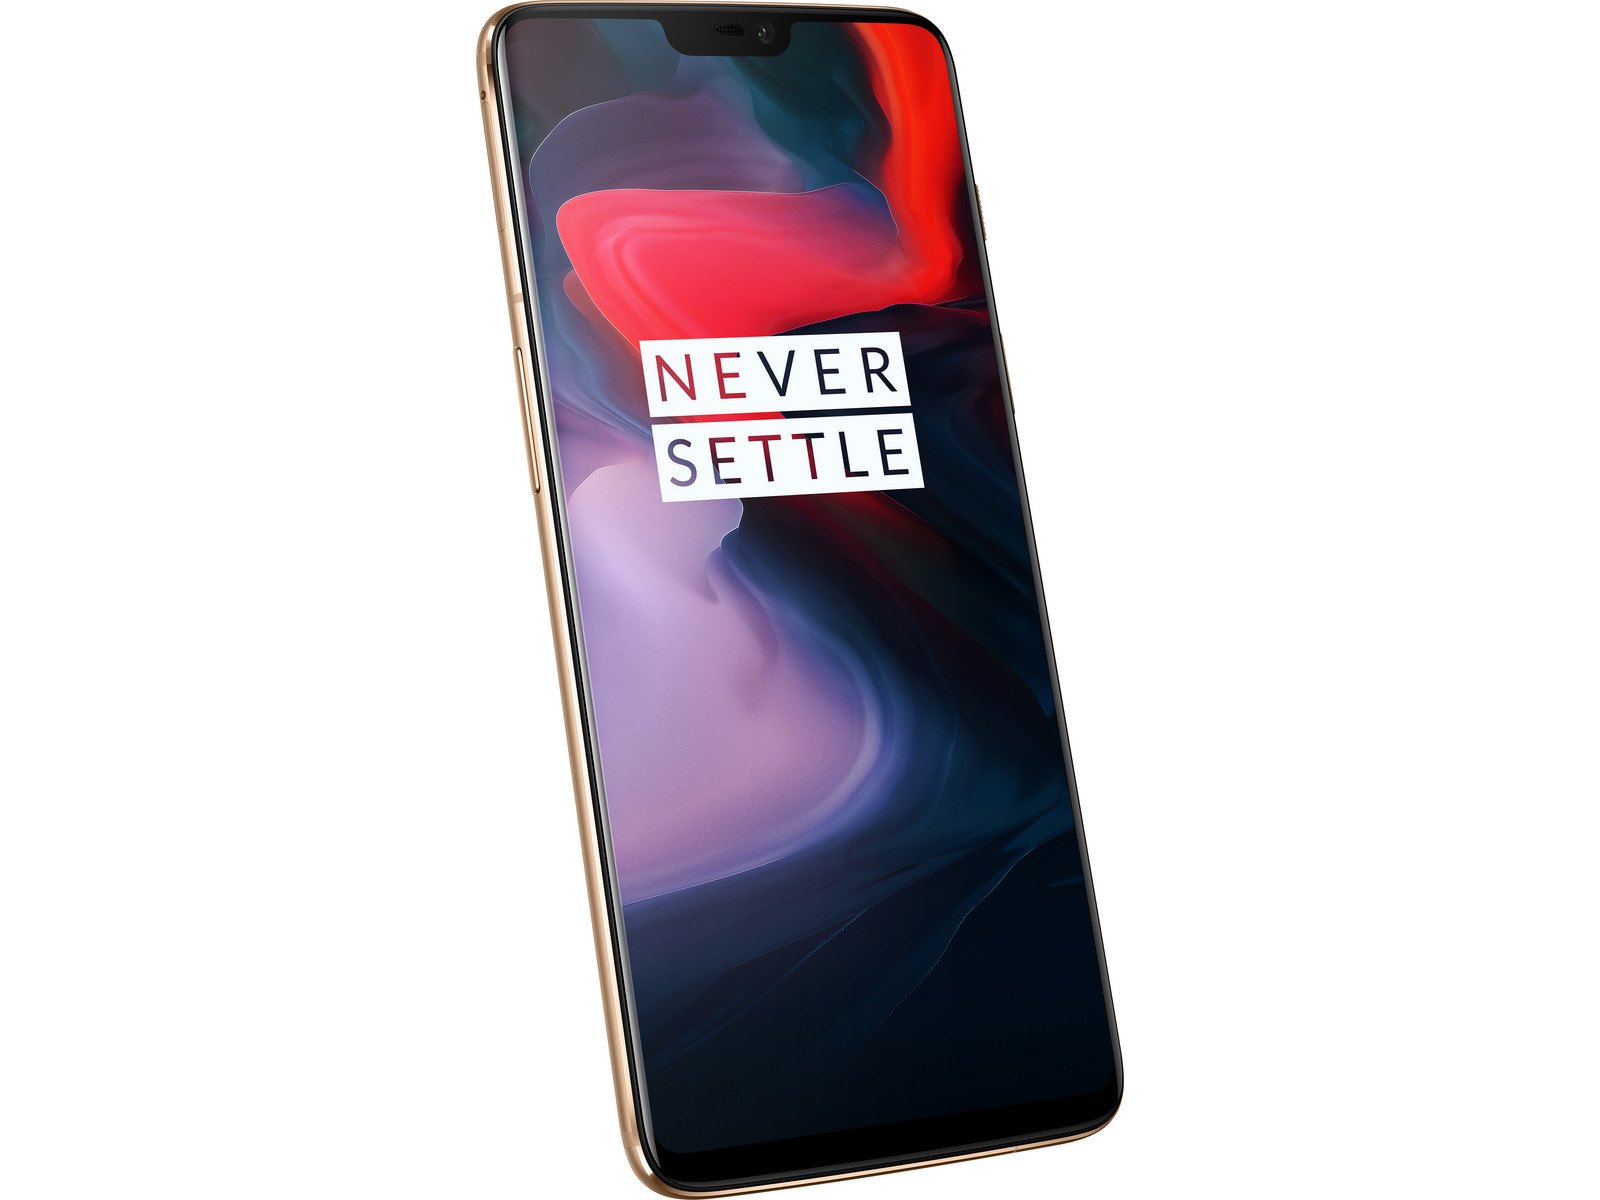
OnePlus 6

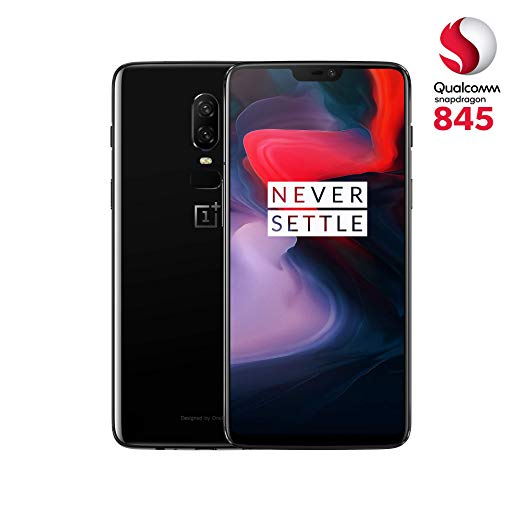
OnePlus 6 sports a 6.28-inches Optic AMOLED screen. The resolution of this screen is 1080 x 2280 pixels. It has 402 PPI. OnePlus 6’s screen is protected by Gorilla Glass 5. It has a notch which houses the front camera and sensors. The notch helps this display have a 19:9 screen ratio.

OnePlus 6 Randomly Rebooting

OnePlus 6 is powered by the Qualcomm Snapdragon 845 SoC. This phone has a RAM of 6 or 8GB with internal storage of 64, 128, and 256GB. It does not support external SD cards. OnePlus 6 has a dual camera at the back. It has a 16MP + 20MP camera. On the front, it has a 16MP camera. There is a fingerprint scanner mounted right next to the rear camera.

OnePlus 6 Randomly Rebooting

This phone has a 3300 mAh battery placed inside. Originally, the OnePlus 6 ran on Android Oreo out of the box. The phone was updated to Android Pie as soon as Google released it. OnePlus 6 comes in Midnight Black, Mirror Black, Silk White, and Amber Red colors.

Fix OnePlus 6 Randomly Rebooting after Android Pie Update

There can be a number of reasons which are pushing the OnePlus 6 to restart on its own. This can be a buggy software update, this can be some feature which is not working fine in the new Android Pie update, this can also be due to a dirty update installation. So, to fix the OnePlus 6 that is randomly rebooting, we can apply a number of solutions. I am going to list down the solutions in ascending order (easiest to hardest). OnePlus 6 owners can follow the upcoming steps to fix the random reboot problem right now.

In most cases, this is the solution that will fix OnePlus 6 randomly rebooting.

  1. Power down your OnePlus 6 completely.

    Press the power button for about 5 seconds. Your OnePlus 6 should shut down now. Follow the next instruction.

  2. Boot your OnePlus 6 into Recovery Mode.

    Press and hold Volume Up + Down + Power button to boot into recovery mode. If your phone asks for a password, enter your screen lock pin or password. If you did not set any password, just click on enter/ok without entering any password.

  3. Click on “Wipe data and cache”.

    As you have entered the recovery now, click on “Wipe data and cache”. This will take you to wipe cache option.

  4. Now click on Wipe Cache and wipe it.

    As soon as you see “Wipe cache” click on it. Now click on “Yes” to wipe the cache.

  5. Reboot your phone to the system.

    Your phone will now show the Reboot option. Reboot it and see if the randomly rebooting problem has gone or not.

Clear OnePlus 6T Cache

Another method to fix randomly rebooting OnePlus 6

In most cases, clearing the cache of your OnePlus 6 will fix its randomly restarting problem. Just in case the solution given above does not work, the next step is to check if an application is messing up with your phone. To check this, you can boot your OnePlus 6 in the Safe Mode. This will disable all the applications. Now you can run your phone for a while. If it continues working without rebooting, it means that an application was messing up the phone. Here is how to boot your OnePlus 6 into Safe Mode.

  • Turn off your OnePlus 6 completely.
  • Now turn on the OnePlus 6.
  • As soon as the phone turns on, press and hold Volume Down Key.
  • Keep the key press until you see the home screen.
  • As you see the home screen, you will find the “Safe Mode” icon on the lower left corner.
  • This means your phone is in the Safe Mode now.

So, all apps are disabled now. As mentioned earlier, if the phone runs without problems now, you simply have to reboot it to quit Safe Mode. After this, you have to check all the apps you recently installed. Delete the application that you think can cause all this trouble.

Update OnePlus 6 to fix Randomly Restarting problem

If your phone has started acting up after updating to Android Pie, it does not necessarily mean that something is wrong with the phone. There are likely chances that an update full of bugs is making the phone to restart on its own. When there is a widespread problem with a software update, companies are usually quick enough to roll out another stable update. So, what you can do is, you can go to Settings on your phone, System Udpates, and check for a software update. If there is a new update available, update your phone.

In case there is no OTA, but there is a new firmware available on the OnePlus site, you can download it manually. Copy the firmware to your phone’s root directory. Open settings, go to system updates, click on local upgrade and flash the file manually.

Factory Reset to fix OnePlus 6 Randomly Rebooting

Factory Reset should be your last option to fix the OnePlus 6. Since it deletes all your Apps and Data, you should avoid this option as far as you can. This is the only reason I am listing this solution in the end here. To factory reset your OnePlus 6, simply reboot it into recovery (Follow the steps given above). In Recovery, click on Wipe Data and Cache > Reset system settings > Yes. Reboot your phone after this. Check if the phone manages to stay up now.

Wrap Up

Hopefully, your OnePlus 6 is running smoothly by now. Random reboot or random restart is not a huge problem. It can always be fixed by following the simple solutions like the ones given above. If you are still facing some issues on your OnePlus 6, feel free to let us know about them. We will try our best to come up with the solutions for your phone.

Fix Youtube Picture-in-Picture Not Working on Android

0
Fix Youtube Picture-in-Picture Not Working on Android

Let’s tell you how To Fix Youtube Picture-in-Picture Not Working on Android. Now you all be wondering what is Picture-in-Picture? We will tell you about that in a bit. As we all know that no matter what we got ourselves in these expensive smartphones. They cannot replace a desktop. However, they are trying really hard to replace the desktop PC.

But when it comes to multitasking they are lacking behind, the desktop has the edge over smartphones. On the other hand, smartphones are replacing desktops when it comes to entertainment.

Youtube Picture-in-Picture Not Working

It all started when Android phones start getting split screens along with that  Picture-in-picture (PiP) comes to life. PiP is a feature which lets you video in a small floating window while you are using other apps. This feature was adopted by many including YouTube. However, we have seen many user reporting that PiP isn’t working for them while using Youtube.

Let’s get started and tell you what to do when Youtube Picture-in-Picture Not Working on Android. YouTube does support PiP but you might need to enable it through the settings.

Picture-in-Picture (PiP) Compatibility:

Before you start judging and all. You should know that Picture-in-Picture (PiP) was made available in Android 8.0 and it was only available in YouTube Premium/Red subscription. However, in 2018, it was available for everybody but only in the U.S.

Fix Youtube Picture-in-Picture Not Working:

Now if you have checked and you are meeting all the requirements that are needed to use PiP. Then either you should update YouTube app to the latest version or you need to clear the app data & cache. Heed the instructions provided below.

Time needed: 15 minutes.

Following are the all possible solutions which will help you fix Youtube Picture-in-Picture Not Working on Android.

  1. Clear Cache & Data.

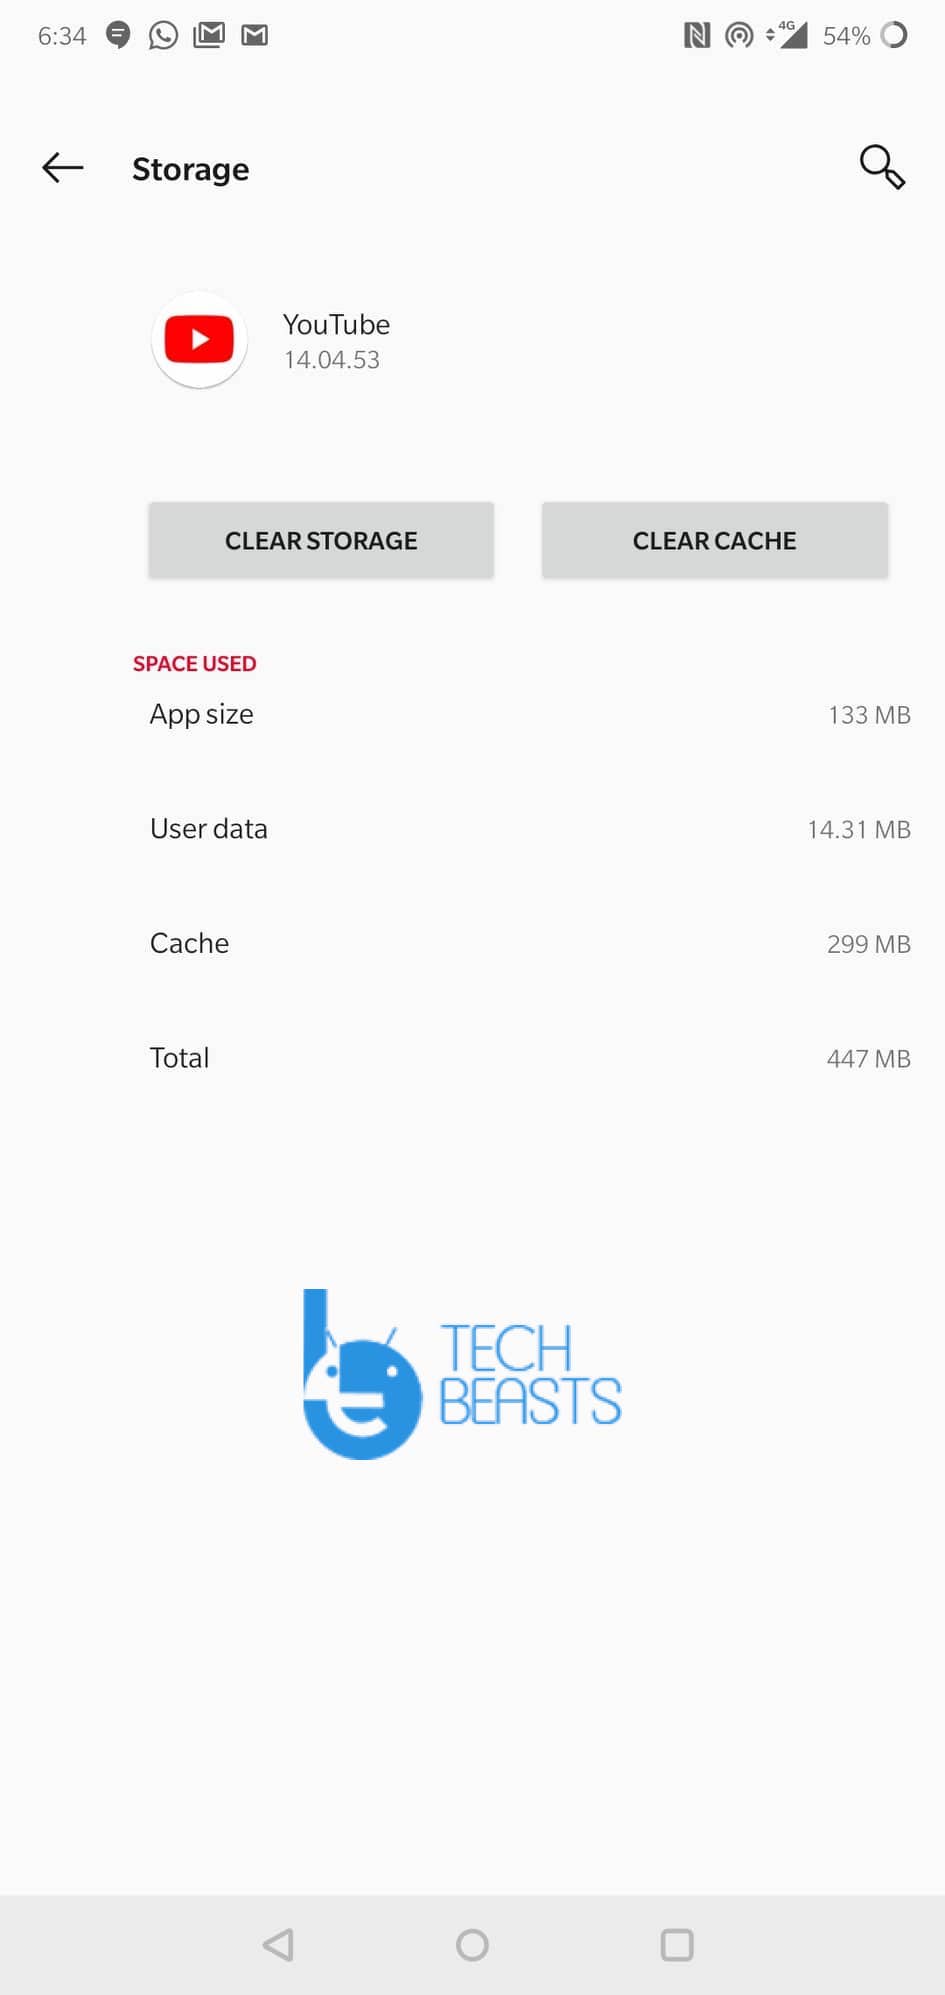
    Head over to the Settings. Scroll down and look for Apps & Notifications. Tap on it and then Tap on See All Apps. From there, Scroll down again and find YouTube. Once you do, Tap on it, you will be on YouTube App Info Page, Tap on Storage -> Tap Clear Cache.
    Don’t Clear Storage, otherwise, you will lose all your downloaded videos & it will log you out from the app.

  2. Enable Picture-In-Picture Mode.

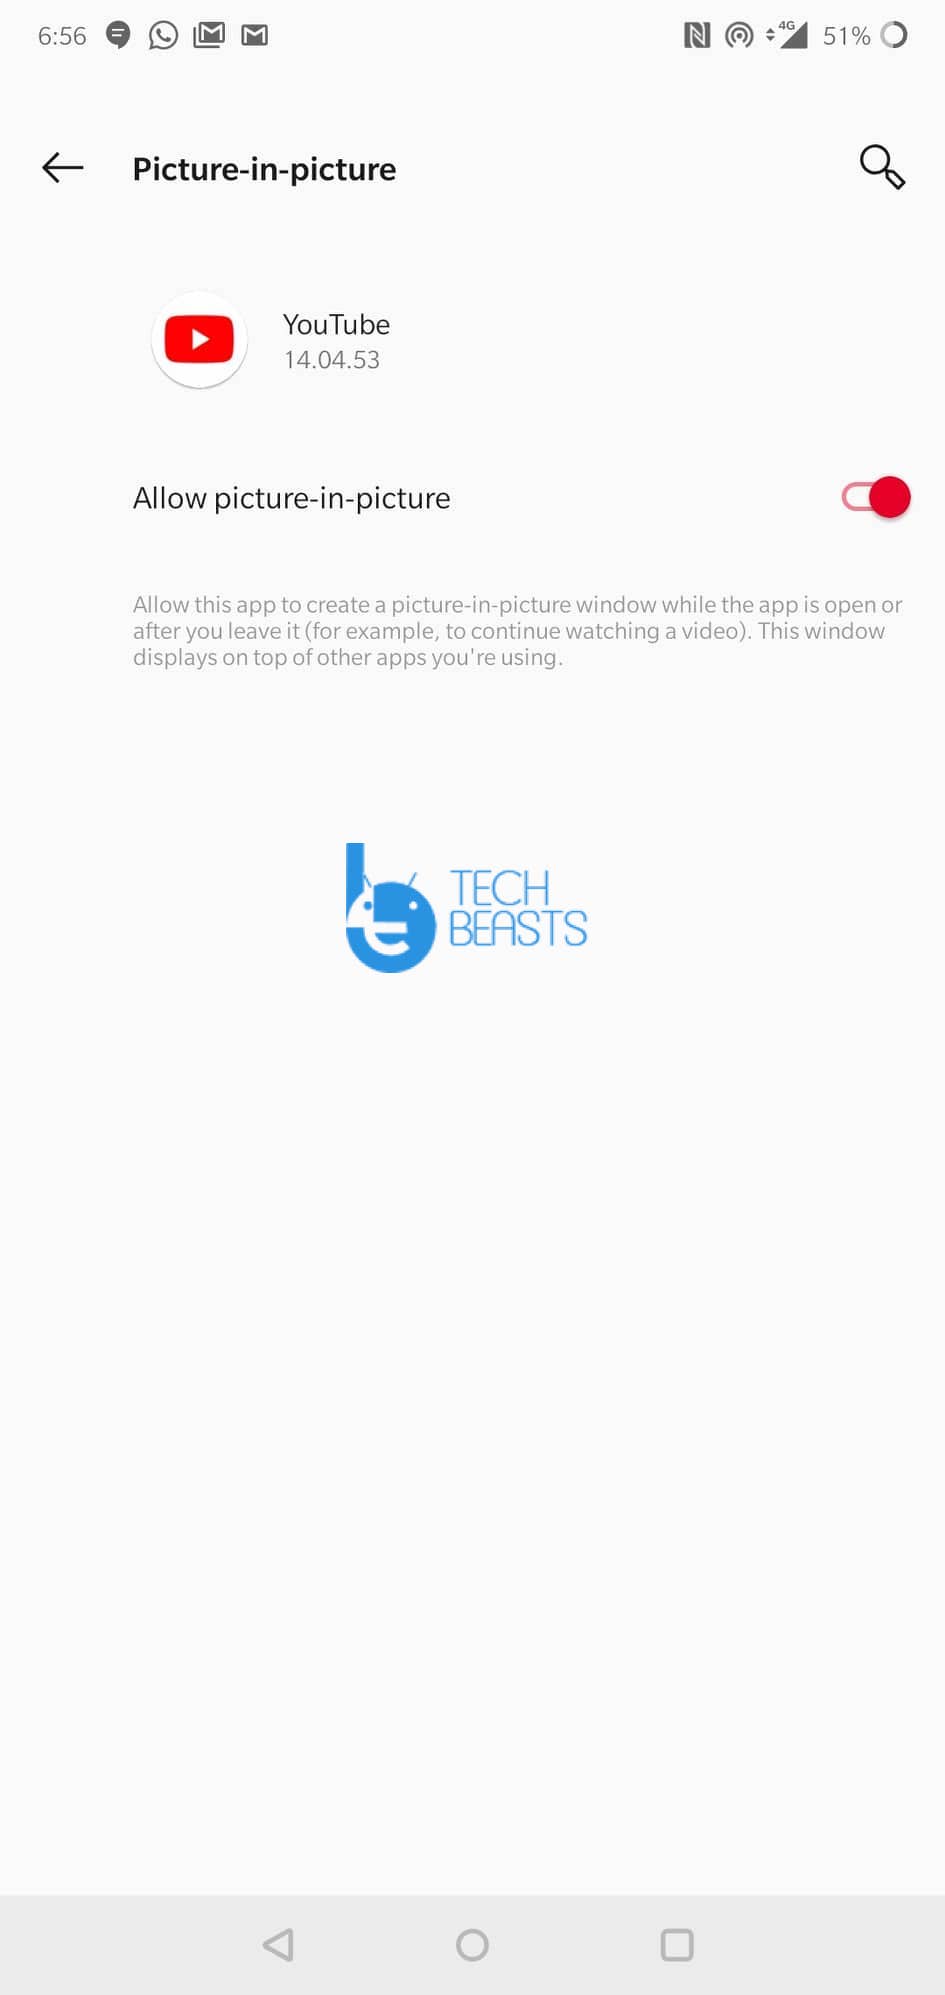
    As I told you earlier, sometimes you have to Enable Picture-In-Picture Mode. Either You can do it from app settings or within the app. Although PIP is turned on by default, sometimes we accidentally disabled it.
    *Open Settings -> Apps & Notifications -> See All -> YouTube -> Enable Picture-In-Picture.
    *Launch YouTube App, Tap on your Account icon located at the top right corner of the screen. On the next page, tap on Settings -> General-> Picture-in-Picture -> Toggle it.

  3. Use the Picture-in-Picture mode:

    Now that you have enabled the Picture-in-Picture mode. It’s time to test it.
    * Open YouTube App, play a video and tap the home button.
    * You will see a small player will appear at the right side of your screen. You can easily drag this mini video player anywhere. In order to resume the YouTube app, double tap on the mini video player.
    * On-screen video controls will also be available.
    * In order to close the PIP mini player, either you can tap on the close button or you can drag it to the bottom of the screen.

  4. How To Get PIP, if it is not available in your Country:

    * First of you can get PIP mode using the Mobile browser. Google Chrome also supports PIP, all you have to do is open up your browser.
    * Launch YouTube.com, Click on the 3 dots (Settings for Chrome), select desktop view.
    * Select a Video, Tap on the full-screen button. Once your video is loaded in Full screen and it’s playing. Tap the home button.
    The other method is the VPN. Download a VPN app and set your location to the U.S. Open the YouTube app and you will be the PIP feature will start working.

  5. Disable Picture-in-Picture Mode:

    It is simple, head over to the Settings of your device, Apps & Notifications -> See All ( All Apps ) -> YouTube -> Disable PIP Mode.
    You can also do it from YouTube App, Tap on your Profile icon, -> Settings -> General -> Disable PIP Mode.

Download the Full HD PUBG Wallpapers

0
Download the Full HD PUBG Wallpapers

Nowadays the craze of the game called PUBG (Player Unknown Battleground) is ruling almost each and every smartphone out in the woods. With this accelerated excitement, people started to personalize everything under the theme of PUBG. Starting from t-shirts, key chains, coffee mug or even doormats. Busy playing PUBG? Here’s something new about the newly launched full HD wallpapers of PUBG. Go download the Full HD PUBG Wallpapers.

Full HD PUBG Wallpapers

About the Game

Tencent gaming has launched a bazooka by launching the world-famous gaming application called PUBG Mobile. It has been a hotline among all the gaming applications in this very world. People are going crazy bout its gaming experience and it is turning into the most addictive game till date. For those endangered species who are having no idea what this game is all about.

Interface

This game comes under the rule regulation of ‘Battle Royale’, which says that this game is all about survival. In this game, players are deployed to a single island and they supposed to face and survive the challenge that is thrown at them. A small sloppy move and you die and lose the match. It all starts with a drop. Everyone follows one of the team members who will decide where to go and when to jump from the plane that they are on.

Many hotlines are located throughout the map that has elite loot and gears which is important as one may find a fight as soon as they land. A player can choose between bc the arcade mode, a high intensified match that will sharpen up your skills or one can opt for the classic mode that will help you to rank up high and put a test to your surviving skills.

This game contains four maps, Erangel, Miramar, Shanhok and Vikendi Beta with a different physical condition that will put up a challenge to one’s skills. Each and every version comes with solo, duo, and squad. One can rampage one the ground all alone or one can have a partner or a helping hand in a duo or by being in a four-man squad and use tactical offensive and defensive skills to yell out, “winner winner chicken dinner”.

PUBG Wallpapers

Now the craze of this game has climbed to such a zenith that users are turning into hardcore fans and started to personalize stuff starting from T-shirts, key chains, coffee mugs or even doormats. Among all these merchandise the most and favourite tool used to personalise one’s electronic device is wallpapers. So this post is all about how efficiently and within less span of time one can get the ultra 4K wallpapers for an android and iOS device. Personalizing is cool. It is really eye-catching if one will witness a sniper in a gillie suit on your home screen. So all these highly attractive wallpapers will intensify one’s look of the device he or she is holding.

Among all these merchandises the most and favorite tool used to personalize one’s electronic device is wallpapers. So this post is all about how efficiently and within less span of time one can get the ultra 4K wallpapers for an android and iOS device.

Have a look at the full HD PUBG wallpapers.

Full HD PUBG Wallpapers

Aren’t they vibrant enough to decorate your device? Go download and enjoy the glazing wallpapers of PUBG.

Also Read:

Download Playground Childish Gambino APK

0
Download Playground Childish Gambino APK

Are you a fan of playmojis? If so, this is the latest Google application for you. The Playground Childish Gambino is calling all the playmoji lovers to create their own custom playmoji. The Childish Gambino is here to help you with that. Google’s official Childish Gambino application is out in the Google Play Store now. We have got our hands on its APK as well. You can download the Playground Childish Gambino APK from here now. While download the Playground Childish Gambino APK, you will also learn all about this new application.

Playground Childish Gambino APK

Childish Gambino

In case you don’t already know, Childish Gambino is the famous American actor, comedian, singer, and rapper. His real name is Donald Glover. Childish Gambino is the stage name of Donald Glover. Donald Glover is famous for his dance movies, his comedy skills, and also his phenomenal acting. The Playground application in collaboration with Donald Glover has been built to let his fans get a little closer. Playground application will let Gambino’s fans create their desired playmoji. These playmojis can be assigned the dance moves as per the liking of the users.

Playground Childish Gambino APK

For those who have no idea of what a playmoji is, it is basically a cartoon animation of the character. This animation can do everything that the application owner wants it to do. In the case of Gambiano, the playmoji is supposed to act up and dance. The Playground application uses augmented reality to bring the playmojis to life. You can simply turn on the camera of your phone and bring Gambiano to life. You can make the playmoji interact with the real life objects, but of course, all this is happening in the screen of your phone only.

Playground Childish Gambino APK

Playground lovers can download the Childish Gambino APK by following the instructions given below.

Note: You must have the latest Playground and AR Core application installed in order to make it work.

  • Playground Childish Gambino APK – Download Link.
  • Copy the APK to your phone.
  • Open the File Manager on your phone and click on the copied APK.
  • If the APK asks for any permissions, allow it.
  • Complete the installation and launch it.

Childish Gambino Play Store Link.

That’s all folks. If you are facing any difficulties regarding this APK, feel free to reach out to me.

Download BitLife Life Simulator APK

0
Download BitLife Life Simulator APK

If you recently opened the App Store on your phone, you must have found BitLife in the top charts. This new game by Candywriter, LLC is driving the gamers crazy at the moment. BitLife Life Simulator, as its name suggests, is a simulation give in which you have to live a life. The life starts as a newborn Kid and then goes on and on. You can download BitLife Life Simulator APK from here. The latest version of BitLife Life Simulator is what you can find in this post. Before you download and install BitLife Life Simulator APK, let us take a look at a brief overview of this game.

BitLife Life Simulator

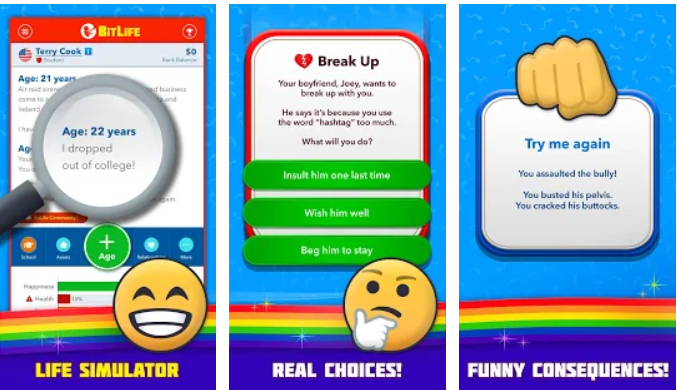
The game starts off by pressing the “New Life” button. At this point, an infant comes into this world and then you have to keep pressing the “+” button. With the increase in the age of the baby, the activities increase too. The game asks you about your intentions with every single year. Basically, the players are the decision makers regarding the life of this baby.

BitLife Life Simulator APK

If you successfully raise your character, you can take it to university or college. Players can fall in love with other imaginary characters. They can adapt a career of their choice. Options to manage all the matters of life are given in this app. For example, you can decide when to go to a doctor, when to see a friend, when to attend a party and so on.

The task in this game is to stretch the life to as far as possible. Making the wrong decisions can result in your death. So, make all the right choices and get your character a great, successful career.

Details of your character appear at the top of your screen. These details include Name, Age, Country, Gender etc. Overall, this is quite a fun game to play. In case you are bored of something, you can play this game just to kill time.

It’s time to get back to the BitLife Life Simulator APK now.

BitLife Life Simulator APK

BitLife Life Simulator is a completely free game. It is available in the Google Play Store at the moment. It was released a couple of days back. Since this game is new, it is hard to find it in some countries. Those of you who are unable to find it in their regions, they can download its APK from here. The safe and sound BitLife Simulator APK is given below. Follow the instructions to download and install it without any further ado.

  • BitLife Life Simulator APK – Download
  • Copy the APK to your phone.
  • Open the File Manager on the phone and then open BitLife APK.
  • Install the APK. If the phone asks for unknown apps installation permission, allow it.
  • Finish the APK installation now.
  • Launch BitLife Life Simulator from the App Drawer.

That’s all.

Download Sound Amplifier APK for Android

0
Download Sound Amplifier APK for Android

Sound Amplifier is the latest application by Google. This application is designed to enhance the listening experience on your Android devices. As the name suggests, it amplifies all the unwanted sounds from your surroundings. Sound Amplifier has been released as a free application. In this post, you can find the latest Sound Amplifier APK. As you go through this guide, you will be able to download Sound Amplifier APK. Before you download it, let us talk a bit more about Sound Amplifier.

Sound Amplifier – Goodbye Noise!

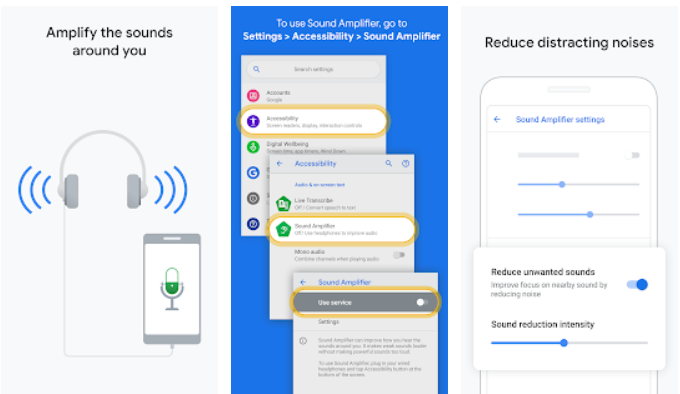
Sound Amplifier basically enhances the microphone audio on your Android device. It uses headphones to provide you with a natural and crispy sound. It is useful particularly in the environments where you have a lot of noise going on in the surroundings. Having this application will not only cut the noises in the sound that you are listening to, but it will also take care of what you are speaking and amplify the mic input. This is a great tool for audible sound output, especially if you are having a conversation with someone in an extremely noisy environment.

Sound Amplifier APK

The amplification options are customizable. Users can set the bar to whatever level they want. If they want, they can increase the amplification level or decrease it too. Furthermore, this application gives options to enhance the sounds for both the left and right ears separately. Users can boost the quiet sounds in loud environments to avoid distortion in the sound. The real time audio processing is in the play in order to reduce all the unwanted sounds.

Sound Amplifier is enabled system-wide. When you install this application, you have to go to Accessibility settings on your Android phone in order to enable this application. This is done in order to give this application all those extra permissions regarding your earphones and the mic. Once enabled, you don’t have to touch this application again and again. It can perform its job well without any confusing settings.

Sound Amplifier APK

Sound Amplifier is quite new at the moment. This application is not available world-wide yet. If you are unable to find it in the Play Store in your country, you can get its APK. The latest version of Sound Amplifier APK is given below. Go ahead and download Sound Amplifier APK right now. The instructions to install Sound Amplifier APK are also listed below.

  • Sound Amplifier APK – Download Link
  • Copy the APK to your Android phone.
  • On the phone, open Settings > Privacy Settings > Unknown Sources > Allow.
  • Open file manager and locate Sound Amplifier APK.
  • Now open the APK and install it.
  • Once done, open Settings > Accessiblity Settings > Enable Sound Amplifier. That’s all.