Home Blog Page 64

Root and Install TWRP Recovery on Galaxy A6 Plus 2018

0
Root and Install TWRP Recovery on Galaxy A6 Plus 2018

Samsung Galaxy A6 Plus owners can now unlock the full potential of their phone. A TWRP Recovery has been released for this phone. Using the TWRP, the Galaxy A6 Plus can be rooted. If you own this device, follow the steps given in this guide to root and install TWRP recovery on Galaxy A6 Plus 2018. The steps to install TWRP recovery on Galaxy A6 Plus and root it are explained in laymen terms. Go ahead to refresh your knowledge about the Galaxy A6 Plus prior to rooting it.

Galaxy A6 Plus 2018

Samsung released the Galaxy A6 and Galaxy A6 Plus 2018 back in May 2018. The Galaxy A6 Plus is the bigger variant with more powerful specifications. With the Galaxy A6 and Galaxy A6 Plus, Samsung brought its infinity display to its mid-range devices.

The Galaxy A6 Plus sports a 6.0-inch Super AMOLED screen. The aspect ratio of this display is 18.5:9. The resolution of this smartphone is 1080 x 2220 pixels while the PPI is 411.

Root and Install TWRP Recovery on Galaxy A6 Plus 2018

Galaxy A6 Plus runs on the Qualcomm Snapdragon 450 CPU. It has the Adreno 506 GPU. The internal storage of this phone is 32/64GB while the RAM is 3/4GB. It supports external microSD card as well.

Galaxy A6 Plus has a 16MP + 5MP camera at the back. On the front, it has a single 24MP camera. Below the dual-camera system at the back, the phone has a fingerprint scanner.

There is no USB Type-C on this phone. It uses the microUSB 2.0. The battery of this phone is 3500 mAh. Galaxy A6 Plus runs on Android 8.0 Oreo out of the box. This phone hasn’t been updated to any further version of Android so far.

That is pretty much it about the Galaxy A6 Plus 2018. Take a look at the method to root and install TWRP Recovery on Galaxy A6 Plus 2018.

Disclaimer

Now that you are going to install TWRP and root your Galaxy A6 Plus, you must keep a few things in mind. Flashing custom recoveries and rooting the devices is a highly custom process. Companies like Samsung do not recommend any such thing. You must understand all the risks involved and only go ahead. If you are new to Android customization, you should pay extra attention to this guide. Make sure that you are doing this at your own risk.

Preparing Galaxy A6 Plus 2018 for TWRP and Root

  • This guide is for the Galaxy A6 Plus SM-A605 only. Do not try on any other phone.
  • Back up your contacts, call logs, text messages, and media content. This procedure will format your phone.
  • Charge the battery of your phone up to 40% at least.
  • Disable Windows Firewall, Antivirus, and Samsung Smart Switch if you have any of these.
  • Use the OEM Data Cable to connect Galaxy A6 Plus to the computer.
  • Enable OEM Unlocking and USB Debugging on Galaxy A6 Plus.
  • Follow the upcoming steps carefully.

Downloads Required

How To Root and Install TWRP Recovery on Galaxy A6 Plus 2018

These are the simple steps to root your Galaxy A6 Plus 2018 and install TWRP on it.

  1. Open Odin and add the TWRP Recovery file in the AP tab.

    From the extracted Odin files, open Odin.exe. In Odin, click on the AP tab and load the TWRP Recovery.tar file that you downloaded above. Now go to the Options tab in Odin and make sure that the only checked option is the F.Reset.Time. All other options should be unchecked.

  2. Boot Galaxy A6 Plus 2018 into Download Mode and connect to the computer.

    Power down your A6 Plus 2018 now. Press and hold Volume Down + Volume Up + Power button for a while. As you see a warning on the screen, press Volume Up to continue. Connect the phone to the computer now. Odin should show “Added” in the logs and also show a Blue light in the ID:COM
    box.

  3. Flash the TWRP Recovery now.

    Click on the start button in Odin now. This will flash the TWRP. It can take up to 3 minutes. Do not reboot your phone at this point. Just disconnect the phone from the computer.

  4. Now boot your Galaxy A6 Plus 2018 into TWRP Recovery.

    Press and hold Volume Up + Down + Power button for a while. As soon as the screen goes black, let the Volume Down key go. This will take your phone to the TWRP Recovery. Swipe the screen to enter the TWRP Recovery now.

  5. Format Data in TWRP to disable Encryption.

    In TWRP, click on Wipe > Format Data. This is important in order to mount data and disable encryption on your A6 Plus 2018.

  6. Copy the Magisk and Encryption Disabler.zip files to your phone.

    Connect your phone to the computer now. Copy the Magisk and Encryption Disabler.zip files to your phone now.

  7. Flash the Encryption Disabler and Magisk.

    Disconnect the phone after copying files. On the phone, click on Install > Install Zip > Locate and flash the Encryption Disabler.zip file. After this, click on Install > Install Zip once again. Locate the Magisk.zip file and flash it.

  8. All done! Reboot to the system now.

    Now go back to the main menu in TWRP and click on Reboot > System. Your phone will boot up being rooted and having the TWRP installed on it. You can use Magisk Manager to manage root on your phone now.

Galaxy A6 Plus 2018 TWRP & Root
This is how the TWRP looks like.

Final Words

You have finally rooted your Galaxy A6 Plus with the TWRP installed on it. You can now explore the options in TWRP like wiping the cache, Dalvik cache, or wiping any other partition separately. TWRP also gives you the option to create a Nandroid Backup. You can flash custom ROMs and install Mods like Xposed framework via TWRP. Furthermore, root specific applications use the root permissions to add new features to your phone. You can also boost the performance and battery life of your phone by using apps like Greenify. If you have any queries regarding this guide, feel free to drop it below in the comments section.

Install TWRP on Galaxy Tab S4 and Root It

0
Install TWRP on Galaxy Tab S4 and Root It

TWRP Recovery is now available for Samsung Galaxy Tab S4. The Galaxy Tab S4 owners can root their device by means of the TWRP recovery. Galaxy Tab S4 owners can follow this guide to install TWRP on Galaxy Tab S4 and Root it. Before you being installing TWRP and rooting the Tab S4, let us take a look at the spec sheet of this device.

Galaxy Tab S4

Samsung released the Galaxy Tab S4 last year in August. Tab S4 comes in two variants. It has the SM-T830 variant which has the Wi-Fi only. The T835 variant has the GSM/LTE capabilities. Rest of the specifications on both these devices are identical.

The Galaxy Tab S4 comes with a 10.5-inch Super AMOLED screen. The resolution of this screen is 1600 x 2560 pixels. Tab S4’s screen PPI is 287. The 10.5-inch display has an aspect ratio of 16:10.

install TWRP on Galaxy Tab S4 and Root it

Samsung has used the Qualcomm Snapdragon 835 SoC to power this device up. To support the Snapdragon 835, there is the Adreno 540 GPU inside this tab. It has a RAM of 6GB and internal storage of 64GB or 256GB. It does support external microSD cards too.

At the back, the Galaxy Tab S4 has a 13MP camera. On the front, it has an 8MP camera. It supports stereo speakers tuned by AKG. The sound is from Dolby Atmos. Galaxy Tab S4 has the USB Type-C port for connection and charging purposes. It has a whopping 7300 mAh battery under the hood. The Tab S4 comes in Black and White colors. Its price starts at 580 EUR.

That was a glimpse at the Galaxy Tab S4’s specifications, let’s get back to the guide in order to install TWRP and Root Galaxy Tab S4.

Why TWRP Recovery and Root?

If this is your first time to install TWRP and Root an Android device, it is important to learn what you are exactly doing.

TWRP for Tab S4
TWRP for Tab S4

The TWRP Recovery runs in the bootloader of an Android device. When you install the TWRP Recovery, it replaces the stock recovery of your device. The custom recovery comes with a number of pros and a few cons.

By installing TWRP, you will be able to wipe the Dalvik Cache of your device. Wiping the Dalvik Cache on the stock recovery is not possible. The recovery also gives you the option to backup all the partitions in your phone. TWRP also gives access to its terminal. This terminal can be used for sideloading apps and custom ROMs.

In the recovery, users can find the Install option. This option can be used to install .zip and .img files. This is how the users flash custom ROMs and other custom MOD files. There are many other things that one can do with the help of TWRP. These were just to give you a basic idea about TWRP.

When it comes to rooting an Android device, you get access to a world of endless possibilities. Rooting can enhance the performance and battery life of your phone. Simply rooting doesn’t do it, you do have to get the root-specific applications to take your phone’s potential to a whole new level.

If you don’t like the current UI of your phone, or you want to add or remove some features, you will find a plethora of Android apps to do this. Such apps use root permissions to modify the system files of your Android device.

Go ahead to install TWRP on your Galaxy Tab S4 and Root it now.

Disclaimer

Before you follow this procedure, bear in mind that this is a custom process. Companies like Samsung do not recommend any such thing on their devices. You should only do this if you have a great idea of what you are doing. If you are new to rooting and custom recoveries, you should pay extra attention to the steps explained below. Make sure that you are doing this on your own risk.

Preparations to Root Galaxy Tab S4 and Install TWRP

  • This guide is only for the Galaxy Tab S4 T830 and T835. Do not try on any other device.
  • Charge your Tab up to 30% to avoid a power mishap during installation process.
  • Enable OEM Unlocking and USB Debugging from the Developer Options on your Tab S4.
  • Back up all of your contacts, call logs, and text messages.
  • Copy all of the files from your Tab S4 to your computer.
  • Use the original data cable to connect Tab S4 to the computer.
  • Follow the upcoming steps carefully now.

Required Downloads

Install TWRP on Galaxy Tab S4 and Root

Here are the steps to install TWRP on Galaxy Tab S4 and Root it.

  1. Open Odin and add the TWRP Recovery file in the AP tab.

    From the extracted Odin files, open Odin.exe. In Odin, click on the AP tab and load the TWRP Recovery.tar file that you downloaded above. Now go to the Options tab in Odin and make sure that the only checked option is the F.Reset.Time. All other options should be unchecked.

  2. Boot Galaxy Tab S4 into Download Mode and connect to the computer.

    Power down your Galaxy Tab S4 now. Press and hold Volume Down + Volume Up + Power button for a while. As you see a warning on the screen, press Volume Up to continue. Connect the tab to the computer now. Odin should show “Added” in the logs and also show a Blue light in the ID:COM box.

  3. Flash the TWRP Recovery now.

    Click on the start button in Odin now. This will flash the TWRP. It can take up to 3 minutes. Do not reboot your tab at this point. Just disconnect the tab from the computer.

  4. Now boot your Galaxy Tab S4 into TWRP Recovery.

    Press and hold Volume Up + Volume Down + Power button for a while. Just when the screen goes black, let the Volume Down key go, keep the other keys pressed. This will take your tab to the TWRP Recovery. Swipe the screen to enter the TWRP Recovery now.

  5. Format Data in TWRP to disable Encryption.

    In TWRP, click on Wipe > Format Data. This is important in order to mount data and disable encryption on your Tab S4.

  6. Copy the Magisk and Encryption Disabler.zip files to your tab.

    Connect your tab to the computer now. Copy the Magisk and Encryption Disabler.zip files to your tab now.

  7. Flash the Encryption Disabler and Magisk.

    Disconnect the tab after copying files. On the tab, click on Install > Install Zip > Locate and flash the Encryption Disabler.zip file. After this, click on Install > Install Zip once again. Locate the Magisk.zip file and flash it.

  8. All done! Reboot to the system now.

    Now go back to the main menu in TWRP and click on Reboot > System. Your tab will boot up being rooted and having the TWRP installed on it. You can use Magisk Manager to manage root on your tab now.

TWRP and Root Tab A T380/T385
This is the TWRP for phone, it should have a different UI for your Tab, but should have the exact options.

Conclusion

By this time, you should have the Galaxy Tab S4 with the TWRP Recovery and Rooted. You can now check out this list of best free root apps for Android to grab a few goodies. If you have any queries regarding this guide or regarding the Galaxy Tab S4, feel free to drop them in the comments section below. Stay connected.

How to Install TWRP & Root Galaxy A7 2018

0
How to Install TWRP & Root Galaxy A7 2018
Install TWRP & Root Galaxy A7 2018

Samsung Galaxy A7 2018 is the South Korean giant’s first triple-camera smartphone. This phone has definitely attracted a number of users. It has been caught up by custom recovery developers too which means we have the TWRP support now. Galaxy A7 2018 owners can follow this guide to install TWRP & Root Galaxy A7 2018. The steps are laid out in laymen terms. Let us learn more about the Galaxy A7 2018 before we root it.

Galaxy A7 2018

Galaxy A7 2018 was released back in September 2018. This was the unique Galaxy A series smartphone as it came with a triple-camera setup at the back.

Galaxy A7 2018 has a 6.0-inches Super AMOLED screen. This screen has a resolution of 1080 x 2220 pixels. The aspect ratio is 18.5:9. In case you don’t know about the 18:9, it is the infinity display that we saw on the Samsung Galaxy S8. There is no home button on this phone.

Install TWRP & Root Galaxy A7 2018

Galaxy A7 2018 is powered by the Exynos 7885 SoC. This SoC is accompanied by the Mali-G71 GPU. It has a RAM of 4GB or 6GB and internal storage of 64GB or 128GB.

The highlight of this phone is the rear camera system. At the back, this phone has a 24MP + 8MP + 5MP camera. The main shooter is the wide shooter, the 8MP shooter is ultrawide and the 5MP is for depth sensing only. On the front, this phone has a 24MP camera.

Galaxy A7 2018 has a rear mounted fingerprint scanner. This pone uses USB Type-C for charging and connection purposes. Under the hood, it has a 3300 mAh battery. This phone can be found running on Android Oreo out of the box. Samsung offers the Galaxy A7 in Golod, Black, Blue, and Pink colors.

That’s all about the Samsung Galaxy A7 2018. Let’s get back to work now. Pay attention to the steps given below to install TWRP & Root Galaxy A7 2018.

Note

Flashing TWRP and Root the phone are custom procedures. It requires you to be very much familiar with Android customization. If you are new to this stuff, you must pay full attention to each and every single step given below avoid a mishap. Remember that companies like Samsung do not recommend rooting their phones. You have to take full responsibility of what you are going to do next. You can learn more about rooting Android here.

Preparations to Root Galaxy A7 2018 and Install TWRP

  • This guide is only for Galaxy A7 2018 A750F. Do not try on any other phone.
  • Charge your phone’s battery up to 50%. This should be done to avoid power loss during this process.
  • Backup each and everything from your phone as this procedure will require formatting it.
  • Use original data cable to connect your phone to the computer.
  • You must enable OEM Unlocking and USB Debugging on your phone.
  • While using Odin, turn off Windows Firewall, any Antivirus if you have, and the Samsung Smart Switch if you have it.
  • Follow the remaining steps carefully.

Required Downloads

Install TWRP & Root Galaxy A7 2018

Go through these simple steps to root Galaxy A7 2018 and install TWRP on it.

  1. Open Odin and add the TWRP Recovery file in the AP tab.

    From the extracted Odin files, open Odin.exe. In Odin, click on the AP tab and load the TWRP Recovery.tar file that you downloaded above. Now go to the Options tab in Odin and make sure that the only checked option is the F.Reset.Time. All other options should be unchecked.

  2. Boot Galaxy A7 2018 into Download Mode and connect to the computer.

    Power down your A7 2018 now. Press and hold Volume Down + Volume Up + Power button for a while. As you see a warning on the screen, press Volume Up to continue. Connect the phone to the computer now. Odin should show “Added” in the logs and also show a Blue light in the ID:COM box.

  3. Flash the TWRP Recovery now.

    Click on the start button in Odin now. This will flash the TWRP. It can take up to 3 minutes. Do not reboot your phone at this point. Just disconnect the phone from the computer.

  4. Now boot your Galaxy A7 2018 into TWRP Recovery.

    Press and hold Volume Up + Down + Power button for a while. As soon as the screen goes black, let the Volume Down key go. This will take your phone to the TWRP Recovery. Swipe the screen to enter the TWRP Recovery now.

  5. Format Data in TWRP to disable Encryption.

    In TWRP, click on Wipe > Format Data. This is important in order to mount data and disable encryption on your A7 2018.

  6. Copy the Magisk and RMM.zip files to your phone.

    Connect your phone to the computer now. Copy the Magisk and RMM.zip files to your phone now.

  7. Flash the RMM and Magisk.zip file.

    Disconnect the phone after copying files. On the phone, click on Install > Install Zip > Locate and flash the RMM Disabler.zip file. Go back to the main menu in TWRP, click on Reboot > Recovery.
    As the phone reboots into recovery again, click on Install > Install Zip once again. Locate the Magisk.zip file and flash it.

  8. All done! Reboot to system now.

    Now go back to the main menu in TWRP and click on Reboot > System. Your phone will boot up being rooted and having the TWRP installed on it. You can use Magisk Manager to manage root on your phone now.

TWRP and Root Tab A T380/T385
This is how the TWRP looks like.

Wrap Up

That is all folks. For those of you who have no idea about TWRP, it is the custom recovery that will open your door towards customization. With TWRP, you can wipe cache and Dalvik cache. You can also backup all the partitions of your phone. Another thing you can do via a TWRP is to flash custom ROMs and custom.zip files. With root, you can add new features to your phone, you can also enhance the performance and battery life of your phone. Take a look at our list of best free root apps for Android. If you have any questions regarding this guide, feel free to reach out to us.

Recovery Source

Root Galaxy Tab A T380/T385 & Install TWRP Recovery

0
Root Galaxy Tab A T380/T385 & Install TWRP Recovery

Samsung Galaxy Tab A 2017 has the TWRP Recovery support now. It means that this Tab can be rooted too. In this guide, the Galaxy Tab A owners will find steps to root their device and install TWRP recovery. As you go ahead, you will find the steps to root Galaxy Tab A T380/T385 and Install TWRP Recovery on it. Let’s take a look at the spec sheet of this device before starting the customization process.

Root Galaxy Tab A T380/T385 & Install TWRP Recovery

Galaxy Tab A 8.0 2017

The Galaxy Tab A series stared back in 2016 as Samsung’s low-end Tab series. The very first set of devices included a Tab A 7.0 and and a 10-inch Tab. In 2017, Samsung introduced the 8.0-inch Galaxy Tab A. This is the very device we are going to root and install TWRP recovery on.

The Galaxy Tab A 2017 comes in two variants. It has the T380 and T385 variants. The Tab A T380 is the WiFi only device. The Galaxy Tab A T385 is the GSM/LTE variant.

This Tab has got an aluminum body. It boasts off an 8.0-inch IPS LCD display. The resolution of this screen is 800 x 1280 pixels. Tab A 2017 is powered by Qualcomm Snapdragon 425 SoC. It has a RAM of 2GB and internal storage of 16GB.

At the back, there is an 8MP camera. On the front, it has a 5MP camera. Galaxy Tab A 8.0 2017 has a whopping 5000 mAh battery under the hood. It uses USB 2.0 for connection purposes. Samsung made this Tab in the Black and Gold colors. It runs on Android 7.1 Nougat out of the box. This tab was updated to Android Oreo later on. The official price of the Tab A 2017 is about 200 EUR.

That’s all about the Tab A 8.0 2017. Head over to the steps to root Galaxy Tab A T380/T385 & install TWRP recovery.

Disclaimer

Before rooting your Tab, please keep in mind that this is a custom process. Not following this procedure exactly as laid out below can damage your device. Pay full attention to this method to avoid a mishap. Also, if you are a newbie, you need to be extra careful. Companies and recovery/root developers do not recommend these procedures. You have to make sure that you are doing this on your own will. If you need to learn more about root, you can take a look at the reasons to root an Android device.

Preparations to Install TWRP and Root Tab A 8.0

TWRP for Tab A 2017
  • This guide is only for Galaxy Tab A 8.0 2017 T380 and T385. Check the model number of your Tab before following this procedure.
  • Charge your Tab up to 50% to avoid a power loss.
  • Backup your contacts, call logs, media content, and SMS messages.
  • While using Odin on your computer, turn off Windows Firewall and Antivirus if you have it.
  • Also close the Samsung Smart Switch software while using Odin.
  • Enable OEM Unlocking and USB Debugging mode on your Tab A.
  • Use the original data cable to connect Tab A to the computer.
  • Follow the remaining steps carefully.

Required downloads to root Tab A 2017 and install TWRP

Root Galaxy Tab A T380/T385 & Install TWRP Recovery

Follow these steps to install TWRP on Tab A T380/T385 and root it.

  1. Open Odin.exe and add the twrp_3.2.3-1.tar file in the AP tab.

    From the extracted “Odin files, open the Odin.exe file. In Odin, click on the AP tab and select the Recovery.tar file for your Tab. Now go to Options in Odin and ensure that the only options checked is the F.Reset.Time. Uncheck all other options.

  2. Put your Tab A in Download Mode and connect it to the Computer.

    Now turn off your Tab A. While the Tab is powered down, press and hold Volume Down + Home + Power button. As you see a warning on the screen, press Volume Up to continue. Now your Tab is in the Download Mode. Connect it to your computer now.

  3. Click on the Start button in Odin to flash TWRP.

    You are all set now. Hit the start button to flash TWRP. TWRP will be flashed in 2-3 minutes. After this disconnect your Tab from the computer.

  4. Restart your Tab A in the Recovery Mode.

    On the Tab, press and hold Volume Up + Home + Power button to boot into recovery mode. Do not reboot the tab in any other way. You must reboot into the recovery mode from here.

  5. In TWRP, Format the Data and Copy Magisk & RMM.zip files.

    Now enter the TWRP recovery and click on Wipe > Format Data. After this, go back to main menu in TWRP and click on Reboot > Recovery. After the Tab reboots into the recovery again, connect it to your computer. Now open the USB Storage in computer and copy the Magisk.zip and RMM.zip files to your Tab.

  6. In TWRP, click on Install > Install Zip > Flash the Magisk & RMM.zip files.

    Go to Install tab in the TWRP, click on Install Zip > Locate the Magisk.zip file and flash it. After flashing Magisk, go to Install once again, Install Zip and this time, flash the RMM.zip file.

  7. Reboot into System now. That’s all.

    Go back to the main menu in TWRP now. Click on Reboot > System. As your Tab boots up now, you will have it rooted. TWRP is already there. Use the Magisk Manager to manage the root settings now. That’s all.

TWRP and Root Tab A T380/T385
This is how the TWRP looks like.

Final Words

That’s all folks. You have the TWRP and Root on your Tab now. You can start customizing your Tab A the way you want. With TWRP, you can flash custom ROMs and other .zip files. You can also clear the cache, dalvik cache, and perform many other operations. To get the full potential of root access, check out our list of 30+ free root apps. If you are facing any problems while following this procedure, feel free to reach out to us through the comments section below.

Recovery Credit

10 Reasons Why You Should Root Android in 2019

2
10 Reasons Why You Should Root Android in 2019

We have witnessed 9 successful iterations of Android starting with Android Cupcake and having reached Android 9.0 Pie now. We have also witnessed how Android has changed the way we interact with our handheld gadgets powered up with this operating system.

It is the open nature of Android that has allowed the developers to dig deep beyond the limits and come up with something new every other day. Android’s open nature has made it possible for developers and users to collaborate to enhance the way Android works. Android definitely brought a revolution in the mobile phone world and has taken the world to a whole new level.

Smartphone giants like LG, Motorola, Samsung, HTC, Sony and now a plethora of Chinese OEMs use Android as a primary operating system in their smartphones and tablets. Android loaded on these devices in its stock form may not be pretty enjoyable, but it’s no longer difficult for users to unleash the true power of their Android handheld since we’ve got a great community of developers working hard to bring us new features, MODs, tweaks, and customizations.

If you are an Android device user, you must have heard of root access at least once in your life. You may have wondered what is this root access, and what’s the purpose of rooting your Android device. This curiosity may have kept you away from rooting your Android device and knowing what’s beyond this boundary. We are about to discuss the plus points of root access, but before we head towards that, we will learn a little bit about this root terminology and its role in Android devices.

Going behind the term “ROOT”

Basically, the term root is a Linux terminology. Root access to Linux allows you to get hold of your system as an administrator. Once you have this root access, you can access and modify any component of your OS. Root can be understood in a better way by keeping the example of administrator account of windows in view. Root access simply allows you to take administrative access to the entire system of your operating system. Since Android originated from Linux, the term root access followed Android as well.

You can control your Android device according to your liking after having it rooted. Many of you might be looking for some solid reasons to convince yourselves to root your Android device. We’ve put together a list of 10 reasons on why you should root Android in 2019, that are good enough to convince you to go ahead, wipe off your fears and root your Android smartphone. Let’s begin with it.

Disclaimer: Rooting your Android device results in voiding its warranty. Whenever you’re rooting your Android smartphone, follow the instructions in the respective thread or page carefully. Be reminded that when you’re rooting your Android smartphone, you’re responsible for everything that you’re doing.

10 Reasons Why You Should Root Android in 2019

  1. Remove Bloatware

The reason for putting the bloatware removal at number one is, this may be the most annoying thing that any Android user wants to get rid off. Manufacturers like Samsung, Sony, HTC push a handful of applications in their Android smartphones. These applications include manufacturer exclusive applications that these giants want the users to use in the first place. Bloatware is responsible for slowing down the performance of your phone. We have seen Samsung users always getting disappointed because of getting a laggy TouchWiz. There’s nothing that makes TouchWiz laggy, but the culprit is the default applications installed by Samsung, called bloatware.Wallpaper-Funny-Android-vs-Apple-HD-Free-900x1000

You cannot apparently remove the stock or default applications by simply accessing the file manager. You need root access to remove the factory installed applications from your phone. Some manufacturers now allow disabling the stock applications, but if you’re owning a bit older device then you’re probably gonna need root access to remove bloatware. So, that’s why we put it at the number one spot. Here’s a guide on how to remove bloatware using NoBlaot.


2. Root-Specific Applications
android-root

Okay, the 2nd reason that may be good enough to convince you to root your Android phone is the installation of root applications. Root-specific applications are the greatest choice to enhance your Android device without installing a custom ROM or without flashing custom MODs. Root-specific applications allow you to perform the actions that you normally cannot perform. To understand the applications for rooted phones in a better way, we can take a look at Titanium Backup.

Titanium Backup allows the users to backup all system and user applications with data. It also allows users to freeze / disable or uninstall in-built applications. Another great root specific application is Greenify. Using Greenify, you can get better battery life from your Android device. That’s not it, these two applications were mentioned to give you an idea of root-specific apps only. There are tons of root-specific applications which can help you to enhance the performance, battery life of your phone and also bring in some new features. Here’s our list of 10 best applications for a rooted Android smartphone. We recently published a new post covering 30+ best root Apps for Android in 2019.

3. Flash Custom Kernels, Custom Recoveries, Custom ROMs01
Root means freedom. Once you’re rooted, you’re free to install applications like Flashify, Flash Gordon etc. By means of such applications, you can install Custom Kernels, Custom Recoveries and even Custom ROMs. Using Custom Kernels, you can enhance the performance of your phone. Using Custom Recoveries you can flash further .zip files, backup Nandroid, wipe cache, dalvik cache and do a lot more and by flashing a custom ROM, you can enjoy a whole new OS on your phone. You can also install a custom recovery prior to rooting your device, but if you’re got your device rooted before installing a custom recovery then that’s just a plus.This can be done by using a simple root specific application known as Flashify.

4. Customisation and Tweaksgoogle-graffiti-art-mural-android-mwc-2

Root access takes customisation to a whole new level. As we mentioned above that you can flash custom MODs to customise or tweak your system, that means you will be able to make your Android smartphone’s OS work the way you want. One of the greatest tools to modify or tweak your Android system is the Xposed Mod. Xposed Mod works for hundreds of Android smartphones. Xposed MOD’s module repository contains tons of MODs which can make you love your Android phone in just a few taps. You can go ahead and learn to install Xposed MOD on your Android Marshmallow device. 

5. Backup Everythinghow-to-backup-android
We mentioned Titanium Backup above in the root specific applications section. Titanium Backup is something that will allow you to backup each and every file of the applications installed on your phone. You don’t have to worry about the progress of your game. For instance, you’re switching to a new Android device and you want to shift the data of your played game, then Titanium Backup is what’s going to help you. There are many other applications out there that allow you to backup various partitions like IMEI, EFS, Modem of your Android smartphone. You can also backup Nandroid once you’re rooted. In short, you can backup your whole Android device. This is one of the most important things that you would want to do having enabled root access on your Android smartphone. Here are the guides to Backup Nandroid and also how to use Titanium Backup.

6. Merge Internal and External Storagemicro-SD-Card
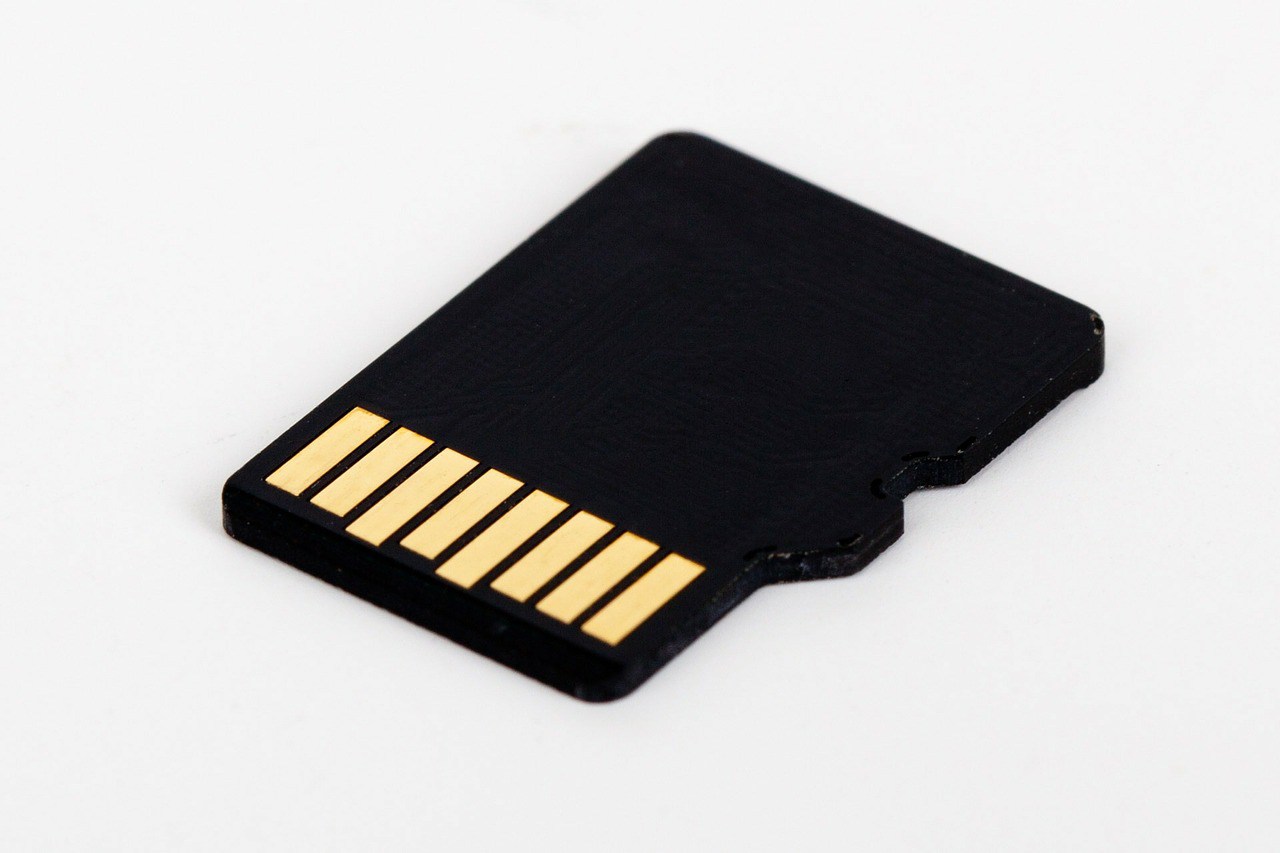
Want to install tons of games on your Android phone but running short of storage? Well, you don’t have to worry if you have a microSD card slot on your phone. All you need to do is, you need to insert a microSD card in your phone and you can merge the internal and external storage using applications like GL to SD, Folder Mount etc. Manufactures now allow moving apps to SD cards, but this functionality may not work for some users as advertised. You will still need to mount SD card into internal storage to have the freedom of installing as many games as you want. You can go ahead and use the guide How To Move Apps, Games To SD Card On Android Using GL to SD.

7. WiFi Tethering

WiFi Tethering allows you to share the internet of your with other deandroid-internetvices. This feature is useful for those users who have got a great data bucket and their usage on phone isn’t enough to finish the data bucket. They can go ahead and share the internet of their bucket with their Laptops, or other phones around them. WiFi Tethering on the unlocked / international devices is not locked down or restricted. Users having international variants of devices can use this feature without any hiccups. The problem stays there for users who have carrier branded devices. Most of the carriers do not allow sharing the internet or phone with other devices. This is done in order to make sure that the users do not use a huge amount of data and stay limited. But I guess, if you’re a user with your a rooted phone, it shouldn’t be a thing to worry about for you. Users with a rooted phone can easily tether WiFi and enjoy the internet of their phone on other devices.
8. Overclock / Under-clock processorAndroid-CPU-UnderClock-OverClock

Just in case the current performance of your phone isn’t satisfying you, you may want to over-clock or under-clock the CPU of it. While this is something that’s highly forbidden and involves high risks, this may not stand as a prominent reason for many users to root their phone. But if you’re not afraid to go ahead and unleash the true power of your phone, you may give it a try. Here’s a complete guide on CPU over-clock and under-clocking.

9. Record Screen of your Androidbest-screen-recorder-for-android

I always wanted to record a video of stuff that I do on my Android phone. After figuring out that it’s easily possible, I was pretty happy and I did try recording the screen of my Android phone. This experiment went pretty successful. All I had to do was, I had to root my phone and then get my hands on a nice screen recorder. There are many screen recording applications out there. There also may be some applications that allow recording the screen without root. Just in case you want to give a try to one of the coolest screen recording applications, you may grab Shou Screen Recorder. Shou requires root.

10. Root your Android because you can and you should!
root3

Android brought all the freedom in the world of smartphones. We have already discussed the greatest advantages of rooting Android. Rooting your smartphone sure has many downsides as well as discussed in the disclaimer, but it shouldn’t be a big deal if you’re willing to explore the world hidden beyond the apparent boundaries of Android. There are tons of methods which have made rooting a lot more easier then it was until a few years ago. Now you only have to make a few taps and you’re done, so why not to root your phone and check out what’s in there?

You can easily root your Android smartphone or tablet using the guides published in the root section of our site.

There may be many other reasons that will be good enough to convince anyone to root their device. Our purpose was to discuss some of the basic and most popular things that you can do after rooting your Android smartphones. So, just because we haven’t mentioned many other aspects, spare us.

We hope that the reasons discussed above were good enough to convince you to root your phone. Are you convinced? Let us know through the comment box below.

Fix Galaxy Note 8 Problems After Android Pie Update

0
Fix Galaxy Note 8 Problems After Android Pie Update

In this guide, we will take a look at the problems of Galaxy Note 8 after Android Pie update. We will also take a look at the solutions to fix Galaxy Note 8 problems after Android Pie update. Let’s learn more about Android Pie update before we fix Galaxy Note 8 issues.

A couple of days back, Samsung updated the Galaxy Note 8 to official Android Pie. The final update takes place after 4 beta versions of Android Pie. The Android Pie update brings a lot of goodies on-board. Even though this update came after 4 beta builds, it still has a number of bugs. Since this is the very first final build of Android Pie, a few bugs were definitely expected. A few Galaxy Note 8 owners have already decided to switch back to Android Oreo from Android Pie. If you have also updated recently, and now you are facing problems, but you don’t want to go back to Android Oreo, then here is the guide you need.Galaxy Note 8 Problems After Android Pie Update

Android Pie for Galaxy Note 8 and its problems

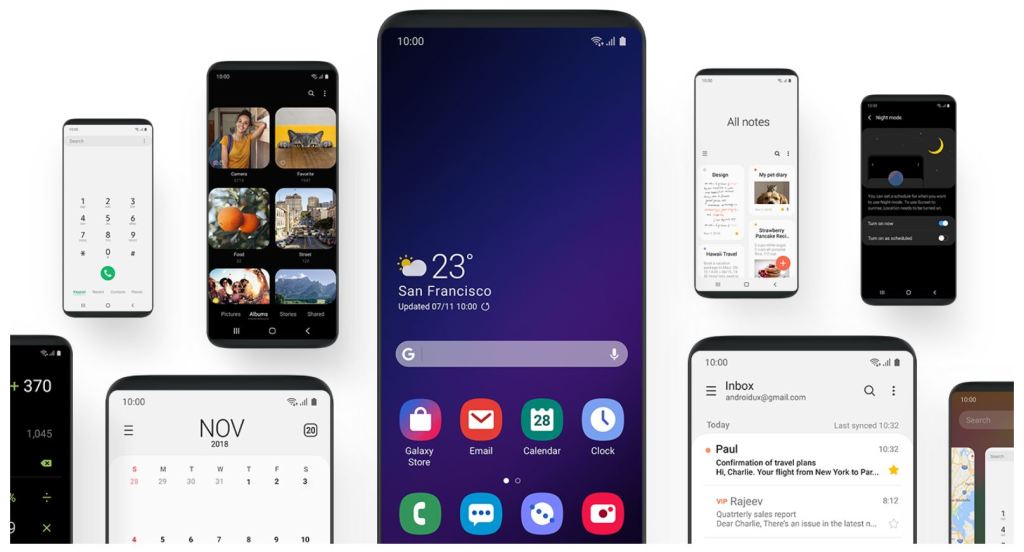
Android Pie update carries the version 9. The Android 9 brings major UI changes for the Note 8. It has got the latest One UI. Settings application along with some other apps has got a whole new design. Notification panel and status bar are completely redesigned. Samsung has added new features like the Night Mode, Adaptive Battery, Native DNS Support, Navigation Gestures, Samsung DeX support without the dock, etc.

While updating the UI and adding new features, Samsung shifted some settings here and there. Samsung also made it more difficult to disable features like the Google Assistant. The phone was supposed to get a boost in its battery life and performance, but for some users, things went on the opposite side. A number of Galaxy Note 8 owners reported poor battery life, lag in performance, unable to disable a few features, and many other problems. This pushed a few Note 8 owners to downgrade the phone to Android Oreo as well, but downgrading is not the best option here.

The best thing is to fix all the problems on your Note 8 after Android Pie. You should not just downgrade since there’s always a solution to every single problem. Also, the latest Android Pie update comes with the latest security patch, which means that this firmware is more secure. Now comes the real question, how are you going to fix all those Galaxy Note 8 issues? Well, that is exactly what we are supposed to do here. As you scroll down, you will find a list of the most common Galaxy Note 8 problems. Multiple fixes to each problem are listed next to it. You can apply the solutions one by one to find out the one that works for you. Let’s start now.

Galaxy Note 8 Problems After Android Pie Update

There is a plethora of solutions given below. At times, you will find one same solution fixing many problems, and many solutions fixing one problem. The solutions are given at the bottom of this guide just to avoid repetition. Follow these simple steps to fix all those Galaxy Note 8 Problems after Android Pie update.

Galaxy Note 8 Reboots Randomly or Reboots on its own after updating to Android Pie

So, right after updating your Note 8 to Android Pie, it started randomly rebooting. Why is it happening? Well, you have to check a few things. The very first thing is whether you performed a clean installation or not. This means if you factory reset your Galaxy Note 8 prior to installing the Android Pie update or you flashed it over your previously filled Galaxy Note 8. In case you dirty-flashed the Android Pie, you should go ahead and perform a clean ROM installation. In case your ROM was installed on a fresh Note 8, follow the solutions given below.

  1. Clear the Cache of your Note 8.
  2. If cache clearing doesn’t work, boot Note 8 into Safe Mode. Check the phone now if it works fine or not.
  3. Factory reset your Galaxy Note 8 before clean ROM installation.
  4. In case the solutions given above do not work, go ahead and perform a new ROM installation all over again.

Galaxy Note 8 is stuck in the boot loop after flashing Android Pie

Now if your phone is stuck in a boot loop right after installing Android Pie, you might be having trouble with the cache of your device. Here are the possible solutions.

  1. Simply boot your phone into the recovery mode. Clear the cache of your phone and reboot it.
  2. If clearing cache doesn’t help, go into recovery again and perform a factory reset.
  3. If the phone is still not working fine, go ahead and install the Android Pie firmware manually once again.

Lock Screen Notifications are gone after Android Pie

If you are unable to find the lock screen notifications on your phone, we would like to tell you that Samsung has messed them up. Samsung has changed the settings for the view style of lock screen notifications. Here is how you wll get them back now.

  • On your Note 8, go to Settings > Notifications.
  • In Notifications, click on View Style > Detailed.
  • Lock the phone and check the notifications on screen now.

Night Mode does not stay on all the time

If you try enabling the Night Mode on your Note 8 from the Developer options, it will not stay on all the time. It will stay on for a while and go off on its own. To make sure that the Night Mode doesn’t turn off on its own, you will have to disable it from Developer Options and enable it from the Night Mode settings. To disable it from the Developer Options, do this:

  • Open Developer Options > Night Mode > Switch it off.

How to disable Google Assistant after updating to Android Pie

The method to disable Google Assistant has changed now. Those of you who are facing trouble to disable it on Android Pie, they can follow these steps.

  1. Go to Settings and open Apps.
  2. Click on the three-dotted (hamburger) icon on the top-right.
  3. Now tap Default Apps > Device Assistant > Choose None.
  4. This will completely disable the Google Assistant.

How to disable Bixby on Note 8 Android Pie

You can disable Bixby on Note 8 powered by Android Pie via BxActions application. Install the application and remap the Bixby button or completely disable it. The choice is yours.

Unable to turn off Battery Saver after installing Android Pie

A few users have reported that they were unable to turn off the Battery Saver after enabling it once. To disable the battery saver, go to Settings and enable the High-Performance mode on your Note 8. After this, click on the Optimized Mode once again. Doing this will disable the Battery Saver on your phone.

Poor Battery Performance on Android Pie – Battery Drains faster

On a new firmware, the battery sometimes gets extremely awkward. At first, it takes a little bit of time for the battery to calibrate itself. If you think that the poor battery life of your Note 8 on Android Pie is due to the battery calibration, you can try calibrating it on your own. If the calibration does not work fine, you can move on to the other solutions. Follow the steps given below calibrate battery first. The other solutions are also listed next to it.

Calibrate Galaxy Note 8 Battery on Android Pie

  1. First of all, let your phone discharge to 0. Do not charge it in between.
  2. As the phone goes dead, put it on charging and charge it to 100%.
  3. After this, use the phone again and let it die at 0.
  4. Charge the phone to 100% again.
  5. Repeat this cycle for 4-5 times.
  6. The battery will be calibrated now.
  7. Check the battery life of your phone now.

Other solutions for Poor Battery life

  1. First of all, you can try turning on the adaptive battery on your Note 8.
  2. If this does not help, go ahead and clear the cache of your phone.
  3. Clearing cache didn’t work? Okay, go ahead and boot into the Safe Mode. Check if the phone works better without apps or not. If it works better, you need to find and delete the trouble-making app.
  4. Factory resetting the Note 8 should be your next option.
  5. If all these options fail, go ahead and perform a whole new clean ROM installation.

Phone lags, poor performance after installing Android Pie on Note 8

You expected the phone to become as smooth as a cream after Android Pie, but it became laggier, the performance became poor. What to do now? Follow these steps.

  • First of all, make sure that you did not touch the Window Animation Scales under Developer Options. If you have changed anything, go back and switch them to their original state.
  • Now boot your Note 8 into the Safe Mode and check how it works without Apps. If it works fine, find the culprit app and delete it.
  • Safe Mode didn’t help, go ahead and clear the cache of your phone.
  • Clearing cache failed too? Go ahead and perform a factory data reset to give your phone a whole new life.
  • If these solutions fail to work, the last option is to perform a clean ROM installation.

Not registered on network error right after flashing Android Pie

Believe me, this is the most annoying error to occur on any Android smartphone. This error is actually much more common on the Samsung Galaxy handsets. It does have a number of reasons to pop up. If you have started seeing this error on your Note 8 after Android 9
Pie installation, there might be something wrong with your network settings. Here are your options to fix this problem.

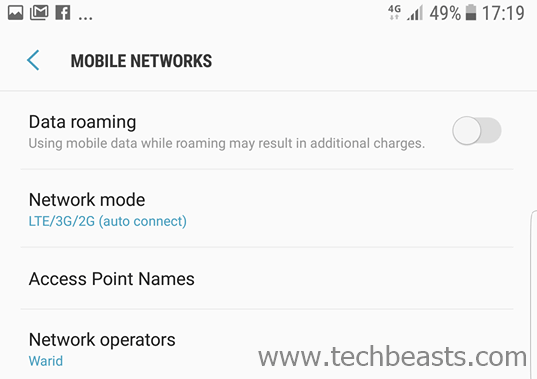
  1. Open Settings and go to Connections > Mobile Networks > Network Mode > It should be set to “Auto Connect”.
  2. The second option is to choose your network. Open Settings > Connections > Mobile Networks > Network Operators > Search Network Operators > Choose your operator from the list.
  3. The last option to fix this problem is by resetting the network settings. To do this, go to Settings > About phone > Reset > Reset Network Settings > Reset Settings. Done.

Galaxy Note 8 WiFi problems on Android 9 Pie

WiFi is not working fine after updating the phone? You need to go through a few steps to fix this problem. Follow these steps to fix Galaxy Note 8 WiFi problems after the Android Pie update.

  1. Open Settings > Connections > WiFi > Choose your connection > Forget it.
  2. Connect to the network again and see if it works fine.
  3. If it still does not work fine, check your router on another device. If the other device is having the same issue, you need to fix the router. Try restart the router or completely resetting it.
  4. Make sure that your Mobile Data is disabled while you try to connect to WiFi.
  5. Enable Airplane Mode and disable it and then see the WiFi.
  6. In the end, call your ISP and ask if something is wrong with the internet in your area.
  7. If none of this helps, install the firmware once again to see if the WiFi works fine on a new firmware.
  8. Still failed? Time to take your Note 8 to the Samsung Service Center.

Galaxy Note 8 Camera crashing on Android 9 Pie

Samsung has enhanced the Camera app in the Android Pie update. The phone now has a handful of new options in the camera application. Unfortunately, the Camera app is not working up to the mark for some users. Here is what you can do.

  • First of all, try clearing the Cache of the Camera app. Reboot your phone after this.
  • If clearing Camera Cache helps, you should be fine. In case it doesn’t, try clearing the cache of your phone.
  • In case both these solutions do not work, check the error you are getting and see if its related to the hardware.
  • If the problem is hardware-related, you need to get your phone checked from the nearest Samsung Service Center.

Clear Galaxy Note 8 Cache

How to clear cache on Galaxy Note 8

  • First of all, shut down your Note 8 by pressing the power button for about 5 seconds.
  • Now press and hold Volume Up + Bixby + Power button to boot the phone.
  • As soon as you see the logo on the screen, let the keys go.
  • Your phone will take you into the recovery mode now. In recovery, press Volume Down to highlight “wipe cache partition”.
  • Press the Power button to wipe cache. Now press Volume Down once again to select “Yes” and press Power button to make a selection.
  • Reboot your Galaxy Note 8 after this. The cache will be wiped.

Clear Galaxy Note 8 App Cache

How to clear App Cache on Note 8

  • On your phone, open Settings > App Settings/Apps/Application Manager.
  • Go to All Apps.
  • Now select the application who’s cache you want to clear.
  • In the App Settings, go to Storage.
  • Now click on Clear Cache.
  • Reboot your phone after this.
  • Run that application again.

Boot Galaxy Note 8 into Safe Mode

Boot Galaxy Note 8 into Safe Mode

  • Turn off your Note 8.
  • Turn on the Note 8 again.
  • While the phone is booting up, press and hold Volume Down key.
  • Keep the key pressed unless you see the Home Screen.
  • As you see the screen, you will see “Safe Mode” watermark on the lower left corner.
  • Leave the key now.
  • Your Note 8 is in Safe Mode. All Apps are disabled.

Run your phone without apps now to see if the issue has been resolved or not. If your phone still got the problem you are trying to solve, then it is not related to any application. If the phone is not having any issues now, reboot your phone again and check all the apps you installed recently. Delete the application that you think is causing trouble.

Factory Reset Galaxy Note 8

How to factory reset Galaxy Note 8

  • Turn off the Galaxy Note 8.
  • While the phone is off, press and hold Volume Up + Bixby + Power button to go into recovery.
  • As soon as you see the logo on the screen, release the keys.
  • Your phone will take you into the recovery mode now.
  • In recovery, press Volume Down to highlight “factory data reset”.
  • Press the Power button to perform a factory data reset.
  • Now press Volume Down to highlight “Yes” and then press the Power button.
  • Reboot your Galaxy Note 8 after this. Your Note 8 has been reset to factory settings.

Clean Android Pie Installation on Galaxy Note 8

How to make clean Android Pie installation on Note 8

  • Open this guide to install Android Pie on Note 8.
  • Download and extract the firmware.
  • While adding files to Odin, add the CSC file in the CSC tab. CSC file will wipe your phone completely. DO NOT select the HOME_CSC file as that does not clean install the ROM.
  • Install the firmware by following the steps given in that guide.
  • After flashing the new firmware, clear the cache of your phone by following the steps given above.
  • That’s all. You have a clean Android Pie ROM now. This should fix any issue on your phone.

Wrap Up

That’s all folks. I hope that your Galaxy Note 8 is running well on the Android Pie now. If you are facing any other issues, feel free to reach out to us. We will try our best to find the solutions to your problem. Stay connected.

Downgrade Galaxy Note 8 from Android Pie to Android Oreo

2
Downgrade Galaxy Note 8 from Android Pie to Android Oreo

Samsung Galaxy Note 8 was updated to the Android Pie firmware a couple of days back. The latest update brings many changes. The Android Pie, in fact, is the biggest update for the Galaxy Note 8 till date. Although this update is packed with many new features, there are users who are not happy with it. A number of Galaxy Note 8 owners reached out to us asking for a way to downgrade from Android Pie to Android Oreo. If you are also one of those users, you have landed at the right place. In this guide, you will find the steps to downgrade Galaxy Note 8 from Android Pie to Android Oreo. Before you take your Galaxy Note 8 back to Android Oreo, let us take a look at the reasons to downgrade.

Downgrade Galaxy Note 8 fr

Downgrading Galaxy Note 8 to Oreo, but why?

Android Pie update has changed almost everything on the Galaxy Note 8. For example, Samsung has updated the whole UI. The old Samsung Experience UI is gone now. Users have the new One UI on the phone. The One UI comes with new icons, new elements, new menus etc. The icons in the One UI were supposed to look cool, but many users have disliked them. Especially, the phone icon is quite annoying. Similarly, Samsung has moved some options in the Settings application here and there. Its very difficult to find those settings where they used to be before. For example, the settings to change lock screen content have moved to a new menu.

The new update also brings navigation gestures. Samsung hasn’t added haptic feedback, which is also quite annoying for some users. It has now become more difficult to disable Google Assistant.

Having these minor issues does not mean that they are going to stick forever. Users can provide feedback to the developers so that they can fix bugs and make things easy in the future updates. Also, the Android Pie update’s very first build has just rolled out. Samsung will definitely release a number of updates in the coming few days it comes to know about the problems.

For now, if you are not satisfied with the Android Pie on Note 8, you can downgrade it. It is quite easy to downgrade Galaxy Note 8 from Android Pie to Android Oreo. All you have to do is to follow a few steps given below.

Preparations to downgrade Note 8 to Android Oreo

  • This guide is for Galaxy Note 8 only.
  • Backup your call logs, SMS messages, contacts, and media content.
  • Enable OEM Unlocking and USB Debugging mode on your Note 8.
  • Use OEM Data Cable to connect phone to your computer.
  • Disable Firewall, Antivirus, and Samsung Smart Switch if you have any of these enabled.
  • Charge your phone up to 50% to avoid a powerloss during downgrade process.
  • Follow the remaining steps carefully.

Required Downloads

  • Odin 3.13.1 for PC – Download & Extract
  • Samsung USB Drivers – Download & Install
  • Android Oreo Firmware for Note 8
    • Note: Download the most recent Android Oreo firmware. Make sure that the Android Oreo has the latest security patch installed. Do not download an old firmware.
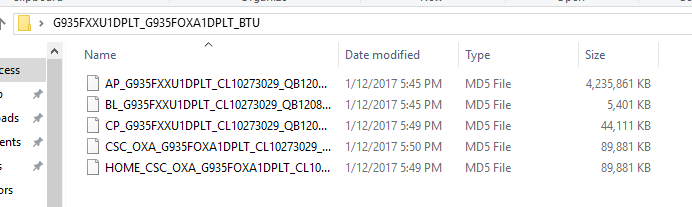
  • Extract the downloaded firmware files to get AP, BL, CP, CSC, and HOME_CSC files.
Android Oreo firmware files
Android Oreo firmware files – Image used for Reference only.

Downgrade Galaxy Note 8 from Android Pie to Android Oreo

Follow these steps to downgrade Galaxy Note 8 from Android Pie to Android Oreo.

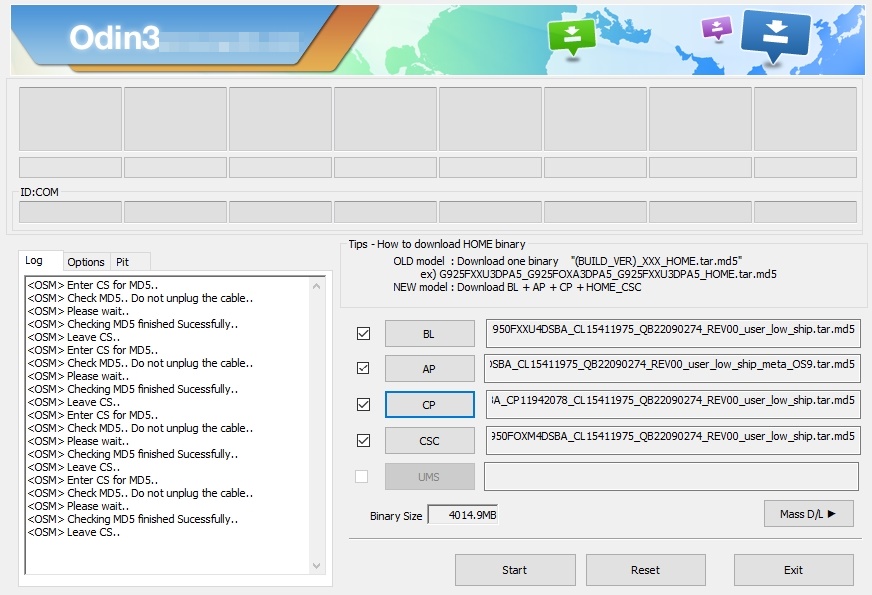
  1. Open Odin.exe, add the firmware files.

    You will get the Odin.exe file after you extract Odin. Open Odin.exe. Go to Options in Odin and make sure that the only options checked are F.Reset.Time and Auto Reboot. Now get back to the main menu in Odin.
    Click on the AP tab and load the AP file.
    Similarly, click on the BL tab and load the BL file.
    Now add the CP file to the CP tab.
    Lastly, if you want to factory reset the phone, add the CSC file to the CSC tab. If you want to keep all data, load the Home_CSC file instead of CSC.

  2. Boot Galaxy Note 8 into Download Mode.

    Power down your Galaxy Note 8 now. Press and hold Bixby + Volume Down + Power button to boot into Download Mode. As you see a warning on screen, press Volume Up to continue.

  3. Connect Note 8 to the computer now.

    Use your original data cable to connect Note 8 to the computer. As you connect the phone in download mode, Odin will show a Blue light in the ID:COM box. Odin will also show “Added” in the logs on the left side.

  4. Click on the Start button in Odin to start downgrading.

    You are all set now. Files are loaded. Phone is connected to the computer. Click on the Start button now. Odin will start flashing the Oreo firmware. This process will take 5 to 10 minutes.

  5. Disconnect the phone and restart. That’s all.

    As the process ends, disconnect the phone and restart it. As it boots up, you will find it running on the Android Oreo. That’s all.

Galaxy Note 8 Android Oreo downgrade process
Image used for reference only.

Wrap up

By now, you should have the Note 8 downgraded to Android Oreo. If you have any questions regarding the Galaxy Note 8 or regarding this guide, feel free to reach out to us. We will try our best to respond back.

Fix Galaxy Note 8 Update Failed Error

0
Fix Galaxy Note 8 Update Failed Error

Follow the steps given in this guide to fix Galaxy Note 8 Update Failed Error. The Galaxy Note 8 Update Failed Error does not let you update the phone through OTA. Here is the solution.

Samsung Galaxy Note 8 will be the very first Galaxy phone to get Android 8.0 Oreo update. In the meanwhile, Samsung will keep updating the phone with minor software updates. These minor software updates are there basically for the bug fixing and safety of an Android phone. Every month, smartphone manufacturers roll out new security updates. It’s very important to update your phone with the new updates since these ensure your safety and security. Samsung Galaxy Note 8 users get the updates as well. While installing the updates sometimes, they encounter the error Software Update Failed. This error comes up when the update has been downloaded and it’s about to get installed. This can actually get annoying when the update includes some major changes and you are eager to get it running on your phone.Fix Galaxy Note 8 Software Update Failed Error

Fixing the Software Update Failed issue is not something impossible. There are several methods to solve this creepy issue. You can opt for the easiest method first of all and if it doesn’t work for you, you can go ahead and try using different methods. The methods listed below are numbered according to the difficulty of their use. You should go with the one that seems the best to you. Let’s move on towards the guide to fix the Update Failed error on the Samsung Galaxy Note 8.

Fix Galaxy Note 8 Update Failed Error

How To Fix Software Update Failed Error on Galaxy Note 8 using Wipe Cache Partition

  1. Turn off your phone completely.
  2. Now press and hold Volume Up + Bixby + Power button to turn it on.
  3. As soon as something shows up on screen, let the keys go.
  4. Your phone will now take you to the recovery mode.
  5. In the recovery mode, use the Volume Down Key to navigate to the Wipe cache partition option.
  6. Press the power key to select this option and then select Yes in the next screen.
  7. Once wiped cache, reboot your phone.
  8. Try updating your phone through OTA now and this error won’t come up anymore.

Fix Software Update Failed using Samsung Smart Switch

  1. Download and install Samsung Smart Switch.
  2. Connect your phone to your PC now.
  3. Unlock your phone and allow it for what it’s asking.
  4. Now in the Samsung Smart Switch, click on the Backup button and create a backup of your phone.
  5. After making the backup, click on More > Emergency Sofware Recovery and Initialization.
  6. Now follow on-screen instructions to update your phone using Samsung Smart Switch.

Fix Software Update Failed using Odin

If the solutions listed above fail to work for you, then you can flash a brand new software on your Galaxy Note 8 manually. Here’s the guide to do so: How To Flash Stock Firmware On Samsung Galaxy With Odin

Fix Galaxy S9 Black Screen of Death after the Android 9 Pie update

0
Fix Galaxy S9 Black Screen of Death after the Android 9 Pie update

We’ve got a number of Emails about Galaxy S9 Black Screen of Death problem after updating to Android 9.0. Black Screen of Death is a very serious problem, in the past, we have seen the same issue on many Android devices. There is no limitation of this problem, it can pop-up on your high-end devices as well as on low end. Now we have received a number of complaints from our readers saying, after updating to Android 9.0 their devices don’t respond. All they can see is the black screen nothing more.

However, strange thing is, I am using Samsung Galaxy S9 and I have updated it to Android 9.0. So far I haven’t faced any issue what so ever. But we got Emails about this problem so we have help readers to get it fixed. In this post, you will some potential workarounds which will help you fix the Galaxy S9 Black Screen of Death problem. We have used these workarounds in the past and they did well. Let’s get started now.

Galaxy S9 Black Screen of Death

Samsung Galaxy S9 Black Screen of Death:

Heed the instructions below to Fix the Galaxy S9 Black Screen of Death, After updating it to Android 9.0 Pie. Moreover, you can also use the solutions to Fix stuck in the loop problem.

Forced reboot:

In the past, we got to know that most of the time if you are stuck on the black screen, it’s because of a firmware crash. It happens and there is nothing to worry about, it’s a common and minor issue. Once you got stuck on black screen no matter what you do, your device won’t respond. It seems that it’s some kind of hardware issue but it’s not. Try the following instructions and you will get rid of Galaxy S9 Black Screen of Death.

  • Press and hold the volume down button and the power key at the same time for 10 seconds or more.

We called it forced reboot, it may seem like a normal reboot but it’s not. All of your device memory will be refreshed and all the services will be reloaded. However, if it is not working for you, then you should try the following steps. It may look alike the same procedure but breaking into steps will help you get the clear picture.

  • Press + Hold Volume Down Button -> Keep Holding Volume Down Button & Press and Hold Power Key -> Hold both Keys for 15 seconds.

This will give your device a kick start. However, if this method didn’t work for you, try the next one below.

Connect the phone to charger and force restart it:

Time needed: 5 minutes.

Follow the instruction provided below. Make sure you perform all the steps in the same manner.

  1. Plug Charger

    Make sure you plug the charger in the working wall outlet. Otherwise, you won’t be able to wake up your device.

  2. Connect your Device

    Now that you have plug the charger, connect your Galaxy S9 to its charger. Also, make sure you are using the original USB cable.

  3. Charger for at least 10 minutes

    No matter what your device shows you on the screen or not. You need to charge your device for at least 10 minutes.

  4. Force Reboot

    Press + Hold Volume Down Button -> Keep Holding Volume Down Button & Press and Hold Power Key -> Hold both Keys for 15 seconds.

Try rebooting your phone in recovery mode:

  1. Power down your phone completely.
  2. Now press and hold Volume Up + Bixby + Power button to turn it on.
  3. Your phone will take a while to boot up. As soon as it does and shows you the Samsung logo, let the keys go.
  4. Your phone will now load the recovery.
  5. Let the recovery load. Once done, you can operate the recovery mode freely using Volume Up, Down & Power keys.

How to Hard Reset or Factory Reset Galaxy S9/S9 Plus

  1. Turn off your phone.
  2. Reboot your Galaxy S9 or S9 Plus into Recovery Mode using the steps above.
  3. Once you are in recovery mode, navigate to the “wipe data/factory reset” using Volume Down key.
  4. Press the Power button to make a selection.
  5. In the next screen, highlight Yes and press the power button to perform a hard reset.

How to clear cache on Galaxy S9 & Galaxy S9 Plus

  1. Shut down your phone.
  2. Boot into the recovery mode.
  3. Scroll down and highlight “wipe cache partition”.
  4. Press the Power button to make a selection.
  5. Highlight Yes and let the phone wipe its cache now. That’s all.

Block Ads on Samsung Galaxy without third-party applications [No root required]

0
Block Ads on Samsung Galaxy without third-party applications [No root required]
Block Ads on Samsung Galaxy without third-party applications

You can now block Ads on Samsung Galaxy without third-party applications. No root access, nothing complex is needed for this. Wondering how? Well, that is possible because of the latest Android Pie update on Samsung Galaxy handsets. Follow this guide to block Ads on Samsung Galaxy without third-party applications. This guide will explain how to use the private DNS to enable system-wide Ad-Block. Before enabling the system-wide AdBlock on Samsung phones, let us understand how this has been made possible.

Block Ads on Samsung Galaxy without third-party applications

How Blocking Ads on Samsung Galaxy without third-party applications has been made possible

Samsung finally started rolling out the stable Android Pie update. The update, first of all, hit the Samsung Galaxy S9 and S9 Plus phones. The Galaxy S9 and S9 Plus owners were quick enough to find the native DNS over TLS support in the stable Android Pie build. Samsung has now integrated the native private DNS in this new update. This means that you can use a private DNS without using any third-party application. No root access is needed. You do not need to edit any files using root browser. All you need is a good working DNS to block all those annoying ads on your Samsung phone.

A Redditor going by the name Panda_de tried a DNS to block ads on his Galaxy S9. His experiment worked out and it was further confirmed by numerous Galaxy S9 and S9 Plus owners. It means that all the Samsung phones that will get the Android Pie, can use the same method to block ads. What was cool about this experiment was the fact that it blocked ads in all the stock and third-party applications. It also blocked ads on all the websites that were surfed using the stock or third-party browser. If you are not liking ads on your phone, you can quickly block them using the method coming up next.

Samsung Galaxy Phones that will get Android Pie

In case you don’t already know, here is a list of devices that will get Android Pie.

  • Galaxy S9 and S9 Plus
  • Samsung Galaxy S8 and S8 Plus
  • Galaxy Note 8
  • Samsung Galaxy Note 9
  • Galaxy A8 2018 and Galaxy A8+ 2018
  • Samsung Galaxy A7 2018
  • Galaxy A9 2018
  • Samsung Galaxy Tab S4
  • Galaxy J4 and J4 Plus
  • Samsung Galaxy J6 and J6 Plus
  • Galaxy A8 Star
  • Samsung Galaxy J7 2017, J7 Duo
  • Galaxy Xcover 4
  • Samsung Galaxy J7 Duo
  • Galaxy Tab S3 9.7
  • Samsung Galaxy Tab A 2017
  • Galaxy Tab Active 2
  • Samsung Galaxy Tab A 10.5

This list means that if you have any of these phones/tabs running on Android Pie, you can block Ads on it right away.

Before you block Ads, know that it can hurt website/application owner
Websites, applications, and games use Ads to earn revenue. Our very own website, TechBeasts, is also one of them. If you block ads, it will result in a potential loss of revenue. Before blocking ads, please see if the ads are bearable or not. If the ads are not annoying, you should leave them as it is. Otherwise, blocking is completely your choice. We are only telling you about a trick here and not advising you to do this very thing.

Block Ads on Samsung Galaxy

As mentioned above, this guide is only for Android Pie-powered Galaxy smartphones. Making sure that you have Android 9.0 running on your phone, follow this procedure.

  1. On your phone, Open Settings > Connections > More Connection Settings > Private DNS.
  2. Now click the “Private DNS Provider Hostname”.
  3. Now add one of these in the field depending on your choice.
    1. dns.adguard.com
    2. dns-family.adguard.com
    3. dot-de.blahdns.com
  4. Now click on Save.
  5. All done. You can now enjoy system-wide AdBlock.

Enable Ad Block on Google Chrome

  1. Here is what you have to do to use this feature in Google Chrome.
  2. Open Google Chrome browser on your phone and in the address field, type “chrome://flags” and hit enter.
  3. Now search for “async DNS resolver (#enable-async-dns)” and choose “disabled” in the drop-down menu.
  4. This will let Google Chrome use the Private DNS that you set up. Without this, you will not be able to block ads in Google Chrome. That’s all.

Conclusion

That’s all with this guide. This is just a neat trick to stop those irritating pop-ups on your phone. I have already explained how the consequences of this feature can hurt someone who owns a website or application. Give it a second thought before you enable this. If you have any queries or suggestions, feel free to reach out to me through the comments section below.

Enable Night Mode in Android to Stop Asthenopia

0
Enable Night Mode in Android to Stop Asthenopia

With the help of this guide, you will be able to Enable Night Mode in Android devices. Research says the blue spectrums of light emitted out of smartphones are harmful to our eyes. It leads to poor sleep, Asthenopia, and poor health. Both iOS and PC users have solutions for Asthenopia, for Desktop PC you can use software called f.lux. However, iOS users don’t have to install any app, they have got themselves a built-in feature called Night Shift.

Once they are active, both of them will eliminate the blue light spectrum from your display. You will see a red screen instead of white or blue. Moreover, once you have enabled the night shift feature and install f.lux, they automatically get activated whenever you are in a dark environment.

In the case of Android, not all of the Android devices have a built-in night mode feature. That’s why we have created this post, we will tell you how to enable Night Mode in Android devices. Moreover, we will also give you a solution for those Android devices which don’t have built-in Night mode.

Enable Night Mode in Android

Enable Night Mode in Android to Stop Asthenopia:

First, we’ll start with the manufacturers which have built-in night mode feature in their devices. Once we are done with those, then we will tell you what you have to do if you don’t have built-in night mode in your device.

How to disable/hide Notch on Android phones

Pixel Devices:

If you own a Pixel device you are in luck. Google introduced Night Light feature in Android 7.1, it means if you have Pixel device running Android 7.1 or higher. You can enable night mode from your settings. However, the bad news is that it was only introduced for Pixel devices.

  • Open Settings on your Pixel devices. You can directly open settings from app drawer or you can pull down the notification bar and tap on the gear icon.
  • From there, Tap on Display. Look for “Night Light.” Tap on it to proceed.
  • Now here you can either check the turn on automatically option or you can manually set it as per your desire. Moreover, you can also set a custom schedule.
  • Once the Nigh Light is active you can set its intensity using the slider in the notification bar. Otherwise, you change the settings by heading back to the Night light menu.

Samsung Galaxy Devices:

Just like Pixel devices, Samsung has its own night mode. They called it the “Blue Light Filter,” this mode comes with flagship devices like S8 and Note 8. It works the same as Night Mode.

Fix Youtube Picture-in-Picture Not Working on Android

  • Open Setting on your Samsung devices.
  • Scroll down and Tap on Display menu. Here you will find the Blue Light Filter settings. Tap on it.
  • From here you can set Blue Light Filter settings, set it as you like or you can always go with the automatic settings. However, as per research, the best option is sunset to sunrise.
  • You can also set the intensity through the settings. Set the level of Blue light Filter as per your desire.

Nougat Devices [ Works on only Android 7.0 ]:

It may strange to hear, Android Nougat comes with the built-in Night Mode. However, it was hidden in the System UI Tuner when Android 7.0 was in the beta stage. But it was removed when the final version came out. Although the hidden menu is still there that means you can still access it.

  • First, you need to enable System UI Tuner. Drag down the notification bar twice, now long press the cog icon. Wait for few seconds and then release it. Once you have done that, you will see a wrench icon right next to cog icon.
  • Once you have enabled System UI Tunes, it’s time to Install Night Mode Enabler app. Use the following link.

Night Mode Enabler
Price: Free

  • Launch the app after you have installed it. Tap on “Enable Night Mode” button.
  • A new menu will open up within the System UI Tuner. Moreover, you will see a pop-up saying ” Yay, you should now have a quick toggle for Night Mode available”.
  • It’s time to test the Night Mode. By default when you launch the Night Mode Enabler app, you will notice that your screen will turn yellow. However, if it not that means you are having issues. Tap on the Word ON located at top of the screen.
  • As I have said before the automatic option will be perfect for you. However, like all the devices, you can also set the night mode settings as per your desire.

Third-party apps to Enable Night Mode in Android:

There are a plethora of apps available on Google Play to provide you night mode feature. But among all of them these three are the best. Use the following link to download them.

CF.lumen
Price: Free

That’s all.

How to update Note 8 N950F to Android Pie 9.0 stable

8
How to update Note 8 N950F to Android Pie 9.0 stable

After a few beta builds, Samsung has finally released the stable Android Pie build for Galaxy Note 9. It is initially available in Bulgaria and Slovakia with build number N950FXXU5DSB2. OTA update is released only few days after the beta build popped up. It is safe to say that all minor bugs are now a gone thing and Note 8 users can finally experience a fluid Android Pie experience with brand new One UI.

After Bulgaria and Slovakia, India also received the OTA update. However, it is not sure when rest of the world are going to get it. The current build number is N950FXXU5DSB2 firmware and it is available for N950F variant only. Therefore, do not try to update any other variant of Note 8 using this guide. We will update the site as soon as new firmwares for other variants are released.

update note 8 n950f android pie

What’s new in Note 8 Android Pie & One UI?

Android Pie is a huge update in terms of new features and performance improvements. However, it is not same for Samsung devices. These devices are always branded with a unique UI. For the first time in many years, Samsung has finally moved on from old and sluggish UI to a brand new One UI. It is faster, smoother, seems a lot more minimal and easy to use.

One UI is introduced with Android 9.0 Pie only. Lets take a brief overview of what is new in Galaxy Note 8 Android Pie update. The most important update in the One UI for Note 8 is improved One-Handed usage. Until now, this was only possible due to features like shrinking the display to bottom left or right corner. However, with new language design, there is no specific need for it. All the UI elements are designed in such a way that they are accessible for use with one hand in default view.

Overall focus of OneUI is one a unified design language. Until now, it always seemed like a cluttered and unfinished product. New features were added to find a fix for bad design language in original design. The phone-wide Night mode is a much needed and important addition. It enables the traditional dark mode across entire device. It not only includes the apps but basic UI as well. This works well in addition to the blue light filter to protect your eyes at night time.

In addition to the UI updates, camera app is also updated with improved UI optimizer. It is an AI based software update that enhances the Auto mode in current camera app. Users will get better settings for each scene they’re trying to take a photo in. Moreover, the new Samsung keyboard has got an aesthetic overhaul. Now it changes color based on the app it is in. It picks the accents based on current app. Say goodbye to the old and boring Samsung keyboard for good!

Downloads / Prerequisites

  1. Odin 3.13.1 – Download
  2. Samsung USB Drivers – Download and Install on your PC.
  3. ADB Drivers – Download
  4. Check phone model number in Settings > About Phone > Model Number. It must be N950F. Do not use this guide on any other model.
  5. Charge the phone over 50%.
  6. Enable OEM Unlocking and USB Debugging mode on your Note 8. To do so open Settings > About Phone > Tap the build number for 7 times to enable Developer options. Now go back to Settings > Developer options > Find OEM Unlock & USB Debugging > Enable.
  7. Download Galaxy Note 8 N950F stable Android Pie 9.0 Firmware – N950FXXU5DSB2 Slavokia ORX: Download or N950FXXU5DSB2 Bulgaria BGL: Download
  8. Download any of the two firmware mentioned above. It does not make a difference.

Install Android Pie 9.0 firmware on Galaxy Note 9 N950F

Since it is a full firmware, there is no complicated update procedure. In order to update / install N950FXXU5DSB2 Android Pie 9.0 firmware on N950F Note 8, follow the basic installation steps below. First of all, download and unzip the firmware on desktop. Next up, set up Odin on your PC. Make sure to install ADB and Samsung drivers to avoid connections beforehand. All of these downloads are given above.

If you cannot quite make out the technical terms, follow the easy to follow and step by step guide below.

Time needed: 10 minutes.

Learn how to manually install Android Pie 9.0 Firmware on Galaxy Note 8 N950F.

  1. Start Odin and put Galaxy Note 8 in Download Mode

    Before this step, make sure you’ve set up ADB drivers. Now start unzip the downloaded Odin and open its exe file. Turn off Note 8, wait for few seconds. Hold Volume down + Bixby + Power button until you see the Download screen.

  2. Connect Note 8 with PC via USB cable and start Odin connection

    Once the phone is in download mode, connect it to PC. The ID:COM light should turn blue now. It will also show Added in the activity log.

  3. Add BL, AP, CP, CSC files in Odin

    Download and unzip the firmware file on desktop. Click on respective buttons and add BL, AP, CP and CSC files from the unzipped folder.odin files method

  4. Check all files and click on Start button

    Make sure top 4 boxes are filled with related files. Also the ID:COM box should be blue now. The activity log should show it as ready to flash.

  5. Hit the Start button and wait for it to complete

    Hit the start button on Odin and wait for the flashing to complete. Once done, the phone will restart itself.

Final Words

Once the flashing is complete, the phone will take over 3-4 minutes to reboot. Note that if the flashing does not work because phone does not connect with Odin, then check ADB drivers and Samsung drivers. Moreover, restart your PC after installing these drivers. The first reboot after flashing takes about 3-4 minutes.

This is pretty much all. You have now successfully install Android Pie 9.0 stable firmware on Galaxy Note 8 N950F variant. DO NOT try it on any other device.

Feel free to leave your feedback and queries in the comments below.