Home Blog Page 63

Hard Reset Samsung Galaxy S10 [ Exynos & SD855 ]

0
Hard Reset Samsung Galaxy S10 [ Exynos & SD855 ]

Since Samsung Galaxy S10 made its way to the smartphone world. It’s time to tell you how to Hard Reset Samsung Galaxy S10. You all now that why the hard reset is important and if you don’t know why. Let me give you an idea, Hard reset is the best way to boost up your performance level, you can remove all the software glitches, your device will be back in the factory state.

Now before we move on to the guide, let me give you a complete overview of Samsung Galaxy S10 specs & features. Moreover, you can read all the advantages or benefits of Hard Reset below.

Hard Reset Samsung Galaxy S10

Samsung Galaxy S10:

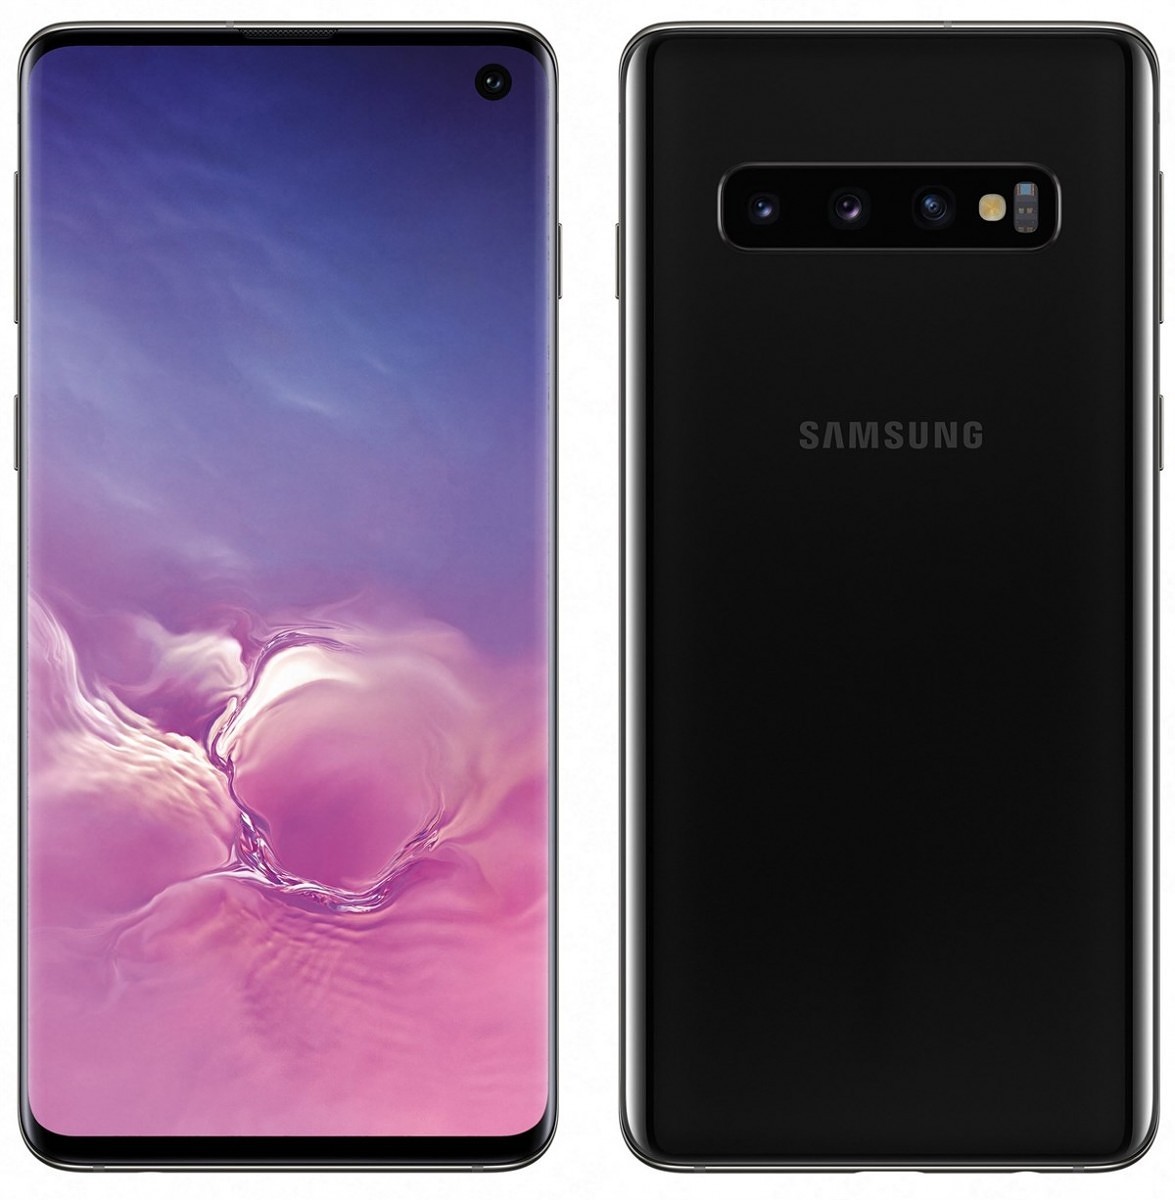
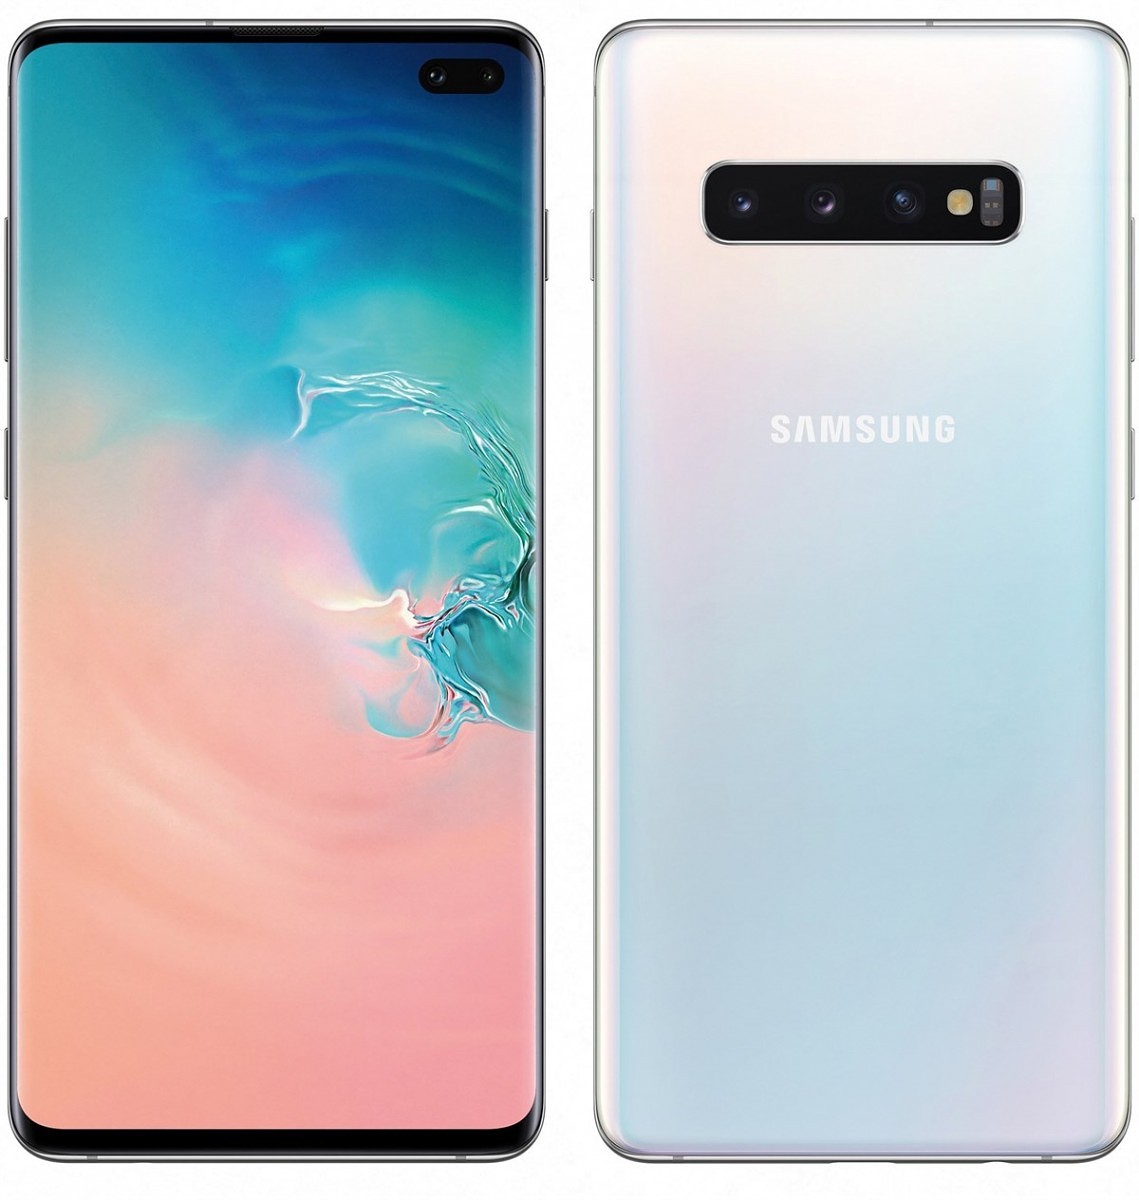
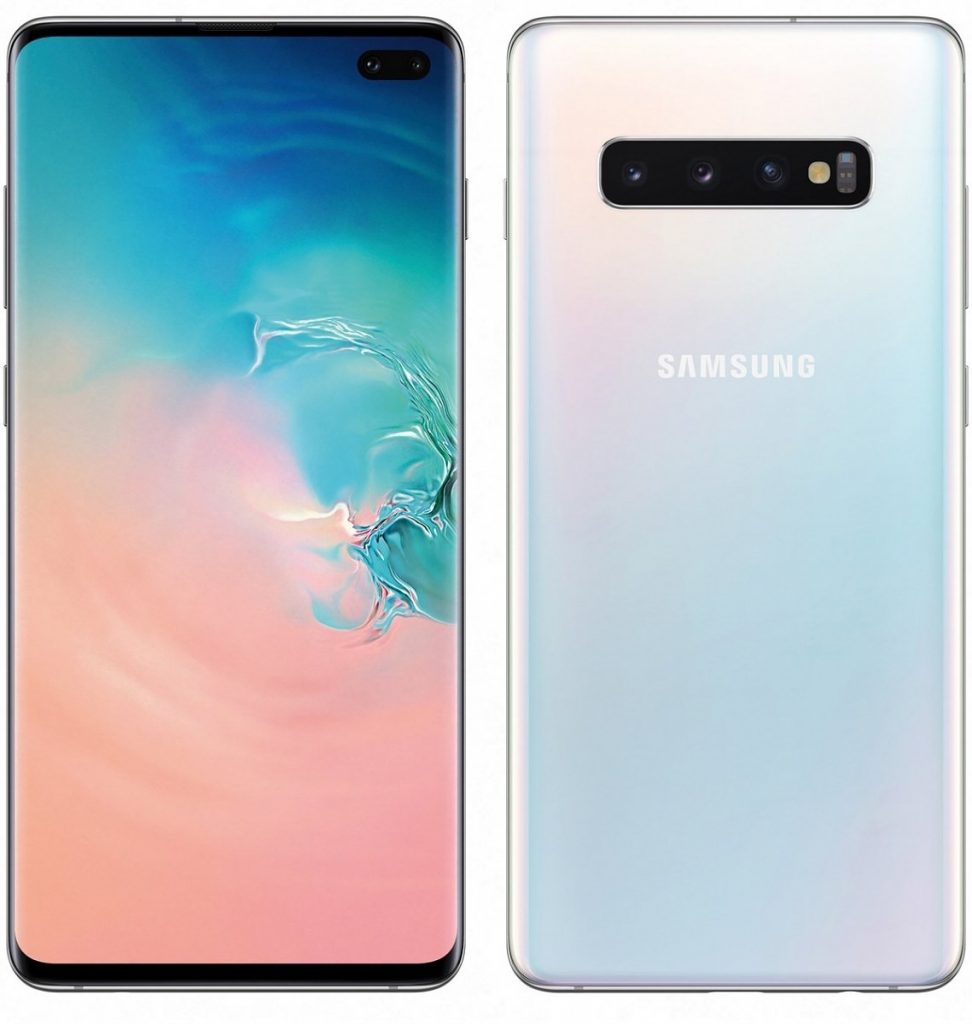
Samsung Galaxy S10 is a lot different from the S10E, but not very much different from the S10 Plus. This phone is for the users who do not want a too big or too small smartphone. The Galaxy S10 comes with a modern design, an upgraded and premium build, and looks that to impress you.

Galaxy S10 Plus sports a 6.1-inch QHD+ Dynamic AMOLED screen. Since this phone has a punch-hole display, its aspect ratio is 19:9. The phone has a glass-sandwich design. Its front and back both are protected by Corning Gorilla Glass 6.

Galaxy S10 comes with the Qualcomm Snapdragon 855 (7nm) or the Exynos 9820 (8nm) CPU. It has the Adreno 640 or the Mali-G76 MP12 GPU. There are two RAM/Storage variants of this phone. You can get the 8GB + 128GB or the 8GB + 512GB option.

If you want to know more about Samsung Galaxy S10, Click Here.

Benefits of Hard Reset:

Summary:
*You can Wipe all of your Data Stored on your device.
*Easily fix all the performance issue.
*Bypass screen lock through hard reset.
*Bring the factory state.
*Fix all the firmware issues.
*Get rid of signal problems, loop issues, rebooting problems and power problems.

How to Hard Reset Samsung Galaxy S10:

  • Turn off your device by holding down the power button for a few seconds.

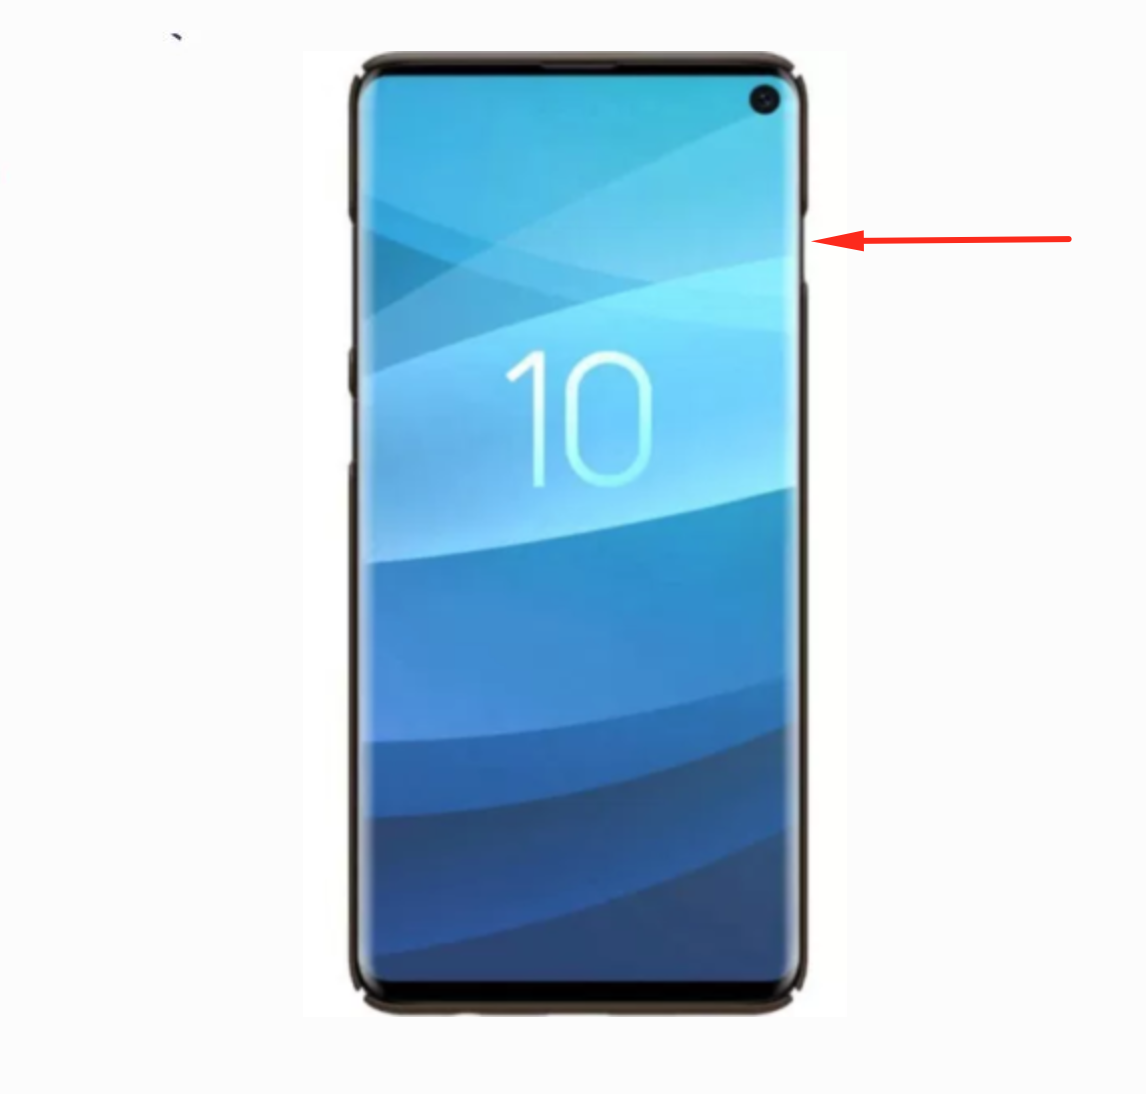
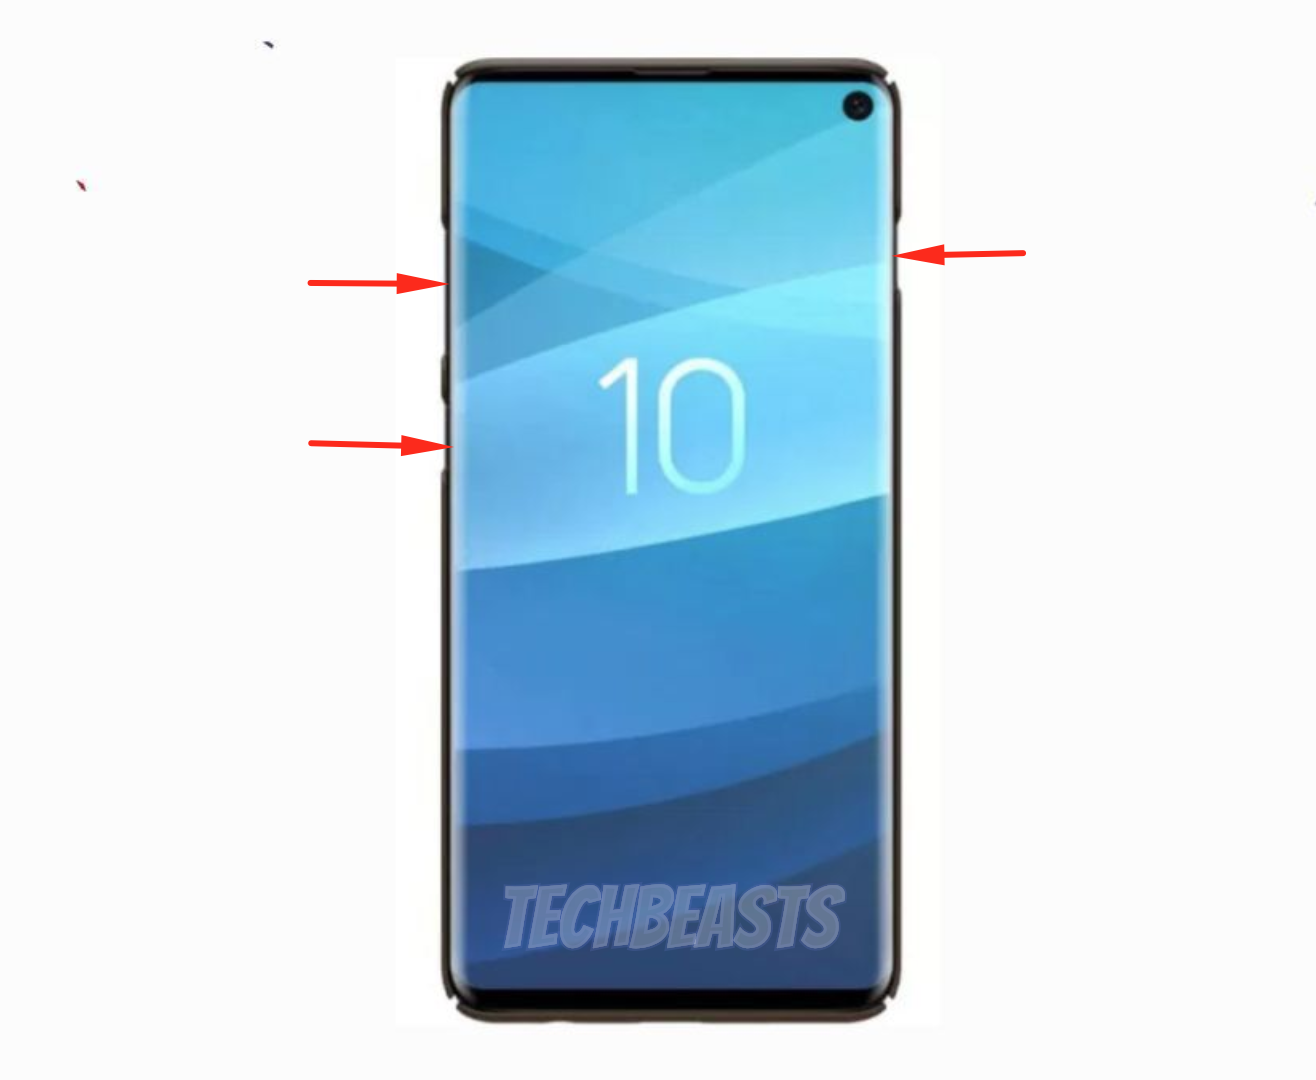
  • Now you need to press & hold Volume Up + Bixby + Power key. When you see the Samsung logo, let go off all the buttons.

  • You’ll in the recovery mode, from here select “wipe data/factory reset” by using the volume buttons. After that, press the power button to confirm your selection.
  • On the next screen, select “Yes” and press the power button.
  • Once Factory Data Reset is finished, head back to the main menu. Tap on “Reboot System“.

That’s all. Now in this method, we used recovery to hard reset Samsung Galaxy S10. In the next method, we’ll use the Setting menu.

Method2:

  • Open Settings from the Home Screen.
  • Scroll down and Tap on Backup & Reset -> Factory Reset.
  • Now select Reset device.
  • To Confirm Choose Erase everything.
  • That will be all, wait for the process to complete.

That’s all. You have successfully Hard Reset Galaxy S10. Please do tell us if you face any problem during this process.

How to Connect Galaxy S10 & S10 Plus to TV

0
How to Connect Galaxy S10 & S10 Plus to TV

Let’s tell you how to Connect Galaxy S10 & S10 Plus to TV. Samsung Galaxy S10 & S10 Plus are the latest flagships. Both of these devices are the best in the business. In term of specs and design, both of these devices are the next big thing in 2019. These devices come with the screen mirroring options, means you can connect Galaxy S10 & S10 Plus to TV. In this article we’ll tell all the methods you can use to connect Galaxy S10 Plus to TV. But before that let me give you an overview of both of these devices.

Samsung Galaxy S10 Plus

Samsung Galaxy S10 Plus is the bigger Galaxy S10 variant this year. This phone comes with a behemoth of a display. Samsung has introduced the new Dynamic AMOLED display which is the only HDR 10+ display at the moment. The Galaxy S10 Plus comes with an infinity -O display carrying a dual camera setup on the front. It has a triple camera at the back. The phone features an ultrasonic fingerprint reader. Galaxy S10 Plus comes with internal storage up to 1TB, which also makes it a device of its own kind. Here is a rundown of Samsung Galaxy S10 Plus’s specs.

Samsung Galaxy S10 Overview

Samsung Galaxy S10 is a lot different from the S10E, but not very much different from the S10 Plus. This phone is for the users who do not want a too big or too small smartphone. The Galaxy S10 comes with a modern design, an upgraded and premium build, and looks that to impress you.

Galaxy S10 Plus sports a 6.1-inch QHD+ Dynamic AMOLED screen. Since this phone has a punch-hole display, its aspect ratio is 19:9. The phone has a glass-sandwich design. Its front and back both are protected by Corning Gorilla Glass 6.

Galaxy S10 comes with the Qualcomm Snapdragon 855 (7nm) or the Exynos 9820 (8nm) CPU. It has the Adreno 640 or the Mali-G76 MP12 GPU. There are two RAM/Storage variants of this phone. You can get the 8GB + 128GB or the 8GB + 512GB option.

If you want to know more you can visit List of Samsung Galaxy S10 Model Numbers and Differences.

Connect Galaxy S10 & S10 Plus to TV

How to Connect Galaxy S10 & S10 Plus to TV:

Following are all the methods which you can use to connect Samsung Galaxy S10 & S10 Plus to TV. Let’s get started now.

How To share the screen and data between your PC and mobile device:

  • First of all download SideSync on your Windows/Mac and mobile device. You can download SideSync from Google Play on your device.
  • Once SideSync is installed on your PC and mobile device, connect your device with PC using USB cable or WiFi.
  • If you have Samsung Smart TV then you can connect your device using WiFi, but if you don’t have Samsung SmatTV then you have to buy an AllShare cast hub in order to connect with TV.

How to screen mirror from Samsung Galaxy S10 to a TV using AllShare Cast:

  • Turn on your television.
  • Power on your AllShare Cast though charger.
  • Connect your TV with AllShare Cast with HDMI Cable.
  • Kindly properly put HDMI Cable in the right port.
  • Now, wait for the light to get blue from red on your AllShare Cast device.
  • Your TV is connected with AllShare Cast.
  • Now go to Samsung Galaxy S10 quick setting and tap on screen mirroring and first turn off then turn on it again.
  • After turning on Screen mirroring you will get a list of available devices. Select AllShare Cast’s dongle and enter the PIN as shown on TV.
  • Your Samsung Galaxy S10 is connected to your TV through AllShare Cast.

How to screen mirror from Samsung Galaxy S10 to a Samsung Smart TV:

  1. Press Input from your Samsung SmartTV remote.
  2. Select Screen Mirroring from your Smart Tv screen.
  3. Now go to your Galaxy S10 quick setting tap on Screen Mirroring.
  4. Your Phone will list all the available device available for Screen Mirroring.
  5. Select Samsung Smart TV. That’s all.

Connect Galaxy S10 to TV using ChromeCast:

This is the best option I think I can give to all those who want to connect their smartphone to a TV.

  • All you have to do is buy a ChromeCast.
  • Connect ChromeCast to your TV HDMI port. Now before moving on make sure that your ChromeCast and Galaxy S10 are same WiFi Network.
  • Now download Chromecast app on the Galaxy S10.
  • Follow the on-screen Instructions to setup ChormeCast and connect your Galaxy S10 to a TV.

List of Samsung Galaxy S10 Model Numbers and Differences

0
List of Samsung Galaxy S10 Model Numbers and Differences

Samsung Galaxy S10 lineup is out in all its glory. Samsung released three powerful smartphones yesterday. Apart from the Galaxy S10, Samsung introduced the Galaxy S10E and the Galaxy S10 Plus. The Galaxy S10 is the standard flagship device for this year. As usual, Samsung will release this phone in all the regions carrying a different model number. Those of you planning to get the Galaxy S10 must have an idea of the model number they want to get. To make your selection easier, here is a list of Samsung Galaxy S10 Model Numbers and Differences. If you are thinking why do the Galaxy S10 Model Numbers and Differences matter, you will find out the answer in a while. Let us take a look at the features and specifications of the new Galaxy S10 before we jump up to its model numbers.

Samsung Galaxy S10 Overview

Samsung Galaxy S10 is a lot different from the S10E, but not very much different from the S10 Plus. This phone is for the users who do not want a too big or too small smartphone. The Galaxy S10 comes with a modern design, an upgraded and premium build, and looks that to impress you.

Galaxy S10 Plus sports a 6.1-inch QHD+ Dynamic AMOLED screen. Since this phone has a punch-hole display, its aspect ratio is 19:9. The phone has a glass-sandwich design. Its front and back both are protected by Corning Gorilla Glass 6.

Galaxy S10 comes with the Qualcomm Snapdragon 855 (7nm) or the Exynos 9820 (8nm) CPU. It has the Adreno 640 or the Mali-G76 MP12 GPU. There are two RAM/Storage variants of this phone. You can get the 8GB + 128GB or the 8GB + 512GB option.

Galaxy S10 Model Numbers

As far as the cameras are concerned, this phone has a triple camera system at the back. It has a 12MP wide shooter, a 12MP telephoto shooter, and a 16MP ultra wide shooter at the back. On the front, it has a single 10MP camera.

Galaxy S10 features and ultrasonic fingerprint scanner. The new fingerprint scanner unlocks the phone before you blink your eye. It also takes less space and doesn’t light up a whole portion of the screen. Users can unlock the phone without even waking it up.

Galaxy S10 uses the USB Type-C for connection and charging purposes. This phone retains the headphone jack too. It has a whopping 3400 mAh battery placed inside. Galaxy S10 comes in Prism Black, Prism Blue, Prism Green, Prism White, and Pink colors.

That was a glimpse of the Galaxy S10’s features and tech-specs. Let’s get back to the Galaxy S10 Model Numbers and Differences. It’s time to understand the importance of model numbers.

Galaxy S10 Model Numbers & Differences – Why does it matter?

The radio frequencies, on which a smartphone connects to a network, are different in each part of the world. To make the smartphones compatible with these frequency bands, companies like Samsung design the radios of there phones in compliance with the regions. To identify a smartphone for a particular region, companies assign it a different model number.

The frequency bands vary from country to country, and network carrier to network carrier as well. For example, a phone belonging to the At&t in the US can have a different model number from the phone that belongs to Verizon. Similarly, a phone designed for the Asian market will have a different model number from the one designed for the European market.

If you try taking the phone Asian Galaxy S10 to the European region and vice versa, it may not work. The only thing blocking your phone could be a different radio frequency or 3G/4G/LTE band.

For this very reason, you always have to be sure of the Galaxy S10 model number you want for your country. Before buying your brand new Galaxy S10, you can take a look at the list coming up next.

List of Samsung Galaxy S10 Model Numbers & Differences

Device NameModel NumberChipsetRegionConnectivity
Galaxy S10SM-G9730Snapdragon 855China (Hong Kong)SIM1:TDD-LTE+FDD-LTE+WCDMA+TD-SCDMA+GSM;SIM2:GSM
Galaxy S10SM-G973FExynos 9820GlobalFDD-LTE+WCDMA+GSM
Galaxy S10SM-G973USnapdragon 855T-MobileFDD-LTE+WCDMA+GSM
Galaxy S10SM-G973SExynos 9820Korea SKTFDD-LTE+WCDMA+CDMA+GSM
Galaxy S10SM-G973KExynos 9820Korea KT+FDD-LTE+WCDMA+GSM
Galaxy S10SM-G973LExynos 9820KoreaFDD-LTE+WCDMA+GSM
Galaxy S10SM-G973USnapdragon 855Sprint - (United States)FDD-LTE+WCDMA+GSM
Galaxy S10SM-G973USnapdragon 855At&t - (United States)FDD-LTE+WCDMA+GSM
Galaxy S10SM-G9739Exynos 9820ChinaSIM1:TDD-LTE+FDD-LTE+CDMA;SIM2:GSM;Roaming:WCDMA+GSM
Galaxy S10SM-G9738Exynos 9820ChinaSIM1:TDD-LTE+TD-SCDMA+GSM;SIM2:GSM;Roaming:FDD-LTE+WCDMA
Galaxy S10SM-G973USnapdragon 855US Cellular - (United States)FDD-LTE+WCDMA+GSM
Galaxy S10SM-G973USnapdragon 855Verizon - (United States)FDD-LTE+WCDMA+CDMA+GSM
Galaxy S10SM-NG973FD Exynos 9820Southeast AsiaSIM1:FDD-LTE+WCDMA+GSM;SIM2:GSM
Galaxy S10SM-G973W8Exynos 9820CanadaFDD-LTE+WCDMA+GSM
Galaxy S10SM-G973JSnapdragon 855JapanFDD-LTE+WCDMA+CDMA+GSM
Galaxy S10SM-G973U1Snapdragon 855US UnlockedFDD-LTE+WCDMA+GSM

Conclusion

That’s all for now. I’m assuming that you are now capable of choosing the right model of Galaxy S10 for yourself. If you have anything to add to this guide or any queries, feel free to drop them in the comments section below. Don’t forget to provide your valuable feedback on the list of Samsung Galaxy S10 Model Numbers & Differences. Stay tuned.

List of Samsung Galaxy S10E Model Numbers & Differences

0
List of Samsung Galaxy S10E Model Numbers & Differences

Before picking up your Galaxy S10E, you need to know which model number is the right one for you. This is the guide to make your Galaxy S10E model selection easier. Galaxy S10E fans can take a look at Galaxy S10E Model Numbers. The differences between all the model numbers are also listed here. Let’s learn about more about the Galaxy S10E and the importance of model numbers before jumping to the list.

Samsung Galaxy S10E

As Samsung’s Galaxy S series completes its first 10 year journey, Samsung rolled out its most powerful smartphones to make a mark. The brings the Galaxy S10E, Galaxy S10, and the Galaxy S10 Plus. The Samsung Galaxy S10E is the cheaper of all three. While this phone is supposed to be a smaller, cheaper device, the main hardware manages to stay inline with the Galaxy S10 and S10 Plus. To cut it short, Samsung has managed to build a cheap-premium phone in the form of Galaxy S10E.

Galaxy S10E Model Numbers

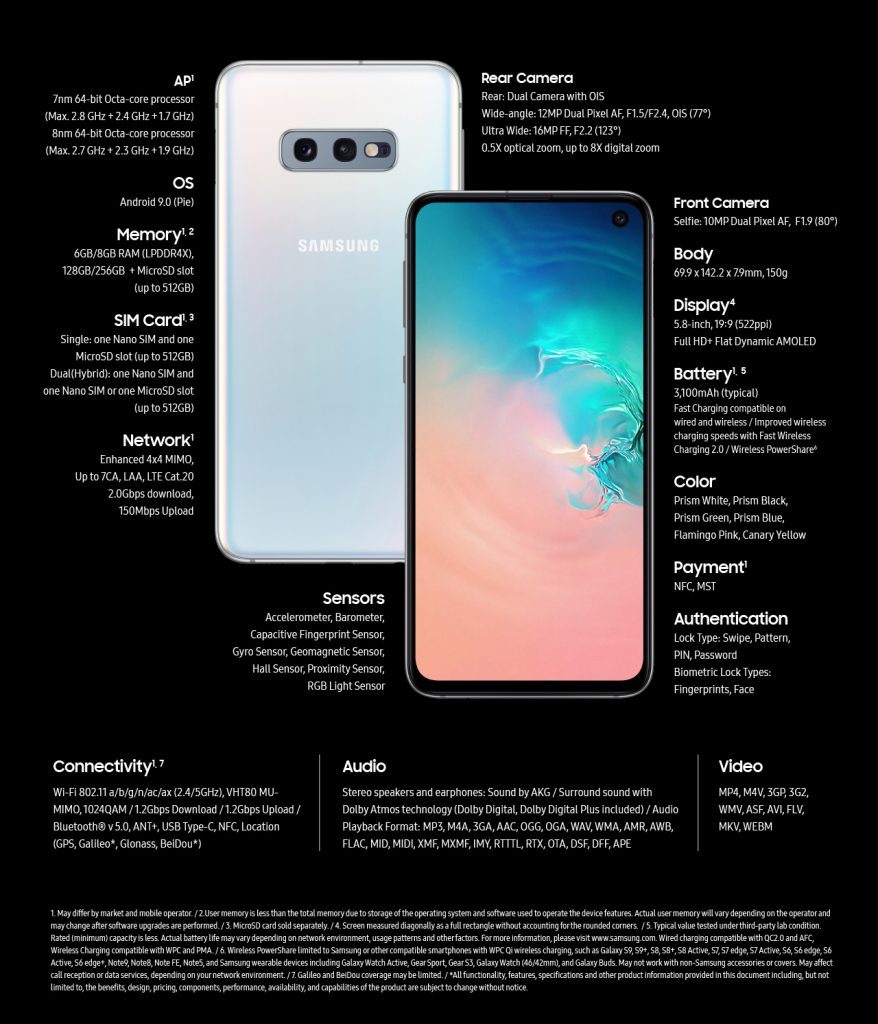
The Galaxy S10E, on the front, has a 5.8-inches full HD Dynamic AMOLED display. Its screen has 19:9 aspect ratio since it has a punch-hole camera. Galaxy S10E is powered by Qualcomm Snapdragon 855 or Exynos 9820 SoC. The GPU is either Adreno 640 or the Mali-G76 MP12. This phone has a RAM of 6GB or 8GB with internal storage of 128GB or 256GB.

Galaxy S10E has a single camera on the front. This is a 10MP camera. At the back, it has 2 cameras including a 12MP wide shooter and a 16MP ultra wide shooter. There is no telephoto lens here, so you don’t have the optical zoom. The digital zoom is definitely there.

Galaxy S10E has a 3100 mAh battery under the hood. This battery is even more than the battery of the Galaxy S9. Galaxy S10E lacks the ultrasonic fingerprint scanner. It utilizes its power button on the right side as its fingerprint reader. This phone also runs on Android 9 Pie out of the box. Galaxy S10E comes in Prism Black, Prism Blue, Prism Green, Canary Yellow, and Pink colors. Its starting price is $750.

Significance of Galaxy S10E Model Numbers

Different network carriers in different countries operate on different frequency bands. The connectivity modules of a country can be different from another country. To avoid connectivity disruption, companies like Samsung manufacture the radios of their smartphones in compliance with a particular region.

To specify the appropriate frequencies for a region, Samsung uses different model numbers for its smartphones. For example, the Galaxy S10E for the US will have a different model number than the Galaxy S10E in Canada. The only purpose of different model numbers is to let the users pick up the right device for their country/region.

The model numbers can be different for the network carriers as well. For example, until the Galaxy S8, Samsung used to release a different model number for each carrier in the United States. The Galaxy S8 for At&t was completely different from the Galaxy S8 for Verizon. With the Galaxy S9, Samsung introduced the unified variant carrying the alphabet “U” in the model number. The U-models are now specified for the network carriers in the US only while the U1-models are the unlocked variants in the US. You cannot use the U-model or the U1 model of Galaxy S10E in a country like Canada or the UK. You must have your compatible Galaxy S10E for your own country.

That was all about the importance of model numbers. I’m assuming that you have a clear understanding of the model numbers and differences now. It’s time to take a look at the Galaxy S10E model numbers and differences.

List of Galaxy S10E Model Numbers & Differences

Device NameModel NumberChipsetRegionConnectivity
Galaxy S10ESM-G9700Snapdragon 855China (Hong Kong)SIM1:TDD-LTE+FDD-LTE+WCDMA+TD-SCDMA+GSM;SIM2:GSM
Galaxy S10ESM-G970FExynos 9820GlobalFDD-LTE+WCDMA+GSM
Galaxy S10ESM-G970USnapdragon 855T-MobileFDD-LTE+WCDMA+GSM
Galaxy S10ESM-G970SExynos 9820Korea SKTFDD-LTE+WCDMA+CDMA+GSM
Galaxy S10ESM-G970KExynos 9820Korea KT+FDD-LTE+WCDMA+GSM
Galaxy S10ESM-G970LExynos 9820KoreaFDD-LTE+WCDMA+GSM
Galaxy S10ESM-G970USnapdragon 855Sprint - (United States)FDD-LTE+WCDMA+GSM
Galaxy S10ESM-G970USnapdragon 855At&t - (United States)FDD-LTE+WCDMA+GSM
Galaxy S10ESM-G9709Exynos 9820ChinaSIM1:TDD-LTE+FDD-LTE+CDMA;SIM2:GSM;Roaming:WCDMA+GSM
Galaxy S10ESM-G9708Exynos 9820ChinaSIM1:TDD-LTE+TD-SCDMA+GSM;SIM2:GSM;Roaming:FDD-LTE+WCDMA
Galaxy S10ESM-G970USnapdragon 855US Cellular - (United States)FDD-LTE+WCDMA+GSM
Galaxy S10ESM-G970USnapdragon 855Verizon - (United States)FDD-LTE+WCDMA+CDMA+GSM
Galaxy S10ESM-NG970FD Exynos 9820Southeast AsiaSIM1:FDD-LTE+WCDMA+GSM;SIM2:GSM
Galaxy S10ESM-G970W8Exynos 9820CanadaFDD-LTE+WCDMA+GSM
Galaxy S10ESM-G970JSnapdragon 855JapanFDD-LTE+WCDMA+CDMA+GSM
Galaxy S10ESM-G970U1Snapdragon 855US UnlockedFDD-LTE+WCDMA+GSM

Final Words

That’s all with this guide. I hope that you guys found this guide useful. You should now be able to avoid any kind of mishap with the device selection. If you have any questions regarding the Galaxy S10E, feel free to ask them below. Don’t forget to drop your feedback regarding the Galaxy S10E Model Numbers and Differences.

Samsung Galaxy S10 Plus Model Numbers & Differences

Samsung Galaxy S10 Plus Model Numbers & Differences

The South Korean giant pulled its most powerful smartphones out of the curtains yesterday. The new Galaxy S10 lineup includes the Galaxy S10E, and the S10 Plus. The Galaxy S10 Plus is the premium smartphone in this lineup. As usual, Samsung will release this phone all over the world carrying a different model number. These model numbers specify the chipset in accordance with the connectivity bands in a particular region. Before getting your Galaxy S10 Plus, you must have a clear idea about which model number you should go with. So, here’s a list of Samsung Galaxy S10 Plus Model Numbers & Differences. Before you take a look at the Galaxy S10 Model Numbers, take a look at the phone’s features and spec-sheet.

Galaxy S10 Plus Model Numbers

Samsung Galaxy S10 Plus

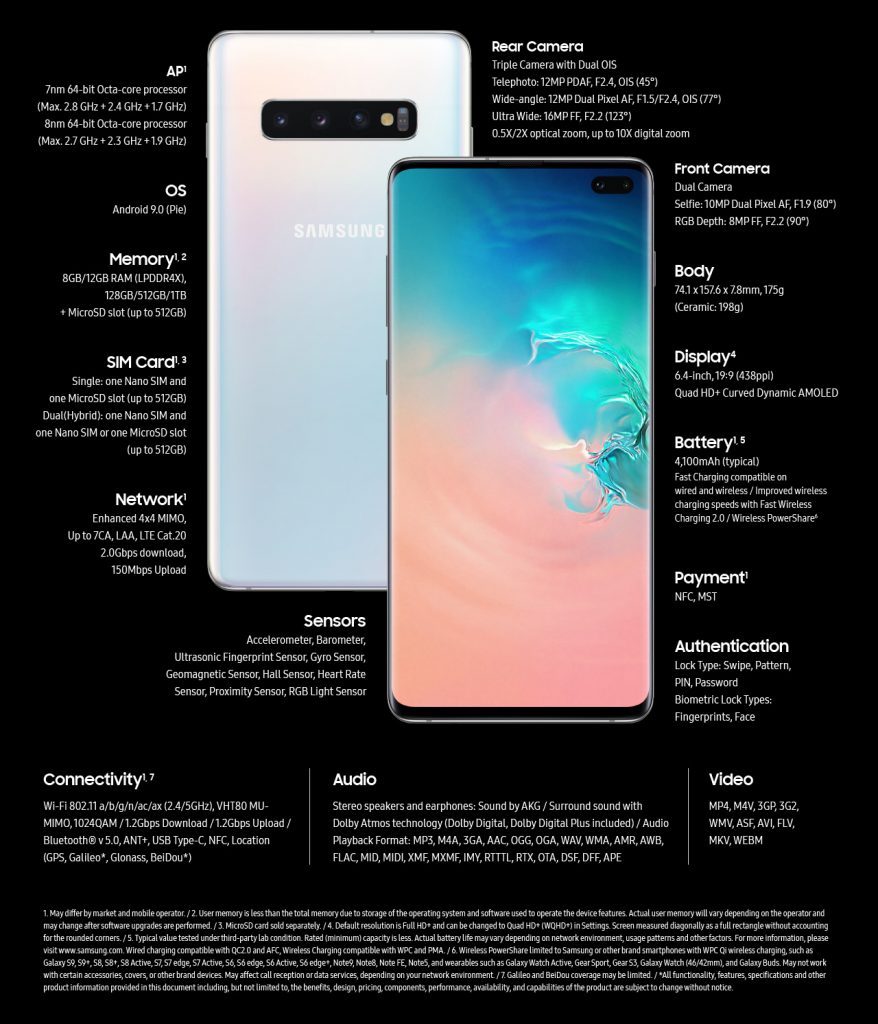
Samsung Galaxy S10 Plus is the bigger Galaxy S10 variant this year. This phone comes with a behemoth of a display. Samsung has introduced the new Dynamic AMOLED display which is the only HDR 10+ display at the moment. The Galaxy S10 Plus comes with an infinity -O display carrying a dual camera setup on the front. It has a triple camera at the back. The phone features an ultrasonic fingerprint reader. Galaxy S10 Plus comes with internal storage up to 1TB, which also makes it a device of its own kind. Here is a run down of Samsung Galaxy S10 Plus’s specs.

Galaxy S10 Plus Specifications

Dimensions 157.6 x 74.1 x 7.8 mm
Weight 175 g
BodyGlass Sandwich
Gorilla Glass 5 &6
DisplayDynamic AMOLED
6.4 inches
1440 x 3040 pixels
SoCSnapdragon 855
Exynos 9820
GPUAdreno 640
Mali-G76 MP12
RAM8GB or 12GB
Storage128GB/512GB/1TB
Camera – Rear12MP+12MP+16MP
Camera – Front10MP+2MP
Battery4100 mAh

Galaxy S10 Plus runs on Android Pie out of the box. The phone uses USB Type-C for connection and charging. Apart from this, the unique features of this device include reverse wireless charging. Samsung has also enhanced the fast wireless charging. The phones now come with a 15W charger to boost the charging speed.

Overall, the Galaxy S10 Plus is a good-looking and impressive smartphone. The notch on the top-right corner of this smartphone basically appears in a place where we used to have the battery icon, signal strength bars or WiFi signals. That cluttered space has now been replaced by the new tiny notch on the S10 Plus which doesn’t let it become ugly.

galaxy s10 model numbers and differences

That’s all with the specifications and features of Galaxy S10 Plus. Let’s get back to what we are here for. Take a look at the Galaxy S10 Plus Model Numbers. Next to the Galaxy S10 Plus Model Numbers, the chipset, network carrier, and connectivity bands are also listed. This list should help you find the differences between all the Galaxy S10 Plus variants.

List of Samsung Galaxy S10 Plus Model Numbers & Differences

Device NameModel NumberChipsetRegionConnectivity
Galaxy S10 PlusSM-G9750Snapdragon 855China (Hong Kong)SIM1:TDD-LTE+FDD-LTE+WCDMA+TD-SCDMA+GSM;SIM2:GSM
Galaxy S10 PlusSM-G975FExynos 9820GlobalFDD-LTE+WCDMA+GSM
Galaxy S10 PlusSM-G975USnapdragon 855T-MobileFDD-LTE+WCDMA+GSM
Galaxy S10 PlusSM-G975SExynos 9820Korea SKTFDD-LTE+WCDMA+CDMA+GSM
Galaxy S10 PlusSM-G975KExynos 9820Korea KT+FDD-LTE+WCDMA+GSM
Galaxy S10 PlusSM-G975LExynos 9820KoreaFDD-LTE+WCDMA+GSM
Galaxy S10 PlusSM-G975USnapdragon 855Sprint - (United States)FDD-LTE+WCDMA+GSM
Galaxy S10 PlusSM-G975USnapdragon 855At&t - (United States)FDD-LTE+WCDMA+GSM
Galaxy S10 PlusSM-G9759Exynos 9820ChinaSIM1:TDD-LTE+FDD-LTE+CDMA;SIM2:GSM;Roaming:WCDMA+GSM
Galaxy S10 PlusSM-G9758Exynos 9820ChinaSIM1:TDD-LTE+TD-SCDMA+GSM;SIM2:GSM;Roaming:FDD-LTE+WCDMA
Galaxy S10 PlusSM-G975USnapdragon 855US Cellular - (United States)FDD-LTE+WCDMA+GSM
Galaxy S10 PlusSM-G975USnapdragon 855Verizon - (United States)FDD-LTE+WCDMA+CDMA+GSM
Galaxy S10 PlusSM-NG975FD Exynos 9820Southeast AsiaSIM1:FDD-LTE+WCDMA+GSM;SIM2:GSM
Galaxy S10 PlusSM-G975W8Exynos 9820CanadaFDD-LTE+WCDMA+GSM
Galaxy S10 PlusSM-G975JSnapdragon 855JapanFDD-LTE+WCDMA+CDMA+GSM
Galaxy S10 PlusSM-G975U1Snapdragon 855US UnlockedFDD-LTE+WCDMA+GSM

Wrap Up

By now, you should have a clear idea about the Galaxy S10 Plus you want to get. This list is an essential part of the Galaxy S10 Plus buying guide. It is very much important to get the appropriate model as getting a wrong model can cause serious connectivity and compatibility issues in an incompatible region. If you are looking for any other kind of information about the Galaxy S10 Plus, feel free to reach out to us. Don’t forget to provide your feedback about the Galaxy S10 Plus Model Numbers & Differences.

Magisk vs SuperSU – What’s the best method to root Android in 2019?

0
Magisk vs SuperSU – What’s the best method to root Android in 2019?

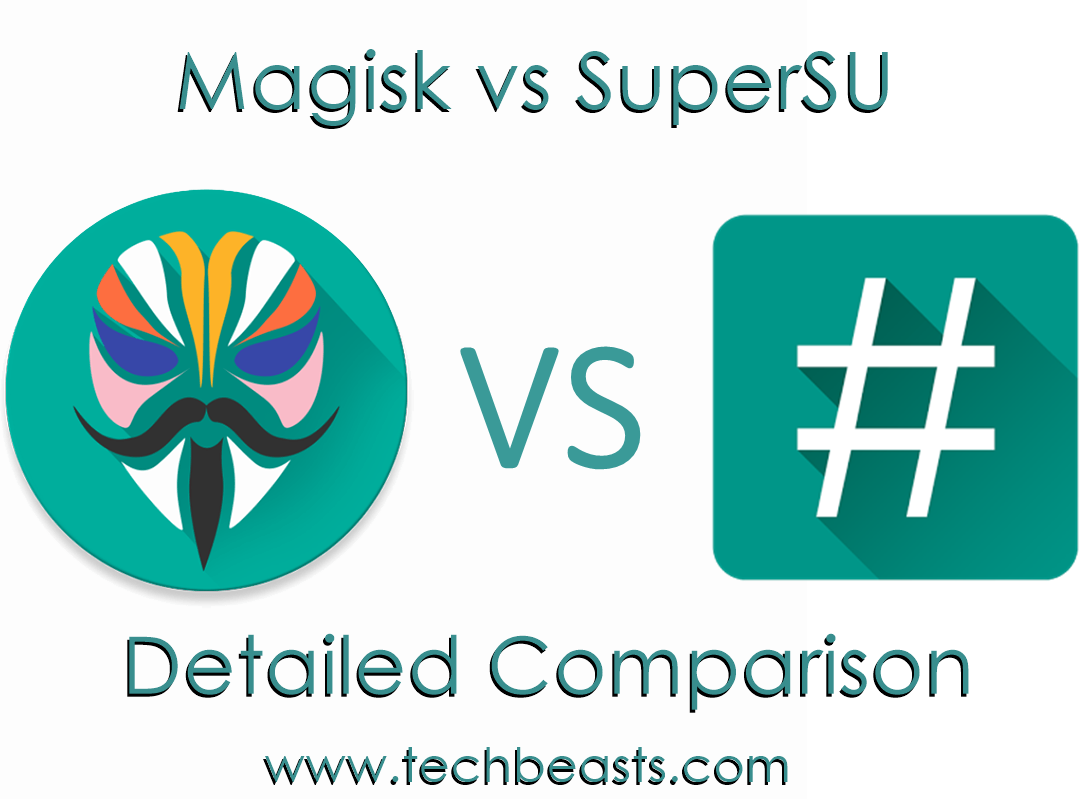
Magisk has replaced SuperSU on thousands of Android devices, but is it the best method to root Android in 2019? In this post, we will take a look at Magisk vs SuperSU to find out what is the best method to root Android now in 2019.

Android is the most widely used operating system on mobile devices all around the world. Since its birth, Android has greatly improved. Over the course of the past few years, Android has been becoming better and secure. Although Android OS, in its stock form, is highly customizable, the rooting solutions gave users more privilege to modify their phones. Rooting solutions have existed since the birth of the Android ecosystem. The open nature of Android allowed the development enthusiasts to mold Android into whatever they wanted.

For those who have no idea about what root is, let’s look into the answer. The term root originates from Linux OS. Since Android is like an offshoot of Linux, the term rooted got replicated for Android as well. The purpose of the root is the same on both the Linux and the Android i.e. to give user access to the system files of the operating system.

Android users root their phone to get various outputs. The root access paves a way for some really useful applications that can completely tweak an Android phone. Users can modify the UI of their phone using such applications. They can also enhance the performance of their phone. The CPU of an Android phone can be overclocked or underclocked. Some users took the opportunity to perform battery optimizations by playing with the system files of Android. Some of the greatest root-access-inventions include applications like Titanium Backup and Greenify. As of 2019, there’s a never-ending list of apps for rooted phones that can enhance your Android experience by leaps and bounds.Magisk vs SuperSU
Superuser vs SuperSU

Back in the good old days, we had amazing developers taking care of all things custom for Android. A custom recovery named as ClockworkMod was developed for Android. This recovery allowed users to flash superuser which easily rooted the phone. The superuser was developed by Koush, the guy who was behind ClockworkMod recovery and SuperSU was developed by Chainfire, who is also known as the root-God in the Android world.

The fame of SuperSU

Both the superuser and SuperSU offered almost same features. SuperSU turned out to be more famous because of continuous updates and its stability. With each new iteration of Android, Chainfire updated his SuperSU package and it kept working smoothly. Chainfire also introduced a CF-Autoroot package for the Samsung Galaxy and Google Nexus phones. Users only had to flash this single file on their phone in order to root it. Typically, users need a custom recovery and the SuperSU.zip file to root the phone. Samsung and Google Nexus users were quite lucky in this regard as they had a cooked all-in-one zip file.

Starting from Android Lollipop, Google focused more on Android security. When Google reached Android Marshmallow, it tried to restrict the users from rooting their phones. The security updates patched some of the root methods. Chainfire had to update his SuperSU to work with the new Android system. However, at this stage, it was evident that Google will keep trying to kill the root access so it was the time for Android users to brace themselves.

SuperSU acquired by a Chinese Company & Google introduced SafetyNet

Back in 2015, a Chinese Company bought SuperSU from Chainfire. However, Chainfire announced that he will keep working on SuperSU in collaboration with the company for a couple of years. At this stage, SuperSU was still working well. And then came the year 2016, when Google introduced SafetyNet. SafetyNet simply restricted the applications from working on rooted phones and that’s when problems for root users started pouring in.

Birth of Magisk

In October 2016, the famous XDA developer topjohnwu released a script named Magisk. The script was capable of bypassing SafetyNet and laid the base for systemless root on Android handsets. Magisk turned out to be a new life for Android while the users were getting sad about the probable end of SuperSU approaching them.

Magisk rose to fame when it allowed gamers to play Pokemon Go on rooted Android phones. Magisk also hides the root from all the apps that refused to work on rooted Android phones. It came with its own Magisk Manager which allowed root users to install mods on the go. There are thousands of modules available for Magisk Manager today.

SuperSU updates halted

In the meanwhile, Chainfire also updated the SuperSU for systemless root. The years of SuperSU’s support by Chainfire were passing by and in May 2019, In his Google+ post, Chainfire announced that he is retiring. Chainfire’s retirement didn’t mark the end of SuperSU, SuperSU is still here and working flawlessly on millions of Android phones. SuperSU will just not see any further Android updates and, so will other root applications of Chainfire. The developer is busy working on his other projects.

SuperSU and Magisk in 2019

So, as of writing this post, there are two most popular root solutions i.e. Magisk and SuperSU. Since the birth of Magsik, a huge number of users have opted for it and they are not relying on SuperSU anymore. So, if you are going to root your Android phone for the first time, the only question that’s going to tickle your mind is what script you should use. This is where you have to see Magisk vs SuperSU comparison. The answer to this question is really simple and I will just list a few points to explain it.

SuperSU vs Magisk

SuperSUMagisk
Modified system back in the day, Systemless root came later on.Systemless Root
SuperSU - Limited ControlMagisk Manager - Extended control over root behviour
Only roots the phone and does nothing else.Magisk Modules - Install thousands of Modules to modify your phone on the go.
Acquired by Chinese Company called CCMTBeing run by topjohnwu and a number of Android enthusiasts
Bypassed SafetyNet after Suhide release, it took a lot of time.Bypassed SafteyNet with its initial release.
Closed SourceOpen Source- Updated very frequently

Conclusion: SuperSU was/is Legendary, but Magisk is the winner in 2019

After Chainfire’s retirement and SuperSU being closed source, it is clear that this script is not going to see further updates. At some point, the SuperSU might stop working and it will fade out. On the other hand, Magisk’s development is just getting more and more improved. Magisk is currently supporting Android P’s developer previews as well. The development is not only active, but it’s also fast. Keeping in view how easy Magisk has made the things for Android users once again, it will not be wrong to say that Magisk is here to stay for at least a decade.

So in 2019, the best method to root Android undoubtedly is Magisk!

Download Magisk | Download SuperSU | Magisk Thread | SuperSU Thread

Guide to install official Android Pie on Galaxy S8 Plus

1
Guide to install official Android Pie on Galaxy S8 Plus

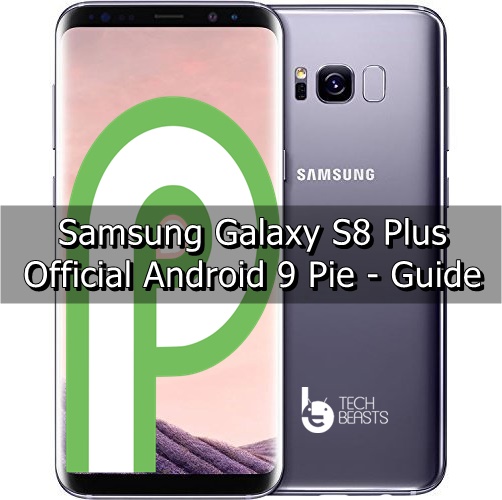
Samsung Galaxy S8 Plus is a two-generation old device. It is the limit to which Samsung pushes major updates. Therefore, we finally have the official Android Pie 9.0 for Galaxy S8 Plus. This firmware is initially released for Germany only. However, anyone around the world can update their S8 Plus to Android Pie firmware with Odin. Since it is an official update, therefore, you don’t have to use the update process. Use this update method for a fresh install, which is of course, much better than the regular update method.

This guide is currently applicable for G955F Galaxy S8 variant. We have to wait until Samsung releases official Android 9.0 firmwares for other variants. Here you can find the new firmwares download links and their installation methods right after they are released. For now, use this guide only to update the Galaxy S8 G955F to Android Pie 9.0 official firmware. Note that this update is from Germany region. However, it is neither region locked nor telecom branded.

s8 plus android pie update firmware

What’s new in Galaxy S8 Plus Android Pie update

The brand new update comes with all the goodies of Android 9.0 in addition to Samsung’s One UI. This is the most prominent update when it comes to a Galaxy device. We have been stuck with slow and below-part touchWiz UI for quite some years now. For the first time, Samsung has finally paid attention to the details and designed its UI with user accessibility in mind.

Ease of use

The basic motivation behind building One UI is to redefine the entire interface for large screen phones. While large phone displays are very cool, it is often in the way of one-handed usage. Now, lot of people have gotten used to it. However, it is still not perfect and lot of things could be improved. Therefore, the brand new One UI totally reimagines the usability. It now keeps in mind all the issues that one could face while using a phone with large display.

For example, the notification tray in Galaxy devices contains buttons for quick settings. These include the likes of WiFi, Mobile Data, Airplane Mode, Screen Share, Night Mode and many more. While there is nothing wrong with how these are presented but their placement is certainly an issue. These are located at top of screen it is often hard to reach buttons with one hand. Now double swiping down on notification bar also brings down the quick settings icons.

Revamped stock Apps

The applications in TouchWiz UI are same for God knows how long. In past, these apps launch with few changes. For the first time, we get new apps for stuff like Messaging, Phone App, Contacts, Music, Calendar and more. All of these apps are redesigned with design language consistent with One UI.

Another cool addition is the Dark Mode. This is a system-wide night mode. What this mode does is turn all white background black. As signified by its title, this mode is there to make viewing screen easeir on the eye in low-light. It is mainly there for when someone wants to use their phone in dark rooms. The white light is really blinding in such times. Until now, these feature was only available withing certain apps, through themes or third-party apps. However, the built-in implementation is certainly better than any third party solutions.

Improved Performance

Although the basic hardware is same. Initial performance tests indicate slight improvement in overall performance. This means that animations are now faster, smoother and responsive. There is an option in Developer Options to decrease transition time for animations. This option is now available by default in settings.

Overall, Android Pie for Galaxy S8 Plus is a massive upgrade. It not only comes with new Android goodies, but it offers new updates from Samsung itself. Enjoy Samsung’s new design language. It is a revamped experience.

Pre-Update Requirements

  1. Odin 3.13.1 – Download
  2. Samsung USB Drivers – Download and Install on your PC.
  3. ADB Drivers – Download
  4. Download Galaxy S8+ G955F Android Pie 9.0 G955FXXU4DSBA Firmware – Direct Link
  5. Check phone model number in Settings > About Phone > Model Number. It must be G955F. Do not use this guide on any other model.
  6. Charge the phone over 50%.
  7. Enable OEM Unlocking and USB Debugging mode on your Galaxy S8+. To do so open Settings > About Phone > Tap the build number for 7 times to enable Developer options. Now go back to Settings > Developer options > Find OEM Unlock & USB Debugging > Enable.
  8. Head over to Settings > Lock Screen and Security > secure Startup. Enable “Require PIN” option here. Enter a PIN that you will remember.

How to install Android Pie 9.0 Firmware on Galaxy S8 Plus

This is an official and stable release. Currently, you can use this guide to update Galaxy S8+ G955F to Android Pie 9.0 official firmware. It is not an update zip therefore, we are going to use Odin for it. The firmware used here is G955FXXU4DSBA and it is of Germany region. Do not worry! It is not locked in German language.

Note that you must make a backup of your personal data before updating. Otherwise, some data may be lost.

Update Guide

Follow the steps below to install Android Pie 9.0 Firmware on Galaxy S8+ via Odin.

Total Time: 10 minutes

Download and unzip Odin.

Unzip the downloaded odin zip file from above. Put it anywhere on your PC.

Download and unzip the Galaxy S8+ Android Pie 9.0 firmware.

Use the link above and download this firmware anywhere on your PC. Unzip it to get all files inside.

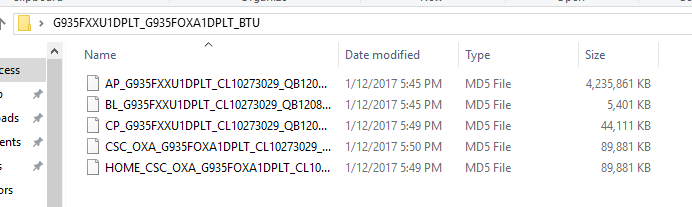
Add BL, CSC, AP and CP files from firmware zip in Odin.

Open Odin, click on respective tabs and load the files with extensions. For example, BL file will go into BL tab. These are mentioned as prefixes on these files. Use Home_CSC file to avoid factory reset. CSC_ file will wipe all data. Choose which one to use.

Put Galaxy S8+ into Download Mode.

Turn off your phone. Wait for 5 seconds. Press and hold volume down + Bixby + home keys together. Wait until you see download mode screen. Press volume up to continue.

Connect Galaxy S8+ to Odin in Download Mode.

Use a USB cable to connect your phone to PC. The ID:COM box should turn blue. Moreover, you’ll get “Added” message in log.

Untick Re-partition option.

In the main menu of Odin, untick Re-partition option. Only tick Auto Reboot and F.Reset Time. Leave rest of the options.

Press Start and let the flashing complete.

Once you’ve double-checked everything, hit the Start button. The flashing process with take few minutes.

Phone will restart automatically after flashing is complete.

Once the flashing is complete, your phone will restart automatically. The first reboot will take longer than usual.

Enter startup PIN if asked.

Once the phone restarts, enter the startup PIN that you created in requirements.

Complete the setup after reboot.

Once the phone is rebooted and unlocked, customize it with your personal settings.

That’s it guys! Your phone is now updated to official Android 9.0 firmware. If someone is facing issues after updating, then consider doing a clean flash. Read it again in step no. 3 above.

Feel free to leave your feedback and queries in the comments below

How to update Galaxy S8 to Android Pie via Odin

1
How to update Galaxy S8 to Android Pie via Odin

Samsung Galaxy S8 G950F in Germany is the first variant to receive an official Android 9.0 update. This is the first region and other regions are yet waiting for it. In this guide, learn how to manually install Android Pie 9.0 firmware on Galaxy S8 G950F with Odin. It is used to install official firmware on Samsung smartphones and tablets.

If someone does not want to want to wait for the OTA update, then follow the steps below to install Android Pie 9.0 firmware on G950F. At this point of time, this is the only variant. This post gets new updates with new firmware releases. Stay tuned for more updates and firmware download links.

galaxy s8 to android pie firmware via odin

What’s new in Galaxy S8 Android Pie update?

Until now, Samsung users did not get a major update in terms of UI. The TouchWiz UI has been the main interface for Galaxy devices for a very long time. However, the Android Pie 9.0 update for Galaxy S8 brings One UI. This is the new proprietary interface for Samsung’s Android devices. It is a complete overhaul. The basic motivation behind One UI is to make overall user experience more friendly. It is especially designed to make one-handed use more accessible.

One UI update

All Galaxy users will agree that it was a complete mess to press any button in notifications bar. On double swipe down, we get the buttons for WiFi, Mobile Data, Airplane Mode and lot of others. However, all of these were previously positioned at top of screen. A phone with large screen is hard to use with this design. Therefore, when you double swipe down on Galaxy S8, the notification button move down as well. It feels way more easy to use this time around.

A much awaited addition to this update was the brand new Dark Mode. It is a system-wide Dark mode or Night mode. From notifications tray to background in settings and stock apps, everything is optimized for night use. Since most of the background turns black, it is much easier on the eye at night time. Moreover, the battery life should be slightly better since white screen consumes slightly more battery.

New stock Apps

In addition to design updates, we also get new stop apps. All of these apps are designed with one-handed usage in mind. This includes Messaging, Phone App and lot of other apps. In the messaging app, now you get menu selection at bottom of screen. To make the bezel less and full screen experience even better, now switch between navigation buttons at bottom of screen for swipe gestures. Swipe up in mid for home key, in left for recent apps menu and in right for back button. This replaces the traditional three button layout of Galaxy S8 with 3 gesture positions.

The biggest complaint with TouchWiz UI was the performance. Initial tests reveal that One UI slightly improves the performance score for S8. However, this does not mean that phone is going to get faster. But the overall change to UI and animations make it feel much faster and smoother than before.

Pre-Update Requirements

  1. Odin 3.13.1 – Download
  2. Samsung USB Drivers – Download and Install on your PC.
  3. ADB Drivers – Download
  4. Download Galaxy S8 G950F Android Pie 9.0 G905FXXU4DSBA Firmware – Direct Link
  5. Check phone model number in Settings > About Phone > Model Number. It must be G950F. Do not use this guide on any other model.
  6. Charge the phone over 50%.
  7. Enable OEM Unlocking and USB Debugging mode on your Galaxy S8. To do so open Settings > About Phone > Tap the build number for 7 times to enable Developer options. Now go back to Settings > Developer options > Find OEM Unlock & USB Debugging > Enable.
  8. Head over to Settings > Lock Screen and Security > secure Startup. Enable “Require PIN” option here. Enter a PIN that you will remember.

How to install Android Pie 9.0 firmware on Galaxy S8 – Guide

Note that this is an official update. This means that it is not rooted or a custom ROM with unofficial changes. The G905FXXU4DSBA update in this guide was first released in Germany (DBT) region. However, the firmware itself is neither locked in any language nor branded with any telecom company. It is a pure update for unlocked Galaxy S8.

At this time, we have only received the Android Pie 9.0 firmware for G950F. As more firmwares are released, this post will incorporate those updates along with firmware download links.

Installation steps via Odin

Follow the steps below to install Android Pie 9.0 Firmware on Galaxy S8 via Odin.

Total Time: 10 minutes

Download and unzip Odin.

Unzip the downloaded odin zip file from above. Put it anywhere on your PC.

Download and unzip the Galaxy S8 Android Pie 9.0 firmware.

Use the link above and download this firmware anywhere on your PC. Unzip it to get all files inside.

Add BL, CSC, AP and CP files from firmware zip in Odin.

Open Odin, click on respective tabs and load the files with extensions. For example, BL file will go into BL tab. These are mentioned as prefixes on these files. Use Home_CSC file to avoid factory reset. Otherwise use CSC_ file to perform a clean install. It will wipe all data on phone.

Put Galaxy S8 into Download Mode.

Turn off your phone. Wait for 5 seconds. Press and hold volume down + Bixby + home keys together. Wait until you see download mode screen. Press volume up to continue.

Connect Galaxy S8 to Odin in Download Mode.

Use a USB cable to connect your phone to PC. The ID:COM box should turn blue. Moreover, you’ll get “Added” message in log.

Untick Re-partition option.

In the main menu of Odin, untick Re-partition option. Only tick Auto Reboot and F.Reset Time. Leave rest of the options.

Press Start and let the flashing complete.

Once you’ve double-checked everything, hit the Start button. The flashing process with take few minutes.

Phone will restart automatically after flashing is complete.

Once the flashing is complete, your phone will restart automatically. The first reboot will take longer than usual.

Enter startup PIN if asked.

Once the phone restarts, enter the startup PIN that you created in requirements.

Complete the setup after reboot.

Once the phone is rebooted and unlocked, customize it with your personal settings.

That’s pretty much it! Enjoy the latest Android Pie update on Galaxy S8 from now on. Note that this might be last major update for this device. Samsung may still release security patches. However, Galaxy S8 Plus probably won’t get official Android 10 firmware.

Feel free to leave your queries and feedback in the comments below.

Install Official Android Pie on Galaxy S8 Plus

1
Install Official Android Pie on Galaxy S8 Plus

The steps to update Galaxy S8 Plus manually using Odin are given in this guide. You can install official Android Pie on Galaxy S8 Plus G950F and G950FD by following the steps coming ahead. 

Today is a big day for Samsung. The South Korean giant introduced its new Galaxy S10 to the world today. Apart from the new phone, Samsung came up with a surprise for the Galaxy S8 Plus owners. Samsung has updated the Galaxy S8 Plus to the Android 9 Pie today. The new update was in beta stages so far. After releasing 4 beta version of the Android Pie, Samsung finally rolled out the final official build. Official Android 9 Pie update carries the build number XXU4DSBA.

Install Official Android Pie on Galaxy S8 Plus

The new update carries massive changes. This is indeed the biggest update to ever happen in the history of Samsung. Since this update is rolling out in phases, it can take pretty long to make its way to all the regions of the world. The update has rolled out for the Galaxy S8 Plus G955F, which can be installed on G955FD as well. If you are one of the users who can’t wait for the OTA to appear in their region, you can update your phone manually.

Before you begin installing official Android Pie on Galaxy S8 Plus, let us take a look at the new features introduced in this firmware.

Galaxy S8 Plus Android Pie

The Android Pie firmware for Galaxy S8 Plus brings a whole new UI. Apart from introducing the cosmetic changes, the phone also gets a bunch of new features. Performance and battery life enhancements are there. Samsung has fixed a handful of problems in this update. Here is a list of all the new features in the Android Pie update.

Samsung One UI
  1. New Samsung One UI with new Launcher and Icons.
  2. Toggles section has been upgraded. New status bar introduced too.
  3. New UI for Settings, Calendar, Phone, and many other apps.
  4. Night Mode, which also known as Dark Mode.
  5. Adaptive Battery Mode.
  6. Samsung Dex support without Dex pad.
  7. Navigation Gestures
  8. New features in the Camera app, also new UI.

That was a glimpse of the new features in the Android Pie update for Galaxy S8 Plus. Let’s get back to the topic now. As you proceed, you will find the method to install Android Pie manually on your S8 Plus.

Note

While updating Galaxy S8 Plus with Android Pie, bear in mind that the firmware given here is the official firmware. It is completely untouched and stock. The firmware is from German region, however, it can be flashed on any Galaxy S8 Plus carrying model number G955F or G955FD regardless of the region. It will not void the warranty of your phone or touch the Knox status. The firmware installation is also safe and secure. All you have to do is to pay full attention to the steps on the way.

Preparing your Galaxy S8 Plus for Android Pie update

  • This guide is for Galaxy S8 Plus G955F and G955FD only.
  • Your phone should have a battery backup of at least 50%.
  • Back up contacts, messages, call logs, and media content.
  • Enable OEM Unlocking and USB Debugging from the Developer Options.
  • Use OEM Data Cable to connect S8 Plus to the computer.
  • Do not use Samsung Smart Switch while using Odin.

Required Downloads for S8 Plus Android Pie Installation

Android Pie firmware files for S8 Plus
Image used for reference only.

How to Install Official Android Pie on Galaxy S8 Plus

Time needed: 8 minutes.

Now these are the few steps to download the Android Pie on Galaxy S8 Plus right away.

  1. First, Open Odin.exe, load the AP, CP, BL, and CSC files.

    First of all, open Odin.exe on your computer. In Odin, click on the AP tab and load the AP file. Similarly, add the CP file to the CP tab. Now add the BL file to the BL tab. Now depending on whether you want to factory reset the phone or not, add the CSC or Home_CSC file to the CSC tab.

  2. Set up Odin for firmware installation now.

    Now in Odin, go to the Options tab. In Options, ensure that the only checked options are F.Reset.Time and Auto Reboot. No other options should be checked. After this, get back to the main menu in Odin.

  3. Enter your Galaxy S8 Plus in Download Mode and connect it to the computer.

    Turn off your Galaxy S8 Plus now. While the phone is off, press and hold Volume Down + Bixby + Power button. As the screen shows you a warning, press Volume Up to continue. Connect the phone to the computer now. The ID:COMbox in Odin should turn blue and it should also show “Added” in the logs.

  4. Install Android Pie on Galaxy S8 by hitting the Start button.

    Click on the “Start” button in Odin now. This will start installing the Android 9 Pie firmware. This process will take up to 10 minutes. After this, the phone will reboot. Disconnect the phone now.

  5. Firmware installed. Set up the phone and enjoy Android Pie!

    As your phone boots up, set it up. You will find it running on the Android Pie now. Enjoy the new version of Android with everything new.

Image used for reference only.

Final Words

Your Galaxy S8 Plus has been updated now. You should be able to enjoy the Android 9 Pie on your phone without any problems. After this update, you should be able to get the OTA updates easily. If your phone is not getting the OTA updates, you can always install the firmware of your region by following this very same guide. If you are stuck with something or if there is something difficult in this guide, feel free to contact us. We will try our best to get back to you as soon as possible.

Download Galaxy S8 Android 9 Pie Stock Firmware

2
Download Galaxy S8 Android 9 Pie Stock Firmware

On a day when Samsung introduced the new Galaxy S10, it did surprise the Galaxy S8 owners too. Samsung has released the official Android 9 Pie update for the Galaxy S8. The Galaxy S8 owners can follow the steps in this guide to upgrade their phone. This new update carries the build number XXU4DSBA. The steps to install Galaxy S8 Android 9 Pie stock firmware are explained in laymen terms. Before you being downloading Galaxy S8 Android 9 Pie firmware, let us see what this new firmware has to offer.

Galaxy S8 Android 9 Pie Stock Firmware

Galaxy S8 Android 9 Pie

The Android Pie firmware comes with numerous changes. At first, this update brings the whole new UI. Samsung has replaced the Samsung Experience UI with the One UI. The One UI has been designed to operate the phone with one hand. It also changes the look of almost every single element of the UI. It brings new icons for all the apps and all options. There are new toggles in the notifications panel. New icons in the status bar can be seen. One UI also changes the entire UI and icons of Settings app. Calendar and Phone apps have a new look too. 

Samsung One UI

Apart from enhancing the looks, this new update also adds a few new features. Samsung users can now find the Adaptive Battery mode in the phone. Galaxy S8 has got a Night Mode too which is actually the Dark Mode. Galaxy S8 can now work with the Samsung Dex without the Dex station. All you need is to use an HDMI to USB Type-C cable. Furthermore, Samsung has optimized the firmware to provide a better battery life and faster performance.

That is all the new stuff in the Android Pie update for Galaxy S8. Let’s get back to work now. Go ahead, follow the instructions to install the official Android 9 Pie on Galaxy S8.

Note

Before using this method to install Android 9 Pie, you can go to Settings > About Phone > Software section and check if there is an OTA for Android Pie. If there is an update available, you should use that method to update the phone. In case the update is not there, you can use this method to update the phone right away.

Preparations to install Android 9 Pie on Galaxy S8

  • First things first, this guide is only Galaxy S8 G950F or G950FD. Do not try on any other device.
  • Backup all of your data as this guide can wipe your phone.
  • Charge your phone up to 50% to avoid power loss during installation.
  • This firmware is for German region, however, you can install it on a Galaxy S8 from any region. The only thing you need to make sure is that your device has the G950F or G950FD model number.
  • Enable OEM Unlocking and USB Debugging mode on your phone.
  • Use OEM Data Cable to connect your phone to the computer.
  • Do not use Samsung Smart Switch while using Odin.
  • Follow the remaining steps carefully.

Required Downloads for Galaxy S8 Android 9 Pie Installation

  • Samsung USB Drivers – Download and Install
  • Odin 3.13.1 – Download and Extract
  • Galaxy S8 Android 9 Pie Firmware – Download and Extract
    • After extraction, you should get the AP, CP, BL, CSC and Home_CSC files
Android Pie Firmware Files

How to install Galaxy S8 Android 9 Pie Stock Firmware

Time needed: 10 minutes.

These are the steps to flash Galaxy S8 Android 9 Pie stock firmware. We will be using Odin to install the firmware manually.

  1. Open Odin.exe, load the AP, CP, BL, and CSC files.

    First of all, open Odin.exe on your computer. In Odin, click on the AP tab and load the AP file. Similarly, add the CP file to the CP tab. Now add the BL file to the BL tab. Now depending on whether you want to factory reset the phone or not, add the CSC or Home_CSC file to the CSC tab.

  2. Set up Odin for firmware installation now.

    Now in Odin, go to the Options tab. In Options, ensure that the only checked options are F.Reset.Time and Auto Reboot. No other options should be checked. After this, get back to the main menu in Odin.

  3. Enter your Galaxy S8 in Download Mode and connect it to the computer.

    Turn off your Galaxy S8 now. While the phone is off, press and hold Volume Down + Bixby + Power button. As the screen shows you a warning, press Volume Up to continue. Connect the phone to the computer now. The ID:COM box in Odin should turn blue and it should also show “Added” in the logs.

  4. Install Android Pie on Galaxy S8 by hitting the Start button.

    Click on the “Start” button in Odin now. This will start installing the Android 9 Pie firmware. This process will take up to 10 minutes. After this, the phone will reboot. Disconnect the phone now.

  5. Firmware installed. Set up the phone and enjoy Android Pie!

    As your phone boots up, set it up. You will find it running on the Android Pie now. Enjoy the new version of Android with everything new.

Galaxy S8 Android Pie
Image used for reference only.

Wrap Up

By this time, you should have the Android Pie up and running on your Galaxy S8. Since this update takes will roll out in phases, it will probably take a lot of time to reach your region through the OTA. But with this guide, you are already ahead and without waiting for the OTA, you just installed it manually on the go. If you are facing any issues using this guide or with your Galaxy S8, feel free to reach out to us. We will try our best to get back to you as soon as possible.

Enable Private Browsing on Any Web Browser [ Tutorial ]

0
Enable Private Browsing on Any Web Browser [ Tutorial ]

Here you will find how to Enable Private Browsing on Any Web Browser. Yes, you can use private browsing on any web browser, whether it is on a mobile or PC. Private browsing feature is available on all the browser in their own ways. Moreover, you will be surprised to know, Private browsing has been around since 2005. Now you can use private browsing on any web browser, it will help you surf the internet anonymously. Nothing will be stored in your browser for e.g history, passwords, cookies, and more.

Private browsing has its perks but on the other hand, you cannot say that private browsing will make you the ghost. The basic information may not store on your PC. However, your Internet service provider, websites you visit and others can collect your information. Still, private browsing will help you a lot when it comes to browsing freely. Now enough of the chit chat, let’s get back to our topic.

Enable Private Browsing

As I have said before, every browser has private browsing but they have different names for it. Moreover, not every browser provides the same feature when it comes to private browsing. Heed the instructions below to Enable Private Browsing on Any Web Browser.

How to Enable Private Browsing on Any Web Browser:

We’ll start with Chrome since it is the most used web browser on PC & smartphones. You will find methods for both PC & smartphones below.

Google Chrome:

You all are well aware of Incognito Mode in Chrome. This is the private browsing in Google Chrome although it doesn’t do much as per our experience but as I said it is the Private Browsing feature in Google Chrome. So let’s tell you how you can enable Incognito Mode in Chrome.

On Windows and Mac:

  • Click on the 3 dots located at the top right corner of the screen. Settings Menu will pop-up, Click on the “New Incognito Window”. This works for both Windows & Mac. However, if you are using Mac you can also access Incognito Window using the file menu.

  • You can use Shorts on both Mac & Windows to access the Incognito Mode. ( Control+Shift+N on Windows or Command+Shift+N on a Mac ).

Once you are in Incognito Windows you will see, everything will be different from the normal Chrome Windows. Even the icon of the Incognito mode is a guy with the hat. They themed it really good, also you will be able to access all your bookmarks, saved password, autofill and download files. However, you won’t be able to use your extensions by default but you can change your chrome extension settings to use them in Incognito Mode.

On Android and iOS:

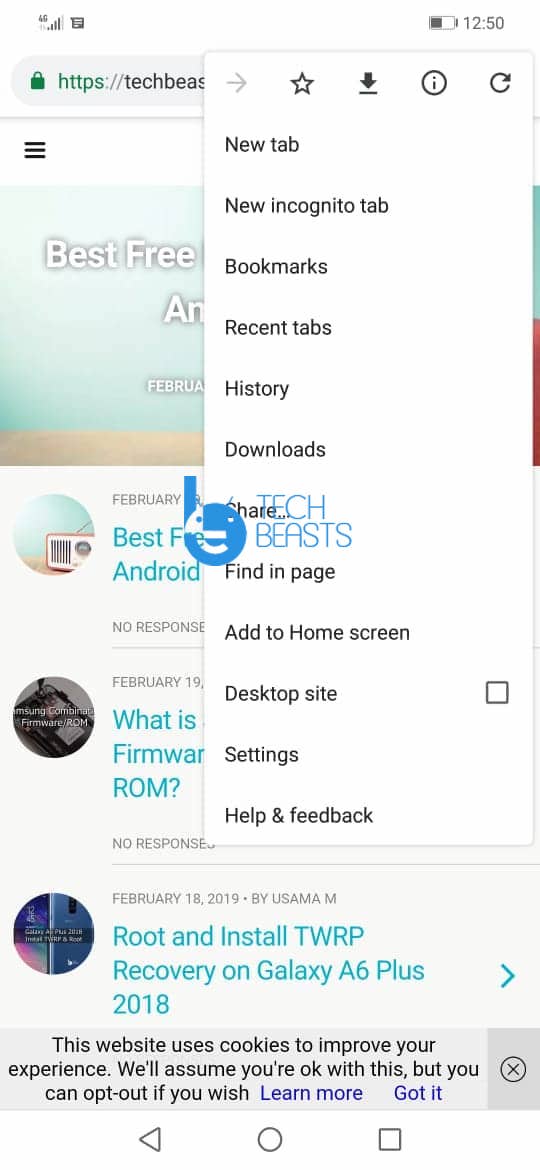
  • In order to use Incognito Mode on Android & iOS devices. Open Chrome -> Tap 3dots -> Tap New Incognito Tap. 

Mozilla Firefox:

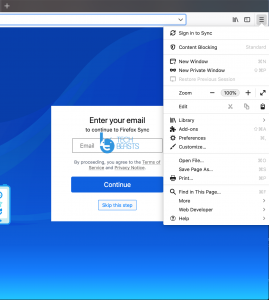
Unlike Chrome, FireFox named it Private Browsing. Nothing fancy and in order to access Private Browsing in Firefox. You need to same just like you did on Chrome. Click on the 3 line icon located on the right upper corner. Click “New Private Window”.

As I told you, you can access Incognito Mode from File option in Mac. You can do the same with FireFox, click on File and select “New Private Window”.

Shortcut:

  • Control+Shift+N on Windows or Command+Shift+N on a Mac.

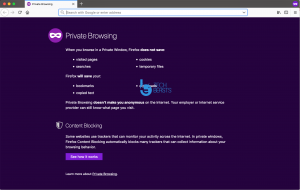
FireFox Private Window is different from the regular Windows. It is all themed in Purple and as it is private browsing Window, you can browse anonymously. Moreover, you can turn tracking protection on or off. Just to make things clear, FireFox Tracking is not as effective as they say.

Internet Explorer:

Don’t be surprised, Internet Explorer is still used by few and they also provide private browsing feature. So it would be unfair not to tell you how to enable Private Browsing on Internet Explorer.

In order to access the private browsing mode in Internet Explorer, click on the gear icon located at the top right side of the browser. Select Safety -> “New InPrivate Windows”. That’s all.

The next Window will be your private browser Window. Unlike all the others, IE Private Browsing Windows will be the same as the regular one. But in terms of private, none of your data will be stored and also none of your toolbars & extensions will work.

Shortcuts:

  • Ctrl+Shift+P.

Microsoft Edge:

Windows 10 comes with a number of new feature including Microsoft Edge. Since it is the predecessor of IE, it provides the same feature as Internet Explorer. Private Browsing feature is called InPrivate in Microsoft Edge Browser. In order to access it, click on the 3dots menu, select New InPrivate Window.

When the new Window opens up, you will see InPrivate on each tab. You can also use the shortcut to enable private browsing in Microsoft Edge.

Shortcuts:

  • Ctrl+Shift+P.

Safari:

Safari is the second most used browser. Moreover, it provides a very secure user experience as compared to all others. It also has its own Private Browsing feature which is called Private Browsing Mode. It works like all the other browsers. Heed the instructions below to enable private browsing mode on Safari.

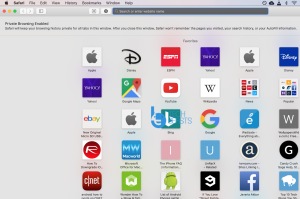
  • Open Up Safari, Click on the File Menu. Choose New Private Windows. A new Window will show up, you will see a pop-up saying “Private Browsing Enabled”.

On iOS:

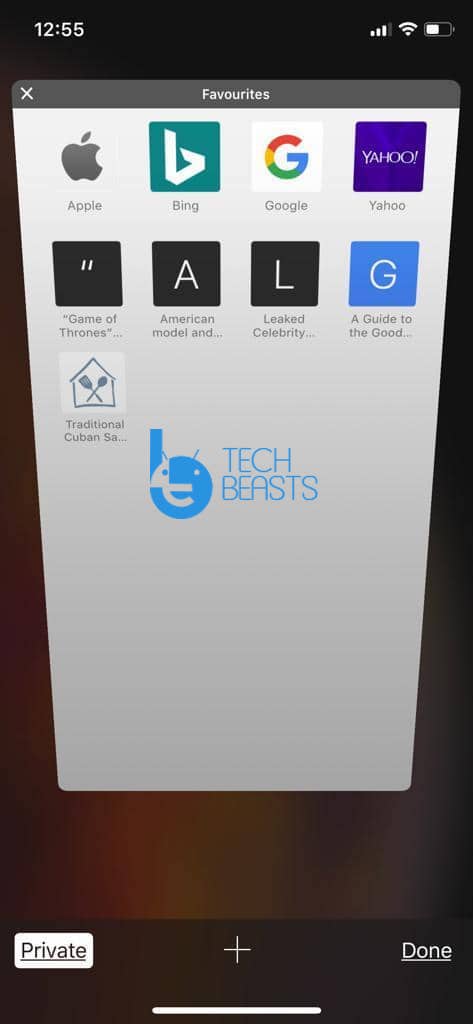
  • Launch Safari – Tap on New Tab Button -> Tap on Private. Now you will be Private Browsing Mode, you will see a grey themed Windows.

That’s all. This is how you can Enable Private Browsing on Any Web Browser. Please do tell us how helpful was our article.

What is Samsung Combination Firmware or Combination ROM?

0
What is Samsung Combination Firmware or Combination ROM?

Over the course of the past few years, the Android OEMs have focused on making the ecosystem secure. With the Android 6.0, Google introduced the factory reset protection in its OS. The same was implemented by companies like Samsung, Huawei, and others. The problem in the world of Android is, it doesn’t take very long for developers to crack the nuts. The security features can be bypassed custom pieces of software. The Samsung Combination Firmware is also one such solution. You must have heard of the combination firmware or combination ROM, but you might have no idea about what it is exactly is. So, the purpose of this guide is to teach you what is Combination Firmware & why do you need it at times.

Combination Firmware

Samsung Combination Firmware

The Samsung Combination Firmware, often known as Combination ROM, is a professional service firmware. Combination Firmware kind of takes your device into the debug mode. It gives the users access to all the hardware features of the Samsung smartphone. Combination Firmware enables the users to test each and every single component of the device. It may be used to view the hardware information of the device too. Developers can use the Combination Firmware to test their applications prior to releasing it for the audience.

Why people use the Combination ROM?

That was the legal side of the combination firmware. Now comes the illegal part of the combination firmware, and to be honest, this is why the combination ROM is so popular. The most common use of the combination ROM is to bypass the FRP (factory reset protection). There is a plethora of tools that can bypass the initial Google Account security check on your Samsung smartphone given that you have installed the combination firmware. The debug mode in the combination ROM is what allows tools like FRP Bypass to crack the security checks.

The Combination ROM can be used to fix the missing or invalid IMEI on an Android phone. Furthermore, it can be used to fix DRK (Device Root Key) on a device. In case you don’t know, the DRK is a unique key that is injected into an Android smartphone by Samsung for the sake of identity and security.

A number of Samsung phone owners have been using the combination firmware to fix boot loop, stuck in the recovery, or the random reboot problems too. To sum it up, you can say that the combination firmware gives you access to the components/features that are only for development purposes. These features are not accessible on a normal Samsung stock ROM.

How the Combination ROM is installed?

Combination ROM, or a component of the combination ROM can be flashed via Odin. Just like the official stock ROM, the combination ROM can be loaded into the AP or PDA tab of the Odin flashtool. The users can put their Samsung handset in the Download Mode to install the combination firmware.

After installing the combination ROM, several tools can be used to achieve your goals that you flashed this ROM for.

For what devices the Combination ROM is available?

Unlike the official Samsung stock ROM, this firmware is available only for a few devices. The Combination ROM is a little difficult to find. There are a few sites that will provide you the firmware for your device, but you have to take the PDA/build number into account. It is not available for each build of the stock ROM.

As of writing this guide, the Combination firmware is available for almost all the popular devices like the Galaxy S7, S7 Edge, S8, S8 Plus, S9, S9 Plus, Galaxy Note 8, and Note 9. You can also find it for slightly older devices.

Wrap Up

By now, I am assuming that you have a clear idea of Combination Firmware. The main purpose of this firmware was the hardware diagnostics, but it’s being utilized for illegitimate purposes too. As a smartphone owner, you must be aware of your Google Account credentials to avoid the use of anything like Combination ROM. Even if you are flashing a combination ROM for the sake of bypassing security on a smartphone you do not own, it is still not secure to keep running the device on the same firmware. It is recommended to know the complications of the combination firmware before flashing it.

If you have any questions or queries, feel free to reach out to us. We will try our best to get back to you as soon as possible.