Home Blog Page 62

How to clear cache on OnePlus 6 without losing data

0
How to clear cache on OnePlus 6 without losing data
OnePlus 6 Picture: BGR

Clearing cache on your Android smartphone is one medicine for over a hundred diseases. If you have been experiencing any kind of issues on your OnePlus 6 lately, you may try clearing its cache. When it comes to clearing cache on a phone like OnePlus 6, many the users are usually afraid of losing their data. The appropriate steps to clear cache on OnePlus 6 without losing data are laid out in this guide. Before you clear cache on OnePlus 6 without losing data, it’s important to learn more about this device and how the cache works.

Clear cache on OnePlus 6
OnePlus 6 Picture: BGR

OnePlus 6

The 6th smartphone of the OnePlus series was released by the Chinese smartphone giant back in 2018. This was the 2nd OnePlus smartphone to come with a notch in its display. The OnePlus 6 carried a 6.28-inch Full HD display with an aspect ratio of 19:9. The company used Gorilla Glass 5 to protect this phone’s screen.

OnePlus 6 was powered by Qualcomm Snapdragon 845 CPU. Adreno 630 GPU was used for graphics. This phone was rolled out in various storage/RAM configurations including 8GB or 6GB RAM and 128GB or 256 GB internal storage. OnePlus 6 ran on Android Oreo out of the box. The phone was later updated to Android Pie.

As far as the cameras are concerned, the OnePlus 6 uses 2 of them at the back and one on the front. At the back, it has a 16MP + 20MP camera setup. On the front, it has a single 16MP camera. Right next to the rear cameras, OnePlus 6 has a fingerprint scanner. It uses USB Type-C for connection and charging. There is a headphone jack in this smartphone too. It has a 3300 mAh battery placed inside.

Those were all the specifications of this device. Let’s learn what is cache and how many types of cache are there in your OnePlus 6.

Cache on OnePlus 6

There are three types of cache on a smartphone like OnePlus 6 in general. First of all, there is the main cache of the entire smartphone. After this, there is the Internet Browser cache, and then there is the application cache.

The phone cache is responsible for running all the processes from booting up the phone to launching applications. This cache is there to boot the phone faster or launch the apps faster. Whenever you launch an application for the first time, its instance is recorded in the cache of your phone. When you launch the same application for the 2nd time, it doesn’t take long to launch. When something goes wrong with the cache of your phone, it can enormously slow down the processing speed of your phone. This is why you need to clear it often.

The Internet Browser cache keeps a record of all the websites you launch. When you launch a same website for the 2nd time, the cache comes in the play to launch that site faster. It doesn’t have to load all the elements from scratch. The cache loads the website instantly because of the recorded data.

The application cache makes the processes inside an application swift. For example, if you are running an application like Prisma or Snapseed, you can make photo-processing fast by clearing the cache of these applications. Similarly, if you want to finish the stutters and glitches from games like PUBG Mobile and Asphalt 9, you can try clearing their cache too.

Assuming that you have a clear idea of how the cache works on a smartphone, we can get back to the guide now. Take a look at the steps given below.

Note

You will not lose any data on your OnePlus 6 by following the steps given in this guide. The steps below elaborate how to clear the OnePlus 6 cache, Apps Cache on OnePlus 6, and the Browser Cache on OnePlus 6. All you have to do is to follow the steps carefully.

Clear cache on OnePlus 6 without losing data

These are the steps to clear OnePlus 6 cache.

Boot your OnePlus 6 into Recovery Mode.

Turn off your OnePlus 6 first of all. Now press and hold Volume Up + Volume Down + Power button to boot into the Recovery.

In Recovery, click on “Wipe data and cache”.

As you enter the recovery mode, enter your password to access it. If you are not using any password, just click the enter button without entering password. As you are in the main menu of recovery, click on “Wipe data and cache”.

Wipe the Cache now.

As you click on Wipe data and cache, you will find an option to “Wipe cache”. Click on this option and then click on “Yes”. The cache will be cleared now.

All done. Reboot the OnePlus 6 now.

You will now see the option to reboot the phone now. Reboot it. As you enter the Home Screen, check the performance of your phone. Also check the issue that you cleared the cache for.
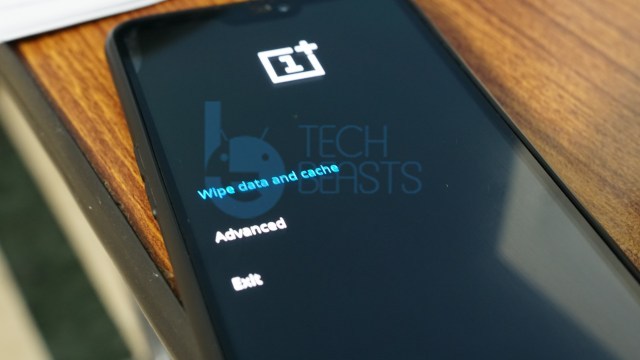
Wipe data and cache
Wipe cache
Hit yes

Clear App Cache on OnePlus 6

  • On your OnePlus 6, open Settings.
  • In Settings, go to Apps and Notifications.
  • Now click on “See All Apps”.
  • Select the application now, for example, Booking.com app.
  • Now click on “Storage” inside the settings of that app.
  • Click on “Clear cache”. You can also click on “Clear data” if needed.
  • Reboot your OnePlus 6 now.
  • App cache has been cleared.
Picture showing how to clear app cache. Booking.com app used as an example only.

Clear Browser Cache on OnePlus 6

  • Open the Google Chrome Browser on your phone.
  • Click on the hamburger menu icon on the top-right corner.
  • Click on “Settings > Privacy > Clear Browsing data”.
  • Select the data you want to clear. For example, cookies, history, cached pages.
  • Clear the data now.
  • Close the Google Chrome Browser and open it again.
Picture showing how to clear browser cache.

Final Words

You have successfully cleared all three types of cache on your OnePlus 6 now. It should help you to fix many problems and also boost the battery life of your OnePlus 6. If you have any further questions, you can drop them in the comments section below. We will try our best to respond back as soon as possible.

How to clear Cache of Galaxy S10 without losing data

0
How to clear Cache of Galaxy S10 without losing data

Samsung’s Galaxy S10 and S10+ are two of the best devices currently. These offer probably the best phone display along with beast performance and features out there. You get one of the best smartphone cameras and unparalleled performance in one package. This guide however if for those whose Galaxy S10, S10+ or even S10E starts getting slower. Moreover, if the phone’s battery is getting affected, use this guide to clear cache on both S10 and S10+. Same method applies to S10E as well. Note that when you follow this particular guide, none of the personal data on your device is deleted. It is all safe when process is done.

how to clear cache of galaxy s10 without losing data

When or why to clear Cache?

Cache storage is basically there to speed up the loading time of apps and overall system. It stores all the data that a user loads again and again. Be it thumbnails, some preferences or something else. It also extends to particular apps’ data. It holds stuff that any users accesses again and again from same place. This is why, none of this data holds any importance. It can be deleted and nothing is affected.

When the Galaxy S10/S10+ starts getting slower or the apps do not work normally, it is an indication that cache is now corrupted. It may seem very trivial but this happens very often. Moreover, if you apply an update like a security patch or a major OS update, the old cache can make new update not work properly. Sometimes, the Galaxy S10 may get slow after installing new update. In order to fix this, clear the cache storage.

Similarly, when apps are updated, the old cache may not work properly with new update. This results in lot of force closed errors. In order to fix all of these issues, we have to clear the cache partition.

How is cache stored in Galaxy S10 devices

In total, there are two main cache stores in these devices. The first one is system wide cache partition. It contains everything. We usually need to wipe it when a system update is installed and phone does not work normally after it. This is accessed from the stock recovery. We are assuming that most people run with stock recovery therefore, this guide only targets that.

Secondly, each app has a cache storage. It is accessible via each app’s settings menu. Normally, you can clear both the data and cache of these apps. However, some apps may only restrict it to cache option. Since it is the safest option, there is no harm in clearing it. Use this option when app does not work properly after an app update from Play Store.

How to clear cache of Galaxy S10/S10+/S10E from Recovery without losing data

This is the main cache store in Galaxy S10, Galaxy S10+ and Galaxy S10E. It holds the cache memory for all apps, system apps / processes. Therefore, clearing it means phone is kind of getting a fresh start. Everything will get cached once again. Moreover, if there were any errors before, they will be gone after clearing the cache.

Follow the steps below to clear cache of Galaxy S10, S10+ or S10E without losing data. None of the personal data or data stored on internal storage is deleted. Make sure that you do not mistake hard reset for it. It is usually labelled as “Wipe cache partition”.

Some people worry that clearing cache may take away personal data too. However, it does not.

Steps:

Follow the steps below to clear Galaxy S10/S10+/S10E cache without losing data.

Total Time: 5 minutes

Turn on screen and hold Power button for few seconds.

Keep the button pressed until you see the icon for turning the phone off.

Tap on the Power Off icon in new pop up.

After tapping it, wait for few seconds for the phone to shut down.

Wait for few seconds until phone is completely shut down.

It is important since we need to open recovery in next step.

Once phone is turned off, press and hold Volume Up + Power + Bixby buttons.

Keep these buttons pressed until you see the Samsung logo.

If there is a Samsung logo, then tap on it. It will open the Recovery screen now.

The recovery screen is with dark background. Since it is stock recovery, the touchscreen does not work here.

Use the volume keys to navigate between options in the stock recovery menu.

Use volume keys to go up and down in menu. Do not try to use touchscreen here.

Navigate to the option called “Wipe Cache Partition” and press power button.

In stock recovery, power button is the selection key.

Confirm it in next step and wait for cache to wipe.

You will see bunch of stuff in the log. It indicates what is going on in background.

Once done, select the Reboot option and press Power button to restart the phone.

It may not start automatically. Therefore, use the reboot option after clearing cache on Galaxy S10.

That’s it! First reboot will take a bit longer than usual.

Since the phone is once again building up cache for apps and system, the first reboot after clearing cache will take longer than usual.

How to clear an App’s cache

Use the steps below to clear cache storage of any particular app on Galaxy S10, Galaxy S10+ or Galaxy S10E. This is particularly useful when a certain app starts misbehaving. An app like Google Play Services may start consuming too much battery, present login issues, or show the App closed errors.

Cache memory stores all the repetitive information for an app to work. If this data gets corrupted, the overall performance or app itself may be degraded. Use the following steps to clear cache of both user-installed and stock apps on Galaxy S10 series devices.

  • Open Settings.
  • Scroll down to “Apps” and tap on it.
  • This list only shows the user-installed and non-system apps.
  • In order to access System apps like Play Services, tap on options icon in top corner and tap on “Show system Apps”.
  • Scroll down this list to find the app you’re looking for.
  • Tap on its icon.
  • In next screen, tap on “Storage”.
  • Now use the “Clear cache” option here.
  • This option will clear only the cache for that particular app.
  • If you want to completely reset data for that app, then use “Clear data” option too.

Conclusion

Above mentioned are the two main methods of clearing cache on Galaxy S10+, S10 and S10E without losing personal data. It only clears app specific data that is basically regenerated with each use. Clearing cache helps in boosting the device’s performance and especially clearing errors. If an app or the phone itself starts misbehaving, clearing cache can fix some issues. Both of these methods are totally safe to use since they only make use of stock tools. All of these functions are built-in by Samsung.

Fix Galaxy S10 Plus Moisture Detected in Charging Port Error

0
Fix Galaxy S10 Plus Moisture Detected in Charging Port Error

With the help of this guide, you will be able to Fix Galaxy S10 Plus Moisture Detected in Charging Port Error. If you are Samsung user then you are well aware of Moisture Detected in Charging Port Error. Because we have seen this same issue on Samsung Galaxy Note 8, Galaxy S9, Galaxy S8. Being said that, we have helped you fix Moisture Detected issue in the past and yet again we’ll help you fix Moisture Detected issues on Galaxy S10 Plus. Let’s get into it.

Before we move on to the solutions, let me give you an overview of Moisture detected error. If you have read our other posts on this specific topic then you are well aware of the fact, whenever we troubleshooting an issue. First, we shed some light on our core issue and then we proceed.

Moisture Detected FAQ:

Galaxy S10 Plus Moisture Detected

Moisture Detection Error Background

There’s a whole background to the Moisture detected in charging port error. You must not have seen this error on the older Samsung Galaxy handsets. That is because Samsung just started making water-resistant handsets very recently. All the water-resistant handsets have this property. The water-resistant Samsung Galaxy phones have a moisture sticker inside the charging port, which works as a moisture detector.

If there is moisture in the charging port of the phone, and one connects the charger, this stripe will immediately inform the user through a pop-up notification on the phone. The moisture sensor is programmed to detect and notify the user. The sole purpose of this error is to protect your phone from a potential short circuit.

Now, why does the phone refuse to charge if it’s already water-resistant? Well, that is because, the phone is water resistant, the circuits inside the phone are not.

Learn How To Hard Reset Samsung Galaxy S10 Plus.Techbeasts.com

In Depth:

Manufacturers like Samsung, Sony, LG, and others use rubber gaskets to protect the components of the phone from water. The gaskets are not applied to the electric-circuits inside the phone. Gaskets are only applied in the phone to stop the water from getting inside. Whenever the phone is exposed to water.

If you are testing your phone’s water-resistance of your phone by dipping inside a bowl or bucket of water for a while. The water will definitely get inside the charging port. The gaskets will prevent the water from entering the phone and hitting the electric circuits inside.

Until the water dries off from the charging port, it will keep giving you the error so that there’s absolutely no damage done to the phone. At times, it becomes completely annoying when you are unable to resolve this issue. If you have faced such an issue on your phone and you are on this post to find a solution, then let us help you out from here.

Fix Galaxy S10 Plus Moisture Detected in Charging Port Error:

The workarounds we are providing below are the one we provided in all of our guides. We have tested these methods on different Samsung devices and as well as on other manufacturers. They have worked for us, that is why we are suggesting you these methods to Fix Galaxy S10 Plus Moisture Detected Issue.

Note: Try these solutions one by one.

The Cloth Solution

  1. First of all, you should try wiping off the charging port using a towel or any other suitable cloth.
  2. Shake the phone in order to let all the water out and then wipe it off again.
  3. Try looking into the charging port if there’s moisture left inside. If the phone still gives an error, move onto the next fix.

The Vacuum Cleaner Solution

Got a vacuum cleaner? Let’s fix the phone using a vacuum cleaner then. All you have to do is to suck the moisture/water out of all the holes of the phone. Suck the moisture from the speaker holes, the charging port, and the headphone jack. Using a vacuum cleaner is the safest way to fix the phone.

The Hair Dryer Solution

Take a hair dryer, turn it on. Set it’s temperature to 1 at max. Do not increase the temperature as we only want to dry off the moisture. Blow the air right into the charging port, the headphone jack and the speaker holes in the phone. Use the hair dryer for a few minutes to completely wipe off the moisture. Once done, you can try putting your phone back to charging.

The Qtip Solution

First of all, take a Q-tip and try cleaning the charging port of the phone. Check the Qtip if it pulls out any moisture from the port. If the dry Qtip doesn’t work good enough, you can get rubbing alcohol. Dip the Q-tip in the rubbing alcohol and then use it to wipe off the charging port. Let it dry for a while and it will most probably fix your phone.

The Tweezer Solution

If you find out that the charging port of your phone is filled up with corrosion because of water, you can use a tweezer to scrape it in order to remove corrosion. This is a tricky and risky solution. You have to be very careful while scraping the charging port of your phone. Do this one at your own risk.

If the solutions above fail to work for you, you can try wiping the cache of your phone. If you think that there is no moisture in the phone and the error has just got stuck in the software, you may want to flash stock firmware on your phone.

That’s all. This is how you can Fix Galaxy S10 Plus Moisture Detected in Charging Port Error. Please do tell us how did it go for you in the comments section.

How to enter Download Mode on Galaxy S10

0
How to enter Download Mode on Galaxy S10

Samsung’s latest flagship lineup is composed of three amazing smartphones. Samsung Galaxy S10, Galaxy S10+ and Galaxy S10E. While the first two are truly premium devices, S10E is comparatively a cheaper alternative. However, do not be fooled merely by its title. It is actually a beast and holds lot of value. In this post, learn how to enter Download mode on Galaxy S10 devices i.e. S10, S10+ and S10E.

What is Download Mode?

In simple words, the Download mode is there for downloading new firmwares in Samsung Galaxy devices. This is the same mode of installing firmwares across all Galaxy devices.

The main concept behind this is the portability and usability of Android. Users of Android have complete freedom to modify their operating systems. Since it is open-source, all companies have adapted to it in their own ways. For Xperia, it is usually via Fastboot. In Samsung Galaxy, it is called Download Mode.

The download Mode in Galaxy S10+, S10 and S10E also keep track of knox counter. This represents how many times a phone’s knox counter is tripped. This usually goes up when an unsigned firmware is installed. This includes lot of custom ROMs and some modified stock ROMs too.

When to use Download Mode?

The only use of Download mode is to install or flash firmwares. This mode is known by different names in Android ecosystem. However, since our concern is Galaxy S10, we stick to the Samsung’s given titles.

Most people use Download Mode when they need to either flash a new version of Android based firmware or just re-flash a firmware. Whether it is about installing an unreleased firmware or just refreshing the phone, Download mode is up for it.

Steps to enter Download Mode on Galaxy S10, Galaxy S10+ & Galaxy S10E

This method works for all variants of Galaxy S10, Galaxy S10 Plus and Galaxy S10E. Since the operating system is same, the entire method of entering download mode on all of these devices is identical.

Before continuing, make sure that your phone is charged over 50% at least. Since we use this mode mainly for installing updates, therefore, it is cautious to keep some charge. In case something goes south, there should be enough juice in the phone to bring it back to life.

Follow the steps below to enter Download Mode on Galaxy S10, Galaxy S10+ and Galaxy S10E.

This method outlines all the steps to enter and use Download Mode on Galaxy S10 series devices.

Total Time: 2 minutes

Go to Settings > Developer Options > enable OEM Unlock.

Since anyone is going to use Download mode to install a firmware on S10, therefore, enable this option beforehand.

Open Settings > Lock Screen and Security > Secure Startup and enable Require PIN.

Here you must enter a PIN and remember it for when phone restarts after flashing a new firmware.

Press and hold power button for few seconds and then tap on Power Off option.

Use the turn off option to completely shut down your mobile.

Press and hold Volume Down + Bixby together and connect USB C cable.

Use the two button combination together while phone is turned off. Hold these buttons together and connect USB C cable to phone. It takes phone to Download Mode screen. Note that the USB must be connected to laptop or PC beforehand.

Now you will see the Download Mode confirmation screen. Press Volume Up to continue.

This screen is there to ensure that someone really wants to enter Download mode or not. Press volume up key to finally enter into Download mode.

Let the ADB Drivers for Galaxy S10 install automatically.

When you connect S10 with PC in download mode for first time, it will install the required drivers automatically. It is necessary for it to work with Odin.

Open Odin and check if there is blue light in ID:COM box.

Open Odin while phone is in Download mode. Connect it via USB cable. If the ID:COM box turns blue, then phone is both in Download mode and communicating with PC successfully.

Conclusion

That’s all! This is a very simple yet tricky thing. Therefore, follow these steps 1 by 1 to ensure maximum success. Use the Download only to install firmwares that you trust. Moreover, only flash compatible files with Download Mode. Odin is the most used software for flashing firmwares on Galaxy S10, Galaxy S10+ and Galaxy S10E. Always check Odin after connecting phone to PC in Download Mode. If it is working in Odin, then you are good to go. Otherwise, install the ADB drivers for it.

Download Magisk for Android [All Versions]

0
Download Magisk for Android [All Versions]

Download Magisk for Android, Back in the day, SuperSU was the most popular solution to root any Android smartphone. SuperSU’s popularity has been taken over There is no doubt that SuperSU made it easy for the thousands of Android smartphones to gain root access. With Google tightening the security of Android OS in every single update, the SuperSU needed to be updated consistently.

The Android OS reached a point where it wasn’t possible to root it without modifying the system image. Till this time, the SuperSU development did not remain as active as it used to be. In between, the SuperSU developer, Chainfire, also announced his plans to say goodbye to the SuperSU and its community.

This was a time when a dire need for another root solution reached its peak. Just at the right time, the XDA recognized developer Topjohnwu came up with his system-less root solution called the Magisk.

Magisk

How Magisk helped Android users?

Magisk was indeed a milestone in the history of custom Android development. This new script completely changed the way the root used to look like on Android smartphones. It turned out to be the most useful tool for the users who wanted all the stock Android features working on their phone in parallel with the root access. Google made it impossible for certain applications to run on Android phones which were rooted. With Magisk, it was possible to run features like Google Pay on a rooted phone.

In 2016, Pokemon Go was released. Pokemon Go banned the players who were using a rooted Android phone. The company wanted to keep Android users from tampering the game. This was another occasion when Magisk’s use reached new heights. Users with a rooted Android phone used Magisk and played Pokemon Go on their rooted phone without getting banned. Now if you are wondering how all of this is possible, let us get the answer.

Magisk vs SuperSU – What’s the best method to root Android in 2018?

Systemless root and Magisk Manager

As mentioned above, it is a systemless root solution. It does not touch any system files of your phone while rooting. The Magisk simply adds root access to the phone with extended options. It has a hide option which can temporarily hide the root access on your phone.

The systemless Magisk comes with its own application called Magisk Manager. The Magisk Manager is loaded with tons of options that were never there on the previous root applications. The Magisk Manager also runs the Magisk Modules, which is a huge repository of MODs for the Android phones.

Magisk started off as a small tool back in October 2016. At the time of writing this post, it has become the most popular application to root any Android phone. Magisk has successfully become an alternative to the SuperSU if it hasn’t replaced it yet.

Magisk for Android [All Versions]

With every single update in the Android ecosystem, a new version of Magisk comes out. So far, the Magisk has been able to run with all the Android versions above Android Lollipop.

When it comes to picking up the right file for your phone, you have to make sure that you pick up the appropriate package. There is a number of Magisk versions available at the moment. The latest available version is the Magisk v17.1. The oldest available version is the v7.0. The Magisk Manager also gets updated consistently.

Below are all the versions of Magisk and Magisk Manager. Download the latest Magisk or Magisk Manager depending on your need.

Magisk Version Release Date Download Links
Magisk v7 May 2017 Download
Magisk v8  May 2017 Download
Magisk v9  November 2016 Download
Magisk V10  January 3, 2017 Download
Magisk v10.1  January 3, 2017 Download
Magisk v11.0  February 06, 2017 Download
Magisk v11.1  February 07, 2017 Download
Magisk v11.5  March 20, 2017 Download
Magisk v11.6  March 21, 2017 Download
Magisk v12.0  May 5, 2017 Download
Magisk v13.1 July 11, 2017 Download
Magisk v13.2  July 16, 2017 Download
Magisk v13.3 July 19, 2017 Download
Magisk v14.0  Sep6, 2017 Download
Magisk v14.2  October 18, 2017 Download
Magisk v14.3  October 18, 2017 Download
Magisk v14.5  November 23, 2017 Download
Magisk v14.6  December 22, 2017 Download
Magisk v15.0  December 26, 2017 Download
Magisk v15.1  December 29, 2017 Download
Magisk v15.2  January 02, 2018 Download
Magisk v15.3  January 13, 2018 Download
Magisk v15.4  February 13, 2018 Download
Magisk v16.0  February 21, 2018 Download
Magisk v16.1  March 11, 2018 Download
Magisk v16.2  March 18, 2018 Download
Magisk v16.3  March 28, 2018 Download
Magisk v16.4  April 29, 2018 Download
Magisk v16.6  July 8, 2018 Download
Magisk v16.7  July 19, 2018 Download
Magisk v17.0  September 1, 2018 Download
Magisk v17.1  September 1, 2018 Download
Magisk v17.2 September 21, 2018 Download
Magisk v18.1 February, 2019 Download

Magisk v17.2 Changelog:

Magisk Manager Obfuscation
There is some detection method out in the wild (e.g. PS4 Remote Play) that analyzes all installed APKs to find signs of Magisk Manager to mitigate the package name randomization feature within the app. The counter-counter-attack here is to do excessive obfuscation so it can no longer do so.

New Communication Scheme
However, for full obfuscation to be possible, it creates some issues. In MagiskSU’s code, some Java class names in Magisk Manager are hardcoded as destinations to send requests and logging information. A completely new communication scheme is written from scratch to eliminate any class name assumptions in MagiskSU, so that 100% Magisk Manager obfuscation is achievable. This current release (Magisk Manager 6.0.0), however, is not built with full obfuscation due to the requirement to be backwards compatible with v17.1.

Randomize Service Names
Magisk injects several init services to startup the daemon. Some apps (e.g. Fate Grand Order) are updated to detect these specific service names to determine whether Magisk services are running on your device. MagiskInit is updated to randomly generate service names pre-init, so every time your device reboots it will use a different service name.

Updated Resetprop
Android Pie introduced a new type of system property format that previous resetprop is not able to handle. Several properties, for example device fingerprint props, are therefore unable to be modified (many people modify device fingerprint to pass CTS). Resetprop is updated to use the upstream AOSP code base to process system properties.

Note: It is always recommended to install the latest version on your phone.

How to install Magisk on Android?

  1. To install Magisk, you must have the TWRP recovery installed on your phone. Follow this guide to install TWRP recovery.
  2. Boot your phone into the TWRP recovery by using the Volume + Power buttons combination. This combination will vary according to your phone.
  3. Connect the phone to the computer.
  4. Mount all the storage partitions of your phone using TWRP recovery.
  5. Now copy latest Magisk.zip file to your phone.
  6. On the phone, click on Install > Install Zip > Locate and select Magisk.zip file > Swipe to flash.
  7. Magisk will be flashed. It will also install the Magisk Manager on the phone.
  8. Boot the phone into the TWRP recovery now.
  9. You will have Magisk Manager under the app drawer.

Magisk Manager for Android

The number of Magisk Manager versions for Android is equal to the number of Magisk versions mentioned above. However, you always need the latest version of Magisk Manager to maintain root on the phone. I am going to attach the latest version of Magisk Manager here. The latest Magisk Manager will work with all the previous Magisk builds.

Version Release Date Download Link
Magisk Manager v5.9.1 September 01, 2018 Download
Magisk Manager v7.0 February, 2019 Download

How to install Magisk Manager on Android?

You need the Manager only if it didn’t come with your Magisk.zip file. Download the Magisk Manager and copy it to your phone.

  1. On the phone, go to Settings > Security > Unknown Sources > Allow.
  2. Now using a file manager, open the Magisk Manager APK file.
  3. Install the APK file and find the Magisk Manager in the application drawer.

How to uninstall Magisk?

Just like you installed Magisk, uninstalling it is equally easy as well. Just download the Magisk-uninstaller-20190204.zip file on your phone. Open TWRP recovery, and flash this file as a zip just like you flashed Magisk. The Magisk will be uninstalled from your phone in less than a minute.

Root Galaxy Note 8 on Android Pie and Install TWRP

3
Root Galaxy Note 8 on Android Pie and Install TWRP

Samsung Galaxy Note 8 was updated to Android Pie almost a week back. The phone has got tons of new features. After updating to the latest Android Pie, Galaxy Note 8 owners have lost root on their phone. This is the guide you need to root your Galaxy Note 8 on Android Pie. By following the easy steps laid down in this post, you will be able to root Galaxy Note 8 on Android Pie and install TWRP. Before I tell you how you are going to be able to root Galaxy Note 8 on Android Pie, let’s take a look at the goodies brought in by Android Pie.

Root Galaxy Note 8 on Android Pie

Samsung Galaxy Note 8 Android Pie

The Android Pie update first of all moves the version number to Android 9. This is a major update. Android Pie for Note 8 brings the biggest changes till date. The update carries a brand new UI, updated features to enhance battery life and performance, and features to make the device more useful for the users.

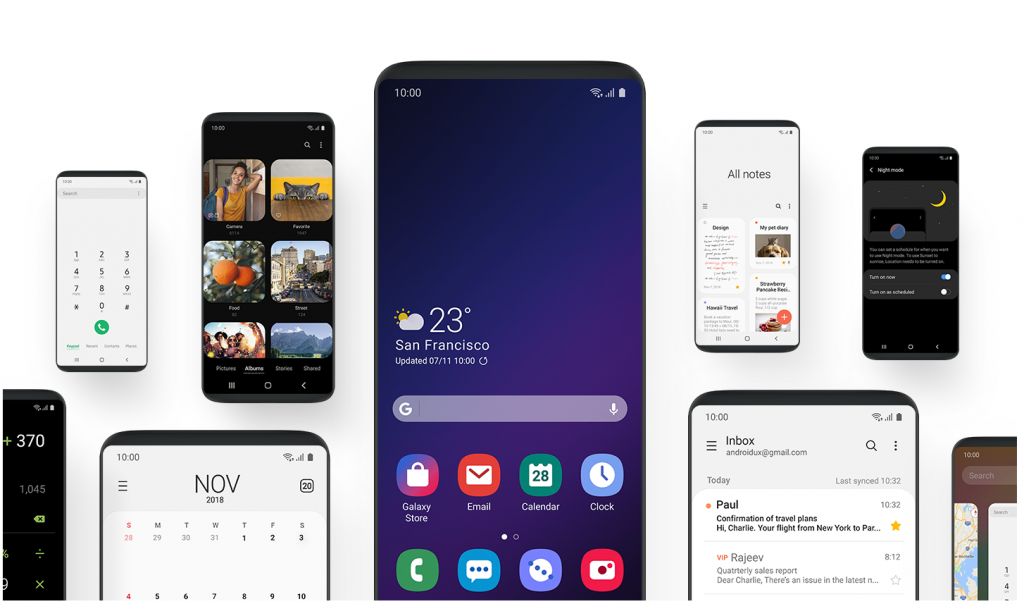
The UI updates include the One UI. This is Samsung’s brand new UI and it replaces the Samsung Experience UI. The One UI is designed to make the phone easy to use with one hand. The icons and elements are now round. For example, all the icons are round and the recent apps menu is round too. Samsung has added new icons in the toggles section. The notifications area and status bar have been completely revamped.

Check out: Guide to install Android Pie on Galaxy Note 8

Settings application has a new UI too. Samsung has shuffled some of the options. For example, the location of information view under the lock screen settings has been changed. Samsung has also changed the look of the main menu of the applications.

The native Dark Mode has been added to the Samsung phones. Samsung has named this feature as “Night Mode”. This will definitely give the users a battery time boost on their Super AMOLED smartphones.

Samsung has also added the native private DNS mode in this update. Users can now use a private DNS to block ads without using a third-party application.

The Android 9 Pie update for the Note 8 also brings navigation gestures. If you are not a fan of the navigation buttons, you can enable the navigation gestures to navigate through your Galaxy Note 8.

Samsung One UI for Note 8

There are several other improvements like the addition of Adaptive Battery Mode. Samsung has enormously increased the performance of its 2017 flagship with the help of this update.

That’s all about the Android 9 Pie for the Galaxy Note 8. It’s time to take a look at the steps to root Galaxy Note 8 running on Android Pie. Before following the procedure, pay attention to the note written below.

Note:

Rooting your device or installing a custom recovery is something that the phone manufacturers do not recommend. This isn’t recommended by the root and recovery discoverers/developers either. Before rooting your Galaxy Note 8, make sure that you have a great idea of what you are going to do. Understand all the risks involved before going ahead. If you are a newbie, you need to pay extra attention to all the steps given below to avoid a mishap.

Preparations to Root Galaxy Note 8 and install TWRP

  • This guide is only for Galaxy Note 8 running Android Pie. Check your phone’s details under Settings > About phone section.
  • You need an External MicroSD card to root the phone.
  • Charge your phone’s battery up to 50% to avoid power loss.
  • Back up all of your messages, call logs, and contacts. This process may wipe your phone.
  • Enable OEM Unlocking and USB Debugging Mode from Developer Options.
  • Use the original data cable to connect Note 8 to the computer.
  • Follow the remaining steps with full attention.

Required Downloads

How to Root Galaxy Note 8 on Android Pie and Install TWRP

Open Odin3.exe and add the TWRP Recovery.img.tar file.

First of all, open Odin.exe on your computer. In Odin, click on the AP tab and select the TWRP.img.tar file. Now go to Options tab in Odin. Make sure that the only option checked is “F.Reset.Time”. All other options should be UNCHECKED.

Boot your Galaxy Note 8 in Download Mode.

Power down your Galaxy Note 8. Now press and hold Volume Down + Home + Bixby buttons simultaneously to boot up. As your phone shows a warning, press Volume Up to continue.

Connect Note 8 to the computer and flash TWRP.

Now connect your phone to the computer. As Odin shows a Blue light in the ID:COM box and “Added” in the log box, click Start. This will flash TWRP. After TWPR flashing ends, DO NOT REBOOT your phone. Disconnect it.

Reboot your Galaxy Note 8 into the TWRP Recovery to format it.

After disconnecting your phone, press and hold Volume Up + Bixby + Power button for a while to boot into the TWRP Recovery. TWRP will now ask if you want to allow modifications. Swipe the screen and go ahead. Now in TWRP, click on Wipe > Format Data. This will wipe the data from your phone.

Reboot into Recovery again, flash Magisk.

Now go back to main menu in TWRP. Click on Reboot > Recovery. As your Note 8 reboots into the recovery, click on Install > Install Zip > Choose the OEM Fix Magisk.zip file from the external SD card. flash the file.

All done. Reboot into the System now.

After flashing the file, go back to the main menu again and tap Reboot > System. This will reboot your phone into the system now. You will have the Note 8 rooted with TWRP installed. That’s all. Enjoy!

Galaxy Note 8 TWRP Recovery
This is how the TWRP looks like.

Don’t have an SD card? Here’s what to do

In case you do not own an SD card, you can skip copying files to the external sd card. Follow all the steps from Step 1 to Step 4. After step 4 when your phone is in the TWRP recovery, connect it to the computer. As the mount is working now, you can copy the OEM Issue Fix file directly to your Note 8. Just copy the file, disconnect the phone and follow step 5 and 6.

Wrap Up

By now, you should have a Galaxy Note 8 with a TWRP Recovery and Magisk installed. You have opened a world of endless possibilities now. Feel free to install any root application or flash any custom ROM. You can enhance the performance of your device with the help of best root apps. If you need any help regarding this guide, feel free to reach out to us. The best way to contact us is to leave a comment below.

Thanks to our friend Dr.Ketan for developing the OEM Fix + Magisk file.

Jailbreak iOS 12 Using Unc0ver Without Computer

0
Jailbreak iOS 12 Using Unc0ver Without Computer

Let’s tell you how to Jailbreak iOS 12 Using Unc0ver Without Computer. I am sure you will be glad to know, Now you can Jailbreak iPhone, iPad, iPod touch running iOS 12, iOS 12.1.1, iOS 12.1.2. This new Jailbreak made possible through unc0ver. One more thing that you should know, you won’t be needing your Computer.

You will be surprised to know, this latest unc0ver jailbreak on iOS 12 is running wild. We’ve heard, because of unc0ver jailbreak, BigBoss repository is offline. We’ll Jailbreak still lives, that is not the best part, this Jailbreak seems to work fine for everyone. Moreover, since there is no need for any computer to perform the unc0ver jailbreak. That’s why everyone is giving it a try and in this post, we’ll guide you how you can Jailbreak iOS 12 Using Unc0ver Without Computer. Let’s jump in.

Jailbreak iOS 12

Jailbreak iOS 12 Using Unc0ver Without Computer:

Before you move any further, let me remind you, Jailbreak is never promised to work 100%. We have seen that in the past and future is the same too. You should make a complete backup of your device before you make that move. Now you know everything, it is time to start the Jailbreak process.

Jailbreak iOS 12 Without Computer:

Time needed: 10 minutes.

Heed the instructions below in order Jailbreak iOS 12.0-12.1.2. One important thing you should it will not work with iOS 12.1.3 or higher.

  1. Open Tweak Box Website.

    Open Safari on your iPhone or iPad. Type in next.tweakboxapp.com and hit enter.

  2. Select Apps

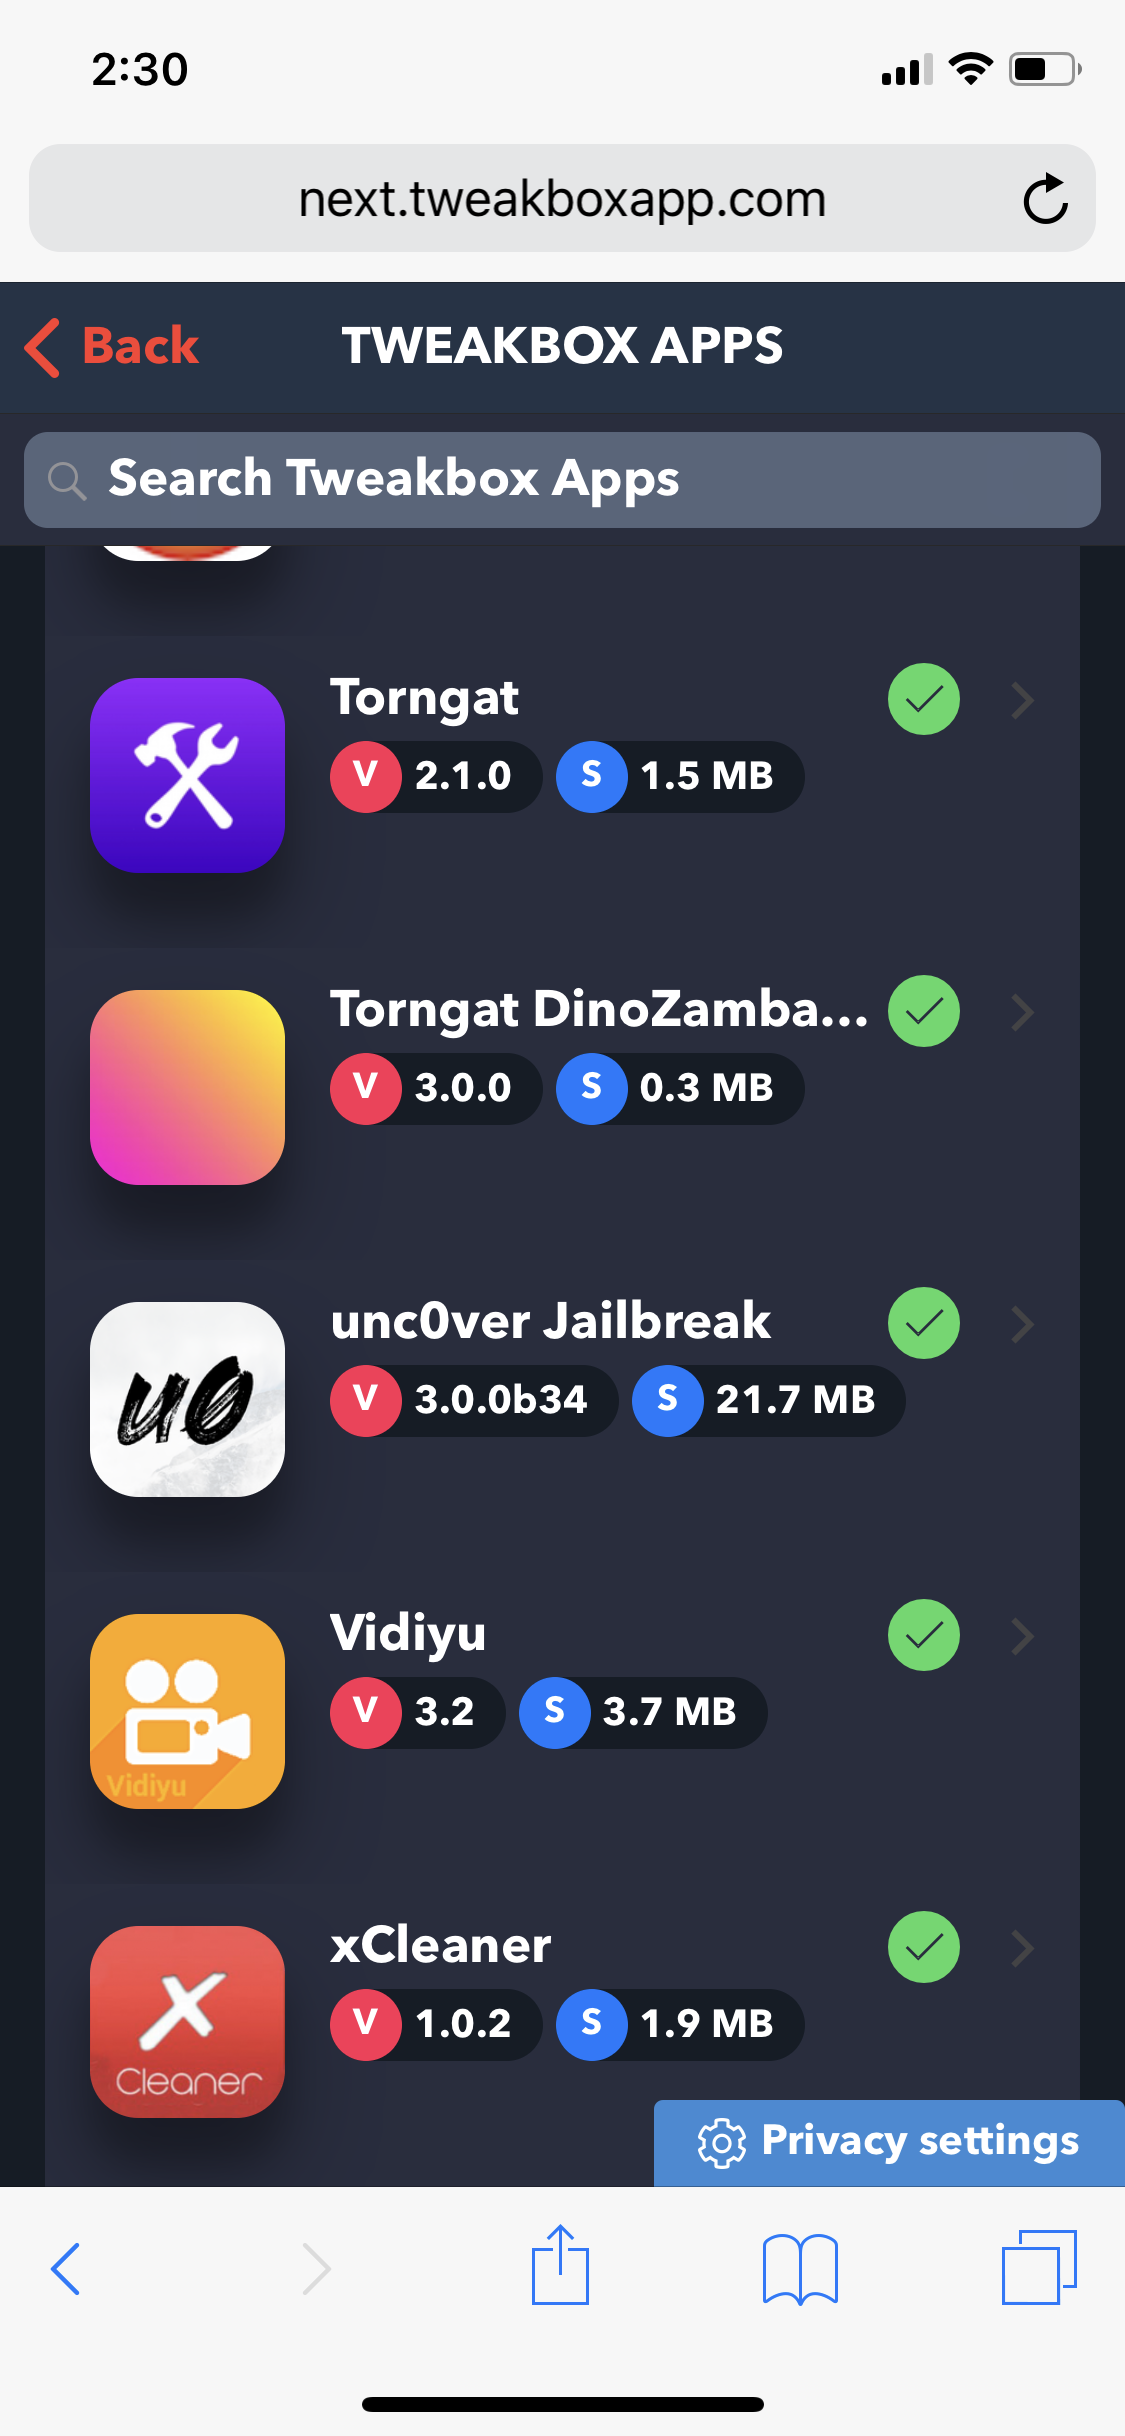
    Once the page loads up, you will see 3 Tabs. Tap Apps -> Tweak Box Apps.

  3. Install Unc0ver jailbreak App

    From the Tweak Box Apps, scroll down and look for the unc0ver jailbreak app. Once you find it, Tap on it, next tap on Install & after that you will get a pop-up, Tap on confirm.

  4. Install Lebo International

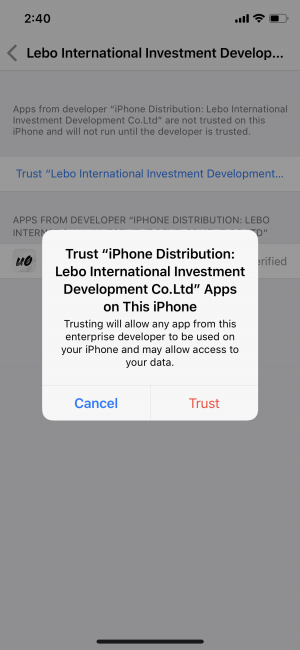
    After you have downloaded files, head over to the Settings -> General > Profiles & Device Management > Lebo International Investment Development Co.Ltd and then tap the Trust Lebo International Investment Development Co.Ltd option -> Tap Trust.

  5. Jailbreak iOS 12

    Now that you have done everything, all that left is to start the Jailbreak process. Open the unc0ver app and tap on the Jailbreak button. After the process is completed and you have restarted your device but there is no Cydia. Rerun Jailbreak process.

That is all. Please do tell us how did it go for you, leave your feedback in the comments section below. If you face any issue let’s know we would love to help you.

Hard Reset Galaxy S10 Plus [ SD855 & Exynos ]

0
Hard Reset Galaxy S10 Plus [ SD855 & Exynos ]

In our previous article, we told you how to hard reset Galaxy S10. Today, we’ll tell you how to hard reset Galaxy S10 Plus or Master Reset Galaxy S10 Plus. There are many benefits of hard reset but among all of them, there is one reason which can lead to performing factory data rest on any device. To boost up the performance level and get rid of lagging & freezing.

You will find all the possible methods to Hard Reset Galaxy S10 Plus. Check out how you can factory reset Galaxy S10 plus using hard keys & through settings. As a result, your Samsung Galaxy S10 Plus will be as new. Also, it will improve your device speed and processing.

Hard Reset Galaxy S10 Plus

If you want to more about the specs and features of Samsung Galaxy S10 Plus, you can visit our Samsung Galaxy S10 Plus complete review. Moreover, you will find some important tips & tricks of Samsung Galaxy S10 Plus below. Let’s get started now.

Benefits of Hard Reset:

Summary:
*You can Wipe all of your Data Stored on your device.
*Easily fix all the performance issue.
*Bypass screen lock through hard reset.
*Bring the factory state.
*Fix all the firmware issues.
*Get rid of signal problems, loop issues, rebooting problems and power problems.

How to Hard Reset Samsung Galaxy S10 Plus:

  • Turn off your device by holding down the power button for a few seconds.

  • Now you need to press & hold Volume Up + Bixby + Power key. When you see the Samsung logo, let go off all the buttons.

  • You’ll in the recovery mode, from here select “wipe data/factory reset” by using the volume buttons. After that, press the power button to confirm your selection.
  • On the next screen, select “Yes” and press the power button.
  • Once Factory Data Reset is finished, head back to the main menu. Tap on “Reboot System“.

That’s all. Now in this method, we used recovery to hard reset Samsung Galaxy S10 Plus. In the next method, we’ll use the Setting menu.

Method2:

  • Open Settings from the Home Screen.
  • Scroll down and Tap on Backup & Reset -> Factory Reset.
  • Now select Reset device.
  • To Confirm Choose Erase everything.
  • That will be all, wait for the process to complete.

That’s all. You have successfully Hard Reset Galaxy S10 Plus. Please do tell us if you face any problem during this process.

Galaxy S10 Plus Tips: Screenshot, Download Mode, Recovery, Safe, Clear Cache & More.

0
Galaxy S10 Plus Tips: Screenshot, Download Mode, Recovery, Safe, Clear Cache & More.

This is the Galaxy S10 Plus Tips page, you will find everything about Samsung Galaxy S10 Plus. You will learn how to Boot Galaxy S10 Plus into Download Mode, Recovery Mode, & Safe Mode. Moreover, you will learn how to Hard Reset or Master Samsung Galaxy S10 Plus, Reset Network Settings, Soft Reset & more.

Before we move on to the technical stuff let me give you an overview of Samsung Galaxy S10 Plus. Let’s get started now. Moreover, you might know that you can connect Galaxy S10 Plus to your TV.

Galaxy S10 Plus Tips

Samsung Galaxy S10 Plus:

Samsung Galaxy S10 Plus is the bigger Galaxy S10 variant this year. This phone comes with a behemoth of a display. Samsung has introduced the new Dynamic AMOLED display which is the only HDR 10+ display at the moment. The Galaxy S10 Plus comes with an infinity -O display carrying a dual camera setup on the front. It has a triple camera at the back. The phone features an ultrasonic fingerprint reader. Galaxy S10 Plus comes with internal storage up to 1TB, which also makes it a device of its own kind. Here is a rundown of Samsung Galaxy S10 Plus’s specs.

Samsung Galaxy S10 Plus Tips:

Heed the instructions below and boot Galaxy S10 Plus into Safe Mode, Recovery, Odin & also clear cache, app data and more.

Summary:

Topics:
Safe Mode
Download Mode
Recovery Mode
Reset Network Settings
Clear App Data
USB Debugging Mode

Hard Reset Galaxy S10 Plus:

Heed the instructions provided in the following link and you will get to know how to hard reset Samsung Galaxy S10 Plus.

Clear App data:

  1. On your Android phone, go to Settings.
  2. Find the Application Manager or Application settings.
  3. In the Application settings, swipe towards the All or the Running Applications tab.
  4. Select the application of which you want to clear the cache and data.
  5. A list of further options will appear now, tap the Storage option.
  6. Under the Storage option, you will find Clear Cache and Clear Data options.
  7. Tap the button according to your liking.
  8. That’s all.

Check New Software Update on Samsung Galaxy S10 Plus:

  • Open Settings Apps.
  • Scroll down and Tap on software update.
  • It will now check the available software update.
  • If there is any, you will be notified and follow the on-screen instruction in order to proceed.

Enter Recovery Mode on Samsung Galaxy S10 Plus:

  1. Power down your phone completely.
  2. Now press and hold Volume Up + Bixby + Power button to turn it on.
  3. Your phone will take a while to boot up. As soon as it does and shows you the Samsung logo, let the keys go.
  4. Your phone will now load the recovery.
  5. Let the recovery load. Once done, you can operate the recovery mode freely using Volume Up, Down & Power keys.

How to Hard Reset or Factory Reset Galaxy S10 Plus:

  1. Turn off your phone.
  2. Reboot your Galaxy S10 Plus into Recovery Mode using the steps above.
  3. Once you are in recovery mode, navigate to the “wipe data/factory reset” using Volume Down key.
  4. Press the Power button to make a selection.
  5. In the next screen, highlight Yes and press the power button to perform a hard reset.

Boot Samsung Galaxy S10 Plus into safe mode:

  1. To boot into Safe Mode, turn off your phone completely. Now turn on your phone. While your phone boots up press the Volume Down key and keep it pressed until the phone boots into the system.
  2. As your phone boots into the system, you will find the Safe Mode watermark on the lower left corner. This means you are now in the Safe Mode.

Wipe cache partition on Galaxy S10 Plus:

  1. Shut down your phone.
  2. Boot into the recovery mode. Using the instructions provided above.
  3. Scroll down and highlight “wipe cache partition”.
  4. Press the Power button to make a selection.
  5. Highlight Yes and let the phone wipe its cache now. That’s all.

Reset network settings on Galaxy S10 Plus:

  1. On your phone, open Settings.
  2. Now in settings, go to About device.
  3. Tap Reset > Reset Network Settings > RESET > RESET.

Enable developer options and USB debugging on Galaxy S10 Plus:

  1. Go to settings.
  2. In settings, scroll all the way down and locate About device section.
  3. In the About device section, find build number in the Software details.
  4. Tap the build number 7 times to enable Developer Options.
  5. Once done, the Developer Options section will appear at the bottom where you found the About device option.
  6. Now go to Settings > Developer Options.
  7. Find USB Debugging mode in Developer Options and tap the radio button located next to USB Debugging mode to enable it.
  8. That’s all.

Enter download or Odin mode on Galaxy S10 Plus:

  1. Turn off your phone completely.
  2. Now press and hold Volume Down + Bixby + Power button.
  3. Your phone will turn on and show you a warning.
  4. Press the Volume Up button to continue into Download Mode now. That’s all.

How to take a screenshot on Galaxy S10 Plus:

  1. Open a screen that you want to capture.
  2. While having the screen opened, press the Bixby + Power button at the same time.
  3. The screen will be captured. On the screen, you will find the option to capture more.
  4. If you want to take a scrolling screenshot, tap capture more to select the area.
  5. The taken screenshots will appear in the “Screenshots” folder in Gallery.

Important Message.
Please follow us on Facebook, Twitter, and Google Plus. Help us grow our social family.

Download Samsung Galaxy S10 Stock Wallpapers

Download Samsung Galaxy S10 Stock Wallpapers

Download Galaxy S10 stock wallpapers on your android and iOS devices. Galaxy S10 and S10 Plus are the current flagship devices by Samsung. S10E is the low-end model of this range with competitive pricing. It offers a lot of cool features and hardware that will dominate the mid to top tier devices in upcoming year. The the key feature of these devices is punch-hole camera. Samsung kept away from the whole notch mayhem. However, we are not very sure if this is going to stay for more than a year. Something even nicer is gonna come along to achieve the true bezel less screen experience.

Punch-Hole Cameras and Galaxy S10 Stock Wallpapers

Samsung has played a nice trick to hide its front facing cameras. All the wallpapers in S10, S10 Plus and S10E have blackened out portion at the top. This makes sure that you do not notice the punch-hole with black background around it. Since the hole is cut with laser precision and how neatly it is built, it totally blends with black background.

Another cool gimmick is the light that shines around borders of camera lenses. A nice white light shines around the hole whenever you either shift to front facing camera in app or just open it from get go. This shows how much effort and details Samsung has put into this tech.

Galaxy S10 Specs

Display: Dynamic AMOLED 6.1” | 1440 x 3040 Resolution

Glass Protection: Corning Gorilla 5 (Back) | Corning Gorilla 6 (Front)

Chipset: Exynos 9820 Octa (8 nm) / Qualcomm SDM855 Snapdragon 855 (7 nm)

CPU: Octa-core (2×2.7 GHz Mongoose M4 & 2×2.3 GHz Cortex-A75 & 4×1.9 GHz Cortex-A55) / Octa-core (1×2.8 GHz Kryo 485 & 3×2.4 GHz Kryo 485 & 4×1.7 GHz Kryo 485)

GPU: Mali-G76 MP12 / Adreno 640

Memory: Internal – 128GB/512GB | External – Upto 512GB | RAM – 8 GB

Camera: Front (Single Lense) | Back (Triple Lense)

Battery: 3400mAh | Fast Charging

Colors: Prism White, Prism Black, Prism Green, Prism Blue, Canary Yellow, Flamingo Pink

Galaxy S10 Plus Specs

Display: Dynamic AMOLED 5.8” | 1440 x 3040 Resolution

Glass Protection: Corning Gorilla 5 (Back) | Corning Gorilla 6 (Front)

Chipset: Exynos 9820 Octa (8 nm) / Qualcomm SDM855 Snapdragon 855 (7 nm)

CPU: Octa-core (2×2.7 GHz Mongoose M4 & 2×2.3 GHz Cortex-A75 & 4×1.9 GHz Cortex-A55) / Octa-core (1×2.8 GHz Kryo 485 & 3×2.4 GHz Kryo 485 & 4×1.7 GHz Kryo 485)

GPU: Mali-G76 MP12 / Adreno 640

Memory: Internal – 128GB/512GB/1TB | External – Upto 512GB | RAM – 8 – 12GB

Camera: Front (Dual Lense) | Back (Triple Lense)

Battery: 4100mAh | Fast Charging

Colors: Prism White, Prism Black, Prism Green, Prism Blue, Canary Yellow, Flamingo Pink, Ceramic Black, Ceramic White

Galaxy S10E Specs

Display: Dynamic AMOLED 5.8” | 1080 x 2280 Resolution

Glass Protection: Corning Gorilla 5 (Back) | Corning Gorilla 5 (Front)

Chipset: Exynos 9820 Octa (8 nm) / Qualcomm SDM855 Snapdragon 855 (7 nm)

CPU: Octa-core (2×2.7 GHz Mongoose M4 & 2×2.3 GHz Cortex-A75 & 4×1.9 GHz Cortex-A55) / Octa-core (1×2.8 GHz Kryo 485 & 3×2.4 GHz Kryo 485 & 4×1.7 GHz Kryo 485)

GPU: Mali-G76 MP12 / Adreno 640

Memory: Internal – 128GB/256GB | External – Upto 512GB | RAM – 6 – 8GB

Camera: Front (Single Lense) | Back (Dual Lense)

Battery: 3100mAh | Fast Charging

Colors: Prism White, Prism Black, Prism Green, Prism Blue, Canary Yellow, Flamingo Pink

Get all Stock S10 / S10+ Wallpapers

The resolution for wallpapers on S10 and S10+ is 2560 x 2560. Each wallpaper averages around 8MB. This shows how detailed these wallpapers are. Moreover, each wallpaper is in PNG format. Therefore, no exception is made to ensure that the overall quality is superb.

Click on any wallpaper thumbnail below to view it in full canvas. Right click on any of these wallpapers and click on Save Image to download it to your PC or mobile. This gallery contains all 16 Galaxy S10 stock wallpapers in QHD Resolution.

That’s it folks. Feel free to leave your feedback in the comments section below.

Download Samsung Galaxy S10 Stock Wallpapers

0
Download Samsung Galaxy S10 Stock Wallpapers
Samsung Galaxy S10 Stock Wallpapers

Samsung has unveiled its Galaxy S10 Lineup. A week before the official launch of the S10 series, its stock wallpapers made it to the internet. It turns out that those were not all the stock wallpapers of the S10. Galaxy S10 has a handful of more cool wallpapers. All of the Galaxy S10 stock wallpapers are now available here. Wallpaper enthusiasts who have been eyeing the Galaxy S10 stock wallpapers for quite a while, they can download them now. The Galaxy S10 stock wallpapers can be applied to any phone including Android and iPhone. All official stock wallpapers of Galaxy S10 are available in QHD resolution.

Samsung Galaxy S10 Stock Wallpapers

Update: Samsung Galaxy S10, S10E, and S10 Plus have been released

Samsung Galaxy S10E, Galaxy S10, and Galaxy S10 Plus

Samsung has prepared three variants of the Galaxy S10 for this year. The cheaper variant of the Galaxy S10 will be the Galaxy S10. The standard model will be the Galaxy S10 itself. The high-end model will be named as Galaxy S10 Plus. Surprisingly, all these phones are going to be very different from each other. So many pictures of the Galaxy S10 variants have leaked that there actually isn’t much left to the surprise. Here is what we know about these phones.

Samsung Galaxy S10E

Galaxy S10E is the budget Galaxy S10. It has a 5.8-inch Dynamic AMOLED screen with 1080P display. Galaxy S10E has a punch hole screen which helps its aspect ratio to bump up to 19:9. S10E uses the same SoC as the S10 and S10 Plus i.e. Snapdragon 855 or Exynos 9820. Galaxy S10E’s storage and RAM options include 6GB RAM or 128GB internal storage or 8GB RAM and 256GB internal storage. This phone has a dual shooter at the back. It has a 12MP wide shooter and a 16MP ultrawide shooter. Galaxy S10E has a 3100 mAh battery inside. This phone has fast charging support, fast wireless charging, and reverse wireless charging too.Galaxy S10E Model Numbers

The Galaxy S10E has the headphone jack. It will use the USB Type-C for charging and computer connection. A side-mounted fingerprint scanner there which means no under display fingerprint scanner on this phone. The color options of the Galaxy S10E include Prism Black, Prism White, Prism Green, Prism Blue, Canary Yellow, and Pink.

Galaxy S10

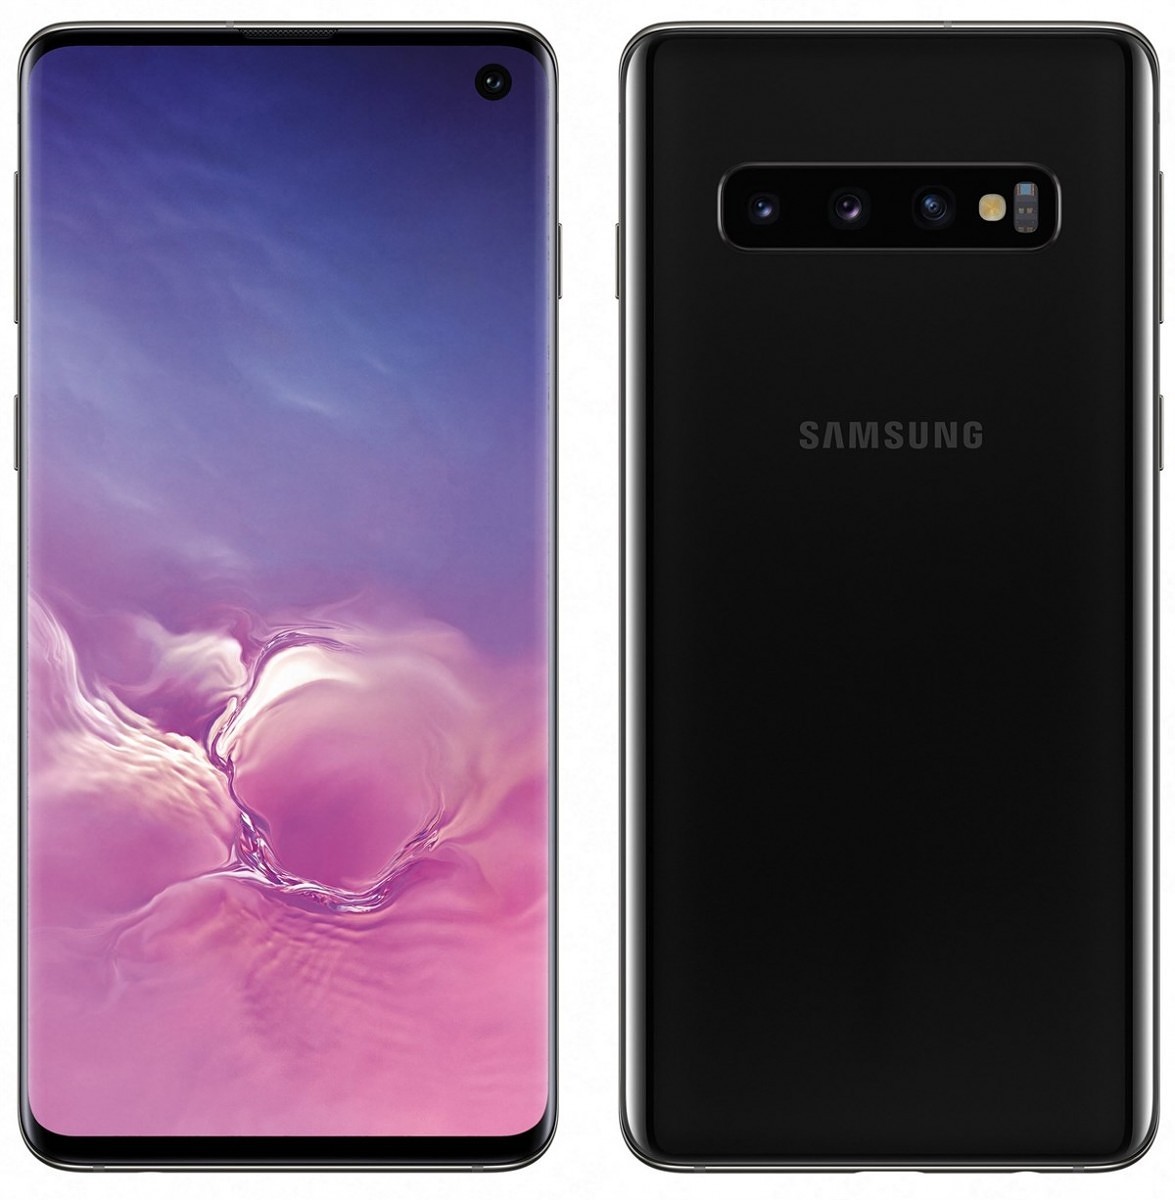
Galaxy S10 has a 6.1-inch Dynamic AMOLED screen. Like the S10E, it also has a punch-hole camera on the front. This phone uses Gorilla Glass 6. The screen ratio is 19:9. The resolution of Galaxy S10’s display is QHD+. This phone is equipped with the Snapdragon 855 or Exynos 9820 SoC. Galaxy S10 is quite similar to the S10 Plus, there is the difference in the front Camera, Battery, and Storage options only. S10 has a triple-camera system at the back and has a single camera on the front only. It has a 3400 mAh battery under the hood. The Galaxy S10 has an ultrasonic fingerprint reader too. Color options of Galaxy S10 are as same as the S10E.Galaxy S10 Model Numbers

Samsung Galaxy S10 Plus

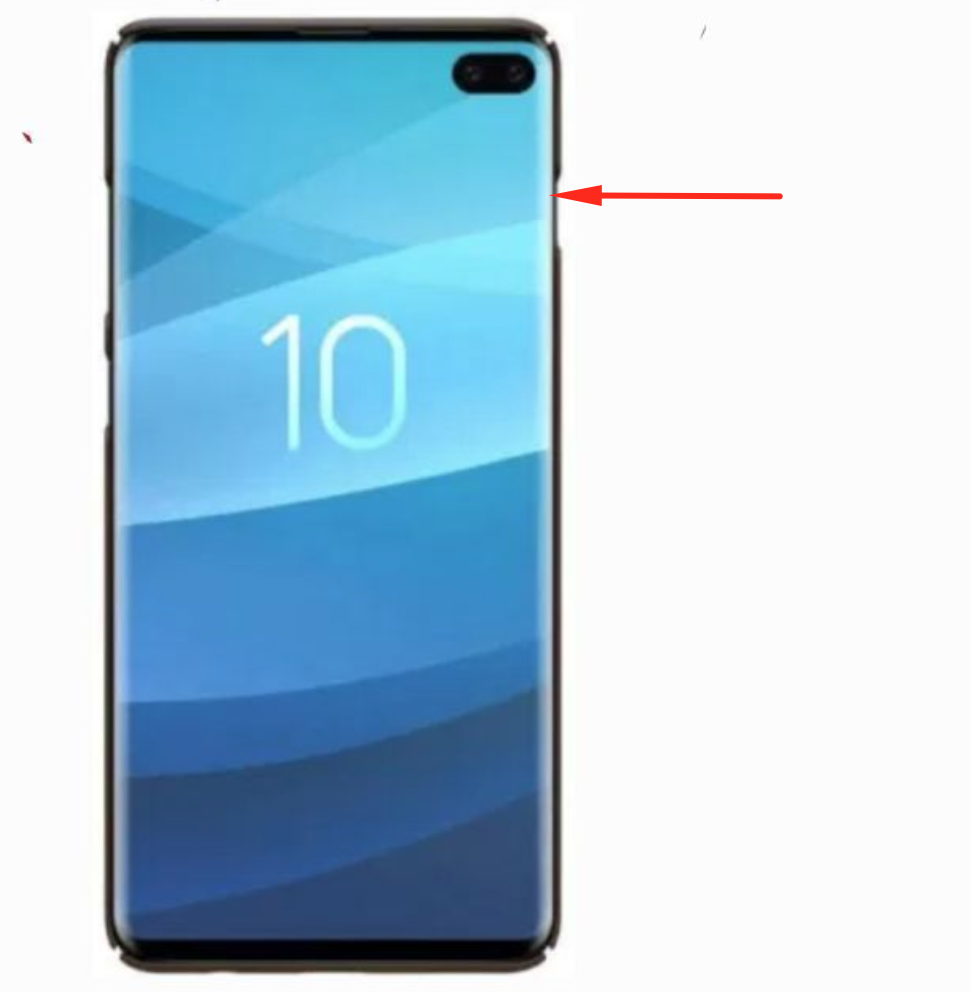
This is the most powerful variant of the Galaxy S10 series. The S10 Plus comes with a 6.4-inch Dynamic AMOLED display. This is the world’s first display with HDR10+ support. This phone uses a pill-like notch on the top-right corner of the screen. The screen ratio is 19:9. This is a QHD+ display too. The front and back fo the S10 Plus are wrapped inside corning Gorilla Glass 6. Galaxy S10 Plus is powered by Qualcomm Snapdragon 855 or the Exynos 9820 SoC. This phone comes with a RAM of 8GB with 128GB or 512GB internal storage or a RAM of 12GB with 1TB internal storage. It supports microSD cards too. Galaxy S10 Plus has a triple-camera system at the back. It has a 12MP wide shooter, 12MP telephoto shooter, and a 16MP ultrawide shooter. On the front, it has a 10MP + 8MP dual shooter. The battery in this phone is of 4100 mAh. Galaxy S10 Plus uses an ultrasonic fingerprint reader as well. This phone supports reverse wireless charging too.

All these phones run on Android Pie out of the box. Go ahead now to download Galaxy S10 Stock Wallpapers.

Galaxy S10 Stock Wallpapers

There are 16 stock wallpapers in the Galaxy S10 in total. The wallpapers of S10, S10E, and S10 Plus are all same. All these wallpapers have a resolution of 2560 x 2560 pixels. If you want to give your Android phone or your iPhone a touch of the Galaxy S10, grab these wallpapers and apply them right away. To download the wallpapers, simply right-click on your desired image and then click on “Save image as”. These wallpapers can be applied to any Android phone having 1080P or 1440P resolution.

Download all Galaxy S10 Stock Wallpapers: Download Link

That’s all for now. Stay tuned for the upcoming Galaxy S10 Wallpapers.

Furthermore, you can download the following stock wallpapers:

Download Xiaomi Mi 9 Stock Wallpapers

1
Download Xiaomi Mi 9 Stock Wallpapers

Xiaomi Mi 9 is the latest flagship by the Chinese giant. The Xiaomi Mi 9 stock wallpapers are now available. Wallpaper lovers can download the Xiaomi Mi 9 stock wallpapers from here. There are 18 official stock wallpapers of the Xiaomi Mi 9 in total. These official Xiaomi Mi 9 wallpapers can be applied to any Android phone and even on an iPhone. Before you download the wallpapers, let’s take a look at the features and spec-sheet of this latest phone by the Apple of China.

Xiaomi Mi 9

A few days back, Xiaomi introduced the Xiaomi Mi 9 which is the successor of the Xiaomi Mi 8. Xiaomi Mi 9 is Xiaomi’s first smartphone to come with the latest Qualcomm Snapdragon 855 SoC. The Adreno 640 GPU accompanies the Snapdragon 855 chipset on this smartphone. Xiaomi has used a 6.39-inches Super AMOLED display on this smartphone. This is a waterdrop-notched display. The Corning Gorilla Glass 6 adds an extra layer of protection over this display. Its screen has a resolution of 1080 x 2340 pixels.

The Xiaomi Mi 9 comes in 2 storage and RAM variants. Users can either get a 6GB RAM with 64GB internal storage or 128GB storage with a RAM of 8GB. There is no external card slot on this phone. This is a huge downside while companies like OnePlus and Apple are already focusing on pulling out smartphones with 256GB or 512GB of internal storage.

Xiaomi Mi 9 has a triple camera system at the back. It has a 48MP standard shooter. There is a 16MP ultrawide shooter. The third shooter is a 12MP telephoto lens. On the front, the Mi 9 has a single 20MP shooter fixed inside that tiny notch. This phone has an under-display fingerprint scanner. It’s not an ultrasonic fingerprint reader, it is an optical fingerprint reader instead. The Mi 9 uses USB Type-C for connection and charging purposes. This phone has a battery of 3300 mAh. Xiaomi offers the Mi 9 in LAvender Violet, Ocean Blue, and Piano Black colors. There are speculations that Xiaomai will release this phone with a fake transparent back as well.

Xiaomi Mi 9 Stock Wallpapers

You can find the 18 lock screen/home screen stock wallpapers of the Xiaomi Mi 9 below. These wallpapers carry a resolution of 1080 x 2340 pixels. As mentioned above, feel free to apply these wallpapers to any phone including Android and iPhone. To download the wallpapers, simply open the wallpaper and then right-click on your desired image and then click on “Save image as…”. A link to all Xiaomi Mi 9 Stock Wallpapers is also given below.

All Xiaomi Mi 9 Stock Wallpapers: Download


More stock wallpapers: