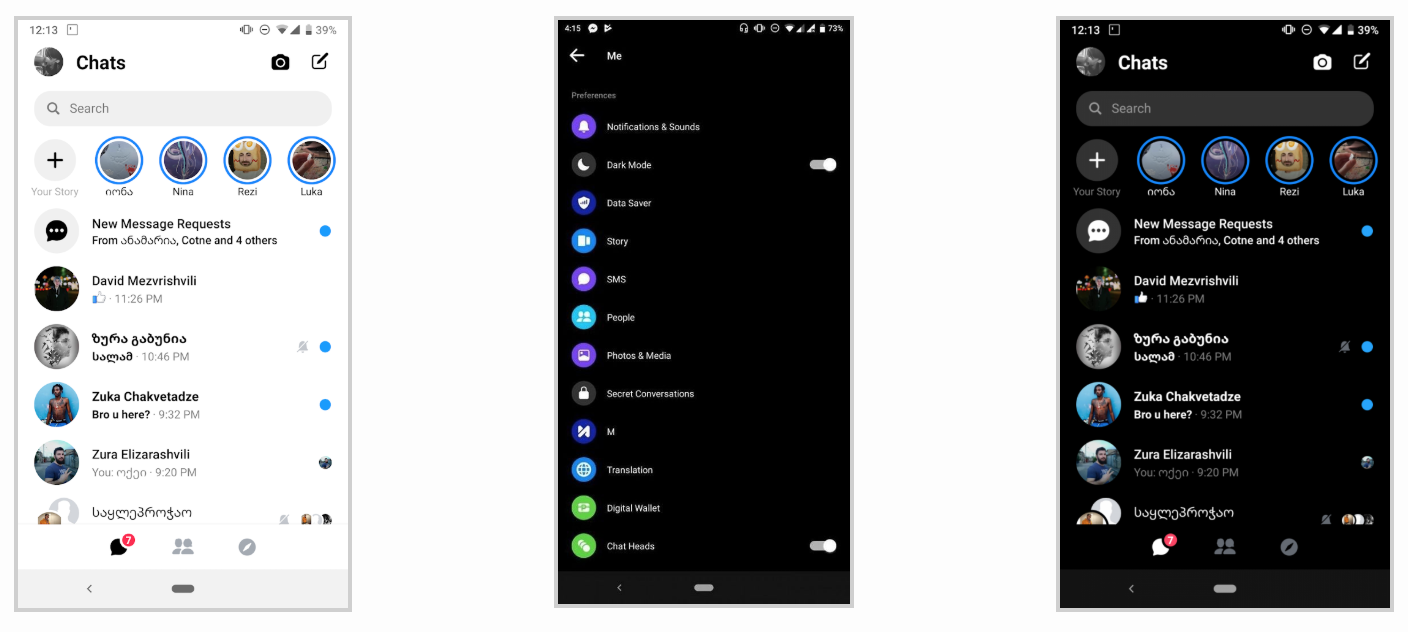
Here’s how you can enable dark mode in Facebook Messenger. Yes! Dark Mode for Facebook Messenger, I mean now it’s like a thing, the Drak Mode. Everyone is adapting this feature over the past year. We’ve seen Drak Mode in a number of devices. Facebook Messenger also had a dark mode feature but they are not just ready to give it a go. Good news is, Facebook Messenger got a huge update, all new features and more. Moreover, just for testing a couple of months ago they did showed us the Dark Mode. Since it is not in the final stages, that is why it was not included in this update.
However, we have found a way to Enable dark mode in Facebook Messenger unofficially. It means you need to Root your device, I mean like I said ” unofficially ” so it is for sure that rooting will be involved. Those who are using the beta version of Facebook Messenger, they would be happy to hear, this app includes dark mode. Oh Yes! it is there but you can’t just enable it yet. But thanks to XDA Developers, now you can enable dark mode in Messenger with the help of root. Let’s get started now.
Enable dark mode in Facebook Messenger [Root]:
Heed the instruction carefully provided below and please do exactly the same as we are telling you.
First of all, you need to download the Facebook Messenger Beta app, click here to download it.
Before we proceed, your device must be rooted and you have installed the beta version of Messenger.
Head over to the Google Play and Download an app called Termux. It will let you execute commands on your Android device.
Open Termux and type in SU, hit Enter. You will be asked to grant rights to Superuser, please grant them.
After that, you will a superuser. Now type am start -n “com.facebook.orca/com.facebook.abtest.gkprefs.GkSettingsListActivity” and hit enter.
On the next screen, Tap on Search Gatekeepers -> Type in ” Dark “. You will see a list of options, Tap on all of them on which you see “NO”. Select ‘YES’.
Close this app and terminal. Open up Messenger, Tap on your Profile icon, scroll down. There you will see a new option, Dark Mode. Tap on it to enable it.
That’s it. Just for heads up, if you don’t Dark Mode option, you need to close the Messenger app and restart your device. This is how you can Enable dark mode in Facebook Messenger. Please do tell us about your experience in the comments section below.
Samsung Galaxy M30 stock wallpapers are up now. Wallpaper enthusiasts can download the 6 official stock wallpapers of the Galaxy M30 from here. We have managed to extract the Galaxy M30 stock wallpapers in full HD resolution. Take a look at the spec-sheet of the Galaxy M30 before you download its wallpapers.
Galaxy M30 Stock Wallpapers
Galaxy M30 – Another Budget-Friendly Handset
Samsung Galaxy M30 is the latest addition to the Galaxy M series. Earlier, Samsung released the Galaxy M10 and the Galaxy M20 to launch this series. The Galaxy M30, being the most powerful smartphone of the Galaxy M series, offers amazing specifications. Galaxy M30 sports a 6.4-iches 1080 x 2280 pixels Super AMOLED screen. This phone comes with the infinity -U display which bumps the aspect ratio to 19:9.
Samsung has equipped this phone with the in-house Exynos 7904 Octa-core SoC. The GPU is Mali-G71 MP2. Galaxy M30 has 2 storage and RAM configurations. Users can get this phone either with a RAM of 4GB and 64GB internal storage or a RAM of 6GB and 128GB internal storage. As far as the cameras are concerned, this phone comes with a triple-camera system at the back. It has a 13MP PDAF camera, 5MP ultrawide, and 5MP depth sensor. On the front, there is a single 16MP sensor fixed inside that notch.
The Galaxy M30 has a USB Type-C port at the bottom. Next to this port is a 3.5mm headphone jack. This phone has a fingerprint scanner mounted at the back. The battery of this phone is 5000 mAh which is the highest for any Samsung Galaxy handset. Samsung offers this phone in Black and Blue colors. Its price starts at $200.
Galaxy M30 Stock Wallpapers
These are the 6 wallpapers that I could find the Samsung Galaxy M30. These wallpapers are in the native Full HD resolution of the Galaxy M30. Users can apply these wallpapers to any Android phone and also to an iPhone. To download the wallpaper to your computer, simply open the desired wallpaper, “right click > Save image as..”. To download the wallpaper to your phone, open the wallpaper on phone and then long press the image anywhere > download image to your phone. An all-in-one download link including all wallpapers is also attached below.
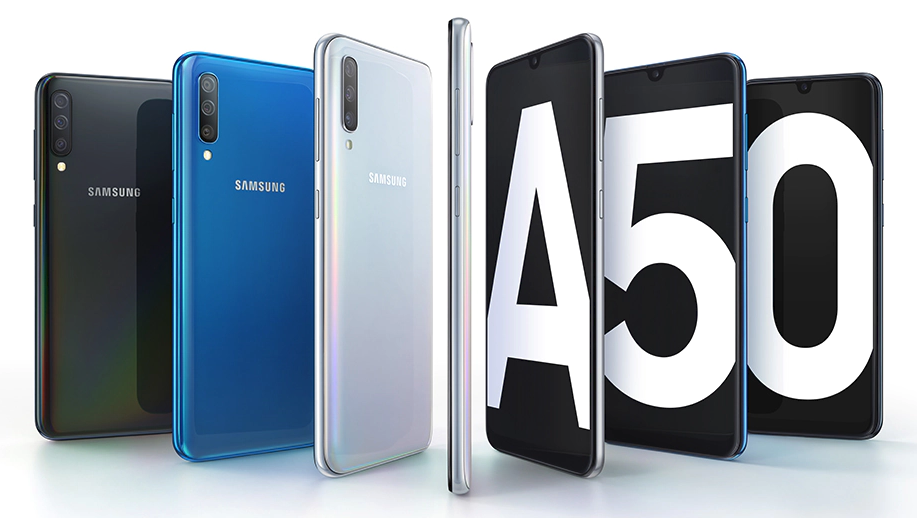
Wallpaper lovers, we have got our hands on the Samsung Galaxy A50 StockWallpapers. The phone brings 9 new wallpapers designed from scratch. Galaxy A50 Stock Wallpapers have been extracted by us for our viewers. You can download Galaxy A50 Stock Wallpapers in Full HD resolution from here. Before you download the official stock wallpapers of the Galaxy A50, let’s learn more about this brand new smartphone by Samsung.
Galaxy A50 Stock Wallpapers
Galaxy A50 – Value for Money!
Samsung Galaxy A50 is yet another budget-friendly smartphone for the millennials. Just like the Galaxy M10 and M20, this phone aims at providing value for money. The Galaxy A50 is a decent smartphone with a number of features that we haven’t seen on a Samsung smartphone so far.
Galaxy A50 Specs
Galaxy A50 is wrapped in a plastic body. Samsung has tried to keep this phone as premium as possible, however, the plastic can be seen and felt all around this phone. The phone carries a new design language that Samsung introduced with the Galaxy M series.
The Samsung Galaxy A50 comes with a 6.4-inch Super AMOLED screen. This phone has got the infinity -U display. There’s a tiny U-shaped notch mounted right in the middle of the screen’s top holding the front camera. The screen ratio of this screen is 19:9. The resolution is 1080 x 2340 pixels.
This phone is powered by the Exynos 9610 CPU. IOt has a RAM of 6GB or 4GB with internal storage of 128GB or 64Gb. It supports external microSD cards as well.
As far as the cameras are concerned, Galaxy A50 has three of them at the back. It has a 25MP PDAF shooter, an 8MP ultrawide shooter, and a 5MP depth sensor at the back. On the front, the Galaxy A50 has a single 25MP camera.
Attractive Price, Impressive Battery, Headphone Jack & Under Display Fingerprint Scanner
Samsung has added the USB Type-C port in this phone. It also supports fast charging. Since this phone has a plastic body, it doesn’t have wireless charging. It does retain the headphone jack too. What’s exciting about this phone is that it houses a fingerprint reader under its Super AMOLED display. This is definitely an optical fingerprint reader since this is not a flagship-grade phone to have an ultrasonic fingerprint scanner.
Galaxy A50 has a 4000 mAh battery under the hood. Samsung will release this phone in Black, White, Coral, and Blue colors. Galaxy A50 is priced at $320.
Overall, Samsung has managed to pull off an impressive device. Xiaomi’s competition to Samsung in India has forced it to make phones with a top-notch spec-sheet in a very nominal budget. The Galaxy A50 has got all the likes of a rockstar.
Galaxy A50 Stock Wallpapers
The Galaxy A50 has 6 stock wallpapers in total. Other than these 6 wallpapers, I found 3 other images that I have no idea what they are for. “I have uploaded all 6 images below. You can download the Galaxy A50 stock wallpapers one by one or all of them using the link given below. All these wallpapers have a resolution of 720 x 1280 pixels.
If you want to download the wallpapers one by one, open your desired image from this gallery and then right click > save image as. This will save the image to your computer. To download the wallpapers on your phone, open one of the wallpapers from below and then long press the wallpaper > Download/save image.
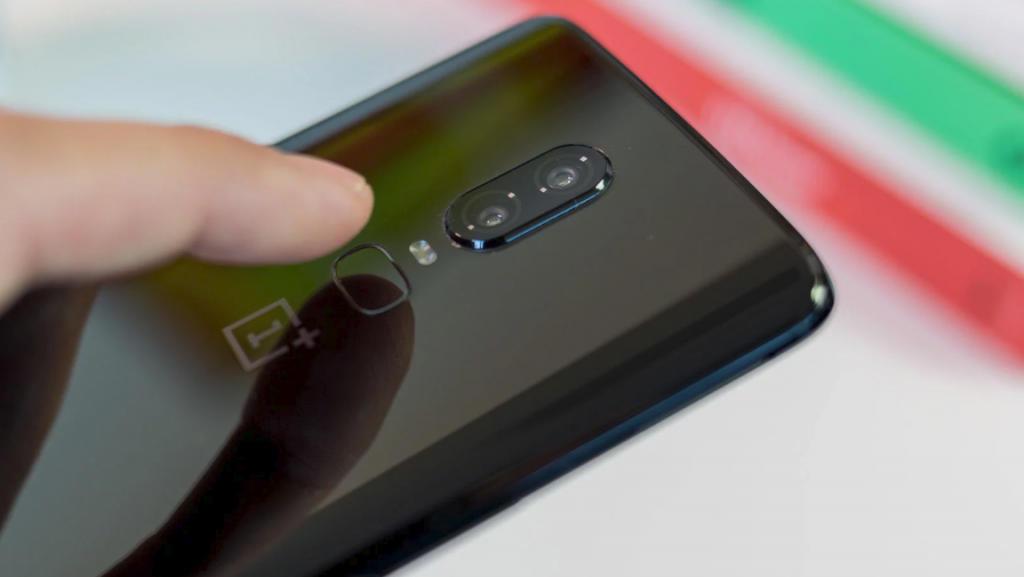
OnePlus 6 is one of the best devices from the Chinese phone maker. The phone comes with a bold design and top-notch specifications. The device is in use by millions of users all across the world. Recently, some OnePlus 6 users started reporting an issue with the fingerprint scanner. The OnePlus 6 fingerprint not working was first reported by a Redditor which was later confirmed by a handful of other users. Some users linked this issue with the latest Android Pie update while some suggested its a hardware issue. A few users were able to fix the OnePlus 6 Fingerprint after applying easy solutions. If you are facing a similar issue on your OnePlus 6, it’s time to fix it. As you scroll through this guide, you will find the steps to fix OnePlus 6 fingerprint scanner not working. A recap of OnePlus 6’s spec-sheet will be followed by the Fingerprint Scanner fix below.
Image of OnePlus 6 Fingerprint Scanner
OnePlus 6
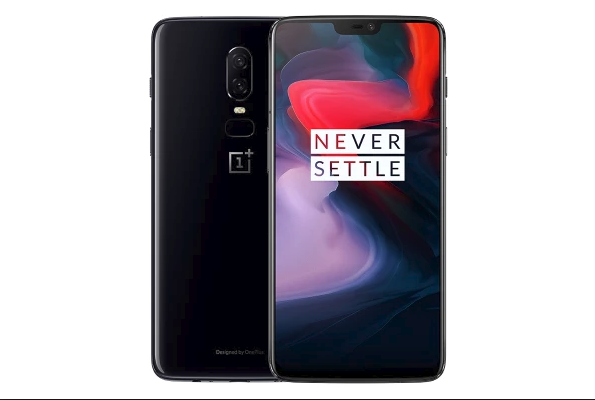
OnePlus 6 was released last year as the successor of the OnePlus 5T. With the OnePlus 6, the company fully opted for the notch culture. The OnePlus 6 came in with a 6.28-inch Optic-AMOLED screen. This screen has an aspect ratio of 19:9, thanks to the notch mounted right in the middle.
Image of OnePlus 6
OnePlus 6 is equipped with the Qualcomm Snapdragon 845 CPU. This phone came with a RAM of 6GB or 8GB with internal storage of 128GB or 256GB. This phone has dual cameras at the back including a 16MP and a 20MP shooter. On the front, it has a single 16MP camera. There’s a fingerprint scanner mounted right next to the rear cameras.
OnePlus 6 has a 3300 mAh battery. This phone uses USB Type-C for connection and charging. There is a headphone jack on this phone. This was probably the last OnePlus smartphone to have a headphone jack. The OnePlus 6 comes in Black, White, and Red colors.
OnePlus 6 Fingerprint Scanner not working
As mentioned above, the OnePlus 6 owners linked the fingerprint scanner problem to a number of factors. At first, the OnePlus 6 owners were found saying that this issue popped up after installing the latest Android Pie update. In the Android Pie update, the pocket mode of the phone got malfunctioned. In the Pocket Mode, the phone is supposed to stay asleep and immune to accidental touches.
This actually makes a lot of sense that the phone doesn’t come out of Pocket Mode even after taking it out of your pocket. The fingerprint scanner fails to respond and that’s when the problem occurs. The OxygenOS carrying this bug has the version number 9.0.2.
While most of the users reached a consensus regarding this issue to be a bug in the OxygenOS 9.0.2, some reported it to be a hardware issue. A hardware issue definitely needs an examining from the service center. As long as it’s not a hardware issue on your OnePlus 6, you can pay attention to the method to fix OnePlus 6 Fingerprint scanner not working below.
Fix OnePlus 6 Fingerprint Scanner not working
These are the steps to fix a malfunctioned OnePlus 6 Fingerprint Scanner.
Check your OxygenOS Version.
On your OnePlus 6, go to Settings > About Phone > Check the OxygenOS version number. If it’s 9.0.2 or below, you need to update your OnePlus 6 right away. Follow the remaining steps.
Download OxygenOS 9.0.3 or higher
Download the OxygenOS 9.0.3 or higher from the OnePlus website. Copy the downloaded file to the internal storage of your OnePlus 6.
Install OxygenOS 9.0.3 on your OnePlus 6.
On the OnePlus 6, go to Settings > System Updates > Local Upgrade > Click on the file that you just copied and install it.
Restart your OnePlus 6.
As the latest software update comes to an end, restart your OnePlus 6.
All done. The Fingerprint Scanner should be working fine now.
Your phone has been updated now and the issue is probably gone. Try using the fingerprint scanner now. Also, put the phone in your pocket and pull it out, check the fingerprint scanner afterwards. It should be working fine.
Final Words
That is all that was needed to fix a OnePlus 6 who’s fingerprint scanner is not working. If the solution given above fails to work, you can look into other solutions like clearing the cache of your phone, restarting it, deleting the current fingerprint and registering it again, or factory resetting the device. If you are facing any further problems, feel free to contact us. The best way to reach out to us is through the comments section below.
It’s been more than a week since the Galaxy S10 is out. Samsung has packed the phone with goodies. Galaxy S10 has a new set of eye-soothing wallpapers. The phone also packs new ringtones, notification, and alarm tones. We already shared the Galaxy S10 wallpapers. It’s time to get your hands on the Galaxy S10 ringtones. From this post, you can download Galaxy S10 ringtones, notification, and alarm tones. Let us refresh our knowledge about the Galaxy S10 trio before jumping to the downloads.
Galaxy S10 Trio
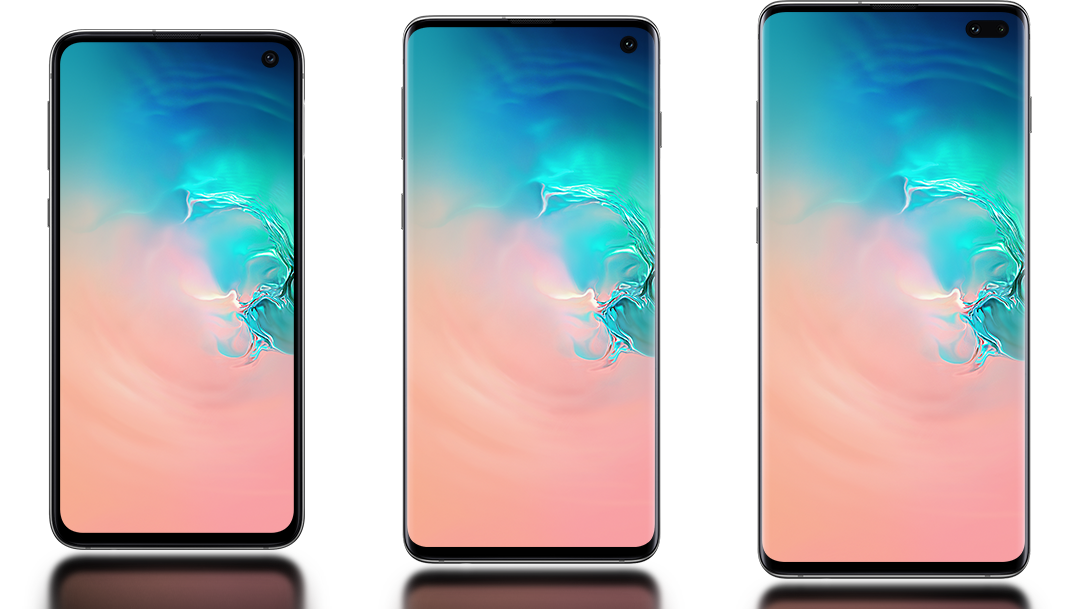
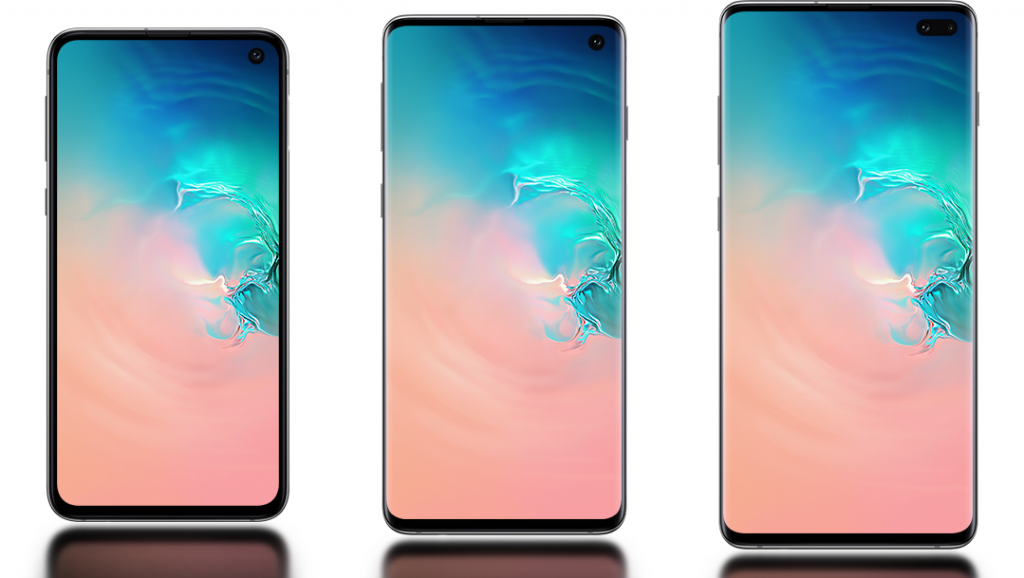
The Galaxy S10 lineup includes the Galaxy S10E, Galaxy S10, and the Galaxy S10 Plus. Galaxy S10E is the budget variant of the S10. The Galaxy S10 is the standard flagship. Galaxy S10 Plus is the most powerful version of the S10.
Galaxy S10E comes with a 5.8-inch screen. This phone has a punch-hole camera on the fron which bumps the aspect ratio to 19:9. The glass sandwich design is protected by Corning Gorilla Glass 6. Resolution of S10E’s screen is 1080P which means Full HD. Galaxy S10E is powered by Qualcomm Snapdragon 855 or Exynos 9820 CPU. It has a RAM of 6GB or 8GB with internal storage of 128GB or 256GB. The S10E has a dual camera system at the back including 12MP wide shooter and 16MP ultrawide shooter. On the front, the S10E has a 10MP shooter. It has a battery of 3100 mAh and it runs on Android Pie out of the box.
Galaxy S10 has a 6.1-inch dynamic AMOLED screen. It also has a punch-hole camera and the aspect ratio is similar to the S10E. The processor on this phone also similar to the S10E. Galaxy S10 has a RAM of 8GB with internal storage of 128GB or 512GB. It has 3 cameras at the back including 12MP wide, 12MP telephoto, and 16MP wide shooter. On the front, it has a single 10MP camera. This phone has got a battery of 3400 mAh inside. The remaining specs are same as that of S10E.
The S10 Plus is quite similar to the S10. It’s got same cameras at the back. On the front, it has 2 cameras including a 10MP and an 8MP camera. S10 Plus has a 6.4-inch Dynamic AMOLED screen. It has a battery of 4100 mAh inside. Both the Galaxy S10 and S10 Plus have an ultrasonic fingerprint reader. The remaining specs of these phones are same.
It’s time to go ahead and download Galaxy S10 Ringtones. Along side the ringtones, you can also download notification tones and alarm tones.
Galaxy S10 Ringtones, Notification, and Alarm Tones
Download Galaxy S10 Ringtones, Notification Tones, Alarm Tones, and UI Tones: Download Link
Extract the downloaded folder on your computer or phone.
You will get a folder named “media”.
Copy this folder to the internal storage of your phone. This folder should be placed in the root of your internal storage. Do not place it inside any folder.
Now go to the Ringtone/Sound settings on your phone and open Ringtones, Notification Tones, or Alarm Tones.
You will find all the Tones synced there.
Alternatively, you can download a Ringtone Maker application from the Play Store and manually choose one of those Tones on your phone.
Wrap Up
Whether you are tight on budget the Galaxy S10 or you just have no plans to get this phone, you can still get its stock wallpapers and all of its tones. It’s a good idea just to give your phone a new look and feel. Let us know how you are enjoying these ringtones on your phone. For any queries or suggestions, feel free to reach out to us.
Samsung’s Galaxy S10 series is one of the best smartphone series out there. It offers style, quality, performance, and numerous useful and brand new features. However, a phone of even this caliber can sometimes run into issues. If the Galaxy S10 becomes unresponsive, keeps rebooting, again and again, then it may be the right time to hard reset it. This tutorial goes through all the steps to factory reset or hard reset Galaxy S10, Galaxy S10+, and Galaxy S10E. It’s time to fix annoying issues.
What is Hard reset / Factory reset?
Normally when someone wants to wipe data on their phone, they use the factory reset option. This particular option is available inside Settings menu. However, when the phone becomes unusable and you cannot access the settings, then only solution is “Hard Reset”. This is same as factory reset but done outside of main menu. Users can wipe entire data or factory reset the device from recovery menu.
Hard reset deletes all data stored on the device from internal storage. Normally, phones give the option of wiping the external SD card too. However, it may not be available in recovery menu.
When to Factory reset / Hard reset Galaxy S10, S10+ or S10E
As the name suggests, hard reset is the last resort when phone becomes unresponsive. The most common use case is when Galaxy S10 is stuck in bootloop. It does not turn off properly and you keep seeing Samsung logo again and again. This is true for Galaxy S10+ and Galaxy S10E as well. In this case, the first possible solution is hard reset. Normally, the phone starts working normally after doing this.
Another possible use case is when phone becomes unresponsive or very slow. In this case, first try doing a soft reset with volume down + power keys combination. If it does not solve the issue, then turn it off forcefully as described below. Perform a hard reset using steps below afterwards.
Some people may try to hard reset to bypass lockscreen of Galaxy S10, S10+ or S10E. However, with improvement if software and security, it may not be possible. It can ask for login information as well as biometric verification if stored beforehand.
Guide to Factory Reset / Hard Reset Galaxy S10+, S10 & S10E
Before continuing, note that it will wipe all user data. Therefore, before performing a factory reset, take out the SD Card (if inserted) and copy all data in internal storage. Otherwise, all data will be lost. However, there are cases when you are attempting to hard reset in case of bootloop or something like that. In that case you may not be able to access data on internal storage. In any case, follow the steps below to factory reset or hard reset Galaxy S10/S10+/S10E. Since all three of these devices are running similar software, the entire process is same too.
Follow the steps below to hard reset/factory reset Galaxy S10 series phones.
Total Time:5 minutes
Hold the power button for few seconds and turn off the phone.
If you can access the main menu, then hold it for few seconds and press power off button in next screen.
If the phone is unresponsive, hold volume down + power keys together until phone turns off.
In case the phone is either stuck in bootloop or just unresponsive, use this trick to turn it off.
Once the phone is off, enter recovery mode.
This is the default/stock recovery menu. Follow the guide in this link to enter recovery mode on Galaxy S10 series phones.
Inside the recovery menu, use volume buttons to navigate to “Wipe data/Factory Reset” option.
Touch control do not work on stock recovery.
Press Power button to select “Wipe data/Factory Reset” option.
This option will execute the hard reset process.
Once completed, select the reboot option and press power button to select it.
After confirmation of factory reset and when it is complete, reboot the phone to get into main menu.
That’s it! Now your phone should be working normally again.
The first reboot should take longer than usual. However, you have to set it all up once again.
Conclusion
Follow the steps mentioned above carefully. Also do not forget to to make a backup of data beforehand, if possible. Hard reset wipe all data stored on the device. It also clears all stored accounts except for the biometrics probably. These may be required for verification upon rebooting.
Feel free to leave your feedback and queries in the comments below.
Let’s tell you how you can easily Move status bar clock to the right on Samsung One UI. One UI is the latest OS version of Samsung based on Android 9 Pie. It comes with a number of improvements and the UI design is awesome. Samsung made a big Journey from TouchWiz to One UI, we have seen many versions in the past.
However, if you ask me what is best you used so far, my answer will be One UI. There is so much new, now you cannot say that Samsung UI is laggy or buggy etc. They did bring in a number of features and also they did some cleaning, removed a few tweaks and apps. But If you are Android Stock lover, Samsung One UI is not for you and it cannot beat the stock Android experience.
Moreover, Samsung One UI is only made available to the flagship devices such as Galaxy S9/S9+, Galaxy Note 9, Galaxy S8/S8+, and the Galaxy Note 8. As I told you, they have made a hell of changes and they put status bar clock to the top left corner. Why would you do that, there was no need to do that.
It was perfectly good when it was in top right corner. Well, its been said that it was done because Samsung Galaxy S10 camera is moved to the right corner. However, they forgot that it will effects all the One UI devices.
Move status bar clock to the right on Samsung [ One UI ]:
This is why we will help you Move status bar clock to the right on Samsung One UI. Don’t worry there is no Root required for that, all you have to do is install an app called SystemUI Tuner. After that, heed the instructions below to learn how to restore the status bar clock back to its original place.
If you have recently installed Samsung One UI and now you not receiving notification, you should check our guide.
Quick Guide:
First of all, head over to the Google Play Store. Now Download & Install SystemUI Tuner on your Samsung device.
Launch the app, follow the instructions provided on the screen. Grant all the permissions required via ADB. If you don’t know how to setup ADB, Click here.
Once you have given all the permissions, head back to the app and open Settings. From there tap on TouchWiz.
In the TouchWiz menu, look for Miscellaneous menu -> Clock Position -> Select Right -> Save.
That’s all. See how simple it was, you have moved status bar clock to the right on Samsung One UI. Please do tell us how was your experience in the below comments section.
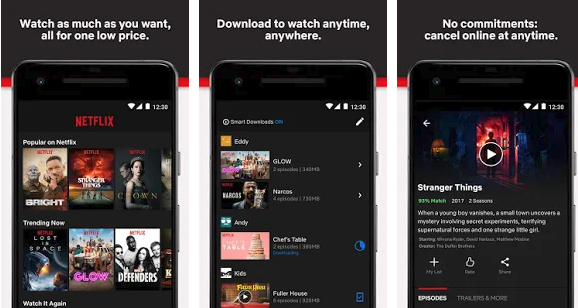
Netflix is undoubtedly the best subscription-based movie streaming service. Users can browse through the Netflix website to watch movies and TV shows. Netflix has its application for Android and iOS. It runs on a number of media players too. Android Netflix users often come across an annoying error. This error states “There is a problem playing the video (5.2)”. Once this error pops up, whatever you are trying to play doesn’t work, and you end up cursing the Netflix service or your Android phone. This guide will help you to fix Netflix error “There is a problem playing the video (5.2)” on Android.
Netflix Android
There is a problem playing the video (5.2) – How to fix
There are various solutions that can fix “There is a problem playing the video (5.2) on an Android device. You have to apply the following solutions one by one to find the one that works for you.
Restart your Android Phone
The very first thing is to try restarting your phone. This solution is recommended by Netflix itself. If you haven’t restarted your phone in a while, it’s time to do it now. After restarting your phone, run the Netflix application again and try playing a video.
Log out of Netflix App and log in again
The second solution is to log out of the Netflix app and log in again. Open the Netflix application on your Android phone. Go to the options and log out of Netflix. After logging out, Restart your Android phone and then log into the Netflix application again. Play a video and see if the error is gone or not.
Clear the Cache and Data of Netflix App
On your Android phone, go to Settings > Apps & Notifications or Application Manager > See all Apps > Netflix > Storage > Clear Cache and Clear Data. After this, Restart your phone. Now open the Netflix application, it will ask you to log in again. Enter your login details and play a video. There is a problem playing the video (5.2) error should be gone after applying this solution in case the previous solutions did not work.
Clear the Cache of your Android phone
Power down your Android phone completely. Now press and hold Volume Up + Volume Down + Power button, or the Volume Up + Bixby + Power button to boot into the recovery mode on your phone. In the recovery, select the Wipe Cache option and then wipe the cache of your phone. Restart your phone and then launch Netflix app. It should work this time.
Check if there is an update for Netflix available
Another solution is to check whether there is an updated version of Netflix available or not. At times, there is a new version of an app available and the existing version starts popping up errors. Open Google Play Store and see if Netflix has an update available. Update Netflix and launch it again. The videos should play through this time.
Check your internet connection
You also need to check whether your internet connection is working fine or not. You may check your WiFi router or your Mobile Data Bucket. Make sure your internet is working fine. Weak internet connection can also bring this error up on your phone.
Uninstall and reinstall Netflix
If all of the solutions given above fail to work, simply uinstall the Netflix app. Restart your Android phone. Now go to the Google Play Store and install Netflix again. Enter your login details and play any video. The video should play this time.
Wrap up
That’s all with the Netflix error “There is a problem playing the video (5.2)”. If you are unable to apply any solution given above, feel free to contact us through the comments section below. Let us know which solution worked for you. We will try our best to get back to you as soon as possible.
Samsung launched the Samsung Galaxy S10 trio a week ago. The phone is all set to make its way to the markets worldwide. If you are planning to get one of the newly launched Samsung Galaxy S10 handsets, you need to know which model number is compatible with your region. To make your Galaxy S10 selection easy, here is a list of Galaxy S10E, Galaxy S10, and Galaxy S10 Plus Model Numbers. This list sorts the Galaxy S10 variants on the basis of model numbers, SoC, Region/Carrier, and connectivity. If you have no idea of why the model numbers matter, you need to learn that first.
Galaxy S10E, S10, and S10 Plus Model Numbers
Why so many Galaxy S10 Models?
Companies like Samsung launch multiple variants of one same device for different regions. This is done in order to make a device compatible with the radio frequencies of a particular region. Network carriers operate on different radio frequencies all across the world. For a smartphone to work on a particular network, it must support all the frequencies that the network carriers in a region run on. If you try using an incompatible phone, it may not be able to pick up network signals causing connectivity failure.
To understand it further, you can take an example of a carrier-branded smartphone. In the US, there is a handful of network operators. All these operators operate on different bands. Samsung designs the smartphones for each carrier in the US. The phone designed for T-Mobile will have different frequencies from the one designed for Verizon. Similarly, the US Unlocked Galaxy S10 will have different bands and connectivity modules as compared to the Galaxy S10 Plus for Europe. You cannot use the European Galaxy S10 Plus in the US and vice versa.
Before picking up your Galaxy S10E, S10, or S10 Plus, you must make sure that you have a clear idea of the model number you are looking for. For further assistance, you can take a look at the tables showing all Galaxy S10E, S10, and S10 Model Numbers & Differences.
Galaxy S10E Model Numbers & Differences
Galaxy S10E Model Numbers
In case you don’t know, the Galaxy S10E is the budget Galaxy S10. This phone has a 5.8-inch Dynamic AMOLED screen. Its screen has a 1080P resolution. The screen ratio is 19:9. Galaxy S10E is powered by Snapdragon 855 or Exynos 9820 SoC. It has a RAM of 6GB with 128GB internal storage or a RAM of 8GB with 256GB of internal storage. Galaxy S10E has a dual camera system at the back. It has a 12MP wide shooter and a 16MP ultrawide shooter. On the front, this phone has a 10MP camera. Galaxy S10E uses the USB Type-C for connectivity. It does have a headphone jack. The phone has a battery of 3100 mAh. Galaxy S10E runs on Android Pie out of the box. Here is the list of Galaxy S10E model numbers & differences.
Galaxy S10 is the standard Galaxy S10 phone for this year. This phone has a 6.1-inch Dynamic AMOLED WQHD+ screen. It has 19:9 aspect ratio too. Like the S10E, this phone is also powered by Snapdragon 855 or Exynos 9820. Galaxy S10 has internal storage of 128GB or 512GB with a RAM of 8GB. It has 3 cameras at the back including a 12MP wide shooter, 12MP telephoto shooter, and a 16MP ultrawide shooter. On the front, it has a single 10MP camera. Galaxy S10 has a whopping 3400 mAh battery. It has an ultrasonic fingerprint scanner too. Here is a list of Galaxy S10 Model Numbers & Differences.
The Galaxy S10 Plus is the most powerful Samsung flagship to date. This phone boasts off a 6.4-inch Dynamic AMOLED display. The resolution is WQHD+ here too. It has an aspect ratio of 19:9 as well. Galaxy S10 Plus also has Exynos 9820 or Snapdragon 955 SoC. This phone has a RAM of 8GB or 12GB with internal storage of 128GB, 512GB or 1TB. Galaxy S10 Plus has 3 cameras at the back which are similar to the S10. On the front, it has 2 cameras including a 10MP shooter and an 8MP depth sensor. This phone also uses the ultrasonic fingerprint scanner. Galaxy S10 Plus has a 4100 mAh battery inside. Here you go with the list of Galaxy S10 Plus Model Numbers & Differences.
That’s all. Got any questions? Feel free to reach out to us. If you have any kind of suggestions, feel free to share them via the comments section given below.
A week back, Samsung pulled the curtains off from its most powerful smartphone yet. Samsung released the Galaxy S10E, Galaxy S10, and the Galaxy S10 Plus. The Galaxy S10 Plus is the most powerful phone among this series. Samsung has managed to bring out a trend-setter device once again. Galaxy S10 Plus comes with numerous features that we have never seen before. Here, in this post, we will take a look at the Samsung Galaxy S10 Plus Top Ten Features. Before you learn about the Samsung Galaxy S10 Plus Top Ten Features, let’s learn more about this device.
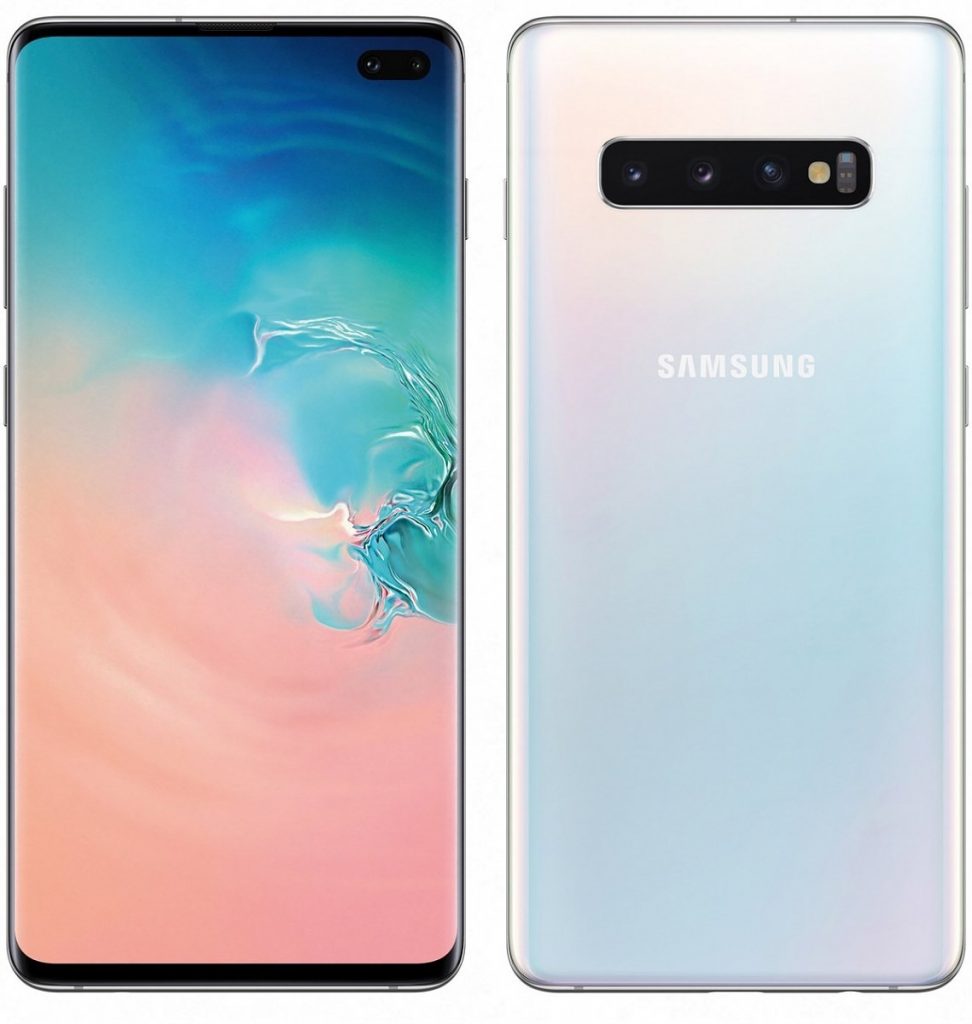
Galaxy S10 Plus comes with a brand new design language. This is Samsung’s first ever flagship phone to have a punch-hole camera on the front. Galaxy S10 Plus’s aspect ratio is 19:9 with the help of the punch-hole camera. This phone comes with a triple-camera module at the back which is also a first for a flagship Samsung smartphone. The phone looks incredible and it’s loaded with the features which will set new goals in the tech industry. The industry-altering smartphone deserves a lot of appreciation. Take a look at the Galaxy S10 Plus specifications and then learn about Samsung Galaxy S10 Plus Top Ten Features.
Galaxy S10 Plus Specifications
Display
6.4-inch Dynamic AMOLED – 19:9 WQHD+
SoC
Snapdragon 855 (7nm) or Exynos 9820 (8nm)
RAM
8GB or 12GB
Storage
128GB – 512GB – 1TB
Rear Cameras
12MP Wide + 12MP Telephoto + 16MP Ultrawide
Front Cameras
10MP Standard + 8MP Depth Sensor
Connectivity
USB Type-C, WiFi 6
Colors
Prism White, Black, Blue, Green, Ceramic White & Black
Battery
4100 mAh
OS
Android 9 Pie
Galaxy S10 Plus Top Ten Features
These are the best features of the Galaxy S10 Plus in my opinion. Take a look at the Galaxy S10 Plus best features and let me know if you find them as good or not.
Dynamic AMOLED Display
Dynamic AMOLED of Galaxy S10 Plus with HDR 10+
Samsung has been marketing its Dynamic AMOLED infinity -O displays for quite a while. The displays are finally out on the Galaxy S10 series. The Galaxy S10 Plu’s 6.4-inch Dynamic AMOLED Display is HDR10+ compliant. This screen uses Dynamic Tone Mapping to enhance the contrast and colors on your phone’s screen. It also automatically enhances colors when you are watching movies. To reduce the eye strain, the Galaxy S10 Plus’s display reduces blue light by 42%.
Ultrawide Camera Lens
Ultrawide Camera of Galaxy S10 Plus
Galaxy S10 Plus comes with a 16 megapixel Ultrawide shooter at the back. This third shooter on the phone is to give you extra field of view while capturing a picture. Whether you are shooting landscapes or shooting a group of people, this mode is going to come in handy. Samsung has introduced this lens on its smartphones before, but for a flagship phone like Galaxy S10 Plus, this is the first time.
Ultrasonic Fingerprint Reader
Ultrasonic Fingerprint Scanner. Image: Cnet
Galaxy S10 Plus is the first ever smartphone in the world to have an Ultrasoconic fingerprint reader. This fingerprint reader is way different from an optical reader. Ultrasonic scanner is a 3D scanner while the optical scanner is 2D. The Ultrasonic reader uses high-frequency ultrasonic sound waves to map out a user’s fingerprints on the phone’s screen. These sounds are not audible for a user, however they are in the play.
3.5mm Headphone Jack
Galaxy S10 Plus Headphone Jack. Image: Digital Trends
In a world where Headphone jack is becoming obselete for no reason, the Galaxy S10 Plus still has the real courage to retain it. The 3.5mm headphone jack can be found on the bottom next to the USB Type-C port. Galaxy S10 Plus comes with AKG tuned sound and an AKG headphone in the box. Users who don’t like the lack of headphone jack, the Galaxy S10 Plus is lying out there for them.
Dual Front Cameras with 4K Recording
Front Dual Cameras of S10 Plus
You heard it right. The 4K recording capability in the front cameras of a smartphone is here. The Galaxy S10 Plus is the phone to have this feature. The dual front cameras on the phone are there to give you better selfies with the help of 10MP standard shooter and an 8MP depth sensor. You can now film yourself in 4K with these cameras.
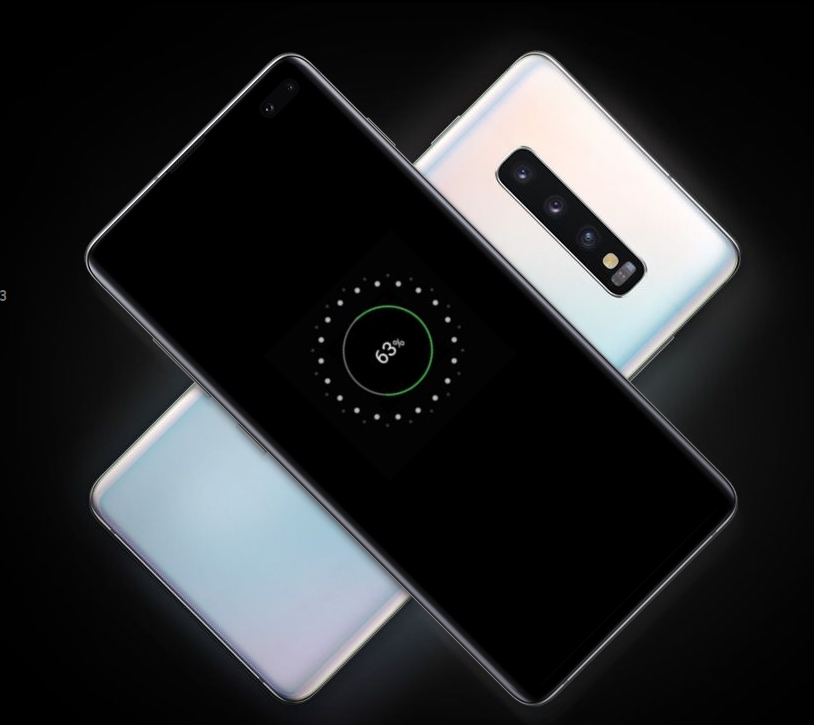
Power Sharing
Galaxy S10 Plus Power Sharing
The power sharing feature is there to let you share the battery juice of your S10 Plus with another phone. The other phone must support wireless charging to use this feature of the Galaxy S10 Plus. Samsung has set a limit on this feature. When the Galaxy S10 Plus’s battery drops to 30%, the power sharing feature stops working. It also makes sense since you have to keep your device alive at priority one.
WiFi 6
WiFi 6
The world’s first phone to support WiFi 6 is the Galaxy S10 Plus. This new WiFi is there to enhance the WiFi connectivity and also boost the WiFi speed. WiFi 6 bumps the bumps the speed from 3.5 Gbps of WiFi 5 to 9.6 Gbps. While it doesn’t make much of a difference in real world right now, it’s going to be useful in the future when we have blazing fast internet. Another feature of WiFi 6 is to ease the strain of a WiFi router when there is congestion going on. WiFi 6 lays off the router’s load when there’s a plethora of devices connected to the same network.
1.5TB Storage
1.5TB Internal & External Storage
Galaxy S10 Plus has a variant with 1TB of internal storage and 12GB RAM. This phone also supports a microSD card. It means if you add a card of 500 GB, you will end up having 1.5TB of total storage. I’m sure you haven’t seen a smartphone with this amount of storage so far. The Galaxy S10 Plus does it and it’s going to push other phone makers to hit these benchmarks too.
AI App Prediction
AI to launch Apps before you start using.
Galaxy S10 Plus enpacks AI App Predcition feature. This feature records the patterns of your app usage on the Galaxy S10 Plus. After learning about your usage, it launches a certain application at a certain time of a day before you start using it. This is done in order to make the processes swift. This is a feature of Android Dashboard and it was supposed to be inside the Android Pie originally. The Galaxy S10 Plus renames this feature as AI App Prediction.
Cryptocurrency Wallet
Cryptocurrency Wallet
While companies like HTC have gone ahead to making a dedicated cryptocurrency-friendly smartphone, Samsung chose to bring the most-wanted cryptocurrency feature to its flagship. Galaxy S10 series comes with an inbuilt cryptocurrency wallet. This is a cold storage wallet and it isn’t connected to the internet. It means that you can fully trust this wallet with all of your important coins.
Wrap Up
Those are the best features I could see in the Galaxy S10 Plus. If you have any other feature to add to this list, feel free to drop it below in the comments section. Don’t forget to let us know about your favorite feature of the Galaxy S10 Plus? Are you planning to get this phone? Find out which Galaxy S10 Plus model number is compatible with your region.
Samsung Galaxy S10 issues are pretty imminent. Every new device is bound to run into some sort of issue once in a while. This includes fast battery loss, random apps force closing and even a bootloop. Use the guide below to fix all of these errors on 3 devices in current series: Galaxy S10, Galaxy S10+ and Galaxy S10E. This guide assumes that you are using stock recovery, therefore, it does not have any risk whatsoever.
What is Recovery Mode?
As the name suggests, the recovery mode is in place to recover the phone in case something goes south. Lets assume that someone installs a new update on on one of the three devices and phone gets stuck in bootloop. It is when you try to turn the phone on and it keeps reloading Samsung logo again and again.
Other issues include the phone’s battery draining fast, apps force closing and even trying to reset the phone. The phone may get stuck in bootloop even after installing an Odin update. Sometimes, the bootloop error pops up due to no apparent reason. In order to fix all of these and lot of other issues, use the guide below to learn how to enter and use recovery on Galaxy S10/S10+/S10E.
Guide to install Update.zip via “Apply update from SD Card” on S10
How to fix Galaxy S10/S10+/S10E stuck in bootloop
Types of recoveries
There are two main types of recoveries: stock and custom. Every Android system comes pre-installed with a stock recovery. The overall interface is 99% same across all manufactures. Therefore, it is very easy to learn and use. However, the functionality of stock recovery is very limited. It does not support root access actions.
A custom recovery is for power users. The most notable custom recovery these days is TWRP. It gets rid of traditional volume/power button navigation. You can use it directly as a touchscreen. Moreover, it is only available for rooted users. Get access to plethora of features from a custom recovery that a stock recovery cannot provide.
Steps to enter Recovery Mode
The recovery mode in Galaxy S10 and its other variants S10+ and S10E are all accessed the same way. It is in place to help users ‘recover’ their phones from various bugs and errors. Moreover, stock recovery there to install update zips for new OS updates. The method below is to enter recovery mode on Galaxy S10, S10+ and S10E. Follow the steps carefully.
Follow the steps below to enter recovery on Galaxy S10/S10+ and S10E.
Total Time:2 minutes
Hold the power button for few seconds until you see the power off button. Press it to turn off the phone.
The recovery menu opens when the phone is already turned off. Therefore, turn it off before next step.
Press and hold Volume Up + Power + Bixby buttons together. Hold these buttons until you see the Samsung logo and then recovery screen.
This is a unique button combination to open recovery on Samsung Galaxy smartphones including of course S10, S10 Plus and S10E.
Use the volume up and down to navigate between different menu options in recovery.
The touchscreen does not work inside stock recovery. This guide assumes that you are using stock and not a custom recovery.
Press the Power button on any menu item to activate / select that option.
Instead of tapping with thumb on screen, use the power button to select any option.
That’s it. Now you can do stuff like wiping cache, installing update zips and even factory resetting the phone.
The recovery menu is there even when the phone does not turn on. Use this to fix you phone in case of any error.
Use the Reboot option once you’re done in recovery menu.
The reboot option is also located on the recovery screen. Use it to restart the phone to normal home screen.
Conclusion
This is pretty much it. The recovery menu in Galaxy S10 series is there to fix almost any kind of issue. It covers stuff like wiping cache, resetting the phone and even installing update zips. Feel free to leave your feedback and queries in the comments below.
With the help of this guide, you will be able to Fix Not receiving notifications after One UI update. Notifications are everything, they help us stay connected with all of our apps for e.g chats, messages & missed calls, reminders, emails & more. In other words, you can say that notifications are the quickest way to access the information rather getting it manually.
However, sometimes notifications are distracting but you can always turn off the notifications form the settings. But this is not the case here, Samsung One UI update is the best user interface based on Android Pie update. If you haven’t tried it, I will suggest you try it but there is one problem. It seems people are having problems receiving notifications after One UI update. We are certain that this issue is software based not hardware.
In this post, you will find the best solution to Fix Not receiving notifications after One UI update. We have tested the method we are about to tell you and it worked for us, we are pretty convinced that it will work for you too. Let’s jump right in.
You can now Install Samsung One UI Update on Galaxy S9/S9+, Galaxy Note 9, Galaxy S8/S8+, and the Galaxy Note 8. This latest OS update is based on Android 9 Pie OS.
Fix Not receiving notifications after One UI update:
Before we move on let’s tell you what is the main reason behind this notification problem. I am sure you don’t know, Android Pie comes with a lot of battery enhancement features, I know it’s great to hear it. However, it is the problem, in order to provide a good battery experience these new enhancement features put apps to deep sleep. Moreover, they also put restrictions on background activities. This is why you stop receiving notifications. This has happened in the past with the mid-range Huawei devices.
Now you get the picture, let’s tell you how you can Fix Not receiving notifications after One UI update.
Time needed: 5 minutes.
By following these steps you will be able to stop battery enhancement feature from stopping apps to send notifications.
Open Setting:
Head over to Settings -> Device care -> Battery. In Battery Menu tap on 3 dots and select Settings.
Turn off the Adaptive battery
Once you are in Battery Settings. You need to Turn off some of the features. Such as Adaptive battery & Auto disable unused apps.
Sleeping Apps:
Now if you are using certain apps often, yet you are still not receiving notifications. Tap on Sleeping Apps and there you will find a list of apps. Look for the app you aren’t receiving notification. If it’s there, select the app and tap on the remove button.
![Enable dark mode in Facebook Messenger [Root]](https://techbeasts.com/wp-content/uploads/2019/03/Screen-Shot-2019-03-02-at-5.59.04-AM.png "Enable dark mode in Facebook Messenger [Root]")


















![Move status bar clock to the right on Samsung [ One UI ]](https://techbeasts.com/wp-content/uploads/2019/02/Screen-Shot-2019-03-01-at-1.56.07-AM.png "Move status bar clock to the right on Samsung [ One UI ]")