Huawei and Honor smartphone owners, you can download the Aptoide APK from here. The latest version of Aptoide APK is here. Aptoide is one of the best Google Play Store alternatives for your Huawei and Honor devices.
Aptoide is a third-party app store for Android phones. Just like the Play Store, Aptoide also has millions of Android apps. In fact, all the apps that you see in the Play Store, you will see them in the Aptoide store too. The apps that have been removed from the Play Store or never made it to the Play Store, you can find those apps on the Aptoide store too. To cut it short, Aptoide is one of the best Play Store alternatives out there.
Since you all know that the Google Play Store is going away from the Huawei and Honor phones, you need to find an alternative of the Play Store as soon as possible. Just today, the news mills had it that Huawei is in talks with Aptoide to replace the Play Store on its phones.
We are not sure when Huawei will opt for the Aptoide officially, but if you don’t want to wait, you can download and install Aptoide right now.
I’m sure that you want to learn a little more about Aptoide, so let me tell you how it works.
Aptoide – A Great Play Store Alternative
Aptoide is a platform for all. Whether you are a developer, an average Android user, or a gamer, you will find resources for yourself at the Aptoide store.
Aptoide claims to have 200 Million+ users at the moment, which is possible keeping in view the number of users who cannot access the Play Store.
Developers can create their accounts on Aptoide, and then create mini-stores to share their apps. Aptoide doesn’t have a very strict screening process like the Play Store. So, if your app was rejected on the Play Store, there are very bright chances that you can publish it on the Aptoide.
For the users, Aptoide has got all the apps and games sorted into their respective categories. It shows you the most popular apps and games too. As far as my own experience is concerned, I found Aptoide much more user-friendly as compared to the Play Store.
Aptoide is secure!
Being a third-party app store doesn’t make Aptoide less secure. The development team of Aptoide keeps an eye on all the apps. They verify each and every single app and add a security mark. So, if an app has a security shield, you can trust it, but you will have to be a little careful with the apps without security shields.
The download process of Aptoide is a bit different from the Play Store. It first downloads the setup (APK) files of apps on your phone and then installs them. This is a little bit of a downside, but if it gives you all the apps that you would expect from the Play Store, and can’t access the Play Store, then I guess, this downside shouldn’t really be a downside.
Furthermore, Aptoide is the world’s first App Store to accept cryptocurrencies. You can use the AppCoin to purchase apps on the Aptoide store. If you don’t have USDs to buy any Android apps or games, get some AppCoins and get them.
Using a File Manager, launch the Aptoide APK and install it.
Follow all of the on-screen instructions to finish the installation.
From the App Drawer, launch the Aptoide app now.
Accept all the permissions.
You will see all the apps and games now.
Start downloading anything now. That’s all.
Wrap Up
That’s all. I know that Aptoide cannot fulfill the space of the Play Store, but it’s better to have something than nothing. The Aptoide store is better than many other Google Play Store rip-offs. Also, in this time of disaster that Huawei Technologies is going through, apps like Aptoide can help you keep up with it. Don’t forget to share your thoughts on the Aptoide store below. We would love to hear from you.
The craze of shooting games dates back to when video games were still in their infancy. It is one of the most played genres of all time. However, it reached its all time high when Call of Duty franchise released. It is one of the most iconic games of all time. Following the trend set by games like PUBG and Fortnite, Call of Duty Mobile is now a thing too. It is a special designed mobile version of iconic COD series from its first few installments. It include maps from Modern Warfare and Black Ops series.
How to install and play Call of Duty Mobile beta in any country
At the time of writing, Call of Duty Mobile’s open beta version is available for testing in India only. Anyone living inside India can play it without additional work. However, the enthusiasts that we are, it is natural to find ways to play it in other countries too.
Nore that if you open it on Play Store outside testing region, there’s only option to pre-register. Below are the steps to install and play Call of Duty Mobile APK anywhere around the world.
Download Call of Duty Mobile APK first!
Since it is a huge title, the installation size is too. In order to install it, you need two files: APK and Data File.
After download is complete, copy these files to your Android device. FOllow the installation steps below afterwards.
Installation Steps
Follow these steps to download and install Call of Duty Mobile APK on Android phones and tablets.
Open Play Store and register for Call of Duty Mobile from your Google account.
Visit the Game’s page on Play Store via this Link and register for it.
Download the COD Mobile APK and copy it to phone or tablet.
Follow the link given above to download APK either directly to device or a PC. Then copy it to your device.
Open File Manager on phone, navigate to folder with APK in it and tap on it to install it.
Once installed, move on to next step to insert all data files.
Don’t launch the game yet!
We still have not put the data files in place. Therefore, don’t launch it or it will blow the whole process up.
Open file manager again, go to Root > Android > obb and create a new folder named “com.activision.callofduty.shooter “.
This is the folder that game would have created by itself and downloaded all game files into it.
Download Data files from link given above and put those files inside the folder created in last step.
Make sure to download the file completely. And do not create any sub-folders. Otherwise, game won’t be able to read game data.
Connect to India via any VPN.
Indians don’t need to to this. Anywhere else in the world? Use a VPN to connect to Indian servers. Find out our favorite picks for VPN HERE.
Now go back to app drawer and launch Call of Duty Mobile.
If everything worked fine, the game should now run without any issue.
You’ve done it! Now play COD Mobile as much as you’d like.
However, note that any progress made or achievements/items unlocked will be reset on full release.
Note!!
Call of Duty Mobile may give Network error 4.28 with VPN. This error pops up when logging in either as guest or through Facebook. In order to fix this issue, change the server location in VPN app. Then close game and launch it again. Try it few times and it should work. For us, it worked on the second try.
Call of Duty: Mobile Gameplay & Screenshots
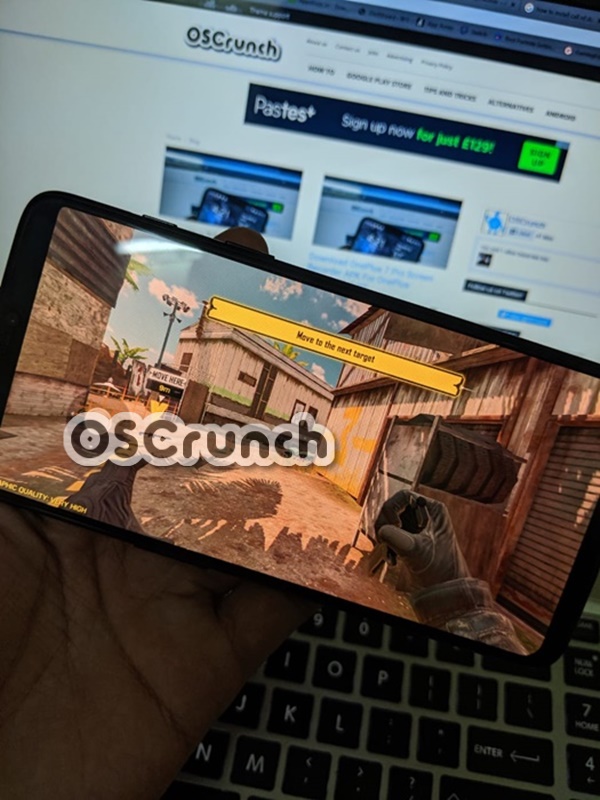
From a visual point of view, this game looks stunning. It runs smoothly and looks pretty good. The animations for running, aiming, shooting, knife are pretty close to original.
The only disappointing gameplay mechanic is the fact that there is no shoot button. You just have to point the gun at opponents and shooting will start automatically. Now, we get that aiming on mobile is hard. But it totally removes the skill gap. Anyone can just swing the gun around and keep hitting targets in these condition. The shooting mechanics should be something like what PUBG implemented.
Here are some pictures from what the game actually looks like.
Conclusion
Overall, the fans of this series are quite happy with how this game is turning out to be. There is no rushed job whatsoever. The company behind this masterpiece is surely taking its time in testing to make it the best possible final release.
Feel free to leave your feedback and queries in the comments below
Tired of using the third-party screen recorders on your OnePlus phone? It’s time to get the official OnePlus screen recorder. OnePlus 7 Pro’s screen recorder works on all previous OnePlus phones. Follow this tutorial to get OnePlus 7 Pro Screen Recorder on OnePlus 6T/6//5T/3T/3
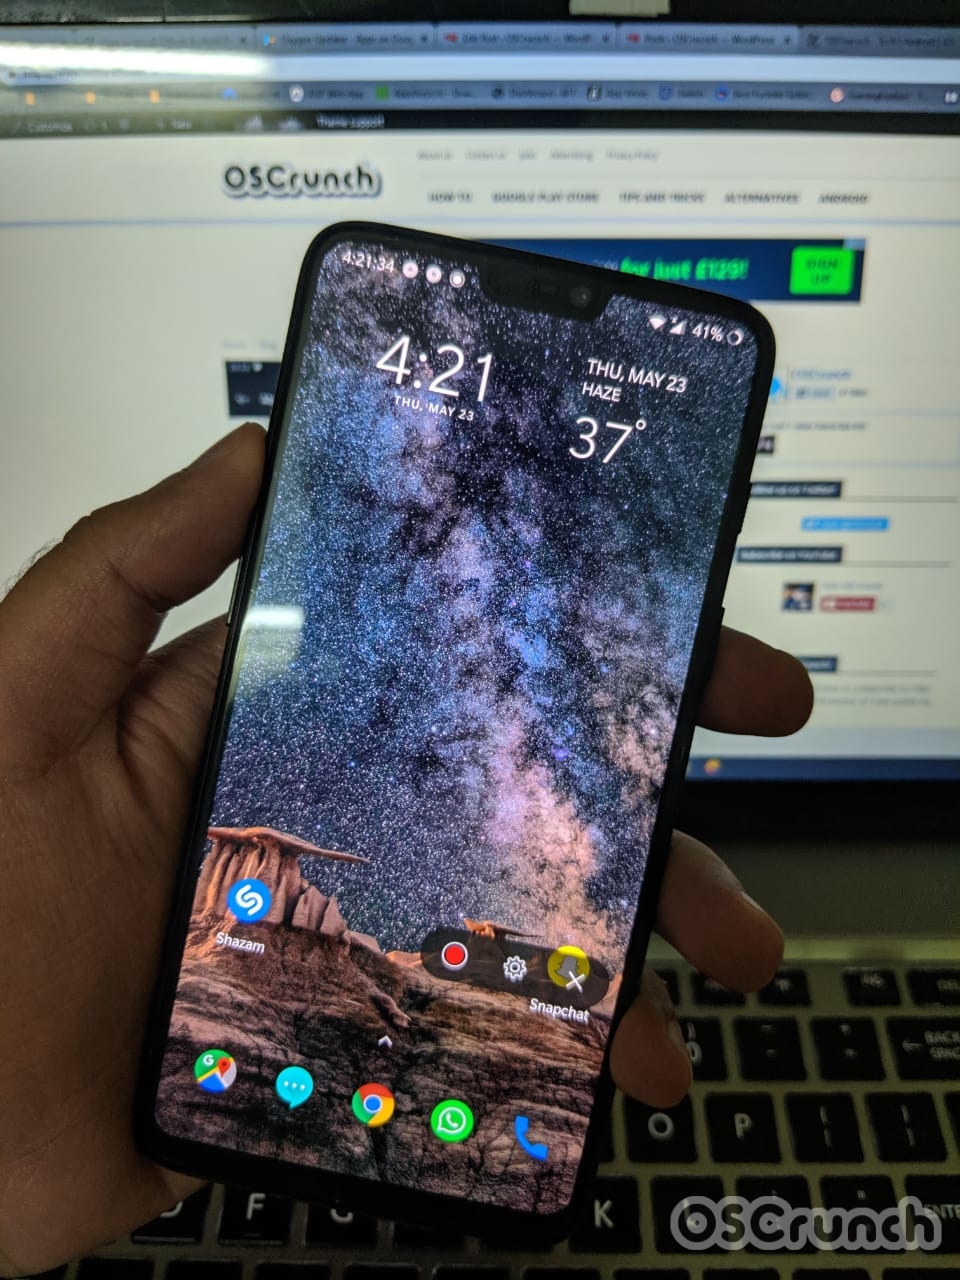
OnePlus 6 with the OnePlus 7 Pro Screen Recorder
About the Screen Recorder of OnePlus 7 Pro
OnePlus 7 Pro’s screen recorder has become the talk of the town lately. It’s not because this is a just a screen recorder. The OnePlus 7 Pro’s screen recorder is capable of much more than what an ordinary screen recorder can do. The Screen Recorder has been pulled out and tested on older OnePlus handsets. All the OnePlus phones, that run on Android 9 Pie, support this screen recorder. This means that you can get OnePlus 7 Pro’s screen recorder on the OnePlus 6T and 6, OnePlus 5 and 5T, and the OnePlus 3/3T which were updated to Android Pie just today.
The Feature-rich Recorder
Let’s take a look at what this screen recorder can do. At first, this screen recorder, in your older OnePlus device, will work as a native screen recorder just like the OnePlus 7 Pro. Since the OnePlus 7 Pro is a gaming-focused smartphone, the company added sound-recording support in this screen recorder. It can record the sound of whatever is being played (video or a game) on the screen. You can set it to record the external sound too. So, for example, you want to record a game with the game’s sound or with your own commentary, you can do so and upload your game on YouTube.
The extended settings give you better control over this screen recorder. For instance, you can set the resolution you want to record the videos on. You can also define the bit rate of the videos. The Audio Source choice is there. Remember that when you are using the internal audio source, it will not record the external audio. You can also define the Video Orientation in this recorder. The option to stop or keep recording while the screen is off is there too. While recording a screen, it shows you the controls on the screen. If you don’t like the controls buttons hanging around, you can remove them too.
So, to cut it short, it’s a whole screen recording solution and the best part is, it comes straight from OnePlus. It doesn’t have a pathetic UI like those third-party screen recorders. It will not annoy you with those shady pop-ups or bloat your notifications panel with useless ads.
At this point, I’m assuming that you have fallen in love with this screen recorder and now you want to get it on your OnePlus handset. Don’t worry, we are done getting familiar with the screen recorder. Go ahead, follow the few steps below to install it.
Guide on how to install OnePlus 7 Pro Screen Recorder on OnePlus 6T/6/5T/5/3T/3
Follow these few steps to get the OnePlus 7 Pro Screen Recorder up and running on OnePlus 3, 3T, 5, 5T, 6, and 6T. Remember that your phone must be running on Android 9 Pie for this.
Total Time:2 minutes
First, download the OnePlus 7 Pro Screen Recorder APK.
OnePlus 7 Pro Screen Recorder – Download | Mirror. Copy the Screen Recorder APK to your phone. Using a File Manager, open the APK and install it.
Now pull down the notifications bar on your phone.
Click on the Edit button and add the Screen Recorder icon to the toggles. Click on the Screen Recorder icon.
Turn on the Screen Recorder now.
Now pull down the notifications panel again, go to the 2nd screen of toggles. Click on the Screen Recorder icon to turn it on now.
Set up the Screen Recorder and use it.
After pressing the Screen Recorder button, It will show you controls on the screen. Either press the record button to start recording, or press the Gear icon to access settings.
Screen Recorder Settings.
You can now change the resolution, Audio Source, bit rate, or anything that you want.
Access the Recorded Videos.
The recorded videos will go to the Screen Recordings in the File Manager and also appear in the Gallery. That’s all.
Conclusion
You have the screen recorder on your OnePlus phone now. Feel free to show off your gaming skills on any social media platform now. While using the screen recorder, keep the internet laws of your country in mind. Do not illegally record someone else’s video or chat as it can cause you serious trouble. Use this screen recorder for good things only. If you have queries, feel free to reach out to us.
OnePlus 7 Pro Screen Recorder APK is available here. You download OnePlus 7 Pro Screen Recorder APK for OnePlus 3/3T,OnePlus 5/5T, and OnePlus 6/6T.
Screen Recorder running on the OnePlus 6/6T.
OnePlus 7 Pro Screen Recorder
OnePlus 7 Pro is a feature-rich smartphone. It comes with industry-altering features like the all-screen 90Hz display, a pop-up front camera, 30W warp charging, etc. On top of powerful hardware, the company has added software features that suit the needs of gamers. One of these features is the new screen recorder.
The native OnePlus 7 Pro screen recorder can record anything on the screen, along with its sound. It comes with extended settings where you can adjust the screen resolution, the bitrate, and the video format. To cut it short, this screen recorder built by OnePlus is as feature-rich as a premium screen recorder which may cost you a few bucks.
Fortunately, the screen recorder of the OnePlus 7 Pro works on all previous OnePlus handsets too, given that they run on Android 9 Pie. The screen recorder APK of the OnePlus 7 Pro has already been pulled and it is up for all other OnePlus phones. You can download the OnePlus 7 Pro’s Screen Recorder APK from here and install it by following the few steps given below.
Using a File Manager, open the APK and install it.
After installation, pull down the notifications panel, click on the Edit button, and add the screen recorder button to the toggles.
Press the button in the toggles to start recording now. That’s all.
That’s all. If you want to learn more about this recorder, check out this complete guide. In case you have any queries or questions, feel free to reach out to us.
The Android Pie for OnePlus 3 and 3T is in works for past few months. Finally, we have got our hands on the official and stable Android Pie firmware for OnePlus 3/3T. It is based on OxygenOS 9.0.2. Therefore, it comes with all the goodies of new Android version. This time, there are no bugs and therefore it is bound to run smoothly.
The only downside to this good news is that it is an incremental update. OnePlus is pushing the update to few selected devices at any given time. It could be weeks before it reaches your region. Hence, follow the guide below to download OnePlus 3/3T OxygenOS 9.0.2 Android Pie 9.0 official firmware. It is a stable release and extracted directly from the servers. Moreover, it is not an incremental update zip but a full OnePlus 3/3T Android Pie firmware zip. It works the same on both rooted and non-rooted devices.
The incremental update zips do not work with rooted phones. Since the system is modified, the update process may soft-brick the phone. On the other hand, non-rooted phones work with incremental update zips just fine. Therefore, we have got the full flashable zip of OxygenOS 9.0.2 for OnePlus 3/3T. The easiest way to judge if a file is either incremental update or full firmware is to check size. If the zip is over 1GB in size, then it is full update file and it works on both rooted and non-rooted phones.
Requirements
Charge your phone over 50%.
Make a backup of all data on internal storage. The update may wipe the phone clean.
Phone’s bootloader should be locked. Don’t know how to check? Then check the end of post to find out how.
Make sure to download the correct firmware marked for your device.
OnePlus 3 Android 9 Pie OxygenOS 9.0.2 full firmware – DOWNLOAD
OnePlus 3T Android 9 Pie OxygenOS 9.0.2 full firmware – DOWNLOAD
How to install stable Android 9 Pie OxygenOS 9.0.2 firmware on OnePlus 3/3T
Before continuing, note that when you follow this method, your phone will be non-rooted if it was rooted earlier. You could always use Magisk to root it again. Moreover, this is the official method to update OnePlus phones. Therefore, do not worry about anything going south.
Steps to download and install official OxygenOS 9.0.2 Android Pie firmware on OnePlus 3 and OnePlus 3T.
Download the full firmware zip from link given above.
In this post, we have included Android Pie zips for both phones. Therefore, download the correct file for your phone only.
Copy the OxygenOS 9.0.2 firmware zip to phone’s root storage.
This is an important step. Once the firmware is downloaded fully, copy it to the root of your phone’s internal storage. It is the main folder and you cannot use the Up or back button here anymore.
Head over to Settings > System > System Updates.
This is the official OnePlus setting to either download OTA updates or install them manually. Open Settings, scroll down and tap on System. Here, find System Update and open it.
Tap on the Settings icon in top right and select ‘Local upgrade’.
The main screen of System Update shows the center that keeps checking online for available updates. Skip that and tap on the settings icon in top right. Here, select Local upgrade.
Select downloaded Android Pie 9 Firmware zip from here.
If you followed the step 2 correctly, then the update zip should appear here.
Tap on the correct update file in this window.
It is possible that some may have previously downloaded update files in root as well. Therefore, select only the recently downloaded file here.
Phone will reboot into recovery and start updating it.
From here onwards, you don’t need to do anything. Just wait until the update is complete.
Phone will reboot automatically after update is complete.
Once update process is done and Android Pie is flashed on OnePlus 3/3T, it will reboot to homescreen itself.
That’s it! You’ve done it. The phone is now running on latest and stable Android Pie based on OxygenOS 9.0.2.
The first reboot may take longer than usual. This is so that all apps are developing their cache for first time.
Rooted users can flash the firmware zip from TWRP recovery directly.
Just open the Install menu and select flashable zip from there. Don’t forget to wipe dalvik cache and cache storage before installing the update.
Alternative Method
Not a fan of updating phone manually? But you still cannot wait for the OTA update. Here is a simple solution to get latest and stable Android Pie on OnePlus 3/3T automatically.
Install OxygenOS 9.0.2 Android 9 Pie on OP 3/3T with Oxygen Updater
A fair warning! Oxygen updater is an unofficial app developed by awesome OnePlus fans. Its goal is to make sure that your phone gets all latest updates as soon as possible. Follow the simple steps below.
Install Oxygen Updater on your phone – Play Store.
Open the app on your phone.
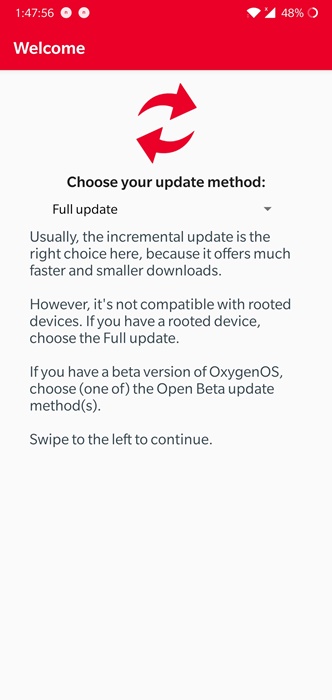
Select update method as “Full Update” when app starts for first time.
Non-rooted users can still opt for “Incremental update”. However, rooted OnePlus 3/3T can only go for Full update option.
Once the setup is complete, go to app’s homescreen and let it search for the recently available firmware for your device.
It is region-free. Therefore, if an update is available, it will show up here.
Tap on the firmware to download it to phone and follow rest of the instructions to install it.
That’s it! Now your phone should be running Android Pie (OxygenOS 9.0.2) now.
Optional: Check Bootloader Status and Re-lock it
Follow the steps below to check if bootloader of your phone is unlocked or not.
Turn off phone.
Press and hold Volume Up + Power keys until phone vibrates and Fastboot logo shows up.
In this screen, the last line shows phone status as “locked” or “unlocked”. This status should be “locked”.
Now press volume key until you see Turn Off option at top.
Press power button to turn off the phone.
Now turn it by just holding power button.
Steps to re-lock bootloader
If the bootloader of your phone is unlocked, then follow these steps. Otherwise, just move on to update process.
Install ADB tools on your PC.
Download and install Android SDK from HERE. Click on “Download Options”, scroll down to “Command Line Tools” and download Windows SDK tools from there. Mac and Linux users should download their own version.
Next up, download ADB tools from HEREand extract in any drive (C, D, E).
Enable USB Debugging on your phone. To get developer options, go to Settings > About Phone and tap on Build number 7 times. Next up, go to Settings > System > Developer Options and enable USB Debugging. Allow USB Debugging permission from phone as well.
Also make sure that your phone is on stock recovery. Flash the stock recovery image for your phone. It is is available in OnePlus forums.
Now connect the phone to PC via USB Cable.
Open Command Prompt.
Type cd <Drive Letter>:/extracted folder title. (For example cd C:/Android).
Now type “adb reboot bootloader” and press Enter.
When phone reboots into bootloader mode, type “fastboot oem lock” and press Enter.
The bootloader will now be locked. Just reboot the phone now.
What’s new in Android Pie for OnePlus 3/3T?
New system-wide UI
There is a massive change coming to OxygenOS 9.0.2. The overall system appearance is now sleeker and even more flat. The appearance of basic apps like Settings, Messages, Dialer is now based on Android Pie.
Changes to Do not disturb mode
Users now have the option to set time range for activating and deactivating do not disturb mode. It is similar to setting time range for Night mode / blue light filter.
Google Lens integration
This feature is first introduced in OnePlus 7 Pro. Thankfully, OnePlus 3 and OnePlus 3T will come equipped with it from the get go. Open the camera app, point it on any object, put a finger on screen (on the object) and hold it. Google lens will activate and perform a Google search for it.
Gaming Mode 3.0
It now supports text notifications, third-party calls and other types of notifications.
Final Words
Overall, it is a huge upgrade and makes the phone feel a lot newer. Make sure that you follow all the steps carefully and everything will go fine.
Make sure to leave your queries and feedback in the comments section below
The thing that I love the most about OnePlus is swift software updates. OnePlus supports the latest iterations of Android as soon as Google rolls them out. Following its own trend, OnePlus opted for the Android Q Developer Preview on the OnePlus 7 Pro. The build was good enough to taste the Android Q. If you have already checked everything on Android Q on your OnePlus 7 Pro, you may be looking for a way back to Android Pie now. This is the tutorial to downgrade Android Q DP to Android Pie on OnePlus 7 Pro or the OnePlus 7.
OnePlus – Keeping its users happy!
OnePlus is one of the few brands that have got the Android Q DP support. The Android Q Developer Preview is already out for the OnePlus 7 and OnePlus 7 Pro. As expected, the DP Android Q is full of bugs. This is not something abnormal. The DP builds are nothing but test firmware. So, all those errors and problems that you are seeing in the Android Q for OnePlus 7 Pro, they are going to be fixed in the stable build. If you already updated your OnePlus 7 Pro to the Android Q and now you are not liking it, you may consider going back.
It is always possible to go back to the old stable build. Yes, you will miss the features on the old firmware, but you can’t live with those bugs either. Its better to wait for a stable Android Q build instead. If you have already made your mind to downgrade Android Q to Android Pie on the OnePlus 7 Pro, you have landed at the right place. You will find the steps here to perform this downgradation process.
Android Q Developer Preview Known Problems
Ambient Display is not working
System stability issues
Cannot send SMS when VoLTE is on
Navigation gesture is not working
Recovery mode doesn’t work
Some apps may not function as expected when running on this Developer preview release
An issue with MTP that doesn’t allow you to copy rollback file from PC to Phone
About the OnePlus 7 Pro
Before taking a look at the downgrade procedure, let me give you a flashback of the OnePlus 7 Pro. The device comes with a 6.7-inch AMOLED display with a QHD+ resolution. There is no notch, punch-hole, or camera cutout. The phone users a pop-up mechanism to hide the front 16MP camera. There is a fingerprint scanner beneath its screen. This is a 90Hz display, which is a great addition for the gamers.
OnePlus 7 and OnePlus 7 Pro
The OnePlus 7 Pro has got three cameras at the back. It’s a 48MP main shooter, 16MP ultrawide camera, and an 8MP telephoto shooter. It’s got a RAM of 8GB or 12GB with an internal storage of 256GB. The OnePlus 7 Pro is the world’s first available phone with UFS 3.0 storage standard. It’s got a 4000 mAh battery inside. The phone uses Snapdragon 855 CPU and Adreno 640 GPU. OnePlus 7 Pro supports 30W Warp charging. There is no headphone jack in this handset. It doesn’t support wireless charging either.
Downgrade Android Q DP to Android Pie on OnePlus 7 Pro
Remember that this process is only for the users who installed the Android Q DP on their OnePlus 7 or 7 Pro, and now they want to roll back to Android Pie. Also, make sure that you back up each and everything on the phone as this process will completely wipe your phone. This is the only method to downgrade or roll back. There is no other way.
Total Time:10 minutes
Download the OnePlus 7 or OnePlus 7 Pro Roll Back Firmware.
OnePlus 7 Roll Back Firmware – DownloadOnePlus 7 Pro Roll Back Firmware – Download
Copy the Roll Back Android Pie firmware to your phone.
Make sure that you copy the firmware files to the internal storage’s root. The root means, the file should not be inside a folder but on the main internal storage.
Go to Settings > System > System Updates > ⚙ > Local Upgrade.
Open settings, scroll all the way down to enter system, system updates, and then local upgrade. Now it will show you the file that you just copied to the internal storage. Select the file.
Let the roll back file finish its installation.
The installation will take about 5 to 10 minutes. This is a roll back, so everything will be wiped in the process. Just follow the on-screen instructions and finish it.
Restart your phone. That’s it.
After the installation, the phone should automatically restart, but if it doesn’t, restart it. Set it up, and you have the stable Android Pie with OxygenOS back now.
Wrap Up
That’s all. You can now patiently wait for the stable Android 10 Q to come out. We will have the Android Q for the OnePlus 7 out somewhere around September or October 2019. If you wish, you can install a more stable version of Android Q Developer Preview as it comes out. The choice is totally yours. If you have any other queries or questions, feel free to reach out to us.
Screen Recording on Samsung Galaxy S10 Plus - Camcorder button at the bottom.
This is the tutorial to enable native screen recording on Samsung Galaxy phones. You can enable screen recording on any Samsung Galaxy handset running on Android 9 Pie or higher. This means that the screen recording will work on all the phones that have the Samsung One UI.
Screen Recording on Samsung Galaxy S10 Plus – Camcorder button at the bottom.
Remember that by native, I do not mean that it already exists in your phone, you will have to add the call recording to the phone first, and then it will work like a native feature.
Before you get the screen recording feature on your Samsung Galaxy, let me give you an idea of how Samsung has added such cool features to its UI.
One UI + Good Lock 2019 – Samsung has improved!
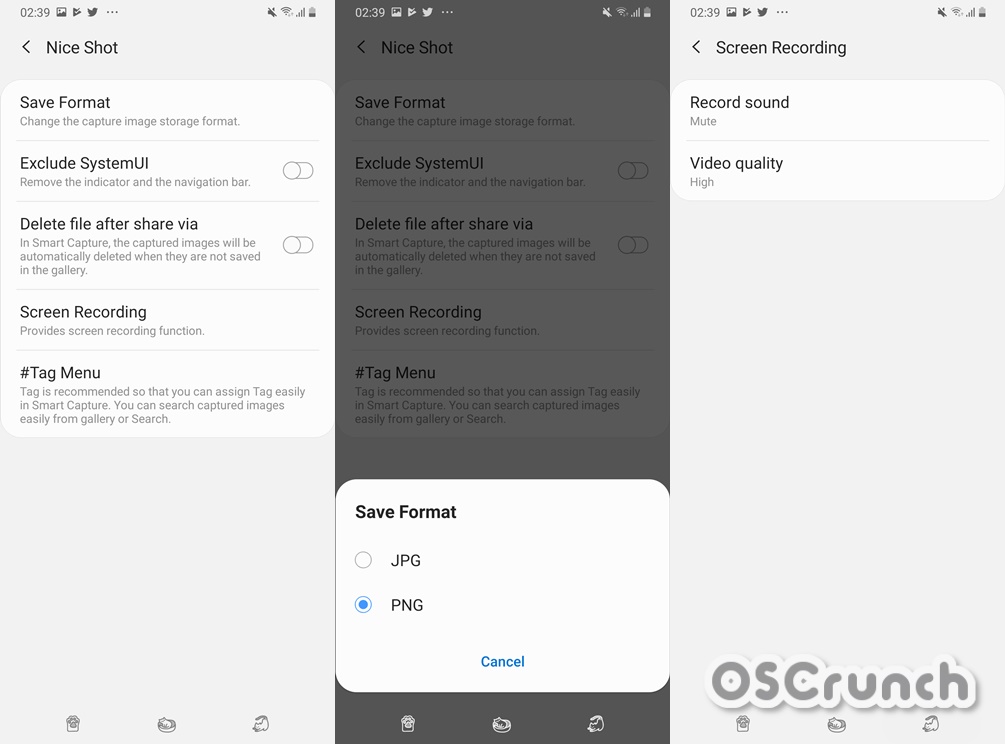
Over the last couple of years, Samsung has enormously improved its software. The South Korean giant has been paying attention to the suggestions of its users which has helped them to come up with the coolest features for their smartphones. Samsung’s new One UI has earned appreciation from all around. In the past, Samsung has faced a lot of criticism for adding bloatware and not-so-user-friendly features in its UIs like the TouchWiz and Samsung Experience. Samsung recently updated the Good Lock application with some new features for the One UI. The new Good Lock 2019 features have made the Samsung One UI much more lovely. One such feature of Good Lock 2019 is the Nice Shot, which adds native screen recording to the Samsung Galaxy handsets.
To get the screen recording, you do not need the entire Good Lock 2019 dashboard on your handset. All you have to do is to install the Nice Shot application. It will add the screen recording feature to the phone.
Enable Native Screen Recording on Samsung Galaxy Phones
This method will work for all Samsung Galaxy phones running on Android 9. The screen recording compatible phones include the entire Galaxy A series like the A10, A20, A30, A40, A50, A60, A70, A80, Galaxy S10E/S10/S10 Plus, Galaxy S8 and S8 Plus, Galaxy S9 and S9 Plus, Galaxy Note 8, Galaxy Note 9, Galaxy Note FE, and all other old phones that got the Pie update.
Take a look at these steps to get this feature up and running on your handset now.
Copy the Nice Shot APK to your phone’s internal storage.
Open the File Manager on your phone now and open the Nice Shot APK.
Follow the on-screen instructions and finish the installation of Nice Shot.
Restart your Galaxy phone now.
Now when the phone is ready, press the Volume Down + Power button to take a screenshot.
You will see a “Video Camcorder” icon at the bottom now.
Press the camcorder to start the recording.
Recording icon will appear on the screen and also in the notifications.
You can stop anytime. The video will be saved to the Gallery.
If you want to access the full settings of Nice Shot, you can install the Samsung Good Lock 2019. This will let you install other Good Lock plugins too and also take full control of the app.
Now that you have the Screen Recording enabled, you can record any game or any video that is playing on the phone. Screen Recording is also one of the ways to save a WhatsApp status, or a Facebook or a Snapchat story. Furthermore, you can upload the recorded games to YouTube in order to show off your gaming skills.
Also, beware of the laws and regulations in your country. Recording someone’s chat or video illegally can land you in trouble. Our purpose and intentions of sharing this tutorial here is only for the useful things like recording a game or any fun activity. Make sure that you are not doing anything dodgy with the screen recording app. In case of a mishap, OSCrunch or Samsung may not be held responsible.
Wrap Up
That’s all. Remember that this screen recording does not record the sound, which is weird. However, you have the native screen recording which is a thousand times better than all those third-party poorly developed screen recorders in the Play Store. Don’t forget to let us know why you installed the Screen Recording on your phone and how is it coming along?
Got a problem with your Galaxy S10 or S10 Plus’s battery? Don’t worry. You will find the fixes here. This is the detailed guide to fix Galaxy S10 Plus Battery Drain problems. This tutorial will work for both the Galaxy S10 and S10 Plus.
A 4100 mAh battery, but what’s wrong?
The best smartphone at the moment is the Samsung Galaxy S10 Plus. The Galaxy S10 Plus has a number of amazing features under its hat. It comes with a 4100 mAh battery, which is more than the battery of most of the 2019 flagships. The 4100 mAh battery, apparently, is large enough to last for a day. Unfortunately, even this huge battery is not working very well for some Galaxy S10 Plus owners. There are dozens of threads on Reddit where users have dropped a word about their Galaxy S10 Plus’s battery being worst.
The Galaxy S10 Plus with Battery Stats
Worst screen-on-time
For some users, the screen-on-time is above 5 hours and for some, it is not even hitting 3 hours. A few users found some applications sucking up all the battery juice. So, if you are facing the battery drain problem on your Galaxy S10 Plus, first of all, I would like to tell you that you are not alone. There are hundreds if not thousands of Galaxy S10 Plus owners facing the same problem. The battery percentage depletes sooner than expected on the S10 Plus.
Battery drain problem on the Galaxy S10 Plus has got the users worried. And obviously, when you have invested a thousand dollars on a smartphone, and it doesn’t act like one, you scratch your head. But don’t worry, honestly, these are very common problems. And as they say, every problem has a solution.
Ideal Galaxy S10/S10 Plus Battery Time
I did go through each and every single thread on Reddit to find out what problems the Galaxy S10 Plus owners were facing and how they fixed the problems. So, based on my research, I can say that the Galaxy S10 Plus battery drain problem can be fixed within a minute.
Fixing Galaxy S10 Plus Battery Drain
All of the Galaxy S10 Plus owners, who were facing Battery Drain problems on the phone, they did propose solutions that worked for them. I have picked all of the solutions and compiled them into a mega-guide for all the S10 and S10 Plus users.
Optimal battery consumption
You can try the Galaxy S10 Plus Battery Drain fixes one by one to see which one works for you. Do not try all of these solutions at once. You should read the whole guide first and then try the method that you think matches your problem the best.
Guide on how to Galaxy S10 Plus Battery Drain Problems
At first, I’m going to list down all the steps you can perform to fix battery drain on S10 Plus. Below these steps, you can find complete steps to implement each of the steps given here.
Total Time:10 minutes
Update Galaxy S10 Plus to the latest Software
On the S10 Plus, go to Settings > About Phone > Software Information > Check for updates. If there is an update available, update the phone right away.
Clear Cache of the Galaxy S10 or Galaxy S10 Plus
Reboot your Galaxy S10 into the Recovery Mode. Select Wipe cache partition and wipe it. Restart the phone and check its functionality now.
Uninstall the Apps you don’t need
Go through all of your Apps one by one. Create a list of all the apps you do not use. Now disable or uninstall all the unused applications.
Use the Galaxy S10 or S10 Plus in Dark Mode
Galaxy S10 has got a Dynamic AMOLED screen. This screen, with a combination of dark/black graphics, consumes the lowest amount of battery. So, enable the Night Mode from the notifications. Also, use the Dark Mode for all the apps that have it.
Use low or Adaptive Brightness
Using high brightness will eat the battery. Either use low brightness, or enable Adaptive Brightness to automatically adjust it according to your environment.
Explanation of the steps given above
Update Galaxy S10 Plus to the latest software
A couple of months back, Samsung released the Biometrics Security update. This update fixed the fingerprint scanner problem on the Galaxy S10 Plus. The update did fix the fingerprint scanner, but it caused troubles for the battery. Galaxy S10 Plus owners immediately reported that they were facing battery drain after Biometrics update.
After this was reported, Samsung released more updates that fixed the battery drain problem too. At the present time, the latest software version of the Galaxy S10 Plus is free of all such issues.
So, what this implies is, the software updates can cause problems, but new software updates can fix those problems too. For this very reason, it is always recommended to have your phone running on the most recent software.
You can go to Settings > About phone > Software Information > Check for software updates. If your phone finds a new OTA update or a new security patch, you should be quick enough to update it.
Clear Cache
Clearing cache can fix many potential issues on an Android phone. If your phone is showing lag in its performance, its heating up, or its battery is dropping quickly, you can try clearing cache and it might work well. Here is how you will clear the cache to give a fresh start to your Galaxy S10 Plus.
Turn off of the Galaxy S10 or S10 Plus.
Press and hold Volume Up + Power button.
As soon as the phone vibrates, let the keys go.
You will now enter the recovery mode.
In recovery, highlight the “Wipe cache partition” option by pressing Volume Down key.
Press the Power button to wipe it now.
Restart your phone after wiping cache.
Remember that wiping cache does not harm your phone or wipe its data. Its a safe process.
Disable or uninstall the Apps you don’t use
The third-party or even the first-party apps can eat up the battery. If you have too many apps installed on the phone, and you use only a few of them, it’s in your best interest to uninstall all those unused apps.
Furthermore, go to Settings > Device Care > Battery > Check all apps. If an application is consuming an unwanted amount of battery, its time to deal with it.
Battery Optimisation on Galaxy S10 Plus
If you do not use any stock application of your phone, you can disable it. The third-party apps can be disabled.
To uninstall or disable an app, long-press the icon of any app and go to its settings. Now disable or delete the app.
Disable the Google Search App
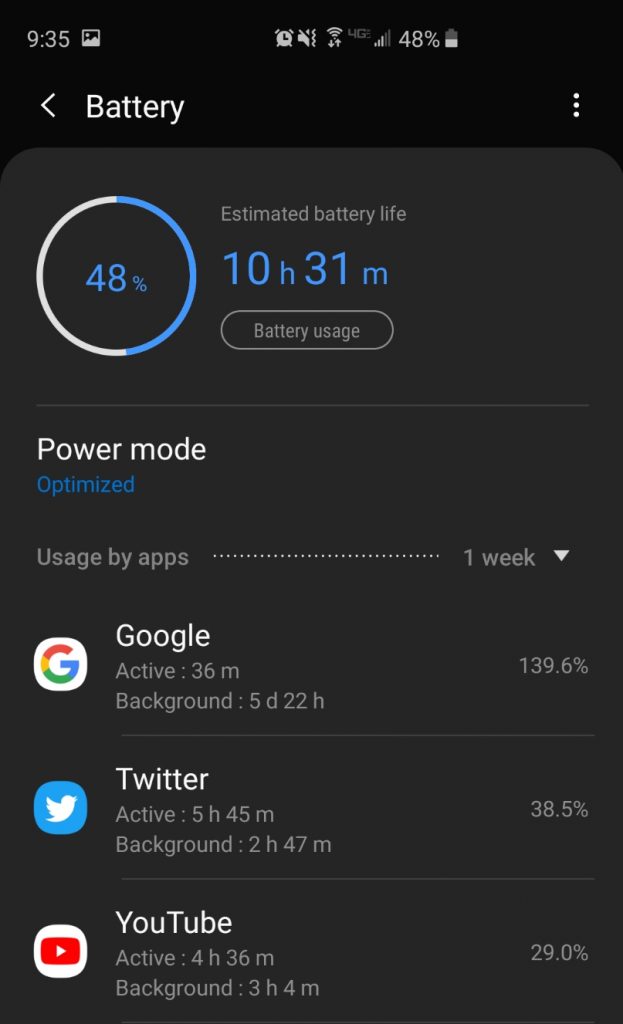
As the thread embedded above explains that the Google App was consuming the largest amount of battery, the only way to get rid of it was to disable the app.
Google App consuming battery – Source: Reddit
The Google App is basically the Google search app. If you do not use those search widgets on your Galaxy S10 Plus, it is totally useless to have the Google app enabled on the phone. Disabling the Google app will also disable the Google Assistant’s Hey Google.
To disable it, just locate the Google on your phone. Long-press the Google icon > Disable. It will be disabled now and you will see a significant improvement in the battery life of your Galaxy S10 Plus.
Use WiFi mostly, switch to 4G/LTE only when needed
A Redditor mentioned that while using the LTE on his phone, he was getting only 3-4 hours of screen-on-time. While using the WiFi, he was getting 6 – 7 hours of screen-on-time. This is alarming. Because the LTE should not be eating that much of battery, but unfortunately, it was verified by many other users. Not only the LTE consumes a higher percentage of battery, it also heats up the phone. This is probably because of the radio antennas used by the 4G/LTE modules.
There is no perfect solution to this problem, but what you can do is, you can stop using 4G/LTE when its not needed. Try using WiFi whenever it is available.
Also, when you are using the WiFi, turn off the mobile data. Because when the Mobile Data and WiFi both are turned on, and the signal strength of one of these goes down, the phone starts looking for a better connection. In the process, it can consume battery.
So, these are the two key takeaways for you; Use WiFi most of the times. Do not have WiFi and Mobile Data turned on at the same time.
Check battery life in Safe Mode
Safe Mode disables all third-party apps. So, for instance, if your phone started acting up after you installed third-party apps, you can disable them all to check if it works fine without them. To do this, simply boot your phone in the Safe Mode. Here is how you can do this.
Power down the S10 or S10 Plus.
Turn on the phone now.
As soon as the phone vibrates, press the Volume Down key and hold it unless you see the home screen.
On the home screen, you will see the Safe Mode watermark on the left side’s bottom.
All third-party apps have been turned off now. Use the phone for a while and watch its battery life. If it works fine, uninstall your recently installed apps one by one to figure it out.
To get out of the Safe Mode, just restart the phone.
Calibrate the Galaxy S10 Plus Battery
When we talk about calibrating the battery on Galaxy S10, it means that we have to refresh the Battery Stats file of the phone, or train the battery to charge properly. Not charging the battery appropriately can result in providing low output.
The battery stats file contains the battery logs. In the good old days, there were battery calibration apps to delete this file and record the logs from scratch. Nowadays, there is an advanced menu in the Samsung handsets which does something with the battery. It’s unclear whether or not this advanced settings wipes the battery stats file, but it definitely does something like that.
To calibrate the battery on your Galaxy S10, open the Dialer and dial *#0228#.
Dialing this will open the BatteryStatus.
Click on Quick Start. It will show you a Fuel gauge warning. Click on Ok.
Press Ok will just lock the screen.
Unlock the phone and restart it.
Factory reset your Galaxy S10 Plus
If all those solutions given above have failed or you are unable to identify the problem, its time to take the bitter step. You heard it right, the factory reset is your 2nd last option. This will wipe everything off from your phone. To be on the safe side, you can create a backup of Galaxy S10 via Smart Switch.
To factory reset the S10, just reboot into the Recovery mode and select wipe factory data reset. Press power button to perform the factory data reset now.
Set up your phone as a brand new device and watch its battery percentage.
If this fails to work too, then the only choice you are left with is to install new stock firmware on the phone.
Install new clean stock firmware on the S10 Plus
The clean stock firmware installation, which is the last resort to fixing battery drain issues on the S10 Plus, means that you do not dirty-flash a stock firmware. In order to make a clean installation, you will select the CSC file in the CSC tab instead of the Home_CSC file. The CSC file will wipe off each and everything from your phone.
Those were all the possible solutions to get back the amazing battery life on the Galaxy S10 lineup. I am assuming that this guide has helped you, if that’s right, I would love to hear about it from you in the comments section. If you have anything to add here, any solution that’s worked for you but its not here in the list, make sure that you send it to us in the comments or through our contact us page. Feel free to reach out to us for any other queries too. Thank you all.
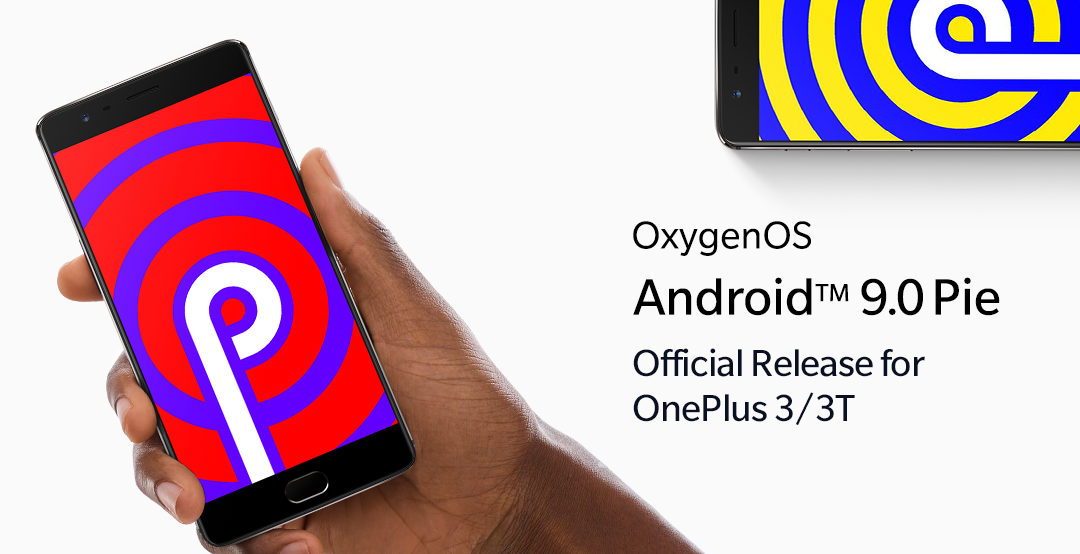
Another good day for the OnePlus 3 and OnePlus 3Towners is here. The stable Android 9 Pie has started rolling out for the OnePlus 3/3T. So far, the OnePlus 3/3T were running on the beta Android 9 Pie with the OxygenOS 9.0.2. A large number of users refrain from trying out the beta build because of the bugs in the testing phase. If you have been a part of that large audience eyeing the stable update, it’s time now. You can download stable Android 9 Pie on OnePlus 3/3T now. The guide to update OnePlus 3/3T OxygenOS 9.0.2 is also given in here. Before you update the OnePlus 3 or 3T, let me give you an idea about the update’s history and also a brief look at these handsets.
Android 9 Pie for OnePlus 3/3T
First of all, I would like to appreciate OnePlus for not giving up on the OnePlus 3/3Towners. 2ndly, I would like to congratulate the OnePlus 3 and 3T owners as its really good news for them. For a phone that came out in 2016 running on Android 6.0.1 Marshmallow, the Android 9 Pie is a huge thing. You don’t see this happening every day, especially with a non-pixel/Google handset. OnePlus has definitely proved itself here.
The new OxygenOS 9.0.2 Stable Pie update carries all new features like the Dark Mode, new UI for the toggles, new UI for settings and a number of other stock applications. You will get new icons for most of the apps. It brings a new dialer and a new File Manager too. Op3/3T owners can now customize the time-range for the Do Not Disturb mode. OnePlus has added the Google Duo support in the dialer. Some bug fixes have been done for the Google Lens.
The update also supports text content of the heads up notifications. Furthermore, this update incorporates the latest features introduced in the Android 9 Pie. These features include the new Adaptive Battery, the Digital Well Being is a part here too. The Android Dashboard which allows you to track your usage is also a part of the Android 9 Pie. At the top of all the new features and goodies, you are getting the latest security patch i.e. 2019.4 on your OnePlus 3 and 3T.
Here is the changelog of the new update.
System
Updated system to Android™ 9 Pie™
Brand new UI for Android Pie
Updated Android security patch to 2019.4
Do Not Disturb mode
You can now customize the time range in the new Do Not Disturb mode
New Gaming mode 3.0
Supported displaying text content of the heads up notifications
Added notification for 3rd party calls
Phone
Dialer now supports Google Duo
Camera
Supports Google Lens to provide you with powerful image recognition experience
System
General bug fixes and improvements
So, if your OnePlus 3 or OnePlus 3T has been lying around in a drawer, its time to pull it out, wipe the dust off, and give it a whole new life.
OnePlus 3
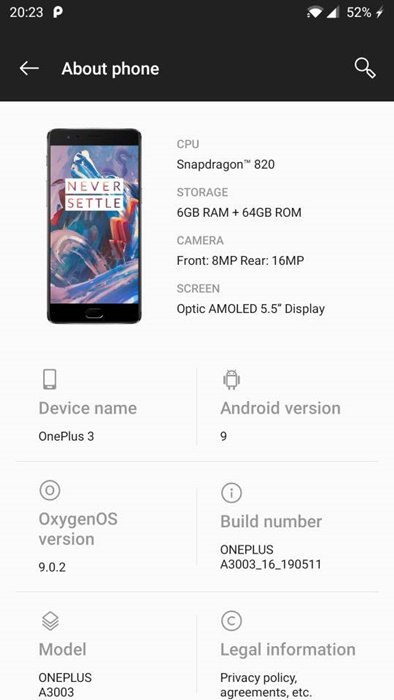
OnePlus 3 was released in June 2016. It had a 5.5-inch screen with a 1080P resolution and Gorilla Glass 4 protection. OnePlus 3 was powered by the Qualcomm Snapdragon 820 CPU and Adreno 530 GPU. This phone had a 6GB RAM and 64GB internal storage. The OnePlus 3 had a single 16MP shooter at the back and an 8MP shooter on the front. At the time when companies were a little bit hesitant to use the USB Type-C in their phone,s OnePlus took this step and added it. This phone had a 3000 mAh battery. Other features include a fingerprint scanner and a headphone jack.
The original firmware of this phone was Android Marshmallow. By following the steps in this guide, you can update OnePlus 3 to Android 9 Pie OxygenOS 9.0.2.
OnePlus 3T
OnePlus 3T was quite similar to the OnePlus 3. It also had the same display size and resolution. It came with a 128GB internal storage while the RAM was still 6GB. The processor in this phone was Snapdragon 821 and its GPU was Adreno 530. OnePlus 3T’s rear camera is a single 16MP shooter and the front one is also a 16MP shooter. It had a 3400 mAh battery, 20W Dash Charging, and a fingerprint scanner in the home button.
Like the OnePlus 3, the 3T also ran on Android Marshmallow out of the box. Today, you can update the OnePlus 3T to OxygenOS 9.0.2 stable Android 9 Pie.
Download Stable Android 9 Pie on OnePlus 3/3T OxygenOS 9.0.2
Before you download the update, remember that this is an incremental update. It means that you can flash this update on your existing Android Oreo firmware or on the Android 9 Pie Beta. There are two methods to flash this file. I am going to tell you the method to update both ways. At first, you need to download the appropriate file.
Check for the latest update, Oxygen Updater will find it and show you the details. The app has found the latest stable Pie for all users who used it so far.
Download the update via Oxygen Updater now.
The update will be stored in the root of your phone’s internal storage.
Now follow the steps given below to flash this update.
Alternatively, you can manually download the OTA file, and copy it to the phone’s internal storage.
Steps on how to install Android Pie on OnePlus 3/3T OxygenOS 9.0.2
On the OnePlus 3 or 3T, go to Settings.
In Settings > System > System Updates.
Now click on the small Settings Gear icon.
Click on Local Upgrade.
It will read the update file from the internal storage.
Click on the update file and let the phone flash it.
Restart the phone after updating. That’s all.
If the above method, for some reason, fails to work, you can update the phone via TWRP Recovery.
For those of you, who have TWRP recovery on phone, copy the file to your phone’s internal storage. Boot the phone into the TWRP Recovery, click on Install > Install Zip > Select the ROM.zip file. This way, the ROM will be installed via TWRP Custom Recovery.
Wrap Up
You are all set to enjoy the stable Android 9 Pie on your OnePlus 3 or OnePlus 3T now. The first boot can easily take up to 10 minutes, so hold on tight there. If you have any questions or queries regarding this guide, feel free to drop them down below. I will try my best to respond as soon as possible.
The very reason that makes me fall in love with OnePlus is how swift their update procedure is. I recently switched from Galaxy Note 8 to the OnePlus 6 because it takes ages for Samsung to update the Note 8 to Android Oreo. In order to receive future versions of Android immediately, I switched to OnePlus 6 and believe me, the company doesn’t betray you when it comes to updates.
Since the day of its launch, the OnePlus 6 has already got 5 major updates. OnePlus has introduced the missing features and greatly improved the performance and stability of the device. If the same had to be done by Samsung, it would have taken ages.
Like other manufacturers, OnePlus also releases the OTA updates in different phases. It rolls out the updates in different regions in different phases. At times, it takes a little longer for a particular region to get an update. For example, I live in Asia, the update that came out for the European OnePlus 6 users in the 2nd week of June, I got that same update in the 4th week of June. This is not a lot of time, however, if you can skip this wait time, it would be more than great.
Oxygen Updater – A tool to bypass OTA Update Wait Time
The newly built application Oxygen Updater is something that serves the purpose we just talked about. Oxygen Updater can skip all the time that you would wait for otherwise. The application snoops through the OnePlus servers to find an update. If the update is available, it can download the update for you. Since the update flashing procedure on OnePlus devices is way easy, you can use the local upgrade system to bring in the latest version of OxygenOS on your phone.
If you are a OnePlus user who doesn’t like to wait for the OTA updates to hit his region, you should definitely go ahead and get Oxygen Update application. It’s a very small application. The application can also update your rooted OnePlus device. So, whether you have a stock or a rooted OnePlus smartphone, the application is going to be a great companion.
Furthermore, Oxygen Updater is not just an application to update the phone. Through this app, OnePlus users can also download the full ZIP file of their ROM. Another great option of this ROM is to download the Android P Beta. It’s very easy to switch between Android P Beta and full stock ROM via this application. Oxygen Updater supports all the OnePlus phones that have come out till date.
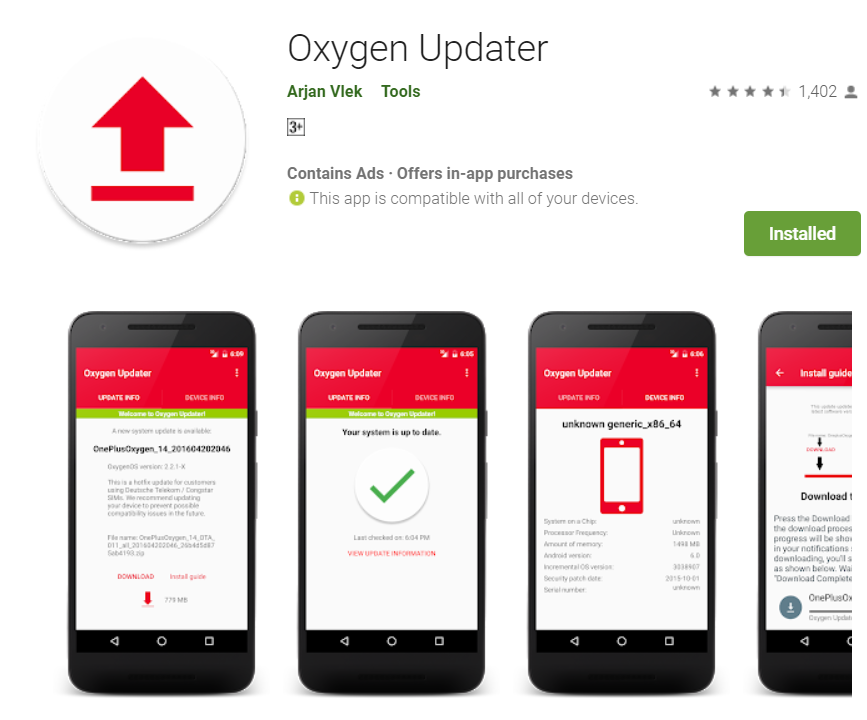
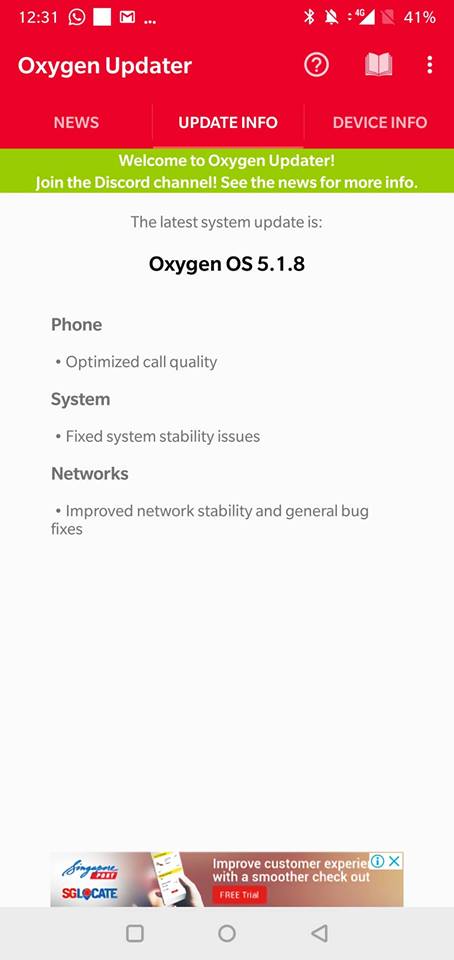
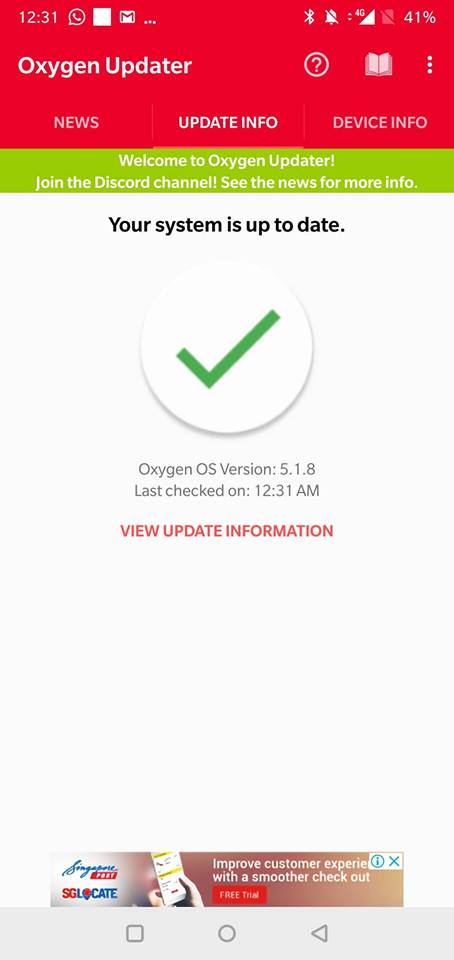
Oxygen Update keeps a regular check on the updates. It even shows you the changelog of the updates. There is a device info tab in this application. The device info tab shows the hardware details and also the software architecture details. The app comes for free in the Play Store.
I have extracted the Oxygen Updater APK and linked it here. If you are looking for this application, download it from here. The instructions to install Oxygen Updater are given next to the APK download link. The procedure to use Oxygen Updater is also given in this tutorial.
Hey folks! This is the OnePlus 7/Pro tutorial thread. Here you can find the guide to enter OnePlus 7 Pro Recovery Mode. Steps to Hard Reset OnePlus 7 Pro are given too. You can also Wipe Cache of OnePlus 7 Pro, enable Developer Options, USB Debugging, OEM Unlocking, and boot the phone into Safe Mode.
Before taking a look at all those OnePlus 7 Pro tutorial, let’s take a look at this device’s recap.
OnePlus 7 Pro is out in all its glory. Just like the previous OnePlus phones, this new flagship has successfully attracted masses. There are many reasons that make the OnePlus 7 Pro a great choice for the millennials. The value it offers with a price tag equal to that of mid-rangers, that is great. Take a look at OP7 Pro’s spec-sheet here.
OnePlus 7 Pro – The Beast
Let’s get the unique features of this handset out of the way first. OnePlus 7 Pro doesn’t have any notch, punch-hole, or camera cutout on the front. It sports an all-screen front. The screen size is 6.67-inches at its ratio is 19.5:9. This is a 90 Hz display with a resolution of 1440 x 3120 pixels. It supports HDR10+. OnePlus has not mentioned what kind of protection this phone is using, but according to the reviews, it’s either Gorilla Glass 5 or 6. There is a fingerprint scanner beneath the screen.
The Qualcomm Snapdragon 855 coupled with Adreno 640 GPU is powering this device. It has a RAM of 8GB or 12GB with an internal storage of 256GB. In the camera department, the OnePlus 7 Pro has got 3 of them at the back. It’s got a main 48MP shooter, 16MP ultrawide camera, and an 8MP telephoto with 3x optical zoom. On the front, it’s got the 16MP camera.
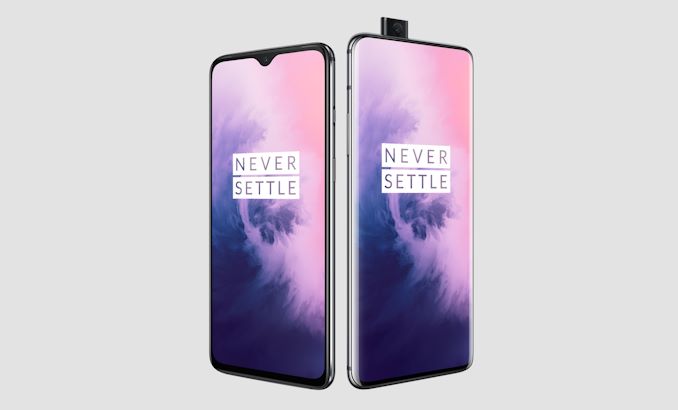
A 4000 mAh battery adds life to this phone. It supports 30W warp charging. There is no 3.5mm headphone jack. OnePlus offers this handset in Mirror Grey, Almond, and Nebula Blue colors.
OnePlus 7 – The OnePlus 6T Rebooted
The OnePlus 7 looks like a refreshed version of OnePlus 6T. It’s got the same full HD 6.4-inch display with a waterdrop notch. It’s also got the same Optic-AMOLED screen. There is still the 3700 mAh battery in this phone. The rear camera gets the new 48MP shooter alongside a 5MP depth sensor. No ultrawide or telephoto for the OnePlus 7.
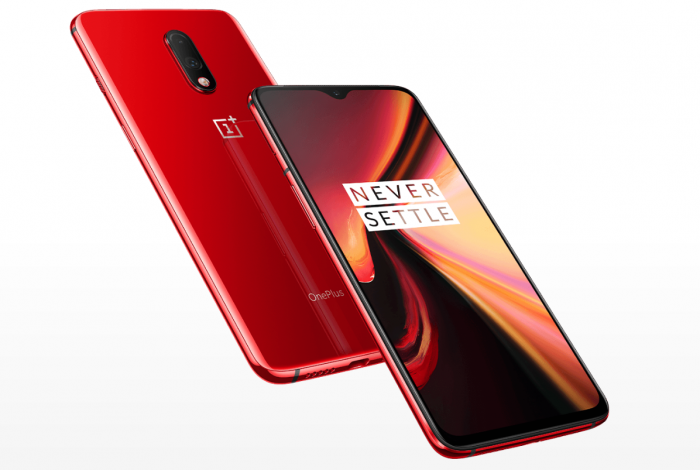
On the hardware and power end, it shares the same Snapdragon 855 with the OP7 Pro. The RAM options of this handset are 6 and 8GB with an internal storage of 128GB or 256GB. OnePlus 7 comes without a headphone jack too. It’s got different color options like the Red and Mirror Gray.
Both handsets run on Android 9 Pie out of the box themed by the latest OxygenOS 9.5.
Alright! That’s it about the new smartphone. Let’s go through the guides one-by-one to master it.
OnePlus 7 Pro Tutorial
Remember that the OnePlus 7 Pro tutorials given below will work on the OnePlus 7 and OnePlus 7 Pro both.
Enable Developer Options on OnePlus 7 or OnePlus 7 Pro
Developer options have the settings/preferences that you will not find in the phone otherwise. From the Developer Options, you can do things like slowing down the animations on the phone, reverting the colors of the screen, take a look at the running services, and so on. One of the greatest uses of the Recovery mode is to enable the OEM Unlocking and USB Debugging mode. So, here’s how to enable Developer Options on OnePlus 7 Pro.
Open Settings on the OnePlus 7 or OnePlus 7 Pro.
Go all the way down to the About Phone option and open it.
Find “Build number” and click on it 7 times.
Now go back to Settings.
Scroll down and find Developer Options at the end.
OnePlus 7 Pro Advanced Reboot
Advance reboot will give you the options to reboot into Recovery or Bootloader mode right from the phone. This means no volume and power button combination. Here is how you can enable OnePlus 7 or OnePlus 7 Pro’s Advanced Reboot.
Open Settings.
Go to Developer Options.
Scroll down and find Advanced Reboot next to Webview implementation.
Click on the radio-toggle to enable it.
Pressing the power button for 5 seconds will show you the advance-reboot menu now.
OnePlus 7 Pro Recovery Mode
The recovery mode will let you wipe the cache partition, hard reset, and do many other things on your OnePlus 7 or OnePlus 7 Pro. Here is how you can boot into recovery mode.
Since you have enabled the Advance Reboot, we will use the easier method first.
Press and hold the power button for about 5 seconds while your phone is on.
You will see options like Reboot, Recovery, Bootloader, and Screenshot.
Click on Recovery and let the phone reboot.
In about 5-10 seconds, you will see the recovery mode now.
If you have any password or pin set up, enter it, otherwise, just click the enter button without any password.
Select the recovery language now and get in. That’s all.
Method# 2
The 2nd method uses the button combination while your phone is powered off. In many cases, you will need the recovery mode when your phone is not turned on and it’s off instead. Here is how to do this.
Make sure your OnePlus 7/Pro is turned off. If it’s not, you may turn it off.
Now press and hold Volume Up + Power button for about 10 seconds.
As soon as the phone vibrates, let the keys go.
You will see the recovery in a while.
Enter the password and proceed, if you did not have any pin/password, press enter without it.
Choose recovery language now to access all the options.
To get out of recovery, go back to the main menu, click on Advanced > Reboot > System.
Remember that your phone’s navigation keys will work in the recovery mode just as they do normally.
OnePlus 7 Pro Bootloader Mode
With the help of Advanced Reboot, you can do it easily.
While you are on the home screen of your phone.
As you see the reboot options, click on Bootloader.
The phone will take a few seconds to take you to the bootloader.
Your phone is now ready for ADB sideloading and other such operations.
Method# 2
Reboot your OnePlus 7 or 7 Pro into the Recovery Mode.
In the Recovery Mode, click on Reboot > Bootloader.
Let your phone reboot into the bootloader now.
OnePlus 7 Pro Hard Reset
Hard resetting your OnePlus 7 handset will wipe everything stored on it. This includes all your data i.e. images, videos, music files, documents, apps, contacts, call logs, messages, and everything else. It’s a good option to reset the performance of your phone or if you just want to fix some random boot loop or heating up problem. Here is your best method to hard reset a OnePlus 7.
Reboot OnePlus device into the Recovery Mode.
In the Recovery mode, click on Wipe cache and data.
Now click on Erase everything > Yes.
Enter the password if you set any, if you did not, press the enter button without the password.
This will start the erase process. It can easily take up to 5 minutes.
After erasing, go back to recovery > advanced > reboot > system.
Set up your OnePlus 7 Pro as a new handset now.
OnePlus 7 Pro Wipe Cache Partition
Wiping cache can fix potential issues on the phone. If your OnePlus 7/Pro is heating up, having battery problems, performance issues, or anything else, clearing cache might help it big time. Here is how you wipe cache partition without losing data.
Reboot the OnePlus 7 or OnePlus 7 Pro into the Recovery Mode.
In the Recovery Mode, click on Wipe cache and data.
Now click on Wipe cache > Yes.
Go back to the main menu in recovery now.
Click on Advanced > Reboot > System.
The cache is clear and your phone will get a performance refresh.
OnePlus 7 Pro Safe Mode
Safe Mode disables all the apps on your OnePlus 7. This can help you find out an application that is creating a problem on the phone. The Safe Mode does not disable system apps. it only disables third-party apps. So, if your phone has been having any problems lately and you think that an app is behind those problems, the Safe Mode is going to be the savior. Here is how to boot the OnePlus 7 Pro in Safe Mode.
Turn off the OnePlus completely.
Now turn the phone on again.
As soon as the phone vibrates and shows the OnePlus logo, press the Volume Down key.
Keep the Volume Down key pressed until you see the home screen.
As you enter the home screen, let the key go.
You will find the Safe Mode logo on the lower left corner of the screen.
All apps have been disabled now.
To get out of the Safe Mode, just reboot the handset.
OnePlus 7 Pro USB Debugging Mode
USB Debugging mode helps your phone with connects to the computer.
Enable Developer Options on the OnePlus 7.
In the Developer Options, scroll all the way down to find USB Debugging.
Click on the radio toggle next to USB Debugging to enable it.
If the phone shows any warning or asks for permission, allow it.
Connect the phone to the computer now.
The phone will ask for permission now. Allow it.
The USB Debugging Mode has been fully enabled now.
OnePlus 7 Pro OEM Unlocking
OEM Unlocking will let you unlock the bootloader, root the phone, flash a custom recovery, or sideload anything on the phone.
Enable Developer Options on OnePlus 7.
Open the options now and find OEM Unlocking.
Click on the radio button toggle next to OEM Unlocking.
If the phone shows any warning, read it and click Ok.
The OEM Unlocking has been enabled now.
OnePlus 7 Pro Screenshots
There are three methods to take screenshots on OnePlus 7 and OnePlus 7 Pro. Here is how you can do it.
Press the Volume Down + Power button simultaneously to capture the screen.
Press the Power button > Screenshot to capture any screen.
Enable the 3-finger swipe from the settings. Now swipe three fingers altogether on the screen to take a screenshot.
All the screenshots will be saved in the Gallery/File Manager of the phone. That’s all.
OnePlus 7 Pro Screen Recording
OnePlus 7 Pro comes with an in-built screen recorder. This screen recorder is great for recording games, not that it records the screen, almost all Android phones, and iPhones do that… The OnePlus 7 Pro can record the in-game audio or the audio of a video that is playing on your OnePlus 7 Pro. Here is how to use it.
On the OnePlus 7 Pro, play any game or a video.
Pull down the notifications panel and go to the 2nd page of toggles.
You will find the “Screen Recorder” there now.
Click on the screen recorder button to start the recording now.
You are all set. Record anything you want. It will be stored in the Gallery/File Manager.
Wrap Up
That’s all with all the possible OnePlus 7 or OnePlus 7 Pro tutorials. If you like the OnePlus 7 Pro Tutorial guide, do let us know in the feedback below. In case you have got any further questions, feel free to drop them below as well. If you want anything else added to this guide, we are ready to do that too. Stay connected to learn more about OnePlus 7.
With the help of this guide, you can download the Zenfone 6 Unlock Tool. Moreover, you will be able to unlock the bootloader of your Zenfone 6.
Those who want to Install Custom ROM’s and Mods on Zenfone 6, they are well aware of the fact. First, they need to unlock the bootloader of their Zenfone 6 and then they can try custom mods. In the midst of all this, the starnge thing is that Zenfone 6 is not yet released and we have got our hands on Unlock Tool and Kernel Source Code.
You can download the both Unlock Tool and Kernel Source Code from the links below. But I am not sure why Asus is doing such things, let the device come to the market first and then give users unlocking tools. However, the Kernel Source Code is another thing, since it is out there. All the developer can use the Zenfone 6 Source Code to create custom recoveries like TWRP and custom Kernels.
Now before we move on to the technical stuff, let me give you a spec overview of Asus Zenfone 6. Maybe after checking out the specs you can change your mind and buy this device. But there are a few things you should know which will be game changers.
Zenfone 6 Overview:
Asus has changed a number of things in Zenfone 6. The first thing you will notice is the Android Skin, it is now nearly close to AOSP now. This is a huge improvement and also they have removed number of bloatware.
We’ve listened to you, and made ZenUI 6 simpler and cleaner with just the essential apps. It’s easier and more enjoyable to use, and the brand-new design gives it a simple look and feel that’s built to let you get things done quicker.Asus blog
Zenfone 6 Full phone specifications:
The Zenfone 6 will be released in 2019. The will Phone come out with a screen of 6.4 inches having 1080 x 2340 pixels resolution. Zenfone 6 will be powered by Qualcomm SDM855 Snapdragon 855 (7 nm) – Octa-core (1×2.84 GHz Kryo 485 & 3×2.41 GHz Kryo 485 & 4×1.78 GHz Kryo 485) and Adreno 640.
It will have internal storage of 256 GB, 8 GB RAM or 128 GB, 6 GB RAM. The camera at the back of this phone is 48 MP & 13 MP, and on the front, you will get the same camera because it has Motorized flip-up main camera module. Inside this Phone, there will be a 5000 mAh battery.
Download Zenfone 6 Unlock Tool and Kernel Source Code:
Use the following links to download the Zenfone 6 Unlock Tool and Kernel Source Code. Since we haven’t got our hands on the Zenfone 6, that’s why we cannot confirm the tool is working or not.
Before you proceed with the bootloader unlocking read the following.
New Features:
You also acknowledge ASUS does not guarantee service satisfaction to any Revised Product, including events involving paid service requested by you to be performed to the Revised Product.