Home Blog Page 88

How To Hard Reset Xiaomi Redmi 4A [ Tutorial ]

0
How To Hard Reset Xiaomi Redmi 4A [ Tutorial ]

Let’s tell you how you can Hard Reset Xiaomi Redmi 4A. The Xiaomi Redmi 4A is the best budget device in terms of specs and it gained a lot of popularity.

Today we’ll tell you how to factory reset Xiaomi Redmi 4A. This is the best solution so far to boost up the performance level on an Android device. Moreover, it is the ultimate solution of all your hardware or software problems on Xiaomi Redmi 4A.

Now before we move on and start telling you how to Hard Reset Xiaomi Redmi 4A. Let me give you an overview of Xiaomi Redmi 4A so that you get to know why this device is so famous.


Hard Reset Xiaomi Redmi 4A

Xiaomi Redmi 4A Specs:

The Xiaomi Redmi 4A was released in 2016, November. The Phone came out with a screen of 5.0 inches having 720 x 1280 pixels resolution. Xiaomi Redmi 4A was powered by Qualcomm MSM8917 Snapdragon 425 (28 nm) CPU and Adreno 308 GPU. It had internal storage of 16/32 GB, 2 GB RAM. The camera at the back of this phone is 13 MP, AF, f/2.2 and on the front, it is 5 MP. Inside this Phone, there was a 3120 mAh battery. The Phone originally ran on Android 6.0.1 (Marshmallow).

Benefits of Hard Reset:

Summary
*You can Wipe all of your Data Stored on your device.
*Easily fix all the performance issue.
*Bypass screen lock through hard reset.
*Bring the factory state.
*Fix all the firmware issues.
*Get rid of signal problems, loop issues, rebooting problems and power problems.

How to Hard Reset Xiaomi Redmi 4A:

Method1:

  • First, you need to Turn off your device, hold down the power button for 2-3 seconds.

  • Once your device is completely turned off. Press + Hold Volume Up and Power Key. 
  • When Mi logo appears, let go of the Power Button.
  • Keep holding the Volume Up Key until you see the Recovery Logo.
  • You will be provided with different languages. Select English using the power button.
  • Use the Volume Buttons to navigate and Power button for selection.
  • Choose Wipe & Reset from the list provided on the screen.
  • On the next screen, you have to go with Wipe All Data. After that, you need to select YES to proceed.
  • Once the process is finished, Reboot your device.

Method2:

  • Open Settings from the Home Screen.
  • Scroll down and Tap on Backup & Reset -> Factory Reset.
  • Now select Reset device.
  • To Confirm Choose Erase everything.
  • That will be all, wait for the process to complete.

That’s all. You have successfully Hard Reset Xiaomi Redmi 4A. Please do tell us if you face any problem during this process.

Xiaomi Redmi 4A General Guides: [ Hard Reset, Recovery, Fastboot, Download, Reset Setting etc ]

0
Xiaomi Redmi 4A General Guides: [ Hard Reset, Recovery, Fastboot, Download, Reset Setting etc ]

Here you will find all the Redmi 4A General Guides. You will learn how to Boot into Recovery Mode, Safe Mode, Fastboot Mode. Moreover, you will also learn how to Wipe Cache on Xiaomi Redmi 4A and much more. So let’s get started now.

Redmi 4A General Guides
Quick Summary
Hard Reset.
Soft Reset.
Codes.
Recovery Mode.
Fastboot Mode.
Reset Settings.
Download Mode.
Reset Network Settings.
Portable Hotspot.
Power Saving Mode.
Add Fingerprint.
Screenshot.
Video Tutorials.
Back Up Data.
Bypass Google Verification.
Check IMEI.

Redmi 4A General Guides:

Heed the instructions below in order to learn everything about Xiaomi Redmi 4A. These Xiaomi Redmi 4A General Guides will help you master everything on your device.

How To Hard Reset Xiaomi Redmi 4A:

We’ve posted this guide yesterday. You can use the following link to learn how you can hard reset Xiaomi Redmi 4A.

Hard Reset Xiaomi Redmi 4A

Soft Reset Xiaomi Redmi 4A:

In order to Soft Reset your Xiaomi Redmi 4A, all you have to do is hold down the power button for 2-3 seconds and your device will turn off.

Safe Mode Xiaomi Redmi 4A:

  • Power off the device.
  • Hold the Power Button to turn on your device.
  • When you see the Xiaomi logo let go of the power button and hold the volume down button.
  • Release the Volume button when you see the Safe Mode logo on the bottom left side of the screen.

USB debugging Xiaomi Redmi 4A:

  • Head over to the Settings.
  • Scroll down and tap on About Device.
  • Look for Build version and tap on it 7 times. You will see a pop-up saying developer options enabled.
  • Head back to the Settings menu and scroll down and tap on developer options.
  • Scroll down again and you will see USB Debugging option. Tap on it to enable it.

Enable USB Debugging on Android

Secret Codes for Xiaomi Redmi 4A:

Every Android device has different service codes to access a number of settings. Following are the Xiaomi Redmi 4A Codes.

QC test *#*#64663#*#*
Testing  *#*#4636#*#*
Calendar *#*#225#*#*
Google Play services *#*#426#*#*
Rlz Debug Ul *#*#759#*#*
IMEI   *#06#

Boot Xiaomi Redmi 4A into Recovery Mode:

  • First, you need to Turn off your device, hold down the power button for 2-3 seconds.
  • Once your Redmi 4A is completely turned off. Press + Hold Volume Up and Power Key. 
  • When you see the Mi logon on your screen. Let go of both buttons.
  • Select English to 3s Primeceed. You can choose whatever language you find convenient.
  • Use the Volume Buttons to navigate and Power button for selection.

Boot Xiaomi Redmi 4A into FastBoot Mode:

  • Turn off your Redmi 4A 3s Prime by holding down the power button for 2-3 seconds.
  • Now Hold and Press Volume Down + Power Button.
  • When you see the FastBoot Icon on your home screen let go of the button.

Bootloader Mode on Xiaomi Redmi 4A:

  • First, you need to Turn off the device using the power button.
  • Now press the Power and Volume Up key together.
  • Release both buttons when you see the Mi Logo on the screen.

How to Reset Settings on Xiaomi Redmi 4A:

  • Open Settings -> Advanced Settings.
  • Tap Backup & reset -> Reset all Settings.
  • Now you have to tap two times on Reset all Settings.

Download Mode on Redmi 4A:

  • Turn off your device using the power button.
  • Connect it to your PC and Press + Hold Volume Down and Power button.

Reset Network Settings on Xiaomi Redmi 4A:

  • Open Settings -> Advanced Settings.
  • Tap Backup & reset -> Reset Network Settings.
  • Now you have to tap two times on Reset Network Settings.

Enable Portable Hotspot on Xiaomi Redmi 4A:

  • Open Settings on your device.
  • Head over to the Wireless & networks –> Tethering & portable hotspot.
  • Now select Portable Wi-Fi hotspot and Configure Wi-Fi hotspot.
  • In the end, Turn on Portable Hotspot.

Power Saving Mode on Xiaomi Redmi 4A:

  • Open Settings.
  • Tap on the Battery.
  • Here you will find all the options related to power saving mode. Customize as you like.
  • Pull down the notification menu, Tap on Ultra Saving Mode to enable it.

Add Fingerprint Xiaomi Redmi 4A:

Now before you Add Fingerprint on your Xiaomi Redmi 4A, you have to set Pin or Pattern Lock first.

  • Launch Settings on your device.
  • Head over to the Security & privacy.
  • Tap on Fingerprint and you will be asked to set up a Pin or Pattern. Do as you like.
  • Once you’ve set your passcode or pattern, now you can add fingerprint on Xiaomi Redmi 4A.

Take Screenshots on Xiaomi Redmi 4A:

There are three methods which can be used to take screenshots on Xiaomi Redmi 4A.

Method1:
  • Open the Screen of which you want to take a screenshot of.
  • Press Power + Volume Down button together for once.
  • You will hear a splash voice. Done.
Method2:
  • Open the screen or page of which you want a screenshot
  • Drag down the notification bar.
  • Tap on the screenshot and all done.

BackUp data on Xiaomi Redmi 4A:

  • Open Settings on your device.
  • Tap on Backup&Reset.
  • On the next page, select local backup.
  • You’ll see the backup button at the end of the next page.
  • Tap on it to start the backup.

Phone storage > MIUI > Backup > All Backup folder.

Device Description:

The Xiaomi Redmi 4A was released in 2016, November. The Phone came out with a screen of 5.0 inches having 720 x 1280 pixels resolution. Xiaomi Redmi 4A was powered by Qualcomm MSM8917 Snapdragon 425 (28 nm) CPU and Adreno 308 GPU. It had internal storage of 16/32 GB, 2 GB RAM. The camera at the back of this phone is 13 MP, AF, f/2.2 and on the front, it is 5 MP. Inside this Phone, there was a 3120 mAh battery. The Phone originally ran on Android 6.0.1 (Marshmallow).

Check IMEI Number on Xiaomi Redmi 4A:

Finding IMEI number on any Android is same, all you have to do is open your phone’s dialer. Type *#06#, Voila. You’ll see a pop-up with numbers written on it. That is your IMEI number.

That’s all. These were the Redmi 4A General Guides. 

How to fix Google Pixel 3 Overheating Issue

0
How to fix Google Pixel 3 Overheating Issue

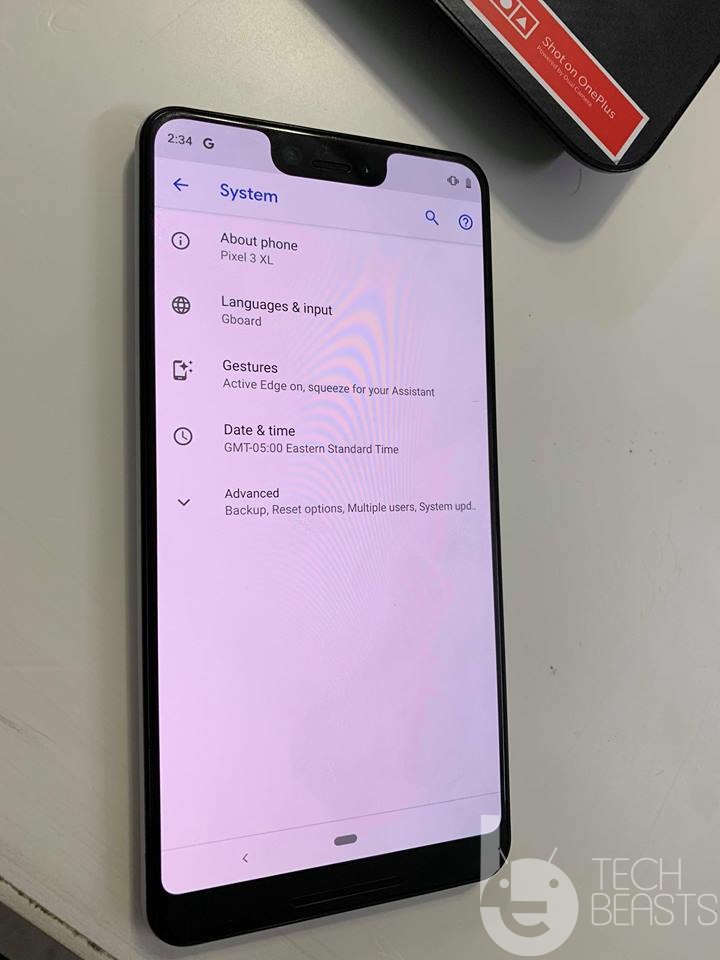
It has been a month since Google released the Google Pixel 3 and the Google Pixel 3 XL. Since the day of the release, these phones have been facing a new issue every now and then. A few days back, we saw the Google Pixel 3 XL showing the extra notch and now we have the Google Pixel 3 causing trouble to its owners. The Google Pixel 3 owners have reported about the phone getting overheated. A message pops up on the screen of the Google Pixel 3 informing the phone owners about the phone turning off because of the temperature.

The phone overheats while it is connected to a charger, while using the camera application or while using an application like WhatsApp for 10-15 minutes. This issue has caused an unrest among the Google Pixel 3 owners. Google is quiet so far. It hasn’t issued any statement on this issue. It’s still unknown whether this is a hardware or software issue. Now that the issue is there and Google isn’t breaking its silence, we have to try to resolve this issue on our own. I have listed a few solutions that I think will resolve the issue for the Google Pixel 3 owners. Follow the solutions given below one by one to Google Pixel 3 Overheating Issue.

Fix Google Pixel 3 Overheating Issue

Follow these steps one by one in order to fix a Google Pixel 3 which is overheating. Do not try all these solutions at once. Follow the sequence as it has the easiest methods first and the hardest methods at the bottom.

Check for Software Update

First of all, you should check if there is a Software Update available for your phone. If this is a Software-related problem, Google will definitely roll out an update to fix it. So, to start off, you can open Settings > System > Advanced > System update > Check for update. If an update is available, update the phone and check if the overheating problem is resolved or not.

Clear Cache of your Pixel 3

  1. Turn off your phone completely.
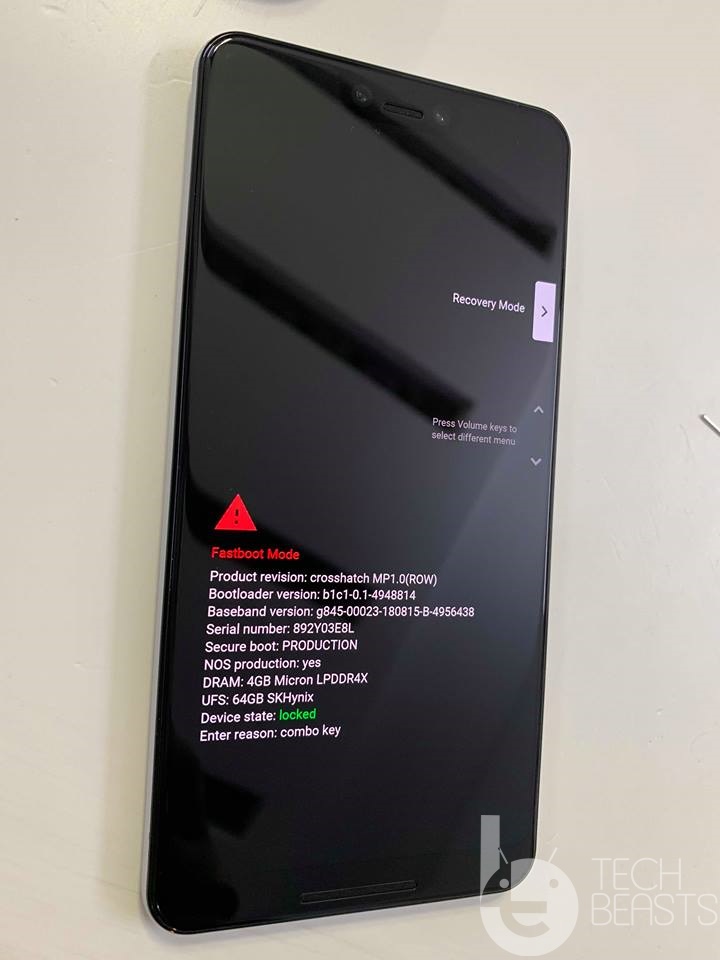
  2. Now press and hold Volume Down + Power button to boot into the fastboot or bootloader mode.
  3. Once in bootloader mode, use Volume Down or Volume Up to bring the recovery mode.
  4. Press the power button to enter the recovery mode.
  5. Once in recovery mode, use Volume Down or Up to select “Wipe cache partition” option and press Power button to wipe it.
  6. Reboot your phone into the system now.
  7. Try using your Pixel 3 now.

Safe Mode

  1. Power down your Google Pixel 3.
  2. Now turn on the phone.
  3. As soon as the phone vibrates or shows you the white screen, press and hold the Volume Down button.
  4. Keep the key pressed until you see the home screen.
  5. Once you are in the home screen, find the Safe Mode watermark on the lower left corner of the screen. If there is the watermark, it means you are in Safe Mode now. All apps have been disabled.
  6. Use your phone without any third party apps and see if it works fine.
  7. If it works fine, it would mean that there is some third party application causing trouble. You need to uninstall all the unnecessary applications now.

Disable Mobile Data when not needed

Mobile Data can heat up the device. Especially when the signal reception is poor and your phone is trying its best to provide you the best experience of the internet, it can heat up your phone and also eat its battery. It is always recommended to turn off Mobile Data after you are done using it. Try using WiFi for most of the time.

Uninstall unnecessary applications

As mentioned above, if you have any unnecessary applications that you do not need or you have never used, it is always recommended to get rid of those applications. Applications can cause a lot of trouble on your phone. Especially the applications that you just randomly install without learning much about them, those applications can bring down the performance of your phone, eat up the battery, and heat it up as well. So, go through your recent installations and delete all the applications you don’t need.

Perform a factory reset

Turn off your phone completely. Press and hold Volume Down + Power button to boot into the Fastboot mode. Once in fastboot, use Volume Down to select Recovery Mode. Press the Power button to get into the Recovery Mode. In the Recovery Mode, use the Volume Down or Up key to select “Factory data reset” mode and then press Power button once again to perform it. This will reset each and everything in your phone. This solution is not guaranteed to work, however, it is worth giving a try.

Install new firmware

Last, but not the least, if you think that your phone’s software is not coming along well, you can opt for a whole new software on your phone. Installing a new software on your Google Pixel 3 is a piece of cake. All you need to do is to download the official firmware file from Google’s website and run the batch file to flash the firmware on your phone. A new firmware will replace the old firmware and refresh your phone. This can potentially fix all the issues that existed in your previous firmware.

Conclusion

That’s all with the possible solutions I could think of. If these solutions have helped you, don’t forget to drop your feedback in the comments section below. If you have anything to add to this guide, feel free to drop it here. Also, tell us how your Google Pixel 3 has been treating you. Stay connected with us!

Download Epic Seven for PC on Windows and Mac

0
Download Epic Seven for PC on Windows and Mac

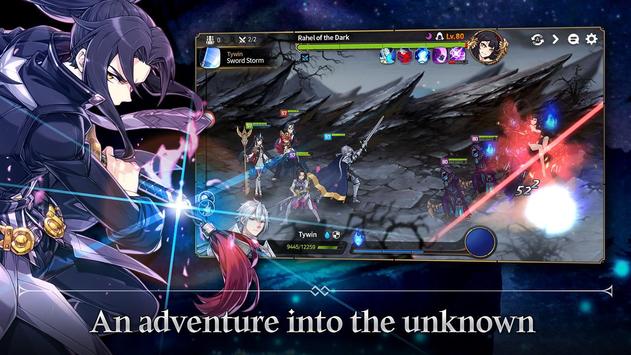
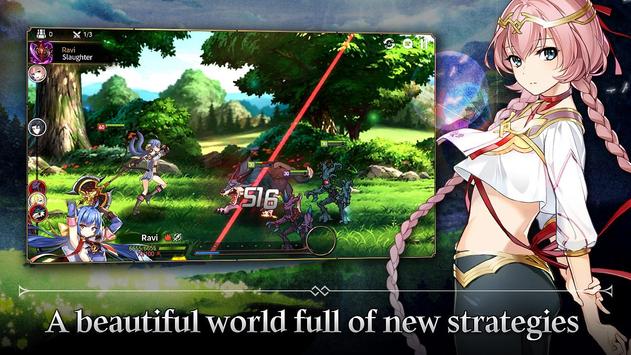
Epic Seven is an epic animated RPG by Smilegate Megaport. This game is available in the Google Play Store which means you can install the Android version on your computer as well. In this guide, I will show you the steps to download Epic Seven for PC. Before taking a look at the steps to install Epic Seven for PC, let us learn a little bit about this game.

Epic Seven for PC

Epic Seven – Overview

The game prompts the players to take action against the forces of evil who are trying to disrupt the peace in this world. The adventure takes place in a world full of monsters. Players will start their journey into a completely unknown world. Their quest for peace will take them to the places they have never even thought of before.Epic Seven for PC

Epic Seven is more than an RPG. While the players will be experiencing a new kind of adventure, they will interact with other players and befriend them. Players will attract other characters depending on their habits and their attitude in the game. They may fall in love with another character and enjoy their love story as well. Friendship is something that this game emphasizes a lot on. In the ordinary RPG games, you recruit team members to take down the enemies or the forces of evil, but here, you will make friends and your friends will save you for the sake of friendship.Epic Seven for PC

Everything in this game is upgradable. Be it the costumes of your characters, the weapons, or any other items, you will get a chance to upgrade them. Focus on winning as many rewards as you can as the rewards will help you to unlock upgrades.

The battles in this game are taking place in an enchanting environment. The on-screen elements show how hard the developers have worked on the graphics of this game. With the crisp graphics, the action is more enjoyable especially when you are playing this game on a bigger screen. To cut it short, Epic Seven maybe an Android game, but it is totally worth playing on a computer as well. Epic Seven comes for free with some IAPs. It’s time to play Epic Seven on a computer now.

Epic Seven for PC

Players can download, install, and run Epic Seven for PC via BlueStacks 4 on Windows and the old BlueStacks on Mac. Epic Seven for PC can be installed on both the Desktop PCs and Laptops.

To run Epic Seven right now, you need to install BlueStacks 4 or BlueStacks first of all. Once you have installed the emulator, you need to set it up using your Google Account. After setting up the Google Account, open the Google Play Store in the emulator and look for “Epic Seven”. As you find the game, install it. The game will now appear under the “All Apps” tab in the emulator. Launch the game now.

You can use the Mouse and Keyboard to play this game. If you don’t like the existing key mapping, you can remap your keyboard according to your liking. The game will run smoothly on your computer. That’s all with the installation of Epic Seven on a PC. If you have any queries or questions, feel free to reach out to me through the comments section below.

iPhone XR, iPhone XS, and iPhone XS Max Model Numbers and Differences Explained

0
iPhone XR, iPhone XS, and iPhone XS Max Model Numbers and Differences Explained

This is a list of all the iPhone XR, iPhone XS, and iPhone XS Max Model Numbers and Differences. The model numbers are explained in the form of tables for your better understanding.
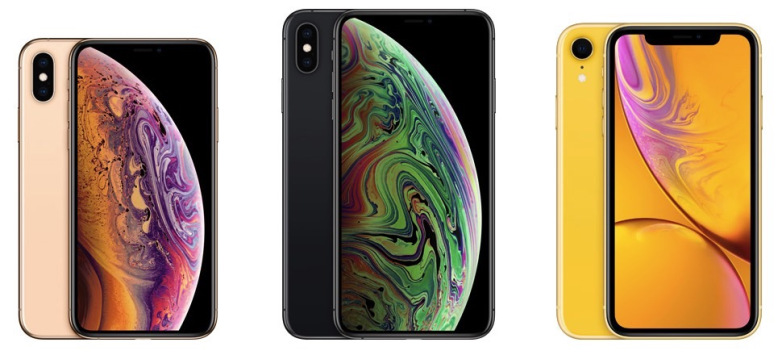
iPhone XR, iPhone XS, and iPhone XS Max Model Numbers

Apple launched the iPhone XR, iPhone XS, and the iPhone XS Max back in September this year. The three new iPhones are a powerhoU.Se. Apple killed the home button now. There is no iPhone with a home button and touch ID this year. All the iPhones have a 19:9 display with the Face ID this time around. The iPhone XR is the cheap iPhone for this year while the iPhone XS and iPhone XS Max are the expensive ones. iPhone XS Max happens to be the most powerful and most expensive iPhone.

Like every year, Apple is going to build a number of iPhone XR, XS, and XS Max variants. The variants are going to differentiate according to every single region/country. For example, if you are living in UAE, you need an iPhone that is compatible with the radio frequencies of UAE. If you try to U.Se an iPhone built for the U.S in the UAE, you will get connectivity problems which means the U.S iPhone is not compatible with the carriers in the UAE. Therefore, It is very important to learn about the iPhone XR, iPhone XS, and iPhone XS Max Model Numbers and Differences. In this post, I am going to put forward all the iPhone XR, XS, and XS Max Model Numbers with their product codes mentioned next to them. Before going through the lists, let us take a look at the specifications of all the new iPhones.

iPhone XR, iPhone XS, and iPhone XS Max

iPhone XR

iPhone XR comes with a 6.1-inches LCD display. Apple has named this display as its Liquid Retina display. This is a 720P screen which means you will not be able to enjoy anything in full HD on this iPhone. iPhone XR has a screen resolution of 828 x 1792 pixels. The display ratio is 19:9 and there is a notch on this phone. It is powered by Apple’s A12 Bionic Chipset which is built through 7 nm process. A RAM of 3GB is placed inside. The internal storage options of the iPhone XR are 64GB, 128GB, and 256GB. It has a 12MP single shooter at the back. The single shooter of the iPhone XR can take portrait shots as well. On the front, it has a 7MP camera. iPhone XR has a 2942 mAh battery inside. This iPhone comes in Black, Red, Yellow, Blue, and Coral colors.

iPhone XS

iPhone XS is an upgraded version of the iPhone X. It has the same dimensions, same form factor, same weight. Everything is the same except for the processor. The iPhone XS comes with the latest A12 Bionic CPU accompanied by the new Apple GPU and Neural Engine support. The iPhone XS has a 5.8-inches Super AMOLED display with a resolution of 1125 x 2436 pixels. It has IP68 water and dU.St resistance. There is a dual shooter at the back of this iPhone. Both the shooters are of 12MP each. On the front, the iPhone XS has a 7MP camera. The storage options of this iPhone are 64GB, 256GB, and 512GB alongside a RAM of 4GB. It has a 2658 mAh battery under the hood. It’s quite surprising to see that the iPhone XS has a battery smaller than the iPhone XR.

iPhone XS Max

Last, but not least. The iPhone XS Max was the showstopper at Apple’s launch event. This is the biggest and the most powerful iPhone that Apple has ever produced. The iPhone XS Max comes with a 6.5-inch Super AMOLED screen having a resolution of 1242 x 2688 pixels. The display ratio is 19:9 on this phone as well. iPhone XS Max also has the A12 Bionic CPU, the new 4 Core Apple GPU and a RAM of 4GB. The storage options are also as same as that of the iPhone XS. iPhone XS Max has a 12MP + 12MP camera at the back and a 7MP camera on the front. It has got a battery of 3174 mAh. The remaining specifications and the color options of the iPhone XS Max are similar to the iPhone XS.

iPhone XR, iPhone XS, and iPhone XS Max Model Numbers and Differences

I have already explained above why it’s important to learn about the model numbers of the iPhones and the differences between them. It’s time to go through the model numbers of all the iPhones for this year so that you do not pick up a wrong iPhone for yourself. This guide is meant to make your purchase easy.

iPhone XR Model Numbers and Differences

iPhone XR – At&t | U.S/CA – A1984

Note: All iPhone XR A1984 models support “FDD LTE (Bands 1, 2, 3, 4, 5, 7, 8, 12, 13, 14, 17, 18, 19, 20, 25, 26, 29, 30, 32, 66, 71); TD LTE (Bands 34, 38, 39, 40, 41); CDMA EV-DO Rev. A (800, 1900 MHz); UMTS/HSPA+/DC-HSDPA (850, 900, 1700/2100, 1900, 2100 MHz); [and] GSM/EDGE (850, 900, 1800, 1900 MHz).

iPhone XR Model Number Region Storage Color Apple Part Number
A1984 U.S/CA At&t 64GB White MT3L2LL/A
 A1984 U.S/CA At&t 64GB Black MT3K2LL/A
 A1984 U.S/CA At&t 64GB Royal Blue MT3R2LL/A
A1984 U.S/CA At&t 64GB Yellow  MT3N2LL/A
A1984 U.S/CA At&t 64GB Coral MT3Q2LL/A
A1984 U.S/CA At&t 64GB Red MT3M2LL/A
 A1984 U.S/CA At&t 128GB White  MT3U2LL/A
 A1984 U.S/CA At&t 128GB Black MT3T2LL/A
 A1984 U.S/CA At&t 128GB Royal Blue  MT3Y2LL/A
A1984 U.S/CA At&t 128GB Yellow MT3W2LL/A
A1984 U.S/CA At&t 128GB Coral MT3X2LL/A
A1984 U.S/CA At&t 128GB Red MT3V2LL/A
 A1984 U.S/CA At&t 256GB White MT412LL/A
 A1984 U.S/CA At&t 256GB Black MT402LL/A
 A1984 U.S/CA At&t 256GB Royal Blue MT462LL/A
A1984 U.S/CA At&t 256GB Yellow MT442LL/A
A1984 U.S/CA At&t 256GB Coral MT452LL/A
A1984 U.S/CA At&t 256GB Red MT422LL/A

iPhone XR – Verizon | U.S/CA – A1984

iPhone XR Model Number Region Storage Color Apple Part Number
A1984 U.S/CA Verizon 64GB White MT312LL/A
A1984 U.S/CA Verizon 64GB Black MT302LL/A
A1984 U.S/CA Verizon 64GB Royal Blue MT352LL/A
A1984 U.S/CA Verizon 64GB Yellow MT332LL/A
A1984 U.S/CA Verizon 64GB Coral MT342LL/A
A1984 U.S/CA Verizon 64GB Red MT322LL/A
A1984 U.S/CA Verizon 128GB White MT372LL/A
A1984 U.S/CA Verizon 128GB Black MT362LL/A
A1984 U.S/CA Verizon 128GB Royal Blue MT3C2LL/A
A1984 U.S/CA Verizon 128GB Yellow MT392LL/A
A1984 U.S/CA Verizon 128GB Coral MT3A2LL/A
A1984 U.S/CA Verizon 128GB Red MT382LL/A
A1984 U.S/CA Verizon 256GB White MT3E2LL/A
A1984 U.S/CA Verizon 256GB Black MT3D2LL/A
A1984 U.S/CA Verizon 256GB Royal Blue MT3J2LL/A
A1984 U.S/CA Verizon 256GB Yellow MT3G2LL/A
A1984 U.S/CA Verizon 256GB Coral MT3H2LL/A
A1984 U.S/CA Verizon 256GB Red MT3F2LL/A

iPhone XR – Sprint | U.S/CA – A1984

iPhone XR Model Number Region Storage Color Apple Part Number
A1984 U.S/CA Sprint 64GB White MT482LL/A
A1984 U.S/CA Sprint 64GB Black MT472LL/A
A1984 U.S/CA Sprint 64GB Royal Blue MT4F2LL/A
A1984 U.S/CA Sprint 64GB Yellow MT4A2LL/A
A1984 U.S/CA Sprint 64GB Coral MT4D2LL/A
A1984 U.S/CA Sprint 64GB Red MT492LL/A
A1984 U.S/CA Sprint 128GB White MT4H2LL/A
A1984 U.S/CA Sprint 128GB Black MT4G2LL/A
A1984 U.S/CA Sprint 128GB Royal Blue MT3C2LL/A
A1984 U.S/CA SprintU.S/CA Sprint 128GB Yellow  MT4L2LL/A
A1984 U.S/CA Sprint 128GB Coral MT4N2LL/A
A1984 U.S/CA Sprint 128GB Red MT4J2LL/A
A1984 U.S/CA Sprint 256GB White MT4U2LL/A
A1984 U.S/CA Sprint 256GB Black MT4R2LL/A
A1984 U.S/CA Sprint 256GB Royal Blue MT4Y2LL/A
A1984 U.S/CA Sprint 256GB Yellow MT4W2LL/A
A1984 U.S/CA Sprint 256GB Coral MT4X2LL/A
A1984 U.S/CA Sprint 256GB Red MT4V2LL/A

iPhone XR – T-Mobile | U.S/CA – A1984

iPhone XR Model Number Region Storage Color Apple Part Number
A1984 U.S/CA – T-Mobile 64GB White  MT2F2LL/A
A1984 U.S/CA – T-Mobile 64GB Black MT2E2LL/A
A1984 U.S/CA – T-Mobile 64GB Royal Blue MT2K2LL/A
A1984 U.S/CA – T-Mobile 64GB Yellow MT2H2LL/A
A1984 U.S/CA – T-Mobile 64GB Coral MT2J2LL/A
A1984 U.S/CA – T-Mobile 64GB Red MT2G2LL/A
A1984 U.S/CA – T-Mobile 128GB White MT2M2LL/A
A1984 U.S/CA – T-Mobile 128GB Black MT2L2LL/A
A1984 U.S/CA – T-Mobile 128GB Royal Blue MT2R2LL/A
A1984 U.S/CA – T-Mobile 128GB Yellow MT2P2LL/A
A1984 U.S/CA – T-Mobile 128GB Coral MT2Q2LL/A
A1984 U.S/CA – T-Mobile 128GB Red MT2N2LL/A
A1984 U.S/CA – T-Mobile 256GB White MT2U2LL/A
A1984 U.S/CA – T-Mobile 256GB Black MT2T2LL/A
A1984 U.S/CA – T-Mobile 256GB Royal Blue MT2Y2LL/A
A1984 U.S/CA – T-Mobile 256GB Yellow MT2W2LL/A
A1984 U.S/CA – T-Mobile 256GB Coral MT2X2LL/A
A1984 U.S/CA – T-Mobile 256GB Red MT2V2LL/A

iPhone XR – Japan| A2106

iPhone XR Model Number Region Storage Color Apple Part Number
A2106 Japan 64GB White MT032J/A
A2106 Japan 64GB Black MT002J/A
A2106 Japan 64GB Royal Blue MT0E2J/A
A2106 Japan 64GB Yellow MT082J/A
A2106 Japan 64GB Coral MT0A2J/A
A2106 Japan 64GB Red MT062J/A
A2106 Japan 128GB White MT0J2J/A
A2106 Japan 128GB Black MT0G2J/A
A2106 Japan 128GB Royal Blue , MT0U2J/A
A2106 Japan 128GB Yellow MT0Q2J/A
A2106 Japan 128GB Coral MT0T2J/A
A2106 Japan 128GB Red MT0N2J/A
A2106 Japan 256GB White MT0W2J/A
A2106 Japan 256GB Black MT0V2J/A
A2106 Japan 256GB Royal Blue MT112J/A
A2106 Japan 256GB Yellow MT0Y2J/A
A2106 Japan 256GB Coral MT102J/A
A2106 Japan 256GB Red MT0X2J/A

iPhone XR A2106 supports “FDD LTE (Bands 1, 2, 3, 4, 5, 7, 8, 11, 12, 13, 14, 17, 18, 19, 20, 21, 25, 26, 28, 29, 30, 66); TD-LTE (Bands 34, 38, 39, 40, 41, 42); CDMA EV-DO Rev. A (800, 1,900MHz); UMTS/HSPA+/DC-HSDPA (850, 900, 1,700/2,100, 1,900, 2,100MHz); [and] GSM/EDGE (850, 900, 1,800, 1,900MHz).

iPhone XR – China/Hong Kong | A2108

iPhone XR Model Number Region Storage Color Apple Part Number
A2108 China/Hong Kong 64GB White MT132CH/A
A2108 China/Hong Kong 64GB Black MT122CH/A
A2108 China/Hong Kong 64GB Royal Blue MT182CH/A
A2108 China/Hong Kong 64GB Yellow  MT082CH/A
A2108 China/Hong Kong 64GB Coral MT172CH/A
A2108 China/Hong Kong 64GB Red MT142CH/A
A2108 China/Hong Kong 128GB White MT1A2CH/A
A2108 China/Hong Kong 128GB Black MT192CH/A
A2108 China/Hong Kong 128GB Royal Blue MT1G2CH/A
A2108 China/Hong Kong 128GB Yellow MT0Q2CH/A
A2108 China/Hong Kong 128GB Coral MT1F2CH/A
A2108 China/Hong Kong 128GB Red MT1D2CH/A
A2108 China/Hong Kong 256GB White MT1J2CH/A
A2108 China/Hong Kong 256GB Black MT1H2CH/A
A2108 China/Hong Kong 256GB Royal Blue MT1Q2CH/A
A2108 China/Hong Kong 256GB Yellow MT0Y2CH/A
A2108 China/Hong Kong 256GB Coral MT1P2CH/A
A2108 China/Hong Kong 256GB Red MT1L2CH/A

iPhone XR A2018 supports “FDD-LTE (Bands 1, 2, 3, 4, 5, 7, 8, 12, 13, 14, 17, 18, 19, 20, 25, 26, 29, 30, 32, 66, 71); TD-LTE (Bands 34, 38, 39, 40, 41); TD-SCDMA 1900 (F), 2000 (A); CDMA EV-DO Rev. A (800, 1900 MHz); UMTS/HSPA+/DC-HSDPA (850, 900, 1700/2100, 1900, 2100 MHz); [and] GSM/EDGE (850, 900, 1800, 1900 MHz).

iPhone XR – Global | A2105

iPhone XR Model Number Region Storage Color Apple Part Number
A2105 Global 64GB White  MRY52B/A
A2105 Global 64GB Black MRY42B/A
A2105 Global 64GB Royal Blue MRYA2B/A
A2105 Global 64GB Yellow MRY72B/A
A2105 Global 64GB Coral MRY82B/A
A2105 Global 64GB Red MRY62B/A
A2105 Global 128GB White MRYD2B/A
A2105 Global 128GB Black MRY92B/A
A2105 Global 128GB Royal Blue MRYH2B/A
A2105 Global 128GB Yellow MRYF2B/A
A2105 Global 128GB Coral MRYG2B/A
A2105 Global 128GB Red MRYE2B/A
A2105 Global 256GB White MRYL2B/A
A2105 Global 256GB Black MRYJ2B/A
A2105 Global 256GB Royal Blue MRYQ2B/A
A2105 Global 256GB Yellow MRYN2B/A
A2105 Global 256GB Coral MRYP2B/A
A2105 Global 256GB Red MRYM2B/A

iPhone XR A2105 supports “FDD LTE (Bands 1, 2, 3, 4, 5, 7, 8, 12, 13, 14, 17, 18, 19, 20, 25, 26, 28, 29, 30, 32, 66); TD LTE (Bands 34, 38, 39, 40, 41); UMTS/HSPA+/DC-HSDPA (850, 900, 1700/2100, 1900, 2100 MHz); [and] GSM/EDGE (850, 900, 1800, 1900 MHz).

iPhone XS Model Numbers and Differences
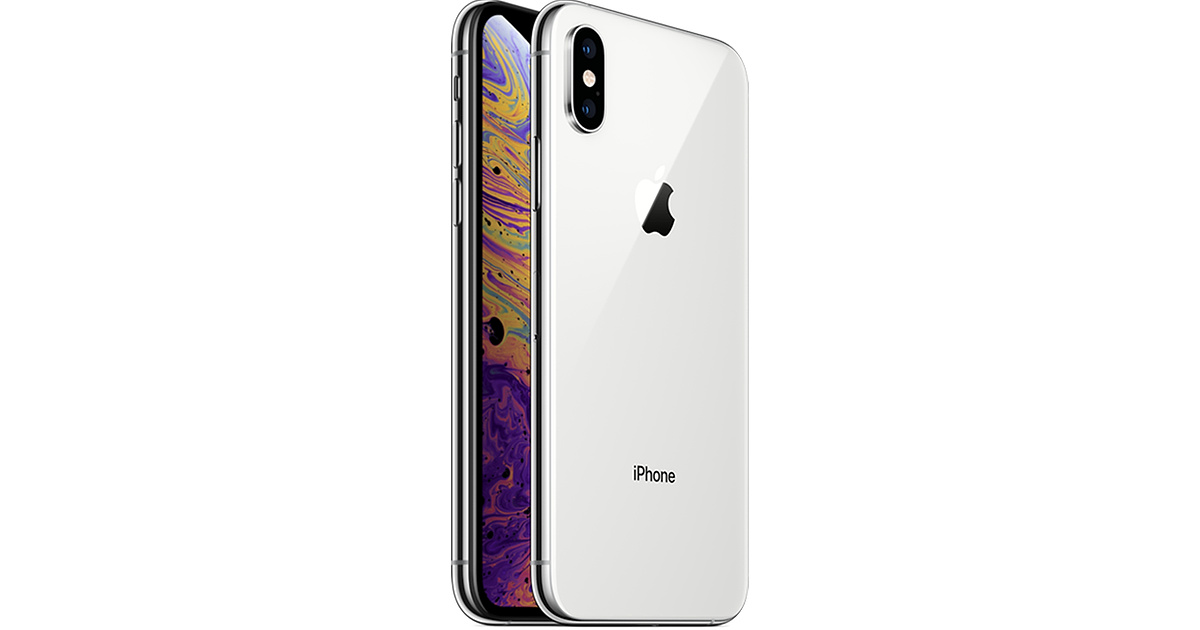
iPhone XS – Global | A2097

iPhone XS Model Number Region Storage Color Apple Order Number
A2097* (EMC 3232*) Global 64GB Silver MT9F2B/A
A2097* (EMC 3232*) Global 64GB Gold MT9G2B/A
A2097* (EMC 3232*) Global 64GB Space Gray MT9E2B/A
A2097* (EMC 3232*) Global 256GB Siver MT9J2B/A
A2097* (EMC 3232*) Global 256GB Gold MT9K2B/A
A2097* (EMC 3232*) Global 256GB Space Gray MT9H2B/A
A2097* (EMC 3232*) Global 512GB Silver MT9M2B/A
A2097* (EMC 3232*) Global 512GB Gold MT9N2B/A
A2097* (EMC 3232*) Global 512GB Space Grey MT9L2B/A

A2097 supports “FDD LTE (Bands 1, 2, 3, 4, 5, 7, 8, 12, 13, 14, 17, 18, 19, 20, 25, 26, 28, 29, 30, 32, 66); TD LTE (Bands 34, 38, 39, 40, 41, 46); UMTS/HSPA+/DC-HSDPA (850, 900, 1700/2100, 1900, 2100 MHz); [and] GSM/EDGE (850, 900, 1800, 1900 MHz).

iPhone XS – China | A2100

iPhone XS Model Number Region Storage Color Apple Order Number
A2100* (EMC 3262*) China 64GB Silver MT9Q2CH/A
A2100* (EMC 3262*) China 64GB Gold MT9R2CH/A,
A2100* (EMC 3262*) China 64GB Space Gray MT9P2CH/A,
A2100* (EMC 3262*) China 256GB Siver MT9U2CH/A
A2100* (EMC 3262*) China 256GB Gold MT9V2CH/A,
A2100* (EMC 3262*) China 256GB Space Gray MT9T2CH/A,
A2100* (EMC 3262*) China 512GB Silver MT9X2CH/A
A2100* (EMC 3262*) China 512GB Gold MT9Y2CH/A
A2100* (EMC 3262*) China 512GB Space Grey MT9T2CH/A

A2100 supports FDD LTE (Bands 1, 2, 3, 4, 5, 7, 8, 12, 13, 14, 17, 18, 19, 20, 25, 26, 29, 30, 32, 66, 71); TD LTE (Bands 34, 38, 39, 40, 41, 46); TD-SCDMA 1900 (F), 2000 (A); CDMA EV-DO Rev. A (800, 1900 MHz); UMTS/HSPA+/DC-HSDPA (850, 900, 1700/2100, 1900, 2100 MHz); [and] GSM/EDGE (850, 900, 1800, 1900 MHz).

iPhone XS – Japan | A2098

iPhone XS Model Number Region Storage Color Apple Part Number
A2098* (EMC 3233*) Japan 64GB Silver MTAX2J/A
A2098* (EMC 3233*) Japan 64GB Gold MTAY2J/A
A2098* (EMC 3233*) Japan 64GB Space Gray MTAW2J/A
A2098* (EMC 3233*) Japan 256GB Silver MTE12J/A
A2098* (EMC 3233*) Japan 256GB Gold MTE22J/A
A2098* (EMC 3233*) Japan 256GB Space Gray MTE02J/A
A2098* (EMC 3233*) Japan 512GB Silver MTE42J/A
A2098* (EMC 3233*) Japan 512GB Gold MTE52J/A
A2098* (EMC 3233*) Japan 512GB Space Gray MTE32J/A

A2098 supports FDD LTE (Bands 1, 2, 3, 4, 5, 7, 8, 11, 12, 13, 14, 17, 18, 19, 20, 21, 25, 26, 28, 29, 30, 66); TD LTE (Bands 34, 38, 39, 40, 41, 42, 46); CDMA EV-DO Rev. A (800, 1,900MHz); UMTS/HSPA+/DC-HSDPA (850, 900, 1,700/2,100, 1,900, 2,100MHz), [and] GSM/EDGE (850, 900, 1,800, 1,900MHz).

iPhone XS – U.S/Canada/Hong Kong & Contract Free | A1920

iPhone XS Model Number Region Storage Color Apple Order Number
A1920* (EMC 3218*) U.S/Canada/Hong Kong [Unlocked & Contract Free] 64GB Silver MT952LL/A
A1920* (EMC 3218*) U.S/Canada/Hong Kong [Unlocked & Contract Free] 64GB Gold MT962LL/A,
A1920* (EMC 3218*) U.S/Canada/Hong Kong [Unlocked & Contract Free] 64GB Space Gray MT942LL/A
A1920* (EMC 3218*) U.S/Canada/Hong Kong [Unlocked & Contract Free] 256GB Siver MT982LL/A
A1920* (EMC 3218*) U.S/Canada/Hong Kong [Unlocked & Contract Free] 256GB Gold  MT992LL/A
A1920* (EMC 3218*) U.S/Canada/Hong Kong [Unlocked & Contract Free] 256GB Space Gray  MT972LL/A
A1920* (EMC 3218*) U.S/Canada/Hong Kong [Unlocked & Contract Free] 512GB Silver MT9C2LL/A
A1920* (EMC 3218*) U.S/Canada/Hong Kong [Unlocked & Contract Free] 512GB Gold MT9D2LL/A
A1920* (EMC 3218*) U.S/Canada/Hong Kong [Unlocked & Contract Free] 512GB Space Grey MT9A2LL/A

A1920 supports FDD LTE (Bands 1, 2, 3, 4, 5, 7, 8, 12, 13, 14, 17, 18, 19, 20, 25, 26, 29, 30, 32, 66, 71); TD LTE (Bands 34, 38, 39, 40, 41, 46); CDMA EV-DO Rev. A (800, 1900 MHz); UMTS/HSPA+/DC-HSDPA (850, 900, 1700/2100, 1900, 2100 MHz) [and] GSM/EDGE (850, 900, 1800, 1900 MHz).

iPhone XS – U.S/At&t | A1920

iPhone XS Model Number Region/Carrier Storage Color Apple Order Number
A1920* (EMC 3218*) U.S – At&t 64GB Silver MT8V2LL/A
A1920* (EMC 3218*) U.S – At&t 64GB Gold MT8W2LL/A
A1920* (EMC 3218*) U.S – At&t 64GB Space Gray MT8U2LL/A
A1920* (EMC 3218*) U.S – At&t 256GB Siver MT8Y2LL/A
A1920* (EMC 3218*) U.S – At&t 256GB Gold MT902LL/A
A1920* (EMC 3218*) U.S – At&t 256GB Space Gray MT8X2LL/A
A1920* (EMC 3218*) U.S – At&t 512GB Silver MT922LL/A
A1920* (EMC 3218*) U.S – At&t 512GB Gold MT932LL/A
A1920* (EMC 3218*) U.S – At&t 512GB Space Grey MT912LL/A

iPhone XS – U.S/Sprint | A1920

iPhone XS Model Number Region/Carrier Storage Color Apple Order Number
A1920* (EMC 3218*) U.S – Sprint 64GB Silver MT8K2LL/A
A1920* (EMC 3218*) U.S – Sprint 64GB Gold MT8L2LL/A,
A1920* (EMC 3218*) U.S – Sprint 64GB Space Gray MT8J2LL/A
A1920* (EMC 3218*) U.S – Sprint 256GB Siver MT8N2LL/A
A1920* (EMC 3218*) U.S – Sprint 256GB Gold MT8P2LL/A
A1920* (EMC 3218*) U.S – Sprint 256GB Space Gray MT8M2LL/A
A1920* (EMC 3218*) U.S – Sprint 512GB Silver MT8R2LL/A
A1920* (EMC 3218*) U.S – Sprint 512GB Gold MT8T2LL/A
A1920* (EMC 3218*) U.S – Sprint 512GB Space Grey MT8Q2LL/A


iPhone XS – U.S/T-Mobile | A1920

iPhone XS Model Number Region/Carrier Storage Color Apple Order Number
A1920* (EMC 3218*) U.S – T-Mobile 64GB Silver  MTA12LL/A,
A1920* (EMC 3218*) U.S – T-Mobile 64GB Gold MTA22LL/A
A1920* (EMC 3218*) U.S – T-Mobile 64GB Space Gray MTA02LL/A
A1920* (EMC 3218*) U.S – T-Mobile 256GB Siver MTA82LL/A
A1920* (EMC 3218*) U.S – T-Mobile 256GB Gold MTA92LL/A
A1920* (EMC 3218*) U.S – T-Mobile 256GB Space Gray MTA72LL/A
A1920* (EMC 3218*) U.S – T-Mobile 512GB Silver MTAD2LL/A
A1920* (EMC 3218*) U.S – T-Mobile 512GB Gold MTAF2LL/A
A1920* (EMC 3218*) U.S – T-Mobile 512GB Space Grey MTAA2LL/A


iPhone XS – U.S/Verizon | A1920

iPhone XS Model Number Region/Carrier Storage Color Apple Order Number
A1920* (EMC 3218*) U.S – Verizon 64GB Silver MTAH2LL/A
A1920* (EMC 3218*) U.S – Verizon 64GB Gold MTAJ2LL/A
A1920* (EMC 3218*) U.S – Verizon 64GB Space Gray MTAG2LL/A
A1920* (EMC 3218*) U.S – Verizon 256GB Siver MTAN2LL/A
A1920* (EMC 3218*) U.S – Verizon 256GB Gold  MTAQ2LL/A
A1920* (EMC 3218*) U.S – Verizon 256GB Space Gray MTAL2LL/A
A1920* (EMC 3218*) U.S – Verizon 512GB Silver MTAU2LL/A
A1920* (EMC 3218*) U.S – Verizon 512GB Gold MTAV2LL/A
A1920* (EMC 3218*) U.S – Verizon 512GB Space Grey MTAR2LL/A

iPhone XS Max Model Numbers and Differences
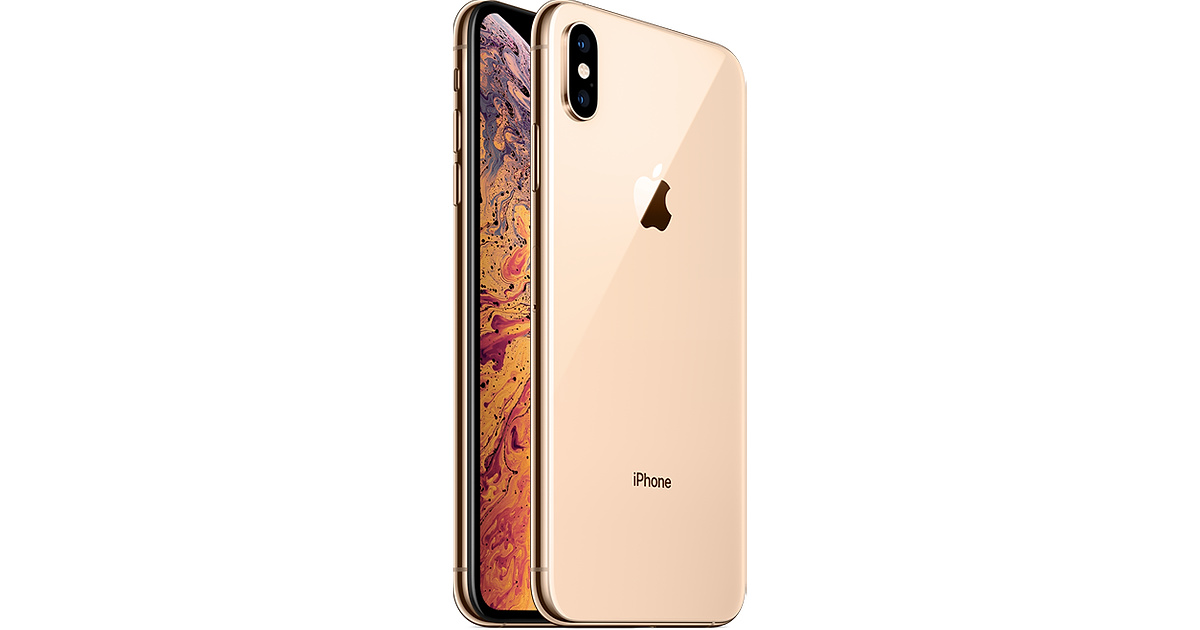
Note: iPhone XS Max’s radio frequencies are similar to the iPhone XS that’s why I haven’t mentioned them here once again.

iPhone XS Max – U.S – At&t | A1921

iPhone XS Max Model Number Region Storage Color Apple Part Number
A1921 U.S – At&t 64GB Silver MT5W2LL/A
A1921 U.S – At&t 64GB Gold MT5X2LL/A
A1921 U.S – At&t 64GB Space Gray MT5V2LL/A
A1921 U.S – At&t 256GB Silver MT602LL/A
A1921 U.S – At&t 256GB Gold MT612LL/A
A1921 U.S – At&t 256GB Space Gray MT5Y2LL/A,
A1921 U.S – At&t 512GB Silver MT632LL/A
A1921 U.S – At&t 512GB Gold MT642LL/A
A1921 U.S – At&t 512GB Space Gray MT622LL/A

iPhone XS Max – U.S – T-Mobile| A1921

iPhone XS Max Model Number Region Storage Color Apple Part Number
A1921 U.S – T-Mobile 64GB Silver  MT662LL/A
A1921 U.S – T-Mobile 64GB Gold MT672LL/A,
A1921 U.S – T-Mobile 64GB Space Gray MT652LL/A
A1921 U.S – T-Mobile 256GB Silver MT692LL/A
A1921 U.S – T-Mobile 256GB Gold MT6A2LL/A
A1921 U.S – T-Mobile 256GB Space Gray  MT682LL/A
A1921 U.S – T-Mobile 512GB Silver MT6D2LL/A
A1921 U.S – T-Mobile 512GB Gold MT6E2LL/A
A1921 U.S – T-Mobile 512GB Space Gray MT6C2LL/A

iPhone XS Max – U.S – Sprint | A1921

iPhone XS Max Model Number Region Storage Color Apple Part Number
A1921 U.S – Verizon 64GB Silver MT6G2LL/A,
A1921 U.S – Verizon 64GB Gold MT6H2LL/A
A1921 U.S – Verizon 64GB Space Gray MT6F2LL/A
A1921 U.S – Verizon 256GB Silver MT6K2LL/A,
A1921 U.S – Verizon 256GB Gold MT6L2LL/A
A1921 U.S – Verizon 256GB Space Gray MT6J2LL/A
A1921 U.S – Verizon 512GB Silver MT6N2LL/A
A1921 U.S – Verizon 512GB Gold MT6P2LL/A
A1921 U.S – Verizon 512GB Space Gray MT6M2LL/A

iPhone XS Max – U.S – Verizon| A1921

iPhone XS Max Model Number Region Storage Color Apple Part Number
A1921 U.S – Verizon 64GB Silver MT6G2LL/A,
A1921 U.S – Verizon 64GB Gold MT6H2LL/A
A1921 U.S – Verizon 64GB Space Gray MT6F2LL/A
A1921 U.S – Verizon 256GB Silver MT6K2LL/A,
A1921 U.S – Verizon 256GB Gold MT6L2LL/A
A1921 U.S – Verizon 256GB Space Gray MT6J2LL/A
A1921 U.S – Verizon 512GB Silver MT6N2LL/A
A1921 U.S – Verizon 512GB Gold MT6P2LL/A
A1921 U.S – Verizon 512GB Space Gray MT6M2LL/A

iPhone XS Max – U.S – Canada| A1921

iPhone XS Max Model Number Region Storage Color Apple Part Number
A1921 U.S/Canada 64GB Silver MT5A2LL/A
A1921 U.S/Canada 64GB Gold MT5C2LL/A
A1921 U.S/Canada 64GB Space Gray MT592LL/A
A1921 U.S/Canada 256GB Silver MT5E2LL/
A1921 U.S/Canada 256GB Gold MT5F2LL/A
A1921 U.S/Canada 256GB Space Gray MT5D2LL/A
A1921 U.S/Canada 512GB Silver MT5H2LL/A
A1921 U.S/Canada 512GB Gold MT5J2LL/A
A1921 U.S/Canada 512GB Space Gray MT5G2LL/A

iPhone XS Max – Japan | A2102

iPhone XS Max Model Number Region Storage Color Apple Part Number
A2102 Japan 64GB Silver MT6R2J/A
A2102 Japan 64GB Gold MT6T2J/A
A2102 Japan 64GB Space Gray MT6Q2J/A
A2102 Japan 256GB Silver MT6V2J/A
A2102 Japan 256GB Gold MT6W2J/A
A2102 Japan 256GB Space Gray MT6U2J/A
A2102 Japan 512GB Silver MT6Y2J/A
A2102 Japan 512GB Gold MT702J/A
A2102 Japan 512GB Space Gray MT6X2J/A

iPhone XS Max  – China/Hong Kong | A2104

iPhone XS Max Model Number Region Storage Color Apple Part Number
A2104 China/Hong Kong 64GB Silver MT722CH/A
A2104 China/Hong Kong 64GB Gold MT732CH/A
A2104 China/Hong Kong 64GB Space Gray  MT712CH/A
A2104 China/Hong Kong 256GB Silver MT752CH/A
A2104 China/Hong Kong 256GB Gold MT762CH/A
A2104 China/Hong Kong 256GB Space Gray  MT742CH/A
A2104 China/Hong Kong 512GB Silver  MT782CH/A
A2104 China/Hong Kong 512GB Gold MT792CH/A
A2104 China/Hong Kong 512GB Space Gray MT772CH/A

iPhone XS Max – Global | A2101

iPhone XS Model Number Region Storage Color Apple Part Number
A2101 Global 64GB Silver MT512B/A
A2101 Global 64GB Gold MT522B/A
A2101 Global 64GB Space Gray  MT502B/A
A2101 Global 256GB Silver MT542B/A
A2101 Global 256GB Gold MT552B/A
A2101 Global 256GB Space Gray MT532B/A
A2101 Global 512GB Silver MT572B/A
A2101 Global 512GB Gold MT582B/A
A2101 Global 512GB Space Gray MT562B/A

That’s all guys. I hope you find this list useful. Don’t forget to drop the feedback below as I have worked for countless hours to compile this list. Stay connected.

Move to iOS unable to connect and other issues [FIXED]

0
Move to iOS unable to connect and other issues [FIXED]

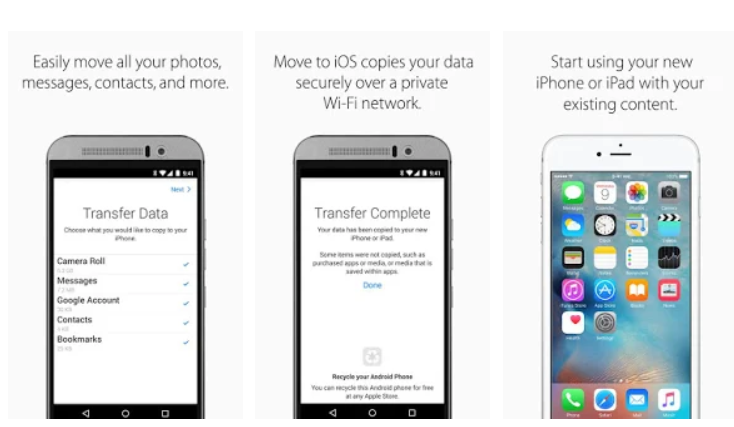
Take a look at this guide to fix Move to iOS unable to connect and all other issues that you are facing.

Move to iOS is the official application by Apple to transfer data from Android to iOS. The application comes in handy when you are switching from your Android phone to an iPhone. Move to iOS can transfer all of your contacts, text messages, photos, videos, and some other content. If you think that transferring your data manually from Android to iOS is a piece of cake, you may be completely wrong. It is difficult to even with the Move to iOS application because you are going to encounter a number of problems with this application. 

The most common problem is your Android phone unable to connect to the iPhone. You will get the error “unable to communicated with the other device” error. At times, the data transfer stops in between. The files sometimes take longer than expected to switch. All these issues can really change your mood and there is a likely chance that you will likely end up sticking to Android. That is the case with me at the least.

A few weeks back I was switching from OnePlus 6 to the iPhone XS Max. Transferring my data was such a painful process that I decided to stick to the OnePlus 6. However, I was able to resolve all the issues that I faced with the Move to iOS application. So here, in this post, I am going to list all the problems that you may face and also how to resolve the problems. Here are the Move to iOS unable to connect and other issues with their fixes.

Move to iOS unable to connect and other issuesMove to iOS could not communicate with the device

These are the common Move to iOS problems:

  1. Could not communicate with the device
  2. Unable to connect to another phone
  3. Unable to start the file transfer
  4. File transfer interrupted after 6 seconds

These are the most popular issues that I saw on many different forums. The first one is something that you will definitely encounter for at least once. The remaining 3 are not that common. So, in order to avoid any such error, follow these steps to move your data from Android to iOS.

Fix Move to iOS unable to connect and other issues

  1. First of all, make sure that your iPhone is in the start-up mode. You will get the Move Data from Android option only when you are on the start-up screen. If you have already set up your iPhone, you need to perform a factory reset in order to go back to the initial settings screen to get this option.
  2. Now download and install the Move to iOS application on your Android handset.
  3. Turn on Airplane Mode on your Android phone.
  4. Now turn on WiFi as the Airplane Mode turned it off. Do not turn on Airplane Mode, only turn on the WiFi. At this point, everything else is disabled on your phone.
  5. Make sure that your Android phone and your iPhone, both are connected to the same WiFi network.
  6. Now plug a charging cable into your Android phone, you need the power to start data transfer.
  7. Plug your iPhone into a charger as well.
  8. Restart your Android phone now.
  9. Open Move to iOS application.
  10. On your iPhone, click on Move Data from Android.
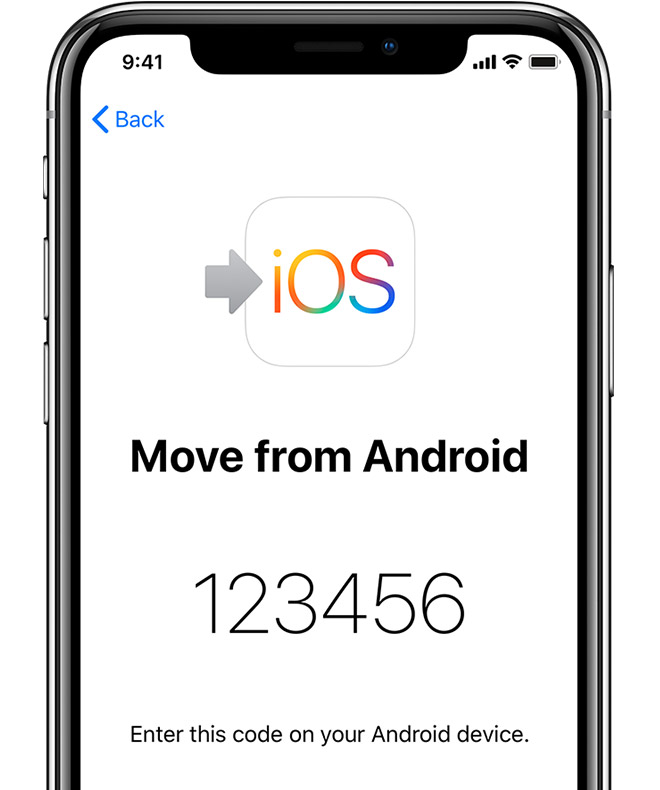
  11. You will get a code on your iPhone.
  12. Enter this code on your Android phone.
    Only for reference. Your code will be different.
  13. The Android phone will now establish a connection.
  14. Start the data transfer, the process should be really smooth this time.

Conclusion

Now that you have successfully transferred data by following the method given above, you must have realized what you were doing wrong. In my case, I did not have my phones plugged into a wall charger. Apple itself suggests that you must have both the phones connected to a charger. Without a charger, you are likely to get the unable to communicate error. The data transfer interruption happens because of the phone not being in the flight mode. In the method above, I have explained the steps in such a way that you do not have to face any problems at all. I hope that you guys find this guide helpful. If you have any queries, feel free to reach out to me through the comments section below.

The Day After Tomorrow for PC and Laptop

0
The Day After Tomorrow for PC and Laptop

The Day After Tomorrow is a brand new game by NetEase Games, the makers of games like Rules of Survival, Survival Royale and others. This game also follows the footsteps of the existing survival games, but the game has got a twist. Before we look at the guide to install The Day After Tomorrow for PC, we will learn a little bit about this game.The Day After Tomorrow for PC

The Day After Tomorrow – Overview

This game is taking place while a Zombie Apocalypse is going on. The virus which has killed thousands of human beings and has made them zombies is coming after you now. Players are sent off into the area filled with Zombies in a truck. The Zombies will quickly come after the truck and you have to prepare your weapons. Do not let the Zombies bite you or else you will become one of them. Can you survive while this dangerous virus has spread across the country? The Day After Tomorrow is going to test your survival skills.

The virus has spread rapidly throughout the country now. It has developed a lot of diseases, people have been infected with cold, flu and other such diseases. Dangers have surrounded every single place. You are not infected yet. You have to take this opportunity to find a solution to get rid of the virus. Use every single resource to survive in this situation. You will find everything devastated.

Survive, because that’s the only thing you can do

There are buildings with broken walls, universities, grounds, trees and many other such objects that you can explore to find the items for your survival. Collect as many items you can, hunt anything that you think isn’t infected yet, cook and keep your stomach filled as you can’t die of hunger. Make the medicines as well as you will need them at every step in the game.

As you find more survivors, team up with them. This will increase your chances of the survivor. The only thing that you need to take care of are the people whom you team up with. There are going to be people who will try to kill you for their survival. If you team up with the wrong people, you will eventually end up getting killed. Your ultimate goal is to find a place where human beings can survive. The human habitation needs to be established in order to let the survivors live. 

The game offers high-quality graphics. The sound effects are equally good. Just like their previous games, this is also a console-quality game. The game is worth playing on a computer. Since this game has made its way to the Android ecosystem, you can install it on a computer as well. In this guide, I will show you the steps to download The Day After Tomorrow for PC.

The Day After Tomorrow for PC

Windows users can download and install the BlueStacks 4 and Mac users can get the old BlueStacks in order to install The Day After Tomorrow for PC. The game will run smoothly on both the Desktop PCs and Laptops.

After installing the BlueStacks 4 or BlueStacks, you need to set up the emulator using your Google Account. Once the Google Account has been added, open the emulator and launch the Play Store in it. In the Play Store, look for “The Day After Tomorrow”. As soon as you find the game, install it.

After installation, the game will appear under the “All Apps” tab. Launch the game and use your Mouse and Keyboard to play it. If you do not like the default key mapping, you can customize the keys in the BlueStacks emulator easily.

Note: At the moment, this game is available only in the Chinese language. The developers are working on the English version and it will be available soon. Till then, enjoy the game as it is.

Bomb Me Brazil for PC – Windows and Mac

0
Bomb Me Brazil for PC – Windows and Mac

Bomb Me Brazil is a free Action game by Proficient City Limited. Like the existing Action games, this game also puts the players on the quest to shoot down their enemies. The game involves team building, going on expeditions, exploring the abandoned buildings, breaking into castles and a lot more. Bomb Me Brazil was previously available for computers. This game has made its way to iOS and Android as well. We are going to talk about the Android version of this game and also see how we can run the Android version of Bomb Me Brazil on a computer.Bomb me Brazil for PC

Bomb Me Brazil Overview

The game starts off having the players dropped off into the battlefield. Players have to start looking for weapons for their defense. After killing a few of the enemies, the players will get the chance to make friends. The friends will join your team and help you to take down your enemies easily. The journey is going to be dangerous. There are powerful enemies and their bosses waiting for you at every single step. Killing the enemies may be easy, but when it comes to bosses, it’s going to be a real deal. You will be exploring dungeons to take out the enemies.

Collect the masks to hide your identity. Use the clothing of your enemies to look like one of them. Assemble your team carefully as your team will define your destiny in this game. The game comes with several modes. You will get a particular mode where you will fight the bosses only. There is a fair battle mode to fight against other players online. The game also offers PvP mode.

Apart from killing your enemies and conquering the map, you will also get a chance to live a normal life in this game. For example, players can fall in love with someone and get married in the game. Players can also get a pet, raise it, train it, and take it to battles. You will also interact with other characters in the game and experience life in the community.

Bomb Me Brazil comes with marvelous graphics as well. The only downside that I see here is that this game is not available in English. It’s 100% in the Portuguese language. If you can understand the game without English, you should definitely give it a try. Bomb Me Brazil comes for free.

Bomb Me Brazil Features

  • Portuguese – Not available in English.
  • PvP Mode.
  • Play online with other players via cross-server.
  • Challenge the Dark Dragon.
  • Create or join expeditions.
  • Kill the Guild Chief to get rewards.
  • Fall in love with someone and get married.
  • Upgrade weapons and your gear.
  • Get a pet and train it.
  • Record the gameplay.
  • Play online or offline – up to you!

Bomb Me Brazil for PC

Since this game comes with good graphics, you can play it on your computer as well. I am talking about running the Android version on the computer. Bomb Me Brazil for PC can be installed via BlueStacks 4 or the BlueStacks Android emulator. Follow the steps given below to install Bomb Me Brazil for PC right now.

Windows users can get the BlueStacks 4 and Mac users can get the old BlueStacks to install Bomb Me Brazil for PC. Download and install the emulator on the computer. After installing the emulator, set it up using your Google Account. Once done, open the Play Store in the emulator and find “Bomb Me Brazil”. As soon as you find the game, install it.

After installation, the game will appear under the “All Apps” tab in the emulator. Open the game now and play it using your mouse and keyboard. If you do not like the existing configuration of the keys, you can map the keys the way you like.

Conclusion

That’s all. If you are facing any difficulties, feel free to reach out to me. I will try my best to help you guys out.

Heroes of Warland for PC – Windows and Mac

0
Heroes of Warland for PC – Windows and Mac

Heroes of Warland is a PvP FPS Action game by Nitro Games Oyj. From the very first look, one can assume that it is just another FPS game where you have to pick up the weapons and shoot your enemies. However, the actual game has a whole new concept, a whole new plot to offer.

Heroes of Warland – Overview

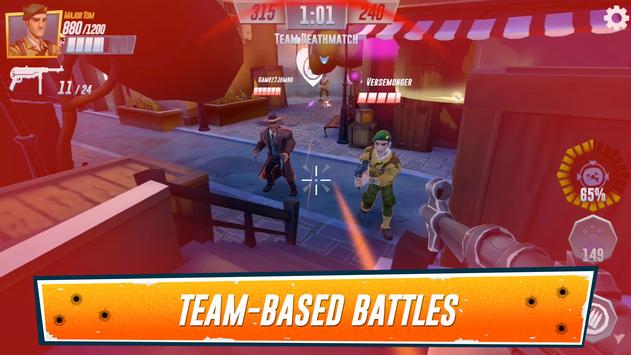
In this game, the players first have to build a team. To build a team, they will first jump into the battle arena to see who the enemy is. Players will start taking their enemies down in order to attract the heroes in their team. As they show their skills in the battle arena, they will be able to invite heroes to join their team. All the heroes will have their unique powers and skills. They will all be equipped with different weapons meant for different purposes. After recruiting enough number of heroes, you will be in a better position against the enemies.Heroes of Warland for PC

The action in Heroes of Warland takes place in an abandoned area which is now occupied by the enemies. This area has abandoned shops, buildings, vehicles, and many other such places where the enemies can easily hide. The game is full of so many interesting locations with interesting views. When you jump into the battlefield, you have to be very careful with your movements. Lead your heroes carefully as you cannot risk anyone’s life here.Heroes of Warland for PC

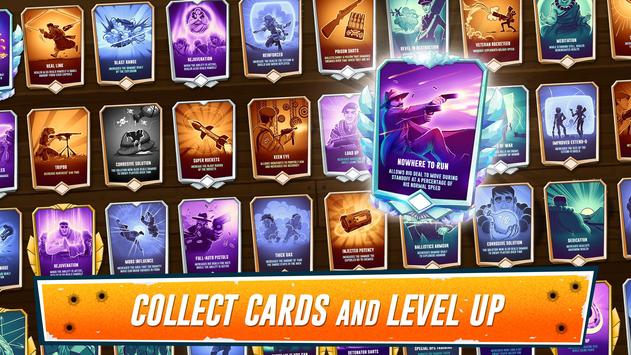
As you make progress in the game, you will unlock the hero cards. These cards will help you to manage your heroes. All the upgrades will be performed using these cards. The cards will be used to launch your heroes while the war is going on. Everything that you want to do with your heroes will be done using these cards so do not ignore them at any point in the game.

Everything from the costumes of your heroes to the weapons and other gear is upgradable in this game. It’s a PvP multiplayer game which means you can join other players online in order to fight with a random team or you can invite other players to join your team.Heroes of Warland for PC

What I personally loved about this game were its graphics. The developers have done a tremendous job in the visual department. The core idea of this game may not be a lot different from the ordinary FPS games, however, its graphics are what make it a completely awesome game to play. Heroes of Warland is actually a console-level game and it is worth playing this game on a computer as well.

Heroes of Warland Features

  • Multiplayer FPS
  • Blitz shooting battles in 3D
  • Collectible Hero Cards
  • Hero Progress and Leveling
  • Global Tournament System.
  • Battle Rewards.
  • Adjustable Controls.
  • Refined Hero Roles and Weapons.

Download Heroes of Warland for PC

As I mentioned earlier, this game has got impressive graphics so you can give it a try on your computer. Heroes of Warland can be installed on both the Desktop PCs and Laptops. You can download Heroes of Warland for PC on Windows and Mac-powered computers. To get Heroes of Warland for PC, take a look at the tutorial below.

First of all, you need the BlueStacks running on your computer. Windows users can install the latest BlueStacks 4 and Mac users can install the old BlueStacks for this purpose. After installing BlueStacks, set it up using your Google Account.

Once done, open BlueStacks and then open Google Play Store in it. In the Play Store, search for “Heroes of Warland”. As soon as the game appears in search results, install it. After installation, the game will appear under the “All Apps” tab. Launch the game and follow the on-screen instructions to play it. If you wish, you can customize the BlueStacks controls according to your liking.

That’s all. That’s how easy it was to run this game on your computer. If you have any queries or questions, feel free to reach out to me through the comments section below.

How to disable Notch on Huawei Mate 20 Pro

0
How to disable Notch on Huawei Mate 20 Pro

Huawei Mate 20 Pro is a superb device. It has the up to date design. It has everything that a flagship device of 2018 should have, but it has a notch as well. The notch trend, which was initiated by Apple, is being ruthlessly copied by Android phone makers and Huawei is one of those. If you do not want to have the notch on your Huawei Mate 20 Pro, you can disable it. Disabling the notch on Huawei Mate 20 Pro is possible because it runs on Android as well. Basically, you can disable notch on all the Android phones. Before we take a look at how to disable or hide notch on Huawei Mate 20 Pro, let us take a look at the specifications of this beast.disable Notch on Huawei Mate 20 Pro

Huawei Mate 20 Pro – A beast in all the ways!

Huawei Mate 20 Pro is the most powerful smartphone that the Chinese phone maker has ever produced. It comes with a 6.39-inches AMOLED screen. The resolution on this screen is 1440 x 3120 pixels and the display ratio is 19.5:. This screen is built by Samsung. Mate 20 Pro is water and dust resistant with the help of IP68 certification. Huawei Mate 20 Pro uses the Kirin 980 SoC which is Huawei’s first 7 nm processor. This CPU is accompanied by Mali-G76 MP10 GPU.

The internal storage on this phone is either 8GB RAM and 256GB internal storage or 6GB RAM and 128GB internal storage. Mate 20 Pro has got a triple camera system at the back. There is a 40MP wide shooter, 20MP ultrawide shooter and an 8MP telephoto shooter in the rear camera system. On the front, it has a 24MP camera. Mate 20 Pro lacks the headphone jack. It comes with the USB Type-C headphones instead. The phone also lacks a speaker at the bottom, the USB Type-C port acts as the speaker. It has the under-display fingerprint scanner which works amazingly. Inside the phone, there is a 4200 mAh battery. It runs on Android Pie out of the box.

Disable Notch on Huawei Mate 20 Pro

Notch on the Mate 20 Pro has a cutout right in the middle of the screen. This Notch has the front camera and all the sensors mounted right inside. The status bar icons appear on both the sides of the Notch. Apparently you will not find any problems with the Notch, however, as soon as you play a video in full screen or you play a game in the full-screen mode, you will find the notch coming in the way. This is when you would want to disable it in order to enjoy the videos and games without any display cutout. Thankfully, it is very easy to get rid of the Notch on the Mate 20 Pro. Follow these steps to hide or disable Notch on Huawei Mate 20 Pro.

  1. On the Huawei Mate 20 Pro, open Settings.
  2. In Settings, go to Display. It should be the 7th option in Settings.
  3. In Display > More Display Settings.
  4. Now click on “Notch” to open the Notch settings.
  5. Now tap the option next to “Hide notch” which says “Darken the surrounding areas to hide notch”.
  6. Get back to the home screen now.
  7. The Notch should be gone. That’s all.

Conclusion:

So that’s how we removed the Notch from the Huawei Mate 20 Pro. If you need any further help regarding the Mate 20 Pro, feel free to reach out to me through the comments section below. Stay tuned to catch more guides on the Huawei Mate 20 Pro.

Download & Install 5.9.023S Firmware for LeEco Le 1, Le 1S, Le 2

0
Download & Install 5.9.023S Firmware for LeEco Le 1, Le 1S, Le 2

From here you can Download and Install 5.9.023S Firmware for LeEco Le 1, Le 1S, Le 2. This is the latest Stock Firmware for LeEco Le 1, Le 1S, Le 2.

With this update your device will be updated to the latest version and also the update comes with a number of fixes and improvements. We’ve managed to find the direct download links to 5.9.023S Firmware. You can find them below, also if you don’t know to flash stock firmware on LeEco Le 1, Le 1S, Le 2, no worries. We’ve posted a step by step guide to Install 5.9.023S Firmware for LeEco Le 1, Le 1S, Le 2. All you have to do is heed the instructions below to Install it.

5.9.023S Firmware for LeEco

What is this all about:

This update was rolled out via OTA. It means you can Install it through your update center. Head over to Settings -> About Phone -> Software Update.

5.9.023S Firmware is based on Android Marshmallow and it is available for LeEco Le 1, Le 1S and Le 2. If you haven’t got the OTA update you can manually install the EUI 5.9.023S firmware on Le 1, Le 1S and Le 2.

As like always, a new update comes with tons of new features. This update has come along with an optimized Camera HDR algorithm, App Drawer feature added, updated GSM package app, stability & security, and Enhancements & Bug Fixes. Below are the download links for 5.9.023S Firmware and a complete guide to Install it, let’s get started now.

Download 5.9.023S Firmware for LeEco:

Click on the following button to start the downloading. We’ve posted sperate links for each device.

LeEco Le 1 and 1S:

LeEco Le 2 Downloads:

Important Notes:

Keep In Mind
*Before you proceed to the next step, make sure you have taken a complete backup of your device.
*stock firmware and stock recovery required.
*This update is only for LeEco Le 1, Le 1S and Le 2.

Install 5.9.023S Stock Firmware Update on LeEco Le 1, Le 1S and Le 2:

  • First, Dowbload the 5.9.023S Stock Firmware for your device.
  • Now move the EUI ZIP file to your device internal storage.
  • Rename the downloaded file to update.zip.
  • Head over the device Settings -> System Update.
  • Click on the menu icon and select “choose Local update”.
  • The installation process will begin and it will take time.
  • Don’t turn off your device during the process.
  • Once the Installation process is finished. Reboot your device.

That’s all. You have successfully updated your LeEco Le Max 2 or Le 2 to EUI 5.9.023S.

Download Google Camera APK with Night Sight for OnePlus 6/6T and Xiaomi Poco F1/Mi 8

0
Download Google Camera APK with Night Sight for OnePlus 6/6T and Xiaomi Poco F1/Mi 8

Google Pixel 3 and Pixel 3 XL come with amazing cameras. Just like the Google Pixel 2, Google has once again done a tremendous job with only a single rear shooter. The camera of the new phones is packed with some features that we have never seen before. One such feature is the Night Sight. Just as the name suggests, the Night Sight feature is bound to give you a better visibility in the pictures in the night. Normally, the cameras of the phones are tuned to perform just fine in the low light mode. The cameras ordinarily do not add a lot of brightness to the pictures shot in low light. However, the Night Sight mode on the Google Pixel 3 phones is something that you would definitely want on your phone.

Google Camera APK with Night Sight

Night Sight – Improving Night Time Photography

Huawei’s smartphones take 5 seconds to shoot in the night mode. In those 5 seconds, the camera adds as much light as possible to the picture.  The night mode adds that extra light to the photos bringing better visibility. When compared to the Google Pixel 3’s Night Sight, even the Huawei night mode is not that good. The Night Sight Mode is exclusive to the Google Pixel smartphones. This mode is actually a part of Google’s latest camera application. What’s good to know here is that the Night Sight mode has more to do with the software rather than the hardware.

Now if you are thinking something after coming to know about its dependency on software, let me tell you that you are thinking right. This Night Sight mode can be ported to other Android phones and guess what, it has already been ported for a number of Android smartphones.

Night Sight for OnePlus 6, OnePlus 6T, Xiaomi Poco F1, and Mi 8

At the time of writing this post, the Night Sight Mode enabled Google Camera has been ported to the OnePlus 6, OnePlus 6T, Xiaomi Poco F1, and the Xiaomi Mi 8. The OnePlus 6T comes with its own Nightscape mode which has already made it to the OnePlus 6 as well, but that Nightscape mode is not as impressive as the Night Sight mode of the Pixel phones.

Take a look at these shots with the Night Sight enabled and disabled.

Google Night Sight Disabled
Night Sight Enabled
Google Night Sight Disabled
Night Sight Enabled

The Google Camera with Night Sight Mode is available in the form of an APK file. It means that you do not need a rooted Android phone. All you have to do is to download the APK and install it on your phone. The Google Camera will appear as a 2nd camera application in your phone alongside your stock camera application.

Google Camera APK with Night Sight for OnePlus 6/6T and Xiaomi Poco F1/Mi 8

It’s time to go ahead and download the Google Camera APK with Night Sight for OnePlus 6, OnePlus 6T, Xiaomi Poco F1, and Xiaomi Mi 8.

  1. Google Camera APK with Night Sight for your phone: OnePlus 6 | OnePlus 6T | Xiaomi Poco F1 | Xiaomi Mi 8
  2. Copy the downloaded APK file to your phone.
  3. On your phone, open the File Manager and locate the APK.
  4. Open the APK to install it.
  5. If the phone asks for some permission, allow it.
  6. Complete the installation.
  7. Now open your App Drawer and find the Camera application with a new icon as shown below.
  8. Launch the camera now and access the Night Sight mode.
  9. That’s all. It’s time to shoot in the night now.