Home Blog Page 79

How to install Stock ROM on Galaxy A8/A8+ 2018

0
How to install Stock ROM on Galaxy A8/A8+ 2018

Samsung has managed to produce the most beautiful mid-rangers in the history of smartphones. The Galaxy A8 and the A8+ 2018 come with an enormous display. Samsung has removed the home-button from these phones. The S8’s infinity display has made its way to the Galaxy A series now.install Stock ROM on Galaxy A8

Galaxy A8 and A8+ Specifications

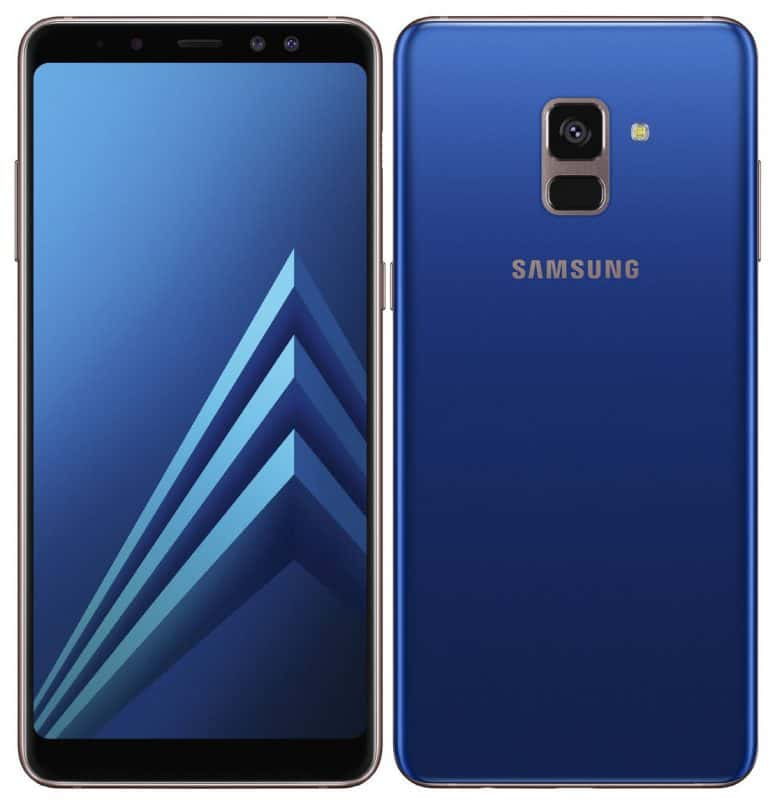
Galaxy A8 and A8+ are powered by Exynos 7885 CPU alongside a RAM 4GB(Galaxy A8 2018) and 4GB/6GB(Galaxy A8 Plus 2018). Both these phones are available in 32GB and 64GB storage options. Samsung has added a 16MP single-lens shooter at the back. The camera at the back is accompanied by a fingerprint scanner beneath the camera body. On the front, there’s a dual selfie shooter which makes these phones a little bit selfie-centric. These phones come with full HD displays. The display on Galaxy A8 is 5.6-inch while on the A8+ is 6.0-inch. It’s not an edge-to-edge display, however, it’s the infinity-flat-screen display joining the 18:9 aspect ratio brigade. USB Type-C and a headphone jack is there on both the phones. The battery capacity of the Galaxy A8 2018 is 3000 mAh and the Galaxy A8 Plus has 3500 mAh. Galaxy A8 and A8+ 2018 run on Android 7 Nougat out of the box.

If you are considering buying a new phone, you might consider the Galaxy A8 and Galaxy A8 Plus 2018. Owning a smartphone means you are supposed to know everything about its software and hardware as well. When it comes to software, we often need to install new software in order to upgrade the phone, restore it to factory settings or simple to fix the existing issues on the phone. Fortunately, Samsung makes it extremely easy for its loyal customers to install the software on the phone. It’s incredibly easy to restore your Galaxy A8 or the A8+ 2018 to its factory state.

Why you should install a Stock ROM?

Installation of a stock ROM on your phone refreshes everything. It wipes off any previous data stored on your phone. If your phone was previously rooted, installing a stock ROM will unroot it. In case there’s a new version of Android available for your phone, and you just cannot get it because the update is available in another country, you can always download the entire update and flash it manually. Before flashing stock firmware on your new A8/A8+, keep in mind that it will not restore the warranty of your phone if it was void. However, the installation will not void the warranty either if it was intact.

The installation happens through Samsung’s own software called Odin. There’s a great misconception that Odin will damage the device or it’s not a trustworthy tool. I would like to tell you that Odin is Samsung’s official tool and it’s safe by all the means. Using Odin will not damage your phone in any way. You can proceed with the firmware installation without any fears.

I have made this guide below to install Stock ROM on Galaxy A8/A8+ 2018. The guide to flash factory firmware will work on all the variants of the Galaxy A8 2018 and Galaxy A8 Plus 2018. The guide has been made in layman’s terms. It is compiled using all the links and steps to the best of my knowledge. Galaxy A8 and A8 Plus owners just need to follow all the steps carefully and they are good to go ahead.

How to install Stock ROM on Galaxy A8/A8+ 2018

A few things to keep in mind before proceeding

  1. This method is applicable only to Galaxy A8/A8+ 2018. Do not try this on any other device. You can apply this to any variant of the Galaxy A8/A8+ 2018 as long as you have downloaded the correct firmware.
  2. Charge your phone up to 50% to avoid power mishap during the flashing process.
  3. Backup your important contacts, SMS messages, call logs. Copy your media content to your computer. If you have WhatsApp installed on your phone, copy the entire WhatsApp folder to your computer.
  4. Use your OEM data cable to connect your phone to your PC.
  5. Disable Samsung Kies using Odin.
  6. Enable OEM unlocking on the phone.
  7. Enable USB debugging mode as well.
  8. Your phone must be rooted in order to unroot it.

Required downloads

  1. Samsung USB drivers.
  2. Download Odin3 3.12.5 and extract it on your computer’s desktop.
  3. Download the firmware for your phone through this page.

Get the firmware carefully according to your region/country. Do not download a carrier-branded firmware for a non-branded device. If you are unable to find the firmware for your region, you can download the firmware of the closest possible region and flash that instead.

Installing Stock ROM/Flashing Factory Firmware on Galaxy A8 & A8 Plus 2018

  1. Extract the downloaded firmware folder to get the firmware.tar and other files.
  2. Open Odin3.exe now. In Odin, click on the AP tab and select the firmware.tar file. The file takes a few minutes to load. Let Odin load it completely.
  3. Now in Odin, click on the BL tab and load the BL file that you got from the extracted folder.
  4. Similarly, click on the CP tab and load the CP file.
  5. Click on the CSC tab and load the Home_CSC file in it.
  6. It’s time to connect your S8 in the download mode. Power down your S8 completely. Press and Volume Up + Volume Down + Power Key to boot into download mode. As soon as the screen comes up with a warning, press Volume Up key to continue.
  7. Now connect your phone to your PC while Odin is open. Odin will show “Added” message in the log box. It will also turn the ID:COM box blue upon successful connection.
  8. Click on the Options button in Odin. The only option checked should be F.Reset.Time. No other option should be checked here.
  9. Now click on the Start button in Odin and let it flash the firmware.
  10. Once the firmware flashing ends, disconnect your phone and turn it on.
  11. It will be all new as it takes you to the menu. Set it up from scratch and enjoy since it’s unrooted now.

Note: Unrooting the phone will not bring its warranty back. The Knox counter cannot be reset once tripped.

Conclusion

So, that’s it with the installation of a brand new software on your new Galaxy A8 phone. This method can be used to fix your soft-bricked phone as well. You can also use it to fix your phone if it’s lagging or it’s battery time consumption has increased. In case you are facing any kind of issues, you can contact me directly using the comments section below.

How to install TWRP Recovery and Root Galaxy A8+ A730F

1
How to install TWRP Recovery and Root Galaxy A8+ A730F

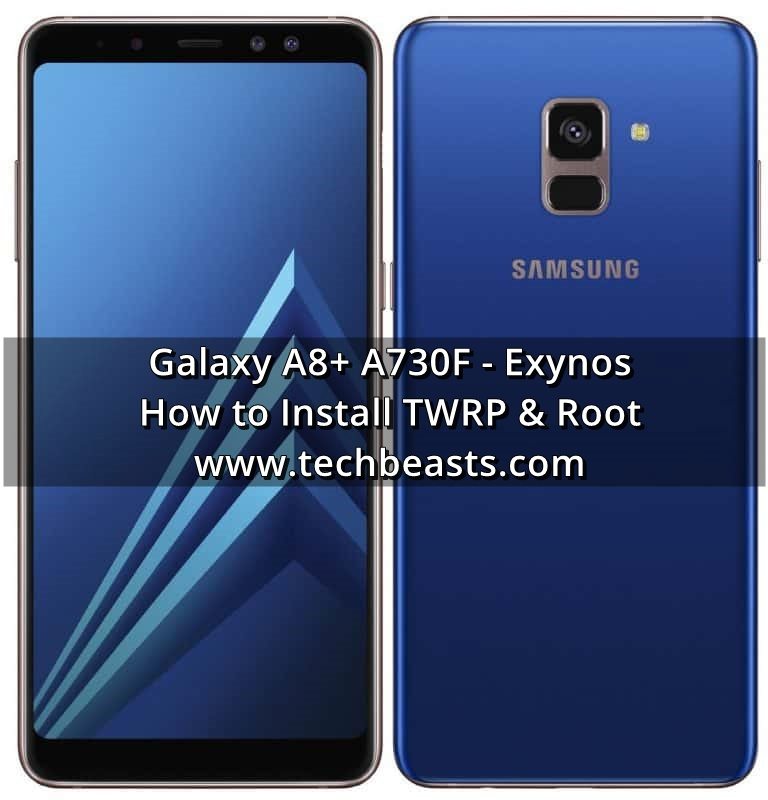
Samsung Galaxy A8+ 2018 is the most beautiful mid-ranger that the company has ever produced. The Galaxy A8+ follows the design language of the Galaxy S8 and it has also set the base for the Galaxy S9. The Galaxy A8+ is powered by Exynos 7885 CPU accompanied by a RAM of 4GB. The internal storage of this phone is 64GB. Galaxy A8+ has a very beautiful 6.0-inch Super AMOLED edge-to-edge display that has no home-button at the bottom. At the top of the screen, there is a dual-shooter for the selfies. At the back, there’s a solo 16MP shooter. The fingerprint scanner is placed right below the camera. The Galaxy A8 has a 1080 x 1920 screen. This phone is sleek, it’s got a glass build surrounded by an aluminum frame. Galaxy A8+ is a little bit costly as compared to the traditional mid-rangers, but the phone is also quite powerful. It won’t be wrong to say that Samsung has launched a phone to compete with the flagships of its rivals. The A8 and A8+ are totally worth getting your hands on.install TWRP Recovery and Root Galaxy A8+ A730F

The need for TWRP Recovery and Root

Although these phones have got handy features, you can still unleash their real potential by customizing them. To customize or modify your new Galaxy A8+, you would need a TWRP custom recovery first of all. The custom recovery can do magic for you. It can let you root your phone. With the help of both the custom recovery and root access, you can flash new custom ROMs and mods. TWRP will also let you backup all the partitions including the EFS partition, data of your phone and even the Nandroid. Another use of the TWRP recovery on your A8+ is wiping the cache and Dalvik cache. TWRP has got its own ADB terminal which will let you sideload apps and ROMs on the phone. The uses of TWRP recovery are quite many. It’s not possible to discuss them all in one go. It’s better to flash it on your phone and test it yourself.

Now that you are on this page, I’ll assume that you are here to learn to install TWRP on your brand new Galaxy A8+ 2018. You can use this guide to install TWRP Recovery and Root Galaxy A8+ A730F Exynos variant. The recovery has been developed by none other than Ashyx. The XDA recognized contributor Ashyx has brought us recoveries and root solutions for many phones that were not going to see the light of the day. We would like to thank him before we proceed with the tutorial.

Disclaimer:

  • Read all the instructions carefully. We have tried our best to make the tutorial as simple as possible. If you still make a mistake, that will not be our responsibility.
  • In case of a mishap, TechBeasts or the recovery developer may not be held responsible.
  • Processes, like flashing TWRP and Rooting your phone, are highly custom. They will trip your Knox counter and also void the warranty of your phone. Follow this tutorial at your own risk.

Install TWRP and Root Galaxy A8+ A730F

Important prerequisites

  • TWRP recovery and root files will work for the Galaxy A8+ 2018 A730F. Do not try this method on any other device as you will result in bricking it because of invalid files.
  • Charge your phone up to 50% to avoid power issues during flashing process.
  • Enable USB deubgging from the developer options in your phone.
  • Enable OEM Unlocking on your phone from the developer options as well.
  • Backup all your important contacts, call logs, sms messages and media content.
  • Use your phone’s original data cable to connect it to your PC.
  • If you have Samsung Kies installed on your PC, turn it off while using Odin.
  • Disable Firewall/Antivirus in order to download the files properly.
  • Get a microSD card or a USB OTG since you need to copy the files to it.
  • Follow the rest of the method being very careful.

Files you need to download:

  1. Install Samsung USB drivers on your PC.
  2. Download Odin 3.11.1 on your PC and extract it to get Odin3.exe.
  3. Download TWRP Recovery for Galaxy A8+ A730Ftwrp_3.2.1-1_sm-a730f_210117
  4. Also, download Magisk.zip and DM-Verity file and copy these files to an external SD card or a USB OTG.

How To Install TWRP and Root Galaxy A8+ A730F

  1. Open Odin3.exe file from the extracted Odin files that you downloaded above.
  2. Put your Galaxy A8+ in download mode now. To do so, turn off your phone first. Now turn it on by pressing and holding Volume Down + Power + Volume Up. As soon as your device boots up showing a Downloading screen, leave the keys.
  3. Connect your phone to your PC now. Odin should show an “Added” message in the logs and also show the blue light in the ID:COM box. This will verify a successful connection between your phone and your PC.
  4. Now click on the “AP” tab in Odin and select the TWRP Recovery.img.tar file according to your device carefully.
  5. The options ticked in Odin should be only “F.Reset Time“. Make sure that the Auto-Reboot option is not checked, we do not want to reboot the phone after flashing TWRP recovery.
  6. After selecting the file and checking/unchecking the options, carefully hit the start button. Odin will now flash the TWRP and show you a PASS message in a few minutes.
  7. Once done, disconnect your device from your PC now. Do not reboot your device.

Root and disable forced encryption

  1. Now you need to boot directly into TWRP Recovery. Turn off your phone completely and turn it on by pressing and holding Volume Up + Power key now. Your phone should successfully boot into newly installed custom recovery.
  2. TWRP will ask you whether you want to allow modifications or not, you will need to swipe the finger to the right to enable modifications. Swiping the finger to right will trigger dm-verity if you will need to disable it immediately. Leaving it enabled will not let you boot the phone either root it. This is an important stuff since we want to be able to modify the system.
  3. Now tap “Wipe > Format Data > type “yes” to format data. This is important to disable encryption. This step will factory reset your phone, so make sure that you’ve backed up the entire data at hand.
  4. Now make sure that you’ve copied the Magisk.zip and dm-verity.zip files in external SD Card or USB OTG, if not then transfer both these files to your external SD Card by using MTP mode in TWRP now.
  5. Once you have the files, tap “Install > locate the Magisk.zip according to the location where you copied > flash it”.
  6. Now once again tap “Install > locate the dm-verity.zip file > flash it”.
  7. Once done flashing, reboot your phone into the system.
  8. That’s all. You’re rooted and have a TWRP recovery installed. Best of luck.

Let me know if I can help you guys any further. That’s all for now.

How to Unroot Galaxy A8/A8+ 2018 [Restore to factory state]

1
How to Unroot Galaxy A8/A8+ 2018 [Restore to factory state]

Samsung updated its Galaxy A lineup in December 2017. The new stars in the Galaxy A lineup are the Galaxy A8 2018 and the Galaxy A8 Plus 2018. Both the phones are amazingly beautiful. Galaxy A8 and A8 Plus introduce a new display for Samsung’s mid-rangers. Samsung has successfully set new standards for the budget-smartphone market now.Unroot Galaxy A8/A8+ 2018

Flashback at Galaxy A8 and Galaxy A8 Plus 2018

Galaxy A8 and A8 Plus 2018 come with a 5.7-inch and 6.0-inch display respectively. This is the infinity display that we saw on the Galaxy S8 earlier. The display has a resolution of 1080 x 2220 pixels. Although it’s not that edge-to-edge display, the 18:9 aspect ratio makes it flawlessly beautiful. These phones are protected by IP68 certification making them water and dust resistant. Samsung’s in-house Exynos 7885 CPU is powering up these phones. The RAM on the A8  is 4GB and on the A8 Plus is 4GB or 6GB. The Galaxy A8 and A8 Plus have a dual-selfie shooter with one camera of 16MP and the other of 8MP. At the back, these phones have a single 16MP shooter with a fingerprint scanner beneath. Since the headphone jack has now become a feature, these phones do have this feature as well. There’s a USB Type-C to charge the phone and connect it to the computer. Galaxy A8 2018 has 3000 mAh battery and the A8 Plus 2018 has 3500 mAh battery. These phones run on Android 7.1.1 Nougat out of the box. Samsung will definitely update these phones to Android 8.0 Oreo within this year.

Scenarios to restore your Galaxy A8 or A8 Plus 2018 to factory settings

A TWRP recovery and a method to root the phones was released very recently. This development is a blessing in a disguise for the Galaxy A8/A8+ owners. If you own this phone, you may consider flashing TWRP custom recovery and rooting the phone. If you do so, there are good chances that you would want to revert your phone back to the factory settings later on. In another case, things can go wrong while rooting the phone and even then you are gonna need a guide to restore your phone to factory state. To get out of any such trouble, you simply have to flash a stock ROM on your new A8 or A8 Plus and Phew!

Rooting the phone voids the warranty of the phone. Samsung protects its phones using Knox. There’s a Knox counter in the phones that appears in the bootloader mode when you boot your phone into the download mode. Upon rooting the phone, this counter turns from 0x0 to 0x1 or more. The number 1 means you tripped the Knox counter once. The more you trip the counter, the higher the number will get. For example, upon rooting the phone twice, this counter will become 0x2. While we are talking about unrooting the phone here, you will be able to reset the phone to factory state, but you will not be able to reset this Knox counter to 0x0 again. The Knox counter can never be reset if tripped once.

Assuming that you have a clear idea about unrooting the phone, we can move towards our guide now. I have written a step-by-step guide to unroot Galaxy A8/A8+ 2018. This guide will work for all the variants of the Galaxy A8 and Galaxy A8 Plus 2018. Let’s go through the unrooting process now.

How to Unroot Galaxy A8/A8+ 2018 [Restore to factory state]

A few things to keep in mind before proceeding

  1. This method is applicable only to Galaxy A8/A8+ 2018. Do not try this on any other device. You can apply this to any variant of the Galaxy A8/A8+ 2018 as long as you have downloaded the correct firmware.
  2. Charge your phone up to 50% to avoid power mishap during the flashing process.
  3. Backup your important contacts, SMS messages, call logs. Copy your media content to your computer. If you have WhatsApp installed on your phone, copy the entire WhatsApp folder to your computer.
  4. Use your OEM data cable to connect your phone to your PC.
  5. Disable Samsung Kies using Odin.
  6. Enable OEM unlocking on the phone.
  7. Enable USB debugging mode as well.
  8. Your phone must be rooted in order to unroot it.

Required downloads

  1. Samsung USB drivers.
  2. Download Odin3 3.12.5 and extract it on your computer’s desktop.
  3. Download the firmware for your phone through this page.

Get the firmware carefully according to your region/country. Do not download a carrier-branded firmware for a non-branded device. If you are unable to find the firmware for your region, you can download the firmware of the closest possible region and flash that instead.

Unroot Galaxy A8/A8+ 2018

  1. Extract the downloaded firmware folder to get the firmware.tar and other files.
  2. Open Odin3.exe now. In Odin, click on the AP tab and select the firmware.tar file. The file takes a few minutes to load. Let Odin load it completely.
  3. Now in Odin, click on the BL tab and load the BL file that you got from the extracted folder.
  4. Similarly, click on the CP tab and load the CP file.
  5. Click on the CSC tab and load the Home_CSC file in it.
  6. It’s time to connect your S8 in the download mode. Power down your S8 completely. Press and Volume Up + Volume Down + Power Key to boot into download mode. As soon as the screen comes up with a warning, press Volume Up key to continue.
  7. Now connect your phone to your PC while Odin is open. Odin will show “Added” message in the log box. It will also turn the ID:COM box blue upon successful connection.
  8. Click on the Options button in Odin. The only option checked should be F.Reset.Time. No other option should be checked here.
  9. Now click on the Start button in Odin and let it flash the firmware.
  10. Once the firmware flashing ends, disconnect your phone and turn it on.
  11. It will be all new as it takes you to the menu. Set it up from scratch and enjoy since it’s unrooted now.

Note: Unrooting the phone will not bring its warranty back. The Knox counter cannot be reset once tripped.


Conclusion

That’s how we unrooted the Galaxy A8/A8+ 2018. This method basically flashes a new stock firmware on your phone and replaces the old firmware. This method also resets your device to factory settings. You can root the phone again if you want to. In case you are facing any kind of issues, do not hesitate to contact us through the comments box below.

Galaxy A8 2018 Common Problems and Fixes: Battery, Performance, WiFi, Bluetooth, Camera & More

2
Galaxy A8 2018 Common Problems and Fixes: Battery, Performance, WiFi, Bluetooth, Camera & More

Samsung Galaxy A8 2018 was released in December 2017. Along with the Galaxy A8 2018, Samsung released the Galaxy A8 Plus 2018 as well. Samsung’s Galaxy A series is known to pull out smartphones with very good spec-sheet under a friendly budget. The Galaxy A8 2018 is just about that. With the new A8, Samsung has upgraded the design language of the A series. The phone now comes with an 18:9 aspect ratio sporting an infinity display which is quite similar to that of the S8’s.

Galaxy A8 2018 Specs

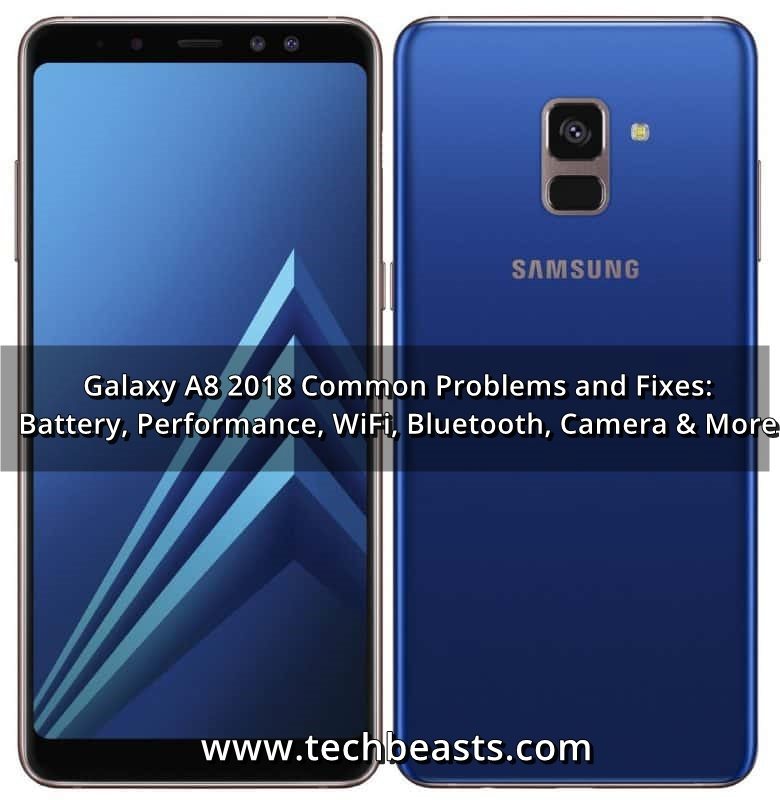
Galaxy A8 2018 is running on the Exynos 7885 CPU. The Exynos 7885 CPU is designed for the mid-rangers. This CPU is backed by a RAM of 4GB. The internal storage is either 32GB or 64GB. Samsung is using a dual-camera setup on the front. There is a 16MP and an 8MP shooter on the front. At the back, Samsung is using a single 16MP shooter. Just below the single 16MP shooter, there is a fingerprint scanner. Samsung has installed the USB Type-C port for charging and connecting this phone to a computer. The headphone jack is there as well. Front and back of the phone are built out of glass and rounded by an Aluminium frame. Galaxy A8 2018 is protected by IP68 certification which means this phone is water and dust resistant.

As far as the display is concerned, the phone comes with a 5.6-inch full HD display. This is not an edge-to-edge display. However, the home button is gone from the phone making more room for the 18:9 aspect ratio. Galaxy A8 2018 is sleeker and it looks absolutely gorgeous. The phone runs on Android 7.1.1 Nougat out of the box. There is no doubt about the Android 8.0 Oreo update for this phone.

Master your Galaxy A8 2018 to fix its problems

Galaxy A8 2018 is one solid smartphone, but it doesn’t mean that it cannot encounter any issues. It is very usual for the smart gadgets to pop-up issues every day. The issues are not really vexatious as long as you know what’s exactly wrong. If you are planning to get a Galaxy A8 2018, it is essential to learn what kind of issues this smartphone can face. It is also important to know the possible fixes for all such errors. A few users who have already got the new Galaxy A8 reported some issues. The reported issues/errors were very common to occur on a Samsung Galaxy handset. I have tried to compile a list of all the possible Galaxy A8 2018 problems and listed their fixes right next.

The Galaxy A8 2018 Common Problems and Fixes list includes WiFi issues, sluggish performance, poor battery life, Bluetooth connectivity, Camera quality, Mobile Data connectivity, and all other such issues. Galaxy A8 owners can have a look at all the problems and their fixes below to keep their phone free of any such problems.

Galaxy A8 2018 Common Problems and Fixes: Battery, Performance, WiFi, Bluetooth, Camera & More

Performance Issues

The most annoying problem a smartphone user faces is the sluggish performance. If a phone, that you just bought after paying the hard-earned money, starts lacking, it definitely makes you cringe. Fortunately, the Performance Problems are not such a big deal as you can always fix them (as long as it’s about the software of the phone). There are various solutions that can solve the performance problems of your new A8 2018.

1.  Clear the cache of your phone

Clearing the cache of your phone is like one medicine for 100 different diseases. Once you clear the cache of the phone, it refreshes everything and gives your phone a new start. It’s very easy to clear the cache, just follow the steps below.

  1. Turn off your phone completely.
  2. Now turn on the phone by pressing and holding Volume Up + Volume Down + Power button.
  3. As soon as your phone shows a screen with some options, follow the on-screen instructions to get into the recovery mode.
  4. In the recovery mode, use Volume Up and Volume Down keys to navigate to “Clear cache data” and then press the Power key to make a selection.
  5. Clear the cache now and reboot your phone. Check the performance after rebooting the phone.

2. Boot your phone in Safe Mode

Booting up your phone in Safe Mode disables all the applications on the phone. This is a method to check if a particular application that you recently installed is behind the slow performance of your phone. If the phone performs better after booting up in Safe Mode, it will mean that there is an application slowing down your phone. In such a case, you can start deleting your recent installations one by one to identify what makes the performance better. Here’s how to do this.

  1. Turn off your phone completely.
  2. Now turn on your phone. As soon as the Samsung logo appears on screen, press the Volume Down key and keep it pressed until the phone takes you to the home screen.
  3. You will now see a “Safe mode” watermark on the lower left corner of the screen. All apps will be disabled now.
  4. Check the performance of your phone now and fix it.

3. Uninstall unnecessary applications

Having too many unnecessary applications can pull down the performance of the phone. If you have a pile of applications that you absolutely do not touch, it’s time to uninstall them. This will potentially improve the performance of your new Galaxy A8.

4. Check for Software Updates

Go to Settings > Software update > Download updates manually > check if there’s an update available. If there is one, update your phone right away. Running your phone on an older version of Android can cause the issue.

Heating Up Issues

The solutions given above to fix the performance issues of the phone will work for fixing the heating up problems as well. There are many reasons for a phone to heat up. The games that consume most of the CPU, clock the GPU at its max and also give a bull-run to the RAM can heat up the phone. You have to identify an application that’s causing trouble, or you just have to give your phone a refresh to cool it down. Here is what you can do to fix it up.

  1. Clear the cache of your phone to restart all the process on your phone. A stuck process can heat up your phone. Clearing the cache will refresh everything by starting it from scratch.
  2. Reboot your phone in the Safe Mode to check if an application is adding to the temperature of the device. You can follow the method given above for booting into the Safe Mode.
  3. If the phone heats up the most while playing a resource-intensive game, you need to uninstall that game right away before it kills your phone.
  4. Sometimes, an old software can start heating up your phone as well. You can check for updates and install a new update if there is one available.
  5. If the above issues fail to work for you, it’s time for you to factory reset your phone. You can do so by booting into the recovery mode.
  6. If the factory reset also fails, you can choose to flash new software manually on your phone using Odin. Here’s a guide to install stock ROM on your Galaxy A8 2018.

Battery Problems (Poor battery consumption)

So your phone’s battery consumption just got poor? Well, it’s nothing to worry about. The battery problems are not something out of this world. You can always fix the battery problems of a phone. Here are the possible solutions to fix the Galaxy A8 2018 battery problems.

  1. First of all, you should try to use the Battery Optimizer that is in the Settings of the phone. The Battery Optimizer can identify the applications that are bringing down battery consumption.
  2. As mentioned above, clearing cache can do wonders for your phone. Clear the cache of your phone to restart all the process on your phone. Piling up old cache can also pull down the battery consumption.
  3. Reboot your phone in the Safe Mode to check if an application is eating up all the battery. You can follow the method given above for booting into the Safe Mode. After checking the battery consumption having all apps disabled, you can start uninstalling the applications one by one to see which one improves the battery life.
  4. Sometimes, an old software can affect the battery consumption of your phone as well. You can check for updates and install a new update if there is one available.
  5. If the above issues fail to work for you, it’s time for you to factory reset your phone. You can do so by booting into the recovery mode.
  6. If the factory reset also fails, you can choose to flash new software manually on your phone using Odin. Here’s a guide to install stock ROM on your Galaxy A8 2018.

Charging Problems

Your phone is not charging at a speed it is supposed to charge? or it is just refusing to charge? Here’s what you can do in this case.

  1. Always use the original charger and the original data cable. If you do not have the original charger and cable, get an aftermarket charger and cable that is close to the original.

  2. Check the electricity switch for electric current. There’s a great chance that the switch is malfunctioned and it is not providing required current to the charger. The phone can refuse to charge as a result of low voltage as well.
  3. Check the phone’s charging port. Clear out any smut or dirt using a Qtip from the charging port.

  4. Charging your phone in a car or using a power bank will not give you the same results as that of an electric switch. While charging in a car or using a portable charger, keep in mind that the charging time will only increase.

  5. Charging you phone using the laptop will also take a lot of time.

Camera Problems

Somethings gone wrong with the camera on the Galaxy A8 2018? Is the Camera taking poor-quality pictures? or the Camera is just refusing to take pictures? Here are the solutions to fix all such problems.

  1. Make sure that your phone’s battery is charged over 10%. Below 10%, the phones often refuse to take pictures. The battery below 10% will also not let your phone use the Flash.
  2. If the camera is taking poor-quality pictures, you can try using different modes to set the quality.
  3. In case the settings do not improve the picture quality, you can simple try clearing the data and cache of camera application. To do so, go to Settings > APPS > Camera > Storage > Clear Cache & Clear Data.
  4. Check if there is a Software Update available for your phone. A new update often fixes the bugs if there exist any.
  5. Try flashing a new ROM on your phone to bring in a brand new camera application.
  6. If the camera is not working, you can try using a third-party camera application from the Play Store to check if it’s really an application issue or it’s some hardware issue. In case it turns out to be a hardware issue, you will have to take your phone to the service center to claim its warranty to get it fixed.

Bluetooth Connectivity Problems

Bluetooth connectivity, visibility and pairing issues? Here are the solutions.

  1. First of all, make sure that the Bluetooth isn’t turned off. If you recently enabled flight mode, it can also turn off Bluetooth. Although Bluetooth can be easily enabled while the flight mode is on, the flight mode just turns it off when you enable it for the first time.
  2. Always make sure that your device is discover-able by other devices. Go to Settings > Connections > Phone visibility > Turn it on.
  3. If your phone is unable to pair a specific device, you need to check the visibility and connectivity of the 2nd device.
  4. If the phone still refused to pair, you can try restarting your phone.
  5. Having difficulty connecting to an already paired device? You can remove that device from paired devices and connect it again.
  6. If all the solutions listed above fail to work or you are facing any other kind of problem with the Bluetooth, you can go to Settings > About Phone > RESET > Reset network settings > RESET Settings. Restart your phone after resetting these settings.

WiFi Connectivity Problems

  1. Your phone’s WiFi should be turned on.
  2. Make sure that the router you are trying to connect is in the range of your WiFi.
  3. Make sure that the router is turned on and its internet connectivity is available.
  4. If you are unable to connect to an already added WiFi, you can go to WiFi settings under Connections and forget that particular network. Add that network from scratch once again.
  5. In case the solutions above do not work, you can reset the entire WiFi settings. To do so, you can go to Settings > About Phone > RESET > Reset network settings > RESET Settings. Restart your phone after resetting these settings.

Mobile Data Connectivity Problems

Mobile Data is not working? No problem. Have a look at these solutions:

  1. Flight mode should be disabled on your phone in order to connect to Mobile Data.
  2. Make sure that you have a working Data Bundle. In case your Data Bundle has come to an end, you will not be able to use Mobile Data.
  3. On your phone, go to Settings > Connections > Mobile networks > Network mode > set it to LTE/3G/2G (auto connect).
  4. The SIM card you are using should be in a working state. If you using a malfunctioned SIM card, you cannot use Mobile Data.
  5. To reset the entire network settings of the phone, go to Settings > About Phone > RESET > Reset network settings > RESET Settings. Restart your phone after resetting these settings.

SIM Card & Related Problems

In case your phone is not detecting the SIM card, you need to check if your SIM card is properly inserted or not. Apart from verifying the SIM card placement in the phone, you also need to check if it’s in the working form. Always make sure that the flight mode is disabled as it can stop your SIM card from working.

Mic Problems

There are two mics on the phone. One at the top and one at the bottom. The bottom one works when you are talking on a call while the top one works either for noise cancellation or when you are using the phone on the speaker mode. The top mic also works for recording videos and recording audio. You can try cleaning both these mics using a brush or a small pin. There can be a spot of dirt covering up the mic hindering the outgoing voice.

Speaker Problems

Use a pin to clean the speakers of the phone if the voice coming out is not clear. Also, make sure that the audio you are trying to listen is of high quality. If the speaker is having issues during a call, it may be possible that the other person has issues in his/her mic.

Galaxy A8 2018 Not Detected By PC / USB Not Recognized Error & Other Related Problems

When you connect your phone to your computer for the first time, it doesn’t show any contents. In order to show the contents of the phone in your computer, you have to allow the phone to connect to PC first. After connecting your phone to the computer, unlock the phone and tap the Allow button appearing on the screen to connect it as a USB Storage.

At times, the PC fails to recognize the phone as a result of a faulty driver. Always update the drivers on your phone. Make sure that you have installed Samsung USB drivers prior to connecting your phone to the PC. You also need to use the OEM data cable to establish the connection.

That’s all for now. I hope that you guys find these solutions helpful. In case I have missed something, or you have found another solution for one of the problems listed above, feel free to drop it in the comments section below.

Install TWRP and Root Galaxy A8 2018

2
Install TWRP and Root Galaxy A8 2018

Here is a guide to install TWRP and root Galaxy A8 2018. The guide will work flawlessly for the Galaxy A8 2018 Exynos having the model number A530F.

Galaxy A8 2018 proves that Samsung has got the guts to divert the mid-range smartphone industry towards new standards. The Galaxy A8 2018 is an incredibly beautiful handset. Samsung has totally re-invented its mid-range lineup with the 2018 edition of the Galaxy A8. Just like the Galaxy S8, the home button has vanished from the new A8. The display on the phone is now infinity. Galaxy A8 along with the Galaxy A8+ 2018 joins the league of 18:9 smartphones. The phone is built out of glass surrounded by an aluminum frame. Galaxy A8 2018 offers a very powerful spec-sheet as well.Install TWRP and Root Galaxy A8 2018

On the front, the Galaxy A8 2018 has a 5.6-inch 1080P display. This phone is protected by IP68 certification making it resistant to water and dust. Under the hood, this phone is powered by Exynos 7885 CPU and a RAM of 4GB. Internal storage is either 32GB or 64GB. At the back, this phone has a 16MP camera shooter. On the front, there’s a dual-selfie shooter with one camera of 16MP and the other of 8MP. Samsung has inserted a 3000 mAh battery inside this phone. It runs on Android 7.1.1 Nougat out of the box. Galaxy A8 2018 will definitely get the Android Oreo update as well in near future. For now, the users have to stick with what they are getting in the stock form.

It isn’t been long since this phone hit the markets. The phone has been blessed by a TWRP recovery and already rooted as well. If you have got this phone already or you are planning to get it, you may feel happy to know that you can unleash its real power immediately. The TWRP recovery will let you flash custom ROMs, SuperSU, Magisk, and other .zip files. You can install the Xposed Framework to unlock the maximum potential of your new phone. TWRP will also enable you to wipe the Dalvik Cache and other partitions of your new A8 2018. Another use of TWRP is to be able to backup all the partitions one by one. On the other hand, the root access will let you load new features on your phone with the help of root-specific applications.

Rooting the phone and installing TWRP is not recommended by the smartphone manufacturers. It’s something that only the Android power users do to add more features to their phones or to simply boost up the performance and battery life. Rooting and Flashing processes void the warranty of a phone. If you are going to install the TWRP and root the phone right now, we would like to tell you that you are going to do it at your own risk. The method given below will work flawlessly to the best of my knowledge. In case something goes wrong, the TWRP recovery developer or TechBeasts may not be held responsible.

Install TWRP and Root Galaxy A8 2018 A530F

Important prerequisites

  • TWRP recovery and root files will work for the Galaxy A8 2018 A530F. Do not try this method on any other device as you will result in bricking it because of invalid files.
  • Charge your phone up to 50% to avoid power issues during flashing process.
  • Enable USB deubgging from the developer options in your phone.
  • Enable OEM Unlocking on your phone from the developer options as well.
  • Backup all your important contacts, call logs, sms messages and media content.
  • Use your phone’s original data cable to connect it to your PC.
  • If you have Samsung Kies installed on your PC, turn it off while using Odin.
  • Disable Firewall/Antivirus in order to download the files properly.
  • Get a microSD card or a USB OTG since you need to copy the files to it.
  • Follow the rest of the method being very careful.

Files you need to download:

  1. Install Samsung USB drivers on your PC.
  2. Download Odin 3.11.1 on your PC and extract it to get Odin3.exe.
  3. Download TWRP Recovery for Galaxy A8 2018 A530Ftwrp_3.2.1-1_sm-a530f_210117
  4. Also, download Magisk.zip and DM-Verity file and copy these files to an external SD card or a USB OTG.

How To Install TWRP Custom Recovery on Galaxy A8 2018

  1. Open Odin3.exe file from the extracted Odin files that you downloaded above.
  2. Put your Galaxy A8 A530F in download mode now. To do so, turn off your phone first. Now turn it on by pressing and holding Volume Down + Power + Volume Up. As soon as your device boots up showing a Downloading screen, leave the keys.
  3. Connect your phone to your PC now. Odin should show an “Added” message in the logs and also show the blue light in the ID:COM box. This will verify a successful connection between your phone and your PC.
  4. Now click on the “AP” tab in Odin and select the TWRP Recovery.img.tar file according to your device carefully.
  5. The options ticked in Odin should be only “F.Reset Time“. Make sure that the Auto-Reboot option is not checked, we do not want to reboot the phone after flashing TWRP recovery.
  6. After selecting the file and checking/unchecking the options, carefully hit the start button. Odin will now flash the TWRP and show you a PASS message in a few minutes.
  7. Once done, disconnect your device from your PC now. Do not reboot your device.

Root and disable forced encryption

  1. Now you need to boot directly into TWRP Recovery. Turn off your phone completely and turn it on by pressing and holding Volume Up + Power key now. Your phone should successfully boot into newly installed custom recovery.
  2. TWRP will ask you whether you want to allow modifications or not, you will need to swipe the finger to the right to enable modifications. Swiping the finger to right will trigger dm-verity if you will need to disable it immediately. Leaving it enabled will not let you boot the phone either root it. This is an important stuff since we want to be able to modify the system.
  3. Now tap “Wipe > Format Data > type “yes” to format data. This is important to disable encryption. This step will factory reset your phone, so make sure that you’ve backed up the entire data at hand.
  4. Now make sure that you’ve copied the Magisk.zip and dm-verity.zip files in external SD Card or USB OTG, if not then transfer both these files to your external SD Card by using MTP mode in TWRP now.
  5. Once you have the files, tap “Install > locate the Magisk.zip according to the location where you copied > flash it”.
  6. Now once again tap “Install > locate the dm-verity.zip file > flash it”.
  7. Once done flashing, reboot your phone into the system.
  8. That’s all. You’re rooted and have a TWRP recovery installed. Best of luck.

Let me know if I can help you guys any further. That’s all for now.

How to install Stock ROM / Factory Image on Razor Phone

0
How to install Stock ROM / Factory Image on Razor Phone

Razor just released the official factory images for its phone. The Razor Phone’s factory images were not out until a couple of days ago. Because there was no way to restore this phone to its factory state, a number users did not try to customise or tweak their phone. Factory images are essential to restoring your phone to its original factory condition. The Razor Phone official images can be installed using Android ADB and Fastboot interface. In this guide, we will learn how to install stock ROM / factory image on Razor Phone. Before we have a look at the factory image installation guide for the Razor Phone, we will have a recap of this incredible smartphone.Stock ROM / Factory Image on Razor Phone

The Razor Phone is meant for gamers. This phone is a powerhouse because of the top-notch specifications it comes with. The Razor Phone has a 5.7-inch IGZO IPS LCD display with a resolution of 1440 x 2560 pixels. This is absolutely not the ordinary QHD display. The Razor Phone’s display comes with 120HZ support. This means that the phone can handle up to 120 Frames Per Second. This outstanding feature of the Razor Phone’s display simply puts other displays to shame. Razor also released a list of games that support this 120HZ display. Razor Phone is the very first in the world to have a lot of unique features. The phone comes with dual Dolby Atmos speakers that can be seen on the front at the top and at the bottom. Here are the Razor Phone specs in a nutshell:

  • Display: 5.7-inch IGZO IPS LCD – 1440 x 2560 pixels
  • CPU: Snapdragon 835
  • RAM:  8GB
  • Storage: 128GB + microSD support
  • Rear Camera: Dual 12MP
  • Front Camera: 12MP
  • Sound: Dolby Atmos Dual Front Facing Speakers
  • Battery: 4000 mAh
  • OS: Android 7.1.1 Nougat

It’s time for us to get back to what we were here for. Since we are going to learn how to flash a stock ROM or a factory image on the Razor Phone, it’s also important to learn a few reasons that might push you towards the ROM installation. Here are all the possible scenarios in which you will have to install a factory image on a Razor Phone.

  1. Your phone is rooted, you want to unroot it to go back to its stock state.
  2. Your phone has a custom recovery and you want to replace it with a stock recovery.
  3. The Razor Phone has a custom ROM installed on it, you want to uninstall the custom ROM and replace it with a Stock ROM.
  4. All of a sudden, your phone’s performance has become sluggish, the battery time is not good, you want to refresh everything with the help of a new ROM.
  5. The phone was soft-bricked while trying to customise, you need a new firmware to get it going.
  6. You want to manually update your phone through a factory image.
  7. And many more…

So, let’s have a look at the tutorial now.

Preparation

  • This process will wipe your phone completely. Don’t forget to backup all your data beforehand.
  • Charge your phone up to 50% to help it last during the flashing process.
  • Use OEM Data Cable to connect your phone to your computer.
  • This process will restore your phone to its factory settings. It will not bring in new features.

Unlock the bootloader

  1. First of all, you need to download and install the Minimal Android ADB and Fastboot drivers.
  2. On your phone, go to Settings > About Phone > Tap the Build Number for 7 times to enable Developer options.
  3. Now get back to Settings > Developer options > Enable USB Debugging and OEM Unlocking.
  4. Now open the Minimal ADB and Fastboot.exe file from your computer’s desktop. If you did not create a desktop shortcut while installing it, you can go to your Windows drive, which should be C:\Program Files (x86)\Minimal ADB and Fastboot and open the cmd-here.exe file instead.
  5. You will have a command window on the screen now.
  6. Now using the original data cable, connect your Razor Phone to your computer.
  7. Your phone will ask for a permission, immediately allow it.
  8. Now in the command window, enter this command: adb devices
    1. This command will verify connection by showing a code and list of devices attached.
  9. Enter this command now: adb reboot bootloader
    1. This command will reboot your phone in the bootloader mode and will show the “Download Mode” on screen.
  10. Now enter the following command: fastboot flashing unlock
    1. This command will unlock the bootloader of your phone and restart it. Let your phone boot up once and then go ahead with the next step.
  11. Once again, repeat the whole process from step 3 to step 9.
  12. Now enter the following command: fastboot flashing unlock_critical
    1. This command will be unlocking flashing critical partition of your phone. That’s it. We have unlocked the bootloader of the Razor Phone.

Install the factory image on Razor Phone

  1. Now download the Factory Image for your Razor Phone.
  2. After download, the factory image, follow step 1 to step 9 in the method given above.
  3. Your phone at the moment should be connected to your phone and it should have Download Mode on the screen.
  4. Now unzip the factory image that you just downloaded.
  5. From the unzipped contents, launch the following file: flash_all script
  6. This will take a moment to install the factory image on your phone. Once done, you can disconnect the phone and set it up.


Galaxy A8 Plus 2018 Common Problems and Fixes: Battery, Performance, WiFi, Camera & More

0
Galaxy A8 Plus 2018 Common Problems and Fixes: Battery, Performance, WiFi, Camera & More

Galaxy A8 Plus 2018 is a mid-range smartphone with flagship-like specifications. Samsung has set new standards for the mid-range smartphone industry. Smartphones under a friendly budget will have to be incredibly beautiful now. Galaxy A8 Plus 2018 sets the Galaxy A lineup on the path towards a new design language. The phone comes with an edge-to-edge displaying saying goodbye to the home button. Galaxy A8 Plus has an 18:9 aspect ratio display. The phone is built out of glass surrounded by an Aluminium frame. The fingerprint scanner has moved to the back just below the camera sensor. Galaxy A8 Plus 2018 is sleeker. Samsung has shown the art of its craftsmanship once again.Galaxy A8 Plus 2018 Common Problems and Fixes

Galaxy A8 Plus 2018 Specifications

On the specification end, the Galaxy A8 Plus is equipped with a 6.0-inch full HD display. This phone is a house to Exynos 7885 CPU and a RAM of 4GB/6GB. There are two internal storage options i.e. one with 32GB and the other with 64GB. Galaxy A8 Plus 2018 has a dual-camera setup on the front. There is one shooter of 16MP and the other of 8MP on the front. The single shooter at the back is of 16MP only. Samsung has added the USB Type-C port to this phone. Right next to the USB Type-C, there is a headphone jack. This phone has a whopping 3500 mAh battery. It is protected by IP68 certification which means this phone is resistant to water and dust. Galaxy A8 Plus 2018 runs on Android 7.1.1 Nougat out of the box. Samsung calls it a budget smartphone, but the price of this phone is similar to the price of the flagship phones of the year 2013 – 2017. Now that flagship phones cost us over $900 or $1000, the standard price for new budget smartphones has become $600 to $700.

A lot of users have got their hands on the Galaxy A8 Plus 2018. If it’s too hard for you to afford a phone like the Galaxy S8, Galaxy A8 may be the choice to go with. This phone is not exactly a mid-range device, it falls somewhere between mid-rangers and the flagship lineup. Galaxy A8 Plus is a good deal for your hard earned bucks. In case you have already got this phone or you are planning to get on in near future, it’s important to learn about the problems it can have.

Solutions to Galaxy A8 Plus Problems

Smartphones have become our daily companions now. It’s not uncommon for a smartphone to show you an error every now and then. When you get a phone, you also have to master it to fix any problems that may occur later on. Keeping in view the problems the Galaxy A8 Plus users may come across, I compiled this guide. The guide here shows all the problems and their potential fixes for the Galaxy A8 Plus 2018 owners.

The Galaxy A8 Plus common problems and fixes guide include the Battery consumption problems, problems with the performance of the phone, WiFi, Bluetooth, and Mobile Data connectivity problems, charging problems, overheating problems and all other such issues. Galaxy A8 Plus 2018 owners can go through the list to apply a quick fix to their phone now.

Galaxy A8 Plus 2018 Common Problems and Fixes: Battery, Performance, WiFi, Camera & More

Performance Issues

The most annoying problem a smartphone user faces is the sluggish performance. If a phone, that you just bought after paying the hard-earned money, starts lacking, it definitely makes you cringe. Fortunately, the Performance Problems are not such a big deal as you can always fix them (as long as it’s about the software of the phone). There are various solutions that can solve the performance problems of your new A8 Plus 2018.

1.  Clear the cache of your phone

Clearing the cache of your phone is like one medicine for a 100 different diseases. Once you clear the cache of the phone, it refreshes everything and gives your phone a new start. It’s very easy to clear the cache, just follow the steps below.

  1. Turn off your phone completely.
  2. Now turn on the phone by pressing and holding Volume Up + Volume Down + Power button.
  3. As soon as your phone shows a screen with some options, follow the on-screen instructions to get into the recovery mode.
  4. In the recovery mode, use Volume Up and Volume Down keys to navigate to “Clear cache data” and then press the Power key to make a selection.
  5. Clear the cache now and reboot your phone. Check the performance after rebooting the phone.

2. Boot your phone in Safe Mode

Booting up your phone in Safe Mode disables all the applications on the phone. This is a method to check if a particular application that you recently installed is behind the slow performance of your phone. If the phone performs better after booting up in Safe Mode, it will mean that there is an application slowing down your phone. In such a case, you can start deleting your recent installations one by one to identify what makes the performance better. Here’s how to do this.

  1. Turn off your phone completely.
  2. Now turn on your phone. As soon as the Samsung logo appears on screen, press the Volume Down key and keep it pressed until the phone takes you to the home screen.
  3. You will now see a “Safe mode” watermark on the lower left corner of the screen. All apps will be disabled now.
  4. Check the performance of your phone now and fix it.

3. Uninstall unnecessary applications

Having too many unnecessary applications can pull down the performance of the phone. If you have a pile of applications that you absolutely do not touch, it’s time to uninstall them. This will potentially improve the performance of your new Galaxy A8 Plus.

4. Check for Software Updates

Go to Settings > Software update > Download updates manually > check if there’s an update available. If there is one, update your phone right away. Running your phone on an older version of Android can cause the issue.

Overheating or Heating Up Issues

The solutions given above to fix the performance issues of the phone will work for fixing the heating up problems as well. There are many reasons for a phone to heat up. The games that consume most of the CPU, clock the GPU at its max and also give a bull-run to the RAM can heat up the phone. You have to identify an application that’s causing trouble, or you just have to give your phone a refresh to cool it down. Here is what you can do to fix it up.

  1. Clear the cache of your phone to restart all the process on your phone. A stuck process can heat up your phone. Clearing the cache will refresh everything by starting it from scratch.
  2. Reboot your phone in the Safe Mode to check if an application is adding to the temperature of the device. You can follow the method given above for booting into the Safe Mode.
  3. If the phone heats up the most while playing a resource-intensive game, you need to uninstall that game right away before it kills your phone.
  4. Sometimes, an old software can start heating up your phone as well. You can check for updates and install a new update if there is one available.
  5. If the above issues fail to work for you, it’s time for you to factory reset your phone. You can do so by booting into the recovery mode.
  6. If the factory reset also fails, you can choose to flash a new software manually on your phone using Odin. Here’s a guide to install stock ROM on your Galaxy A8 Plus 2018.

Battery Problems (Poor battery consumption)

So your phone’s battery consumption just got poor? Well, it’s nothing to worry about. The battery problems are not something out of this world. You can always fix the battery problems of a phone. Here are the possible solutions to fix the Galaxy A8 Plus 2018 battery problems.

  1. First of all, you should try to use the Battery Optimizer that is in the Settings of the phone. The Battery Optimizer can identify the applications that are bringing down the battery consumption.
  2. As mentioned above, clearing cache can do wonders for your phone. Clear the cache of your phone to restart all the process on your phone. Piling up old cache can also pull down the battery consumption.
  3. Reboot your phone in the Safe Mode to check if an application is eating up all the battery. You can follow the method given above for booting into the Safe Mode. After checking the battery consumption having all apps disabled, you can start uninstalling the applications one by one to see which one improves the battery life.
  4. Sometimes, an old software can affect the battery consumption of your phone as well. You can check for updates and install a new update if there is one available.
  5. If the above issues fail to work for you, it’s time for you to factory reset your phone. You can do so by booting into the recovery mode.
  6. If the factory reset also fails, you can choose to flash a new software manually on your phone using Odin. Here’s a guide to install stock ROM on your Galaxy A8 Plus 2018.

Charging Problems

Your phone is not charging at a speed it is supposed to charge? or it is just refusing to charge? Here’s what you can do in this case.

  1. Always use the original charger and the original data cable. If you do not have the original charger and cable, get an aftermarket charger and cable that is close to the original.

  2. Check the electricity switch for electric current. There’s a great chance that the switch is malfunctioned and it is not providing required current to the charger. The phone can refuse to charge as a result of low voltage as well.
  3. Check the phone’s charging port. Clear out any smut or dirt using a Qtip from the charging port.
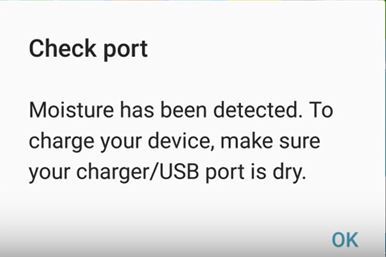
  4. Charging your phone in a car or using a power bank will not give you the same results as that of an electric switch. While charging in a car or using a portable charger, keep in mind that the charging time will only increase.

  5. Charging your phone using the laptop will also take a lot of time.

Camera Problems

Something’s went wrong with the camera on the Galaxy A8 Plus 2018? Is the Camera taking poor-quality pictures? or the Camera is just refusing to take pictures? Here are the solutions to fix all such problems.

  1. Make sure that your phone’s battery is charged over 10%. Below 10%, the phones often refuse to take pictures. The battery below 10% will also not let your phone use the Flash.
  2. If the camera is taking poor-quality pictures, you can try using different modes to set the quality.
  3. In case the settings do not improve the picture quality, you can simply try clearing the data and cache of the camera application. To do so, go to Settings > APPS > Camera > Storage > Clear Cache & Clear Data.
  4. Check if there is a Software Update available for your phone. A new update often fixes the bugs if there exist any.
  5. Try flashing a new ROM on your phone to bring in a brand new camera application.
  6. If the camera is not working, you can try using a third-party camera application from the Play Store to check if it’s really an application issue or it’s some hardware issue. In case it turns out to be a hardware issue, you will have to take your phone to the service centre to claim its warranty to get it fixed.

Bluetooth Connectivity Problems

Bluetooth connectivity, visibility and pairing issues? Here are the solutions.

  1. First of all, make sure that the Bluetooth isn’t turned off. If you recently enabled flight mode, it can also turn off Bluetooth. Although Bluetooth can be easily enabled while the flight mode is on, the flight mode just turns it off when you enable it for the first time.
  2. Always make sure that your device is discover-able by other devices. Go to Settings > Connections > Phone visibility > Turn it on.
  3. If your phone is unable to pair a specific device, you need to check the visibility and connectivity of the 2nd device.
  4. If the phone still refused to pair, you can try restarting your phone.
  5. Having difficulty connecting to an already paired device? You can remove that device from paired devices and connect it again.
  6. If all the solutions listed above fail to work or you are facing any other kind of problem with the Bluetooth, you can go to Settings > About Phone > RESET > Reset network settings > RESET Settings. Restart your phone after resetting these settings.

WiFi Connectivity Problems

  1. Your phone’s WiFi should be turned on.
  2. Make sure that the router you are trying to connect is in the range of your WiFi.
  3. Make sure that the router is turned on and it’s internet connectivity is available.
  4. If you are unable to connect to an already added WiFi, you can go to WiFi settings under Connections and forget that particular network. Add that network from scratch once again.
  5. In case the solutions above do not work, you can reset the entire WiFi settings. To do so, you can go to Settings > About Phone > RESET > Reset network settings > RESET Settings. Restart your phone after resetting these settings.

Mobile Data Connectivity Problems

Is the Mobile Data not working? No problem. Have a look at these solutions:

  1. Flight mode should be disabled on your phone in order to connect to Mobile Data.
  2. Make sure that you have a working Data Bundle. In case your Data Bundle has come to an end, you will not be able to use Mobile Data.
  3. On your phone, go to Settings > Connections > Mobile networks > Network mode > set it to LTE/3G/2G (auto connect).
  4. The SIM card you are using should be in a working state. If you using a malfunctioned SIM card, you cannot use Mobile Data.
  5. To reset the entire network settings of the phone, go to Settings > About Phone > RESET > Reset network settings > RESET Settings. Restart your phone after resetting these settings.

SIM Card & Related Problems

In case your phone is not detecting the SIM card, you need to check if your SIM card is properly inserted or not. Apart from verifying the SIM card placement in the phone, you also need to check if it’s in the working form. Always make sure that the flight mode is disabled as it can stop your SIM card from working.

Mic Problems

There are two mics in the phone. One at the top and one at the bottom. The bottom one works when you are talking on a call while the top one works either for noise cancellation or when you are using the phone on the speaker mode. The top mic also works for recording videos and recording audio. You can try cleaning both these mics using a brush or a small pin. There can be a spot of dirt covering up the mic hindering the outgoing voice.

Speaker Problems

Use a pin to clean the speakers of the phone if the voice coming out is not clear. Also, make sure that the audio you are trying to listen is of high quality. If the speaker is having issues during a call, it may be possible that the other person has issues in his/her mic.

Galaxy A8 Plus 2018 Not Detected By PC / USB Not Recognized Error & Other Related Problems

When you connect your phone to your computer for the first time, it doesn’t show any contents. In order to show the contents of the phone on your computer, you have to allow the phone to connect to PC first. After connecting your phone to the computer, unlock the phone and tap the Allow button appearing on the screen to connect it to a USB Storage.

At times, the PC fails to recognize the phone as a result of a faulty driver. Always update the drivers on your phone. Make sure that you have installed Samsung USB drivers prior to connecting your phone to the PC. You also need to use the OEM data cable to establish the connection.

That’s all for now. I hope that you guys find these solutions helpful. In case I have missed something, or you have found another solution for one of the problems listed above, feel free to drop it in the comments section below.
Galaxy S9 & S9 Plus: Boot into Download, Recovery Mode, Hard Reset, Clear Cache & More

0
Galaxy S9 & S9 Plus: Boot into Download, Recovery Mode, Hard Reset, Clear Cache & More

Samsung Galaxy S9 and Galaxy S9 Plus are here now. If you are planning to get one of these phones, it’s important to learn how to boot into the Download Mode, into the Recovery Mode and also how to hard reset these phones. A method to clear cache and to take a screenshot on the Galaxy S9 and S9 Plus is also given below.Galaxy S9 & S9 Plus: Boot into Download, Recovery Mode, Hard Reset, Clear Cache & More

Galaxy S9 & S9 Plus: How to boot into Download Mode, Recovery Mode, Hard Reset the phones, Wipe Cache & take a Screenshot

How to boot into Download Mode on Galaxy S9 and S9 Plus

  1. Turn off your phone completely.
  2. Now press and hold Volume Down + Bixby + Power button.
  3. Your phone will turn on and show you a warning.
  4. Press the Volume Up button to continue into Download Mode now. That’s all.

How to reboot Galaxy S9 and S9 Plus into Recovery Mode

  1. Power down your phone completely.
  2. Now press and hold Volume Up + Bixby + Power button to turn it on.
  3. Your phone will take a while to boot up. As soon as it does and shows you the Samsung logo, let the keys go.
  4. Your phone will now load the recovery.
  5. Let the recovery load. Once done, you can operate the recovery mode freely using Volume Up, Down & Power keys.

How to Hard Reset or Factory Reset Galaxy S9/S9 Plus

  1. Turn off your phone.
  2. Reboot your Galaxy S9 or S9 Plus into Recovery Mode using the steps above.
  3. Once you are in recovery mode, navigate to the “wipe data/factory reset” using Volume Down key.
  4. Press the Power button to make a selection.
  5. In the next screen, highlight Yes and press the power button to perform a hard reset.

How to clear cache on Galaxy S9 & Galaxy S9 Plus

  1. Shut down your phone.
  2. Boot into the recovery mode.
  3. Scroll down and highlight “wipe cache partition”.
  4. Press the Power button to make a selection.
  5. Highlight Yes and let the phone wipe its cache now. That’s all.

How to take a screenshot on Galaxy S9 & S9 Plus

  1. Open a screen that you want to capture.
  2. While having the screen opened, press the Bixby + Power button at the same time.
  3. The screen will be captured. On the screen, you will find the option to capture more.
  4. If you want to take a scrolling screenshot, tap capture more to select the area.
  5. The taken screenshots will appear in the “Screenshots” folder in Gallery.

Also, have a look at List of Samsung Galaxy S9 and Galaxy S9 Plus Model Numbers  &  Download Galaxy S9 and S9 Plus Official Stock Wallpapers

How to install Stock Firmware on Galaxy S9 and S9 Plus

1
How to install Stock Firmware on Galaxy S9 and S9 Plus

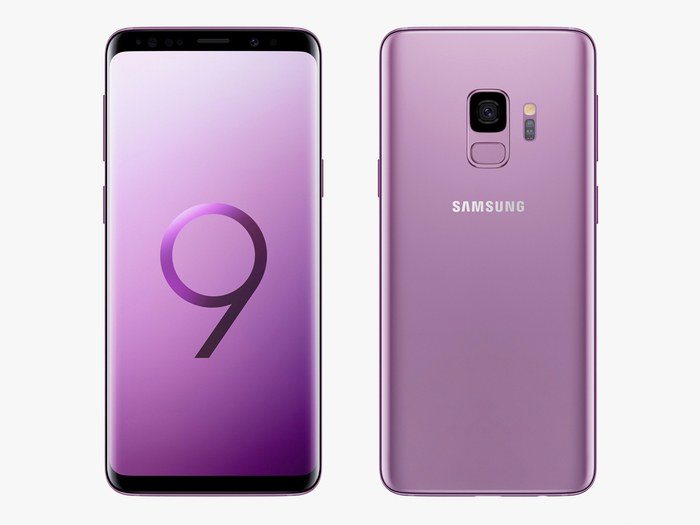
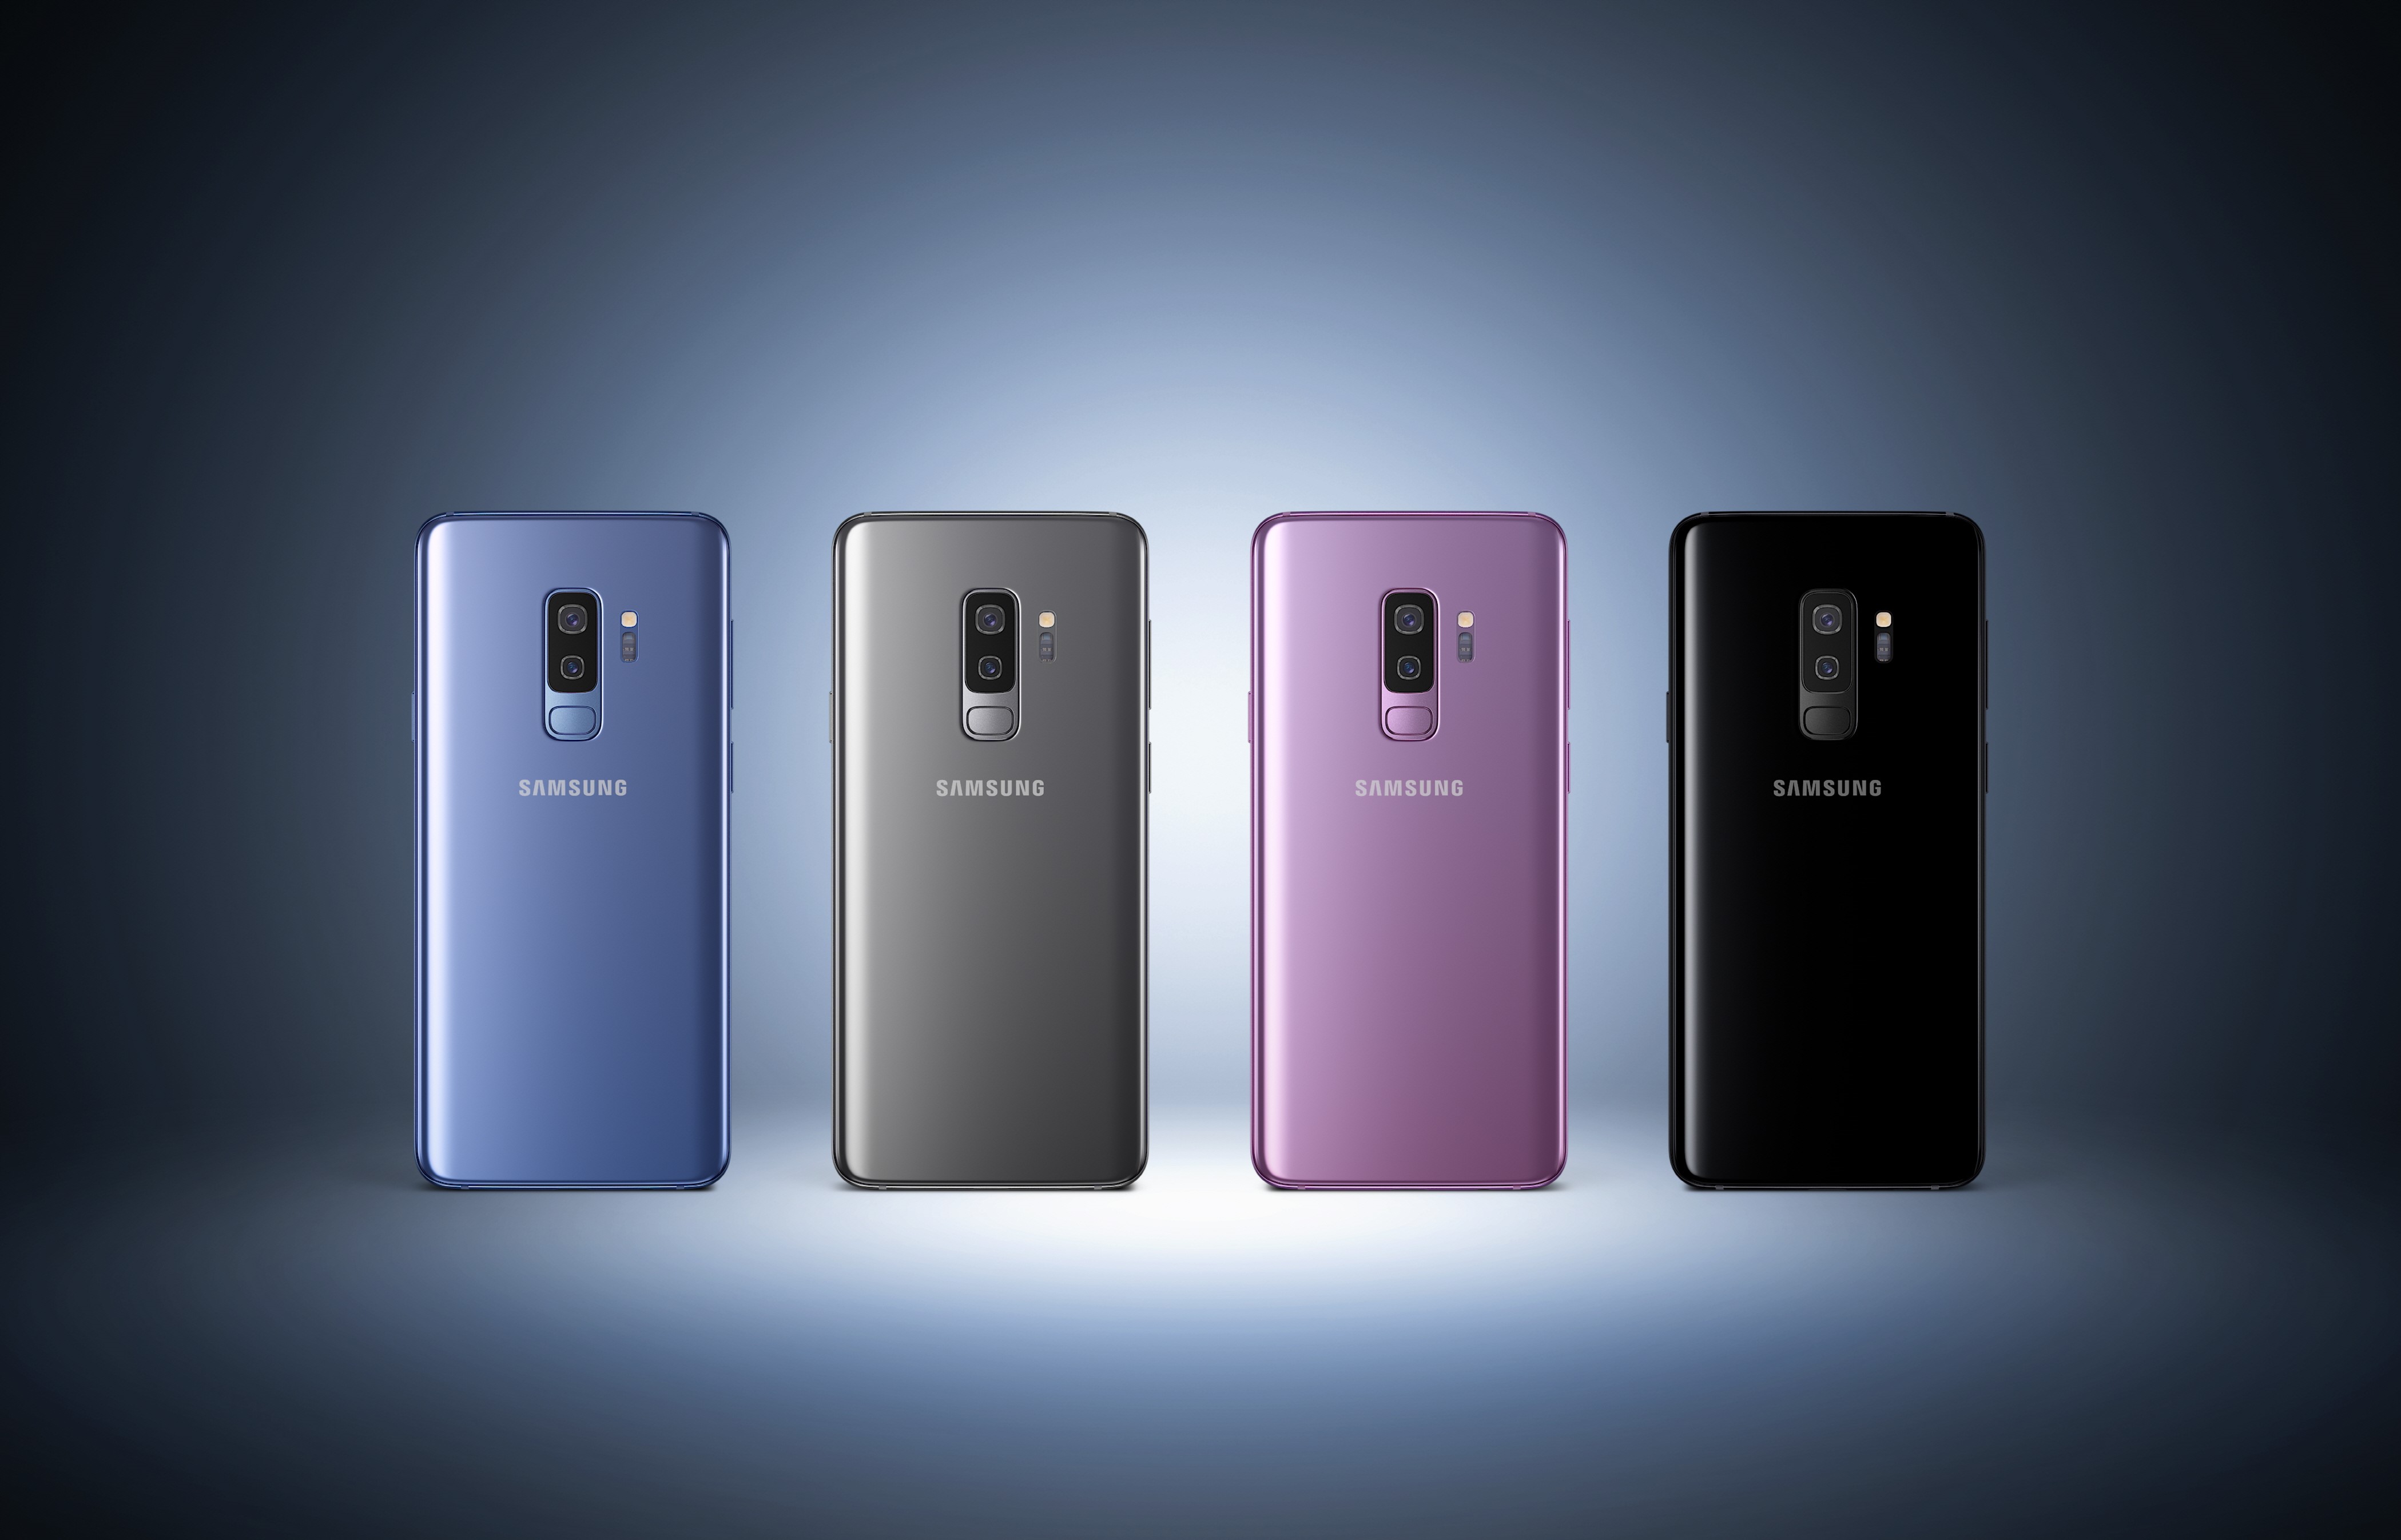
With the release of Samsung Galaxy S9 and S9 Plus, Samsung has once again set the new standards for the smartphone industry. These incredible smartphones by the South Korean giants bring a few features that you have never seen on a smartphone before. install Stock Firmware on Galaxy S9 Plus

The Galaxy S9 and S9 Plus have an adjustable camera aperture. These phones are given a score of 99 on the DxOmark. This is the highest score for any smartphone till date. The Galaxy S9 has pushed the Google Pixel 2 and the iPhone X behind on the list.

The Galaxy S9 comes with a single 12MP shooter and the S9 Plus has a dual shooter with 2 cameras of 12MP each. On the front, these phones have an 8MP shooter that has been upgraded to take nice selfies.

Both these phones are equipped with either the Exynos 9810 or the Snapdragon 845 CPU. On the Galaxy S9, there’s a 4GB RAM and on the S9 Plus, there’s a 6GB RAM. Both the phones have a basic internal storage of 64GB and there’s an external SD card slot supporting up to 400GB.  The smaller variant has a 3000mAh battery and the bigger one has a 3500mAh battery. These phones run on Android Oreo. install Stock Firmware on Galaxy S9

Galaxy S9 and S9 Plus are expensive phones, and they are loaded with the best hardware and software available in the market at the moment. In their stock state, the phones are complete powerhouses. If you just start customising these phones, you can unleash their true potential to get the maximum out of them.

While customising your phone, there is a risk if bricking it. The phones often get soft-bricked and the only way to recover them from the soft-bricked state is to flash a stock ROM on it.

Also, when you root your phone, the system status changes to custom from official. To unroot the phone and to restore the system status to official, you need to re-install a stock firmware on the phone.

At times, an update is available for the phone, but it doesn’t make it to your region right when it launches. In such cases, you can grab a firmware file from the internet and flash it manually. Updating your phone manually requires you to flash the stock firmware file using a tool like Odin. This process is also same as installing factory firmware on the phone.

Another scenario in which you would want to install a stock firmware on your Galaxy S9 or S9 Plus is when your phone slows down. Having a new and fresh installation of stock firmware can do wonders for you.

So, these are a few scenarios in which you will find this on-going guide helpful. Let’s have a look at the tutorial to install Stock Firmware on Galaxy S9 and S9 Plus.

How to install Stock Firmware on Galaxy S9 and S9 Plus

Prepare for flashing a stock firmware on S9/S9+

  1. This guide will work on all the models of the Galaxy S9 and S9 Plus. Do not try this guide on a phone other than Galaxy S9/S9+.
  2. Charge your phone up to 50% to make sure that it lasts through the flashing process. If the phone goes dead during new firmware installation, your phone can potentially get bricked.
  3. Backup all your important data including contacts, call logs, SMS messages and media content before the installation of a new firmware.
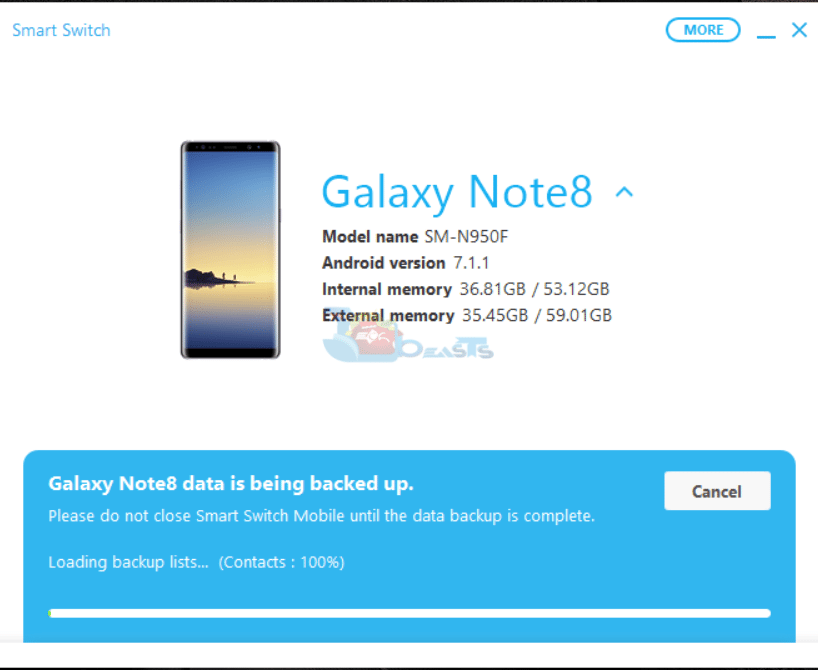
  4. If you have Samsung Kies installed on your computer, you need to disable it. If there is Samsung Smart Switch on your computer, you need to close it as well.
  5. Disable your Firewall or any Antivirus if you have installed one.
  6. Use OEM data cable to connect your S9 to the computer.
  7. Enable OEM Unlocking and USB Debugging on your phone.
  8. Follow this guide carefully.

Required downloads and installations

  1. Download and install Samsung USB Drivers.
  2. Get the latest Odin 3.13.1 and extract it on your computer’s desktop.
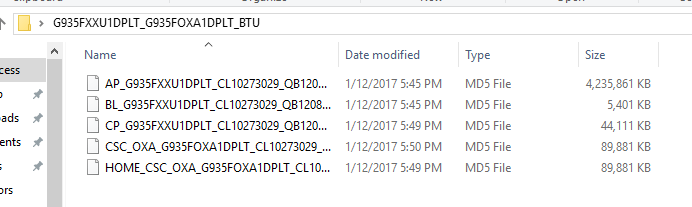
  3. Download the firmware for Galaxy S9 or the Galaxy S9 Plus. Extract the firmware on your computer’s desktop to get AP, BL, CP and Home_CSC files.
    Image attached for reference only.

Install Stock Firmware on Galaxy S9 and S9 Plus

  1. Open Odin3.exe file from the Odin 3.13.1 extracted content.
  2. Now put your Galaxy S9 or S9 Plus in download mode. To do so, turn off the phone first. Now turn on the phone while pressing Volume Down + Power + Bixby button simultaneously.
  3. Your phone will boot up in the download mode showing you a warning. Press the Volume Up key to continue.
  4. Connect your phone to your computer now.
  5. Now in Odin, click on the AP tab and load the AP file that you got from the firmware files.
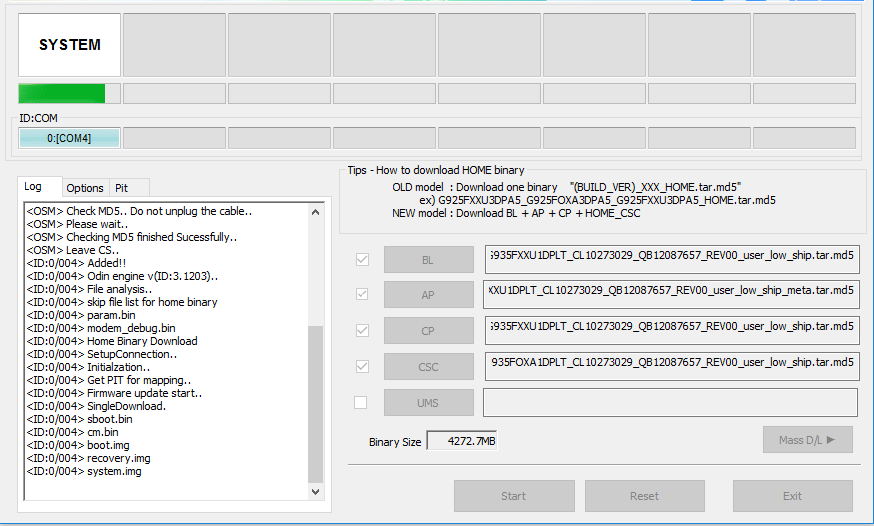
  6. Similarly, click on the BL tab and select BL file. Select the CP file in the CP tab and select the Home_CSC file in the CSC tab.
    Galaxy S9 stock firmware
    Image attached for reference only
  7. Navigate to Options in Odin and make sure that the only options ticked are Auto Reboot and F.Reset.Time.
  8. Now that you are all set to flash the factory firmware on your S9, click the start button.
  9. Firmware installation will start now and come to an end within a few minutes. Your phone will reboot and you can disconnect it now.

That’s all with the firmware installation on your Galaxy S9 handset. Don’t forget to check out the official stock wallpapers of the S9/S9+ now.

How to locate lost Galaxy S9 or S9 Plus remotely

0
How to locate lost Galaxy S9 or S9 Plus remotely

Smartphone manufacturers follow a trend of releasing a flagship phone every year. Samsung is also one of those manufacturers. We see new phones with new features, new specs and new tech. With the changing hardware and software on the phones, we also see a surge in the price tag looking to empty your pockets. locate lost Galaxy S9 or S9 Plus remotely

The phones are getting expensive with the passage of time. If you look towards a flagship phone by Samsung, or even from its rival company Apple, you will be considering spending a flat 1000 bucks of your hard earned money. Such an expensive gadget requires a lot of care as well.

The all-new Galaxy S9 and S9 Plus are all set to make it to the markets. If you are planning to get one of these phones, you need to take all the security measures which will help you in case a mishap takes place on your phone. Companies like Samsung and Google have introduced a lot of applications and software which protect your phone from the hands of the thieves.

When you set up a new Samsung Galaxy phone, it asks you to activate your Samsung account. This account links your phone to the Samsung Find My Mobile service. The Find My Mobile service is more like a rescue service to handle your phone in case of a mishap.

Just like Samsung Find My Mobile, Google has its Android Device Manager as well. It syncs your phone using the Google Account. On an Android phone, you need a Google Account to set up Play Store. So, if you are using Play Store, you probably have got the Device Manager enabled as well.

The whole point of these services is to give you an extra layer of security so that you can take measures to wipe off your data from falling into wrong hands. You can also locate your phone through the map given on these services. You can also ring your phone to find it around you. There are options to factory reset your phone remotely as well.

So, just imagine if you are carrying your new Samsung Galaxy S9 or the S9 Plus, and you accidentally lose it, what’s are you going to do then? If you have got one of the services mentioned above activated and the internet connection enabled as well, then you have a chance of tracking down the lost, stolen, fallen or snatched Galaxy S9 or Galaxy S9 Plus.

In such a situation, you need to act intelligently. The very first thing you should try to do is to locate lost Galaxy S9 or S9 Plus remotely. If you fail to find your phone, your next option should be to remotely wipe your phone. The first option might bring your phone back, but the 2nd one will only wipe the phone. If you cannot get your phone back, it’s a rather better option to wipe it to prevent your data from falling into the wrong hands.

Here is the tutorial to track or locate lost Galaxy S9 or S9 Plus remotely. The guide is divided into several steps. Follow them one by one to achieve the best results.

Locate lost Galaxy S9 or S9 Plus remotely

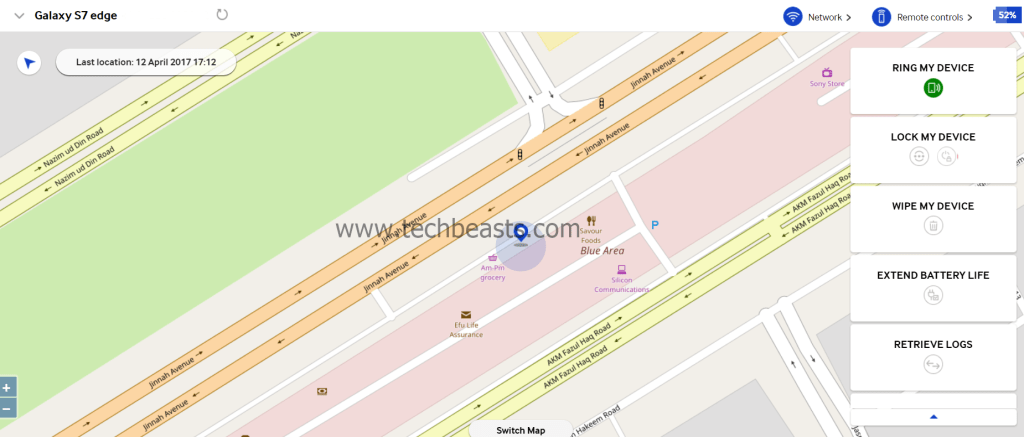
Track and locate lost S9 or S9 Plus using Samsung’s Find My Mobile

locate lost S9 or S9 Plus using Samsung's Find My Mobile

  1. First of all, open the Samsung Find My Mobile web page on your computer.
  2. Login to the Samsung Find My Mobile using the account that you also used to sign into the Samsung account on your Galaxy S9 or S9 Plus.
  3. The moment you get logged in, Samsung Find My Mobile will show you a map. If the map is empty, you can click on the Switch Map button to check the last and current location of your phone.
  4. On the right side, you can find the following options:
    1. Ring My Device
    2. Lock My Device
    3. Wipe My Device
  5. First of all, you should try looking at the map and check where your phone is. If the phone is in a known vicinity, you should be able to go there and get it back.
  6. If the phone is lost somewhere around you, you can click on the Ring My Device option to ring the phone louder.
  7. In case the phone is lost somewhere you don’t know, the first step should be to click on the Lock My Device option.
  8. If you completely fail to recover your phone, click on the Wipe My Device option to wipe your phone remotely.

Track and locate lost S9 or S9 Plus using Google’s Android Device Managerlocate lost Galaxy S9 or S9

  1. Just like Find My Mobile, open the Android Device Manager web page on your computer.
  2. Login to the Android Device Manager using the same Google account that you used on your phone.
  3. Android Device Manager will open up showing you a map and also the options to erase and ring your phone.
  4. You can first try looking for your phone on the map. If it’s lost somewhere near your own location, you can ring it up using the ring option.
  5. In case you fail to find your phone, you should immediately erase it.
  6. You can also look at the map and see if the phone was dropped at a place you visited recently. You can go to that place and look for your phone.

I hope you guys find this guide helpful. If you have any query or anything to add to this guide, feel free to contact me using the comments section below.

Root & Install TWRP on Galaxy S8 or S8 Plus on Android Oreo

0
Root & Install TWRP on Galaxy S8 or S8 Plus on Android Oreo

It’s time to root & install TWRP on Galaxy S8 or Galaxy S8 Plus on Android Oreo. In the first part of this guide, we will take a look at how to install TWRP on S8 and S8 Plus running Android Oreo. Once we have installed the TWRP custom recovery, we will then learn to root the Galaxy S8 Oreo firmware.Root & Install TWRP on Galaxy S8 or S8 Plus on Android Oreo

It’s been a week since the Galaxy S8 and S8 Plus have been updated to Android Oreo. At first, Samsung halted the update due to some technical reasons. Just after a couple of days of halting the update, Samsung re-rolled it. Right now, the update is on a full roll and it’s reaching out to all the Galaxy S8 and S8 Plus owners across the globe.

Those Galaxy S8 owners who had their phones rooted prior to the Android Oreo update, they will lose the root upon updating their phone. Rooted Galaxy S8 owners used the Odin tool to manually update their phone to Android Oreo. Flashing a new firmware completely restores the phone to its factory settings. So, if you are one of those users, you must have a phone that is running on Android Oreo but it doesn’t have the root access.

To root the Galaxy S8 or S8 Plus running on Android Oreo, the phone owners have to flash a TWRP recovery on their phone and then root the phone all over again. Also, those users who have never rooted their phone, and they are willing to root it now, they will have to follow a method from scratch as well.

For those who do not have an idea what is root and what is a custom recovery, let’s clarify this stuff for them first. A custom recovery like the TWRP runs in the bootloader of your phone. This recovery like an extended menu for your phone which helps you perform various operations within the bootloader. Using a TWRP recovery, Galaxy S8/S8+ users can flash custom ROMs, custom MODs, SuperSU or Magisk to root the phone. They can also create an EFS backup, a Nandroid backup and also back up all other partitions of the phone. TWRP will also let the S8 owners wipe Cache or Dalvik Cache of their phone. There’s and ADB terminal in TWRP recovery which allows the Android users to sideload zip and other such files.

Nowadays, there are only a few devices that are lucky enough to get rooted without a custom recovery. Most of the smartphones are rooted using a custom recovery only. The Galaxy S8 and S8 Plus on Android Oreo also need a TWRP recovery before you try to root them. So, if the question running through your mind right now is about what this root access is, then let’s take a look at the answer.

Root privilege allows applications and scripts to access the system files of a device. The system files are usually locked to keep the system intact. Once you have rooted a phone or any other gadget, the sort of security check wipes off and the system is then free to be modified. With the help of root, you can install applications to enhance the performance and battery life of your phone. You can also make changes to the system to make your UI look better. Your phone’s CPU can be overclocked or underclocked as well.

There are some famous root specific applications like Titanium Backup and Greenify. There is a whole world of root apps out there. It’s not possible to discuss them all right here. I hope that the description was good enough to give you guys an idea of both the terms that are our target in this guide.

Root & Install TWRP on Galaxy S8 or S8 Plus on Android Oreo

Let’s head over to the guide now. Have a look at the tutorial to root your Android Oreo powered Samsung Galaxy S8 or Galaxy S8 Plus now.

Preparing your Galaxy S8/S8 Plus for TWRP recovery

This guide is only for the Galaxy S8/S8 Plus Exynos variants.
Charge your phone up to 80% to avoid power issues during the installation process.
Backup your contacts, call logs, SMS messages and important media content.
Enable OEM Unlocking on your phone.
Enable USB debugging mode on your phone as well.
If you are using a Chinese variant of the Galaxy S8/S8 Plus, then unlock its bootloader.
While using Odin3, disable Samsung Kies if you have it installed on your PC.
Use OEM data cable to connect your phone to your PC.

Downloads required

  1. Download and install Samsung USB drivers on your PC: Download Link with Guide
  2. Download and extract Odin 3.13.1 on your PC: Download Link with Guide
  3. Download the TWRP Recovery.tar file: TWRP for Galaxy S8 |  TWRP for Galaxy S8 Plus
  4. Download no-verity-opt-encrypt-5.1.zip file.
  5. Download latest SuperSU.zip file.

Install TWRP and Root Galaxy S8/S8 Plus running Android Oreo [Exynos]

  1. Open the Odin3.exe on your computer from the extracted files in Odin.
  2. In Odin, click on the AP tab and select the recovery.tar file that you just downloaded above.
  3. The only option checked in Odin should be F.Reset Time. No other option should be ticked.
  4. Now put your Galaxy S8/S8 Plus in download mode. To do so, turn it off first. Now press and hold Volume Down + Bixby + Power button for a while. As soon as the phone turns on with a warning, press the Volume Up button to get into download mode.
  5. Connect your phone to your PC now.
  6. Odin will recognize the phone and turn the ID:COM box blue. You will also see the “Added” message in the logs box on the lower left side.
  7. Now press the “Start” button in Odin. It will begin flashing the recovery on your phone.
  8. As soon as the recovery flashing ends, disconnect your phone from your PC.
  9. Press and hold the Volume Down + Bixby + Power key once again. As soon as the screen goes black, quickly switch from Volume Down to Volume Up key while keeping Bixby and Power keys pressed.
  10. Your phone will boot into TWRP recovery now. It will ask you whether you want to allow modifications. Swipe the screen and get into TWRP now.
  11. In the main menu in TWRP recovery, tap Wipe > Format Data.
  12. After formatting the data, get back to the main menu in TWRP recovery.
  13. Connect your phone to your PC now.
  14. Copy the DM-Verity and SuperSU.zip files to your phone’s internal storage.
  15. Now disconnect your phone.
  16. In TWRP’s home-screen, tap Install > locate the DM-Verity.zip file and flash it.
  17. Right after flashing the DM-Verity file, flash the SuperSU.zip file similarly.
  18. Reboot your phone into the system now.

How to Backup and Restore Samsung Galaxy S9/S9 Plus

0
How to Backup and Restore Samsung Galaxy S9/S9 Plus

If you have got the all-new Galaxy S9 or S9 Plus, we would like to congratulate you. If you are planning to get one, we would still like to congratulate you. The S9/S9+ are the finest smartphones that the company has manufactured to date. These phones come with a lot of goodies that we have never seen before.Backup and Restore Samsung Galaxy S9/S9 Plus

Why should you backup your Galaxy S9 or S9 Plus?

Our smartphones are more like our companions now. Most of our everyday communication takes place through our smartphones. Our important contacts are stored in the phones. There are the text messages from our friends, families and workplace. Call logs are maintained on the phone to keep us informed about whom we are in touch with. We take hundreds of pictures every day which go down the memory lane and are kept in our phones.

We rely too much on the phones. It’s not basically a handset that we are depending on, we care too much about our data that we are interacting with using our phone. We can keep patience if an unfortunate event takes place and we lose our phone, but we definitely cannot bear the loss of data.

This is why it’s very, very important to keep our data backed up. A backup of your data will let you restore all your important data if something goes wrong with your phone.

There are various cases that can result in a data loss. The phone can get stolen. It can fall off from your pocket. The phone can get malfunctioned, you can lose data as a result of a factory reset. You can also lose data while updating your phone and there are many similar unfortunate happenings that can take place.

I hope that no such event takes place in your life, Galaxy S9 and S9 Plus are quite expensive smartphones. But, just to make sure that your data stick with you even after something has happened, you should back it up beforehand. Right after getting your brand new S9 or S9 Plus, you should learn how to take a backup of everything stored on it. Knowing that what backup mechanism will work the best for you, you will be able to take a backup every few hours or every few days.

A little bit about this guide

In this guide, we will take a look at a tutorial to learn how to backup and restore Samsung Galaxy S9/S9+. To backup and restore Samsung Galaxy S9/S9 Plus, we will be using the Smart Switch. With the help of Smart Switch, you can backup contacts, call logs, SMS messages, pictures and everything else stored on your Galaxy S9/S9 Plus.

Although there is a huge number of backup applications, we will use Smart Switch because it belongs to Samsung. It is also the most frequently updated utility for Galaxy owners. Here is how to take a backup and also how to restore the backup on an S9 or S9 Plus.

How to Backup and Restore Samsung Galaxy S9/S9 Plus

Galaxy S9/S9 Plus users can use Smart Switch to backup Contacts, Calendar, Messages, Samsung Notes, Call logs, Clock, Internet Browser data, Samsung Health Data, Reminders, Images, Music, Videos, Documents, Voice Memos, Soundcamp, Applications, Emails, Home screen settings, and the entire settings of the phone.

Note: To demonstrate the functionality of the Smart Switch, I have used a Galaxy Note 8. However, the same guide should work flawlessly for the Galaxy S9/S9+ as well.

Backup Galaxy S9/S9 Plus

  1. Download and install Samsung Smart Switch on your computer.
  2. Open Smart Switch now.
  3. Connect your Galaxy S9 to your computer now.
  4. If the phone asks for any permission, allow it.
  5. You will find your phone showing a Smart Switch screen now.
  6. Now in the Smart Switch on your computer, click on the small Settings Gear icon and click on Preferences.

    Backup and Restore Samsung Galaxy S9/S9 Plus

  7. In the preferences, select the backup folder location.
  8. Now click on the Backup Items tab and select the data that you want to back up. It is preferred to select all.

    Backup and Restore Samsung Galaxy S9/S9 Plus

    Backup and Restore Samsung Galaxy S9/S9 Plus

  9. After selecting the backup items, click on Ok button and get back to Smart Switch’s home screen.

    Backup and Restore Samsung Galaxy S9/S9 Plus

  10. Click on the Backup button now and let the Smart Switch do the magic.

    Backup and Restore Samsung Galaxy S9/S9 Plus

Restore Samsung Galaxy S9/S9 Plus

  1. Make sure that you have backed up your data before you try to restore.
  2. When you want to restore data in your Galaxy S9/S9 Plus, simply open Smart Switch on your computer.
  3. Connect your phone to your computer.
  4. In Smart Switch, click on the Restore button and it will start restoring all the data.

    Backup and Restore Samsung Galaxy S9/S9 Plus

That’s all you had to do to take a backup of your Galaxy S9. To view the backup details, you can open the Preferences > click on the Details button appearing in front of the device information. You can now view the details of all the backups created by Smart Switch. You can click on the View Folder option to view the backup folder. It’s a good idea to make a few copies of this folder so that your data stays as secure as possible.

Backup and Restore Samsung Galaxy S9/S9 Plus

Backup and Restore Samsung Galaxy S9/S9 Plus

If you have any queries or anything to add to this guide, feel free to reach out to us using the comment box below.