

If you have got the all-new Galaxy S9 or S9 Plus, we would like to congratulate you. If you are planning to get one, we would still like to congratulate you. The S9/S9+ are the finest smartphones that the company has manufactured to date. These phones come with a lot of goodies that we have never seen before.
Why should you backup your Galaxy S9 or S9 Plus?
Our smartphones are more like our companions now. Most of our everyday communication takes place through our smartphones. Our important contacts are stored in the phones. There are the text messages from our friends, families and workplace. Call logs are maintained on the phone to keep us informed about whom we are in touch with. We take hundreds of pictures every day which go down the memory lane and are kept in our phones.
We rely too much on the phones. It’s not basically a handset that we are depending on, we care too much about our data that we are interacting with using our phone. We can keep patience if an unfortunate event takes place and we lose our phone, but we definitely cannot bear the loss of data.
This is why it’s very, very important to keep our data backed up. A backup of your data will let you restore all your important data if something goes wrong with your phone.
There are various cases that can result in a data loss. The phone can get stolen. It can fall off from your pocket. The phone can get malfunctioned, you can lose data as a result of a factory reset. You can also lose data while updating your phone and there are many similar unfortunate happenings that can take place.
I hope that no such event takes place in your life, Galaxy S9 and S9 Plus are quite expensive smartphones. But, just to make sure that your data stick with you even after something has happened, you should back it up beforehand. Right after getting your brand new S9 or S9 Plus, you should learn how to take a backup of everything stored on it. Knowing that what backup mechanism will work the best for you, you will be able to take a backup every few hours or every few days.
A little bit about this guide
In this guide, we will take a look at a tutorial to learn how to backup and restore Samsung Galaxy S9/S9+. To backup and restore Samsung Galaxy S9/S9 Plus, we will be using the Smart Switch. With the help of Smart Switch, you can backup contacts, call logs, SMS messages, pictures and everything else stored on your Galaxy S9/S9 Plus.
Although there is a huge number of backup applications, we will use Smart Switch because it belongs to Samsung. It is also the most frequently updated utility for Galaxy owners. Here is how to take a backup and also how to restore the backup on an S9 or S9 Plus.
How to Backup and Restore Samsung Galaxy S9/S9 Plus
Galaxy S9/S9 Plus users can use Smart Switch to backup Contacts, Calendar, Messages, Samsung Notes, Call logs, Clock, Internet Browser data, Samsung Health Data, Reminders, Images, Music, Videos, Documents, Voice Memos, Soundcamp, Applications, Emails, Home screen settings, and the entire settings of the phone.
Note: To demonstrate the functionality of the Smart Switch, I have used a Galaxy Note 8. However, the same guide should work flawlessly for the Galaxy S9/S9+ as well.
Backup Galaxy S9/S9 Plus
- Download and install Samsung Smart Switch on your computer.
- Open Smart Switch now.
- Connect your Galaxy S9 to your computer now.
- If the phone asks for any permission, allow it.
- You will find your phone showing a Smart Switch screen now.
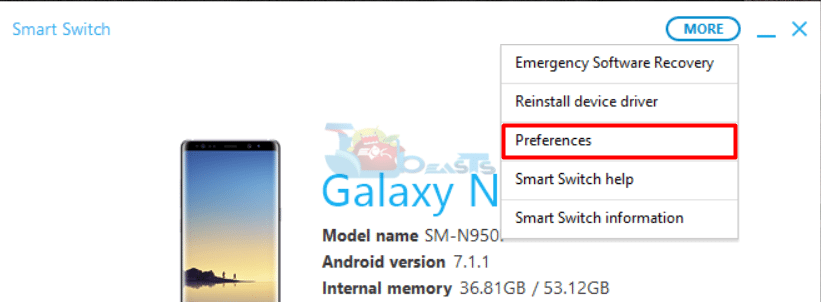
- Now in the Smart Switch on your computer, click on the small Settings Gear icon and click on Preferences.
- In the preferences, select the backup folder location.
- Now click on the Backup Items tab and select the data that you want to back up. It is preferred to select all.

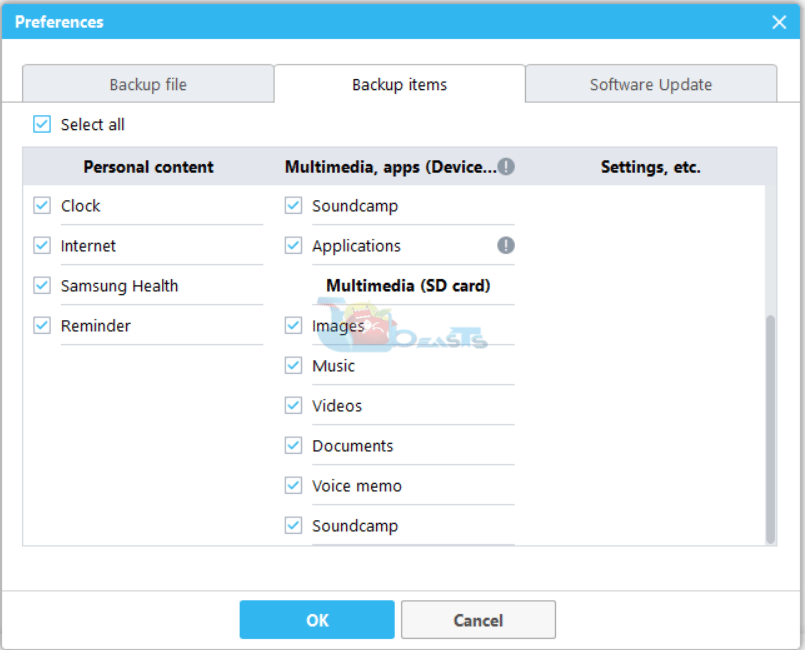
- After selecting the backup items, click on Ok button and get back to Smart Switch’s home screen.

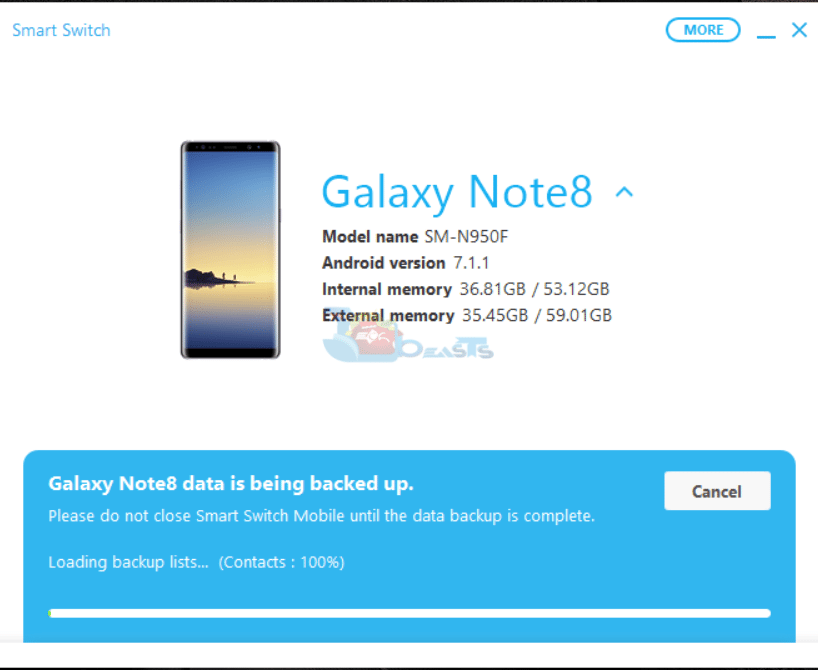
- Click on the Backup button now and let the Smart Switch do the magic.
Restore Samsung Galaxy S9/S9 Plus
- Make sure that you have backed up your data before you try to restore.
- When you want to restore data in your Galaxy S9/S9 Plus, simply open Smart Switch on your computer.
- Connect your phone to your computer.
- In Smart Switch, click on the Restore button and it will start restoring all the data.
That’s all you had to do to take a backup of your Galaxy S9. To view the backup details, you can open the Preferences > click on the Details button appearing in front of the device information. You can now view the details of all the backups created by Smart Switch. You can click on the View Folder option to view the backup folder. It’s a good idea to make a few copies of this folder so that your data stays as secure as possible.


If you have any queries or anything to add to this guide, feel free to reach out to us using the comment box below.


")


