Home Blog Page 78

Unlock Bootloader, Install TWRP and Root Huawei Honor 7X

0
Unlock Bootloader, Install TWRP and Root Huawei Honor 7X

Huawei’s mid-range smartphone the Honor 7X came out very recently with very powerful features onboard. Those of you have got the 7X, they can now unlock its bootloader, flash a TWRP custom recovery and root the phone. The custom solutions for this phone have landed in. It’s time to reveal the potential this phone has got.

Honor 7X Overview

The Honor 7X released just a few days ago. This phone has a 5.93-inch display having 18:9 display ratio. Huawei has proved that it can produce smartphones with an incredible display under a very affordable budget. This whopping display on the Honor 7X has full HD resolution as well. The 7X is powered by Huawei’s in-house Kirin 659 CPU. To accompany the CPU with the processing of graphics, there’s Mali-T830 MP2 GPU. Huawei Honor 7X has multiple variants. It has a 64GB and 4GB variant, there is the 32GB and 4GB variant and then there is a 32GB and 3GB variant. There is a dual 16MP + 2MP shooter setup at the back.

On the front, this phone has a 2MP shooter. Now that Huawei has kept almost everything so good, there has to be some downside as well. The downside of this phone is the outdated firmware running on it. Huawei Honor 7X will run on Android 7.0 Nougat out of the box. If you can patiently wait for the Oreo update, you shouldn’t bother with this phone running on Nougat. It has got powerful hardware after all.

The use of TWRP and Root

To further the functionality of this phone to add a slew of new features, you can install the TWRP and root it. Installing TWRP is going to be handy. It will let you backup all the partitions of your phone including Nandroid and the EFS. TWRP will let you wipe all the partitions as well including the Dalvik cache. You can sideload applications and custom ROMs using TWRP. There is an install option to install ZIP, IMG and other such files. Rooting your phone will let you install applications to optimize the performance and battery life of your phone. Xposed Framework is something that you can install with the help of TWRP to make the best out of your Huawei Honor 7X.

Unlock Bootloader, Install TWRP and Root Huawei Honor 7X

I hope that you have had a good idea of the phone and what we are going to do with it. It’s time for us to head towards the actual tutorial now. In this guide, we will learn to Unlock Bootloader, Install TWRP and Root Huawei Honor 7X.

Precautions & Preparation

  • This guide is intended for Huawei Honor 7X L21 only. Do not try this method on any other device otherwise, you may result in bricking it.
  • Make sure that your phone’s battery is charged up to 80% in order to avoid any power issues during the flashing process.
  • Backup all of your important contacts, call logs, SMS messages and media content to stay on a safe end. Do not forget to create a backup since this process is supposed to wipe your phone completely.
  • Enable USB debugging mode on your phone in developer options. To do so, go to settings > about device > tap build number 7 times. You will have developer options in settings now. Open developer options > Enable USB debugging. If you have the OEM Unlocking option, enable it as well.
  • Use your original data cable to establish a connection between your phone and your PC.
  • Follow this guide to the letter to avoid any mishap.

Disclaimer: The methods involved in flashing custom recoveries and rooting the device are highly custom. Rooting the device and flashing a custom recover is never recommended by a device manufacturer. In case something goes wrong, TechBeasts or the device manufacturers may not be held responsible. Make sure that you’re doing everything at your own risk.

Required downloads & installations

  1. Download and install Huawei USB drivers.
  2. Download and install Minimal ADB & Fastboot drivers.

How to Unlock Huawei Honor 7X Bootloader

  1. Unlocking bootloader will wipe your device. Make sure that you’ve backed up everything before going ahead.
  2. Install Huawei’s HiCare app on your phone and call the support in HiCare. Request them to get your bootloader unlock code. You will have to provide your email, IEMI and serial number.
  3. Huawei will send you your bootloader unlock code through an email in a few days or in a few hours.
  4. Make sure that you’ve downloaded and installed Minimal ADB & Fastboot drivers on your Windows PC or installed Mac ADB & Fastboot for Mac.
  5. Connect your phone to your PC now.
  6. Now open Minimal ADB & Fastboot.exe from your desktop. If you do not have this file on your desktop, then go to your Windows installation drive i.e. C drive > Program Files > Minimal ADB & Fastboot > Press and hold Shift Key + Right-click on an empty area with the open folder > click “Open command window here”.
  7. Now in the command window enter the following commands one by one.
  • adb reboot-bootloader

    This will reboot your Nvidia Shield in bootloader. Once booted up, issue the following command.

    fastboot devices

    This command will verify the connection of your device with your PC in fastboot mode.

  • fastboot oem unlock (bootloaderunlockcodexxxxxxxxxxxx)

    This command will unlock the bootloader. As soon as you press the enter key after typing this command, you will get a message in your phone asking for the confirmation of bootloader unlocking. Use volume up & down keys to navigate through options and confirm unlocking.

Install TWRP and Root Huawei Honor 7X

Required downloads [for the installation of TWRP and SuperSU]

  1. Download twrp_Honor_7x.img file and rename it to recovery.img.
  2. Download SuperSU.zip file and copy it to your phone’s external storage.
  3. Copy the renamed recovery.img file to the Minimal ADB and Fastboot directory which should be in a location such as: C drive > Program Files > Minimal ADB & Fastboot.
  4. Connect your Huawei Mate 10 Lite to the computer now.
  5. Now open Minimal ADB & Fastboot.exe from your desktop. If you do not have this file on your desktop, then go to your Windows installation drive i.e. C drive > Program Files > Minimal ADB & Fastboot > Press and hold Shift Key + Right-click on an empty area with the open folder > click “Open command window here”.
  6. As the command window opens up, enter the following commands one by one.
    1. adb devices
      1. This command will return a list of devices attached with a code verifying connection.
    2. adb reboot bootloader
      1. This command will reboot the phone in bootloader mode.
    3. fastboot devices
      1. This command will verify the connection in fastboot mode.
    4. fastboot flash recovery recovery.img
      1. This will flash the TWRP recovery on your phone.
    5. fastboot reboot
      1. This command will reboot your phone into the system.
  7. Once your phone has rebooted, turn it off.
  8. Now press and hold Volume Down + Power button to boot into newly installed TWRP recovery.
  9. Once you are in TWRP, tap Install > Locate and select SuperSU.zip > flash and reboot into the system.
  10. You are rooted now. Congrats!

How to Fix Unfortunately Prisma has Stopped Error on Android

1
How to Fix Unfortunately Prisma has Stopped Error on Android

Prisma has made its way to Android and it’s already rocking. It took almost no time for Prisma to become a viral photo editing application. If you have ever remained a fan of prismatic effects, Prisma is going to entertain you. Prisma’s modern art filters and stunning photo effects make your memories look extremely beautiful. Prisma also makes the surroundings in your picture look fantastic. Prisma’s photo effect and art filters are based on the arts pulled out by famous artists like Picasso, Munk and many others. Prisma is the right way to turn your beautiful moments into art.prisma

Prisma was previously available for iOS only. Recently the application made its way to the Android platform. The application has already gained a lot of appreciation from Android users all around the world. There are many other photo editing applications out there, and every now and then we saw a photo editing application getting viral. Right now is the time for Prisma since everyone around is playing with their pictures by applying cartoonish effects.

Prisma for Android supports Android 4.1 and higher. If you’re already using this application, you may have faced the “Unfortunately Prisma has Stopped” error, or you may face it at a later stage. If this error keeps coming up on your device, you will want to fix it right away. We have the solution right here for all of you. Let’s go ahead and learn how to fix unfortunately Prisma has stopped error on Android.

How to Fix Unfortunately Prisma has Stopped Error on Android

Method#1

Update Prisma

The error may be coming up because there’s the latest version of Prisma available in the Google Play Store and the one installed on your Android device has outdated. To fix this issue, simply tap the Google Play Store and search for “Prisma”. If an update is available, hit update and let it install the latest version of the game. Once it has updated, you will not get the Force Close error anymore.

Prisma Google Play Store: Link

Method#2

Clear Prisma Data and Cache.

  1. One your Android device, open Settings > Applications / Applications Manager > All Apps
  2. Scroll all the way down and locate Prisma.
  3. Tap Prisma to open its settings.
  4. If you’re using Android Marshmallow or higher, you will have to tap Prisma > Storage to open cache and data options.
  5. Now tap Clear Data and Clear Cache.
  6. Now restart your Android device now.
  7. Once done, open Prisma and the issue should have been resolved by now.

Method#3

Clear cache of your Android device

Just in case you’ve recently updated your Android device or made any potential changes in the system of your phone, it may have hampered the working of Prisma. To resolve this issue, you simply need to wipe the cache of your device. In order to clear the cache, boot into the stock or custom recovery of your Android device and locate “Wipe Cache or Cache Partition” option. Wipe the cache and restart the phone. After restarting, try opening the Prisma app and it should be working fine.c03754848

That’s all. We hope that your issue has been resolved. In case you have got any queries, reach us out in the comment box below.

How to Fix Unfortunately Pokemon Go has Stopped Error on Android

6
How to Fix Unfortunately Pokemon Go has Stopped Error on Android

Pokemon Go has taken the world by storm. A tumultuous crowd was looking forward to the release of this game, and as soon as it came out of the curtains, it totally freaked out the Android and iOS gaming geeks. If Pokemon has ever remained your first love then it is the time to capture him and his friends. Pikachu and his companions are waiting for you in your surroundings. Open this game on your phone and start looking around to hunt them down. Pokemon Go has hit a record number of users and has become the best game/application of all the times at this moment. Pokemon Go for Android is absolutely free. At the time of writing this post, the game has made its way to select countries and the worldwide rollout has stopped due to the load on servers. Worldwide release will be made pretty soon. In the meanwhile, you can grab the Pokemon Go APK and install it manually.

That was a brief overview of Pokemon Go. Let’s get back to what we were here for. Like other Android applications, you might face force close errors while playing Pokemon Go. An error as “Unfortunately Pokemon Go has stopped” might come at any point in your game. This error is pretty annoying as it keeps on coming back after it occurs for the first time. In order to fix it, you’ve to go through a little workout. Have a look at How to Fix Unfortunately Pokemon Go has Stopped Error on Android and play your game without any hiccups.

Update: Pokemon Go++ | iOS/Android [Poke Go++ Hack]

How to Fix Unfortunately Pokemon Go has Stopped Error on Android

Method#1

Update Pokemon Go

The error may be coming up because there’s the latest version of Pokemon Go available in the Google Play Store and the one installed on your Android device has outdated. To fix this issue, simply tap the Google Play Store and search for “Pokemon Go”. If an update is available, hit update and let it install the latest version of the game. Once it has updated, you will not get the Force Close error anymore.

Pokemon Go Google Play Store: Link

Method#2

Clear Pokemon Go Data and Cache.

  1. One your Android device, open Settings > Applications / Applications Manager > All Apps
  2. Scroll all the way down and locate Pokemon Go.
  3. Tap Pokemon Go to open its settings.
  4. If you’re using Android Marshmallow or higher, you will have to tap Pokemon Go > Storage to open cache and data options.
  5. Now tap Clear Data and Clear Cache.
  6. Now restart your Android device now.
  7. Once done, open Pokemon Go and the issue should have been resolved by now.13689563_10209085441585842_208205977_n

Method#3

Clear cache of your Android device

Just in case you’ve recently updated your Android device or made any potential changes in the system of your phone, it may have hampered the working of Pokemon Go. To resolve this issue, you simply need to wipe the cache of your device. In order to clear the cache, boot into the stock or custom recovery of your Android device and locate “Wipe Cache or Cache Partition” option. Wipe the cache and restart the phone. After restarting, try opening the Pokemon Go app and it should be working fine.c03754848

That’s all. We hope that your issue has been resolved. In case you have got any queries, reach us out in the comment box below.

Fix Galaxy Note 8 that won’t turn on after battery drain

0
Fix Galaxy Note 8 that won’t turn on after battery drain

Samsung Galaxy Note 8, Galaxy S8 and the Galaxy S8 Plus are suffering from a deep discharge issue. Whenever the phone discharges to 0% and it turns off, it refuses to turn back on. The issue is not widespread, it’s happening with only a few Samsung Galaxy smartphones. Samsung has already acknowledged that the issue is real. Samsung hasn’t given a word yet on how it’s planning to tackle this problem. In the meanwhile, Galaxy Note 8, Galaxy S8 and S8 Plus users are on their own.

Fix Galaxy Note 8 that won't turn on after battery drain

Since the day this issue started happening, a number of solutions popped up to prevent the battery from going to 0%. It is advised to charge your phone as soon as it falls down to 10 or 12%. This issue puts all the Galaxy Note 8 users at a huge risk. Suppose you want to check whether your hone has this issue or not, and you let your phone discharge to 0%. The moment you try to turn it on, it doesn’t pick up the power. What are you going to do? Even checking the phone is a risk as well. Galaxy Note 8 users have been living in fear ever since this issue was reported. Those users who haven’t faced this issue so far, they shouldn’t let their phone’s battery drain completely. Those who have already been hit by this issue, they should try fixing the phone using this guide.

Fix Galaxy Note 8 that won’t turn on after battery drain

In this guide, we will take a look at a few possible fixes for the Galaxy Note 8 that won’t turn on after battery drain. The solutions listed below are not guaranteed to work. However, you may try them and if you happen to be lucky enough, your phone will certainly turn on as well.

Put the phone on charging for a while

The very first thing you should do is, connect a charge to your phone and leave it for a while. Wait for at least 25 – 30 minutes. After 30 minutes, try turning your phone and see if it shows you the display or not. Usually, when the battery is drained and goes to 0%, it needs a few minutes of charging before turning on. In the case of Galaxy Note 8, the phone may not turn on for the first 25 – 30 minutes.

Turn on your phone in download mode

Another solution is to try turning on your phone into the download mode. In order to boot it up in download mode, press and hold the Volume Down + Bixby + Power key. As soon as the phone shows a warning, press the Volume Down Key again to reboot it.

Take your phone to the Service Centre

The last resort is to take your phone to a Samsung Service Center. If your phone is still under warranty, you will easily get it replaced or get its battery fixed at the least. Samsung knows that this issue is disturbing the users and it’s bound to resolve any such issues immediately.

That’s all. If you have anything to add to this guide, drop in the comments section below.

Fix Galaxy Note 8 Moisture detected in charging port error

0
Fix Galaxy Note 8 Moisture detected in charging port error

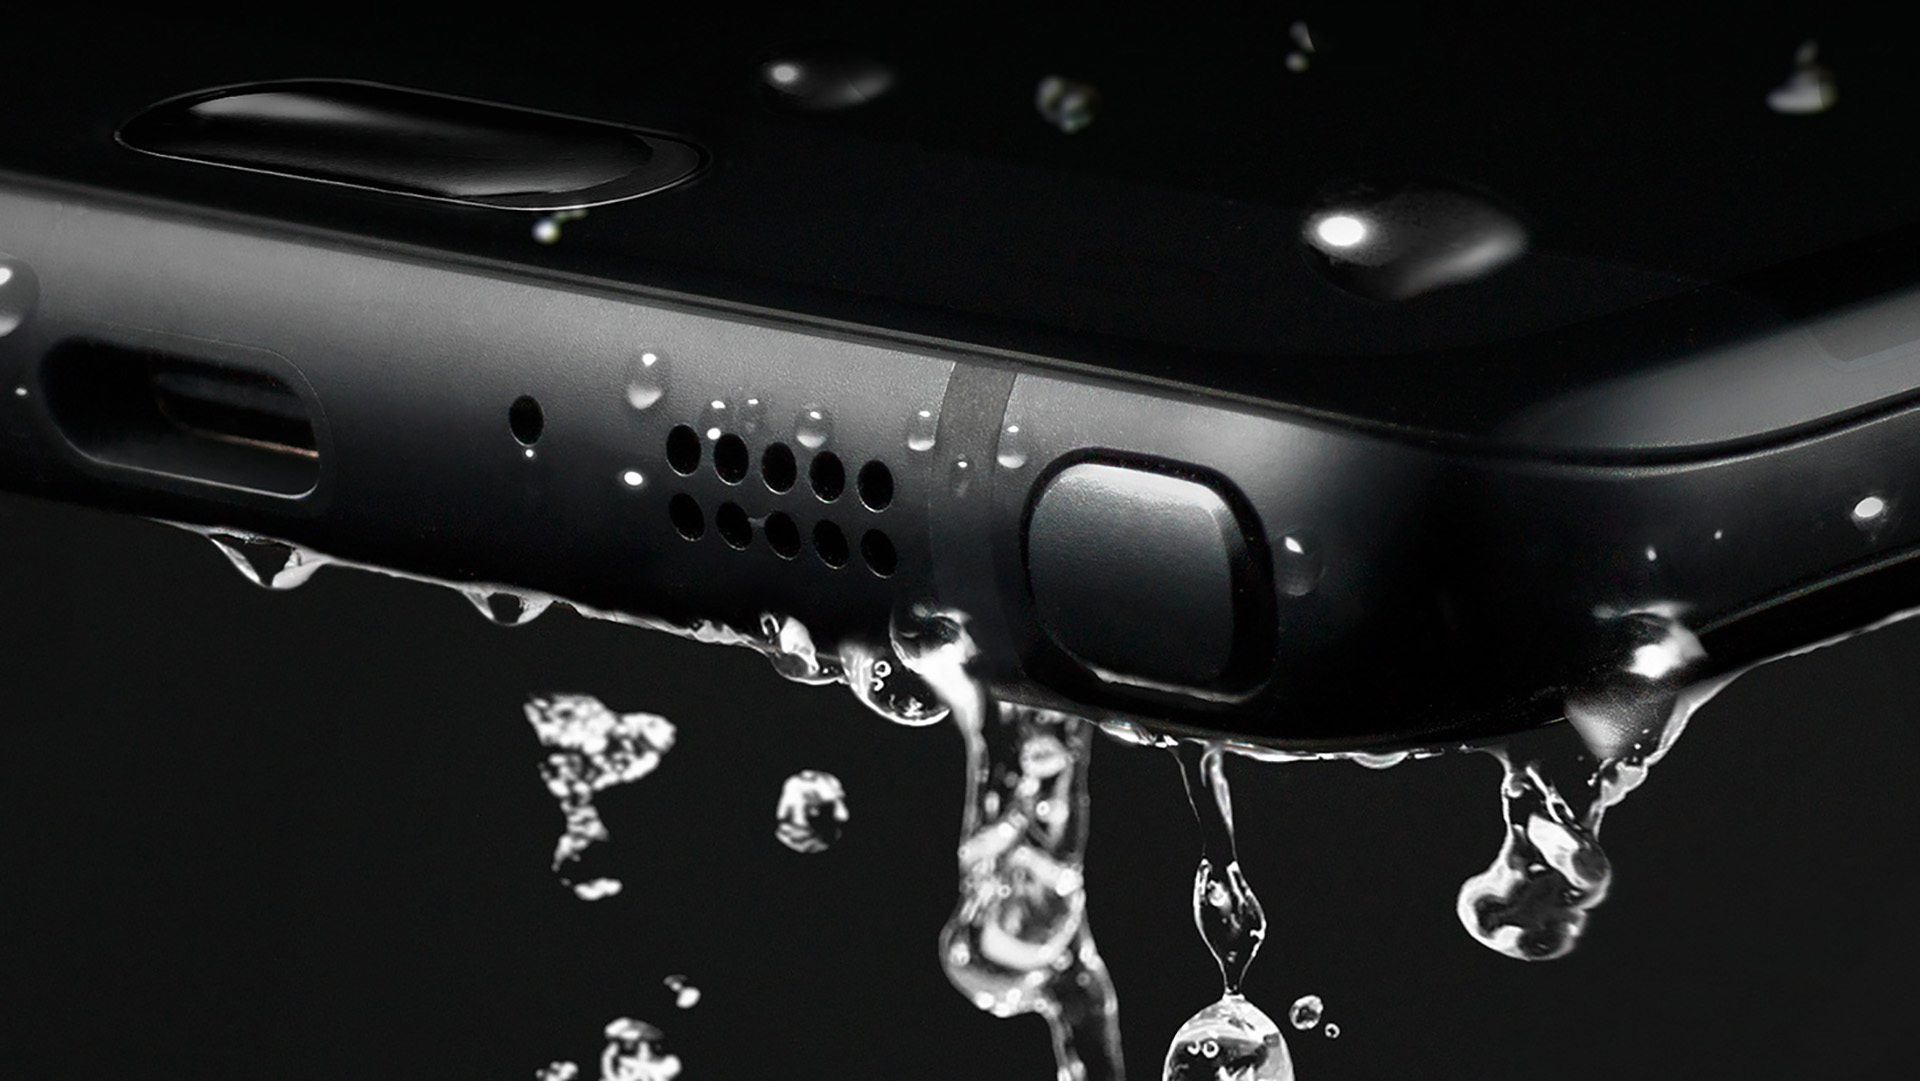
Moisture detected in charging port is a common error on Samsung Galaxy handsets. The error is self-explanatory. Whenever moisture sticks up in the charging port of your phone, it will refuse to charge and pop up this error. This happens mostly when you have just water-tested your water-resistant phone and the water sticks up in the charging port of the phone. Other than this, if you live in a very humid area, your phone can build up moisture in the charging port and refuse to charge. Touching the charging port of the phone with wet hands can also drop the water inside and result in this error.

Moisture Detection Error Background

There’s a whole background to the Moisture detected in charging port error. You must not have seen this error on the older Samsung Galaxy handsets. That is because Samsung just started making water-resistant handsets very recently. All the water-resistant handsets have this property. The water-resistant Samsung Galaxy phones have a moisture sticker inside the charging port, which works as a moisture detector. If there is moisture in the charging port of the phone, and one connects the charger, this stripe will immediately inform the user through a pop-up notification on the phone. The moisture sensor is programmed to detect and notify the user. The sole purpose of this error is to protect your phone from a potential short circuit.

Now, why does the phone refuse to charge if it’s already water-resistant? Well, that is because, the phone is water resistant, the circuits inside the phone are not. Manufacturers like Samsung, Sony, LG, and others use rubber gaskets to protect the components of the phone from water. The gaskets are not applied on the electric-circuits inside the phone. Gaskets are only applied in the phone to stop the water from getting inside whenever the phone is exposed to water.

If you are testing your phone’s water-resistance of your phone by dipping inside a bowl or bucket of water for a while, the water will definitely get inside the charging port. The gaskets will prevent the water from entering the phone and hitting the electric circuits inside. Until the water dries off from the charging port, it will keep giving you the error so that there’s absolutely no damage done to the phone. At times, it becomes completely annoying when you are unable to resolve this issue. If you have faced such an issue on your phone and you are on this post to find a solution, then let us help you out from here.

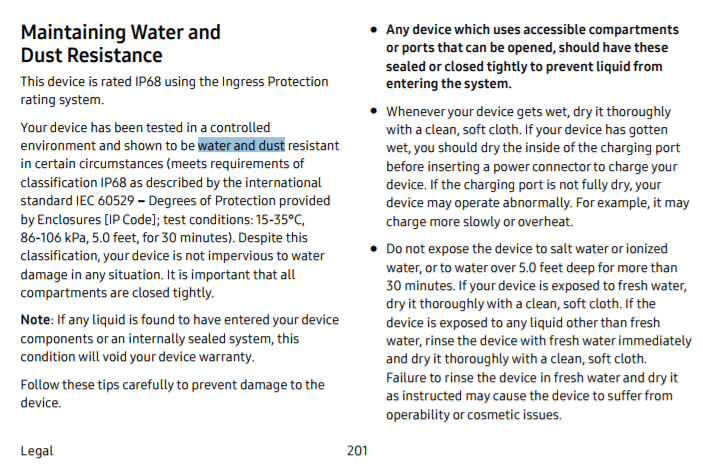
Here are a few snapshots of the Samsung manual explaining the water and dust resistance feature of the Samsung Galaxy Note 8.

Fix Galaxy Note 8 Moisture detected in charging port error

Galaxy Note 8 users who have started facing this problem recently can find the guidelines given below now. There are several tips that will help you to fix Galaxy Note 8 Moisture detected in charging port error immediately. Let’s go through the tips one by one now.

Note: Try these solutions one by one.

The Cloth Solution

  1. First of all, you should try wiping off the charging port using a towel or any other suitable cloth.
  2. Shake the phone in order to let all the water out and then wipe it off again.
  3. Try looking into the charging port if there’s moisture left inside. If the phone still gives an error, move onto the next fix.

The Vacuum Cleaner Solution

Got a vacuum cleaner? Let’s fix the phone using a vacuum cleaner then. All you have to do is to suck the moisture/water out of all the holes of the phone. Suck the moisture from the speaker holes, the charging port and the headphone jack. Using vacuum cleaner is the safest way to fix the phone.

The Hair Dryer Solution

Take a hair dryer, turn it on. Set it’s temperature to 1 at max. Do not increase the temperature as we only want to dry off the moisture. Blow the air right into the charging port, the headphone jack and the speaker holes in the phone. Use the hair dryer for a few minutes to completely wipe off the moisture. Once done, you can try putting your phone back to charging.

The Qtip Solution

First of all, take a Qtip and try cleaning the charging port of the phone. Check the Qtip if it pulls out any moisture from the port. If the dry Qtip doesn’t work good enough, you can get rubbing alcohol. Dip the Qtip in the rubbing alcohol and then use it to wipe off the charging port. Let it dry for a while and it will most probably fix your phone.

The Tweezer Solution

If you find out that the charging port of your phone is filled up with corrosion because of water, you can use a tweezer to scrape it in order to remove corrosion. This is a tricky and a risky solution. You have to be very careful while scraping the charging port of your phone. Do this one at your own risk.

If the solutions above fail to work for you, you can try wiping the cache of your phone. If you think that there is no moisture in the phone and the error has just got stuck in the software, you may want to flash a stock firmware on your phone. Here’s how you can re-install an official software on the Samsung Galaxy Note 8.

In case you need further help, feel free to reach me out through the comment section below.

How To Install Yalp Store On Android

0
How To Install Yalp Store On Android

Yalp Store is kind of a Google Play Store alternative. When Google Play Store is installed on a smartphone, it runs with the help of Google Play Services. Google Play Services come with their own framework installed in a phone in order to work properly. Google Apps can siginificantly slow down the performance of an Android phone. If you have ever had an experience of installing custom ROMs, you must have noted that custom ROMs often come without Google Apps. That is because users do not want bloated ROMs. They want to have the freedom of choosing what applications should be there in the operating system. Yalp Store is something for such users. It doesn’t need any services to run on. It’s a very simple, light application that can give you the Google Play Store like experience without a heavy framework installed on your phone.

What is Yalp Store?

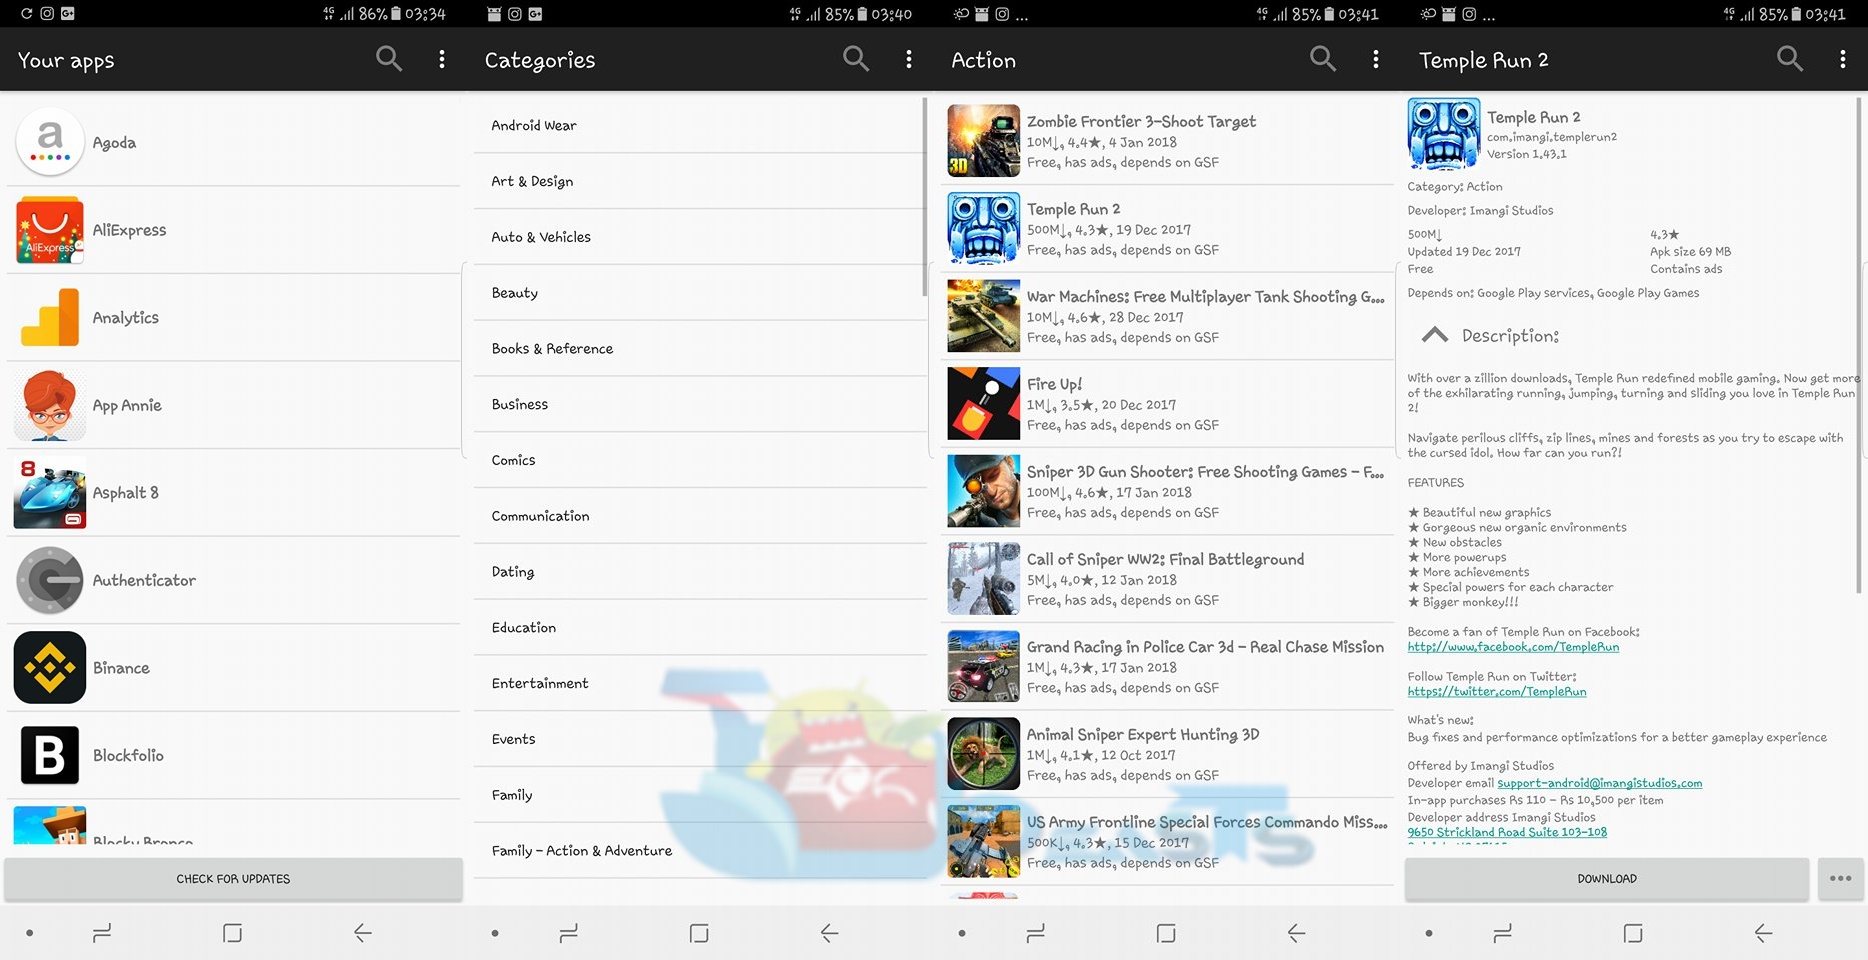
Yalp is available on F-Droid. F-Droid is the largest open-source application platform for Android. At F-Droid, you can find some really handy applications that never made it to a popular platform like the Play Store. Yalp is one of them. It’s a hidden gem indeed. Apart from allowing the users to install all the applications, it also manages updates. The home-screen of Yalp shows you all the applications that you have currently installed. The categories screen will show you a list of all the categories through which you can navigate to your desired application or game. Yalp has a very simple, easy to understand UI. It shows the maximum amount of information in the list of applications so that you don’t have to tap each application to view its details.

So, why would you want to get Yalp when the Play Store can do a fine job? Well, the question is already answered in the first paragraph, but we can have a detailed look at it. Yalp is basically for those who want to keep the things simple. Android enthusiasts, who want to keep their phone’s performance maximum, can uninstall all the Google Apps and choose to go with a store like Yalp. Also, if you install a custom ROM on your phone, and you do not want to flash the Gapps package, you can install the Yalp Store instead. There is absolutely no need to go with a heavy GApps package to sort out the applications problem. At times, the Google Play Store faces connection issues. If such issues are intermittent in your region, you can pick up Yalp as an alternative. There are some applications that you will not find on the Play Store, but you will find them on Yalp. Another great aspect of Yalp Store is that it’s an open source project and it’s consistently being improved.

A cool feature of the Yalp Store

And let’s not forget the most important feature of Yalp. Whenever you install an application using Yalp, it accesses the Play Store to download the APK file of that application. The APK file is stored in a download folder in the internal or external storage of your phone. Once Yalp has downloaded the APK file, it asks you to install it. You simply tap the install button in the Yalp Store and it will do the job. It means if you ever accidentally delete an application from your phone, you can still have its APK file to install it next time without downloading it again. If the Android phone is rooted, Yalp can update the applications in the background without putting a huge impact on the current processes of the phone. On a rooted phone, Yalp can use to install or uninstall the applications in the background as well. For the background usage, you can install Yalp as a system application.

Now that you have learned all about Yalp, it’s time for me to show you how you can install it. Here’s a step-by-step guide explaining how to install Yalp Store on Android.

Installing Yalp through F-Droid

  1. Download and install F-Droid on your phone.
  2. Open F-Droid now.
  3. Tap the Search button in F-Droid
  4. Type “Yalp” and search.
  5. You will find Yalp Store, tap to install it.
  6. Once installed, it will appear in the App Drawer.

Installing Yalp using Yalp APK

  1. Download Yalp Store APK and copy it to your phone.
  2. On your phone, go to settings > lock screen & security > unknown sources > allow.
  3. Now locate the Yalp Store APK and open it to start the installation.
  4. Proceed with the on-screen instructions to install Yalp Store.
  5. Once done, it will appear in the app drawer.

Now that you have opened Yalp Store, you will find your installed applications on the home screen. You can tap the menu button on the top-right to access rest of the options. The categories option will take you to the directory of applications. From the categories, you can install the applications. It has all the applications that are available at the moment in the Play Store.

That’s all for now. In case you have got something that can help this guide further, drop that in the comment box below. If you have any queries, feel free to reach me out.

How To Fix Galaxy S8 That Shows “Moisture detected in charging port” Error

0
How To Fix Galaxy S8 That Shows “Moisture detected in charging port” Error

Moisture detected in charging port is a very common error on the water-resistant handsets. The aforementioned error mainly belongs to the Samsung Galaxy handsets. If you own a phone like the Galaxy S6, S7, S8, Note 8 or any other Samsung Galaxy phone which is water resistant, you must be familiar with this error. This comes up when there is moisture stuck up in the charging port of your phone and the phone refuses to establish an electric connection. The sole purpose of this error is to save your phone. It’s always suggested to fix this warning before you begin charging your phone. Before I tell you how you can fix a Galaxy S8 that shows “Moisture detected in charging port”, it’s important to know the background of this error.

Water-resistant phones and background of Moisture detection

Sony, Samsung, LG, and some other manufacturers have been making water-resistant and waterproof smartphones for a few years. All these manufacturers use a specific kind of rubber gaskets to seal the phones from the inside. These rubber gaskets are responsible for keeping the water out and protected the phone from getting water-damaged. Samsung has its own proprietary gaskets that it utilizes. All of its Galaxy phones are protected by IP67 or IP68 certification making the phones water and dust resistant. The gaskets are applied to the body-joints of the phone. These are not directly applied over the electric-circuit. This means the purpose of gaskets is not to protect the electric-board or wiring inside your phone. If the phone’s electric board is directly exposed to water, it will definitely make an impact. But it’s unlikely to happen since the body is sealed really well.Moisture detected in charging port

Charging port, headphone jack can attract moisture

So, when your phone is exposed to water or moisture, it’s likely to stick up in the charging port. The gaskets applied next to the charging port will not let it enter the phone. The charging port is supposed to establish a connection between your phone’s electric circuit and the charger. If the charging port is wet, it can greatly damage the phone. For this purpose, there is a sensor strip applied inside the charging port. If the port is wet, and the charger is connected, this strip is responsible for sending a signal to the software that the user needs to dry off the moisture first and only then the phone will charge. Therefore, it’s very important to fix this warning as soon as it pops up.

Note: While water experimenting with your phone, always remember that companies make water-resistant phones, not water-proof. There is a huge difference between water-resistance and water-proof products. If you will expose a water-resistant gadget to water for a long while, it will definitely get damaged. Here’s what Samsung has to say about the Galaxy S8 in its own user manual:   


Now, what happens is, at times you apply several fixes to get rid of this warning, but it doesn’t go away. So, today, we will have a look at some methods which will definitely work. Here are all the possible solutions to fix Galaxy S8 that shows “Moisture detected in charging port” error.

How To Fix Galaxy S8 That Shows “Moisture detected in charging port” Error

Galaxy S8 or S8 Plus users who have started facing this problem recently can find the guidelines given below now. There are several tips that will help you to fix Galaxy S8 Moisture detected in charging port error immediately. Let’s go through the tips one by one now.

Note: Try these solutions one by one.

The Cloth Solution

  1. First of all, you should try wiping off the charging port using a towel or any other suitable cloth.
  2. Shake the phone in order to let all the water out and then wipe it off again.
  3. Try looking into the charging port if there’s moisture left inside. If the phone still gives an error, move onto the next fix.

The Vacuum Cleaner Solution

Got a vacuum cleaner? Let’s fix the phone using a vacuum cleaner then. All you have to do is to suck the moisture/water out of all the holes of the phone. Suck the moisture from the speaker holes, the charging port, and the headphone jack. Using vacuum cleaner is the safest way to fix the phone.

The Hair Dryer Solution

Take a hair dryer, turn it on. Set it’s temperature to 1 at max. Do not increase the temperature as we only want to dry off the moisture. Blow the air right into the charging port, the headphone jack and the speaker holes in the phone. Use the hairdryer for a few minutes to completely wipe off the moisture. Once done, you can try putting your phone back to charging.

The Qtip Solution

First of all, take a Q-tip and try cleaning the charging port of the phone. Check the Qtip if it pulls out any moisture from the port. If the dry Qtip doesn’t work good enough, you can get rubbing alcohol. Dip the Q-tip in the rubbing alcohol and then use it to wipe off the charging port. Let it dry for a while and it will most probably fix your phone.

The Tweezer Solution

If you find out that the charging port of your phone is filled up with corrosion because of water, you can use a tweezer to scrape it in order to remove corrosion. This is a tricky and a risky solution. You have to be very careful while scraping the charging port of your phone. Do this one at your own risk.

If the solutions above fail to work for you, you can try wiping the cache of your phone. If you think that there is no moisture in the phone and the error has just got stuck in the software, you may want to flash stock firmware on your phone. Here’s how you can re-install an official software on the Samsung Galaxy S8 or S8 Plus.

In case you need further help, feel free to reach me out through the comment section below.

Fix Galaxy Note 8 Charging Issues

0
Fix Galaxy Note 8 Charging Issues

Samsung Galaxy Note 8 is the best smartphone that the South Korean giant has ever produced. Galaxy Note 8 comes with great hardware with the best software running on-board. Galaxy Note 8 has the new dual cameras which take mind-blowing pictures. The phone has got a great design language. The features on the phone are good enough to impress any user. All the goodness in the Samsung Galaxy Note 8 does not mean that the phone is resistant to issues and errors. The performance and battery life of your Galaxy Note 8 can get sluggish at times. It starts coming up with charging issues. It’s screen starts flickering. All such issues can be easily fixed, but you need to know how to do so.  

So, your Samsung Galaxy Note 8 recently started having charging issues? Is it refusing to charge? Its fast charging is not working? or it’s charging slow? Whatever issue you are having, I am going to help you resolve it in this post. Charging issues are very common with the Samsung Galaxy phones. At times, it’s very easy to fix a charging issue on a phone like the Galaxy Note 8, but we just do not know what to do. In order to fix a Note 8 that’s having charging issues, you need to first find out what exactly the problem is. Once the problem has been identified, you can start applying the solutions one by one in order to fix it.

Fix Galaxy Note 8 Charging Issues

In this post, I have collected a number of solutions that will fix different charging issues of the Galaxy Note 8. You can check what kind of charging issue your Note 8 is having and then you can apply the relevant fix for Galaxy Note 8 charging issues. Let’s start it now.

Galaxy Note 8 is not fast charging

A phone not picking up fast charging is a very common problem, especially with the Samsung Galaxy phones. Samsung users have often reported that they do not get the Fast charging notification when the plug in the charging cable. At times we are not paying attention whether we are using original data cable and charger or not. There are many other reasons which can turn off the Fast charging feature of the phone. Here are the few possible solutions to fix a Note 8 that is not Fast charging.

Use original data cable and charger:

  1. Always use OEM data cable and charger to charge the phone.
  2. Using low-quality aftermarket data cable and charger will not fast charge the phone.
  3. Always make sure that the charger is properly plugged into the switch and the cable is properly plugged into the phone.

Fast charging will not work when you are charging your phone in car, using power bank or using your laptop

  1. Fast charging will only work when your original charger is plugged into an electric switch.
  2. The switch must have proper current to make the charger work.
  3. If the current is not appropriate, the charger will refuse to provide Fast charging to the phone.
  4. The current in a car’s charger, from the power bank or from the laptop is not powerful enough to trigger the Fast charging.

If you think that the issue is in the software, try these solutions.

Clear the cache of your phone: To do so, turn off your phone. Now press and hold Volume Up + Bixby + Power key to get into recovery mode. Once you are in recovery, scroll down to highlight Wipe cache partition and wipe it. Try connecting the charger once you have wiped the cache.

Galaxy Note 8 charging slow

First of all, you need to make sure that you are using original data cable and charger just like I mentioned above. After this, you need to check if there is any application that is slowing down the charging time of your phone. To do so, you can boot your phone in safe mode which will disable all the applications. Once you are in safe mode, you can try charging your phone. If it charges in time, it means that there was an application causing the trouble. Now you need to go through your recent installations to identify the culprit. Here’s how to get into the safe mode.

Boot Note 8 into Safe Mode

  1. Turn off your phone completely.
  2. Now turn on the phone. As soon as Samsung logo appears on screen, press the Volume Down key.
  3. Keep the key pressed until the phone shows you home-screen.
  4. As it shows the home-screen, you can find the Safe Mode watermark on the bottom-left corner.
  5. Charge your phone now and check if the issue is gone.

You can also try clearing the cache of the phone to fix it. The method to clear cache is also given above.

Galaxy Note 8 refusing to charge

If your phone is not detecting the charger, these are the few possible solutions you can try.

  1. Check if the wall charger is properly plugged into the switch or not.
  2. Check if the current coming out of the electric switch is as per requirement or not.
  3. Check if the charging cable is fine or not. Using a damaged cable or an aftermarket cable can be a trouble sometimes.
  4. Make sure that there is no smut in the charging port of your phone.
  5. Also ensure that there is no moisture in the charging port.

Moisture detected in charging port issue

I have already done a detailed guide on how to fix the moisture detected in charging port issue on the Galaxy Note 8. Here’s the solution from the guide.

The Cloth Solution

  1. First of all, you should try wiping off the charging port using a towel or any other suitable cloth.
  2. Shake the phone in order to let all the water out and then wipe it off again.
  3. Try looking into the charging port if there’s moisture left inside. If the phone still gives an error, move onto the next fix.

The Vacuum Cleaner Solution

Got a vacuum cleaner? Let’s fix the phone using a vacuum cleaner then. All you have to do is to suck the moisture/water out of all the holes of the phone. Suck the moisture from the speaker holes, the charging port and the headphone jack. Using vacuum cleaner is the safest way to fix the phone.

The Hair Dryer Solution

Take a hair dryer, turn it on. Set it’s temperature to 1 at max. Do not increase the temperature as we only want to dry off the moisture. Blow the air right into the charging port, the headphone jack and the speaker holes in the phone. Use the hair dryer for a few minutes to completely wipe off the moisture. Once done, you can try putting your phone back to charging.

The Qtip Solution

First of all, take a Qtip and try cleaning the charging port of the phone. Check the Qtip if it pulls out any moisture from the port. If the dry Qtip doesn’t work good enough, you can get rubbing alcohol. Dip the Qtip in the rubbing alcohol and then use it to wipe off the charging port. Let it dry for a while and it will most probably fix your phone.

The Tweezer Solution

If you find out that the charging port of your phone is filled up with corrosion because of water, you can use a tweezer to scrape it in order to remove corrosion. This is a tricky and a risky solution. You have to be very careful while scraping the charging port of your phone. Do this one at your own risk.

That’s all for now. If find this guide helpful, do not forget to drop the feedback. In case you are still facing some issues, fell free to reach me out.

How to install Andy Android Emulator on Windows 10

3
How to install Andy Android Emulator on Windows 10

Android OS was originally supposed to run on handheld devices, smartphones to be more appropriate. The open nature of Android allowed developers to mould it for any device they wanted. Back in 2009, we saw a company named BlueStacks coming with an Android Emulator named BlueStacks App Player. This company laid the foundation for Android Emulators that would allow running Android OS on a computer. The idea of Android Emulators for computers expanded exponentially since then. Right now, we have a huge number of Android Emulators on the market. All the emulators serve the same purpose with their own unique features. Among the Android Emulators, the Andy Android Emulator is one prominent name.Andy Android Emulator on Windows 10

A flashback of Andy (Formerly known as Andyroid)

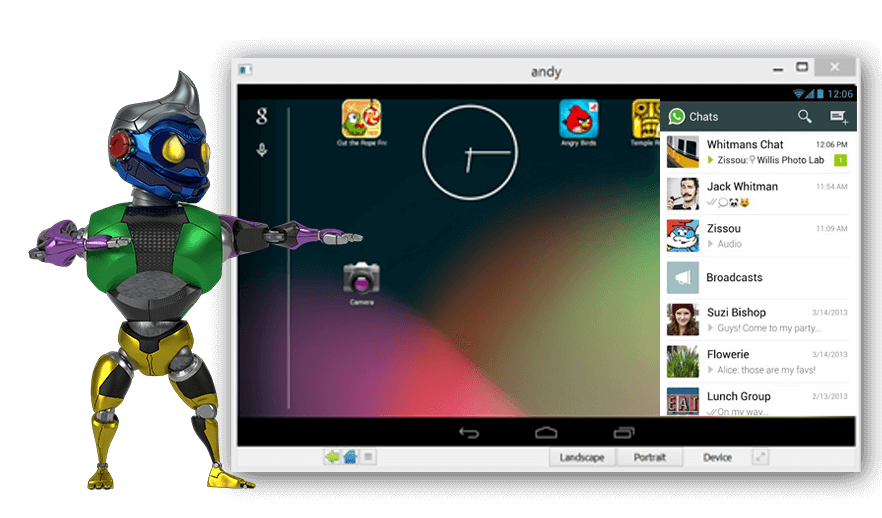
Andy Android Emulator was launched between late 2011 and early 2012. The idea behind launching Andy was to connect the mobile and computer users. Andy bridges the gap between a smartphone and a computer. Andy makes the use of Android 6.0 Marshmallow to run on. On a computer, it just runs like a virtual tablet. Andy has the stock Android look. If you have ever had an experience of running Vanilla Android, you will realise that Andy has quite the same look. It shows you the dock on the home screen just like you would see on a screen of a tablet powered by pure Android. The app drawer is also the same. It’s a complete Android device, but it’s totally virtual.

Now the question that may or may not crawl through your mind is, why you would use Andy or any other Android emulator when you have a phone? There are several answers to one same question. Whether you need to run your favourite games, communication applications, any tool or any other app, Andy is going to run it on your computer. With Andy, you can enjoy the resolution of a game on a bigger screen. There aren’t going to be any compatibility issues, no storage issues, no nothing. As far as communication applications are concerned, you can run any application like WhatsApp, WhatsApp for Business, Viber, IMO and others using Andy.

If you do not always want to pick up your phone to connect with your friends, you can still do it using your laptop right in front of you. There are many applications which are not available for operating systems like Windows and Mac. If an application is available for Android, it means you can run it on your computer as well. So, if you have ever wanted to get a desktop version of an Android application, you can simply emulate it into your computer. If we keep discussing the reasons to use an Android emulator, we will never be able to push the breaks. For now, we will simply get back to what we were here for.Andy Android Emulator on Windows 10

Andy works pretty well on the Windows operating system. We have already published several guides on Andy. So far we have discussed the methods to install Andy on previous versions of Windows. Today, we are going to have a look at the tutorial to install Andy Android Emulator on Windows 10. The step-by-step guide will help you to download Andy for Windows 10 and then install Andy on Windows 10. After installing Andy, you will also learn how to run applications or play games in Andy on Windows 10.

How to install Andy Android Emulator on Windows 10

Do you know why Andy doesn’t launch on Windows 10 computers? That’s because it needs virtualization technology enabled. Before installing Andy, I will tell you guys how to enable VT on your Windows 10 computer.

How to enable Virtualization Technology (VT) on Windows 10 for Andy

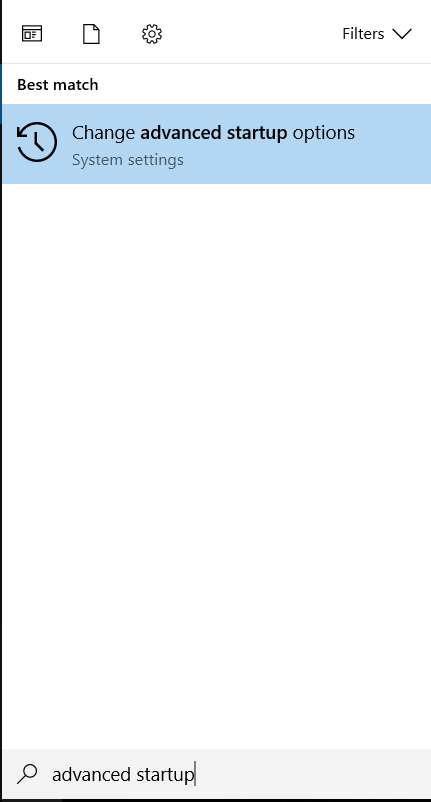
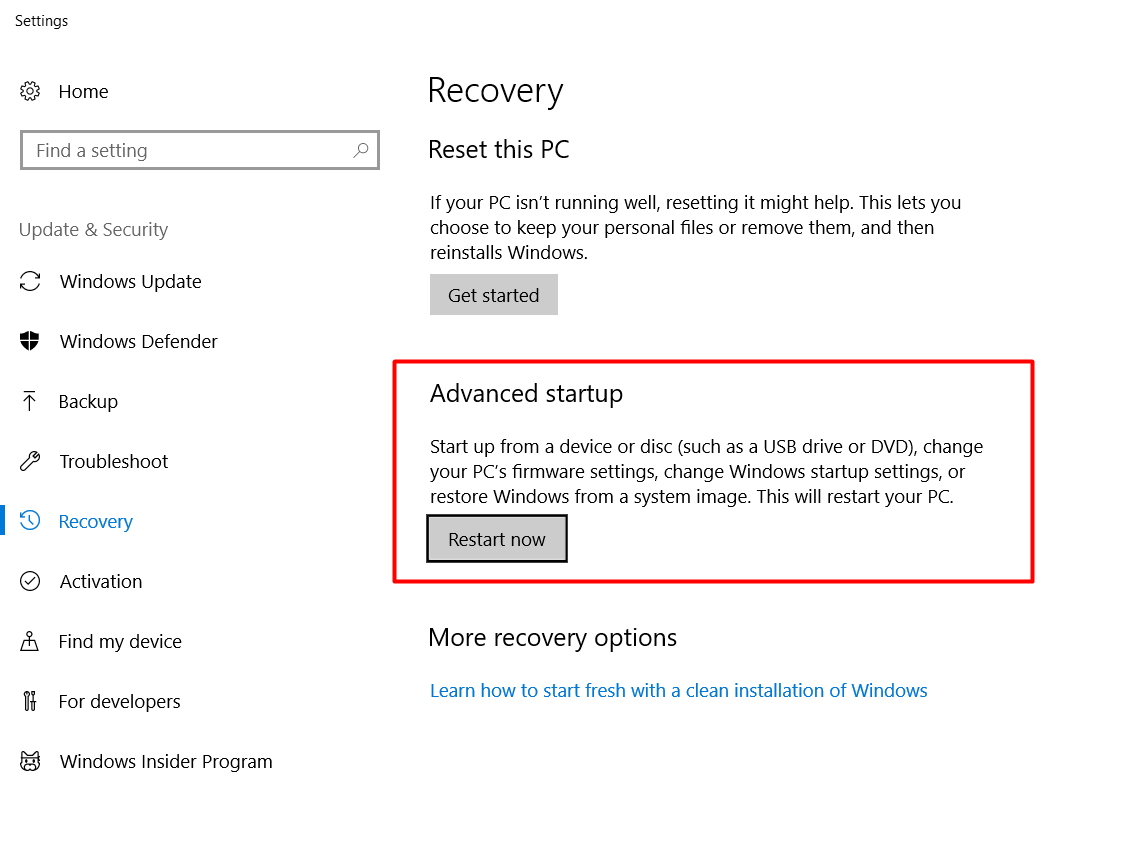
  1. Click on the search button in the Windows 10 taskbar and type “Advanced Startup”.Andy Android Emulator on Windows 10
  2. Now from the Advanced Startup settings page, click on Restart.Andy Android Emulator on Windows 10
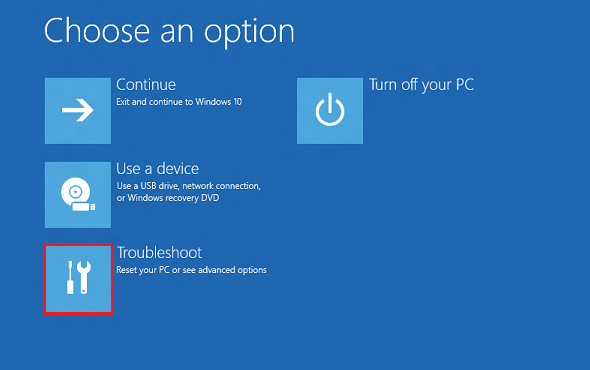
  3. As your computer restarts and shows you the options, select “Troubleshoot”.enable Virtualization Technology (VT) on Windows 10
  4. Now under the Troubleshoot options, click on Advanced options.enable Virtualization Technology (VT) on Windows 10
  5. Under Advanced options, click on UEFI Firmware Settings > Restart.
  6. This will restart your computer in UEFI (BIOS) mode.
  7. Now your computer will reboot in the BIOS.
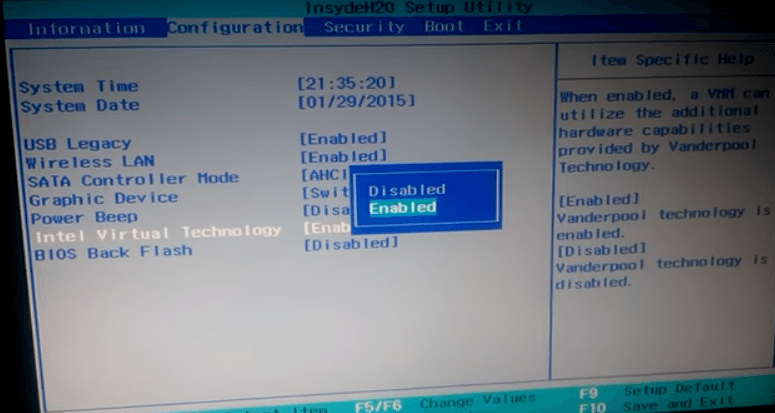
  8. On the BIOS screen, press the arrow key to enter “System configuration”.
  9. On the System configuration screen, you will have the Virtualization Technology. You can select it and then Enable it if it’s already disabled.     enable Virtualization Technology (VT) on Windows 10 enable Virtualization Technology (VT) on Windows 10

How to install Andy on Windows 10 now

  1. Download Andy Android Emulator Setup. 
  2. Launch the Andy setup file.
  3. On the screen, click Next.
  4. In the Next screen, Andy will ask you to install an antivirus as a part of their partnership. On this screen, you can click “Decline”.
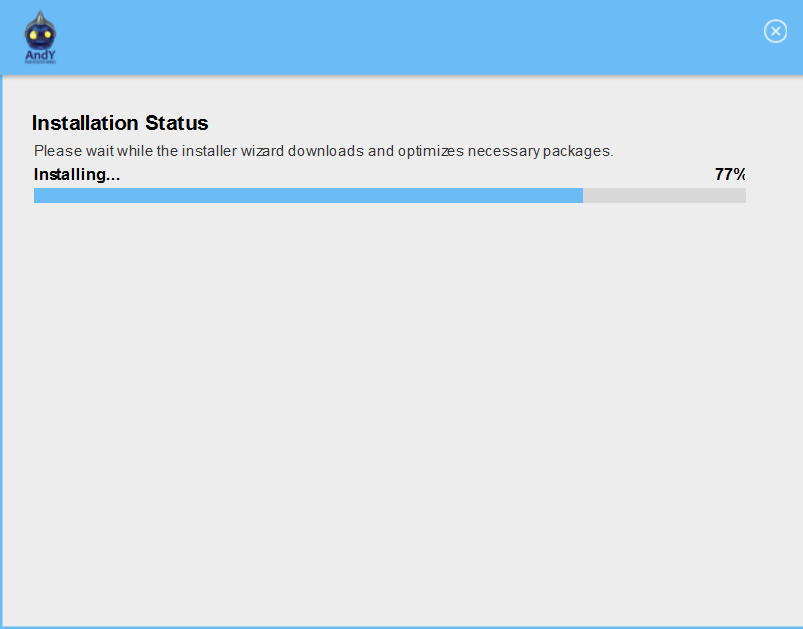
  5. Now Andy will start downloading its required files which are of about 500MB.Andy Android Emulator on Windows 10
  6. Let Andy download the files, once done, it will start installing the emulator automatically. After installation, Andy will automatically start as well. It can take a few minutes to launch. Andy Android Emulator on Windows 10
  7. Now you can setup Andy using your Google account.
  8. Once you have added an account, open the app drawer in Andy, and then open the Play Store to install the apps and games.
  9. You can find the installed apps and games in the app drawer as well. That’s all.

If you have any questions, ask them below!

Unlock Bootloader and Install TWRP on Huawei MediaPad T3 10

0
Unlock Bootloader and Install TWRP on Huawei MediaPad T3 10

Gone are the days when everyone used to love having a tablet. These days, the tablets are quite rare. Although companies like Huawei and Samsung are still producing powerful tablets, the users are reluctant to get a tablet for everyday use. Smartphones are big enough to serve the purpose of a tablet as well nowadays. You can easily find a phone with a screen of 5.0 to 6.0-inch in a very friendly budget. Because the tablets are not widely used devices now, the developers stopped focusing on custom recoveries, mods and custom ROMs for such devices. If you have a tablet, and you have got custom stuff for it, you are truly blessed. Right now, one of the blessed tablets is the Huawei MediaPad T3 10. Just recently, XDA member z1on developed a custom recovery for the Huawei MediaPad T3 10.Install TWRP on Huawei MediaPad T3 10

Huawei MediaPad T3 10 owners, it’s time for you to unleash the real power of your gadget. Before installing the TWRP custom recovery, you have to unlock the bootloader of the device. Upon installing the TWRP custom recovery, you will be able to carry out a number of operations to enhance the performance and usability of the tab. Using TWRP, you can install custom ROMs, MODs, SuperSU or Magisk to root. You can also backup the entire device. There’s an option to wipe the Dalvik cache as well. TWRP has its own terminal using which you can sideload applications and ROMs. TWRP has a long list of uses. It’s important to install it and try to understand it on your own.

In this guide, we will take a look at a method to first unlock the bootloader and then install TWRP on Huawei MediaPad T3 10. The method is divided into several parts. You must read the entire guide carefully in order to succeed.

Precautions & Preparation

  • This guide is intended for Huawei MediaPad T3 10 only. Do not try this method on any other device otherwise, you may result in bricking it.
  • Make sure that your phone’s battery is charged up to 80% in order to avoid any power issues during the flashing process.
  • Backup all of your important contacts, call logs, SMS messages and media content to stay on a safe end. Do not forget to create a backup since this process is supposed to wipe your phone completely.
  • Enable USB debugging mode on your phone in developer options. To do so, go to settings > about device > tap build number for 7 times. You will have developer options in settings now. Open developer options > Enable USB debugging. If you have the OEM Unlocking option, enable it as well.
  • Use your original data cable to establish a connection between your phone and your PC.
  • Follow this guide to the letter to avoid any mishap.

Disclaimer: The methods involved in flashing custom recoveries and rooting the device are highly custom. Rooting the device and flashing a custom recover is never recommended by a device manufacturer. In case something goes wrong, TechBeasts or the device manufacturers may not be held responsible. Make sure that you’re doing everything at your own risk.

Required downloads & installations

  1. Download and install Huawei USB drivers.
  2. Download and install Minimal ADB & Fastboot drivers.

How to Unlock Huawei MediaPad T3 10 Bootloader

  1. Unlocking bootloader will wipe your device. Make sure that you’ve backed up everything before going ahead.
  2. Install Huawei’s HiCare app on your phone and call the support in HiCare. Request them to get your bootloader unlock code. You will have to provide your email, IEMI and serial number.
  3. Huawei will send you your bootloader unlock code through an email in a few days or in a few hours.
  4. Make sure that you’ve downloaded and installed Minimal ADB & Fastboot drivers on your Windows PC or installed Mac ADB & Fastboot for Mac.
  5. Connect your phone to your PC now.
  6. Now open Minimal ADB & Fastboot.exe from your desktop. If you do not have this file on your desktop, then go to your Windows installation drive i.e. C drive > Program Files > Minimal ADB & Fastboot > Press and hold Shift Key + Right-click on an empty area with the open folder > click “Open command window here”.
  7. Now in the command window enter the following commands one by one.
  • adb reboot-bootloader

    This will reboot your Nvidia Shield in bootloader. Once booted up, issue the following command.

    fastboot devices

    This command will verify the connection of your device with your PC in fastboot mode.

  • fastboot oem unlock (bootloaderunlockcodexxxxxxxxxxxx)

    This command will unlock the bootloader. As soon as you press the enter key after typing this command, you will get a message in your phone asking for the confirmation of bootloader unlocking. Use volume up & down keys to navigate through options and confirm unlocking.

Install TWRP and Root Huawei MediaPad T3 10

Required downloads [for the installation of TWRP and SuperSU]

  1. Download twrp_recovery for T3 10.img file and rename it to recovery.img.
  2. Download Magisk.zip file and copy it to your phone’s external storage.
  3. Copy the renamed recovery.img file to the Minimal ADB and Fastboot directory which should be in a location such as: C drive > Program Files > Minimal ADB & Fastboot.
  4. Connect your Huawei Mate 10 Lite to the computer now.
  5. Now open Minimal ADB & Fastboot.exe from your desktop. If you do not have this file on your desktop, then go to your Windows installation drive i.e. C drive > Program Files > Minimal ADB & Fastboot > Press and hold Shift Key + Right-click on an empty area with the open folder > click “Open command window here”.
  6. As the command window opens up, enter the following commands one by one.
    1. adb devices
      1. This command will return a list of devices attached with a code verifying connection.
    2. adb reboot bootloader
      1. This command will reboot the phone in bootloader mode.
    3. fastboot devices
      1. This command will verify connection in fastboot mode.
    4. fastboot flash recovery recovery.img
      1. This will flash the TWRP recovery on your phone.
    5. fastboot reboot
      1. This command will reboot your phone into the system.
  7. Once your phone has rebooted, turn it off.
  8. Now press and hold Volume Down + Power button to boot into newly installed TWRP recovery.
  9. Once you are in TWRP, tap Install > Locate and select Magisk.zip > flash and reboot into the system.
  10. You are rooted now. Congrats!

Download BlueStacks N [BlueStacks with Android Nougat]

0
Download BlueStacks N [BlueStacks with Android Nougat]

BlueStacks Inc updated its famous BlueStacks Android Emulator to Android Nougat. So far, the BlueStacks App Player has been running on the Android Marshmallow. The Nougat update was long due. This is the only Android emulator that has made its way with the Android Nougat running on-board. The latest version of Android running atop of a seamless emulator is what BlueStacks is known far and probably this is why BlueStacks is the most popular and most widely used Android emulator.BlueStacks N

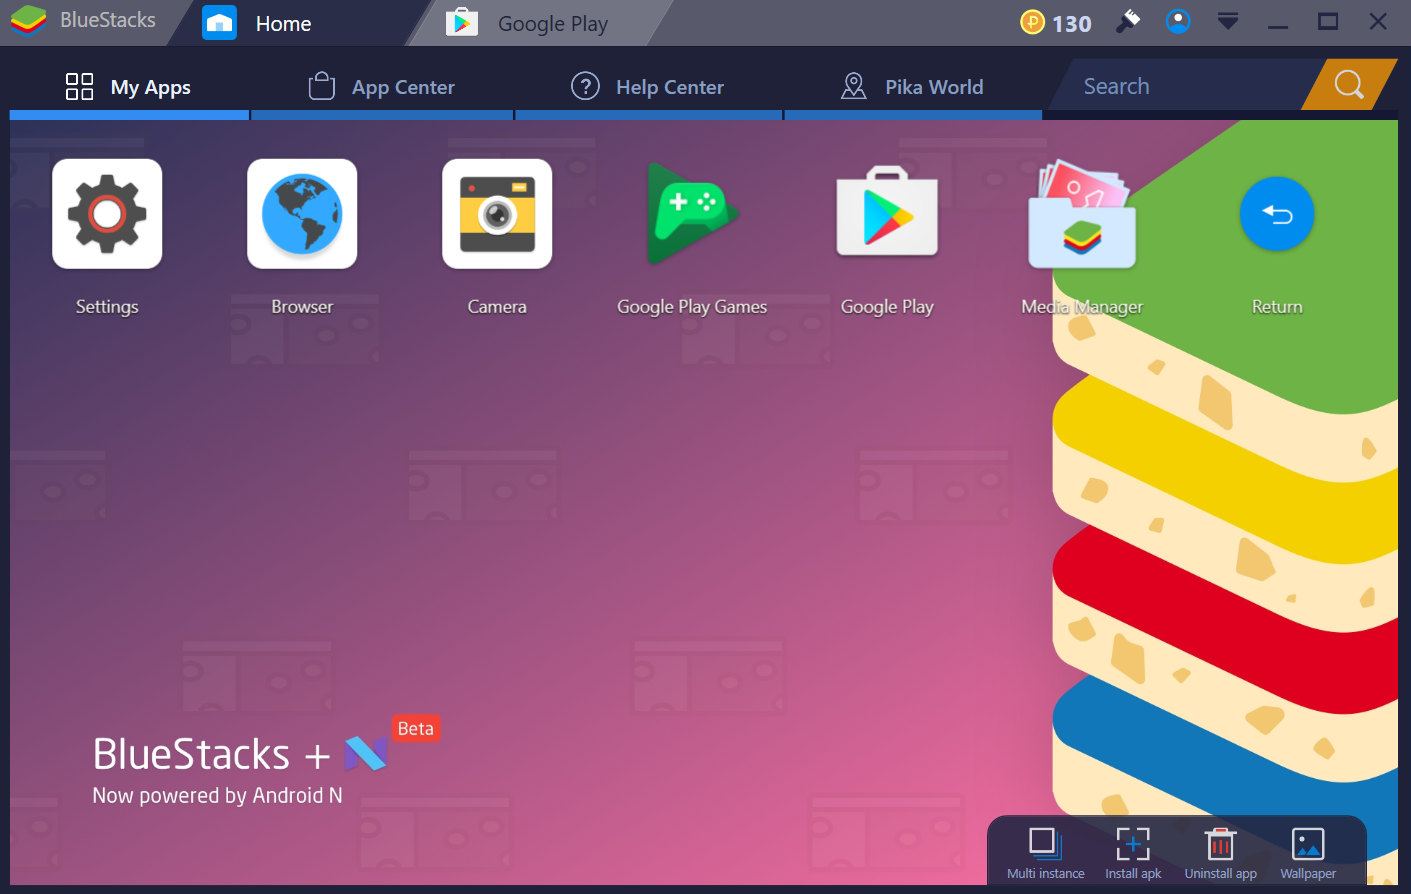
The recent installment of the BlueStacks was BlueStacks 3. The company overhauled the entire UI in BlueStacks 3. All the bugs reported in BlueStacks 2 were fixed with the new update. The BlueStacks 3 also brought features like Multi-instance, custom keyboard controls, and many other such features. The new version of BlueStacks, which is named as BlueStacks + N, is built atop of the BlueStacks 3 UI. While BlueStacks 3 was already quite stable, you can build more good stuff from the BlueStacks with Android Nougat. BlueStacks N

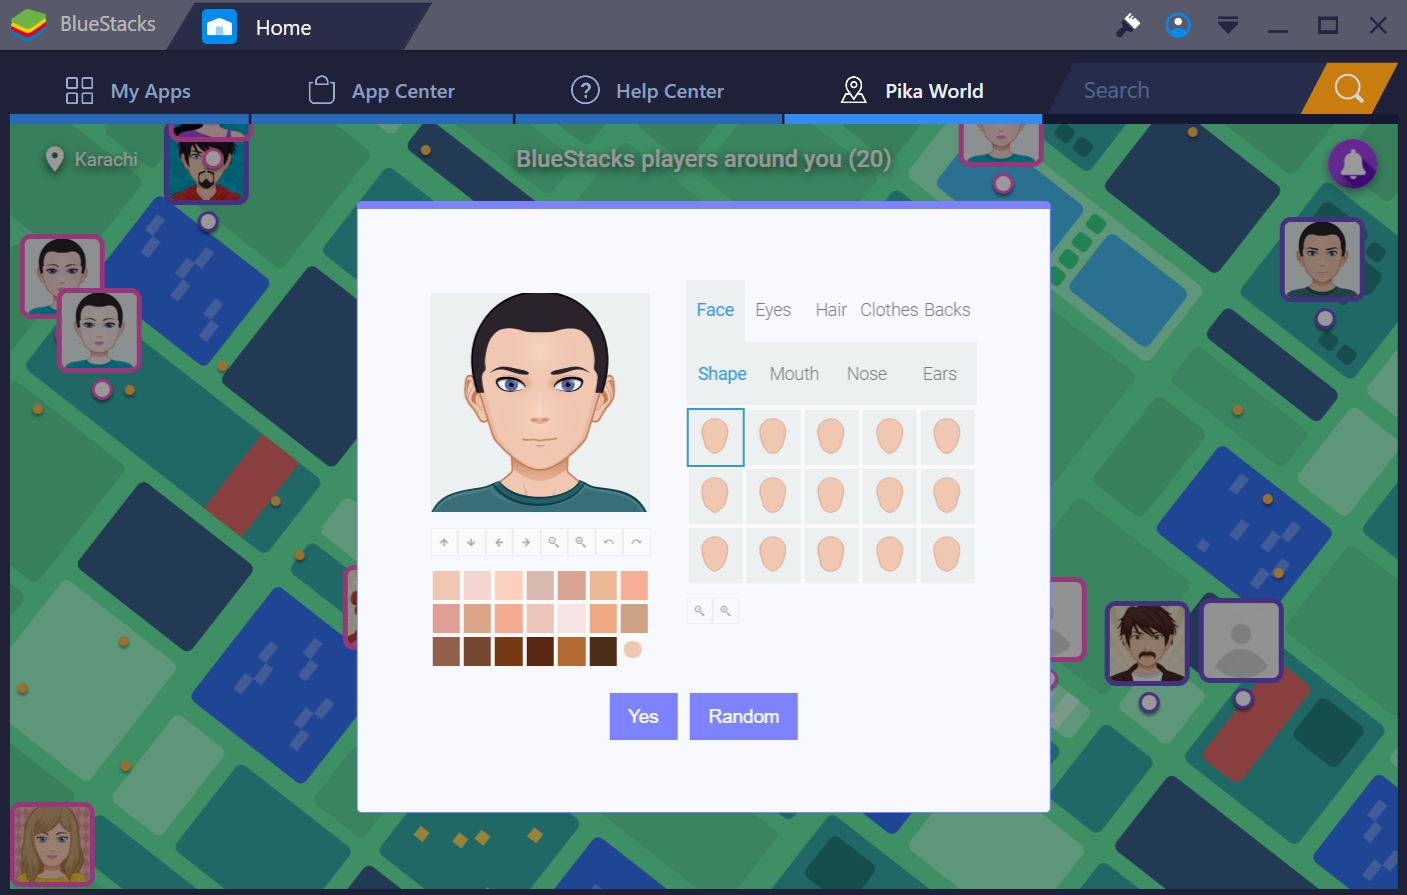
BlueStacks + N has a few new features in the UI now. As soon as your BlueStacks + N opens up, it will ask you to customize your avatar for the Pika World. This Pika World is basically the same BlueStacks Friends feature that you saw in the BlueStacks 3. Pika World will show you a map with the avatars of BlueStacks users who are nearby You can now set a wallpaper of your choice in the emulator. This feature is for premium BlueStacks users. However, the background in the My Apps screen is now Android Nougat themed which looks incredible. The App Center has 4 categories including Top Charts, Collections, Preregistration and Space Voyage. Under the Preregistration tab, you can find the upcoming Android games and register for them to earn extra rewards upon their release. Space Voyage is a mini-game that you are playing with your Pika fellows. BlueStacks N

In the top menu bar of the new BlueStacks, you will find the Pika Points. These Pika Points can be used to redeem skins for the games and your BlueStacks app player. Right next to the Pika Points, you can find the Skins library. Next to the Skin Library is your own profile. There is a drop-down menu next to the account icon. Under this drop-down, you can find the Settings of the app player and also beginners’ guide with other options such as Volume Control.

From the settings of the app player, you can set the amount of RAM you want to use, the DPI you want to use. You can also check for the latest updates for the emulator and all other basic settings of the BlueStacks Engine.BlueStacks N

In the My Apps > System Apps tab, you can now find a Media Manager. This is responsible for handling all of your audio, video and image files. You also find the settings application with a brand new UI of the Android Nougat. Other applications like Google Play Store, Camera and Contacts will also appear in the System Apps tab.BlueStacks N

What makes this new version of BlueStacks superb is the responsiveness. BlueStacks now runs extremely stable. You will find the emulator performing all the tasks within a few seconds. The games will be flawless. They will not get stuck anymore. BlueStacks has significantly improved the emulator this time. With the new player, they have proved that they are capable of putting a high-end virtual device on our computers keeping the experience close to real.

BlueStacks Nougat is currently in the beta stage. The BlueStacks N Version Beta is already up for download. It requires a very high-end computer to run on. If your computer doesn’t meet the requirements of BlueStacks N Version Beta, it will fail to run. Let’s have a look at the BlueStacks N requirements an then install it on a computer.

Minimum system requirements

    • OS: Windows
    • Processor: Intel/AMD Processor with virtualization extensions (VT/SVM) enabled in the BIOS.
    • RAM: 4GB RAM
    • HDD: 4GB Disk Space
    • You must be an Administrator on your PC
    • Up to date graphics drivers from Microsoft or the chipset vendor

BlueStacks N Beta will work on systems that fulfill the minimum systems requirements. However, for a superior gameplay experience, Recommended System Requirements are mentioned below

Recommended system requirements

OS: Windows 10

Processor: Intel Core i5-680 (PassMark 3500) or higher processor with virtualization extensions enabled in the BIOS

Graphics: Intel HD 5200 (PassMark 750) or higher

Memory: 6GB or higher

HDD: SSD (or fusion)

Internet: Broadband connection to access games, accounts and related content

Download BlueStacks NDownload Link

How to install BlueStacks N and run Apps on it?

  1. First of all, you have to enable virtualization on your computer. Here’s How to enable Virtualization Technology (VT) for BlueStacks.
  2. Now run the BlueStacks N setup file to install it.
  3. Finish the installation.
  4. Open the newly installed BlueStacks now.
  5. As BlueStacks opens, it will ask you to setup your avatar for Pika Friends.
  6. After setting it up, click on the My Apps tab.
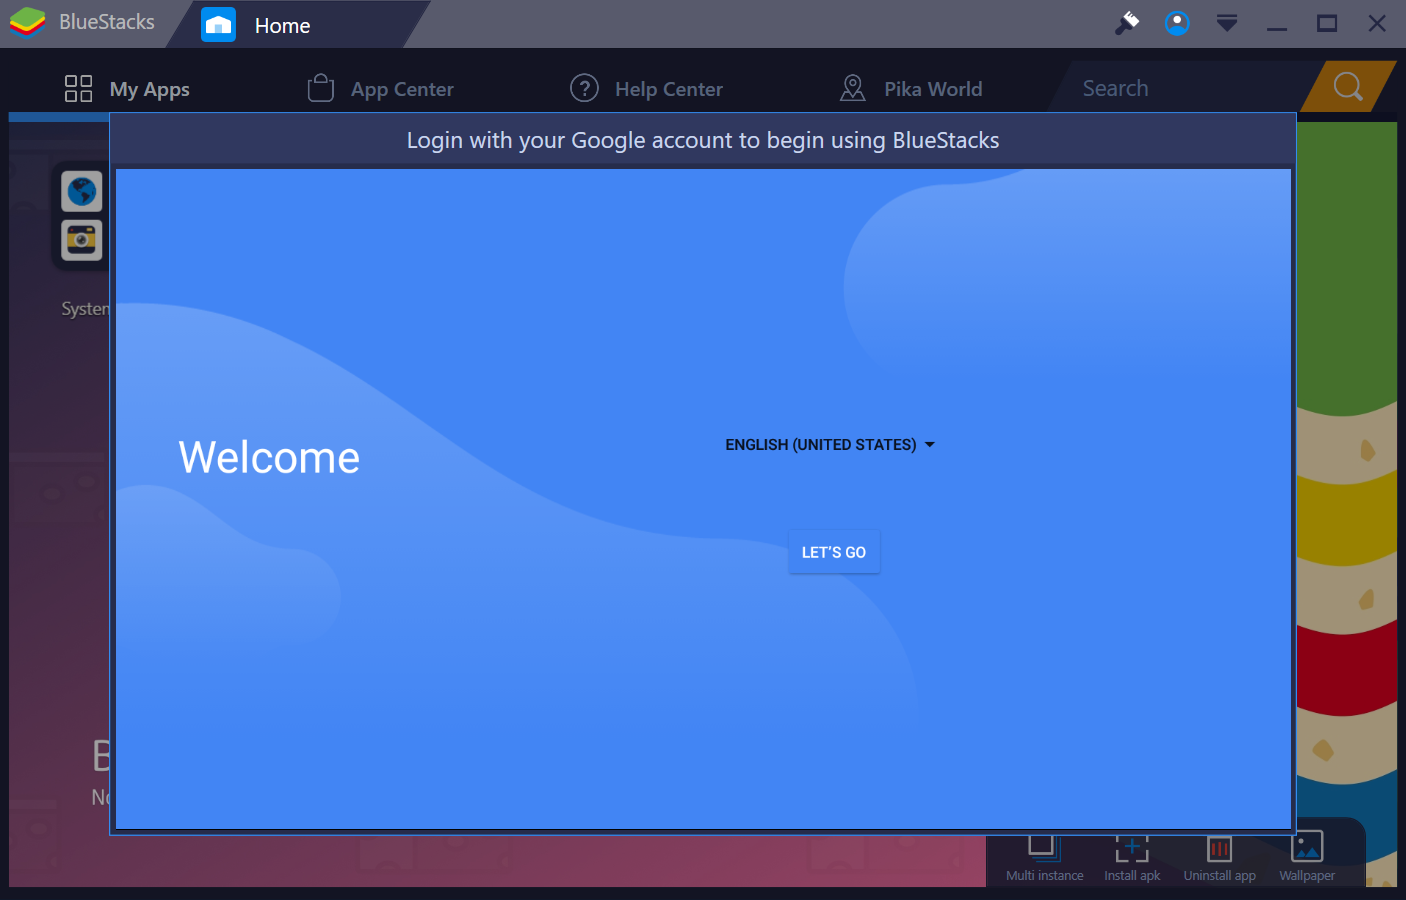
  7. Now the BlueStacks will ask you to setup your Google Account.
  8. Follow on-screen instructions and set up the account.
  9. Once done, you can get back to My Apps > System app > Google Play Store to install your desired games and apps.
  10. Another way to install apps on the BlueStacks N is by downloading an APK file. You can install the APK using the Install APK button appearing in the lower-right corner under the My Apps tab.
  11. Rest of the stuff in BlueStacks N is sself-explanatory You can explore it to learn more about it. That’s all.

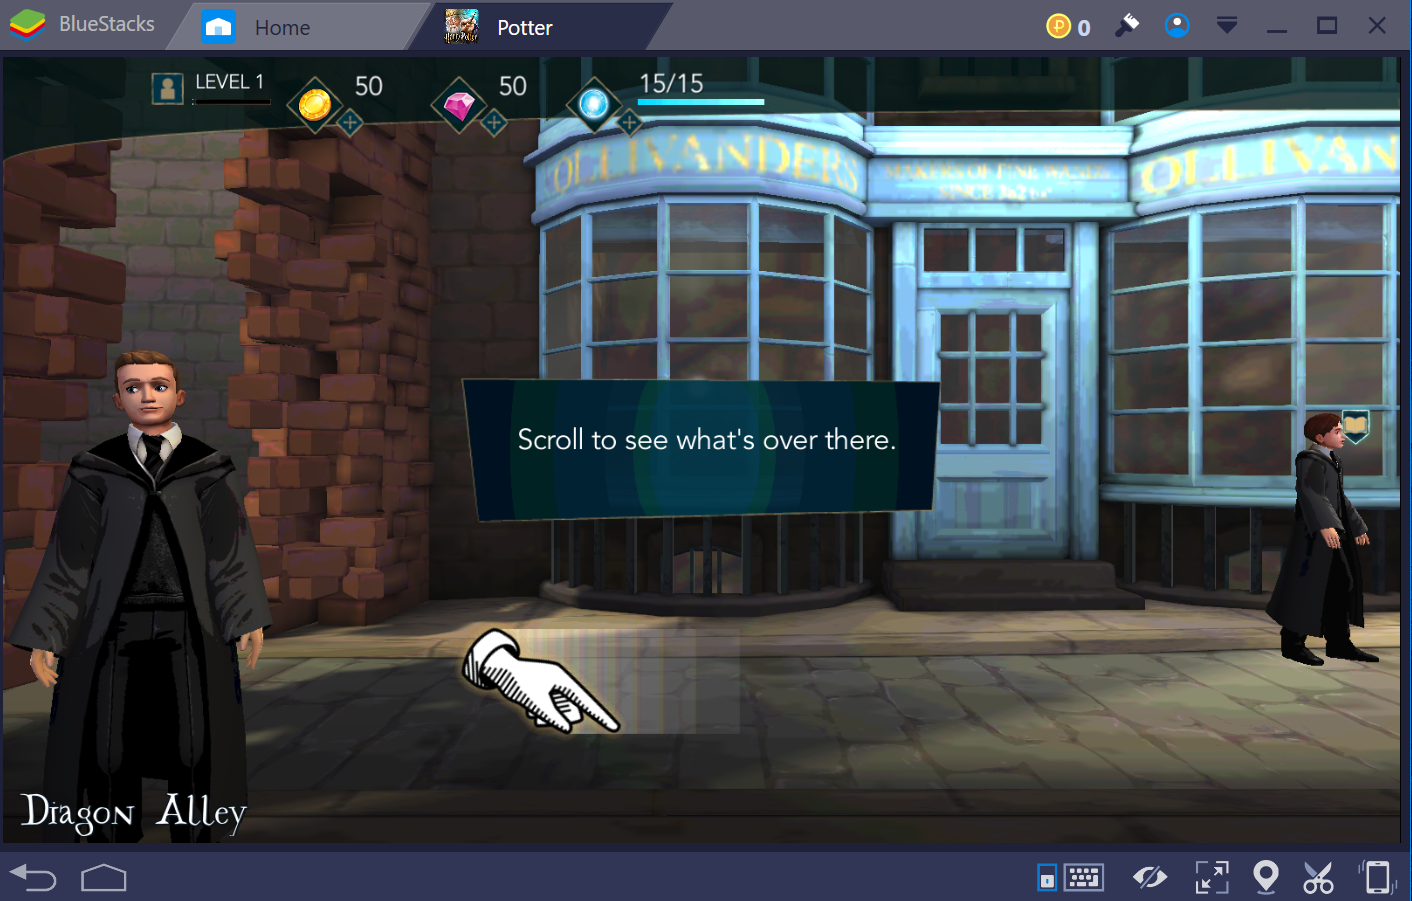
Here I have installed the new Harry Potter Hogwarts Mystery for PC and ran it successfully using BlueStacks N.

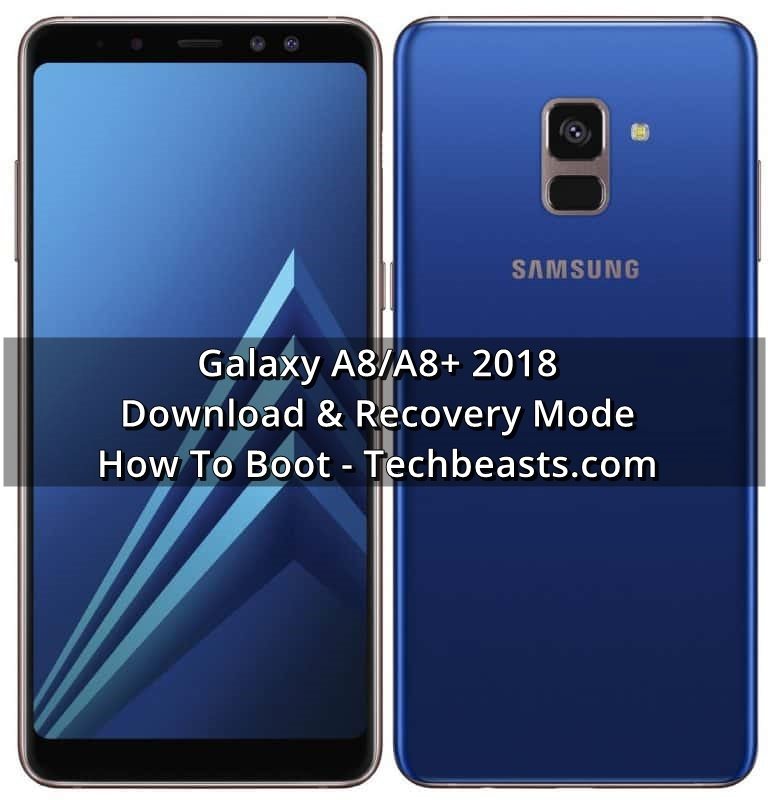
How to enter download and recovery mode on Galaxy A8/A8+ (2018)

0
How to enter download and recovery mode on Galaxy A8/A8+ (2018)

Samsung has removed the home button from its mid-range smartphones as well now. Earlier, we saw the Galaxy S8 and the Galaxy Note 8 coming without the home button. Now the new Galaxy A8 and the A8+ 2018 also come without a home button. The buttons on the new A8 and A8+ are not exactly the same as that of the Note 8 and the S8. There’s no exclusive Bixby button on the A8 and A8+. The removal of the home button and the Bixby button from the A8/A8+ will leave you wondering how you are going to boot into the download and the recovery mode. In case you have already got one of these phones, you must have noted that you cannot get into the download mode using the home button since there isn’t one.How to enter download and recovery mode on Galaxy A8/A8+ (2018)

On the Galaxy Note 8 and the S8, the Bixby button replaced the home button in the three button combo to boot either into recovery or the download mode. Now that there’s no Bixby or home button on the A8/A8+, users are out of choice for the third button to boot into one of those modes. A number of users have already tried different combinations but none worked for them. Luckily, I got a chance to play with the Galaxy A8 for a while and I figured out how to boot into download or recovery mode.

How to enter download and recovery mode on Galaxy A8/A8+ (2018)

On the Galaxy A8 or the Galaxy A8+, you will have to use all the physical keys to get into the download mode. This means you will shut down your phone first of all. After shutting it down, you will press and hold the Volume Up + Volume Down + Power keys to boot your phone up. Simultaneously pressing the keys will bring up the menu that will show you a warning before getting into the download or the recovery mode. You can now follow the on-screen instructions to boot your Galaxy A8 or the A8+ into the recovery or the download mode.

Conclusion

That’s how simple the process has become with the new phones. Unfortunately, the removal of 2 physical keys left the users in a confusion. However, I hope that you guys find this guide helpful and you have already started using the download/recovery mode on your new phone.

A TWRP recovery is already available for the Galaxy A8+. If you have got this phone, don’t forget to try it.

In case you have got any questions, reach me out in the comments section below.