Home Blog Page 77

Download Huawei HiSuite – Android Smart Device Manager

0
Download Huawei HiSuite – Android Smart Device Manager

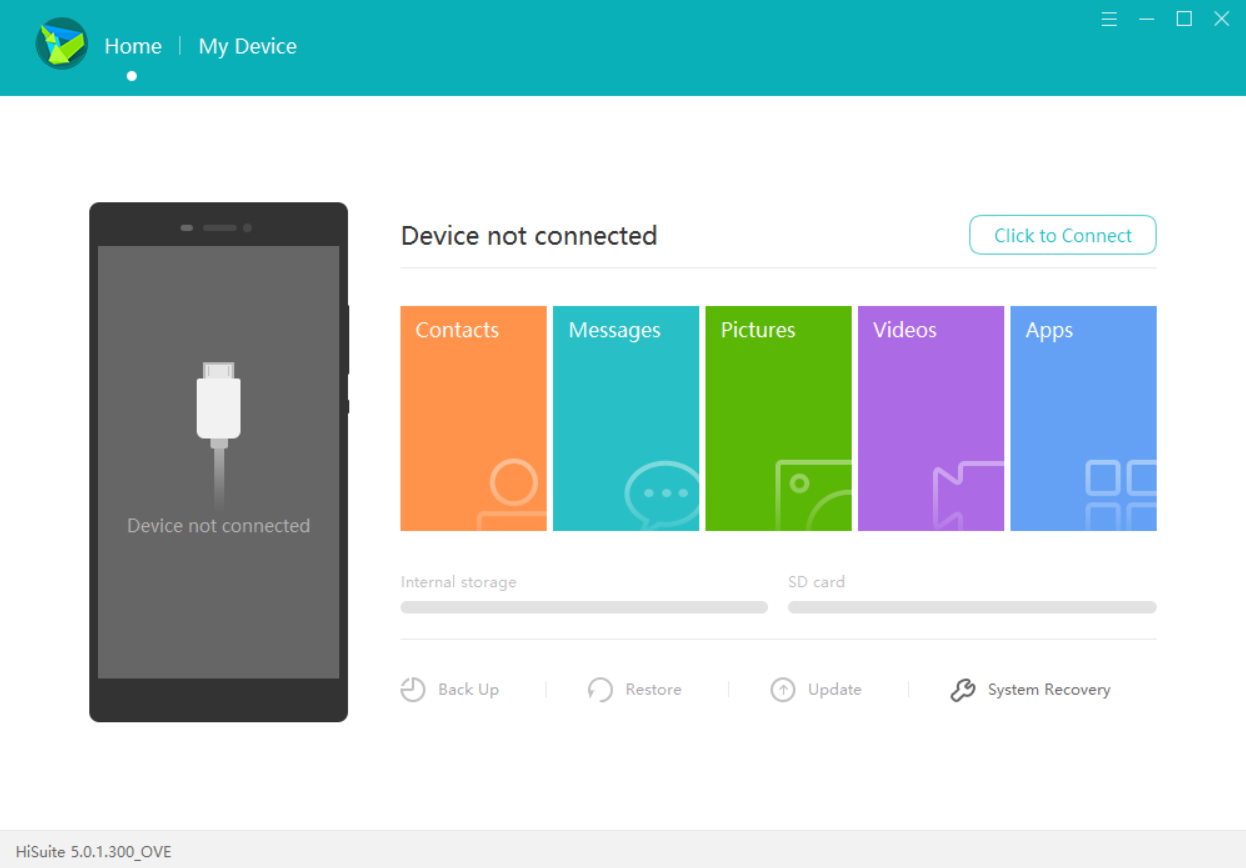
Huawei HiSuite is a PC Suite supporting all Android smartphones from Huawei. The Chinese smartphone giant emerged up as one of the biggest manufacturers in the last few years. Huawei has occupied a major chunk of the smartphone industry all across the world. To ensure that Huawei consumers do not face problems managing their Android phones, Huawei made this PC Suite named Huawei HiSuite.

Huawei HiSutie has a very diversified list of functions. This software can shift your entire smartphone to your computer. Once connected your phone, it can read what applications are installed on your phone. Huawei users can then install, uninstall or update the applications with a few clicks. With a single click, it can capture the screen of your phone and save the screenshot to your computer. Usually, you have to back up the components of your phone one by one, but with HiSuite, you can take a backup of entire data in one go. You can restore this data on another Huawei phones by tapping through a few options. The backup works with contacts, call logs, messages, emails, calendar entries, pictures, videos, songs and everything else that is stored on your phone.

HiSuite’s major use is the software update part. If your phone isn’t getting the recent OTA updates, you can connect it to your computer and check the HiSuite if the latest software update is available on your phone. Furthermore, you can operate your phone using your computer. You can manage contacts, send and receive text messages and perform other such tasks on your phone with the help of your computer.

The latest version of Huawei HiSuite is 5.0.2.301. It’s available for download here. If you are on the lookout for Huawei HiSuite, you can download the Huawei HiSuite 5.0.2.301 from here. The download link is fast, it will take a few minutes to grab it into your computer.

Download Huawei HiSuite – Android Smart Device Manager

Huawei HiSuite 5.0.2.301Download Link

  1. Download and install Huawei HiSuite on your computer.
  2. Connect your phone to your computer now.
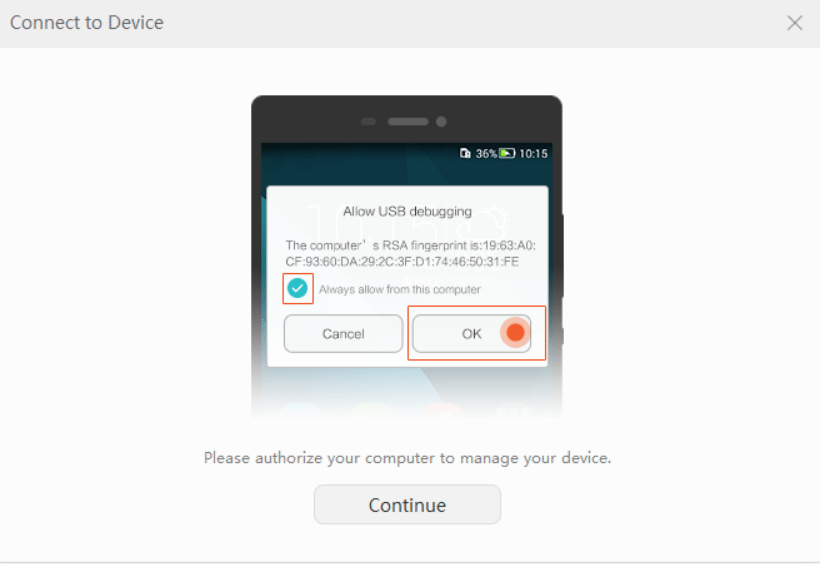
  3. Your phone will ask some permissions now, allow it.
  4. HiSuite will take a moment to recognize your phone and show it on the left side in the Android Device Manager.
  5. Since this is an Android Device Manager, it also works with the non-Huawei smartphones. You can control your phone using your computer now. That’s all.
  6. That’s all.

Download F-Droid APK for Android

0
Download F-Droid APK for Android

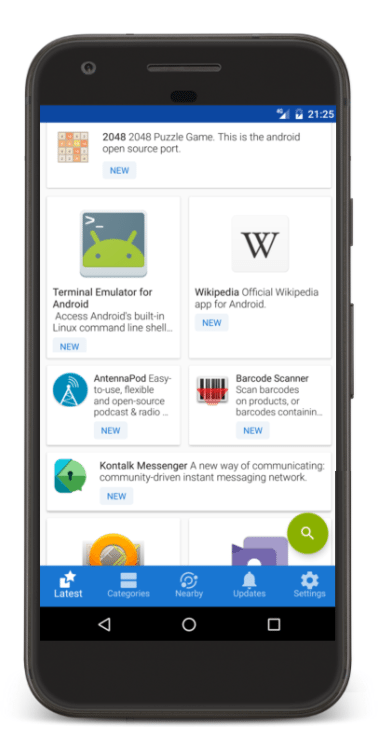
F-Droid is kind of an application store that houses all the open-source applications for Android. F-Droid has been around for quite a few years. Since it hosts very different kind of applications, it isn’t very popular among average Android users. If you have ever had an experience of tweaking your phone, you must have heard of F-Droid before. Some of the applications on F-Droid are very handy. 

F-Droid falls into the custom category for Android. Most of the F-Droid applications require a rooted Android smartphone to run on. Because developers are free to tweak applications on F-Droid, it isn’t available for download on the Google Play Store. If you like an application that is available on F-Droid, and now you want to install F-Droid, you will have to go after its APK. Recently, F-Droid reached its version 1.0.0. The APK is available for download. You can download the F-Droid APK for Android from here and then follow the instructions given below to install it.

Download F-Droid APK for Android

  1. Download F-Droid APK: Official Site | Mirror.
  2. If you have downloaded F-Droid APK on your computer, copy it to your phone.
  3. On the phone, go to settings > security > unknown sources > allow them.
  4. Now on your phone, locate the F-Droid APK and install it.
  5. Once installed, access F-Droid from the application drawer. That’s all.

How to Unlock Essential Phone Bootloader

0
How to Unlock Essential Phone Bootloader

Own an Essential Phone and want to begin tweaking it? You need to unlock its bootloader first of all. It’s extremely easy to unlock the bootloader of your Essential Phone. You only need to follow a few steps given here to Unlock Essential Phone Bootloader.

How to Unlock Essential Phone Bootloader

Prerequisites

  1. This guide is only for the Essential Phone. Do not try this on any other phone.
  2. Charge your phone at least up to 50% to make sure that it doesn’t die during the unlocking process.
  3. Backup all your data because unlocking the bootloader will completely wipe your phone.
  4. Follow this guide carefully to achieve successful bootloader unlocking.

Enable USB Debugging Mode and OEM Unlocking on Essential Phone

  1. On your phone, go to Settings > About Phone > Build Number. Tap the Build Number of 7 times.
  2. This will enable Developer Options just below About Phone option in Settings.
  3. Now open Develop Options. Find USB Debugging and enable it. Also, find OEM Unlocking and allow it.
  4. Now head towards the bootloader unlocking procedure.

Required Downloads

Download and install Minimal ADB and Fastboot drivers on your computer.

Unlock Essential Phone Bootloader

  1. Connect Essential Phone to your computer.
  2. Now open Minimal ADB and Fastboot.exe file from your computer’s desktop.
  3. In the command window, enter the following commands one by one.
    1. adb devices

    2. This command will verify your phone’s connection with your computer. The result should be devices list followed by a code.

    3. adb reboot bootloader

    4. This will reboot your phone in the fastboot mode.

    5. fastboot devices

    6. This will verify your phone’s connection in the fastboot mode.

    7. fastboot flashing unlock

      1. This will launch the bootloader unlock setup on your phone.
  4. Now use the Volume Up & Down keys to navigate through the options. Select “Yes” in order to confirm bootloader unlocking. You will press Power key to make a selection.
  5. Your phone will now unlock its bootloader. It will take a while to boot up. All the data will be wiped. That’s all.

Here is a video that might help you out: 

Video Credits: Chris Panton

Also Checkout:

Download and Install Nox App Player for PC

0
Download and Install Nox App Player for PC

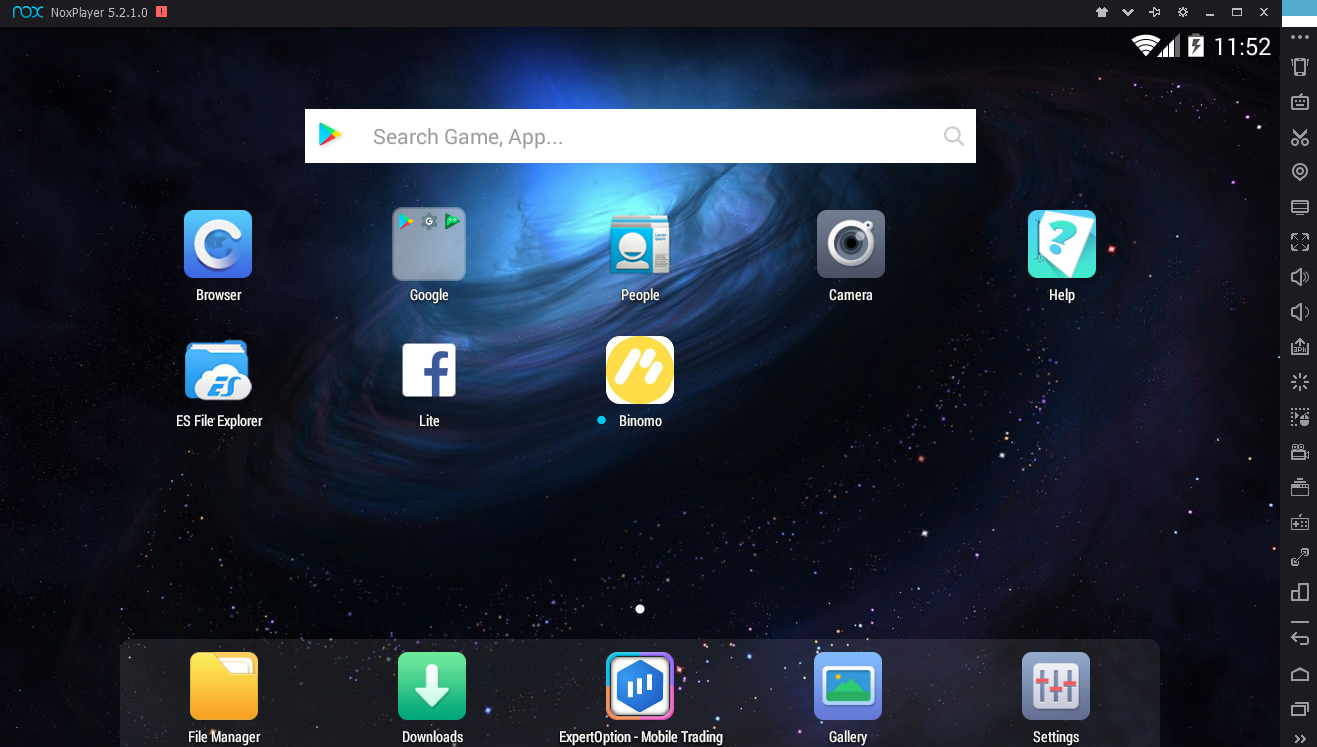
Nox App Player is probably the best Android Emulator that you can use to run Android Apps for PC. You can also run all those addictive Android Games on your computer. Nox runs a virtual Android tablet on your computer. Here’s a step-by-step tutorial to download, install and run Nox App Player for PC.

Until a few years ago, Android used to be a thing only for the smartphones. The open-source nature of Android helped developers mold this operating system for every kind of device. Today, we have Android running inside Washing Machines, inside Watches, in Smart-Home devices and everything else that we can think of. Running Android on computers was made possible right after Android started getting popular. We can run Android on a Laptop, in a Notebook, and in a desktop PC now. There are some computers that are completely based on Android ecosystem, but in case you have a Windows or Mac-powered system, you still have the option to install Android on it.

We are not talking about replacing your Windows or Mac operating system here. What we are talking about is kind of an Add-on. There is a plethora of App Players, which are basically the Android Emulators. These emulators simply emulate a specific version of Android on your computer. This emulated Android looks like a portable tablet running on your computer. A popular name in the world of Android emulators is the Nox App Player.

A brief introduction to Nox App Player

Nox App Player popped up about 2 years ago. Nox App Player makes the use of Android 4.4.2 KitKat to run on. This App Player is the most appropriate Android tablet for your desktop computer. Nox App Player is currently available only for the Windows and Mac OS. With Nox, it’s incredibly easy to play your favorite Android Games on PC and run your desired Android Apps for PC.

What’s good about Nox?

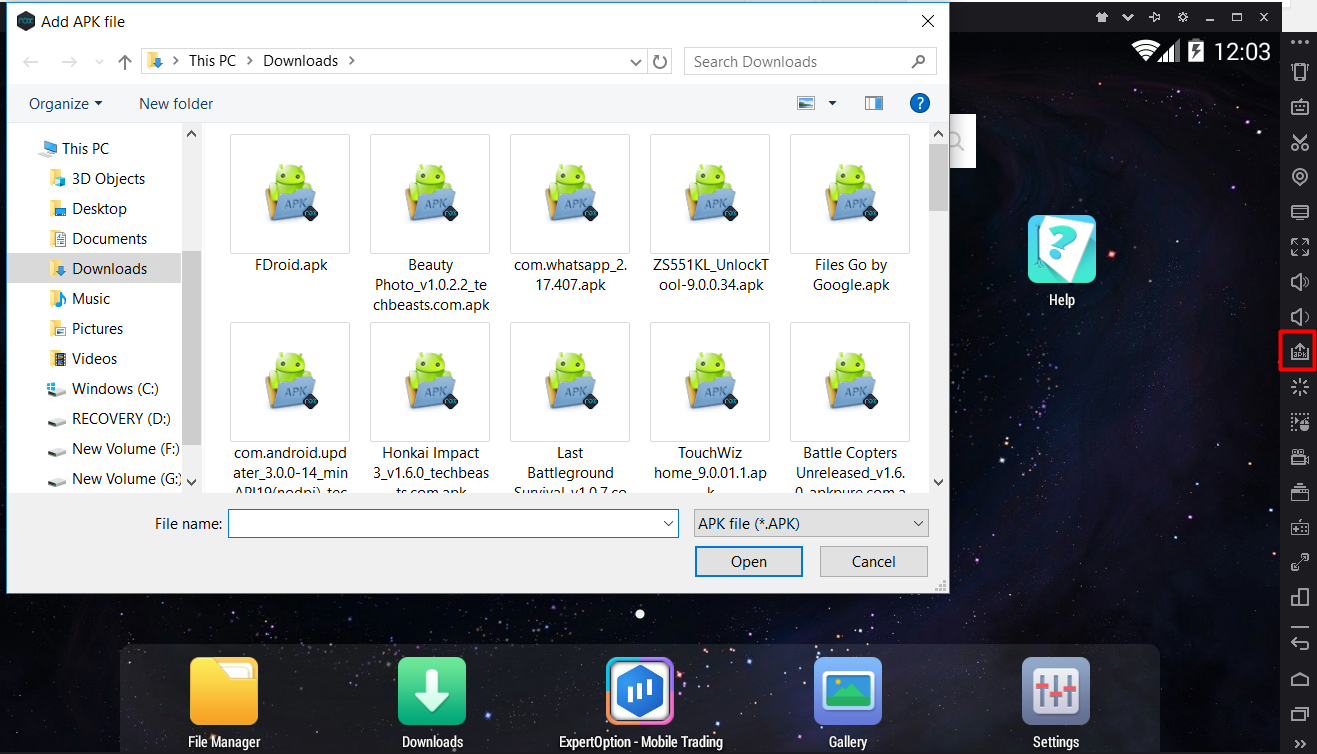
The moment you launch Nox on your computer, you find out that there is absolutely no difference between a tablet and the virtual tablet running on your computer now. Nox is pre-loaded with all the basic applications including the Play Store, Play Services, Browser, Gallery, Camera and more. There is a toolbar located on the right side which is loaded with every single function that you need to run every now and then. You can find the screenshot feature, APK installation button, multi-instance, controller settings, macro recorder, video recorder and features like gesture controls in this toolbar. Navigating through Nox is something very much comfortable. This is one emulator that I personally do not find complex at any single point. Nox makes the use of your computer’s storage to store all the data and other files.

Why would you want to run Nox App Player to run Apps for PC?

Now the question that mind tickle through your mind is, why you would want to use an emulator like Nox when you can always use your Android smartphone or the real Android tablet? Well, there’s a huge list of answers to this question. Let’s look at the reasons to convince you to get Nox App Player for PC.

  1. You want to run an app or play a game, but it isn’t compatible with your device, what to do? Get Nox!
  2. Your phone is running out of storage and can’t download any game/app? Nox will not run out of space because it’s running on your computer probably with 100s of GBs empty at hand.
  3. The game’s graphics are stunning, but the small screen is not giving you the extreme pleasure you want, what to do? Get Nox, run the game on a big screen of your PC or Laptop.
  4. There is an application or game that you badly want for your computer, but its desktop version isn’t officially available, how to get it? Well, Nox is the answer.
  5. Want to run communication applications like WhatsApp, Viber, IMO, WeChat on your computer? Nox App Player is there.
  6. And the list goes on…

Download and Install Nox App Player for PC

  1. Download Nox App Player: Download Link
  2. Launch the Nox App Player Setup now.
  3. Agree to the terms and conditions and proceed with Nox installation.
  4. Once done, Nox will open up on its own.
  5. Now in Nox, click on the Google folder > Open Google Play Store.
  6. Now use your existing Google Account to log in. If you do not have an existing account, you can create a new account within the emulator.
  7. After setting up an account, you are free to download any game or application now. That’s all.

How to run Apps for PC using Nox App Player

  1. Launch the newly installed Nox Player on your computer.
  2. I’m assuming that you have already set up Google Play Store on your Nox.
  3. Now open Play Store.
  4. In Play Store search, type the name of app/game you want to download.
  5. From the search results, click on your desired game/app and install it.
  6. Nox will install it now and it will appear on the home-screen of Nox Player. That’s all.

How to install Apps for PC using Nox App Player via an APK file

  1. Download the APK file of your favorite game or application from a credible source.
  2. Now open Nox App Player on your computer.
  3. Click on the APK button in the toolbar of the Nox App Player.
  4. Now locate and select the APK you want to install.
  5. Nox will install it and it will appear on the home-screen of Nox.
  6. Now launch your newly installed app/game and follow on-screen instructions to play it.

What is F-Droid and how to install it on Android

0
What is F-Droid and how to install it on Android

Did you ever come across this application store named as F-Droid? It has been around for almost 7 years now, but what it is and why is it there? We are going to answer some of the questions about F-Droid today. We are going to learn what is F-Droid and also how to install F-Droid on Android.

What is F-Droid?

F-Droid is basically an application store. All the applications in F-Droid are open source. The applications are free to improve, free to tweak and free to modify. This is why F-Droid is not available on the Google Play Store. The applications on F-Droid are of a very different nature. Just like the Play Store, there are categories in F-Droid as well. Anyone can access the application on F-Droid and improve them according to their liking.

The applications on F-Droid are quite useful. There are some applications that never made it to the mainstream stores, but the applications are more than useful. For example, there is an application called NewPipe. This application has to do with YouTube. You can play YouTube videos in a pop-up, in an external video player and also download the YouTube videos on the go. There are some launchers which can give you current Android phone a completely new look.

just a month ago, F-Droid finally reached a stable state and got an update to version 1.0.0. F-Droid has an active community of developers working 24/7 to improve the overall store and the applications inside the store. Following are the categories that are currently available in F-Droid.

Categories in F-Droid

  1. Connectivity: Applications to establish a connection between multiple devices. You can also access another piece of hardware by establishing a connection using an application from the connectivity section of F-Droid.
  2. Development: Tools for Android smartphones that you can use to tweak the applications or develop new applications using your Android smartphone.
  3. Games: Games that are being consistently improved. An open platform for people to show off their ideas.
  4. Graphics: Painting and Drawing applications for Android.
  5. Internet: Applications to stream online media. Internet Browsers and more.
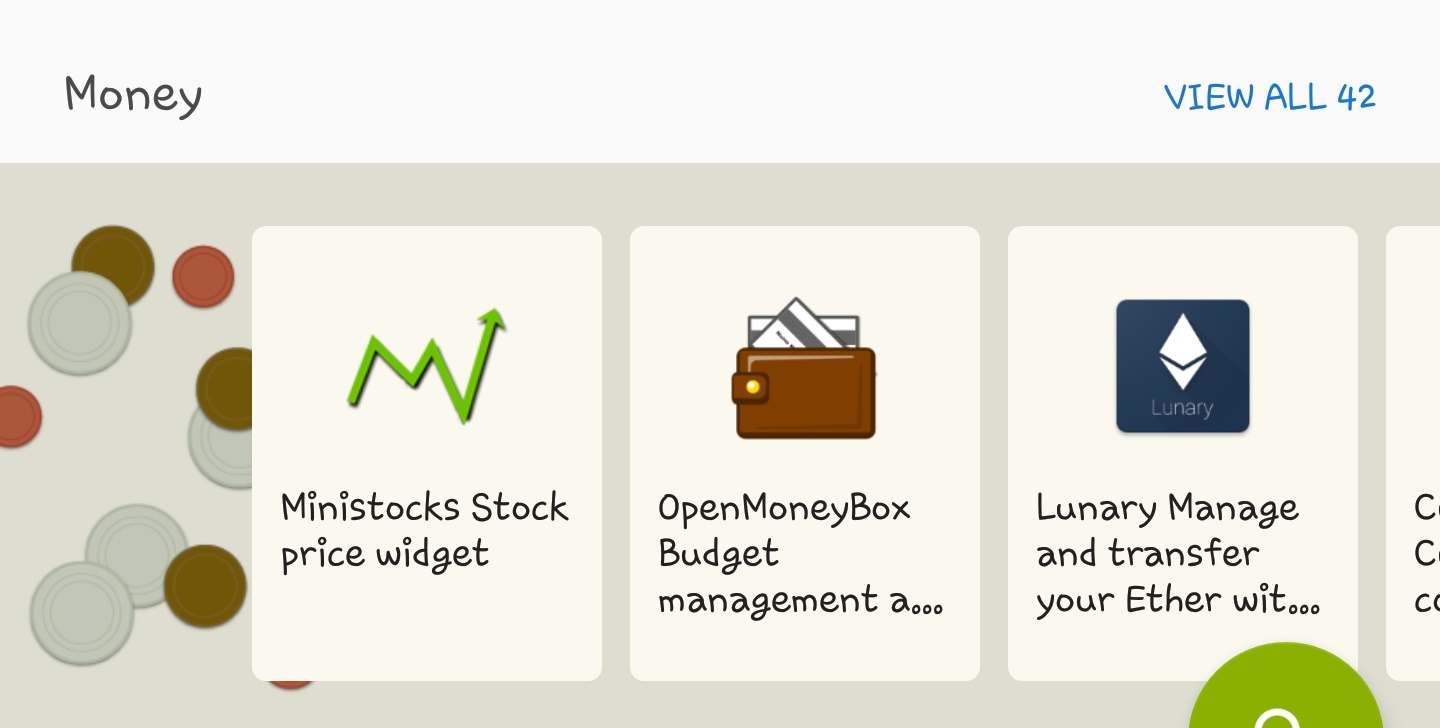
  6. Money: Stock price applications, money saving tips and also the financial managers.
  7. Multimedia: Music Players, Video Players and more.
  8. Navigation: Maps applications.
  9. Reading: Companion applications of platforms to keep an eye on the insights.
  10. Security: Applications to watch fishy services on your phone.
  11. Science & Education: Learning applications for Kids and elders as well.
  12. Sports & Health: Medical tools, sports activities and more.
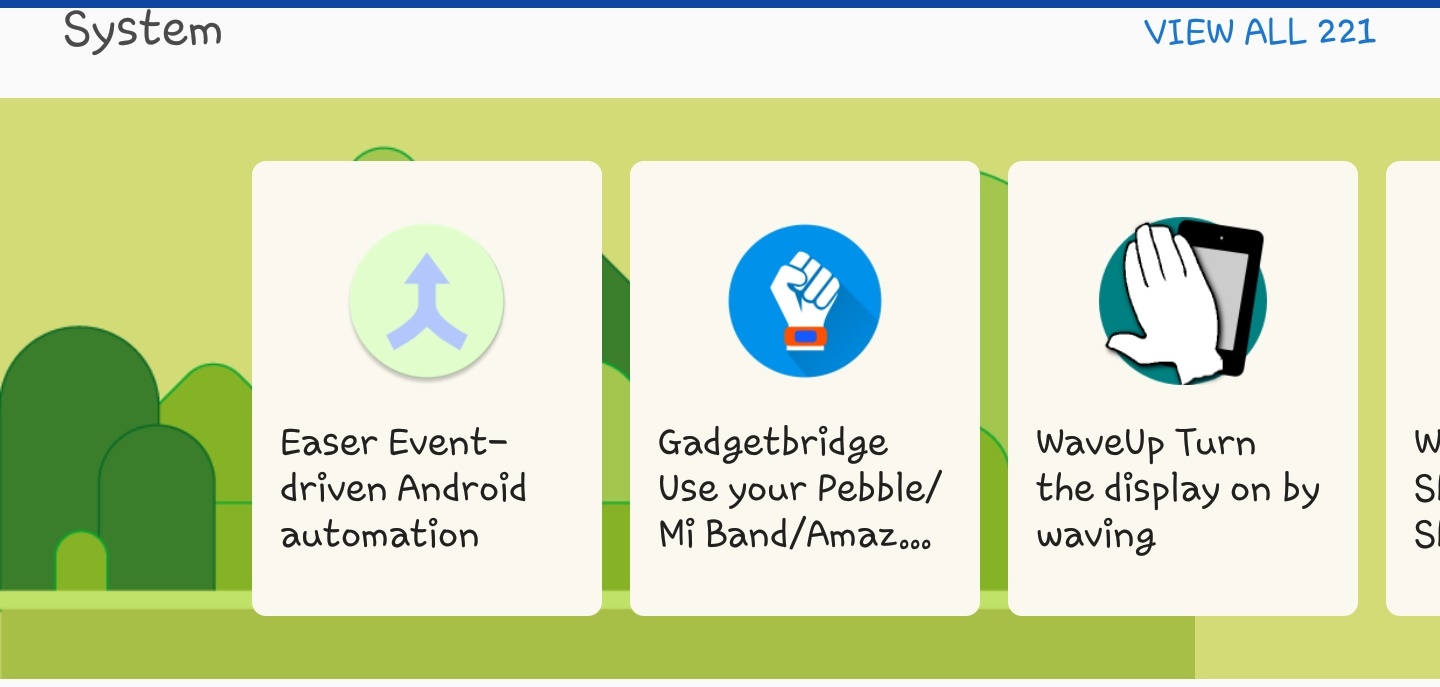
  13. System: Applications to modify the system on your Android handset.
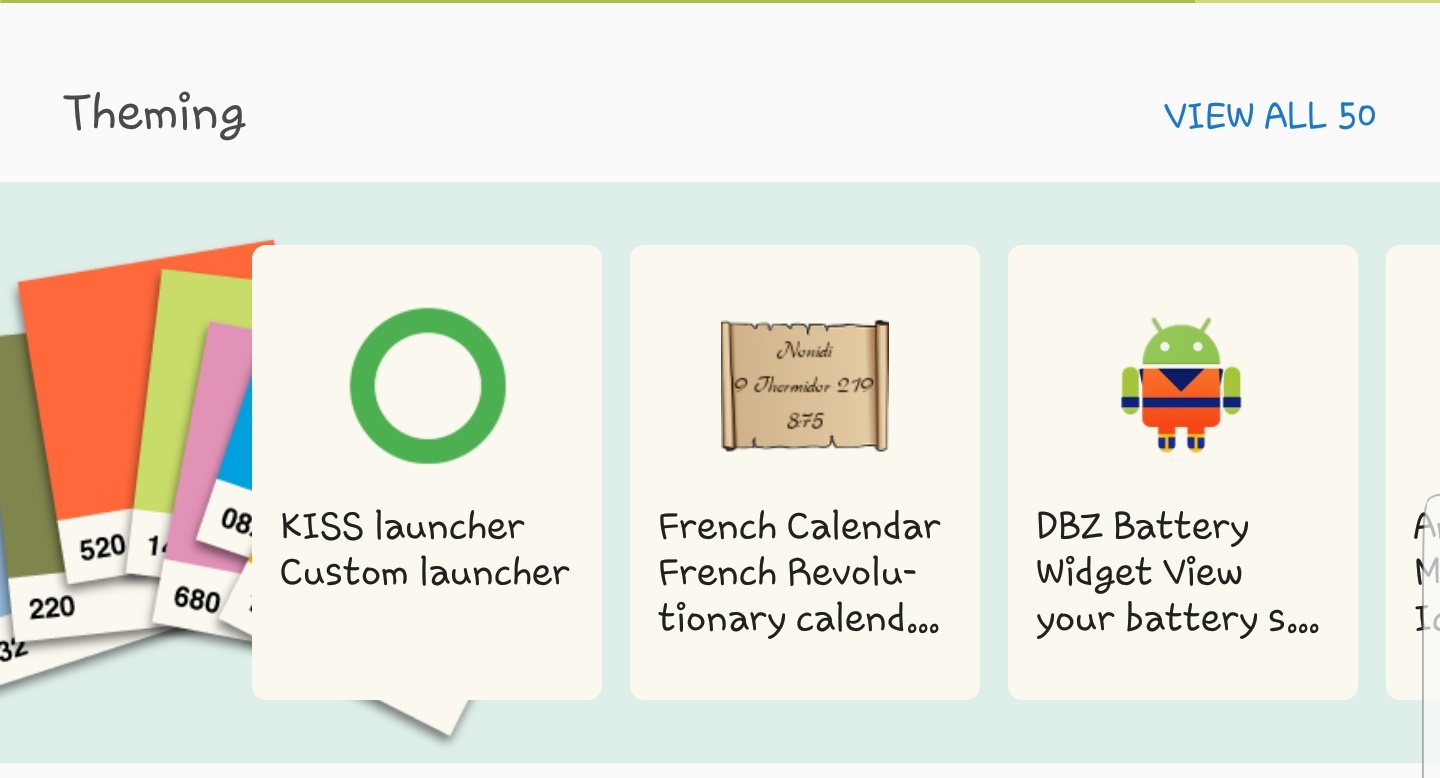
  14. Theming: Applications to give a new makeover to your Android phone. Themes, Launchers, Wallpapers and more. 
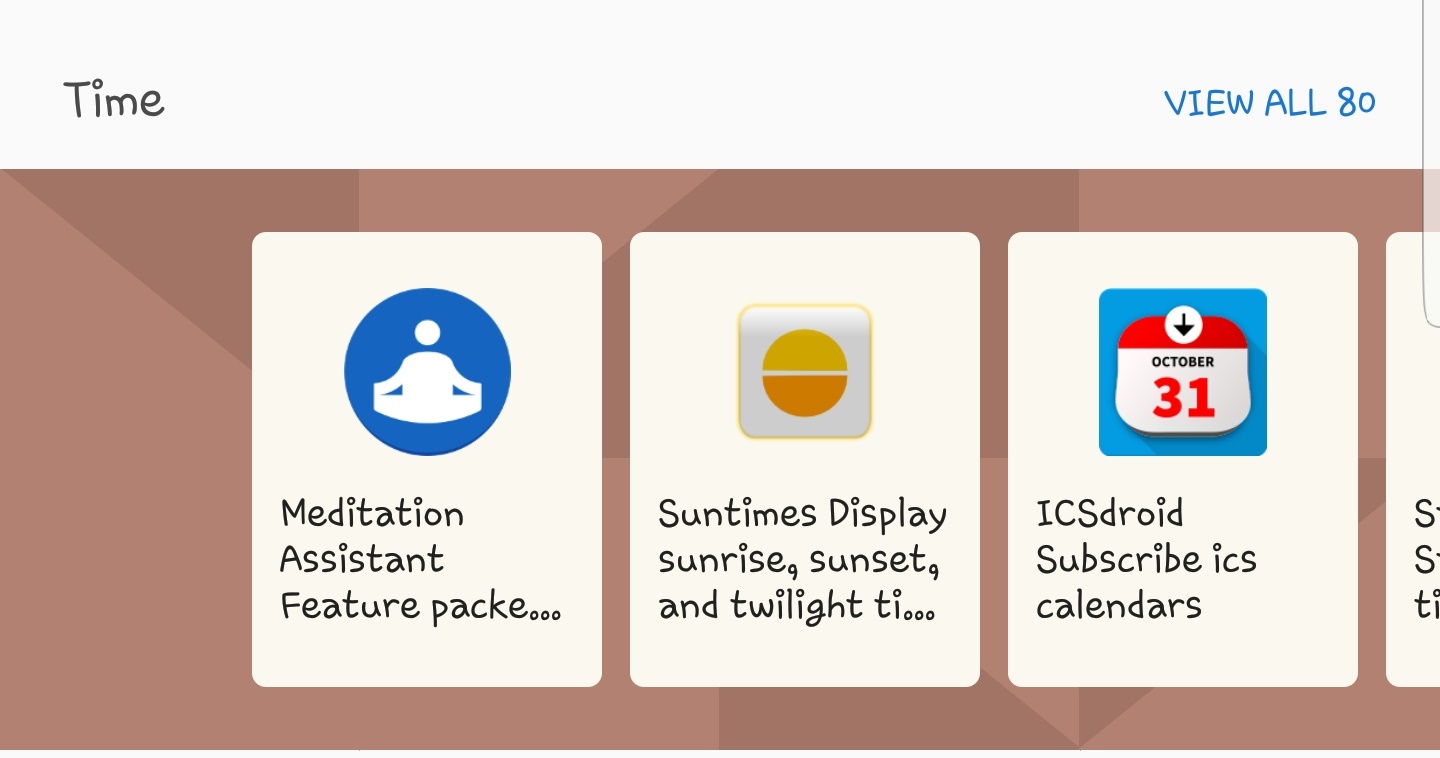
  15. Time: Clocks, Calendars and more.
  16. Writing: Text Editors, Notepads and more.
  17. Phone & SMS: SMS & Phone Clients.

How to install F-Droid on Android

  1. Download latest F-Droid APK.
  2. Copy the downloaded APK to your phone.
  3. On your phone, go to settings > security > unknown sources > tap the radio button to allow.
  4. Now launch F-Droid APK using a file manager.
  5. Complete the installation.
  6. F-Droid will now appear in the app drawer.
  7. Launch F-Droid now.
  8. Now you can install any application from F-Droid. F-Droid also manages the updates for all the applications that are installed from its store.

That’s all that we know about F-Droid. In case you have any queries, feel free to drop them below.

How To Unlock Xiaomi Mi Bootloader

0
How To Unlock Xiaomi Mi Bootloader

Own a Xiaomi Mi and want to modify it? You need to unlock its bootloader first. The bootloader of Xiaomi Mi phones is locked by default. The company doesn’t allow modifying your phone without unlocking its bootloader. There is a reason why the smartphone manufacturers have the bootloaders locked on their devices. The basic purpose of the bootloader is to check your operating system whether it’s safe and sound or not.Unlock Xiaomi Mi Bootloader

What is a bootloader?

The bootloader of an Android smartphone has the kernel code which helps the phone boot up. If the bootloader is modified or the system is modified, the kernel code fails to execute and thus results in failing the boot. Keeping the bootloader in a way is good for the security of consumers. By disallowing the installation of third-party custom ROMs, manufacturers like Xiaomi can control the potential chances of hackers breaking through their devices.

Custom ROMs and mods do not have a verified code or a secure-to-use certificate, which is why manufacturers never ever recommend the installation of anything custom. By flashing a custom recovery on your phone or by rooting your phone, you are putting your device at a risk. You are also accepting the fact that you are going to lose the warranty and you no longer care about the official software updates for your phone. This doesn’t mean you will never ever be able to update your phone, there are flash tools to install a software manually on your phone. You can always unroot your phone, restore everything back to stock, but you can never get the warranty back.

Flashing a custom ROM or rooting your phone doesn’t mean that you are always putting yourself at a risk. If you have a know-how of how the custom things work, you can play absolutely safe. Before flashing any custom script, you have to keep a few things in your mind. You may check whether the customization is coming from a well-reputed developer or not, and also how much popular that specific piece is. Another way to check a custom ROM, recovery or a mod is by reading the reviews given by users. As long as you know what you are doing, you are all good to unlock the bootloader of your device.

How To Unlock Xiaomi Mi Bootloader

Assuming that you have a clear idea of what a bootloader is, what are the consequences of unlocking it and how you can put yourself on a safe side, we can now proceed with the guide. Xiaomi Mi users can follow this tutorial to unlock Xiaomi Mi Bootloader. Unlike the bootloader unlock procedure of other smartphone manufacturers, Xiaomi’s procedure is a bit lengthy and it involves a number of days. We have tried to explain the entire procedure in layman terms. Let’s get on with it now.

Disclaimer:

  1. Unlocking bootloader will completely wipe your phone.
  2. You will also lose the warranty on your phone by unlocking the bootloader.
  3. You will stop getting OTA updates. Every time you want to update your phone, you will have to update it manually using Mi Updater or the Mi Flash Tool.
  4. This method is supposed to work only for the Xiaomi Mi phones. Trying it on another phone can potentially brick it.
  5. Follow this guide carefully. In case of a mishap, TechBeasts or Xiaomi may not be held responsible.

Prerequisites

  1. Make sure that your phone is a Xiaomi Mi handset.
  2. Backup your contacts, call logs, media content and SMS messages.
  3. Enable OEM Unlocking and USB Debugging mode on your Mi phone.
  4. Charge your phone up to 50% to avoid power loss during bootloader unlock process.
  5. Your phone must be running on a locked MIUI ROM.

Request Xiaomi Mi Bootloader Unlock Code

  1. First of all, you need to open the Mi Bootloader Unlock Page.
  2. Now on the opened page, click Unlock Now.
  3. On the next page, you can either log in using your existing account or you can create a new account to get in.
  4. On the next page now, you need to fill out a small form by adding the required details. You must add your real name which should be the same as that of the name in your Xiaomi Mi phone. Also, add your active contact number. All other details should be genuine as well.
  5. Enter the real reason for unlocking the bootloader of your phone. You can use a reason such as.
    1. I want to root the phone and install a custom ROM.
    2. My phone is not booting up, I need to flash a new ROM.
    3. I want to calibrate the battery on my phone.
    4. I want to add new features to my phone.
  6. After completing the fields in the form, click on “Apply Now” button.
  7. After pressing the Apply Now button, a new page will open up asking you to enter the mobile verification code. You will get an SMS on your phone with a verification code. Grab the code from your phone and enter it here.
  8. After verifying through the SMS code, a new page will open up telling you to wait for the approval. The approval can take 1 to 14 days. So you have to keep patience while Xiaomi decides whether you should be given a chance to unlock bootloader or not. Upon approval, you will get a notification and an email with the unlock details.

Required downloads

  1. Download and extract Mi Unlock Tool.
  2. Download and install Mi USB Drivers on your Windows PC.

Unlock Xiaomi Mi Bootloader

  1. From the extracted files of Mi Unlock Tool, run the miflash_unlock.exe file.
  2. You will be presented with a page displaying a disclaimer. Click on Agree to continue.
  3. Now log into your Mi Account using which you applied for the unlock permission.
  4. You will find a page asking you to connect your phone now. You need to connect your phone to the fastboot mode now.
  5. Turn off your phone. Turn it on by pressing and holding Volume Down + Power key. It will boot up in the fastboot mode now.
  6. Now simply plug in the cable to establish a connection between your phone and your PC.
  7. Mi Unlock Tool will detect your phone now and it will pull up an Unlock button.
  8. Click the Unlock button now and let the tool do its thing.
  9. The tool will verify your phone, unlock it and then reboot it. Once done rebooting, you can check that the bootloader has been unlocked. That’s all.

You are now free to perform any kind of modifications on your phone. If you are stuck with something, or if you have anything to add to this guide, feel free to reach us out using the comment box given below.

How To Unlock Asus Zenfone Bootloader

0
How To Unlock Asus Zenfone Bootloader

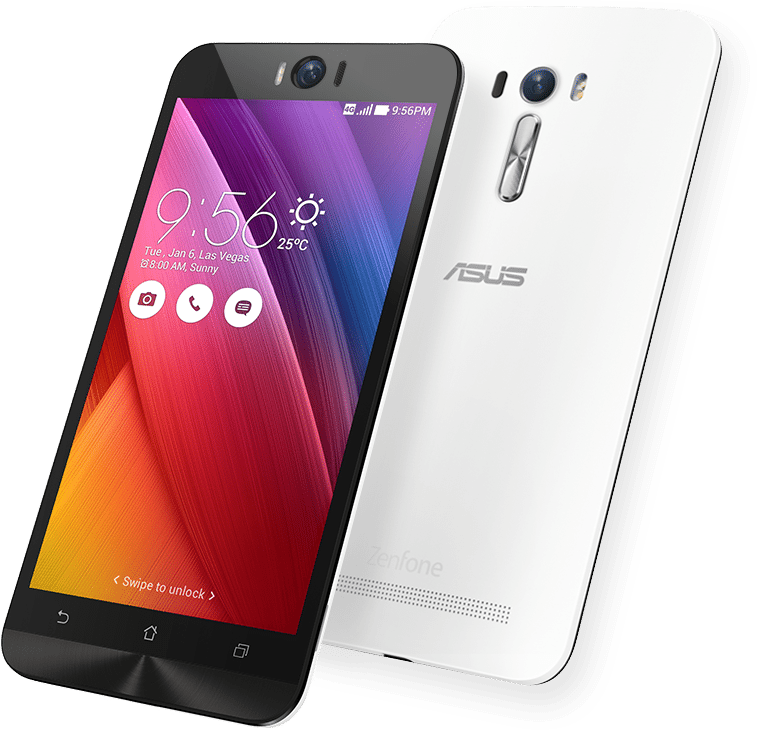
By default, the bootloaders of Asus Zenfone handsets are locked. If you want to modify your Asus Zenfone, you have to unlock its bootloader first. Asus Zenfone users have an option to unlock the bootloader of their phone, but they have to put the burden of this risk on their own shoulders. Once you opt for unlocking the bootloader of your Asus Zenfone, Asus says goodbye to the official warranty for your phone. Afterward, you are not eligible to ask for Asus’s official help on any matter regarding your Zenfone. Such things do not really matter for Android enthusiasts who have decided to unleash the real potential of their device. If you are one such user, you here to learn how you can unlock your Asus Zenfone’s Bootloader. In this tutorial, we will have a look at a step-by-step guide to unlock Asus Zenfone Bootloader.Unlock Asus Zenfone Bootloader

What is bootloader unlocking and how it works?

Before taking a step to unlock the bootloader of your Zenfone, it’s very important to understand what you are going to do exactly. The bootloader of your phone is responsible for loading the firmware on your phone. Bootloader’s code is responsible for keeping a check on your phone whether it has been modified or it’s in the original form. The bootloader has the kernel code for a smartphone. Bootloader’s modification allows unsecured services to load on your phone. The companies do not send the phones with unlocked bootloaders in order to ensure the safe and secure operating systems on the smartphones. By unlocking the bootloader of your phone, you are agreeing to allow all the installation of custom ROMs, custom recoveries and everything that adds to the modification of your phone.

While there are some cons of unlocking the bootloader, there are some pros as well. If you are an Android expert, unlocking the bootloader isn’t going to be a big deal for you. As long as you know that the stuff you are flashing on your phone is not going to violate your security, you are all good. There is a long list of handy applications that can add new features or enhance your current operating system by adding a few new elements. Such applications mostly require root access to make changes to your system. To root the phone, again, you need the bootloader unlocked. So in short, to unlock all the power hidden inside your phone, you need to say goodbye to the lock set on the bootloader.

Unlock Asus Zenfone Bootloader

Assuming that Asus Zenfone users have a complete understanding of tweaking their bootloader, we can now head towards the tutorial.

Unlocking Asus Zenfone Bootloader is the easiest thing. Unlike other smartphone manufacturers, Asus has its own application for each smartphone. All you have to do is to get the Bootloader Unlock application for your Zenfone and then agree to Asus’s terms and conditions. Once you have done this, you are free to break the locks. With this tutorial, you can unlock the bootloader of phones like Asus Zenfone 2, Zenfone 3, Zenfone 4, Zenfone 5, Zenfone Delux, Zenfone AR, Zenfone Laser and more.

Download Asus Zenfone UnlockTool for your Phone

  1. Go to Asus Product Support page.
  2. Scroll down to the Support page and select your phone series and the exact device with its model number.
  3. Now on the right side, click on “Drivers and Tools“.
  4. A new page will now open up asking you to select your OS. Select Android as your operating system.
  5. Now you will see a list of downloads. Look for the Bootloader UnlockTool for your phone. If it’s not shown in the first box, click on “See All Downloads” to find it.
  6. Now download the UnlockTool and unzip it to get the APK file.
  7. Copy the unzipped UnlockTool APK file to your Asus Zenfone now.

Preparation:

  1. Download the UnlockTool for your phone carefully. Do not download a wrong tool as it can harm your phone.
  2. Backup your phone. Unlocking the bootloader will wipe everything.
  3. Enable OEM Unlocking and USB Debugging mode on your Asus Zenfone.
  4. You are doing everything at your own risk. In case of a mishap, we may not be held responsible.

How To Unlock Asus Zenfone Bootloader

  1. On your Asus Zenfone, go to Settings > Security > Device administrators > Unknown sources > Tap the radio button to turn on Unknown sources.
    Image Source: Asus Edge Up
  2. Now using a file manager, locate the UnlockTool where you copied it.
  3. Tap the UnlockTool APK to install it.
    Image Source: Asus Edge Up
  4. Once done, open the UnlockTool from your phone’s app drawer.
  5. Read Asus’s End User License Agreement and accept it if you are sure that you want to unlock it now.
    Image Source: Asus Edge Up
  6. Now wait and watch, let the application do its thing. After a reboot, your phone’s bootloader will be unlocked. That’s all.
    Image Source: Asus Edge Up


Source

Download Gapps for LineageOS 15 [Android Oreo]

0
Download Gapps for LineageOS 15 [Android Oreo]

Want to install Android Oreo on your phone while it’s not officially available? The best option you may come across is going to be the LineageOS 15. Formerly known as CyanogenMod, LineageOS 15 is out for a plenty of Android handsets. The LineageOS 15 is based on Android Oreo. This ROM is popular because it is the only custom ROM that has made its way to a variety of Android phones giving them a new life.

LineageOS 15 based on Android Oreo is a ROM very close to Vanilla Android. These ROMs do not contain any kind of bloatware. In fact, the size of these ROMs is just a few hundred MBs. Usually, a stock ROM is a few GBs and custom ROMs are relatively very small in size. This is because alongside being Vanilla Android, these ROMs have absolutely nothing inside. There is no application that would act as bloatware. There is even nothing called Google Play Store or the Google Play Services. In order to install any such service, you have to install them manually.

Because Google Play Store and the Play Services are two very basic applications, everyone wants to install them right after flashing a ROM like LineageOS 15. In order to flash these, you have to find a Gapps package compatible with your ROM. Gapps package come in different categories. There’s a Gapps package that includes only basic Google Apps and then there’s a Gapps package that includes every single application ever developed by Google. Also, the Gapps package differs according to the CPU architecture of your Android phone. If your phone is Android x86 based, you need a different Gapps, if your phone is the ARM, you need a different Gapps and if your phone is ARM64, the Gapps package is totally different from the previous two.

It may take a few minutes for you to find the right file for your phone. If you haven’t found one and you’ve reached this place while looking for the Gapps for LineageOS 15, you have done the right thing. LineageOS 15 users can download Gapps for LineageOS 15 Android Oreo from here. The Gapps installation method is also given next to the Gapps download link.

Download Gapps for LineageOS 15 [Android Oreo]

Download Google Gapps for LineageOS 15 – Download Link

How to install Google Gapps on LineageOS 15

  1. Download the Gapps for your phone from the link given above.
  2. Copy the downloaded Gapps.zip file to your phone’s internal or external storage.
  3. Boot your phone into the custom recovery mode.
  4. In recovery, select Install > Locate and select Gapps.zip file > Swipe screen to flash.
  5. Once flashed, reboot your device.
  6. Find Play Store and other such apps in the app drawer now. That’s all.

How to install TWRP Custom Recovery & Root Huawei Mate 10 Lite

9
How to install TWRP Custom Recovery & Root Huawei Mate 10 Lite

Huawei Mate 10 Lite was announced recently. It’s a budget phone with an 18:9 display and impressive hardware inside. Huawei Mate 10 Lite is equipped with a 5.9-inch 1080 x 2160 pixels display having 409 PPI. This phone is powered by Huawei’s in-house Kirin 659 CPU and Mali-T830 MP2 GPU. It has 64 GB internal storage and 4 GB of RAM. At the back, this phone has a dual shooter with 16 MP + 2 MP cameras. It has a dual shooter setup on the front as well having a shooter of 13 MP and one of 2 MP. There is a rear-mounted fingerprint scanner. A 3440 mAh battery is placed inside. Out of the box, this phone runs on Android 7.0 Nougat. Huawei Mate 10 Lite is a very good option to go with if you have a mid-range budget and you also want a decent phone.Huawei Mate 10 Lite was announced recently. It's a budget phone with an 18:9 display and impressive hardware inside. Huawei Mate 10 Lite is equipped with a 5.9-inch 1080 x 2160 pixels display having 409 PPI. This phone is powered by Huawei's in-house Kirin 659 CPU and Mali-T830 MP2 GPU. It has 64 GB internal storage and 4 GB of RAM. At the back, this phone has a dual shooter with 16 MP + 2 MP cameras. It has a dual shooter setup on the front as well having a shooter of 13 MP and one of 2 MP. There is a rear-mounted fingerprint scanner. A 3440 mAh battery is placed inside. Out of the box, this phone runs on Android 7.0 Nougat. Huawei Mate 10 Lite is a very good option to go with if you have a mid-range budget and you also want a decent phone. It's merely been 2 months since this phone came out, the goodies have already started pouring in. Huawei Mate 10 Lite has already been rooted and it is the first phone of the Mate 10 series to get the TWRP custom recovery. You can now install the TWRP recovery and start customizing your phone. TWRP recovery will allow the Mate 10 Lite owners to install custom ROMs, mods, image files and other zip files on the phone. With the TWRP recovery, you can create a Nandroid backup, EFS backup and also a backup of all the partitions of the phone. Users can also wipe Dalvik cache of the phone. There is an option to wipe the individual partitions of the phone using a custom recovery. You can change the partition format of the phone as well. There are many other uses of TWRP recovery like sideloading applications and mods. TWRP is your gateway to an entirely different and new world of Android customization. Now that TWRP is available for Mate 10 Lite, its time to unleash the real beast hidden inside this phone. We have already posted a guide on how to unlock the bootloader and root Huawei Mate 10 Lite. It's time to flash TWRP custom recovery now. Here are the steps to install TWRP custom recovery on Huawei Mate 10 Lite.  Precautions & Preparation This guide is intended for Huawei Mate 10 Lite only. Do not try this method on any other device otherwise, you may result in bricking it. Make sure that your phone's battery is charged up to 80% in order to avoid any power issues during the flashing process. Backup all of your important contacts, call logs, SMS messages and media content to stay on a safe end. Do not forget to create a backup since this process is supposed to wipe your phone completely. Enable USB debugging mode on your phone in developer options. To do so, go to settings > about device > tap build number for 7 times. You will have developer options in settings now. Open developer options > Enable USB debugging. If you have the "OEM Unlocking" option, enable it as well. Unlock Huawei Mate 10 Lite bootloader. Use your original data cable to establish a connection between your phone and your PC. Follow this guide to the letter to avoid any mishap. Disclaimer: The methods involved in flashing custom recoveries and rooting the device are highly custom. Rooting the device and flashing a custom recover is never recommended by a device manufacturer. In case something goes wrong, TechBeasts or the device manufacturers may not be held responsible. Make sure that you're doing everything at your own risk. Required downloads & installations Download and install Huawei USB drivers. Download and install Minimal ADB & Fastboot drivers. Download twrp-mate10-lite.img file and rename it to recovery.img. Download SuperSU.zip file and copy it to your phone's external storage. How to Unlock Huawei Mate 10 Lite Bootloader Copy the renamed recovery.img file to the Minimal ADB and Fastboot directory which should be in a location such as: C drive > Program Files > Minimal ADB & Fastboot. Connect your Huawei Mate 10 Lite to the computer now. Now open Minimal ADB & Fastboot.exe from your desktop. If you do not have this file on your desktop, then go to your Windows installation drive i.e. C drive > Program Files > Minimal ADB & Fastboot > Press and hold Shift Key + Right-click on an empty area with the open folder > click “Open command window here”. As the command window opens up, enter the following commands one by one. adb devices This command will return a list of devices attached with a code verifying connection. adb reboot bootloader This command will reboot the phone in bootloader mode. fastboot devices This command will verify connection in fastboot mode. fastboot boot recovery.img This will boot your phone in the TWRP recovery. Now in TWRP, tap Advanced > Terminal. In the Terminal, type and enter the following command: echo "systemless = true" /data/.supersu Get back to the main menu in TWRP recovery now and tap Install > Locate and select SuperSU.zip file and flash it. Once done, reboot to the system and your Mate 10 Lite should be rooted. That's all. Note: The method given above will not install TWRP recovery on your phone. In case you want to install TWRP, you can use the command: fastboot flash recovery recovery.img command in step 4 above. This command will flash the recovery in your phone. We are not sure whether the recovery will stick fine or not since it's still in the beta stage.

It’s merely been 2 months since this phone came out, the goodies have already started pouring in. Huawei Mate 10 Lite has already been rooted and it is the first phone of the Mate 10 series to get the TWRP custom recovery. You can now install the TWRP recovery and start customizing your phone. TWRP recovery will allow the Mate 10 Lite owners to install custom ROMs, mods, image files and other zip files on the phone. With the TWRP recovery, you can create a Nandroid backup, EFS backup and also a backup of all the partitions of the phone.

Users can also wipe Dalvik cache of the phone. There is an option to wipe the individual partitions of the phone using a custom recovery. You can change the partition format of the phone as well. There are many other uses of TWRP recovery like sideloading applications and mods. TWRP is your gateway to an entirely different and new world of Android customization. Now that TWRP is available for Mate 10 Lite, its time to unleash the real beast hidden inside this phone.

How to install TWRP Custom Recovery & Root Huawei Mate 10 Lite

We have already posted a guide on how to unlock the bootloader and root Huawei Mate 10 Lite. It’s time to flash TWRP custom recovery now. Here are the steps to install TWRP custom recovery and Root the Huawei Mate 10 Lite.

Precautions & Preparation

  • This guide is intended for Huawei Mate 10 Lite only. Do not try this method on any other device otherwise, you may result in bricking it.
  • Make sure that your phone’s battery is charged up to 80% in order to avoid any power issues during the flashing process.
  • Backup all of your important contacts, call logs, SMS messages and media content to stay on a safe end. Do not forget to create a backup since this process is supposed to wipe your phone completely.
  • Enable USB debugging mode on your phone in developer options. To do so, go to settings > about device > tap build number for 7 times. You will have developer options in settings now. Open developer options > Enable USB debugging. If you have the OEM Unlocking option, enable it as well.
  • Unlock Huawei Mate 10 Lite bootloader.
  • Use your original data cable to establish a connection between your phone and your PC.
  • Follow this guide to the letter to avoid any mishap.

Disclaimer: The methods involved in flashing custom recoveries and rooting the device are highly custom. Rooting the device and flashing a custom recover is never recommended by a device manufacturer. In case something goes wrong, TechBeasts or the device manufacturers may not be held responsible. Make sure that you’re doing everything at your own risk.

Required downloads & installations

  1. Download and install Huawei USB drivers.
  2. Download and install Minimal ADB & Fastboot drivers.
  3. Also, download twrp-mate10-lite.img file and rename it to recovery.img.
  4. Download SuperSU.zip file and copy it to your phone’s external storage.

How to Unlock Huawei Mate 10 Lite Bootloader

  1. Copy the renamed recovery.img file to the Minimal ADB and Fastboot directory which should be in a location such as: C drive > Program Files > Minimal ADB & Fastboot.
  2. Connect your Huawei Mate 10 Lite to the computer now.
  3. Now open Minimal ADB & Fastboot.exe from your desktop. If you do not have this file on your desktop, then go to your Windows installation drive i.e. C drive > Program Files > Minimal ADB & Fastboot > Press and hold Shift Key + Right-click on an empty area with the open folder > click “Open command window here”.
  4. As the command window opens up, enter the following commands one by one.
    1. adb devices
      1. This command will return a list of devices attached with a code verifying connection.
    2. adb reboot bootloader
      1. This command will reboot the phone in bootloader mode.
    3. fastboot devices
      1. This command will verify the connection in fastboot mode.
    4. fastboot boot recovery.img
      1. This will boot your phone in the TWRP recovery.
    5. Now in TWRP, tap Advanced > Terminal.
    6. In the Terminal, type and enter the following command: echo “systemless = true” /data/.supersu
  5. Get back to the main menu in TWRP recovery now and tap Install > Locate and select SuperSU.zip file and flash it.
  6. Once done, reboot to the system and your Mate 10 Lite should be rooted. That’s all.

Note: The method given above will not install TWRP recovery on your phone. In case you want to install TWRP, you can use the command: fastboot flash recovery recovery.img command in step 4 above. This command will flash the recovery in your phone. We are not sure whether the recovery will stick fine or not since it’s still in the beta stage.

Download Odin 3.12.10 for PC

0
Download Odin 3.12.10 for PC

Odin3 is Samsung’s tool that makes it extremely easy to install new software on your Samsung Galaxy smartphone. Ever since Samsung started producing Android-powered handsets, it also produced a handful of tools to keep the phone users comfortable.

Odin 3.12.10

Odin gives Samsung Galaxy users complete control of their device. With the help of this utility, users can perform many operations apart from just installing a  new piece of software. Odin can be used to install a new custom recovery, to root the phone, to install a custom bootloader, a new CSC or Modem file and even a PIT file to re-partition a Galaxy phone. Odin’s latest version is v3.12.10.

The new version brings support for new Galaxy smartphones that were released this year. If you are buying a brand new Galaxy phone and you want to carry out some manual software-related tasks, it’s important to use the latest Odin3 v3.12.10.Odin 3.12.10

Understanding Odin

Before downloading this tool, it’s important to understand a few aspects. Odin basically has 4 tabs. There is an AP tab that was formerly known as the PDA tab. This tab can be used to load .md5 or .md5.tar files. There is the CP tab which loads the Phone or Modem files. The BL tab is used to load the bootloader files and the CSC tab is used to load the CSC files. In Odin options, you can find the options to restart the phone after flashing a particular file. You can also select a PIT file if you want to re-partition your phone.

Odin’s uses

As far as Odin’s use is concerned, Odin is more than helpful in some extremely dangerous stages. If you have bricked your phone or it’s stuck in the bootloop, the only way to rescue yourself is the use of this tool. In case your handset is rooted and now you want to unroot it, Odin is there to restore it to factory settings. If there is a new software update available, and it’s not available through OTA or through Samsung smart switch, you can get the .tar file of the update and flash it manually using Odin. The list of Odin’s uses keeps expanding like this. The idea of discussing this stuff was to give the users a glimpse of what Odin is and how it works. We can now get back to what we came here for.

Below is the download link to Odin 3.12.10 for PC. You can download latest Odin 3.12.10 for PC and start using it right away. This version of Odin will work with all the new and existing Samsung Galaxy phones powered by the Android operating system.

Download Odin 3.12.10 for PC

Latest Odin 3.13.1 is now available for newer Galaxy phones. Download Odin 3.13.1 for PC [Odin3 v3.13.1]

Unlock Bootloader & Root Huawei Mate 10, Mate 10 Lite & Mate 10 Pro

0
Unlock Bootloader & Root Huawei Mate 10, Mate 10 Lite & Mate 10 Pro

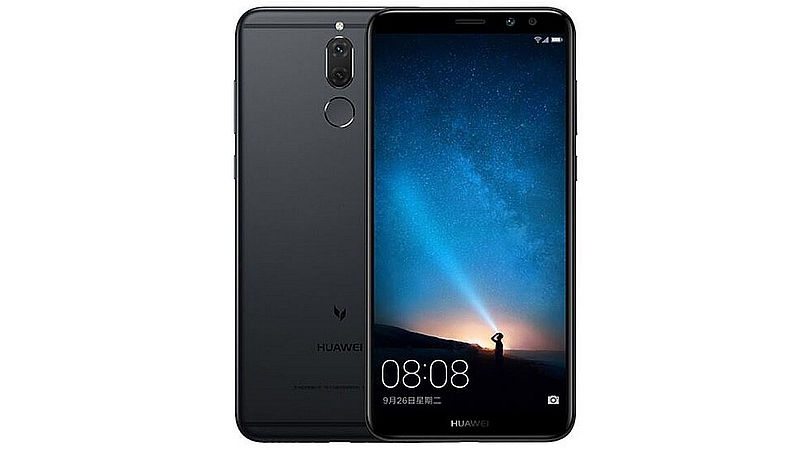
About a month ago, Huawei released its Mate 10 flagship series. The Mate series brought several smartphones. These phones included the Huawei Mate 10, Mate 10 Pro, Mate 10 Porsche Design and the Mate 10 Lite. All these phones have the same design, some of the hardware aspects are also the same. The Mate 10 is the standard variant, Mate 10 Pro is the one with a big screen, the Porsche Design is the Porsche Signature smartphone and the Mate 10 Lite is the one with less powerful hardware.

Huawei Mate 10 series is running quite well. All these phones have the 18:9 display ratio which is why these are attracting the users in masses. Huawei Mate 10 Lite and Mate 10 Pro have full HD screens and the Mate 10 has a QHD display. Mate 10 and Mate 10 Pro is powered by Kirin 970 CPU and the Mate 10 Lite is powered by Kirin 659 CPU.  The Mate 10 Lite is slightly more popular because of a very budget-friendly price. The Mate 10 and Mate 10 Pro run on Android Oreo and Mate 10 Lite runs on Android Nougat out of the box.Unlock Bootloader & Root Huawei Mate 10, Mate 10 Lite & Mate 10 Pro
 

Unlocking the bootloader and rooting these phones

All these phones have been successfully unlocked (talking about the bootloader), blessed by a custom recovery and have been rooted as well. If you have managed to get one of these, it’s time for you to unlock their real potential. Unlocking bootloader of your phone is important since you need to install a custom recovery on it. Unlocking the bootloader will stop the OTA updates and it will also wipe your phone completely. If you are brave enough to take this very first step, the remaining steps to install a custom recovery and root the phone shouldn’t be a big deal to you.

Unlocking the bootloader of your Huawei Mate 10 means you no longer care about the warranty of your phone. The bootloader is responsible for checking the security of the system on your phone. If you unlock it, your phone will no longer check the system for any kind of modifications. The bootloader has the kernel code responsible for booting up your phone. This is the reason why smartphone manufacturers keep it locked by default. If you want to unlock the bootloader, you have to agree to the terms and conditions given by the smartphone manufacturer. Android enthusiasts who are used to flashing and rooting do not care much about the bootloader. If you are doing it for the very first time, it’s important to understand the pros and cons.

Without unlocking the bootloader, you cannot install a custom recovery on your phone which means you cannot root your phone either. If you have already made your mind to flash a custom recovery on your phone and root it, then let’s head towards the tutorial now. The TWRP recovery is still in the beta stage, so we will skip it for now. For now, we will only unlock the bootloader and root the phone. Here’s a comprehensive guide to unlock bootloader & Root Huawei Mate 10, Mate 10 Lite & Mate 10 Pro.

Unlock Bootloader & Root Huawei Mate 10, Mate 10 Lite & Mate 10 Pro

Precautions & Preparation

  • This guide is intended for Huawei Mate 10 only. Do not try this method on any other device otherwise, you may result in bricking it.
  • Make sure that your phone’s battery is charged up to 80% in order to avoid any power issues during the flashing process.
  • Backup all of your important contacts, call logs, SMS messages and media content to stay on a safe end. Do not forget to create a backup since this process is supposed to wipe your phone completely.
  • Enable USB debugging mode on your phone in developer options. To do so, go to settings > about device > tap build number for 7 times. You will have developer options in settings now. Open developer options > Enable USB debugging. If you have the OEM Unlocking option, enable it as well.
  • Use your original data cable to establish a connection between your phone and your PC.
  • Follow this guide to the letter to avoid any mishap.

Disclaimer: The methods involved in flashing custom recoveries and rooting the device are highly custom. Rooting the device and flashing a custom recover is never recommended by a device manufacturer. In case something goes wrong, TechBeasts or the device manufacturers may not be held responsible. Make sure that you’re doing everything at your own risk.

Required downloads & installations

  1. Download and install Huawei USB drivers.
  2. Download and install Minimal ADB & Fastboot drivers.

How to Unlock Huawei Mate 10 Bootloader

  1. Unlocking bootloader will wipe your device. Make sure that you’ve backed up everything before going ahead.
  2. Install Huawei’s HiCare app on your phone and call the support in HiCare. Request them to get your bootloader unlock code. You will have to provide your email, IEMI and serial number.
  3. Huawei will send you your bootloader unlock code through an email in a few days or in a few hours.
  4. Make sure that you’ve downloaded and installed Minimal ADB & Fastboot drivers on your Windows PC or installed Mac ADB & Fastboot for Mac.
  5. Connect your phone to your PC now.
  6. Now open Minimal ADB & Fastboot.exe from your desktop. If you do not have this file on your desktop, then go to your Windows installation drive i.e. C drive > Program Files > Minimal ADB & Fastboot > Press and hold Shift Key + Right-click on an empty area with the open folder > click “Open command window here”.
  7. Now in the command window enter the following commands one by one.
  • adb reboot-bootloader

    This will reboot your Nvidia Shield in bootloader. Once booted up, issue the following command.

    fastboot devices

    This command will verify the connection of your device with your PC in fastboot mode.

  • fastboot oem unlock (bootloaderunlockcodexxxxxxxxxxxx)

    This command will unlock the bootloader. As soon as you press the enter key after typing this command, you will get a message in your phone asking for the confirmation of bootloader unlocking. Use volume up & down keys to navigate through options and confirm unlocking.

Now that your phone’s bootloader has been unlocked, your phone will be completely wiped. You will have to enable USB Debugging and OEM Unlocking once again after your phone is completely set up. You can jump up to the next section to root your Mate 10 now.

How to Root Huawei Mate 10, Mate 10 Pro and Mate 10 Lite

  1. Download and unzip FHMate10tool.
  2. Connect your phone to your computer once again.
  3. Open the Minimal ADB and Fastboot.exe command window.
  4. In the command window enter the following command: adb reboot bootloader
  5. This command will reboot your phone in the bootloader mode now.
  6. Now you need to run the FHMate10Tool.exe file.
  7. In the newly opened screen, you will find the options to root your phone. The first option is “Root your Mate 10”.
  8. Type 1 now and press Enter.
  9. You will find a few more on-screen instructions. Follow the procedure now and you will get your phone rooted.
  10. Once your phone is rooted, it will reboot and all of the USERDATA will be completely erased. SuperSU will be installed on your phone.

So that’s how we rooted Huawei Mate 10, Mate 10 Pro and the Mate 10 Lite. In case you have got any queries, feel free to drop them in the comments section below.

Download Odin3 v3.12.7 for PC

0
Download Odin3 v3.12.7 for PC

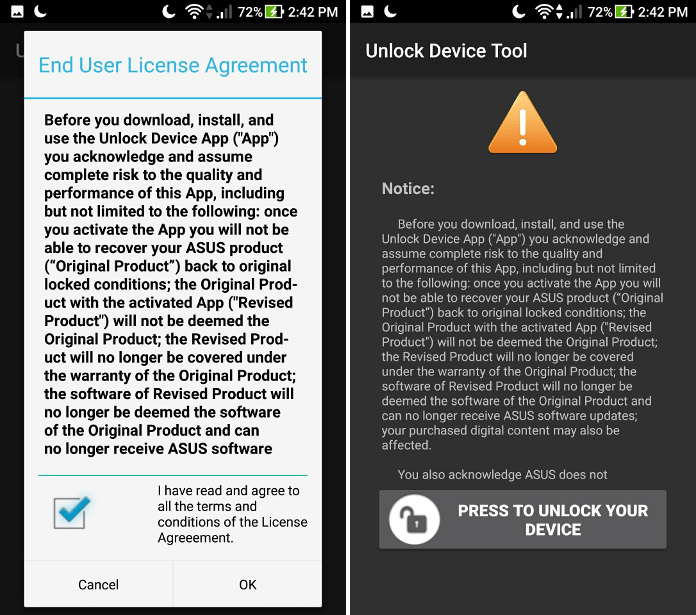
Samsung Galaxy smartphones can be flashed easily using a tool called Odin. Odin is Samsung’s official tool that can install official/stock ROMs, custom recoveries, bootloader, CSC and other such files on your phone. The Odin flashtool can be used to root the phone as well in some cases.
Odin 3.12.7

Samsung’s Odin has existed since the very first smartphone produced by Samsung. With the release of new Samsung Galaxy smartphones, new versions of Odin came out with the support for new Galaxy handsets. The new version of Odin is 3.12.7 which supports all the new Samsung Galaxy devices that were released in the year 2017.

Samsung users with the latest Galaxy phones will have to use the Odin3 3.12.7 in order to install stock firmware on the phone.Odin3 v3.12.7 for PC

Uses of Odin

Odin’s use is not limited to only flashing a new ROM or a recovery. Odin can be a life savior in so many cases. For example, you have soft-bricked your handset and there’s no way to get out of the bootloader screen, you will have Odin to manually restore your phone to the previous working state.

Odin can unroot your phone as well. It can change the CSC of the phone, it can be used to flash a different modem and a different bootloader as well. If your phone’s storage partition is messed up, you can use Odin3 to flash PIT file and fix the partition structure of the phone.

Although you can flash a stock firmware using a tool like Samsung Smart Switch, there’s something that makes Odin more useful. For example, there is a new firmware update available for your phone, but this update is not out through OTA and through Samsung Smart Switch, what you are going to do? Well, if you can get the firmware file from an online source, all you need is the Odin tool to flash it. Updating a Samsung Galaxy phone manually using Odin is the most popular use of this tool.

Download Odin3 v3.12.7 for PC

Assuming that you have an understanding of the Odin tool now, we can head towards the download. From here, you can download the latest Odin3 v3.12.7 for PC. Old versions of Odin are also linked next to the latest Odin3 v3.12.7 download. There’s a detailed guide on Odin available on our site as well. The guide for all versions of Odin is the same. The only thing that changes is the version number with the support for new models of Samsung Galaxy series.

Latest Odin 3.13.1 is now available for newer Galaxy phones. Download Odin 3.13.1 for PC [Odin3 v3.13.1]