Home Blog Page 299

How To Disable Custom Blocker on Samsung Galaxy S7/S7 Edge

3
How To Disable Custom Blocker on Samsung Galaxy S7/S7 Edge

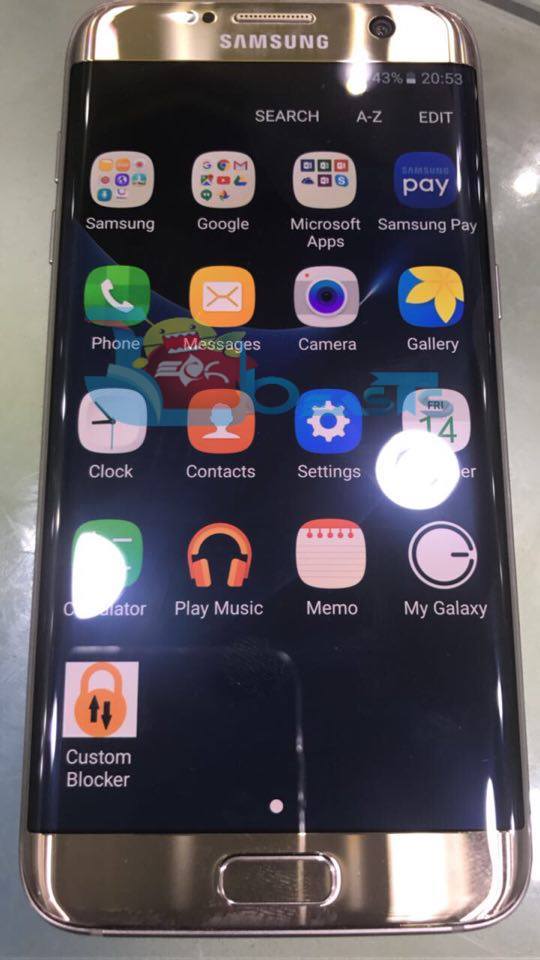
In this post, I’ll tell you How To Disable Custom Blocker on Samsung Galaxy S7/S7 Edge. Today my friend bought Samsung Galaxy S7 Edge and after using it a while he saw a new app named as a custom blocker and just to check what it is he activated it. After that Galaxy S7 edge started behaving strangely, Google Play Store icon was missing he cannot install third-party apps and much more. In order to disable Custom Blocker on Samsung Galaxy S7/S7 Edge, I tried many methods but nothing worked but in the end, I got a solution. First I’ll tell you what I tried and then, in the end, I’ll tell you the working method.

How To Disable Custom Blocker on Samsung Galaxy S7/S7 Edge

How To Disable Custom Blocker on Samsung Galaxy S7/S7 Edge:

Let’s start with the 1st method I tried, Open Setting on your device, scroll down and select Backup and Reset. Tap on Factory data reset option located at the bottom of the list. Now wait for the process to be completed, Once your device is in Factory state start setting up your device as you do normally. Now keep in mind once your device boots up to the home screen, turn off WiFi/Mobile data connections. You’ll see Knox setup page don’t do anything, go to settings by dragging down the notification bar and tap on the gear icon. Now in settings->About device->Software info->Tap on build number until you see developer options are enabled. Now to back to settings,  Tap on developer options, Turn on OEM lock and the USB debugging option will be grayed out. Now go to Sammobile firmware section and download the Galaxy S7 Edge official firmware.

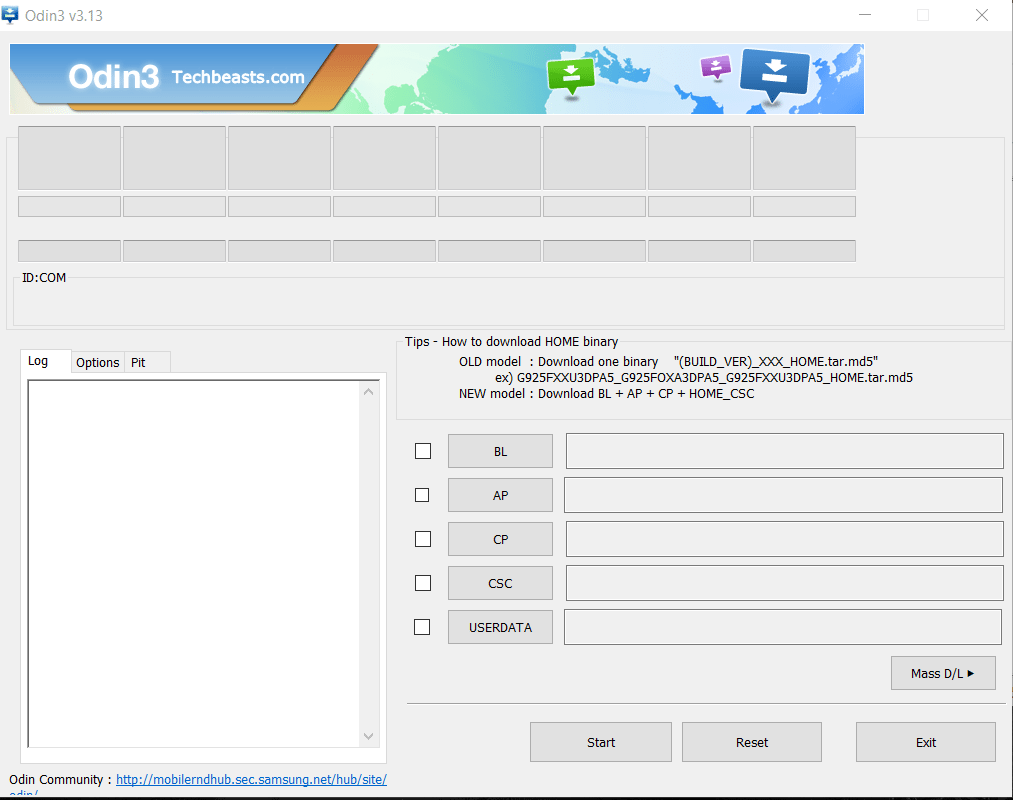
Flash the firmware using Odin and when your device boots up there are chances that Custom Locker will be gone for good. I didn’t work for me.

#2. In 2nd method, I tried is to root my Galaxy S7 Edge using this method ( link ). First I boot my device into download mode and tried to flash custom recovery but once the flashing process was completed and I tried to boot my device into recovery it stuck on Samsung Galaxy S7 Edge logo and nothing was working. I boot my device back to normal mode by pressing Volume down+power+home button. Then I tried many times to flash the recovery but no luck, during this method I have flash stock firmware 2-3 times. This method didn’t work for me either.

#3. In the end, I finally found a working method and it worked perfectly. Download these files ( Galaxy S7 ) ( Galaxy S7 Edge ).

  • Download Odin.
  • Open Settings on your device and enable developer options.
  • Tap on “OEM Unlock” to enable it.
  • Extract the “.tar.md5” from the zip file you downloaded.
  • Hold Home, Power and Volume Down buttons to boot into download mode.
  • AP button in Odin, and select the .tar.md5.
  • Click START, to flash the file you added.

Once the flashing process completes, boot your device into recovery mode.

  1. Now using Volume Up & Down keys navigate to Wipe Cache Partition, select it using Power Key and wipe it.
  2. Once you’ve wiped it, reboot your device and check if your issue has been resolved or not.
  3. That’s all.

Disable iOS 10 Press Home To Unlock / Open On Lock Screen

0
Disable iOS 10 Press Home To Unlock / Open On Lock Screen

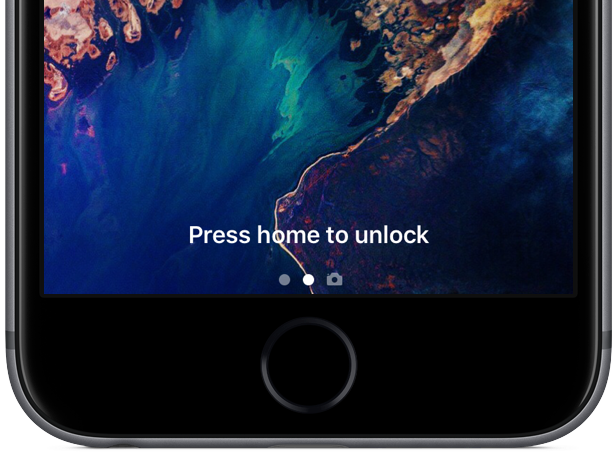
iOS 10 is the latest OS for iPhone, iPad, and iPod  Touch, Apple has introduced a lot of new and exciting features in iOS 10 but there is one thing that bothering everyone. Now you to Press Home to unlock your device, means before all we need is to put our thumb or finger to unlock our device but now after putting your thumb you have to press the home button to unlock your device. In this post, I’ll tell you how to Disable iOS 10 Press Home To Unlock / Open On Lock Screen.

press home to unlock

Disable iOS 10 Press Home To Unlock / Open On Lock Screen:

Following are the instruction to disable iOS 10 press home to unlock, you can also use a third-party app to unlock your screen by just swiping. [ Use video tutorial ]

Step #1: Launch the Setting app on your device.

Step #2: Tap on General from the list.

Step #3: Now, tap on Accessibility.

Step #4: Scroll down and  tap on Home Button.

Step #5: All you have to do is turn on “Rest Finger to Open.”

Enable iOS 10 Press Home To Unlock / Open On Lock Screen:

Step #1: Launch the Setting app on your device.

Step #2: Tap on General from the list.

Step #3: Now, tap on Accessibility.

Step #4: Scroll down and  tap on Home Button.

Step #5: All you have to do is turn off “Rest Finger to Open.”

Download Google Pixel Apps (Pixel Launcher, Wallpaper Picker and More)

2
Download Google Pixel Apps (Pixel Launcher, Wallpaper Picker and More)

Google’s new smartphones, the Pixel and Pixel XL are out in all their glory. These are the very first smartphones that are completely built by Google from the inside and the outside. Google has put a lot of effort into making these smartphones join the premium line of smartphones. Google Pixel and XL come with some features that no other Android smartphones have or will they will never get those features. These include the new Google Pixel Launcher, a new Google Pixel Wallpaper Picker. Apart from these exclusive features, the applications embedded into the system of Google Pixel smartphones have been completely overhauled. Although the users may not be able to get their hands on the Pixel and Pixel XL smartphones, but the good news is, they can now get their hands on the official apps of Google Pixel and Pixel XL.

google-pixel-and-pixel-xl-images-3

Goodies from the Google Pixel smartphones started floating around the web way back when the smartphone was only visiting the rumour mills. Now the official bundle of applications residing in the Googgoogle-pixel-wallpapers-article-headerle Pixel phones is out and you can install them on your Android Nougat or Marshmallow powered smartphone. The apps are not guaranteed to work on your below Nougat phone. But if you are an Android power user, a little search on the Xposed Module will definitely help you to run the apps on your Marshmallow powered phone.

The available to download Google Pixel apps include the all new Google Camera, Google Pixel Launcher, Google Pixel Wallpaper Picker, Google Pixel Launcher Icons, Google Photos, Clock, Calendar and a lot of other goodies. So, what are you waiting for? Just go ahead, pick up your desired app from the Google Pixel Apps and install it right away.


Download Download Link
Google Pixel Launcher Download
Google Pixel Launcher Wallpaper Picker Download
Google Pixel Launcher Icon Pack Download
Google Camera Download
Google Photos Download
Google Drive Download
Google Chrome Download
Google Keyboard Download
Google Dialer Download
Google Pixel Settings App Download
Google Maps Download
Google Play Services Download
Google Play Music Download
Contacts Download
Calendar Download
Clock Download
Cloud Print Download
Hangouts Download
Gmail Download
Youtube Download

All these apps can be installed as normal APK files.

Don’t forget to stop by: Download Google Pixel and Pixel XL Stock Wallpapers

Download Real Football for PC

0
Download Real Football for PC

After a very long time, Gameloft has finally updated the Real Football. The new Real Football is for the year 2016. The update comes after Real Football 2013. This time around, Gameloft hasn’t named the game having year in it, it’s simply called Real Football. We have been seeing potential games from Gameloft over the course of past few years, so we are certain that new Real Football is set to meet all our expectations and it meets all the new standards of the year 2016. Real Football is packed up only in 29 MBs and will most likely run on all of the Android smartphones running Android 4.0 and higher.real-football-for-pc

New Real Football brings tons of new features. You can build your own team, perform upgrades, pull in new skills and lead your team to a great victory. You can recruit players, work on their abilities and see where do you stand in a world full of football maestros. The game brings 3D stadiums, Gameloft has worked hard on the details of the game as well. Play with world champions, manage your own virtual teams and experience how it feels to be a real footballer. Real Football is the perfect simulation game for learning football if you are a football freak.

Real Football works great on Android and iOS devices. Games like Real Football are also worth playing on a computer. If you want get a hand of this all-new-cool game on your computer, then that is easily possible. Real Football for PC can be installed and played on Desktop PCs and Laptops powered up with Windows or Mac OS. You can install the game on your computer using an Android emulator like Remix OS Player or BlueStacks. We have a comprehensive guide coming your way as you scroll down. Go through it and start playing Real Football for PC.

Download Real Football for PC

  1. Download Real Football APK for PC.
  2. Download and install Bluestacks or Remix OS Player: Bluestacks Offline Installer | Rooted Bluestacks |Bluestacks App Player | Remix OS Player for PC
  3. Double click the APK file that you just downloaded.
  4. Let BlueStacks or Remix OS Player install the APK file.
  5. Finish the installation of this game and open the app drawer or all apps in the emulator.
  6. Click the Real Football icon to open it, follow the on-screen instructions to play it.

You can also use Andy OS  to install Real Football for PC, here’s the tutorial: How To Run Android Apps On Mac OS X With A


How to install Android 7.0 Nougat on Galaxy Mega 6.3 I9200/I9205

4
How to install Android 7.0 Nougat on Galaxy Mega 6.3 I9200/I9205

Origin of Samsung’s Galaxy Mega series dates back in the year 2013. Samsung released two devices, the Galaxy Mega 5.8 and Galaxy Mega 6.3. These were not the mainstream flagship devices, however, they did quiet well in terms of sales. Galaxy Mega 6.3, the bigger variant carried a 6.3-inch SC-LCD capacitive touchscreen display. It was powered up with Qualcomm Snapdragon 400 Dual-Core CPU accompanied by Adreno 305 GPU. Storage options were 8/16 GB and RAM was 1.5 GB. Galaxy Mega had an external SD card slot as well. 8MP shooter at the back and 1.9MP shooter was fixed on the front. Galaxy Mega 6.3 ran on Android 4.2.2 Jelly Bean out of the box and its updates ended at Android 4.4.2 KitKat. Since then, the device has been neglected completely by Samsung in terms of software updates.samsung-galaxy-mega-6-3-front

Since the discontinuation of Galaxy Mega’s official software updates, the only updates that the Galaxy Mega is relying on are custom ROMs. Earlier, we had a chance to taste Android Lollipop on the Galaxy Mega. We also had a chance to run the Android Marshmallow on Galaxy Mega by means of custom ROM. Now we have the Android 7.0 Nougat out for the Galaxy Mega 6.3 as well.

Android 7.0 Nougat for the Galaxy Mega 6.3 I9200 and the LTE variant I9205 comes out based on an unofficial build of CyanogenMod 14. Luckily, the most common features like Calls, sending text messages, mobile data, Bluetooth, Audio, Camera and Wifi are found working on this ROM. The ROM is in its early development stages and it’s supposed to carry a few bugs here and there. But if you are a power Android user, the bugs really shouldn’t matter and the installation should go smooth for you.

In the following post, we will show you a very easy method to install Android 7.0 Nougat on Galaxy Mega 6.3 I9200/I9205 via CM 14 custom ROM. To make sure that nothing goes out of the way, follow the instructions carefully.

Precautions

  1. This ROM is intended for Galaxy Mega 6.3 I9200 and I9205 . Do not try flashing this ROM on any other device otherwise you will result in bricking it. Check your device’s model number under settings > about device.
  2. Charge your phone up to 50% to avoid any power issues during the flashing process.
  3. Flash a custom recovery on your Galaxy Mega 6.3 I9200 and I9205 .
  4. Backup everything including your important contacts, call logs and text messages.
  5. Don’t forget to create a Nandroid backup. This is highly recommended so that you can revert back to your previous system in case of a mishap.
  6. Backup EFS partition to avoid EFS corruption later on.
  7. Follow the instructions to the letter.

DISCLAIMER: FLASHING CUSTOM ROMS VOIDS THE WARRANTY OF A DEVICE AND ITS NOT RECOMMENDED OFFICIALLY. WHILE YOU’RE GOING TO DO THIS, MAKE SURE THAT YOU’RE DOING THIS AT YOUR OWN RISK. IN CASE OF A MISHAP TECHBEASTS, SAMSUNG OR THE DEVICE MANUFACTURERS MAY NOT BE HELD RESPONSIBLE.

Install Android 7.0 Nougat on Galaxy Mega 6.3 I9200/I9205 via CM 14

  1. Download latest CM 14.zip file according to your device
    1. CM 14 Android 7.0.zip file
  2. Download Gapps.zip [arm, 6.0.zip] file for Android Nougat.
  3. Connect your phone to your PC now.
  4. Copy all .zip files to the storage of your phone.
  5. Now disconnect your phone and turn it off complete.
  6. Boot into TWRP recovery now, in order to do so, turn it on by pressing and holding Volume Up + Home Button + Power Key. You should see the recovery mode in a while.
  7. Now in TWRP  recovery, wipe cache, factory data reset and advanced options > dalvik cache.
  8. After wiping all these three, select “Install” option.
  9. Now select “Install Zip >  Select cm-14.0…….zip file > Yes”.
  10. This will flash the ROM in your phone, once done get back to the main menu in recovery.
  11. Now once again select “Install > Select Gapps.zip file > Yes”
  12. This will flash the Gapps in your phone.
  13. Reboot your device.
  14. You should see the Android 7.0 Nougat CM 14.0 running on your device in a while.
  15. That’s all!

In order to enable root access on this ROM, go to settings > about device > tap the build number for 7 times. This will enable developer options on in settings. Now open developer options and enable root.

First boot may take up to 10 minutes, you may not worry if it’s taking that much long. In case it’s taking too long, you may boot into TWRP recovery and wipe cache and dalvik cache and reboot your device as it may fix the issue. In case your device is having issues, you may return to your old system using the Nandroid backup or follow our guide here to install stock firmware.

Got any queries? Reach us out through the comment box below.

Source

Download Best HD Halloween 2016 Wallpapers

0
Download Best HD Halloween 2016 Wallpapers

Halloween 2016 is just around the corner. It’s that time of the year when the kids are all set to play the trick or treat games once again. Everyone’s getting their spooky costumes ready, making preparations to give their houses a haunted look and trick each other to fall in those scary traps. Halloween 2016’s date is 31st October, 2016. While you are planning it this event to make it another unforgettable day in your life, we have also collected something to add to your celebrations.colorful-halloween-horor-wallpaper-620x434

As always, we have gathered a collection of best HD Halloween 2016 Wallpapers for your desktop PCs and your Android/iOS handheld devices. You can use these wallpapers on your computers while you turn them on the Halloween 2016 or you can also use these wallpapers as Halloween 2016 cards. All the wallpapers that we collected are in HD resolution and they will fit perfectly on the screen of your laptop/Desktop PC or the handheld device.

In order to download your desired wallpaper, just go ahead and right click on it. After the right click, click on “Save image” and save the wallpaper either to your computer or directly in your smartphone/tablet.

Note: We do not own any of the images attached above. All these images/graphics are the copyrights of their respectful owners. We have only collected the images and uploaded here for private/personal use.

Install TWRP Recovery and Root Galaxy S6 Edge Plus

1
Install TWRP Recovery and Root Galaxy S6 Edge Plus

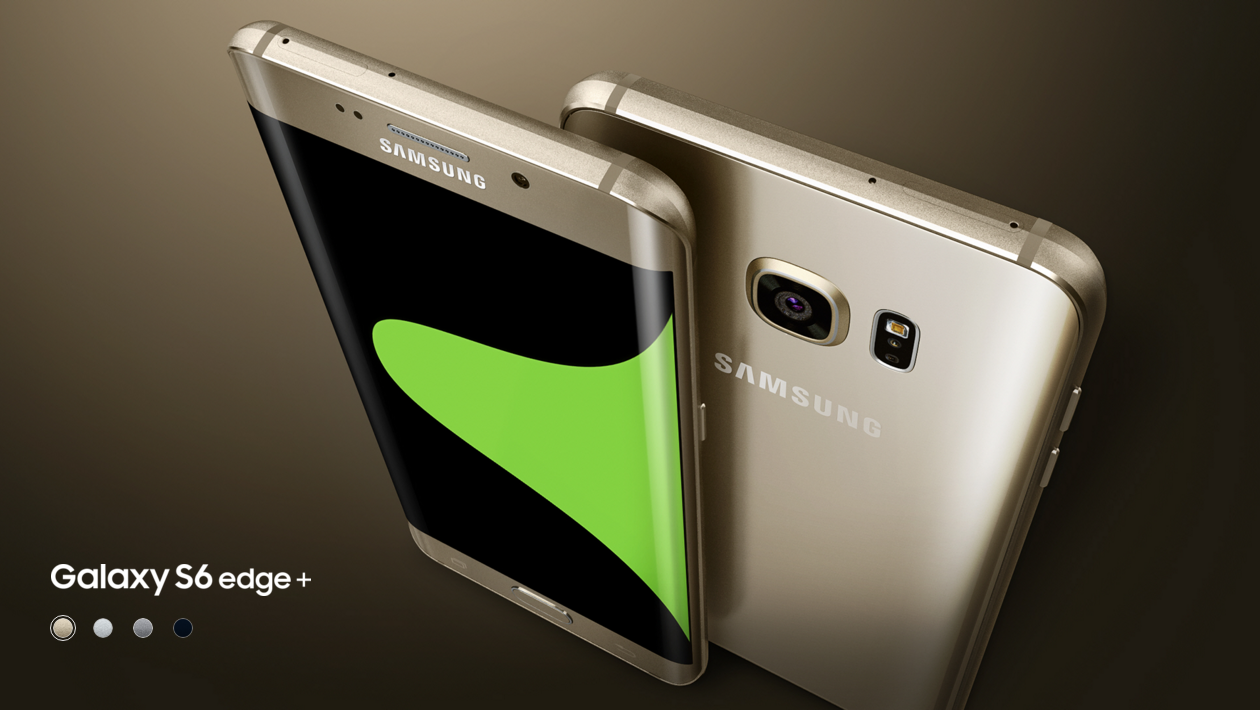
Latest build of TWRP custom recovery is available for the Galaxy S6 Edge Plus. TWRP’s latest version works pretty well with the all variants of the Galaxy S6 Edge Plus running Android 6.0.1 Marshmallow. If you have been looking for a working method to install a custom recovery and root your phone, you may have spotted the right place. In the following post, we will show you the easiest method to install latest TWRP recovery on your Galaxy S6 Edge Plus. After flashing TWRP recovery, we will also root the phone.s6-edge-plus

Early preparations

  1. Charge your Galaxy S6 Edge Plus up to 50% to avoid power issues during the flashing process. Check your device’s model number carefully under settings > more / general > about device.
  2. Enable OEM Unlocking and also enable USB debugging mode on your phone.
  3. Get a microSD card as you will need to copy SuperSU.zip file to that, otherwise you will have to use the MTP mode while you boot up into TWRP recovery to flash copy it.
  4. Backup your important contacts, call logs, sms messages and also copy your media content to your computer as you will have to wipe your phone on the way.
  5. Uninstall/disable Samsung Kies while using Odin. Samsung Kies can hinder the connection between your phone and Odin.
  6. Use OEM data cable to establish connection between your PC and your phone.
  7. Follow these instructions to the letter to avoid any mishap during flashing process.

Disclaimer: Rooting, flashing custom recoveries and tweaking your device are the processes which are never recommended by device manufacturers or the OS providers. In case a mishap occurs while following the method listed below, TechBeasts or the device manufacturer may not be held responsible. Make sure that you are doing everything at your own risk.

Downloads and installations

  • Download and install Samsung USB drivers on your PC: Download Link with Guide
  • Download and extract Odin 3.12.3 on your PC: Download Link with Guide
  • Download the TWRP Recovery.tar file carefully according to your device.
    • TWRP Recovery for International Galaxy S6 Edge Plus SM-G928F/FD/G/I: Download
    • TWRP Recovery for Korean Galaxy S6 Edge Plus SM-G928S/K/L: Download
    • TWRP Recovery for Canadian Galaxy S6 Edge Plus SM-G928W8: Download
    • TWRP Recovery for T Mobile Galaxy S6 Edge Plus SM-G928T: Downoad
    • TWRP Recovery for Sprint Galaxy S6 Edge Plus SM-G928P: Download
    • TWRP Recovery for US Cellular Galaxy S6 Edge Plus SM-G928R4: Download
    • TWRP Recovery for Chinese Galaxy S6 Edge Plus SM-G9280, SM-G9287, SM-G9287C: Download
  • Download SuperSU.zip file and copy it to your phone’s external SD card. If you haven’t got an external SD card, you will need to copy it to internal storage after installing TWRP recovery.
  • Download dm-verity.zip file and copy it to the extern SD card as well. Alternatively, you can also copy both these.zip files to a USB OTG if you have got one.

Install TWRP Recovery & Root Galaxy S6 Edge Plus

  1. Open Odin3.exe file from the extracted Odin files that you downloaded above.
  2. Put your Galaxy S6 Edge Plus in download mode now. To do so, turn off your phone first. Now turn it on by pressing and holding Volume Down + Power + Home button. As soon as your device boots up showing a Downloading screen, leave the keys.
  3. Connect your phone to your PC now. Odin should show an “Added” message in the logs and also show the blue light in the ID:COM box. This will verify a successful connection between your phone and your PC.
  4. Now click on the “AP” tab in Odin and select the TWRP Recovery.img.tar file according to your device carefully.
  5. The options ticked in Odin should be only “F.Reset Time“. Make sure that the Auto-Reboot option is not checked, we do not want to reboot the phone after flashing TWRP recovery.
  6. After selecting the file and checking/unchecking the options carefully, hit the start button. Odin will now flash the TWRP and show you a PASS message in a few minutes.
  7. Once done, disconnect your device from your PC now.
  8. Now you need to boot directly into TWRP Recovery. Turn off your phone completely and turn it on by pressing and holding Volume Up + Home + Power key now. Your phone should successfully boot into newly installed custom recovery.
  9. TWRP will ask you whether you want to allow modifications or not, you will need to swipe finger to the right to enable modifications. Swiping the finger to right will trigger dm-verity, if you will need to disable it immediately. Leaving it enabled will not let you boot the phone neither root it. This is an important stuff since we want to be able to modify the system.
  10. Now tap “Wipe > Format Data > type “yes” to formate data. This is important to disable encryption. This step will factory reset your phone, so make sure that you’ve backed up the entire data at hand.
  11. Now go back to the main menu in TWRP Recovery and tap “Reboot > Recovery”. This will once again reboot your phone in TWRP.
  12. Now make sure that you’ve copied the SuperSU.zip and dm-verity.zip files in external SD Card or USB OTG, if not then transfer both these files to your external SD Card by using MTP mode in TWRP now. Once you’ve the files, tap “Install > locate the SuperSU.zip according to the location where you copied > flash it”.
  13. Now once again tap “Install > locate the dm-verity.zip file > flash it”.
  14. Once done flashing, reboot your phone to system.
  15. That’s all. You’re rooted and have a TWRP recovery installed. Best of luck.

That was it guys. Don’t forget to backup your EFS partition now and also create a Nandroid backup. Its’ time to unleash the true power of your Galaxy S6 Edge Plus. I hope that this guide proved to be fruitful for all of you. Let us know if you are stuck with something or something isn’t working right for you.

Credits:  jcaduono

A look at the Galaxy Note 7 fiasco from its release to the production suspension

0
A look at the Galaxy Note 7 fiasco from its release to the production suspension

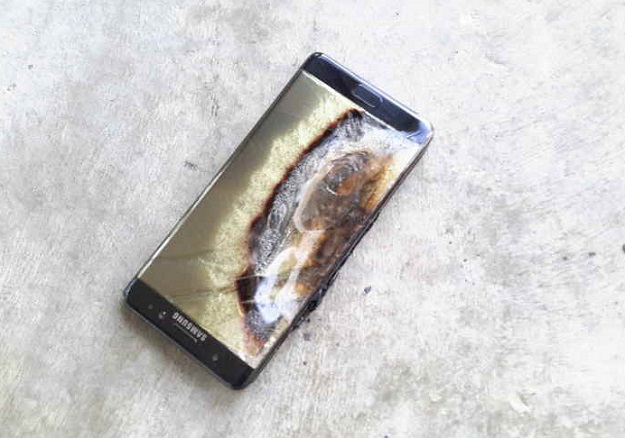
Samsung brought its latest Galaxy Note phablet to light back in August. Samsung’s exclusive unpacked event excited everyone, raised the hopes and when the Galaxy Note 7 came out, it certainly met all the expectations of users. At a glance, the Galaxy Note 7 looked a great phone. Galaxy Note 7’s premium build, a revamped design and the new cool colors made the phone look stunning. Samsung pushed in the top-notch hardware and also loaded the completely revamped TouchWiz Grave UI in the phone. Everything was going well until the very first Note 7 explosion report came out from somewhere in the world.note-7-explosion-photo

Smartphone explosions once in a blue moon are something more than common. That’s what everyone thought when the very first Samsung Galaxy Note 7 explosion report popped up. No one actually thought that the explosion of the Galaxy Note 7 will turn into a whole new fiasco and drown Samsung’s brand image all of a sudden. As the explosions kept on increasing, Samsung had to make a recall for all the Galaxy Note 7 all across the globe. This was supposed to undo all the damage to Samsung’s image and the procedure, up to some extent, worked really well.

Sometimes there is bad luck, and sometimes hard luck joins bad luck. The composite of hard luck an bad luck can result in a great disaster and that’s what exactly happened with Samsung. After the recall, Samsung started rolling out the new safe Galaxy Note 7 devices. Soon after the users got their hands on safe Galaxy Note 7s, reports of explosion of the Note 7 units furthered. Alas, this time they were safe Galaxy Note 7s.

After keeping a close watch on the Note 7 disaster, major carries in the US and UK halted the sale of these phones. While the reports of fire issues kept coming in one after another, Samsung had to break the silence and it finally suspended the Note 7 production until further notice.

To shed some light on the entire Note 7 debacle, Michale from mobielkopen.net sent us a infographic. The infographic is formed really well and explains how the Galaxy Note 7 explosions started, what steps Samsung took and where this entire drama led Samsung to. Have a look to learn everything about this matter.infographic-note-7-mobielkopen-big-en


At&t officially discontinues Galaxy Note 7, no more Note 7s from At&t

0
At&t officially discontinues Galaxy Note 7, no more Note 7s from At&t

Since the launch of the Galaxy Note 7, Samsung has been through a deluge because of the Note 7 explosion fiasco. The Galaxy Note 7, as it came out, seemed a great device. Samsung’s SDI firm, the company responsible for making non-removable batteries of the Note 7 did not do its homework which caused Samsung a more than great damage. The explosion issue on the Galaxy Note 7 did not only hurt Samsung’s high running revenues, it also hit Samsung right in the back with the company’s reputation and its trust among the users. Samsung tried its best to undo all the damage by recalling the phone all across the globe, and it even conducted a successful recall with hundred thousands of smartphones.

The recall started recovering Samsung’s reputation, but things didn’t seem to go in the right direction and Samsung Galaxy Note 7 was found seeing the light of another recall. The replacement units, proclaimed as safe Galaxy Note 7s started catching fire, which led to a great fire against the Galaxy Note 7 on the internet. Samsung has been working closely with the CPSC to ensure that the entire Galaxy Note 7 goes safe and sound, but Samsung is just hit hard by badluck and hardluck this time. The combination of badluck and hardluck here has made it hard for the Galaxy Note 7 to survive.note-7-explosion-photo

Following the news of replacement Galaxy Note 7 explosions on a flight and in the hands of users, the major US Carriers have taken a notice of the users. The worst thing may have happened for Samsung just now as At&t has officially announced that it’s kicking out the Galaxy Note 7 from its smartphone lineup.

Apart from removing the Galaxy Note 7 from its smartphone bucket, At&t has also announced that it is no longer offering the Galaxy Note 7 replacements. The users with an At&t Galaxy Note 7 can either get a refund or any other smartphone by Samsung or any other manufacturer. In an official statement, At&t said:

“Based on recent reports, we’re no longer exchanging new Note 7s at this time, pending further investigation of these reported incidents, we still encourage customers with a recalled Note 7 to visit an AT&T location to exchange that device for another Samsung smartphone or other smartphone of their choice.”

Now that At&t has taken its step, it won’t be surprising to see other carriers following its footsteps anytime soon. This has indeed resulted in more bad news for Samsung. For this year, it won’t be wrong to say that Samsung failed to play its cards right. Users are now avoiding getting their hands on the Samsung Galaxy Note 7 and this fire has also affected other smartphones as company’s reputation keeps falling apart.

What do you think about the entire Galaxy Note 7 debacle? Experts are suggesting that Samsung should discontinue the Galaxy Note 7 and move on. Do you think the same? Let us know!

How to fix Samsung Galaxy Recovery is not Seandroid Enforcing

0
How to fix Samsung Galaxy Recovery is not Seandroid Enforcing

Playing with your Android smartphone is not safe at times. While trying out the custom stuff, that you are not well aware of, you often end up bricking your phone. Sometimes, there are some weird errors which simply get you stuck in the worst situation and then make you run here and there for the sake of fixing your smartphone. The “Recovery is not Seandroid Enforcing” is one such error and it often comes up on Samsung Galaxy smartphones.

Background of Recovery is not Seandroid Enforcing

Recovery is not Seandroid Enforcing error comes up on Samsung Galaxy devices after flashing a wrong custom recovery or a file that you intend to root your smartphone with. This error results in a black screen with the sentence “Recovery is no Seandroid Enforcing” written on the top-left of your phone’s screen and that’s all that you can see when it’s there. While the error comes up, you no longer are able to boot into your smartphone or do anything. It doesn’t let your phone boot into recovery mode or the system. The only boot option that works is the download mode. The catch is, trying to wipe your phone’s data or performing a factory data reset are none of the use in this case. Flashing custom kernels or new recoveries doesn’t help either. The phone stays stuck in a particular mode, which we can name as a stuck boot-screen rather than a bootloop.

Before having a look at the fix, it is necessary to shed some light on its background. With the release of Android 6.0.1 Marshmallow, Google made it tough for the Android developers to tinker their devices and play around with the system. Samsung, being one of the major Android OEM, contributed to Google’s security system and resulted in adding fuel to the fire. This act by Samsung made it even tougher for the developers to tweak the Samsung Galaxy smartphones. Flashing files like CF-Autoroot on Marshmallow powered Galaxy smartphones brought this Recovery is not Seandroid Enforcing error up.20150722_125050

Solution

If you have also fallen prey to this error and now you are wandering here and there to fix it, you may have spotted the right place here. We can safely assume that you have given a try to all the methods before coming here and none of those methods worked for you. Fortunately, we have figured out the workaround and it’s found to be working perfectly well to get your Samsung Galaxy smartphone recovered in a few steps. The workaround requires you to flash stock firmware on your smartphone. flashing stock firmware won’t perform a factory data reset on your phone and it will probably stay safe. A stock firmware will simply wipe off the custom kernel from your phone and bring it back to life. Let’s move ahead and learn how to fix Samsung Galaxy Recovery is not Seandroid Enforcing error.

How to fix Samsung Galaxy Recovery is not Seandroid Enforcing

  1. Download and install Samsung USB drivers on your PC. Find them here: Android USB Drivers
  2. Download and extract Odin3 on your PC. You a get all Odin versions here.
  3. Open the Odin3.exe now. In Odin, the only options selected should be F.Reset.Time and Auto Reboot.
  4. Download and extract the official firmware for your Samsung Galaxy smartphone. Download the firmware from here. Carefully select your device on the firmware download page.
  5. After extracting the downloaded firmware file, you will get a file with a .tar.md5 or .tar extension.
  6. Now put your Galaxy smartphone in download mode. To do so, press Volume Down + Home + Power Key. It will boot up in download mode with a warning. Press Volume Up to continue to download mode now.
  7. Now connect the phone to your computer.
  8. In Odin, the ID:COM box should turn blue or yellow depending on your Odin’s version. It should also show “Added” message in the log box.
  9. Now in Odin, click on PDA or AP tab and select the extracted .tar or .tar.md5 stock firmware file.
  10. Making sure that the phone is connected in download mode, Odin is showing a blue light, drivers are installed successfully and the file has loaded completely in Odin, hit the start button and sit back.
  11. Once the firmware gets flashed, your device will restart.
  12. This time it won’t show any Recovery is not Seandroid Enforcing error and it will safely boot up to the system.
  13. That’s all.

Let’s us know if the guide worked for you or not. Additionally, you can reach us out through the comment box below.

Sour Patch Kids Candy Defense for PC (Windows and Mac)

0
Sour Patch Kids Candy Defense for PC (Windows and Mac)

Sour Patch Kids, a new candy themed strategy game just found its way to the world today. It’s a tower defense game in which the Sour Patch Kids are in trouble because of the gummy bears, spiders and bunnies. Your mission is to save your yard from sugary savages here. Place the towers to defend your yard from the fiends. Command your heroes in the right direction to make sure that the bunnies, spiders and bears fail to invade your yard. A coat of sour armour is available which can act as your protective shield against the little monsters. The sour coated heroes are capable of teaching your enemies a listen. Deploy the weaponry carefully and devise a strategy to make all the enemies bite the dust of defeat.candy-defense-for-pc

Sour Patch Kids appears in the free-games category. Apparently, the game seems to be appealing. Developers of this game have worked on packing up stunning graphics. The game has already started attracting masses. Apart from download and playing this game on your Android smartphone or tablet, you can also play it on your computer.

Sour Patch Kids Candy Defense for PC can be installed and played on a computer running Windows XP, Windows 7, Windows 8, Windows 8.1, Windows 10 and MacOS / OS X. An Android emulator will help you in this regard. You can make the use of BlueStacks or Remix OS Player to play Sour Patch Kids Candy Defense for PC. Have a look on the following steps to achieve the target aforementioned.

Download Sour Patch Kids Candy Defense for PC

  1. Download and install Bluestacks or Remix OS Player: Bluestacks Offline Installer | Rooted Bluestacks |Bluestacks App Player | Remix OS Player for PC
  2. Open the installed BlueStacks or Remix OS Player and open the Google Play Store in it.
  3. Now in Play Store, search for “Sour Patch Kids: Candy Defense“.
  4. Install the game and open the app drawer or all apps in the emulator.
  5. Click the Sour Patch Kids Candy Defense icon to open it, follow the on-screen instructions to play it.

You can also use Andy OS  to install Sour Patch Kids Candy Defense for PC, here’s the tutorial: How To Run Android Apps On Mac OS X With Andy.

Download Hill Climb Racing 2 for PC

0
Download Hill Climb Racing 2 for PC

Have you been missing Bill from the Hill Climb Racing? Well, Hill Climb Racing was one of the most widely played racing games a few years back and there are chances that Bill has left some memories in your life. To revive all those good memories, Bill is back with Hill Climb Racing 2. Fingersoft, the developers behind the popular Hill Climb Racing title have released the sequel of this game. The sequel brings the same concept with some improvements and extras to entertain the gaming geeks once again.hill-climb-racing-2-for-pc

Hill Climb Racing 2 brings new stunning HD graphics. The game also brings new tracks where you will be collecting coins and performing stunts. Your character Bill and your car both are customizations. Keep a balance between your driver and your car by providing them an appropriate makeover. Leaderboards are all set and are waiting for you to put a high score while others are trying to compete.

Explore new locations and have the crazy driving experience once again. Hill Climb Racing 2 has currently made its way for Android devices to the Google Play Store, the game stands free.

Hill Climb Racing 2 can also be played on a computer. You can download and install Hill Climb Racing 2 for PC on your Windows XP, Windows 7, Windows 8, Windows 8.1, Windows 10 PC/Laptop and MacOS/OS X devices.

You will need BlueStacks, BlueStacks 2 or Remix OS Player in order to play Hill Climb Racing 2 for PC. The guide coming your way explains the entire process is very simple and easy steps. Go through it and start playing Hill Climb Racing 2 for PC right away.

Download Hill Climb Racing 2 for PC

  1. Download Hill Climb Racing 2 APK
  2. Install BlueStacks N on Windows, if you have a Mac, you can install BlueStacks.
  3. After installing BlueStacks, double-click on the Hill Climb Racing 2 APK.
  4. Hill Climb Racing will be installed in the BlueStacks.
  5. Open BlueStacks N > My Apps > Find Hill Climb Racing 2, for Mac, open BlueStacks > All Apps.
  6. Use your mouse and keyboard to play Hill Climb Racing 2 now.