Home Blog Page 86

Huawei Mate 20 Guides [ Hard Reset, Recovery, Fastboot, Download, Reset Setting etc ]

0
Huawei Mate 20 Guides [ Hard Reset, Recovery, Fastboot, Download, Reset Setting etc ]

Here you’ll find Huawei Mate 20 Guides or you can say general guide on how to use Huawei Mate 20. We will include Hard Reset, Recovery, Fastboot, Download, Reset Setting and more. Without further ado, Let’s get started now.

Huawei Mate 20 Guides
Quick Summary
Hard Reset.
Soft Reset.
Codes.
Recovery Mode.
Fastboot Mode.
Reset Settings.
Download Mode.
Reset Network Settings.
Portable Hotspot.
Power Saving Mode.
Add Fingerprint.
Screenshot.
Video Tutorials.
Back Up Data.
Bypass Google Verification.
Check IMEI.

Huawei Mate 20 Guides:

Heed the instructions below in order to learn everything about Huawei Mate 20. These Huawei Mate 20 Guides will help you master everything on your device.

How To Hard Reset Huawei Mate 20:

We’ve posted this guide yesterday. You can use the following link to learn how you can hard reset Huawei Mate 20.

Hard Reset Huawei Mate 20

Soft Reset Huawei Mate 20:

In order to Soft Reset your Huawei Mate 20, all you have to do is hold down the power button for 2-3 seconds and your device will turn off.

Secret Codes for Huawei Mate 20:

Every Android device has different service codes to access a number of settings. Following are the Huawei Mate 20 Codes.

Project menu *#*#2846579#*#*
Testing  *#*#6130#*#*
About phone *#*#0000#*#*
Calendar info  *#*#225#*#*
Google Play service  *#*#426#*#*
IMEI   *#06#

Boot Huawei Mate 20 into Recovery Mode:

  • Turn off your Huawei Mate 20 by holding the power button for 2-3 seconds.
  • Once your device is turned off completely. Press + Hold Volume Up and Power button together for 2-3 seconds.
  • Now when you see the Huawei logo, let go of all the buttons.

Boot Huawei Mate 20 into FastBoot Mode:

  • Turn off your Mate 20 by holding down the power button for 2-3 seconds.
  • Connect your device to PC using USB Cable and While doing that Hold Volume Down button.
  • When you see the FastBoot Icon on your home screen let go of the button.

How to Reset Settings on Huawei Mate 20:

  • Open Settings -> Advanced Settings.
  • Tap Backup & reset -> Reset all Settings.
  • Now you have to tap two times on Reset all Settings.

Download Mode on Mate 20:

  • Turn off your device using the power button.
  • Connect it to your PC and Press + Hold Volume Down and Up button.

Reset Network Settings on Huawei Mate 20:

  • Open Settings -> Advanced Settings.
  • Tap Backup & reset -> Reset Network Settings.
  • Now you have to tap two times on Reset Network Settings.

Enable Portable Hotspot on Huawei Mate 20:

  • Open Settings on your device.
  • Head over to the Wireless & networks –> Tethering & portable hotspot.
  • Now select Portable Wi-Fi hotspot and Configure Wi-Fi hotspot.
  • In the end, Turn on Portable Hotspot.

Power Saving Mode on Huawei Mate 20:

  • Open Settings.
  • Tap on the Battery.
  • Here you will find all the options related to power saving mode. Customize as you like.
  • Pull down the notification menu, Tap on Ultra Saving Mode to enable it.

Add Fingerprint Huawei Mate 20:

Now before you Add Fingerprint on your Huawei Mate 20, you have to set Pin or Pattern Lock first.

  • Launch Settings on your device.
  • Head over to the Security & privacy.
  • Tap on Fingerprint and you will be asked to set up a Pin or Pattern. Do as you like.
  • Once you’ve set your passcode or pattern, now you can add fingerprint on Huawei Mate 20.

Take Screenshots on Huawei Mate 20:

There are three methods which can be used to take screenshots on Huawei Mate 20.

Method1:
  • Open the Screen of which you want to take a screenshot of.
  • Press Volume Up + Volume Down button together for once.
  • You will hear a splash voice. Done.
Method2:
  • Open the screen or page of which you want a screenshot
  • Drag down the notification bar.
  • Tap on the screenshot and all done.
Method3:
  • Open the Screen -> Knock 2 times -> Open Gallery.

BackUp data on Huawei Mate 20:

We have posted a complete tutorial on how to backup data on Huawei devices. Use the link below to access that guide and following instructions provided in that post will help you back up the data on Huawei Mate 20.

How to Backup Data on Huawei Phones.

How to Bypass Google Verification on Huawei Mate 20:

Heed the instructions provided below in the guide to bypass FRP lock on Huawei Mate 20.

How to Bypass FRP Lock.

Check IMEI Number on Huawei Mate 20:

Finding IMEI number on any Android is same, all you have to do is open your phone’s dialer. Type *#06#, Voila. You’ll see a pop-up with numbers written on it. That is your IMEI number.

That’s all.

How To Hard Reset Huawei Mate 20 [ Tutorial ]

0
How To Hard Reset Huawei Mate 20 [ Tutorial ]

Huawei Mate 20 Pro is the latest flagship and today we’ll tell you how to Hard Reset Huawei Mate 20 Pro. Huawei has done a wonderful job with Huawei Mate 20, a number of new features are added such as 3 camera’s at the back, more battery juice, wireless charging, and optical fingerprint sensor on the screen.

Following are the main features and the benefits of hard reset. Now let’s get started and tell you how you can Hard Reset Huawei Mate 20 using Recovery and through Settings.

Hard Reset Huawei Mate 20


Huawei Mate 20:

The Huawei Mate 20  is released in 2018, November. The phone came out with a screen of 6.53 inches having 1080 x 2244 pixels resolution. Huawei Mate 20 was powered by HiSilicon Kirin 980 (7 nm), Octa-core (2×2.6 GHz Cortex-A76 & 2×1.92 GHz Cortex-A76 & 4×1.8 GHz Cortex-A55) and Mali-G76 MP10 GPU. It had internal storage of 128 GB, 4/6 GB RAM. The camera’s at the back of this phone are 12 MP, f/1.8, 27mm (wide), 16 MP, f/2.2, 17mm (ultrawide), 8 MP, f/2.4, 52mm (telephoto) on the front, it is 24 MP, f/2.0. Inside this Phone, there was a 4000 mAh battery. The Phone is originally running on Android 9.0 (Pie).

Benefits of Hard Reset:

Summary:
*You can Wipe all of your Data Stored on your device.
*Easily fix all the performance issue.
*Bypass screen lock through hard reset.
*Bring the factory state.
*Fix all the firmware issues.
*Get rid of signal problems, loop issues, rebooting problems and power problems.

How To Hard Reset Huawei Mate 20:

  • Turn off your Huawei Mate 20 Pro by holding the power button for 2-3 seconds.
  • Once your device is turned off completely. Press + Hold Volume Up and Power button together for 2-3 seconds.
  • Now when you see the Huawei logo, let go of all the buttons.
  • You will be presented with a menu with different options. Choose “wipe data/factory reset“.
  • As like all other Android devices, use the volume button to navigate and power button to select.
  • After selecting wipe data/factory reset using volume button, Press the power button to proceed.
  • In the end, after the process is successfully completed. Reboot your device now.

Through Settings:

  • Open Settings from the Home Screen.
  • Scroll down and Tap on Backup & Reset -> Factory Reset.
  • Now select Reset device.
  • To Confirm Choose Erase everything.
  • That will be all, wait for the process to complete.

Once your device boots, set up the device as you did it before. You will good to go.

Important Message.
Please follow us on Facebook, Twitter, and Google Plus. Help us grow our social family.

*New* 3D HD Nature Images Free Download [ 20 + ]

0
*New* 3D HD Nature Images Free Download [ 20 + ]

If you want to enjoy nature at its best then you should download these 3D HD Nature Images for PC, Desktop, Laptop, Computer, and Smartphones.

To define Nature, it is not that simple but I can put it that way. Natural is known as plants, animals, and other features of the world develop of their own accord. You can add almost anything in Nature because of the concept of Nature is said to be the whole physical universe.

Everyone loves Nature, whatever form it is in. That’s why we have collected the best 3D HD Nature Images for you all. All of these images are free and you can use it on all of your devices.

We always bring the best for our users, all of these Nature Images are breathtaking, you will love them. Moreover, we won’t stop at there, bookmark this page and we will add more awesome Nature Images for you.

3D HD Nature Images:

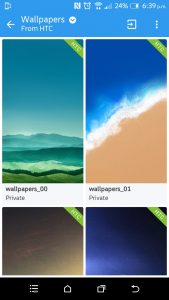
Following are the best HD Nature Images, don’t get confused by the Images they are Wallpapers. You can easily download the HD Nature Wallpapers. Heed the instructions below.

How To Download HD Nature Wallpapers:

Important:
If you are on a PC Browser, Open the Wallpapers -> Right Click -> Save Image As.
On a smartphone or tablet. Select the Wallpaper-> Tap & Hold on the Images -> Tap on Save or Download.

20+ 3D HD Nature Images Free Download:

3D-Nature-Images-For-Desktop
3D-Nature-Images
3D-HD-Nature-Images
3D-HD-Nature-Backgrounds-download
Desktop-hd-wallpapers-1080p-of-nature-download
Desktop-hd-nice-nature-wallpapers-free-download
Desktop-autumn-hd-wallpaper
Best-hd-widescreen-nature-wallpapers-hd-wallpapers
3D-HD-Nature-Images-Free-Download
3D-HD-Nature-Images-For-Desktop
Best-hd-wallpaper-nature-hd-3D
Beautiful-3d-nature-wallpapers
3D-HD-Nature-Images-Screen-Download
Desktop-hd-3d-nature-photos-1080p-widescreen-dowload
Desktop-hd-nature-images-download
Desktop-beautiful-hd-pictures-nature-dowload
Pictures-3D-HD-Nature
HD-wallpaper-nature-beach-3D
Free-Download-3D-Nature-Images
3D-Images-Nature-download
HD Nature Images
HD-Nature-Wallpapers-For-Desktop

Download Links:

You can download all of these Wallpapers with just one click. We have uploaded all these Wallpapers in a single folder and the download link is available below. Click on it and download all 22 3D HD Nature Wallpapers for your Desktop, PC, Laptop & Mac.

Important Message.
Please follow us on Facebook, Twitter, and Google Plus. Help us grow our social family.

Merry Christmas tree free download wallpaper – 2018

0
Merry Christmas tree free download wallpaper – 2018

Merry Christmas tree free download wallpaper 2018: Xmass 2018 is on the door. Everyone’s probably busy preparing for the best to welcome this great day and celebrate the moments. While you’re busy bringing the Holiday tree in your house, decorate your house with a lot of lights, colors, and all set to welcome the 25th of December, 2018, we have done something as well to add a little charm to your celebrations. Just like last year, we, once again have collected some cool wallpapers for  Merry Christmas and help you to do a little makeup to the screens of your gadgets by applying these wallpapers.

Merry Christmas Wallpapers

Merry Christmas tree free download wallpaper – 2018

Merry Christmas tree

Merry Christmas tree free download wallpaper

Merry Christmas Wallpapers

Merry Christmas beautiful snow white

Merry Christmas Wallpapers

Merry christmas and happy new year tree wallpaper

Merry Christmas Wallpapers

Merry christmas 1920×1200 holiday wallpaper

Merry Christmas Wallpapers

Happy merry christmas tree 2018 lighiting HD wallpapers

Merry Christmas Wallpapers

Happy merry christmas HD wallpapers

Merry Christmas Wallpapers

Christmas tree glowing at night in snow, Alberta, Canada

Merry Christmas Wallpapers

Download merry christmas free wallpaper

Merry Christmas Wallpapers

Merry christmas wallpaper football tree

Merry Christmas Wallpapers

Merry Christmas Wallpapers HD download.

Merry Christmas Wallpapers

Merry Christmas Wallpapers

Download HTC Launcher APK [ Updated ]

0
Download HTC Launcher APK [ Updated ]

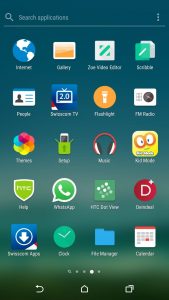
From here you can download the latest HTC Launcher APK. Like every smartphone manufacturer has its own unique UI, HTC does too. They called it HTC Sense. However, HTC is not making headlines as it used to do before, but there HTC Sense experience is amazing.

The latest HTC Sense 10 has everything new and better. The one thing you will find quite odd is that it is nearly the same as the Samsung TouchWiz. HTC 10 is all new UI and it has its own launcher along with a number of new apps.

HTC Launcher APK

HTC Launcher:

If you were a fan of HTC devices but because of their poor design and bad specs selection, you have to switch to other manufacturers. But still, you want to enjoy HTC Sense, this is the post you were looking for. We are providing you with the latest HTC Sense 10 launcher, so you can enjoy HTC UI on other Android devices.

The latest HTC Sense is designed as a theme, that means you can also use other themes to change the entire system look. So now back to our main topic, if you want to enjoy the latest HTC Sense experience, you need to download the latest HTC Launcher APK from the links provided below.

HTC Sense 10 Launcher:

Download HTC Launcher APK:

Click on the following button to download the latest HTC Launcker APK. Once you have downloaded it, proceed with the following instructions to install it.

Install HTC Launcher APK on any Android Device:

  1. Download the HTC Launcher installable file from the link above.
  2. Copy the APK file to your phone now.
  3. Locate the APK and install it, allow “Unknown Sources” if required.
  4. Once installed, press the home key on your Android device and it should ask you to select the launcher.
  5. Select the “HTC Sense” launcher, it should launch it and set it as your default launcher.
  6. That’s all. You can now use the HTC Sense 10 Launcher.
  7. To remove the launcher, you can simply go to Settings > Applications > All / Running > HTC Sense > Clear Defaults.
  8. That’s all.
Important Message.
Please follow us on Facebook, Twitter, and Google Plus. Help us grow our social family.

Download Sony Xperia Home Launcher APK [ Updated ]

0
Download Sony Xperia Home Launcher APK [ Updated ]

With the help of this post, you can download the latest Sony Xperia Home Launcher APK. Moreover, you can install this Sony Xperia Home Launcher APK on any Android device.

Whenever a new Xperia device is launched, they update their system UI. Although Xperia smartphones are not as popular as they were back in the days. But still, there UI is better than other smartphones manufacturers. The good thing is that you can install Sony Xperia Home Launcher on any Android device, whether it is rooted or not.

You will get a better UI experience after installing Sony Xperia Home Launcher on your Android devices. I think this will help all those who are using devices from Redmi, Xiaomi, and more. Let’s get started now.

Sony Xperia Home Launcher APK

Sony Xperia Home Launcher for All Devices:

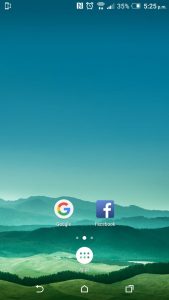
Following are the screenshots from HTC M9. You can see Xperia Home in action.

Download Sony Xperia Home Launcher APK:

Use the following link to download the latest Download Sony Xperia Home Launcher APK. This app is ported out, once installed you can enjoy the stock Android UI experience with a decent theme.

Install Sony Xperia Home APK for all Devices:

  1. Download the Sony Xperia Home APK form the link given above.
  2. Copy the APK file to your phone now.
  3. Locate the APK and install it, allow “Unknown Sources” if required.
  4. Once installed, press the home key on your Android device and it should ask you to select the launcher.
  5. Select the “Xperia Home” launcher, it should launch it and set it as your default launcher.
  6. That’s all. You can now use the Xperia Home Launcher.
  7. To remove the launcher, you can simply go to Settings > Applications > All / Running > Xperia Home > Clear Defaults.
  8. That’s all.
Important Message.
Please follow us on Facebook, Twitter, and Google Plus. Help us grow our social family.

Flip Font Collection for Samsung Galaxy Phones

0
Flip Font Collection for Samsung Galaxy Phones

Flip Font Collection is the best font collection for Samsung Galaxy devices. We’ve covered this topic before and you can find detailed guides on how to get extra fonts on Samsung Galaxy Phones.

But today, we will give one more which will help you get more stylish fonts on Samsung devices. This app is called Flip Font, once you have installed it, you can easily set custom fonts on your Samsung devices.

Different smartphone manufacturers use their custom UI over the top of Android OS. As a part of their custom UI, these manufacturers use different font styles. For example, the default font of the Android OS is the Robot font. The font on Samsung Galaxy phones is the Samsung One font and the font on the LG phones is also the Roboto font.

The beauty of Android OS is, it allows you to change each and every single element of your phone’s screen. The same applies to the fonts as well. You can install thousands of new font styles on your phone.

Flip FontDownload Links:

Use the following link to download the Flip Font APK. You can install this APK as you used to do.

Install 1900+ Fonts on Samsung Phones without Root:

We have posted a number of post on the same topic. Below are the links to access those posts, If you want more custom Fonts on your Samsung Galaxy device. Heed the instructions provided in the link. Below.

The Flip Font will give you access to over 250+ custom fonts. Moreover, this app is only supported by Gingerbread, Ice Cream Sandwich, and Jelly Bean firmware. Now let’s tell you how you can install FlipFont APK on your Samsung Galaxy devices.

Flip Font Collection for Samsung Galaxy Phones:

You don’t need to Root your device in order to install Flip Font on your Samsung devices. Just heed the instructions provided below and you will be good to go.

  • Download Flip Font APK from the link provided above.
  • It will be better to directly download it on your smartphone.
  • Once the APK is downloaded, you can access it from notification panel or you can find it in downloads.
  • Tap on the Flip Font APK to start the Installation.
  • Follow the on-screen instructions to proceed.
  • Once the Flip Font is installed.
  • Head over to the Settings> Display> Font Style.

That’s all.

Enable Floating Keyboard Mode In Google Keyboard

0
Enable Floating Keyboard Mode In Google Keyboard

Let’s tell you how to Enable Floating Keyboard Mode In Google Keyboard. All of you are well-known to floating keyboard concept and we have seen Floating Keyboard Mode in many Android keyboards. But whenever a stock app picks such features which were available in third-party apps. Everyone gets excited, recently Google Keyboard added the Floating Keyboard Mode. This is why we are posting this guide to help you Enable Floating Keyboard Mode In Google Keyboard.

The last Gboard came with this interesting feature. It works similarly as we have seen on many Android Keyboards. But there are many users who are not aware of this feature. They don’t know such feature exists. For them, it won’t be easy to enable Floating Keyboard Mode In Google Keyboard.

But that is the reason we are here, it seems pretty difficult because you cannot find it in settings. However, it is not that difficult to find and enable it. Although you won’t get too use it in short time. Now let’s move on help you enable Floating Keyboard In Gboard.

Floating Keyboard Mode In GoogleEnable Floating Keyboard Mode In Google Keyboard:

You can download the latest update of Gboard from the following links. We have added the Google Play link and along with that, we have added the latest APK.

Download Links:

Enable Floating Keyboard in Gboard:

  • Open any app on which you want to use Gboard.
  • Tap on the “G” icon, now swipe to left. You will see a number of options, Tap on 3dots.
  • Here you will see Text Editing, One-Handed, Settings & Floating.

  • Tap on Floating and you will see keyboard floating in the middle of the screen.

  • In order to move or resize you have to icon located on the bottom center of the keyboard to drag it. Also, tap on the same icon to resize it.

Disable Floating Keyboard in Gboard:

  • Open any app on which you want to use Gboard.
  • Tap on the “G” icon, now swipe to left. You will see a number of options, Tap on 3dots.
  • Here you will see Text Editing, One-Handed, Settings & Floating.
  • Tap on Floating, to disable it.

That’s all.

Important Message.
Please follow us on Facebook, Twitter, and Google Plus. Help us grow our social family.

Enable Google Pixel 3 Call Screening on Pixel 2 and Pixel

0
Enable Google Pixel 3 Call Screening on Pixel 2 and Pixel

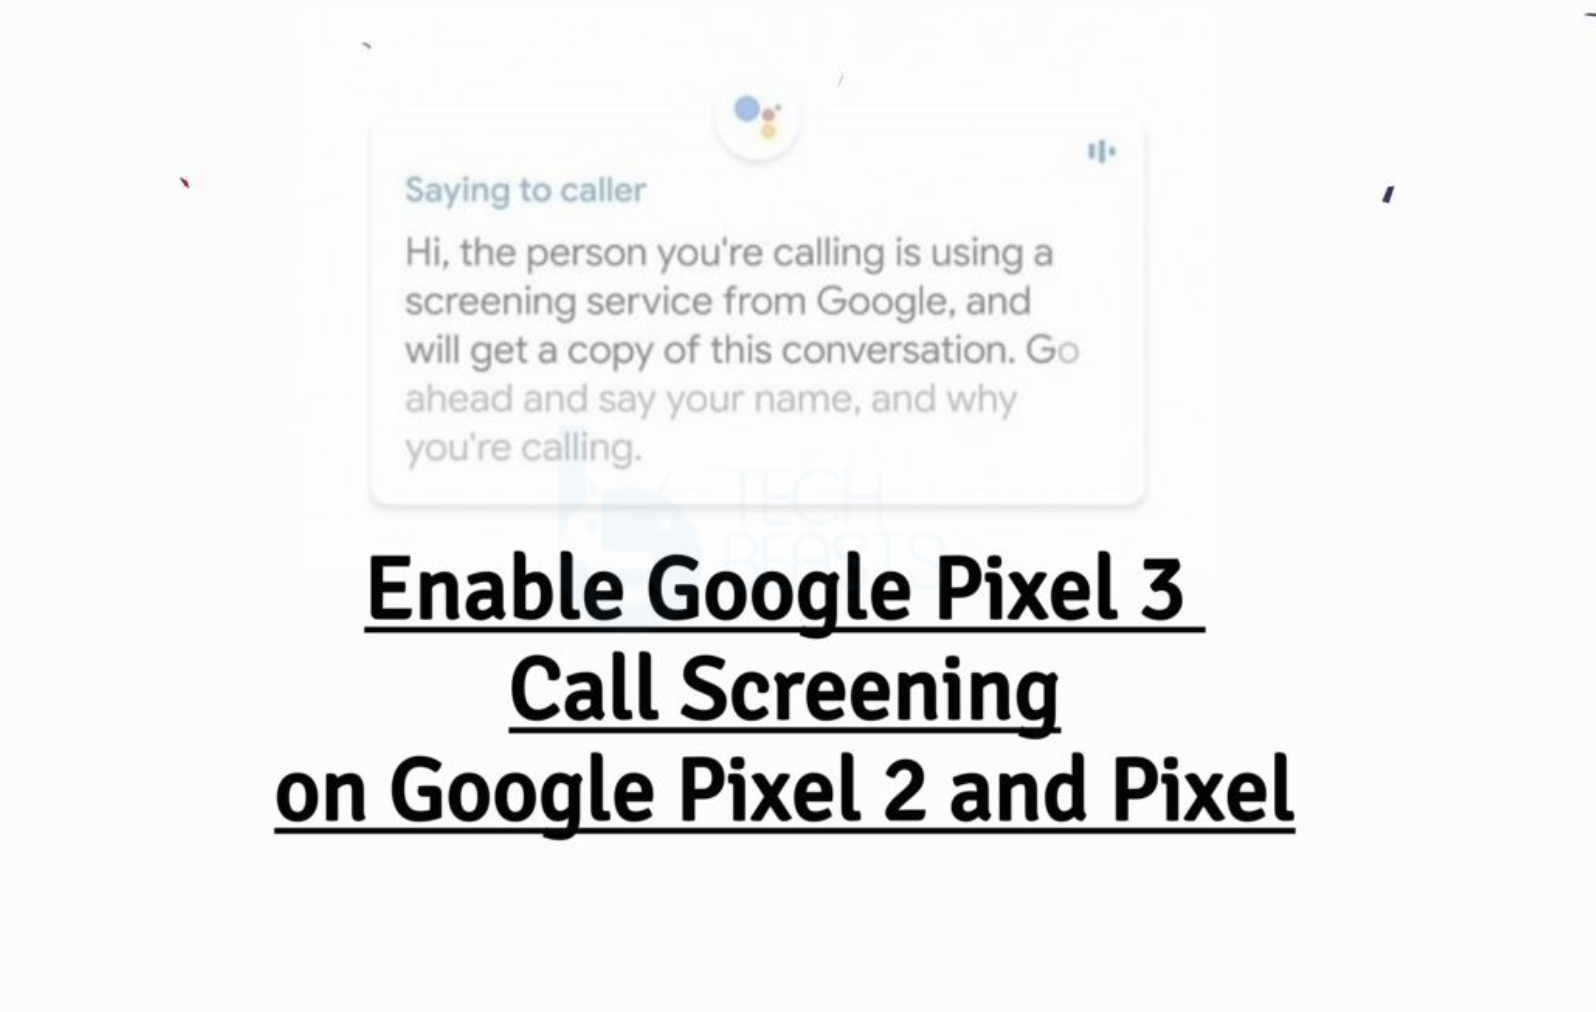
In this article, you will learn how to Enable Google Pixel 3 Call Screening on Pixel 2 and Pixel. Google Pixel 3 is the latest flagship device from Google and it came out with a number of new features. The feature so far is Night Sight and thanks to Android developers now we can use this features on other Android devices as well. The feature which is worth talking about is Call Screening. Today we will tell you how you can enable Google Pixel 3 Call Screening on Pixel 2 and Pixel devices.

Google Pixel 3 Call Screening on Pixel 2

What is Call Screening?

Call Screening is quite when it comes to taking on Spam callers. It is a built-in feature in the Google Phone app and it takes over when a call is coming. Google Assistant also comes in action when Call Screening feature is enabled. It will tell the caller to leave a message or you can take over. Hence, when a spam caller calls, you will be notified and also an automatic response will be sent to the caller.

Call Screening is currently available on Pixel 3 and Pixel 3 XL. Moreover, Google has said that they will bring this feature to other Google devices with the passage of time. But, why wait when you can get it right now. Heed the instructions below to enable Call Screening on Google Pixel, Google Pixel XL, Google Pixel 2, and Google Pixel 2 XL.

Requirements:

But before we move on, you need to Root your Pixel devices. Use the following link to Root Pixel 2 and all the other devices.

Enable Google Pixel 3 Call Screening on Pixel 2 and Pixel:

  • First, Root your Pixel device. You can use the links given above.
  • Download any Root-Enabled file Explorer. Since we have to edit a few files, that is why we required Root Explorer.
  • Once you have installed File Explorer, follow the instructions below.
  • Navigate to /data/data/com.google.android.dialer/shared_prefs.
  • When you are there, look for a file named dialer_phenotype_flags.xml. In this file, you need to find a value named “ __data_rollout__SpeakEasy.CallScreenOnPixelOneAndTwoRollout__launched__” Once you do, change it from ‘false’ to ‘true’.
  • Look for another value,  “__data_rollout__SpeakEasy.OverrideUSLocaleCheckRollout__launched__” Once you do, change it from ‘false’ to ‘true’.
  • On the next step, you need to find “G__enable_speakeasy_details” Once you do, change it from ‘false’ to ‘true’. Find all the values mentioned below and change their values from ‘false’ to ‘true’.
  1. G__speak_easy_bypass_locale_check.
  2. G__speak_easy_enabled.
  • Changing all the values, you need to open Settings and head over to the apps sections. find the Phone app and Force stop it.
  • Restart your device and there you go.

That’s all.

Important Message.
Please follow us on Facebook, Twitter, and Google Plus. Help us grow our social family.

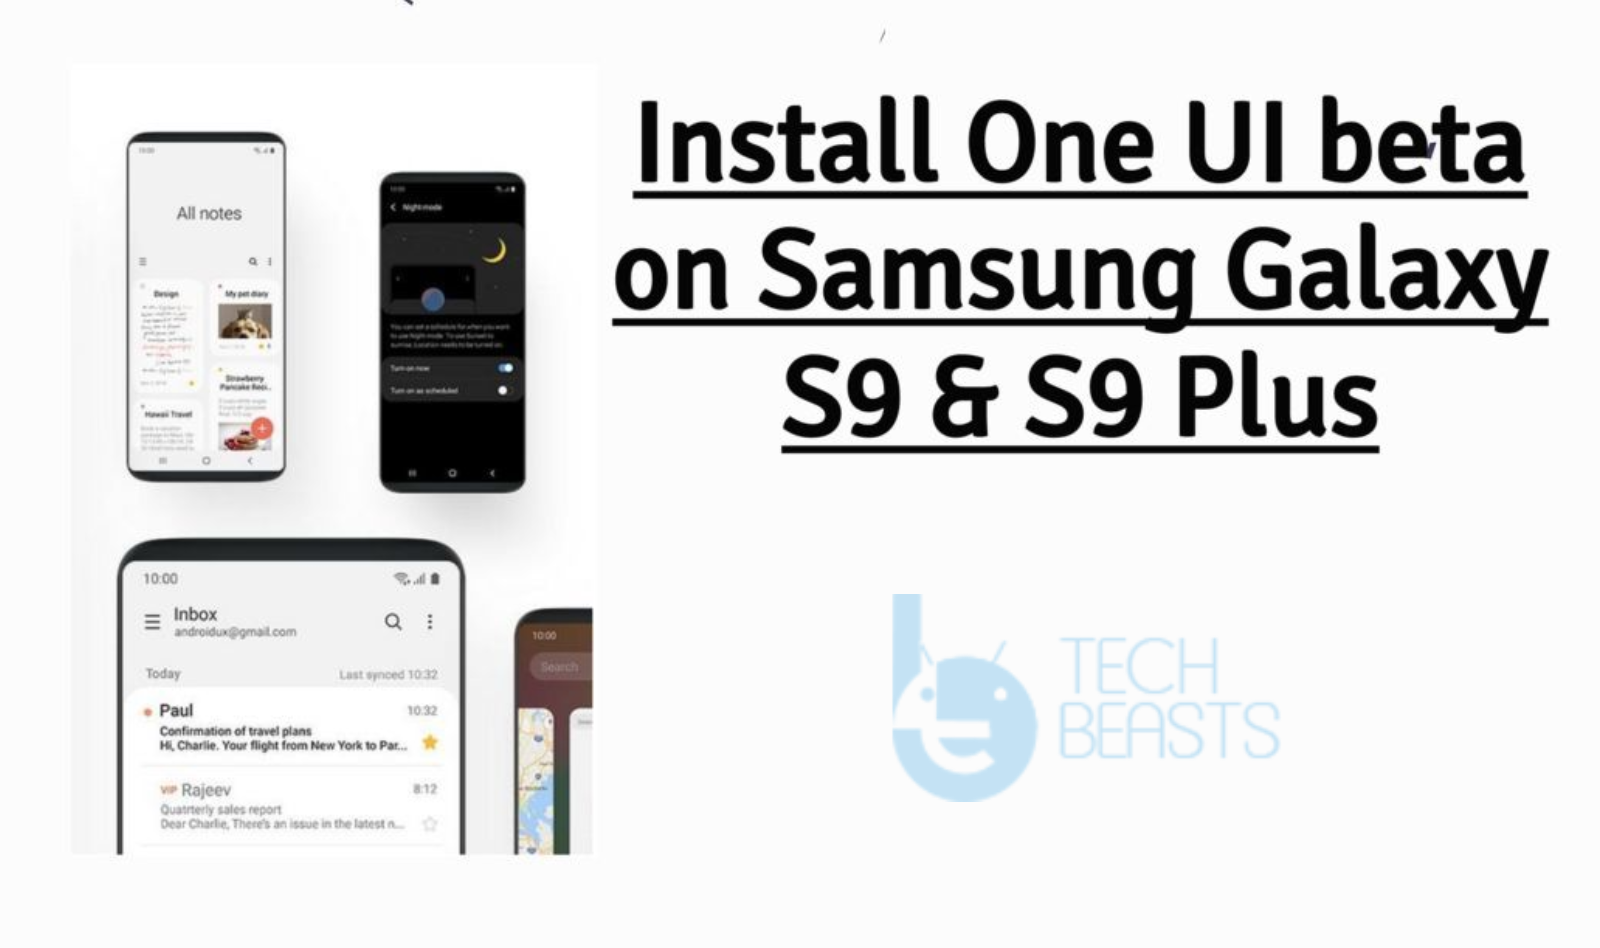
Install One UI Beta on Samsung S9 or S9 Plus

0
Install One UI Beta on Samsung S9 or S9 Plus

With the help of this guide, you will be able to Install One UI Beta on Samsung S9 or S9 Plus. Samsung has launched their latest OS, named it One UI. Right now, it is available for Samsung Galaxy S9 and S9 +.

The new One UI is latest OS which was formally known as TouchWiz and it is based on the latest Andorid Pie. It is in beta phase and yet it is not available for all devices. It was launched in Germany, South Korea, and the United States. Good news is that US users got lucky, a build is leaked for Snapdragon Galaxy S9 series devices.

Like always XDA Developers provided the One UI OTA for Exynos, now both Snapdragon and Exynos series devices can enjoy the latest Samsung One UI beta program. Also, I would like to add one thing more, once you have flashed this firmware, you won’t be able to receive the OTA updates from your carrier or Samsung.

Now let’s get started with our guide and tell you how to Install One UI Beta on Samsung S9 or S9 Plus.

One UI Beta on Samsung S9
One UI Beta on Samsung S9 or S9 Plus

What is Samsung One UI Beta Program?

It is said that starting from January 2019, Samsung latest flagship will start receiving the officail Android Pie update. We’ll It Samsung a bit long to provide Android 9.0. However, let me make things more clear, All the Samsung device which made their way to the market in the last two years will receive the Android Pie update. Moreover, there are very few devices which will receive all-new One UI.

Samsung has released their first batch of One UI beta program, which will help them to get bug free OS. As I have told you before that Samsung One UI beta program is live in Korea, USA, and Germany. In the coming weeks, it will be available in China, France, India, Poland, Spain, and the UK.

Now the main thing, how you can Enroll in Samsung beta program. It is very simple, all you have to do is install Samsung Members and from there you can send the update request.

Requirements:

Important:
Models: SM-G960F (S9) or SM-G965F (S9+).
Make a Complete backup of your device.
Download & Install Odin.
One UI Beta Update Package.
Note: Since the One UI update we are installing is from Germany. We need to update our device to the latest German update. You can use SamFirm to download the latest firmware or you can use SamMobile.

Install One UI Beta on Samsung S9 or S9 Plus:

We have posted sperate method for both Snapdragon and Exynos series devices. Please follow all the steps carefully, so you won’t have to face any unlikeable situation.

Exynos Models:

First, you need to download the latest version of Odin. After that, you need the following.

One UI files for Samsung Galaxy S9 & S9 Plus:

Galaxy S9:
Galaxy S9 Plus:

Method 1:

  • If you have SD Card installed on your S9 or S9, copy the update.zip file to your SD card.
  • Boot your device into Recovery mode -> install an update from the SD Card -> Select the Package.
  • Wait for 10 or more minutes to let it install. Once the update is installed, Reboot your device.

Method 2:

  • Open Odin on your PC and Put your Galaxy S9 or S9 Plus into download mode. [ Power + Volume Down + Bixby button ]
  • Add the firmware file for Galaxy S9 ( SM-G960F_1_20181031161553_2yj261n7q7_fac.zip ) & for Galaxy S9 Plus ( G965FXXS2BRJ6.zip ).
  • Add all the required files for Odin ( BL, AP, CP, and HOME_CSC ).
  • Once all the files are added successfully, Hit Start Button.
  • Now Odin will flash the new firmware and reboot your device.
  • Once you have successfully flashed the firmware. Boot your device into recovery mode.  ( Power + Volume Up + Bixby ).
  • If you have SD card installed then. Boot your device into Recovery mode -> install an update from the SD Card -> Select the Package.
  • Wait for 10 or more minutes to let it install. Once the update is installed, Reboot your device. If not then proceed with the following.

Install update using ADB:

  • Boot your device to Recovery. Select “apply update from adb” option.
  • Open up a command prompt terminal on your PC or Mac. Type the following command.
adb sideload <file location of update.zip>
  • Wait for few seconds and your device will be updated to the latest One UI beta.

Snapdragon:

One UI files for Samsung Galaxy S9 & S9 Plus:

Samsung Galaxy S9:
Samsung Galaxy S9 Plus:

Method 1:

  • If you have SD Card installed on your S9 or S9, copy the update.zip file to your SD card.
  • Boot your device into Recovery mode -> install an update from the SD Card -> Select the Package.
  • Wait for 10 or more minutes to let it install. Once the update is installed, Reboot your device.

Method 2:

  • Open Odin on your PC and Put your Galaxy S9 or S9 Plus into download mode. [ Power + Volume Down + Bixby button ]
  • Add the firmware file for Galaxy S9 ( SM-G960F_1_20181031161553_2yj261n7q7_fac.zip ) & for Galaxy S9 Plus ( G965FXXS2BRJ6.zip ).
  • Add all the required files for Odin ( BL, AP, CP, and HOME_CSC ).
  • Once all the files are added successfully, Hit Start Button.
  • Now Odin will flash the new firmware and reboot your device.
  • Once you have successfully flashed the firmware. Boot your device into recovery mode.  ( Power + Volume Up + Bixby ).
  • If you have SD card installed then. Boot your device into Recovery mode -> install an update from the SD Card -> Select the Package.
  • Wait for 10 or more minutes to let it install. Once the update is installed, Reboot your device. If not then proceed with the following.

Install update using ADB:

  • Boot your device to Recovery. Select “apply update from adb” option.
  • Open up a command prompt terminal on your PC or Mac. Type the following command.
adb sideload <file location of update.zip>
  • Wait for few seconds and your device will be updated to the latest One UI beta.

That’s all. This is how you can Install One UI Beta on Samsung S9 & S9 Plus. Let’s know if you face any issues.

Important Message.
Please follow us on Facebook, Twitter, and Google Plus. Help us grow our social family.

Motorola Moto G4 Plus Guides: Soft Reset, Har Reset, Recovery, Fastboot etc

0
Motorola Moto G4 Plus Guides: Soft Reset, Har Reset, Recovery, Fastboot etc
Motorola Moto G4 Plus Guides

Motorola Moto G4 Plus Guides Post: We’ve made this post for Motorola Moto G4 Plus users. They can learn how to Hard Reset, Boot Into Recovery, Fastboot Mode, and much more. You can say that this is the ultimate guides post for Motorola Moto G4 Plus. Now before we move on to the Motorola Moto G4 Plus Guides & Tricks. Let me give you an overview of Motorola Moto G4 Plus specs.

Motorola Moto G4 Plus Guides

Motorola Moto G4 Plus XT1644:

The Motorola Moto G4 Plus was released in 2016, May. The Phone came out with a screen of 5.5 inches having 1080 x 1920 pixels resolution. Moto G4 Plus was powered by Qualcomm MSM8952 Snapdragon 617 (28 nm) CPU and Adreno 405 GPU. It had internal storage of 64 GB, 4 GB RAM or 32 GB, 3 GB RAM or 16 GB, 2 GB RAM. The camera at the back of this phone is 16 MP, PDAF & laser AF, f/2.0 and on the front, it is 5 MP, f/2.2. Inside this Phone, there was a 3000 mAh battery. The Phone originally ran on Android 6.0.1 (Marshmallow), upgradable to 7.0 (Nougat).

Motorola Moto G4 Plus Guides:

Following are the general guides of Motorola Moto G4 Plus. These will help you know all about Moto G4 Plus.

Hard Reset:

Heed the instructions provided in the following link and you will learn how to hard reset Moto G4 Plus.

Soft Reset:

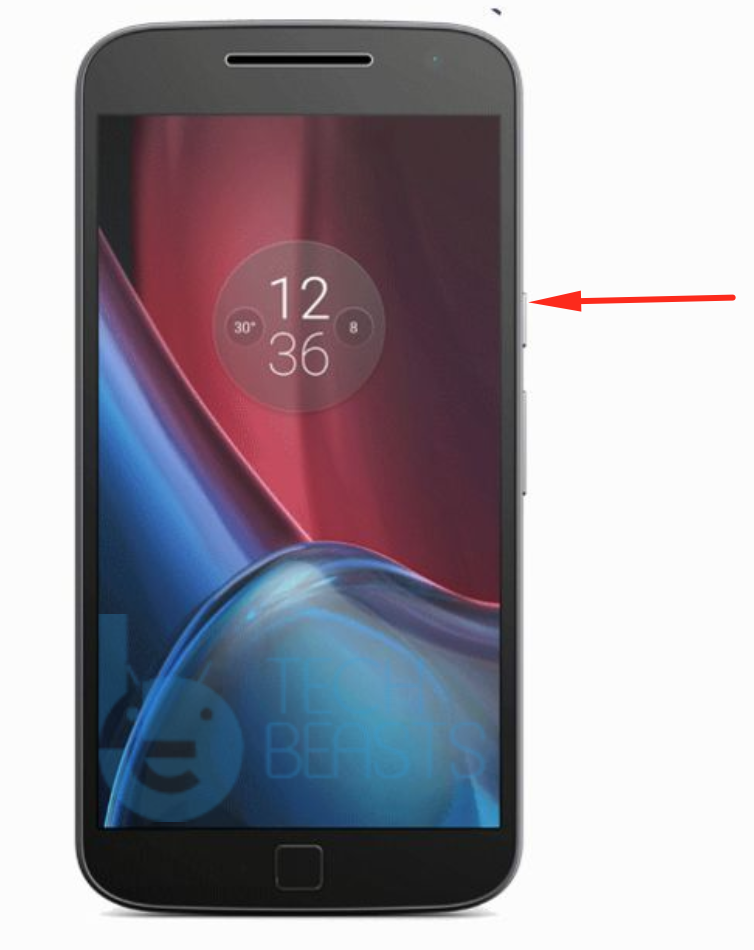
  • Press + Hold down the power button for few seconds. Wait till your screen goes black.
  • Once the device is completely turned off, Press + Hold the power button again for few seconds.

Recovery:

  • First, you need to Turn off your device by holding the power button for a few seconds.
  • After that, you need to press and hold volume down button for 2-3.
  • While doing that you need to press the power button for a few seconds and release all the buttons.
  • In the next step, choose Recovery Mode using Volume rockers and press power button to select it.

FastBoot:

  • First, you need to Turn off your device by holding the power button for a few seconds.
  • After that, you need to press and hold volume down button for 2-3.
  • While doing that you need to press the power button for a few seconds and release all the buttons.

Codes:

Phone information *#*#4636#*#*
IMEI Info *#06#
Calendar *#*#225#*#*
Debug info for Google Play Service *#*#426#*#*
Access Google Partner Setup *#*#759#*#*
Engineering Mode *#*#2486#*#*


Important Message.
Please follow us on Facebook, Twitter, and Google Plus. Help us grow our social family.

How To Hard Reset Motorola Moto G4 Plus XT1644

0
How To Hard Reset Motorola Moto G4 Plus XT1644

With the help of this guide, you will be able to Hard Reset Motorola Moto G4 Plus XT1644. There are a number of ways to factory reset Motorola Moto G4 Plus XT1644 and we’ve posted all of them.

This is the best solution so far to boost up the performance level on an Android device. Moreover, it is the ultimate solution of all your hardware or software problems on Motorola Moto G4 Plus XT1644.

Now before we move on and start telling you how to Hard Reset Motorola Moto G4 Plus XT1644. Let me give you an overview on Motorola Moto G4 Plus XT1644 so that you get to know why this device is so good.

Hard Reset Motorola Moto G4 Plus

Motorola Moto G4 Plus XT1644:

The Motorola Moto G4 Plus was released in 2016, May. The Phone came out with a screen of 5.5 inches having 1080 x 1920 pixels resolution. Moto G4 Plus was powered by Qualcomm MSM8952 Snapdragon 617 (28 nm) CPU and Adreno 405 GPU. It had internal storage of 64 GB, 4 GB RAM or 32 GB, 3 GB RAM or 16 GB, 2 GB RAM. The camera at the back of this phone is 16 MP, PDAF & laser AF, f/2.0 and on the front, it is 5 MP, f/2.2. Inside this Phone, there was a 3000 mAh battery. The Phone originally ran on Android 6.0.1 (Marshmallow), upgradable to 7.0 (Nougat).

Benefits of Hard Reset:

Summary:
*You can Wipe all of your Data Stored on your device.
*Easily fix all the performance issue.
*Bypass screen lock through hard reset.
*Bring the factory state.
*Fix all the firmware issues.
*Get rid of signal problems, loop issues, rebooting problems and power problems.

How To Hard Reset Motorola Moto G4 Plus XT1644:

Method1:

  • First, you need to Turn off your device by holding the power button for a few seconds.

  • After that, you need to press and hold volume down button for 2-3.


  • While doing that you need to press the power button for a few seconds and release all the buttons.
  • In the next step, choose Recovery Mode using Volume rockers and press power button to select it.
  • When you see the Android logo, Press + Hold Volume Up button for a few seconds.
  • Now while holding the volume up button, press and release the power button.
  • When you are in the Recovery Menu, Use volume button to choose “wipe data/factory reset“. Now Press the power button to confirm it.
  • Select “Yes–delete all user data“. Press the power button again to confirm it.
  • Once the Wiping process is finished, Select Reboot System Now.

Method 2:

  • Open Settings from the Home Screen.
  • Scroll down and Tap on Backup & Reset -> Factory Reset.
  • Now select Reset device.
  • To Confirm Choose Erase everything.
  • That will be all, wait for the process to complete.

That’s all. You have successfully Hard Reset Motorola Moto G4 Plus. Please do tell us if you face any problem during this process.

Important Message.
Please follow us on Facebook, Twitter, and Google Plus. Help us grow our social family.