Home Blog Page 81

Download Galaxy A8s Stock Wallpapers

0
Download Galaxy A8s Stock Wallpapers

The stock wallpapers of the unique Samsung Galaxy A8s are here. Wallpaper lovers can download all stock Galaxy A8s wallpapers from this post now. The Galaxy A8s stock wallpapers are out in the HD resolution. These wallpapers can be applied to any Android or iOS-powered smartphone. Let us take a look at the technical specifications of the Galaxy A8s before heading to the wallpapers.Galaxy A8s stock wallpapers

Samsung Galaxy A8s – World’s first phone with punch-hole camera!

Samsung Galaxy A8s is the world’s first smartphone with a punch-hole display. The infinity-o display has finally made it out. This is Samsung’s take on the ugly notches. Samsung was the only brand which did not opt for a notch so far. It just found a new way to put a camera somewhere on the screen. The Galaxy A8s has a big camera hole on the top-left corner of the phone’s screen. It doesn’t look any better, it is actually a little less ugly than the notches.

Galaxy A8s specifications

Galaxy A8s has a 6.4-inches IPS LCD display. This is Samsung’s first ever smartphone to have a display ratio of 19.5:9. It has a resolution of 2340 x 1080 pixels. Samsung has used the latest Qualcomm Snapdragon 710 SoC to power this phone up. The GPU used here is the Adreno 616. The internal storage of this phone is 128GB. It supports microSD cards up to 512GB. A RAM of 6GB or 8GB can be found inside.

At the back, the Galaxy A8s has 3 cameras. There is a 24MP camera with PDAF. Another 10MP camera is there for AF, and then there is a 5MP depth sensor. On the front, the Galaxy A8s has a 24MP camera mounted in that punch hole. It has a rear-mounted fingerprint scanner as well. The battery capacity is 3400 mAh. It does support fast charging as well. This phone runs on Android Pie out of the box which is quite interesting because Samsung has failed to update its Galaxy S9 and other flagships to the latest version of Android so far.

Galaxy A8s also happens to be the first Samsung smartphone to say goodbye to the headphone jack. The 3.5mm headphone jack is gone. Users will have to rely on the USB Type-C headphones or spend extra money to get those wireless earbuds. Let’s just hope that Samsung doesn’t remove the headphone jack from its upcoming flagships.

That’s all about the specifications of the Galaxy A8s. Let us get back to the Galaxy A8s stock wallpapers now.

Samsung Galaxy A8s Stock Wallpapers

Samsung has added a handful of gorgeous wallpapers to the Galaxy A8s. The wallpapers have been designed to show off the beauty of the Galaxy A8’s new display. Since this is the first Samsung phone to come with such a screen, they have done a wonderful job in the wallpapers department.

These are all the Galaxy A8s official stock wallpapers. These wallpapers carry a resolution of 1080 x 2340 pixels. You can use these wallpapers on any smartphone with a compatible display. To download these wallpapers, simply open the image and save to your device. Go ahead and give your phone a whole new look.

Note: At this time, the stock wallpapers of Galaxy A8s are not available. I have collected some other beautiful wallpapers which are uploaded below. I am keeping an eye on the wallpapers of the Galaxy A8s. As soon as I get my hands on those wallpapers, they will be added here. For now, you can enjoy these beautiful wallpapers.

Galaxy A8s Stock WallpaperGalaxy A8s Stock Wallpaper Galaxy A8s Stock Wallpaper Galaxy A8s Stock Wallpaper Galaxy A8s Stock Wallpaper Galaxy A8s Stock Wallpaper Galaxy A8s Stock Wallpaper Galaxy A8s Stock Wallpaper Galaxy A8s Stock Wallpaper Galaxy A8s Stock Wallpaper Galaxy A8s Stock Wallpaper

That’s all. Here are some more wallpapers if you are interested.

How to Fix Google Play Store stuck on download pending

0
How to Fix Google Play Store stuck on download pending

Android is the most popular mobile operating system in the world right now. Consequently, Google Play Store is the most used app store as well. It hosts over 2.5 Million Apps and boasts over 15 Billion downloads per month. A common issue that a lot of users have encountered is when Google Play Store gets stuck at downloading an app. In order to identify this issue, you’ll notice that whenever an app is in the download queue, it will remain stuck as pending. Even though it is not that big of an issue but still quite a lot of people face it. Continue reading this guide to learn how to fix Google Play Store stuck at downloading issues.fix Google Play Store stuck on downloading

Google Play Store download stuck in “Pending”

When there is a new cool app out and everyone is already downloading it on their phones, but some poor soul is just stuck with an annoying bug. This is one of the most common issues when using the Play Store. When starting to download an application or a game, Google Play Store gets stuck at pending. The download does not even start. It does not matter how long someone waits for it.

The first thing that comes to mind is that maybe some other apps are downloading which is why it is later in the queue. However, it is not the case. It is a bug and it can happen in all the latest versions of Android: Nougat, Oreo, and even Android Pie. We are yet to see is the Google Play Store download bug is still in Android Q.

The main explanation for this could be that this bug is not exactly related to the core Android OS. We will explore the causes and solutions for it later on.

Google Play Store Can’t Download App Error

Somehow if someone manages to get through the first error, there might be another one waiting next! This is the “Can’t download App” error. This error message pops up in the notification bar.

For example, if someone is downloading an app, let’s say Instagram, they will get the notification saying “Can’t download App” and “Instagram can’t be downloaded” error in the notification bar. This happens after the download starts or just comes out of the pending phase.

Both of these issues are related and we are going to discuss what causes these and how to fix them.

What causes it?

Since it is impossible to pinpoint a single reason for it because of a huge variety of possible issues, we are going to list all possible ones.

  1. Android OS Update (OTA Update). This is one of the main reasons for just not this but many other bugs. Updating Android is good and everyone wants it but the OTA method is not always best. Since it tries to keep all previous settings even after updating, it can cause some bugs and crashes. If someone has just updated from let’s say Nougat to Oreo on their devices, then it may be the culprit.
  2. App Preferences. It is a bit more complex issue. The app preferences are about their permissions and stuff like that. Some advanced users like to tinker with these settings. While we always encourage exploring these kinds of things, it can sometimes mess stuff up. Therefore, apps like Google Play Store and Google Play Services start misbehaving. It gives birth to bugs like “Google Play Store stuck at downloading/pending” in return.
  3. Phone and App’s Cache. This reason is pretty similar to the first one. The cache is a phone’s storage that keeps tiny bits of information. It is all about the user’s preferences and the app’s behavior. It helps the phone and apps run faster and load faster. However, the outdated or corrupted cache can also cause this bug.
  4. Roaming. If you asked us, we could not tell you the exact reason. However, it is known for a long time that Android OS has a bug where if Roaming is turned on, it breaks down downloads and cases Google Play Store download issues.

This is a brief summary of the issue that could cause Google Play Store download pending or “Can’t download App” error. Below are all the possible solutions. Go through this list, written in order of simple to advanced.

Solutions to Google Play Store stuck at download / Pending issue

fix Google Play Store stuck at downloading pending

1: Restart phone / WiFi / Mobile Data

This is the most basic solution. This is how it works. The downloads on Play Store are done using either WiFi or Mobile Data. However, whenever both of these services are closed, the download is paused and goes away from the notification. Doing this can reset the download process and fix the bug.

The screenshots below show the settings that you can follow to disable both WiFi and mobile data.

Another way of doing so is by “turning on Flight Mode”. Wait for 45 seconds and then turn it off again. The phone will automatically connect to WiFi or Mobile data. Whatever was turned on before flight mode. This can have the same effect as doing it manually.

Lastly, try restarting the phone to reset Play Store downloads. This is another manual method.

This is the most basic troubleshooting method to solve Google Play Store stuck at download or pending issue.

2: Cancel download and start again

If the connection reset method does not change anything and the app is still stuck at pending download then try doing it manually.

To do so, open the Play Store app on the phone. Now tap on the menu button in the top left (3 horizontal bars). Tap on “My Apps and Games”. The new screen shows apps that are either downloading or are pending. Tap on the cross button on the right of the app that you want to restart. Once canceled, open the app from the Play Store search again and then tap on install.

If that app starts downloading normally this time, the issue is fixed.

play store app download stuck at pending

3: Log out and log in again with Google account

The Google account cache may get corrupted over time. This is also one of the reasons that the phone may get stuck while downloading apps from the Play Store. Therefore, the best solution for this is to reset the whole thing.

In order to do so, go Settings > Accounts > Google. Tap on your Email. In the next screen, tap on the menu button in the top right (3 dots). Select the “Remove account” option from here.

Once the account is removed from your phone, restart it once. After restarting, go to Settings > Account > Add new Account. Tap on Google in the next screen and once again login with your main account.

Once the Google account is set up and running, try downloading any app from Play Store. If it works, the Google Play Store download bug is fixed!

fix Google Play Store download stuck at pending

4: Turn off Roaming

It is actually a weird one. Apparently there is no connection between Play Store downloads and roaming settings, but it is still a thing. Many users have reported that when they have roaming turned on and mainly using Mobile data, then apps from Play Store get stuck at either pending or download.

In order to fix this issue, go to Settings > Connections > Mobile Networks. Tap on Data Roaming here. Toggle the setting to turn it off.

Note that this fix works only for those who are using 4G/3G to download apps from Play Store.

fix Google Play Store app stuck at downloading


5: Allow background data usage if using mobile data

This particular fix is also for the people using Mobile data to download apps from Play Store. If someone is downloading an app on either 4G or 3G and then the app gets stuck at download, it may have something to do with background data settings.

A particular setting in any app’s menu can help users control whether it can use data in the background or not. This setting is there to prevent extra data charges when the user doesn’t even know about it. Most apps keep running in the background and the Play Store does that a lot. It keeps checking for updates and even security checks on applications. If the background data usage is turned off, then it may cause downloads to get stuck.

In order to fix this, go to Settings > Apps and search for Play Store. Tap on it and then open the “Data Usage” option. Here toggle the specified setting to turn background data usage on.

Also, open Play Store, go to Settings, and tap on Download Preferences. Select the “Any Network” option to enable downloads over data.

These tips should fix the issue when Google Play Store stuck at downloading while using mobile data (4G/3G).

google play store download pending bug

6: Clear Play Store cache and data

The cache is essentially junk data. Even though it helps speed up the device and other stuff like that, it holds no real value. It stores app preferences and other stuff like that. If this data is overloaded and gets corrupted, then apps may start misbehaving. Similarly, Play Store’s cache may also cause it to get stuck at downloading apps.

In order to fix this, go to Settings > Apps and search for Google Play Store in the list. Open it. Then follow these three steps to fix it:

  1. Tap on Storage and Clear Cache.
  2. Similarly, clear Data.
  3. Next up, go back on step and tap on “Force Stop”.

Once it is done, open the Play Store and download the app again. If it starts downloading normally, then you’ve successfully found a solution to Google Play Store stuck on Apps downloads.

solution play store stuck at pending download

7: Clear cache of Google Play Services

Google Play Services is the core of all Google’s core Android apps. This includes the likes of Maps, Google App, Music and yes you guessed it, Play Store as well. Therefore, corruption in its data may lead to corruption in the Play Store.

In order to fix this, go to Settings > Apps. Search for Google Play Services on this list. Tap on it. On the next screen, tap on Storage and then Clear Cache from here. Restart your device after doing so.

Open the Play Store again after restarting the phone and then try downloading any app again. If it’s fixed, voila! Otherwise, move on to the next possible solution.

fix play store stuck at download app

8: Reset App Preferences

Custom app preferences include stuff like notifications settings, background usage, and more. All of these are unique to every user’s phone. However, over time, when they are changed, one of these changes or a couple of changes combined may produce a bug. One of these bugs is when Google Play Store gets stuck at Pending while downloading any app or game.

In order to fix this, go to Settings > Apps. Now tap on the menu button in the top right. Select the “Reset Preferences” option from this pop-up menu. It will show a warning sign. Select the OK or Yes option depending on your phone model.

Once done, restart the phone to try Play Store out once again.

fix play store stuck at app download pending

9: Complete Cache Wipe

We’ve already tried wiping the cache of Play Store and Play Services in previous steps. If you are reading this, it means that issue still persists. Therefore, in this step, we are going to wipe the cache of the entire phone. Do not worry! It does not contain any kind of personal files. All of these are junk files and will build up once again.

Just to Settings > Storage > Internal Storage Settings and tap on “Cached Data”. This will show a pop up stating what it does. Select OK or Yes.

After all, the cache is cleared, restart your phone to test out the Play Store once again.

solution of play store stuck at download issue bug

10: A factory reset or flash ROM

If somebody is reading this, things must really be getting out of hands! If nothing is working it means that there is a problem with the core OS.

This happens mainly after an OTA update. The OTA (Over the air) updates are when you get a notification on phone saying download this update to the new Version. This is not the same as “clean install”. The OTA update keeps all previous settings. Therefore, more often than not, there is a clash in settings and things don’t work normally. Therefore, we have to manually get rid of useless data and settings and give the phone a fresh start.

The first thing to try is “Factory Reset”. In order to do so, go to Settings > General Management > Reset. Now select the Factory Reset option. If you’re having trouble finding this option, simply use the search function in the Settings main menu.

If you’re a power user, then we recommend flashing stock ROM. For example, if someone is using a Samsung device, then use Odin. Similarly, use FlashTool for Xperia devices. The flashing methods and tools vary from model to model.

Final Words

Listed above are all possible methods to fix Google Play Store stuck at download or pending issue. The issues are listed from easiest and basic and up to advanced methods. Always try to simpler solutions first rather than going for advanced options.

Feel free to share your feedback in the comments below. If it helped you or not? Or if you’d like to ask us something? Use the comments section below.


Download iOS 11 Icon Pack APK [ Free ]

0
Download iOS 11 Icon Pack APK [ Free ]

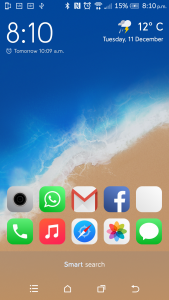
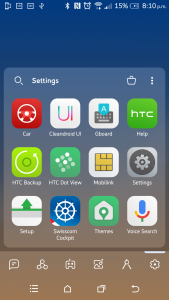
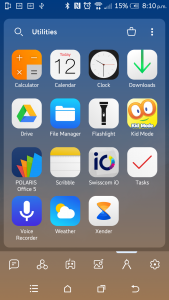
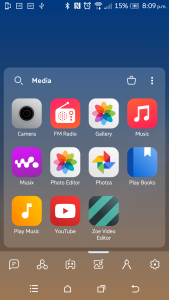
Download the latest iOS 11 Icon Pack APK from here. You can easily install iOS 11 Icon Pack APK on your Android devices. Those who love iOS Icons, this is what they need to get the iOS icons on your Android device. Moreover, you don’t need to root your device. As in the situations, you need to root your device in order to enjoy such perks.

iOS is said to be the most popular mobile OS, we have seen a number of improvements over the past few years. If you compare the iOS initial release to the latest one, you’ll see a hell of improvements. Not only iOS has a beautiful interface, but the functionality is also off the hook. But the fact remains that iOS has a lot to catch up in terms of features to take the crown form the Android.

Not everyone is a fan of iOS but you cannot deny the fact that they are people who love to try iOS UI on Android. The best aspect of iOS OS is the icons so far. They have always provided a colorful icon with a unique design. So you are the among those who love to try iOS icons on Android. This is the right place for you because we have everything you need. Let’s get started now.

iOS 11 Icon Pack APK

iOS 11 Icon Pack for Android:

This app is totally free of cost, you don’t have to pay any penny. iOS 11 Icon Pack contains a number of icon packs which you can use on your Android device. Including the iOS Icon Pack, you see the screenshots below.

Download iOS 11 Icon Pack APK for Android:

You can download the latest iOS 11 Icon Pack APK from the following links. Moreover, if you are not comfortable downloading APK from an unknown source, you can download iOS 11 Icon Pack app from Google Play. Use the link provided below.

Install iOS 11 Icon Pack APK:

  1. First, Download iOS 11 Icon Pack APK.
  2. Download the file to your phone straight away, or copy it to your phone from your PC.
  3. Now on your phone, go to settings > security > allow unknown sources > check this.
  4. Now using a file manager, locate the APK file that you just copied or downloaded.
  5. Tap the APK file and finish installation using the on-screen instructions.

How to Apply iOS 11 Icon Pack on your Android device:

  • Launch Cleandroid UI from the app drawer.
  • Tap on the menu icon located left side of the screen.
  • Now tap on Select Apply.
  • All the supported launcher will be shown here, but in order to install any of the launchers, you have to install it from Google Play.
  • Once you have installed the desired launcher, head over to its settings and apply the iOS Icon Pack.

That’s all.

Important Message.
Please follow us on Facebook, Twitter, and Google Plus. Help us grow our social family.

Clash of Clans 11.185.8 APK – New Troops, New Spell & Siege Machine

0
Clash of Clans 11.185.8 APK  – New Troops, New Spell & Siege Machine

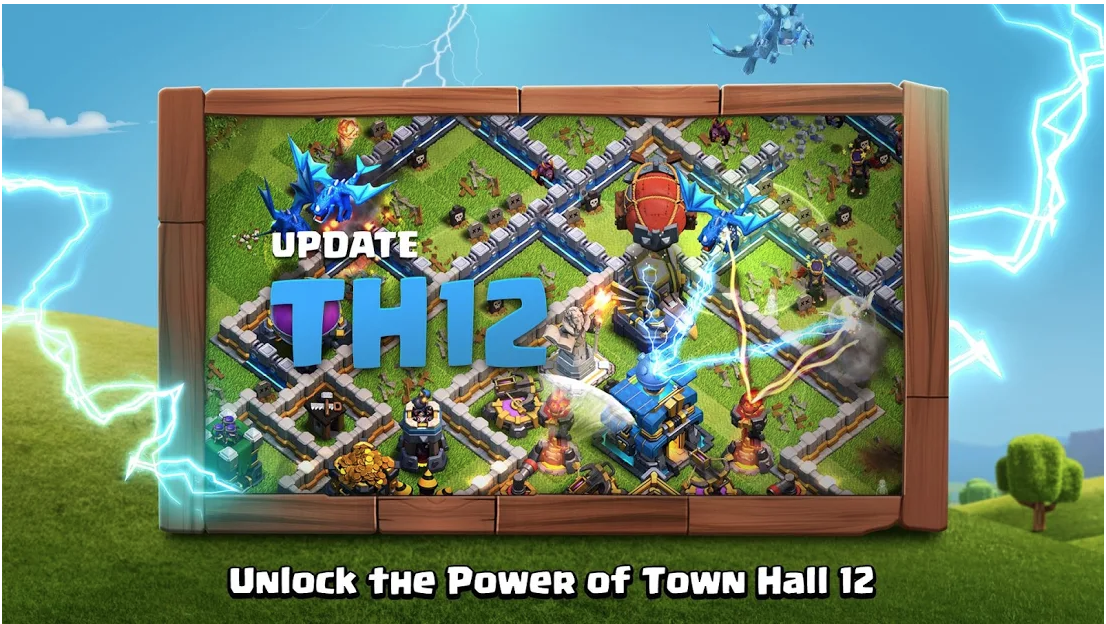
Download the latest Clash of Clans 11.185.8 APK. If you haven’t got the latest Clash of Clans update till now. This is said to be the Final Update of the year. Moreover, with this new update, you will get a number of new Troops. It is time to improve your army with the latest generation of soldiers. Not only they have added new troops, but you will also get a number of new spells too. Now you can cast new spells on your enemy since these are brand new spells that mean all of them will have new powers.

You can download the Clash of Clans 11.185.8 APK from the following links. Also, we have added the installation methods at the end of this post. If you are not comfortable with the APK, you can always use Google Play to download the latest version. We’ve also added that too.

Clash of Clans 11.185.8 APK

What’s New:

Final Update of the Year!
• New Troop: Ice Golem! This chill guy slows down enemy defenses and freezes them solid when he gets destroyed!
• New Spell: Bat Spell! Overwhelm enemy defenses with a cloud of angry bats!
• New Siege Machine: Stone Slammer! A flying fortress that drops big rocks on enemy defenses to clear a way for your army!
• A whole lot of fixes, tweaks and quality of life improvements!
Google Play

Download Links:

Following are the download links to Clash of Clans 11.185.8 APK. We’ve added both links, you can download Clash of Clans APK from one and from other you can go to the Google Play. Choose what suits you more.

Install Clash of Clans 11.185.8 APK:

  1. First, Download Clash Of Clans 11.185.8 APK.
  2. Download the file to your phone straight away, or copy it to your phone from your PC.
  3. Now on your phone, go to settings > security > allow unknown sources > check this.
  4. Now using a file manager, locate the APK file that you just copied or downloaded.
  5. Tap the APK file and finish installation using the on-screen instructions.
  6. Once installed, access the newly installed game through app drawer.
  7. That’s all. Enjoy Clash of Clans!

Download Play Store on Huawei and Honor Chinese Phones

17
Download Play Store on Huawei and Honor Chinese Phones
Google Play Store on Huawei and Honor

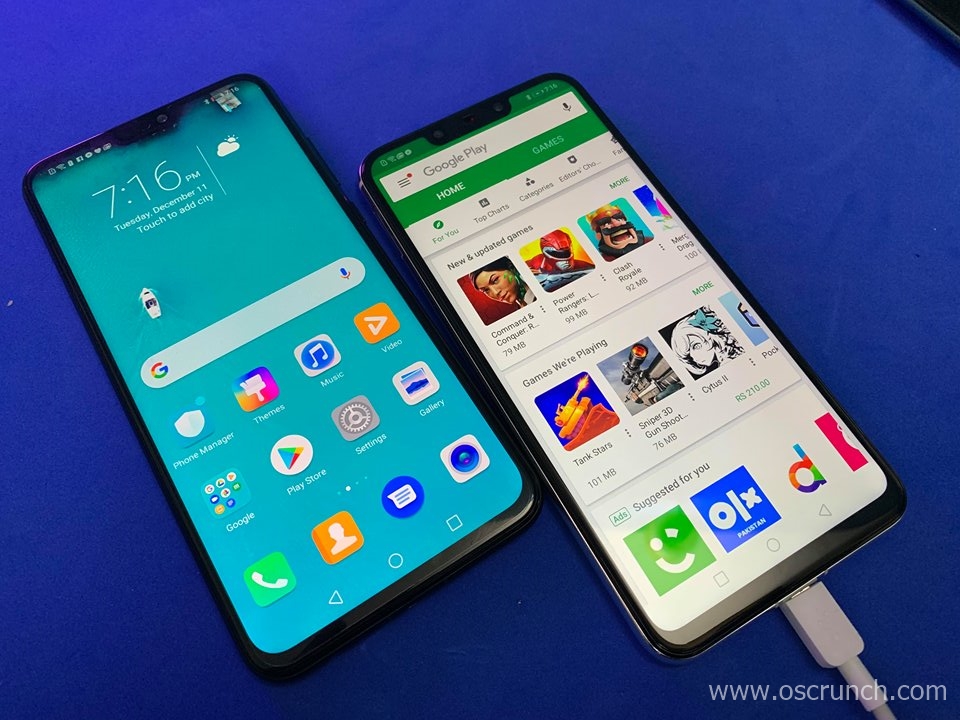
Learn here how to download Play Store on Huawei and Honor Chinese phones. This guide will explain the tutorial in simple and easy steps. Before installing the Play Store on Huawei and Honor Chinese phones, it is important to understand the background of the missing Play Store on Chinese phones.

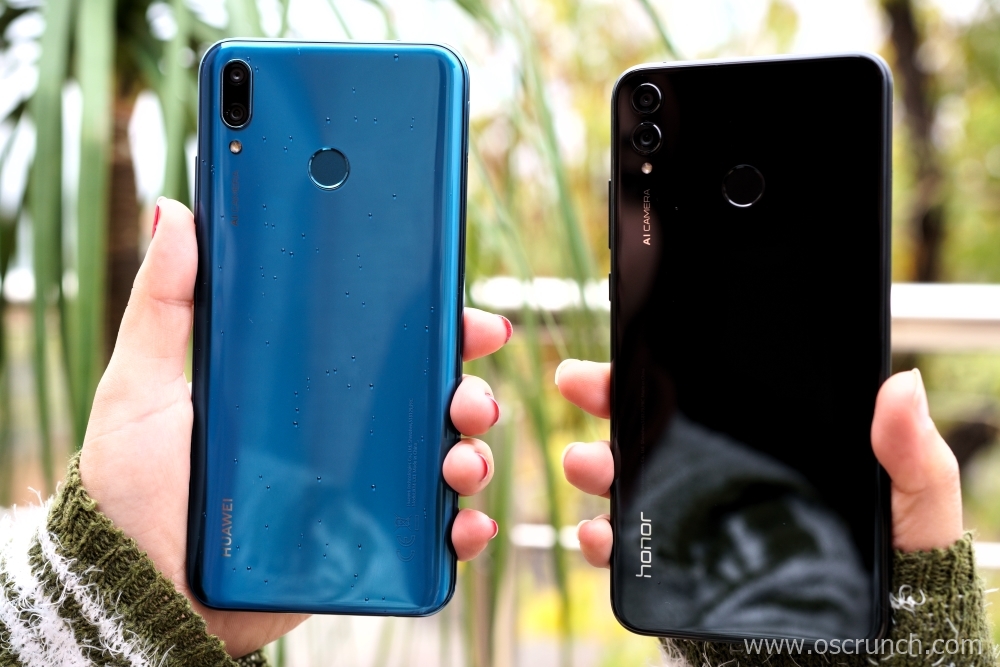
Huawei Y9 and Honor 8X

So before we jump up to the guide, let us take a look into the Internet censorship in China. I will also try to explain why some important platforms cannot operate in China and the importance of the Google Play Store. Without any further ado, let us start now.

Internet censorship in China

Internet Censorship

The internet in many countries is censored. Governments and authorities restrict certain information from making its way to the users. The censorship rules may not be that much strict in some countries, but when it comes to China, things get tough. People living in China have no access to the biggest search engine, biggest social media platforms, and the biggest communication applications. The government in China controls all the information, and it has all the right reasons to do so.

Chinese citizens cannot use Google. When we talk about Google, it means the Google search engine and every other application that falls under the umbrella of Google. They do not have access to Skype, which is the most popular video calling platform. People in China have no idea of what Facebook, Twitter, and Instagram are? WhatsApp and Viber do not work in the Chinese territory. The Google Play Store, which is the main source to download Android Apps on an Android phone, does not work in China either. In short, all the applications that a modern smartphone or computer user uses in his daily life, are restricted in China.

So, how do the Chinese people communicate and socialize? Well, they have their own search engines, one of the popular search engines in China is Baidu. They have their own social media platform known as Weibo. They also have their own communication application called WeChat. Same goes for all other applications that do not work in China.

Android is a product of Google, but the phones in China to run on Android. As mentioned earlier, the Chinese Android phones do not have the Google Play Store and Services in them. Users have the alternative app stores to grab the applications.

Why China restricts all those applications?

Over the course of the past few years, our lives have become so much connected to the internet that we cannot live without it. The way the behavior of users changed towards the internet in these years, the giants like Google, Facebook, and others expanded their goals.

What used to be a simple search engine, knows about you more than you yourself know. What used to be just a platform to interact with others, can now manipulate your internet activities. Companies like Google and Facebook have achieved this by continuously working on their products to keep a track of their users lives. We search for everything on the internet and Google records those queries. The Facebook and its Messenger have the capability to record our voice and show us the content based on our interests. These platforms can get so much involved in our private lives that at one point, it can get really hard to get rid of them. The spying capabilities are definitely out there as well. The manipulation of people by these tech giants has caused a distress.

Now the situation that I explained above is one reason for the Chinese government and lawmakers to restrict the open access to such platforms. Another reason for them to keep them from people is because they want to control the information. These two reasons are more than enough for the authorities to handle what you see on the internet.

Google Play Store in China

Play Store

Chinese smartphone makers have played a great role in the innovation of the smartphone industry over the course of the past 3 years. We have seen great smartphones from phone manufacturers like Huawei, Honor, Xiaomi, Vivo, OnePlus, Oppo, and many others.

All these phone makers manufacture two versions of their smartphones. One version is for the Chinese audience and the other one is for the Global audience. The difference between both the versions is in the software department. Yes, the phones to run on Android, however, the type of applications and access to applications is different.

The Android phones for Chinese users do not have the Play Services, Play Store, Play Books, and Play Music. They do not have Facebook, Twitter, WhatsApp, Instagram, Snapchat, and all other such applications. They have all the alternatives only. The software on these phones is optimized to comply with the policies of the government. The case is otherwise with the Global variants.

As long as you are living in China, survival without the Play Store in China is possible, but if you are thinking to move out of China with the Huawei or Honor phone that you purchased from China, what are you going to do? The Chinese app store will not work outside China, and that is when you would want to have access to the Play Store. This is the very reason I am trying to explain everything in detail here right now. Let us understand the importance of the Google Play Store.

Importance of the Google Play Store

  • Google Play Store is the largest applications repository in the world for a mobile operating system.
  • It has nearly 1 Billion users all across the world.
  • Play Store has nearly 4 Million applications available at the moment.
  • There are over 40 Million songs uploaded on the Google Play Store.
  • Over 8 Billion apps on average are installed from the Google Play Store in a month.
  • Google keeps a safety check of all the applications to prevent any damage to your device.
  • Google Play Store is available in over 190 countries.
  • The Play Movies and TV are available in around 117 countries.

Now, this is the platform that you are missing out on your Chinese Huawei and Honor smartphones. If you have got a smartphone from Huawei or its subsidiary Honor, and it does not have Play Services/Play Store, it is the time to get it right now.

Assuming that you have a clear idea of everything, we will now move towards the tutorial to install the Play Store on Huawei and Honor Chinese phones.

Note: After following this guide, you will have access to the Play Store on your phone. This will let you download any applications of your choice anywhere in the world. The Play Store will work on your phone in all the countries afterward.

Download Play Store on Huawei and Honor Chinese phones

Google Play Store on Huawei and Honor

We have two methods to install the Play Services and Play Store on Huawei and Honor phones. The first method is to enable the pre-installed Play Store and Services on the phones that have it disabled by default. The second method is for the phones that have absolutely no traces of Google Mobile Services. So, in any case, you should give a try to the first method before going towards the second method. If the first one does not work, you can use the second method which will definitely work.

Method# 1: Enable the pre-installed Play Store and Play Services

This is the method for the phones that have the Google Mobile Services pre-installed.

  1. On your Chinese Huawei or Honor phone, open the Application Gallery.
  2. Now in the Gallery, change our country to China.
  3. Now search for the Google Play Store.
  4. As you find the Play Store in the gallery, click on “Update”.
  5. The update will now begin. As soon as the update ends, click on “Open”.
  6. This will start the Play Store setup. Finish and launch the Play Store. That’s all.

Method# 2: Install Play Store on Huawei and Honor Chinese phones that have no Google Mobile Services

So, this is the method which will work on our Huawei or Honor handsets that have completely no sign of the Google Mobile Services, Play Services, and the Play Store. This method is extensive, so pay it a little attention.

Total Time: 12 minutes

Enable Unknown Sources on Huawei and Honor

On your Huawei or Honor phone, open Settings. Go to Security & Privacy and click on More. Click on “Install Unknown Apps”. Now find “Files” and open this option. Tap the radio button to allow Unknown App installs from Files. Allow Unknown Sources on Huawei and Honor phones.

Download GMS Installer and Google Installer

For old Huawei and Honor phones, download this GMS Installer: GMS APK Link For latest Honor phones get this GMS Installer: Gmsanzhuangqi Link Google Installer: Link Copy both the APKs to your Huawei Honor phone’s internal storage.

Install GMS Installer (Gmsanzhuangqi)

Open Files on your phone, and find the Gmsanzhuangqi APK or GMS Installer APK. Click on the APK to start its installation. If it asks for permission, click on “Install Anyway”. It will install the application now and asks you if you “Trust this application”. Turn on the trust option and do not open this application right now. Press the back button and follow the steps given below.

Install Google Installer

Open Files once again and this time, find and open the Google Installer APK. The APK will now ask you for installation permission, click on “Install Anyway”. Once the installation ends, it will ask you if you “Trust this application”. Turn on the Trust feature. The installation will now finish and it will show you the open button, open this application now.

Installing Google Play Store and Play Services on Huawei and Honor Phones

1. At this point, we have installed the GMS Installer and the Google Installer. The Google Installer is already open on your phone showing you some options, so follow these steps now.2. The Google Installer is now showing you a big blue “INSTALL” button. Click on this button to start the installation. If it asks for permission, click on “Allow” to let the installer install those apps. 3. The Installer will try to install 6 basic Google applications including Google Services Framework, Google Account Management, Google Play Service, Gooogle Calendar Synchronization Service, and Google Contacts Synchronization Service. 4. For each application, it will show you the “INSTALL ANYWAY” and “Trust this application” feature. Click on INSTALL ANYWAY and also turn on Trust this application for all the installations. 5. The entire process should take 2 – 3 minutes.   6. The installer will now keep showing you the progress, as it ends, it will show you the Google Play written inside a big red button. 7.Click on the red button now to launch the Google Play Store.

Note

If you want to use the Play Store within China, you will have to get a VPN for that. Here is our list of best free VPN Apps for Chinese Android phones.

Couldn’t load GMS APK. What to do?

Run the GMS APK and it will ask you to remove Google Apps. Run it now. Reboot your phone now. Open Huawei App Gallery and change region to China. Now search for Google Play Store or Play Services and install/update it.

Google Play Store is showing me white blank screen after installation. What can I do?

Run the GMS APK again, it will ask you to remove the Google apps. Answer Yes. After this, reboot your phone and check if there is an EMUI update. Update your phone. Now run the “Google Installer” application. This will install Google Apps in your phone. You can now run the Play Store.

I am getting “This application may harm your device” error.

Reboot your device. If there is an update available, update your phone. Run the Google Installer straight away and install the Google Apps. Check if it works this time.

Play Store White Screen, Force Close Errors, How to fix?

Run the GMS APK on your phone again, it should ask you if you want to uninstall the Google Apps. Complete the uninstallation. Reboot your phone. Now only download the Google Installer 3.0 APK and install it. Complete the installation and you will have the play store.

Conclusion

That is all with the installation of Play Store on Huawei and Honor smartphones. You are now all set to download the unlimited applications from the biggest app store in the world. Install away any games, applications, or entertain yourself with all the content that is available on the Play Store. I hope that you guys found this guide really helpful. If something is not working for you or you are unable to understanding something, feel free to reach out to me. I will try to help you as soon as possible. Stay connected!

Google News 5.7.0 APK – [ Latest Version ]

0
Google News 5.7.0 APK – [ Latest Version ]

From here you can download the latest version of #Google News APK. Google News app is the best source to get the latest and updated news from around the world. Too bad there are a number of users who cannot download Google News app. As I have told you earlier that if you are unable to download an app, it would be a compatibility issue. However, If you cannot download it from Google Play, you can always count on the APK. If you want to install the Google News app on your Android device. Heed the instruction provided below and you can download the latest Google News APK.

Google News APK

Google News:

Google news stands top on all the news apps available on Google Play. The best thing about this app is that it has a smart sense. Thus, it provides you with the news stories that matter to you. You will get the latest news from your region.

Here’s a thing you cannot keep up with all the news stories and not all of them are worth reading. You will always get hooked by the thing you like the most. This is what I like about Google News, it feeds you with the stories which you would like to read. All the news provided by Google News will be relevant.

You will get briefing updates whole day, and the top stories will be from including local stories, national news, and world content.

Now if you want to learn more about Google News, the best thing is to follow the links below.

Download Links:

Get it on Google PlayGoogle News APK:

Download

Version Info:

Version: 5.7.0 (2018111617)
Size: 13.96 MB
Updated: December 7
Package: com.google.android.apps.magazines
Minimum Android: Android 4.4

What’s New:

·Bug fixes and performance improvements.
Google Play

How To Install Google News 5.7.0 APK on Android:

  1. Download Google News APK from the link provided above.
  2. Copy the APK file to your phone now.
  3. On the phone, open Settings > Security > Unknown Sources > Allow.
  4. Now using a file manager, locate the APK files that you just copied.
  5. Tap on the APK file to proceed with the installation. Heed the instruction provided on the screen and you will be able to Install Google News.
  6. After the installation, launch the Google News for Android from the app drawer.

That’s all.

How to Unroot Samsung Galaxy S9 and S9 Plus

3
How to Unroot Samsung Galaxy S9 and S9 Plus

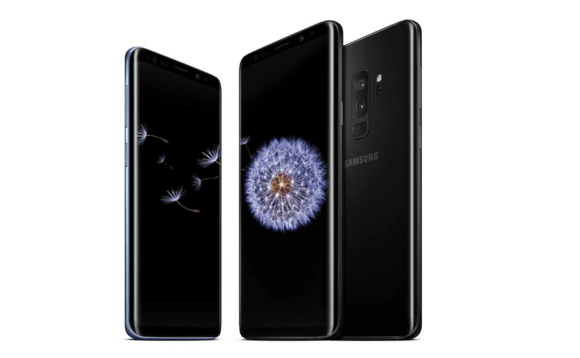
Samsung Galaxy S9 and S9 Plus are out. Once again, Samsung has produced 2 incredible smartphones. Both the Galaxy S9 and S9 Plus come with a brand new CPU, an updated camera, new fingerprint scanner option and some other features under the hood.Unroot Samsung Galaxy S9 and S9 Plus

The Galaxy S9 and S9 Plus are all set to make it to the users. These phones are equipped with the Snapdragon 845 or Exynos 9810 CPU. On the Galaxy S9, there is a 4GB RAM and on the Galaxy S9 Plus, there is a 6GB RAM. These phones come with 64GB of internal storage. The WQHD display takes graphics to a whole new level. The headphone jack is still there. There are dual speakers for stereo sound.

Overall, the Galaxy S9 and S9 Plus are real beasts. As soon as these phones land in the hands of some good Android developers, these will be rooted and also get a custom TWRP recovery. While these phones come with the top-notch hardware, almost every Galaxy S9 or S9 Plus user out there will root the phone, flash the custom recovery and, maybe, a custom ROM as well.

Now what happens is, rooting your phone changes the system’s official status to custom. The custom status keeps appearing in the bootloader of the phone. You can see it whenever you boot your Galaxy S9 into the download mode. The rooting also trips the Knox counter. It means that your phone is not eligible for claiming the warranty anymore.

You cannot reset the Knox counter of your phone once rooted, but you can definitely change the custom status to “official” once again. Wondering how? Well, the answer is simple. All you have to do is to unroot Samsung Galaxy S9 and S9 Plus.

So, this guide is all about installing a stock firmware or a what you call is a stock ROM on the Galaxy S9 or S9 Plus. The installation of stock firmware will reset your S9/S9 Plus to its factory state. It means the phone will be unrooted immediately. This will also change system status from custom to official in the bootloader.

Here are the steps to unroot Samsung Galaxy S9 and S9 Plus to reset the system status and to restore the phone to factory state. Let’s have a look at the steps to get this done without any further ado.

Preparing your Galaxy S9/S9+ for the unrooting process

  • This guide is applicable only on the Galaxy S9 or S9 Plus. Do not try it on any other phone.
  • Backup all your contacts, SMS messages, call logs and media content. This process requires wiping your phone’s internal storage. So, to make sure that you do not lose your data, back it up right now.
  • Charge your phone up to 50% to make sure it stays alive during the unrooting process.
  • Disable Samsung Kies or Samsung Smart Switch if you have installed it.
  • Disable Windows Firewall or any Antivirus if you have installed it.
  • Use original data cable to connect your phone to your computer.
  • Enable OEM Unlocking and USB Debugging mode on your phone.
  • Follow this guide to the letter.

Downloads and Installations

  1. Download and install Samsung USB Drivers.
  2. You need to download Odin 3.13.1 as well. Download it and extract it.
  3. Download the latest firmware for Galaxy S9 or S9 Plus. Extract the firmware to get the AP, BL, CP and Home_CSC files.

    Galaxy S9 Firmware FilesQ
    Image for reference only

Unroot Samsung Galaxy S9 and S9 Plus

  1. Open Odin3.exe file on your computer.
  2. Now in Odin, click on the AP tab and select the AP file. Similarly, click on the BL tab to select BL file, click on the CP tab to select CP file and click on the CSC tab to select Home_CSC file.
  3. Put your Galaxy S9 or S9 Plus in download mode now. To do so, power it down first. Now turn it on by pressing and holding Volume Down + Power + Bixby button. As soon as your phone shows a warning, press the Volume Up button to continue.
  4. Connect the S9 to the computer now.
  5. The ID:COM box in Odin should turn blue identifying successful connection with your phone.
  6. Click on the Options tab in Odin and make sure that the only options selected are F.Reset.Time and Auto Reboot. No other options should be selected.
  7. You are all set to start the unrooting process now. Click on the start button and let it flash the stock ROM now.

    Galaxy S9 Stock ROM Installation - Unrooting Process
    Image for reference only.
  8. It will take a few minutes for the process to finish. Once it comes to an end, your phone will reboot.
  9. After your phone reboots, you can disconnect it and check the system status. It should have changed to official now. That’s all.

If you are facing any issues while following the tutorial given above, feel free to contact me through the comment box below.

How to Install WhatsApp on your WiFi Tablet

17
How to Install WhatsApp on your WiFi Tablet

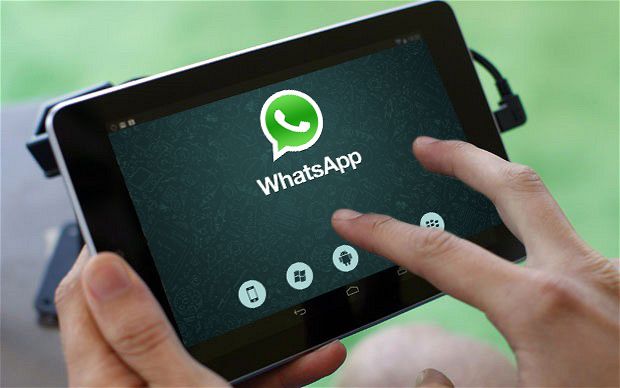
WhatsApp has definitely lessened the use of SMS messaging and has eased the lives of a lot of users. It’s very easy to send unlimited messages, sharing photos, videos, sharing music just in a few taps using WiFi or 3G on your device with WhatsApp.WhatsApp for Tab

WhatsApp is available for free in the Google Play Store. You can download it and install it on your Android or iOS device and start chatting with your friends and family for hours without any cost. But, in order to proceed with WhatsApp verification, you will need a SIM card in your device as WhatsApp will use your number to activate your profile after verification.

Since there is a number of devices available around powered with Android, these devices include various smartphones, tablets, cameras, etc. Android-powered tablets are further divided into 3G, LTE, and WiFi models. So, you got a hefty list to choose from. A Tablet with 3G support will let you use a SIM card, you will be able to dial calls, send text messages, use Viber and other such social chat apps including WhatsApp as well, but a WiFi tablet will not let you use a SIM card, thus, you won’t be able to do any SIM verification related activity.

So you got a Tablet with no 3G support but WiFi and you’re willing to get WhatsApp on it? Well, as mentioned above, without a sim card in your device you won’t be able to verify it and you will start feeling trapped having an awesome device but no social chat app like WhatsApp. Well, there’s no need to ponder about it anymore. We have the complete solution to your worry. In the following post, we will go through a method that will let you install WhatsApp on your WiFi tablet. Also, this tutorial is only for Android tablets.

How to Install WhatsApp on your WiFi Tablet

What you will need for this:

  • A phone with a SIM card in it doesn’t matter what phone it is, you just need to receive and SMS or Call.
  • WhatsApp on your tablet, get it below.

Also Check: How To Install Viber On Your WiFi Tablet

How to Install:

      1. Download WhatsApp latest APK from here.
      2. Place the downloaded APK file on your tablet and install it.
      3. Allow unknown sources if install blocked, select package installer if prompted.
      4. Once installed, open WhatsApp now.
      5. WhatsApp will ask you to select your country, insert your number and verify it.
      6. Fill the requirements (use the number that you’re running on your phone) and proceed with the verification.
      7. WhatsApp will start verifying the number you inserted, you will get a call at first on the number that you used for WhatsApp.
      8. Pick up the call on your phone, listen to the code and insert it WhatsApp.
      9. In case the call verification fails, verify it again. You should receive a text message with the verification code this time.
      10. Insert the verification code.
      11. Phewwww! You will pass the verification now, set up your profile and start using WhatsApp.

That’s All! In case you got any queries or you face any difficulties, feel free to stop by the comment box below and drop us your words. We will get back to you as soon as possible. Thanks All.

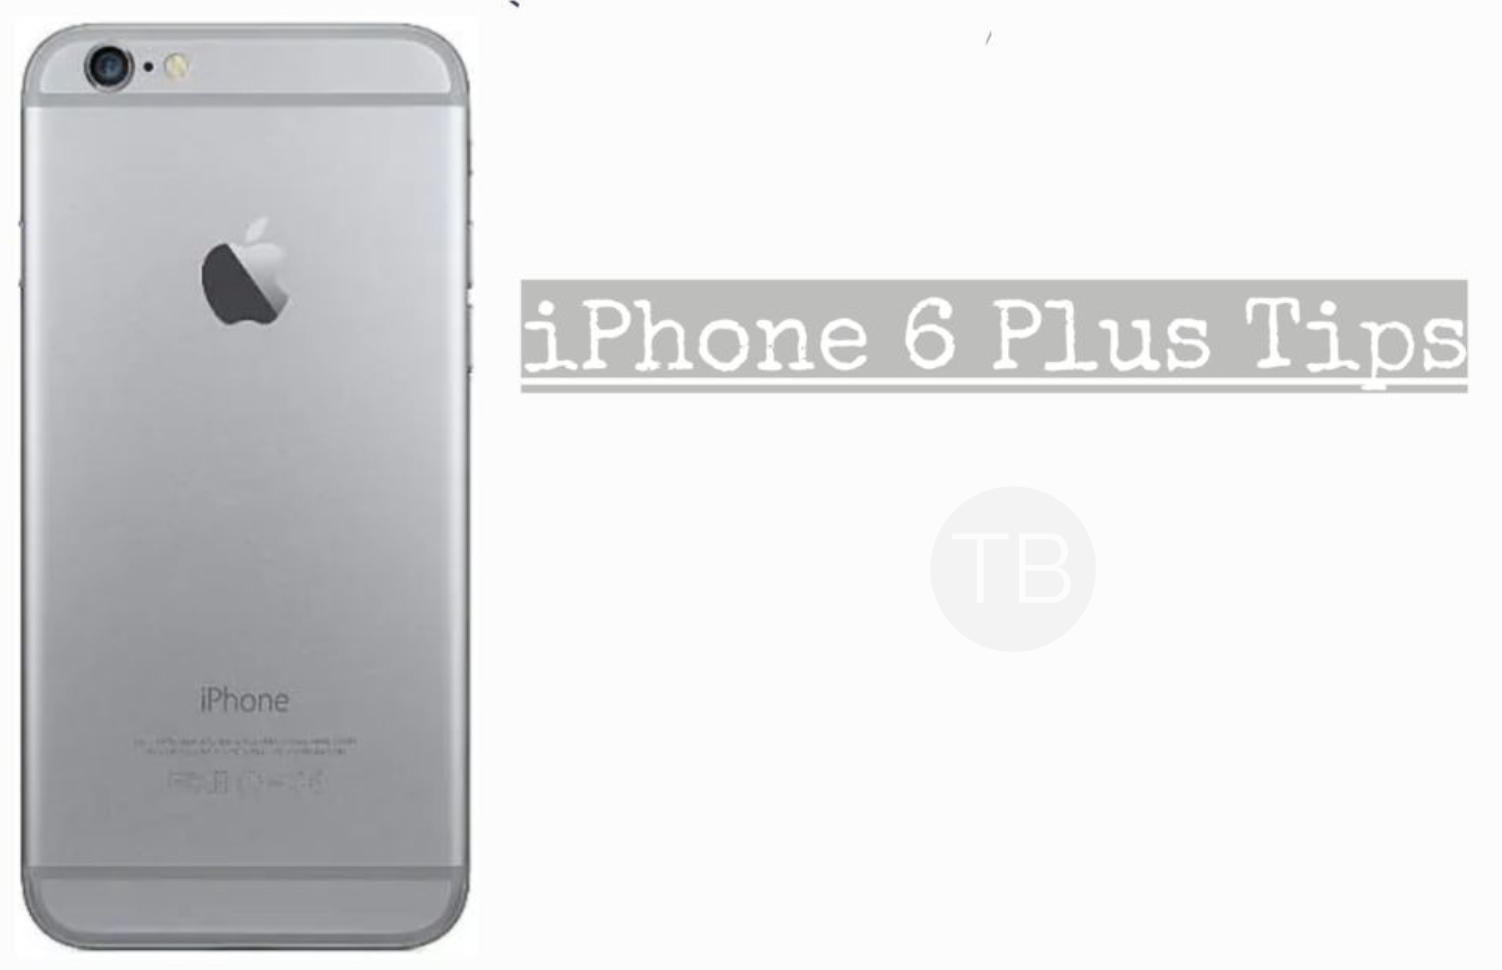
iPhone 6 Plus Tips & Tricks: Soft Reset, Codes, DFU Mode, Reset Settings, Recovery Mode, Screenshot.

0
iPhone 6 Plus Tips & Tricks: Soft Reset, Codes, DFU Mode, Reset Settings, Recovery Mode, Screenshot.

Here you will all iPhone 6 Plus Tips & Tricks. If you want to master iPhone 6 Plus then you have everything here. We’ll tell you how to Boot iPhone 6 Plus into Recovery Mode and Dfu Mode.

Moreover, we’ll share secret codes of iPhone 6 Plus. Along with that, you will learn how to take a screenshot on iPhone 6 Plus, Reset Settings, hard reset, soft reset and more. Let’s get start our iPhone 6 Plus Tips & Tricks post.

iPhone 6 Plus Tips
iPhone 6 Plus Tips

iPhone 6 Plus Details:

The iPhone 6 Plus was released in 2014, September. The Phone came out with a screen of 5.5 inches having 1080 x 1920 pixels resolution. iPhone 6 Plus was powered by Apple A8 (20 nm) CPU and PowerVR GX6450 GPU. It had internal storage of 16/64/128 GB, 1 GB RAM DDR3. The camera at the back of this phone is 8 MP, f/2.2  and on the front, it is 1.2 MP. Inside this Phone, there was a 2915 mAh battery. The Phone originally ran on iOS 8, upgradable to iOS 12.1.

Quick Summary
Hard Reset.
Soft Reset.
Codes.
Recovery Mode.
Dfu Mode.
Reset Settings.
Reset Network Settings.
Portable Hotspot.
Power Saving Mode.
Reset Location & Privacy.
Screenshot.
Video Tutorials.
Back Up Data.
Check IMEI.

iPhone 6 Plus Tips & Tricks:

Heed the instructions below in order to learn everything about iPhone 6 Plus. These iPhone 6 Plus Tips will help you master everything on your device.

Soft Reset iPhone 6 Plus:

  • Press + Hold Volume Up & Power Key until you see the slide pop-up.
  • Slide it to the right, as you can see on the screen.
  • Hold the power button to power on your device.

How to Hard Reset iPhone 6 Plus:

Follow the instructions provide in the link below and you will easily hard reset iPhone 6 Plus.

iPhone 6 Plus Secret Codes:

Field mode. *3001#12345#*
IMEI number *#06#
Settings for transferring the phone calls, fax etc. *#21#
Presentation of your number while making phone calls. *#30#
Information about blocked phone calls. *#33#
Settings for awaiting calls. *#43#
The number to which the calls are transferred to. *#61#
Information about the numbers on which your calls are redirecting. *#62#
Where your calls are redirecting when your number is busy. *#67#
IMSI number. 5005#

Dfu Mode iPhone 6 Plus:

  • Connect your iPhone to your PC.
  • Now Press Volume Up button once, Press Volume Down button once and after that Press Side Button.
  • Once the screen goes off, Press Volume Down + Power Key for 5 seconds and let go of the power key.
  • You will see a pop-up saying a device is found in recovery mode. Let go of all the buttons. You have Booted your iPhone 6 Plus into Dfu Mode.

Reset Settings:

  • Open Settings from your home screen.
  • Tap on General.
  • Scroll down and at the end of the screen, you will see Reset. Tap on it.
  • Now Tap on Reset All Settings.

Reset Network Settings:

  • Open Settings from your home screen.
  • Tap on General.
  • Scroll down and at the end of the screen, you will see Reset. Tap on it.
  • Now Tap on Reset Network Settings.

Recovery Mode iPhone 6 Plus:

  • Connect your iPhone to your PC and launch iTunes.
  • Now Press Volume Up button then Volume Down and after that press + hold the power button.
  • Let go of the power button, once you see the recovery mode on your iPhone 6 Plus.

ScreenShot:

  • Open Up the screen of which you want to take a screenshot.
  • Now Press both Volume Up and Power together.
  • There you go.

Delete Apps on iPhone 6 Plus:

Method 1:

  • Unlock your device and go to the home screen page from where you want to delete the apps.
  • Now Tap and Hold any app icon for 2 seconds, you’ll see all the icon will start to wiggle.
  • Once your icons start wiggling, you’ll see an X will appear on the icon top left corner.
  • Tap the X on the app you want to uninstall.
  • When you tap on X, you’ll see a confirmation pop-up ( Delete – Cancel ). Tap on delete to proceed with the uninstallation process.

Method 2:

  • Open Settings on your device. Tap on General.
  • Select “iPhone Storage” from the settings.
  • Here you’ll see all the apps and also you will see the space of each app.
  • Tap on the app you want to delete.
  • You’ll get two options, either you delete the app or you can offload the app.

Back Up Data on iPhone 6 Plus:

  • Connect your device to PC and launch iTunes.
  • You will you see your iPhone under the Devices Tab.
  • Click on your device icon located at the top of iTunes.
  • You will see there will be two options in Backups Tab. Backup Now & Restore Backup.
  • All you have to do is click on Backup Now.

How To check Blacklist status of iPhone 6 Plus:

Click on the following button and you will be taken to a new website. Enter the required details and click on Blacklist check.

Important Message.
Please follow us on Facebook, Twitter, and Google Plus. Help us grow our social family.

How to Hard Reset iPhone 6 Plus [ Tutorial ]

0
How to Hard Reset iPhone 6 Plus [ Tutorial ]

With help of this guide, you can Hard Reset iPhone 6 Plus. We have posted all the methods which can be used for resetting iPhone 6 Plus. Don’t get confused by Hard Reset, it is also known as Factory Reset.

Factory reset came handy in many ways but the one is best among all. It will help you boost up your device performance. Because once you have gone through with Hard Reset, your device will go back to the factory state.

The only downside of the hard reset is that you will lose all of your data if you do not back up your device. More or less, every iPhone user backup data on daily basis. Now, this post is only for Apple iPhone 6 Plus, that means you can follow the instructions below and you can hard reset iPhone 6 Plus. Let’s get going.

Hard Reset iPhone 6 Plus

iPhone 6 Plus Details:

The iPhone 6 Plus was released in 2014, September. The Phone came out with a screen of 5.5 inches having 1080 x 1920 pixels resolution. iPhone 6 Plus was powered by Apple A8 (20 nm) CPU and PowerVR GX6450 GPU. It had internal storage of 16/64/128 GB, 1 GB RAM DDR3. The camera at the back of this phone is 8 MP, f/2.2  and on the front, it is 1.2 MP. Inside this Phone, there was a 2915 mAh battery. The Phone originally ran on iOS 8, upgradable to iOS 12.1.

Benefits of Hard Reset:

Details
*You can Wipe all of your Data Stored on your device.
*Easily fix all the performance issue.
*Bypass screen lock through hard reset.
*Bring the factory state.
*Fix all the firmware issues.
*Get rid of signal problems, loop issues, rebooting problems and power problems.

How to Hard Reset iPhone 6 Plus:

Method1:

  • Launch iTunes and connect your iPhone to your computer. You’ll see an iPhone icon button under your devices tab. Click on that button.
  • The best thing about this method is you can make a backup of your device. All you have to do is click on sync. Although iTunes automatically begin to sync, when you connect the device.
  • Once the sync has completed, go back to the information page. Click on restore, and you’ll see a warning message saying ” restoring your iPhone to factory settings will erase all the data from your device”. Click on Restore to start the process.
  • iTunes will now start the restoring process and it will take some time. Once the process is finished iTunes will tell you that your iPhone has been restored.

Method2:

  • Tap on Settings.
  • Tap on General.
  • Scroll down and Tap on Reset.
  • Tap Erase all Content and Settings.
  • Enter the passcode and Tap on Erase iPhone.

Method 3:

  • Connect your iPhone to PC and launch iTunes.
  • Now first press volume up button once then volume down button once. After that keep pressing the side button until you see the Apple logo.
  • You will see a pop-up on your PC screen. Close and click on Restore iPhone.
  • Next, click on Restore and Update from the iTunes. Click on Next and Agree.

That’s all. You have successfully Hard Reset iPhone 6 Plus. Please do tell us if you face any problem during this process.

Nokia 8.1 General Guides: Soft Reset, Hard Reset, Recovery, Screenshots

0
Nokia 8.1 General Guides: Soft Reset, Hard Reset, Recovery, Screenshots

In this post, you will find Nokia 8.1 General Guides, it means you will know everything about Nokia 8.1. Such as, how to boot Nokia 8.1 into Recovery, Safe Mode, and Fastboot Mode. Also, you will learn how to hard reset Nokia 8.1, Soft reset, take screenshots and more. Let’s get started now.

Nokia 8.1 General Guides

Summary:

Topics:
Safe Mode
Fastboot Mode
Hard Reset
Soft Reset
Screenshot
Codes
Recovery Mode
Safe Mode
Clear App Data
USB Debugging Mode

Nokia 8.1 Official Specs:

The Nokia 8.1 was released in 2018, December. The Phone came out with a screen of 6.18 inches having 1080 x 2280 pixels resolution. Nokia 8.1 was powered by Qualcomm SDM810 Snapdragon 810 (10 nm), Octa-core (2×2.2 GHz 360 Gold & 6×1.8 GHz Kryo 360 Silver) CPU and Adreno 616. It had internal storage of 64 GB, 4 GB RAM. The camera at the back of this phone is 12 MP, f/1.8 – 13MP and on the front, it is 20 MP. Inside this Phone, there was a 3500 mAh battery. The Phone originally ran on Android 9.0 (Pie); Android One.

Nokia 8.1 General Guides:

In order to master Nokia 8.1, heed the instruction provided below. You can find all Nokia 8.1 General Guides here.

Soft Reset Nokia 8.1:

In order to Soft Reset your Nokia 8.1, all you have to do is hold down the power button for 2-3 seconds and your device will turn off.

Hard Reset Nokia 8.1:

Heed the instructions provided below in the link and you will be able factory reset Nokia 8.1.

Boot Nokia 8.1 into Recovery:

  • First, Turn off your device by holding down the power button for a few seconds.
  • Once your device is completely turned off, Start Pressing Volume Up and Power button together.
  • When you see the Recovery Menu, release all the buttons you were pressing and holding.
  • In the recovery mode, you can navigate using Volume rockers and for selection, you will use the power button.

Fastboot Mode on Nokia 8.1:

  • First, Turn off your device by holding down the power button for a few seconds.
  • Once your device is completely turned off, Start Pressing Volume Down and Power button together.
  • When you see the Fastboot Logo, release all the buttons you were pressing and holding.

Safe Mode Nokia 8.1:

Hold the power button for a few seconds. Now Tap the Power off and after that, you will see a pop-up ” Reboot to Safe Mode “. Tap OK to proceed. When your device boots up you will be in Safe Mode.

Codes for Nokia 8.1:

Phone information *#*#4636#*#*
IMEI Info *#06#
Calendar *#*#225#*#*
Debug info for Google Play Service *#*#426#*#*
Access Google Partner Setup *#*#859#*#*

Take Screenshot on Nokia 8.1:

In order to take screenshots on Nokia 8.1. All you have to do is press + hold Volume Down and Power button together.

USB Debugging on Nokia 8.1:

  1. Go to settings.
  2. In settings, scroll all the way down and locate About device section.
  3. In the About device section, find build number in the Software details.
  4. Tap the build number 8 times to enable Developer Options.
  5. Once done, the Developer Options section will appear at the bottom where you found the About device option.
  6. Now go to Settings > Developer Options.
  7. Find USB Debugging mode in Developer Options and tap the radio button located next to USB Debugging mode to enable it.
  8. That’s all.

Important Message.
Please follow us on Facebook, Twitter, and Google Plus. Help us grow our social family.