Home Blog Page 84

How to install Google Play Store on Chinese Android phones

9
How to install Google Play Store on Chinese Android phones

Updated: 1/6/2019. Chinese Android smartphones do not have a Google Play Store installed in them. There is no single application by Google installed in the phones. This is because of China’s policies towards the restriction of the search giant and social media platforms operating worldwide. China doesn’t allow these platforms to work openly in their country. If you are planning to get your hands on a smartphone by a Chinese manufacturer within China, you may find out that there is no official Play Store in the phone, but you will find the exclusive stores by the smartphone manufacturers. Those stores are not as good as the Google Play Store and this may raise a need for installing the Play Services along with the Play Store on your phone.install-play-store-on-xiaomi-smartphones

Luckily, it is very easy to install the Play Services and all other Google applications on your Chinese Android phone. You can install Play Store on any Chinese phone manufactured by Huawei, Xiaomi, ZTE and others by following the guide coming up next. This can be done either by manually installing the Google Play Store through an APK file or by installing the Google Installer which will push the Google Play Services framework in your phone. Once you have the install, you are all set to explore the Play Store loaded with millions of cool Android applications and games. Let’s learn now how to install Google Play Store on Chinese Android phones.

How to install Google Play Store on Chinese Android phones using Play Store APK

Let’s have a look at the easiest method first. If this works, it’s all good otherwise the 2nd method is guaranteed to work.

  1. Download the latest Google Play Store APK file and copy it to the internal or external storage of your Android phone.
  2. Now on your phone, go to Settings > Additional settings > Privacy > Turn on the Unknown Sources. For some phones, you will simply have to go to Settings > Security/Privacy > Turn on the Unknown Sources by tapping its button.
  3. Now open the file manager on your phone and locate the copied Play Store APK file and tap it to install it.
  4. Finish the Play Store installation. Play Store will automatically install Play Services on your phone.
  5. Reboot your phone now.
  6. Once done, access the Play Store through app drawer or app menu.
  7. Start downloading your favorite apps and games now. That’s all.

How to install Google Play Store on Chinese Android phones using Google Installer

Note: In some cases, for example, for Huawei Honor phones, you will first have to install the GMS Installer. This is the Google Mobile Services installer which will allow the installation of Google Installer on your phone. To install it, simply download the GMS Installer APK and install it just as you install any other APK on your phone. After installing the GMS Installer, go ahead and install the Google Installer to install Play Store and Play Services.

  1. Download the latest available Google Installer APK file and copy it to your phone’s internal or external storage.
  2. Now on your Android phone, go to settings > security/safety> check Unknown sources option.
  3. After this, open file manager on your phone and locate the copied Google Installer APK.
  4. Tap the APK and install it by using on-screen instructions.
  5. Once the installer APK has been installed, open the installer from the app drawer or application menu.
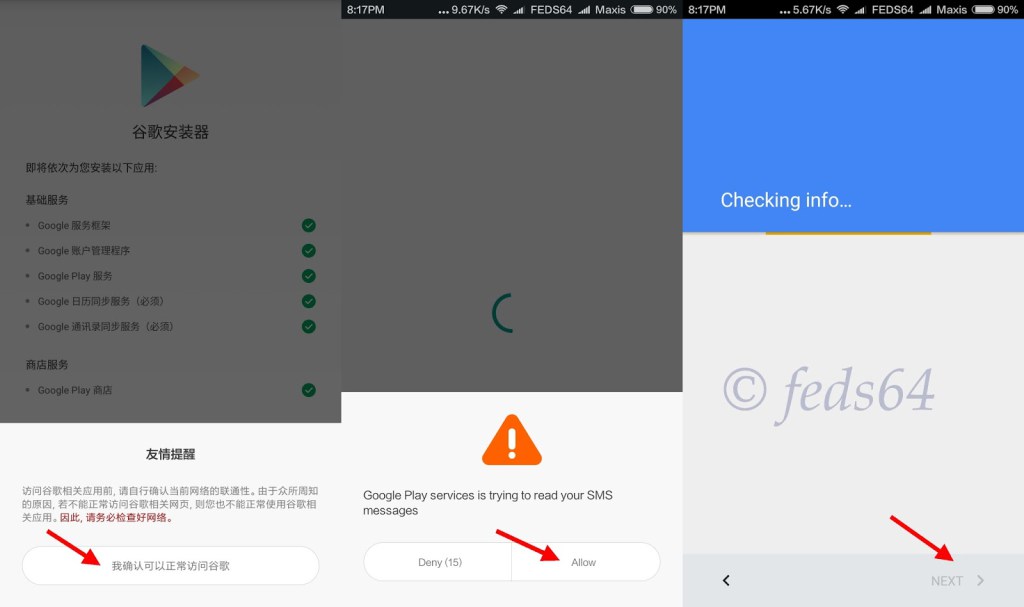
  6. Now in the installer, tap the yellow button on the bottom to proceed installation.
  7. download-google-play-store-on-huawei-chinese-phones-1
  8. In the next screen, tap install and then tap OK to process it.
  9. download-google-play-store-on-huawei-chinese-phones-2
  10. When it asks you for the Google Play Store, once again tap Install, then tap OK and then tap the red button appearing at the bottom of the screen.
  11. download-google-play-store-on-huawei-chinese-phones-3
  12. Now press the button showing an agreement/asking for permissions > Allow it and press NEXT.
  13. Once done, Play Services and Play Store will be installed on your phone.

If the Play Store doesn’t appear in the application menu, you may have to grab the latest Play Store APK file and install it manually on your phone. Since you have installed the Google Framework, installing Play Store will not be an issue now. Here are the guides to install How to download and install the Google Play Store on Android | Download Google Play services 9.6.80 APK.

That’s all. If you face any kind of issues regarding the guide above, do reach me out through the comment box below.

Google Installer v3 for Xiaomi / MIUI Devices

0
Google Installer v3 for Xiaomi / MIUI Devices

Updated: 12/4/2018. From here you can download the latest Google Installer v3 for Xiaomi and MIUI Devices. All we all know that Xiaomi, complying with Chinese policies and they don’t ship their device with Google Apps. You will not get the Google Play Store, Gmail App, and more.

The best workaround we can suggest is Google Installer v3. This will help you can get all the Google Apps on your Xiaomi / MIUI Devices. Moreover, installing Google Installer v3 won’t be a big task. Google Installer comes in APK format, that means you can easily install it on your Xiaomi devices. However, if you already have Google Play installed on your device then you don’t need to install Google Installer v3.

Read more: Download Google Installer for Chinese Android phones 2018

Google Installer v2

Google Installer v3 for Xiaomi / MIUI Devices:

The Google Installer works on all the phones introduced by Chinese smartphone manufacturers as well as the manufacturers that produced the phones for Chines region. These manufacturers include Samsung, Huawei, Xiaomi, OnePlus, Oppo, Vivo, ZTE and all others that exist. So, if you have got any phone without the Google Play Services and Google Play Store, it’s time for you to grab the Google Installer. I have got my hands on the latest Google Installer. Chinese Android phone users can download Google Installer APK from this page now. Here is the Google Installer for Chinese Android phones.

Google Installer v3 APK – Features:

  • Supports Kitkat, Lollipop & Marshmallow firmware;
  • Easy installation;
  • Google Play Services;
  • Play Store;
  • Framework;
  • Calendar Sync;
  • Contacts Sync.

Download Google Installer v3 APK for Chinese Android phones

  1. Google Installer v3 – APK – Download
  2. Copy the Google Installer APK to your phone.
  3. Now on your phone, go to Settings > Security > Unknown Sources > Allow.
  4. Locate the Google Installer using the File Manager now.
  5. Install Google Installer now.
  6. Run Google Installer and follow the on-screen instructions to install Google Apps. That’s all.

Fix Galaxy Note 8 Problems after Android Oreo update

2
Fix Galaxy Note 8 Problems after Android Oreo update

Galaxy Note 8 finally started getting the long-awaited Android 8.0 Oreo update. The Android 8.0 Oreo for the Galaxy Note 8 is packed with all the goodies that Google showed off when it released the Android Oreo. It took more than long for the South Korean phone maker to make Android Oreo for its flagship devices.Galaxy Note 8 Problems after Android Oreo

Samsung is releasing Android 8.0 Oreo for the Note 8 when Google has already rolled out the first developer preview of the Android 9.0, the Android P. It’s quite disappointing when you spend a huge amount of money on a phone and then the company doesn’t release the latest firmware on time.

OnePlus launched the OnePlus 5T in November 2017 and it updated the phone to Android Oreo by the time it was January 2018. Even Nokia updated its phones to Android Oreo before Samsung. After ridiculing the loyal Galaxy Note 8 owners, the update finally started rolling out about 2 days ago. If you carry a Galaxy Note 8, you can check for OTA update or update your phone manually using Odin.

A new firmware is always supposed to improve the performance, battery life and the overall stability of a phone. This is because the new firmware fixes all the existing bugs, it takes into account all the problems that the users face on the previous version and provide them with the better experience. This, however, is not a very common case. Most of the times, users start facing more issues after updating their phone to a newer firmware. Same is the case with the Galaxy Note 8 after the Android 8.0 Oreo update.

A number of users have reported a lot of problems that they have faced prior to updating the phone to Android Oreo, and also after updating the phone to Android Oreo. In this guide, we will take a look at the tutorials to fix Galaxy Note 8 Problems before Android Oreo Update and then we will also learn to fix Galaxy Note 8 problems after Android Oreo update. Fix Galaxy Note 8 Problems after Android Oreo update

Fix Galaxy Note 8 Problems before Android Oreo Update

Galaxy Note 8 Update Failed Error

This is a very common problem happening on almost all the Samsung Galaxy phones. The solution is easy. Here are the two possible solutions to fix Galaxy Note 8 Update Failed Error.

Clear Cache Partition of the phone

  1. Turn off your phone completely.
  2. Now press and hold Volume Up + Bixby + Power button to turn it on.
  3. Your phone will now boot into the Recovery mode.
  4. Using Volume Rocker, Navigate to Wipe cache partition option and then press Power key to wipe it.
  5. Once done, reboot your phone and try updating your phone once again through OTA update.

Fix the update failed error using Samsung Smart Switch

  1. Download and install the Smart Switch software on your computer.
  2. Connect your phone to the computer now. If the phone asks for any permission, immediately allow it.
  3. In the Smart Switch, click on the Backup button and create a backup of your phone.
  4. After making the backup, click on More > Emergency Software Recovery and Initialization
  5. Follow the instructions given on the screen to fix the phone now. That’s all.

Odin flashing failed on Galaxy Note 8

Samsung recently updated the format of its firmware files. It was adding a new .lz4 extension to its .img files. This resulted in the existing versions of Odin to fail. After the issue widespread, Samsung released a new version of Odin which can handle the .img files with the .lz4 extension. So, if you are getting the Odin flashing failed on Galaxy Note 8, you need to use the Odin 3.13.1. A guide to manually update the Note 8 to Android Oreo can be found here.

No Android Oreo update available for Galaxy Note 8

If you are trying to update your phone through OTA update and you can’t find the update at your end, you may have to go for a manual method. You can check this guide to manually update your Galaxy Note 8 to Android 8.0 Oreo. Manually updating your phone is completely safe and secure.

Fix Galaxy Note 8 Problems after Android Oreo Update

Galaxy Note 8 Slow Performance after Oreo Update

Slow performance issue after updating to a new firmware is something happening with every second Galaxy Note 8 user. There are a few reasons that slow down the performance of the Note 8 after the Oreo update. Here are the probable reasons that have slowed down your Galaxy Note 8.

Perform a clean Galaxy Note 8 Oreo installation

It’s always recommended to perform a clean installation of the new firmware. If you have updated your phone without factory resetting it, you may find the performance getting sluggish. In such a case, you can factory reset your phone and update is once again all over again. Don’t forget to backup all your data before performing a clean installation of the new Android Oreo update on the Galaxy Note 8.

Clear Cache after updating the phone

Clearing cache can fix almost all Galaxy Note 8 problems after Android Oreo update. Clearing cache is just like a single medicine for a hundred diseases. Messed up cache can significantly slow down your phone. Here’s how to clear cache and fix the Note 8.

  1. Turn off your phone.
  2. Now turn it on by pressing and holding Volume Up + Bixby + Power button.
  3. As soon as you see the recovery, use Volume Down to select wipe cache partition and then press the power key.
  4. Clear the cache and reboot the phone. The issues should be gone now.

Delete all the unnecessary applications

Half of the Galaxy Note 8 problems after Android Oreo update can come up as a result of having unnecessary applications on your phone. If you have a bunch of apps that you have no idea of or the apps that you simply do not use, it’s the time to remove them from your phone. Having unused applications on your phone are nothing more than junk.

Boot into Safe Mode to check if an application is slowing down the phone

Safe Mode disables all the third party applications on your phone. It’s a great way to check if a specific application is causing trouble in your phone. You can always turn on Safe Mode and then check the performance of your phone. If there’s a difference in the performance of your phone after enabling Safe Mode, you can then start by uninstalling the applications one by one to check what application was the culprit. Here’s how to boot into Safe Mode to fix Galaxy Note 8 problems after Android Oreo update.

  1. Turn off your phone completely.
  2. Now turn on the phone and keep the Volume Down key pressed as soon as it shows you Samsung logo on the screen.
  3. As your phone boots up, you will find the Safe Mode watermark on the lower left corner of the screen.
  4. This means your phone is now in the Safe Mode.
  5. Check the performance and battery life of your phone now. If it performs better, you need to find the apps that may be slowing it down. That’s all.

Camera Failed on Android Oreo

Is the camera failed error coming up on your Note 8 after the Oreo update? This is also a common issue. Here are the possible fixes.

  1. On your phone, go to Settings > Apps > All Apps > Camera > Storage > Clear Cache & Data.
  2. Restart your phone now.
  3. Open Camera and check if the issue is gone or not.

Use a third party Camer Application

If the solution above fails to work, you can opt for a third party camera application like the Google Camera. There are many other camera applications which are a great alternative to Samsung’s stock camera application.

Clear Cache Partition

Try clearing the cache of your phone. At times, a bad cache can also make the camera app to fail. Have a look at the method to clear cache partition to fix Note 8 problems after Android Oreo update.

Install a new Android Oreo firmware

The camera can also fail as a result of a bad firmware update. You can manually update your Note 8 to Android Oreo using Odin. Make sure that you perform a clean installation. A clean installation can fix all the potential problems that came up on your phone after a corrupt installation.

Note 8 Heating Up After Oreo Update

These are the possible reasons for your phone to heat up after the Android Oreo update.

  1. You did not perform a clean Android Oreo update.
  2. An application is heating up your phone.
  3. You did not clear the cache of your phone after updating it.
  4. Your phone’s battery isn’t working right.
  • So, to fix these problems on the Note 8, you can, first of all, try clearing the cache. If clearing the cache fixes the heating up issue, then it’s all good. The second choice should be to boot your phone into the Safe Mode and check if an application is a culprit.


  • If the first two solutions do not work, you can try installing a new firmware manually. While performing a new installation, make sure that you are performing a clean installation.


  • The last resort should be to get the battery of your phone checked. For that purpose, you can take your phone to the Samsung Service centre and get it checked under its warranty.

Galaxy Note 8 Randomly Rebooting after Android Oreo Update

When the Samsung Galaxy S8 was updated to Android Oreo, the phone owners reported the phone rebooting on its own at random intervals of time. The same happened with the Galaxy Note 8 as well. A huge number of users reached out to us asking for a solution to fix the Galaxy Note 8 that is randomly rebooting after Android Oreo update. The solutions to this problem are also quite simple. You can apply the following fixes one by one to see which one works for you.

  1. Clear the cache of your phone if you haven’t done that already.
  2. If clearing cache doesn’t help, boot into the Safe Mode to check if an application is being the pain of your phone.
  3. Clean Installation is your last choice to go with. If the above two solutions fail to work, go ahead and perform a clean installation.

Battery Consumption Problems

After updating your phone, the battery needs to be calibrated once again. To do so, you need to charge your phone to 100% first of all. After charging it to 100%, you need to let it drain to 0%. Do not charge your phone in between. Make sure that it comes to 0 from 100 without charging it in-between.

Repeat the same cycles for 3 or 4 times to fully calibrate the battery of your phone on the new firmware. This should fix the battery consumption issues on your phone.

If you think that there’s another issue with the battery, you can try clearing cache or booting into the Safe Mode to check if an application is eating the battery of your phone.

Charging Problems

Is your phone charging slowly after the Android Oreo update? This may or may not be a software related issue. Here are the possible fixes.

  1. Always use original charger to charge the phone.
  2. Use the OEM data cable to connect your phone to the charger.
  3. Do not expect a Laptop or your Car to charge the phone as fast as the original charger does.
  4. Calibrate the battery of your phone immediately after updating to a new firmware.

Not Registered on Network Error

Network issues have several fixes. Here’s what you can do to fix Note Registered on Network Error on the Galaxy Note 8 after Android Oreo update.

  1. Make sure that you are using appropriate SIM card and it’s properly inserted. Faulty SIM card will give this error.
  2. Check if the Flight Mode is turned off or not. If it’s on, then you need to turn it off.
  3. You can also try turning on the Flight Mode and then turn it off again.
  4. On your phone, go to Settings > About > RESET > Reset Network Settings > Reset all the settings. Reboot your phone.

That’s all for now. If you are still facing any issues, feel free to contact me using the comments section below.

Hard Reset Galaxy J3 Orbit [ Tutorial ]

0
Hard Reset Galaxy J3 Orbit [ Tutorial ]

With the help of this guide, you will be able to Hard Reset Samsung Galaxy J3 Orbit. There are a number of ways to factory reset Samsung Galaxy J3 Orbit and we’ve posted all of them.

This is the best solution so far to boost up the performance level on an Android device. Moreover, it is the ultimate solution of all your hardware or software problems on Galaxy J3 Orbit.

Now before we move on and start telling you how to Hard Reset Samsung Galaxy J3 Orbit. Let me give you an overview on Samsung Galaxy J3 Orbit so that you get to know why this device is so famous.

Hard Reset Galaxy J3 Orbit


Samsung Galaxy J3 Orbit:

The Samsung Galaxy J3 Orbit was released in 2018, November. The Phone came out with a screen of 5.0 inches having 720 x 1280 pixels resolution. Samsung Galaxy J3 Orbit was powered by Octa-core, Dual-core 1.35 GHz Cortex-A73, Hexa-core 1.35 GHz Cortex-A53 CPU and Mali-G71 MP2. It had internal storage of 16 GB, 2 GB RAM. The camera at the back of this phone is 8 MP, f/2.2, and on the front, it is 5 MP. Inside this Phone, there was a 2600 mAh battery. The Phone originally ran on Android OS v8.0 (Oreo).

Benefits of Hard Reset:

Summary:
*You can Wipe all of your Data Stored on your device.
*Easily fix all the performance issue.
*Bypass screen lock through hard reset.
*Bring the factory state.
*Fix all the firmware issues.
*Get rid of signal problems, loop issues, rebooting problems and power problems.

How to Hard Reset Samsung Galaxy J3 Orbit:

Method1:

  • Turn off your device.

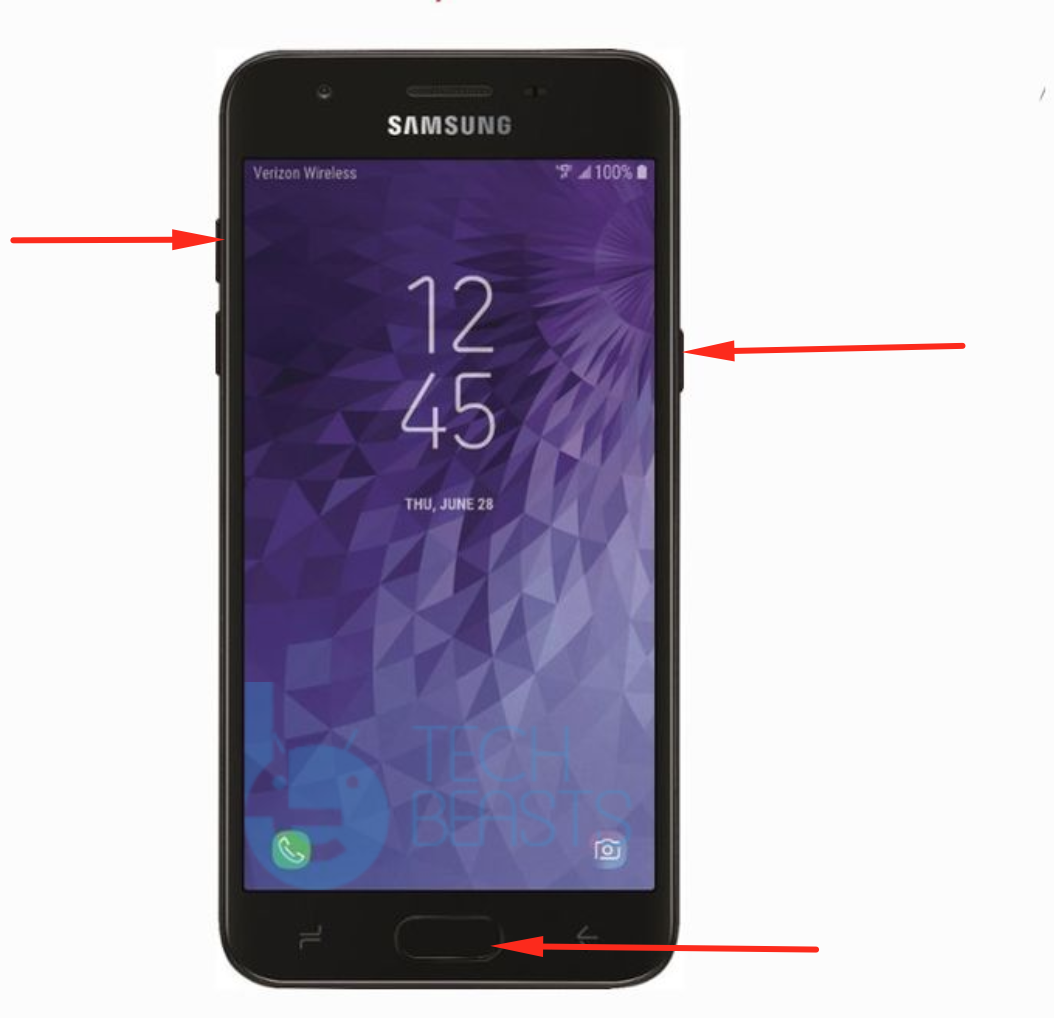
  • Now press and hold home+Power+Volume Up key.

  • Release the power button once you see the logo, but keep holding home and Volume up keys.
  • Now when you see the Android logo, let go both buttons.
  • Use the volume down button to navigate and highlight wipe data/factory reset.
  • Now use the power key to select the option.
  • You have to select ‘Yes‘ when you’ll be prompted for the next menu.
  • Now wait for the process to be completed, once it’s done highlight ‘Reboot system now’ and press power button to select it.
  • All Done.

Method2:

  • Open Settings from the Home Screen.
  • Scroll down and Tap on Backup & Reset -> Factory Reset.
  • Now select Reset device.
  • To Confirm Choose Erase everything.
  • That will be all, wait for the process to complete.

That’s all. You have successfully Hard Reset Samsung Galaxy J3 Orbit. Please do tell us if you face any problem during this process.

Important Message.
Please follow us on Facebook, Twitter, and Google Plus. Help us grow our social family.

Samsung Galaxy J3 Orbit Guides: Hard Reset, Recovery, Safe Mode, Download Mode & More

0
Samsung Galaxy J3 Orbit Guides: Hard Reset, Recovery, Safe Mode, Download Mode & More
Galaxy J3 Orbit Guides

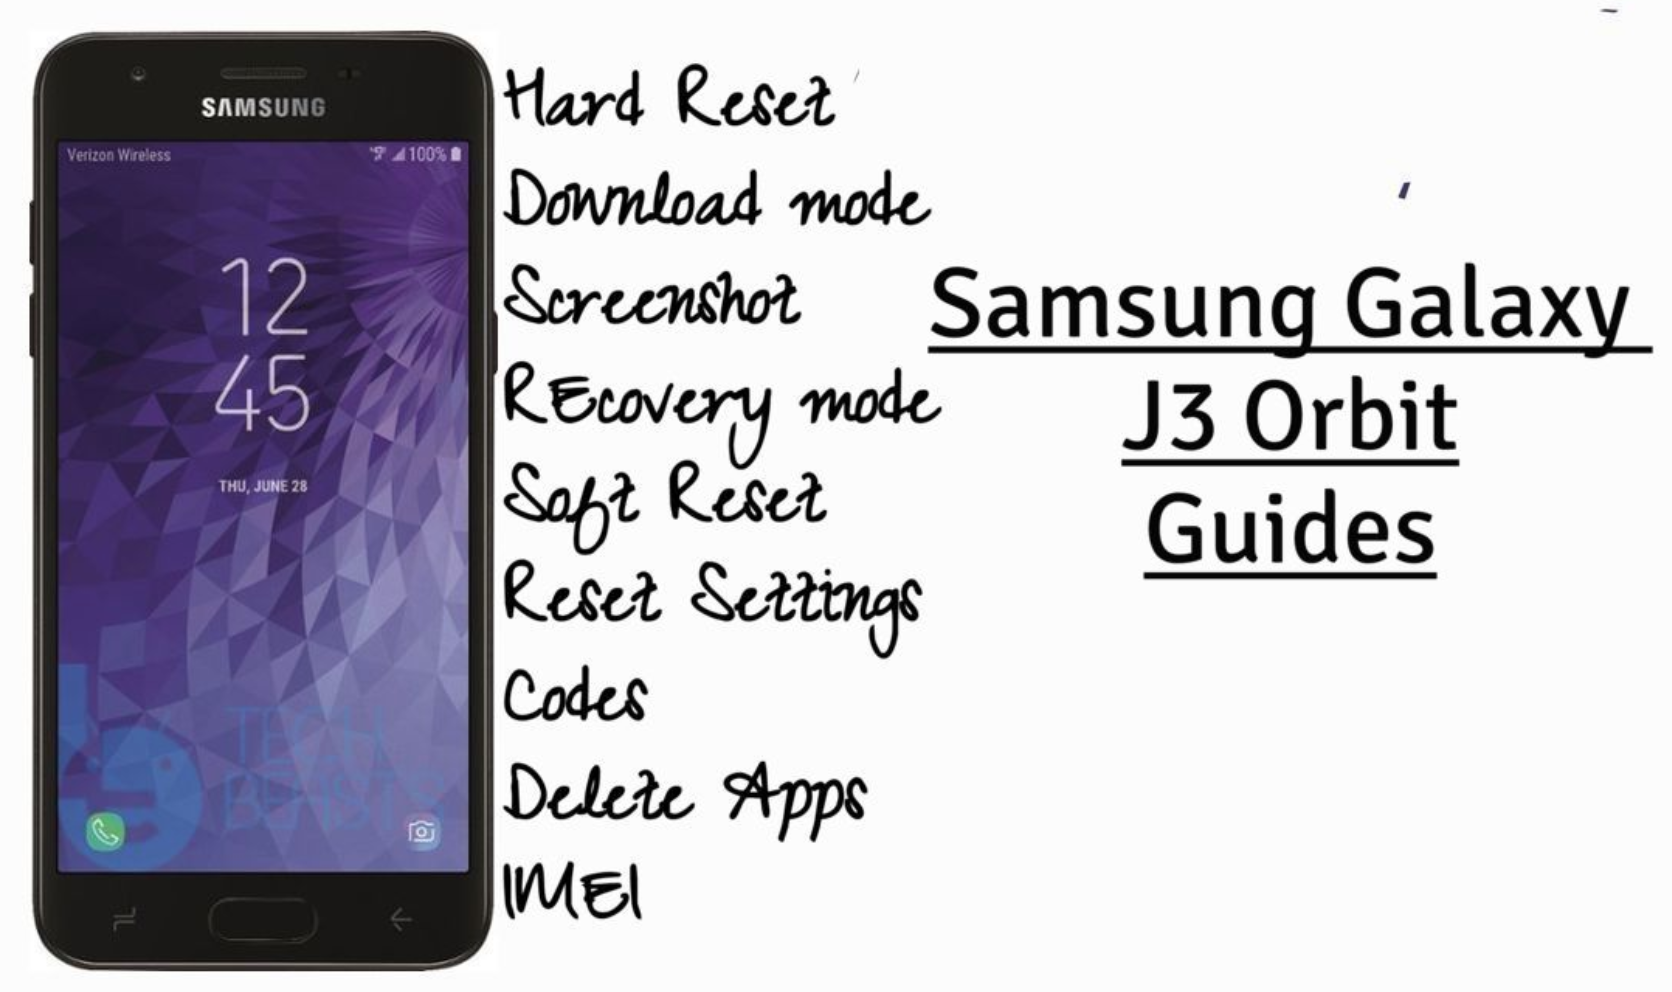
Samsung Galaxy J3 Orbit Guides Post: We’ve made this post for Samsung Galaxy J3 Orbit users. They can learn how to Hard Reset, Boot Into Recovery, Safe Mode, Download Mode and much more. You can say that this is the ultimate guides post for Samsung Galaxy J3 Orbit. Now before we move on to the Samsung Galaxy J3 Orbit Guides & Tricks. Let me give you an overview of Samsung Galaxy J3 Orbit specs.

Galaxy J3 Orbit Guides

Samsung Galaxy J3 Orbit:

The Samsung Galaxy J3 Orbit was released in 2018, November. The Phone came out with a screen of 5.0 inches having 720 x 1280 pixels resolution. Samsung Galaxy J3 Orbit was powered by Octa-core, Dual-core 1.35 GHz Cortex-A73, Hexa-core 1.35 GHz Cortex-A53 CPU and Mali-G71 MP2. It had internal storage of 16 GB, 2 GB RAM. The camera at the back of this phone is 8 MP, f/2.2, and on the front, it is 5 MP. Inside this Phone, there was a 2600 mAh battery. The Phone originally ran on Android OS v8.0 (Oreo).

Samsung Galaxy J3 Orbit Guides & Tricks:

Summary:

Topics:
Safe Mode
Download Mode
Recovery Mode
Reset Network Settings
Clear App Data
USB Debugging Mode

Heed the instructions below and you will find out how you can Clear App data, New Software Update, Safe Mode, Recovery Mode, Download Mode and more on Samsung Galaxy J3 Orbit.

Hard Reset Galaxy J3 Orbit:

Heed the instructions provided in the following link and you will get to know how to hard reset Samsung Galaxy J3 Orbit.

Clear App data:

  1. On your Android phone, go to Settings.
  2. Find the Application Manager or Application settings.
  3. In the Application settings, swipe towards the All or the Running Applications tab.
  4. Select the application of which you want to clear the cache and data.
  5. A list of further options will appear now, tap the Storage option.
  6. Under the Storage option, you will find Clear Cache and Clear Data options.
  7. Tap the button according to your liking.
  8. That’s all.

Check New Software Update on Samsung Galaxy J3 Orbit:

  • Open Settings Apps.
  • Scroll down and Tap on software update.
  • It will now check the available software update.
  • If there is any, you will be notified and follow the on-screen instruction in order to proceed.

Enter Recovery Mode on Samsung Galaxy J3 Orbit:

  1. Power down your phone completely.
  2. Now press and hold Volume Up + Home + Power keys.
  3. Your phone will take a while to boot up. As soon as it does and shows you the Samsung logo, let the key go.
  4. Your phone will now load the recovery.
  5. Let the recovery load. Once done, you can operate the recovery mode freely using Volume Up, Down & Power keys.

Boot Samsung Galaxy J3 Orbit into safe mode:

  1. To boot into Safe Mode, turn off your phone completely. Now turn on your phone. While your phone boots up press the Volume Down key and keep it pressed until the phone boots into the system.
  2. As your phone boots into the system, you will find the Safe Mode watermark on the lower left corner. This means you are now in the Safe Mode.

Wipe cache partition on Galaxy Galaxy J3 Orbit:

  1. Shut down your phone.
  2. Boot into the recovery mode. Using the instructions provided above.
  3. Scroll down and highlight “wipe cache partition”.
  4. Press the Power button to make a selection.
  5. Highlight Yes and let the phone wipe its cache now. That’s all.

Reset network settings on Galaxy Galaxy J3 Orbit:

  1. On your phone, open Settings.
  2. Now in settings, go to About device.
  3. Tap Reset > Reset Network Settings > RESET > RESET.

Enable developer options and USB debugging on Galaxy Galaxy J3 Orbit:

  1. Go to settings.
  2. In settings, scroll all the way down and locate About device section.
  3. In the About device section, find build number in the Software details.
  4. Tap the build number 7 times to enable Developer Options.
  5. Once done, the Developer Options section will appear at the bottom where you found the About device option.
  6. Now go to Settings > Developer Options.
  7. Find USB Debugging mode in Developer Options and tap the radio button located next to USB Debugging mode to enable it.
  8. That’s all.

Enter download or Odin mode on Galaxy Galaxy J3 Orbit:

  1. Turn off your phone completely.
  2. Now press and hold Volume Down + Volume Down + Power button.
  3. Your phone will turn on and show you a warning.
  4. Press the Volume Up button to continue into Download Mode now. That’s all.
Important Message.
Please follow us on Facebook, Twitter, and Google Plus. Help us grow our social family.

Samsung Galaxy J4 Core Guides: Hard Reset, Recovery, Safe Mode, Download Mode & More

0
Samsung Galaxy J4 Core Guides: Hard Reset, Recovery, Safe Mode, Download Mode & More

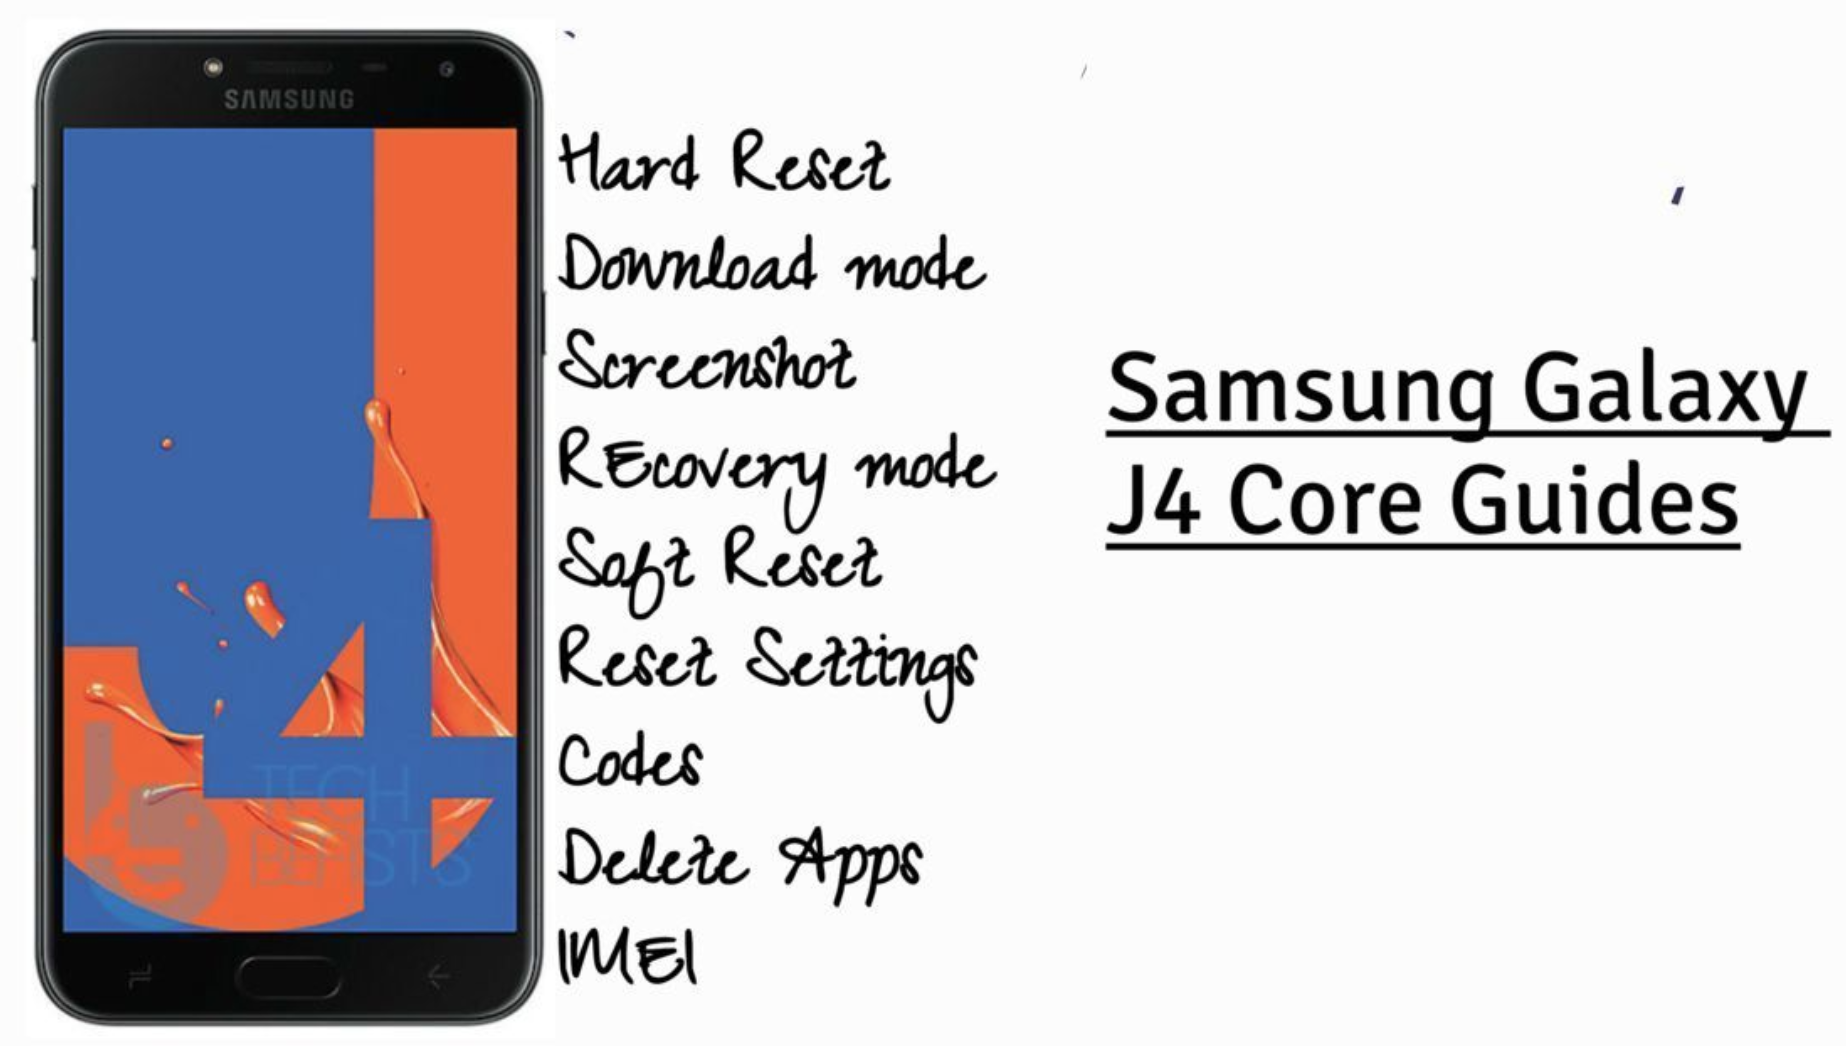
Samsung Galaxy J4 Core Guides Post: We’ve made this post for Samsung Galaxy J4 Core users. They can learn how to Hard Reset, Boot Into Recovery, Safe Mode, Download Mode and much more. You can say that this is the ultimate guides post for Samsung Galaxy J4 Core. Now before we move on to the Samsung Galaxy J4 Core Guides & Tricks. Let me give you an overview of Samsung Galaxy J4 Core specs.

Galaxy J4 Core Guides

Samsung Galaxy J4 Core:

The Samsung Galaxy J4 Core was released in 2018, November. The Phone came out with a screen of 6.0 inches having 720 x 1480 pixels resolution. Samsung Galaxy J4 Core was powered by Qualcomm MSM8917 Snapdragon 425 (28 nm) ( Quad-core 1.4 GHz Cortex-A53 ) CPU and Adreno 308. It had internal storage of 16 GB, 1 GB RAM. The camera at the back of this phone is 8 MP, f/2.2, and on the front, it is 5 MP. Inside this Phone, there was a 3300 mAh battery. The Phone originally ran on Android 8.1 Oreo (Go edition).

Samsung Galaxy J4 Core Guides & Tricks:

Summary:

Topics:
Safe Mode
Download Mode
Recovery Mode
Reset Network Settings
Clear App Data
USB Debugging Mode

Heed the instructions below and you will find out how you can Clear App data, New Software Update, Safe Mode, Recovery Mode, Download Mode and more on Samsung Galaxy J4 Core.

Hard Reset Galaxy J4 Core:

Heed the instructions provided in the following link and you will get to know how to hard reset Samsung Galaxy J4 Core.

Clear App data:

  1. On your Android phone, go to Settings.
  2. Find the Application Manager or Application settings.
  3. In the Application settings, swipe towards the All or the Running Applications tab.
  4. Select the application of which you want to clear the cache and data.
  5. A list of further options will appear now, tap the Storage option.
  6. Under the Storage option, you will find Clear Cache and Clear Data options.
  7. Tap the button according to your liking.
  8. That’s all.

Check New Software Update on Samsung Galaxy J4 Core:

  • Open Settings Apps.
  • Scroll down and Tap on software update.
  • It will now check the available software update.
  • If there is any, you will be notified and follow the on-screen instruction in order to proceed.

Enter Recovery Mode on Samsung Galaxy J4 Core:

  1. Power down your phone completely.
  2. Now press and hold Volume Up + Home + Power keys.
  3. Your phone will take a while to boot up. As soon as it does and shows you the Samsung logo, let the key go.
  4. Your phone will now load the recovery.
  5. Let the recovery load. Once done, you can operate the recovery mode freely using Volume Up, Down & Power keys.

Boot Samsung Galaxy J4 Core into safe mode:

  1. To boot into Safe Mode, turn off your phone completely. Now turn on your phone. While your phone boots up press the Volume Down key and keep it pressed until the phone boots into the system.
  2. As your phone boots into the system, you will find the Safe Mode watermark on the lower left corner. This means you are now in the Safe Mode.

Wipe cache partition on Galaxy Galaxy J4 Core:

  1. Shut down your phone.
  2. Boot into the recovery mode. Using the instructions provided above.
  3. Scroll down and highlight “wipe cache partition”.
  4. Press the Power button to make a selection.
  5. Highlight Yes and let the phone wipe its cache now. That’s all.

Reset network settings on Galaxy Galaxy J4 Core:

  1. On your phone, open Settings.
  2. Now in settings, go to About device.
  3. Tap Reset > Reset Network Settings > RESET > RESET.

Enable developer options and USB debugging on Galaxy Galaxy J4 Core:

  1. Go to settings.
  2. In settings, scroll all the way down and locate About device section.
  3. In the About device section, find build number in the Software details.
  4. Tap the build number 7 times to enable Developer Options.
  5. Once done, the Developer Options section will appear at the bottom where you found the About device option.
  6. Now go to Settings > Developer Options.
  7. Find USB Debugging mode in Developer Options and tap the radio button located next to USB Debugging mode to enable it.
  8. That’s all.

Enter download or Odin mode on Galaxy Galaxy J4 Core:

  1. Turn off your phone completely.
  2. Now press and hold Volume Down + Volume Down + Power button.
  3. Your phone will turn on and show you a warning.
  4. Press the Volume Up button to continue into Download Mode now. That’s all.
Important Message.
Please follow us on Facebook, Twitter, and Google Plus. Help us grow our social family.

Hard Reset Samsung Galaxy J4 Core [ Tutorial ]

0
Hard Reset Samsung Galaxy J4 Core [ Tutorial ]

With the help of this guide, you will be able to Hard Reset Samsung Galaxy J4 Core. There are a number of ways to factory reset Samsung Galaxy J4 Core and we’ve posted all of them.

This is the best solution so far to boost up the performance level on an Android device. Moreover, it is the ultimate solution of all your hardware or software problems on Galaxy J4 Core.

Now before we move on and start telling you how to Hard Reset Samsung Galaxy J4 Core. Let me give you an overview on Samsung Galaxy J4 Core so that you get to know why this device is so famous.


Samsung Galaxy J4 Core:

The Samsung Galaxy J4 Core was released in 2018, November. The Phone came out with a screen of 6.0 inches having 720 x 1480 pixels resolution. Samsung Galaxy J4 Core was powered by Qualcomm MSM8917 Snapdragon 425 (28 nm) ( Quad-core 1.4 GHz Cortex-A53 ) CPU and Adreno 308. It had internal storage of 16 GB, 1 GB RAM. The camera at the back of this phone is 8 MP, f/2.2, and on the front, it is 5 MP. Inside this Phone, there was a 3300 mAh battery. The Phone originally ran on Android 8.1 Oreo (Go edition).

Benefits of Hard Reset:

Summary:
*You can Wipe all of your Data Stored on your device.
*Easily fix all the performance issue.
*Bypass screen lock through hard reset.
*Bring the factory state.
*Fix all the firmware issues.
*Get rid of signal problems, loop issues, rebooting problems and power problems.

How to Hard Reset Samsung Galaxy J4 Core:

Method1:

  • Turn off your device.

  • Now press and hold home+Power+Volume Up key.

  • Release the power button once you see the logo, but keep holding home and Volume up keys.
  • Now when you see the Android logo, let go both buttons.
  • Use the volume down button to navigate and highlight wipe data/factory reset.
  • Now use the power key to select the option.
  • You have to select ‘Yes‘ when you’ll be prompted for the next menu.
  • Now wait for the process to be completed, once it’s done highlight ‘Reboot system now’ and press power button to select it.
  • All Done.

Method2:

  • Open Settings from the Home Screen.
  • Scroll down and Tap on Backup & Reset -> Factory Reset.
  • Now select Reset device.
  • To Confirm Choose Erase everything.
  • That will be all, wait for the process to complete.

That’s all. You have successfully Hard Reset Samsung Galaxy J4 Core. Please do tell us if you face any problem during this process.

Important Message.
Please follow us on Facebook, Twitter, and Google Plus. Help us grow our social family.

Guide to download One UI on Galaxy S9 and S9 Plus

0
Guide to download One UI on Galaxy S9 and S9 Plus
Galaxy S9 and S9 Plus

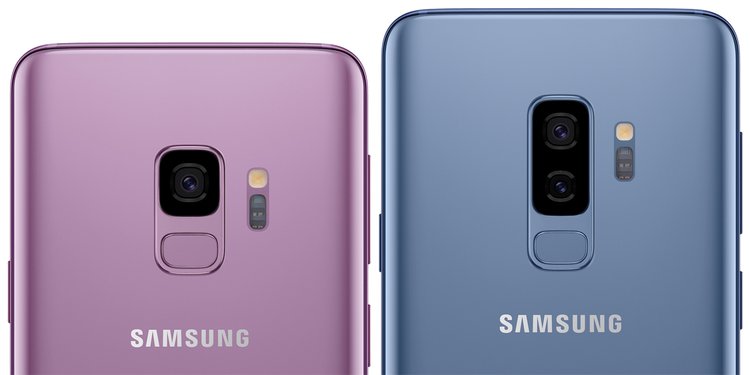
Samsung One UI beta has already landed in for the Galaxy S9, S9 Plus, and the Galaxy Note 9. The One UI can be installed on the Galaxy S9 and S9 Plus easily. This is your comprehensive guide to download One UI on Galaxy S9 and S9 Plus.

Samsung One UI on Galaxy S9 and S9 Plus
Galaxy S9 and S9 Plus

Samsung One UI

For years, Samsung has been facing severe criticism because of its software on the Android phones. Samsung makes the best smartphones. There is no doubt that Samsung has managed to remain the industry leader when it comes to handsets. However, Same is not the case when it comes to the software.

Samsung’s UI, which was called the TouchWiz UI, was famous for being the UI filled with the maximum junk and bloatware. Samsung used to add a lot of applications by default that the UI used to become a burden for the phone. There was absolutely no option to disable or delete those applications.

Samsung overhauled the TouchWiz UI and named it as Samsung Experience UI. By this time, Samsung had added the options to disable some of those inbuilt applications. The Samsung Experience UI was a big change, but it failed to satisfy the Samsung users once again.

Now Samsung is all set to roll out the Android Pie for its flagship devices released in 2018. With the Android Pie, Samsung is looking forward to refreshing its UI once again. Samsung is all set to say goodbye to the Samsung Experience UI and welcome the One UI. 

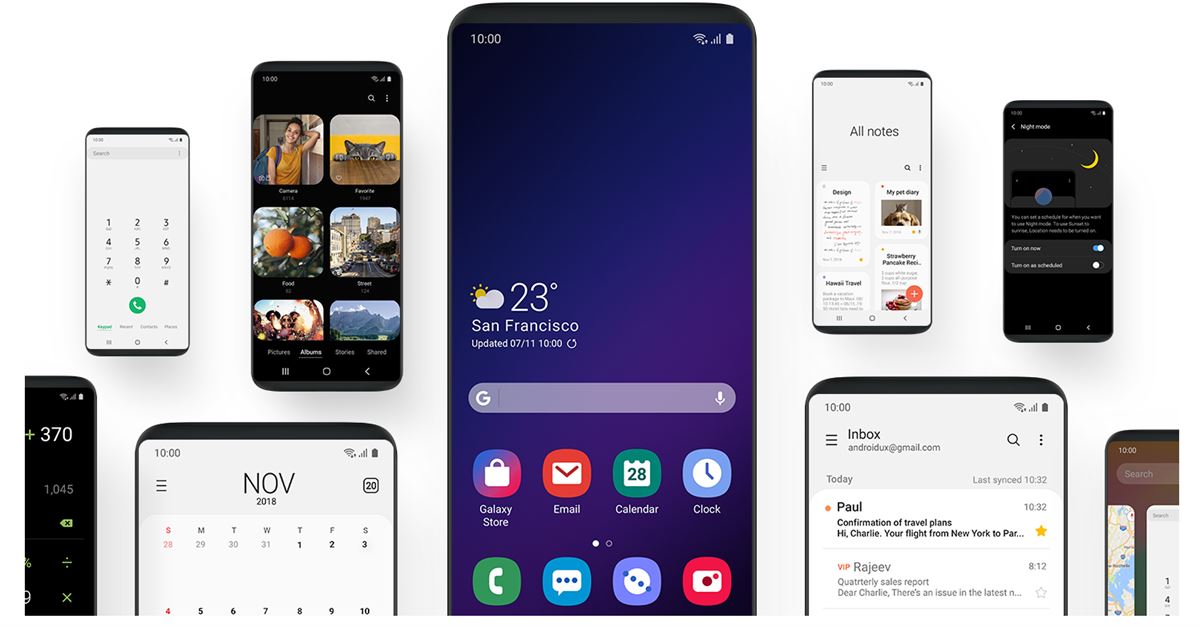
Samsung One UI looks much better, neat and clean, and bloatware free as compared to the Samsung Experience UI. The UI is bringing a whole new design for the icons, for the application drawer, and new interfaces for all the stock applications. The rounded icons look much better now.

One UI Notable Features

The notable changes include the addition of the Night Mode, better animations, a very clean UI for the settings application and an overall performance enhancement. The Night Mode enables a system-wide Dark Theme on the phones. Samsung users have been eagerly waiting for this one feature and its finally here. It is time to save a little more battery on your Super-AMOLED phone with the help of this Night Mode.Samsung One UI

Samsung One UI for Galaxy S9 and S9 Plus

Samsung One UI has entered the beta stage for the Galaxy S9 and S9 Plus. I am not sure when Samsung will release it officially. Samsung is slower than a turtle when it comes to software updates. Luckily, you can install the One UI beta manually on your Galaxy S9 and S9 Plus. This guide is just about that.

Remember that the purpose of installing the Beta version of such a software is to get an early hang of the software and also to see what are the bugs. Do not expect the Beta to work just like your everyday complete software. There may be a number of bugs in the Beta build. You are supposed to report the bugs to Samsung that may help Samsung to fix them in the final release. So, those of you who are willing to get this brand new Samsung Android software on your phones, go ahead and follow this guide download One UI on Galaxy S9 and S9 Plus now.

Note: After installing One UI Beta, you will stop receiving the OTA updates. To get the OTA updates once again, you will have to install the official stock firmware on your phone once again.

Download One UI on Galaxy S9 and S9 Plus

Compatible devices

  • Exynos Galaxy S9 – G960F
  • Exynos Galaxy S9 Plus – G965F
  • Snapdragon Galaxy S9 – G960U
  • Snapdragon Galaxy S9 Plus – G965U

Required Downloads

Preparations

  1. To flash this update, your Exynos S9 or S9 Plus must be running on the build number BRJ6. The Snapdragon S9 or S9 Plus must be running on the U3BRJ5 build.  Check it in the Settings > About phone > Software section of your phone.
  2. Backup all your important messages, contacts, call logs, and media content.
  3. You must have SD card to flash the update.
  4. Use the OEM Data Cable to connect S9 or S9 Plus to the computer.
  5. Disable Windows Firewall or any Antivirus if you have enabled one.

Install One UI on Galaxy S9 or S9 Plus

  1. First of all, open Odin3.exe on your computer.
  2. In Odin, click on the BL tab and select the BL file. Now, in the AP tab, select the AP file. In the CP tab, select the CP file, and in the CSC tab, select the CSC or Home_CSC file. Leave the User Data tab empty and ignore the remaining files as well.
  3. Let Odin load the files, it can take a few minutes. Now power down your phone.
  4. Press and hold Volume Down + Bixby + Power button to boot your phone into Download mode.
  5. As your phone goes into Download mode, leave the keys and connect it to the computer.
  6. Odin will show a Blue light behind the ID:COM box and also show “Added” in the log box. It means your phone is connected.
  7. Now hit the Start button in Odin.
  8. Odin will now flash the files on your phone and your phone will reboot.
  9. Once the phone has completely rebooted, shut it down once again.
  10. Now press and hold Volume Up + Bixby + Power button to boot into recovery.
  11. Once you are in recovery, use select “apply update from sd card” and press Power button to apply it.
  12. Now locate the update.zip file that you copied to the SD card for your phone.
  13. Flash the file, reboot your phone. All done! Find the brand new Samsung One UI running on your phone now.

Conclusion

So, that’s all with the installation of the One UI on your S9 and S9 Plus. You have the new UI running on your phone now. To start getting the OTA updates on your phone once again, you will have to flash the stock firmware on it. Installing the stock firmware is quite easy, just download the firmware and install it using Odin. Check out all the new features in One UI and let me know about your favorite features in the comments section below. If you have any questions or queries, feel free to reach out to me.

Source

Download Gmsanzhuangqi APK [GMS Installer for Chinese Phones]

19
Download Gmsanzhuangqi APK [GMS Installer for Chinese Phones]

GMS stands for Google Mobile Services. Your smartphone bought from China does not have the Google Mobile Services by default. If you wish to install the Play Store, Play Services, or any other application from Google, you will first need the Google Mobile Services. For the Chinese Android phones, there is a number of GMS installers available, but a very few works. Recently, I wanted to install the GMS and Play Store on my Huawei Honor 8X. It was quite a hard task to find the correct version of GMS. That is when I came across GMSanzhuangqi APK, which is another version of Google Mobile Services. The APK can be installed on any Chinese phone including those from Honor, Xiaomi, Vivo, and many others. If you have been looking for the GMSanzhuangqi APK, you may have landed on the right spot. From this post, you can download Gmsanzhuangqi APK, which is also known as GMS Installer, for your Chinese Android phone.

Gmsanzhuangqi APK
Google Mobile Services

The Absence of GMS in your Chinese Android phone

Before you download Gmsanzhuangqi APK, let us learn a little more about the absence of Google Mobile Services in the Chinese phones. The Chinese government does not allow applications like the Play Store, Facebook, Instagram, WhatsApp, and many others to work inside China. This is because the Chinese government does not trust these applications and it does not want to take the risk of letting its data fall into the wrong hands. This is why they completely ban all such applications in the phones and on all the mediums as well. The Chinese Android users have their own app stores, they have their own social media platforms, and they have their very own communication applications.

Importance of GMS Installer

Now comes the most important part, why do you need the Google Mobile Services? Well, the name of this module has the answer. The Google Mobile Services lay down the basis for anything called Google to work on your phone. Basically, there are two installers that you need to install the Play Store on your phone. One is the GMS installer and the other is the Google Installer. GMS Installer brings the Google Mobile Services and the GMS installer brings the Google Mobile Services. Google Installer includes the Play Services, Play Store, Google Calendar, Google Play Music and all other basic Google apps for an Android phone.

Download Gmsanzhuangqi APK or Google Installer

GMSanzhuangqi APK – Download

  1. Copy the APK to your phone.
  2. Allow Unknown Sources on your phone using Settings > Security & Privacy.
  3. Using a File Manager, find and install the Gmsanzhuangqi APK.
  4. After installing this APK, you need to install the Google Installer as well.
  5. Find the Google Installer in this post and install it on your phone to get the Play Store. That’s all.

Update 9/25/2019 – New Google Core Framework Installer Available

A new version of Google Core installer is out for EMUI 10 and EMUI 9. This works on new phones like the Huawei Mate 30 series and also on the older phones. You can download this latest Google Installer from here.

Conclusion

By installing the Gmsanzhuangqi APK, you will be able to get the appropriate Google Mobile Services on your Android phone. After this, you will install the 6 essential Google Apps with the help of Google Installer. This will bring the original Play Store on your phone. This is very helpful for the phones which were initially purchased from China but were taken to another country later on. The Chinese phones may be restricted to use these apps within its premises, however, you are free to use these applications once you move out of the Peoples Republic of China. If you have any questions, feel free to reach out to me using the comments section below.

Last Updated: 26th October 2019

Best 10 Minute Mail Alternatives

0
Best 10 Minute Mail Alternatives

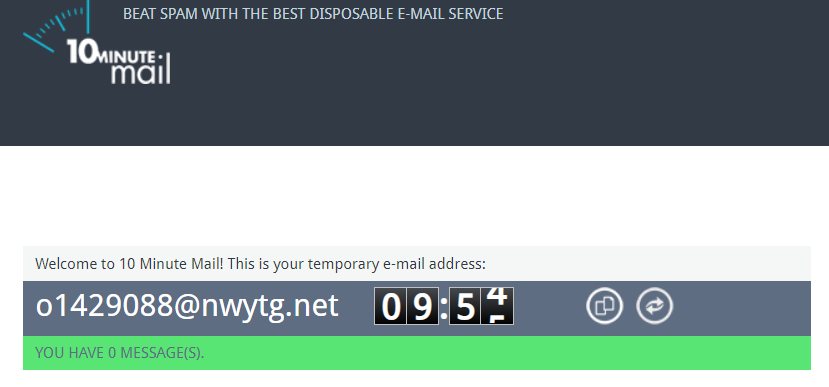
10 Minute Mail is the most popular temporary email service. This service is useful for the users who want to avoid spam in their main email inbox. 10 Minute Mail is a great solution to avoid all those useless emails taking all the spaces in your mail inbox. For example, you are signing up on a website/blog temporarily, but you don’t want that website to come after you on your main email address, you can quickly generate a temporary email address via 10 Minute Mail. 10 Minute Mail itself is a very much complete tool, however, it may start acting up at times. In the aforementioned case, you need the best possible alternatives to Minute Mail. I have collected the best Minute Mail Alternatives and listed them here. Temporary email users can take a look on this list to get the 10 Minute Mail alternative.

"<yoastmark

Best Minute Mail Alternatives

Before taking a look at the alternatives, it is important to know what criteria I have used to pick up these Minute Mail rivals. I have checked the status of all these websites and listed them here according to the amount of traffic these websites receive. The alternative listed at the top gets the highest amount of visitors among all other alternatives and then the list goes on in ascending order. The higher number of users on a website simply means that the website is being trusted by a large audience, so I believe that this is the best possible criteria. Furthermore. I have personally gone through the UI of each and every single webpage which has also remained a factor in making this list.

Temp-mail

"<yoastmark

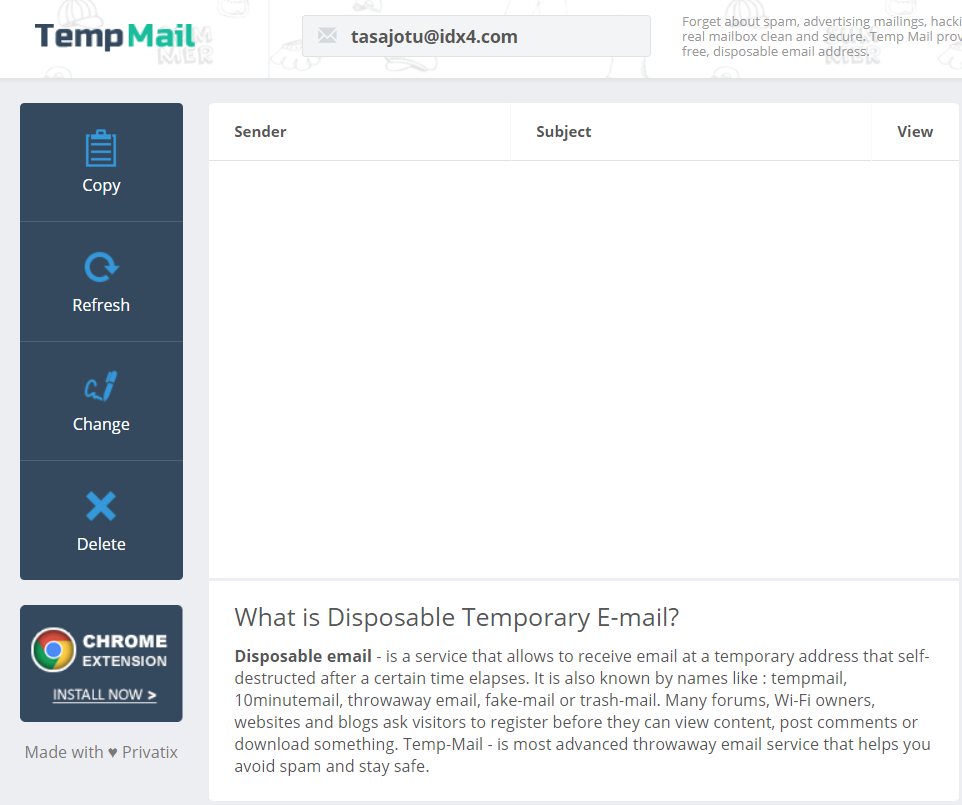
After 10 Minute Mail, Temp-mail is the most popular disposable email service. The website comes with a very easy-to-understand UI. The moment you open Temp-mail, you will find your temporary email address at the top. Below the email address, you have the mailbox showing the sent or received emails. On the left side, you will find options such as copy, refresh, change, and delete. Clicking on change will let you make a new email address. You can make your desired email address but you will have to use the domains provided by Temp-mail only.

Another great feature of Temp-mail is the Google Chrome extension. If you don’t feel like opening the website every now and then, you can get their Chrome extension and quickly grab a temporary email address every single time you need one.

Mailinator

"<yoastmark

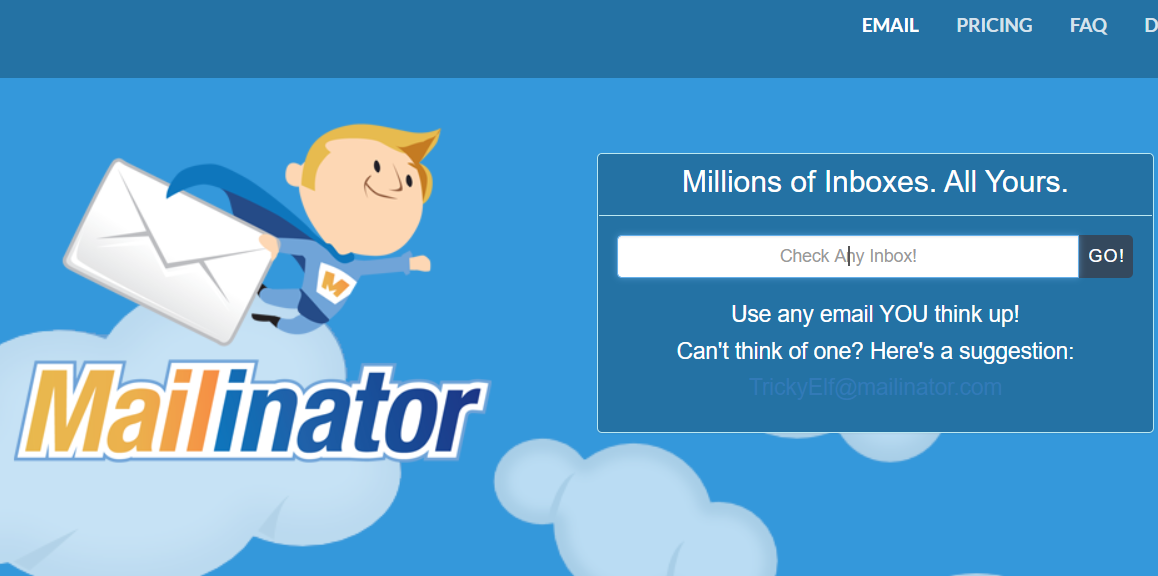
In the list of Minute Mail Alternatives, we have Mailnator as well. Mailnator is another great service, however, it works slightly different. Mailnator is a public email service. All the emails sent to Mailnator are in the public domain. When you open this site, you simply find a form asking you to enter your desired email address. You can type in any ID and generate your free disposable email address. Mailnator is one good way to prevent spam in your main email inbox. If you wish to get private accounts for your team or your company, you can take a look at the paid services by Mailnator as they have the team and enterprise packages as well.

Fakemailgenerator

"<yoastmark

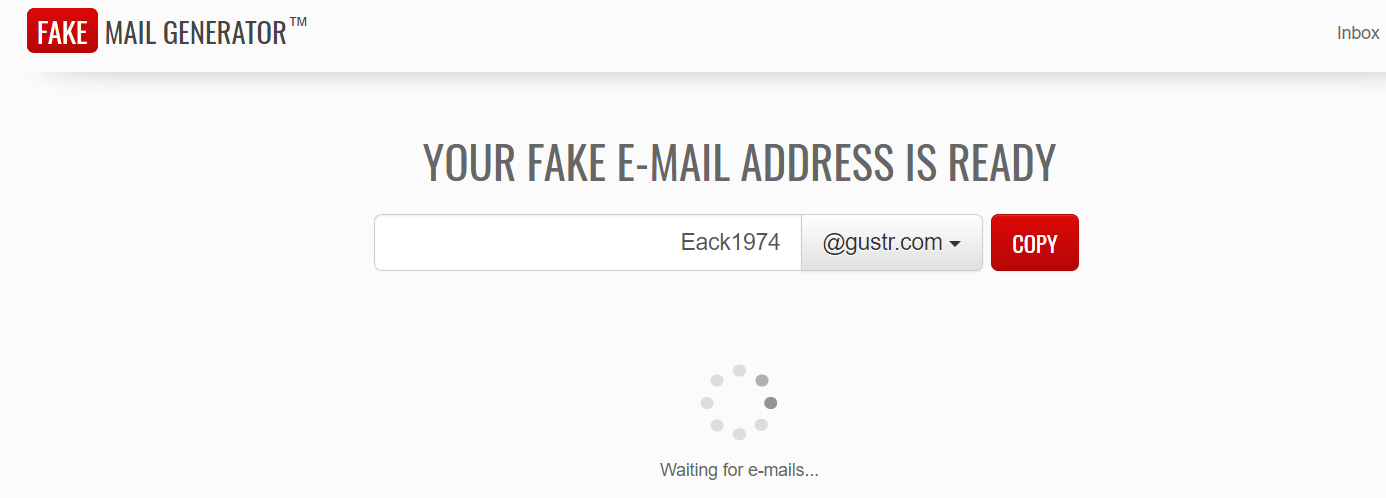
Fake Mail Generator is yet another free disposable email service. It is a fine 10 Minute Mail Alternative. As you open the site, you find your free email address on the front and there is the inbox button on the top-left corner of the screen. Fake Mail Generator gives you the option to generate any email address of your choice as well. There isn’t much else about the fakemailgenerator. One thing to note here is that Fakemailgenerator doesn’t have its SSL certificate, so use this site at your own risk.

Guerrillamail

"<yoastmark

Just like Fakemailgenerator, Guerrilla Mail does not have an active SSL as well so use it with a little bit of caution. Guerrilla Mail has got a little bit of confusing UI. The UI is too much cluttered. You get your free email address right in the center of the screen on the website. You can create a scrambled email address as well. The normal email address is readable, easy to use, while the scrambled email address is way too complex. Guerrillamail has its own Android application as well.

Generator.email

"<yoastmark

Generator Email is the service that I personally liked and there are a few reasons for that. This actually looks like the most authentic email service. Its not a 10 Minute Mail service, the temporary email address stays active for as long as the temporary domain given on Generator Email is active. You can even add your own email address to Generator Email in order to avoid the loss of access to your mail inbox. Generator Email comes with sound and pop-up notifications. It has the ability to provide you level 1 and level 2 domains for emails.

Emailfake

"<yoastmark

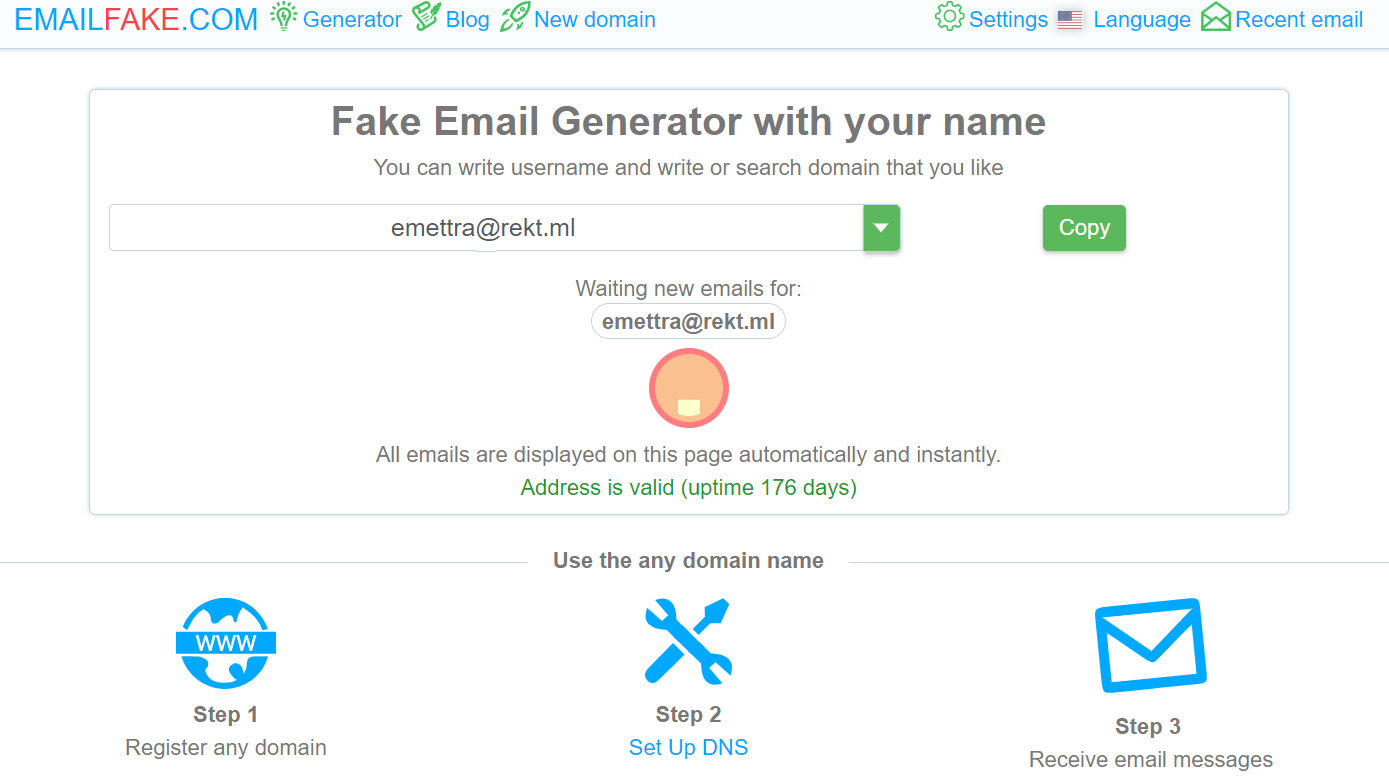
Emailfake is much like the Generator Email. Your temporary email address is going to be active for the number of days the domain is active for. The uptime of each and every domain is given below the list of domains. There are 10s of domains that you can create your temporary email address with. If you want to use the domain of your choice, you will have to set up the DNS using the Emailfake nameservers. Overall, Emailfake is quite a good service to avoid spam, to sign up for temporary sites, or to even share with the site/blogs/companies whom you don’t want to come after you.


Tempmailaddress

"<yoastmark

Temp Mail Address, in my personal opinion, is one great service. The reason? You have the ability to chose the expiry date of your email address here. You can set the expiry time of your temporary email address to 10 minutes, 60 minutes, 1 day, 3 days, 1 week, or 2 weeks. It provides you with your temporary email address right when you open this website. When you try changing the expiry time, your email address does not change. It simply extends the expiry time so you do not have to worry about losing this temporary email. I could not find the option of changing the domain on this site.

Maildrop

"<yoastmark

Want no complexity, no confusion, no options, no nothing? Maildrop is your choice. This is a simple and straightforward temporary email service. Open this site, grab your fake email address and use it. Maildrop uses its own domain to give you the temporary email addresses. It does not have a list of third-party domains. I am not sure about the expiry time on Maildrop. I could not find the expiry time on this site. I believe that your email address is going to stay active for as long as Maildrop is going to exist.

Minuteinbox

"<yoastmark

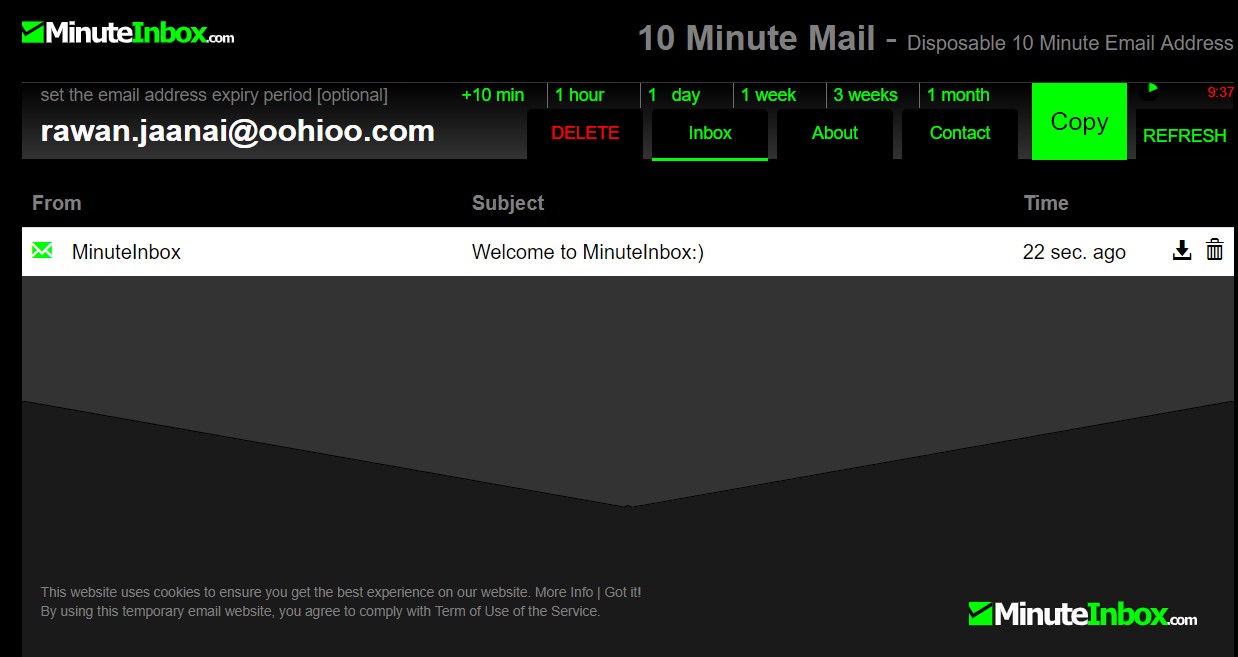
The Minuteinbox looks like a real alternative to 10 Minute Mail. It gives you your temporary email after you open the site. Your email then stays active for the time you want to keep it active. This site gives you the option to extend the expiry time as well. It is totally up to you whether you want to use the temporary email for 10 minutes, 10 hours, or 10 days.

Crazymailing

"<yoastmark

Crazymailing is another cool service. It comes with its own Chrome extension as well. This service allows users to create 10 Minute temporary emails for free. Users can register and extend the expiry time up to 30 minutes. Registration is free and you can use Facebook or Google account to login. Crazymailing’s UI is very simple. It shows you the disposable email address and the inbox right up on the home page.

20minutemail

"<yoastmark

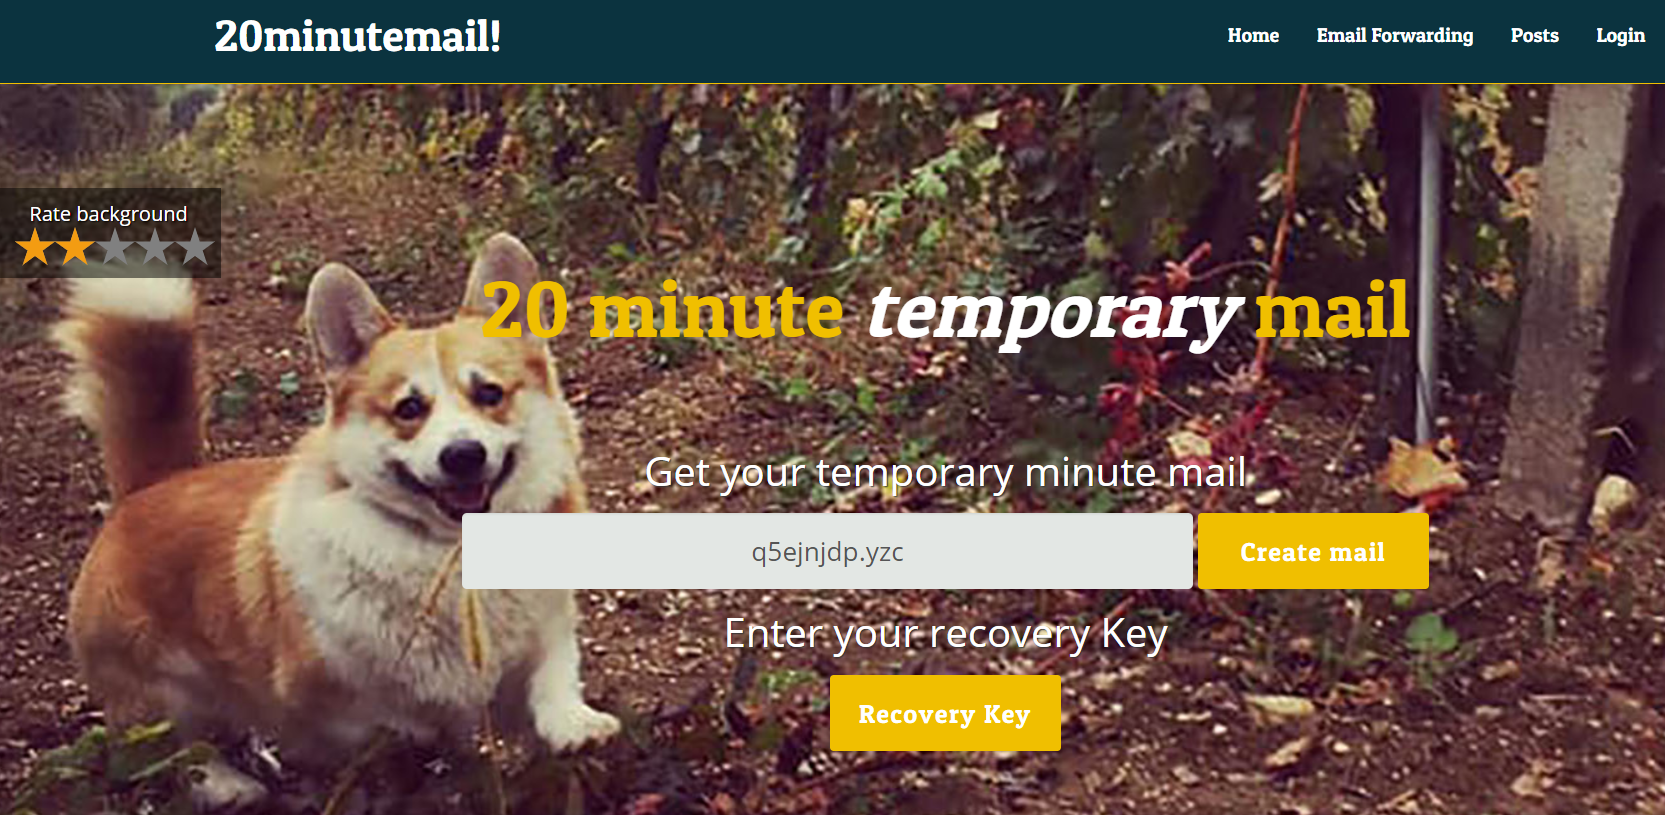
Just as the name suggests, this is a 20 Minute Mail service. You can create an email address and use it free for 20 minutes. The accounts can be attached to a recovery key so if you wish to recover an expired account, later on, you can use the recovery key to bring it back. 20 Minute Mail website does not have its own SSL so you have to be a little bit careful while using this website.

GetNada

GetNada is the second last service on our list. This is a handy service. You can add multiple email inboxes on GetNada simultaneously. GetNada has 10s of domains that you can create your temporary email address with. GetNalsollso has its own Google Chrome extension.

"<yoastmark

Dispostable

"<yoastmark

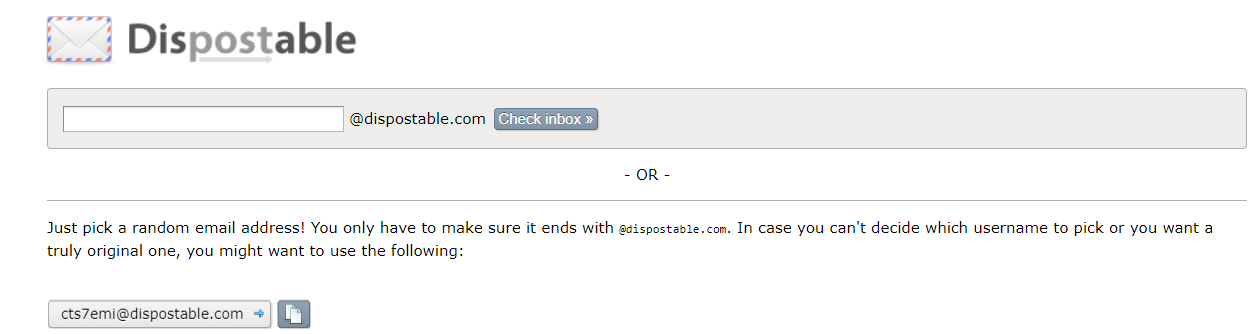
Of all the Minute Mail alternatives that I have mentioned above, Dispostable is the least complex. It just has your temporary email address on the front. There is absolutely nothing else on their website which is why I am putting it here. For the users who do not even want to read any additional text, Dispostable is their go-to place.

Conclusion

That’s all with the list of best alternatives to Minute Mail. I have listed all the websites according to their rank and their UI. You just have to be careful with those without an SSL certificate. Remaining sites are completely safe and secure to use. If you have any other nice website to add to this list of Minute Mail Alternatives, feel free to drop it in the comments section below. Don’t forger to drop your feedback below as well. Stay connected 🙂

Christmas Lights Wallpapers HD Free 2018

0
Christmas Lights Wallpapers HD Free 2018

Download the best Christmas Lights Wallpapers Free for your PC & Desktop. Christmas is all about decorations and lights are the most essential part of these decorations. That’s why we have gathered Best Christmas Lights Wallpapers for you all. All of these Wallpapers are in HD.

Christmas Lights Wallpapers

Christmas lights:

Christmas lights (also known as fairy lights) are lights used for decoration in celebration of Christmas, often on display throughout the Christmas season including Advent and Christmastide. The custom goes back to when Christmas trees were decorated with candles, which symbolized Christ being the light of the world; these were brought by Christians into their homes in early modern Germany.

Christmas trees displayed publicly and illuminated with electric lights became popular in the early 20th century. By the mid-20th century, it became customary to display strings of electric lights along streets and on buildings; Christmas decorations detached from the Christmas tree itself.Wikipedia

Christmas Lights Wallpapers HD 2018:

The images we are providing is for all devices such as PC, Desktop, Computer, Laptop, Android, iOS, Windows and more.

How To Download Wallpapers:

Important:
If you are on a PC Browser, Open the Wallpapers -> Right Click -> Save Image As.
On a smartphone or tablet. Select the Wallpaper-> Tap & Hold on the Images -> Tap on Save or Download.

Christmas Lights Wallpapers:

Download-free-Xmas-Light-Full-HD-Wallpaper
Coloful-Christmas-Light-HD-Wallpaper
Christmast-Light-trees-Wallpaper
Beautiful-Christmast-Lights
HD-free-christmas-lights-wallpapers
Dublin-christmas-lights-images
Download-hd-christmas-lights-wallpaper
Christmas-lights-desktop-Wallpapers-HD-photo-images
Christmas-lights-desktop-Backgrounds
Photo-Christmas-Lights-Image-Wallpaper
Christmas-Lights-Wallpaper-HD-Desktop
Christmas-tree-lights-wallpaper-background-hd-wallpapers
Free-Desktop-Christmas-Lights-Wallpapers
Free-Desktop-Christmas-Lights-Wallpapers-Download
Free-Desktop-Christmas-Lights-Wallpapers-Winter
HD-christmas-lights-wallpapers
Christmas-Lighting-HD-Photos
Christmas-Lights-Widescreen-Wallpaper
christmas-lights-widescreen-new-wallpaper
Christmas-lights-wallpapers-free-hd
Christmas-Lights-Wallpapers
Christmas-lights-wallpaper-outside-download
Christmas-lights-wallpaper-images-hd-wallpapers
Christmas-lights-hd-wallpaper
Christmas-Lights-Wallpaper-HD-Photo
Free-Desktop-Christmas-Lights-Wallpaper-HD
Free-Download-Christmas-Lights-Wallpaper-HD
Christmas-Lights-Tree-HD-Wallpaper
Christmas-Lights-Tree-Desktop-Backgrounds
Christmas-lights-wallpaper
Christmas-lights-wallpaper-and-background
Christmas-lights-wallpaper-hd-widescreen
Christmas-Lights-Wallpaper-HD
Christmas-Lights-Wallpaper-HD-Free-Download
Christmas-Lights-Wallpaper-High-Quality
Christmas-Lights-Desktop-HD-Wallpapers
Christmas-lights-cookies-winter-new-year
Christmas-lights-clip-art-wallpaper
Christmas-lights-blur-wallpaper-hd-wallpapers
Christmas-lights-bokeh-wallpaper-photos-hd-wallpapers
Christmas-Lights-And-More
Important Message.
Please follow us on Facebook, Twitter, and Google Plus. Help us grow our social family.

Merry Christmas Wallpapers HD 2018

0
Merry Christmas Wallpapers HD 2018

Let’s celebrate the christmas with these awesome Merry Christmas Wallpapers HD 2018 free. Christmas is celebrated all over the world, People decorate their houses, put light on their houses, bring trees and decorate them. I’ve collected the best Merry Christmas Wallpapers HD 2018 free.

Christmas is an annual festival commemorating the birth of Jesus Christ, observed primarily on December 25 as a religious and cultural celebration among billions of people around the world. A feast central to the Christian liturgical year, it is preceded by the season of Advent or the Nativity Fast and initiates the season of Christmastide, which historically in the West lasts twelve days and culminates on the Twelfth Night in some traditions, Christmastide includes an octave. Christmas Day is a public holiday in many of the world’s nations, is celebrated religiously by a majority of Christians, as well as culturally by many non-Christians, and forms an integral part of the holiday season centered around it.Wikipedia

Merry Christmas Wallpapers HD 2018:

The images we are providing is for all devices such as PC, Desktop, Computer, Laptop, Android, iOS, Windows and more.

How To Download Wallpapers:

Important:
If you are on a PC Browser, Open the Wallpapers -> Right Click -> Save Image As.
On a smartphone or tablet. Select the Wallpaper-> Tap & Hold on the Images -> Tap on Save or Download.

Merry Christmas Wallpapers HD:

Merry Christmas Wallpapers HD
HD-Photos-Merry-Christmas
Free-Images-Merry-Christmas
Merry-Christmas-Wallpapers-HD
Merry-christmas-wallpapers-hd-free-download
Merry-Christmas-Tree-HD-Wallpaper
Merry-christmas-strawberry-dessert-wide
/Merry-christmas-snow-man-backgrounds
Merry-Christmas-Images
Merry-Christmas-hd-Wallpapers-Images-Free-Download
/Merry-Christmas-Digital-Images
Merry-Christmas-1080p-HD-Wallpapers
Christmas-free-hd-wallpapers-for-desktop
1920×1080-Merry-Christmas-Backgrounds-HD
Merry-Christmas-Wallpapers-hd-2015-free-download
merry-christmas-wallpapers-2018-free-download
Merry Christmas Wallpapers HD Free
merry-christmas-wallpaper-hd-download-free
merry-christmas-snow-hd-wallpaper
merry-christmas-HD-wallpaper-windows-background
merry-christmas-and-happy-new-year-holiday-wallpaper
Free-Download-Merry-Christmas-Lights-Wallpaper-HD
cute-quotes-merry-christmas-wallpaper
christmas-tree-wallpaper-HD-free-download
merry_christmas_2015-hd-wallpaper
Merry-Christmas-1080p-Widescreen-HD-Wallpaper
merry-christmas-wallpapers
HD-Merry-Christmas-Desktop-Photos
Free-Christmas-Wallpaper
Merry-christmas-wallpapers-hd-desktop
Important Message.
Please follow us on Facebook, Twitter, and Google Plus. Help us grow our social family.