Home Blog Page 505

Install Android 4.3 on Samsung Galaxy S4 Mini GT-I9190 using CM 10.2 Custom ROM.

10
Install Android 4.3 on Samsung Galaxy S4 Mini GT-I9190 using CM 10.2 Custom ROM.

Samsung’s flagship device Galaxy S4 was unveiled back in March, 2013 and following the flagship its mini version came out as well known as Galaxy S4 mini. Out of the box Samsung Galaxy S4 mini runs on Android 4.2.2 and Samsung hasn’t announced any firmware updates, nor any date is hinted so far for any kind of update, the device is still running on Android 4.2.2 Jelly Bean.

While Android 4.3 is already there and now Android 4.4 KitKat has also come out, many of the Galaxy S4 mini owners might be looking for a way to get hands on an updated Android version on their device. The developers over xda-developers forum have always done the awesome work for the users, and they’ve successfully made an Android 4.3 firmware based on Cyanogenmode 10.2 custom ROM. We’ll be having a look on the method to update the 3G variant of the Galaxy S4 mini GT-I9190 to Android 4.3 CM 10.2 custom ROM.

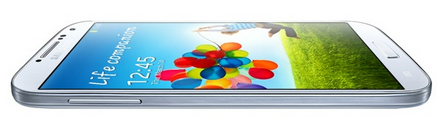
GalaxyS4mini-Press-07-580-90

While installing custom firmwares /rooting your phone, please keep it in mind that the Root Process or the custom roms aren’t  official and have nothing to deal with Google Inc and the device manufacturer, which is Samsung in our case. Follow the guide carefully to prevent any damages to the device as the method is completely custom. Make sure that you’re doing it at your own risk.

Here are some pre-requisites you must have before you begin:

      1. Make sure that you’ve rooted your device and installed cwm recovery. Here’s our guide to root and install cwm on your Galaxy S4 Mini GT-I9190. Only use this recovery, otherwise you may result in bricking your device.
      2. Make sure that you’ve battery charged over 60%, this is highly recommended in order to prevent any mishap during the flashing process.
      3. Make sure that you have battery charged over 60 % and have backed up all your important ContactsCall Logs & Messages.It is highly recommended in case of any mishap or data loss to backup all your important data. Also backup the list of applications that you want to install later.
      4. Backup your ROM using the Backup option in the CWM recovery. This is recommended in case you want to return to your old ROM after flashing the custom ROM.
      5. All set? Let’s move forward.

logo-cid

How to Install Android 4.3 using CM 10.2 custom ROM on Samsung Galaxy S4 Mini GT-I9190:

      1. Download the CyanogenMod 10.2 Android 4.3 Custom ROM and place it on your phone’s sd card.
      2. Download gapps-jb-20130813-signed.zip and place on your phone’s sd card.
      3. After having placed both files on your phone’s sd card, boot into the recovery mode, to do so, press and hold Volume Up + Home Button + Power Key simultaneously unless you see the recovery mode.
      4. In recovery mode select ”install zip from sd card > choose zip” and select the downloaded CyanogenMod 10.2 ROM file that you placed on your sd card and select ”yes”.
      5. It will take a while to install the CM 10.2 custom ROM, after that once again select ‘‘install zip from sd card > choose zip’‘ and select the gapps-jb-20130813-signed.zip file this time and select ”yes”, it will flash the gapps on your device.
      6. Reboot your device now and enjoy the newly installed Android 4.3 CM 10.2 custom rom on your Galaxy S4 Mini. 
      7. In case your device is strucked up in the boot loop, boot into the recovery mode and wipe data/cache, and try rebooting it.

That’s All! In case you got any queries, feel free to write us in the comment box below. We will try our best to help you out. Thanks All!
How to Root & Install CWM Recovery on Huawei Ascend P6

0
How to Root & Install CWM Recovery on Huawei Ascend P6

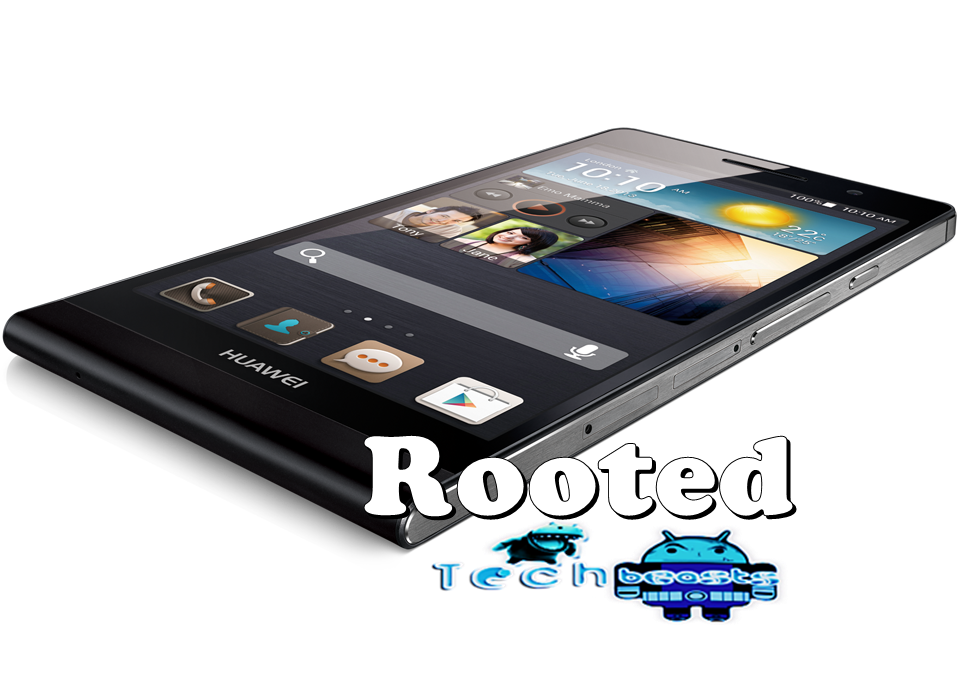
At 6.18 mm, Huawei Ascend P6 is the world’s slimmest smartphone by Huawei Technologies. The smartphone was unveiled by Huawei back in June, 2013. Huawei Ascend P6 became a tough competitor for the flagship devices of manufacturers like HTC, Sony and Samsung as the device paced up the massive specifications at a lower price with a premium and elegant body.

The phone sports a 4.7 inch 720p display with 312 ppi. The device is powered up with Huawei K3V2 Quad-core CPU clocked at 1.5 GHz. There is an 8 MP camera at the back, while the front facing camera is ranged at 5 MP, under the hood it has got a massive 2000 mAh battery. Out of the box Huawei Ascend P6 runs on Android 4.2.2.

Huawei Ascend P6 has been caught up by the developers as well and there is a number of mods and custom roms being developed for the device, but to enjoy all the mods, custom roms and custom recoveries you need root access. Not only the these few things, root access also allows you to back up your current rom completely using a custom recovery, you can also play with the clock speed of your device and enhance the battery life, performance by making changes to the internal system using the root access. In the following post, we’ll be having a look on a method to root the Huawei Ascend P6 and also how we can install a custom recovery on the device.

ascend-model2

Before we head to the root and custom recovery installation method, here are some pre-requisites you need to have:

  • Make sure that your phone’s battery is charged over at least 60%.
  • Use the original data cable for establishing the connection between your PC and Mobile phone.
  • Use this method only on Huawei Ascend P6, not on any other device.
  • Make sure that you back up all of your important ContactsCall Logs & Messages. Although rooting your device does not delete any files, but this is highly recommended as it may become helpful in case of any mishap or data loss.
  • Disable any firewalls/antivirus applications if you have installed on your PC.

Things you need to download:

        • Download and Install Huawei USB Drivers – Download Here.
        • Download and extract this Root Tool – Here.

How to Root Huawei Ascend P6:

      1. Now on your device, tap Settings > About Device, and tap the ”Build Number” for 7 times to enable the Developer Options, skip this if you have already enabled the developer options.
      2. After the developer options are enabled, open them in settings and enable ”USB debugging mode”  [Settings>Developer Options> USB debugging].
      3. Now open the extracted Root Tool, and connect your phone to the PC.
      4. Hit next on the root tool, and hit Root Now!
      5. Phewww! You’ve successfully rooted your device now, the ”Rooted” message will appear in the root tool screen.genroot-1 genroot-2

Now Here’s how you can install the ClockworkMod recovery.

      1. Make sure that you’ve already rooted your phone.
      2. Download this TouchRecoveryInstaller-vX_X.apk. You can download it either on your phone directly or download it on your PC and place it on your phone.
      3. Install the downloaded apk file on your phone.
      4. Launch the installed ”Recovery Installer” from the app drawer, or from homescreen shortcuts.
      5. Select ”Install Recovery”, and grant it the root privileges as soon as it prompts.
      6. Now select ”Reboot into Recovery” to boot into the CWM recovery mode.
      7. That’s all. You’ve successfully installed ClockworkMod recovery and also rooted your phone as well.

How to keep Root after OTA Updates

The OTA updates rolled out by the manufacturers wipe the root access on your phone. In case you don’t know how you can restore the root access after OTA update, you’ll have to root your phone once again, but there is no need to do it as you can restore it using the OTA Rootkeeper App which is available in the Google Play Store. The app creates backup of your root and simply restores it after any OTA update.

That’s All. Please report us if the guide works perfect for you. In case of any queries or difficulties feel free to write us below. Thanks All.

How To Install Android 4.3 Jelly Bean On HTC Sensation/ Sensation XE.

73
How To Install Android 4.3 Jelly Bean On HTC Sensation/ Sensation XE.

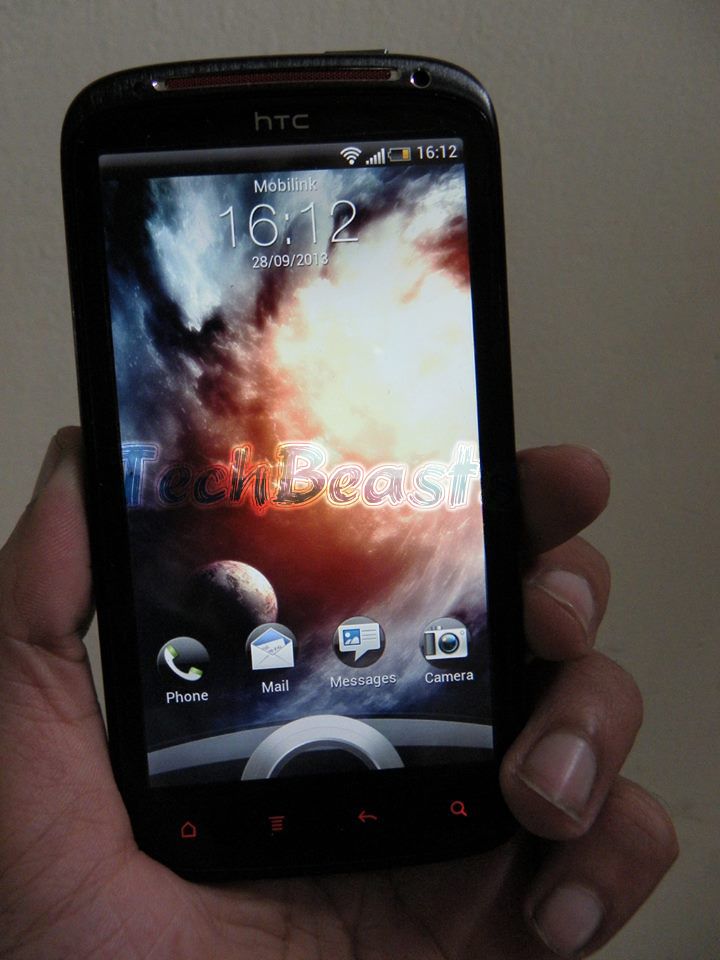
Finally, I am satisfied from HTC Sensation XE, i completely underestimated such device, while developers are doing everything they can to keep this device alive, here I am criticising it due ti low Custom Support, but today while on Goo Manager, i found Android 4.3 CM 10.2 for HTC Sensation XE and this time it’s from official people, both Hydra and CyanogenMod team. Last time, I share with you Android 4.1.2 but without any testing, but this time, I have tried this Android 4.3 ROM on my device and it’s working perfect. A little Glitch with Maps 7 but downgrading it to Maps 6 will solve the whole problem.

f4oSyQR

In this Article, we will show you How To Install Android 4.3 Jelly Bean On HTC Sensation XE.But before we begin, Make sure that you have battery charged over 60 % and have backed up all your important ContactsCall Logs & Messages.It is highly recommended in case of any mishap or data loss to back up all your important data.

Disclaimer:

The methods involved in flashing custom roms and rooting your phone is highly custom and may result in bricking your device, and has nothing to do with Google or the device manufacturers which is Samsung in our case. In case of any mishap we may not be held responsible. Follow these instructions to the letter to avoid any mishap or bricking. Make sure that whatever you do, you are doing it at your own responsibility.

Important things:

  • Your Device must be Rooted and CWM Recovery must be installed on it. HOW? Follow the Link
  • Enable USB debugging mode.
  • Make sure that battery level is at 85% or more.
  • This Tutorial is Only For HTC Pyramid [ Sensation and Sensation XE].

How To Install Android 4.3 Jelly Bean On HTC Sensation/ Sensation XE.

1371457_10152237114039377_1727799490_n

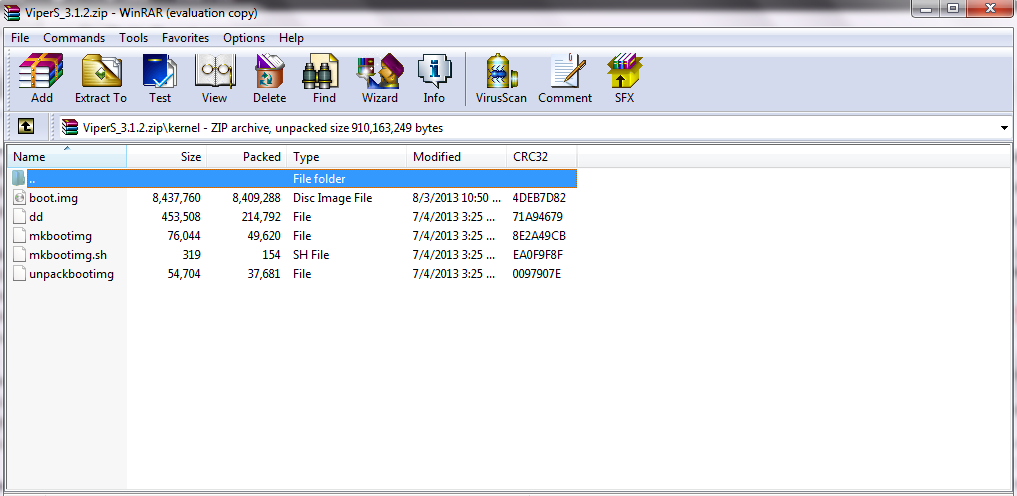
  • Download Android 4.3.zip File and Google Apps.
  • Make Sure that USB Debugging is enable, goto Settings > Developers Option and Tick the USB debugging.

Screenshot_3

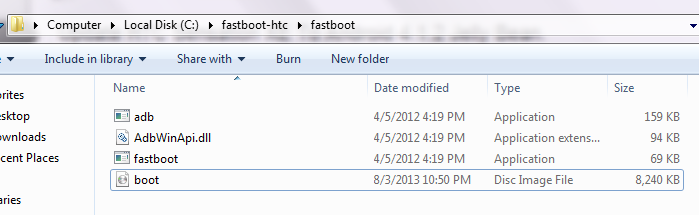
  •  Copy and paste the boot.img to the Fastboot Folder.

Screenshot_4

  • Now copy and paste the CM 10.zip and Google Apps file to the root of your SD card.
  • Turn off your phone and open Bootloader/Fastboot mode. How? Press and hole Volume Down + Power button until you see some text on screen.
  • Now Open Command prompt in Fastboot Folder, How? Hold Shift Key and Right Click anywhere in the Fastboot folder.

Screenshot_17


  • Now type in the following command: fastboot flash boot boot.img Press Enter.

Screenshot_1


  • Then type in the following command: fastboot reboot.

Screenshot_2

  • After the reboot, take out the battery and wait for at least 10 seconds.
  • Then re-insert the battery and enter Bootloader mode. How? Press and hold Power + Volume Down button till you see some text on screen, From bootloader select recovery.
  • Choose “Wipe Cache” Partition first.
  • Choose ‘advance’ and select ‘Devlik wipe cache’, so you won’t stuck in any Boot loop.
  • The finally choose ‘Wipe Data/Factory Reset’.
  • Now select ‘Install zip from sd card’, then select ‘choose zip from sd card’.
  • Select the JB 4.3.zip file and confirm the installation on next screen.
  • After the installation, Again select ‘install zip from sd card’ and ‘choose zip from sd card’ and select Gapps.zip file and confirm installation on next screen.
  • After that, +++++Go back. and Reboot System now. Wait for 5-minutes for the first run.

Voila that’s it you HTC Sensation XE is now upgraded to Android 4.3 Jelly Bean, to check Goto settings> About > Software Version.


How To Install Android 4.3 Dirty Unicorns Jelly Bean Custom Firmware On Galaxy S I9000.

0
How To Install Android 4.3 Dirty Unicorns Jelly Bean Custom Firmware On Galaxy S I9000.

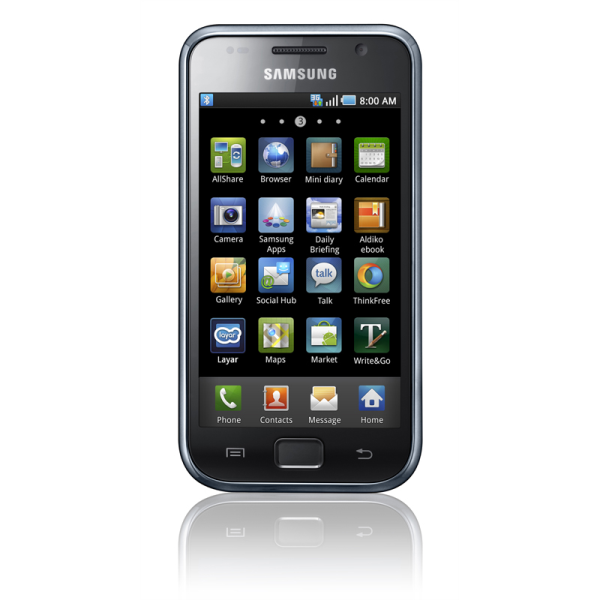
Samsung Galaxy S was the first member if Galaxy Series and after that Samsung started its way to the top. Officially Samsung Galaxy S was done with the update of Android 2.3 GingerBread, but developers don’t want this device to die. So, despite being that old it has received the update of Android 4.3.1 Jelly Bean, where it’s competitors are long gone. The main reason why i like Samsung Smartphones is only because of the update, whether Custom or Official, and since Samsung has said that now they will change it’s software and make i a lot better than now, owning a Samsung device is a real good option.

Untitled_1

In this article, we will show you How To Install Android 4.3 Dirty Unicorns Jelly Bean Custom Firmware On Galaxy S I9000. But before we begin make sure to Backup all your data placed on your phone’s internal storage, contactscall logs and messages. This is necessary as if something go wrong during the process, so you will be able to restore it afterwards.

Disclaimer:

The methods involved in flashing custom roms and rooting your phone is highly custom and may result in bricking your device, and has nothing to do with Google or the device manufacturers. In case of any mishap we may not be held responsible. Follow these instructions to the letter to avoid any mishap or bricking. Make sure that whatever you do, you are doing it at your own responsibility.

Important things:

  • Your Device Must Be Rooted.
  • Enable USB debugging mode. HOW? Go to Settings > Developer Options and Check USB Debugging mode.
  • If you can’t see the developers options, Go to settings > About > Tap build number until your device announces you the Developer.
  • Make sure that battery level is at 85% or more.
  • This Tutorial is Only For Galaxy S I9000.

How To Install Android 4.3 Dirty Unicorns Jelly Bean Custom Firmware On Galaxy S I9000.

samsung-galaxy-s-i9000-front-2-sam-i9000b-r3

  1. Download the Download Dirty Unicorns Android 4.3.1 ROM and Google Apps files but don’t extract any of them.
  2. Connect Galaxy S I9000 to PC. Make sure to use original USB cable. Download Samsung USB Drivers.
  3. Copy and Paste the downloaded files to the root of your sd card.
  4. Disconnect the cable.
  5. Turn off your tablet.
  6. Now go to Recovery mode, Press and hold Power + Volume Up + Home Buttons till you see some text on-screen.
  7. From Recovery, First Choose ‘Wipe Cache’.
  8. Then Navigate to ‘advance’ and choose ‘Devlik Wipe Cache’ so you won’t get in any bootloop.
  9. Then finally select ‘Wipe Data/Factory Reset’.
  10. Navigate to ‘Install zip from sd card’ then select ‘choose zip from sd card’.
  11. Select the Android 4.3 file and confirm the installation on next screen.
  12. Wait for the process to over, then select ‘reboot system now’.

Note: Repeat Step 10 and 11, but select Gapps instead of Android 4.3, to install Google Apps.

Voila! your Samsung Galaxy S I9000 has been updated to Android 4.3.1 Dirty Unicorns Jelly Bean Custom Firmware , Wait for at least 5-minutes for the first run.

Facebook Messanger On PC – Download Here.

0
Facebook Messanger On PC – Download Here.

Facebook is no doubt, became a very important part of our life, youth uses it to stay updated about their friends activity and any new about their School College and University. On the Other hand, adult use it stay connected with the ones who are far away from them, despite that there are many other and far suitable ways yet everyone is on Facebook even for Video calls. But one problem is that if you close the browser you can’t able to use Facebook or its chat. SO, there comes a Facebook messenger for PC that allows you to stay Connected with the ones on Facebook.

Facebook-Messenger

Using Facebook installer, even if you are watching movies and you received a message you don’t need to open the browser, Messenger will remain open like Skype and all you have to do is reply. The new update even brought the option of updating your Status and uploading photos without opening the browser. It’s just like your Facebook app on Phone, no need to open again and agin, but you need to refresh the news to get updated. You will even received the Notifications and you can open them straight from this app.

How To Install Facebook Messenger On PC.

  • First Download Facebook Messenger from here.
  • Install it like a regular .exe file.
  • Once the Installation is done, open the Messenger.
  • Now it will ask you to put the Facebook ID and Password.
  • Once inserting ID and Password, click Log-in.
  • After successful log-in, you will see all your friends in chat list and Notification on top along with Messages and Friend requests.
  • As long as the Wi-Fi is running and your machine is On you will remain available to your friends.

Plant Vs Zombies 2 For PC – Download Here.

0
Plant Vs Zombies 2 For PC – Download Here.

Plant Vs Zombies is a fun playing strategic game, which will take you back to the struggle of vegetables and most popular living dead from network. It’s all about stopping the hard rush of Zombies using some brave old Plants. In this Log awaited Second part of this game, you can find a good point for your soldiers and make real strong defenses to make sure that Zombies will not star the Apocalypse at all. In this version you will able to Witness history by going back to Egypt or knowing the pirates from colonial period.

On the other hand, Zombies will be stronger than ever and with the help of their new allies ‘Zombies Ra’, in Egypt ‘Zombies Chicken‘, in pirates ” Zombies Swordsman“. But that is all fun if you happen to own an Android or an iOS device, but in case if you don’t we got a good solution for you, now don’t tell me that you don’t even own a simple PC.You can enjoy this game on both iOS and Android devices and by following this tutorial you can play in on PC too.

12106190305226710054


How To Install Plant Vs Zombies 2 On PC.

Screenshot_2

  • First Download BlueStacks from here.
  • Install and start it.
  • Click search bar and search for Plant Vs Zombies 2.
  • Choose your Store and click on Install.
  • After the installation, click on App Icon to start playing Plant Vs Zombies.

FaceTime For PC – Download Here.

0
FaceTime For PC – Download Here.

FaceTime is a brilliant video calling Application, originally released with iPhone 4, now fully available for Mac. The best thing about it that you can download FaceTime directly from Apple Store. Open FaceTime and you will immediately see yourself on Screen then you need to put in your Apple ID that you used to Download this app from Apple Store. This app only works on WI-Fi and since you are installing it on Mac, you can’t use 3G, follow the whole tutorial to learn how to install and Set-up FaceTime On Mac.

How To Install FaceTime On PC.

  • First Download It From Here
  • Open and Install It.
  • Installation done, now open the app.
  • Once open, it will show you your face and ask for Apple ID and Pass.
  • After entering the ID and Password, it will automatically sync the app with your contacts.
  • Now open a contact and start calling.


Comparison: Samsung Galaxy S IV vs Google-LG Nexus 5

Comparison: Samsung Galaxy S IV vs Google-LG Nexus 5

Samsung brought up its flagship device Galaxy S IV in March, 2013 in order to take the lead over its rivals HTC One, Xperia Z and some others. Samsung’s first device to occupy an Octa Core processor, and also Full HD display was the Galaxy S IV. Though Samsung was criticized over using the plastic material to build the phone’s body, but the phone somehow took the lead in markets because of its mighty features and the beautiful display.

SIV SLIDE

While all other Smartphone Giants brought up their phones for the year 2013, Google was left behind with its flagship device after the Nexus 4 by LG. Nexus 5 has been launched recently, once again by the manufacturer of its predecessor LG. Along with the Nexus 5 Google has also brought up the new version of Android, the all new Android KitKat that is Android 4.4.

Nexus 5, is a true competitor to Samsung’s flagship, the Galaxy S IV in most of the terms. While you continue reading this post, we will be comparing both the phones on the basis of specifications and the hefty features.


Nexus 5 _ TB1

To begin with, we’ll first take a look at the dimensions of both the devices.


Dimensions, Design and Build Quality:

Samsung Galaxy S IV is made using a plastic material while the sides are made up of rugged aluminium. The build quality is what Samsung has been criticized for since years now. Samsung has used the same shape as S III keeping the edges curved, but it’s a little more squared now. The dimensions of Galaxy S IV are 136.6 x 69.8 x 7.9 mm (5.38 x 2.75 x 0.31 in), while the device weighs at 130g.

S IV Dimensions

On the other hand, LG Google Nexus 5 is pretty beautiful, the design has got better then the Nexus 4. The sides are of plastic, while the back is a rubbery material. LG has used ceramic to build the power and volume buttons. The device is grippier to hold, while the glossy look makes it sit at the top. The dimensions of Nexus 5 are 137.9 x 69.2 x 8.6 mm (5.43 x 2.72 x 0.34 in), while the device weighs at 130g.

TechSPecs_Nexus 5

Display:

The Galaxy S IV sports a 5 inch full HD Super AMOLED display with 441 ppi. Samsung’s first device to sport a full HD display. Based on my very own experience, I can say that the display is quite impressive, the colors look perfect. Corning is Gorilla Glass 3.SIV DISPLAY

Whereas, Google Nexus 5 sports a 4.95 inch full HD IPS display with 445 ppi. It stands in the line with other smartphones including Galaxy S IV, HTC One and Xperia Z, Z1.  Google Nexus 5 also has Gorilla Glass 3 Corning.

Nexus 5 _ TB

Features and Hardware (Battery, Processor, RAM, Camera, etc)Nexus 5_TB3

 Samsung Galaxy S IV is powered up with Samsung’s own Exynos 5 Octa Core CPU clocked at 1.6 GHz or Qualcomm’s Snapdragon 600 Quad Core CPU clocked at 1.9 GHz with PowerVR SGX 544MP3 GPU or Adreno 320 GPU respectively. Occupying a 2 GB RAM, the phone is powered up with a massive 2600 mAh battery. At the back it has got a powerful 13 MP shooter while a 2 MP at the front. Galaxy S IV is available in 16/32/64 GB internal storage variants while there is a microSD card slot as well to expand the memory.Along with the massive improvements in the hardware department, Samsung introduced the features like Air Gesture, Air View and Smart Screen that helped the GS4 to become even more popular and take place at the top of all the smartphones.

On the other hand, Nexus 5 is powered up with Qualcomm’s Snapdragon 800 Quad Core chipset clocked at 2.26 GHz with Adreno 330 GPU. There is a 2 GB RAM and under the hood it has got a 2300 mAh battery.Nexus 5 is available with 16/32 GB of internal storage. It has got an 8 MP camera at the back which also supports Optical Image Stabilization and that is even more better than any other smartphone’s camera according to Google.  At the front it has got a 1.3 MP camera.

Where LG Nexus 5 gives a tough competition to Samsung Galaxy S IV in the hardware aspects, it lacks 300 mAh battery then the GS4 that is 2600 mAh. While the rest of the hardware is not much different as the GS4 has the lead over Nexus 5 in terms of features like Air Gesture, Air View etc.

Software:

Software is the basic things that determines the reliability of a smartphone. Out of the box, Samsung Galaxy S IV runs on Android 4.2.2 Jelly Bean, but after the recent software update the device has been shifted to Android 4.3 Jelly Bean.

Nexus 5, as mentioned above, out of the box runs on Android 4.4 KitKat that helps it to take a clear lead over the Galaxy S IV. As Nexus 5 is Google’s very own device, Google has brought up the latest software, in fact rolled out the latest version of Android packed inside the Nexus 5. LG-built Nexus 5 is the only device at the moment which runs on Android 4.4 KitKat while It may be noted that in future, Nexus 5 will be the device to get all of the latest Android updates first of all.

Nexus5_KitKat

Price:

This is where Google Nexus 5 will definitely take lead as it offers the best things packed up inside that a user would want and that too at a very low price. Google is offering Nexus 5, the 16 GB variant for only $349 while the 32 GB variant only for $399. Whereas, the Galaxy S IV still, after 5 months of its release costs over $550.

That’s all from the short comparison we made. We would like to hear from you about these smartphones, and do tell us which one you like for yourself. Thanks All.


How To Install Android 4.4 Slim-Kat Asphalt Kit-Kat Custom ROM On Galaxy Nexus.

2
How To Install Android 4.4 Slim-Kat Asphalt Kit-Kat Custom ROM On Galaxy Nexus.

Android 4.4 Kit-Kat will officially be released for Nexus device in coming days,but developers have already started to create custom ROMs based on Android 4.4. But these custom ROMs are only available for Nexus devices, well for other they still have to wait. Galaxy Nexus might be an old device in Nexus family, but Google hasn’t forgotten about it. All the Nexus devices, including Galaxy Nexus but not Nexus S, will receive the Official Update of Android 4.4, but if you don’t want to wait for it or you just can’t, Follow this tutorial and Install this Custom ROM based on Android 4.4.

android_kitkat

In this Article, we will show you How To Install Android 4.4 Slim-Kat Asphalt Kit-Kat Custom ROM On Galaxy Nexus. But before we begin make sure to Backup all your data placed on your phone’s internal storage, contactscall logs and messages. This is necessary as if something go wrong during the process, so you will be able to restore it afterwards.

Disclaimer:

The methods involved in flashing custom roms and rooting your phone is highly custom and may result in bricking your device, and has nothing to do with Google or the device manufacturers. In case of any mishap we may not be held responsible. Follow these instructions to the letter to avoid any mishap or bricking. Make sure that whatever you do, you are doing it at your own responsibility.

Important things:

  • Your Device Must Be Rooted
  • Enable USB debugging mode. HOW? Go to Settings > Developer Options and Check USB Debugging mode.
  • If you can’t see the developers options, Go to settings > About > Tap build number until your device announces you the Developer.
  • Make sure that battery level is at 85% or more.
  • This Tutorial is Only For Galaxy Nexus.

How To Install Android 4.4 Slim-Kat Asphalt Kit-Kat Custom ROM On Galaxy Nexus.

Samsung-Galaxy-Nexus

  1. Download the Download Android 4.4 SlimKat Alpha ROM and Google Apps files but don’t extract any of them.
  2. Connect Galaxy Nexus to PC. Make sure to use original USB cable.
  3. Copy and Paste the downloaded files to the root of your sd card.
  4. Disconnect the cable.
  5. Turn off your tablet.
  6. Now go to Bootloader/Fastboot mode, Press and hold Power + Volume Up + Down Buttons till you see some text on-screen.
  7. From Bootloader, choose Recovery.
  8. From Recovery, First Choose ‘Wipe Cache’.
  9. Then Navigate to ‘advance’ and choose ‘Devlik Wipe Cache’ so you won’t get in any bootloop.
  10. Then finally select ‘Wipe Data/Factory Reset’.
  11. Navigate to ‘Install zip from sd card’ then select ‘choose zip from sd card’.
  12. Select the Android 4.4 file and confirm the installation on next screen.
  13. Wait for the process to over, then select ‘reboot system now’.

Note: Repeat Step 10 and 11, but select Gapps instead of Android 4.4, to install Google Apps.

Voila! your Samsung Galaxy Nexus has been updated to Android 4.4 Slim-Kat Custom Firmware , Wait for at least 5-minutes for the first run.

Asphalt 8 Goes Free in the Play Store, Grab it Now

1
Asphalt 8 Goes Free in the Play Store, Grab it Now

Gameloft’s racing game Asphalt 8: Airborne was released on 22nd of August, 2013. The game was available on the Google Play Store  for 99 cents. With Asphalt 8: Airborne, Gameloft introduced a new racing trend. As the name suggests, Airborne, the game is full of Air Stunts. There are straight and curved ramps on the tracks that help the players to perform stunts in the air. Along the stunts, the game’s graphics are designed in such a way that the crashes, tracks look more realistic. Gameloft has also kept the music lovers in mind while making this game. There is an option to change the music tracks now.

IMG-20130823-WA0023

Recently, Asphalt 8: Airborne has received its first ever content update. It supports more devices now, and there is a number of bug fixes that was causing inconvenience for users. With the update being rolled out, Gameloft has made the game free in the Play Store. Anyone can download it now and start enjoying the all new Airborne racing game. While this might be a limited time offer, don’t be so late. Go ahead and download it here.

How To Install TWRP Custom Recovery On LG G2 All Versions.

2
How To Install TWRP Custom Recovery On LG G2 All Versions.

Now after rooting your LG G2, you are wondering what to do with it now. Allow us. install a Custom Recovery on it and prepare yourself for installing Custom ROMs on it.A custom Recovery allows you to install Custom ROMs, Kernels and many more tweaks on it. Installing a Recovery is not a difficult process, once you have rooted your device its all good to go.

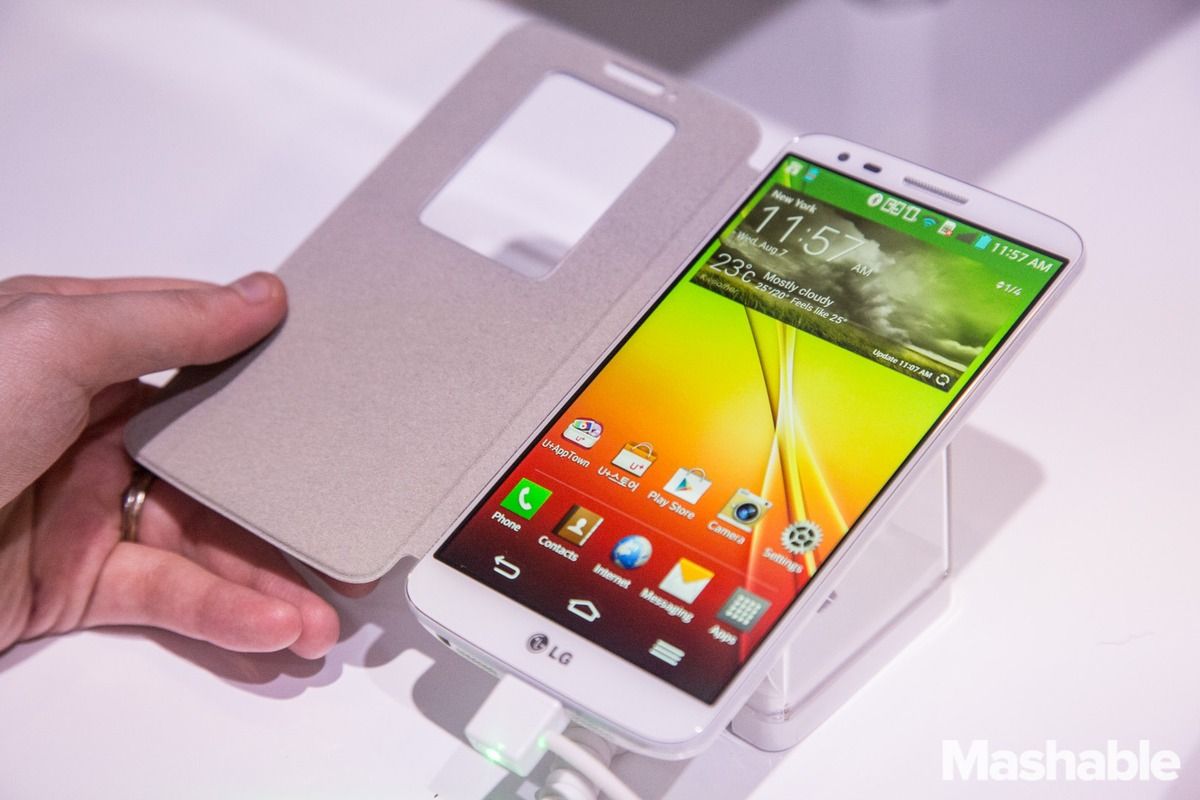
LG-G2-hands-on-07


In this Article, we will show you How To Flash TWRP  Custom Recovery On LG G2. But before we begin make sure to Backup all your data placed on your phone’s internal storage, contactscall logs and messages. This is necessary as if something go wrong during the process, so you will be able to restore it afterwards.

Disclaimer:

The methods involved in flashing custom roms and rooting your phone is highly custom and may result in bricking your device, and has nothing to do with Google or the device manufacturers. In case of any mishap we may not be held responsible. Follow these instructions to the letter to avoid any mishap or bricking. Make sure that whatever you do, you are doing it at your own responsibility.

Important things:

  • Your Device Must Be Rooted
  • Enable USB debugging mode. HOW? Go to Settings > Developer Options and Check USB Debugging mode.
  • If you can’t see the developers options, Go to settings > About > Tap build number until your device announces you the Developer.
  • Make sure that battery level is at 85% or more.
  • This Tutorial is Only For LG G2.

How To Flash TWRP  Custom Recovery On LG G2 All Versions.

Screen-Shot-2013-11-01-at-7.04.42-PM

  1. Download the Recovery Image from here. Make sure to choose your device compatible.
  2. Copy and Paste it inside ioroot folder that you have extracted in How To Root LG G2 All Versions.
  3. Download Loki Flash Firmware, click on Download zip on the Bottom Right side on Screen.
  4. Extract the Zip file and inside the extracted folder, Copy the  loki_flash file.
  5. Paste the Loki Flash File in the Same folder, where you have saved the recovery image “ioroot”.
  6. Finally Rename the recovery.img from openrecovery-twrp-2.6.3.2-g2XXX.img to just recovery.img.

Now. lets head towards the Flashing Tutorial.

  • Plug your LG G2 with PC, make sure that USB Debugging is enable.
  • Open the ioroot folder, and open command prompt here  How? Hold Shift Key and Right Click anywhere in the ioroot Folder.
  • When the command prompt opens, type the following into it with hitting enter at the end of each line.

adb push loki_flash /data/local/tmp/loki_flash

adb push recovery.img /data/local/tmp/recovery.img

adb shell

su

cd /data/local/tmp

chmod 777 loki_flash ./loki_flashrecovery /data/local/tmp/recovery.img

exit

exit adb reboot recovery

  • It’ll Reboot to Recovery, IF you see TWRP Recovery then everything went Alright.

How To Root LG G2 All Versions.

1
How To Root LG G2 All Versions.

LG G2 has been released 6-weeks ago and developers have found a way to root LG G2 and almost all of its versions or the one in the list we will give you below. Rooting your Android device allows you to get full control over it, allows you to install Custom Recoveries and ROMs on it along with many more tweaks and other stuff. It allows you to change settings of your hardware too like you can overclock your CPU. GPU and RAM, but all of it will heat up your device and not suggested by many officials. If you have an LG G2 and want to root it follow the tutorial ahead and get what you want.

G2-Root

In this article,  we will show you How To Root LG G2. But before we begin make sure to Backup all your data placed on your phone’s internal storage, contactscall logs, and messages. This is necessary as if something goes wrong during the process, so you will be able to restore it afterward.

Disclaimer:

The methods involved in flashing custom ROMs and rooting your phone is highly custom and may result in bricking your device, and has nothing to do with Google or the device manufacturers. In case of any mishap, we may not be held responsible. Follow these instructions to the letter to avoid any mishap or bricking. Make sure that whatever you do, you are doing it at your own responsibility.

Downloads Required:

LG USB Drivers.

Rooting Package

Important things:

  • Enable USB debugging mode. HOW? Go to Settings > Developer Options and Check USB Debugging mode.
  • If you can’t see the developers options, Go to settings > About > Tap build number until your device announces you the Developer.
  • Make sure that battery level is at 85% or more.
  • This Tutorial is Only For LG G2 Listed Devices.

Here is the list of Compatible Devices:

  • AT&T G2 (D800) – D80010d
  • Verizon G2 (VS980) – VS98010B (Original ROM)
  • Verizon G2 (VS980) – VS98011A (OTA)
  • T-Mobile G2 (Original ROM)
  • KT F320k (Original ROM)
  • Rogers D803 (Original ROM)
  • Bell D803 (Original ROM)
  • Telus D803 (Original ROM)
  • OPEN D802 (Original ROM)

How To Root LG G2 All Versions.

LG-G2-hands-on-07

After installing USB Driver of LG, first connect your device to PC in Debugging mode and let it install the drivers/

  1. Download the Rooting Package and extract it all.
  2. Inside the extracted folder, double-click the root.bat file while your device is still connected to PC.
  3. Follow the Command Prompt until is says “Completed”.
  4. When Prompted, Unplug the device.
  5. Turn Off debugging mode, then turn it back On.
  6. Plug the Device again via USB.
  7. Press any Key on Computer to Continue.
  8. When it’s done, reboot your device. All Done!