Home Blog Page 36

Spectrum TV – How to watch on PC?

2

Spectrum TV can be watched on a computer. Did you know this? In case you didn’t, you can do so now. Here’s a guide to download and install Spectrum TV app on a computer. The Spectrum TV for PC can be downloaded on Desktop PCs and Laptops.
Spectrum TV for PC

Spectrum TV

The Spectrum TV App is designed to let you take your Spectrum TV entertainment along with you in your pocket. If you have a Spectrum TV subscription, you can watch pretty much everything from the Spectrum TV in the smartphone application.
Spectrum TV for PC

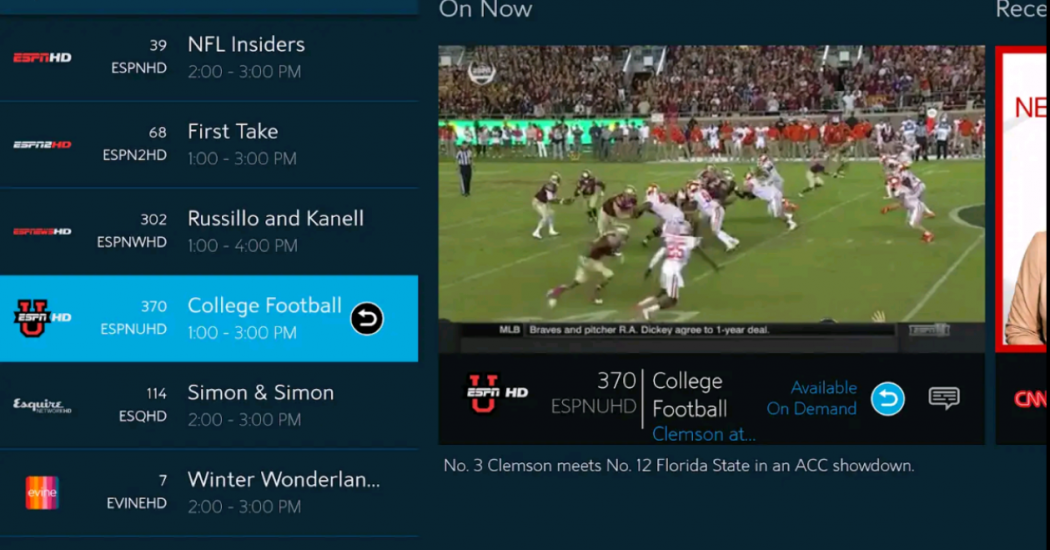
The Spectrum TV app will let you access over 250 Live TV Channels and over 30,000 on-demand movies and TV shows. The application works with the help of the Spectrum Internet WiFi connected at your home. If you move away from the Spectrum Internet WiFi, you can watch over 150 TV Channels live and over 20,000 movies and TV shows. In that case, you would need a WiFi or cellular connection. The service works flawlessly almost everywhere in the United States.

The main idea of the Spectrum TV app is to bring portability into your hands. Gone are the days when you would stick to your Sofa and watch the TV all day long. You can now watch a movie or a TV show anywhere. Take your phone into the Kitchen and watch your favorite cooking show. You can pull the phone out of pocket and watch a show in your car.

The Spectrum TV app has a solid filter in place. It’s very easy to find your desired content in this app. You can find via title, cast, or by typing in the name of any personality related to a show. Spectrum TV app also lets you control your DVR. The app will let you change TV channels on the Spectrum receiver. You can also record TV shows and movies. The DVR recordings can be modified via this app. Furthermore, the application comes with complete settings that you get with the Spectrum TV box.
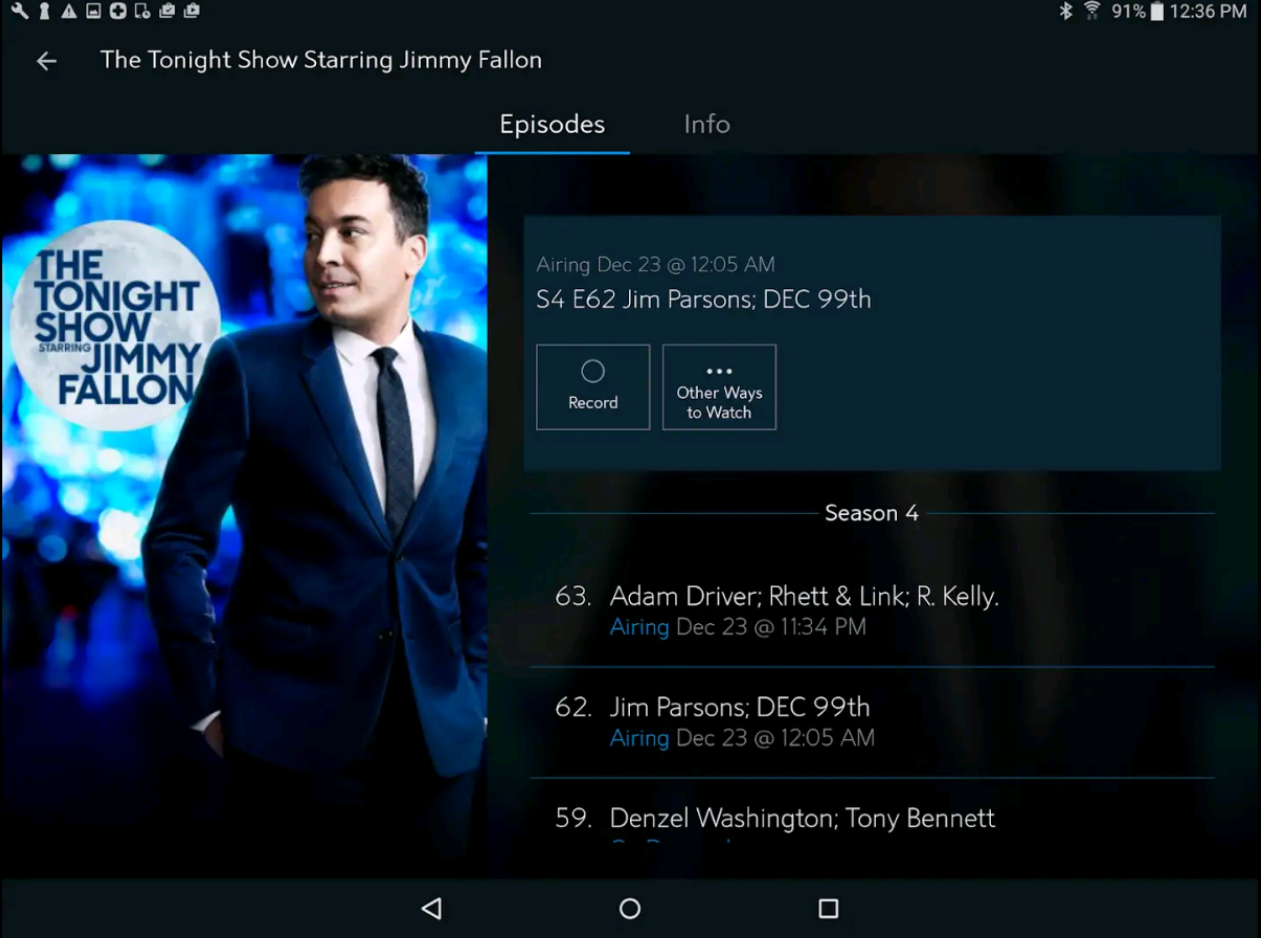
To use this application, you must have the Spectrum TV subscription and a working internet connection. These are the two basic requirements. In case you don’t know, you can use the same Spectrum TV application for PC as well. You can enjoy the shows on a bigger screen of your computer or laptop. I am going to show you the procedure to run Spectrum TV app on a computer now.

Requirements to install Spectrum TV App for PC

  1. You need a good Android emulator. You can pick up one from this list. Recommended emulators include BlueStacks 4 for Windows and Nox Player for Mac.
  2. A Windows or macOS-powered computer.
  3. This guide 😉

Spectrum TV for PC – How to install

Follow these simple steps to download, install, and watch Spectrum TV on your PC.

Total Time: 2 minutes

Open the Android emulator and set it up.

First of all, open the Android emulator that you just installed. In the emulator, log in using your Google account. You can use an old account or create a new one.

Now open the Play Store in the emulator.

In the emulator, open the Play Store now. Let the Play Store load. Make sure that you are already logged in. If you are not, log in now.

Search for Spectrum TV and install it.

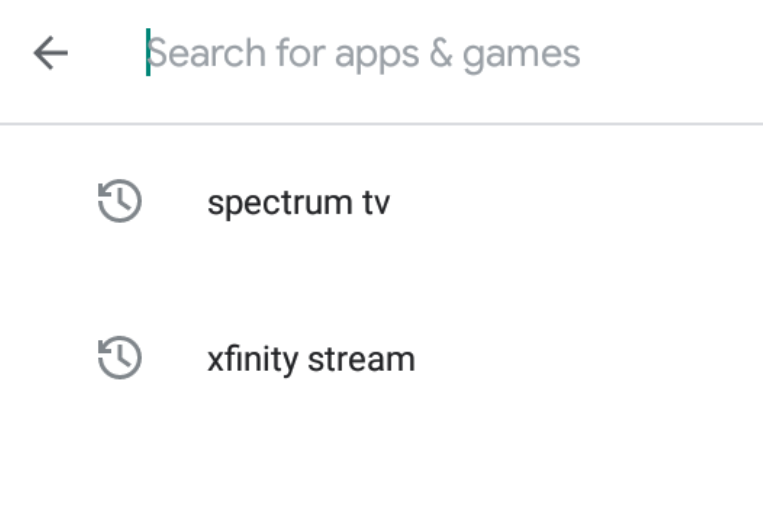
In the Play Store’s search bar, type “Spectrum TV” and hit enter. As soon as you find it, install it.
Open Spectrum TV and log in.

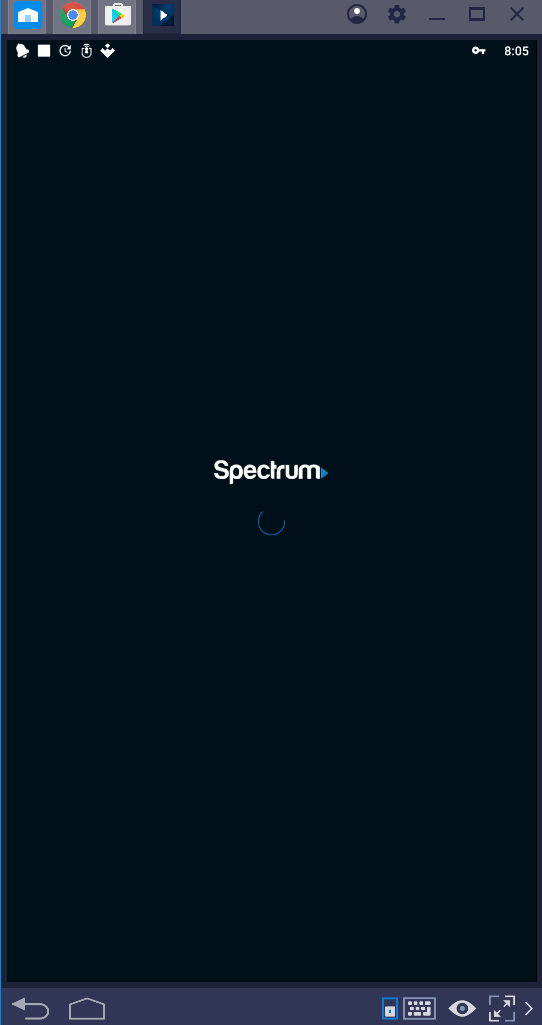
After installation, open Spectrum TV from all apps or the app drawer of the emulator. Log in using your Spectrum TV subscription details.

Enjoy your favorite movies and TV shows in the Spectrum TV App now.

You are now all set to navigate through the Spectrum TV application. Watch anything you want. That’s all.

That’s all. If you have any questions or queries, feel free to reach out to us. I will try my best to get back to you as soon as possible.

Download Chimera 1.3.x IPA – Cydia Impactor

Download Chimera 1.3.x IPA – Cydia Impactor

From here you can download Chimera 1.3.9 IPA. Chimera can be used to Jailbreak iOS 12.1, 12.2, and 12.4 on all iPhones and iPads.

Chimera 1.3.x IPA

Before you download the Chimera 1.3.x IPA, let me tell you a little bit more about this tool.

Chimera – The Unc0ver Alternative

A few years back, Jailbreaking an iPhone or iPad was quite a task. The processes for Jailbreaking devices were complex. The risks were equally bigger too. The arrival of tools like Unc0ver made the Jailbreak process a piece of cake.

Back in the day, Unc0ver was the only one-click Jailbreak tool. Unc0ver’s instability raised the need for another Jailbreak and this is where Chimera stepped in.

Chimera is not an entirely new tool. It was formerly known as Electra, and back then, it used a different Jailbreak method. Transformation of Electra Jailbreak into Chimera changed a number of things. The biggest change was the one-click Jailbreak functionality.

Like Unc0ver, Chimera can Jailbreak an iPhone or iPad in a few seconds. Chimera also uses the same exploits that are being used by Unc0ver. Where Unc0ver uses Cydia for Tweaks, Chimera uses Sileo. One of the major differences between Unc0ver and Chimera is UI. Chimera has a UI which is reminiscent of the iOS UI.

The team behind Chimera has CoolStar as its head. It has a number of other renowned developers including Jamie Bishop, Tri’angle, and Tihmstar. The team works consistently to fix bugs and keep the tool as stable as possible.

Chimera was recently updated to version 1.3 with Jailbreak support for iOS 12.1 and iOS 12.2. It used the SockPuppet 3 exploit to do so. Later on, Chimera was updated to version 1.3.6 which Jailbroke the iOS 12.4. Furthermore, Chimera supported all iPhones and iPads powered by A7 – A11 – A12 – A12X chipsets. As of now, the latest version of Chimera is 1.3.9.

Chimera 1.3.9 IPA

There are two methods to install Chimera. Either you can direct-install Chimera on the iPhone/iPad or you can download the Chimera 1.3.9 IPA and install it manually. Down below in this post, you can find the Chimera 1.3.9 IPA file and the guides to install it too.

Download Chimera 1.3.9 IPA

  • Chimera 1.3.9 IPA – Download | Mirror [Extract mirror to get the IPA file]

Here are the guides to Jailbreak iPhone via Chimera and also to install Chimera via Cydia Impactor.

  • Guide to Jailbreak iOS 12.4 via Chimera – Cydia Impactor Method.
  • Guide to install IPA files via Cydia Impactor.
  • How to install IPSW Firmware files via iTunes.

That’s all. If you have any questions and queries, feel free to reach out to us. I will try my best to get back to you as soon as possible.
Google Pixel 2 won’t connect or pair with Bluetooth accessory

0
Google Pixel 2 won’t connect or pair with Bluetooth accessory

Those who own a Google Pixel 2 and there are facing Bluetooth connectivity issues. This is the guide for them, In this guide, I will share solution for Google Pixel 2 won’t connect or pair with Bluetooth accessory problem. Let’s get started.

Let me explain the issue first:

Now before I proceed, Let me tell you what is the main issue. So you can get the clear picture of what is going on and after that. If you are also facing such problems. You need to heed the instructions below to fix Bluetooth connectivity problems on Google Pixel 2.

Google Pixel 2 won’t connect

I have heard and faced issue such as Google Pixel 2 won’t connect and pair with the Bluetooth devices. By the devices, I mean it can be your wireless headphones, selfie sticks, your car infotainment system and more. Now if this is what you are facing, then I will help you fix it by providing potential solutions.

There are a number of solutions and workarounds provided below. Please keep on trying all of them and one will do the trick for you.

Fix Google Pixel 2 won’t connect or pair with Bluetooth accessory:

There are a number of potential solutions you can find on the internet when it comes to Bluetooth issues on Android. But our best bet is to start with the basic troubleshooting and then move on.

Verify and ensure that Bluetooth is turned on:

Before you do anything and get more technical, I would suggest you start with the basic set of troubleshooting. Make your Bluetooth is turned on both of your devices.

  • Open Settings on your devices.
  • Head over to the Bluetooth section and make sure it is turned on.
  • Also, head over to the connected devices section and look for the device you are trying to connect.

Once the Bluetooth is turned on, you will see the Bluetooth icon on the top of your Google Pixel 2. It means you can now connect with other Bluetooth devices.

Confirm that both your devices are paired and connected:

In order to connect any device with your Pixel 2, you need to make sure that they are paired. You can pair devices in the Bluetooth section, once they are discoverable.

  1. Open Settings on your Google Pixel 2 or you can directly go to the Bluetooth settings by long-tapping the Bluetooth icon in the navigation bar.
  2. Now in Bluetooth setting look for paired or connected devices.
  3. Select a device you want to pair and follow the on-screen instructions.

Once your devices are paired, connecting with it won’t be an issue. Just head over to the Settings -> Bluetooth -> Paired  Devices -> Tap on the device you want to connect.

Reboot your Google Pixel and your Bluetooth device:

Whenever we face any issue on our Android devices the first thing that comes to our mind is to reboot. Sometimes there is a glitch, either it can be of software or hardware. In both cases, a soft reset or reboot can do the work for you. Follow the instructions below.

  1. Press and hold the power button for like 2-3 seconds.
  2. You will be presented with two options. Tap on Power off.
  3. Wait about 20-30 seconds and then press & hold the power button to turn on your device.

Once your device turns on try connecting your Google Pixel 2 with other Bluetooth accessories. Also, there is another thing, if your device is unresponsive or frozen, you can force restart your device.

  • Press and hold the Power button for about 10 to 20 seconds.

Now, these were the basic solutions that you can try if you facing Google Pixel 2 won’t connect or pair with Bluetooth problem. Let’s talked about the other Bluetooth problems which Pixel 2 users are complaining about.

I will tell you each Bluetooth Problems and along with it, you will find the best workarounds to fix them.

Google Pixel 2 cannot pair with car Bluetooth:

It happens with me all the time, no matter which car I am driving. It does happen with me every now and then. So whenever I face this problem, I turn off my car infotainment system first and then wait for like 2-3 minutes. Then I forget the Bluetooth devices which paired with my device.

Moreover, you can say, I un-pair the device connected with my Google Pixel. Heed the instructions below to learn how to forget the Bluetooth device.

  • Open Settings -> Bluetooth -> Paired Devices -> Settings -> Forget.

Now turn on your car system and turn on the Bluetooth. Head back to your Google Pixel and pair your car system again. It will work.

Cannot pair Google Pixel 2 with Bluetooth accessories: [Android wear]

Following are the solutions you can try to pair Google Pixel 2 with Bluetooth accessories.

  • Make sure Bluetooth is turned on.
  • Restart your devices.
  • Unpair devices.
  • Reset Bluetooth accessory.

After that try connection, your Android wear again with your Google Pixel 2 and it will connect this time without any problem.

Cannot hear music from a Bluetooth headset, speaker, or car:

Turn off and on both of your devices. If you have connected your device with a car system. Unpair and then re-pair the device and make sure that they are connected properly.

Make sure if you have connected your device with Bluetooth speaker, check the volume on both. It would be better with Bluetooth speaker too. If you unpair and then pair again.

  • Settings -> Connected devices -> Bluetooth -> Settings Of the Connected device -> Media audio.

Cannot make or get calls with a car Bluetooth:

The best solution I can give you to fix Google Pixel Cannot make or get calls with car Bluetooth. Is to check that you have enabled Phone audio option. Heed the instructions below.

  • Settings -> Connected devices -> Bluetooth -> Settings Of the Connected device -> Phone audio.

Reset Bluetooth accessory to factory settings:

If everything else fails, there one last resort left. You need to factory restore your Bluetooth device but before you do that. You need to keep this in your mind. If you do that, you will lose all, Apps, Settings, Music etc.

However, the best part is, your device will start working properly and you can connect it with all the Android devices. Because if none of the above worked for you, it is for sure a software glitch and it can’t be fixed like that.

So, you need to follow the instructions provided on the manual and reset your Bluetooth device. Once it is done, try connecting it with your Google Pixel 2 and it will work this time.

So that’s it for today. This is how you Fix Google Pixel 2 won’t connect or pair with Bluetooth accessory problem. If still, you are in no luck, I would recommend that you should go to the service center of your device manufacturer and let them fix it for you.

How to install Firmware IPSW File on iPhone or iPad

0

Here is how you can install Firmware IPSW File on iPhone or iPad. This guide will work for both the Windows and macOS-powered computers.

install Firmware IPSW File on iPhone or iPad
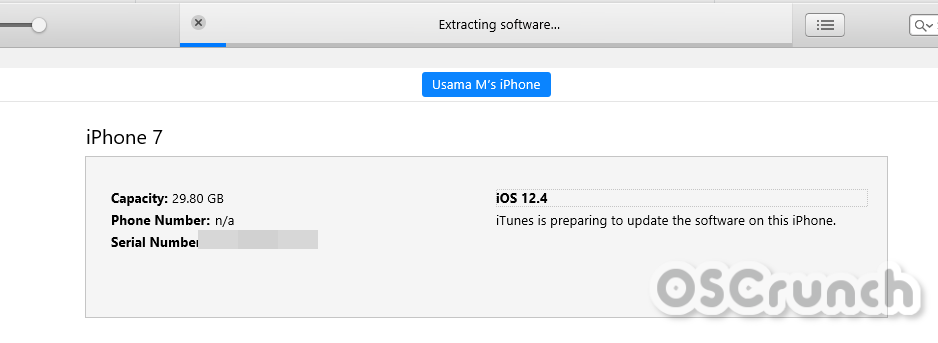
Downgrading my iPhone 7 to iOS 12.4 via IPSW file.

Before I show you the installation method for IPSW files, let me tell you what these files are.

IPSW – Apple Firmware Files

The IPSW package contains an iOS firmware. These files are used to sideload firmware manually on an iPhone or iPad. In most cases, the IPSW files are used to either upgrade the iPhone to a newer version or to restore it to an old stable version of iOS.

Whenever you try to install a firmware through iTunes, you must have noted that the iTunes first downloads firmware and it starts the installation process after that. The iTunes basically downloads the IPSW files for your device from Apple’s servers. 

install Firmware IPSW File on iPhone or iPad

When you have an IPSW file for your phone beforehand, you can slash the iTunes firmware download part and install the firmware straight away. Now having the IPSW file doesn’t mean that your firmware is going to have any loopholes. When you will add an IPSW file in iTunes, it will first check the file’s contents from Apple’s server and proceed only if it’s a valid file.

A great edge of IPSW firmware installation procedure is that you can pick a firmware of your choice and downgrade or upgrade to that. These files are also used to restore an iPhone to a previously working state. Yes, the firmware must be in the signing stage. If Apple has stopped signing a firmware, you will not be able to install its IPSW file either.

When it comes to finding the right IPSW file for your iPhone or iPad, you may get a little confused at first. However, things are on the opposite side. There is a handful of sources from where you can get the IPSW file. The sources take you through a long selection process to ensure that you reach out to the exact file for your device. You have to select your device type, model number, and the exact variant to find the IPSW file.

Assuming that you have a good idea of what IPSW firmware files are, let’s take a look at the steps to install firmware IPSW file on iPhone or iPad.

Preparations

  • First of all, you need the IPSW file.
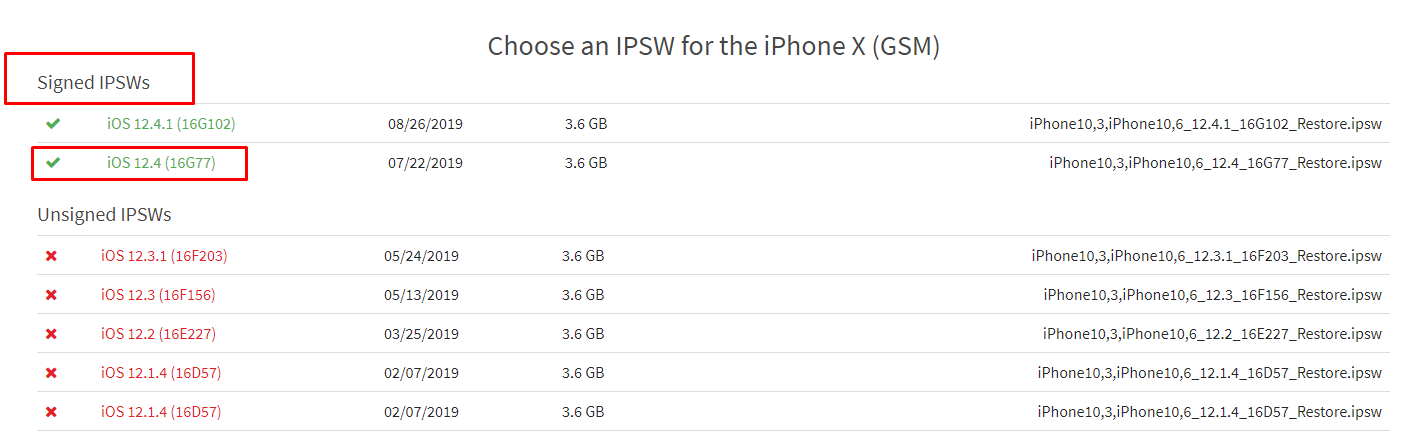
    • Go to this page. Select your device type and select the exact device then. After that, download the firmware. Remember that the currently signed firmware appears in green. The red-highlighted are the one’s that Apple has stopped signing.
downloading iPSW file for iPhone/iPad
  • Also, download and install the latest iTunes on your computer.
  • You need the iPhone or iPad.
  • The original data cable of your Apple device is also needed.
  • Backup your iPhone or iPad beforehand if needed.
  • Remember that this guide will work for all iPhones and iPads.

Install Firmware IPSW File on iPhone or iPad

These are the simple steps to install IPSW file on iPhone or iPad.

Total Time: 10 minutes

Open iTunes and connect iPhone/iPad.

Open the newly installed iTunes on your computer. Plug-in the lightning cable to your iPhone/iPad and let iTunes detect it.

Select your device in iTunes to access Update option.

After iTunes detects the phone, click on the small iPhone icon appearing on the top-left corner. This will take you to the options screen for your iPhone. You will see the Update option now.

Add the IPSW File to iTunes on the computer.

Press and hold the Shift button on the keyboard and then click on the “Update” button. It will now as you to select the IPSW file. Select the file that you want to sideload.

Start the installation process.

As soon as the file is selected, the installation process will start. This process will take a few minutes so keep patience and watch the progress bar.

Disconnect the iPhone/iPad once the installation ends. That’s all.

After the installation ends, your iPhone will attempt a reboot. At this point, you can disconnect the device. As it boots up, set it up and enjoy!

That’s all with the installation of IPSW firmware files on iOS devices. I hope this guide worked for all of you. If you have any questions or queries, feel free to reach out to us. I will try my best to get back to you as soon as possible.

How to sideload iOS App IPA files via Cydia Impactor – Windows & Mac

0
How to sideload iOS App IPA files via Cydia Impactor – Windows & Mac

This is the guide on how to sideload iOS App IPA files via Cydia Impactor. You can use this method on a Windows and a Mac PC.

sideload iOS App IPA files via Cydia Impactor
How to sideload iOS App IPA files via Cydia Impactor

Before I tell you how you can sideload iOS IPA files via Cydia Impactor, let me tell you what exactly IPA files are and a little bit about the Impactor too.

IPA Files

IPA is basically the iOS App Store Package file which contains and iOS application. The package includes binaries for the ARM architecture. It is only installable on the iOS operating system.

IPA Files allow manual installation of an iOS application. Let’s suppose that there is an iOS application that is not there on the App Store, but you have its IPA file, you can easily install it. There are thousands of iOS applications available in the form of standalone IPA files.

There are two methods to install the IPA files. Either you can install them directly on the iPhone/iPad by going to the file’s source page in the browser or you can use a tool like Cydia Impactor.

The Cydia Impactor is the only GUI tool that allows IPA file installation from your computer. Let me give you a brief idea of this tool now.

Cydia Impactor

The Cydia Impactor is built for both Android and iOS devices, but the backbone of its popularity is the iOS compatibility.

For years, the Cydia Impactor has been enabling iOS users to sideload the apps of their choice on iPhones and iPads.

iOS users turn their heads towards Cydia Impactor mostly when they have to install something like Chimera or Unc0ver to Jailbreak the iPhone. In fact, a good amount of iOS users use the Impactor to install the normal applications because in this case, you don’t have to go through the hassle of using the App Store. You can just get the IPA file of any application and sideload it within a few minutes on the iPhone.

On top of those features, the Impactor comes with an impressive UI. It’s not impressive in terms of its looks, it is impressive in terms of simplicity. You only have to select your device and then drop an IPA file on the Impactor’s Window to sideload it. It merely takes a few seconds to install the desired application.

If you recently heard of the Cydia Impactor and now you are willing to sideload iOS App IPA files via Cydia Impactor, you have landed at the right place. Take a look at the steps below to get it done.

Before following the instructions, you must download the latest Cydia Impactor on your computer. The newest iTunes should be installed on the computer too. Also, you need to have the IPA file of the app you want to install.

Sideload iOS App IPA files via Cydia Impactor

These are the few simple steps to install or sideload IPA files via Cydia Impactor.

Total Time: 2 minutes

Open Cydia Impactor and connect the iPhone/iPad.

First of all, open the Impactor on your computer. Connect the iPhone or iPad to the computer and select it in the Impactor.

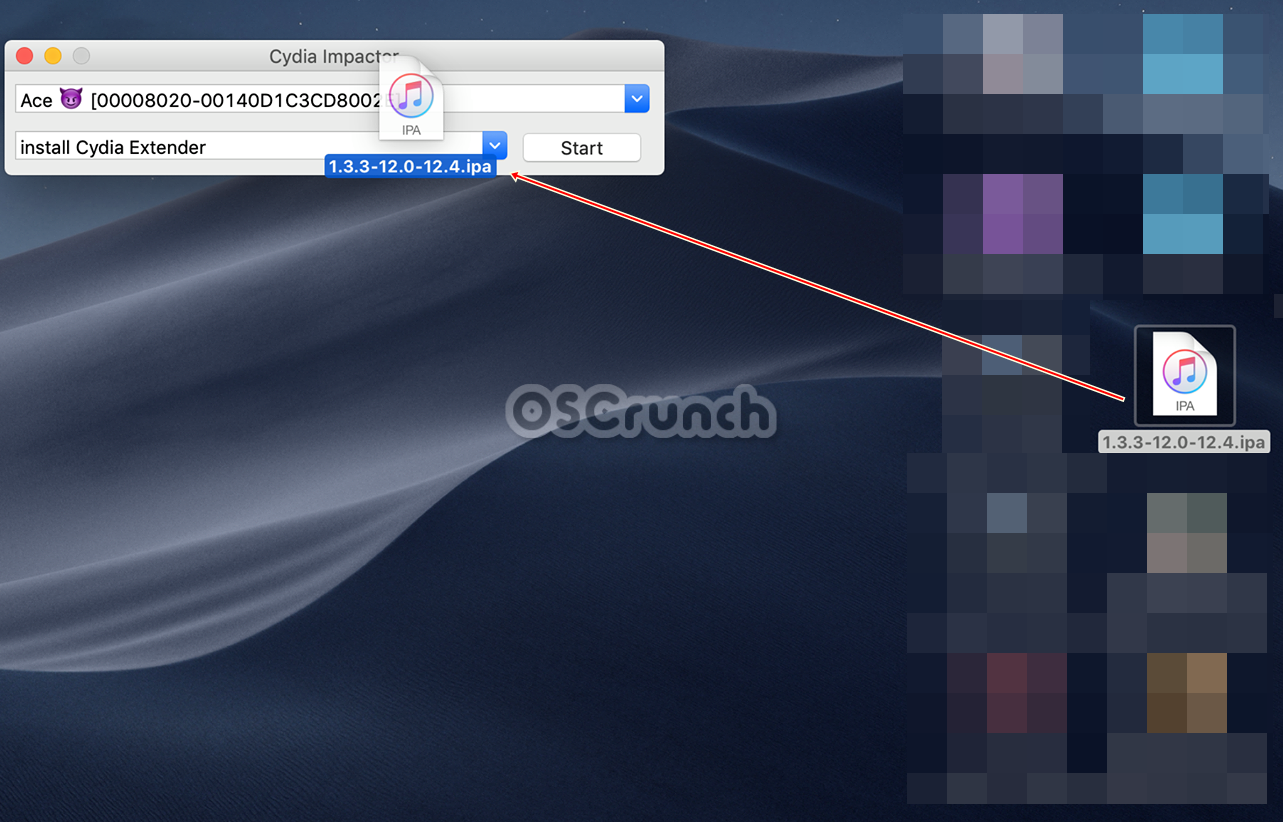
Drag and drop IPA file onto the Cydia Impactor.

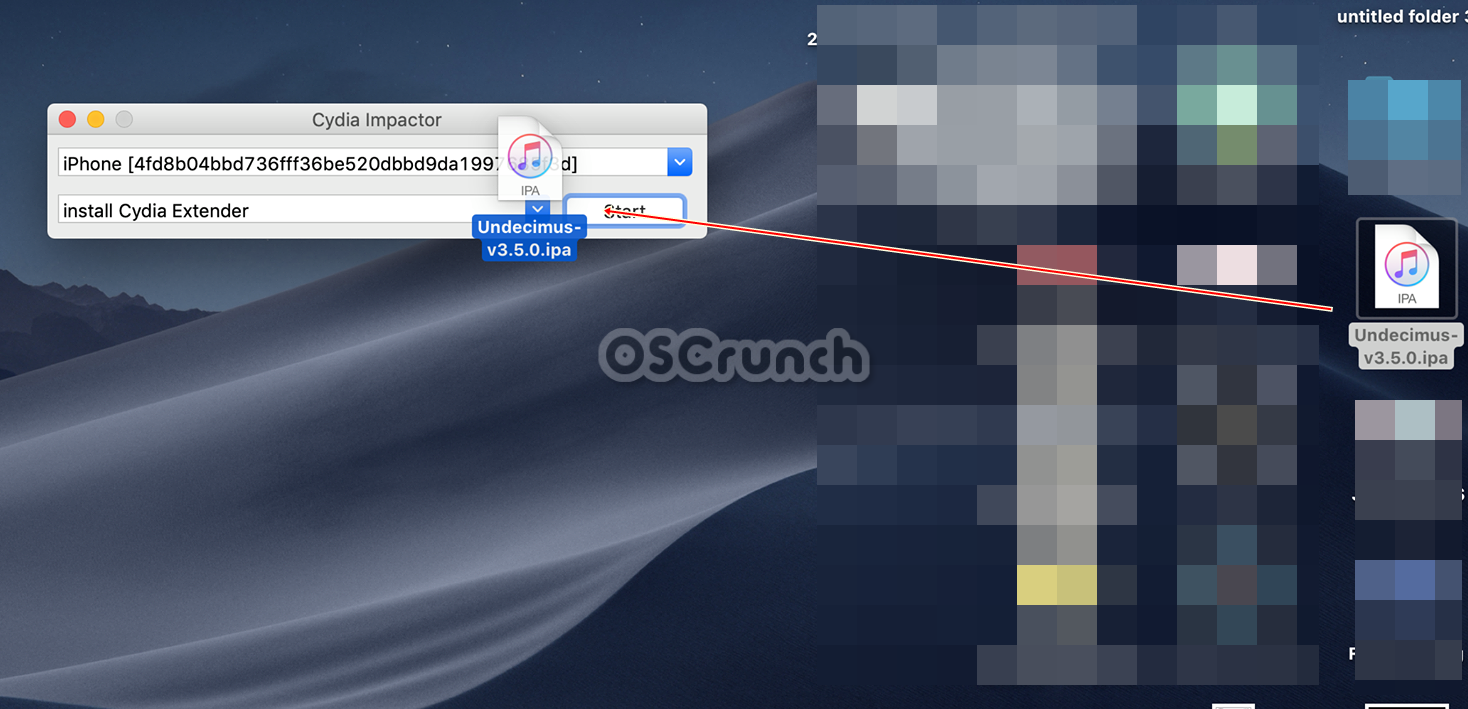
Now drag the IPA file that you want to sideload and drop it on the Cydia Impactor. At this point, it will ask you to enter some details.

Enter the Apple ID and Password in Impactor.

Impactor will ask for your Apple ID and Password. Enter the details and see if it goes ahead. If it gives you the error, follow the next step.

Generate App-Specific Password and enter that.

Impactor will ask for App-Specific Password. Open the Appl ID on your computer and go to Security > Generate App-Specific Password. Copy that and paste it into the Impactor.

Click Start to sideload the app. That’s all.

Now click on the start button. The sideloading process will start. You will find installed app on the iPhone/iPad in a few minutes. That’s all.

That’s all. If you have any questions or queries, feel free to reach out to us. We will try our best to get back to you as soon as possible.

Download Cydia Impactor Tool [Sideload iOS and Android Apps]

0
Download Cydia Impactor Tool [Sideload iOS and Android Apps]

Here is the latest Cydia Impactor Tool for Windows and Mac. The Cydia Impactor can sideload IPA files on iOS and APK files on Android phones.

Download Cydia Impactor Tool

Cydia Impactor

The Cydia Impactor is a very popular GUI tool for installing apps on iPhones and Android phones. Not only the Cydia Impactor is popular for sideloading IPA files, but its Android APK functionality is also worth using as well.

At first, the Cydia Impactor is built for Windows, Mac, and Linux platforms. It’s a very light tool. It comes as a standalone package. You don’t have to install the tool. All you need is its package and you launch the Impactor through its exe file.

Download Cydia Impactor Tool

Once you have the impactor up and running, you see a small window showing two tabs and a few options in its toolbar.

Users have to connect their device and then select the device in impactor. After that, they can select what operation they want to perform.

To install IPA files on iPhone or APK files on Android, you simply drag an APK/IPA file and drop it onto the Cydia Impactor. The Impactor then automatically installs that file. The installed file can be found on your phone.

For those of you who are unsure of when to use Cydia Impactor, let me explain a few suitable scenarios.

There are thousands of Android and iOS applications which are unable to make it to the play store or the App Store. Such applications are available on different platforms independently. You can grab the installation package of those apps and tend to the manual installation.

For Android APK files, the most common method is to install them directly on your phone through the File Manager. However, iOS doesn’t allow direct installation or File Manager access. So, for the iOS, your only manual method is either Cydia Impactor or the resource file webpage.

Another great feature of the Cydia Impactor is that it brings the universal ADB and Fastboot drivers. In case you are unable to connect your device, you can check for its driver through the impactor. 

To make Impactor compatible with iPhone/iPad, you must have the latest version of iTunes installed on the computer.

That was all about the Cydia Impactor. You can now download Cydia Impactor for Windows, Mac, and Linux from below. The guide to using Cydia Impactor is also attached.

Download Cydia Impactor Tool

For Windows, you will unzip the Impactor folder and launch the Impactor exe file. The MacOS users will install the Impactor dmg file. For Linux, you will extract the .tgz file and launch impactor.

Furthermore, you can take a look at this guide to sideload apps via Cydia Impactor.

That’s all. If you have any questions/queries, feel free to reach out to us. I will try my best to get back to you as soon as possible.

Download iPhone 11 Pro Max Stock Wallpapers

0

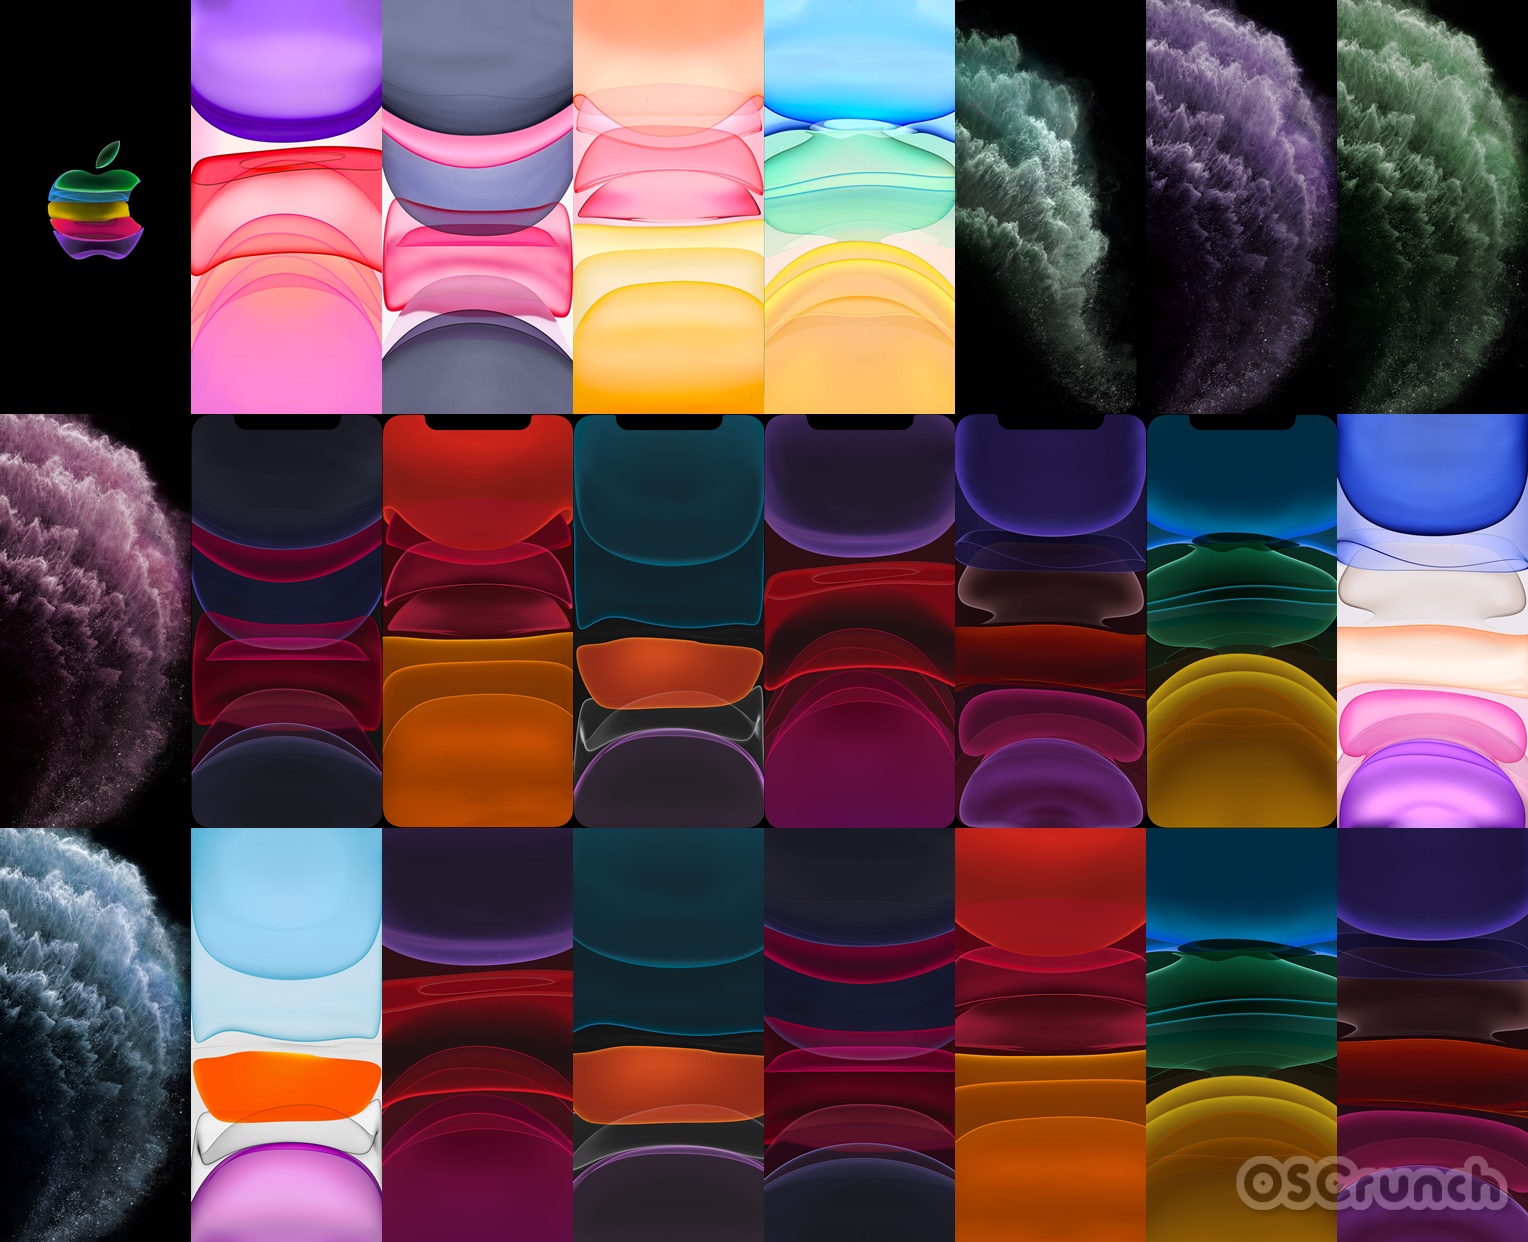
Here are all the stock wallpapers of the new iPhone 11, 11 Pro, and 11 Pro Max. You can download iPhone 11 Pro Max Stock Wallpapers in HD resolution.

iPhone 11 Pro Max Stock Wallpapers

iPhone 11, 11 Pro, and 11 Pro Max

A couple of days back, Apple announced its new iPhone lineup at Steve Jobs Theater in Cupertino. Apple’s CEO Tim Cook took the stage to announced the successors of iPhone XR, XS, and XS Max. This year’s lineup includes the iPhone 11, iPhone 11 Pro, and the iPhone 11 Pro Max. All these phones are quite different from each other. Let me give you a recap of these.

The iPhone 11 is a budget iPhone for this year. Start at $699, this iPhone comes with a 6.1-inches. The liquid retina panel on this phone has a resolution of 828 x 1792 pixels. iPhone 11 is powered by the Apple A13 chip. It’s got a RAM of 4GB. The internal storage begins at 64GB. iPhone 11 has got 2 cameras at the back. The main camera is a 12MP sensor and there’s a 12MP ultrawide camera. On the front, it has a 12MP camera accompanied by a 3D TOF sensor. The battery of this iPhone is of 3110 mAh. Apple is offering the iPhone 11 in Black, Green, Yellow, Purple, Red, and White colors.

iPhone 11 Pro comes with a 5.8-inches Super Retina XDR OLED display. Its resolution is 1125 x 2436 pixels. iPhone 11 Pro is also powered by the A13 Bionic chipset. It also has a RAM of 4GB and internal storage starts from 64GB. It has 3 cameras at the back including a 12MP main camera, 12MP ultrawide, and a 12MP telephoto camera. On the front, it has a 12MP + 3D TOF sensor. The battery capacity of the iPhone 11 Pro is 3190 mAh. 

Lastly, we have the iPhone 11 Pro Max. The main difference between the iPhone 11 Pro and 11 Pro Max is the screen size i.e. the 11 Pro Max has a 6.5-inches display with a resolution of  1242 x 2688. Its battery capacity is 3500 mAh. Rest of the specifications remain the same.

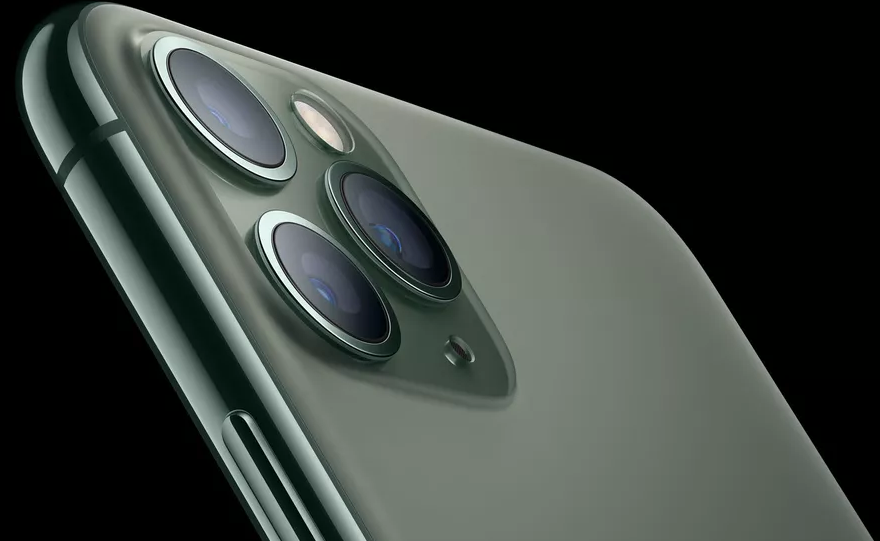
All new iPhones run on the iOS 13 out of the box. Apple is packing an 18W charging brick which can charge the battery up to 50% in about 30 minutes. The iPhone 11 Pro/Max are being offered in Space Gray, Silver, Gold, Midnight Green colors.

That’s all about the handsets. Go ahead and download the iPhone 11 Pro Max stock wallpapers now.

iPhone 11 Pro Max Stock Wallpapers

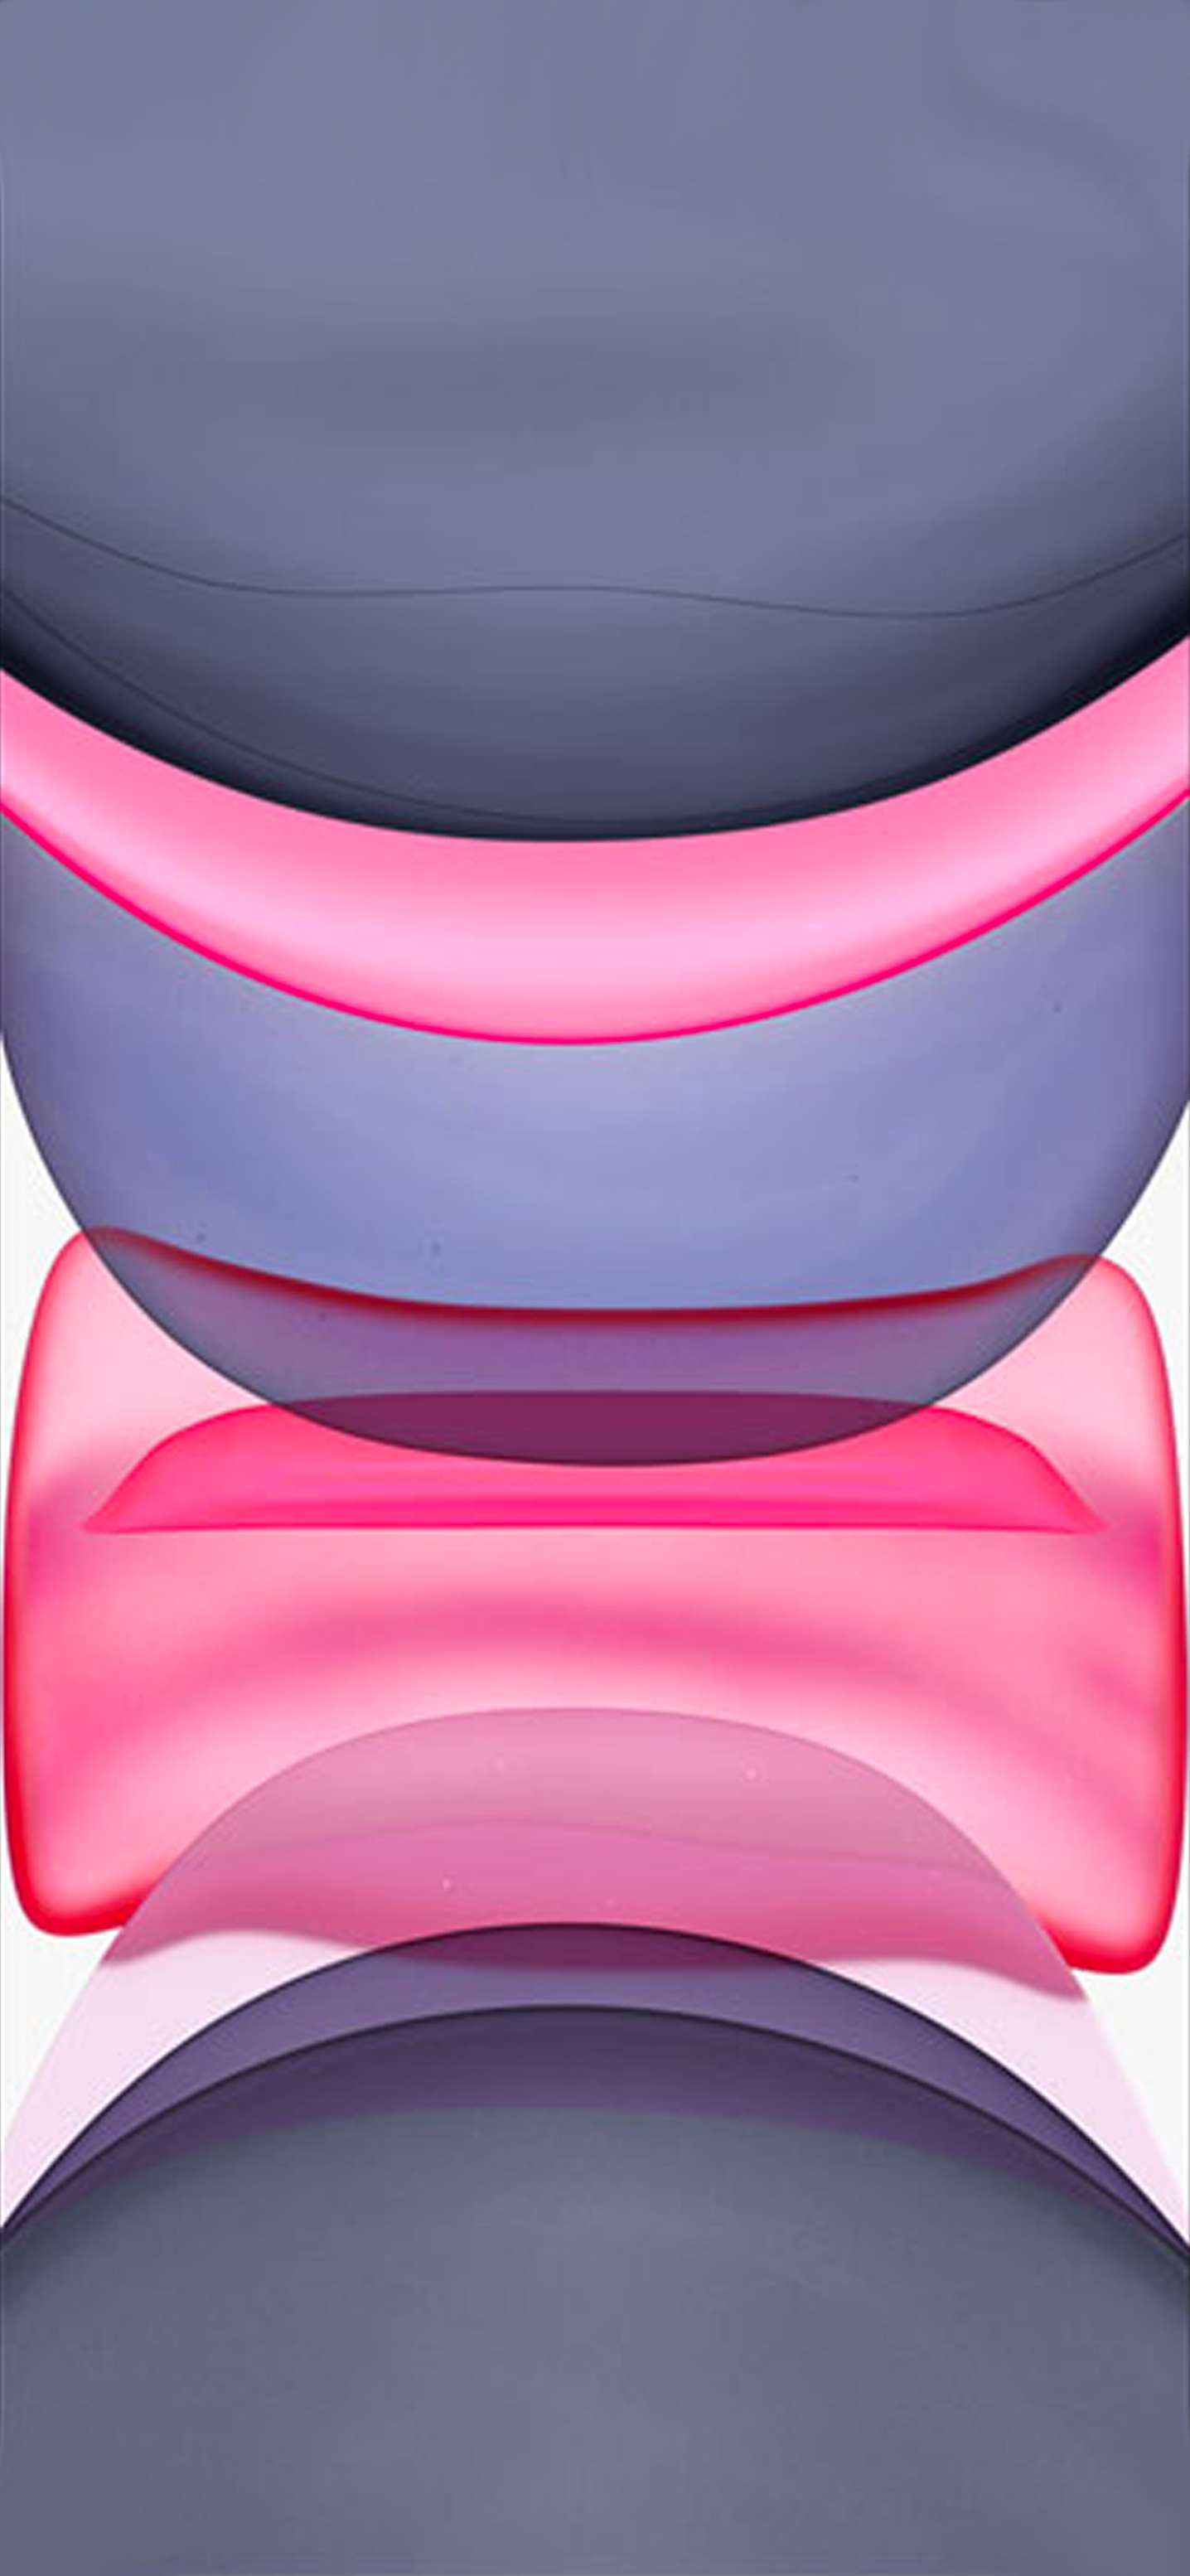
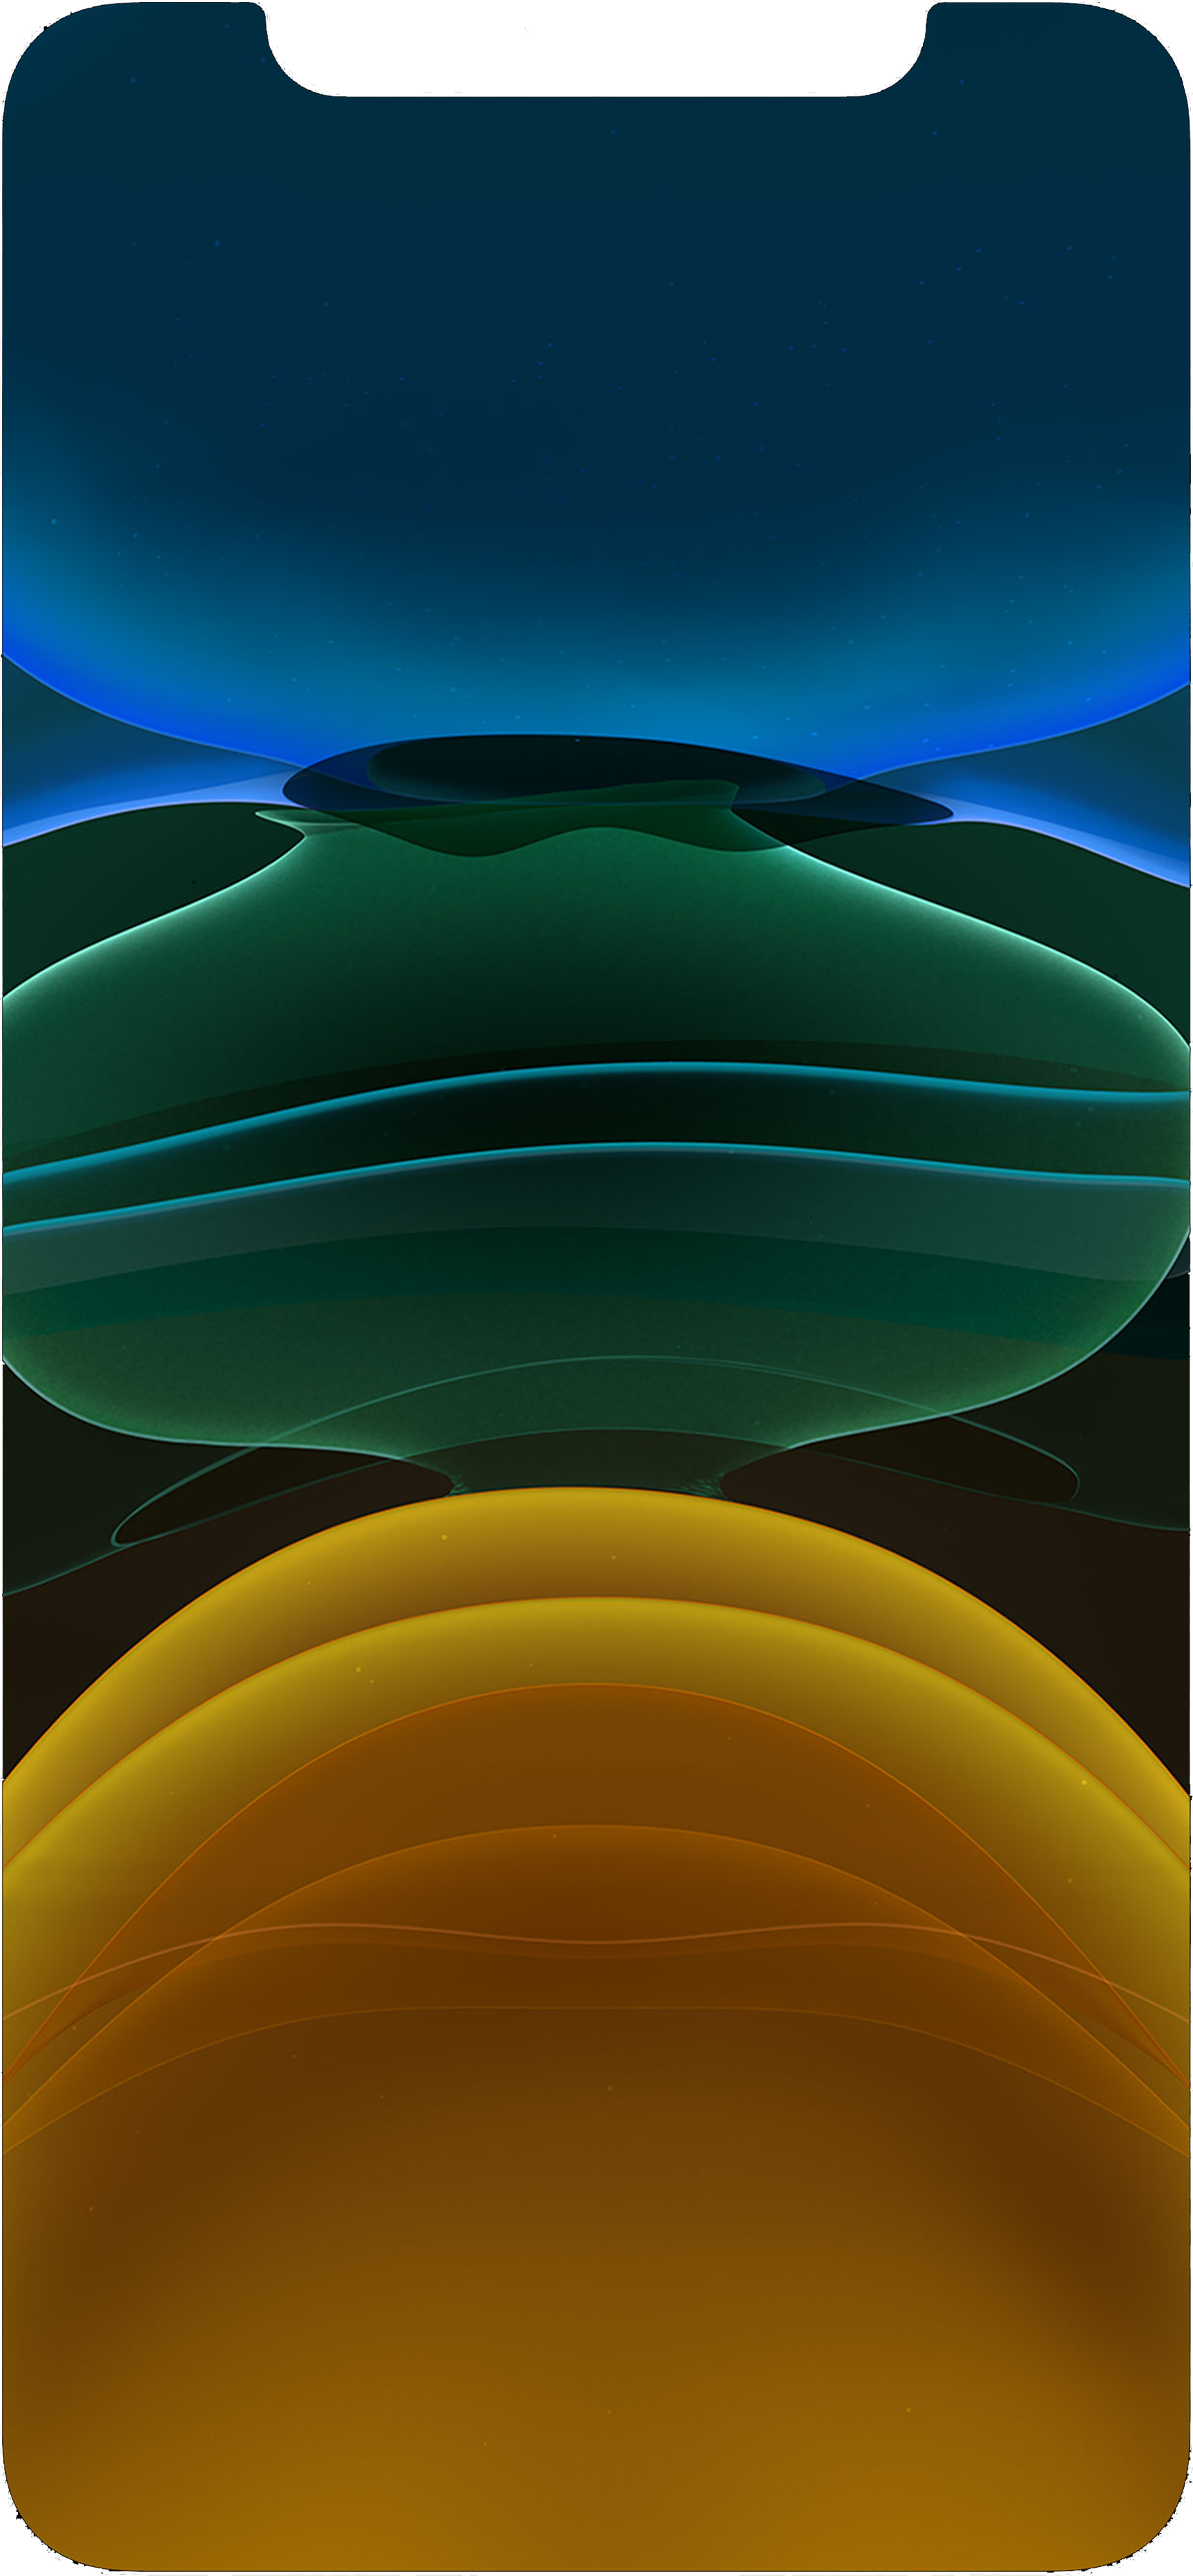
There are 26 stock wallpapers from the iPhone 11, 11 Pro, and 11 Pro Max in total. Some of these wallpapers have a resolution of 1125 x 2436 pixels, some have 1436 x 3108 and some are of 1436 x 3113 pixels resolution. You can apply these wallpapers to any iPhone or even to an Android phone’s screen.

There are two ways to download the iPhone 11 Pro Max Stock Wallpapers. You can either download the wallpapers from the all-in-one link given below or you can download the wallpapers one-by-one by “right-clicking on the image > save image as” option. Furthermore, you can download these iPhone 11 Pro Max stock wallpapers on your phone by “long-pressing the image > download image as” option.

All stock wallpapers of iPhone 11: Download

iPhone 11 Pro Stock Wallpapers
iPhone 11 Stock Wallpapers
iPhone 11 Stock Wallpaper
iPhone 11 Stock Wallpapers
iPhone 11 Pro Max Stock Wallpapers

That’s all. You can check out more stock wallpapers on our site. If you have any questions/queries, feel free to reach out to us.

Last Updated: 26th October 2019

Install Downloader On Android TV Box & Android TV

0
Install Downloader On Android TV Box & Android TV

Today, I will tell you how to Install Downloader On Android TV Box & Android TV. I have made a simple step by step guide to get you on with it.

Once you have downloaded the Downloader App on Android TV Box. You will be able to download anything on your Android TV Box & Android TV.


Install Downloader On Android TV Box

Since we cannot directly download third-party apps on our Android TV Box & Android TV. We’ll be using ES File Explorer to install Downloader On Android TV Box. Also, you will learn how to use ES File Explorer on your Android TV Box. Why ES File Explorer? Because we can use ES Explorer as an alternative to the Downloader app.

Now let me tell you a bit about the downloader app. This application use to download anything on Android devices including, Smart TV and TV boxes. Moreover, the downloader can be used to sideload applications on Fire TV or Fire TV Stick. First, it was only available for Fire TV Stick but with the latest update, it is available for Android TV Boxes.

There is more to it, the downloader app comes with a built-in browser but thanks to Google policies. The developers behind the downloader app had to disable it. Don’t worry about it, we can use Google Chrome instead of the built-in browser.

Now let’s get to it and install Downloader On Android TV Box & Android TV.

Install Downloader On Android TV Box:

Heed the instructions below in order to install Downloader On Android TV Box with ease. Please carefully follow all the instructions.

Step1: Launch Google Play store on your Android TV Box.

Step2: After Google Play store opens up, Type in ES File Explorer and hit enter. Now install ES File Explorer on your Android TV Box.

Step3: Once ES File Explorer is installed. Head back to the home screen and click on Settings.

Step4: On the Settings page -> click Security & restrictions -> Unknown sources-> Turn on ES File Explorer.

Step5: Head back to the home screen and launch ES File Explorer on your Android TV Box.

Step6: You will side a number of option on the right sidebar of ES File Explorer. Click on Tools -> Downloader Manager.

Step7: On the next screen, click on the “+” icon located at the bottom of the screen.

Step8: A new pop-up will show up, enter this URL in the path ” https://flb.st/wgXKk ” and put downloader in the name. After that click on download now.

Step9: When the file is downloaded, click on the open file button -> Click Install.

Step10: Now you will see a similar interface, the one you do on your Android device. Follow the on-screen instructions to install the downloader On Android TV Box.

That’s all. You have successfully installed the downloader app on your Andorid TV Box. Those who want to install downloader on Android TV Devices (NVIDIA SHIELD, MI-BOX). Follow the instructions below.

 Android TV:

Step1: Open Google Play on your Android TV -> Type “aftvnews” -> Click on Downloader -> Click on Install.

Step2: Once downloader is installed. Click on Open -> Click Allow -> Type in the URL ( https://flb.st/xBl7g) and hit enter.

Step3: On the next page, a prompt will show up, click Settings -> It will take you to the unknown sources settings. Allow Downloader in the settings.

Step4: After allowing unknown source installation. You will see the installation prompt. Click on Install button. Follow the on-screen instructions to install the browser extension for Downloader app on Android TV.

Step5: Once you have installed the browser extension for Downloader app. Launch the downloader and click settings -> enable JavaScript.

There you go, you have successfully installed Downloader on Android TV Box & Android TV. 

List of Android Apps that have Malware – Uninstall right now

0
List of Android Apps that have Malware – Uninstall right now

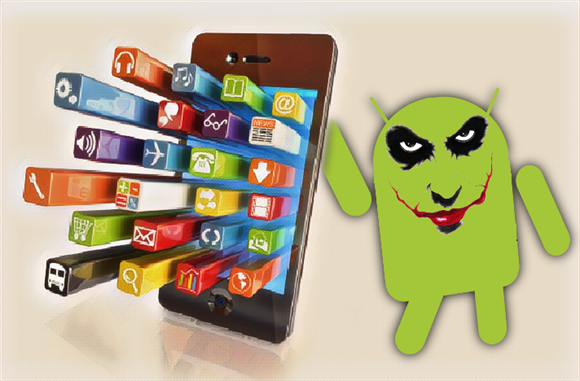
Over 24 different applications carrying a wallpaper in tow made it to the Play Store. Here is a list of Android apps that have Malware going by the name Joker. Every Android user must uninstall these apps right now.

Android Apps that have Malware
Image Credits: SCMagazineUK

Android and Malware

Android is the most widely used Smartphone operating system at the moment. Since it’s an open-source OS, anyone with good programming skills can manipulate the behavior of apps easily. Not only that, the malicious applications are then published on to the Play Store and then masses begin to installing those apps. This is where things go wrong. Now, when we talk about the Malware on Android operating system, we need to understand a few things.

Malware on Android doesn’t necessarily mean that it will corrupt your system or make the phone un-operatable. The moto of sending out Malware to an Android user through an App is quite different. 

List of Android Apps that have Malware

For the most part, it has to do with stealing information from the phone. The list of 24 applications that have come out today, those apps can manipulate a user’s behavior without the user knowing about it.

When you install the apps and run them, they ask you for specific permissions like accessing your contacts, call logs, location, camera, etc. As soon as you grant these permissions, the applications are free to do anything on the phone and you will never know about what’s happening in the background.

The list of infected Android apps includes 24 apps in total. All these apps are designed to steal information from Android phones. The primary goal of these apps is to sign the users up for premium services. Your credit card details and other data is transferred to these apps making things worst. To cut it short, you will end up losing your very very sensitive information along with a few hard-earned bucks.

This Malware carries the name, Joker. I won’t be surprised if it reminds you of the Batman Dark Knight’s Joker because the goal of this Malware seems to be inspired from original Joker’s role from that movie.

Take a look at the further explanation of the Joker Malware in Android Apps.

Joker Malware in Android Apps

Aleksejs Kuprins, Malware Analyst at CSIS Security Group took a deeper look into this malware and named it as Joker after watching its behavior. Here is what Kuprins has to say about it.

“For example, in Denmark, Joker can silently sign the victim up for a 50 DKK/week service (roughly ~6,71 EUR). This strategy works by automating the necessary interaction with the premium offer’s webpage, entering the operator’s offer code, then waiting for a SMS message with a confirmation code and extracting it using regular expressions. Finally, the Joker submits the extracted code to the offer’s webpage, in order to authorize the premium subscription.”

Google has already removed those applications from the Play Store, but Google cannot remove them if you have already installed any one of them on your phone. Take a look at the list of Joker Malware-infected Apps below and uninstall them right now.

Android Apps that have Malware

  • Advocate Wallpaper
  • Age Face
  • Antivirus Security – Security Scan
  • Altar Message
  • Board Picture Editing
  • Beach Camera
  • Climate SMS
  • Collate Face Scanner
  • Certain Wallpaper
  • Declare Message
  • Dazzle Wallpaper
  • Display Camera
  • Great VPN
  • Humor Camera
  • Ignite Clean
  • Leaf Face Scanner
  • Mini Camera
  • Print Plant Scan
  • Rapid Face Scanner
  • Ruddy SMS
  • Soby Camera
  • Spark Wallpaper

To uninstall these apps, open the app drawer on the phone and long-press the icon of the app > click on uninstall.

Download Best HD Video Wallpapers for Samsung Galaxy Phones

Download Best HD Video Wallpapers for Samsung Galaxy Phones

Looking for some neat Video Wallpapers for your Samsung Galaxy? Well, you can find many here. Take a look and download the best HD Video Wallpapers for Samsung Galaxy phones.

Best HD Video Wallpapers for Samsung Galaxy
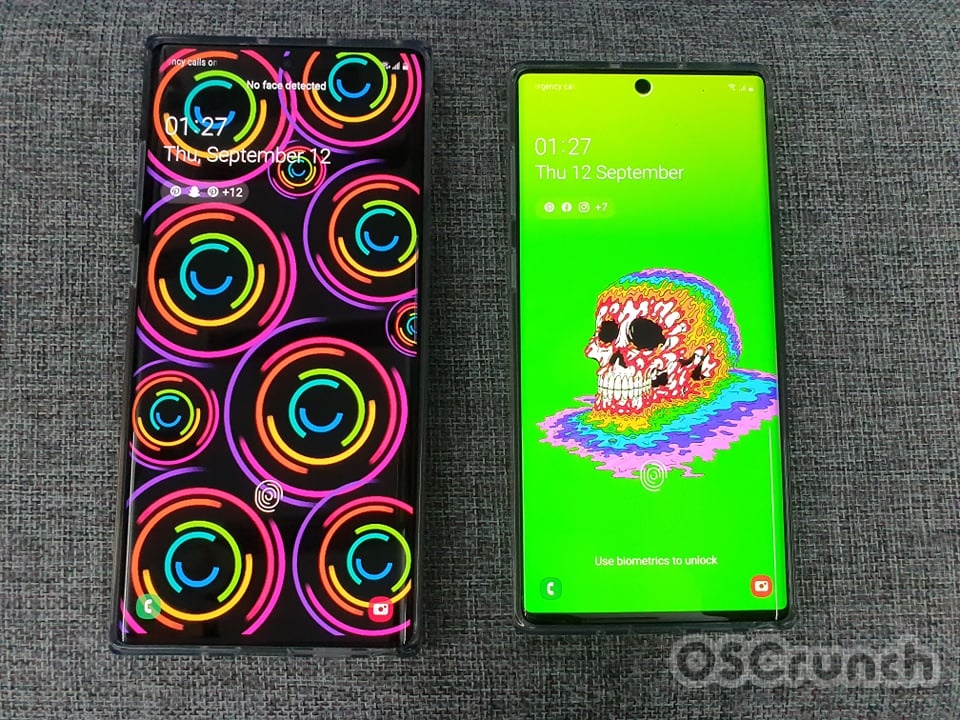
Note 10 Plus and Note 10 with Video Walls

Video Wallpapers – Samsung One UI

While many of you will be thinking of the Video Wallpapers as something new, let me tell you a few things about them.

The Video Wallpapers are not entirely new. They were always there since day one. Remember those cool live wallpapers? The same live wallpapers are now called Video Wallpapers for Samsung phones.

Note 10 Plus and Note 10 with Video Walls

The concept has changed a little bit as you can set any video of up to 15 seconds as a wallpaper on your phone while the Live Wallpapers were more about an animation only. It won’t be wrong to call the Video Wallpapers an evolved form of the Live Wallpapers.

Samsung introduced this concept with its One UI which surfaced with the Android 9 Pie. The Samsung One UI is definitely one of the best Android UIs as of now. It’s got a huge list of cool features and Video Wallpaper feature is at the top among those.

The Video Wallpapers can be set as your lock screen wallpaper and the video will silently play whenever you lock the phone and view the lock screen. Some of the wallpapers can be set as your home screen wallpaper too.

Another great thing about Video Wallpapers is the use of a GIF. You can set any GIF as the video wallpaper. Whenever you will try to set a GIF as a wallpaper, it will be transformed into a video. This will be done by your phone automatically. The GIFs look much better than the actual wallpapers as you see the same animation repeating itself or flashing again and again.

All wallpapers on my computer.

You can set any of your captured or saved videos as video wallpaper. There are no stock video wallpapers in the Samsung phones, however, you can find thousands of them crafted by different users who have posted them online. A bunch of these wallpapers is also there in the Samsung Galaxy store.

To save you the hassle of finding the video wallpapers for Samsung Galaxy phone, I’ve collected a lot of them that you will find below.

Video Wallpapers for Samsung Galaxy Phones

Following are all the video wallpapers. You can download these wallpapers directly from here or you can download the packs linked below. All wallpapers are available in the following files.

To apply these wallpapers, open Gallery on your phone and swipe down. Now click on Videos and open any video. Click on the hamburger menu icon on the top-right corner and click on “Set as wallpaper > set”.

That’s all. I would like to tell you that I do not own any of the video wallpapers linked above. I have collected them from Reddit and all the wallpapers belong to their respectful owners. I have only re-shared here for the Samsung Galaxy owners.

Download Granny Chapter Two for PC and Laptop

0
Download Granny Chapter Two for PC and Laptop

Granny Chapter Two is out now. Granny fans can download Granny Chapter Two for PC and Laptop. This game can run smoothly on Windows and Mac-powered computers.

Granny Chapter Two for PC

Granny Chapter Two

Before you download the Granny Chapter Two for PC, let me give you a brief idea of what this game is about.

Granny Chapter Two is the sequel of Granny. The new game follows in the footsteps of its prequel. The concept is the same. There are a few new features in the UI of the game, however, a major part remains the same.

In Granny Chapter Two, the Granny and Grandpa are going to entrap the players/grandchild in their house. The house is completely locked down. It’s supposed to be a terrifying experience since this is kind of a haunted house.

The goal of the players is to escape. They can escape by finding the door and by beating all the zombies including Granny and Grandpa. The catch here is that the Grandpa has some hearing problems. He cannot keep listening all the time. On the other side, the Granny stays alert 24/7. Any single movement of yours will result in making Granny following your way. 

You’ve to draw a plan to escape while maintaining a pin-drop silence. In case Granny comes your way and you need to hide immediately, you can hide under a bed or hide inside a cupboard. 

You will find a lot of boxes on the floor. Break those boxes and you will find some tools to defend yourself. Remember that you have only 5 days to get out of this house. If you don’t successfully get out, the game will be over and you will end up loosing.

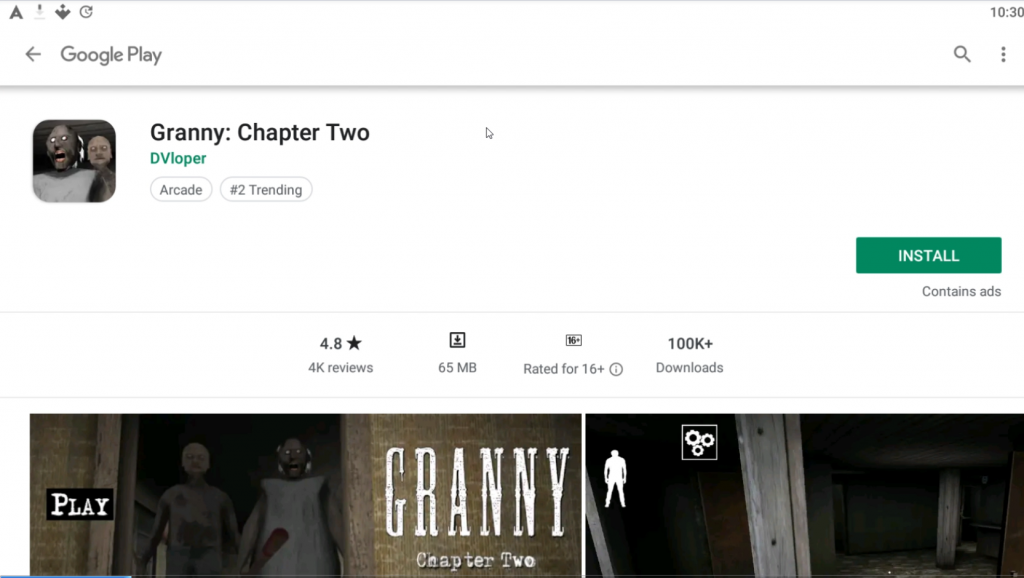
Granny Chapter Two also comes for free. The game is already out on the Play Store. As usual, this is an Android/iPhone-only game. If you wish to play it on a computer, you will have to use a different route. As you go down this post, you will find the steps to get Granny Chapter Two for PC.

Granny Chapter Two for PC

  1. Install the BlueStacks Android emulator on your computer.
  2. Open the emulator and log in using your Google Account.
  3. Now open the Play Store in the emulator.
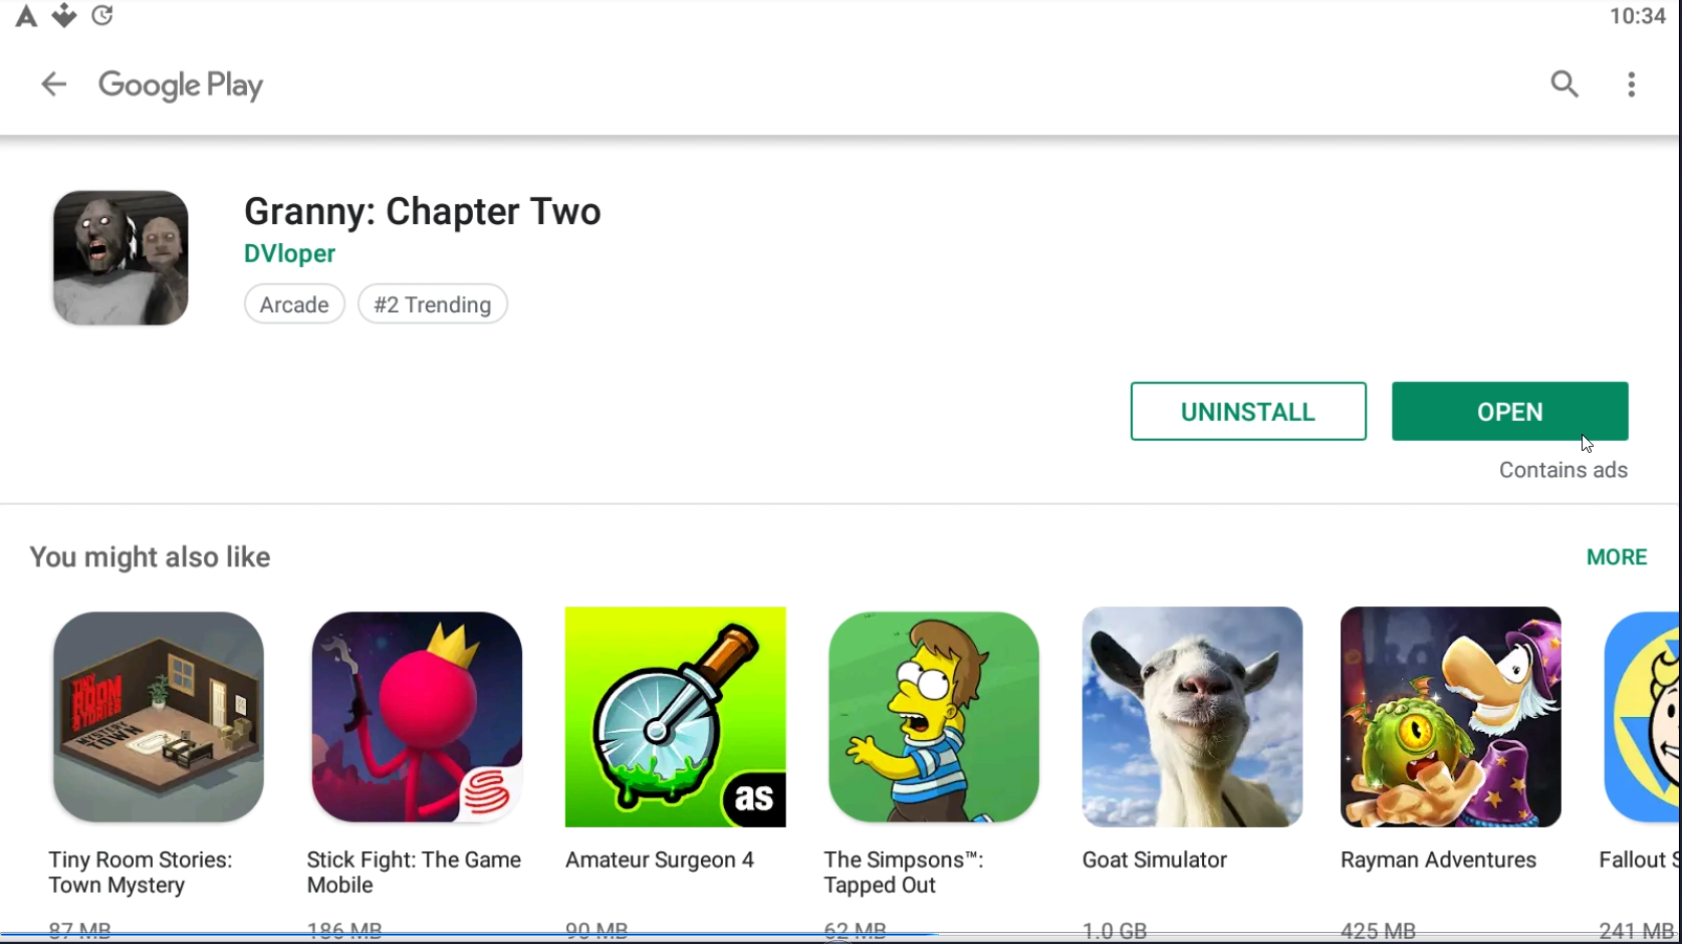
  4. In the Play Store, type “Granny Chapter Two” and find it.
  5. As you find the game, install it.
  6. Now open the game and start playing it.
Granny Chapter Two for PC

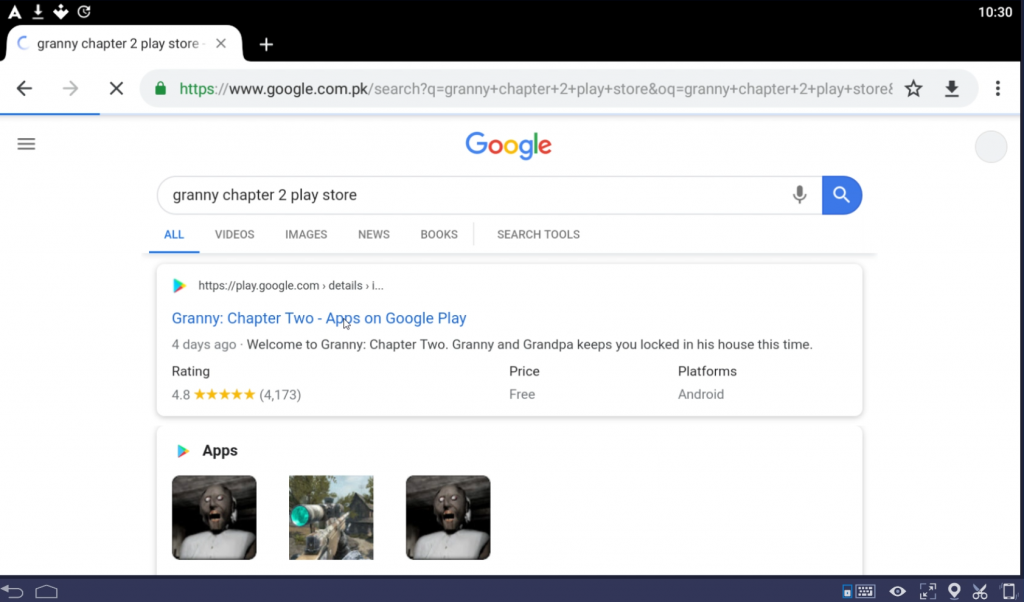
Alternatively, if the game is not appearing in the Play Store, you can open the internet browser in the BlueStacks and find “Granny Chapter Two Play Store” on Google. Now open the Play Store link which will be the very first one. You can install the game now from the Play Store.

Granny Chapter Two for PC

You can find the Granny Chapter Two APK for Android here.

That’s all. If you have any questions and queries, feel free to reach out to us. I will try my best to get back to you as soon as possible.

Enable DoH DNS-over-HTTPS in Google Chrome

0
Enable DoH DNS-over-HTTPS in Google Chrome

Users can now enable DNS-over-HTTPS in Google Chrome. The DoH in Google Chrome will provide better privacy and security to the concerned users.

DNS-over-HTTPS – DoH

Before I tell you how you can enable DNS-over-HTTPS DoH in the Chrome browser, it’s very important to understand what it is and how it works.

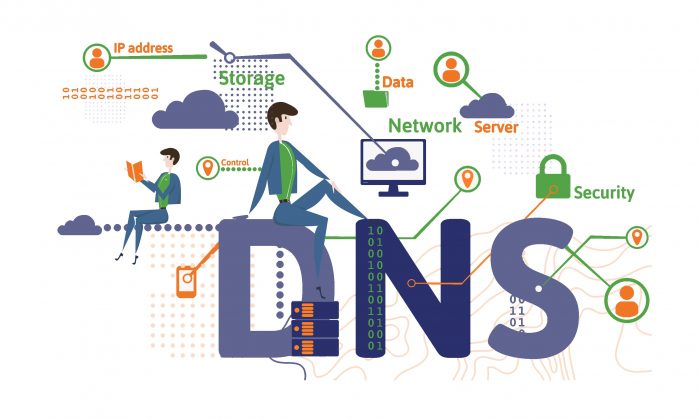
Whenever we enter a website URL in an internet browser or we enter a query online, a protocol performs the task of taking our request ahead. The common protocol for this task is the DNS protocol. The main objective of using the DNS protocol was to allow the users to avoid the hassle of going through numeric IP addresses, take a human-readable name, query, or domain from a user and look it up on the internet.

enable DoH DNS-over-https in Google Chrome
How DNS Works – Image Credits: Thesslstore

The DNS protocol doesn’t involve any encryption. It makes all the requests in a plain text. The requests you make on the internet are easily readable by the involved third-parties. This certainly puts the security of a user at risk. Not only the security, but it’s also a huge privacy concern as well.

The DNS-over-HTTPS aims to resolve this problem. It still uses the DNS protocol, but the resolution happens via the HTTPS protocol. This increases user privacy by preventing any possible eavesdropping. Your DNS data is prone to manipulation by the middleman. 

Where the DNS protocol makes the requests in plaintext, the DoH makes the same requests packaged in encrypted HTTPS traffic. It hides all of your DNS requests. The third-parties are unable to look into the requests made from your computer.

The DoH also bypasses the DNS-based blocklists because the encrypted information cannot be filtered.

The DoH protocol was implemented by Mozilla in its FireFox browser long ago. Google was also testing it for its Chrome browser for a while. The feature is now available for the Chrome browser, but it’s a little bit of a hassle to enable it. This is the very reason I am going to show you the steps to enable DNS-over-HTTPS in Google Chrome browser.

How to Enable DoH DNS-over-HTTPS in Google Chrome

Follow these simple steps to enable DoH in chrome browser.

Total Time: 2 minutes

Open Google Chrome Properties.

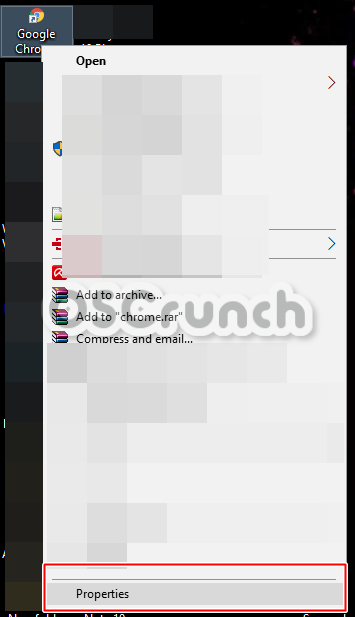
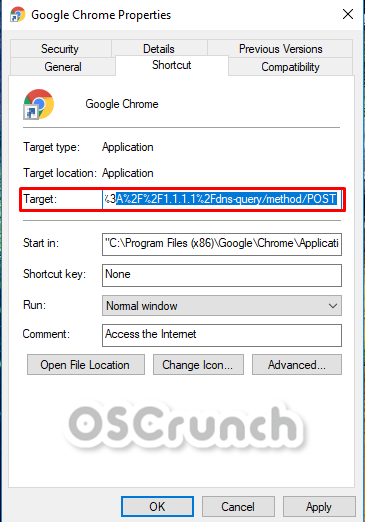
First of all, locate the Google Chrome shortcut on your computer’s desktop or in all programs. Right-click the shortcut and click on Properties.
enable DNS-over-https in Google Chrome

Access “Shortcut” in the Chrome Properties.

In the properties of Chrome, navigate to the “Shortcut” tab. You should see a number of options in the tab including the “Target” field.enable DNS-over-https in Google Chrome

Enter the following text at the end of the Target field in Shortcut.

Copy the following text:
–enable-features=”dns-over-https<DoHTrial” –force-fieldtrials=”DoHTrial/Group1″ –force-fieldtrial-params=”DoHTrial.Group1:server/https%3A%2F%2F1.1.1.1%2Fdns-query/method/POST

Paste this text at the end of the text field appearing in front of “Target”. Click on Ok or Apply now.enable DNS-over-https in Google Chrome

Restart the Chrome browser now.

If the Chrome browser is already running on your PC, shut it down and restart it. If it was close, you can just start it.

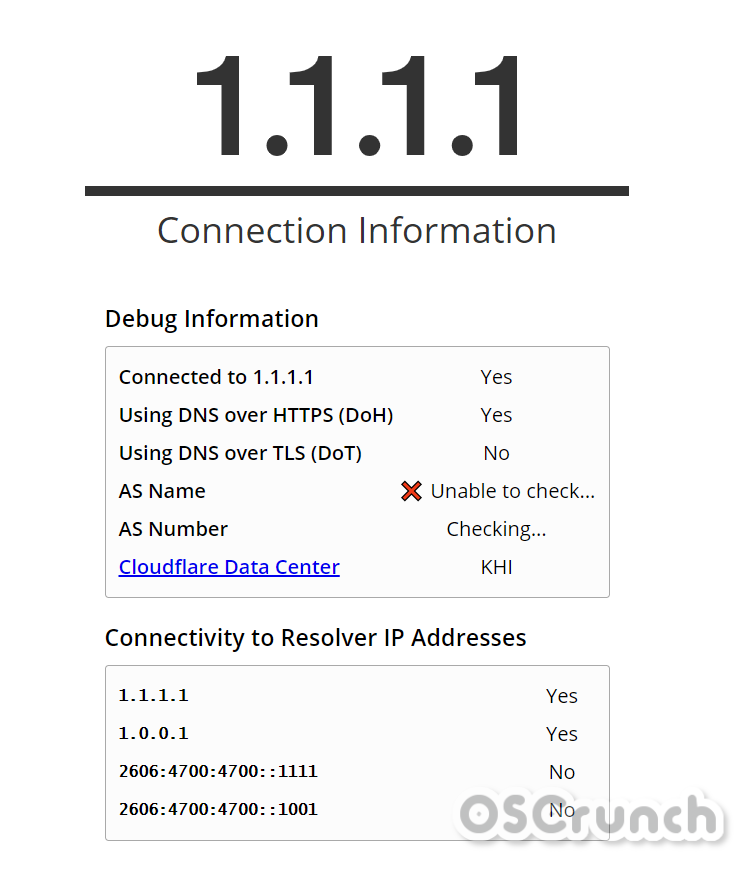
Test DoH support as it should be working. That’s all.

Now open this address in chrome: https://1.1.1.1/help and you will see “Yes” written next to “Using DNS-over-HTTPS DoH”. This means your privacy is intact now. That’s all.enable DNS-over-https in Google Chrome

The procedure above uses DoH server from Cloudflare. You can also pick a DoH server of your choice by visiting this page.

That’s all. If you have any questions or queries regarding this tutorial, feel free to use the comments section given below. I will try my best to get back to you as soon as possible.