Home Blog Page 434

Smurfs’ Village for PC (Windows 7, 8, XP, 8.1& Mac)

0
Smurfs’ Village for PC (Windows 7, 8, XP, 8.1& Mac)

We all are huge fans of Smurfs, they have been our favorite cartoons from our childhood and everyone of us used to watch them daily. After that we also got a chance to see Smurfs cartoon movie and thanks to Beeline Interactive, Inc. just because of them we got the chance to relive our childhood moments by playing Smurfs’ Village on our smartphones. In Smurfs’ Village app you have to rebuild the Smurfs’ Village which was destroyed by Gargamel. When you start building the village you’ll only have a single mushroom but with the help of Papa Smurf you can easily build the village back as it was. It will be more fun to play Smurfs’ Village on PC, so today I’ll guide you on how to install Smurfs’ Village for PC, so you can play it while you are working.

Smurfs' Village for PC

Smurfs’ Village for PC Main Features:

  1. Creativity is your only limit, build a complete Smurfs’ village from scratch
  2. Play with your favorite Smurfs including Papa Smurf, Smurfette, Lazy Smurf, Baby Smurf, Handy Smurf and Jokey Smurf
  3. Purchase Smurfberries via in-app purchase to speed up the growth of your crops and village!
  4. Play mini games like Greedy Smurf’s Baking Game, Papa Smurf’s Potion Mixing Game, Painter Smurf’s Painting Game, Lazy Smurf’s Fishin’ Game and a new free Handy Smurf minigame and unlock additional bonuses
  5. Connect with friends through Facebook and Game Center and send gifts to your friends’ villages
  6. Play offline… manage your village anytime without having to connect to the internet.
  7. Retina display graphics.

Fore More info Visit Google Play Store:

How to Download and Install Smurfs’ Village for PC – Windows 7/8/XP/Mac:

  1. Running Android apps on PC is possible through an App Player / Android Emulator only. To do this, we recommend BlueStacks. Follow the full guide here and install it on your PC.
  2. Download Smurfs’ Village apk file to your PC.
  3. Once downloaded, go to the downloaded file location.
  4. Double click the downloaded APK file now.
  5. Wait for the installation to get complete with BlueStacks.
  6. Once it is completed, open BlueStacks now.
  7. Click on “All Apps” in the BlueStacks now and click on the app that you just installed.
  8. Use the app by following the on-screen instructions.
  9. That’s All! Enjoy!

7 Reasons Why You Should Never Buy Cheap Android Smartphones

0
7 Reasons Why You Should Never Buy Cheap Android Smartphones

Android is definitely the world’s most widely used mobile operating system at the moment, because of its flexible and open nature. Billions of devices including Smartphones,Tablets, Smartwatches and other gadgets today run on Android. What actually enhances the user experience on Android is the number of cool and great applications available in the Play Store that are able to perform all the tasks of a user that he/she would expect from a smartphone, and a number of games is there that will never let you feel bored.

There are quite a few reasons that make a user fall for an Android device. This paves a way for a number of manufacturers to step in. While you start looking for a cheap Android device, whether as a starter or just in case you cannot afford, you will find a number of  local manufacturers and some international manufacturers offering a hefty list of devices at an extremely cheap price e.g $40 or $50 (off contract). That will be spiced up in such a way that it gets hard to resist buying it. These days there’s a number of Tablet manufacturers, especially the Chinese manufacturers that sell the tablets like some everyday food and prices are extremely low, but as soon as you use any of those devices, you come to know that its actually a great choice as long as it remains a toy and you can’t keep that device as your everyday companion. You  need to give it a thought before going with some low-class Android device.  It is preferred to make the best decision while emptying your pocket on a smartphone or tablet and this is what we are here for today. I’ve compiled up the best reasons that stress upon avoiding a cheap Android smartphone. Let’s move forward and learn why you should never buy a cheap Android device.androidphones

1. Build Quality/Material Is Not So Good

Let’s classify the manufacturers into two categories first. There are low-end and local manufacturers (some of the Chinese manufacturers), and there are high-end manufacturers like Samsung, HTC, LG and others.

If you’re planning to get a device from a low-end manufacturer, the very thing you should keep in mind is, no matter how beautiful the device looks, its build quality is actually going to annoy you. A cheap device means cheap, if the manufacturer is providing you the device at an extremely low cost, there must be some reason behind this and one of the reasons standing atop of the list is the material used to build that device.

Let’s talk about a mainstream manufacturer, e.g Samsung, HTC. Samsung’s high end devices come with Gorilla Glass Corning, and with each high end device, Samsung tries to improve its build quality and bring up some new design, just like it brought up the Faux Leather design for the Galaxy Note 3 that’s hard to make the scratches on, and the dotted back of the Galaxy S5 that’s quite tough as well. Gorilla Glass Corning is there on the screen to protect it from any rough and tough scratches, and helps keep the device’s display as safe as possible, and yeah, Galaxy S5 is resistant to water and dust as well. Now that is Samsung’s flagship device and that’s costs quite a lot. Do you expect the same features in a low-cost device, let’s say, Samsung Galaxy Star? or Samsung Galaxy Ace? No! not at all. So don’t put that on your choice list.

2. Low Quality Touchscreens / Display

When you’re going for an Android device, you surely expect a lot from it. The device’s display and graphics have to be awesome so that you can actually unleash the true power of your droid. Just in case the colors, transitions, animations, and the navigation do not work properly, you’ll probably dislike your Android device. In short, display matters more than a lot.

Low-end manufacturers use extremely low quality touchscreens on their devices, and when you use them, it feels like swiping your fingers on some ordinary plastic material, the screen doesn’t seem like a screen and thus you loose the charm of Android. Samsung uses Super AMOLED screens provided by Gorilla Glass Corning in its front end and flagship devices, but uses IPS touchscreen display in its low-end and mid-range devices including the tablets too, and the difference gets obvious once you use a Galaxy S5 and a Galaxy Grand. So, you actually need to keep this in mind before you invest your money on such a device.

3. Low Speed Processors

Most of the high end Android devices are getting powered up with Quad Core CPUs these days and some are getting powered up with Octa Core CPUs e.g Samsung’s Exynos Galaxy S4, Note 3, S5. Manufacturers always use the most powerful CPUs and GPUs on their mainstream devices, and take this charm away from their low end devices. To run the Android applications perfectly on your device, you’ll need a compatible CPU and a compatible GPU as well, so there surely will be a number of Applications that HTC One M8 or Galaxy S5 will be capable of running, but an HTC Desire or Galaxy Ace or Galaxy Core won’t be able to run those devices.

Low end manufacturers, including some of the Chinese manufacturers, do not use a power full CPU and GPU on their devices in order to keep the costs as lower as possible. Those devices are actually good as long as you don’t want to go beyond the phone and texting feature of the device.

So, before you invest on some cheap device, you need to keep your use of an Android device in mind and take the decision accordingly.

4. Lesser RAM

Applications are always RAM hungry. More applications you load on your Android device, more RAM you need. Performance of Android applications depends on the CPU, GPU at first, and then depends on the RAM. If your device doesn’t have a good RAM, it’s going to get hanged again and again until and unless it doesn’t free up some RAM to prioritize the on-going tasks on your smartphone. Let’s take anther example here, Samsung’s Galaxy S3 is capable of running a number of applications with its 1 GB RAM, the other reason that helps the device to work perfectly is its Quad Core CPU, on the other hand, Galaxy Grand will lack in running the same applications having the same 1 GB RAM, but the CPU is a Dual Core. So the difference is clear, you need to pick up a device with proper CPU and proper RAM.


5. Forget Android Updates

Don’t get fooled by the local device manufacturers when it comes to Android updates. I’ve personally used a number of devices, and those devices never got an Android update and remained at the factory OS , that came pre-installed.  For example, you get a device running Android 4.2.2, the device will stay on Android 4.2.2 forever and won’t receive any Android update.

On the other hand, when it comes to a mainstream smartphone giant, they will take a very long time to update their device to any further version of Android, and that too is not even guaranteed because if any issues comes up, it might kill the further update for the device. Investing in a high end device like a Galaxy S4, S5 or an HTC One M8 or LG G3 is quite useful here as its obvious that all these three manufacturers will always bring the latest updates to their mainstream devices first of all.


6. No Android Development

Android is all about openness. If you can’t go beyond the boundaries on your Android device, it literally is of no use then. Suppose if you own an Android device, that the developers don’t even know about, what are you going to do with that? Sometimes its just hard for the Android freaks to stick with the stock OS and bear the factory limitations, so a little freedom is necessary that is made possible by flashing custom recoveries, rooting the device and flashing custom ROMs and mods.

For the low cost devices by smartphone giants like Samsung, HTC, Sony and others, you will find the development stuff, but that won’t be good enough to mess with. But, as soon as you jump up to some development thread of a flagship device of a company, you will find a great amount of stuff to play with, and sometimes you just get confused about what to pick up and tweak your device with. So this choice is in your hands as well whether you want to invest on a device with a great life or you want to go with a device with a very sad and dull life.

7. Hardware Is Hard To Get Repaired

The hardware installed in cheap Android device isn’t going to be great ever. There are high chances of getting it malfunctioned and as soon as you get your device on a repairing shop, the very problem you’re going to face is, either its hard to get repaired or its parts are not available. A high end device is popular, so the manufacturers make it sure that the device owners never face a problem and they are facilitated in all the ways. Besides this, it’s actually better not to waste too much money on getting a cheap device repaired, because sometimes, the repairing costs might go above the cost of the device itself. So, make sure that you pick up a device that’s actually easy to maintain in all the ways.

The Wrap Up:

It’s actually easy to get a cheap Android device, and that will do a number of your tasks without any hiccups here and there, but that’s gonna be temporary. So its better to make a big move once and get a high end device, at least it won’t annoy you with the problems popping up everyday, that are common with low-end Android devices. Although I’ve tried my best to explain the main reasons to avoid a cheap Android device, but I surely will be missing a number of reasons that add to it.  Let’s wrap it up with, Buy Once and Cry Never! Have your say on these 7 reasons in the comment box below, We’ll be glad to hear from you. Thanks all!


Fix Samsung Galaxy unknown baseband version [ Guide ]

3
Fix Samsung Galaxy unknown baseband version [ Guide ]

What happens when your Samsung Galaxy device is working perfectly fine and then suddenly the signals are gone, you can’t make calls, can’t send text and no matter how many times you perform factory restore but still nothing works at all. This all happens when you are facing unknown baseband version issue on your Samsung Galaxy device. In this following tutorial I will guide you to fix Samsung Galaxy unknown baseband version and this guide is not specifically for a single variant, you can perform all these steps on Samsung Galaxy S1, S2, S3, S4, Note 1, Note 2, Note 3, S4 and all other devices. Following are the main issue that have been reported till now.

fix unknown baseband version

Issue because of unknown baseband version:

  1. Unknown baseband version.
  2. Null IMEI. [ Click Here to See Solutions ]
  3. Not Registered on Network. [ Click Here to See Solutions ]
  4. Insert SIM Card to access the services. [ Click Here to See Solutions ]
  5. No network service. [ Click Here to See Solutions ]

Main Symptoms you will get when Baseband Version is Unknown:

Following are the symptoms that you will get when you are facing Unknown Baseband Version on your Samsung Galaxy. 

  1. Bluetooth address is unavailable
  2. WiFi connection will work inconsistent [ use this link in order to fix it ]
  3. Constantly rebooting
  4. Fake IMEI  or Null IMEI # use this link in order to fix it ]
  5. Null Serial number  use this link in order to fix it ]
  6. Unable to register to network  [ use this link in order to fix it ]

How to Fix Samsung Galaxy unknown baseband version [ All Variants ]:

Before starting the guide let me tell you why are you facing unknown baseband version, the main reason is that your EFS data folder is deleted or corrupted that contains your phone IMEI number. You can use our guides on backing up efs data folder.

Lets start the work !

Step 1: Learn how to backup and restore EFS DATA/IMEI ON SAMSUNG GALAXY.

Step 2: Make sure your device is rooted. [ How to root Samsung Galaxy ].

Step 3: Enable USB debugging by going to Settings >Developer Options>USB debugging “checked”.

Step 4: Now connect your device to Computer.

Step 5: Download  EFS Professional v2.1 .

Step 6: Extract the file and run efs.exe

Step 7: Now you’ll see a pop-up select EFS Professional.

Step 8: You’ll be promoted on next windows where you can see your device is connected and ready for the process.

Step 9: On the top of the window you’ll see tabs Welcome, Backup, restore, Qualcomm, Debug.

Step 10: Select backup form the tabs.

Step 11: After selecting the back you’ll be in backup section now. Select all the partition on left side, now click on Backup.

Step 12: Save the backup file of your Samsung Galaxy EFS data to the secure locations.

Step 13: It will take few minutes to backup the efs data folder.

Step 14: Once done go to Restore tab and select the backup file that you’ve saved before, click on restore to fix the Samsung Galaxy unknown baseband version.

FIX UNKNOWN BASEBAND VERSION USING EFS RESTORE EXPRESS:

Step 1: Enable USB debugging by going to Settings >Developer Options>USB debugging”checked”.

Step 2: Now connect your device to Computer.

Step 3: Download  EFS Restorer Express.

Step 4: Open the EFS restore express folder and run the EFS-BACKUP.BAT file.

Step 5: Now select restore the EFS via ODIN.

How to fix baseband version unknown on galaxy s2:

Step 1: Learn how to backup and restore EFS DATA/IMEI ON SAMSUNG GALAXY.

Step 2: Make sure your device is rooted. [ How to root Samsung Galaxy ].

Step 3: Enable USB debugging by going to Settings >Developer Options>USB debugging”checked”.

Step 4: Now connect your device to Computer.

Step 5: Download  EFS Professional v2.1 .

Step 6: Extract the file and run efs.exe

Step 7: Now you’ll see a pop-up select EFS Professional.

Step 8: You’ll be promoted on next windows where you see your device is connected and ready for the process.

Step 9: On the top of the window you’ll see tabs Welcome, Backup, restore, Qualcomm, Debug.

Step 10: Select backup form the tabs.

Step 11: After selecting the back you’ll be in backup section now. Select all the partition on left side, now click on Backup.

Step 12: Save the backup file of your Samsung Galaxy EFS data to the secure locations.

Step 13: It will take few minutes to backup the efs data folder.

Step 14: Once done go to Restore tab and select the backup file that you’ve saved before, click on restore to fix the Samsung Galaxy unknown baseband version.

How to fix baseband version unknown galaxy s3:

Step 1: Learn how to backup and restore EFS DATA/IMEI ON SAMSUNG GALAXY.

Step 2: Make sure your device is rooted. [ How to root Samsung Galaxy ].

Step 3: Enable USB debugging by going to Settings >Developer Options>USB debugging”checked”.

Step 4: Now connect your device to Computer.

Step 5: Download  EFS Professional v2.1 .

Step 6: Extract the file and run efs.exe

Step 7: Now you’ll see a pop-up select EFS Professional.

Step 8: You’ll be promoted on next windows where you see your device is connected and ready for the process.

Step 9: On the top of the window you’ll see tabs Welcome, Backup, restore, Qualcomm, Debug.

Step 10: Select backup form the tabs.

Step 11: After selecting the back you’ll be in backup section now. Select all the partition on left side, now click on Backup.

Step 12: Save the backup file of your Samsung Galaxy EFS data to the secure locations.

Step 13: It will take few minutes to backup the efs data folder.

Step 14: Once done go to Restore tab and select the backup file that you’ve saved before, click on restore to fix the Samsung Galaxy unknown baseband version.

How to fix baseband version unknown galaxy s4:

Step 1: Enable USB debugging by going to Settings >Developer Options>USB debugging”checked”.

Step 2: Now connect your device to Computer.

Step 3 : Download  EFS Restorer Express.

Step 4: Open the EFS restore express folder and run the EFS-BACKUP.BAT file.

Step 5: Now select restore the EFS via ODIN.

You can also use the method 1 on Samsung Galaxy S4.

How to fix baseband version unknown galaxy s5:

Step 1: Learn how to backup and restore EFS DATA/IMEI ON SAMSUNG GALAXY.

Step 2: Make sure your device is rooted. [ How to root Samsung Galaxy ].

Step 3: Enable USB debugging by going to Settings >Developer Options>USB debugging”checked”.

Step 4: Now connect your device to Computer.

Step 5: Download  EFS Professional v2.1 .

Step 6: Extract the file and run efs.exe

Step 7: Now you’ll see a pop-up select EFS Professional.

Step 8: You’ll be promoted on next windows where you see your device is connected and ready for the process.

Step 9: On the top of the window you’ll see tabs Welcome, Backup, restore, Qualcomm, Debug.

Step 10: Select backup form the tabs.

Step 11: After selecting the back you’ll be in backup section now. Select all the partition on left side, now click on Backup.

Step 12: Save the backup file of your Samsung Galaxy EFS data to the secure locations.

Step 13: It will take few minutes to backup the efs data folder.

Step 14: Once done go to Restore tab and select the backup file that you’ve saved before, click on restore to fix the Samsung Galaxy unknown baseband version.
Top 5 Android Call Recording Apps 2014

0
Top 5 Android Call Recording Apps 2014

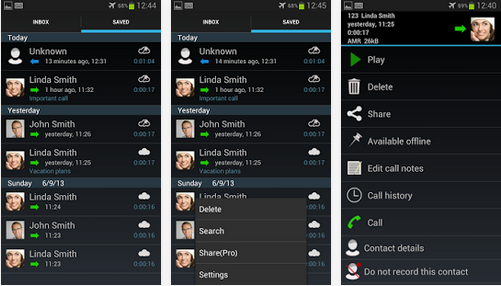
Have you ever wondered, what did the other person tells you on call when you were preoccupied and did not listen to him carefully or wished for a personal assistant to note down the long grocery list your wife just told you to bring on call? We all go through such disasters and sometimes miss out such important things because our mind is not an SD card of course. To make it simple, android market is full of call recording apps that can help you record important calls and save them. We have included the best recording apps among the following, which have all of the necessary as well as some of the outstanding features included.

 Voice-Call-Recorder-Auto-Android-App-Free-Download

Call Recorder ACR:

Call Recorder ACR

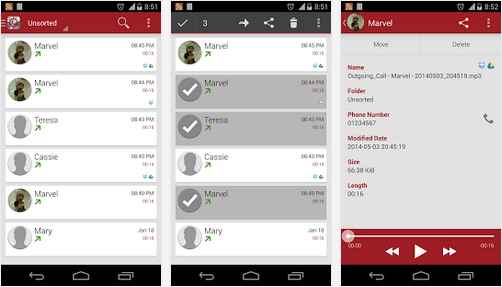
A very reliable app with a vast number of features to record your phone calls. The call recordings can be automated or manual, select the calls to be recorded including incoming as well as outgoing calls, you can save the recordings in an organized way according to the date, mark important recordings so that they do not get auto deleted and you can even protect the recordings by setting password. The app supports various formats and you can use your Dropbox, Google Drive or mailbox to save the recordings.

Once the call has been recorded, you can play to hear it, mark is as important or not, share it and even add a note. The app has all the things you want in a good recorder app.

[ Download ]

Automatic Call Recorder:

Automatic Call Recorder

Automatic Call Recorder is an excellent app to record the calls you want to. The recording is initiated automatically and you do not have to worry about turning the recorder on, while on call. You do not have to record all the calls. The app comes with 3 default settings you can select from and enables you to record all calls, record calls from of selected contacts or record calls from numbers not included in your contacts as well as the selected contacts. You can also select the memory size you want to be used by the app yourself as the app has set no limit for the inbox size.

 [ Download ]

Record My Call:

Record My Call

Record My Call is yet another simply designed app with easy user interface to record phone calls flawlessly. It records all incoming as well outgoing calls. A separate folder is made in the memory card to save the recordings done by this app. The recordings are organized showing the date, time and duration of the call recording. Moreover the app can also be synchronized with Dropbox and Google Drive. The app can also be protected by setting password. Although the recording is manual but the app ratings are good and the users seem to be much satisfied.

[ Download ]

Galaxy Call Recorder:

Galaxy Call Recorder

This app is especially designed for Samsung users with Galaxy S2, 3, 4 & 5 and Note 2 & 3. The app gives you the option to record manually as well as to choose automatic recording mode. You can choose which calls you want the app to record including incoming and outgoing calls. Plus, You can pre-select some contacts as well. To avoid losing important call recordings, you can mark them as important and lock them. The recordings are stored in the SD card or Dropbox and the app can also be synchronized with Google+ and Skydrive.

[ Download ]

All Call Recorder:

All Call Recorder

All call recorder has a simple user interface. The app is very easy to use including all important features. The app records all of your calls, incoming and outgoing, in 3gp files. You can save files in your SD card and send them to Dropbox, Google drive, Sky Drive as well as email, Facebook, Skype,YouTube and Bluetooth which is a great way to easily share files. Along with these features come the basic call recording features like securing the recording with a lock. The app is organized and your recordings are saved with contact’s number, name and the date and time of the call.

 [ Download ]

These are some of the best call recording apps available in the Android market. All of these apps include brilliant features and are absolutely free.

Best eBook Readers Apps for Android Free

0
Best eBook Readers Apps for Android Free

Ernest Hemingway has quoted, “There is no friend as a loyal Book”, what a great pleasure it is to have a book along with you all the time and in the form of eBook, it will be more than awesome. We all know that book reading is a very good hobby and many people read books on daily basis. No doubt, it will help us to gain more knowledge and improve our vocabulary. This is the reason why we have collected the best eBook reader apps for Android. So, you can easily read eBooks on your Android devices.

the-ebook-reader-home

Aldiko Book Reader:

Aldiko Book Reader

Aldiko is a popular eBook reader app with over 20+ million users from around the world, and what makes it so popular are its amazing features. It supports PDF, epub and DRM formats. The app offers customization reading where you can change the font, background, color, line spacing, alignment, etc. according to yourself. You can bookmark and organize the eBooks by tags and collections. The app has a brilliant user interface with night time reading mode, for stress free reading and it remembers your position and you can start from where you left which is amazing.

FB Reader:

FB Reader

FB Reader is another amazing eBook reader for Android users. It supports 30 different languages and gives you options to customize the font size, alignment and line spacing to give a comfortable reading experience on your devices. The app includes eight catalogs to download books from and you can also customize your own catalog easily. The search tool is efficient and you can search the title from within the catalogs to find what you looking for. You can shift between the day and night reading modes, add bookmarks, copy a phrase that you like to the clipboard and send it to another application. The app supports epub, Mobi, HTML, DOC, text and FB2 formats.

Cool Reader:

Cool Reader

Cool Reader supports various formats including ePub, mobi, HTML, FB2, Doc, text, TCR, PBT and CHM. The app also supports 16 different languages. The customization options include six font styles and you add font styles of your own as well. Similarly, you can add your own backgrounds. You can set four margins and font size as well according to yourself. The app comes with amazing toggle control settings and you can define them as they suit you along with toggling between day and night time reading modes.

Moon+ Reader:

Moon+ Reader

Moon+ Reader has a simple and neat user interface, rich features and customization options. The app lets you toggle between the day and night reading mode as well as you can adjust screen brightness manually as well, to suit yourself. You can change font size, type and color, add highlights and bookmarks and read all type of file formats. The app also includes dictionary to look up difficult and uncommon words, sharing option and backup and restore option which makes the app stand out and provides comfortable reading. The app is brilliant and lets you get thousands of eBooks for free.

Google Play Books:

Google Play Books

Your world can completely change the moment you register and start using Kindle. The app gets you updated with new and popular books and also gives you suggestions on which books you would enjoy reading. While reading a book, you can bookmark the pages, add highlights and notes. You can also use dictionary to look up words and open Wikipedia right from the page you are at. For comfortable reading, you have 3 modes to choose from; day, night and sepia. The app has brilliant user interface and you get the 3D feelings while turning pages. The app has over 400 million book for you to read and also lets you read books in offline mode which is amazing.

Download Kik Messenger for PC free (Windows 7, 8, 8.1, XP & Mac)

0
Download Kik Messenger for PC free (Windows 7, 8, 8.1, XP & Mac)

KIK is a social networking app which allows you to chat with your friends, share pictures, audio and video files and play games with them. It is a popular app with millions of users around the world. Through the method mentioned below, you can now use this messenger from your computer as well. It requires following these easy steps and getting along within minutes.

kik messenger for pc

Dow load Bluestacks for PC to Install Kik Messenger for PC.

  1. Bluestacks is an Android emulator which allows you to download any application or game available on android PlayStore on your computer.
  2. The first step is to download bluestacks software by going to the website bluestacks.com.
  3. When you open the website, you will see a download tab. Click on it to download and install the software. If you are a Mac user you can click on the tab where it says ‘download for Mac’.
  4. A window will pop up. Click on the ‘Continue’ button on the bottom right and then click on ‘Install’. Once the app is installed, another window will pop up.

PlayStore

  1. In order to download Kik software, first of all you will have to create an account on Google play store.
  2. Click on the search icon and type Kik messenger. A window will pop up to ask permission to enable App Store.
  3. When you click continue, you will be asked to create your account or use an existing account by entering your username and password. This will enable the App Store.
  4. Next step is to enable App Sync by entering your username and password. After signing into the Play store, you will be able to download Kik messenger.

Install Kik on PC

  1. On the home page, you will see a search bar.
  2. Type ‘KIK messenger’ in the search tool and click on the result that shows in the scroll down menu. The app will download automatically and once it is done the Kik icon will appear on bluestacks home page.
  3. Click on that icon and start using the app.

Using Kik Messenger on PC

  1. First of all, you need to create an account on kik which requires your name, email address, username and password.
  2. Once your account has been registered, you can start adding your friends by their usernames and start a conversation using fun emoticons, voice messages, sketches and much more.
  3. You can also go to different chat rooms, find random people to chat with and even play games with your friends as well with random Kik users.

This is fast and reliable method to register with Google Play store from your computer and download this amazing and fun messenger.

The Best Apps for Sony Xperia Z2 and Z1

The Best Apps for Sony Xperia Z2 and Z1

Sony Xperia Z2 and Z1 are considered to be a top-end phone with all the amazing features one could imagine to be in a good smartphone. It is compatible to all of the Android apps available in the market and comes with some featured apps installed already in the phone. Well, I still have some apps for you that will make your phone standout, if you have them installed.

Sony-Xperia-Z2-vs-Z1-1.JPG

IFTTT:

IFFT

In this fast and busy life, we wish for simpler things; more productive and less time consuming. IFTTT is a perfect app for busy people out there who want to stay connected with their social circle, have all things done at the right time in a less time as much as possible. IFTTT stands for ‘If This Then That‘. You give the app all the tasks to be performed; recipes (actions in response to activities) and then you will not have to bother about doing it yourself ever again. The app does it for you.

Google Camera:

Google Camera
Google camera is another must have app. The official Google camera app gives you amazing extra features. You can produce panoramas with amazing capture, stitching and quality. Moreover, you can use features like lens blur for SLR type photos and photo sphere. The app makes best use of the camera to give best shots.

Cerberus Anti Theft:

Cerberus Anti Theft
No one would like to lose a shiny grand phone like Xperia Z2 and for that purpose the Cerberus anti theft app works perfectly. In case you accidentally forget your phone somewhere, the app will help you access and control the phone remotely. You will be able to locate your phone’s location, record it’s surroundings, capture a photo or make a video of the surroundings and even lock your phone and erase or secure your phone’s data. The app has many other anti theft features as well apart from these.

ADBLock Plus:

UARgNQE1Using WiFi and browsing the web can be annoying with all the unnecessary advertisements and pop-ups. ADB Lock Plus will help block those ads from nagging you while you’re trying to focus on a particular thing. It prevents ad pop-ups, protect the device from spams and can also disable tracking. So, feel free to browse the web on your Xperia Z2 without any hindrance.

Carousel:

Carousel

The developers of Dropbox have introduced a new app to manage your photos, videos, documents and other files in a completely hassle-free way. Carousel helps you to automatically back up all of your data to Dropbox. So, now you do not have to remind yourself again and again to save your precious data to Dropbox. If you have Carousel installed in your phone then you no longer have to worry about losing your data or taking a back up again and again. Just sit back and relax, the app is there to protect your data.

5 Best Gym Apps for Android [ 2014 Edition ]

0
5 Best Gym Apps for Android [ 2014 Edition ]

Gyms can be boring and workouts can turn out to be the last thing you want to do, especially if you are doing it alone. Android has been introducing a number of apps that can be your partners at gym and a great motivation for you, to help you carry on with the workout and look your best. If you are too busy to attend a gym or lazy to go out of the house, here are 5 of the best apps for you that you must have with you and then you will never miss a single workout.

best gym apps for android

Download the 5 Best Gym Apps for Android

Nike Training Club

Nike Training Club

Nike Training Club is an app especially designed for female fitness. Great workouts have been included in the app that you can do anytime. The workouts are from professional fitness trainers and recognized athletes from all over the world. You can choose a specific workout, select for how long you need to spend time at the gym or select the area you want to focus on and the app will guide you. It also includes a four week fitness plan as well.

Workout Trainer

Workout Trainer

It brings hundreds of exercises for you to do at home. The app guides you step-by-step about the different workouts and the way you are supposed to perform them, including photos and videos instruction to make it easier for you. You can customize the workouts and focus on the area you need to. The app has a brilliant user interface. All the exercises are organized into categories, you can filter workouts and see your own created workouts in a different organized panel as well. Moreover, you can share your exercises with friends through Email, Facebook, Twitter, etc.

The app is a great personal trainer.

Daily Workouts Free

Daily Workouts Free

Don’t have a personal trainer? No problem! You no longer need to worry about what exercise you should be doing today or waste your time searching for workouts online. Daily Workouts is your personal fitness trainer. The app gives you different workout each day with a video including instructions and a timer to note the time for you. The app has 5 to 30 minute exercises coming from a certified personal trainers.

Fit Radio Workout Music

Fit Radio Workout Music

The most important thing we need while working out is the right kind of music. Our busy lives do not permit us to search for hours on the internet to find the kind of music to boost our moods during exercise. Fit Radio has made this job easier for you by bringing high energy motivating music for you that too including all genres. You have access to 25 genres and stations without even downloading them. The music is set to beats per minute so that you know when to stop.

Virtuagym Fitness Home & Gym

Virtuagym Fitness Home & Gym

The app needs you to create a free account and you get more than 90 different exercise routines and you can also find your kind of exercise online and synchronize with the app. The app helps bring motivation by awarding you with different badges as you proceed with the workout. You will also get 3 D demonstrations of the exercises to guide you through.

How to Get ‘Ok Google’ Voice Search on Any Screen Easily

0
How to Get ‘Ok Google’ Voice Search on Any Screen Easily

‘Ok Google’ has introduced a faster and easier way to search, what you are looking for. It is a voice search method where you use ‘Ok Google’ command and say whatever you want Google to search for you and the information will be with you without even typing a single word. It is able to do various tasks including searching information, getting directions, typing a message or calling a friend.

Ok-Google-Voice-Search

Previously, when you had to make use of the command ‘Ok Google’ it was possible only from the home screen. This thing was pretty irritating as we could not make much of use of this command if we were some where else except the home screen. This was a major reason which held back the users from opting for this feature.

There is a huge improvement now as Ok Google can be activated from anywhere. For example, you are surfing something on the web or perhaps a news story, you can use your voice command to look for that thing instead of typing.

Well, here is a simple way to get to turn ‘Ok Google’ on from any screen on the mobile device and not just the home screen.

How To Enable Ok Google on Every Screen:

  1. To activate Ok Google, first of all you have to go to your Google app and open settings.
  2. Tap on the Search & Now option and go to Voice. You need to make two changes in here;
  3. First of all, you need to select ‘US English’ as Language as it currently supports only one language.
  4. Secondly, you need to go to the second option just below ‘Language’ option where it says ‘Ok Google Hotword detection’.
  5. Now, you need to check the box which says From Any Screen’. This activates Ok Google to respond to your voice from wherever you want. The good thing is that it works when your screen is on and even if your phone is being charged.
  6. Now that you can use this feature from anywhere and any screen on your phone, I am sure most of you will be willing to give it a try and honestly speaking it is not that bad.

Ok Google can be a little messed up in the beginning but it works well after some time as Google learns your voice and commands. You need to be a little patient with the app and it will soon do wonders for you. Just make sure to keep your phone at arm’s length for best results..

Update Samsung Galaxy S2 I9100 With Android 4.4.4 KitKat CM 11 Custom ROM

0
Update Samsung Galaxy S2 I9100 With Android 4.4.4 KitKat CM 11 Custom ROM

Samsung’s extremely popular, and the past flagship device, the Galaxy S2’s updates stopped at Android 4.1.2 Jelly Bean. Samsung hasn’t shown any intentions to provide any further version of Android for this device. Galaxy S2, still today is one of the most widely used Android devices all across the world and also happens to be one of the best Android smartphones, and this thing paves a way for this device’s development activities. There are so many developers who keep on bringing up something new every second day to make your Galaxy S2 fly high, and somehow they’ve kept the interest of users alive with this device by providing different custom ROMs based on the latest and greatest versions of Android.

Google recently rolled out Android 4.4.4 KitKat with a lot of improvements. Guys at CyanogenMod made a quick move and developed a CM 11 based Android 4.4.4 KitKat Custom ROM for our beloved Samsung Galaxy S2. The ROM is a nightly build, but still is a great chance for you to get your device a latest KitKat. Nightly builds have a high chance of bugs, so if you’re about to install this ROM, make sure that you’re good enough at flashing the Custom ROMs and you’ve enough knowledge to handle it if something goes in the wrong direction, and the nightly builds may not be kept for everyday’s use.

In case you don’t know about CyanogenMod, CyanogenMod is the aftermarket distribution of Google’s Android OS, that has added lives to a number of Android devices forgotten by the manufacturers. As you scroll down, you will find the complete guide to install Android 4.4.4 KitKat on the Samsung Galaxy S2 GT-I9100 using CyanogenMod (CM) 11 Custom ROM. In case you’ve been looking for a guide, all you need to do is to follow the steps explained below carefully and get it done successfully. Let’s move forward to the process now.Android 4.4.4 Galaxy S2 I9100

Pre-Installation Instructions:

  1. This ROM is only for Samsung Galaxy S II GT-I9100. Do not try this on any other device, please check your device’s model in Settings > About Device > Model.
  2. Your device must have a custom recovery installed, in case you’re missing it you may Follow our full guide here to install CWM.
  3. Your device’s battery should be charged at least over 60%. This is highly recommended in order to prevent any power issues during the flashing process.
  4. Make sure that you backup your important media content, ContactsCall Logs & Messages. This is highly recommended just in case something goes wrong and you need to reset your phone.
  5. If you already have rooted your device, use Titanium Backup to back up all your important apps + system data. Also if you are using a custom recovery, it is recommended that you backup your current system using that first. [Just for the sake of safety]. Here’s our full Nandroid Backup guide.
  6. You will have to go through Data Wipes during installation of this ROM, so make sure that you have backed up all the mentioned data.
  7. Make an EFS backup of your phone before you flash this ROM.
  8. You need enough confidence to flash this ROM.
  9. Alright! Go ahead and flash the custom firmware, follow this guide to the letter.

Disclaimer: The methods involved in flashing custom roms and rooting your phone are highly custom and may result in bricking your device, and has nothing to do with Google or the device manufacturer that is SAMSUNG in our case. Also rooting your device will void its warranty and you will be no longer eligible for any kind of free device services by the manufacturers/warranty providers. In case of any mishap we may not be held responsible. Follow these instructions to the letter to avoid any mishap or bricking. Make sure that whatever you do, you are doing it at your own responsibility.

How to Update Samsung Galaxy S2 I9100 with Android 4.4.4 KitKat CM 11 Custom ROM:

      1. Download CWM 6.0.4.9.zip file [KitKat Compatible.]
      2. Download cm-11-20140709-NIGHTLY-i9100.zip ROM .zip file.
      3. Download 7-5_GApps_Standard_4.4.4_signed.zip file.
      4. Connect your phone to your PC now.
      5. Copy all the three .zip files to the storage of your phone.
      6. Now disconnect your phone and turn it off complete.
      7. Boot into CWM recovery [that you installed using the link in early preparations] now, in order to do so, turn it on by pressing and holding Volume Up + Home Button + Power Key. You should see the recovery mode in a while.
      8. Now select “Install > Choose Zip from SD card > Select CWM 6.0.4.9.zip file > Yes”. [v.important]
      9. This will flash KitKat comaptible CWM recovery in your Galaxy S2.
      10. Once flashed, reboot your device again into the recovery mode [use step 7].
      11. Now in CWM recovery, wipe cache, factory data reset and advanced options > dalvik cache.
      12. After wiping all these three, select “Install” option.
      13. Now select “Install > Choose Zip from SD card > Select CM 11 ROM.zip file > Yes”.
      14. This will flash the ROM in your phone.
      15. Once again in CWM select “Install > Choose zip from SD card > Gapps.zip file > Yes”.
      16. This will flash Gapps in your phone.
      17. Reboot your device.
      18. You should see the CyanogenMod 11 Android 4.4.4 KitKat running on your device in a while.
      19. That’s all!

First boot may take up to 10 minutes, you may not worry if it’s taking that much long. In case it’s taking too long, you may boot into CWM recovery and wipe cache and dalvik cache and reboot your device as it may fix the issue. In case your device is having issues, you may return to your old system using the Nandroid backup or follow our guide here to install stock firmware.

In case you got any issues or you face any difficulties regarding this post, please feel free to stop by the comment box below and let us know. We will get back to you as soon as possible. Thank you all.

Update Samsung Galaxy Tab 3 Lite SM-T111 With Dr Ketan Custom ROM

10
Update Samsung Galaxy Tab 3 Lite SM-T111 With Dr Ketan Custom ROM

Galaxy Tab 3 Lite came out in January, 2013. A low end and cheap variant of the Galaxy Tab 3 sporting a 7.0 inches IPS touch display, a 1.2 GHz dual core CPU, 1 GB RAM and 8 GB memory on the board. Galaxy Tab 3 Lite runs on Android 4.2.2 Jelly Bean and there hasn’t been any update for this device, nor there’s a word by Samsung about any further updates of this device.

For some users, specially the Android enthusiasts, it is always hard to stick with the stock firmware as it may become quite boring after sometime using the same UI and same features again and again, but if you happen to be a Galaxy Tab 3 Lite owner and you’re looking to change your taste, you may not be able to find enough stuff to mess with as this device’s development isn’t too vast.

Thanks to our friend Dr Ketan, who recently got his hands on the Galaxy Tab 3 Lite for his son, and he brought up something great all the Galaxy Tab 3 Lite users. Dr Ketan has brought up his very own Custom ROM for this device loaded with a number of features that will make your device fly high. Dr Ketan’s Custom ROM is based on stock Android 4.2.2 Jelly Bean with the customized features. We are going to install this ROM on the Samsung Galaxy Tab 3 Lite in the following post, just in case you’ve been looking for a custom firmware for your Tab 3 Lite, let’s go through the ROM features in detail and then begin installation.Tab 3 Lite

ROM installation is done by AROMA installer, a fully user controlled customization installer.

-Inbuilt Aroma file manager in case anything go wrong while playing device with different mods, you can manage to explore device from recovery
-EFS Backup/Restore
-Modem flasher
-Customized Bloatware remover, select only app you don’t want.(including Knox)
-Customized bloatware restore (all bloatware you have removed can be restore later with this)
-Lock screen Password cleaner
-GPS changer (select according your location)

ROM features:

Pre rooted , Zip aligned
30 battery Mod
Ad Free
Call Recording –
4 Way Reboot mod
Camera Hack – Use camera with Flash at low battery
Dr.Ketan Utilities 

Auto record Incoming call
Auto Record Outgoing call
Auto GPS (GPS will auto ON with some common app needs GPS)
Auto Wifi (Wifi will be turn off if remains disconnected for 10min)
Auto Blutooth (will be turn off if remains unpaired for 10min)
Smart Network (Mob data will be switched off after 30 sec of screen off)
Media scanner Enable/Disable

Advanced function SecMMs

Group messeging
Schedule msg
Recipient limit 999
Disable SMS-MMS
Raise SMS/hr limit
Split view toggle in setting menu
Increased MMS max size
Increased size of image
No SMS to MMS with Emoji

There’s a number of tweaks/MODs available that you may come across while installing this ROM. Let’s get done with the process now.

Early Preparations:

      1. This ROM is only for Samsung Galaxy Tab 3 Lite SM-T111. Do not try this on any other device, please check your device’s model in Settings > About Device > Model.
      2. Your device must have a custom recovery installed, in case you’re missing it you may. Install TWRP recovery on your Tab 3 Lite SM-T111 from this post.
      3. Your device’s battery should be charged at least over 60%. This is highly recommended in order to prevent any power issues during the flashing process.
      4. Make sure that you backup your important media content, ContactsCall Logs & Messages. This is highly recommended just in case something goes wrong and you need to reset your phone.
      5. If you already have rooted your device, use Titanium Backup to back up all your important apps + system data. Also if you are using a custom recovery, it is recommended that you backup your current system using that first. [Just for the sake of safety]. Here’s our full Nandroid Backup guide.
      6. You will have to go through Data Wipes during installation of this ROM, so make sure that you have backed up all the mentioned data.
      7. Make an EFS backup of your phone before you flash this ROM.
      8. You need enough confidence to flash this ROM.
      9. Alright! Go ahead and flash the custom firmware, follow this guide to the letter.

Disclaimer: The methods involved in flashing custom roms and rooting your phone are highly custom and may result in bricking your device, and has nothing to do with Google or the device manufacturer that is SAMSUNG in our case. Also rooting your device will void its warranty and you will be no longer eligible for any kind of free device services by the manufacturers/warranty providers. In case of any mishap we may not be held responsible. Follow these instructions to the letter to avoid any mishap or bricking. Make sure that whatever you do, you are doing it at your own responsibility.

How To Install Dr Ketan Custom ROM On Galaxy Tab 3 Lite SM-T111:

      1. Download T111-NB2_Dr.Ketan Custom ROM V1 .zip file.
      2. Copy the downloaded file to your Galaxy Tab 3 Lite’s internal SD card.
      3. Now boot into TWRP recovery on your Tab 3. To do so, turn it off completely. Now turn it onn by pressing and holding Volume Up + Home + Power Key. You should be able to see TWRP interface in a while.
      4. Once in TWRP, tap “Wipe>Swipe finger to Factory Reset”.
      5. Once wiped, get back to the main menu in TWRP and tap “Install”.
      6. Locate the copied Dr Ketan Custom ROM.zip file and tap it.
      7. Swipe finger on “Yes” to confirm the flashing, as soon as you do, ROM installer will open up.
      8. Now make the selections you wish, follow the on screen instructions and flash the ROM.
      9. Once done, reboot your Galaxy Tab 3 Lite.
      10. Congrats! Dr Ketan Custom ROM is installed on your Tab 3 Lite. Enjoy the great features now.

That’s all. In case you got any queries or you’re facing any issues regarding this custom ROM, feel free to stop by the comment box below. We will catch you up immediately. Thanks all.

Install CWM/TWRP Recovery and Root Samsung Galaxy Tab 3 Lite SM-T110/SM-T111

Install CWM/TWRP Recovery and Root Samsung Galaxy Tab 3 Lite SM-T110/SM-T111

Samsung introduced a low cost variant of the Galaxy Tab 3 7.0, named as the Galaxy Tab 3 Lite 7.0 also known as Galaxy Tab 3 Neo in January, 2014. The device sports a 7.0 inches TFT touch screen display, is powered up with 1.2 GHz Dual Core CPU accompanied by Vivante GC1000 GPU. A RAM of 1 GB is there while the internal storage is 8 GB and there’s a microSD card slot that supports up to 32 GB of external memory. There’s a huge 3600 mAh battery placed under the hood. The device is available as SM-T111 with GSM support while SM-T110 with Wi-Fi only support.

Samsung rolled out this device running Android 4.2.2 Jelly Bean, and the device is running on the same firmware till today. If you happen to be Galaxy Note 3 Lite owner and you’re feeling caged with the stock firmware and stock applications, you may want to give your device and  customized look and feel by applying different mods, tweaks or by installing a custom ROM, but before you do that you probably will need a custom recovery and root access on your Galaxy Tab 3 Lite. In case you’ve been looking for a custom recovery and the method to root your device, you have spotted the right place at the moment.

As you scroll down, you will come across a comprehensive guide that will teach you to install ClockworkMod [CWM] or TWRP recovery and root your Galaxy Tab 3 Lite SM-T110 and SM-T111. Both these recoveries serve the same purpose, but the users have their own liking so you may pick one up that satisfies you. For those who don’t know, CWM is quite simplistic while TWRP is the touch recovery with a very nice and user friendly UI. Once we are done installing the recovery, we can easily root the device. Galaxy Tab 3 Lite Root And Recovery.jpg

In case you’re a first timer / newbie with the recovery installation and root process, here’s something to remove your confusions before you head towards the installation guide.

What is a custom recovery and root access?

A custom recovery allows you to install custom roms, mods etc. Along with these, you can make a Nandroid backup, this helps you a lot as you can move back to the previous working state of your phone at any time you want if you have backed up your current system. In some cases, to root the phone you need to flash SuperSu.zip file in the custom recovery, having installed the recovery may help you while in some casesto install the recovery easily, you need to have the phone rooted. You can also wipe cache and dalvik cache of your phone using a custom recovery.

Rooting your phone gives you complete access over all the data which is apparently locked by the manufacturers. This includes removal of the factory restrictions and making changes to the internal system and the operating system. Gaining the root access gives you the privileges to install various applications to enhance the performance of your device, allows you to remove the built-in applications/programs, helps you to upgrade the battery life of your device & install the apps which require the root access for the proper functionality and modify your device in so many other ways e.g using mods and flashing custom recoveries and custom ROMs. Here’s our collection of 10 Best Root Apps.

Early Preparations:

      1. This guide is only for Samsung Galaxy Tab 3 7.0 Lite / Neo SM-T111/SM-T110. Do not try this on any other device.
      2. Make sure that your phone’s battery is charged at least over 60%.
      3. Use the original data cable for establishing the connection between your PC and phone.
      4. Backup all your important contacts, find the full guide here.
      5. Backup all your important sms messages, find the full guide here.
      6. Backup all your important call logs, find the full guide here.
      7. Backup all your important media content manually. (Copy to your PC.)
      8. If you’ve flashed a custom recovery previously, it is suggested that you create a Nandroid Backup.  If this is the first time, you can do this step after you flash the recovery.
      9. Don’t forget to make EFS backup before flashing this firmware. [Important]
      10. If your device is previously rooted, you may use Titanium Backup to backup each and everything on your phone. In case this is the first time, you may skip this step for now.
      11. Turn off /disable Samsung Kies while using Odin3.
      12. Turn of any Anti Virus software while using Odin3.
      13. Alright. Follow the instructions carefully.

Disclaimer: The methods involved in flashing custom recoveries, roms and rooting your phone are highly custom and may result in bricking your device, and has nothing to do with Google or the device manufacturer that is SAMSUNG in our case. Also rooting your device will void its warranty and you will be no longer eligible for any kind of free device services by the manufacturers/warranty providers. In case of any mishap we may not be held responsible. Follow these instructions to the letter to avoid any mishap or bricking. Make sure that whatever you do, you are doing it at your own responsibility.

Downloads Required:

How To Install CWM/TWRP Recovery and Root Galaxy Tab 3 Lite SM-T110/SM-T111:


  1. Download CWM or TWRP Recovery.tar.md5 file [According to your choice and your device].
  2. Open Odin3.exe.
  3. Put your Tab 3 Lite in download mode. To do so, turn it off and wait for 10 seconds. Turn it on by pressing and holding Volume Down + Home Button + Power Key simultaneously, You should see a warning, press Volume Up to continue. In case this method doesn’t work for you, try one from this guide.
  4. Connect your Tab 3 to your PC.
  5. As soon as Odin detects your phone, the ID:COM box should turn blue.  Make sure that you’ve installed Samsung USB drivers before connecting.
  6. For Odin 3.09 hit the AP tab. Select the recovery.tar.md5, that you downloaded above.
  7. If you’re using Odin 3.07, you will select “PDA” tab instead of the AP tab, rest of the options remain untouched.
  8. Make sure that the options selected in your Odin are exactly as shown in the pic.
  9. Odin 3.09 explained. (2)
  10. Hit start and wait till the recovery flashing is complete, as soon as your device restarts, remove it from PC.
  11. You can now boot into recovery mode by turning off your device, and then turning it on by pressing and holding Volume Up + Home + Power Key.
  12. That’s all!

How to Root Galaxy Tab 3 Lite SM-T110/T111:

  1. Copy the downloaded Root Package.zip file to your Tab’s SD card.
  2. Boot into recovery mode on your Galaxy Tab 3, use step 11 in the recovery installation guide.
  3. Now Select “Install > Choose Zip from SD card > Root Package.zip > Yes / Confirm”.
  4. This will flash the Root Package and quickly gain the root access on your Galaxy Tab 3 Lite.
  5. Reboot your device.
  6. Find SuperSu or SuperUser in the App Drawer.
  7. That’s All!

How to check if the device is properly rooted or not?

      1. To do so, go to Google Play Store on your Galaxy Tab 3 Lite.
      2. Find “Root Checker” and install it.
      3. Open Root Checker.
      4. Tap “Verify Root”.
      5. It will ask you for SuperSu rights, tap “Grant”.
      6. It should show you Root Access Verified Now!
      7. That’s All!

1560688_10202529514651766_2061540064_n

That’s all the credits for the recovery goes to XDA dev gr8nole. In case you’re happy with his work, don’t forget to make him a donation for his hardwork. If you’re facing any difficulties regarding this post, feel free to stop by the comment box and drop us your words. We will get back to you ASAP!