Home Blog Page 433

GTA 5 HD & Wide Wallpapers for Your Desktop

GTA 5 HD & Wide Wallpapers for Your Desktop

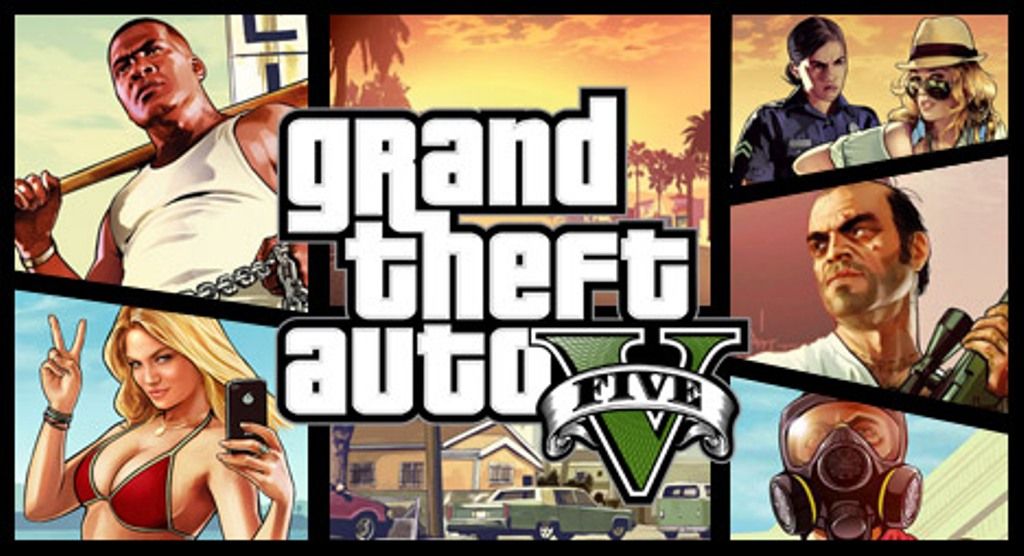
GTA 5 the most popular game in action category it was released back in Step 17 2013 for PlayStation and Xbox 360. Good news is that soon you’ll get GTA 5 on Microsoft WindowsPlayStation 4 and Xbox One. Today i’ve collected the GTA 5 HD & Wide Wallpapers for Your Desktop.

439638

Free-Download-GTA-5-HD-Wallpaper-for-Computers

grand_theft_auto_gta_v-wide

gta_v___official___wallpaper_set_by_streamingpixels-d4dx6s9

gta-5-hd-wallpaper-game-backgrounds-29617

gta-5-hd-wallpaper

gta-5-wallpaper-cover-image

gta-5-wallpaper-hd-1080p-1024x768-awesome

gta-v-franklin_00448759

gta5-wallpaper

wallpaper-gta5-v_trevorfranklinmichael_1920x1080

How To Restore deleted photos or files from your Mobile SD card

1
How To Restore deleted photos or files from your Mobile SD card

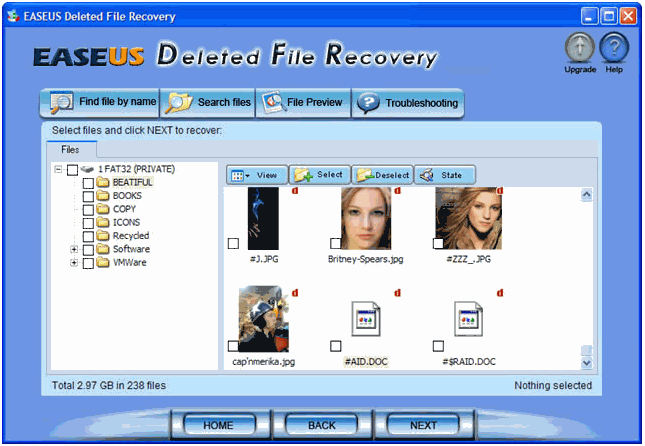
Today i’ll tell you how to restore or recover deleted photos or files from you mobile SD card. Accidentally photos are deleted this happens with all of us. You can find thousands of guide on the web telling you how to restore the deleted files or photos but not all of them are working guides. Few days back i accidentally deleted my Retrica folder and i was so worried because i have so many photos in that folder. But after a lil bit of hard work i found a software that can really help you. So lets start restoring deleted photos or files from your Mobile SD card.

Easeus-Deleted-File-Recovery-Software

How To Restore deleted photos or files from your Mobile SD card:

  1. First Download Photo Recovery Tool.
  2. Connect your device with PC or Use SD card reader to connect SD card with PC.
  3. Now install the recovery tool that you have downloaded in first step.
  4. Once installed now double click on the shortcut of the EaseUS.
  5. A Window will open with three options on your screen. Select ” Data Recovery “.
  6. Once you have selected Data recovery now you’ll see a new windows and again there will be three options.
  7. Select Deleted File Recovery and click on next.
  8. Now you’ll get to choose between 2 options ” Search all lost files automatically ” or  “Search lost files by types”.
  9. If you know the exact location of your files or photos then choose Search lost files by typer else Search all lost files automatically. Click on next.
  10. Now you have to choose your media driver from the following list from where you want to recover photos or files.
  11. After selecting a drive you’ll see a pop-up saying that if the files are not found or corrupted in this mode. Then choose complete recovery. Click on Next.
  12. Now the process will start and you’ll see a lot of recovered files. Choose the ones you want to recover.
  13. After selecting the files or photos now you have to save it. Select a destination folder or drive and save it.


This is all you have to do to Restore deleted photos or files from your Mobile SD card.

How To Shorten URL Links Automatically In Android using Shortpaste

0
How To Shorten URL Links Automatically In Android using Shortpaste

There are times when you have to select the URL link/address and guess what, you are using either a mobile or a Tablet. Now when I am using either one of them it is a real pain in the back to copy it, well not all the times but still most of the times, and I can easily presume that if a certain thing happens to me, it so can be happening to anyone else. I can understand that we all had our moments, whenever we try to Select a URL and struggle to highlight the entire thing. Thanks to Stray Trap or just because of the link which is so long that most of the times it takes half of your screen to paste it, and if you use Standalone URL shorteners, you are sure to loose the efficiency of your work.

shortpaste

Good thing, we have developers at XDA taking care of many things for us, like finding a permanent and reliable solution for this long and huge URL problem. XDA Senior Member, Mohammad_Adib has developed an application called Shortpaste, as you might have guessed from the name of it, it allows you to shorten the URL link length to a small one, thus making it easier for you to copy and paste it. Once you Start the app, it will run in the Background, and it will paste any link you copy in Short form. The default URL Shortener set by Shortpaste is goo.gl, however, you can change it to bit.ly. Furthermore, you can cut the http:// and set the custom Bit.ly username and API Key, and the best, if you want to visit any link you have shortened before, just go to the list of Archives and all will be there for you.  Shortpaste is compatible with all the device running Android 4.0 or above and can be downloaded from Google Play Store for free.

How To Download And Install Shortpaste:

  1. Open Play Store from Your device.
  2. Search for Shortpaste.
  3. Once the results are found, tap the first result.
  4. Tap Install and let it download and install.
  5. Once installed, Open the app.
  6. Now Shortpaste will run in the Background, ready to shorten any URL you highlight.

Root Android device without voiding the warranty [ Android 4.0 or Higher ]

4
Root Android device without voiding the warranty [ Android 4.0 or Higher ]

Whenever rooting a device, the first thing that comes in our mind and that scares the hell out of us is ” voiding the warranty “. That’s what stops people from performing root on their devices. After rooting your device you can have full control of your device, you can even install custom mods, custom ROMs, Custom fonts and you can also remove stock apps which you don’t like. But most of Android user’s avoid rooting. I’ve got good news for them, now you can root your device without voiding the warranty. Please follow my guide below and enjoy the root access on your Android devices.

root android without voiding the warranty


How To Root Android device without voiding the warranty:

  1. Download VRoot on your Desktop.
  2. Download and Install Android USB Derivers on your PC.
  3. First check if Knox is enabled on your phone then goto settings->security->disable Lock Reactivation.
  4. Now install VRoot that you’ve downloaded in first step.
  5. Open Vroot and enable USB debugging on your phone.
  6. Connect your phone with PC.
  7. Wait for few minutes Vroot will search for your device, if it is in database then root button will appear.
  8. Now click on Root and wait till your device reboot. (Note your device will reboot after the process is completed).
  9. Done! Now your phone is rooted without voiding the warranty. Check it through Root checker app.

Dino Hunter Deadly Shores for PC (Windows 7, 8, 8.1, XP and Mac)

1
Dino Hunter Deadly Shores for PC (Windows 7, 8, 8.1, XP and Mac)

Do you want to hunt dinosaurs on your Smartphone? If you do! Then “Dino Hunter” is the game that you should install on your phone. Glu is know for his epic mobile games on both Android and iOS PlayStore. And they have brought another exciting game named as Dino Hunter Deadly Shores. In Dino Hunters you will feel the experience of killing ferocious animals in history. Hunt or be hunted by the docile stegosaurus to the terrifying T.Rex. Today I’ll tell you how to download and install Dino Hunter Deadly Shores for PC. Follow our step by step guide to install Dino Hunter Deadly Shores for PC (Windows 7, 8, 8.1, XP and Mac).

Dino Hunter Deadly Shores for PC

Dino Hunter Deadly Shores for PC ( Windows 8,7,8.1, XP-Mac ) Features:

  1. Kill dinosaurs in lush and dangerous Jurassic environments like the shipwreck-strewn coast, overgrown jungle and dinosaur boneyard!
  2. Load up on firepower with destructive weapons like the rocket launcher and shuriken crossbow. You’ll need a powerful arsenal and an expert shooter strategy to kill these dinosaurs!
  3. Progress through varied shooter series to win rifles, shotguns and assault rifles. Make your kills and complete them all for even greater rewards!
  4. Dynamic shadows, hi-res textures and realistic Jurassic models all combine to make this one of the most beautiful dinosaur shooter games on your mobile device!

How To Install Dino Hunter Deadly Shores for PC (Windows 7, 8 , 8.1, XP and Mac):

  • You need an Android emulator to run this game on your Windows PC or MAC. We recommend using BluestacksUse our guide to install it on your PC.
  • After downloading and installing Bluestacks, Download Dino  Hunter apk.
  • Open the downloaded APK file now, and let Bluestacks install it.
  • Open BlueStacks now > All Apps > Dino Hunter:Deadly Shores.
  • It will take a few minutes in to install depending on application size.
  • Once done you’ll see the app icons in my apps.
  • The game will start now, follow the on screen instructions.
  • That’s all.

How To Speed Up Your Galaxy Note 3 [10 Tips]

0
How To Speed Up Your Galaxy Note 3 [10 Tips]

Samsung’s flagship Galaxy Note is a true beast. It sports a powerful Snapdragon 800 Quad Core CPU or a Exynos 5 Octa CPU accompanied by Adreno 330 or Mali-T628 GPU. There’s a 3 GB RAM. Samsung has fixed in a massive 3200 mAh battery to add life to this device. These specifications surely make this device a great choice and easily win the battle when standing next to the latest flagships of different manufacturers, but these specifications still might not be enough to make this device fast enough to perform different tasks.

Techbeasts-5

How To Speed Up Your Galaxy Note 3

There’s always a room for improvement. While playing with my Galaxy Note 3 SM-N900, I applied some changes and found that my device started working much better than before. The changes require no hard and fast rules, so I couldn’t resist myself to put them up here. I’ve compiled up the best tips that will help you to make best out of your Galaxy Note 3. Let’s move forward and apply the changes on your Galaxy Note 3 and test its performance.

Disable “Open via Home Key” for S-Voice

Did you ever note that pressing the home key on your Galaxy Note 3 takes quite long to take you to the home screen? Well, that is because of the S-Voice. When you double press the home key, it opens up the S-Voice and that is what’s slowing down the performance of your device’s home button. In able to make it work faster, you need to disable the S-Voice’s “Open via Home Key” option. Here’s how you can do it.

      1. Open home screen on your Galaxy Note 3.
      2. Double tap the home button.
      3. Bypass the S-Voice activation screen if you haven’t already.
      4. Once done, press the options key and tap “settings” in S-Voice
      5. In settings > general > uncheck the 3rd option “open via home key”.
      6. Close S-Voice now.
      7. Open the app drawer or any other application now, and try pressing the home key. It should be much faster now.
      8. That’s all.

Homescreen1-tile

Use a Static Wallpaper – Avoid Live Wallpaper

Live wallpapers surely look cool and are liked by so many users. Live wallpapers sometimes play the role of a game as you can play with the effects on your device’s screen. But that’s not a good thing at all when you come to know that it’s slowing down the performance of your device, and it’s also draining the battery of your device. The effects in the Live wallpapers are the processes eating up your device’s RAM and CPU for no use. This slows down navigating through the app drawer or home screens on your Galaxy Note 3.

In order to make your device work a little faster, it is recommended that you should always use a static wallpaper. Using a static wallpaper won’t run any extra processes and will make it a lot easier to navigate through your device without any speed hiccups. To set a static wallpaper, long press your Galaxy Note 3’s home screen, tap Set Wallpaper >  Home/Lock Screen Wallpaper > Select wallpaper from anywhere except “Live wallpapers”.

StaticWallpaper

Disable Animations:

Another way to speed up your Galaxy Note 3 is to disable the Window, transition animations and animator duration scale. These animations generally occur whenever you’re switching between application or you open any new application. You must have noticed that applications take a quite long while switching, this is only because of the animations that load before the application opens up or gets switched. Here’s a little activity to get rid of the animations.

      1. First off all you need to enable developer options on your Galaxy Note 3. In order to do so, go to Settings > More/General > About Device > Tap the build number for 7 times and the developer options are enabled. Now get back to the More/General Tab > Developer Options.
      2. Once in developer options, scroll down and find “Window Animation Scale > Tap it and turn it Off”.
      3. Now tap “Transition Animation Scale > Turn it Off”.
      4. Now tap “Animation Duration Scale > turn it Off”.
      5. Open any application or switch between applications, you will find it much faster now.

Developer Options-tile

Remove Animation Effect From Lock Screen

Samsung has loaded new animation effects on the Galaxy Note 3 including the Watercolor, Particle Effect, Light Effect, and Ripples Effect. When these effects are activated, they slow down unlocking your device. It always is a good idea to avoid the use of any of these effects as it fastens up unlocking your Galaxy Note 3. In order to turn off, the effects follow these steps.

    • Go to Settings > Personal > Lock Screen > Unlock Effect > None.

Once selected “None”, try unlocking your device and it should be fast enough now.Lockscreen

Get Rid of TouchWiz – Use a Custom Launcher

Samsung’s TouchWiz isn’t a great choice to stick with. The launcher is full of features that slow down the working and functionality of your Galaxy Note 3. In order to get rid of the TouchWiz launcher, it is recommended that you use a custom launcher. I’m using the Google Now launcher and it works quite flawlessly. You may use it or try using Nova Launcher, Apex Launcher or some other that suits you the best. You will definitely find the difference between TouchWiz and other launchers.

Launcher1-horz

Clear up your RAM with time

After you use an application, make sure that you clear up your device’s RAM. Leaving an application running at the background will put much burden on the RAM and it might result in slowing down your device’s performance. In order to clear your RAM, follow these steps.

      1. Long press the home button.
      2. Swipe away the applications shown in the task manager.
      3. Now press the very first button at the lower left corner now.
      4. Tap the “Clear memory” button.
      5. That’s all.

ClearRAM-horz

Turn off the background process

Sometimes, some applications launch the background process that is not shown in the task manager. These are the background processes and can be found in the application manager only. These processes might play a role in slowing down the performance of your device as well. Here’s what you can do get rid of these background process.

Go to settings > more/general > application manager >swipe through the “running” tab > find the process that’s not in use and stop it.Background Processes

Root your Galaxy Note 3

Android’s greatest characteristic is the root access. Once rooted your device, you can easily go beyond the boundaries and make a number of tweaks to your device in order to get the maximum out of it. There are tons of applications that require root access and enhance your device’s functionality to the maximum extent. For example, you can perform CPU Under & Overclocking, you can remove bloatware applications, you can make changes to your device’s system and a lot more.SuperSu

Remove Bloatware Apps [Root]

Samsung has loaded the Galaxy Note 3 with a number of useless applications that are called Bloatware. Removing these applications will not only free up the extra space on your Galaxy Note 3, but will also boost up the performance of your device. Here’s our guide that explains how you can remove bloatware from your Android device.Bloatware2

Kill Startup Applications [Root] 

Whenever your device boots up, there are so many applications that start up with your device as well and eat up the RAM and CPU. It’s hard to point out these applications as these might not even appear in the application manager. A very nice application to perform this task is the System Tuner. You can use the “Startups” tab in the System Tuner and kill all the applications that startup with your device. This will make your device turn on faster and will also make it work faster.System Tuner1-tile

That’s all. There surely is a number of so many other ways to enhance the performance of your Galaxy Note 3, but these are the best 10 I came across. In case I’m missing any important, don’t hesitate to mention it in the comment box below. Thank you all.

 

Wear Mini Launcher – The First Custom APP Launcher For Android Wear

0
Wear Mini Launcher – The First Custom APP Launcher For Android Wear

Android wear smartwatches are already out with a number of capabilities. The only thing that might seem annoying for a while is launching the apps on your Galaxy Gear Live or LG G-Watch. To access your installed applications on your Android wear powered smatwatch, you have to open the options and scroll down to the bottom and tap “Installed Apps” to access your lite applications like Google Keep, Evernote, Fit and others.

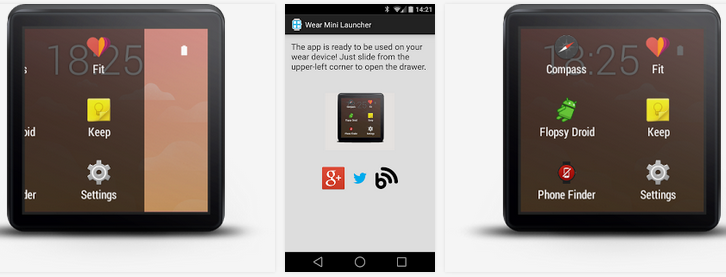
Developer Nicolas POMEPUY has made a quick move to rip this annoying thing off by bringing up the very first custom app launcher for Android Wear. The launcher is named as Wear Mini Launcher. It makes accessing the applications much easier by simply tapping em’. To access the app list, you simply need to swipe in from the top left corner to the right slowly. Make sure that you do not drag it down, or drag it too fast as it will start performing other tasks/functions on your Android Wear device.Wear Mini Launcher

As off now, Wear Mini Launcher seems to work flawlessly with the Gear Live and G-Watch. A number of issues has already been fixed that were reported by the users. The application is new and still might contain a number of bugs that you may come across. The developer is trying his best to improve the app with every single update, and is open to any suggestions and ideas.

Guide To Fix Android 4.4.2 KitKat battery drain issue

0
Guide To Fix Android 4.4.2 KitKat battery drain issue

Most of us who are using high end devices of Android must be running Android 4.4.2 KitKat and surely you people must be facing battery drain issues. Whenever a new Android version is released everybody wants to update their device to the latest version but this time when Android 4.4.2 KitKat was pushed to users, the results were not the same as before. KitKat came with a lot of bugs like lagging, Google play services aren’t working, battery draining issue and more. Today I’ll tell you how to fix Android 4.4.2 KitKat battery drain issue.

Fix Battery Drain issue on Android KitKat 4.4.2


Guide To Fix Android 4.4.2 KitKat battery drain issue:

Step 1: Switch Off WiFi when your are not using it.

Step 2: Turn off Bluetooth after using.

Step 3: Disable the location services.

Step 4: Clear your browser cache twice in a month.

Step 5: Set your brightness do not use it on full.

Step 6: Keep clearing your RAM.

Step 7: Delete unneeded applications and files.

Step 8: Disable Auto updating feature.

Step 9: Stop auto syncing.

Step 10: Disable Google Auto Voice detection.

Step 11: Root your device and use custom ROMs with good battery performance.

Step 12: Use third party apps to over come battery drain issue.

Step 13: Root your device and remove the stock booting apps.

How To Clear Google Play Store Search History On Your Android

0
How To Clear Google Play Store Search History On Your Android

Google Play Store’s Search History is quite annoying, specially when you’ve to look up for something and the suggestions pop up again and again.  Sometimes you want to keep your search history neat and clean so that if someone else access your Android device, he/she may not come across your interest with the applications on the Play Store. If you’re wondering how you can clear the search history, here’s a little how-to that will help you to do so.

How To Clear Google Play Store Search History On Your Android:

  1. Open Google Play Store on your Android.
  2. Tap the options button on the top left corner.
  3. Tap Settings (the sixth option).
  4. In settings, tap “Clear search history” (the fourth option).
  5. You’re all done! You won’t find anymore suggestions in the search box of your Play Store now.


Google Play History1Google Play History

Telegram for PC – Windows XP,7,8,8.1 and MAC

0
Telegram for PC – Windows XP,7,8,8.1 and MAC

Over the past few years, a number of social chat messengers has landed in the Google Play Store, but only a few of them were good enough to use. WhatsApp and Viber surely remain at the top, but just in case you don’t like any of these applications, there are alternatives like WeChat, Line and others to go with. A very nice and new application that landed in the Google Play Store some time ago is even better then these alternatives. We are talking about Telegram. A very nice, light and super fast messaging application is available for free in the Google Play Store.

Telegram has a hefty list of features that enhances the application’s use. Telegram offers a cloud storage in order to backup all of your important chat and the media content you exchange with your contacts. It offers voice messaging as well. Group chat allows you to add over 200 people in conversation.  Telegram is also available for iPhone. Just in case you don’t like to use Telegram on a small screen gadget running iOS or Android and you’re looking for an alternative to run this cool application, you may have spotted the right place. We are going to install Telegram on a desktop PC running Windows XP,7,8,8.1 or a MAC by Apple. All you need to do is, you need to follow this guide carefully in order to run it successfully.Telegram

How To Get Telegram for PC – Windows XP,7,8,8.1 and MAC:

  1. You need an Android emulator to run this game on your Windows PC or MAC. We recommend using BluestacksUse our guide to install it on your PC.
  2. After downloading and installing Bluestacks, download Telegram APK.
  3. Open the downloaded APK file now, and let Bluestacks install it.
  4. Open BlueStacks now > All Apps > Telegram.
  5. The game will start now, follow the on screen instructions.
  6. Follow the initial screen,  you’ll be able to access Telegram.
  7. Add your number and you will receive a text having your verification code.
  8. Enter the verification code in order to bypass setup screen on Telegram.
  9. Use Telegram!.
  10. Stay in touch with your social world!
  11. That’s all.

Flipboard for PC – Windows XP,7,8,8.1 or MAC

0
Flipboard for PC – Windows XP,7,8,8.1 or MAC

Flipboard is the news and magazine app being used by 100s of K’s of users all around the world. The all in one magazine app allows you to stay up to date with your social profiles like Twitter and Facebook, and keep an eye on what’s going around the world in all the areas of life. You can pin news from all of your favorite categories and updates from your social profiles in your very own personalized magazine. Flipboard comes with a ponderous feature list, these include searching for your anything from the web using hashtags, people, topics or anything from different blogs that are synced up with flipboard. Once created your flipboard profile, you can connect it with over 12 social networks in order to streamline your activities.Flipboard

Flipboard is available for free in the Google Play Store. But sometime’s it’s not possible to stick with your Android device. If you always love to stay in touch with your interest and you can’t compromise on missing anything important from the news or social world, you need to keep flipboard infront of you all the time. The moment you are tired of using the small screened Android device, a desktop PC may play a role of a good alternative here. Flipboard can be installed on a Windows XP,7,8,8.1 PC or a MAC device easily. In the following post we will show you how you can get it running on your computer, all you need to do is, you got to follow this guide carefully.

How To Get Flipboard for PC – Windows XP,7,8,8.1 or MAC:

  1. You need an Android emulator to run this game on your Windows PC or MAC. We recommend using BluestacksUse our guide to install it on your PC.
  2. After downloading and installing Bluestacks, download flipboard APK.
  3. Open the downloaded APK file now, and let Bluestacks install it.
  4. Open BlueStacks now > All Apps > Flipboard.
  5. The game will start now, follow the on screen instructions.
  6. Follow the initial screen,  you’ll be able to access Flipboard.
  7. Use your mouse’s left click to use the application.
  8. Stay in touch with the social and the web world!
  9. That’s all.

How To Fix All Google Play Store Errors

0
How To Fix All Google Play Store Errors

Today, I’ll tell you how to fix all Google Play Store errors that appear while using Google Play, from the last few days I have been hearing from so many people about the problems they are facing while opening Google Play Store or trying to download any app. Recently one of my friend told me that Google Play is not loading and whenever he restarts the device there is no Google Play Store. So, lets start fixing all the errors which appear when you try to use Google Play Store.

How To Fix All Google Play Store Errors


How To Fix All Google Play Store Errors:

Following are the main errors that you face while using Google play Store. Perform all the steps in order to solve the errors and you can use Google Play Store as you did before.

Google Play – Error 491:

To solve Error 491 go to settings then accounts->Google and the remove your Gmail account. Restart your device then again go to settings->Applications->Swipe left for All Apps tab and from there click on clear data and force stop.

Google Play – Error 498:

To solve Google Play Error 498 you’ve to delete all unneeded applications and files that are consuming your run time memory. Turn off your device remove the battery wait for few seconds insert the battery back. Go to recovery by pressing volume down+Home+Power button. Now you’ll be in recovery mode a list will be displaying on your device screen. Select wipe cache partition and press power button to confirm it.

Google Play – Error 919:

To Solve Google Play Error 919. All you have to do is delete all the unnecessary files like video, music and photos to free your memory. Your device memory is full and this is the main reason of Google Play Error 919.

Google Play – Error 413:

Google Play Error 413 ( Means you cannot download application and updates are stopped ). To solve Google Play Error. Go to settings then Applications->All->Google Services (clear data and then force stop)-> Google Play Store app (clear data and then force stop). After that clear your browser cache.

Google Play – Error 923:

To Solve Google Play Error 923. First remove your Google account by going into the settings->Accounts->Google->Remove. Turn off your device remove the battery wait for few seconds insert the battery back. Go to recovery by pressing volume down+Home+Power button. Now you will be in the recovery mode, a list will be displayed on your device screen. Select wipe cache partition and press power button to confirm it.

Google Play – Error 921:

To Solve Google Play Error 921. First of all try deleting apps cache, if it didn’t work then delete all Google play Store apps’ data. In the end remove your Google account from the device.

Google Play – Error 492:

To Solve Google Play Error 492. Turn off your device boot in to the recovery mode and select clear Dalvik cache. If it didn’t help try doing a complete factory reset.