Home Blog Page 435

Fix Samsung Galaxy S4 Wi-Fi is ‘Stuck On’ Turning On [ How To ]

2
Fix Samsung Galaxy S4 Wi-Fi is ‘Stuck On’ Turning On [ How To ]

I have posted many solution of Samsung Galaxy devices like , Fix Null IMEI on S4, Fix Not registered on Network, Fix Booting up issue, Fix insert sim card to access service. Today I’ll discuss about WiFi issues on Samsung Galaxy S4. Few days back a friend of mine told me that has Samsung Galaxy S4, and while turning on the WiFi it has a ‘stuck on’ issue, frankly speaking, I was surprised to hear that because I never faced such kind of issue while using Galaxy S4. But let me tell you, it’s really true, while searching on Google I found many people were complaining about the same issue. So, this is why today I’ll discuss about how to fix Samsung Galaxy S4 WiFi is stuck on turning on.

Fix Samsung Galaxy S4 Wi-Fi is Stuck On Turning On

How To check your Samsung Galaxy S4 Wi-Fi is Stuck On Turning On:

Before doing anything you must check first that your Samsung Galaxy S4 is really facing WiFi stuck on turning issue. If yes, then proceed further otherwise don’t try any of the following step.

  1. Check your WiFi turn off/on toggle button is working fine. If it takes time and shows “turning on” or “error”.
  2. If it is showing turning on and stays like that it mean its stuck.
  3. If it shows error then it means it will work.

Main reason of Samsung Galaxy S4 Wi-Fi is Stuck On Turning On:

  1. Low memory.
  2. Extra Programs.
  3. Hidden Programs.

How to Fix Samsung Galaxy S4 WiFi is Stuck On Turning On:

Following are the methods that will help you to get rid of this WiFi is ‘stuck on’ while turning on. Please follow all the methods carefully to fix this issue.

Fix through clearing the memory:

  1. Go to your RAM manager.
  2. Press your home button for 3 seconds you’ll be in task manager now tap on the extreme lower left tab.
  3. Now you’ll be in RAM manager tap on clear memory.
  4. Once done again tap on clear memory.
  5. After performing clear memory for 2 times now your WiFi will be working fine.

Turn off WiFi Power Saving mode:

  1. Open Dialer on your Samsung Galaxy S4.
  2. Dial *#0011#.
  3. After adding the you’ll be in Service mode.
  4. Now press menu button.
  5. Select WiFi from the list.
  6. Switch off the power saving mode.

Restart the router and disconnect all of your device currently connected with WiFi. When the router is rebooted and working now connect only your device. I am sure your Wifi will work properly now.

Perform a factory reset to fix:

  1. Go to Settings on your device.
  2. Tap on account tab.
  3. Now select backup and reset.
  4. After that select Factory Reset.

How To Get Kids Mode On Samsung Galaxy Tab 3 7.0

11
How To Get Kids Mode On Samsung Galaxy Tab 3 7.0

The very feature I loved on the Samsung Galaxy S5 is the Kids Mode, that Samsung loaded in any of its devices for the first time ever. Kids Mode is actually a cool feature, that seems to be a remedy to a number of worries that the Galaxy device owners may have. Especially, when your kids always want to use your device and you’re worried about their access to your important data on the device and afraid of getting it affected, Kids Mode can prove itself to be of a lot of help.

Turning on the Kids Mode on your Galaxy device launches a Kids Launcher, that especially is designed with a Cartoonist look to tempt the kids. It has got its very own camera and gallery application, that comes with some amazing and cool features including different scenes, different frames that may attract the Kids. Samsung has also loaded a number of nice applications that can teach the Kids quite a few things by keeping their interest alive in the application by providing enough fun. Kids mode has a complete parental control that allows the parents to set the access limits for the files/folders/applications while a kid is playing with the device in kids mode.

This feature is available in the Galaxy S5 and some other devices that came after the GS5, like Galaxy Tab 3 lite for now, or might be available in some more latest devices, but how about getting it on your Galaxy Tab 3? Galaxy Tab 3 surely is Samsung’s most widely used tablet device all around the world, and if you use one, that is also being used as a toy by your kid, you may want to add a little privacy by installing Kids Mode and giving the limited access to your kid. Although Samsung introduced a Kids version of the Galaxy Tab 3, but when you can get all those modifications easily, then why to waste money on a device separately?. Well, this job has been done by XDA dev gr8nole, who has ported in the Kids Mode for our beloved Samsung Galaxy Tab 3. It requires a few minutes and some attention to get installed, scroll down and learn how you can install it on your Galaxy Tab 3.

Early Preparations:

  1. This guide is only for Samsung Galaxy Tab 3 7.0 SM-T210/SM-T210R/SM-T211/SM-T217S. Do not try this on any other device as it may result in bricking it.
  2. Your device must be running Android 4.1.2 Jelly Bean firmware with stock TouchWiz launcher.
  3. Your device’s battery must be charged enough to perform the flashing. Say it, at least 80%.
  4. Your device must a custom recovery installed. Install using the following guides.
      1. Install CWM/TWRP Recovery and Root Sprint Galaxy Tab 3 SM-T217S [How To]
      2. How to Root and Install CWM Recovery on Samsung Galaxy Tab 3 7.0 SM-T211
      3. Install CWM/TWRP Recovery on Samsung Galaxy Tab 3 7.0 SM-T210/210R

How To Install Kids Mode On Samsung Galaxy Tab 3 7.0:

      1. Download Kidz_Addon.v.1.1.zip file.
      2. Copy the downloaded .zip file to your Galaxy Tab 3’s internal storage.
      3. Now boot into recovery mode on your Galaxy Tab 3, make sure that you’ve installed CWM or TWRP using the guides linked above.
      4. In order to boot into recovery mode, turn off your Tab 3 completely first. Now turn it on by pressing and holding Volume Up + Home + Power Key. You should be able to see the custom recovery interface in a while.
      5. Once in CWM or TWRP recovery, select “Install / Choose Zip from SD card > Locate the Kidz-Addon.v.1.1.zip file > Select / Swipe Yes to flash”.
      6. It will quickly flash the Kids Mode in your Galaxy Tab 3.
      7. Once flashed, wipe cache and dalvik cache from the recovery.
      8. Reboot your Galaxy Tab 3.
      9. Find the Kids Mode in the app drawer.
      10. Launch and create your kids profile and let the kid enjoy in his own world now.
      11. That’s all.
    1. KidsMode Screenshot_03-05-2014__7.54.22 Screenshot_03-05-2014__7.54.32

That’s all. If you’re impressed by this great feature, do not forget to donate the original developer for his hardwork. Thank you all.


How To Remotely Lock And Wipe Your Android Device

0
How To Remotely Lock And Wipe Your Android Device

Android devices these days are the best companions to carry with as these devices are capable of performing all of your necessary tasks that you would use a laptop or a desktop PC for. If you happen to be a power user of Android and you save a lot of data on your Android device, your device carries your important events, reminders, your important conversations, information about your business and all the data that falls in the highly sensitive and private list, did you ever try to think what would you do if your device gets stolen and all of your important data has been compromised? Well, that’s a big thing to worry about. If you haven’t been paying much attention to the security of your Android device, whether it is a tablet or it is a smartphone, it may be the time, now to protect it.

An year ago, Google introduced the Android Device Manager, a tool that works efficiently by syncing up with your Android device and helps you to track it, make a ring on your phone in order to find where it is if you’ve just lost it somewhere near, and the features were enhanced later on as it got the lock and erase options. Android Device Manager has helped the Android users to relax while increasing the security of their Android device. You can also rename your device using the Android Device Manager. We will be having a look on how you can set up Android Device Manager and use to remotely lock and wipe your Android device when needed.

Early Preparations:

  1. Sync must be enabled on your Android device with the Google Accounts.
  2. Your Android device must be using a gmail address that you will use for Android Device Manager as well.
  3. Disable Flight Mode if its enabled, your device shouldn’t be powered off.
  4. Android Device Manager works with all the Android devices running Android 2.2 and above.

How To Remotely Lock And Wipe Your Android Device Using Android Device Manager:

      1. First of all you need to setup Android Device Manager with your Android device. In order to do so, follow these steps.
      2. On your Desktop PC or Laptop, open the following: Android Device Manager.
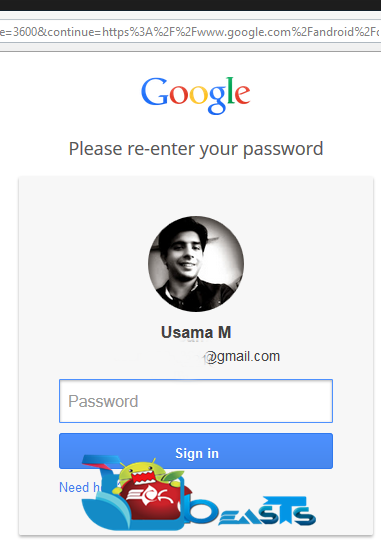
      3. Sign in using the gmail address you’re using on your Android device.Screenshot_1
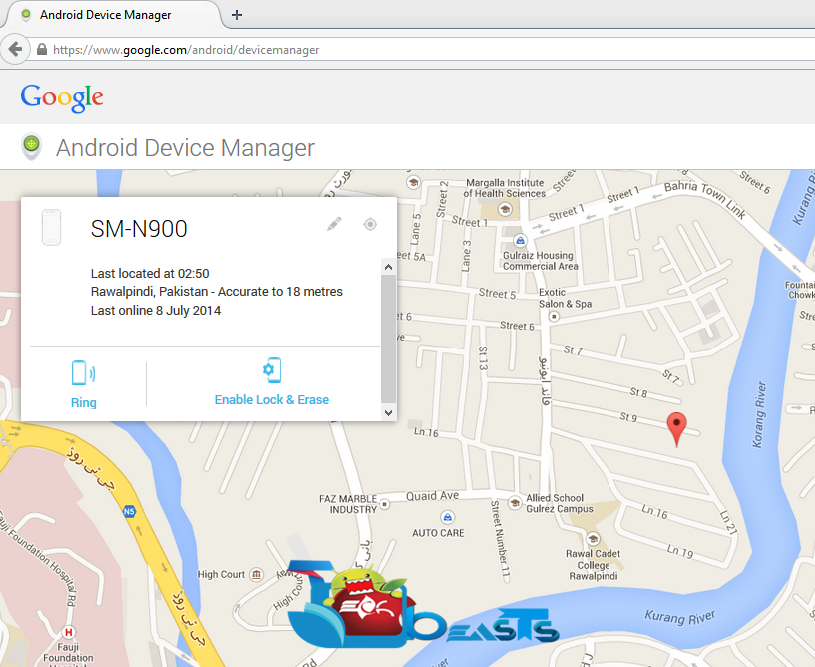
      4. Once signed in, Android Device Manager will show you the devices associated with your gmail account.Screenshot_6
      5. Select the device you want to activate the Android Device Manager on.
      6. Once you select the device, you will receive a notification on your Android.
      7. Tap the notification and activate/confirm the access for Android Device Manager.
      8. Once activated, open the Android Device Manager page again and click on Enable Lock & Erase.Screenshot_2
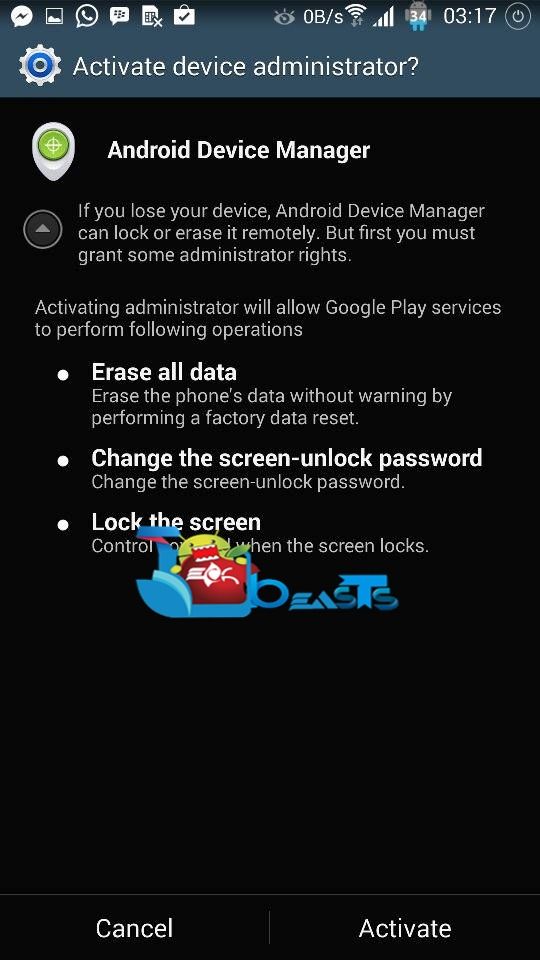
      9. As soon as you click on Enable Lock & Erase, it will prompt on your Android device asking you to make Android Device Manager, the Device Administrator.Android Device Manager4
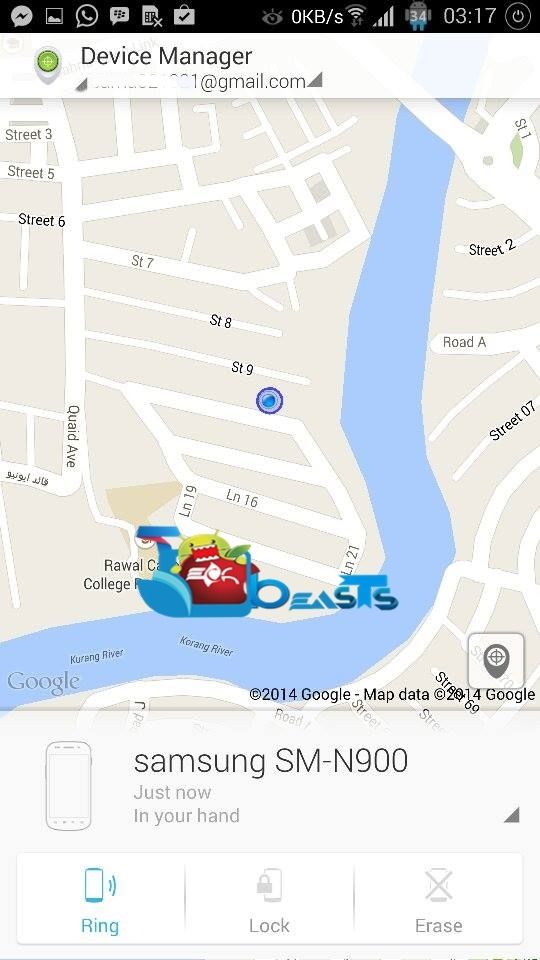
      10. Once you activate it, you will now have the options: Ring | Lock| Erase.
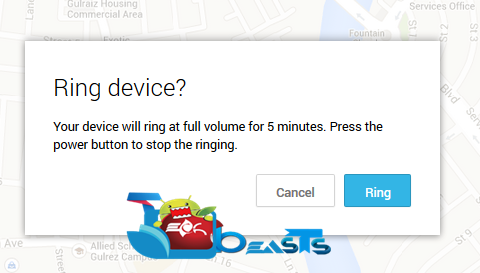
          1. Ring: Will ring your device for 5 minutes, so that you can find it easily.Screenshot_5
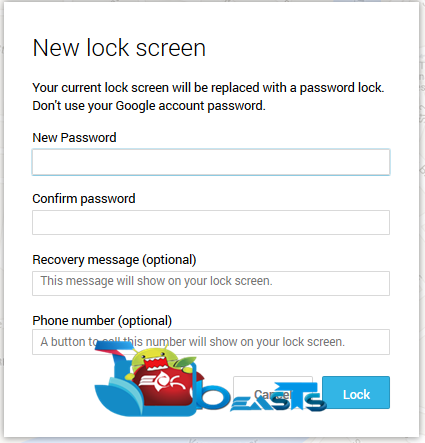
          2. Lock: Will allow you to remotely change the password/pin/pattern on your Android device to a password.Screenshot_3
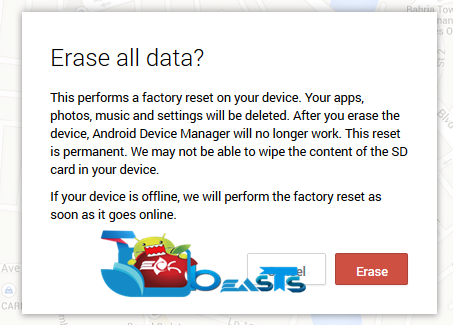
          3. Erase: Will erase all the data and completely wipe your Android device.Screenshot_4
      11. Pressing your desired button will do the desired job.
      12. That’s all!

Alternatively, you can use Android Device Manager app:


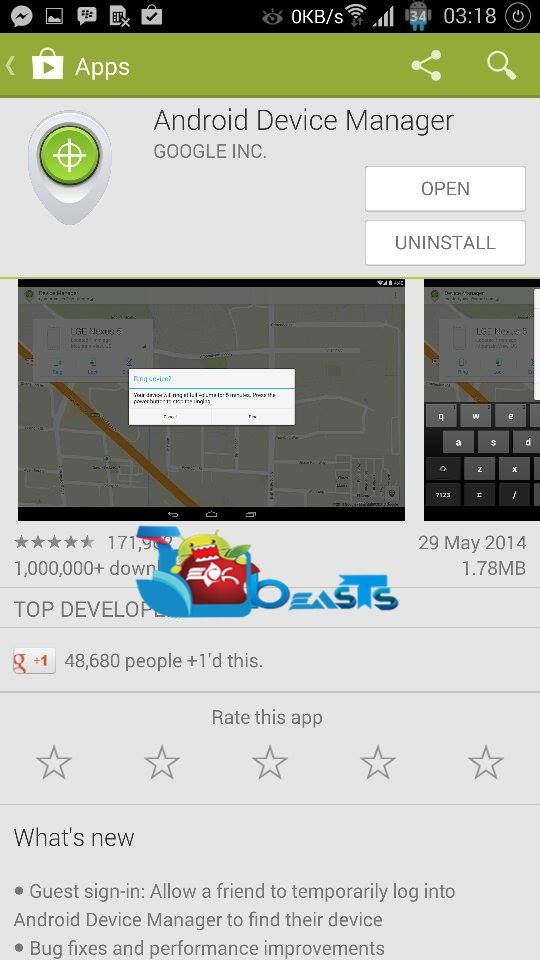
      1. Go to Google Play Store and Type Android Device Manager and install it. Else you can download it using the APK file.Android Device Manager2
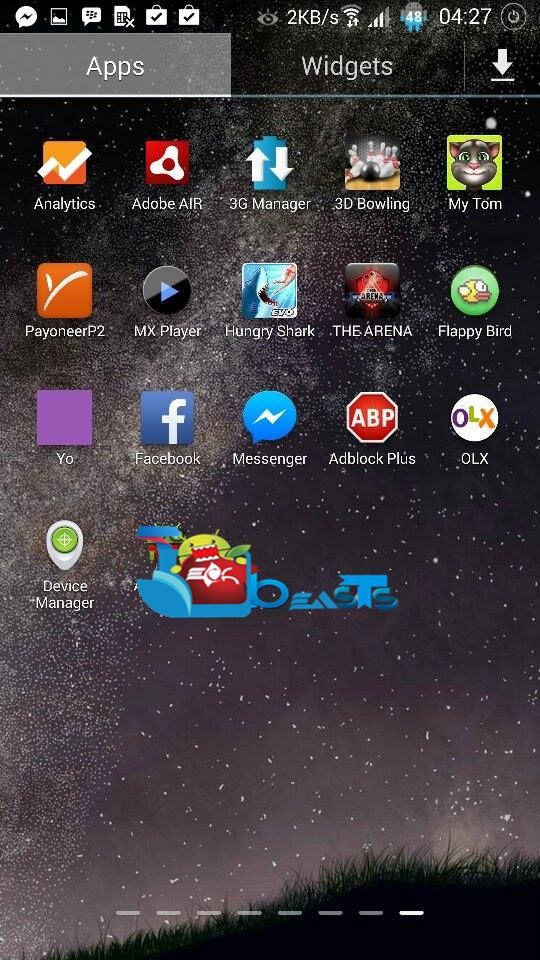
      2. Install the application, once done, open the application from the app drawer.Android Device Manager
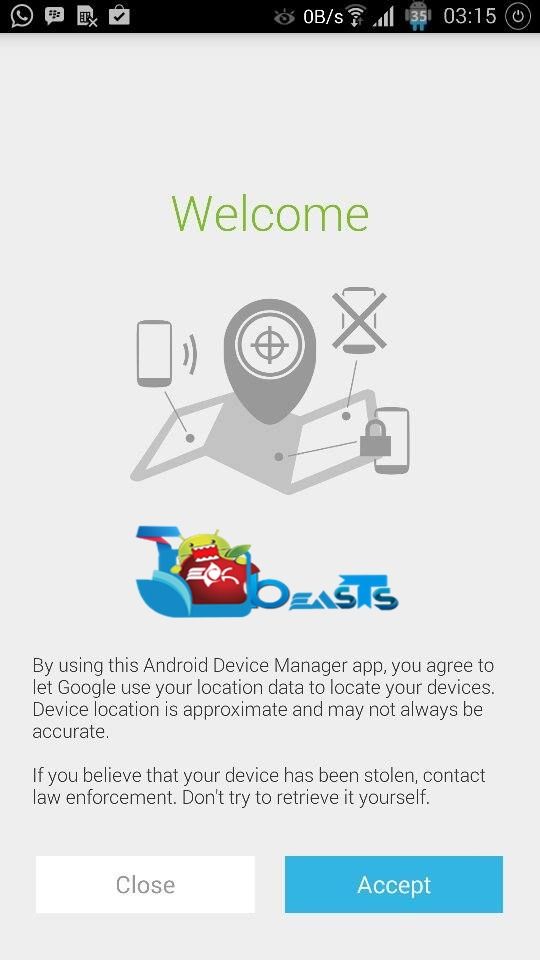
      3. It will ask you to enter your gmail ID and password. Enter the credentials in order to set it up and accept the initial pop up.Android Device Manager5
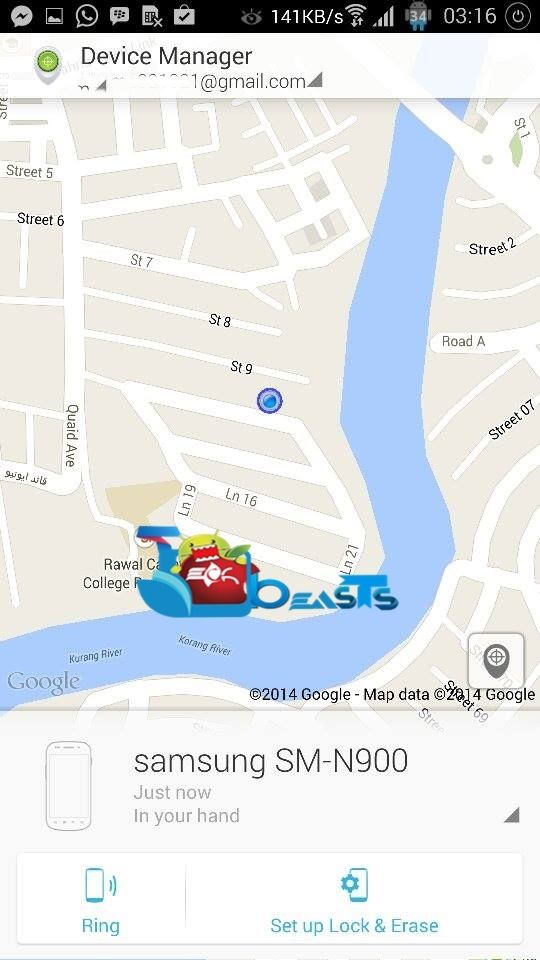
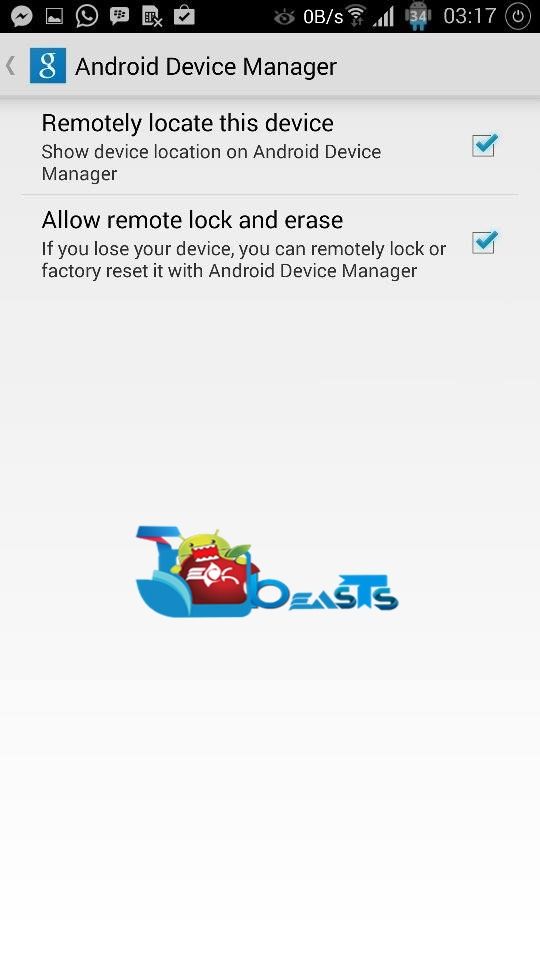
      4. It will show you your current device’s location, you can turn on the Lock & Erase option using the steps explained above.
      5. Android Device Manager 4Android Device Manager 3
      6. Once you’ve activated Android Device Manager using your Android smartphone, you’ll be able to access perform the tasks using the web version of the Device Manager, you don’t need to activate separately on your Laptop or Desktop PC now.
      7. Android Device Manager4Android Device Manager1


That’s all. Please keep in mind that if the thief powers off your device or enables flight mode, you won’t be able to change the lock, or erase your device, nor you will be able to make it ring.  This is the only thing that may seem annoying, but besides this Android Device Manager is good enough to protect your device with all of your important data from getting compromised or stolen.

Download Guess The Emoji for PC ( Windows and Mac )

0
Download Guess The Emoji for PC ( Windows and Mac )

Guessing games always take users attention because it entertains them for hours and keep playing until they pass the current level and then to next one. Guess The Emoji is the same type of game that will entertain you for hours and you’ll keep playing it. Best thing about Guess The Emoji is that everyone can play this game even the whole family. It would be fun if you can play Guess the Emoji on PC, so you won’t have to give your cellphone to kids. You can easily install Guess The Emoji for PC and play it on Windows and Mac.

Guess The Emoji for PC

Main Features of Guess The Emoji for PC:

  • Expose A Letter – Using this hint will reveal a random letter in the puzzle. Use this hint when you need an extra nudge to guess the icon on a hard question!
  • Remove The Letters – This hint removes all letters from the board which are NOT USED in the puzzle game. This hint can be very helpful on shorter puzzles. Use it wisely!
  • Solve It! – This hint will completely solve the word question for you! Use it if you’re totally stuck!

All of these features will be used whenever you’ll get stuck on a level where you cannot guess the given puzzle, then you can use Hint features to move on.

How To Download Guess The Emoji for PC ( Windows and Mac ):

Well to install Guess the Emoji on PC, you’ve to use an emulator and you can either download BlueStacks or  iPadian. In order to install Guess the Emoji for PC.

Step 1: Download iPadian on your PC or Mac.

Step 2: After downloading iPadian install it on your system.

Step 3: Now open iPadian on your PC and click on search.

Step 4: Write Guess The Emoji and enter.

Step 5: Now click on install and wait for installation to be completed.

Step 6: When the installation is done, go to my apps there you’ll see a Guess the Emoji icon.

Step 7: Double click on it to launch the app and start playing it.

Download Guess The Emoji for PC Using BlueStacks.

  1. You need an Android emulator to run this game on your Windows PC or MAC. We recommend using Bluestacks. Use our guide to install it on your PC.
  2. After downloading and installing Bluestacks,Open it
  3. Open BlueStacks now > All Apps > FarmVille 2 country escape
  4. The game will start now, follow the on screen instructions.
  5. Follow the initial screen,  you’ll be able to play it.
  6. Tap the screen by clicking inside the game frame.
  7. Don’t forget to let us know about your high score.
  8. That’s All!

How To Root Samsung Galaxy Note Pro 12.2 (LTE & Wi-Fi)

How To Root Samsung Galaxy Note Pro 12.2 (LTE & Wi-Fi)

Except Flagship devices, Samsung’s all other smartphones are not worthy to be used at all. All that Lag and bugs are more than enough a reason to not use them, instead go after any other set to not only save a little money but also get better performance and results. However, after a huge sales of Note Series and their unexpected success, Samsung released another Note device but with a huge size and much larger display. Samsung Galaxy Note Pro 12.2 supports a Multi-Touch Super Clear LCD Display, Qualcomm Snapdragon 800 Series, 2.3 GHz Krait Quad Core Processor, Android 330 for immense gaming, Android 4.4 Kit-Kat out of the Box and much more.

But our Concern here is not the Specs of Galaxy Note Pro 12.2, but the Question is To Root Or Not To Root, well if you don’t know what will happen or what rooting does, allow me to explain. Rooting your Android device. allows you to get full control over it, also allows you to install Custom Recoveries and ROMs on it, along with many more tweaks and other stuff. It allows you to change settings of your hardware too, like you can overclock you CPU. GPU and RAM, but all of it will heat up your device and not suggested from many officials. If you have a Samsung Galaxy Note Pro 12.2 and want to root it, follow the tutorial ahead and get what you want.

ultimate

In this Article, we will show you How To How To Root Samsung Galaxy Note Pro 12.2 P900/P905. But before we begin, Make sure that:

  1. That you have a Well Charged Battery, 60%-80% is better.
  2. Back-Up all your important ContactsCall Logs & Messages. It is highly recommended in case of any mishap or data loss to back up all your important data.
  3. Back-Up your Mobiles EFS Data. How To Restore and Back-Up EFS Data On Samsung Galaxy Devices.
  4. Check your device model, Go To Setting > About and Make sure that it is SM-P900 Or SM-P905.
  5. Do not try this tutorial on any other device.

Disclaimer:

The methods involved in flashing custom roms and rooting your phone is highly custom and may result in bricking your device,and has nothing to do with Google or the device manufacturers which is Samsung in our case. In case of any mishap we may not be held responsible. Follow these instructions to the letter to avoid any mishap or bricking. Make sure that whatever you do, you are doing it at your own responsibility.

Downloads Required:

CF-Auto Root Package For SM-P900 (Wi-Fi): Link

CF-Auto Root Package For SM-P905 (LTE): Link

How To Root this Device:

odin_explained6

  1.  Download Rooting Package For your Galaxy Note PRO to your computer and extract the zip file.
  2. Download Odin.
  3. Turn off your Phone and Turn it On While Pressing, Power + Volume Down + Home button until you see some text on-screen, Press Volume Up to continue.
  4. Make Sure that the USB drivers are installed.
  5. Open Odin in Computer and connect your device to PC, while it is in the Download mode.
  6. If your Phone is successfully connected to PC, the Odin port will turn Yellow with COM port number.
  7. Now Click on PDA and select the File ‘CF-Auto-Root-v1awifi-v1awifixx-smp900.tar.md5′ for SM-P900 Or “CF-Auto-Root-viennalte-viennaltexx-smp905.tar.md5″ for SM-P905
  8. In Odin, Check Auto reboot  Option.
  9. Now Click the start button and wait for the process to complete.
  10. After the installation is complete, your device will restart and once you see the Home Screen and get the “Pass” Message on Odin, unplug the cable.

Update Google Nexus 4 With Android L [How To]

0
Update Google Nexus 4 With Android L [How To]

Google has given the developers, something new to play with. The release of Android L preview at the Google’s I/O developers conference has created a new temptation among the Android enthusiasts, and everyone is now willing to get this latest and greatest Android firmware on their Android device. Although its just preview, and even the name of the next Android isn’t known yet, but still its worth getting your device the taste of next Android version once as it comes with a number of heavy enhancements, battery improvements, security improvements and the material design UI that adds the charm.

To calm down and bring a little happiness on the faces of Google Nexus 4 owners, XDA dev sykopompos has ported the developer preview of the Android L, the beta version for the Nexus 4 for now. Here’s our guide that will help you to update your Google Nexus 4 with Android L developer preview, just go ahead and install it on your device right now.Android L Nexus 4

Before you install the ported Android L on your Nexus 4, it may be kept in mind that the image that Google rolled it, is not stable and may contain a number of bugs and the ported firmware comes from the same. So, do not expect this firmware to run perfectly, you may face a number of bugs. However, you can quickly switch back to your device’s previous firmware using the Nandroid backup or by flashing a stock image.

Early Preparations:

      1. This guide is only for Google Nexus 4. Do not try this on any other device, please check your device’s model in Settings > About Device > Model.
      2. Your devices must have a custom recovery installed. Check out our One Click Unlock/Root/Custom Recovery Flash Method for Google Nexus 4
      3. You must have installed Google USB drivers. Get here.
      4. Enable USB debugging mode on your Nexus device. If you haven’t done this already, go to Settings > About Device > Tap the build number for 7 times and you will get the developer options enabled, no go to Settings > Developer Options > USB debugging > Enable.
      5. Your device’s battery should be charged at least over 60%. This is highly recommended in order to prevent any power issues during the flashing process.
      6. Make sure that you backup your important media content, Contacts, Call Logs MessagesThis is highly recommended just in case something goes wrong and you need to reset your phone.
      7. If you already have rooted your device, use Titanium Backup to back up all your important apps + system data. Also if you are using a custom recovery, it is recommended that you backup your current system using that first. [Just for the sake of safety]. Here’s our full Nandroid Backup guide.
      8. You will have to go through Data Wipes during installation of this ROM, so make sure that you have backed up all the mentioned data.
      9. Alright! Go ahead and flash the custom firmware, follow this guide to the letter.

How To Install Android L On Nexus 4:

    1. Install CWM or TWRP recovery on your Nexus 4, you may use the guide we linked above.
    2. Download Android L Firmware.zip file:  lpv-79-mako-port-beta-2.zip
    3. Connect your Nexus 4 to your PC now and copy the .zip file to it.
    4. Disconnect it now and turn it off.
    5. Boot into Fastboot mode on your Nexus 4 now. To do so, turn it on by pressing and holding Volume Down + Power Key.
    6. Now use the Volume Keys to navigate between the options and make a selection with Power Key. Select “Recovery mode” here.
    7. Once you enter recovery mode, select “Wipe Factory Data/Reset” and confirm the wipe.
    8. Once wiped, now go to “mounts and storage” and select “format/system” and press the power key to confirm.
    9. Now in recovery mode, select “Install Zip > Choose Zip from SD card > locate lpv-79-mako-port-beta-2.zip > confirm flash “.
    10. Once you press the power key, it will quickly flash the Android L Preview on your Nexus 4.
    11. Once the flashing is finished, wipe cache from the recovery, and dalvik cache from advanced options.
    12. Now select “reboot system now”. As soon as your device reboots, you will find the Android L running on your Nexus 4.
    13. First boot may take up to 10 minutes, hold on tight while the device brings the new firmware for you. Good Luck.

That’s all. In case you’ve got any queries or you’re facing any issues regarding this post, feel free to stop by the comment box below and drop your words. We will get back to you immediately. Thanks all.

How To Transfer Files from Samsung Galaxy S4 to PC/Desktop

How To Transfer Files from Samsung Galaxy S4 to PC/Desktop

Now-a-days all we use is a smartphone for taking photos, use internet, listen music and edit our office documents. Smartphones really help us in so many ways because our of important data that is on our device and we need to protect it by backing it up on PC or online cloud storage (Which is done presently). Today I’ve prepared a brief step by step guide on how to transfer files from Samsung Galaxy S4 to PC. Seems very easy and most of us know how to do it but while doing it you can face many problems. In my guide I’ve added most of the issues (that can accrue during the transfer process) and there solutions.

How To Transfer Files from Samsung Galaxy S4 to PC/Desktop

How To Transfer Files from Samsung Galaxy S4 to PC:

Following are the all possible ways, methods, tips and tricks on how to transfer files from Samsung Galaxy S4 to PC, Computer, Laptop and Mac.

Supported Formats for Samsung Galaxy s4 and PC to transfer files:

  • For Music Files:

mp3, m4a, mp4, 3gp, 3ga, wma, ogg, oga, aac, and flac

  • For Image Files:

bmp, gif, jpg, and png.

  • For Video Files:

3gp, mp4, avi, wmv, flv, and mkv.

  • For Document Files:

doc, docx, xls, xlsx, ppt, pptx, pdf, and txt.

How To Transfer Files Using KIES:

Samsung KIES is the official desktop software manager for all the Samsung devices. You can use KIES to manage, files, contacts, media libraries, documents, sync, calendar and update your device to latest firmware.

  1. Download Samsung KIES from here. [ Download KIES ]
  2. After download is completed now install KIES and wait for installation to be completed.
  3. Now open KIES from the shortcut created on your desktop.
  4. Connect your Samsung Galaxy S4 via USB cable. [ Make sure you are using original cable ].
  5. After your device is connected with KIES, now you can transfer file from your Samsung Galaxy S4 and transfer files to Samsung Galaxy S4.

How to Connect to the computer as a media device to transfer files:

  1. First connect your device with PC/Computer via USB cable.
  2. Wait for few seconds windows will analyse the USB driver’s are installed or not. [ If not download from here ]
  3. After you device is connected it will say on your device “Connected as Media Device”.
  4. Now on your Galaxy S4 drag down the notification bar and tap on Connect as Media device.
  5. Once your device is connected as media device {MTP}. Go to my computer and you will see Samsung Galaxy s4 in portable device section.
  6. Double click on it to open, once it’s open you can transfer files between PC and Galaxy S4.


How to transfer files from your computer to your Samsung S4:

  1. First connect your Samsung Galaxy S4 with PC.
  2. Now make a folder and add all the select files that you want to transfer from your computer to Galaxy S4.
  3. Go to My Computer-> Open your Galaxy S4 connected as media device-> Copy the all the files that you’ve created in first step and paste it to your desire location.
  4. You can transfer files to Phone Memory or Card Memory. You’ll see both the storage option when you open media device in My computer.

How to transfer file between your computer and your Samsung Galaxy S4 wirelessly:

  1. Download and install Airdroid app on your Samsung Galaxy S4.
  2. After the installation is complete open the app.
  3. Once opened Airdroid app will show you a specific IP address to connect.
  4. Go to you computer and add the IP address into your browser.
  5. Once you hit enter you’ll get a message to enter the security code shown on your device.
  6. Insert the code in the box.
  7. If the code is enter successfully you’ll be promoted to a new page where you can see your files and folders of your Galaxy S4.
  8. Now you can easily transfer files between your computer and your Samsung Galaxy S4 wirelessly.

These are the possible ways to transfer files from Samsung Galaxy S4 to PC/ Computer. If you face any kind of issue please tell me in comments, I will surely help you out with that.

How To Block Ads On Android

0
How To Block Ads On Android

Whenever you’re surfing the internet, whether on your Android device or on your desktop PC, the most annoying thing are the ads and the number of ads being displayed on different sites/web pages. Some of the advertisement companies use quite watchable stuff to advertise their products, while some may use which doesn’t suite the eyes at all, and the most irritating kind of ads are the pop up ads, that just open up whenever you open a specific site. There’s a number of methods/extensions/ad blockers available for desktop PC’s, which is being used by so many users and they’ve eased their lives by getting rid of the annoying stuff. Ads sometimes start downloading different files automatically that may even result in harming your device. Ok, so people are actually aware of this ad-blocking thing on a computer, but they don’t actually know how to do the same on their Android smartphone.

People mostly surf the internet on their Android devices using packet data, that may be GPRS or 3G/4G. Whenever you load a site, it takes quite a large time to load, and the more it takes, more its accelerating the data usage that results in consuming your GPRS or 3G/4G network. Did you ever realize that how much data is being consumed by ads whenever you load a webpage on your Android device? And specially, when these are pop up ads, or video ads, they are going to put as much load as possible on your internet connection by getting generated automatically. Well, if not, then let us tell you that it eats hell lot from your data bucket. Blocking ads can also boost up the loading speed of different sites on your Android device, so it doe

sn’t have only 1 advantage, once you actually block the ads, you’re going to love your device as your internet data consumption will lower down by a great amount. Our concern in the following post is to help you get rid of the ads on your Android device and save all the data that is being used by useless stuff while you’re enjoying your favorite stuff on the internet.  Let’s go through the ad blocking methods one by one.

Use Google Chrome as your Android browser:

Using Google Chrome on Android has a number of advantages. It blocks annoying pop-ups and saves your device a life. Chrome for Android also offers. Here’s a little activity you can do.

      1. Open Google Chrome on your Android device.
      2. Tap the options key and go to Settings.
      3. Now in Settings > Bandwidth Management.
      4. Now in Bandwidth Management > Reduce data usage > On

TechBeasts_Chrome_BlockAds 1 (1) TechBeasts_Chrome_BlockAds 1 (2) TechBeasts_Chrome_BlockAds 1 (3)

Activating this feature will block a number of annoying ads, malware and phishing attacks by suspicious websites. So make sure that you keep it on take the advantage of this in-built feature.

Here is the result after compression of page:

10517166_652963271464831_1457338847_n

You can also use FireFox for Android that offers the ad-blocker add-on and helps you to avoid the advertisement stuff.

Use Adblock Plus for Android [Root]10527998_652957994798692_267619050_n

This little nice application works great. All it requires is the root access on an Android device and works perfectly once granted and activated. Here’s how you can download, install and run on your Android device.

      1. Download Adblock Plus APK file.
      2. Copy the APK file to your Android device or download it directly on your Android device.
      3. Now on your Android device go to Settings > Security > Unknown Sources > Check the “Allow box”.
      4. Locate the APK file and tap it to install. Select package installer if prompted.
      5. Complete the installation, once done, open the Adblock Plus application from the App drawer.
      6. Choose the subscription now, recommended one is “Easy List”.
      7. Now select the ads, whether you want to block all the ads or you want to block inappropriate ads only.
      8. You can turn off the notifications if you wish by checking in the notification option.
      9. Run any site on your Android device and you won’t find any ads.
      10. That’s all.

Block Ads on Android [No Root]:

      1. Download and install Adblock Plus using the instructions above.
      2. Now open Adblock Plus, You don’t need to grant root permission because you’re not rooted.
      3. Tap the options key, and go to Advanced Settings.
      4. In Advanced Settings > Show Configuration.
      5. You will be shown the proxy configuration, note down the Port, should be a number like “2020” or some other.
      6. Now on your Android device go to Settings > Wireless and Networks > Long tap the WiFi you’re connected are to > Modify Network > Show Advanced Options > Change Proxy Settings to Manual > Change Proxy Port to what Adblock has shown you.
      7. Save configuration.
      8. In case you cannot fine the configuration in Advanced Settings in Adblock Plus, skip it and simply put “2020” in port using the step 6.
      9. Run any site on your Android device and you won’t find any ads.
      10. That’s all!

10524070_652952584799233_816030410_n10529524_652952568132568_1540389006_n (1) 10529413_652956744798817_343201270_n

That’s all you can do to block the annoying and irritating ads on your Android device. We hope that all these tutorials work well for you. Let us know how it goes at your end, If you’ve got any queries or you are facing any problems regarding this post, the comment box below is for you. Thank you all.

The Seven Types of iPhone Owner’s [ infographic ]

0
The Seven Types of iPhone Owner’s [ infographic ]

When it comes to choosing a smartphone you have a different option now-a-days but iPhone is most attractive among them, Why ? Because of its Looks, Style, Speed, performance and battery time or you can say iPhone is status symbol. So, today I am sharing a interesting infographic of 7 different type of iPhone user’s. Just to tell how people use iPhone now-a-days.

Screen Shot 2014-07-08 at 04.13.44

The Seven Types of iPhone Owner’s [ infographic ]

Infographics-7-Types-iPhone-Users

By reading all these interesting points on iPhone user’s you can easily judge that basically why iPhone is famous among all of other Smartphones.

How To Bypass SMS Limit On Korean Galaxy S2

0
How To Bypass SMS Limit On Korean Galaxy S2

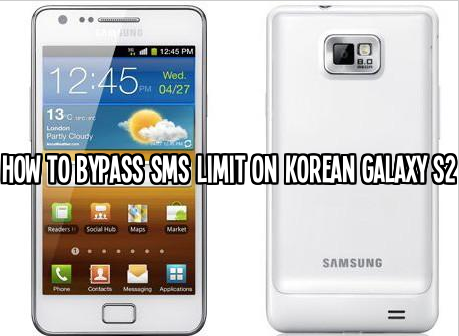
People who are using Samsung Galaxy S2 Korean version they can only send 160 characters in a single SMS. This a kind of frustrating for users who want to send a big SMS but when the exceed the 160 characters their SMS turn’s into MMS, after getting this notification the SMS is no longer a short message now its converted into multimedia message, it means you have to use mobile data to send it over. This SMS limit issue is on mostly all Samsung Korean models, for those who are using Samsung Galaxy S2 Korean version you can bypass SMS limit easily, follow our step by step guide on how to bypass SMS limit on Korean Galaxy S2.

How To Bypass SMS Limit On Korean Galaxy S2

How To Bypass SMS Limit On Korean Galaxy S2:

In the following tutorial we’ll tell you to bypass the SMS limit on Samsung Galaxy S2 Korean version. You can use this method on other Samsung Galaxy Korean variants and do tell me in comments if you face any kind of issue.

Step 1: Open Play Store from your Galaxy s2.

Step 2: When PlayStore is open tap on search icon.

Step 3: Now write ” Handcent SMS ” in search bar and press enter.

Step 4: You’ll get the Handcent SMS on the top of the list tap on it.

Step 5: Now tap on install and then tap on the agree when pop-up shows up.

Step 6: After the downloading and installation is completed. Open Handcent SMS app and start sending messages, now you’ll not face any character limit issue.

Step 7: Now set the Handcent SMS as your default messaging app.

How to Turn off SMS Notification on Android Stock Messaging App:

After installing the Handcent SMS you’ll notice that when ever a new message comes you’ll be notified twice on both Handcent and Stock messaging app. You can follow the following steps below to turn off SMS notification on Android stock messaging app.

Step 1: Open the stock messaging app from your Samsung Galaxy S2.

Step 2: Tap on Menu and select SMS settings from the list.

Step 3: Tap on notification and uncheck it to turn off SMS notification.

How To Bypass SMS Limit On Korean Galaxy Note 1:

Step 1: Open Play Store from your Galaxy Note 1.

Step 2: When play store is open tap on search icon.

Step 3: Now write ” Handcent SMS “ in search bar and press enter.

Step 4: You’ll get the Handcent SMS on the top of the list tap on it.

Step 5: Now tap on install and then tap on the agree when pop-up shows up.

Step 6: After the downloading and installation is completed. Open Handcent SMS app and start sending messages now you’ll not face any character limit issue.

Step 7: Now set the Handcent SMS as your default messaging app.

How To Spy On Boyfriend or Girlfriend Text Messages, Calls and Emails from a Cellphone

4
How To Spy On Boyfriend or Girlfriend Text Messages, Calls and Emails from a Cellphone

Spying in relationships is not considered unless it is done for a serious cause and authentic reasons behind it. The concern of parents has enormously increased for today’s generation with all the latest technologies that make kids more vulnerable. You can keep a track of the whereabouts your concerning people in a number of ways by the help of some apps which are discussed below.

 spy on boyfriend, girlfriend and childrens email, calls, text and photos from a cellphone

Location Trackers To Spy On Boyfriend or Girlfriend Text Messages, Calls and Emails:

The first concern that we usually have is of where my loved one has been hanging out. They can be tracked down by these apps which are provided by authentic developers.

FamilyWhere

T mobile’s Familywhere app provides tracking services for free and it has a paid version as well. You can choose any one of the options at the time of downloading the app. The app helps you locate a person on the map and track them down to show you where they are. The app works on any mobile phone and does not require extra software installation or GPS to track. If you do not have an android phone, you can still get notifications by logging onto Familywhere online on T mobile’s website (My.T-Mobile.com). You can locate up to ten people through this app and the person you are locating will be notified by a text message.

Schedule checks

You can see if the person has arrived home by using scheduled checks. This enable you to get location updates at specific times as you mention in the settings. You will be notified through text or email.

Share Location

This feature lets your loved one to share their location through free check-in option. They can inform you that have they have reached their destination and you are able to see where they are on the map. In order to do so, they can send a text message from their smart phone through the app along with a map. The “To” field requires users to add a contact from your phone’s contact list to share the location with and they will receive their location on mobile web browser. To make it fun they can also add emoticons and a message.

Familywhere requires Android 1.5 and above and first 30 days are free, after that you will have to pay $9.99 per month.

AT&T Family Map

AT&T is another app to hunt the location of a person. The app notifies about the location accurately. It gives 30 days of free trial and then charged $9.99 per month. The app can easily be run on Android, Windows, iPhone, iPad Blackberry phones and uses Wi-Fi and mobile internet and GPS to track down location.

The location can be sent through text message, voice message or email to the concerned person. In order to track iPhone 5 users need to install AT&T Check-in companion along with family map. The app allows locating up to two family members and the phone should be turned on.

Sprint Family Locator

Sprint Family Locator allows you to track any phone including smart phones and normal phones on sprint family plan. The good thing about the app is that you do not have to install the app on the target phone so the person can not uninstall or deactivate the app if they want to and once it is installed on your phone, you can easily track any other phone included in the sprint plan.

Sprint allows locating up to 4 family members. Their locations are shown on the map along with their pictures.

In order to get started with the app, you need to firstly install the app on your smart phone. Then visit Sprint Family locator on Sprint’s website and enter your contact number. A code for registration will sent to you through text message. Now open the app and enter the contacts you need to include in the plan. All the members will get a text message notifying them that they are locatable.

The app has other features including maintaining an online history and checking locations online through the registered account on Sprint’s website. The app has a 15days trial version and after that it charges $5 per month.

Life 360 Family Locator

Life 360 is a free and reliable family locator which works through GPS. Once you download the app on your smart phone, you have to create an account through your email address and send invites to the people you want to locate. Each member will have to click on the internet link and fill in an online form in order to start being located. The person you need to locate is informed and you can not track him without their consent. Moreover, the location sharing can be turned on or off as you want.

Security Alerts

The target phone is also able to send a location alert in case of emergency. They can send their location to you by text, voice message or data.

Check-in Alert

The app also has a check-in feature where you can send a “check-in” request and the other person can tap to accept the request and the app will track their location and send it to you. The app has a free chat service as well and you can chat with the members of your circle anytime for free. While these were the apps which helps to track a person’s location with his/her consent, there are some stealth spying apps which work in secrecy and are unnoticeable.

Stealth Spy Apps To Spy On Boyfriend, Girlfriend or Children’s Text Messages, Calls and Emails from a Cellphone:

Stealthgenie

Stealth genie gives some extra features along with the basic spy app features like GPS tracking, text monitoring, Web browsing, etc and this is the reason why it stands out of all the other apps. Stealth genie is compatible with Android, iPhone and Blackberry.

Geo Fencing

An amazing feature the developers have added to this app is geo fencing where you locate certain boundaries and if they are violated, you receive a notification immediately. You can also add some prohibited areas and if the phone enters into that located you will get an alert instantly.

Triggers

You can add some trigger words like sex, drugs, etc, phone numbers or email addresses and if they are used on the target phone, you will be notified immediately which ensures real time monitoring.

Regular Reporting

Stealth genie gives you the option to set up a time say 30 minutes to get updates after regular intervals. You can reduce this time accordingly and get alerts as often as you want to.

Call Recording

The call recording feature is included in the Android Platinum package which allows you record all incoming and outgoing calls or select various numbers. However, this feature is yet to come on blackberry and iPhone.

Monitoring Social Media Accounts

In the recent update, the app has been included with some features to track social media accounts which includes Whatsapp, Viber, Skype, Blackberry messenger and iMessage conversations, sent and received e-mails on G-mail, Sim card change alert and backup or delete data remotely.

Security monitoring To Spy On Boyfriend, Girlfriend or Children’s Text Messages, Calls and Emails:

Norton Family

Norton Family by Norton mobile security is a helpful app to keep an eye on a person’s activities. It has certain features which can help you track their location, activities online and much more. The app ensures complete remote monitoring.

The app needs to be installed on each of the devices that the target person uses including their smart phones. The app can be downloaded from Play store. Once the app is installed, open it and enter your email address and password in the Sign In field. In the notification settings, choose what alerts do you want to receive regarding the activities held on that device.

Alerts

  • Norton is capable of notifying you about;
  • The browsing history, websites accessed.
  • Block certain websites
  • View sent and received Text and MMS messages
  • Viewing sent and received emails
  • Videos watched and download history

To view the alerts you can either on to the Norton website or you can view alerts on our smart phone.

Spy Apps for AT&T iPhone to Spy On Boyfriend or Girlfriend Text Messages, Calls and Emails:

Here is a list of some other spy apps which can be used to monitor activity logs, online browsing details, text and call conversations, social media networks, etc.

Sony Xperia Selfie Phone, Here Are The Leaked Pictures

0
Sony Xperia Selfie Phone, Here Are The Leaked Pictures

Selfies are now like Oxygen, most users purchase Flip-out-screen cameras just for this sake, so they can take selfies without any problem at all, Mobile Phone cameras have only one purpose in modern days, Take selfies only and that is all, sometimes the amount reaches up-to 100 in a single day and even worst or Better, I don’t know Companies are now supporting the Selfies and making camera with better Front cams to take better selfies, and Sony is also taking part in it.

FrontBig

Sony Has confirmed, that they will release a Selfie Camera Phone, having a big Sensor Cam in the Front with a Flash, now blinding people are even more easy, those who don’t know about the Front flash will be in serious trouble. Names as Sony Xperia C3, though this is unconfirmed right now, however, some decent Picture are leaked over the Web by weibo.com and Digi-wo. and we will share them with you. Further details show that this device will have a 2500 mAH battery and released with varieties of colors. Stay tuned for further updates and till then enjoy the leaked photos.

Leak-Selfie_1 Leak-Selfie_2 Xperia-Selfie-Phone_1-640x462 Xperia-Selfie-Phone_2

Sources: Digi-wo | Weibo