Home Blog Page 407

Google Maps 9.0 APK [Material Design]

0
Google Maps 9.0 APK [Material Design]

The time for Google Maps latest UI has finally come. Google has updated Maps to v9.0 packing Material Design. It finally is the time to let the old UI go away and welcome the new flat-design graphics on the Google Maps application, that will make your navigation experience much more better. The Google Maps application’s latest version wasn’t available in the Play Store for a while, but Google has pushed it into the Play Store and users may install it for free. If you are unable to locate this application in the Play Store at your end or if your Play Store is going through some issues, you may need an APK file of Google Maps 9.0 in order to install it manually. Before you start looking for it here and there, we’ve already done this job for you and pulled it out from the Play Store. The download link and installation instructions are attached below, let’s go through the app’s description and then install it on your phone.Maps1

Description

The Google Maps app for Android phones and tablets makes navigating your world faster and easier. Find the best spots in town and the information you need to get there.• Comprehensive, accurate maps in 220 countries and territories
• Voice-guided GPS navigation for driving, biking, and walking
• Transit directions and maps for over 15,000 towns and cities
• Live traffic conditions, incident reports, and automatic rerouting to find the best route
• Detailed information on more than 100 million places
• Street View and indoor imagery for restaurants, museums, and more

* Some features not available in all countries

Download & Install Google Maps 9.0 

  1. Download Google Maps 9.0 APK.
  2. Copy the downloaded APK file to your phone or download it directly on your phone.
  3. Locate the downloaded APK file on your phone and tap it to begin the installation.
  4. Select “Package Installer” if prompted.
  5. All “Unknown Sources” if required.
  6. Complete the installation and access the app through app drawer.
  7. Enjoy your new navigation experience with Google Maps 9.0.
  8. That’s all!

Google Calendar 5.0 APK [Material Design]

0
Google Calendar 5.0 APK [Material Design]

Although there’s a plethora of Calender applications available in the Google Play Store, all the applications sport enchanting features that may attract you, but if you do not like a lot of makeup in an application and like simplistic and less complex applications like I do, you may want to get Google Calendar. This may not be the most important application for you to consider, but just to keep yourself up with your time, follow your schedules, you will definitely need an application to remind yourself of what you’ve to and when it needs to be done.

Recently, Google updated Calender with the latest Material Design UI, users can now have a look and feel of the Material Design UI on their non-lollipop device since the Calender application is available as a stand alone application in the Google Play Store. You may grab this Google Calender 5.0 straight from the Play Store but if the application doesn’t come up for you or you can’t use the Play Store due to some reasons, you may want to have an APK file that will let you load Google Calender on your Android device. We’ve pulled out the APK file, you may find the download link as you move forward. Let’s go through the app’s features and then head towards the download and installation guide.Calendar

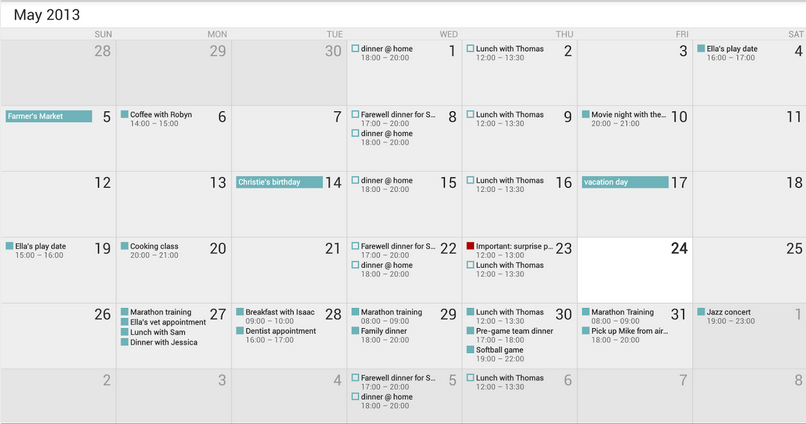
The Calendar app displays events from each of your Google Accounts that synchronizes with your Android device. You can also:

– Create, edit, and delete events.
– View all your calendars at the same time, including non-Google calendars.
– Quickly email all event guests from a notification with a customizable message.

Known issues with HTC devices:

– Day and week views may not work on some HTC devices.
– Notes and pictures may be removed from all calendar events, but will still be available in HTC’s Notes app.
– Local unsynced events may be lost after installing Google Calendar.
– Notifications won’t make sounds unless HTC’s Calendar app is disabled.
– Touching an email invitation in a mail app opens Calendar in the browser rather than the app.

Download Google Calendar 5.0 APK & Install It

  1. Download Calendar APK.
  2. Copy the downloaded APK file to your phone or download it directly on your phone.
  3. Locate the downloaded APK file on your phone and tap it to begin the installation.
  4. Select “Package Installer” if prompted.
  5. All “Unknown Sources” if required.
  6. Complete the installation and access the app through app drawer.
  7. Enjoy your experience with Calendar.
  8. That’s all!


Improve Your Galaxy Note 4 Camera Quality With This Camera Mod

0
Improve Your Galaxy Note 4 Camera Quality With This Camera Mod

Samsung Galaxy Note 4 is the latest flagship device from Samsung, which was released with one of the most initiative ideas of all times, Galaxy Note Edge. Galaxy Note 4, on the outside, is not much different than Note 3, but under the hood, there are alot of gimmicks that will sure to change your mind to purchase the Note 4. However, there is always room for improvements, like Canon did it in their Cameras by promoting the Magic Lantern OS on their devices, although I never liked Canon, but love to use it with Magic Lantern. But that is not our case, we are here to give you something for Galaxy Note 4. The Camera of Galaxy Note 4 is quite amazing, although Mobile cams can never able to reach such heights, but still it is up-to you how much you can get from it.

Camera Mods are something that are always there to help users to get the best out of their Camera, sometimes, the 3rd party apps provide far better results than the Stock Camera, my experience with Stock Camera apps were not good at all, except in Nexus 5. On Galaxy S4, I used Stock Android cam, cause it was fast and provide even better results than the S4 Camera App, in Note 4, if you are not satisfied with its quality, we got your back, cause on XDA there is a solution to every problem. kevinrocksmanat XDA has provided a Camera Mod for Galaxy Note 4, which not only will change the Camera Quality, but also enhanced the video quality and Smooth Motion feature. Without Further ado, let us continue.

galaxy-note-4-teardown-confirms-use-16-megapixel-sony-imx240-camera-sensor

Requirements:

Galaxy Note 4 Camera Mod

Root Your Device

Installation Method Number 1:

  1. Download the file.
  2. Open ES File Explorer.
  3. Navigate to System > App.
  4. Delete the SamsungCamera3.apk and SamsungCamera3.odex.
  5. Copy the SamsungCamera3.apk to System > App.
  6. Set the Permission to rw-r-r. If you are not Familiar on How To Set Permission in Android, follow the link
  7. Copy the media_profiles to System > etc
  8. Set Permission to rw-r-r.
  9. Reboot the device.
  10. Enjoy

Installation Method Number 2:

  1. Copy the Zip to the root of your Sdcard.
  2. Enter Recovery Mode, How? Follow the Link
  3. In Recovery, Navigate to Advance and Tap Devlik Wipe Cache.
  4. Now Tap Wipe Cache
  5. Navigate to Install Zip > Choose Zip
  6. Choose the Zip file you downloaded above and Tap Continue
  7. Once the Installation is over, Go back.
  8. Choose Reboot System Now.
  9. Enjoy

Google Camera 2.4 APK [Material Design]

0
Google Camera 2.4 APK [Material Design]

Google has started updating most of its applications with the all new Material Design UI that it introduced in the Android 5.0 Lollipop. Material Design takes the UI of Android to a whole new level. The UI is pretty smooth and eye-soothing now, and is way flat. Material Design displays the elements just like the real-time objects, that makes it quite attractive.  Recently Google updated the Gmail application with the latest Material design UI, and the Camera application came up following Gmail. Google Camera 2.4 is based on Material Design.

Google Camera now includes some cool Material Design animations and some new colors have been added in this application to make it impressive. The Camera application is more responsive now, improvements have been made to the Camera modes including HDR and others. Although Google Camera is available as a stand alone application in the Google Play Store, but if you are unable to locate and install this application or just in case you’re unable to use the Google Play Store due to some reason, you may want to have an APK file of Google Camera to install it manually. We’ve pulled the APK file for you and linked it below along with the installation instructions. Let’s go through the app’s features and then head towards our target.

Camera


Features:

Simple Interface – Capture photos and video quickly with Google Camera’s simple and intuitive interface
Lens Blur – Manipulate the camera’s depth of field using Lens Blur to focus on the subject in the foreground and blur the background; great for portraits and selfies
Photo Stitching – Create amazing 360° Photo Sphere, panoramas, wide angle and fisheye image captures with Google’s photo stitching technology developed for Google Maps
Video – Shoot video and simultaneously capture stills just by tapping on the screen
Android Wear – Control the camera from a distance
HDR+ – Use the HDR+ (High Dynamic Range) setting to improve images captured in low light, and backlit scenes (only available on Nexus 5 and Nexus 6)

Requirements
• Works on phones and tablets running Android 4.4+ KitKat and above
• Photo Sphere and Panorama require a gyro sensor (not available on Moto G)
• Photo Sphere, Panorama, and Lens Blur require at least 1 gigabyte of memory
• Android L Developer Preview (LPV79) users: Google Camera app will not work on this early preview build. Only final factory system images are supported.

Download Google Camera 2.4 APK & Install It

  1. Download Google Camera 2.4 APK.
  2. Copy the downloaded APK file to your phone or download it directly on your phone.
  3. Locate the downloaded APK file on your phone and tap it to begin the installation.
  4. Select “Package Installer” if prompted.
  5. All “Unknown Sources” if required.
  6. Complete the installation and access the app through app drawer.
  7. Enjoy the new photography experience with Google Camera 2.4.
  8. That’s all!

Gapps for Android 5.0 Lollipop Download [ All ]

0
Gapps for Android 5.0 Lollipop Download [ All ]

Now that Android 5.0 source code was uploaded to the AOSP we have seen many Android 5.0 ROMs surfacing on the Web. The developers are using the pure AOSP code to build these ROMs so they come without Gapps, that means you have to manually install Gapps for Android 5.0. Well no need to worry thanks to drewwalton19216801  of XDA for providing us the Android 5.0 Gapps Package. You can download Gapps for Android 5.0 Lollipop from the following link.

Download Gapps for Android 5.0 Lollipop

Generally Gapps Package come in different size, but this Gapps Package comes with size of 117Mb. Means not all Google Gapps are added in this package. Following is the list of apps that are included in the drewwalton19216801 Android 5.0 Google Gapps package.

Download Latest Google GApps For Andorid 5.0.X Lollipop [All ROMs]

  • Google Now
  • Setup Wizard
  • Gmail
  • Cloud Print
  • Google Calendar
  • Google Now Home
  • Play Store
  • Google Plus
  • Base Required Google Services

Don’t worry about the remaining Gapps you can download them form Google Play or by apks. Most of us know how to install Gapps, but for those who are new to this Stuff follow my guide on how to install Gapps.

Android 5.0 Lollipop Gapps package: (90.7 MB).

How to Flash Android 5.0 Lollipop Gapps [TWRP Recovery]:

Step 1: Download the Gapps Package from the given link.

Step 2: Now copy the Android 5.0 Lollipop Gapps package to the root of your SD card.

Step 3: Boot your device into Recovery Mode.

Step 4: Now select Install form the menu.

Step 5: Navigate to the folder where you’ve placed the Android 5.0 Lollipop Gapps package and select it.

Step 6: Now “Swipe to Confirm Flash”.

Step 7: After the installation process is done go back to main menu and reboot your device.

Common Problems With HTC One M8 and Their Solution – How To Guide

0
Common Problems With HTC One M8 and Their Solution – How To Guide

OK, so if an Android device is free of all Problems, it is jut not available yet. Some of the problems are related with the Software, which is Android, sometimes the problem relates with the OEM, the manufacturer of the device which can be anyone, since Android is running on more than 82 OEMs. But if that particular device is a Flagship from any OEM, then experiencing such common problems on it is quite teasing, I mean a person spend so much amount on a device and what is doing most of his time is searching for the Solutions of some stupid problems he is facing, like I was stuck on the Null IMEI problem on Galaxy S3, thanks to XDA I somehow got over it, but most people don’t.

And if that device is a beauty like HTC One M8, then facing such problems on it is quite something that can force the user to throw and break the device. Form the release of HTC One M8, we have been hearing users, complaining about a lot of problems they face while using the device. However, not all of the users face such problems, the device is quite great in both looks and Performance, so there are fewer chances that you’ll face such problems. Yet there are those who face these common problems and we are here to give them a proper solution. Let’s go through the Problems and their solutions.

main-1

Number 1: Phone Runs Too Slow!

This is not the problem of HTC One M8, but with almost all the Android devices, there are a lot of Reasons behind it, some are because of Bloats, some are because of Custom Mods and Tweaks, sometime a new Installed app does that and sometimes, a user minimize a lot of apps thus filling the RAM making your Phone becoming slow. Here are some Solutions:

  1. Tap the Multi-Tasking Key on HTC One M8, the Glowing Key on the Right.
  2. Close all the Unnecessary apps you don’t want to run.
  • Just Restart the device once in a while to get rid of all the Apps at once

Number 2: LED Light Doesn’t Work Properly!

The LED light is one of the best way to know, whether you have received a message or any sort of other notification. If the device is not showing any sort of LED notification, then there might be a problem, relate to both the Hardware and Software, here are some quick solutions:

  1. Go to Settings > Display & Gesture > Notification Light.
  2. Turn On the Notification Light, if it is turned Off.
  • If the Problem starts occurring after installing an App, Un-install it and try again.
  • Do a Factory Reset, if the case gets more extreme

Number 3: Wi-Fi Keeps Loosing Signals!

Another common problem that everyone faces while owning an Android device, but the solution is quite easy, it is your choice that leads to such problem. Here is what actually happen, and also the solution:

  • Most of the Times users Turn On the Battery Saver mode, which Drops the Signals of Wi-Fi when it is not in used, e.g you are watching a movie and all of a Sudden you see Wi-Fi not working, you’ll immediately think that there is a problem with your device concerning Wi-Fi, just visit the Battery Saver mode and change the settings.
  • Otherwise, if you have any pending update to download or Install, do it, most of the times updates has the Solution to such problem.
  • Restart the router and Check the Mac address and Mac Filter

Number 4: SIM Card Problem!

Usually this problem occurs in Samsung Devices, but if you are experiencing this problem in HTC One M8, here are some solutions:

  • Take out and Re-adjust the SIM.
  • If the SIM is quite thin, put a paper to add thickness, so it won’t get loose.
  • Turn On the Air-plane Mode and then Turn it Off after a couple of Seconds and see if the Problem Solves or not.
  • Check the SIM card in any other device, after that you may want to Replace your SIM card or your HTC One M8

Number 5: Random Crashes!

One HTC Devices, facing Random Crashes is everyday job, but in a limited number, but if your device reboots without any purpose, there is a problem, here are the Solutions:

  • See if the Crashes start after installing a specific app, if Yes! then Un-install the app to get rid of this problem.
  • If the problem gets extreme, perform a Factory Reset

Number 6: Low Call Volume!

Usually I experienced this problem in Sony Devices, however, if you are facing such Problem on this device too, here are some quick solutions:

  1. Navigate to Settings > Call.
  2. See the Hearing Aids and Turn in On
  • Try to Shift the Speakers Position or keep it a little away from your ear.
  • Make Sure to Clean the Speakers

Number 7: No or Slow Screen Rotation!

Heard about this problem on iPhone, never though that HTC One M8 will be having issues with Auto Screen Rotation, Sigh! still here are some solutions:

  • Try the Screen Rotation on the Media Player, if it works fine then the app you were using before is faulty.
  • Restart the device.
  1. Navigate to Settings > Display & Gestures > G-Sensor Calibration. Put your device on Hard Surface and Tap the Calibration.
  2. If nothing Works, Perform a Factory Reset

PAC-MAN Friends for PC Download ( Windows 8,8.1,Xp – Mac )

0
PAC-MAN Friends for PC Download ( Windows 8,8.1,Xp – Mac )

We all have played PAC MAN in our childhood this games never gets old, well good news is that now you can again enjoy the PacMan fun by installing PAC-MAN Friends on your smartphones. This is the upgraded version of the original game, but in this you have to control by tilt. You can install PAC-MAN Friends for Pc by using a third party emulator, since there is no PC version of PAC-MAN Friends is out there. Before proceeding to the guide let me give you a review of PAC-MAN Friends.

PAC-MAN Friends for Pc

About PAC-MAN Friends:

* PAC-MAN Friend is new updated version of original classic PAC-MAN characters.

* You have to control movements by tilt.

* You have to eat fruits as much as you can to get more points.

* Unlock new friends! With powers like Invisibility to Ghosts, Wall Crashing and Illumination, each friend has a unique ability to aid PAC-MAN on his journey!

* If the Ghosts catches you, use the cherries to save PAC-MAN.

* 95 stages for all new challenges (including Dark Mazes) , 5 different control modes, 8 unique friends and Daily Rewards

How To Install PAC-MAN Friends on PC:

Step 1: Download and install BlueStacks on your Windows/Mac.

Step 2: Right click on BlueStacks icon and run as administrator.

Step 3: Click on the Search box on the top and write PAC-MAN Friends.

Step 4: Now click on install and wait for few minutes.

Step 5: Goto MyApps in BlueStacks and there you’ll find the PAC-MAN Friends game.

Step 6: Double click on the PAC-MAN Friends game icon and enjoy the madness.

Update Xperia Z2 D6503,D6502 To Official Android 4.4.4 KitKat 23.0.1.A.0.167 Firmware

13
Update Xperia Z2 D6503,D6502 To Official Android 4.4.4 KitKat 23.0.1.A.0.167 Firmware

The long awaited Android 4.4.4 KitKat update for the Xperia Z2 is finally here. Just yesterday, Sony started rolling out this update packing up enormous enhancements. Sony updated the Xperia Z2’s predecessors to Android 4.4.4 KitKat first, but the flagship Xperia Z2 was missing it since long and its turn has finally come now. Xperia Z2’s update, besides performance, stability and battery life enhancements, includes some new camera applications namely Face in, AR Fun, Multi-camera and more. Along with that, there’s a new Ultra Stamina Mode, that can keep your device alive up to one week by simplifying it. There’s bluetooth unlock included in this update, that allows the users to unlock their device using Sony Smartwear, no password is required when you’ve turned on bluetooth unlock. Smart screen rotation and quick settings have made their way in this update as well.

Screenshot_3

The new firmware is based on the build number 23.0.1.A.0.167. As usual, the update is on a slow roll and will reach out the users depending on the region. But, if you’re one of the Android enthusiasts who can’t wait for the latest and greatest version of Android to reach their device, you may want to have a look on a method that can help you to update your Xperia Z2 to this latest firmware right away, and that’s going be our goal for now. As you move forward, you will come across a comprehensive guide that will help you to install Generic Android 4.4.4 KitKat with the build number 23.0.1.A.0.167 on your Sony Xperia Z2 D6503 and D6502. The firmware installation will be done using Sony Flashtool, this firmware is official and has no risks involved. All you need is, you need to follow the guidelines being very careful. Let’s go through the early preparations now and then head towards the installation guide.

nexusae0_Sony-Xperia-Z2-launch-party-and-specs-tipped

Early Preparations:

1. This is only for Sony Xperia Z2 D6503 and D6502

This guide is only for the device mentioned above. Make sure that your model number matches the one listed above. To do so, go to Settings > About Device on your device and see your model number. Flashing this firmware on any other device will result in bricking it so make sure that you meet this requirement first of all.

2. Battery should be charged at least over 60%.

Make sure that your battery is charged enough to complete the flashing process. In case your battery is low and your device goes dead during the flashing process, you may end up soft bricking your device as it won’t complete the flashing process.

3. Backup everything!

Just to be on the safe side, you may consider backing up each and everything from your Android device. This is highly recommended so that in case anything goes wrong, you still have the access to all of your data and you can restore it immediately. You may backup everything as listed below.

Backup SMS Messages
Backup Call Logs
Backup Contacts
Backup Media – Copy your files manually to your PC or Laptop.

4. Enable USB Debugging Mode on your device.

Enable USB debugging mode on your device. To do so, tap settings>developer options>USB debugging. If you can’t find developer options in settings, then tap settings > about device and tap “Build Number” for 7 times and you’ll get em’ activated under settings.

5. Install and setup Sony Flashtool.

You must have installed Sony Flashtool, here’s the full guide.After installing Sony Flashtool, open the Flashtool folder from the drive where you installed it.Now open Flashtool>Drivers>Flashtool-drivers.exe and install the Flashtool, Fastboot & Xperia Z2 drivers from the list. [Important]

6. Use OEM data cable to establish connection.

Make sure that you use the phone’s original data cable to establish connection between your phone and the PC. Using a different data cable might result in interrupting the firmware installation.

The firmwares we linked below are from Germany and India. Although the regions do not matter, you can update your device without any hiccups here and there, all you need is, you need to have the compatible device model number only. But just in case you want to have your desired FTF, you may create one using our guide How To Download Sony Xperia Official Firmware And Create FTF File.

How To Update Xperia Z2 D6503,D6502 To Official Android 4.4.4 KitKat 23.0.1.A.0.167 Firmware

  1. Before moving forward, please make sure that you’ve read the pre requisites and ensure that you are set to go ahead.
  2. Download the latest firmware Android 4.4.4 KitKat 23.0.1.A.0.167 FTF file.
    1. For Xperia Z2 D6503 [Generic/Unbranded]
    2. For Xperia Z2 D6502 [Generic/Unbranded]
  3. Copy the file and paste in Flashtool>Firmwares folder.
  4. Open Flashtool.exe now.
  5. Hit the small lightening button on the top left corner and select Flashmode.
  6. Select the FTF firmware file that you placed in the Firmware folder.
  7. From the right side, select what do you want to wipe. Data, cache and apps log, all wipes are recommended, perhaps you may select if you don’t want.
  8. Click on OK, and it will start preparing the firmware for flashing. This may take a little while to load.
  9. As soon as the firmware is loaded, it will prompt you to attach the phone by turning it off and keeping the back key press.
  10. For Xperia Z2, Volume Down key will do the job of back key, just turn off your phone, keep the Volume Down key pressed and plug in the data cable.
  11. As soon as the phone is detected in Flashmode, the firmware will start flashing, Do not leave the Volume Down key until the process is complete.
  12. As soon as you see “Flashing ended or Finished Flashing” leave the Volume Down key, plug the cable out and reboot.
  13. That’s All! Congrats! You’ve installed latest Android 4.4.4 kitkat on your Xperia Z2. Enjoy

Got any queries or stuck with anything? Well, make sure that you utilize the comment box below and reach us. We will immediately get back to you. Thank you all.

Gmail 5.0 APK For Android

0
Gmail 5.0 APK For Android

Google is slowly updating all of its applications to let the users enjoy a feel of the Material design and just 2 days back, new version of Gmail started rolling out. Gmail 5.0 is based on Google’s all new material design, that looks pretty flat, eye-soothing and is much better as compared to that of the previous UI of the application. Besides the UI, Google has added several new features in the Gmail application. Atop, there’s support for other emails Yahoo, Outlook, AOL and other working on IMAP/POP servers. The application is now capable of automatically updating the Email threads. Support for Exchange accounts has been added as well. The new Gmail application is a completely re-invented by Google in order to provide the users with the best email experience on their smartphones.Gmail1

Gmail 5.0 is available in the Google Play Store, but just in case you happen to be an unlucky user who can’t access the Google Play Store due to some reason, or who can’t locate the latest Gmail application, you may want to have an APK file of Gmail 5.0 to install on your phone manually. Before you start looking out for it here and there, we’ve done this job for you. We’ve pulled out Gmail 5.0 APK from the Google Play Store and attached the download link right here. Just go ahead, grab the APK and follow the instructions to install Gmail 5.0.

Gmail 5.0 APK and how to install it

  1. Download Gmail 5.0 APK.
  2. Copy the downloaded APK file to your phone or download it directly on your phone.
  3. Locate the downloaded APK file on your phone and tap it to begin the installation.
  4. Select “Package Installer” if prompted.
  5. All “Unknown Sources” if required.
  6. Complete the installation and access the app through app drawer.
  7. Follow the on-screen instructions and setup your Gmail and other Email accounts.
  8. Enjoy modifying the new email experience with Gmail 5.0.
  9. That’s all!

Gmail is built on the idea that email can be more intuitive, efficient, and useful. And maybe even fun. Get your email instantly via push notifications, read and respond to your conversations online & offline, and search and find any email.

Gmail also lets you:
• Manage multiple accounts
• View and save attachments
• Set up label notifications

How to Transfer iTunes music on your Windows phone

How to Transfer iTunes music on your Windows phone

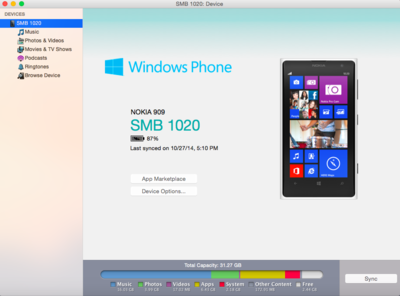
Windows Phone is getting a good response from all over the world many Android and iOS user’s have switched to Windows Phone. Let’s say you have been using iPhone quite long and now you’ve switched to Windows Phone, the one thing you want to transfer is music because it common everybody has its own collection. In the following guide I’ll tell you How to Transfer iTunes music on your Windows phone.

Windows_Phone_App_Mac

How to Transfer iTunes music on your Windows phone:

Step 1: First download and install Windows Phone app for Desktop.

Step 2: Once installation is done, click on settings on the top right corner.

Step 3: Now Select iTunes under Sync music.

Step 4: You’ll see all of your music and media files.

Step 5: Now choose what you want to sync with iPhone.

Step 6: Make sure Sync music has a check.

Step 7: Check all the albums, genders and bands.

Step 8: Now just click on the sync.

All Done.

For Mac:

Step 1: Download and install Windows Phone app for Mac.

Step 2: Connect your windows phone with Mac.

Step 3: From the sidebar choose Music.

Step 4: Now select the files whom you want to Sync.

Step 5: After you’ve selected the Music files click on Sync.

All Done.

How to Transfer music on your Windows phone:

Step 1: Connect your device with Windows.

Step 2: Locate the folder that you want to transfer.

Step 3: Open Windows Explorer.

Step 4: Your Windows Phone will show up in explorer.

Step 5: Double click on your Windows Phone icon.

Step 6: Select and open Music folder.

Step 7: Now copy the music files or the folder you want to transfer.

All Done.

Download WhatsApp v2.11.432 Apk – Updated With Read Receipts and References To VoIP

0
Download WhatsApp v2.11.432 Apk – Updated With Read Receipts and References To VoIP

WhatsApp is the out standing messaging app for every smartphone, this app has alot of features in many ways, But there’s always room for more improvement. Today WhatsApp is adding a new feature which enable users to see that their message has been read by the recipient. You can download WhatsApp v2.11.432 apk directly on your device or you can download it from Google Play Store.

WhatsApp-FAQ

Those who are using iPhone 6 and iPhone 6 Plus they have to wait for WhatsApp to roll out the new update with this new ” message read ” feature, which is currently rolled out for Android.

Lets me tell you what is the new feature well we all know that when we send IM to a recipient, you’ll  see a double gray tick sign beneath our message. That means you message has been delivered, but we don’t know that the person on the other side has read it or not. In this new update when message is delivered and your friend has read it or just glanced at your message those gray ticks will turn blue.

The other feature is VoIP support in WhatsApp and i am sure most of us are waiting for this feature eagerly. Thanks to Droidapp.nl leak ” The clear evidence, indicate that WhatsApp is busy launching Chime in WhatsApp.Earlier still it was announced that WhatsApp VoIP functionality only in early 2015 will roll out in the application.” [Google Translate].

whatsapp_voice_call

Download WhatsApp v2.11.432 Apk ( You can download WhatsApp new update from Google Play Store and for iPhone download it from App Store )

Image credit: DroidApp.nl

How to pair Microsoft Band with the iPhone

0
How to pair Microsoft Band with the iPhone

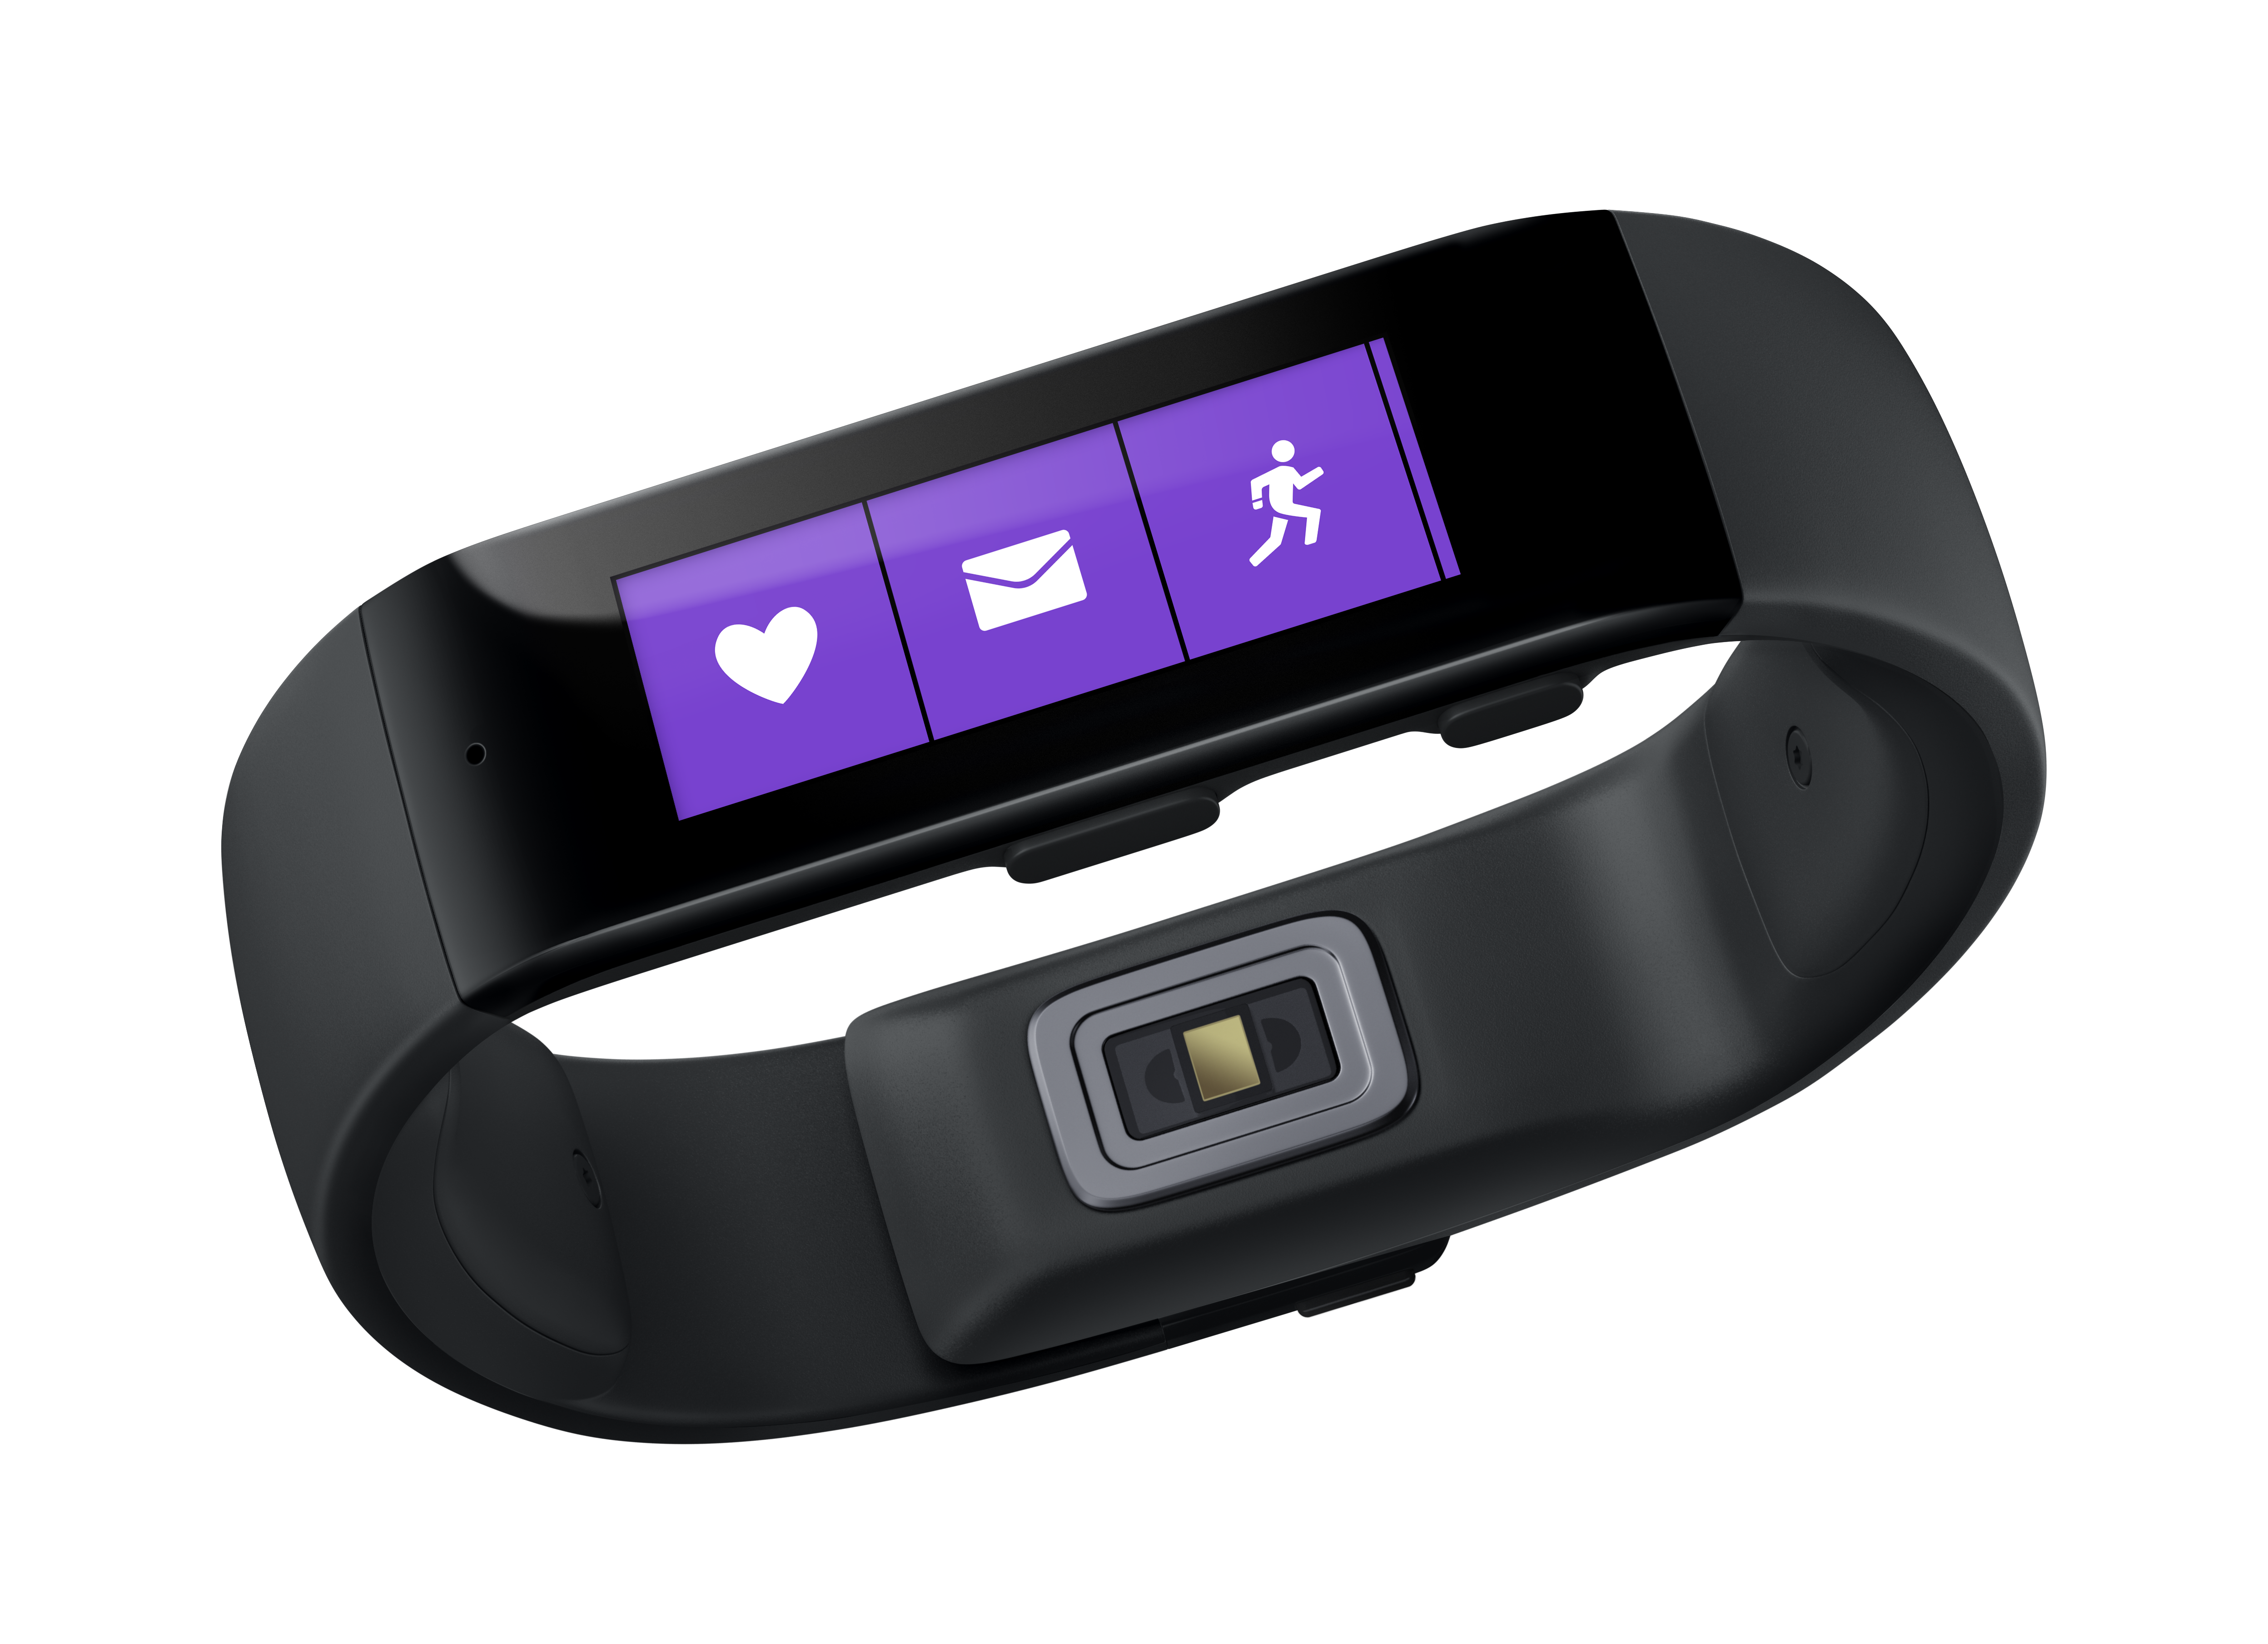
Microsoft Band is compatible with iPhone and Android devices means you can connect the new Microsoft Band with iPhone and also with Android devices easily. Microsft Band has the same features as other SmartWatches by Samsung, LG, and Motorola. In the following guide, I will tell you how to pair Microsoft Band with the iPhone.

Microsoft-Band_Hero_2

Also See: Use Cortana on Microsoft Band.

How to pair Microsoft Band with the iPhone:

Step 1: First Turn on your Microsoft Band.

Step 2: Download and Install Microsoft Health from the App Store on your iPhone.

Step 3: Open Microsoft Health App on your iPhone and sign in with your Microsoft account.

Step 4: Open Settings.

Step 5: Tap on Bluetooth.

Step 6: Now tap MSFT Band in the list of devices to pair.

Step 7: When the pairing is completed open the Microsoft Health app to finished the setup.

Step 8: Now press the action button to start the Microsoft Band.