Home Blog Page 406

Most Popular HD Wallpapers for Your iPad – Free Download

0
Most Popular HD Wallpapers for Your iPad – Free Download

There are millions of Wallpapers on the Web for iPad all variants, but there are few who are most liked by all over the world. I am talking bout the most popular hd wallpapers for iPad all models, after such a hard work i have collected a complete collection of most popular hd wallpapers for your iPads. You can also download the most popular hd wallpapers for your desktop, along with more other devices HD Wallpapers.

fb793330e31cce93aa85c2a5ad234d77

Do check my Wallpaper Gallery and all are free. You can find more exciting a hd wallpapers for your mobile devices and Desktop PC/Mac.

Most Popular HD Wallpapers for Your iPad

Also See: Top HD Wallpapers Free

Google Messenger APK 1.0.123

0
Google Messenger APK 1.0.123

Google’s new Messenger application that surfaced around out of Google’s latest Android lollipop running on Nexus 6 and Nexus 9 is finally available in the Google Play Store. Yet another application, having material design is available for all the users all around the world. It looks like Google is giving up on the Hangouts application and Messenger is there as a complete revamp to the Hangouts. Messenger allows the users to send SMS and MMS to any other mobile phone, it allows the users to create groups, send pictures, videos and audio messages as well. The functionality of Messenger is almost same as that of the Hangouts, the application has a complete new UI, some new features have been added along side Google’s focus, the Material Design.

Current version of Messenger is 1.0.123, it’s available for free and requires an Android device having Android 4.1 or higher to run on. Although you can grab it from the Play Store, but if you’re unlucky to locate Messenger in the Play Store in your region, or if the Play Store is out of access right now, you may want to grab Messenger’s latest APK file in order to install manually on your smartphone. Before you start looking for the APK file of Messenger here and there, we’ve already pulled it out for you and embedded the download link right here following the installation instructions. Let’s go through the app features and install it after then.Messenger

Faster sharing: Select or take pictures and videos directly from the app and share easily. You can even send audio messages to your contacts.
Easy search: Search through contacts and conversation threads to find exactly what you are looking for.
Purposeful design: New, fluid, material design that is intuitive and delightful.
More control: Ability to block SMS senders. No interruptions when you don’t want them!
More features: audio messages, emoji support

Download And Install Google Messenger 1.0.123 APK

  1. Download Google Messenger APK.
  2. Copy the downloaded APK file to your phone or download it directly on your phone.
  3. Locate the downloaded APK file on your phone and tap it to begin the installation.
  4. Select “Package Installer” if prompted.
  5. All “Unknown Sources” if required.
  6. Complete the installation and access the app through app drawer.
  7. Enjoy modifying the new email experience with Messenger 1.0.123.
  8. That’s all!

[ Tutorial ] Stop iPhone Calls Ringing a Mac in OS X Yosemite [ How To ]

1
[ Tutorial ] Stop iPhone Calls Ringing a Mac in OS X Yosemite [ How To ]

With new updates comes new features some people love what is added in the latest update and some not. Same goes with Mac and iPhone with new OS updates we have got our selfs handful features, but as i said not everyone like all the features. If you are a Mac user then you are well aware of that after updating your Mac to OS X Yosemite and your iPhone to iOS 8, every time you get a call on your iPhone your Mac also start showing a incoming call. This feature is no doubt helpful to most of you, but sometimes its get annoying. So in order to Stop iPhone Calls Ringing a Mac in OS X Yosemite follow my step by step guide below. You all are wondering why this is happening ? well when you are using same Apple id on both Mac.

Stop iPhone Calls Ringing a Mac in OS X Yosemite


How To Stop iPhone Calls Ringing a Mac in OS X Yosemite:

In order to stop iPhone calls ringing on your Mac you have to visit your FaceTime preferences. Now follow all the steps carefully in the following guide.

Step 1: Open FaceTime on your Mac.

Step 2: Goto FaceTime menu and choose “Preferences”.

Step 3: Now click on primary Settings tab.

Step 4: Uncheck the box saying “iPhone Cellular Calls”.

Step 5: Close the preference and quit the FaceTime.

See its so simple now you will not receive iPhone notification on your Mac. If you want to enable these settings back on your Mac follow my guide below.

Step 1: Open FaceTime on your Mac.

Step 2: Goto FaceTime menu and choose “Preferences”.

Step 3: Now click on primary Settings tab.

Step 4: check the box saying “iPhone Cellular Calls”.

Step 5: Close the preference and quit the FaceTime.

In order to receive the iPhone call ringing and get the notification back on your Mac. You have to use the same id on both devices Mac and iPhone. If you face any problem regarding this guide do tell me in comments.

How to block a phone number on Nexus 5 Running CM 11

0
How to block a phone number on Nexus 5 Running CM 11

Its normal that when we are using mobile we receive lot of calls from unknown numbers, most of the time calls are related but not every time. Some times its your ex stalking you? Random text messages and unknown numbers, well this is really annoying. No need to take it so serious today i’ll tell you how you can block a phone number on Nexus 5 Running CM 11. Its very simple and effective after blocking a number you’ll not receive a phone call and text message from that number.

how to block a phone number on Nexus 5 Running CM 11

How to block a phone number on Nexus 5 Running CM 11:

Step 1: Open your dialer app.

Step 2: Go to your call log.

Step 3: Search for the number you want to block.

Step 4: Now open profile of the number/contact.

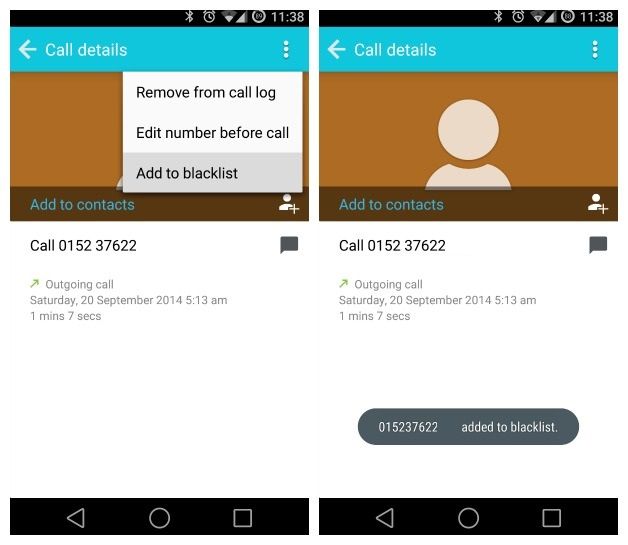
block number on nexus 5

Step 5: Now tap on the three dots to open the menu as show in the photo.

Dialer-Blacklist-2


Step 6: Tap on the Add to blacklist.

Step 7: You’ll see a popup saying added to blacklist.

Method 2:

Step 1: Open the dialer app.

Step 2: Tap on menu button.

Step 3: Now tap on settings.

Step 4: You’ll be in call settings now scroll down and tap on blacklist.

Step 5: Make sure your blacklist setting is turned on.

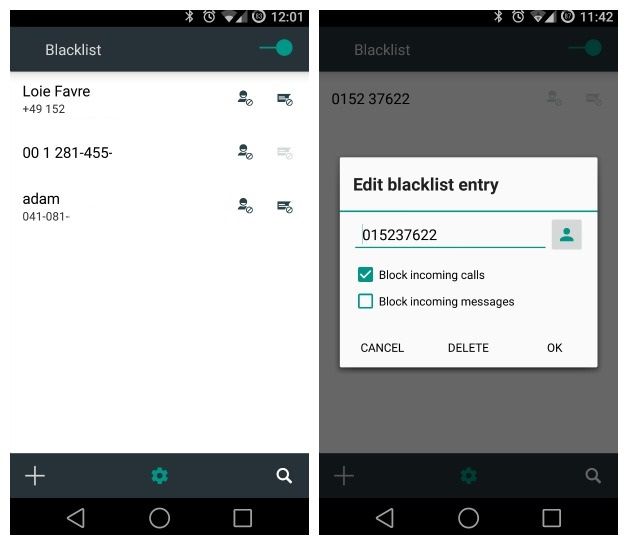
Step 6: Now to add a number tap on + icon.

Step 7: Add the number you want to block.

Step 8: Now set your blacklist parameters.

Step 9: Tap on OK.

Dialer-Blacklist-5

Image Credit: AndroidPit.

Candy Crush Soda Saga for Pc Download ( Windows 8,8.1,7,Xp – Mac )

0
Candy Crush Soda Saga for Pc Download ( Windows 8,8.1,7,Xp – Mac )

Candy Crush Soda Saga is another hit form the creators of famous Candy Crush Saga, Farm Hero Saga and more. We’ve seen many addictive game from King, Candy Crush Soda Saga is the newest puzzle typer games. Basically Candy Crush Soda Saga is designed for iOS and Android devices, but today i’ll tell you how to download Candy Crush Soda Saga for Pc and play it on Windows 8,8.1,7,Xp – Mac. Before proceeding to guide let me give you an overview on Candy Crush Soda Saga.

Candy Crush Soda Saga for Pc

About Candy Crush Soda Saga:

*Download Candy Crush Soda Saga for free.

*New candies are introduced and more combinations, challenging mode are added.

*You can purchase extra moves or lives.

*For now there are only 140 levels.

*Easy and fun to play, yet challenging to fully master.

*New candies and sublime new combinations.

For more infö visit Google Play.

How To Download Candy Crush Soda Saga for Pc:

  1. To download Candy Crush Soda Saga for PC, you will need an Android emulator like Bluestacks. If you do not have it already, you can download it from the website Bluestacks.com.
  2. Open Bluestacks and search for Candy Crush Soda Saga using search tool on the top of the homepage.
  3. Click on install button. The game will automatically download and install.
  4. Once the app has been installed, go to My Apps in Bluestacks homepage.
  5. The icon for the game will appear in My Apps.
  6.  Click on this icon to open Candy Crush Soda Saga.

Now, you can start playing the game any time on your Pc simply by opening it from My Apps. Get mesmerized by the amazing graphics of the game.

Hopefully, you will be able to install the game easily on your PC through this guide. If you still have any issues, please let us know and we will help you solve them. Enjoy !

How To Fix Nexus 9 Slow Charging and Battery Drain Issue

4
How To Fix Nexus 9 Slow Charging and Battery Drain Issue

Those who have used Nexus 7 they are well aware of Nexus tablets have slow charging and battery draining issues. Nexus 9 was released last month and now user are getting Google new tablets, but Nexus 9 has same problem battery charging is so slow. Nexus 9 comes with 6700mah battery so most of user’s think its normal, but i’ve seen users saying that it take more then 8 t0 9 hours to full charge Nexus 9. You can fix Nexus 9 slow charging and battery drain issue just follow my guide below in order to fix Nexus 9 slow charging.

How Tp Fix Nexus 9 Slow Charging

People who are still using Nexus 7 you can fix Nexus 7 slow charging issue, using our guide that we have posted earlier. Follow guide is for Nexus 9 please follow all the steps properly to fix slow charging of Nexus 9.

How To Fix Nexus 9 Slow Charging and Battery Drain Issue:

Step 1: First configured ADB and Fastboot. [ Follow these steps here ]

Step 2: Now Open Command Prompt in Fastboot folder and Type: adb reboot bootloader.

Step 3: Choose Recovery from Bootloader.

Step 4: Now if you have a custom Recovery, it will open in an instant.

DSCN0441-585x600

Step 5: However, if you Stock recovery,  you’ll be prompted to a windows with “No Command”, wait for 20-seconds to enter recovery mode.

DSCN0434-431x600

Step 6: Now Navigate to Wipe Cache and Select it using Power Button.

Step 7: Once the Process is over, Select reboot System now.

DSCN0444-473x600

Step 8: The same process is applied on the Custom Recovery too.

Android 5.0 Material Design HD Wallpapers – Download Here

0
Android 5.0 Material Design HD Wallpapers – Download Here

Android Lollipop 5.0 the latest and upgraded version from the creators of Android is out, making its way to latest Android flagships soon. I am sure everybody gets their hands on Android 5.0 update some how, it doesn’t matter that you’ll enjoy Android 5.0 features using official ROM or Custom. As all of you know that i am Wallpaper freak, love collect Wallpapers, HD, Simple , Black, Wide and much more. Today i am giving you Android 5.0 material design hd wallpapers for free. You can use these Wallpapers on Android smartphones and Tablets.

android-lollipop-631x355

You can check our my Wallpapers collection of HD Wallpapers, Wide Wallpapers and more on Techbeasts Wallpaper Gallery. I have also added HD Wallpapers for Desktop and Mac. [ Visit Here ].

Download Android 5.0 Material Design HD Wallpapers:

Install TWRP Recovery on Canadian Galaxy Note 4

0
Install TWRP Recovery on Canadian Galaxy Note 4

TWRP Recovery is making its way to almost all the Galaxy Note 4 variants, previously we posted the articles about Sprint Galaxy Note 4 and Verizon Galaxy Note 4 and T-Mobile Galaxy Note 4 receiving the support for TWRP Recovery, not it is time for Canadian Galaxy Note 4 to start running with the TWRP Recovery.TWRP is the most active recovery when it comes to arriving on the Android devices, mostly these devices got root after the installation of custom recovery. However, there are those who want to root the device first then install the custom recovery on it, still there is no news about the Rooting method of Canadian Galaxy Note 4, till then enjoy this recovery and wait for the rooting method.

You can wait for the CWM Recovery if you want to, because there is no custom ROM available yet and even the rooting method is not available, so if you are in some sort of development then do install this recovery and keep sharing your work with us. The Whole Process is simple and only needs few click, as we are going to use Odin in such matter, if you are not familiar with Odin and its working, pay a little close attention towards the tutorial. If you don’t want to use Odin, you can look for an alternate method, which requires commanding and active ADB drivers, Yeah! I know it is difficult, I also use Odin a lot more than ADB Shell. So, Without further ado, Let us begin.

TWRP-Recovery

Early Preparations:

1. This guide is only for Canadian Galaxy Note 4!

Make sure that your device is exactly as mentioned above. To check out what device you have, go to Settings > More/General > About Device or Settings > About Device and match the model number. Be careful about the device model number, flashing a file on a device not listed here might result in bricking it up. In that case, we may not be held responsible.

2. Battery should be charged at least 60%!

Your device’s battery shouldn’t be weak. In case your device goes dead during the flashing process, your device may get soft bricked and you might be in need of flashing stock firmware and that will ultimately result in wiping up your data as well. So, make sure that you charge your device before you start the flashing process.

3. Use the OEM data-cable to establish connection!

Always use the original data cable to establish connection between your Android device and your computer / laptop. Using ordinary data cables might interrupt the flashing process, so to avoid any mishap, you need to meet this requirement as well.

4. Backup everything!

Just to be on the safe side, you may consider backing up each and everything from your Android device. This is highly recommended so that in case anything goes wrong, you still have the access to all of your data and you can restore it immediately. Also, clean install is always recommended, that means you will probably have to wipe your device to install the new firmware. So, you may backup everything as listed below.

5. Discalimer

The methods involved in flashing custom recoveries, roms and rooting your phone are highly custom and may result in bricking your device, and has nothing to do with Google or the device manufacturer that is Samsung in our case. Also rooting your device will void its warranty and you will be no longer eligible for any kind of free device services by the manufacturers/warranty providers. Incase of any mishap we may not be held responsible. Follow these instructions to the letter to avoid any mishap or bricking. Make sure that whatever you do, you are doing it at your own responsibility.

How To Install TWRP Recovery On Canadian Note 4:

  1. Download and extract Odin3 v3.09.
  2. Download and Install Samsung USB drivers .
  3. Download and extract TWRP Recovery: Link (scroll to the bottom and choose the Odin method)

Method:

  1. Open Odin3.exe.
  2. Put your Galaxy Note 4 in download mode. To do so, turn it off and wait for 10 seconds. Turn it on by pressing and holding Volume Down + Home Button + Power Key simultaneously, You should see  a warning, press Volume Up to continue. In case this method doesn’t work for you, try one from this guide.
  3. Connect your device to your PC.
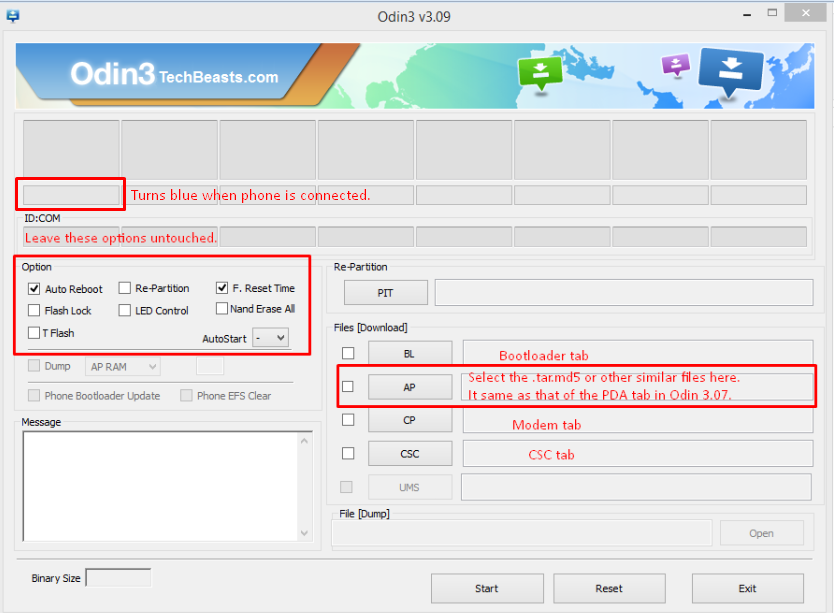
  4. As soon as Odin detects your phone, the ID:COM box should turn blue.  Make sure that you’ve installed Samsung USB drivers before connecting.
  5. For Odin 3.09 hit the AP tab. Select the .tar.md5  file or .tar file, that you downloaded and extracted above.
  6. If you’re using Odin 3.07, you will select “PDA” tab instead of the AP tab, rest of the options remain untouched.
  7. Make sure that the options selected in your Odin are exactly as shown in the pic (Do not Tick the F.reset Option)Odin-3.09-explained.-2
  8. Hit start and wait till the flashing is complete, as soon as your device restarts, remove it from PC.
  9. Wait for your device to reboot.
  10. That’s all!
  11. Now Visit Recovery Mode to Confirm

How To Restore Moto X 2014 to Stock Firmware

3
How To Restore Moto X 2014 to Stock Firmware

There are fewer chances that a users might want to go back to the Stock ROM, simply because the Stock ROMs are not that good as compared to the Custom Ones. However, if you want to sell your device then as most Buyers prefer to get their hands on the Stock ROM, just so they can feel a little safe, you need to restore your device to Stock Firmware, and if installing a custom ROM is easy then installing the stock firmware is as difficult. Cause Custom ROMs are common and available everywhere, where instead of Samsung, every other OEM doesn’t provide much support, instead of a PC Suite to do everything for you, you need to do it manually by using command prompt and executing commands in fastboot mode.

Moto X 2014 has recently received the OTA update of Android 5.0 Lollipop and the very first requirement of installing OTA updates is that your device mush be stock and from zeal to zest. In that article,we weren’t able to provide the Stock Firmware, instead we are making a whole new tutorial on it, so that you people can restore your device to stock easily, rather than that, you also need to restore your device to stock if it is bricked or even worst. Today we will show you How To Restore Moto X 2014 to Stock Firmware which is Android 4.4.4 Kit-Kat, we will provide you the next update too which is the KXB21.85-23 build number, without further ado, let us continue.

Moto-X

Early Preparations:

1. This is only for Moto X 2014!

This custom ROM is only for the device mentioned above. Make sure that your model number matches the one listed above. To do so, go to Settings > About Device on your device and see your model number. Flashing this ROM on any other device will result in bricking it so make sure that you meet this requirement first of all.

2. Battery should be charged at least over 60%

Make sure that your battery is charged enough to complete the flashing process. In case your battery is low and your device goes dead during the flashing process, you may end up soft bricking your device as it won’t complete the flashing process.

3. Backup everything!

Just to be on the safe side, you may consider backing up each and everything from your Android device. This is highly recommended so that in case anything goes wrong, you still have the access to all of your data and you can restore it immediately. You may backup everything as listed below.

4. Configure Fastboot and ADB

Since all the commands needed to be done using fastboot, you’ll need to install and Configure fastboot on your device, Link

5. Disclaimer

The methods involved in flashing custom recoveries, roms and rooting your phone are highly custom and may result in bricking your device, and has nothing to do with Google or the device manufacturer that is Motorola in our case. Also rooting your device will void its warranty and you will be no longer eligible for any kind of free device services by the manufacturers/warranty providers. In case of any mishap we may not be held responsible. Follow these instructions to the letter to avoid any mishap or bricking. Make sure that whatever you do, you are doing it at your own responsibility.

Downloads Required:

Android 4.4.4 Kit-Kat Stock ROM: Link | Mirror

Android 4.4.4 Kit-Kat KXB21.85-23 Build: Link

mfastboot-v2: Link

How To Restore Moto X 2014:

  • Download the mfastboot-v2 and also the Stock ROM.
  • Extract the Stock ROM in the mfastboot folder.
  • Connect your device with PC and open command prompt in fastboot folder and type: adb reboot bootloader
  • Once the Bootloader mode, Open command prompt in mfastboot-v2 folder.
  • If you wish to re-lock the bootl0ader, type: mfastboot.exe oem lock begin
  • Now Type and Execute the Commands one-by-one:
  1. mfastboot.exe flash logo logo.bin
  2. mfastboot.exe flash boot boot.img
  3. mfastboot.exe flash recovery recovery.img
  4. mfastboot.exe flash system system.img_sparsechunk.0
  5. mfastboot.exe flash system system.img_sparsechunk.1
  6. mfastboot.exe flash system system.img_sparsechunk.2
  7. mfastboot.exe flash system system.img_sparsechunk.3
  8. mfastboot.exe flash modem NON-HLOS.bin
  9. mfastboot.exe erase modemst1
  10. mfastboot.exe erase modemst2
  11. mfastboot.exe flash fsg fsg.mbn
  12. mfastboot.exe erase cache
  13. mfastboot.exe erase userdata
  • Now Type: mfastboot.exe oem lock
  • Once all commands are execute, type: mfastboot.exe reboot
  • Voila! your Moto X 2014 has been booted to Stock Firmware.

Update to Android 4.4.4 Kit-Kat KXB21.85-23 Build:

  1. Download this build firmware.
  2. Copy it to the root of your sdcard.
  3. Boot to Stock recovery, from bootloader, press Volume Down and Volume Up to boot into recovery.
  4. Or Connect your device with PC and open command prompt in fastboot folder and type: adb reboot recovery
  5. Select Appy Update From Sd and Choose the Download package
  6. Tada!

Install Android 5.0 Lollipop AOSP Custom ROM On Sony Xperia Z

0
Install Android 5.0 Lollipop AOSP Custom ROM On Sony Xperia Z

Although Sony has announced its plans to update the entire Xperia Z clan to the latest and greatest version of Android, the Android 5.0 Lollipop, but if you’re one of the users for whom it’s getting hard to wait for the official update to arrive and you’re falling short of the sweetness from your current Android version, you may want to taste the Android 5.0 Lollipop a little early on your Xperia Z. XDA senior member thomas1991_12 has made it all possible by bringing up AOSP based Android 5.0 Lollipop custom ROM. The early build is under development stage and contains a number of bugs, it isn’t recommended to be kept for everyday use, and if you’re not much familiar with custom ROMs, it isn’t recommended for you at all.

Just in case you’re coming across the Android 5.0 Lollipop for the very first time, you may want to know that Android Lollipop is the 5th iteration in the history of Android. Android Lollipop packs up biggest updates of Android, it happens to be the Android version with major graphical changes since Android Ice Cream Sandwich. There are a lot of improvements in the core firmware that allow the users to get better performance, battery life from their Android device. Google has improved the security as well, the firmware is much more responsive then the previous firmwares. The new UI is named as Material Design, it’s pretty smooth and flat, and makes the interaction of the users with the device just as they would interact with real-life objects. Since Google has rolled out the source code for Android 5.0, all the smartphone giants will be in a competition to update their flagship devices to this latest firmware, and keeping it in view, Sony has announced its plans for updating all Xperia Z smartphones to Android Lollipop, but we’ve no idea how long will it take for Sony to make it happen. So, until then, you can make your device living a life of Android  5.0 Lollipop using custom ROMs, and just to have a start, this under development AOSP custom ROM is fair enough.

Wondering how you can update your device using this custom ROM? well, that’s what we are about to do in the on-going post. We will be installing Android 5.0 Lollipop AOSP custom ROM on our beloved Sony Xperia Z. Let’s go through a list of what’s working and what’s not and then head towards the early preparations.

Xperia Z Lollipop

Working:
– Screen / touch
– Audio
– Wifi
– Vibrator
– Camera
– RIL (incoming/outgoing + data)
– NFC
– Bluetooth
– Sensors
– GPS (forgot a lib, extract attachment , push libgpsutils.so to /system/lib)

Not Working:

Apps crashing

All bugs not known yet

Early Preparations:

1. This is only for Sony Xperia Z!

This custom ROM is only for the device mentioned above. Make sure that your model number matches the one listed above. To do so, go to Settings > About Device on your device and see your model number. Flashing this ROM on any other device will result in bricking it so make sure that you meet this requirement first of all.

2. Battery should be charged at least over 60%.

Make sure that your battery is charged enough to complete the flashing process. In case your battery is low and your device goes dead during the flashing process, you may end up soft bricking your device as it won’t complete the flashing process.

3. Unlock Bootloader.

Your device’s bootloader must be unlocked in order to flash this custom ROM. You can unlock it by using our Sony bootloader unlock  guide.

4. Backup everything!

Just to be on the safe side, you may consider backing up each and everything from your Android device. This is highly recommended so that in case anything goes wrong, you still have the access to all of your data and you can restore it immediately. You may backup everything as listed below.

5. Disclaimer

The methods involved in flashing custom recoveries, roms and rooting your phone are highly custom and may result in bricking your device, and has nothing to do with Google or the device manufacturer that is Sony in our case. Also rooting your device will void its warranty and you will be no longer eligible for any kind of free device services by the manufacturers/warranty providers. In case of any mishap we may not be held responsible. Follow these instructions to the letter to avoid any mishap or bricking. Make sure that whatever you do, you are doing it at your own responsibility.

How To Install Android 5.0 Lollipop AOSP Custom ROM On Xperia Z

  1. Download the yugalollipop09-11.tar.gz [ROM.tar.zip] file.
  2. Extract the ROM.zip file to get boot.img, userdata.img and system.img files.
  3. Download Android ADB and Fastboot drivers, here’s our comprehensive guide for setting up ADB & Fastboot.
  4. Open the extracted ROM.zip and copy all the .img files.
  5. Now paste all the .img files file that you extracted from the zip folder in the fastboot folder that you downloaded from the guide linked above.
  6. Connect your Xperia Z in Fastboot mode with your PC now. To do so, turn it off completely, now connect it with your PC while keeping the Volume Up key pressed. As soon as your PC has detected your phone in Fastboot mode, a blue light will blink up in the notification LED.
  7. Assuming that you’ve already placed all the .img files in the fastboot folder, now open the fastboot folder again. Press shift and then Right click on any empty area inside the folder, now select “Open command prompt here“. flash the .img files using the commands

    fastboot flash boot boot.img”

    “fastboot flash userdata userdata.img”

    “fastboot flash system system.img”.

    In case you are confused, follow the Android ADB & Fastboot drivers guide carefully.

  8. Once all files are flashed, unplug your Xperia Z.
  9. Reboot your device now and checkout Android 5.0 Lollipop working on it.

That’s all with the ROM installation. In case you’re stuck with anything or you’re facing any issues, feel free to drop your words in the comment box below. We will get back to you as soon as possible.

Install Android 5.0 Lollipop AOSP Custom ROM On Xperia L

0
Install Android 5.0 Lollipop AOSP Custom ROM On Xperia L

Should you require to read the title once again? Well, that’s not less then a surprise, right? Android 5.0 Lollipop for the Sony Xperia L!. When it comes to Android, the only thing you should keep in mind is, there’s nothing impossible and wonders may happen here. While Sony has restricted the Xperia L to Android 4.2.2 Jelly Bean, users won’t be able to taste any further version of Android officially. Android 4.3 and 4.4 KitKat also came out for Xperia L packed up in custom ROMs by various developers and similarly the Android L has landed in.

Recently Google rolled out the Android L source code, all the smartphone giants have got their hands on the source code and will begin updating their flagships to the latest Android 5.0 Lollipop, the old mid-range, low-end and even some past flagship devices will be missing the latest and greatest version of Android. The only option that stands for those device owners is the use of a custom ROM and that too only if the custom ROM is up for that specific device. Fortunately, Xperia L happens to be one of those lucky devices. Android Lollipop features numerous enhancements and some great additions as compared to the previous Android versions, the firmware has received the biggest overhaul in the history of Android in the graphical department, new Material design makes it way awesome. A part from that, there are major core changes in the firmware that enhance the battery life, performance, security has been improved as well.The AOSP based Android 5.0 Lollipop custom ROM has been brought in the spotlight by XDA recognized developer varun.chitre15. The ROM is in very early development stages, and the purpose is only to give the users a feel of the Android Lollipop sooner than the time. It isn’t meant to be kept for daily use at all since you won’t be able to use WiFi, Bluetooth, RIL, and GPS on your Xperia L, while rest of the things may be buggy or may be working.

We only recommend you to flash this ROM if you’ve a great idea about custom ROMs and you know how to handle custom ROMs if anything goes wrong with your device. If you aren’t an Android power user, you may keep yourself far away from this ROM, your telephony services won’t be working since RIL is not working. In the on-going guide, we are about to install this Android 5.0 Lollipop AOSP ROM on our beloved Sony Xperia L, before we begin, we will go through a list of the working and not working features and head towards the early preparations.1756_01
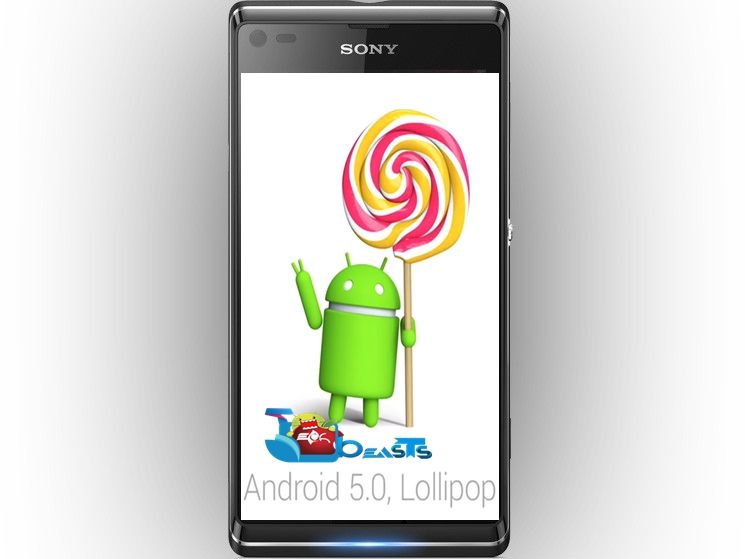
Here’s a list of what’s working:

Display

Touchscreen

Hardware Acceleration

System audio

Hardware Media Decoding/Playback – Audio and Video

All sensors – Auto brightness, magnetic, accelerometer etc

Headset

Vibrator

Camera – Front and Back

GPU Rendering

Internal Storage

External Storage

LEDs

What’s not working

  • WiFi, Blueooth, RIL, GPS

Early Preparations:

1. This is only for Sony Xperia L!

This custom ROM is only for the device mentioned above. Make sure that your model number matches the one listed above. To do so, go to Settings > About Device on your device and see your model number. Flashing this ROM on any other device will result in bricking it so make sure that you meet this requirement first of all.

2. Battery should be charged at least over 60%.

Make sure that your battery is charged enough to complete the flashing process. In case your battery is low and your device goes dead during the flashing process, you may end up soft bricking your device as it won’t complete the flashing process.

3. Unlock Bootloader.

Your device’s bootloader must be unlocked in order to flash this custom ROM. You can unlock it by using our Sony bootloader unlock  guide.

4. Backup everything!

Just to be on the safe side, you may consider backing up each and everything from your Android device. This is highly recommended so that in case anything goes wrong, you still have the access to all of your data and you can restore it immediately. You may backup everything as listed below.

5. Disclaimer

The methods involved in flashing custom recoveries, roms and rooting your phone are highly custom and may result in bricking your device, and has nothing to do with Google or the device manufacturer that is Sony in our case. Also rooting your device will void its warranty and you will be no longer eligible for any kind of free device services by the manufacturers/warranty providers. In case of any mishap we may not be held responsible. Follow these instructions to the letter to avoid any mishap or bricking. Make sure that whatever you do, you are doing it at your own responsibility.

How To Install Android 5.0 Lollipop AOSP Custom ROM On Xperia L

  1. Download the c2105_alpha1_android-5.0.0_r2_fastboot.zip [ROM.zip] file.
  2. Extract the ROM.zip file to get boot.img, userdata.img and system.img files.
  3. Download Android ADB and Fastboot drivers, here’s our comprehensive guide for setting up ADB & Fastboot.
  4. Open the extracted ROM.zip and copy all the .img files.
  5. Now paste all the .img files file that you extracted from the zip folder in the fastboot folder that you downloaded from the guide linked above.
  6. Connect your Xperia L in Fastboot mode with your PC now. To do so, turn it off completely, now connect it with your PC while keeping the Volume Up key pressed. As soon as your PC has detected your phone in Fastboot mode, a blue light will blink up in the notification LED.
  7. Assuming that you’ve already placed all the .img files in the fastboot folder, now open the fastboot folder again. Press shift and then Right click on any empty area inside the folder, now select “Open command prompt here“. flash the .img files using the commands

    fastboot flash boot boot.img”

    “fastboot flash userdata userdata.img”

    “fastboot flash system system.img”.

    In case you are confused, follow the Android ADB & Fastboot drivers guide carefully.

  8. Once all files are flashed, unplug your Xperia L.
  9. Reboot your device now and checkout Android 5.0 Lollipop working on it.

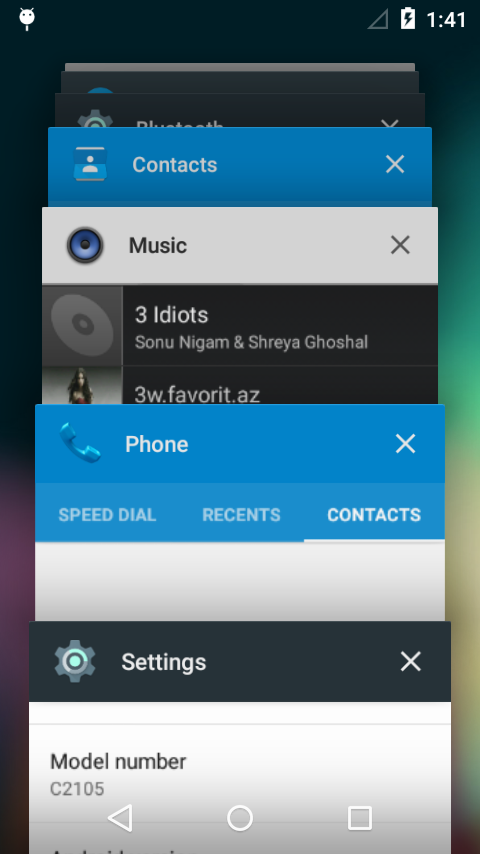
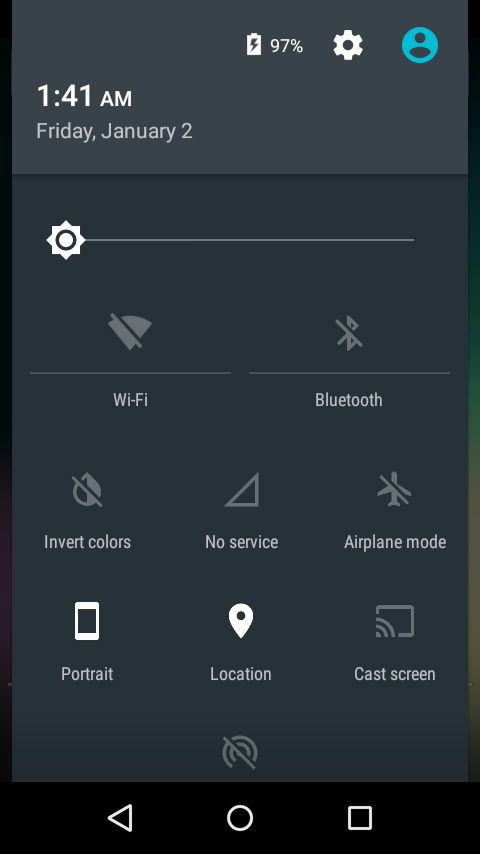
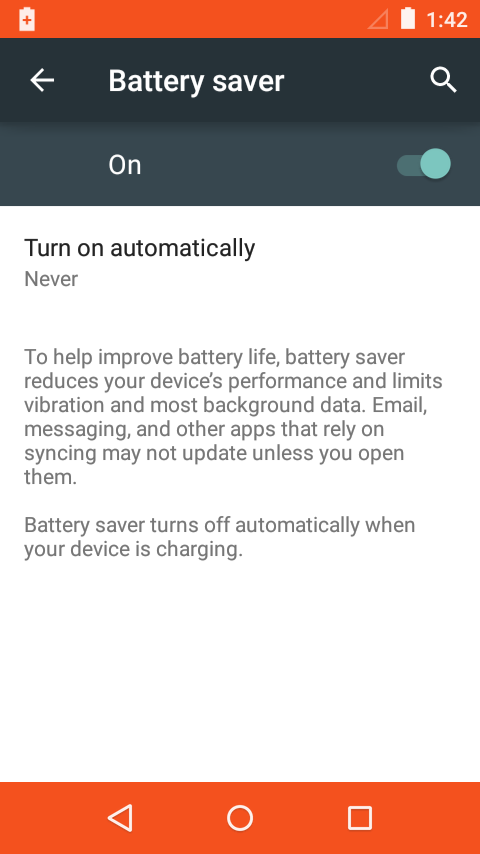
Here are some screenshots

Xperia L Lollipop3Xperia L Lollipop1 Xperia L Lollipop2

Xperia L Lollipop4 Xperia L Lollipop5 Xperia L Lollipop6

That’s all with the ROM installation. In case you’re stuck with anything or you’re facing any issues, feel free to drop your words in the comment box below. We will get back to you as soon as possible.