Home Blog Page 408

Backup & Restore EFS On All Galaxy Note 4 Variants Using EFS Manager

0
Backup & Restore EFS On All Galaxy Note 4 Variants Using EFS Manager

Development of the might Galaxy Note 4 is greatly in runs now. There’s something new coming up every day to unleash the capabilities of the Galaxy Note 4. Since the device sports some seriously massive specifications, you won’t be able to refrain yourself from going out of the limitations and tweak your new beast at its best. Before you start flashing custom ROMs, mods, and make tweaks, there are several important things that you need to take care of, and EFS partition happens to be one of them.

Once messed the EFS partition without having the EFS backup, your device will become pretty much useless forever as you won’t be able to enjoy the phone capabilities of your phone and it will become a smart device only instead of a smartphone. Basically, the EFS partition, that stands for Encrypting File System, it includes all information of your device’s radio, base-band, Bluetooth MAC address, Wireless MAC addresses, product code, most importantly IMEI code, programming parameters and data provisioning parameters. Flashing a wrong file, downgrading your Galaxy Note 4, flashing a wrong bootloader or an invalid custom ROM, invalid kernel or any other such file will result in messing up your EFS partition. This will erase your IMEI number, instead of your device’s original IMEI number, a null or generic IMEI will appear and it will result in causing No Service issue, that won’t let your device detect your SIM card and phone will stop working.

Now that you’ve a good idea about the EFS partition, you may wonder how to handle this issue if it happens. The only solution is, restoring your EFS backup, but what if you haven’t even backed it up? Well, that’s the most important thing you should do if you’re a power user and you’re going to modify your device right away. To keep everything safe and sound, EFS backup should be kept atop.

For the Galaxy Note 4, we’ve already posted a guide to backup the EFS using Dr Ketan’s application, but recently, our friend Maninder Singh (MannyVinny) on XDA has come up with his application named as EFS Manager that works with all the Galaxy Note 4 variants(Exynos and Snapdragon) and creates a backup of the EFS data on your phone’s internal or external storage. The app requires root privileges and does the job in the blink of an eye. Let’s go through the method to backup EFS partition on your Galaxy Note 4  using EFS Manager now.

How To Backup EFS On All Galaxy Note 4 Variants Using EFS Manager

    1. Your Galaxy Note 4 must be rooted. Root it using the guides here.
    2. Download and install EFS Manager on your Galaxy Note 4. Google Play Link | Download APK
    3. Open the application from the app drawer now.
    4. Grand SuperSu permissions if asked.
    5. Choose your variant “Exynos or Snapdragon”. [N910U/K/H/C are Exynos | N910S/F/G/A/T/R/All Duos Variants are Snapdragon]
    6. Now choose your device depending upon the model number.
    7. Now select whether you want to backup or restore.
    8. In case you want to backup, give it the location where you want to store the backup.
    9. The backup will appear in a folder named “mannyvinny_EFS_Backup” on the internal or external storage of your phone.
    10. The restore feature isn’t there yet, but will be added soon and will let you restore the backup similarly.
    11. That’s all with the Galaxy Note 4 EFS Manager application.

  • EFS Manager 01EFS Manager 1 EFS Manager 02


The application doesn’t let you restore the backup right now, but there are so many other ways to flash the EFS manager once you’ve backed it up. So all what matters here is backing up the EFS data, missing one feature isn’t really a big deal.

In case you got any queries, make sure that you utilize the comment box below. We will respond you immediately. Thank you all.

How to Connect and Use Cortana with the Microsoft Band

How to Connect and Use Cortana with the Microsoft Band

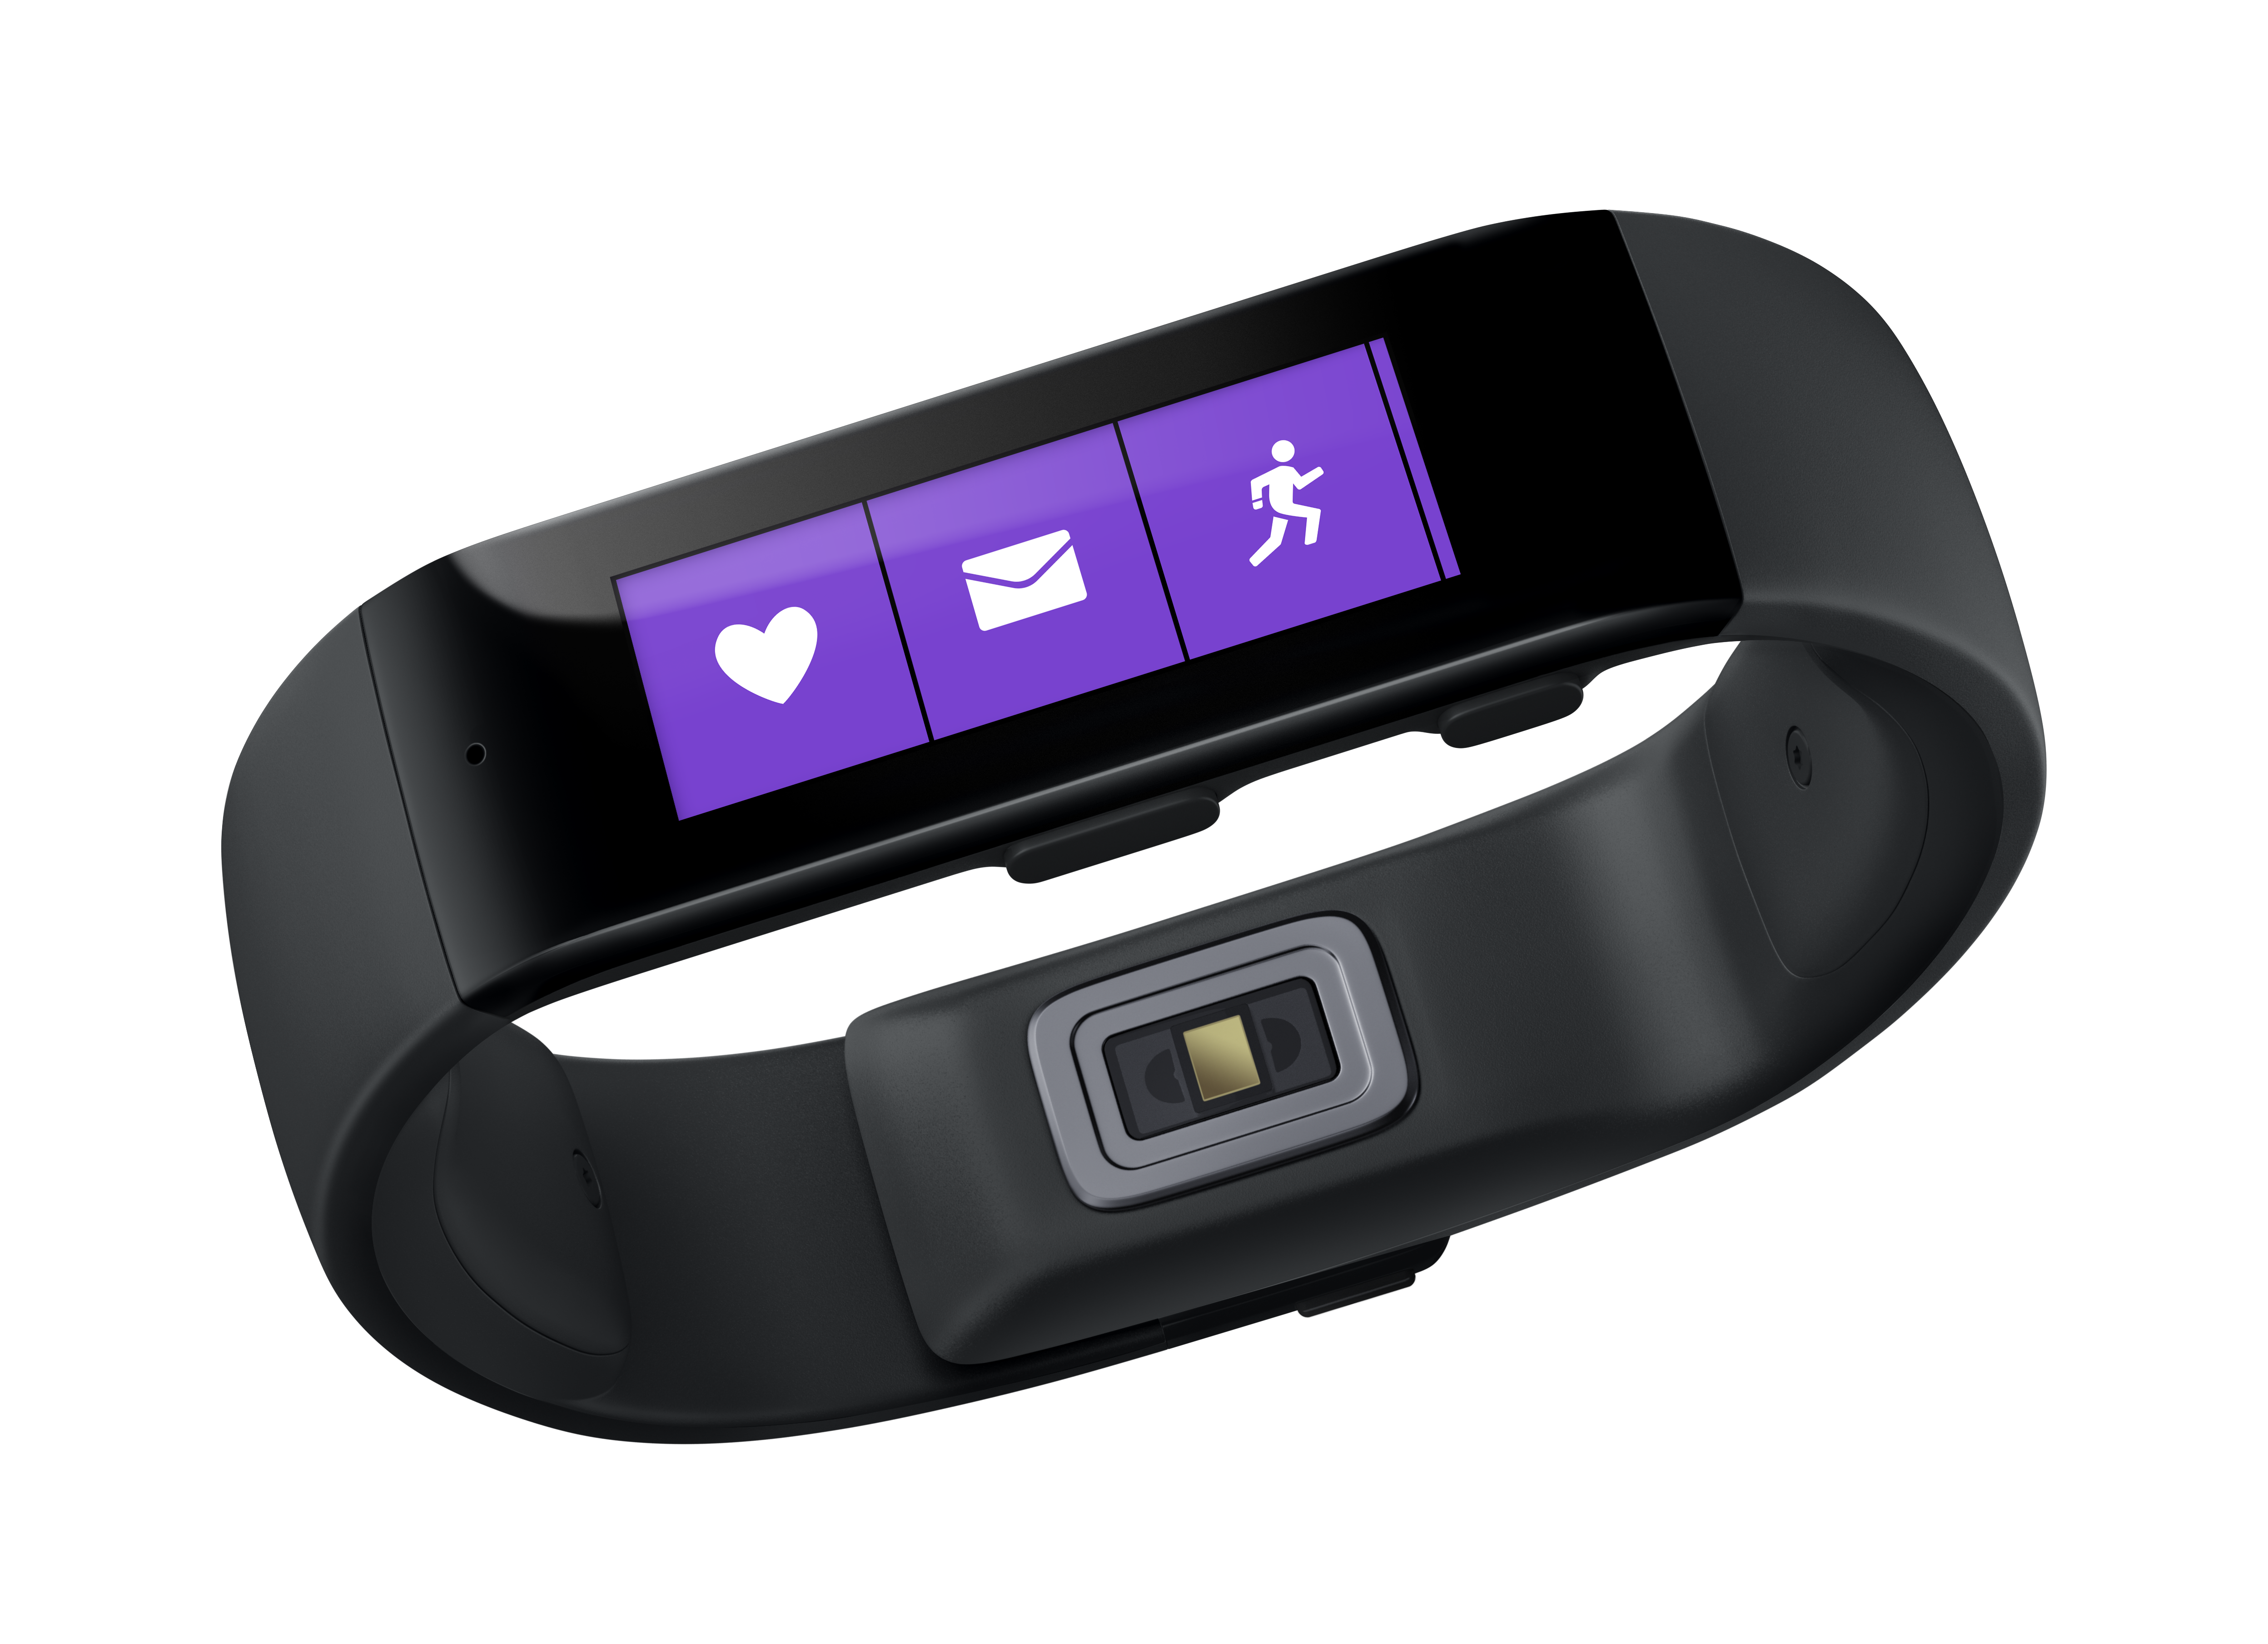
Now that Microsoft band is out, user’s start calling it the Apple and Samsung Competitor. Microsoft Band is no doubt the best, but I don’t think that yet it can compete with Apple and Samsung. Well this post is not about this, in this post will tell you how to Connect and Use Cortana with the Microsoft Band.

Microsoft-Band_Hero_2

How to Connect Cortana with the Microsoft Band:

Step 1: Press Power button to turn on your Microsoft Band.

Step 2: Open Microsoft Health App and sign in with your Microsoft account.

Step 4: Open Settings.

Step 5: Tap on Bluetooth.

Step 6: Now tap MSFT Band in the list of devices to pair.

Step 7: Now Compare the Pin on code on your Windows Phone and Microsoft Band. If they match, accept the pairing on both the phone and the band.

How to Use Cortana with the Microsoft Band:

Step 1: First install Cortana on your Windows Phone.

Step 2: Now Connect your Microsoft Band with Windows Phone.

Step 3: Press and Hold action button on your Microsoft Band to bring up Cortana.

Step 4: Now Tap on Cortana title and speak through Microsoft Band.

Step 5: When you give a command through Microsoft Band Cortana will open up on Windows Phone to perform the task.

It totally depends on your request either Microsoft Band display on itself or use your Windows Phone to preview the results.

Install CWM Recovery On Samsung Galaxy Note 4 SM-N910S, N910F, N910G & Root It[Snapdragon]

Install CWM Recovery On Samsung Galaxy Note 4 SM-N910S, N910F, N910G & Root It[Snapdragon]

Galaxy Note 4 is rocking all around the world at the moment and the lucky owners are just loving the device. Galaxy Note 4’s stock features are good enough to overcome all the needs of an ordinary Android user, but just in case you don’t happen to be an ordinary Android user and you like doing something out of the way in order to get the maximum out of your device and unleash it’s real power, you will have to flash some custom firmwares, mods and apply some tweaks in order to check out what your device is actually capable of. The very thing that will let you open the waste and powerful world of Android on your Galaxy Note 4 and help you to become an Android power user, is the use of a custom recovery, either CWM or TWRP and having the root access.

Guides to root the Galaxy Note 4 have already been posted on our site, so far we’ve been missing the CWM recovery for the snapdragon variants of this device. The recoveries are up, all you need is, you need a method on how to install them and that’s what we are here for at the moment. As you move forward, you will come across a comprehensive guide that will help you to install ClockworkMod [CWM] 6.0.5.1 custom recovery on your Galaxy Note 4 SM-N910S, N910F and N910G running Android 4.4.4 KitKat. All these are snapdragon variants of the device and sport same specifications / features. You need to follow this guide being very careful in order to get it done successfully. Just in case you’ve no idea about what a custom recovery is, let’s go through a brief introduction of it and then head towards the early preparations and the installation guide.Note 4_Snapdragon

A custom recovery allows you to install custom roms, mods etc. Along with these, you can make a Nandroid backup, this helps you a lot as you can move back to the previous working state of your phone at any time you want if you have backed up your current system. In some cases, to root the phone you need to flash SuperSu.zip file in the custom recovery, having installed the recovery may help you while in some cases to install the recovery easily, you need to have the phone rooted. You can also wipe cache and dalvik cache of your phone using a custom recovery.

1. This guide is only for Samsung Galaxy Note 4 SM-N910S, N910F and N910G

Make sure that your device is exactly as mentioned above. To check out what device you have, go to Settings > More/General > About Device or Settings > About Device and match the model number. Be careful about the device model number, flashing a file on a device not listed here might result in bricking it up. In that case, we may not be held responsible.

2. Battery should be charged at least 60%

Your device’s battery shouldn’t be weak. In case your device goes dead during the flashing process, your device may get soft bricked and you might be in need of flashing stock firmware and that will ultimately result in wiping up your data as well. So, make sure that you charge your device before you start the flashing process.

3. Enable USB Debugging Mode

USB debugging mode should enabled on your device in order to avoid any connection issues. To enable USB debugging mode, go to settings > developer options > check “Allow/Enable USB Debugging”. In case you can’t find the developer options in settings, you will have to activate the options by going into settings > about device > tap the build number for 7 times and you should get the developer options under settings, and then you can enable USB debugging mode.

4. Use the OEM datacable to establish connection!

Always use the original data cable to establish connection between your Android device and your computer / laptop. Using ordinary data cables might interrupt the flashing process, so to avoid any mishap, you need to meet this requirement as well.

5. Backup everything!

Just to be on the safe side, you may consider backing up each and everything from your Android device. This is highly recommended so that in case anything goes wrong, you still have the access to all of your data and you can restore it immediately. You may backup everything as listed below.

Backup SMS Messages
Backup Call Logs
Backup Contacts
Backup Media – Copy your files manually to your PC or Laptop.

6. Turn off Samsung Kies and other softwares while using Odin3!

Make sure that you turn off Samsung Kies while using Odin3 flashtool. Samsung Kies will interrupt Odin3 and will result in causing errors and may not let you flash your desired recovery or root file. Also, make sure that you turn off any antivirus software you’ve installed and also disable firewall to avoid any connection and flashing issues.

7. Disclaimer

The methods involved in flashing custom recoveries, ROMs and rooting your phone are highly custom and may result in bricking your device, and has nothing to do with Google or the device manufacturer that is SAMSUNG in our case. Also rooting your device will void its warranty and you will be no longer eligible for any kind of free device services by the manufacturers/warranty providers. Galaxy Note 4 comes with Knox counter on the bootloader, once tripped you won’t be able to reset it again. In case of any mishap we may not be held responsible. Follow these instructions to the letter to avoid any mishap or bricking. Make sure that whatever you do, you are doing it at your own responsibility.

Downloads Required

  1. Download and extract Odin3 v3.09.
  2. Download and Install Samsung USB drivers.
  3. Download the CWM Recovery For Your Device

How To Install CWM Recovery On Samsung Galaxy Note 4 SM-N910S, N910F & N910G

  1. Download CWM Recovery.tar file.
  2. Open Odin3.exe.
  3. Put your Galaxy Note 4 in download mode. To do so, turn it off and wait for 10 seconds. Turn it on by pressing and holding Volume Down + Home Button + Power Key simultaneously, You should see a warning, press Volume Up to continue. In case this method doesn’t work for you, try one from this guide.
  4. Connect your device to your PC.
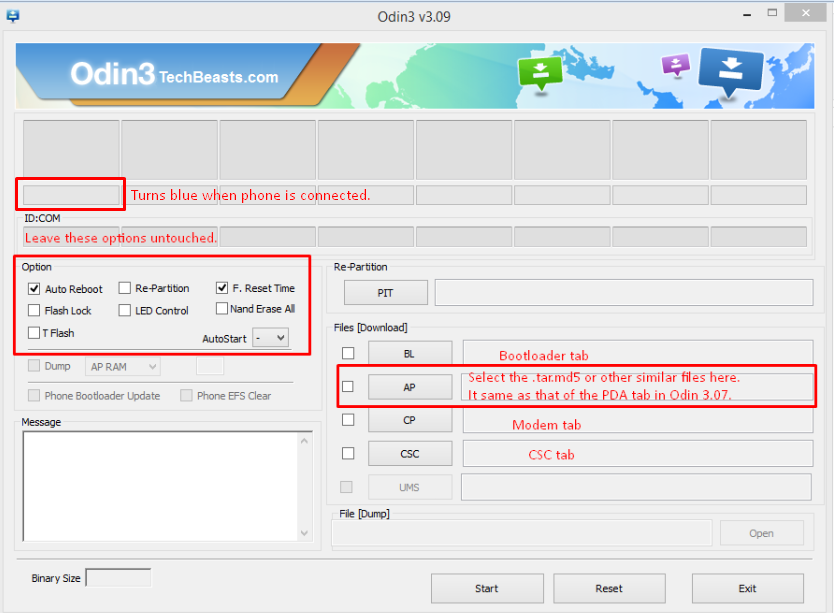
  5. As soon as Odin detects your phone, the ID:COM box should turn blue.  Make sure that you’ve installed Samsung USB drivers before connecting.
  6. For Odin 3.09 hit the AP tab. Select the recovery.tar.md5  or recovery.tar, that you downloaded above.
  7. If you’re using Odin 3.07, you will select “PDA” tab instead of the AP tab, rest of the options remain untouched.
  8. Make sure that the options selected in your Odin are exactly as shown in the pic. Odin-3.09-explained.-2
  9. Hit start and wait till the recovery flashing is complete, as soon as your device restarts, remove it from PC.
  10. You can now boot into recovery mode by turning off your device, and then turning it on by pressing and holding Volume Up + Home + Power Key.
  11. That’s all!

Root The Galaxy Note 4 SM-N910S, N910F, N910G

  1. Download the Root Package.zip file [ UPDATE-SuperSU-v2.16.zip ]
  2. Copy the downloaded Root Package.zip file to your Galaxy Note 4’s SD card.
  3. Boot into recovery mode on your Galaxy Note 4, use step 11 in the recovery installation guide.
  4. Now Select “Install > Choose Zip from SD card > Root Package.zip > Yes / Confirm”.
  5. This will flash the Root Package and quickly gain the root access on your Galaxy Note 4.
  6. Reboot your device.
  7. Find SuperSu in the App Drawer.

How to check if the device is properly rooted or not?

  1. To do so, go to Google Play Store on your Galaxy Note 4.
  2. Find “Root Checker” and install it.
  3. Open Root Checker.
  4. Tap “Verify Root”.
  5. It will ask you for SuperSu rights, tap “Grant”.
  6. It should show you Root Access Verified Now!Screenshot_1

Now make sure that you backup your EFS Partition and Nandroid.

That’s all. We hope that you found this guide helpful. If you’re stuck with anything or got any queries, make sure that you use the comment box below and reach us. Thank you all.

Recovery Credits

How to turn off ‘Briefing’ on Samsung Galaxy Note 4

0
How to turn off ‘Briefing’ on Samsung Galaxy Note 4

There are tons of new feature added in Samsung Galaxy Note 4, but you don’t like all the features as I don’t like Briefing on Samsung Galaxy Note 4. It’s like a presentation for Flipboard or My Magazine, may be this is helpful for most you but I rather find it annoying. Those who want to turn of briefing follow my step by step guide below on how to turn off ‘Briefing’ on Samsung Galaxy Note 4.

2014-11-05 12.22.48

Now carefully follow all the mention steps below in order to turn off the briefing on your Samsung Galaxy Note 4. You can apply these steps on other Samsung variants.

How to turn off ‘Briefing’ on Samsung Galaxy Note 4:

Step 1: First long press the recent button to pull up the launcher.

Step 2: Now Tap “Home screen settings”.

Step 3: You’ll see settings area with few options.

Step 4: Tap on Flipboard Briefing.

Step 5: Just uncheck the box.

Step 6: You can also see My Magazine option in the settings.

You can perfrom these simple steps on other Samsung Galaxy variants in order to turn off Briefing.

How To Unlock Bootloader of Nexus 9 and Root it

0
How To Unlock Bootloader of Nexus 9 and Root it

Nexus 9 is the latest Flagship tablet from Google, one of the most awaited and most demanded tablet of this year was finally available for both developers and Users. As anticipated, it won’t take long for anyone to root the device, unlocking bootloader is a piece of cake, but no one actually thought that it will be Chainfire himself that will root the device at the first place. For all those who are wondering who is Chainfire, he is the genius behind the Rooting method, both the Super SU and CF-Auto Root is the invention of this person. Well Nexus 9 was available only a few days ago, and today on the XDA the rooting method is available for Nexus 9 along with the bootloader unlocking script, which is by far the same for all the Nexus devices.

You are going to unlock the bootloader sooner or later, so don’t make my type of Mistake and unlock is right now while your device is still empty and you don’t have much data in it. I unlocked the Bootloader of Nexus 5 when it was full of data and it was such a sad moment for me, despite that I had a back-up of all my data. Rooting is your choice, whether you want to do it or not, but it is not that difficult, you should give it a try. We are not going to use CF-Auto Root for rooting, because for now, the 64-bit firmware is not supported, we are going to use the Old Super SU method, which might brick your device, so if you are not sure or not ready to do this, back off and do something else, you just can’t because there is nothing to do instead checking out this device. Without further ado, let’s continue towards the method.

N9-grid1-1600

Early Preparations:

1. This is only for Nexus 9!

This custom ROM is only for the device mentioned above. Make sure that your model number matches the one listed above. To do so, go to Settings > About Device on your device and see your model number. Flashing this ROM on any other device will result in bricking it so make sure that you meet this requirement first of all.

2. Battery should be charged at least over 60%

Make sure that your battery is charged enough to complete the flashing process. In case your battery is low and your device goes dead during the flashing process, you may end up soft bricking your device as it won’t complete the flashing process.

3. Backup everything!

Just to be on the safe side, you may consider backing up each and everything from your Android device. This is highly recommended so that in case anything goes wrong, you still have the access to all of your data and you can restore it immediately. You may backup everything as listed below.

4. Disclaimer

The methods involved in flashing custom recoveries, roms and rooting your phone are highly custom and may result in bricking your device, and has nothing to do with Google or the device manufacturer that is Google in our case. Also rooting your device will void its warranty and you will be no longer eligible for any kind of free device services by the manufacturers/warranty providers. Incase of any mishap we may not be held responsible. Follow these instructions to the letter to avoid any mishap or bricking. Make sure that whatever you do, you are doing it at your own responsibility.

How To Unlock Bootloader:

Fir Visit the Link to download and Configure Fastboot and ADB: Link

  1. Now Open your Device Settings.
  2. Navigate to Developer Options.
  3. Tick the Enable OEM unlock.
  4. Also Enable the USB Debugging mode.
  5. Open Command Prompt in Fastboot folder.
  6. Boot your Device in Bootloader mode, Power Off your device and then press and Hold Power + Vol. Down, until you are in bootloader mode.
  7. Connect your device with PC.
  8. Once the connection is successful, Type: fastboot oem unlock
  9. Press Volume up to continue, when prompted.
  10. That is it, all your data is erased and Bootloader is unlocked.

How To Root your device:

Download the Root Package and extract the Files: Link

Now copy the Readme.txt, inject.img and Patched.img to Fastboot folder.

  1. Once Again, Open Command Prompt in Fastboot folder
  2. Boot your Device in Bootloader mode, Power Off your device and then press and Hold Power + Vol. Down, until you are in bootloader mode.
  3. Connect your device with PC.
  4. Now in command prompt, type: fastboot boot inject.img
  5. Once again, Type: fastboot flash boot patched.img
  6. Once the Process is over, type: fastboot reboot.
  7. Once the device boots up, locate the Super User app in App Drawer or use any root Checker app to verify root access

How To Transform Your Galaxy Win I8552 Into A Galaxy S5 With TransWin ROM

1
How To Transform Your Galaxy Win I8552 Into A Galaxy S5 With TransWin ROM

Samsung introduced its new TouchWiz UI in the Galaxy S5, the new UI was a major update over the previous TouchWiz as major changes were prominent. S5’s UI is pretty colorful and eye-catching, new buttons in the notification bar, new settings application, new Gallery app and almost all other applications got a new interface. The stock TouchWiz launcher got a new UI as well. New boot animation, new icons and a lot more has been added to this new UI. The devices, that came out after the Galaxy S5 pack up this new TouchWiz UI, but, unfortunately the old devices won’t be getting this new display, their updates will bring the same old UI. Now this might disappoint the Galaxy device owners as they will have to stick to their device’s same old look, while the new devices are enjoying such a cool UI.

Same might be the case with the Galaxy Win owners. Galaxy Win’s stock Android 4.1.2 Jelly Bean’s UI isn’t that good. But just in case you’re wishing to give your device a look and feel of the Galaxy S5, your wish looks like getting a reality. XDA senior member renzorampas has come up with his ROM, named as TransWin ROM that has the Galaxy S5’s theme packing up some very nice graphics from the Galaxy S5’s UI. The ROM is Deodexed, Debloated and Pre-Rooted. Alongside that, a plethora of features is there waiting for you. Over-all, TransWin ROM is a great choice to go with since it’s based on the stock Android 4.1.2 Jelly Bean firmware having some great modifications atop that can give your Galaxy Win Duos a life of the Galaxy S5.

rockford_hotspotflat_1240x700_mainimage

Wondering how you can get this ROM running on your device? Well, as you scroll down, you will come across a comprehensive guide that will teach you to transform your Galaxy Win Duos I8552 into a Galaxy S5 using TransWin custom ROM. Let’s go through the ROM info, features and then head towards the early preparations and installation guide.

TransWin ROM
      ROM INFORMATION
      -Pre-Rooted SuperSU-v1.65
      -Deodexed
      -Debloated
      -Signal Tweaks
      -3G Tweaks
      -Battery Tweaks
      -GUI Tweaks
      -Smooth Scrolling
      -ADB Notification Icon Disabled
      -Better Call Voice Quality
      -Dalvik Tweaks
      -Media Tweaks
      -Camera Tweaks
      -Wireless Speed Increase Tweak
      -Better Internet Speed Tweak
      -Better Video Streaming
      -Pure Performance X
      -init.d Support
      – TeslaLED Included for Flashlight

MOD THEME Version 3
– Semi Trident Transparent Status Bar.
– White Icons in Status Bar
– No AM/PM in Status Bar and Pulldown.
– Transparent Accuweather
– Remove Factory Reset in Settings
– S5 Bootanimation
– S5 Icons
– S5 Style Statusbar Pulldown
– White S5 battery icon mod with 1% increment
– Non-Transparent ROM
– White MMS
– White Settings
– USB Tether Fixed
– Original Samsung Keyboard as Default Keyboard
– Redesign Phone, Contacts, Calculator…

Early Preparations

1. This is only for Samsung Galaxy Win Duos I8552

This custom ROM is only for the device mentioned above. Make sure that your model number matches the one listed above. To do so, go to Settings > About Device on your device and see your model number. Flashing this ROM on any other device will result in bricking it so make sure that you meet this requirement first of all.

2. Battery should be charged at least over 60%

Make sure that your battery is charged enough to complete the flashing process. In case your battery is low and your device goes dead during the flashing process, you may end up soft bricking your device as it won’t complete the flashing process.

3. Flash a Custom Recovery

A custom recovery is required for flashing this ROM. You may flash Philz Advanced CWM recovery using this guide.

4. Backup everything!

Just to be on the safe side, you may consider backing up each and everything from your Android device. This is highly recommended so that in case anything goes wrong, you still have the access to all of your data and you can restore it immediately. You may backup everything as listed below.

  1. Backup SMS Messages
  2. Backup Call Logs
  3. Backup Contacts
  4. Backup Media – Copy your files manually to your PC or Laptop.
  5. Backup EFS
  6. Titanium Backup – If already rooted, use Titanium Backup to backup all of your apps, system data and other important content.
  7. Backup Nandroid – You can do this using CWM recovery.

5. Disclaimer

The methods involved in flashing custom recoveries, ROMs and rooting your phone are highly custom and may result in bricking your device, and has nothing to do with Google or the device manufacturer that is SAMSUNG in our case. Also rooting your device will void its warranty and you will be no longer eligible for any kind of free device services by the manufacturers/warranty providers. In case of any mishap we may not be held responsible. If your device has the Knox counter on the bootloader, it will be tripped and you won’t be able to reset it ever. Follow these instructions to the letter to avoid any mishap or bricking. Make sure that whatever you do, you are doing it at your own responsibility.

How to install TransWin ROM and Transform your Galaxy Win into a Galaxy S5

  1. Before you flash this ROM, you need to make sure that you’ve read and applied all the guidelines explained above.
  2. Download the ROM [TranSWin_ROM_v3.zip] and place it on your phone’s sd card.
  3. Now boot into Philz Advanced CWM recovery, to  do so, turn off your device and then turn it on by pressing and holding Volume Up+ Home Button + Power Key. Select Wipe >Advanced Wipe > Wipe Cache and Dalvik Cache.
  4. In the recovery mode, now select install zip > TranSWin_ROM_v3.zip file and flash it.
  5. The ROM will take a while to get flashed. As soon as the installation is done, factory reset the phone using the wipe option in Philz CWM recovery.
  6. Reboot now and setup your new ROM in order to enjoy the features of the Galaxy S5.

Here are some ROM screenshots by the developer:

TransWin1 TransWin2

That’s all. If you’re stuck with anything or got any queries regarding this post, feel free to use the comment box below and reach us. We will respond you immediately. Thank you all.

How To Install Philz Advanced CWM Recovery On Galaxy Win I8552 & Root It

How To Install Philz Advanced CWM Recovery On Galaxy Win I8552 & Root It

Galaxy Win, also known as Galaxy Grand Quattro happens to be Samsung’s one of the successful low-end Android devices. On the front it sports a 4.7 inch display having a resolution of 480 x 800 pixels and 199 ppi. Under the hood there’s a Qualcomm Snapdragon 200 Quad Core CPU clocked at 1.2 GHz accompanied by Adreno 203 GPU, a RAM of 1 GB can be found inside as well. At the back there’s a 5 MP shooter while a secondary VGA shooter is there on the front as well. Galaxy Win has a massive 2000 mAh battery to have a life. Out of the box, the device can be found running on Android 4.1.2 Jelly Bean.

That was a little recap of the device. If you are a Galaxy Win owner, you may want to add some charm to your device by going a little out of the ways and unleashing the real power of Android, that is customization. To pave a way for customization on your phone, you will need a custom recovery that will let you load zip files, create nandroid backup, perform factory reset without loosing data, wipe cache, dalvik cache and many more functions. Along side a custom recovery, having your device rooted helps a lot as rooting can let you load plethora of root applications to tweak your device at its fullest. Wondering how you can do both of these? Well, that’s what we are here for.

As you move forward, you should come across a comprehensive guide that will teach you to flash Philz Advanced CWM Touch Recovery based on CWM 6.0.4.8 on your Galaxy Win Duos I8552, and also how to root your beloved device. Let’s go through the early preparations and then head towards the installation guide.

113743311_1GG

1. This guide is only for Samsung Galaxy Win Duos I8552

Make sure that your device is exactly as mentioned above. To check out what device you have, go to Settings > More/General > About Device or Settings > About Device and match the model number. Be careful about the device model number, flashing a file on a device not listed here might result in bricking it up. In that case, we may not be held responsible.

2. Battery should be charged at least 60%

Your device’s battery shouldn’t be weak. In case your device goes dead during the flashing process, your device may get soft bricked and you might be in need of flashing stock firmware and that will ultimately result in wiping up your data as well. So, make sure that you charge your device before you start the flashing process.

3. Enable USB Debugging Mode

USB debugging mode should enabled on your device in order to avoid any connection issues. To enable USB debugging mode, go to settings > developer options > check “Allow/Enable USB Debugging”. In case you can’t find the developer options in settings, you will have to activate the options by going into settings > about device > tap the build number for 7 times and you should get the developer options under settings, and then you can enable USB debugging mode.

4. Use the OEM datacable to establish connection!

Always use the original data cable to establish connection between your Android device and your computer / laptop. Using ordinary data cables might interrupt the flashing process, so to avoid any mishap, you need to meet this requirement as well.

5. Backup everything!

Just to be on the safe side, you may consider backing up each and everything from your Android device. This is highly recommended so that in case anything goes wrong, you still have the access to all of your data and you can restore it immediately. You may backup everything as listed below.

Backup SMS Messages
Backup Call Logs
Backup Contacts
Backup Media – Copy your files manually to your PC or Laptop.

6. Turn off Samsung Kies and other software while using Odin3!

Make sure that you turn off Samsung Kies while using Odin3 flash tool. Samsung Kies will interrupt Odin3 and will result in causing errors and may not let you flash your desired recovery or root file. Also, make sure that you turn off any antivirus software you’ve installed and also disable firewall to avoid any connection and flashing issues.

7. Disclaimer

The methods involved in flashing custom recoveries, ROMs and rooting your phone are highly custom and may result in bricking your device, and has nothing to do with Google or the device manufacturer that is SAMSUNG in our case. Also rooting your device will void its warranty and you will be no longer eligible for any kind of free device services by the manufacturers/warranty providers. In case of any mishap we may not be held responsible. Follow these instructions to the letter to avoid any mishap or bricking. Make sure that whatever you do, you are doing it at your own responsibility.

Downloads Required

  1. Download and extract Odin3 v3.09.
  2. Download and Install Samsung USB drivers.
  3. Download the CWM Recovery For Your Device

How To Install Philz Advanced Touch CWM On Galaxy Win Duos I8552

  1. Download CWM Recovery.tar.md5 file.
  2. Open Odin3.exe.
  3. Put your Galaxy Win Duos in download mode. To do so, turn it off and wait for 10 seconds. Turn it on by pressing and holding Volume Down + Home Button + Power Key simultaneously, You should see a warning, press Volume Up to continue. In case this method doesn’t work for you, try one from this guide.
  4. Connect your device to your PC.
  5. As soon as Odin detects your phone, the ID:COM box should turn blue.  Make sure that you’ve installed Samsung USB drivers before connecting.
  6. For Odin 3.09 hit the AP tab. Select the recovery.tar.md5  or recovery.tar, that you downloaded above.
  7. If you’re using Odin 3.07, you will select “PDA” tab instead of the AP tab, rest of the options remain untouched.
  8. Make sure that the options selected in your Odin are exactly as shown in the pic. Odin 3.09 explained. (2)
  9. Hit start and wait till the recovery flashing is complete, as soon as your device restarts, remove it from PC.
  10. You can now boot into recovery mode by turning off your device, and then turning it on by pressing and holding Volume Up + Home + Power Key.
  11. That’s all!

Root The Galaxy Win Duos Now

  1. Download the Root Package.zip file [ UPDATE-SuperSU-v2.16.zip ]
  2. Copy the downloaded Root Package.zip file to your Galaxy Win Duos’s SD card.
  3. Boot into recovery mode on your Galaxy Win Duos, use step 11 in the recovery installation guide.
  4. Now Select “Install > Choose Zip from SD card > Root Package.zip > Yes / Confirm”.
  5. This will flash the Root Package and quickly gain the root access on your Galaxy Win Duos.
  6. Reboot your device.
  7. Find SuperSu in the App Drawer.

How to check if the device is properly rooted or not?

  1. To do so, go to Google Play Store on your Galaxy Win Duos.
  2. Find “Root Checker” and install it.
  3. Open Root Checker.
  4. Tap “Verify Root”.
  5. It will ask you for SuperSu rights, tap “Grant”.
  6. It should show you Root Access Verified Now!
  7. Screenshot_1

Now make sure that you backup your EFS Partition and Nandroid.

That’s all. We hope that you found this guide helpful. If you’re stuck with anything or got any queries, make sure that you use the comment box below and reach us. Thank you all.

Recovery Credits

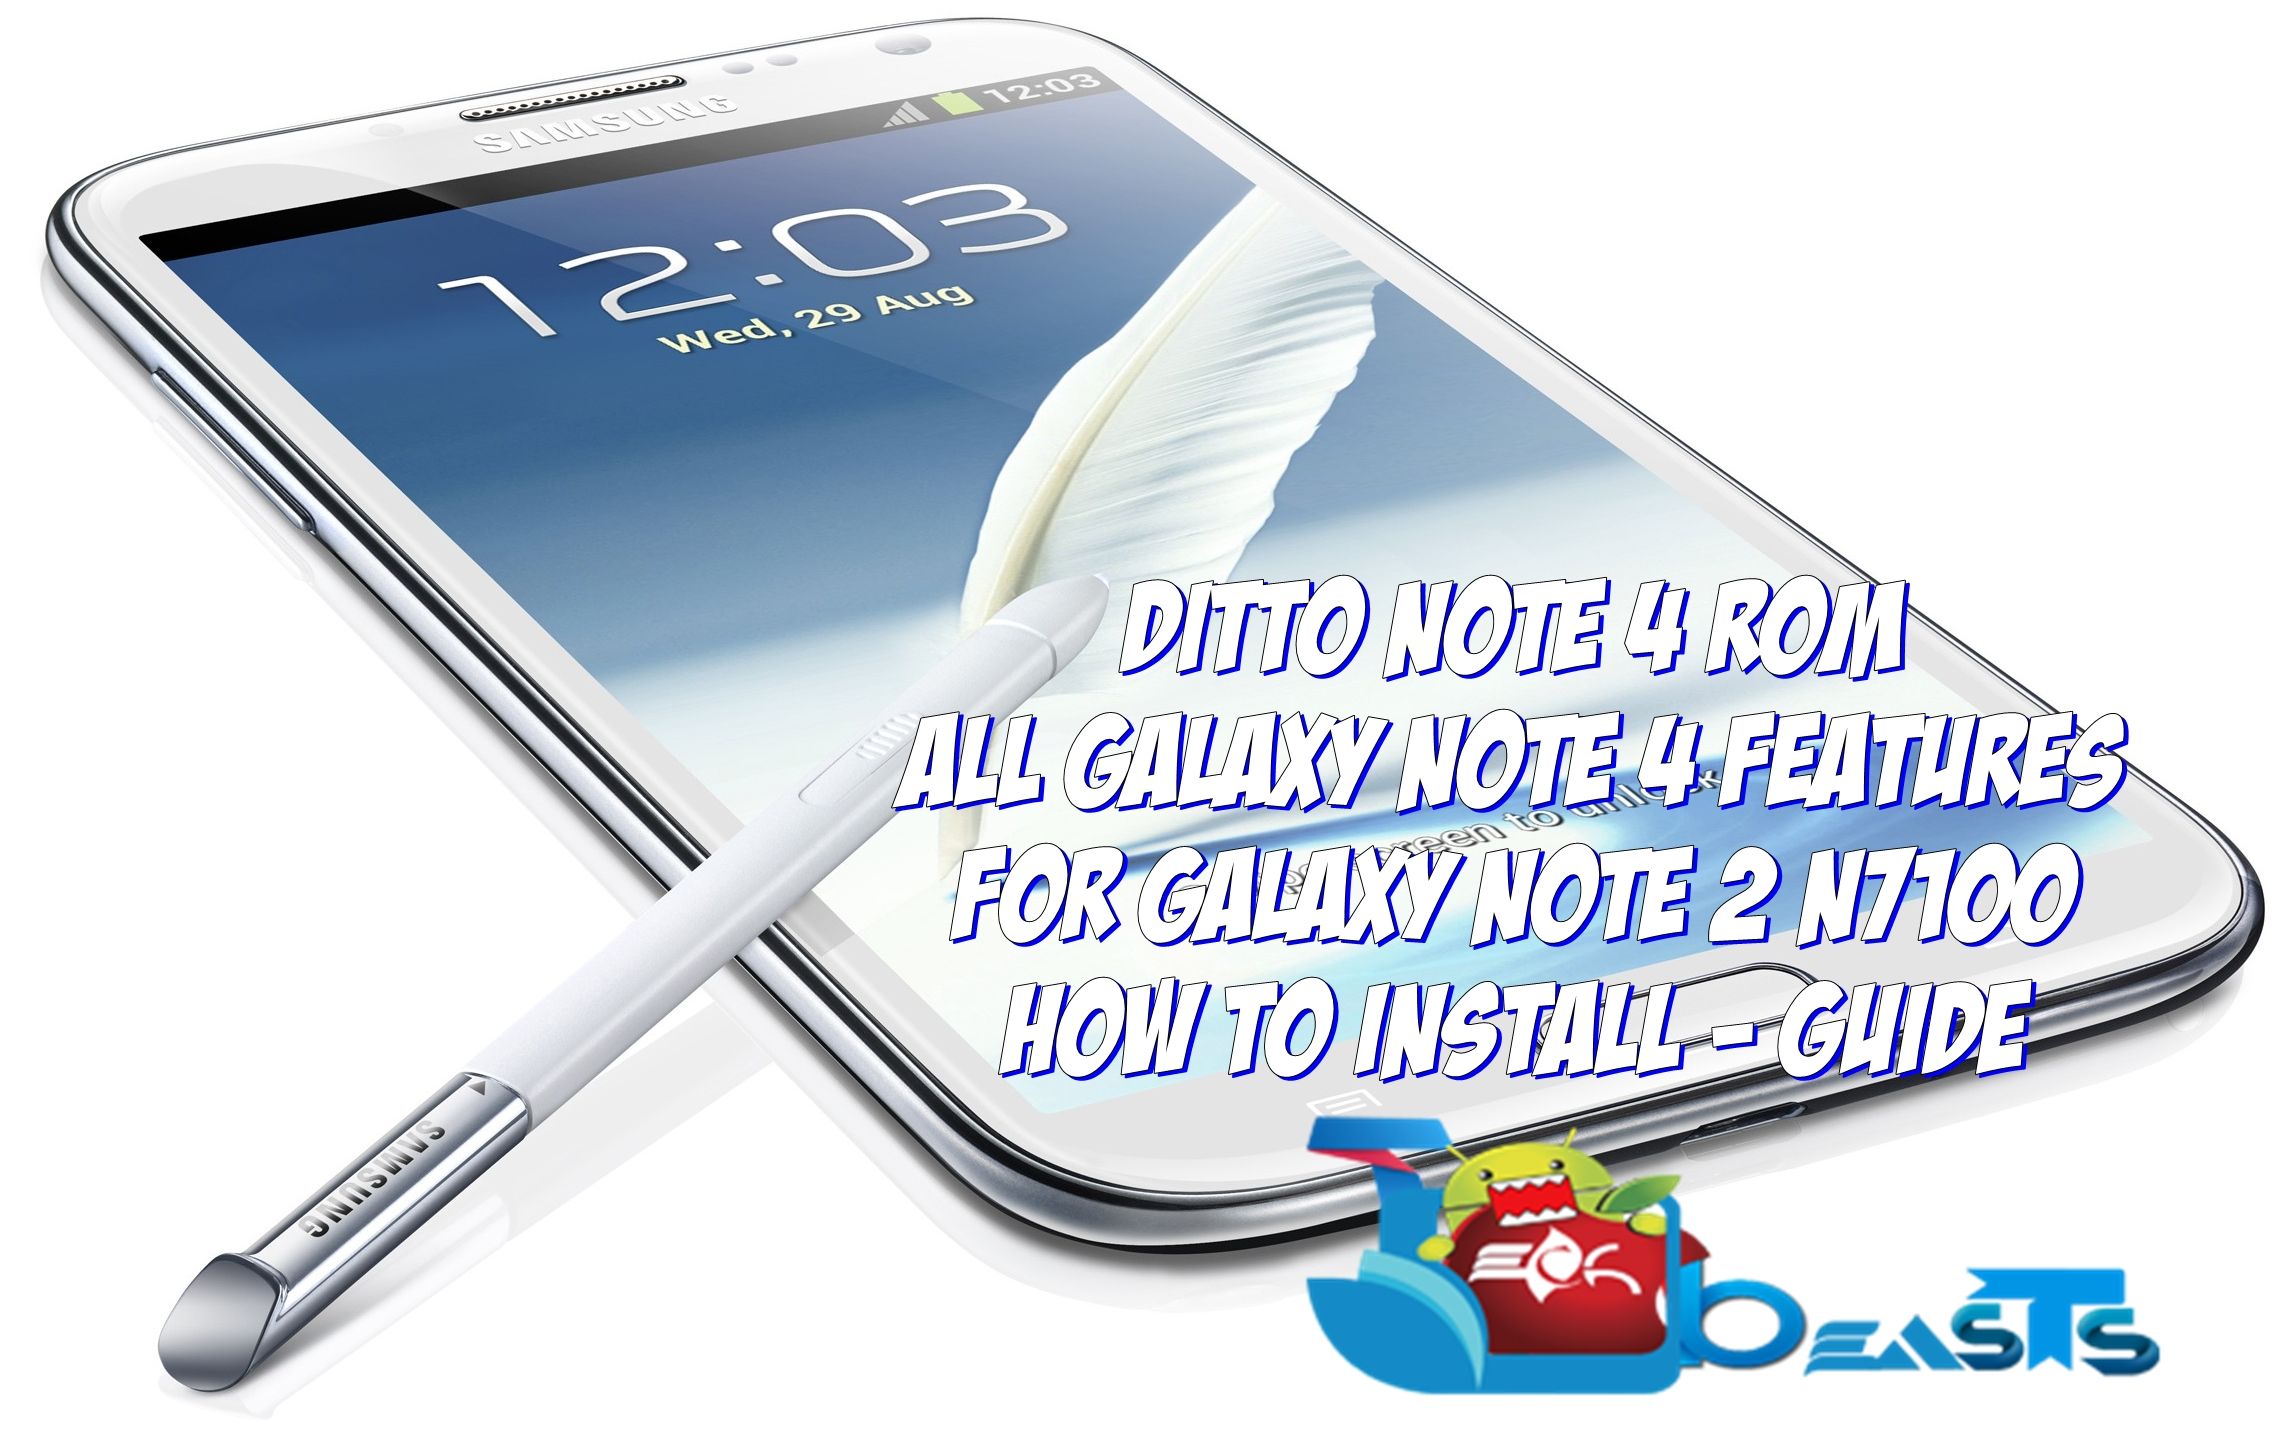
Install Ditto Note 4(DN4) ROM on Galaxy Note 2 and get all Note 4 features

143
Install Ditto Note 4(DN4) ROM on Galaxy Note 2 and get all Note 4 features

Just last year, when Samsung pulled the curtains off from the Galaxy Note 3, it tempted the users at a great level. The features in the Galaxy Note 3 were mouth watering that would just make the users forget any other smartphone easily. These features included the small scroll, smart pause, air view and air gestures. While the predecessor of the device, the Galaxy Note 2, because of being a great Android device of all the time, was owned by a huge number of Android freaks and not all of them were supposed to update their device to the Galaxy Note 3,  so a new team, named as Electron Team, a group of some great XDA developers came up with their ROM named as Ditto Note 3 ROM, that packed up almost all the features of the Galaxy Note 3 for our beloved Galaxy Note 2. The ROM added a new life to the Galaxy Note 2 and turned out to be a big reason for the users to stick with the Galaxy Note 2 having the touch of Galaxy Note 3. Initially the ROM included some minor bugs and hiccups here and there, but with time it received some major improvements and stability, along with the performance has become more than better by now.

Now, the Galaxy Note series by Samsung has reached the 4th great iteration. Just a month back, Samsung brought up the Galaxy Note 4 in spotlight, and as usual, the device turned out to be a beast just like the previous Galaxy Note series phablets. The Galaxy Note 4 has a plethora of features that makes it stand atop among all the Note series phablets so far. Running on Android 4.4.4 KitKat atop of Samsung’s newest TouchWiz UI, the device packs up some cool features. There are great UI changes that make the display eye-catching. Besides this ,there are some awesome features like application pop ups, incoming call pop-up notification,  new recent applications menu, Air command with some new features, some new smart features, new settings application, music player, video player etc. These features make the Galaxy Note 4 a great choice over any other Android device of the day, and are good enough to tempt an Android freak to get hands on this device easily.

While the Galaxy Note 4 costs a whopping amount, it will be out of reach for so many people. And if you own a Galaxy Note 2, you would like to jump to this latest Galaxy Note as you might fall for its enchanting features, but just in case the first reason is stopping you from upgrading your device or you want to stick with your Galaxy Note 2 giving it a touch of Galaxy Note 4,  Electron Team has made it all possible for you. Just like they released the Ditto Note 3 ROM last year, they’ve now come up with the Ditto Note 4 ROM for our beloved Galaxy Note. The new ROM (DN4) packs up almost all the mainstream features of the Galaxy Note 4 and makes them run on the Galaxy Note 2 flawlessly. This will definitely add a new life to your Galaxy Note 2 and prove out to be a great reason for you, not to upgrade your device anytime soon. Let’s go through the features of this ROM now.

GALAXY-Note-II-Product-Image-4-e1346260505345

Ditto Note 4 (DN4) ROM
      Note 4 Air Command (new features)
      Note 4 S Note with Action Memo
      Note 4 Smart Select
      Note 4 Image Clip
      Note 4 Scrapbook
      Note 4 S Finder
      Note 4 Quick Connect
      Note 4 Multiwindow
      Note 4 Recent Apps
      Note 4 Direct Pen Input
      Note 4 Side Key Panel
      Note 4 Resize Windows from corners (new Pen Window)
      Note 4 Power Saving Mode
      Note 4 Ultra Power Saving Mode
      Note 4 Settings and UI
      Galaxy Note 4 Launcher and Accuweather
      Galaxy Note 4 Contacts app
      Galaxy Note 4 Phone app with N4 feature incoming call popup notification, resize window during calls feature and call recording feature
      Galaxy Note Messaging app with N4 feature SMS pop-up notificaton
      Galaxy Note 4 lockscreen with charging effects and new lockscreen effects (only Abstract Mozaic don’t work)
      Galaxy Note 4 Music Player
      Galaxy Note 4 Video Player
      Galaxy Note 4 Internet Browser
      Galaxy Note 4 Gallery with SStudio
      Galaxy Note 4 S Voice with new pop-up features
      Galaxy Note 4 S Planner, Email, Keyboard, Clock, My Files, Calculator
      Galaxy Note 4 Story Album
      Galaxy Note 4 Photo Note
    Possible to use the same app in both multiwindows

ROM Info:

Based on 4.4.4 Touchwiz rom ported from S3 Korean version.

Features ported from Galaxy Note 4

AGNI Kernel by default

Standalone flashable zip (no aroma)

Rooted and Deodexed

Let’s go through the early preparations now and learn how to install the Ditto Note 4 (DN4) Android 4.4.4 KitKat Custom ROM on your Galaxy Note 2  GT-N7100 and grab features from the Galaxy Note 4.


Early Preparations:

1. This is only for Samsung Galaxy Note 2 GT-N7100

This custom ROM is only for the device mentioned above. Make sure that your model number matches the one listed above. To do so, go to Settings > About Device on your device and see your model number. Flashing this ROM on any other device will result in bricking it so make sure that you meet this requirement first of all.

2. Battery should be charged at least over 60%

Make sure that your battery is charged enough to complete the flashing process. In case your battery is low and your device goes dead during the flashing process, you may end up soft bricking your device as it won’t complete the flashing process.

3. Flash a Custom Recovery

A custom recovery is required for flashing this ROM. You may flash TWRP recovery using this guide.

4. Backup everything!

Just to be on the safe side, you may consider backing up each and everything from your Android device. This is highly recommended so that in case anything goes wrong, you still have the access to all of your data and you can restore it immediately. You may backup everything as listed below.

5. Disclaimer

The methods involved in flashing custom recoveries, ROMs and rooting your phone are highly custom and may result in bricking your device, and has nothing to do with Google or the device manufacturer that is SAMSUNG in our case. Also rooting your device will void its warranty and you will be no longer eligible for any kind of free device services by the manufacturers/warranty providers. In case of any mishap we may not be held responsible. If your device has the Knox counter on the bootloader, it will be tripped and you won’t be able to reset it ever. Follow these instructions to the letter to avoid any mishap or bricking. Make sure that whatever you do, you are doing it at your own responsibility.


How to install Ditto Note 4 ROM on Galaxy Note 2 GT-N7100 now

  1. Before you flash this ROM, you need to make sure that you’ve read and applied all the guidelines explained above.
  2. Also, make sure that you’re currently running your Galaxy Note 2 on Android 4.3 [MJ5 bootloader] or higher. Upgrading from an older version of Android will cause issues.
  3. Now boot into TWRP recovery, to  do so, turn off your device and then turn it on by pressing and holding Volume Up+ Home Button + Power Key. Select Wipe >Advanced Wipe > Wipe Cache and Dalvik Cache.
  4. Download the Ditto Note 4 ROM [DN4_BY_ELECTRONG_TEAM.zip] and place it on your phone’s sd card.
  5. Boot into TWRP Recovery again, select install > DN4_BY_ELECTRONG_TEAM.zip file and flash it.
  6. The ROM will take a while to get flashed. As soon as the installation is done, factory reset the phone using the wipe option in TWRP recovery.
  7. Reboot now and setup your new ROM in order to enjoy the features of Galaxy Note 4.

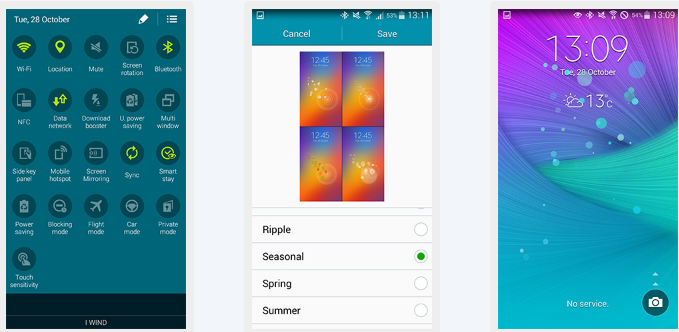
Here are some screenshots by the developers


DN 4 2  DN 4 5 DN4 1
Troubleshooting:

Those having WiFi issues can resolve it using the Patch by Dr Ketan. Here’s how to get across it.

Here’s how you can flash Dr. Ketan’s Wifi Fix Patch:

      • Download and extract Dr Ketan’s Wifi Patch from HERE.
      • Open Odin.
      • Put your phone in download mode. To do so ,turn it off and then turn it on by pressing and holding Volume Down + Home Button + Power Key, then press volume up to continue.
      • Connect it to your PC. the ID:COM box should turn blue in Odin now.
      • Select PDA tab, and select the downloaded Dr Ketan’s Wifi Patch file.
      • Hit start. It should flash the wifi patch quickly. As soon as your device reboots, try turning on wifi and it should be working.
      • In case you are currently on an older bootloader, then download and extract this BL_MJ5_DN3 bootloader  and flash it using Odin and skip Dr Ketan’s Wifi Fix.

Just boot into TWRP recovery now and wipe cache and dalvik cache and reboot your device. If the ROM isn’t good enough to fulfill your needs, you may flash stock firmware using this guide.

That’s all. If you’re facing any issues after installing this ROM, make sure that you reach us by using the comment box below. We will respond you immediately in order to help you out. Thank you all.

How to Jailbreak and install Cydia on iOS 8, 8.1 using Pangu8 1.1.0 [iPhone, iPad, iPod Touch]

0
How to Jailbreak and install Cydia on iOS 8, 8.1 using Pangu8 1.1.0 [iPhone, iPad, iPod Touch]

ios-8-1-logoiOS 8 having all of it’s goodies is running greatly on the compatible devices at the moment, the very thing that Apple’s good at is, the updates and stability of the operating system. The latest iteration of the iOS 8 has now reached iOS 8.1, Apple has fixed some annoying bugs that freaked out a number of users with the no service, Wi-Fi and other similar issues. Currently, the two versions, iOS 8 or iOS 8.1 can be found running on most of the the Apple devices, Apple has enhanced the software at its best and iOS 8 packs up a number of improvements in the UI, as well as in the core to make it work more flawlessly, frameworks for developers and other goodies have been added as well in the biggest update of the iOS history. Having all the good stuff on your iOS 8 device, if the OS still doesn’t satisfy you or doesn’t fulfill your needs, you may want to break the boundaries set by Apple and experience freedom on your Apple iOS 8 device.

Now this can be done by Jailbreaking your Apple iPhone, iPad or iPod Touch. Jailbreaking allows you to load plethora of applications, and tweak your Apple device at its fullest. Basically, the idea behind Jailbreaking your iOS device is to breach all the limits set by Apple and unleash iOS’s true power. This can be done by installing Cydia and then loading applications / mods from Cydia store.It took quite a while for the developers to come up with the Jailbreak for iOS 7, but I guess that was the only time when there was a delay. The Jailbreak for iOS 8 has reached pretty much fast, and the same team Pangu, the guys behind iOS 7’s Jailbreak have done it again.

Panguteam happens to be a group of Chinese hackers, the tool that they have been releasing so far was having a Chinese interface, and the options were limited. Just today, Pangu team has released a new version of their tool, the new version v1.1.0 [Pangu8] has come up with English interface, Cydia support, and a lot of bug fixes have been made over the previous Pangu versions. Before we learn how to Jailbreak your iPhone, iPad or iPod Touch running iOS 8 or iOS 8.1 using Pangu and install Cydia, let’s have a look on the list of compatible devices.

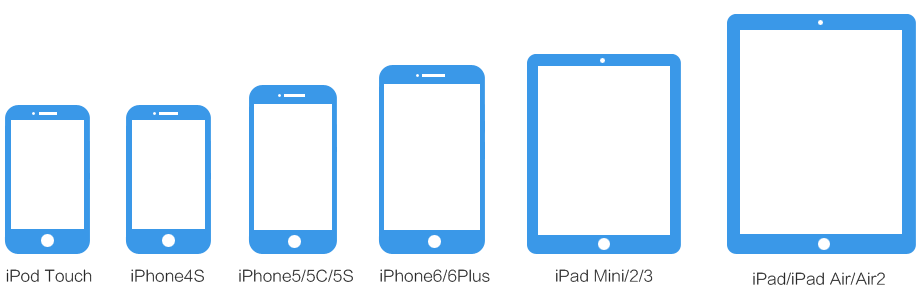
Compatible devices:

Jailbreak

  • iPhone 6 Plus – iOS 8 / 8.1
  • iPhone 6 – iOS 8 / 8.1
  • iPhone 5S – iOS 8 / 8.1
  • iPhone 5C – iOS 8 / 8.1
  • iPhone 5 – iOS 8 / 8.1
  • iPad Air 2 – iOS 8 / 8.1
  • iPad Air – iOS 8 / 8.1
  • iPad 4 – iOS 8 / 8.1
  • iPad 3 – iOS 8 / 8.1
  • iPad 2 – iOS 8 / 8.1
  • iPad Mini 3 – iOS 8 / 8.1
  • iPad Mini 2 – iOS 8 / 8.1
  • iPad Mini – iOS 8 / 8.1
  • iPod Touch 5G – iOS 8 / 8.1

Pangu8 1.1.0 Changelog

1. Bundle latest Cydia for iOS8.

2. Optimize jailbreak process.

3. Fix an issue that may cause MobileSafari to crash on 64bit devices.

4. Fix an issue that causes iMessage/SMS to fail to send images.

5. Respring is not required anymore to make Substrate working.

6. Pangu APP now with some useful functions.

7. Add English support

How to Jailbreak iOS 8, 8.1 using Pangu8 1.1.0 and install Cydia [iPhone, iPad, iPod Touch]

  1. First of all, make sure that you backup all your important data/content using iCloud or iTunes. This is highly recommended so that in case something goes wrong, you still have your data with you and you’re able to restore it.
  2. A clean device is always recommended for fast and successful Jailbreaking. You can backup all of your important content using iTunes, and restore  your iPhone, iPad or iPod Touch with a neat and clean copy of the OS in order to use Pangu 1.1.0. Having less burden on the device will make it much easier for Pangu 1.1.0 to work and take less time.
  3. Disable firewall or any Antivirus if you have enabled on your PC.
  4. Download Pangu 1.1.0 for windows PC and install it now. Just in case you’re using MAC, you may install Pangu on your MAC by installing Windows through a VMware.
  5. Enable Airplane mode on your iOS 8/8.1 device from settings.
  6. Remove any screenlock / fingerprint scanner if you’ve enabled on your device.
  7. Turn off iCloud and Find My iPhone from settings.
  8. Now connect your iOS 8/8.1 device to your PC using the original data cable.
  9. Now locate Pangu8 in programs and run it as administrator.
  10. Pangu3
  11. Pangu will take a while to detect your device, once the device has been detected, click on “Start Jailbreak” button.
  12. Screenshot_3
  13. Read the notice carefully and click on “Already did” in the next step.
  14. Wait for the Jailbreak process to complete, once it has ended, your Apple device will reboot.
  15. Once it has rebooted, remove it from your PC and see the Cydia icon on your device’s app drawer.
  16. Set it up and enjoy! That’s All.

Just in case you’re stuck with anything, make sure that you use the comment box below. We will get back to you immediately. Thank you all.

WhatsApp Plus 6.32D APK

0
WhatsApp Plus 6.32D APK

If you’re tired of your stock WhatsApp application and its boring UI having a few options only, it may be the time to get a little out of the way and add some charm by installing WhatsApp Plus. As the name suggests, this application replaces the original WhatsApp application, and has a lot of modifications and options including different color schemes, add different backgrounds in the application. WhatsApp plus allows the users to modify the conversation and main application screen separately, that’s one of the most unique features found on any chat application ever. There’s a plethora of features that you may experience upon installing this application and applying the different mods to enhance your chat experience on the world’s most widely used social chat app.

WhatsApp Plus cannot be found in the play store since it basically is a mod, the only way to install WhatsApp Plus on your device is to use the APK file and install it. If you’ve been looking for the APK of this cool application, we’ve found and linked it right here. Before you install WhatsApp Plus, you will have to uninstall your previous WhatsApp, if you’ve the backup of your previous WhatsApp, WhatsApp Plus will use that and restore your conversations. Just go ahead, read the instructions and install it.

Download & Install WhatsApp Plus APK

WhatsApp Plus

    1. On your current WhatsApp, go to settings > backup conversations.
    2. Copy your WhatsApp folder from your internal storage as well to be on the safe side.
    3. Now uninstall the stock/original WhatsApp application.
    4. Download WhatsApp+ 6.32D APK.
    5. Copy the downloaded APK file to your phone or download it directly on your phone.
    6. Locate the downloaded APK file on your phone and tap it to begin the installation.
    7. Select “Package Installer” if prompted.
    8. All “Unknown Sources” if required.
    9. Complete the installation and access the app through app drawer.
    10. If you’ve already registered on WhatsApp and have it installed, WhatsApp+ will not ask you for registeration, it will just show you the chats.
    11. Enjoy modifying your messaging environment.
    12. That’s all!

How To Install CWM Recovery & Root Samsung Galaxy Note 4 SM-N910U/C/K [Exynos]

How To Install CWM Recovery & Root Samsung Galaxy Note 4 SM-N910U/C/K [Exynos]

Galaxy Note 4 is out in the markets for quite a while now and the device’s development activities have been started as well. You may come across a number of cool ROMs, mods and tweaks for your Galaxy Note 4, and you may want to unleash the real power of your new beast but the very thing that will pave a way for you to enter the powerful world of Android OS, you will need to have a custom recovery running on your device first in order to flash the zip files, wipe cache, dalvik cache and also to create a Nandroid backup to stay on the safer side. The CWM recovery is already up for a almost all variants of the Galaxy Note 4, and in the following post we are going to install this ClockworkMod [CWM] Recovery 6.0.5.1 on our beloved Exynos Galaxy Note 4 variants including SM-N910U, SM-N910C and SM-N910K. Just in case you’ve been looking for this very method, this might be the right spot for you.

Before we head towards theCWM installation guide, some of you might want to have a recap of the Galaxy Note 4. Galaxy Note 4 is the 4th iteration in the Note series of Samsung. A 5.7-inch QHD display with a resolution of 2560 x 1440 pixels and 515 ppi can be found on the front having a 3.7 MP camera sensor atop of the screen. At the back ,there’s a 16 MP cam with OIS, having a heart rate sensor besides a flashlight under it. Under the hood, Qualcomm’s Snapdragon 805 CPU or Samsung’s very own Exynos 5433 CPU can be found, a RAM of 3 GB’s is there and internal storage begins at 32 GB. Out of the box, Galaxy Note 4 can be found running on Android 4.4.4 KitKat.Samsung-Galaxy-Note-4-590x327

That was all about the device, let’s head towards the early preparations and the installation guide now.

Here are the pre-installation instructions:

1. This guide is only for Samsung Galaxy Note 4 SM-N910U, SM-N910K & SM-N910C!

Make sure that your device is exactly as mentioned above. To check out what device you have, go to Settings > More/General > About Device or Settings > About Device and match the model number. Be careful about the device model number, flashing a file on a device not listed here might result in bricking it up. In that case, we may not be held responsible.

2. Battery should be charged at least 60%!

Your device’s battery shouldn’t be weak. In case your device goes dead during the flashing process, your device may get soft bricked and you might be in need of flashing stock firmware and that will ultimately result in wiping up your data as well. So, make sure that you charge your device before you start the flashing process.

3. Enable USB Debugging Mode

USB debugging mode should enabled on your device in order to avoid any connection issues. To enable USB debugging mode, go to settings > developer options > check “Allow/Enable USB Debugging”. In case you can’t find the developer options in settings, you will have to activate the options by going into settings > about device > tap the build number for 7 times and you should get the developer options under settings, and then you can enable USB debugging mode.

4. Use the OEM datacable to establish connection!

Always use the original data cable to establish connection between your Android device and your computer / laptop. Using ordinary data cables might interrupt the flashing process, so to avoid any mishap, you need to meet this requirement as well.

5. Backup everything!

Just to be on the safe side, you may consider backing up each and everything from your Android device. This is highly recommended so that in case anything goes wrong, you still have the access to all of your data and you can restore it immediately. You may backup everything as listed below.

Backup SMS Messages
Backup Call Logs
Backup Contacts
Backup Media – Copy your files manually to your PC or Laptop.

6. Turn off Samsung Kies and other softwares while using Odin3!

Make sure that you turn off Samsung Kies while using Odin3 flashtool. Samsung Kies will interrupt Odin3 and will result in causing errors and may not let you flash your desired recovery or root file. Also, make sure that you turn off any antivirus software you’ve installed and also disable firewall to avoid any connection and flashing issues.

7. Disclaimer

The methods involved in flashing custom recoveries, ROMs and rooting your phone are highly custom and may result in bricking your device, and has nothing to do with Google or the device manufacturer that is SAMSUNG in our case. Also rooting your device will void its warranty and you will be no longer eligible for any kind of free device services by the manufacturers/warranty providers. The Galaxy Note 4 comes with Knox, so rooting will also trip the Knox counter and you won’t be eligible to claim the warranty anyway. In case of any mishap we may not be held responsible. Follow these instructions to the letter to avoid any mishap or bricking. Make sure that whatever you do, you are doing it at your own responsibility.

Downloads Required

  1. Download and extract Odin3 v3.09.
  2. Download and Install Samsung USB drivers.
  3. Download the CWM Recovery For Your Device

How To Install CWM Recovery On Your Galaxy Note 4 SM-N910C/U/K

  1. Download CWM Recovery.tar.md5 file [According to your choice and your device].
  2. Open Odin3.exe.
  3. Put your Galaxy Note 4  in download mode. To do so, turn it off and wait for 10 seconds. Turn it on by pressing and holding Volume Down + Home Button + Power Key simultaneously, You should see a warning, press Volume Up to continue. In case this method doesn’t work for you, try one from this guide.
  4. Connect your device to your PC.
  5. As soon as Odin detects your phone, the ID:COM box should turn blue.  Make sure that you’ve installed Samsung USB drivers before connecting.
  6. For Odin 3.09 hit the AP tab. Select the recovery.tar.md5  or recovery.tar, that you downloaded above.
  7. If you’re using Odin 3.07, you will select “PDA” tab instead of the AP tab, rest of the options remain untouched.
  8. Make sure that the options selected in your Odin are exactly as shown in the pic.Odin-3.09-explained.-2
  9. Hit start and wait till the recovery flashing is complete, as soon as your device restarts, remove it from PC.
  10. You can now boot into recovery mode by turning off your device, and then turning it on by pressing and holding Volume Up + Home + Power Key.
  11. That’s all!

Root The Galaxy Note 4 Now

Although there’s a much easy method available to root your Galaxy Note 4, that can be found here. But, in case you haven’t rooted yet and you’ve flashed the recovery only, you would like to have the root access too, here’s a way to root your device using the custom recovery.

  1. Download the Root Package.zip file [ UPDATE-SuperSU-v2.16.zip ]
  2. Copy the downloaded Root Package.zip file to your Galaxy Note 4’s SD card.
  3. Boot into recovery mode on your Galaxy Note 4, use step 11 in the recovery installation guide.
  4. Now Select “Install > Choose Zip from SD card > Root Package.zip > Yes / Confirm”.
  5. This will flash the Root Package and quickly gain the root access on your Galaxy Note 4.
  6. Reboot your device.
  7. Find SuperSu in the App Drawer.

How to check if the device is properly rooted or not?

  1. To do so, go to Google Play Store on your Galaxy Note 4.
  2. Find “Root Checker” and install it.
  3. Open Root Checker.
  4. Tap “Verify Root”.
  5. It will ask you for SuperSu rights, tap “Grant”.
  6. It should show you Root Access Verified Now!Screenshot_1

Now make sure that you backup your EFS Partition and Nandroid.

That’s all. We hope that you found this guide helpful. If you’re stuck with anything or got any queries, make sure that you use the comment box below and reach us. Thank you all.

Recovery Credits

How To Un-Root All Samsung Galaxy Note 4 Variants

13
How To Un-Root All Samsung Galaxy Note 4 Variants

Galaxy Note 4 is the latest flagship device from Samsung, and after it arrival in the hands of developers, they started to do what they do best and that is making the devices performance better than ever. The very first step that involves in the Customization of an Android device is the rooting, if you can’t gain root access of your device, you can’t do anything Custom with it, you can’t install Custom MODs, Custom ROMs and even those kernels which requires root access can’t be installed on the device without root access. Although there are times, when you root your device and afterwards you just want to un-root it, bringing it back to Stock completely. There are a lot of reasons for that, you might wanna sell your device, and the person wants it completely stock, you might just has the sudden urge to try the device without root access.

The Process to un-root your device is not that difficult, but I don’t quite get the reason why anyone want to un-root the device. Samsung Galaxy Note 4 also got the Root access and all those who owned the device, got excited and rooted it, If you still own a Stock Galaxy Note 4 and looking for a rooting Solution, Visit our Root Section to do so. Otherwise, if you have a Rooted Galaxy Note 4, follow the rest of the guide to un-root it.We are going to Un-Root Samsung Galaxy Note 4 (any Variant)using Odin3 in the following post. We are going to Install an official firmware on the device to un-root it, you don’t really need to worry about anything. All you have to do is, you need to follow the instructions carefully and get it done flawlessly. Let’s go through the early preparations and then flash the firmware.

essential-apps-after-rooting

Early Preparations:

1. This guide is only for Samsung Galaxy Note 4!

Make sure that your device is exactly as mentioned above. To check out what device you have, go to Settings > More/General > About Device or Settings > About Device and match the model number. Be careful about the device model number, flashing a file on a device not listed here might result in bricking it up. In that case, we may not be held responsible.

2. Battery should be charged at least 60%!

Your device’s battery shouldn’t be weak. In case your device goes dead during the flashing process, your device may get soft bricked and you might be in need of flashing stock firmware and that will ultimately result in wiping up your data as well. So, make sure that you charge your device before you start the flashing process.

3. Use the OEM data-cable to establish connection!

Always use the original data cable to establish connection between your Android device and your computer / laptop. Using ordinary data cables might interrupt the flashing process, so to avoid any mishap, you need to meet this requirement as well.

4. Backup everything!

Just to be on the safe side, you may consider backing up each and everything from your Android device. This is highly recommended so that in case anything goes wrong, you still have the access to all of your data and you can restore it immediately. Also, clean install is always recommended, that means you will probably have to wipe your device to install the new firmware. So, you may backup everything as listed below.

5. Turn off Samsung Kies and other softwares while using Odin3!

Make sure that you turn off Samsung Kies while using Odin3 flashtool. Samsung Kies will interrupt Odin3 and will result in causing errors and may not let you flash your desired firmware. Also, make sure that you turn off any antivirus software you’ve installed and also disable firewall to avoid any connection and flashing issues.

How To Un-Root Samsung Galaxy Note 4

Downloads Required:

  1. Download and extract Odin3 v3.09.
  2. Download and Install Samsung USB drivers .
  3. Download and extract firmware file: Link (Search with your device Model Number)

Method:

  1. Wipe your device complete in order to attain a neat installation.
  2. Open Odin3.exe.
  3. Put your Galaxy Note 4 in download mode. To do so, turn it off and wait for 10 seconds. Turn it on by pressing and holding Volume Down + Home Button + Power Key simultaneously, You should see a warning, press Volume Up to continue. In case this method doesn’t work for you, try one from this guide.
  4. Connect your device to your PC.
  5. As soon as Odin detects your phone, the ID:COM box should turn blue.  Make sure that you’ve installed Samsung USB drivers before connecting.
  6. For Odin 3.09 hit the AP tab. Select the firmware.tar.md5 or firmware.tar, that you downloaded and extracted above.
  7. If you’re using Odin 3.07, you will select “PDA” tab instead of the AP tab, rest of the options remain untouched.
  8. Make sure that the options selected in your Odin are exactly as shown in the pic.Odin-3.09-explained.-2
  9. Hit start and wait till the firmware  flashing is complete, as soon as your device restarts, remove it from PC.
  10. Wait for your device to reboot, as soon as it reboots check out the new firmware!
  11. That’s all!
  12. Now enjoy your Un-rooted Samsung Galaxy Note 4