Home Blog Page 348

Download Youtube Music APK

0
Download Youtube Music APK

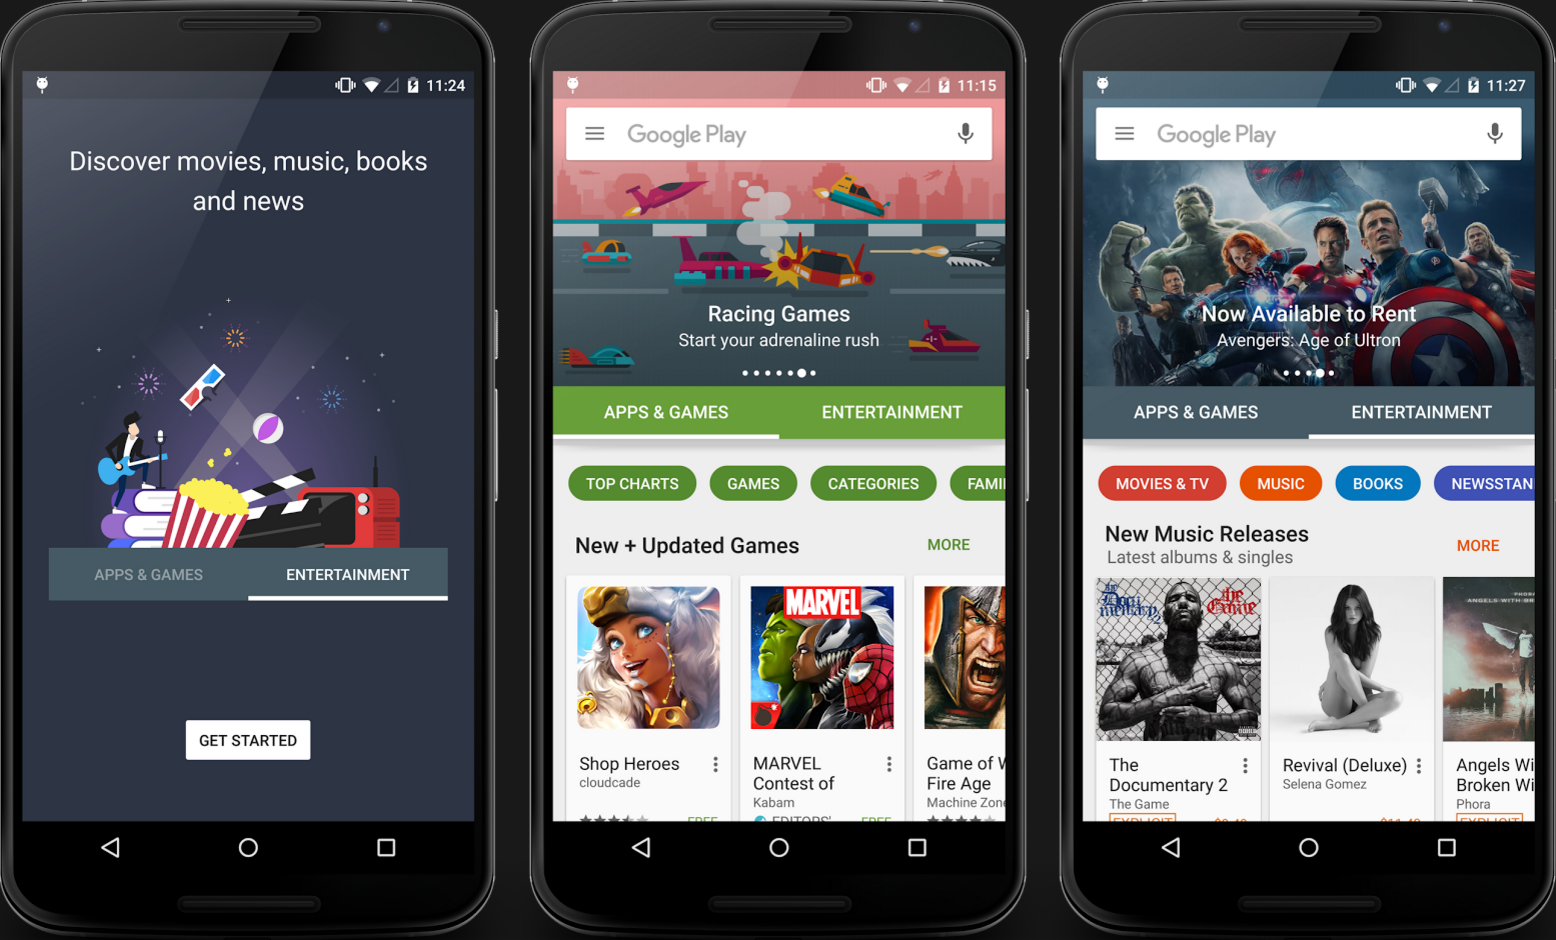
Youtube Music has been around for quite a while now. This new application by Google is a little different version of Youtube carrying some cool features. Youtube Music plays music videos in an endless loop. You don’t have to select a song to play everytime, you can simply select the type of music, your favourite artist or category of music, rest of the job will be done by Youtube Music. It also allows the users to create their very own personalised menus. Youtube Music has the music categorised into different sections. You will find the popular tracks in the trending tab. You will find the top tracks in “One on the rise” section while you will find everyday’s top 40 tracks in the “Daily 40” section. Youtube Music has been appreciated all around the world for these unique features. The application has become way popular in time span of only 2 weeks.

Youtube Music is out now and its available in the Google Play Store for free. But you may not be able to find Youtube Music in the Play Store at your end because of the region limitations set by Google. Youtube Music appears in the United States’ Play Store only. The application is inaccessible for the users living in other regions. Just in case you’re willing to get Youtube Music on your Android device, you will have to get your hands on its APK file and install it manually. We’ve pulled the APK file of latest version of Youtube Music and linked it below. Instructions to install Youtube Music APK are also explained below. Go ahead and learn to download and install Youtube Music APK file now.Youtube Music Image

How To Download and Install Youtube Music APK

  1. Download Youtube Music APK.
  2. Copy the downloaded APK file to your smartphone or tablet.
  3. Now on your Android smartphone or tablet, go to settings > security > check “allow unknown sources”.
  4. Now using a file explorer locate Youtube Music APK that you just copied on your phone.
  5. Tap the APK file and follow the on-screen instructions to install it now.
  6. Once installed, open the application through app drawer.
  7. Setup Youtube Music according to your liking.
  8. Happy Youtubing!

Youtube Music Google Play Link

For now, there’s no desktop version of Youtube Music available.

Download Youtube Kids APK

0
Download Youtube Kids APK

Google recently launched the Kids version of its video broadcasting platform Youtube. Since Youtube has been a video platform for almost everyone, there always has been a difficulty for Parents to find their kids the kids-oriented stuff only. Keeping this need in mind, Google released this new application. Youtube Kids promises a safe Youtube experience. The application is particularly designed for Kids and comes with complete Parental control. You can customise the application the way you want in order to make it more safe and secure for your Kids. The application comes with a Parental Guide that will help you to optimise the application according to your liking. Once your child uses this application, the application starts bringing up the content based on his/her interest by detecting the accessed videos or the search terms. You can also turn on or turn off the search feature so that your Kid doesn’t search for inappropriate content. Youtube Kids doesn’t include any content that is not watchable for Kids, but the app doesn’t guarantee that completely, to overcome this insecurity, the application gives you full Parental Control.Youtube Kids screen

Youtube Kids is available for free in the Google Play Store. The application hasn’t made its way to all countries for now. In case you’re willing to use it, and you are not able to find it in the Google Play Store at your end, you will need the APK file of this application. We have pulled out the APK file of Youtube Kids and linked it below along with the installation instructions. Go ahead to download and install Youtube Kids APK on your Android smartphone or tablet.

How To Download and Install Youtube Kids APK

  1. Download Youtube Kids APK.
  2. Copy the downloaded APK file to your smartphone or tablet.
  3. Now on your Android smartphone or tablet, go to settings > security > check “allow unknown sources”.
  4. Now using a file explorer locate Youtube Kids APK that you just copied on your phone.
  5. Tap the APK file and follow the on-screen instructions to install it now.
  6. Once installed, open the application through app drawer.
  7. Setup Youtube Kids according to your liking.
  8. Make your kids access the cool kids-oriented stuff on Youtube Kids!
  9. Happy Youtubing to your Kids!

That’s all.

How To Install CyanogenMod 13 On Android One Sprout4 Devices

0
How To Install CyanogenMod 13 On Android One Sprout4 Devices

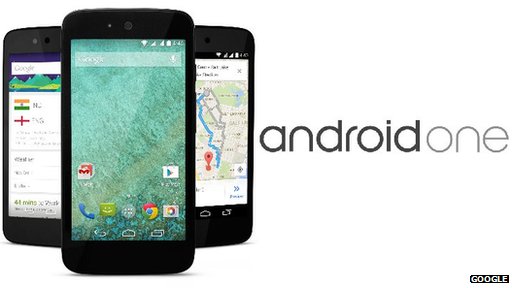
CyanogenMod has been a great source for near stock experience, if you ever wanted to try out Android. Recently, it has been pushing its CyanogenMod 13 updates to numerous devices, but some devices including the Android One Sprout4 series has been showing no sign of receiving the official update. Today, we have gathered the download link for CyanogenMod 13 On Android One Sprout4 Devices, and here is the procedure to do the same.

Android_One_devices_944

How To Install CyanogenMod 13 On Android  One Sprout4 Devices:

Requirements

1. Make sure your battery is above 60%, just in case something wrong happens while flashing.

2. Ensure that your device has a custom recovery like TWRP installed, as we need it to flash the ROM and GApps files.

3. You need the ROM file itself, and can download it by clicking here. Beta 2 | Beta 1

4. Moreover, to attain the Google Play Services, alongside some Google apps, you need the latest GApps file, which you can get by clicking here.

5. Lastly, you need some brains throughout the process.

Install CyanogenMod 13 On Android One Sprout4 Devices:

1. Download the CM 13 flashable zip file from above and transfer it to the root of your device’s storage.

2. Boot your device into recovery mode. To do this:

o Switch off your device.

o Now press and hold the Power + Volume Down buttons simultaneously until you see the Recovery UI on your device.

o Once you see the Recovery UI, you can let go of the two buttons.

3. Once you boot into the recovery, you will have a look at many options. First, we have to clean wipe your current system partition to make way for your new ROM.

4. Tap on the option which reads ‘Wipe‘, and then tap on ‘Advanced Wipe‘. From in there, select the following options. Do not select the option which reads ‘Internal Storage‘ at any cost, as it will wipe off EVERYTHING, including your ROM file. Note: If you’re just updating an existing ROM, you can just wipe the cache and dalvik cache. So, you can have your data after the update.

5. Once the wipe has been successfully done, head back to the menu, and this time tap on the option which says ‘Install‘. Why you’re choosing this is pretty self-explanatory.

6. Browse and select the downloaded zip file in your phone. Swipe on the “Swipe to confirm flash” button to start flashing the zip file.

7. Similarly, flash the GApps file package, and you’re good to go!

See, was that so hard? Now you can enjoy the latest and greatest CyanogenMod 13 On Android One

Sprout4 Devices!

Download Dulp – Color Wheel Blast for Pc – Windows and Mac.

0
Download Dulp – Color Wheel Blast for Pc – Windows and Mac.

Following are the instruction on how to download Dulp – Color Wheel Blast for Pc, this game seems so easy but it’s not. The main concept of this game is that you have to remove the circle by hitting the same color balls on it. Be focused, observe the level pattern and wait for the right moment, this how you can go as far as you can. Dulp – Color Wheel Blast is basically designed for smartphones, you can download this game from both iOS and Android app stores.

Dulp – Color Wheel Blast is not available for PC yet, but we can download and install Dulp – Color Wheel Blast for PC using third-party emulators like BlueStacks and Andy. I’ve prepared a step by step guide on how to install Dulp – Color Wheel Blast for PC with both the emulators.

Dulp - Color Wheel Blast for Pc

How To Install Dulp – Color Wheel Blast For PC or MAC Using BlackStacks

Method 1:

  1. Install Bluestacks on your PC or MAC.
  2. Download Dulp – Color Wheel Blast Apk on your PC.
  3. Make sure that you have installed Bluestacks. Double-click the downloaded Dulp – Color Wheel Blast Apkto install it.
  4. The APK will be installed through Bluestacks, once the notification pop-ups determining the installation completion, open Bluestacks.
  5. Now click on My Apps and then click on Dulp – Color Wheel Blast.
  6. The application will open up. Now follow on-screen instructions to Dulp – Color Wheel Blast.

Method 2:

  1. Install Bluestacks on your PC or MAC.
  2. Open Bluestacks and setup your Google Play Store account.
  3. Now open Google Play Store and search for “Dulp – Color Wheel Blast“.
  4. Once found, install Dulp – Color Wheel Blast.
  5. Now click on My Apps and then click on Dulp – Color Wheel Blast.
  6. The game will open up. Now follow on-screen instructions to Play Dulp – Color Wheel Blast.

How To Install Dulp – Color Wheel Blast For PC or MAC Using Andy OS

  1. Download and install Andy OS on your Windows PC or MAC.
  2. Once downloaded, open Andy OS.
  3. Setup Google Play Account on it.
  4. Now open Apps > Google Play Store and search for “Dulp – Color Wheel Blast“.
  5. Install Dulp – Color Wheel Blast and wait for it to finish the installation.
  6. Once done, open “Uncategorized” portion in Andy and click on Dulp – Color Wheel Blast to play it.
  7. That’s all.

How To Change CSC In Samsung Galaxy Devices [ Guide ]

2
How To Change CSC In Samsung Galaxy Devices [ Guide ]

You might have already come across the name Odin for galaxy smartphones. If you’ve used it ever once, you would probably know that to flash a stock firmware onto a Samsung Galaxy device, you’d require a set of files, namely PDA, Phone, and CSC. Out of the three, the one thing which we users are able to tamper with is CSC (Consumer Software Customization). CSC is an essentiality for devices, and it is responsible for the geographic location and regional differences between the galaxy smartphones. For example, there’s a different CSC number for an Europe made Galaxy S6, and an Indian made Galaxy S6. While the CSC is a crucial part in the working of your galaxy smartphone, it can still be tampered with.

how-to-change-csc-in-samsung-galaxy-phones-

Part of the reason as to why you would want to do that is due to the fact that only some specific regions receive OTA updates the first. For you to be able to get hands on the OTA update, you would just have to change the CSC. You can basically tell Samsung that your device belongs to Europe, while it belongs to Australia. We’re here to make your work just even simpler. Here’s how to Change CSC In Samsung Galaxy Devices. Change CSC In Samsung Galaxy Devices Please do note that changing your device’s CSC means that you’ll be totally resetting your device, so backup anything that’s important to you.

How To Change CSC In Samsung  Galaxy Devices:

Change CSC In Samsung Galaxy Devices

1. Launch your phone’s dialer, and type in the following code, and replace the italics text via your phone’s IMEI number. “*#272*Phone’s IMEI Here#”

2. Your phone will automatically pop up a screen, with some fancy codes all over it. Don’t freak out yet.

3. You will notice some codes with a radio button beside each and every one of it. These are the CSC codes that your galaxy device supports.

4. All you need to do is select the one code that fancies you, and head over back to home.

5. Now, your device will automatically restart, and factory reset itself.

Good going! You’ve successfully changed the CSC code on your Samsung Galaxy device. You can now do

the things you were restricted till date!

How To Configure My Files App On Samsung Galaxy Devices

1
How To Configure My Files App On  Samsung Galaxy Devices

The My Files application has been around on every galaxy device for quite some time now. With the really stone-age release of Android 4.1, Samsung was proud to showcase its latest and greatest features. However, the My Files application has been over looked since. What if it had some serious amounts of customizability powers, and it surely does.Today, we’ve gathered the top 3 things you can do to Configure My Files App On Samsung Galaxy Devices.

cl1KJP1448198081 (1)

Searching A File/Folder Quickly:

In case you missed it, there always has been a search button in the My Files application on your Samsung Galaxy device. This function lets you find the deepest of your files, including images, videos, APKs, random files and many more. Moreover, with GBs of capacity to use from, files sometimes have a tendency to get lost in some folders. This function gets the day’s work narrowed down a lot. So, how do you actually use it? That’s really simple. All you need to do is fire open the application itself, and tap on the capacitive menu button (left to the home key). With the small menu of items, select the one which reads ‘Search’, and then type on the keyword you want to search for.

Assign Custom Directories To Shortcuts:

Shortcuts are everywhere. Even the term has narrowed down our talk of speaking about something huge and complicated. Did you know that your Galaxy device offers you an amazing function wherein you can assign the most used folder/sub-folder/directory path to the default media folder icons so that you can access your files easily and quickly. Follow the steps mentioned below.

  • First Tap on the menu button (left) and select Settings.
  • You will see a few settings options and some other directory-related path settings.
  • Tap on “Set Image Directory”.
  • Now navigate to the folder/sub-folder that contains image files.
  • Tap the target folder/sub-folder and then select Done from the top right corner.
  • See? This is simple.

Add Shortcut Directories:

One such similar feature allows you to actually create a full-on shortcut folder to a directory you choose to have. Many people have hundreds and thousands of APK files just lying around, and they occasionally need a specific place to keep them all. That’s where this feature comes in. Open My Files app, tap on menu button and select “Add Shortcut”. Now assign your desired name to the new shortcut directory, navigate to the folder that has the target files and choose Done from the top bar. That’s it for our picks of the top 3 things you can do to Configure My Files App On Samsung Galaxy Devices. If you think our guide has helped you, feel free to leave down a comment and stay tuned for more crispy content as such.

How to force update Google Play Store on Android

0
How to force update Google Play Store on Android

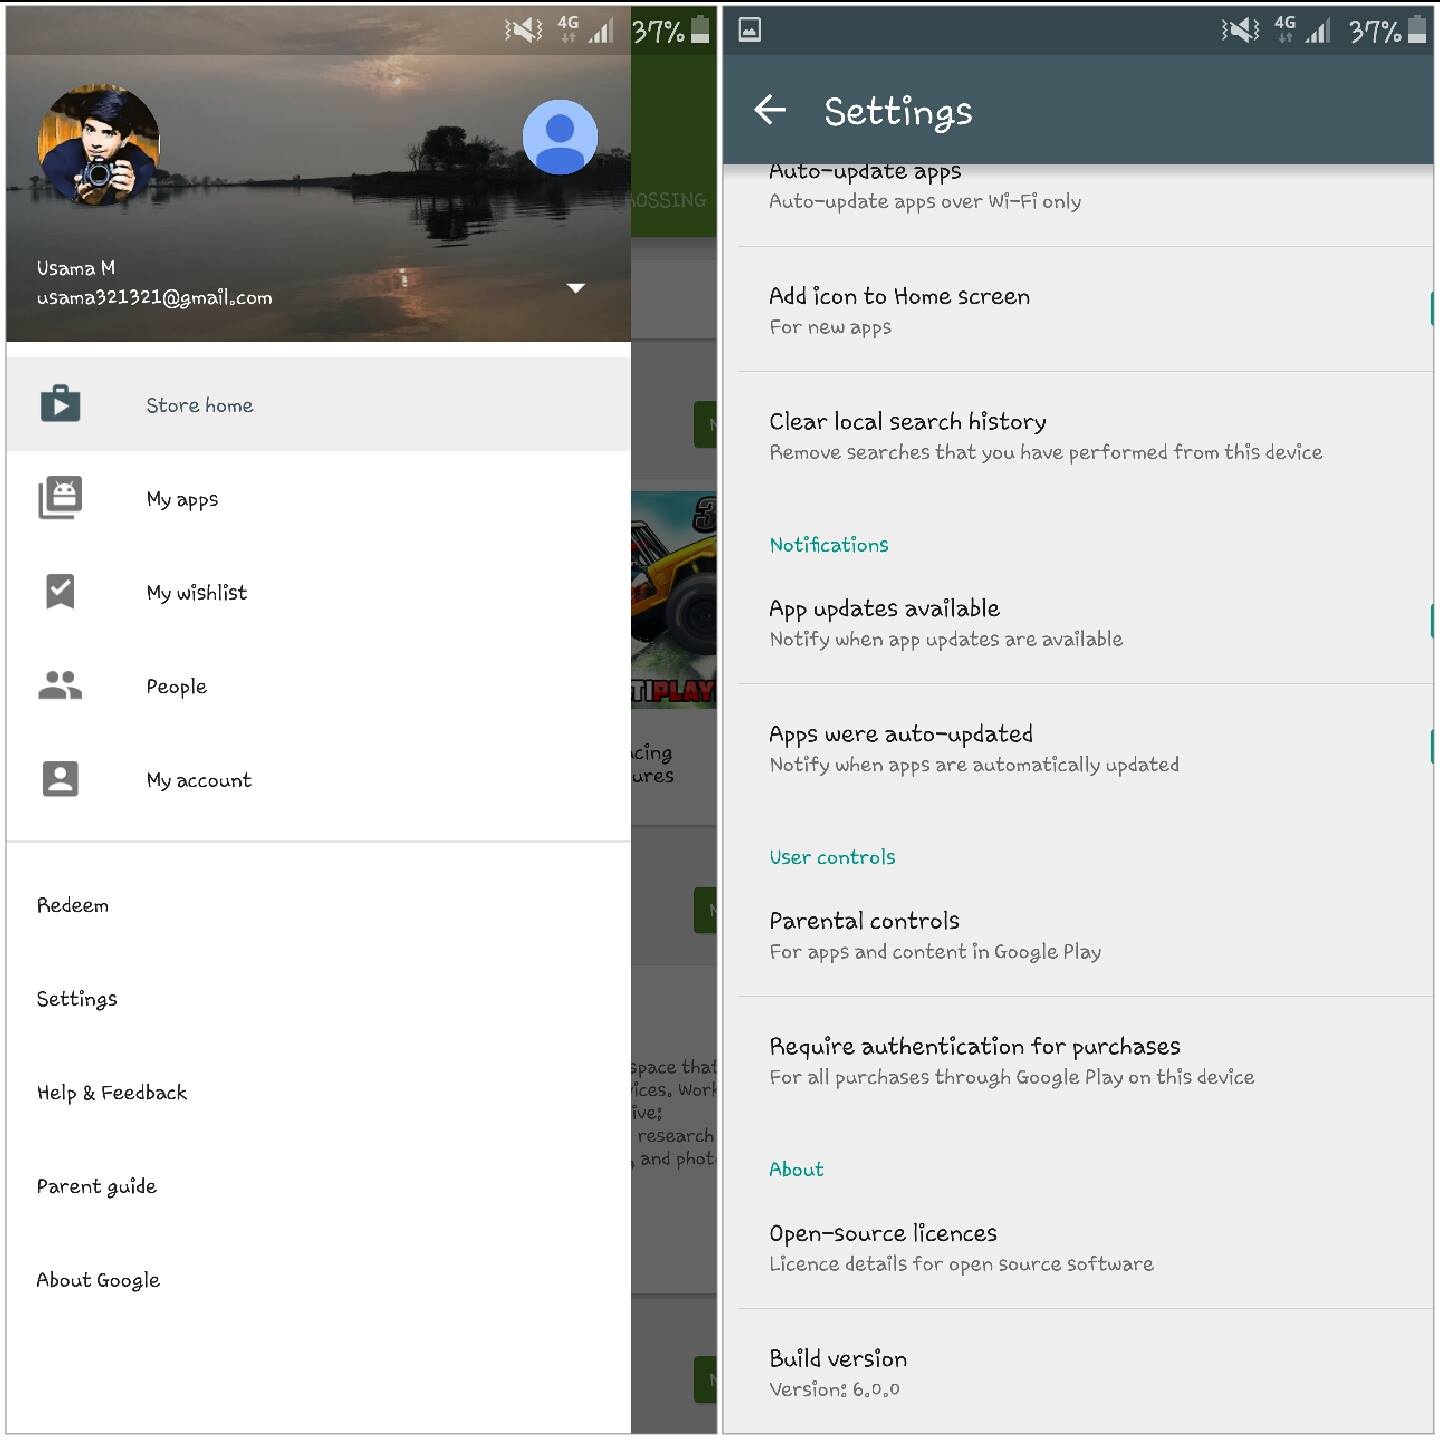
Google Play Store 6.0.00Google consistently keeps improving the Google Play Store to provide the users with the best possible experience. Google rolls out the updates to all the regions at the same time. Sometimes the update take quite a while for update to hit different regions, which makes the users wonder why they couldn’t get the latest version of Play Store on their device instantly. Recently Google rolled out a major Play Store update which was Android Marshmallow 6.0 oriented. The update carried some impressive changes, which prompted the users to get the update instantly. A number of users got this update on their devices instantly but it did freak out some users at the same time. If you’re one of unlucky users who hasn’t got the latest version of Play Store yet, you may try force-updating your version of Google Play Store to get this done.

There are two procedures to force-update Google Play Store on your Android device. You can either try updating Play Store simply through Google Play Store application or you can update by installing the APK file of latest version of Google Play Store. Let’s go through the methods one by one.

Here are the procedures to force-update your Google Play Store.

How to force update Google Play Store using the Play Store app

  1. Open the existing Google Play Store application on your Android smartphone or tablet.
  2. Tap the triple-lined button on the top-left corner and then tap Settings.
  3. Scroll all the way down and find “Build Version”.
  4. Now tap this “Build Version” twice and your Play Store will start getting the latest update (only if available).
  5. That’s all.

Play Store Update

How to force update Google Play Store using APK file


  1. Download latest Google Play Store APK: Google Play Store 6.0.00 APK
  2. You can download the APK file linked above directly on your phone, or you can copy it to your phone after downloading it on your PC.
  3. Once you’ve got the APK file in your phone, go to settings > security > check the allow unknown sources option.
  4. Now using a file manager locate the latest Play Store APK file that you just copied or downloaded on your phone.
  5. Tap the APK file and install it following the on-screen instructions.
  6. Once done, Google Play Store will be installed/updated on your device.
  7. Find the latest version of Play Store in app drawer now.


Restore Samsung Galaxy Note 5, S6 Edge Plus To Stock Firmware

2
Restore Samsung Galaxy Note 5, S6 Edge Plus To Stock Firmware

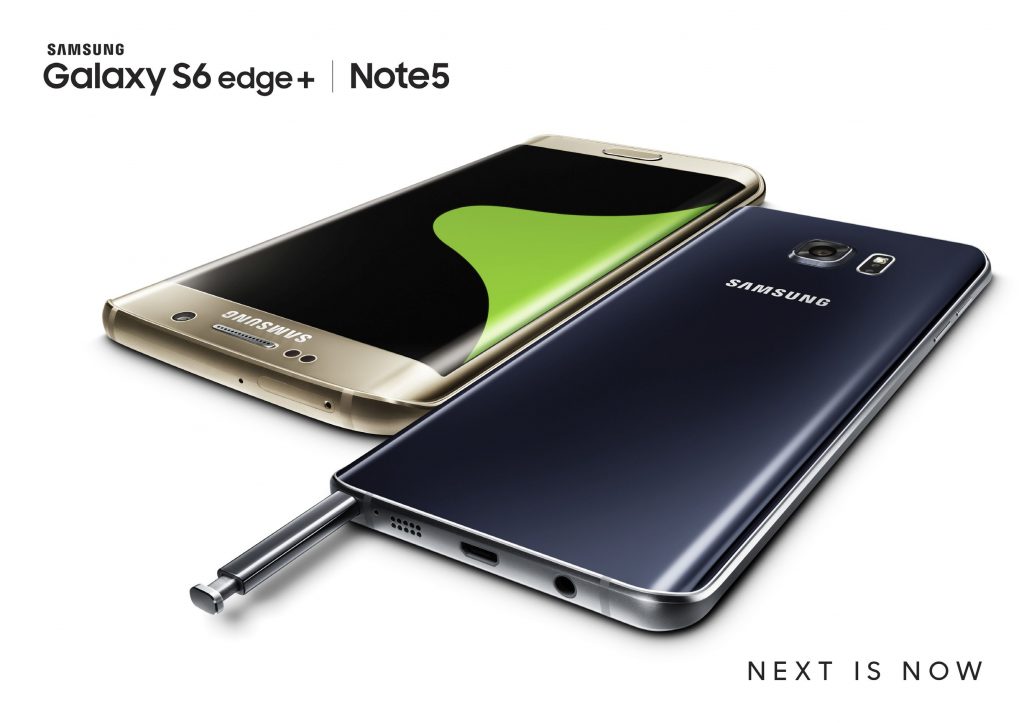
In this guide you will find a comprehensive method to restore your Samsung Galaxy Note 5 and Galaxy S6 Edge plus to stock firmware. We will be showing you the step-by-step method to flash stock firmware on your Galaxy Note 5 and Galaxy S6 Edge Plus using Samsung’s flashtool Odin3. Before we jump up to the procedure, we will go through some reasons that might prompt you to flash a new stock firmware on your Galaxy Note 5 and Galaxy S6 Edge Plus.Samsung-Galaxy-Note5-official-images (2)

Flashing a stock firmware can be the only solution to fix your device in quite many situations. Flashing a stock firmware also reverts back any custom changes that you made to your device’s system by means of any tweaks, MODs or custom ROMs. In case you’ve flashed an invalid file on your Galaxy Note 5 or Galaxy S6 Edge Plus and now your device is caught up in a bootloop, the only solution to fix your device might be restoring it to the stock firmware. The second situation that may prompt you to flash stock firmware is the root access. In case you’ve rooted your device and now you need to unroot it, you won’t be able to unroot it directly, thus you will need to flash a stock ROM to restore your Galaxy Note 5 and S6 Edge to its original unrooted state. Also, if you need to flash a latest version of Android manually, you will need to flash the ROM using Odin3 on your device. Flashing a stock firmware can become handy in some other situations as well. I hope that this was enough to clear up the purpose of the succeeding guide. Let’s get back to the work now.

Time to go through some pre-installation instructions. After pre-installation instructions we will head towards the guide to flash stock firmware on your Note 5 / S6 Edge Plus.

Early Preparations

1. This guide is only for Samsung Galaxy Note 5 and S6 Edge Plus (All Variants)

Make sure that your device is exactly as mentioned above. To check out what device you have, go to Settings > More/General > About Device or Settings > About Device and match the model number. Be careful about the device model number, flashing a file on a device not listed here might result in bricking it up. In that case, we may not be held responsible.

2. Battery should be charged at least 60%!

Your device’s battery should not be weak. In case your device goes dead during the flashing process, your device may get soft bricked and you might be in need of flashing stock firmware and that will ultimately result in wiping up your data as well. So, make sure that you charge your device before you start the flashing process.

3. Use the OEM data cable to establish connection!

Always use the original data cable to establish connection between your Android device and your computer / laptop. Using ordinary data cables might interrupt the flashing process, so to avoid any mishap, you need to meet this requirement as well.

4. Backup everything!

Just to be on the safe side, you may consider backing up each and everything from your Android device. This is highly recommended so that in case anything goes wrong, you still have the access to all of your data and you can restore it immediately. Also, clean install is always recommended, that means you will probably have to wipe your device to install the new firmware. So, you may backup everything as listed below.

Backup SMS Messages
Backup Call Logs
Backup Contacts
Backup Media – Copy your files manually to your PC or Laptop.
Backup EFS – If rooted, otherwise skip this step.

5. Install Samsung USB drivers

In order to be able to establish connection between your PC and your Galaxy Note 5/S6 Edge Plus, you need to have the Samsung USB drivers installed on your PC. You can find all Android USB drivers here on our site.

6. Turn off Samsung Kies and other softwares while using Odin3!

Make sure that you turn off Samsung Kies while using Odin3 flashtool. Samsung Kies will interrupt Odin3 and will result in causing errors and may not let you flash your desired firwmrae. Also, make sure that you turn off any antivirus software you’ve installed and also disable firewall to avoid any connection and flashing issues.

Required Downloads & Installations

  1. Download and extract Odin3 v3.10.6.
  2. Download and extract firmware file (carefully for your variant) to get the .tar.md5 file.

Restore Samsung Galaxy Note 5, S6 Edge Plus To Stock Firmware

  1. Make sure that you read the instructions listed above carefully and you’re all set to go ahead now.
  2. Wipe your device complete in order to attain a neat installation. You may boot into the recovery mode and perform a factory data reset.
  3. Open Odin3.exe.
  4. Put your Galaxy Note 5 or S6 Edge Plus in download mode. To do so, turn it off and wait for 10 seconds. Turn it on by pressing and holding Volume Down + Home Button + Power Key simultaneously, You should see a warning, press Volume Up to continue. In case this method doesn’t work for you, try one from this guide.
  5. Connect your device to your PC.
  6. As soon as Odin detects your phone, the ID:COM box should turn blue.  Make sure that you’ve installed Samsung USB drivers before connecting.
  7. For Odin 3.09 or 3.10.6 hit the AP tab. Select the firmware.tar.md5 or firmware.tar, that you downloaded and extracted above.
  8. If you’re using Odin 3.07, you will select “PDA” tab instead of the AP tab, rest of the options remain untouched.
  9. Make sure that the options selected in your Odin are exactly as shown in the pic.Odin 3.10.6 Explained_Techbeasts
  10. Hit start and wait till the firmware  flashing is complete, The flashing process box will turn green upon successful flashing.
  11. Once the flashing process has been completed successfully, disconnect your device and reboot it manually. You can reboot your device by long pressing Volume Up + Volume Down + Power Key.
  12. Once the device boots up, checkout the new firmware now.
  13. Your device will be running on stock Android firmware.
  14. Once updated to stock, do not try to downgrade, or else you will result in messing up EFS partition of your device.
  15. That’s all!

Got any queries? Make sure that you drop em’ in the comment box below. Good Luck!

How To Turn Galaxy Note 3 Into Note 5 With DarkLord Note 5 ROM

7
How To Turn Galaxy Note 3 Into Note 5 With DarkLord Note 5 ROM

You can now easily turn your Galaxy Note 3 SM-N9005, N900D/S/K/L into Galaxy Note 5 by flashing DarkLord Note 5 ROM. DarkLord Note 5 is based on Galaxy Note 5 N920C’s N920CXXU1AOH2 stock TouchWiz firmware. The ROM  contains almost all features of Note 5 and also contains some features of Galaxy S6 Edge+. We are going to show you the step-by-step instructions to install DarkLord Note 5 ROM on your Galaxy Note 3 and convert it into Galaxy Note 5. Before we head towards the installation method, let’s have a look on some mainstream features of the Galaxy Note 5 that make this ROM worth installing on your Note 3.Samsung-Galaxy-Note-3-Copy-20140712030824

Galaxy Note 5 was released back in August, 2015. Samsung loaded Galaxy Note 5 with tons of new features. Mainstream features of the Galaxy Note 5 OS included a new enhanced TouchWiz UI, a new Theme engine to apply different themes on the TouchWiz UI, new Aircommand and some other S-Pen features. One of the unique features on the Galaxy Note 5 was the off-screen memo, which brings up the memo by simply pulling the S-Pen out even when your phone’s screen is off or its locked. Apart from the software enhancements, Galaxy Note 5 also carried some massive hardware enhancements, but we definitely cannot change the hardware of Galaxy Note 3 to that of the Note 5, so we will only grab the stuff that we can from the Note 5’s OS. Galaxy Note 3’s hardware isn’t too old to be called low-end yet, but we won’t be seeing the Galaxy Note 5 goodies making their way to the Note 3 through an official software update.

If you can’t afford to get your hands on a Galaxy Note 5 and you still want to experience some cool features of the Galaxy Note 5 while staying on your Galaxy Note 3, you may not need to worry about updating your device and you can simply make some features of Note 5 land in your Note 3 by means of the custom ROM we just mentioned above. Galaxy Note 5 features are not the only thing that you will get after flashing this ROM, but it has many other plus points. Since it is based on Android 5.1.1 Lollipop, it provides a better battery life and smooth performance as compared to Android 5.0.2 Lollipop. You will also get some Galaxy S6 Edge plus goodies on your Note 3 using the DarkLord ROM.

Let’s go through the features of DarkLord Note 5 ROM for Note 3

ROM Information
– Base on Note 5 N920CXXU1AOH2
– Rooted / Deodexed / Zipaligned / Busybox / Deknoxed
– Multiple Languages
– First world Touchwiz 5.1.1 for Galaxy Note 3

ROM Features
– Android 5.1.1
– Note 5 features
– Note 5 pure stock
– Note 5 Air Command
– Note 5 Action memo
– Note 5 Smart select
– Note 5 Screen write
– Note 5 Screen off write
– S6E+ People Edge
– Touchwiz Change home mode
– Bring back Note 3 USB 3.0
– Bring to Note 3 USB Charging only mode

Pre-installation instructions

Disclaimer

The methods involved in flashing custom recoveries, ROMs and rooting your phone are highly custom and may result in bricking your device, and has nothing to do with Google or the device manufacturer that is SAMSUNG in our case. Also rooting your device will void its warranty and you will be no longer eligible for any kind of free device services by the manufacturers/warranty providers. In case of any mishap we may not be held responsible. If your device has the Knox counter on the bootloader, it will be tripped and you won’t be able to reset it ever. Follow these instructions to the letter to avoid any mishap or bricking. Make sure that whatever you do, you are doing it at your own responsibility.

How To Turn Galaxy Note 3 Into Note 5 With DarkLord Note 5 ROM

Before you flash this ROM, you need to make sure that you’ve read and applied all the guidelines explained above.

  1. Also, make sure that you’re currently running your Galaxy Note 3 on Android Lollipop. Upgrading from an older version of Android will cause issues.
  2. Now boot into TWRP recovery, to  do so, turn off your device and then turn it on by pressing and holding Volume Up+ Home Button + Power Key. Select Wipe >Advanced Wipe > Wipe System, Cache and Dalvik Cache. You can also perform a factory data reset.
  3. Download the DarkLord Note 5 ROM for Note 3 [DarkLordN5.RC2.1.SamsungViet.vn.zip] and place it on your phone’s sd card.
  4. Boot into TWRP Recovery again, select install > DarkLordN5.RC2.1.SamsungViet.vn.zip
    file and flash it.
  5. As soon as ROM flashing begins, it will open up AROMA installer. AROMA is a self explanatory installer. Select your desired options and complete the ROM installation.
  6. The ROM will take a while to get flashed. As soon as the installation is done, factory reset the phone using the wipe option in TWRP recovery.
  7. Reboot now and setup your new ROM in order to enjoy the features of Galaxy Note 5.

Credits: darkera13

How To Revive A Water Damaged Smartphone

0
How To Revive A Water Damaged Smartphone

Things happen, mostly terrible things. Losing your new device might not be as painful as seeing it get destroyed in front of your own eyes. One of the worst things we Android users suffer from is getting their non-water resistant devices smudged into water, and having seeing them dead. While a situation like this would be best suited to be handled by professionals only, there are some first-aid tips you need to keep in mind, and that’s exactly what’s this post is all about. Here we have some steps to Revive A Water Damaged Smartphone.

phone-battery-w628

What not to do:

  • Do not turn it on
  • Do not press any button or shake your device.
  • Do not blow it and also do not open it.

Revive A Water Damaged Smartphone:

1. Immediately turn off your device once you bring it out of the water, and pull the battery out, if your devices permits you in doing so.

2. Take a dry wipe or towel, and start smudging your device, ensure that you don’t rub it, as it would only rush the water inside of the device.

3. If you device allows you in doing so, remove the battery, SIM card, SD Card, and the back panel. Leave them from drying.

4. Never shake your device when it is wet, as it would just make the situation much worse.

5. Hold your device in an upright position to allow the free droplets of water to run down your device.

6. If you’re positive that there’s some water inside of there, use a vacuum to suck the air out, remember not to use something like a hair dryer or a blower which would rush the water inwards.

7. Once you’re done with that, acquire a zip-lock bag, and fill it with rice. Now, put your smartphone in, and leave it for about 2-3 days.

8. Take your smartphone out of the bag, and keep it in the sun for about 12 hours, just to ensure that all the water dries up.

Try turning your device on now. If you are lucky, like 80% of the people are, then you will be able to use your device once again. If not, take it to the specialist, and he’ll surely do the job for you. If you liked our guide, make sure you stay tuned for much stuff like this.

How To Install Adobe Flash Player On Android [ Guide ]

0
How To Install Adobe Flash Player On  Android [ Guide ]

Adobe Flash Player for Android sure is a big deal, and being able to use it is like cherry on top of the cake. However, there are some complicated difficulties which come in your way. Installing the latest Adobe Flash Player on Android to enjoy seamless experience is not just as easy as it always was, and now it requires you to use a third-party browser. Here’s how to Install Adobe Flash Player On Android.

Also See:

How To Install Adobe Flash Player On Android:

Dolphin Browser

1. Head over to the Google Play Store, and download the latest version of Dolphin Browser. This is the browser that we are going to use to install flash on Android.

2. Once installed, fire the browser up, and ensure you have a steady net connected.

3. Tap on the dolphin logo to pounce in Settings, and from there, head over to Web Content >Flash Player.

4. Now all you need to do is navigate to a website which uses Adobe Flash Player, and when prompted tap download to install Adobe Flash Player.

5. Now, while using such an amazing and seamless browser, you’ll be able to use Adobe Flash Player as well.

Screen Shot 2015-11-20 at 20.42.04

Puffin Browser:

Head over to the Google Play Store, and download the latest version of Puffin Browser. This is the browser that we are going to use to install flash on Android. The reason why we love Puffin Browser is simply that it doesn’t need to be turned on to use Adobe Flash Player on Android. It is pre-enabled, and you can head over to the Setting to tweak some stuff like setting the flash quality to normal or low to get flawless performance out of it.

Screen Shot 2015-11-20 at 20.44.19

That’s It for our guide on How To Install Adobe Flash Player On Android. We hope that our precious readers have enjoyed our guide, and will be stay tuned for more content like this.